

 Thanks:
  Likes:


UPDATED 6/3/16 - Today's TTT on an old how-to is one that will always have relevance due to the continued issues of cracking windshields. Not to scare any of the new (or prospective) builders, but this is one area where spending some additional time during your build will help reduce the risk of cracks in your windshield due to screws that are too long or from stresses on the windshield frame.
NOTE - the pics below in this first post were from the initial test fittings... the final spacers are solid pieces (not washers) and the hardware uses mechanical lock nuts, not wing nuts (which were just for ease of multiple test-fits).
Original Text Follows.....
Still working on getting my chassis ready for what will (hopefully) be the last body-on phase of bodywork for me before taking it back off and sending it out for paint. The most recent project was reassembly of my windshield. I previously posted about taking the glass out and having a local glass company chamfer and polish the edges in hopes of staving off cracks. Since I now need to install the windshield as part of my last body fitting, I tackled grinding down all of the screws that protrude into the frame and try to occupy the same area as the glass - which is obviously not a good thing.
I previously did the one-screw-at-a-time method of testing and grinding the four screws that hold the frame to the side posts. This method was highlighted on a build-school video that I found thorugh a link somewhere on this site. In it, the instructor suggested installing all four screws, then backing them off just a little until the side post can be slightly wiggled. Then, one-at-a-time, tighten each screw and check to make sure that the wiggle goes away. If it doesn't, then that screw is bottoming out and needs to be ground down a bit.
With the side posts done, I then had to grind down all of the other screws. I didn't realize there'd be so many, though, but by my count there were TWENTY(!) that needed attention - four per bottom corner (plus smoothing the brass angle pieces), two in the bottom center for the post bracket, two each (x4) for the sun visors, and two for the British manufacturer's tag that I added to the top frame rail. Once these were all ground down so that they were flush with the inside of the frame, I used a dremel to de-burr the inside of the channel in quite a few places, including all of the holes.
Finally, I reinstalled the glass using the original rubber "U" molding as well as a generous amount of 3M windshield bedding and glazing goo.
The next step was to fit the entire thing to the chassis. As many others before me have done, my goal was to ensure that there is no stress at all on the windshield from the side posts. To do this, I first mocked everything up without the glass in the frame, then double checked it after the glass was installed. What I have now is the two side posts bolted firmly to the chassis in an orientation that is positioned so that the windshield (glass and frame) lines-up perfectly with the sides (including the hocky-stick like bends at the top).
To accomplish this fit, I bent the side posts so that they'd be parallel to the chassis mounting points, then gave them a slight twist so that they'd be square to the chassis, too. I then centered the windshield (with the help of two other people) and figured out how thick the spacers would need to be.
The final result, as tested with two helpers, was that they could hold the windshield (glass and frame) in place between the mounted posts and I was able to install the four screws on each side without any stress, pushing, pulling, etc... As a final fitting step, I also slightly bent the top hocky stick area of the driver's side (by hand) so that it mated-up to the top recess in the windshield frame properly.
From all of the posts on the subject, I'm sure that this is no guarantee against cracking. But, if nothing else, at least I have the peace of mind of having done everything I could do to make sure the windshield is installed properly and without any stresses on the frame or glass.
Here are a few pics:
A sample of the before and after of grinding screws inside the frame channel - the one on the left is done:
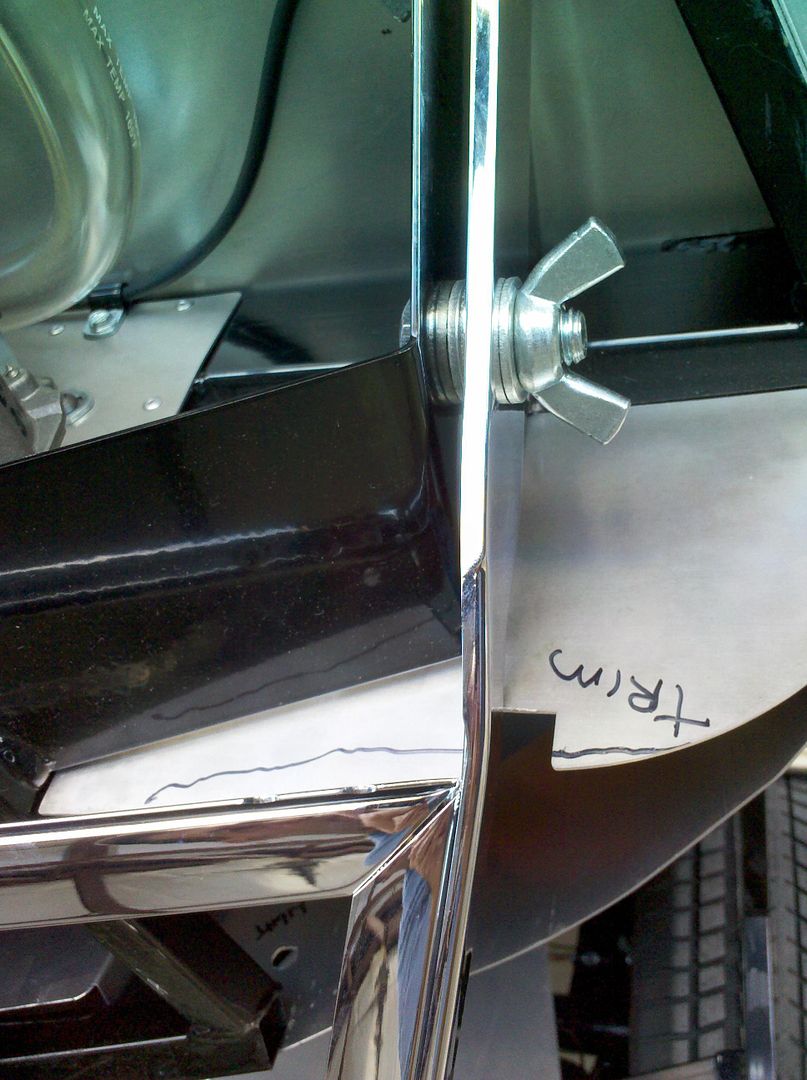
Pass side windshield post at the chassis - ignore the wing nuts... just there to make the on-and-off process a bit easier during the fitting:
Driver's side post at the chassis:
This one shows the twist that I had to put in the side posts to get them completely plumb/square/parallel to the chassis - I accomplished this using my Harbor Freight press and a bit of creative clamping/blocking to get the brass to move where I wanted:
- Home
- Latest Posts!
- Forums
- Blogs
- Vendors
- Forms
-
Links

- Welcomes and Introductions
- Roadster
- Type 65 Coupe
- 33 Hot Rod
- GTM Supercar
- 818
- Challenge Series
- 289 USRCC
- Coyote R&D
- Ask a Factory Five Tech
- Tech Updates
- General Discussions
- Off Topic Discussions
- Eastern Region
- Central Region
- Mountain Region
- Pacific Region
- Canadian Discussions
- Want to buy
- For Sale
- Pay it forward
-
Gallery
- Wiki-Build-Tech


 Reply With Quote