-
Senior Member

Mark's MKIV 8666 Build Thread - Now for sale!
I am re-starting this thread in the proper place and a little more organized than the last.
Well, after 10 years of wanting and dreaming, I ordered a MKIV roadster donor kit. Luckily I got on the first day of the 20 day sale and got a smoking deal on the kit. FFR gave me a pick up date of July 4, Stewart delivered it July 21st. Don was great, the whole process took less than 45 minutes, and that included debating whether we should move his truck to block a few driveways, but we ultimately decided to do so because it cut down the distance by about 300 feet, we still had to push the car 1/2 a block through the alleyway. 100F Texas heat...we did a lot of sweating, I was planning to go back to work after that, but i was so soaked with sweat, there was no way.
Here is a list of all the options I ordered with my kit:
MKIV Base Kit
Powder coated frame
No Body cutouts
Driver and passenger black roll bars
J pipes and uncoated pipes (plan to get JetHot coating)
Uncut dash panel
Full wiring harness with all completion components
Big&Tall leather seats
Heater defroster
Hood hinge kit
FFR floor mats
Leather FFR steering wheel
Koni rear coilovers
My finishing plans for the car are to paint it either Met Blue or Red with White stripes. I'm leaning towards 18" FR500 wheels. I also plan to get custom Speedhut gauges. For now, that's the plan.
Last edited by 6t8dart; 05-13-2018 at 09:55 AM.
-
Senior Member

Looks like a great plan.
Doug
Built FFR5196 MKII in 2003, 427w
Building FFR0058HR, Edlebrock 347-AOD
-
 Administrator

Smart move getting the wiring harness. The difference between what I did on my first build and the harness you get now is night and day. Don't forget to start a picture album and post tons of build pics!
Congrats!

FFR 5369 Pin Drive, IRS, Trigos, Torsen, Wilwoods, FMS BOSS 302 "B" cam , Mass-flo. CA SB100 (SPCN) Registered
Delivered 4/23/06. "Finished" 4/2012 (still not done!)
-
cobra Handler

When I read your list I was reminded of mine. I have seen very few dual roll bar cars. I love to ask the guys, "so why doesn't your wife or girl friend have a roll bar". You get some interesting looks from the passengers.
What's your engine/trans/rear end set up going to be? What you have there sounds like you put a lot of thought into it.
BTW: Another similarity I had with your experience was when the Stewart truck pulled up as close to my house as he could at 10 PM. It was supposed to be much earlier but he had trouble finding the house. So we off loaded the body/chassis onto a dolly and pushed it over the dirt road and gravel drive to the side of the house about a half block but it was rough going all the way. We're in the desert. There was no moon and the only lights were from the back of his truck and the garage outside lights with a big black void between. We scanned for rattle snakes and pushed it along the way. Great memory now but not so great while we were doing it. Those Stewart guys are pretty good!
Have fun with your new toy.
WEK.
Last edited by skullandbones; 07-27-2015 at 11:27 AM.
FFR MkIII 302 (ATK), EFI 75mm TB with custom box plenum chamber, 24# injectors, 4 tube BBK ceramic, cold air sys, alum flywheel, crane roller rockers, T5, Wilwood pedals, custom five link with Watt's link, 4 rotors, coil overs, power steering with Heidt valve, alum FFR rad, driver's crash bar mod, mini dead pedal mod, quick release steering wheel hub #6046
-
Post Thanks / Like - 0 Thanks, 1 Likes
-
Senior Member
So I have decided, since I'm not one to usually give female names to my cars, and since my car is chassis number F5R1008666, the name is officially going to be...."THE BEAST!"
Its very fitting for a MKIV with the number ending in "666." It was born with the mark of the beast.
666.jpg
-
Senior Member
6/23/2015 The donor victim
I got my donor, it was a 95 GT with an AOD-E, and I think a 3.27:1 rear, I towed to the house it because it had a bad coolant leak. The owner just replaced the water pump, but the leak seems to be coming closer to the block, probably a cracked timing cover. (Edit: I later found it was a bad gasket) And before anyone states the obvious, yes, I wanted an AOD. I had back and leg issues, so I don't like shifting a manual anymore.
My victim...I didn't have the heart to tell this guy I was going to chop up his baby.
DONOR STANG.jpgimage.jpgimage.jpgimage.jpg
I ripped all the recommended donor parts out of the Mustang except for the wiring, which is brand new from FFR. I probably got way more than I needed to pull, but its nice to have extras. I later decided not to use this engine and trans, I found a good deal on a rebuilt 302 with a beefed up AOD.
I ended up selling the Mustang body and recouping $400 of the $1700 purchase price, when I sell some of the other parts from it, it I hope to get most of it back.
Last edited by 6t8dart; 09-19-2015 at 11:21 AM.
-
Senior Member
7/14/2015 Bought another engine, so much for the donor concept...
This donor concept is getting more and more new parts.
So far, I have purchased the following:
Engine is a rebuilt 302, .030 over
Ported and polished 5.0 heads (I also have un-ported, rebuilt GT40 iron heads sitting on the shelf), E303 cam, HU pistons, High volume oil pump, 1.7 rockers, and ported 95 5.0 intake. I ended up changing to an Edelbrock Performer RPM with a Slayer 600 carb Edit 8/23/2016: Carb changed to a FITECH EFI unit
Drivetrain consists of a mildly built AOD trans, 1800 stall converter, B&M hammer shifter, new FR yoke, and 8.8 rear with 3.27 ratio. Hammer shifter changed to stock mustang shifter with a polished ball handle, will look like a stick shift
The rear and suspension arms, brakes, fuel tank, and steering rack are all thats left of the donor in my build. Most everything else is getting new parts. Rear suspension arms replaced with FFR steel upper, and FFR forged aluminum lowers
I have not yet decided what intake to use, not sure if I will go fuel injection, or keep it simple and stick with a performer RPM and a Carb from Forte's. see above
Last edited by 6t8dart; 08-23-2016 at 10:00 AM.
-
Senior Member
7/21/2015 Stewart showed up on time! Another Christmas in July!
I got a call from Stewart a week ago, Tuesday they showed up on time as promised! Don did a great job of getting everything off the truck and explaining how it all worked, it was a well thought out method for getting it all off the truck. It took about 25 min to get all the boxes off, and checked off, and on to the cart.
Next we got the car off, onto the cart, and we pushed it halfway up the block to my garage, got it on to the jack stands in another 20 min. Efficient is the key word here, I was very impressed!
del1.jpgdel2.jpgdel3.jpgdel4.jpgdel5.jpgdel6.jpgdel7.jpg
Last edited by 6t8dart; 07-28-2015 at 02:39 PM.
-
Senior Member
7/25 & 7/27 2015 INVENTORY! Oh no!
Saturday I finally took the time to start the inventory process. I have heard horror stories about guys taking 3 days or more, thankfully it took me about 5 hours total. But I can see how it could take some people with less car building experience a lot more time, I pretty much breezed through everything...until I got to box 6A .... Aluminum panels. This was the one that took the longest, so panels were not marked, and I was forced to pull out the manual and start looking for pictures of different panels.
Over all, the inventory went pretty good, only a damaged center steering wheel cover, and few missing electrical ring terminals from all the boxes. When i was done I realized I was missing a few more items I ordered but didn't make it to the packing list, my rear Koni coil overs and 94-05 Rack kit never made it. I called Vinny and he promised to get them out right away.
Also there were a few minor parts on back-order, headlight buckets, door latches, and the steering wheel boss.
I am impressed that of the thousands of individual little parts, only a few screws and ring terminals were missing from the packing list.
-
Senior Member
Due to traveling, I have had very little time to work on my car, however, I got most of my back ordered parts now, still waiting on door latches and a new steering wheel trim ring.
Today I managed to get my chassis cart built and the car on it, my back is wrecked now, and I'm traveling again this week, maybe I can make some more progress next week.
image.jpg image.jpg
-
Senior Member
8/17/15 More pics of the chassis dolly.
I used two 4x4 and two 2x6 along with a few pieces of 2x4 to make the dolly, pretty strong, bu I would make some small changes next time, but it would require another 4x4. I ended up using six 330 lb casters, I planed to use 4 550 lb casters, but the store only had three at the time. it rolls amazingly easy, and in my opinion, WAY safer than four jack stands. I almost lost the car off the stands last night while trying to lift it high enough for the cart to slide through.
cart 1.jpgcart2.jpgcart3.jpgcart4.jpgcart5.jpgcart6.jpg
Im not sure if I need to move this back any farther...
cart7.jpg
-
I kept mine on the chassis dolly even when the engine/transmission was installed but it got too hard to roll around as more weight was added. I mounted the wheels and put it on wheel dollies. The casters on the wheel dollies are small and make rolling it around a chore even on smooth concrete so that wasn't much improvement.
-
Senior Member
i worried about it getting harder to move, in reality, it's only getting moved when installing the engine and when fitting the body back on, so I'm not too worried anymore about being harder to move with weight. Once it's running, it will be sitting on its tires anyway.
-
Senior Member
image.jpg
I got off work a little early today, so I decided to build a body buck. I have a buddy coming over Saturday, he doesn't know it yet, but he is being "volunteered" to lift the body off.
-
Senior Member

The BEAST it is. Enjoying your updates and looking forward to starting a build myself one of these days. In the meantime things that will be transferred from the donor are being put into good shape. The donor will be a track car until I can get to the build.
Daily Driver 2011 Ford Mustang Convertible
Donor 1997 Mustang Coupe
Someday a Type65 Street Coupe
-
Senior Member

Originally Posted by
6t8dart

image.jpg
I got off work a little early today, so I decided to build a body buck. I have a buddy coming over Saturday, he doesn't know it yet, but he is being "volunteered" to lift the body off.
I think I screwed this up, I ran the side supports at 63" apart, however, I forgot that the body pinches in at the bottom and is only about 54" wide. I have to do a little more measuring and see if the sides will clear, if not, I need to tear it apart and move them inboard each about 6 "
-
Senior Member
Originally Posted by
6t8dart
I think I screwed this up, I ran the side supports at 63" apart, however, I forgot that the body pinches in at the bottom and is only about 54" wide. I have to do a little more measuring and see if the sides will clear, if not, I need to tear it apart and move them inboard each about 6 "
Ok, we got the body on the buck yesterday, the fit was just horrible! But then, I wondered, what if we turn it 180 degrees? Wow, fit much better! Lol! It still could be better in the back, I may make a couple pieces to screw to the existing boards and adjust the fit a bit. I think F5 needs to redraw their patterns for the MKIVs.
image.jpg
-
Member

Looks like you're moving right along.. Thanks for the update!
-
Senior Member
2nd weekend actually working on the car, started the front suspension, quickly put together the FFR uppers and all four coilovers. Then I spent hours cleaning the spindles, brakes, lower control arms, and steering rack. Every piece was coated with a very impenetrateable layer of gray dust that rested 5 different chemicals...until I resorted to lacquer thinner...my old friend. I finally got it all painted. I think I am now going to order the breeze short tie rod ends. Next weeekend I am moving to the rear axle...time to stock up on lacquer thinner.
image.jpg
-
Looks like you are starting to make progress. You didn't mention Pin drive in your options and I noticed you mounted the UCA on the top bolt holes. If you don't have Pin drive wheels, the UCA should mount in the outer holes.
-
Not a waxer

Originally Posted by
2bking
...You didn't mention Pin drive in your options and I noticed you mounted the UCA on the top bolt holes. If you don't have Pin drive wheels, the UCA should mount in the outer holes.
This is only true if using the FFR two piece spindles. With donor spindles of any vintage the UCAs mount on the top horizontal surface.
Cheers,
Jeff
-
Senior Member
Yes, donor lower arms and spindles. It gets confusing sometimes with the multiple bolt holes and options. I double checked the manual.
-
Senior Member
Today was one of those expensive days, with one large box already on the way from Summit, I ordered another piggy bank buster from them today, next ordered a new Radiator from FFR, sending my side pipes to HTC Racing, and finally some items from Breeze. I really need parts from each to keep going, so I just decided to go ahead and place the order. I also gave upon fuel injection and ordered a Quickfuel Slayer 600, VAC, ELEC. This finalized my engine combo as follows:
Rebuilt 5.0 (bored to 306)
Ported 5.0 heads
Edelbrock Performer RPM intake
Quickfuel Slayer 600
BBK Shorty headers
Ford Racing E303 cam
This is a pretty simple combo, hoping for between 300-330 HP.
-
Senior Member
Christmas in August!
I got many parts from Summit, Breeze, and Jegs yesterday! I felt like a kid....I promised my wife I was only going to take the parts to the garage, but I ended up opening everything up and playing with all the parts. Pictures to follow later.
-
Member
Hope Santa was good to you! Let's see some pics.
-
Administrator
Wow, almost a day and a half without pics... Tsk, tsk, tsk.
Yah know, I can't recall the last time I handed down an infraction that wasn't spam related. Maybe I should remind my self how that little button works.

FFR 5369 Pin Drive, IRS, Trigos, Torsen, Wilwoods, FMS BOSS 302 "B" cam , Mass-flo. CA SB100 (SPCN) Registered
Delivered 4/23/06. "Finished" 4/2012 (still not done!)
-
Senior Member
I got the rear ended cleaned, painted, and bolted in today. I was almost done but I realized that FFR forgot to send me the hardware with spacers for the rear Koni's. I got them supporting the rear end with stock mustang hardware, but no spacers. I also test fitted my slotted rotor with a wheel to check clearances, tons of room. If you noticed the calipers are missing, I'm cleaning and painting them, hope to get the brakes together tomorrow.
I know I forgot pictures last time, sorry!
image.jpg
image.jpg
-
Senior Member
Yesterday I had a few hours to work on the car, I finished up the front suspension. I had to modify the Mustang lower control arms to fit the coilovers, so I took my iPad into the garage to reference some pictures, and while using a cutting wheel, a spark hit my iPad 6 feet away...and would you believe the screen cracked!!! Argh! frustrated, I wrapped things up, went into the house and my wife told me she wasn't feeling well, so I took her to Urgent Care, they did an EKG...and sent us to the ER for more tests, we spent most of the night there getting more tests. Thankfully she did not have a heart attack, but most likely it was something work stress related. She is OK, we are a bit tired today, both taking the day off from work.
image.jpg
image.jpg
-
Senior Member
Got another piece of engine eye candy in today, RPC Racing air cleaner, matches the Summit polished valve covers.
I am using an Explorer front drive setup, test fitting everything here.
image.jpg
image.jpg
-
Senior Member

Very nice! Like the filter and valve covers. Glad to hear your wife is okay.
Kyle
Complete Kit pickup 09/05/2015, 351w, QF680, 3.55, 3-Link, 15" Halibrands with MT's, Painted Viking blue with Wimbledon white stripes on 03/15/2017. Sold in 08/2018 and totally regret it.
-
cobra Handler
Hi,
Are you using air pump and other smog stuff on your build? I thought I saw the pump in one of your pics. I haven't seen a build with all the OEM emission equipment on it except in a Mustang. Of course, there may be some state requirements you have that others don't.
Also, I like the wheels. Are those American Racing? I like the five spokes. I've got Cobra Rs. So what color scheme with the white wheels?
Glad to hear your emergency trip was nothing serious for your wife.
Thanks,
WEK.
FFR MkIII 302 (ATK), EFI 75mm TB with custom box plenum chamber, 24# injectors, 4 tube BBK ceramic, cold air sys, alum flywheel, crane roller rockers, T5, Wilwood pedals, custom five link with Watt's link, 4 rotors, coil overs, power steering with Heidt valve, alum FFR rad, driver's crash bar mod, mini dead pedal mod, quick release steering wheel hub #6046
-
Senior Member
No smog pump...ever!
Not sure, wheels came on Mustang donor, they will serve for the go kart stage. I plan on metallic red, but not decided yet.
She is doing fine....other than she hates her job and stresses every day over it.
-
Senior Member
i didn't get a whole lot done this weekend, got the rack together and mounted in the chassis, and started fitting the steering shaft and brake booster and pedal box. No issues with the pedal box, but the booster does not clear the frame (I know this), my biggest issue is accessing the master cylinder fill cap after the body is on. I am going to try and do a more exact test fit tonight.
rack 1.jpg rack 2.jpg
-
Not a waxer
Originally Posted by
6t8dart
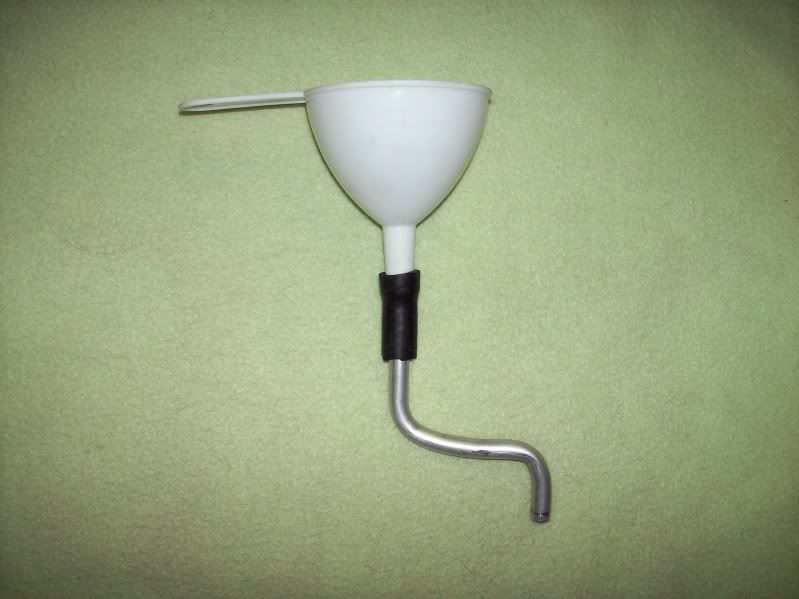
my biggest issue is accessing the master cylinder fill cap after the body is on.
I've built a few cars using the vacuum booster, You can easily reach under the body to remove the master cylinder cap and then to top it off I suggest that you purchase my custom fill device---only $19.95 (cash sales only, I only accept fiftys and hundreds, no change).
Jeff
Last edited by Jeff Kleiner; 09-14-2015 at 03:38 PM.
-
Senior Member
Jeff, I'll send you a stack of hundreds for the idea.
I sometimes overthink things, your solution seems simple enough. My wife says when I see one problem, I create 10 more.
-
Senior Member
Power brakes in a roadster
This was my take on power brakes, with information absorbed from the forum.
I had originally had planned to do power brakes from my donor 95 GT. as I started test fitting parts, I thought that the booster seemed very large. After I installed the steering shaft bearing, there was no way it was going to work, I briefly considered turning into a manual brake setup, but kept researching. I noticed that the earlier mustang booster was smaller. I went to Autozone and picked up a 93 booster.
Bearing in standard location
image.jpg
Moved to the inside. I also decided to cut the brace to clear at this time, and I ordered the Whitby frame mod.
image.jpg
Comparison of the nearly 2" diameter difference, not to mention the taper of the early booster helps.
image.jpg
image.jpg
I used the spacers of the 95 foot box, but there was still interference from the bearing, so I moved it to the inside of the firewall...problem solved.
There is now a fair amount of clearance, enough that I can shorten the spacers.
image.jpg
Last edited by 6t8dart; 09-18-2015 at 10:48 PM.
-
Senior Member
With the 3/4 mustang pedal box spacers, the pedal was too close to the firewall, I decided that I could shorten up the spacers quite a bit.
image.jpg
I searched my garage for half an hour looking for the spacers I knew I had...no luck. I took a drive to Lowes, but they only had long spacers. Off to ACE, they always have all kinds of specialty hardware. I picked up some chrome 3/8 and 1/2 spacers. As soon as I walked back in the garage, I found the spacers I had from before...figures.
Next step, I built a cover plate to cover all the holes in the firewall.
image.jpg
I used a 2 1/8 hole saw to cut the hole to seal against the register. To my surprise, first cut was dead on, no filing or trimming required.
image.jpg
I first tried the 1/2 spacers, but the center register was hitting the firewall, so I needed to trim it. i first tried to screw a piece of wood to the back and use the 2 1/8 hole saw, but it was walking around too much. I finally just got out my die grinder with a metal cutting bit and shaved it to clear.
Now it fit great, so I tried the 3/8 spacers, still have good clearance, and the pedal is up where I want it.
image.jpg
In retrospect I probably should have bought the 1/4 spacers too, they would have fit just fine.
-
Senior Member
FFR Afco radiator
I had ordered a new FFR radiator a few weeks ago to replace the leaking (and ugly) donor radiator. Today I opened up the box to check it out. I started thinking...I wonder if the shroud I ordered for my dart over two years ago from Summit would fit? Wow! It was a perfect fit! If anyone is interested, here is the p/n.
image.jpg
image.jpg
image.jpg
-
Senior Member
I hear you about the spacers. They have been the bane of my build. I seem to be short some again to finalize the 3 link so a trip to Ace will hopefully solve that.
Kyle
Complete Kit pickup 09/05/2015, 351w, QF680, 3.55, 3-Link, 15" Halibrands with MT's, Painted Viking blue with Wimbledon white stripes on 03/15/2017. Sold in 08/2018 and totally regret it.
-
Senior Member

Originally Posted by
6t8dart
I had ordered a new FFR radiator a few weeks ago to replace the leaking (and ugly) donor radiator. Today I opened up the box to check it out. I started thinking...I wonder if the shroud I ordered for my dart over two years ago from Summit would fit? Wow! It was a perfect fit! If anyone is interested, here is the p/n.
That shroud is almost exactly like the Northern Radiator shroud Mark at Breeze Automotive sells, that many of us have used. Similar size and price. Just be careful to give enough clearance around the hose connections. One question though. Is that the a Roadster radiator from Factory Five? It's quite different than the two AFCO Performance ones I've seen before from FF, including my most recent complete kit delivery. Square/welded tank corners vs. rounded, and the lower hose connection at an angle vs. straight out. Also the drains are in a different location.
Last edited by edwardb; 09-19-2015 at 09:00 AM.
Build 1: Mk3 Roadster #5125. Sold 11/08/2014.
Build 2: Mk4 Roadster #7750. Sold 04/10/2017.
Build Thread
Build 3: Mk4 Roadster 20th Anniversary #8674. Sold 09/07/2020.
Build Thread and
Video.
Build 4: Gen 3 Type 65 Coupe #59. Gen 3 Coyote. Legal 03/04/2020.
Build Thread and
Video
Build 5: 35 Hot Rod Truck #138. LS3 and 4L65E auto. Rcvd 01/05/2021. Legal 04/20/2023.
Build Thread. Sold 11/9/2023.


 Thanks:
  Likes:


 Reply With Quote

