-
Senior Member

Chris' 289 FIA build, #8833
I picked up my 289 kit yesterday with the help of Mike Forte (thanks for the help Mike!). Everyone at FFR was great, and my pickup went very smooth. We also got to spend some time chatting with Dave Smith about a whole host of topics; mainly old cars, engines and other war stories. Next step is to organize and inventory everything. This will be next weekend since our daughter had an all day volleyball tournament today (her team won!).
More to follow...
-
I'll be watching this one
Love the FIA
The traveling Builder
717-773-5624
-
East Coast Speed Machines

Welcome to our little group 
FFR 1879, Blown DSS 306,REDLINE management, VeryCoolParts Tuned 460RWHP
FFR 818S, The Flash, Chassis #5, 2.0L, LSD, Electromotive TEC-S, VCP Tuned, 278RWHP 265 RWTQ
FFR 6651, Green Lantern, 408W Crate, Hellion 66mm Turbo, JGS Waste gate / Blowoff valve, Tec-GT management, VCP Tuned, 575 RWHP, 690 RWTQ
FFR 8335, Black Mamba, 289 FIA CSX 2001 tribute car, 347, 48 IDA webers, VCP Tuned, 311 RWHP 386 RWTQ, 3-link, Trigo's
FFR 0004, Gen 3 , Hawk Coupe, Coyote twin turbo, 683 RWHP 559 RWTQ, IRS, VCP Tuned. "not too shabby"
US ARMY Maintenance Test Pilot (CW4 Retired)
-
Awesome! Can't wait to watch your build.
Please keep us posted on your progress.
Love the 289s!!
Regards,
Steve
-
Senior Member
-
Senior Member

Very cool. Welcome into the fold
Bill
-
Senior Member
-
Senior Member
Looking like a great start
-
Senior Member

Welcome to the gang Chris! Time to nutt it up! Not sure why the LCAs are still a problem?
-
Senior Member

Originally Posted by
ehansen007

Welcome to the gang Chris! Time to nutt it up! Not sure why the LCAs are still a problem?
I got some info on delivery of my back-order parts. They should all be in over the next couple of weeks. Rearend is due next week. In the meanwhile I have been test fitting the parts I do have. Assembled the front shocks, did a bunch of deburring/chamfering of spacers, chased some threads and applied anti-seize to the adjusters. I will assemble everything loosely, check the fits and then go back and torque once I'm happy with everything.
Probably start some of the drilling/deburring of the aluminum panels this weekend.
-
Senior Member
I picked up my LCAs and a bunch of other parts. Installed everything, but something seems off:

The adjusters on the upper control arms are in the same position, fully screwed in, but the spindles are pointed in different directions. One up, one down. If the adjusters are in the same position, shouldn't both spindles be angled roughly the same way? Am I missing something obvious?
Chris
-
Measure the LCA leg lengths from bolt center to grease fitting and make sure they sent you a pair of the same length, not 1 standard width and 1 pin drive.
~ Bruce
MK4 #8189
400hp 351w, TKO600, 3.27 3-link
-
Senior Member
Originally Posted by
NukeMMC
Measure the LCA leg lengths from bolt center to grease fitting and make sure they sent you a pair of the same length, not 1 standard width and 1 pin drive.
Didn't even consider that... I checked all the mounting holes several times, but kept looking at the LCAs and something didn't look right.
Rough measurements say they are off by about an inch, so... looks like we have a winner.
Thanks Bruce!
-
Senior Member
I received the correct LCA about a week ago as well as my sway bar which was on back-order. Everything is now assembled, torqued and marked. Looks much better now.

I also received my rear axle. I will be using the three link, test fitting brackets now. I also am waiting for the brake brackets to cure, those were painted with POR-15. I haven't used this before, nice stuff.

-
Chris-
Things are looking good. You are right about POR-15, that stuff is BOSS!
Nice progress. I love watching the 289 FIA builds!
Regards,
Steve
-
Senior Member
Excellent. I should have waited a bit longer and bought one instead of the nightmare is going thru
-
Senior Member
Back from vacation and spent some time in the garage this weekend, boy did I make a lot of progress. That should have been the first warning sign....
I assembled the rear axle and incorporated some suggestions for the banana bracket. I ground off all the powder coating the mating surfaces, plus the exterior of cap, as well as on both sides of the cap. After talking with Jim from FFR, I decided to weld only the cap to the axle, the banana bracket will be bolted in place. I won't be running a lot of horsepower, this should be sufficient to prevent movement. Setting up time with the welder this week, then clean up, POR-15 and bolt in place hopefully this weekend.

With that tackled, I decided to move on to the steering.


Zipping right along, get everything bolted in, go to align the tie rod ends and what? Ball joint stud doesn't fit quite right in the bracket? Could it be... Yep. Dummy installed them with the taper upside down. Off with the front brakes and hubs to resolve this and wham, rounded one of the front caliper attachment bolts during disassembly.
At this point I decided to listen to the manual and stop working because man was I frustrated. Nothing better than self-inflicted misery. So, grabbed a couple double IPAs and cleaned the garage instead. I'll fix it this weekend.
Chris
Last edited by cnutting; 05-02-2016 at 07:33 PM.
-
Senior Member
-
The traveling Builder
717-773-5624
-
Member

Originally Posted by
2FAST4U
Excellent. I should have waited a bit longer and bought one instead of the nightmare is going thru
Oh puleese, You're kidding right. What did you expect? Yours will be so much more realistic than the Fact Five. That's the fun of doing what you are doing and what I did. Solving problems and creating a very unique and special replica. You've had some set backs, but you've beautifully solved them. SUCK IT UP.  It seems The more things change, the more they stay the same.
John O
FFR 1293K - First Factory Five slabside. Replica of CSX 2367. 289 Hi-Po, original Cobra dual quads manifold with original Carter 3258s and 3259s carbs, Dayton wire wheels, Tremec 5-speed, 355 trac-loc rear, original Amco Cobra luggage rack.
-
Originally Posted by
2FAST4U
Excellent. I should have waited a bit longer and bought one instead of the nightmare is going thru
C'mon now. I know you have had some frustration, but your build skills are amazing! Your build is truly special, and in it's own class.
I certainly appreciate your frustration, but I am blown away by your progress and skills!
Hang tough, I know it will be worth it!!
Regards,
Steve
-
Senior Member
Quick update from last weekend. The welder came over and welded the cap for the banana bracket.
Then, after some cosmetics and touch-up with POR-15 we lifted and installed the axle. Maneuvering the axle a little this way, then a little that way, a little up, a little down... hold it... bolts in. Yay! Then bolted up the rear shocks and panhard bar.

Wow, starting to really look like something!

Also finished off the pedal box, but alas no pictures. So... did it really happen??
This weekend, in between cookouts, I'll install the fuel tank and start routing brake and fuel lines.
FFR #8833 289 FIA 3-link
1965 289, TKO600 from Forte's Parts Connection
Body and Paint by Mike's Auto Restoration
Picked up 3/5/2016, First start 4/22/2017, MA legal 7/11/2018
Build Thread
http://thefactoryfiveforum.com/showt...FIA-build-8833
"Insanity is contagious" - Joseph Heller
-
Senior Member
Looking great. Keep the pics coming
-
Senior Member
This weekend was spent on fuel/brake lines as well as fitting aluminum panels (the instrument panel is just placed for giggles and some small motivation....).

A little closer....
Last edited by cnutting; 06-05-2016 at 08:33 PM.
FFR #8833 289 FIA 3-link
1965 289, TKO600 from Forte's Parts Connection
Body and Paint by Mike's Auto Restoration
Picked up 3/5/2016, First start 4/22/2017, MA legal 7/11/2018
Build Thread
http://thefactoryfiveforum.com/showt...FIA-build-8833
"Insanity is contagious" - Joseph Heller
-
Senior Member
-
Senior Member
Filled and bled the brakes today, used a combination vacuum bleeder and the more traditional method. Pedal travel is ~1" then hard as a rock. Held the pedal for a couple minutes with no change in feel. I'd say we are good.
Riveted the passenger side aluminum as well. I'm leaving the panels natural, going for the simple look. Other than cleaning off markings and major scratches I will let them form a natural patina. Will hopefully finish off the drivers side (minus the outer footbox panels) tomorrow.
Next on the agenda is cable runs. Could also use a little guidance on the 289 filler neck. The supplemental instructions are a bit light here. Same with the rollbar.
Oh yeah... Also centered the rear end today. Put a square on the inner surface of the rear rims and measured to the 4" frame tubes. Adjusted until both sides were within ~1/16" of each other. Sound about right?
Tires due next week, then off to get them mounted and balanced.
Last edited by cnutting; 06-18-2016 at 08:11 PM.
FFR #8833 289 FIA 3-link
1965 289, TKO600 from Forte's Parts Connection
Body and Paint by Mike's Auto Restoration
Picked up 3/5/2016, First start 4/22/2017, MA legal 7/11/2018
Build Thread
http://thefactoryfiveforum.com/showt...FIA-build-8833
"Insanity is contagious" - Joseph Heller
-
Senior Member
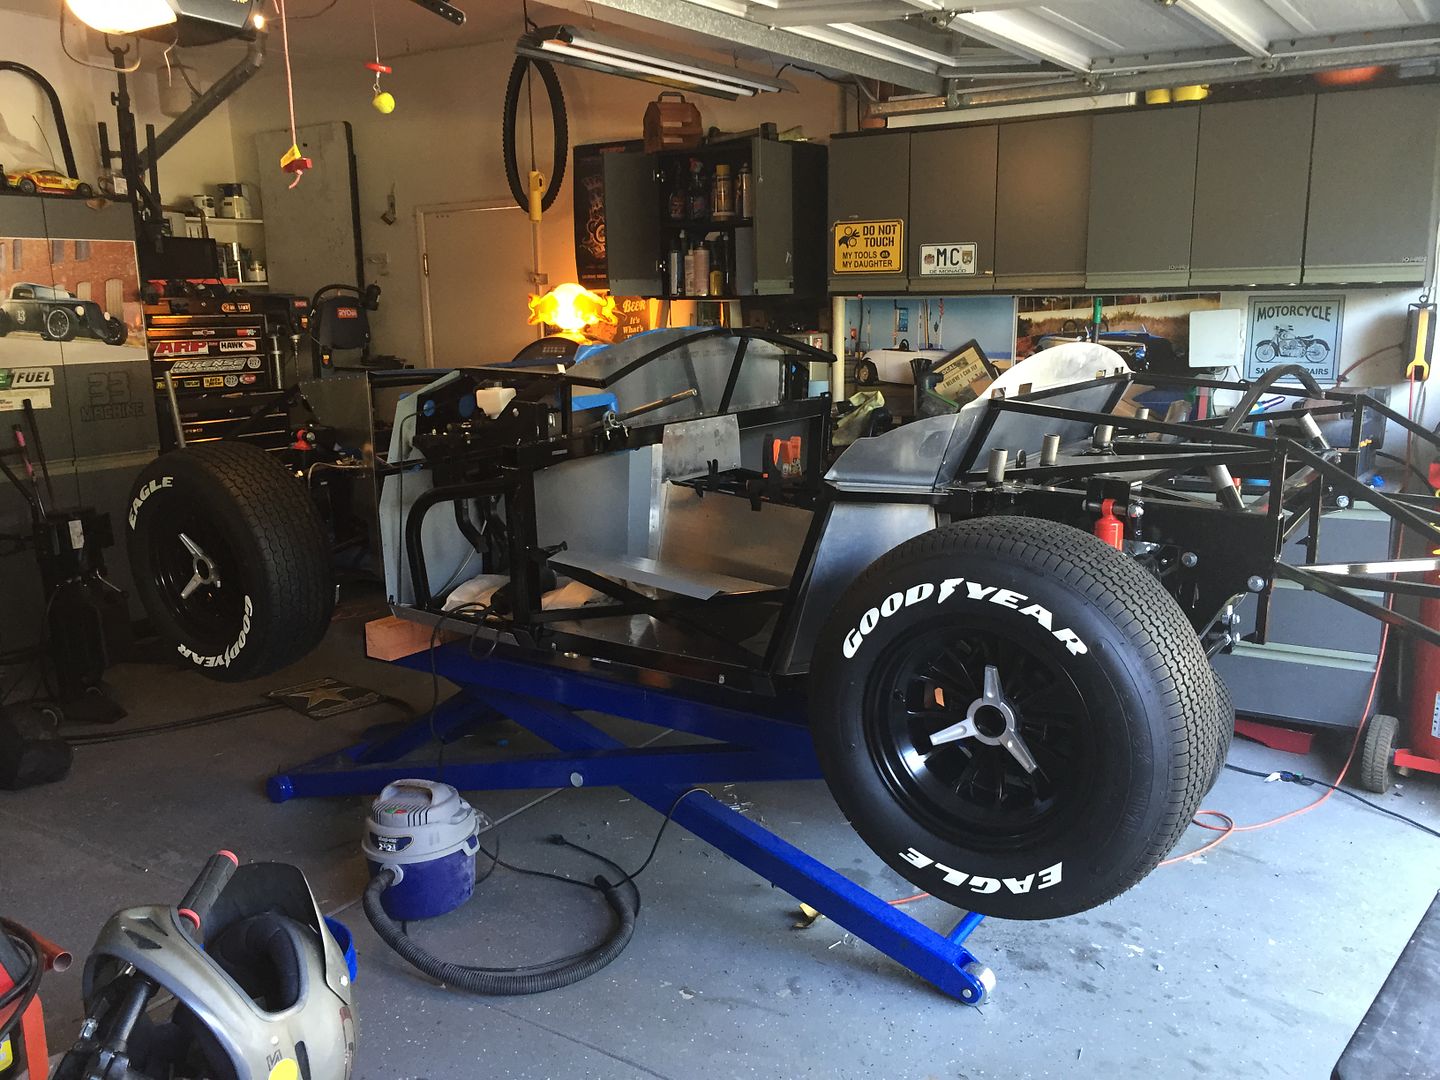
Fantastic progress. What tires and rims?
Bill D
-
Senior Member
15" FFR Halibrand-style rims and Cooper Cobra tires. One of my must-haves were the raised white letter tires and 15" rims. But... to keep things DOT for Mass (and to keep the budget in line) I went with the Coopers. 245 front and 275 rear. Some day I may switch to the Goodyear polyglas, hopefully at the same time that I make the switch to the more traditional Weber intake...
FFR #8833 289 FIA 3-link
1965 289, TKO600 from Forte's Parts Connection
Body and Paint by Mike's Auto Restoration
Picked up 3/5/2016, First start 4/22/2017, MA legal 7/11/2018
Build Thread
http://thefactoryfiveforum.com/showt...FIA-build-8833
"Insanity is contagious" - Joseph Heller
-
Senior Member
So this past weekend fixed an interference issue I had with the rear brakes as well as finishing off the cockpit aluminum. I left the rear wall off until I get the trunk aluminum done. Started in on wiring, I think this step will require lots of thinking and contemplation with some nice double IPAs...

FFR #8833 289 FIA 3-link
1965 289, TKO600 from Forte's Parts Connection
Body and Paint by Mike's Auto Restoration
Picked up 3/5/2016, First start 4/22/2017, MA legal 7/11/2018
Build Thread
http://thefactoryfiveforum.com/showt...FIA-build-8833
"Insanity is contagious" - Joseph Heller
-
Senior Member
-
Senior Member
Originally Posted by
cnutting
15" FFR Halibrand-style rims and Cooper Cobra tires. One of my must-haves were the raised white letter tires and 15" rims. But... to keep things DOT for Mass (and to keep the budget in line) I went with the Coopers. 245 front and 275 rear. Some day I may switch to the Goodyear polyglas, hopefully at the same time that I make the switch to the more traditional Weber intake...
Well, get out that die grinder and some cookie pads and make your own tires with raised lettering son!
-
Post Thanks / Like - 0 Thanks, 1 Likes
-
 Administrator

Originally Posted by
ehansen007
Well, get out that die grinder and some cookie pads and make your own tires with raised lettering son!
Showoff.
FFR 5369 Pin Drive, IRS, Trigos, Torsen, Wilwoods, FMS BOSS 302 "B" cam , Mass-flo. CA SB100 (SPCN) Registered
Delivered 4/23/06. "Finished" 4/2012 (still not done!)
-
Post Thanks / Like - 0 Thanks, 1 Likes
-
Senior Member
Nice! Mine would probably end up saying Goodyear Eagel on at least one of the tires....
FFR #8833 289 FIA 3-link
1965 289, TKO600 from Forte's Parts Connection
Body and Paint by Mike's Auto Restoration
Picked up 3/5/2016, First start 4/22/2017, MA legal 7/11/2018
Build Thread
http://thefactoryfiveforum.com/showt...FIA-build-8833
"Insanity is contagious" - Joseph Heller
-
Senior Member
Ha! I actually missed the foot with the wings on one tire. But nobody knows so don't say anything.. 
-
Really nice tires!
car looking great!
Best of luck
-
Nice lift. Is that a Bendpak MD-6XP? If so, what do you think of it?
Sorry to hijack the thread...
-
Senior Member
Not much going on the last couple of weeks. I have a midterm exam due Sunday and that's pushed off car work. But, this gives me time to think about what's next. One of these tasks is the fuel filler routing. The kit from FFR has a combination of metal and (thin wall) rubber tubes to make up the filler neck. I'm thinking of just replacing the 289 parts with this:

It will simplify things, but am I missing something important here...?
FFR #8833 289 FIA 3-link
1965 289, TKO600 from Forte's Parts Connection
Body and Paint by Mike's Auto Restoration
Picked up 3/5/2016, First start 4/22/2017, MA legal 7/11/2018
Build Thread
http://thefactoryfiveforum.com/showt...FIA-build-8833
"Insanity is contagious" - Joseph Heller
-
Senior Member
Back at it after a couple weekends off to tend to school commitments. So close to being done I can taste it.
Went through the boxes to start in on cabling and what did I spy? A length of 2" softwall tubing. Thanks FFR! Now I can splice the 289 filler much easier.
Finished routing cables today. Seems fairly straightforward, but I'm sure that statement will come back to bite me. After that was don I started fitting aluminum in the trunk, those will get drilled and riveted tomorrow, then the rear cockpit wall. Also was test fitting the dash. I think this is going to come down to a balance between centering the steering shaft best I can against how much of the aluminum sticks up and where. First step was centering the dash, keeping the gauges as horizontal as possible:

Then it was dropping the corners to the frame. Passenger side seems ok:


Middle seems ok based on what I have read:

Drivers side seems high (maybe)?


What does the body actually sit on when mounted? Am I ok here, do I need to trim things? Can't really drop the DS without impinging on the steering shaft.
As a little motivation I popped in some gauges, switches and the dash support just to get a feel how it will look. Need to finalize placement of everything.

Crappy cell phone picture, ugh.
FFR #8833 289 FIA 3-link
1965 289, TKO600 from Forte's Parts Connection
Body and Paint by Mike's Auto Restoration
Picked up 3/5/2016, First start 4/22/2017, MA legal 7/11/2018
Build Thread
http://thefactoryfiveforum.com/showt...FIA-build-8833
"Insanity is contagious" - Joseph Heller
-
Post Thanks / Like - 0 Thanks, 1 Likes
-
Senior Member
Beautiful. A truly inspiring build
-
Senior Member
In between school assignments and family activities, I was able to run all the cables and button up the trunk and cockpit aluminum (note: the transmission tunnel cover is not riveted in yet, just placed):


While waiting for the engine and transmission, I assembled the dash. Fairly straightforward, gluing the dash pad down was easier than expected. After that I added the gauges and a Shelby badge. I was going to use the FFR supplied one, but his caught my eye and I went with it:


For further inspiration I put the seats in (not permanent yet). I went with the Kirkey low-back for the driver and the standard seat for the passenger. I will be putting in a seat track on the driver's side so our daughter can drive it too. She helped build, she gets to drive... Of course I then had to put the wheel on, just to fit check of course...


Last edited by cnutting; 08-14-2016 at 12:57 PM.
FFR #8833 289 FIA 3-link
1965 289, TKO600 from Forte's Parts Connection
Body and Paint by Mike's Auto Restoration
Picked up 3/5/2016, First start 4/22/2017, MA legal 7/11/2018
Build Thread
http://thefactoryfiveforum.com/showt...FIA-build-8833
"Insanity is contagious" - Joseph Heller


 Thanks:
  Likes:


 Reply With Quote

