Very Cool Parts

Visit our community sponsor

Thanks Thanks:  0
Likes Likes:  0
Results 1 to 21 of 21

Thread: Clutch Fork Adjustment Problem

  1. #1
    Well Used Member boat737's Avatar
    Join Date
    Feb 2016
    Location
    So. Bay (So. Calif.)
    Posts
    889
    Post Thanks / Like

    Clutch Fork Adjustment Problem

    I have 427w with a QuickTime 6065 bell housing, Ram HDX series clutch/pressure plate/throw out bearing package, and a standard Ford clutch fork. As far as I know, I have the standard 157 tooth flywheel.

    While putting the clutch assembly together with the bell housing and engine, I ended up with the clutch fork near mid way in the bell housing window. At that position, I'm afraid that I will not have enough forward movement on the fork arm to disengage the clutch fully. I backed out the fork ball stud as far as it would go (backing it out of the bell housing boss, moves the stud forward in relation to the motor/car), to where it was only in the boss by about 4 threads. In addition, the pivot end of the fork was only about 1/10" or so from contacting the pressure plate housing. So the stud was as far out as it would go and the fork arm was still only slightly back from midway in the bell housing window.

    IMG_0828 small.jpgIMG_0829 small.jpg

    After talking to the Ram tech folks, we decided a taller throw out bearing would move the fork arm rearward. I got the new bearing, and indeed, with the pivot ball stud adjusted to a more reasonable setting, the clutch arm was in a more rearward location in the housing window, now with about 5/8" clearance between the fork arm and the rear edge of the window.

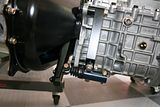
    IMG_0831 small.jpg

    However, I noticed that the collar on the new, deeper bearing was smaller (smaller radius), and the fork could slide sideways on the bearing, to where at it's limit, is just about to fall off the shoulder of the bearing collar. Ram says it's OK, but with even the slightest wear on the fork and/or collar, it is going to fall off the surface, get twisted, and wedge itself sideways. There is nothing to keep the fork centered on the bearing collar, so eventually, or immediately, it is going to start to move sideways off that collar.

    IMG_0827 small.jpg

    So the deeper bearing, even though that solved the initial problem, brought up another. My next thought is that maybe I have the wrong fork arm. From the pic, you can see that it bends forward.

    IMG_0830 small.jpg

    Bottom line:
    Any one run into this problem?
    Do they make a different, taller bearing with the wider collar?
    Is there a fork that is not canted /bent forward like the one I have?

    I have been fighting with this one for 3 weeks now. I should have come to the experts (you all) sooner, and save 50 miles driving around, and a few hours on the phone.

    Whew... That was a mouthful. Appreciate your help.
    Last edited by boat737; 10-17-2016 at 06:53 PM.
    If Brute Force doesn't work, you're not using enough of it.
    Basic Stuff: MK4 Complete Kit #8439, Wilwood's, 17" Halibrands. Extra Stuff: Stainless brake and fuel lines, Breeze cooling, Battery mount, SS Roll Bar. Old Fart Stuff: Heater, Seat Heaters, Footbox Fresh Air, Stereo, Keyless ignition, Power Steering, Hyd Clutch.
    Young & Dumb Stuff: 427w Dart, TKO600, 3 link Moser M9/Ford 9", 3.5:1, Eaton TruTrac Posi. Graduation Thread

  2. #2
    Senior Member karlos's Avatar
    Join Date
    Aug 2013
    Location
    Littleton, CO
    Posts
    412
    Post Thanks / Like
    I'm using the same combination of engine/bellhousing/clutch components. This is how the clutch fork ended up looking when all was said and done.


    The final ball stud adjustment looked like this (about 1.3 inches of exposed threads).


    Here's a shot of the clutch fork. Part number may be a bit hard to read. It's E6ZR-7515-AA.


  3. #3
    Well Used Member boat737's Avatar
    Join Date
    Feb 2016
    Location
    So. Bay (So. Calif.)
    Posts
    889
    Post Thanks / Like
    Thanks Karlos.

    This thing has me really stumped. Something is just not adding up.

    That is the same fork as I have. Using your dimension from the top of the nut, I'm at about 1.10 (1.42 from bottom of the ball stud to the top of the bell housing boss) with the deeper throw out bearing, and it was about 1.42 (1.74 from ball to boss), leaving only about 4 threads into the boss with the original bearing. (It looks as if you are 6, maybe 7 threads into the boss with your 1.29 measurement.)

    It's like my bell housing is longer, or my pressure plate is narrower. What do your pressure plate fingers look like? Mine are recessed somewhat into the pressure plate housing.

    IMG_0748 small.jpgIMG_0749 small.jpg

    If you lay a straight edge across the back of the pressure plate housing, the fingers are recessed in 1/4 inch (the fingers have little raised radius's on them.) Where do your fingers lay? I wish I coul get a measurement from, say, the flywheel, that would be a more valid measurement.

    Just for kicks, can you lay your bell housing on a flat surface and measure it's depth? (say, outside the motor side flange to outside trans side flange)

    I need to figure out why it seems yours and others clutch fork angles are correct, but mine is too far forward.
    Last edited by boat737; 10-18-2016 at 12:54 AM.
    If Brute Force doesn't work, you're not using enough of it.
    Basic Stuff: MK4 Complete Kit #8439, Wilwood's, 17" Halibrands. Extra Stuff: Stainless brake and fuel lines, Breeze cooling, Battery mount, SS Roll Bar. Old Fart Stuff: Heater, Seat Heaters, Footbox Fresh Air, Stereo, Keyless ignition, Power Steering, Hyd Clutch.
    Young & Dumb Stuff: 427w Dart, TKO600, 3 link Moser M9/Ford 9", 3.5:1, Eaton TruTrac Posi. Graduation Thread

  4. #4
    Member Toy4me's Avatar
    Join Date
    Dec 2015
    Location
    Voorhees NJ
    Posts
    94
    Post Thanks / Like
    The bearing once the transmission is installed cannot move anywhere. It will ride on the bearing collar so it cannot move sideways or up and down. Only in and out. If the bearing moves a little on the fork now that is ok. Once installed all the slop you are seeing will go away.

  5. #5
    Senior Member edwardb's Avatar
    Join Date
    Feb 2011
    Location
    Lake Orion, Michigan
    Posts
    10,837
    Post Thanks / Like
    IMO the clutch arm isn't going to move as much as you think. Having it roughly centered, or maybe slightly toward the back, is fine. I don't think taking additional measures to get it further back are necessary and are causing you unneeded complications, like not enough thread engagement for the pivot, the non-standard TOB, etc. It will move maybe 1.125 to 1.25 inch max at the standard cable location attachment point. If you check, I think you'll find with that much movement it easily stays inside the available space when roughly centered. X2 on the TOB is held in place by the transmission input shaft, so don't worry about that. But I don't like the look of that RAM TOB. The contact point between the TOB and the clutch arm, where all the pressure is, doesn't look adequate to me. I suspect your standard TOB fits better than that and I would try to use it. One other aside comment. I see you're using the Forte hydraulic setup with his clutch arm attachment. With that particular attachment, and the significantly inboard pivot point, you may find the standard master cylinder gives too much throw and very high effort. I just went through this on my current build. A 1 inch master worked much better than the usual 1.125 one. Something to look at.
    Last edited by edwardb; 10-18-2016 at 08:47 AM.
    Build 1: Mk3 Roadster #5125. Sold 11/08/2014. Build 2: Mk4 Roadster #7750. Sold 04/10/2017. Build Thread
    Build 3: Mk4 Roadster 20th Anniversary #8674. Sold 09/07/2020. Build Thread and Video. Build 4: Gen 3 Type 65 Coupe #59. Gen 3 Coyote. Legal 03/04/2020. Build Thread and Video
    Build 5: 35 Hot Rod Truck #138. LS3 and 4L65E auto. Rcvd 01/05/2021. Legal 04/20/2023. Build Thread. Sold 11/9/2023.

  6. #6
    Senior Member karlos's Avatar
    Join Date
    Aug 2013
    Location
    Littleton, CO
    Posts
    412
    Post Thanks / Like
    I've got everything assembled, engine in the chassis. So additional measurements are hard to do. But everything looks the same to me.


    Can't tell from your photos if the TOB is installed correctly on the clutch fork. Probably worth a double check.


    YES


    NO

  7. #7
    Well Used Member boat737's Avatar
    Join Date
    Feb 2016
    Location
    So. Bay (So. Calif.)
    Posts
    889
    Post Thanks / Like
    Thanks guys.

    Quote Originally Posted by Toy4me View Post
    The bearing once the transmission is installed cannot move anywhere. It will ride on the bearing collar so it cannot move sideways or up and down. Only in and out. If the bearing moves a little on the fork now that is ok. Once installed all the slop you are seeing will go away.
    Yup, I get that the bearing will not move sideways, since it's on the trans shaft collar, but there is nothing to prevent the fork from moving sideways on the bearing. The arm just free floats out the bell housing window.

    Quote Originally Posted by edwardb View Post
    IMO the clutch arm isn't going to move as much as you think. Having it roughly centered, or maybe slightly toward the back, is fine. I don't think taking additional measures to get it further back are necessary and are causing you unneeded complications, like not enough thread engagement for the pivot, the non-standard TOB, etc. It will move maybe 1.125 to 1.25 inch max at the standard cable location attachment point. If you check, I think you'll find with that much movement it easily stays inside the available space when roughly centered. X2 on the TOB is held in place by the transmission input shaft, so don't worry about that. But I don't like the look of that RAM TOB. The contact point between the TOB and the clutch arm, where all the pressure is, doesn't look adequate to me. I suspect your standard TOB fits better than that and I would try to use it. One other aside comment. I see you're using the Forte hydraulic setup with his clutch arm attachment. With the particular attachment, and the significantly inboard pivot point, you may find the standard master cylinder gives too much throw and very high effort. I just went through this on my current build. A 1 inch master worked much better than the usual 1.125 one. Something to look at.
    I've followed your builds, Paul, for weeks, months, trying to minimize my own mistakes. On your #2 build (I think, the SBF Dart, TKO) your clutch arm was about 3/4's the way back in the bell housing window, and same for Karlos above. I'm not seeing why mine is so much farther forward with the same, or nearly the same, parts. I must be missing something. Even at max extension of the ball stud (which I'm afraid to do due to the reasons above, i.e. only in 4 threads into the bell housing boss, and also getting very close to the pressure plate housing), I am no where near where your fork arms are. At max ball stud extension, my fork arm is barely back of mid way, leaving a smidgen less than 1 1/2" forward fork travel before contacting the window edge. That seems to be pretty close.

    This from one of your posts. Seems a lot better position than mine.

    Transmission IMG_2417_cropped_zpsd611186f.jpg

    I did talk to two transmission mechanic/friends and both said that they would not use the 2nd/thicker bearing. The fork pressure points just don't line up properly on the TOB collar. Here's the original that came with the RAM clutch package, and again the 2nd one from RAM. That thicker bearing has a smaller collar, and the fork just doesn't sit right.

    IMG_0800 small.jpgIMG_0827 small.jpg

    On the Hyd. actuator, I did note your concerns on the #2 and #3 builds, and has me concerned too. I phoned up the Forte folks and voice my concern that I have a 1.125" M/C (Wilwood) and the CNC 7/8" slave actuator. I did the math (but don't have it in front of me) and figured that with my 1 1/8" stroke on the M/C, that the slave stroke was going to be way over that. They weren't worried, and told me that's how they do it and it's fine. I'm still not so sure. How much trouble is it to change out to a smaller M/C? Does CNC make a bigger slave instead? That would accomplish the same goal of limiting the slave stroke a bit.

    I appreciate you trying to alleviate my worries. I just don't want to get this thing in the car only to find out that it won't work, or that I screwed up on the linkage, or I didn't calculate the travel right, or, well, you know.

    Thanks for all your input. I'm pretty sure I'll be sitting here scratching my head for a few more days, or a few more weeks, trying to figure out why my arm is so much farther forward that all of yours. I'm not going to rush this, although, I may have to mate up the engine-bell housing-trans and do some final figuring and measuring.

    On another note: I think you put a dab of grease on the trans shaft collar for the TOB to slide back and forth, correct? But not to grease the splines on the trans shaft that engage the clutch disk, correct?

    Dan.
    Last edited by boat737; 10-18-2016 at 09:13 AM.
    If Brute Force doesn't work, you're not using enough of it.
    Basic Stuff: MK4 Complete Kit #8439, Wilwood's, 17" Halibrands. Extra Stuff: Stainless brake and fuel lines, Breeze cooling, Battery mount, SS Roll Bar. Old Fart Stuff: Heater, Seat Heaters, Footbox Fresh Air, Stereo, Keyless ignition, Power Steering, Hyd Clutch.
    Young & Dumb Stuff: 427w Dart, TKO600, 3 link Moser M9/Ford 9", 3.5:1, Eaton TruTrac Posi. Graduation Thread

  8. #8
    Well Used Member boat737's Avatar
    Join Date
    Feb 2016
    Location
    So. Bay (So. Calif.)
    Posts
    889
    Post Thanks / Like
    Quote Originally Posted by karlos View Post
    I've got everything assembled, engine in the chassis. So additional measurements are hard to do. But everything looks the same to me.

    Can't tell from your photos if the TOB is installed correctly on the clutch fork. Probably worth a double check.
    Thanks Karlos. Yup, I am aware of the way to mis-install the TOB onto the fork. I did it correctly, so not the problem there.

    And your pressure plate fingers look similar to mine, as far as I can tell from the pic.
    Last edited by boat737; 10-18-2016 at 09:06 AM.
    If Brute Force doesn't work, you're not using enough of it.
    Basic Stuff: MK4 Complete Kit #8439, Wilwood's, 17" Halibrands. Extra Stuff: Stainless brake and fuel lines, Breeze cooling, Battery mount, SS Roll Bar. Old Fart Stuff: Heater, Seat Heaters, Footbox Fresh Air, Stereo, Keyless ignition, Power Steering, Hyd Clutch.
    Young & Dumb Stuff: 427w Dart, TKO600, 3 link Moser M9/Ford 9", 3.5:1, Eaton TruTrac Posi. Graduation Thread

  9. #9
    Senior Member edwardb's Avatar
    Join Date
    Feb 2011
    Location
    Lake Orion, Michigan
    Posts
    10,837
    Post Thanks / Like
    Quote Originally Posted by boat737 View Post
    On the Hyd. actuator, I did note your concerns on the #2 and #3 builds, and has me concerned too. I phoned up the Forte folks and voice my concern that I have a 1.125" M/C (Wilwood) and the CNC 7/8" slave actuator. I did the math (but don't have it in front of me) and figured that with my 1 1/8" stroke on the M/C, that the slave stroke was going to be way over that. They weren't worried, and told me that's how they do it and it's fine. I'm still not so sure. How much trouble is it to change out to a smaller M/C? Does CNC make a bigger slave instead? That would accomplish the same goal of limiting the slave stroke a bit.
    "Fine" is a relative term. Yes, that's their standard setup so would expect that answer I guess. All I can say again is that with the pivot point that far inboard you don't need the 1.125 master. It will work, but you're going to need to limit the throw or you'll pop the slave right out of the cylinder (not pretty) plus the effort will be much higher than it needs to be. I just drove both builds yesterday (#2 with the 1.125 MC and #3 with the 1.00 MC) and the difference in effort is surprising. Both work, but I know which I prefer. Yes you could change the slave. But a 1 inch Wilwood drop-in replacement MC (260-10375) is about $80. Worth it IMO.
    Quote Originally Posted by boat737 View Post
    I appreciate you trying to alleviate my worries. I just don't want to get this thing in the car only to find out that it won't work, or that I screwed up on the linkage, or I didn't calculate the travel right, or, well, you know.

    Thanks for all your input. I'm pretty sure I'll be sitting here scratching my head for a few more days, or a few more weeks, trying to figure out why my arm is so much farther forward that all of yours. I'm not going to rush this, although, I may have to mate up the engine-bell housing-trans and do some final figuring and measuring.

    On another note: I think you put a dab of grease on the trans shaft collar for the TOB to slide back and forth, correct? But not to grease the splines on the trans shaft that engage the clutch disk, correct?

    Dan.
    This is where mine ended up on build #3. I can't easily measure it right now, but I can tell you it doesn't come close to the back side of the opening. Understanding this is a Coyote setup and not exactly the same as yours. Something maybe you want to consider. I mocked up both of my hydraulic clutch setups before installing the engine. Not that hard to position the engine so the flex line can reach the slave. That way you know it's going to work before putting the engine in. Yes, a slight little bit of grease on the trans input shaft. None needed on the splines.

    Build 1: Mk3 Roadster #5125. Sold 11/08/2014. Build 2: Mk4 Roadster #7750. Sold 04/10/2017. Build Thread
    Build 3: Mk4 Roadster 20th Anniversary #8674. Sold 09/07/2020. Build Thread and Video. Build 4: Gen 3 Type 65 Coupe #59. Gen 3 Coyote. Legal 03/04/2020. Build Thread and Video
    Build 5: 35 Hot Rod Truck #138. LS3 and 4L65E auto. Rcvd 01/05/2021. Legal 04/20/2023. Build Thread. Sold 11/9/2023.

  10. #10
    Well Used Member boat737's Avatar
    Join Date
    Feb 2016
    Location
    So. Bay (So. Calif.)
    Posts
    889
    Post Thanks / Like
    Quote Originally Posted by edwardb View Post
    "Fine" is a relative term. Yes, that's their standard setup so would expect that answer I guess. All I can say again is that with the pivot point that far inboard you don't need the 1.125 master. It will work, but you're going to need to limit the throw or you'll pop the slave right out of the cylinder (not pretty) plus the effort will be much higher than it needs to be. I just drove both builds yesterday (#2 with the 1.125 MC and #3 with the 1.00 MC) and the difference in effort is surprising. Both work, but I know which I prefer. Yes you could change the slave. But a 1 inch Wilwood drop-in replacement MC (260-10375) is about $80. Worth it IMO.
    Thanks again Paul. I trust your experience, so I just sent an email to Joshual at Wilwood to get a 1" master.

    Does the push rod just sit in the piston/housing in the M/C? or am I going to have to disconnect the clevis from the pedal to swap it out? Luckily, it's not been filled or purged yet, so won't have the mess (I wasn't so lucky with the brake M/C's....)
    If Brute Force doesn't work, you're not using enough of it.
    Basic Stuff: MK4 Complete Kit #8439, Wilwood's, 17" Halibrands. Extra Stuff: Stainless brake and fuel lines, Breeze cooling, Battery mount, SS Roll Bar. Old Fart Stuff: Heater, Seat Heaters, Footbox Fresh Air, Stereo, Keyless ignition, Power Steering, Hyd Clutch.
    Young & Dumb Stuff: 427w Dart, TKO600, 3 link Moser M9/Ford 9", 3.5:1, Eaton TruTrac Posi. Graduation Thread

  11. #11
    Senior Member edwardb's Avatar
    Join Date
    Feb 2011
    Location
    Lake Orion, Michigan
    Posts
    10,837
    Post Thanks / Like
    Quote Originally Posted by boat737 View Post
    Does the push rod just sit in the piston/housing in the M/C? or am I going to have to disconnect the clevis from the pedal to swap it out?
    No. The clutch MC installs just like the brake ones. The part number I provided (260-10375) is exactly like the one Forte provides, just a different size cylinder. Bolt the MC to the footbox then spin the threaded pushrod into the clevis. You should be able to set the clutch pedal to the same height as the brake pedal, then lock down with the jam nut. It might be necessary to trim a little off the end of the pushrod. One time I had to. Another time not.
    Last edited by edwardb; 10-18-2016 at 02:43 PM.
    Build 1: Mk3 Roadster #5125. Sold 11/08/2014. Build 2: Mk4 Roadster #7750. Sold 04/10/2017. Build Thread
    Build 3: Mk4 Roadster 20th Anniversary #8674. Sold 09/07/2020. Build Thread and Video. Build 4: Gen 3 Type 65 Coupe #59. Gen 3 Coyote. Legal 03/04/2020. Build Thread and Video
    Build 5: 35 Hot Rod Truck #138. LS3 and 4L65E auto. Rcvd 01/05/2021. Legal 04/20/2023. Build Thread. Sold 11/9/2023.

  12. #12
    Senior Member rich grsc's Avatar
    Join Date
    Feb 2011
    Location
    O'Fallon, MO
    Posts
    3,442
    Post Thanks / Like
    You seem to be creating problems that don't exist. The clutch arm should be perpendicular to the transmission input shaft with the bearing against the clutch fingers. The arm at the bell housing opening doesn't move as much as the end does. Get rid of the aftermarket throwout bearing, use a genuine Ford bearing.

  13. #13
    Well Used Member boat737's Avatar
    Join Date
    Feb 2016
    Location
    So. Bay (So. Calif.)
    Posts
    889
    Post Thanks / Like
    IMG_0830 small.jpg
    Quote Originally Posted by rich grsc View Post
    You seem to be creating problems that don't exist. The clutch arm should be perpendicular to the transmission input shaft with the bearing against the clutch fingers. The arm at the bell housing opening doesn't move as much as the end does. Get rid of the aftermarket throwout bearing, use a genuine Ford bearing.
    The problem is, with the standard bearing, (it came with the clutch package, don't know if it's OEM or not) the clutch fork arm is in the middle of the bell housing window and pointing forward some. The OEM Ford fork I have is curved and cants forward. if it was straight, then it would be more towards the rear of the bell housing window and wouldn't be an issue. As it is, if the tip of the fork arm moves, say, 1 1/8 inch, the arm will be nearly touching if not hitting the forward window edge. All the other pictures I see on the forums, the fork arm is towards the rear of the window. I'm trying to figure out why mine is not.
    If Brute Force doesn't work, you're not using enough of it.
    Basic Stuff: MK4 Complete Kit #8439, Wilwood's, 17" Halibrands. Extra Stuff: Stainless brake and fuel lines, Breeze cooling, Battery mount, SS Roll Bar. Old Fart Stuff: Heater, Seat Heaters, Footbox Fresh Air, Stereo, Keyless ignition, Power Steering, Hyd Clutch.
    Young & Dumb Stuff: 427w Dart, TKO600, 3 link Moser M9/Ford 9", 3.5:1, Eaton TruTrac Posi. Graduation Thread

  14. #14
    Senior Member
    Join Date
    Jun 2016
    Location
    Leesburg, Va
    Posts
    206
    Post Thanks / Like
    Call Forte.
    Doug
    FFR 7995
    347 SBF Prestige Mototsports, Moser 8.8 (3.31) 3 Link, TKO 600, Nitto 555s, 17" Halibrands, PS, AC, Heat, Color Redfire Pearl, with Wimbledon White Stripes

  15. #15
    Senior Member edwardb's Avatar
    Join Date
    Feb 2011
    Location
    Lake Orion, Michigan
    Posts
    10,837
    Post Thanks / Like
    PM sent.
    Build 1: Mk3 Roadster #5125. Sold 11/08/2014. Build 2: Mk4 Roadster #7750. Sold 04/10/2017. Build Thread
    Build 3: Mk4 Roadster 20th Anniversary #8674. Sold 09/07/2020. Build Thread and Video. Build 4: Gen 3 Type 65 Coupe #59. Gen 3 Coyote. Legal 03/04/2020. Build Thread and Video
    Build 5: 35 Hot Rod Truck #138. LS3 and 4L65E auto. Rcvd 01/05/2021. Legal 04/20/2023. Build Thread. Sold 11/9/2023.

  16. #16
    Member
    Join Date
    Aug 2014
    Posts
    77
    Post Thanks / Like
    Is it possible that the pressure plate was boxed wrong and not correct for your application? Just because it bolted on, doesn't mean it's right. Everything I bought from Forte's fit like a glove and saved me tons of aggravation.

    Just my $ .02, Glen

  17. #17
    Well Used Member boat737's Avatar
    Join Date
    Feb 2016
    Location
    So. Bay (So. Calif.)
    Posts
    889
    Post Thanks / Like
    Quote Originally Posted by GSides9 View Post
    Is it possible that the pressure plate was boxed wrong and not correct for your application? Just because it bolted on, doesn't mean it's right. Everything I bought from Forte's fit like a glove and saved me tons of aggravation.

    Just my $ .02, Glen
    Great point. I'll call RAM today and see if I have all the correct part numbers.
    If Brute Force doesn't work, you're not using enough of it.
    Basic Stuff: MK4 Complete Kit #8439, Wilwood's, 17" Halibrands. Extra Stuff: Stainless brake and fuel lines, Breeze cooling, Battery mount, SS Roll Bar. Old Fart Stuff: Heater, Seat Heaters, Footbox Fresh Air, Stereo, Keyless ignition, Power Steering, Hyd Clutch.
    Young & Dumb Stuff: 427w Dart, TKO600, 3 link Moser M9/Ford 9", 3.5:1, Eaton TruTrac Posi. Graduation Thread

  18. #18
    Forte's Parts Connection
    mike forte's Avatar
    Join Date
    Feb 2011
    Location
    Framingham, Ma.
    Posts
    424
    Post Thanks / Like
    Hi Boat737,
    The pivot ball adjustment is critical for proper fork travel and engagement/disengagement.
    The pivot ball should extend so the fork with the throw out bearing are in contact with the fingers of the pressure plate and the fork position is rearward in the opening on the side of the bellhousing.
    As always a phone call nights & weekends I'm available for tech questions.
    Mike Forte
    Forte's Parts Connection
    508 875 0016

  19. #19
    Well Used Member boat737's Avatar
    Join Date
    Feb 2016
    Location
    So. Bay (So. Calif.)
    Posts
    889
    Post Thanks / Like
    Quote Originally Posted by mike forte View Post
    Hi Boat737,
    The pivot ball adjustment is critical for proper fork travel and engagement/disengagement.
    The pivot ball should extend so the fork with the throw out bearing are in contact with the fingers of the pressure plate and the fork position is rearward in the opening on the side of the bellhousing.
    As always a phone call nights & weekends I'm available for tech questions.
    Mike Forte
    Forte's Parts Connection
    508 875 0016
    Thanks Mike.

    I managed to find a 3 inch ball stud (a McLeod, coming from summit as we speak), which will allow me some more leeway I hope. I'm limited in how far out I can go with the pivot because I am already pretty close to the pressure plate housing. As of now, about the best I can hope for is the fork arm about 2/3 the way rearward in the bell housing window. That's a big guess at this point, when I get the longer ball stud in a few more days, I'll know.

    Dan.
    If Brute Force doesn't work, you're not using enough of it.
    Basic Stuff: MK4 Complete Kit #8439, Wilwood's, 17" Halibrands. Extra Stuff: Stainless brake and fuel lines, Breeze cooling, Battery mount, SS Roll Bar. Old Fart Stuff: Heater, Seat Heaters, Footbox Fresh Air, Stereo, Keyless ignition, Power Steering, Hyd Clutch.
    Young & Dumb Stuff: 427w Dart, TKO600, 3 link Moser M9/Ford 9", 3.5:1, Eaton TruTrac Posi. Graduation Thread

  20. #20
    Well Used Member boat737's Avatar
    Join Date
    Feb 2016
    Location
    So. Bay (So. Calif.)
    Posts
    889
    Post Thanks / Like
    Status Report and Update:

    I got the McLeod ball stud. It was just a tad TOO long, so I cut off the little hex bit on the end, which is useless in this bell housing anyway (it's a blind hole in the ball stud mounting boss). It's now mounted as far out as I can go and still install/remove the clutch fork on the ball stud, because it's so close to the pressure plate. Once the fork in on and seated to the ball stud, I have less than 1/10 inch between the bump on the fork and the pressure plate housing. I figure around .080-.090 inch, which is pretty close considering that massive spinning pressure plate assembly only .080 inch away. There should be no (or minuscule) back-and-forth movement between the two, so hopefully it will be fine. Of course if the little spring steel clip that holds the fork onto the ball stud every weakens of fails, then the clutch fork will come into contact with the pressure plate housing. That would be bad.

    This setup has mostly resolved my clutch fork location problem. I would like to have the fork back another 1/4 inch or so, but that 's just not possible with this throw-out bearing, clutch, and pressure plate configuration. To get any more rearward movement I would need a thicker TOB, or shim the pressure plate back. I definitely have room to adjust the fork forward, but I am at the limit to adjust it rearward. I guess that will have to be good enough.

    Now for 'Edwardb's' test out method. I hope today to mate up the transmission to the bell housing (which is already mated/torqued to the engine), wheel it over next to the car, plumb up the hydraulic line to the clutch, fill, purge, and bleed the hydraulic clutch system, and give it a real live clutch pedal movement, release, engagement test. (hopefully that won't take all day...)
    Attached Images Attached Images
    If Brute Force doesn't work, you're not using enough of it.
    Basic Stuff: MK4 Complete Kit #8439, Wilwood's, 17" Halibrands. Extra Stuff: Stainless brake and fuel lines, Breeze cooling, Battery mount, SS Roll Bar. Old Fart Stuff: Heater, Seat Heaters, Footbox Fresh Air, Stereo, Keyless ignition, Power Steering, Hyd Clutch.
    Young & Dumb Stuff: 427w Dart, TKO600, 3 link Moser M9/Ford 9", 3.5:1, Eaton TruTrac Posi. Graduation Thread

  21. #21
    Well Used Member boat737's Avatar
    Join Date
    Feb 2016
    Location
    So. Bay (So. Calif.)
    Posts
    889
    Post Thanks / Like
    Another Status Report and Update:

    Per EdwardB's build, and suggestion, I swapped out the 1.125 inch master for a 1.00 inch. (Both Wilwood masters. I bought directly from Wilwood since they sell just the master cylinder assembly, with no other accessories like reservoir, fittings, lines, part no. 260-10279. About $65 + S/H/T) With the engine wheeled up next to the car, I plumbed up the hydraulic clutch line, filled and bled the system, and after chasing down a couple of fitting leaks, the system works!

    The pedal stroke to release the clutch is a little longer than I expected, about down to the last inch or more to fully release (that's with turning the yoke by hand). I suspect that it will partially, or begin to, release higher up on the pedal stroke with engine power supplied. That is to say, have the clutch fully engaged higher up on the pedal stroke. Plus, I think when the clutch seats a couple of thousands inch, it will move the release point a fraction of an inch or so up on the pedal stroke.

    Next step is to install the engine and see if all my geometry and math calculations work in the real life. If I can finish up all the nit-noid tasks today, engine just may get installed tomorrow. Fingers crossed.
    Last edited by boat737; 10-28-2016 at 11:35 AM.
    If Brute Force doesn't work, you're not using enough of it.
    Basic Stuff: MK4 Complete Kit #8439, Wilwood's, 17" Halibrands. Extra Stuff: Stainless brake and fuel lines, Breeze cooling, Battery mount, SS Roll Bar. Old Fart Stuff: Heater, Seat Heaters, Footbox Fresh Air, Stereo, Keyless ignition, Power Steering, Hyd Clutch.
    Young & Dumb Stuff: 427w Dart, TKO600, 3 link Moser M9/Ford 9", 3.5:1, Eaton TruTrac Posi. Graduation Thread

Posting Permissions

  • You may not post new threads
  • You may not post replies
  • You may not post attachments
  • You may not edit your posts
  •  

FFMetal

Visit our community sponsor