BluePrint Engines

Visit our community sponsor

Thanks Thanks:  0
Likes Likes:  0
Results 1 to 22 of 22

Thread: Side exhaust alignment

  1. #1
    Senior Member
    Join Date
    May 2014
    Location
    Burlington, WI
    Posts
    689
    Post Thanks / Like
    Blog Entries
    1

    Side exhaust alignment

    I know this has been covered, but I can't seem to locate the discussion. I have the complete roadster kit and installed the side exhaust securing the exhaust to the headers (351W) and to the side exhaust mounting bracket, per page 409 in the instructions. I find that the PS side exhaust is approximately 1 1/2" higher at the rear of the exhaust than the DS side exhaust. And, as the PS exhaust is higher, the side exhaust mounting bracket is tight up against the 2" by 2" outer tube. And, I'm concerned the mounting bracket will rub on the frame and will also interfere with attaching the body.

    So, before I start into modifying the mounting bracket or try to force the PS exhaust to a lower position, any ideas?

  2. #2

    Join Date
    Feb 2011
    Location
    Norton, MA USA earth
    Posts
    3,361
    Post Thanks / Like
    Drill the 4 mounting bolt holes on the flange a bit bigger until you can pivot it down to the right height.
    Mike

  3. #3
    Not a waxer Jeff Kleiner's Avatar
    Join Date
    Feb 2011
    Location
    Bloomington, Indiana
    Posts
    8,180
    Post Thanks / Like
    Agreed. Drill them out to 7/16" and you'll be able to lower the rear.

    Jeff

  4. #4
    Senior Member
    Join Date
    May 2014
    Location
    Burlington, WI
    Posts
    689
    Post Thanks / Like
    Blog Entries
    1
    Quote Originally Posted by Jeff Kleiner View Post
    Agreed. Drill them out to 7/16" and you'll be able to lower the rear.

    Jeff
    I appreciate the help guys. Drilled out to 13/32" (more than 3/8") and has barely moved. Very frustrating...try again tomorrow. Do I need to drill out both the flange on the header and the flange on the side pipe. If so, I only drilled out the holes on the exhaust pipe.

  5. #5
    Not a waxer Jeff Kleiner's Avatar
    Join Date
    Feb 2011
    Location
    Bloomington, Indiana
    Posts
    8,180
    Post Thanks / Like
    Usually drilling just the pipe will do. Don't get too caught up on pipe alignment until the body is on and initially fitted.

    Jeff

  6. #6
    Senior Member
    Join Date
    May 2014
    Location
    Burlington, WI
    Posts
    689
    Post Thanks / Like
    Blog Entries
    1
    Quote Originally Posted by Jeff Kleiner View Post
    Usually drilling just the pipe will do. Don't get too caught up on pipe alignment until the body is on and initially fitted.

    Jeff
    I was just hoping to pre drill the holes in the frame for the exhaust hangers. Your suggesting holding off untill the body is initially fit? If so, I'll get back to working toward first start up.

  7. #7
    Senior Member
    Join Date
    May 2014
    Location
    Burlington, WI
    Posts
    689
    Post Thanks / Like
    Blog Entries
    1
    Quote Originally Posted by Jeff Kleiner View Post
    Usually drilling just the pipe will do. Don't get too caught up on pipe alignment until the body is on and initially fitted.

    Jeff
    I was just hoping to pre drill the holes in the frame for the exhaust hangers. Your suggesting holding off untill the body is initially fit? If so, I'll get back to working toward first start up.

  8. #8
    Senior Member edwardb's Avatar
    Join Date
    Feb 2011
    Location
    Lake Orion, Michigan
    Posts
    10,627
    Post Thanks / Like
    X2 Jeff's advice to not spend time trying to line up the pipes until the body is on. Unless you have mechanical interference with the chassis, just bolt them on for first start (I'm not an open header guy) and save alignment for later. I also wouldn't recommend mounting the hangars without the body on.
    Build 1: Mk3 Roadster #5125. Sold 11/08/2014. Build 2: Mk4 Roadster #7750. Sold 04/10/2017. Build Thread
    Build 3: Mk4 Roadster 20th Anniversary #8674. Sold 09/07/2020. Build Thread and Video. Build 4: Gen 3 Type 65 Coupe #59. Gen 3 Coyote. Legal 03/04/2020. Build Thread and Video
    Build 5: 35 Hot Rod Truck #138. LS3 and 4L65E auto. Rcvd 01/05/2021. Legal 04/20/2023. Build Thread. Sold 11/9/2023.

  9. #9
    Senior Member
    Join Date
    May 2014
    Location
    Burlington, WI
    Posts
    689
    Post Thanks / Like
    Blog Entries
    1
    Quote Originally Posted by edwardb View Post
    X2 Jeff's advice to not spend time trying to line up the pipes until the body is on. Unless you have mechanical interference with the chassis, just bolt them on for first start (I'm not an open header guy) and save alignment for later. I also wouldn't recommend mounting the hangars without the body on.
    As mentioned, I have some time between other projects and I'm really enjoying being back on the build. I am also not a fan of open headers, but will wait till the the body is on to install the hangers. Good advice, thanks. As for first start, going thru my checklist to ensure everything is connected properly. Engine, trans, power steering and all other fluids are in and at the proper level. I could use advice on a few items.

    * Will the power steering self prime? If not, best way to do it, if necessary?
    * The engine has sat since purchased in 2015 from Mike Forte. It was started by him and shipped with minimal oil, which I've since replaced. Can I prime it for oil by cranking it without any power to the coil. Or, is it best, as I've heard to prime thru the distributor? Never done it, so not sure.
    * Should I put a gallon or 2 of fuel in the tank or find some other method to supply fuel to the mechanical fuel pump? If I use the fuel tank, would it be wise to temporarily install the fuel filler neck?
    * Also, some guys jack the rear wheels off the ground. Good idea?

    Any and all comments appreciated.

  10. #10
    Out Drivin' Gumball's Avatar
    Join Date
    Feb 2011
    Location
    Blackberry Township, IL
    Posts
    2,653
    Post Thanks / Like
    Jay,

    I did my first start and first go-kart at the same time, so I had the fuel system working with a few gallons of gas in the tank. The filler neck was installed, but make sure that it is secure as some have reported it flopping down to the ground under acceleration. Priming the oil through the distributor hole is best as they you have oil distributed throughout on start-up - just cranking it will spin the internals (though with no real load) for quite a few revolutions before you see any pressure.

    As for jacking the wheels off the ground, I think that is unnecessary, as long as you've validated that neutral really means neutral by pushing the car or turning the wheels by hand when it's out of gear.

    If you're doing first start this weekend, let me know and I'll try and make it up there to witness and run the camera!!!!
    Later,
    Chris

    "There are no more monsters to fear, and so, we have to build our own."
    Mk3.1 #7074

  11. #11
    Out Drivin' Gumball's Avatar
    Join Date
    Feb 2011
    Location
    Blackberry Township, IL
    Posts
    2,653
    Post Thanks / Like
    Oh, and hanging the side pipes on the headers for first start is okay - that way you're not doing first start with open headers!
    Later,
    Chris

    "There are no more monsters to fear, and so, we have to build our own."
    Mk3.1 #7074

  12. #12
    Senior Member
    Join Date
    May 2014
    Location
    Burlington, WI
    Posts
    689
    Post Thanks / Like
    Blog Entries
    1
    Quote Originally Posted by Gumball View Post
    Oh, and hanging the side pipes on the headers for first start is okay - that way you're not doing first start with open headers!
    Chris,

    Thanks for the input. I won't be ready to start this weekend, but will definitely reach out to you when I am, as another set of eyes is always a good thing. I am quite nervous so I'll be doing a lot of list checking and re checking before the start. Probably over kill, but that's what I need. I also plan to call Mike today for engine prep tips.

    Jay

  13. #13
    Senior Member edwardb's Avatar
    Join Date
    Feb 2011
    Location
    Lake Orion, Michigan
    Posts
    10,627
    Post Thanks / Like
    For an engine that's been sitting that long, X2 on priming the engine oil by spinning the oil pump through the distributor hole. It's easy to do. Hardest part is taking the distributor off and back on. Just get it back in the same place. There is a dedicated tool for that. Like this one: https://www.summitracing.com/parts/oes-27062, which I have and works great. I've seen some use a small socket on an extension. Also works. Just tape the socket on the extension so it won't come off. Not a place you want to be losing parts.

    The power steering will self prime pretty quickly by itself at startup. You can also prime without starting by spinning the pump with a drill motor. Similar to the distributor/oil pump. You'll need to take off the belt and pulley though. Personally, not sure it's really necessary.

    Your mechanical pump will pull the fuel out of the tank. Just will take some additional cranking to get the fuel up to the carb and fill the bowls. You could prime it directly through the carb. Just be super careful. Easy to have a big problem doing that. Ask me how I know (it was a number of years ago, not with anything here).

    Agree no reason to raise the rear tires. Good luck!
    Build 1: Mk3 Roadster #5125. Sold 11/08/2014. Build 2: Mk4 Roadster #7750. Sold 04/10/2017. Build Thread
    Build 3: Mk4 Roadster 20th Anniversary #8674. Sold 09/07/2020. Build Thread and Video. Build 4: Gen 3 Type 65 Coupe #59. Gen 3 Coyote. Legal 03/04/2020. Build Thread and Video
    Build 5: 35 Hot Rod Truck #138. LS3 and 4L65E auto. Rcvd 01/05/2021. Legal 04/20/2023. Build Thread. Sold 11/9/2023.

  14. #14
    Junior Member
    Join Date
    Nov 2015
    Posts
    18
    Post Thanks / Like
    First thing I would check is to make absolutely sure motor & trans is mounted "level" on the motor mounts. If not loosen motor and transmission mount bolts and level engine. Once level the rear pipe mounts with larger holes will mount close to floor on both sides into the cross brace.
    Pattratt

  15. #15
    Senior Member
    Join Date
    May 2014
    Location
    Burlington, WI
    Posts
    689
    Post Thanks / Like
    Blog Entries
    1
    Quote Originally Posted by pattratt1 View Post
    First thing I would check is to make absolutely sure motor & trans is mounted "level" on the motor mounts. If not loosen motor and transmission mount bolts and level engine. Once level the rear pipe mounts with larger holes will mount close to floor on both sides into the cross brace.
    Pattratt
    This may be the exhaust alignment issue. The engine does not appear to be level and I just didn't give it any thought. I will try your suggestion.

    Jay

  16. #16
    Not a waxer Jeff Kleiner's Avatar
    Join Date
    Feb 2011
    Location
    Bloomington, Indiana
    Posts
    8,180
    Post Thanks / Like
    I'll be the dissenting vote on repriming the engine if it's already been run and had oil circulated, even if it has been sitting for a year. I'd spin it up on the starter a few times for 10-15 seconds then energize the ignition and fire it up! Depending on what harness you are using you probably won't see an indication of oil pressure when cranking because the gauge power is usually dropped when the ignition switch is in "crank" so don't be alarmed.

    As for the power steering---On my builds I chuck up a short piece of 3/8" hex to engage the pump and then use my hole hog drill to prime and leak check the system before first starts.


    Drop the belt and spin the pump clockwise when viewed from the front. I have my "lovely assistant" Nancy (she likes it when I call her that 
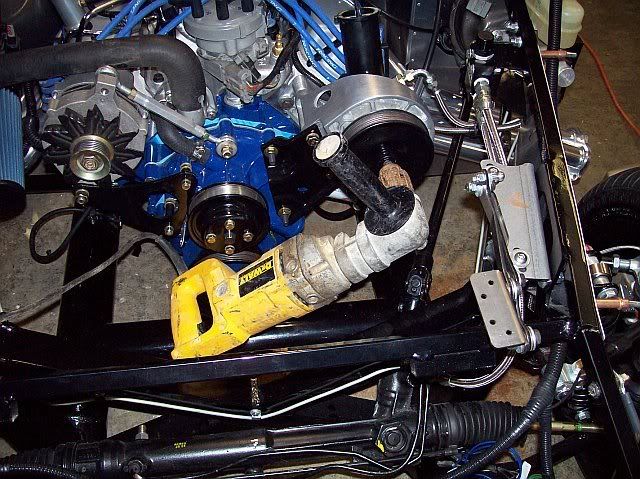
) turn the wheel lock to lock slowly while I spin the pump. Within a minute or two all of the air should bleed out. You can do it with the wheels on the ground or raised. With this done it's one less thing to be concerned with on the first start.

    As others have mentioned just put a few gallons of gas in the tank (it will be much easier with the neck in place).

    Good luck,
    Jeff

  17. #17
    Senior Member
    Join Date
    May 2014
    Location
    Burlington, WI
    Posts
    689
    Post Thanks / Like
    Blog Entries
    1
    I had moved on from trying to align the side pipes until pattratt1 suggested I check the engine for level. After install I had leveled the engine front to rear but did not check for level side to side. Now I see that the PS of the engine is higher than the DS. This explains why the PS exhaust pipe is about 1 1/2" higher off the ground than the DS pipe. I loosened the transmission mount and engine mounts last evening and could not get the engine to budge. This morning I'll try my floor jack to lift one side of the motor. I'm hoping to make a engine mount shim out of some aluminum stock I have laying around.

    Aluminum stock acceptable? Or should I find some metal shims. And, if I'm not approaching this correctly, please weigh in.

    Thanks, Jay

  18. #18

    Join Date
    Feb 2011
    Location
    Norton, MA USA earth
    Posts
    3,361
    Post Thanks / Like
    You shouldn't need any shims. The mounts will accommodate some minor shifting of the drivetrain.
    Mike

  19. #19
    Not a waxer Jeff Kleiner's Avatar
    Join Date
    Feb 2011
    Location
    Bloomington, Indiana
    Posts
    8,180
    Post Thanks / Like
    Like Mike says. Loosen the big bolts in the center of the mounts and raise the engine either with a jack or hoist. The chassis pedestals are slotted so set it back down bring the drivers side up/passenger side down. It doesn't take much movement at the mounts to make a BIG difference at the pipes---1/8" change will probably be all you'll need.

    Jeff

  20. #20
    Senior Member
    Join Date
    May 2014
    Location
    Burlington, WI
    Posts
    689
    Post Thanks / Like
    Blog Entries
    1
    Success! After I removed the 1" spacer beneath the transmission mount, the engine adjusted easily from side to side. Having the tail of the transmission elevated prevented me from rocking the engine. Its all good and the side pipes are now the same height from the ground. Yippee! Now back to prepping things for the first start.Thanks to all.

  21. #21
    Junior Member
    Join Date
    Nov 2015
    Posts
    18
    Post Thanks / Like
    Glad to hear you were able to get leveled and pipes lined up.
    Pattratt

  22. #22
    Senior Member
    Join Date
    May 2014
    Location
    Burlington, WI
    Posts
    689
    Post Thanks / Like
    Blog Entries
    1
    Quote Originally Posted by pattratt1 View Post
    Glad to hear you were able to get leveled and pipes lined up.
    Pattratt
    Thanks to you.

Posting Permissions

  • You may not post new threads
  • You may not post replies
  • You may not post attachments
  • You may not edit your posts
  •  

Breeze

Visit our community sponsor