-
12-20-2017, 01:23 PM
#321
Papa---been lurking here for a little.....I have been contemplating buying a mk4 already built and then modifying to my wants, but threads like yours is giving me pause. It does remind me of the bonding you get from building your own--- and in my case--no matter how long it takes...it could be more satisfying than driving it. Decisions, decisions !
Thanks for sharing all this.
I know---buy one and then build another, right?
----Hey Honey can I buy 2 Cobras? Now Honey put that bat down, I don't like that look on your face--- Honey----Honey-- whew---thanks kids that was a good tackle! I will be back later with lots of chocolate and dinner reservations !
Maybe that wasn't a good idea.......?
-
12-20-2017, 01:55 PM
#322


Originally Posted by
Olddragger

Papa---been lurking here for a little.....I have been contemplating buying a mk4 already built and then modifying to my wants, but threads like yours is giving me pause. It does remind me of the bonding you get from building your own--- and in my case--no matter how long it takes...it could be more satisfying than driving it. Decisions, decisions !
Thanks for sharing all this.
I know---buy one and then build another, right?
----Hey Honey can I buy 2 Cobras? Now Honey put that bat down, I don't like that look on your face--- Honey----Honey-- whew---thanks kids that was a good tackle! I will be back later with lots of chocolate and dinner reservations !
Maybe that wasn't a good idea.......?
Okay, now that I can breathe again after laughing for the last ten minutes! I also contemplated buying a completed car. This was mostly a financial concern as building can, and in my case will exceed what I could have bought a completed car for. The issue I was having was that buying a hand-built car from someone who you don't know can lead to plenty of concerns over how well the car was built. At least when I eventually get behind the wheel of my car, I'll know exactly what I'm driving. And, when it comes time to start going to car shows or club events, I'll be able to say, "I built it!"
Have a great day,
Dave
Last edited by Papa; 12-20-2017 at 05:53 PM.
-
12-20-2017, 05:59 PM
#323
Didn't do much today, waiting on parts to arrive. I did come up with a way to adjust my clutch pedal to be more aligned with the brake pedal. The built-in adjuster is impossible to get at, even with the DS foot box still open, so I improvised. I screwed on a nut to the end of the existing adjustment bolt and then made a short stud from another bolt to get the pedal where I want it.
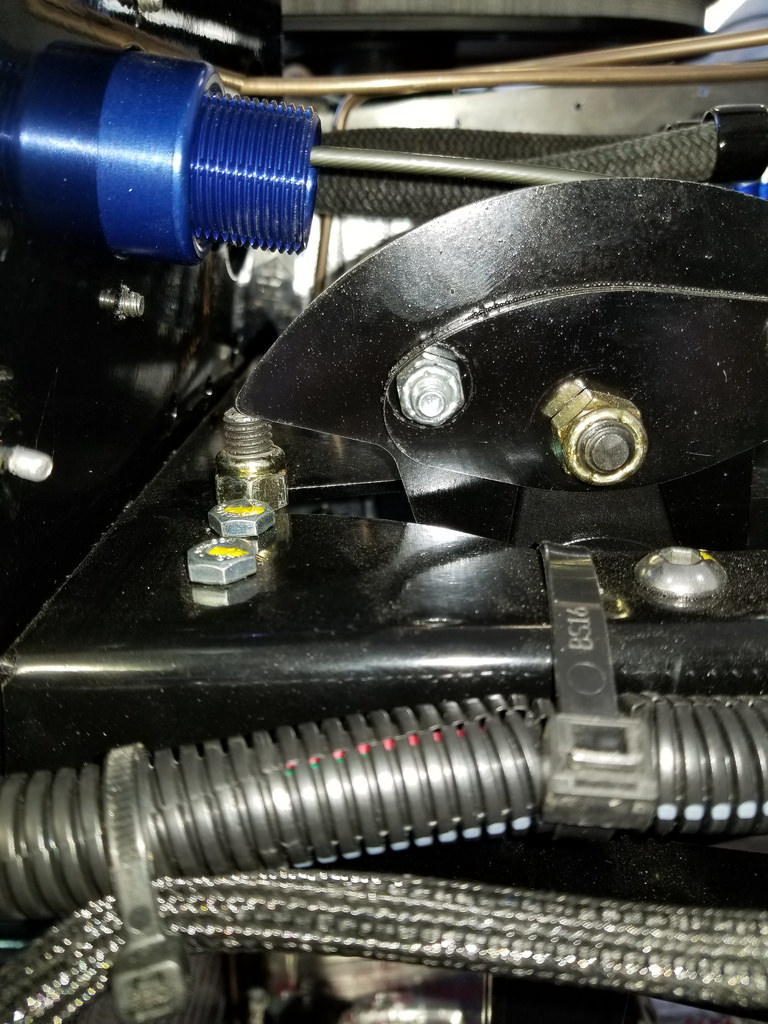

I also had the privilege of meeting another forum member (DenverSteve) that is in my local area and got to show him and his wife my project.
Last edited by Papa; 04-22-2018 at 07:03 PM.
-
12-20-2017, 08:52 PM
#324

Spent most of the day reading this (and referenced links) from page 1 have to say its been fascinating, entertaining and very informative. Definitely taken a lot of the mystery and fear out of a build for someone who has never attempted a project this big. Can't thank you enough for providing this information. Looking forward to the final chapter.
Best
Barry.
-
12-20-2017, 10:22 PM
#325

Originally Posted by
barry sheen

Spent most of the day reading this (and referenced links) from page 1 have to say its been fascinating, entertaining and very informative. Definitely taken a lot of the mystery and fear out of a build for someone who has never attempted a project this big. Can't thank you enough for providing this information. Looking forward to the final chapter.
Best
Barry.
Barry,
Thank you very much for the comments. This is exactly the way I felt reading through other's threads as I was deciding if I was ready to tackle this project. I hope you will choose to build your own MK-IV or any other FFR car for yourself. It has been and continues to be a very rewarding experience. Even when I get stumped and frustrated, I know I can turn to the many knowledgeable people on this forum and get answers to my questions within minutes! Best of luck, and dive in! The water's fine.
Dave
-
12-21-2017, 11:30 AM
#326
I received my new Lokar throttle cable and thought I'd share a picture of the clevis portion that will attach to the throttle pedal.
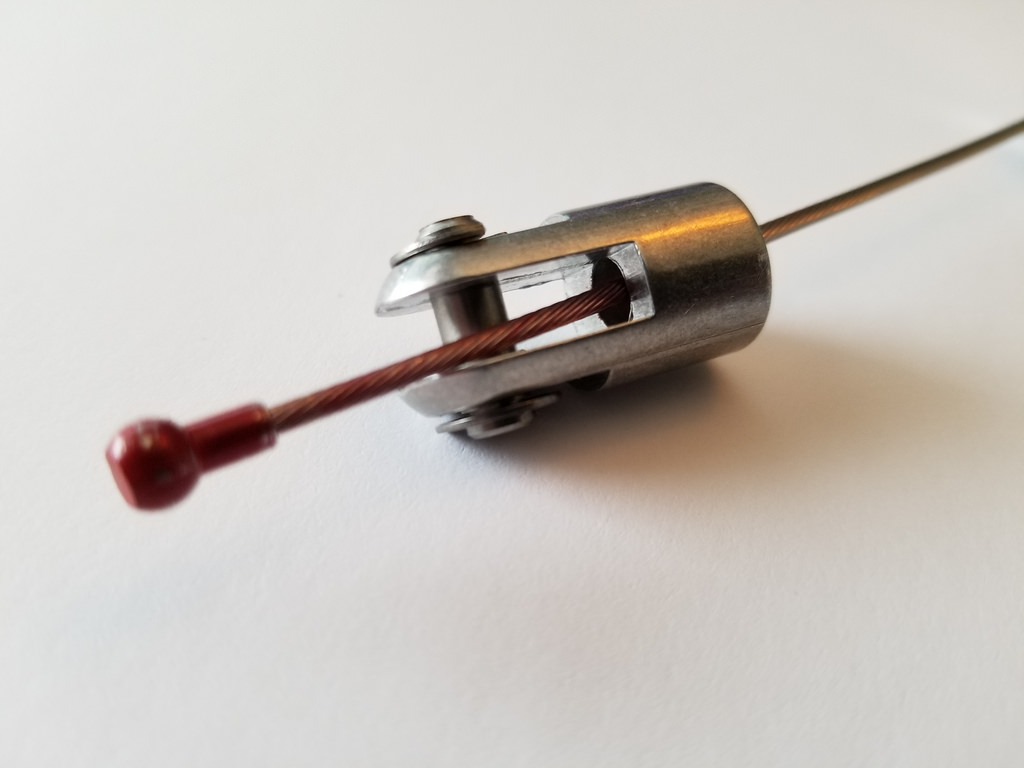
I'll get this installed today or tomorrow, but now I won't have to worry about the cable coming free from the pedal when I'm at the top of the Continental Divide, a hundred miles from home.
Last edited by Papa; 04-22-2018 at 07:04 PM.
-
12-21-2017, 02:10 PM
#327
-
12-22-2017, 02:14 AM
#328
#9160

Hi Papa. Looks like you are getting close to that first start! Good luck! Hey, on that ground strap, it does not look like you removed the paint under the strap before bolting it on. If i am wrong disregard the note. If I am right, and you have any electrical or starting issues, look here first. Ask me how I know  . Brien
MK4 - complete kit - Blueprint 427W - Holly Sniper EFI - TKO 600 .64 - 3.55 3 link - 17" Halibrands
-
Post Thanks / Like - 0 Thanks, 1 Likes
-
12-22-2017, 08:23 AM
#329
Papa: Your build has inspired me to pencil out some initial "rough" numbers using a similar configuration as yours but using either a Roush 427 SRXE or 427 SR Engine. Including a slush fund for miscellaneous/unforeseen expenses I'm getting $50k to $55k +/- as the magic number. Am I in the ball park? Did you get close to your budget (so far at least) and where (if any) did you choose to compromise vs upgrade and did those choices blow your numbers?
Best
Barry
-
12-22-2017, 10:55 AM
#330

Originally Posted by
BB767

Hi Papa. Looks like you are getting close to that first start! Good luck! Hey, on that ground strap, it does not look like you removed the paint under the strap before bolting it on. If i am wrong disregard the note. If I am right, and you have any electrical or starting issues, look here first. Ask me how I know

. Brien
Brien,
I'm getting close, but introduced another delay with my decision to order the Boig Motorsports Cool Tubes for my cooling system. I did remove the powder coat under the strap on the motor mount. I used a small rotary tool to try to keep from making too big of a mess of the area.
Dave
Last edited by Papa; 12-22-2017 at 11:15 AM.
-
Post Thanks / Like - 0 Thanks, 1 Likes
-
12-22-2017, 11:06 AM
#331


Originally Posted by
barry sheen

Papa: Your build has inspired me to pencil out some initial "rough" numbers using a similar configuration as yours but using either a Roush 427 SRXE or 427 SR Engine. Including a slush fund for miscellaneous/unforeseen expenses I'm getting $50k to $55k +/- as the magic number. Am I in the ball park? Did you get close to your budget (so far at least) and where (if any) did you choose to compromise vs upgrade and did those choices blow your numbers?
Best
Barry
Barry,
What I did was probably very similar to how you arrived at your project estimate. I priced the complete kit with all my selected options (don't forget freight on drop ship items like the rear axel, Willwoods, etc.), priced my engine & trans choice (it was simple with BluePrint, but could be more difficult to come up with a number if you are piecing a system together yourself), got a quote for body and paint, added in all my planned modifications and outside purchases, and finally added a 10% margin for incidentals. There are a ton of variables when doing these cars, but a good plan is the first step. As you proceed, you may change your mind on some items and add things you hadn't thought about. For me, that's all been covered by my 10% margin so far. Most guys don't like to talk specific numbers, but your estimate is certainly a reasonable build budget. Another thing I did was to break down the project into phases and allocate budget by phase. This way it was easier to plan out the budget since I knew I didn't need to have body and paint dollars until around 9-12 months into the build. I hope this is helpful, but feel free to send me a PM if you want to discuss something more specific.
Dave
Last edited by Papa; 12-22-2017 at 11:43 AM.
-
12-22-2017, 12:20 PM
#332

Originally Posted by
Papa

Barry,
What I did was probably very similar to how you arrived at your project estimate. I priced the complete kit with all my selected options (don't forget freight on drop ship items like the rear axel, Willwoods, etc.), priced my engine & trans choice (it was simple with BluePrint, but could be more difficult to come up with a number if you are piecing a system together yourself), got a quote for body and paint, added in all my planned modifications and outside purchases, and finally added a 10% margin for incidentals. There are a ton of variables when doing these cars, but a good plan is the first step. As you proceed, you may change your mind on some items and add things you hadn't thought about. For me, that's all been covered by my 10% margin so far. Most guys don't like to talk specific numbers, but your estimate is certainly a reasonable build budget. Another thing I did was to break down the project into phases and allocate budget by phase. This way it was easier to plan out the budget since I knew I didn't need to have body and paint dollars until around 9-12 months into the build. I hope this is helpful, but feel free to send me a PM if you want to discuss something more specific.
Dave
Yes this helps flesh it out... and will do.
Best
Barry
-
12-22-2017, 01:38 PM
#333
Brandon #9196

I'm halfway to Colorado Springs for Christmas. I may come by tomorrow and check out the car if you are not busy with family...
-
12-22-2017, 01:53 PM
#334

Originally Posted by
TexasAviator

I'm halfway to Colorado Springs for Christmas. I may come by tomorrow and check out the car if you are not busy with family...
Tomorrow should be cool. Just give me a shout ahead of time to make sure the wife doesn't have any last minute plans.
Dave
-
12-23-2017, 03:32 PM
#335
-
12-23-2017, 07:09 PM
#336
#9160


Originally Posted by
Papa

Brien,
I'm getting close, but introduced another delay with my decision to order the Boig Motorsports Cool Tubes for my cooling system. I did remove the powder coat under the strap on the motor mount. I used a small rotary tool to try to keep from making too big of a mess of the area.
Dave
Good decision on the pipes, I did exactly the same thing, much cleaner look. You also ended up mounting the XFI very close to where mine is. Our engine bays could be twins!
MK4 - complete kit - Blueprint 427W - Holly Sniper EFI - TKO 600 .64 - 3.55 3 link - 17" Halibrands
-
12-23-2017, 07:46 PM
#337

Originally Posted by
BB767

Good decision on the pipes, I did exactly the same thing, much cleaner look. You also ended up mounting the XFI very close to where mine is. Our engine bays could be twins!
Thanks again for all your help getting me straightened out on the EFI wiring. I owe you a beer if you ever get to Denver with some free time on your hands.
Dave
-
12-25-2017, 06:14 AM
#338
Senior Member

That engine compartment is very clean!! Great job!
-
12-25-2017, 01:11 PM
#339

Originally Posted by
HiggyMK4#????

That engine compartment is very clean!! Great job!
Thank you!
-
12-26-2017, 12:32 AM
#340
#9160


Originally Posted by
Papa

Thanks again for all your help getting me straightened out on the EFI wiring. I owe you a beer if you ever get to Denver with some free time on your hands.
Dave
I would love to do a road trip out there someday. You show me some of your favorite mountain drives for the roadster and I'll buy you a beer!
MK4 - complete kit - Blueprint 427W - Holly Sniper EFI - TKO 600 .64 - 3.55 3 link - 17" Halibrands
-
12-26-2017, 12:35 PM
#341

Originally Posted by
BB767

I would love to do a road trip out there someday. You show me some of your favorite mountain drives for the roadster and I'll buy you a beer!
You're on! Although, you have some pretty nice mountain drives just off your doorstep as well. I used to do a lot of backpacking in Desolation Wilderness area, a bit further up Highway 50 from Placerville. A cruise around Lake Tahoe would be a blast in the roadster. Then there's Yosemite or go west for the redwoods and Highway 1 along the coast. The drive between Eureka to Fort Bragg would be incredible!
-
12-27-2017, 02:41 PM
#342
-
12-27-2017, 03:00 PM
#343
Papa,
Just catching up on your thread. Regarding the Breeze radiator shroud, in addition to the radiator shroud and the lower radiator support, did you also use the heavy duty mounting kit - part #70558 at Breeze? Thank you.
-
12-27-2017, 03:13 PM
#344

Originally Posted by
RJD

Papa,
Just catching up on your thread. Regarding the Breeze radiator shroud, in addition to the radiator shroud and the lower radiator support, did you also use the heavy duty mounting kit - part #70558 at Breeze? Thank you.
I did not. I installed riv-nuts in the mounting bars and used stainless hardware to mount it. I also purchased the upper radiator cover from Breeze that I'll install after the body is in place.
Dave
-
12-27-2017, 03:21 PM
#345

Originally Posted by
Papa

I did not. I installed riv-nuts in the mounting bars and used stainless hardware to mount it. I also purchased the upper radiator cover from Breeze that I'll install after the body is in place.
Dave
Thanks. Appreciate your detailed posts. Have a happy new year.
-
12-27-2017, 07:39 PM
#346
I completed my main electrical today. I was going to run a pass-through terminal in the firewall, but ended up going a different route (no additional holes in the firewall). I ran the main battery cable directly to the starter, and then another 4 awg. wire from the starter to the buss bar. All the other power leads connect to the buss bar as planned. I also wired in the relay for the starter wire. Tomorrow I plan to add all my fluids and prime the engine's oiling system per BluePrint's directions (essentially using the starter to turn the engine over with no fuel or spark until there is oil pressure reading on the gauge). All I need now to start the car are my headers, which I expect to arrive any day now.
Last edited by Papa; 12-28-2017 at 11:56 PM.
-
12-27-2017, 08:30 PM
#347
Senior Member


Originally Posted by
Papa

My Boig Motorsports Cool Tubes were delivered last night and first thing this morning I installed them.
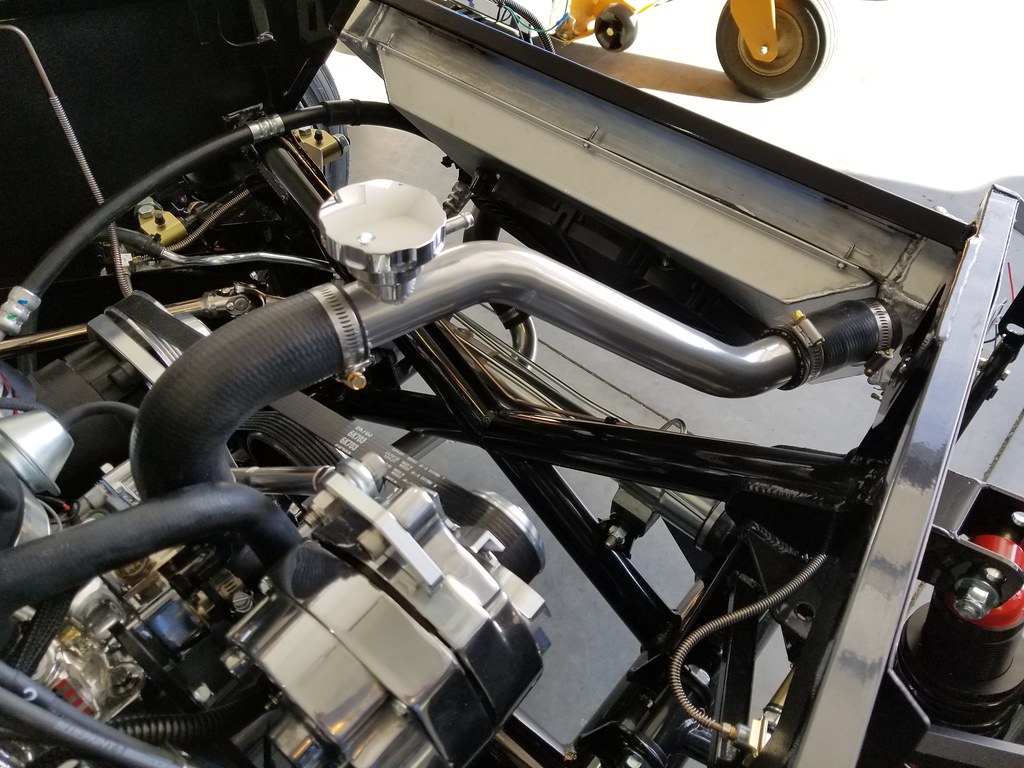
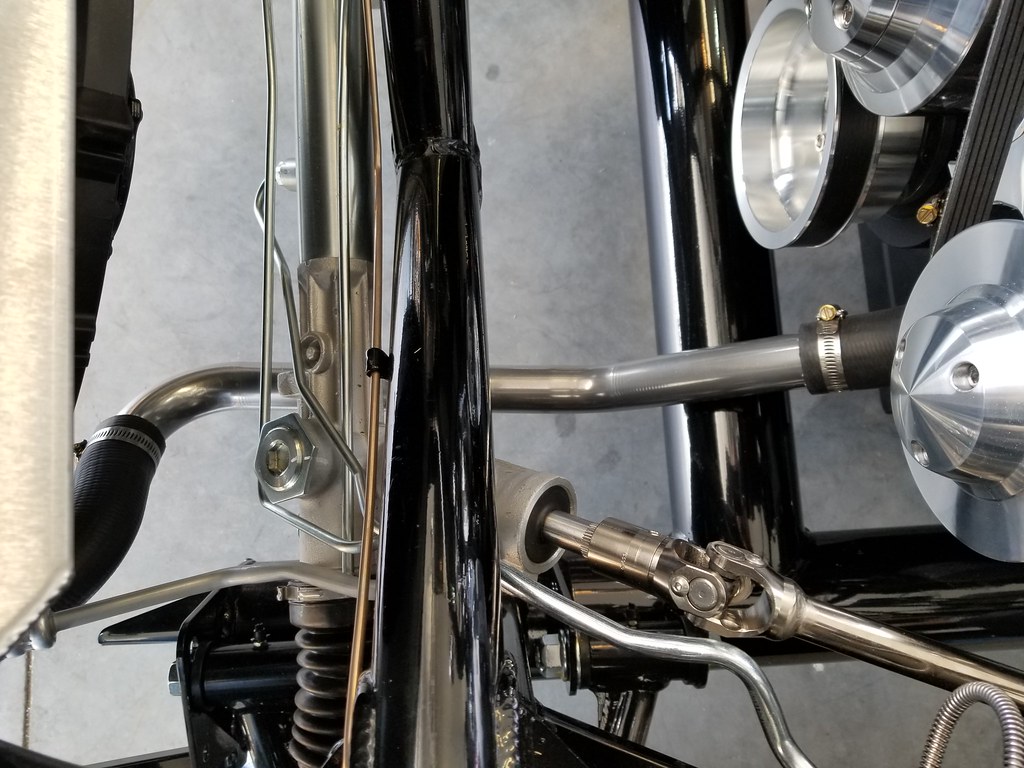
I'm very happy with the look and quality of the parts! I do have a question about the height of the filler. Right now it is above the top of the chassis tubes. Do I need to lower it at all?
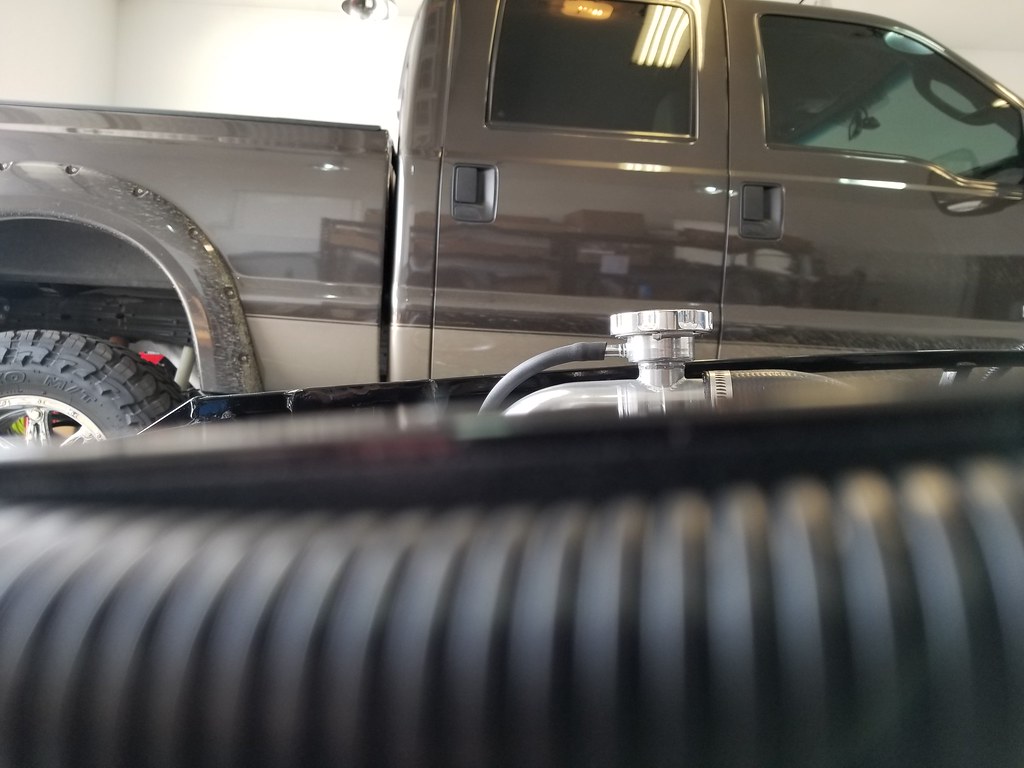
I also installed the FFR provided overflow tank. Look - matching caps!
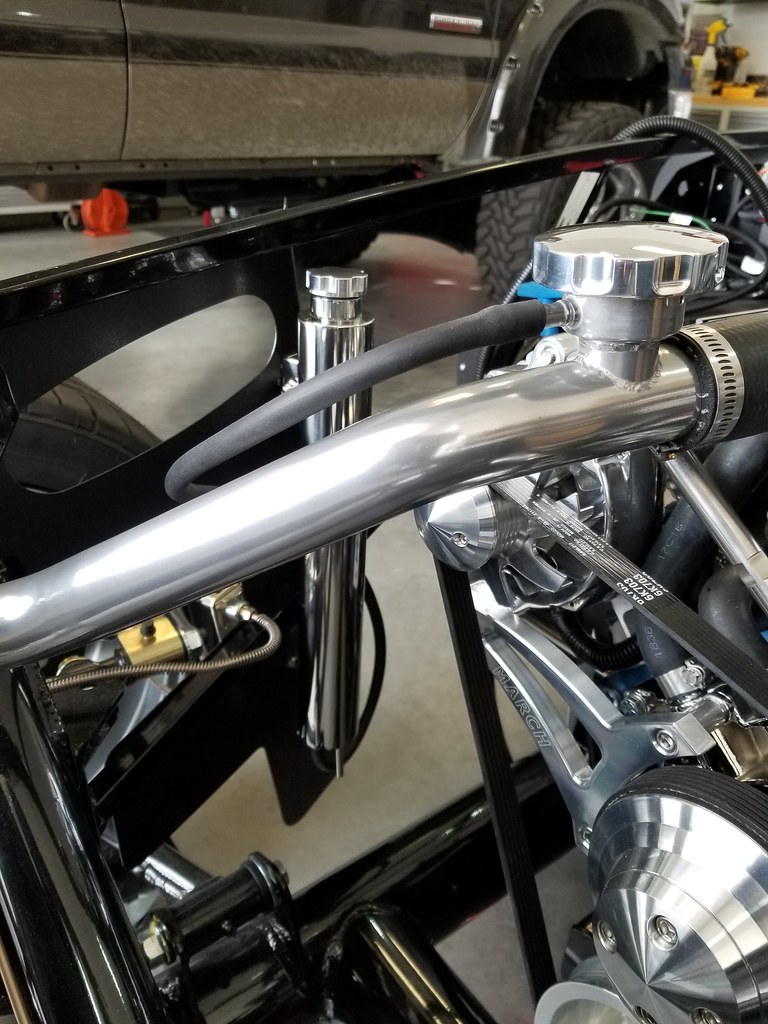
I also added some chafe protection to my power steering lines in the form of some 3/4" heater hose.

Your filler cap looks like it will hit your hood. I just popped my hood and my filler neck is several inches below the top rail. Looking at the hood open & closed, that top frame rail looks like a good limiter to stay beneath. Should be able to cut some of your rubber radiator tube at the engine neck to drop it down.
Those tubes look beautiful!
Chris
Generation 3 Type 65 Daytona Coupe Complete Kit #151885 received May 6, 2022. Gen 3 Coyote, IRS, Tremec TKX, American Powertrain hydraulic throwout bearing & Wilwood brakes.
MK4 Basic Kit #7404, 347 EFI - Pro M Racing ECM, 30# injectors, 70 mm throttle body, 80 mm MAF, Edelbrock Performer aluminum heads & RPM II intake, all new G-Force T5, 3:55 gears, Pro 5.0 shifter, 3-link, carbon fiber dash/custom Speedhut gauges and paint by Da Bat.
-
12-27-2017, 08:35 PM
#348

Originally Posted by
cgundermann

Your filler cap looks like it will hit your hood. I just popped my hood and my filler neck is several inches below the top rail. Looking at the hood open & closed, that top frame rail looks like a good limiter to stay beneath. Should be able to cut some of your rubber radiator tube at the engine neck to drop it down.
Those tubes look beautiful!
Chris
Chris,
That's what I suspected. I'll trim some off of the 90 degree rubber and that should get me where it needs to be.
Thanks,
Dave
-
12-28-2017, 06:23 PM
#349


Well, I'm just waiting for my headers to get here to attempt first start. In the mean time, here is what was accomplished today:
1. Adjusted the radiator filler to get it below the chassis tubes so the hood will close.
2. Filled the engine with oil.
3. Filled the power steering pump with fluid.
4. Filled the radiator with 50/50 mix antifreeze. Found one small leak at the bottom of the overflow and fixed that.
5. Pulled the plug off the fuel pump, pulled the spark plugs, and cranked the starter until I had oil pressure per BluePrint's directions.
6. Changed the clutch pedal adjustment bolt out for a longer bolt instead of the Band-Aid I'd done a couple of days ago.
7. Tidied up the engine wiring (removed all the harness labels and did some bundling and tying up any loose wires)
8. Ordered a stainless steel button/switch to replace the black plastic horn button that came with the kit.
My EFI will control the fan via the RF fan relay. Do I need to do anything special with the fan power and ground wires, or do I just plug them in?

I used the top-side fan thermo-control wire to tie into my EFI, so do I just wrap up the second control wire at the fan connection? I know some guys wire in a manual override for the fan. I assume if I wanted to do the same, I would just need to tie a ground to one side of the switch and the other side to this control wire?
Once my headers get here, it should just be a matter of getting them on and adding a couple of gallons of fuel and lighting this puppy up! Since I won't have my Gas-N side pipes yet, I'm probably going to install the FFR pipes for go-karting. Should I treat them with some high-temp paint before using them?
Last edited by Papa; 04-22-2018 at 07:17 PM.
-
12-28-2017, 08:39 PM
#350
Senior Member

Sounds like your EFI unit is making the ground connection for the fan relay? Similar to what an engine thermo sensor would do. So no, nothing special for the fan motor. Connect the power and ground to the fan as normal. Yes, you could add a manual override using the second fan control wire, and ground with a switch as you say. I've installed a manual override a couple times, but in practice found that I rarely used it. I have, however, installed an indicator light on my builds. Wired in parallel to the fan. Fan powered on = indicator light on. Between watching the water temp gauge and the fan light going on and off, able to verify all is working properly. But the water temp gauge alone is probably enough when you get right down to it.
No reason to put anything on those pipes. You can run them bare steel no problem. Assuming since you're installing those Gas-N's (good choice) you'll sell the stock pipes? You won't get a fortune for them, but in my experience they sell pretty easily. Especially if new or like new. I suspect they would be easier to sell if left plain.
Build 1: Mk3 Roadster #5125. Sold 11/08/2014.
Build 2: Mk4 Roadster #7750. Sold 04/10/2017.
Build Thread
Build 3: Mk4 Roadster 20th Anniversary #8674. Sold 09/07/2020.
Build Thread and
Video.
Build 4: Gen 3 Type 65 Coupe #59. Gen 3 Coyote. Legal 03/04/2020.
Build Thread and
Video
Build 5: 35 Hot Rod Truck #138. LS3 and 4L65E auto. Rcvd 01/05/2021. Legal 04/20/2023.
Build Thread. Sold 11/9/2023.
-
12-28-2017, 08:59 PM
#351
Hi Paul,
Yes, the EFI provides negative control for both the fan and fuel pump. I think I may forgo the manual switch, but I do like the idea of a light to tell me when the fan is running. I may follow your lead on that one. I do plan to sell the FFR pipes once my Gas-N's are installed. I just wasn't sure if they would start to rust up without something on them, although it will be easier to clean them up if they aren't coated.
Thanks for the help and I'll be following your new build. I have no plans to build one, but I learned so much reading through your last build that I can't wait to see what tricks you'll be sharing with the new one!
Dave
-
Post Thanks / Like - 0 Thanks, 1 Likes
-
12-29-2017, 06:17 PM
#352
-
12-29-2017, 07:46 PM
#353
Brandon #9196

don't feel bad I am still waiting on door latches from 3/months ago
-
12-30-2017, 10:55 AM
#354

Originally Posted by
Papa

Didn't do much today, waiting on parts to arrive. I did come up with a way to adjust my clutch pedal to be more aligned with the brake pedal. The built-in adjuster is impossible to get at, even with the DS foot box still open, so I improvised. I screwed on a nut to the end of the existing adjustment bolt and then made a short stud from another bolt to get the pedal where I want it.
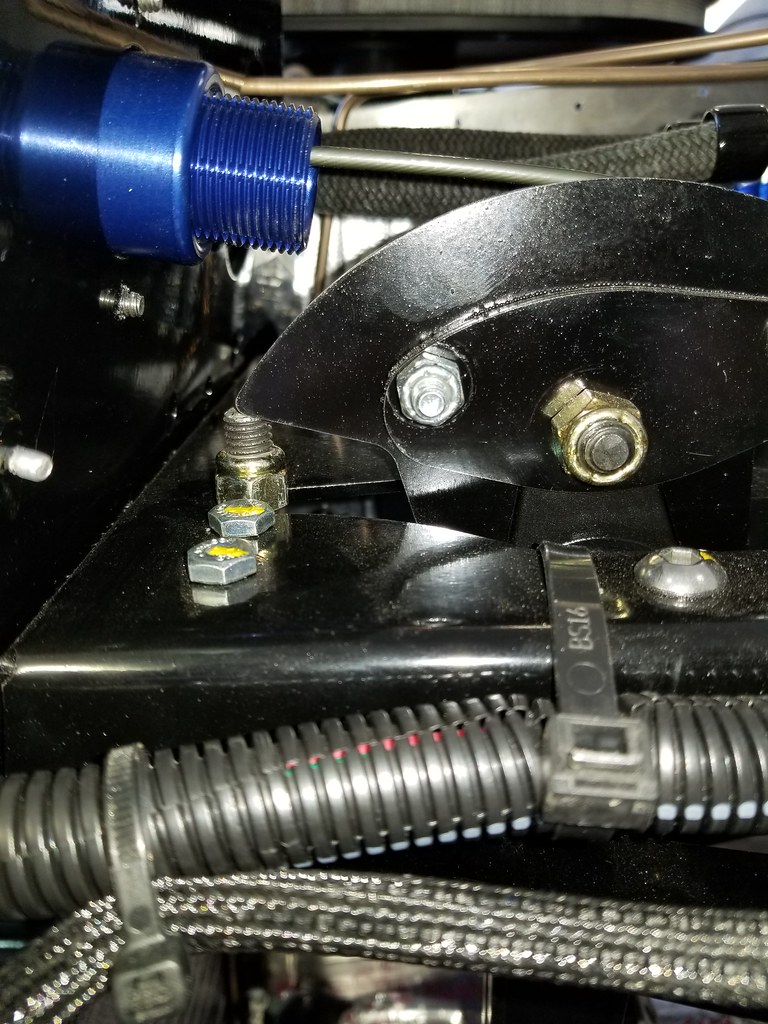
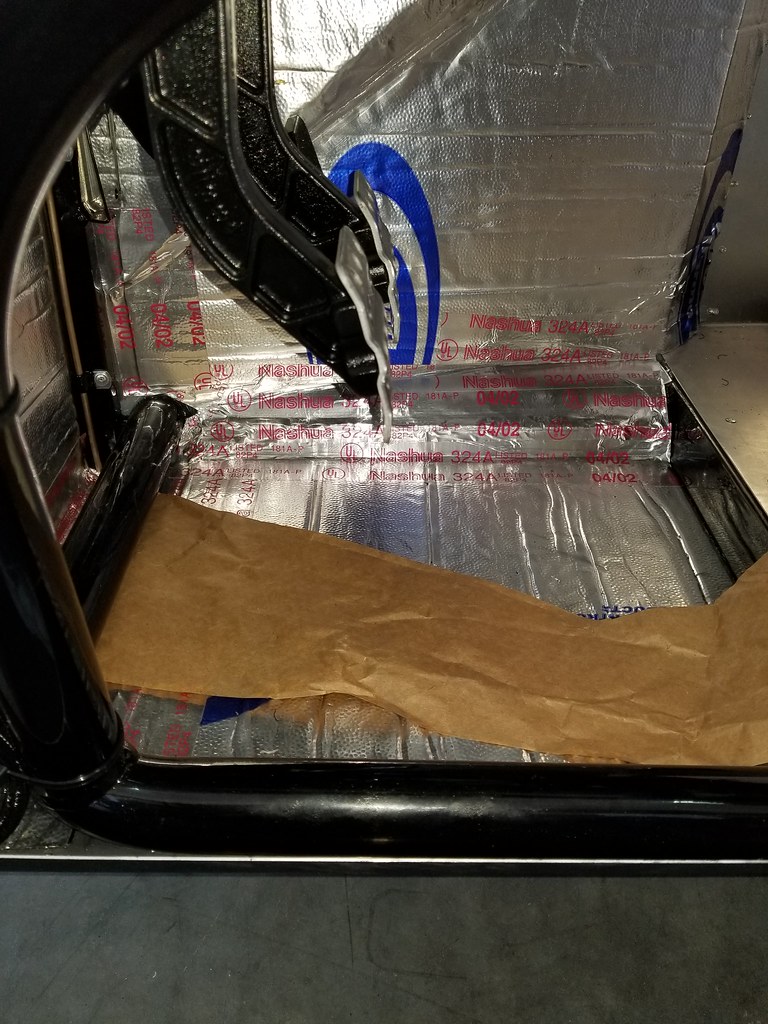
I also had the privilege of meeting another forum member (DenverSteve) that is in my local area and got to show him and his wife my project.
Dave,
Thanks so much for taking the time to share your car and some of your stories. Your build is really amazing and quite the inspiration. I'm sure it won't be the last time we meet! ;-) Just finalized my order yesterday for my production complete date of Jan 13, 2018. Can't wait for the delivery and getting started. Spending tons of time now cleaning up donor parts and organizing/cleaning my garage.
Thanks,
Steve
-
12-30-2017, 10:58 AM
#355

Originally Posted by
Papa

Still no headers.

I sent Georgie an e-mail asking for a tracking number so I can see where they are. They were supposed to ship nearly two weeks ago.
Today I added a relay and power to my coil. I hadn't realized I needed to add that until today. I also secured my throttle cable via a pair of stainless steel standoffs and some longer bolts. I think it looks better than just having it lay wherever it wanted to.
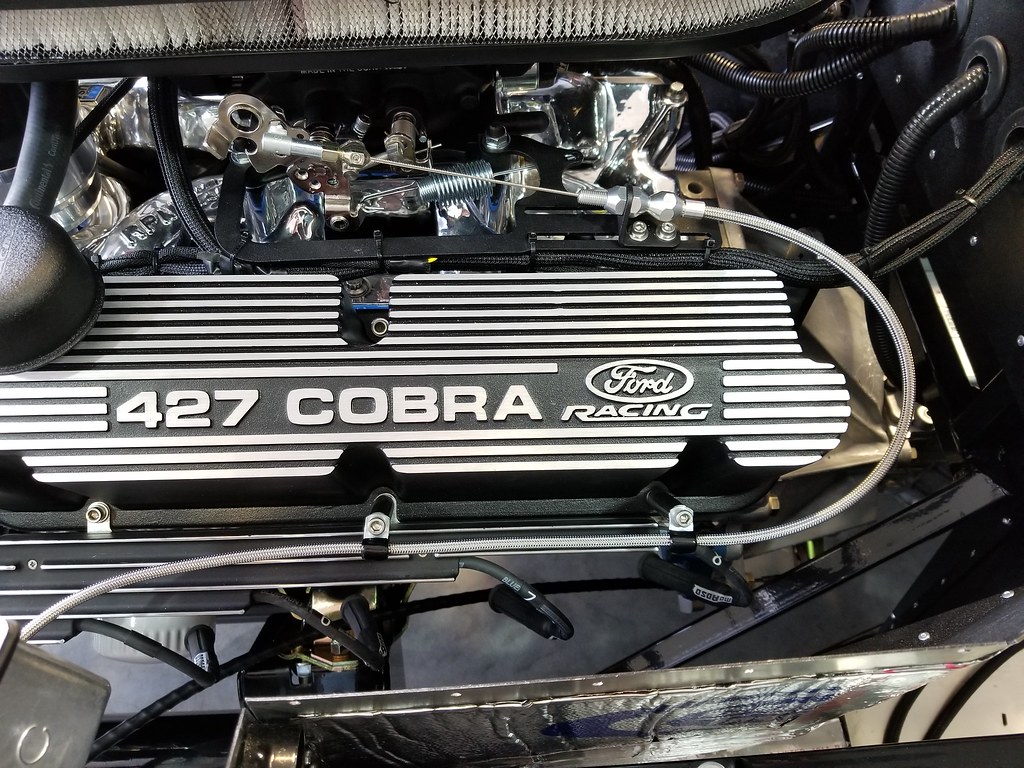
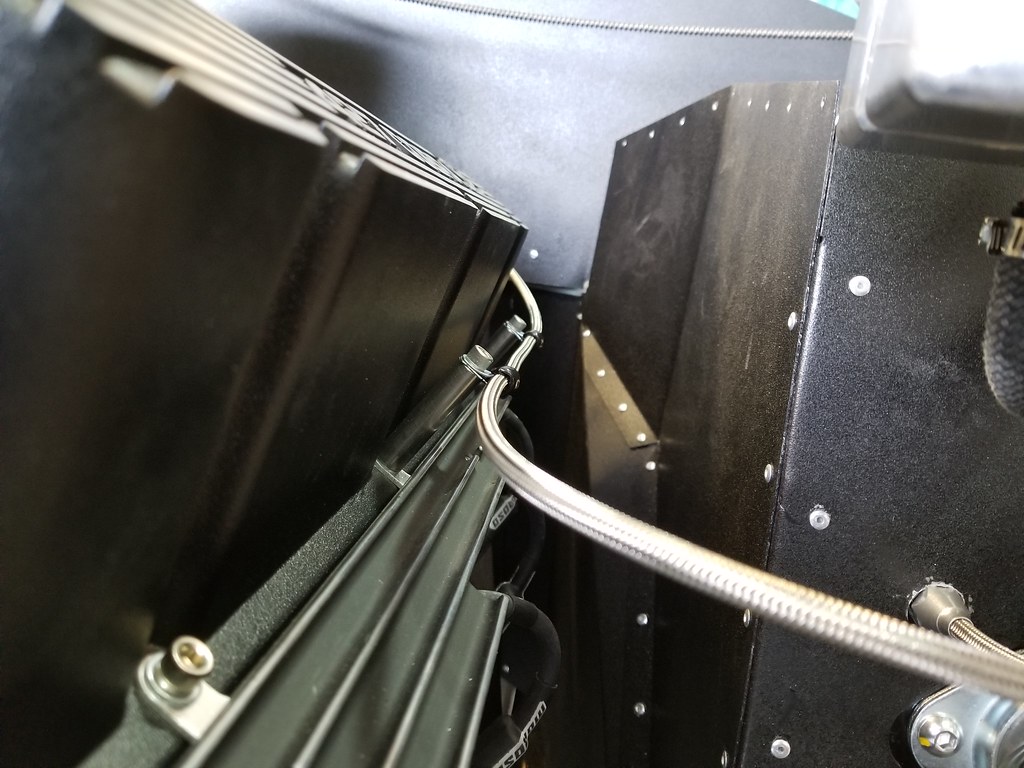
Sexy! I love the look.
-
12-30-2017, 01:31 PM
#356
-
12-30-2017, 05:57 PM
#357
The big brown truck pulled up and delivered my headers! After installing them and hanging the side pipes with HVAC hanger strap, I went over my pre-start checklist and got a successful first start on the first turn of the key!
Last edited by Papa; 02-19-2018 at 04:48 PM.
-
Post Thanks / Like - 0 Thanks, 1 Likes
-
12-30-2017, 06:48 PM
#358
Congrats on the first start - your build thread is great.
your motor sounds friggin great. (I hope to turn the key tomorrow.....)
Happy new year.
Tim
-
12-30-2017, 06:55 PM
#359
Senior Member

Wonderful sound and congratulations on hard work! Huge milestone.
-
12-30-2017, 07:34 PM
#360
Senior Member

Awesome! Congrats/sounds nasty - happy for you!
Chris
Generation 3 Type 65 Daytona Coupe Complete Kit #151885 received May 6, 2022. Gen 3 Coyote, IRS, Tremec TKX, American Powertrain hydraulic throwout bearing & Wilwood brakes.
MK4 Basic Kit #7404, 347 EFI - Pro M Racing ECM, 30# injectors, 70 mm throttle body, 80 mm MAF, Edelbrock Performer aluminum heads & RPM II intake, all new G-Force T5, 3:55 gears, Pro 5.0 shifter, 3-link, carbon fiber dash/custom Speedhut gauges and paint by Da Bat.


 Thanks:
  Likes:

 Reply With Quote


 . Brien


 I sent Georgie an e-mail asking for a tracking number so I can see where they are. They were supposed to ship nearly two weeks ago.


