Have you thought about just keeping your dashes bespoke for whatever the customer needs? Case in point is that I know a guy here local that does custom car work. Not your normal stuff, but some serious stuff where MLB players will go and buy a McLaren and drive it over from the lot and ask him to gut the interior and "make it their own". He only does high end stuff. I think your product would fit into this market nicely, and you could likely charge 60% MORE than the other guys, and these people would pay it to have something that no one else has. If you are interested, let me know and I will put you in touch with this shop. They do some amazing work.
Thanks Shane, I appreciate the quick response. I'll likely use the Vette hose for now, then replace it with a chrome neck later.
Mike,
By "Bespoke", do you mean 'custom' or "exclusive"?
At the moment every kit that I've sold has been customized graphically and even to adapt 3rd party hardware (ie: HVAC or lift systems).
I'm not opposed to designing exclusive graphics for people. My current graphic capability could not compete with OEM supercars.
I have already priced out the software at $40,000 USD + license fee per unit. I can't do that right now.
Thanks for the offer to refer me. I'll keep it in mind once I have updated the hardware and found a better graphics solution.
Custom LCD Gauges , Data Loggers, Control Touch Screens www.LCDdash.com \\ 647-522-9953 \\ Voice & Text Proud new owner of GTM Gen 1., #105 - 08/27/11
LQ9 Powered, G96.00 6 speed transaxle
The 90 degree elbows you are talking about are something like the Spectre Performance 7898 Magna-kool Radiator Hose End Cover. I'm not sure if this is the exact model number, as I only came across the name brand one day and jotted down the note to go back later and get the proper one, but here is a link
I personally would stick with silicone and aluminum, although we do have some steel on the race car. Not a fan of the corrugated hoses and tubes. They tend to adversely effect flow. They may be convenient, but you will never see one on a car I am involved with.
We're finally settled into this temporary, rental house until our home is ready. On that note,
if any of you have done this to your cooling system, or you're thinking of doing it - just stop.
Stop it now!
The previous owner simply slid this hose into a rubber sleeve and hoped that the epoxy would
do the trick.
Luckily I was in the driveway doing the initial "run-up check" for the first drive of the season
when it popped.
Thanks to everyone for their links to the chrome piece.
Today I'm going to switch hats from,"LCD Business Tino" back to, "Building a kit-car Tino". I miss getting my hands dirty and working in the garage...
and just being an F5R forum dude!
After many years of sitting on this project, I'm biting down and making time for myself and the GTM. Job #1 is getting my own LCD gauges installed.
It's a crime that I'm not able to demo the system, or provide a decent photo of the interior when people ask. Today I spent the afternoon gutting the
interior.
The entire dash has been removed, seats pulled out, and steering column (again). The sloppy play in the linkage needs to get fixed. I know I'm
missing a bearing, or sleeve in the telescopic portion of the column. There is also a requirement for a secondary bracket and flange bearing to
prevent the universal joint from binding when the steering wheel is turning.
Now that I'm in the footwell area, the openings in the firewall can be addressed. If you haven't looked close enough, or used some backlighting, you
may not notice all of the air leaks. Most obvious is above the pedal box - I'd like to make a cover to keep the rad heat from getting into the cabin.
I'm having someone redo the gauge pod, and will be replacing the vinyl with Carbon Fiber (same for the passenger side cover). I think a matte finish
will be best to reduce sun glare. The contour of the pod is also going to change from a rounded hood, to a flat top with radiused corners to fit a 12.1"
LCD screen.
The stereo has been pulled and will be replaced with a touchscreen controller/media player with all the options to use as a demo at car shows and future
trade shows. Plus, you can't beat the cool factor of an electronic engine start/stop on screen!
In other news, I met Murray Pfaff while doing a tradeshow in Toronto. Funny guy, and remembered recommending my system to a customer of his.
I thanked him for hooking me up, and he said he'd look me up from time-to-time. We shook hands, exchanged business cards, and off we went.
Kinda cool to finally meet him after seeing so much of his work!
Look at me writing about business...
Anyway, I'll update again once the new dash pod is shaped. Right now, the guy is laying down the fiberglass to make a mold/copy of the original and
then we're going to modify the copy ( I have no idea how this stuff works)!
Tino. I don't know if your steering wheel flexes too much on it's mounts but this is how I stiffened mine. 4 bolts vs 2 and moved the wheel closer to the dash compensating for the space out caused by the quick release steering hub.
Good idea! More mounting points will certainly help the total column flex.
The issue with mine is more with the shaft play, and binding when turning the wheel. The U-Joint tends to "walk up" at a certain
degree and cause a bit of a jolt. If I can mount a bearing just before the u-joint, it will eliminate the nuisance as well.
Custom LCD Gauges , Data Loggers, Control Touch Screens www.LCDdash.com \\ 647-522-9953 \\ Voice & Text Proud new owner of GTM Gen 1., #105 - 08/27/11
LQ9 Powered, G96.00 6 speed transaxle
The pod re-work is moving along. Saturday we'll be fitting the screen and making the new
contour for the dash. I can't wait to finally hit the button and see the gauges come alive!
Getting a bit closer to the LCD install. Theo (the CF/Fiberglass guy) is coming over in a few days to grab the wooden template so he can
shape the pod. Once that's done and the test fit is done, it's getting sent for Carbon skinning! He talked me into redoing the entire interior
as well. Everything vinyl will be covered with CF, and the dash items will be 'flat' to prevent glare.
I'm a few days away from wiring the system, but I had to edit some images to get an idea of aspect ratio. I'm not sure which skin I'm going
to use, but I really like the tachometer in this layout. gtm_lcd_closeup.jpggtm_lcd_closeup.pngcentenario_new.png
While that's setup, pappa is doing up a wicked looking skin that is based on a video game. A bit of a teaser... Star-Combat-Online.jpgcoolestmenu.png
For anyone doing fiberglass molds, check out this pink spray-on release agent. It just peels off, and literally
no resistance to separate the parts.
That is going to be very nice when you get it all together.
What's the brand of the release agent you mentioned?
Looks similar to the stuff I use but it's green....Partall film#10
Shane Vacek
VRaptor SpeedWorks, LLC www.vraptorspeedworks.com
Turn-key GTM, SL-C & Ultima GTR Built to Your Specs!
Offering a full line of GTM Upgrades and Custom Parts
Shane Vacek
VRaptor SpeedWorks, LLC www.vraptorspeedworks.com
Turn-key GTM, SL-C & Ultima GTR Built to Your Specs!
Offering a full line of GTM Upgrades and Custom Parts
I've been trying to get the info about the release agent from "my guy", but he hasn't been very responsive. Oh well, I hope he is still moving along with
the fiberglass work!
The new skin for my car is complete. It's a bit 'off the wall', but I like it! I'm uploading it to the system and will be wiring it up this week.
This will be for the console touchscreen:
I finally got smart and installed a one-way fuel valve. Now I can use the system to prime the fuel rail and shut off the pump
with the pressure reads 55 PSI. It will make starting the engine a bit easier I suppose! fuelflowvalve.jpg
Last edited by LCD Gauges; 09-16-2019 at 11:29 PM.
Custom LCD Gauges , Data Loggers, Control Touch Screens www.LCDdash.com \\ 647-522-9953 \\ Voice & Text Proud new owner of GTM Gen 1., #105 - 08/27/11
LQ9 Powered, G96.00 6 speed transaxle
Mid June and this car will not see the finish line again this year. The dash work that started in April still isn't complete - you just can't pay enough for speedy
work it seems. :/
I can't say I'm disappointed in the progress however, the new interior is going to look great. I'm planning to redo the console and skin the waterfall, as well as the passenger cover in Carbon Fiber.
7 years and counting. I've torn out the inside for the 3rd time. I'm ripping out most of the electrical that was installed when I purchased the used kit. Ideally, I want to
lift the body and start over, but there's no time for that! Maybe over the Winter months if the schedule allows. Anything goes before the body is completed for
paint I guess?
The new contour of the dash pod is going to look great with the LCD. The added glare-shield looks a bit more OEM I suppose.
Hopefully it does the job. pod2.jpgpod3.jpgpod4.jpg
Last but not least, the gauge skin is still getting tweaked. I'm always messing with it! It will probably go through
another major change before I'm happy with it.
I've got some exciting news for the LCD Systems as well - I've contacted a few magazines, and have redone my
website. More to come in their own dedicated thread.
Last edited by LCD Gauges; 06-14-2019 at 06:46 PM.
Custom LCD Gauges , Data Loggers, Control Touch Screens www.LCDdash.com \\ 647-522-9953 \\ Voice & Text Proud new owner of GTM Gen 1., #105 - 08/27/11
LQ9 Powered, G96.00 6 speed transaxle
I received the first cut from the mould. It's pretty good, but needs some tweaking. By mid July, I'm hoping to have the final CF part and
ready to lock in the LCD gauges!
Such a slow process, but I'm busy doing other stuff so I can't be too upset. He says there is one more
clear coat to add, then it's done. I can't wait to get this stuff in the car already!
We're moving at a snail's pace with this interior work. It looks amazing, but waiting is killing me. I'll have to move forward with my demo
video using an alternative pod in the GTM.
Getting somewhere with this interior (finally!). The Carbon Fiber is just beautiful; the vinyl can no longer stay! Over the Winter I'm
hoping to have the doors skinned with CF and the remainder of the console covered with a flat CF.
The gauges are alive, but not yet connected to the sensors. I'll be digging away all week to get a functional video of this thing in action.
Sorry about the blacked out squares, there are just too many eye-sores happening with wires and unfinished interior.
The new pod fits very nicely. It's not screwed down yet, but the contour matches well. dash2.pngdash1.pngcf3.jpg
The Double DIN is roughed-in. I'll need a 90 degree adapter to get more clearance for cable in the rear,
then it will sit flush with the console. The LCD is a live shot, but there's no bezel over the display yet.
I'm trying to find the best method to cut Carbon Fiber straight and clean. DINplate_transp.jpgpromo_dash4.pngpromo_dash3.png
This is a little photo edit of how it will look with trimmed and finished.
Regular saw blades in an air saw can be used to cut fiberglass and CF but they wear out quickly. I found some carbide blades at Home Depot that last a LONG time. They are used for cutting ceramics. They have little bits of carbide fused to the blade. This still is just a rough cut and an air sander or file can be used to straighten all the rough cuts. It's definitely a process.
I just checked out their website and I see lots of different carbide blades for jigsaws and sawzalls, but I don't see any that look like they're specifically for a small body saw? I'd definitely be interested in what you're using as none of the body saw blades I've used will hold up to very much use on fg and especially cf.....
Shane Vacek
VRaptor SpeedWorks, LLC www.vraptorspeedworks.com
Turn-key GTM, SL-C & Ultima GTR Built to Your Specs!
Offering a full line of GTM Upgrades and Custom Parts
I'll see if I can get a picture and post it. I did have to modify the mounting tang to fit my air saw by grinding it slightly IIRC. Hopefully I still have one in a package. To give you an idea, I cut the GTM body into over 20 pieces with LONG cuts along the lengths of fenders, etc. I never wore out the first blade doing this.
I'm trying to find the best method to cut Carbon Fiber straight and clean.
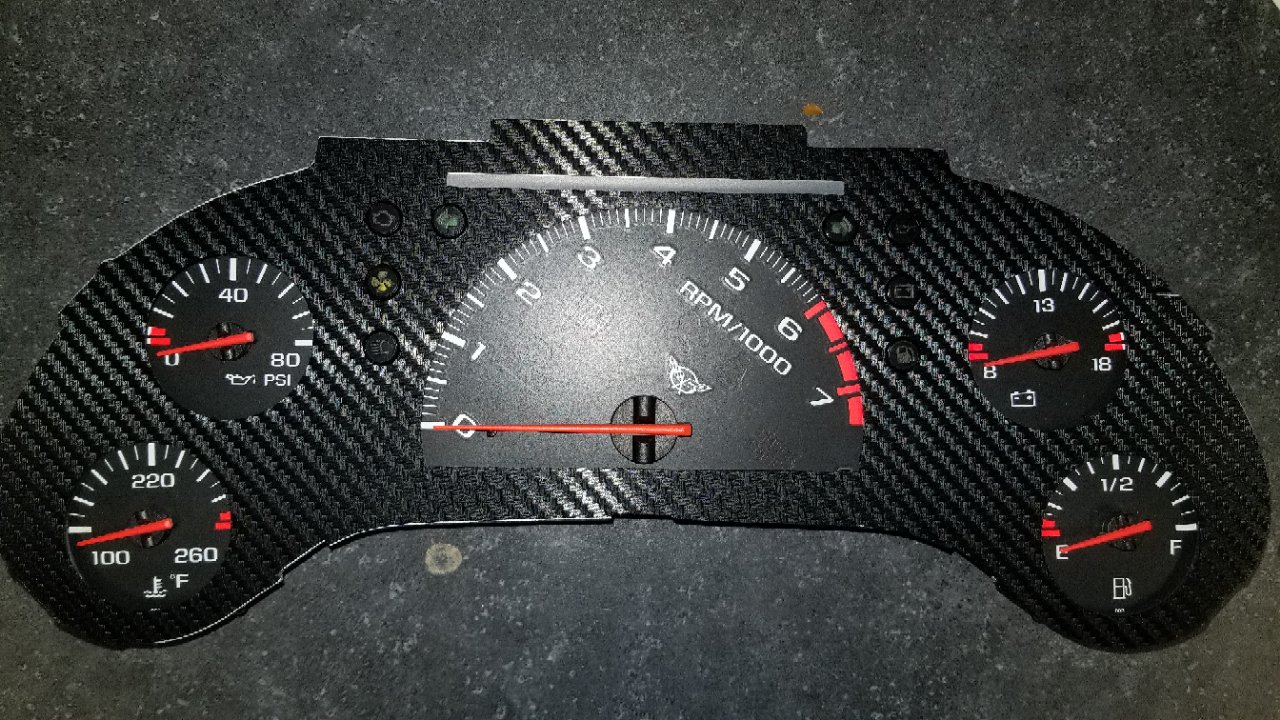
I agree. As good as the new 3D carbon fiber vinyl overlays look, I'm a big fan of sending a DXF file of the gauge surround to Shane at Vraptor, have him cut it from aluminum (with perfectly straight lines, arcs, circles, symmetry, etc), then take that exact same DXF to the wife's Cricut and cut (with perfectly straight lines, arcs, circles, symmetry, etc) the pattern from CF vinyl and lay it on the aluminum.
I don't know anyone who would bet me $1000 that this isn't real CF:
Very Nice!.....and my daughter has a Cricut......never thought of using it for that!....I did consider having her make some vinyl company decals for me, but never thought of using it to cut the vinyl to fit the parts!
Shane Vacek
VRaptor SpeedWorks, LLC www.vraptorspeedworks.com
Turn-key GTM, SL-C & Ultima GTR Built to Your Specs!
Offering a full line of GTM Upgrades and Custom Parts


 Thanks:
  Likes:


 Reply With Quote