-
Senior Member

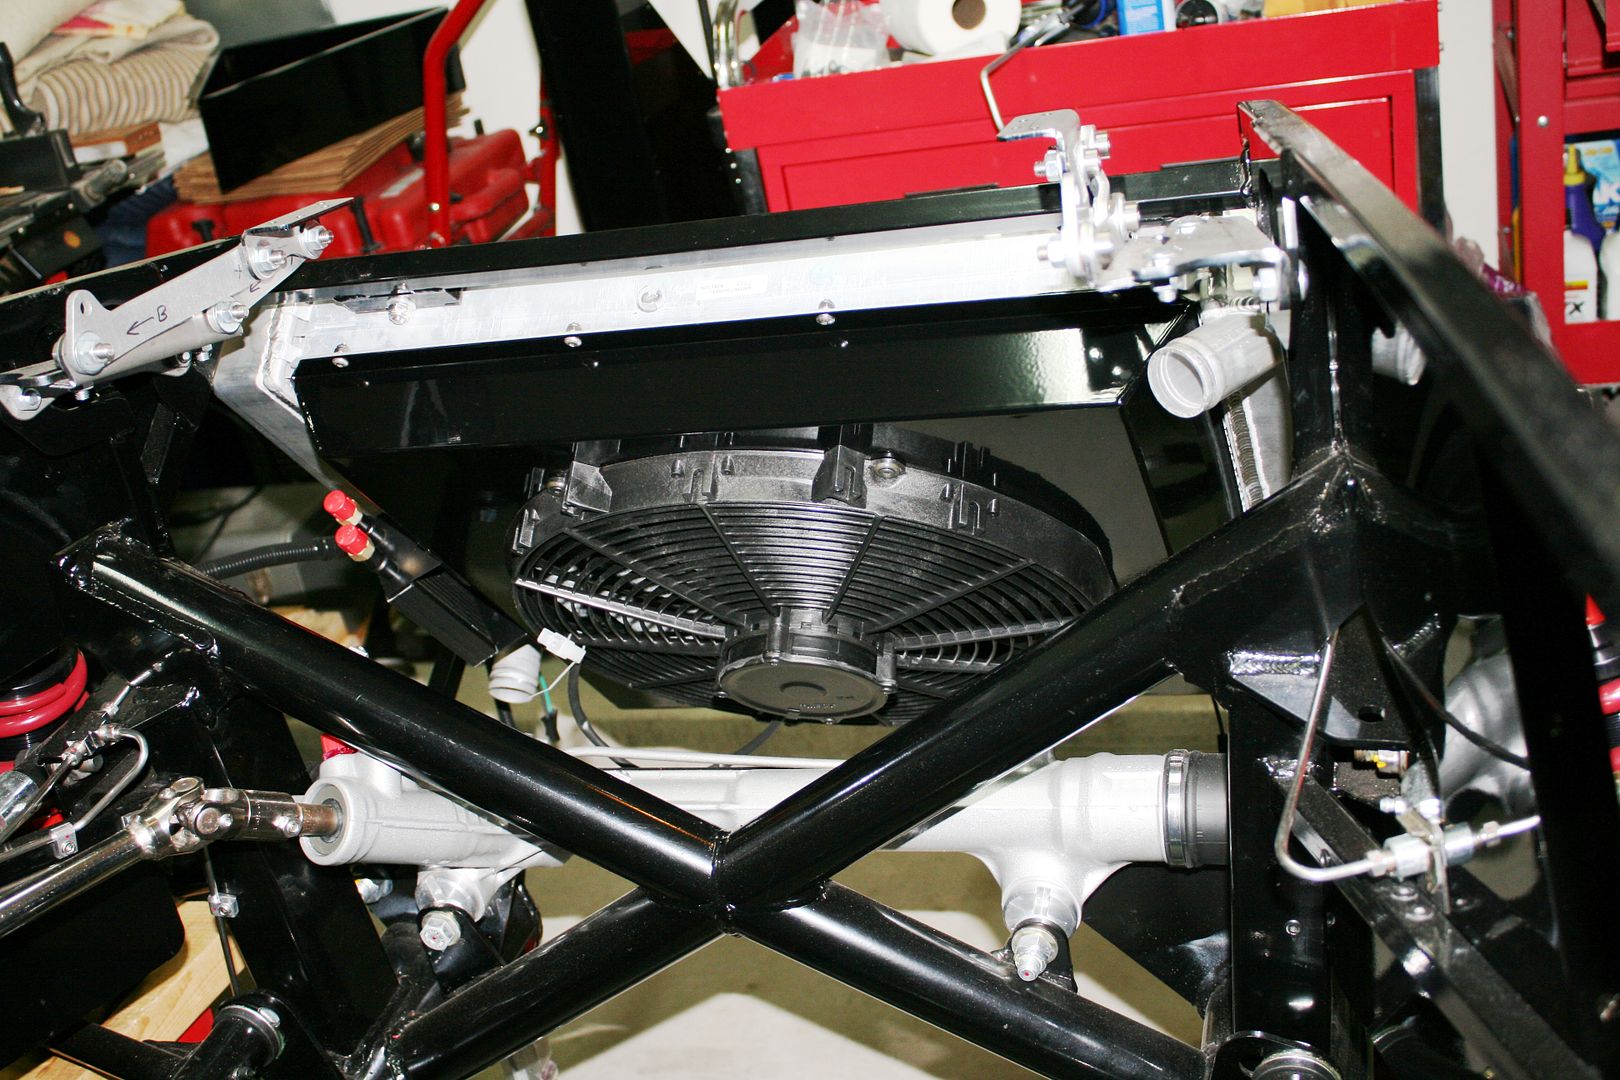
Traveller's Mk4 Coyote IRS Build - Brake Reservoir
I have been thinking / dreaming about doing a roadster for about 15 years. I even started the project way back then with a 302 rebuild and started acquiring donor parts. Alas, three kids and all the associated activities plus a hectic work schedule gave me very little free time, so the idea got shelved and the accumulated parts all got sold off. Now, as I approach my 50th birthday in a few months and with the last of my children headed off to college, its back on the front burner. So on 08/07/2019 I placed my order and was shocked to receive a completion date of 08/24/2019!
As I was researching and developing my build plans, I connected with a few local people who very generously answered my questions, let me see their cars / builds, and even a few rides. Specifically, thank you to edwardb, msumners, and gumball for your time and input.
The goal is a fairly classic looking roadster with a modern engine/trans and a great driving experience. While I am anxious to get on the road, I am not going to rush the build and hope to enjoy each step of the process. Here are some details:
Mk4 Complete Kit
* Powdercoat Chassis
* Coyote/TKO Engine and Transmission Mounts
* IRS
* Body Cutouts
* Vintage GPS Gauge Set
* 18" Halibrand Wheels
* Driver Side Chrome Roll Bar
* Coyote Power Steering Kit and Rack
* 13" IRS Rear Brake Kit
* 2018 IRS 3.55 Center Section and Spindles
Engine and Transmission - Ordered from Factory Five AT
* Gen 2 Coyote
* TKO-600 Transmission with .64 5th gear
* Assembled and mounted on stand
Headers and Sidepipes
* Gas-N Stainless Headers
* Gas-N Stainless Polished Sidepipes
Other
* Windwings
* Sun Visors
* Tangent Hidden Roll Bar Connector
* Herb's Door Panels
* Front Battery Mount
* Kleiner Rear Quick Jack Mod
* Drop Trunk
Future Plans and Wish List
* Automatic Turn Signal Cancel
* Color: TBD. 1966 Ford Ivy Green?
* Glove Box w/ VW keyed latch off ebay
* Integrated/Hidden Garage Door Opener
* Heated Seats
Many more decisions to make along the way, but that is the starting point. I'll keep updating the above list as more decisions are made. I am looking forward to the build and will use this thread to document the project.
Index (Post # - Topic):
5 - Body Buck
7 - Inventory
10 - IRS Differential
14 - Front Suspension
20 - Rear Suspension
31 - Powder Coating of Brackets / Steel Parts
33 - E-Brake Cable
36 - Pedal Box
37 - Cockpit Aluminum
41 - Drop Trunk
45 - Fuel Pump Access
49 - Powder Coating of Aluminum Panels
50 - Coyote Throttle Pedal
52 - Front Battery Box
Last edited by Traveller; 03-11-2020 at 10:03 PM.
-
Post Thanks / Like - 0 Thanks, 1 Likes
-
Senior Member
Picking Up the Kit
I originally was going to have Stewart deliver the kit, but decided to go pick it up myself. I probably saved myself only a few hundred dollars doing so, but I am glad to have done it.
I was going to fly to MA then rent a truck to bring the kit back, but ended up driving both ways. I found a tip on the forums about Penske truck rental having unlimited free miles on one-way rentals. After confirming that picking up a truck at one location in my town and returning to a different store in town counts as a "one-way", we rented a 22-foot bright yellow truck and headed out. My oldest son went with me, and we took a few days to get there with a stop at Niagra Falls as he had never been there before:


After a ride on the "Maid of the Mist" we continued on to Wareham MA and got a good night's sleep before pickup on Monday. Tip-o-the-hat the the crew at FFR. They were top notch in helping get the kit loaded up and offering tips on how to best secure it.


While there, we did the tour of the FFR facility and saw a bunch of other kits ready to head to their new homes. Also saw several of the 25th Anniversary edition frames getting built. I like the color of the powdercoat on these!


After 2,000 miles round trip, we got it back home and unloaded into the garage. We took the body off, unloaded it, then three of us were able to lift the chassis out of the truck and onto the chassis dolly (thank you Mike!). The engine and transmission was on a stand with casters but they were too wide for the truck's loading ramp. Took off the casters and mounted some 2x4"s and screwed that onto harbor freight furniture dollys and it was a snap to roll it off the truck.
The roadster is in it's new home!
Last edited by Traveller; 10-26-2019 at 02:11 PM.
-
Post Thanks / Like - 0 Thanks, 1 Likes
-
Congrats on bringing her home.....enjoy the build!!!
Build#1: MKIV Roadster #9320
-
Post Thanks / Like - 1 Thanks, 0 Likes
-
Welcome aboard! You guys are going to have a great time!
-
Post Thanks / Like - 1 Thanks, 0 Likes
-
Senior Member
-
Senior Member

Welcome Jason. We have nearly identical inventory lists and ideas about the car. The few differences are things like 18” wheels, I did 17, and auto turn signals. I too wanted to take my time and enjoy the build, and I thought I was, but the building is so entertaining that I couldn’t think about anything else. I obsessed. My wife commented at one point that she “knows what it’s like to be widowed”. I didn’t want an overly “moded” Cobra, I wanted something that reminded me of 1965, but would be as dependable as it could be. I look forward to following your progress and don’t hesitate to reach out if you get stuck, I’ve probably been there.
Bradley
Build thread - Mk4, Coyote, IRS, Wilwood brakes, old-style soft top and accessories.
The distance between "finished" and finished is literally infinite.
-
Post Thanks / Like - 1 Thanks, 0 Likes
-
Senior Member
Step 3: Inventory
I've been very busy between work, kids off to college (including one studying abroad), and various other activities so progress has been slow than expected, but inventory is DONE!
Wow does that take longer than one would expect. I worked through it one box at a time, checking off each item as they go back into the box until needed. I also taped a copy of the inventory sheet onto the outside of each box for easy reference. Lastly, there were various items originally on the POL, but picked for my order at the last minute, so I got all those random bits back into their originally designated boxes.
I only discovered a handful of missing fasteners and parts (be sure to count EVERYTHING); however, there was one entire BOX that was not included with my kit and was not included on my POL. Factory Five was quick to acknowledge the mistake and is taking care of it. I've been very impressed with their customer service so far.
On to the next step of marking and removing the mounted panels.
Last edited by Traveller; 09-11-2019 at 07:21 PM.
-
Senior Member

Just found the thread and will be following. Remember to take pictures of all the overlaps on the aluminum when they are coming off, especially the foot boxes. After they have been off for awhile it’s easy to forget the sequence.
-
Senior Member

Originally Posted by
MSumners

Just found the thread and will be following. Remember to take pictures of all the overlaps on the aluminum when they are coming off, especially the foot boxes. After they have been off for awhile it’s easy to forget the sequence.
I took a lot of pictures, but if I missed something I'll just drive over and take a look at yours...
Thanks for the chassis dolly! It's working great.
-Jason
-
Senior Member
IRS Differential Installed!
Very little progress has been made of the past few weeks due to work and family commitments, but slowly panels are getting drilled.
This afternoon I decided take a break from that and get the IRS center section off the floor and mounted to the chassis. Working by myself, I balanced it on a rolling dolly and positioned it under the chassis. Then using 2 sets of ratchet straps, one around the nose and one around the rear of the diff I started lifting it up into place. You really have to angle the nose up first, then coax the rear end up into place, then drop the nose back down a bit, then fiddle with alignment ad nauseam. Bottom line - it can be done solo, but this would be a great time to phone a friend...

BE SURE TO CHECK THE GEAR OIL! - I have read many accounts of people receiving these differentials from the factory filled, and many others being empty. I drained this one to make sure and found it contained only 20 oz of oil, which is less than half the required 3.15 - 3.30 pt. In case anyone is interested, I had asked Ford tech support for the fluid specs and they sent me this:

I find it interesting that "full" is 9mm below the fill hole...
Last edited by Traveller; 09-20-2019 at 08:31 PM.
-
Senior Member
Differential off center - is this correct?
Tonight as I was walking around the chassis and looking at the recently installed IRS differential when I noticed that it is off center toward the passenger side when viewed from the front. Please see the attached photo. I don't see how the diff could be installed incorrectly, but wanted to check with the forum if this is correct?
Thanks,
Jason

-
Senior Member

It's correct. Entire drivetrain (engine, trans, driveshaft, diff) is approx 1-inch offset to the right side. Pretty standard stuff. Many DD's with the same layout (front engine, rear wheel drive) are similar.
Build 1: Mk3 Roadster #5125. Sold 11/08/2014.
Build 2: Mk4 Roadster #7750. Sold 04/10/2017.
Build Thread
Build 3: Mk4 Roadster 20th Anniversary #8674. Sold 09/07/2020.
Build Thread and
Video.
Build 4: Gen 3 Type 65 Coupe #59. Gen 3 Coyote. Legal 03/04/2020.
Build Thread and
Video
Build 5: 35 Hot Rod Truck #138. LS3 and 4L65E auto. Rcvd 01/05/2021. Legal 04/20/2023.
Build Thread. Sold 11/9/2023.
-
Post Thanks / Like - 1 Thanks, 0 Likes
-
Senior Member
Perfect. Thank you, Paul.
Originally Posted by
edwardb
It's correct. Entire drivetrain (engine, trans, driveshaft, diff) is approx 1-inch offset to the right side. Pretty standard stuff. Many DD's with the same layout (front engine, rear wheel drive) are similar.
-
Senior Member
-
Not a waxer

The only thing that the pics don't show for certain is whether the wide end of the tapered hole in the steering arms is down---if it is you're good to go!
Jeff
-
Post Thanks / Like - 1 Thanks, 0 Likes
-
Senior Member
Originally Posted by
Jeff Kleiner
The only thing that the pics don't show for certain is whether the wide end of the tapered hole in the steering arms is down---if it is you're good to go!
Jeff
Seriously?!?!? Dang it. Well - that is why I asked. Gotta go flip them...
Thank you very much, Jeff.
Last edited by Traveller; 10-26-2019 at 03:08 PM.
-
Not a waxer
Originally Posted by
Traveller
Seriously?!?!? Dang it. Well - that is why I asked. Gotta go flip them...
Thank you very much, Jeff.
You'll need to not just flip them but also swap sides. Steering arms need to have the wide end of the taper dawn and must angle outward from the spindle.
Jeff
-
Senior Member
Originally Posted by
Jeff Kleiner
You'll need to not just flip them but also swap sides. Steering arms need to have the wide end of the taper dawn and must angle outward from the spindle.
Jeff
Yeah - I get that. It's funny - I didn't realize that they were tapered holes, but I did catch in the manual where it said to orient them such that the tie rod ends will mount from the bottom. When looking at the steering arms, one side is smooth while the other is textured like the rest of the arm. I assumed the smooth side went down where it would mate against the ball joint.
You know what happens when you assume...
-
Senior Member
Okay - the steering arms are flipped and swapped, and everything is torqued up once more.
The other thing I did today was to paint the front calipers (I did not choose the wilwoods). I think they turned out looking pretty good. I'll give them a day or two to cure before installing.

Last edited by Traveller; 10-26-2019 at 04:18 PM.
-
Senior Member
-
Senior Member
How does my rear end look?
Before I tighten anything down, does this look correct to you? The top arm to the spindle connection seems a bit wonky to me... Note that nothing has been tightened down yet.

Thank you!
jason
-
Senior Member
Looks OK to me. You should find it all tightens up when the bolts are torqued down per the instructions.
Build 1: Mk3 Roadster #5125. Sold 11/08/2014.
Build 2: Mk4 Roadster #7750. Sold 04/10/2017.
Build Thread
Build 3: Mk4 Roadster 20th Anniversary #8674. Sold 09/07/2020.
Build Thread and
Video.
Build 4: Gen 3 Type 65 Coupe #59. Gen 3 Coyote. Legal 03/04/2020.
Build Thread and
Video
Build 5: 35 Hot Rod Truck #138. LS3 and 4L65E auto. Rcvd 01/05/2021. Legal 04/20/2023.
Build Thread. Sold 11/9/2023.
-
Senior Member
-
Senior Member
I just finished torquing down the bolts on the IRS suspension and see in the manual where it says
Check the angle of the upper control arm rod end, make sure that the rod end is not touching the spindle and that it is aligned with the upper control arm.
What does "aligned with the upper control arm" mean? Does it mean the rod end body should be vertical (as shown in this picture) or can I rotate it slightly clockwise to make it more parallel with the spindle which would maximize clearance between the rod end and the spindle surface. I hope that makes sense...
-
Senior Member
Originally Posted by
Traveller
What does "aligned with the upper control arm" mean? Does it mean the rod end body should be vertical (as shown in this picture) or can I rotate it slightly clockwise to make it more parallel with the spindle which would maximize clearance between the rod end and the spindle surface.
I think either perspective is fine. They're not that different. I think they're just confirming you don't have the rod end casing rotated to where it might contact the knuckle (unlikely) or not stay fully engaged on the ball swivel as the suspension moves up and down.
Build 1: Mk3 Roadster #5125. Sold 11/08/2014.
Build 2: Mk4 Roadster #7750. Sold 04/10/2017.
Build Thread
Build 3: Mk4 Roadster 20th Anniversary #8674. Sold 09/07/2020.
Build Thread and
Video.
Build 4: Gen 3 Type 65 Coupe #59. Gen 3 Coyote. Legal 03/04/2020.
Build Thread and
Video
Build 5: 35 Hot Rod Truck #138. LS3 and 4L65E auto. Rcvd 01/05/2021. Legal 04/20/2023.
Build Thread. Sold 11/9/2023.
-
Senior Member
Originally Posted by
edwardb
I think either perspective is fine. They're not that different. I think they're just confirming you don't have the rod end casing rotated to where it might contact the knuckle (unlikely) or not stay fully engaged on the ball swivel as the suspension moves up and down.
Got it. Thank you, Paul.
-
Senior Member
I am putting in the power steering rack from the complete kit and am using the Breeze offset rack mounting bushings (really like these) and am unclear on two things:
1) Are the shims to be inserted in front (pushing the rack rearward) or behind (pushing the rack forward) the rack/bushing?
2) The instructions from Breeze seem to be suggesting that the passenger side bolt feeds from the front (nut in rear) and the opposite from the drivers side (nut in the front). The instructions say this helps with access if using the breeze front battery mount kit, which I am. Is this correct?
Actually on number 2, I am even more confused - the instructions from breeze are very detailed, but only mention inserting the shims on the passenger side. I can only assume it is needed on both.
I emailed Mark these questions but since it's after hours I don't expect a reply until Monday so I thought I'd ask this astute group.
Thanks in advance.
-Jason
Last edited by Traveller; 11-15-2019 at 07:20 PM.
-
Senior Member
Originally Posted by
Traveller
I am putting in the power steering rack from the complete kit and am using the Breeze offset rack mounting bushings (really like these) and am unclear on two things:
1) Are the shims to be inserted in front (pushing the rack rearward) or behind (pushing the rack forward) the rack/bushing?
2) The instructions from Breeze seem to be suggesting that the passenger side bolt feeds from the front (nut in rear) and the opposite from the drivers side (nut in the front). The instructions say this helps with access if using the breeze front battery mount kit, which I am. Is this correct?
Actually on number 2, I am even more confused - the instructions from breeze are very detailed, but only mention inserting the shims on the passenger side. I can only assume it is needed on both.
I emailed Mark these questions but since it's after hours I don't expect a reply until Monday so I thought I'd ask this astute group.
Thanks in advance.
-Jason
1. Behind (pushing the rack forward). On both sides.
2. Correct. Passenger (right) side push the bolt in from the front with the nut on the back. Otherwise, once the Breeze front battery box is installed, you wouldn't be able to get that bolt out.
Both details are visible in this picture from my #7750 build.
Build 1: Mk3 Roadster #5125. Sold 11/08/2014.
Build 2: Mk4 Roadster #7750. Sold 04/10/2017.
Build Thread
Build 3: Mk4 Roadster 20th Anniversary #8674. Sold 09/07/2020.
Build Thread and
Video.
Build 4: Gen 3 Type 65 Coupe #59. Gen 3 Coyote. Legal 03/04/2020.
Build Thread and
Video
Build 5: 35 Hot Rod Truck #138. LS3 and 4L65E auto. Rcvd 01/05/2021. Legal 04/20/2023.
Build Thread. Sold 11/9/2023.
-
Post Thanks / Like - 1 Thanks, 0 Likes
-
Senior Member
Paul - thank you so much. I continue to be astounded at the breadth and depth of your knowledge, and willingness to share it.
I'm off to finish the rack install...
Thank you!
-
Senior Member
Originally Posted by
Traveller
Paul - thank you so much. I continue to be astounded at the breadth and depth of your knowledge, and willingness to share it.
I'm off to finish the rack install...
Thank you!
You're welcome. Happy to help as long as it's something I've had experience with in the builds I've done.
Build 1: Mk3 Roadster #5125. Sold 11/08/2014.
Build 2: Mk4 Roadster #7750. Sold 04/10/2017.
Build Thread
Build 3: Mk4 Roadster 20th Anniversary #8674. Sold 09/07/2020.
Build Thread and
Video.
Build 4: Gen 3 Type 65 Coupe #59. Gen 3 Coyote. Legal 03/04/2020.
Build Thread and
Video
Build 5: 35 Hot Rod Truck #138. LS3 and 4L65E auto. Rcvd 01/05/2021. Legal 04/20/2023.
Build Thread. Sold 11/9/2023.
-
Senior Member
Powder Coating Batch 1
I sent a batch 56 parts off to be powder coated and they turned out great! The shop was recommended to me by MSumners (Thanks Mike!) and they were able to turn around the order in 48 hours. Great service.
I am looking forward to getting the rest of the panels fitted and drilled so I can send them off as well.

-
Senior Member
Rear Brakes - Does this look right?
When I ordered my kit, I decided to not get the Wilwood upgrade and I am starting to regret that (penny wise, pound foolish maybe). I ended up with the 11" front and the 13" rear brake setup and I don't love the look of the different sizes, but I'll stick with them for now and see how the look with wheels on and how they perform.
I had painted the front calipers and they turned out beautifully, but the rear calipers were a different story. The rears where on my backorder list and only recently showed up on my doorstep. The coating on them was some kind of silver powder coat so in preparation for painting them black to match the fronts, I sanded and scuffed very thoroughly. However, the paint WOULD NOT STICK. I probably painted / stripped / repainted these things 5 times before I could finally get decent adhesion. They look good now, but I am worried they will start to chip or flake once in service.

I will not be surprised if I find myself doing a Wilwood upgrade after my first driving season...
Anyway, the only other problem I had was that I could not find a way to get the pads in with the included rattle clips. I found another post that said they couldn't either and ended up leaving them out. So that is what I did. They fit very tightly and there is no play, so I think that will be ok. Agree? Also, could you please take a look and let me know if you see any problems or errors in these photos?


-
Senior Member
EBrake Cable Tension
Rear brakes are in and I ran the eBrake cables from calipers to the mount in the tunnel. The cables are stretched pretty tight. After they were in, I tried to move the internal cables (pushing back through the sleeve toward the calipers). The passenger side slides freely but the driver's side (which is the one most tightly stretched) is VERY hard to push back by hand. I does move, but much more resistance. Is this ok/normal?
Here is a pic of cable routing:

Last edited by Traveller; 12-17-2019 at 08:18 PM.
-
Senior Member
They shouldn't be so tight that the inner cable doesn't move freely. Probably would pull OK to actuate the e-brake. But with the amount of drag you're describing, may not release when the handle is released. Sounds like you need longer cables. Or maybe could be routed inside that frame member instead of outside. Where the UCA mounts.
Build 1: Mk3 Roadster #5125. Sold 11/08/2014.
Build 2: Mk4 Roadster #7750. Sold 04/10/2017.
Build Thread
Build 3: Mk4 Roadster 20th Anniversary #8674. Sold 09/07/2020.
Build Thread and
Video.
Build 4: Gen 3 Type 65 Coupe #59. Gen 3 Coyote. Legal 03/04/2020.
Build Thread and
Video
Build 5: 35 Hot Rod Truck #138. LS3 and 4L65E auto. Rcvd 01/05/2021. Legal 04/20/2023.
Build Thread. Sold 11/9/2023.
-
Post Thanks / Like - 1 Thanks, 0 Likes
-
Senior Member

I had to trim the sides of the rattle clips to get them to fit.
-
Post Thanks / Like - 1 Thanks, 0 Likes
-
Senior Member
-
Senior Member
-
Senior Member
The other area that needed trimming was the trunk side panels where they meet the rear cockpit wall. The angles just didn't align and I had to take the "point" off the top forward corners.
This was the very top left corner of the panel (above and left of the cleco). I had to take off maybe 1/8" to 1/4" on each side otherwise it was visibly pushing the rear cockpit wall forward and distorting it.

-
Senior Member
You don't want/need the standard kit clutch switch with the Coyote. The control pack comes with a different switch that plugs into the control pack harness. It's installed up on the pedal box on the modified clutch quadrant if you're using the Factory Five modified cable setup. Factory Five supplies the necessary mounting pieces on their Coyote completion kit. If you're doing a hydraulic clutch, the pieces can be modified to still work. Several build threads including mine show some ways to do that.
Yes, I've had to trim a little along the transmission tunnel. But not quite that much. Make sure you have the floor sheeting flat on the frame and everything else fitted before cutting anything.
Build 1: Mk3 Roadster #5125. Sold 11/08/2014.
Build 2: Mk4 Roadster #7750. Sold 04/10/2017.
Build Thread
Build 3: Mk4 Roadster 20th Anniversary #8674. Sold 09/07/2020.
Build Thread and
Video.
Build 4: Gen 3 Type 65 Coupe #59. Gen 3 Coyote. Legal 03/04/2020.
Build Thread and
Video
Build 5: 35 Hot Rod Truck #138. LS3 and 4L65E auto. Rcvd 01/05/2021. Legal 04/20/2023.
Build Thread. Sold 11/9/2023.
-
I had to trim my tunnel sides just slightly to get them flush. I don't recall trimming any other panels. I'd check and double check fitment before trimming. On the calipers, I had the same issue with paint. Just take care when bleeding, as the bleeder screws can be loose in those calipers and let fluid out that will ruin your paint job. I just ended up not painting the bleeder pad.


 Thanks:
  Likes:


 Reply With Quote


