Boig Motorsports

Visit our community sponsor

Thanks Thanks:  91
Likes Likes:  353
Page 5 of 28 FirstFirst ... 3456715 ... LastLast
Results 161 to 200 of 1104

Thread: The race is on - Namrups 65 Daytona Coupe build

  1. #161
    Namrups's Avatar
    Join Date
    Sep 2021
    Location
    Mechanicville, NY
    Posts
    1,172
    Post Thanks / Like
    Quote Originally Posted by Blitzboy54 View Post
    I will definitely come check it out
    Your welcome at any time. Just PM me to give me a heads up. Same invite for you also Joel!
    Scott Pregont
    Present build: 65 Daytona Coupe #393 - Forte 427 EFI crate w/TKX 2.87/ .81 - Ordered 11/16/21 - Delivered 6/23/2022
    Location: Mechanicville, NY
    Build Thread: https://thefactoryfiveforum.com/show...na-Coupe-build
    My Albums
    Build album: https://thefactoryfiveforum.com/album.php?albumid=2151
    Build album 2: https://thefactoryfiveforum.com/album.php?albumid=2437
    Special Tools, Custom Parts, misc supplies: https://thefactoryfiveforum.com/album.php?albumid=2045
    Garage Pics: https://thefactoryfiveforum.com/album.php?albumid=2041
    POR15 First Try: https://thefactoryfiveforum.com/album.php?albumid=2068
    Silicone application tips: https://thefactoryfiveforum.com/album.php?albumid=2063

  2. #162
    Namrups's Avatar
    Join Date
    Sep 2021
    Location
    Mechanicville, NY
    Posts
    1,172
    Post Thanks / Like
    Health update - major frustration!

    Anyone following this thread knows I have cancer. In early Jan. the local covid infection rate skyrocketed. My condition made it very dangerous to be going to work every day. (From Jan 3rd thru Jan 21st there was 83 positive cases reported at work!) Last year my doctor placed me on short term disability for the same reason. I was out for six months. He decided to again pull me out until the infection rate came back down. I applied for the same short term disability. I found out that the company started using a new insurance company for the disability insurance this year. I am a member of the union and we were told that there was no change in the insurance just a new company. (Ya right) Well here we are 5 weeks into this and the insurance company has not made a determination to approve or deny the claim! Yes folks, that's 5 weeks without a paycheck! It took them 3 weeks to even contact my doctor. On Jan 21st they faxed paperwork they wanted my doctor to fill out with the notification that if they didn't receive a response on JAN 21ST it could cause the claim to be denied! They followed up 3 days later with an email to me with additional paperwork they wanted me and my doctor to fill out. Last Friday my HR contact told me that they wanted to talk to my doctor over the phone. I checked with the office today and guess what? Yep no phone call yet. I swear, nothing works the way it's supposed to any more.
    Scott Pregont
    Present build: 65 Daytona Coupe #393 - Forte 427 EFI crate w/TKX 2.87/ .81 - Ordered 11/16/21 - Delivered 6/23/2022
    Location: Mechanicville, NY
    Build Thread: https://thefactoryfiveforum.com/show...na-Coupe-build
    My Albums
    Build album: https://thefactoryfiveforum.com/album.php?albumid=2151
    Build album 2: https://thefactoryfiveforum.com/album.php?albumid=2437
    Special Tools, Custom Parts, misc supplies: https://thefactoryfiveforum.com/album.php?albumid=2045
    Garage Pics: https://thefactoryfiveforum.com/album.php?albumid=2041
    POR15 First Try: https://thefactoryfiveforum.com/album.php?albumid=2068
    Silicone application tips: https://thefactoryfiveforum.com/album.php?albumid=2063

  3. #163
    Namrups's Avatar
    Join Date
    Sep 2021
    Location
    Mechanicville, NY
    Posts
    1,172
    Post Thanks / Like
    Rivet Nut Installation Tool

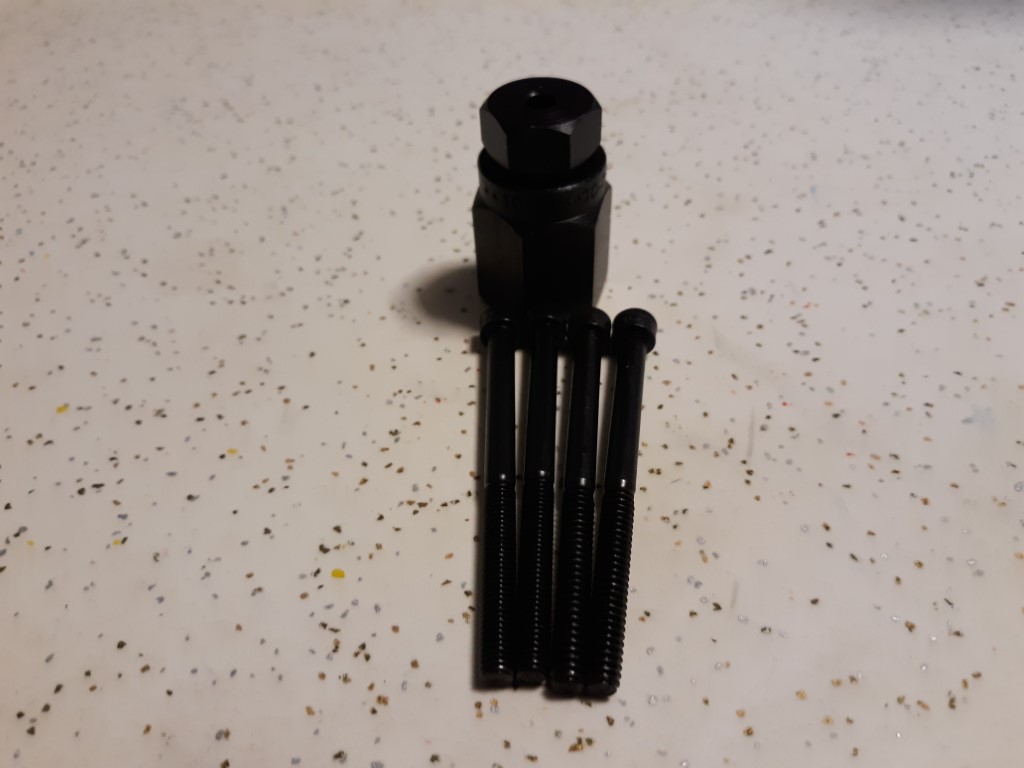
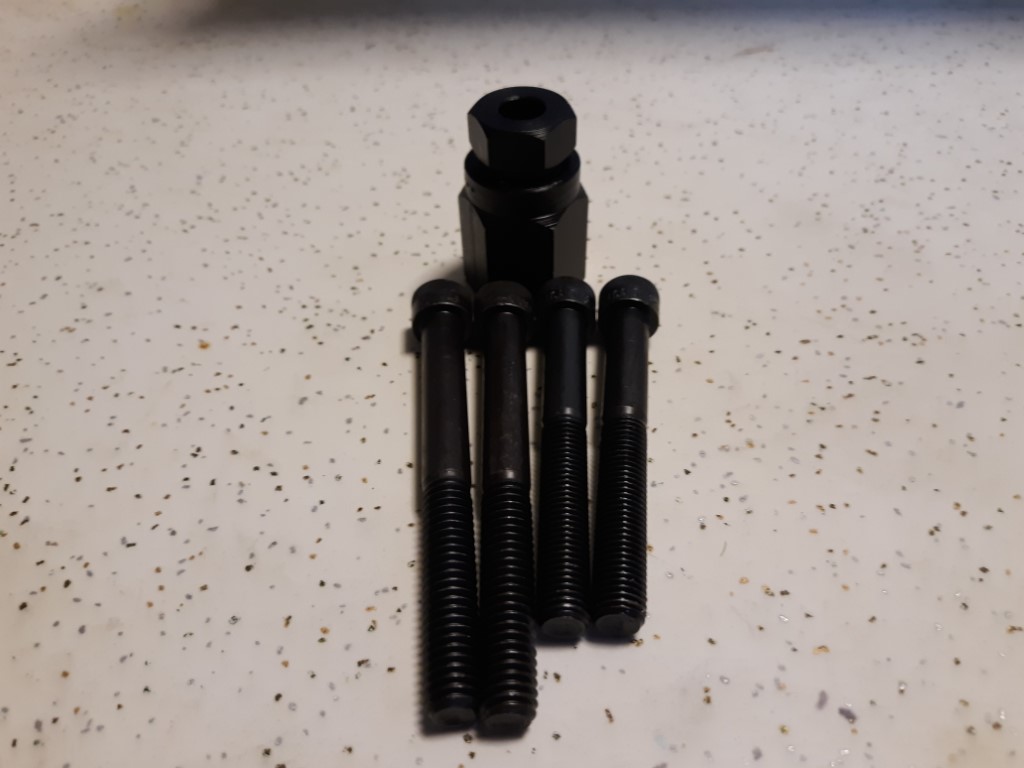
    Most of the build threads I have read use rivet nuts in locations where the panels need to be removed. In investigating different rivet nut installation tools I have made the decision to follow in Paul's (EdwardB's) footsteps (can't really go wrong there!) and get the Wrench-Driven Installation tools. Yes, they are more expensive than a lot of the tools I looked at but I am a true believer you get what you pay for. I'm hoping these will help keep me from screwing up to bad trying to install the rivet nuts.

    Wrench-Driven Installation Tool for 10-24 and 10-32 Thread Size Rivets

    Wrench-Driven Installation Tool for 5/16" 18 and 24 Thread Size Rivets
    Scott Pregont
    Present build: 65 Daytona Coupe #393 - Forte 427 EFI crate w/TKX 2.87/ .81 - Ordered 11/16/21 - Delivered 6/23/2022
    Location: Mechanicville, NY
    Build Thread: https://thefactoryfiveforum.com/show...na-Coupe-build
    My Albums
    Build album: https://thefactoryfiveforum.com/album.php?albumid=2151
    Build album 2: https://thefactoryfiveforum.com/album.php?albumid=2437
    Special Tools, Custom Parts, misc supplies: https://thefactoryfiveforum.com/album.php?albumid=2045
    Garage Pics: https://thefactoryfiveforum.com/album.php?albumid=2041
    POR15 First Try: https://thefactoryfiveforum.com/album.php?albumid=2068
    Silicone application tips: https://thefactoryfiveforum.com/album.php?albumid=2063

  4. #164
    Senior Member
    Join Date
    May 2019
    Posts
    226
    Post Thanks / Like
    Quote Originally Posted by Namrups View Post
    Rivet Nut Installation Tool

    Most of the build threads I have read use rivet nuts in locations where the panels need to be removed. In investigating different rivet nut installation tools I have made the decision to follow in Paul's (EdwardB's) footsteps (can't really go wrong there!) and get the Wrench-Driven Installation tools. Yes, they are more expensive than a lot of the tools I looked at but I am a true believer you get what you pay for. I'm hoping these will help keep me from screwing up to bad trying to install the rivet nuts.

    Wrench-Driven Installation Tool for 10-24 and 10-32 Thread Size Rivets


    Wrench-Driven Installation Tool for 5/16" 18 and 24 Thread Size Rivets
    You know that for the 10-24 and 10-32 screws, you can likely do without the rivnuts, just drill and tap the tube. For those small size fasteners, there should be enough wall thickness to allow it.

  5. #165
    Namrups's Avatar
    Join Date
    Sep 2021
    Location
    Mechanicville, NY
    Posts
    1,172
    Post Thanks / Like
    Quote Originally Posted by Ltngdrvr View Post
    You know that for the 10-24 and 10-32 screws, you can likely do without the rivnuts, just drill and tap the tube. For those small size fasteners, there should be enough wall thickness to allow it.
    You are right. I just feel better with more than three or four threads. I know that in most cases there won't be too much force applied to the fastener but it's just my preference.
    Scott Pregont
    Present build: 65 Daytona Coupe #393 - Forte 427 EFI crate w/TKX 2.87/ .81 - Ordered 11/16/21 - Delivered 6/23/2022
    Location: Mechanicville, NY
    Build Thread: https://thefactoryfiveforum.com/show...na-Coupe-build
    My Albums
    Build album: https://thefactoryfiveforum.com/album.php?albumid=2151
    Build album 2: https://thefactoryfiveforum.com/album.php?albumid=2437
    Special Tools, Custom Parts, misc supplies: https://thefactoryfiveforum.com/album.php?albumid=2045
    Garage Pics: https://thefactoryfiveforum.com/album.php?albumid=2041
    POR15 First Try: https://thefactoryfiveforum.com/album.php?albumid=2068
    Silicone application tips: https://thefactoryfiveforum.com/album.php?albumid=2063

  6. #166
    Senior Member
    Join Date
    May 2019
    Posts
    226
    Post Thanks / Like
    Quote Originally Posted by Namrups View Post
    You are right. I just feel better with more than three or four threads. I know that in most cases there won't be too much force applied to the fastener but it's just my preference.
    Okay, whatever works for you.
    I'm just all about saving money, time and effort when I do a project like this.

  7. #167
    Senior Member rhk118's Avatar
    Join Date
    Nov 2021
    Location
    Portland, Maine
    Posts
    362
    Post Thanks / Like
    Quote Originally Posted by Namrups View Post
    You are right. I just feel better with more than three or four threads. I know that in most cases there won't be too much force applied to the fastener but it's just my preference.
    Quote Originally Posted by Ltngdrvr View Post
    Okay, whatever works for you.
    I'm just all about saving money, time and effort when I do a project like this.
    So question since I will be using rivnuts during my build as well help me understand - The bolts in that kit are intended for "thicker" locations where you are placing rivnuts vs just make a drill hole in the frame as it is thin walled and tap it to the thread spec of the rivnut?

    How does the bolt system work? Still obviously drill, then just wrench in one of those bolts and they act as the tap? Clearly this is something I've never done before, just don't want to *screw* it up...haha see what I did there? (apologize for that, first cup of coffee just went in, bit of mania happening here)

  8. #168
    Namrups's Avatar
    Join Date
    Sep 2021
    Location
    Mechanicville, NY
    Posts
    1,172
    Post Thanks / Like
    Quote Originally Posted by rhk118 View Post
    So question since I will be using rivnuts during my build as well help me understand - The bolts in that kit are intended for "thicker" locations where you are placing rivnuts vs just make a drill hole in the frame as it is thin walled and tap it to the thread spec of the rivnut?

    How does the bolt system work? Still obviously drill, then just wrench in one of those bolts and they act as the tap? Clearly this is something I've never done before, just don't want to *screw* it up...haha see what I did there? (apologize for that, first cup of coffee just went in, bit of mania happening here)
    The threaded bolt is inserted into the holder. The revit nut is screwed on to the threaded bolt and inserted into the hole. The holder is held from turning by one wrench and the bolt is tightened by another wrench collapsing the revit nut securing it in the hole. When the bolt is snug remove the wrenches and remove the bolt. If you have ever used a collapsing fastener in a sheet rock wall, it's the same idea.
    Scott Pregont
    Present build: 65 Daytona Coupe #393 - Forte 427 EFI crate w/TKX 2.87/ .81 - Ordered 11/16/21 - Delivered 6/23/2022
    Location: Mechanicville, NY
    Build Thread: https://thefactoryfiveforum.com/show...na-Coupe-build
    My Albums
    Build album: https://thefactoryfiveforum.com/album.php?albumid=2151
    Build album 2: https://thefactoryfiveforum.com/album.php?albumid=2437
    Special Tools, Custom Parts, misc supplies: https://thefactoryfiveforum.com/album.php?albumid=2045
    Garage Pics: https://thefactoryfiveforum.com/album.php?albumid=2041
    POR15 First Try: https://thefactoryfiveforum.com/album.php?albumid=2068
    Silicone application tips: https://thefactoryfiveforum.com/album.php?albumid=2063

  9. Likes rhk118 liked this post
  10. #169
    Senior Member
    Join Date
    May 2019
    Posts
    226
    Post Thanks / Like
    Quote Originally Posted by rhk118 View Post
    So question since I will be using rivnuts during my build as well help me understand - The bolts in that kit are intended for "thicker" locations where you are placing rivnuts vs just make a drill hole in the frame as it is thin walled and tap it to the thread spec of the rivnut?

    How does the bolt system work? Still obviously drill, then just wrench in one of those bolts and they act as the tap? Clearly this is something I've never done before, just don't want to *screw* it up...haha see what I did there? (apologize for that, first cup of coffee just went in, bit of mania happening here)
    Rivnut is a threaded insert that installs similarly to a rivet, it is placed in a drilled hole, then the tool is used to crimp the insert in place sort of like how a rivet gets crimped in its hole. Then a bolt can be threaded into the hole to attach pieces together.
    Look at this rivnut manufacturers web page to see examples of how they work, https://www.rivetnutusa.com/rivnut-rivet-nut/

  11. Likes rhk118 liked this post
  12. #170
    Senior Member rhk118's Avatar
    Join Date
    Nov 2021
    Location
    Portland, Maine
    Posts
    362
    Post Thanks / Like
    Ok thanks guys. Are there any that mount flush to the fram or is there always a lip that sticks out a little - i.e. if I rivet in an aluminum panel it will sit flush to the frame....if I riv-nut it in with it sit up a tiny amount because of the lip?

  13. #171
    Namrups's Avatar
    Join Date
    Sep 2021
    Location
    Mechanicville, NY
    Posts
    1,172
    Post Thanks / Like
    My friendly neighborhood UPS delivery driver stopped by today! Love that! He dropped off the Trick Flow Fuel Filter that I had ordered from Summit Racing.
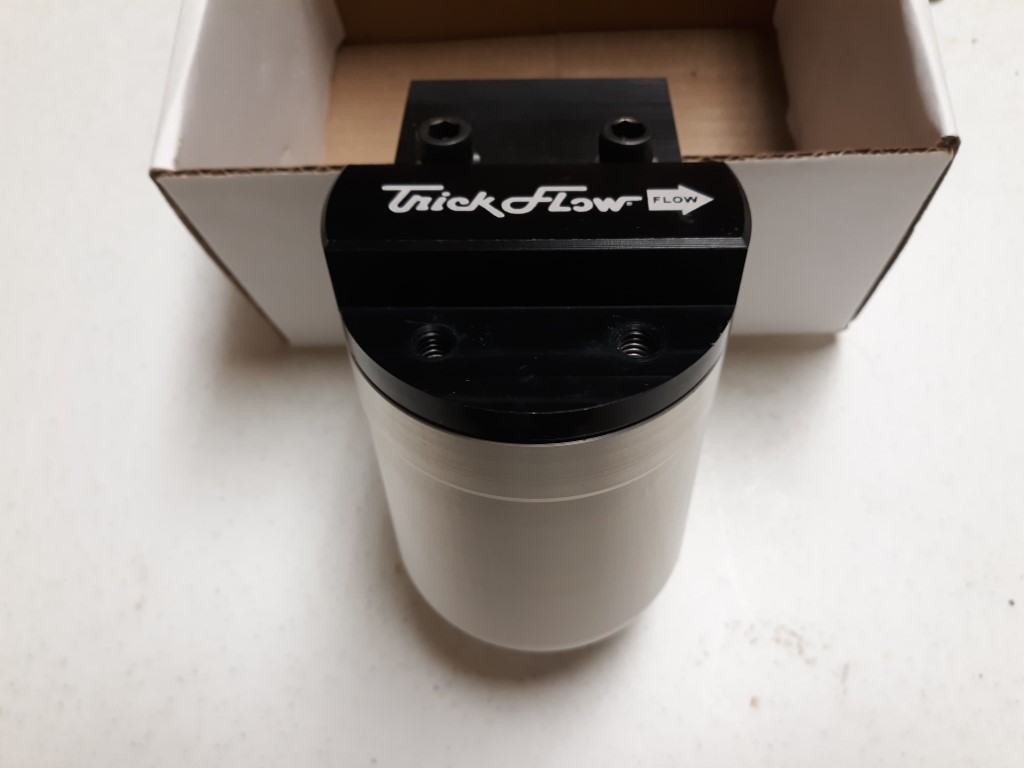

    And of course to get free shipping I had to order more than $100.00 so I added the Universal Driveshaft Safety Loop to put me over the $100.00 mark.


    Too me, From me, For me!!
    Scott Pregont
    Present build: 65 Daytona Coupe #393 - Forte 427 EFI crate w/TKX 2.87/ .81 - Ordered 11/16/21 - Delivered 6/23/2022
    Location: Mechanicville, NY
    Build Thread: https://thefactoryfiveforum.com/show...na-Coupe-build
    My Albums
    Build album: https://thefactoryfiveforum.com/album.php?albumid=2151
    Build album 2: https://thefactoryfiveforum.com/album.php?albumid=2437
    Special Tools, Custom Parts, misc supplies: https://thefactoryfiveforum.com/album.php?albumid=2045
    Garage Pics: https://thefactoryfiveforum.com/album.php?albumid=2041
    POR15 First Try: https://thefactoryfiveforum.com/album.php?albumid=2068
    Silicone application tips: https://thefactoryfiveforum.com/album.php?albumid=2063

  14. Likes cgundermann liked this post
  15. #172
    Senior Member
    Join Date
    May 2019
    Posts
    226
    Post Thanks / Like
    Quote Originally Posted by rhk118 View Post
    Ok thanks guys. Are there any that mount flush to the fram or is there always a lip that sticks out a little - i.e. if I rivet in an aluminum panel it will sit flush to the frame....if I riv-nut it in with it sit up a tiny amount because of the lip?
    I think they make some that are thinner on the top, but you will always have some part above the surface.
    Check that website and see what they have available.
    But, you should be laying down a bead of silicone between the panels and the frame anyway, so not like there will be any open gaps where air or anything would pass through.
    That is one other advantage of drilling and tapping the holes for the screws to screw directly into the frame though.
    Last edited by Ltngdrvr; 02-03-2022 at 01:44 PM.

  16. Likes rhk118 liked this post
  17. #173
    Namrups's Avatar
    Join Date
    Sep 2021
    Location
    Mechanicville, NY
    Posts
    1,172
    Post Thanks / Like
    The use if rivet nuts is so the piece can be removed for example the tranny tunnel cover, the dash, etc. or for a more solid connection than a normal rivet would be. On the drive shaft safety loop for example. You would not want to use silicone to seal the connection as you would not be able to separate it after the silicone cured. IMO the use of thin flat gasket with adhesive on one side would be a better choice.
    Scott Pregont
    Present build: 65 Daytona Coupe #393 - Forte 427 EFI crate w/TKX 2.87/ .81 - Ordered 11/16/21 - Delivered 6/23/2022
    Location: Mechanicville, NY
    Build Thread: https://thefactoryfiveforum.com/show...na-Coupe-build
    My Albums
    Build album: https://thefactoryfiveforum.com/album.php?albumid=2151
    Build album 2: https://thefactoryfiveforum.com/album.php?albumid=2437
    Special Tools, Custom Parts, misc supplies: https://thefactoryfiveforum.com/album.php?albumid=2045
    Garage Pics: https://thefactoryfiveforum.com/album.php?albumid=2041
    POR15 First Try: https://thefactoryfiveforum.com/album.php?albumid=2068
    Silicone application tips: https://thefactoryfiveforum.com/album.php?albumid=2063

  18. #174
    Senior Member
    Join Date
    May 2019
    Posts
    226
    Post Thanks / Like
    The silicone wouldn't keep you from taking the panels back off for repairs or anything like that.

  19. #175
    Namrups's Avatar
    Join Date
    Sep 2021
    Location
    Mechanicville, NY
    Posts
    1,172
    Post Thanks / Like
    It's a sad, sad day

    Most of us have been dreaming of owning, building or driving one of these vehicles. Now that I have actually ordered one I dream about it every day!

    BUT, last night I actually had a dream in my sleep that my daughter and I were driving around in my coupe! I have truly gone over the deep end!
    Scott Pregont
    Present build: 65 Daytona Coupe #393 - Forte 427 EFI crate w/TKX 2.87/ .81 - Ordered 11/16/21 - Delivered 6/23/2022
    Location: Mechanicville, NY
    Build Thread: https://thefactoryfiveforum.com/show...na-Coupe-build
    My Albums
    Build album: https://thefactoryfiveforum.com/album.php?albumid=2151
    Build album 2: https://thefactoryfiveforum.com/album.php?albumid=2437
    Special Tools, Custom Parts, misc supplies: https://thefactoryfiveforum.com/album.php?albumid=2045
    Garage Pics: https://thefactoryfiveforum.com/album.php?albumid=2041
    POR15 First Try: https://thefactoryfiveforum.com/album.php?albumid=2068
    Silicone application tips: https://thefactoryfiveforum.com/album.php?albumid=2063

  20. Likes cgundermann, WIS89, JimStone liked this post
  21. #176
    Senior Member
    Join Date
    May 2021
    Location
    Fort Worth, Texas
    Posts
    477
    Post Thanks / Like
    Welcome to the club,..well,..not driving around with your daughter, but driving around, for sure.

    When the kit arrived, I, immediately, opened the seat box and placed it in the frame and sat for 20 minutes making engines sound while I drove around the track. I only lost it one time.
    My Type 65 Coupe: Ordered May 27, 2021. Arrived November 19, 2021.
    I would like to treat my gas pedal as a binary operator. It would be nice to get the cooperation of everyone in front of me.

  22. Likes WIS89 liked this post
  23. #177
    Namrups's Avatar
    Join Date
    Sep 2021
    Location
    Mechanicville, NY
    Posts
    1,172
    Post Thanks / Like
    Quote Originally Posted by Skuzzy View Post
    Welcome to the club,..well,..not driving around with your daughter, but driving around, for sure.

    When the kit arrived, I, immediately, opened the seat box and placed it in the frame and sat for 20 minutes making engines sound while I drove around the track. I only lost it one time.
    Ya that will probably be me too.
    Scott Pregont
    Present build: 65 Daytona Coupe #393 - Forte 427 EFI crate w/TKX 2.87/ .81 - Ordered 11/16/21 - Delivered 6/23/2022
    Location: Mechanicville, NY
    Build Thread: https://thefactoryfiveforum.com/show...na-Coupe-build
    My Albums
    Build album: https://thefactoryfiveforum.com/album.php?albumid=2151
    Build album 2: https://thefactoryfiveforum.com/album.php?albumid=2437
    Special Tools, Custom Parts, misc supplies: https://thefactoryfiveforum.com/album.php?albumid=2045
    Garage Pics: https://thefactoryfiveforum.com/album.php?albumid=2041
    POR15 First Try: https://thefactoryfiveforum.com/album.php?albumid=2068
    Silicone application tips: https://thefactoryfiveforum.com/album.php?albumid=2063

  24. #178
    Senior Member cgundermann's Avatar
    Join Date
    Feb 2011
    Location
    Chino Valley, Arizona
    Posts
    1,077
    Post Thanks / Like
    You go! You are trucking along getting parts!

    Awesome,

    Chris
    Generation 3 Type 65 Daytona Coupe Complete Kit #151885 received May 6, 2022. Gen 3 Coyote, IRS, Tremec TKX, American Powertrain hydraulic throwout bearing & Wilwood brakes.

    MK4 Basic Kit #7404, 347 EFI - Pro M Racing ECM, 30# injectors, 70 mm throttle body, 80 mm MAF, Edelbrock Performer aluminum heads & RPM II intake, all new G-Force T5, 3:55 gears, Pro 5.0 shifter, 3-link, carbon fiber dash/custom Speedhut gauges and paint by Da Bat.

  25. #179
    Namrups's Avatar
    Join Date
    Sep 2021
    Location
    Mechanicville, NY
    Posts
    1,172
    Post Thanks / Like
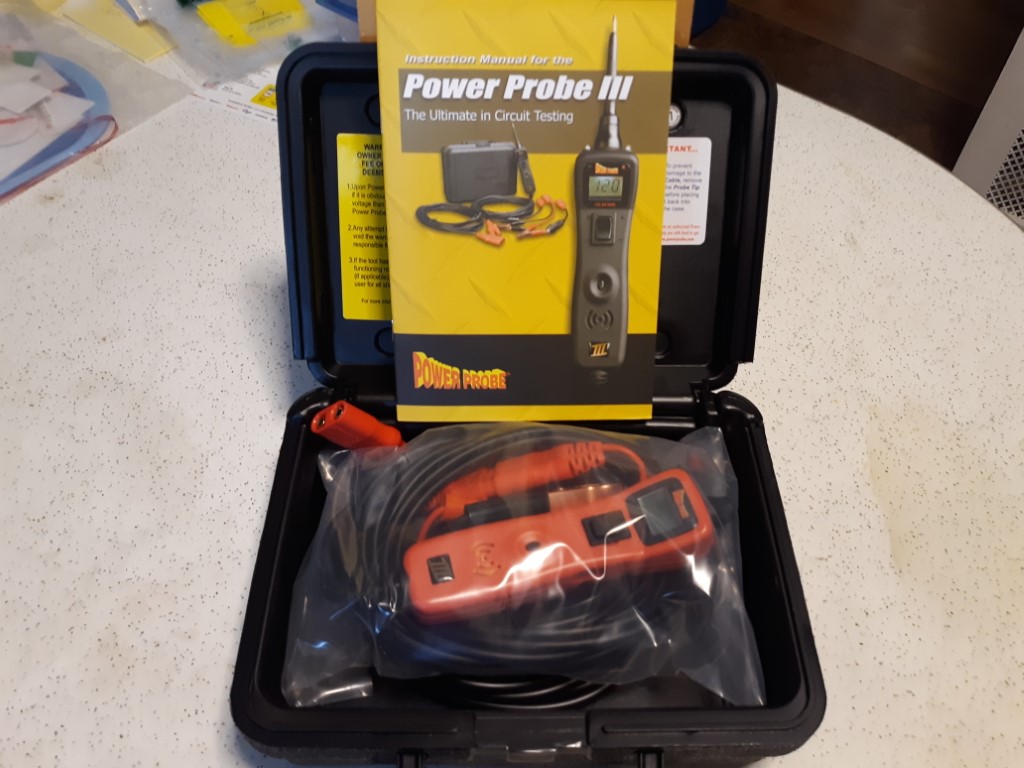
    Power Probe III

    Following Paul's (EdwardB) lead I received my Power Probe III, from Walmart's, today!
    Scott Pregont
    Present build: 65 Daytona Coupe #393 - Forte 427 EFI crate w/TKX 2.87/ .81 - Ordered 11/16/21 - Delivered 6/23/2022
    Location: Mechanicville, NY
    Build Thread: https://thefactoryfiveforum.com/show...na-Coupe-build
    My Albums
    Build album: https://thefactoryfiveforum.com/album.php?albumid=2151
    Build album 2: https://thefactoryfiveforum.com/album.php?albumid=2437
    Special Tools, Custom Parts, misc supplies: https://thefactoryfiveforum.com/album.php?albumid=2045
    Garage Pics: https://thefactoryfiveforum.com/album.php?albumid=2041
    POR15 First Try: https://thefactoryfiveforum.com/album.php?albumid=2068
    Silicone application tips: https://thefactoryfiveforum.com/album.php?albumid=2063

  26. Likes WIS89 liked this post
  27. #180
    Namrups's Avatar
    Join Date
    Sep 2021
    Location
    Mechanicville, NY
    Posts
    1,172
    Post Thanks / Like
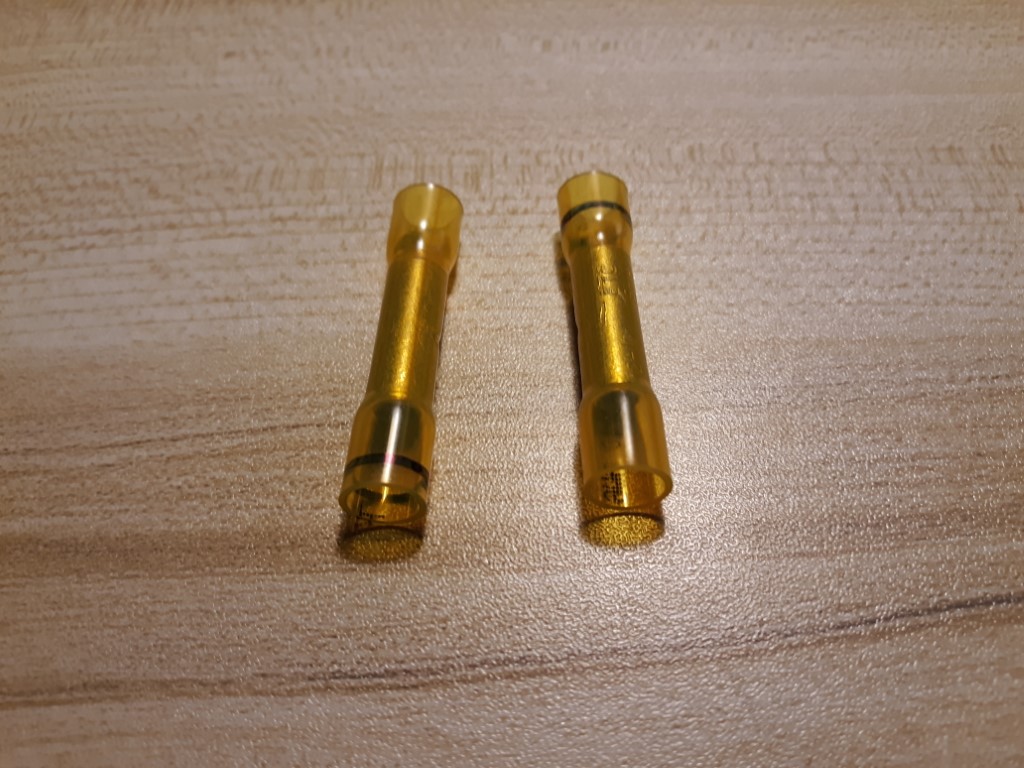
    Molex Permaseal Heat Shrink Connecters

    Received 2 Permaseal connecters today. These were recommended for use on the in-tank fuel pump by Paul. (EdwardB). They are available thru Del-City in a package of ten. Facultyofmusic was offering to pay it forward with his extras and I took him up on his offer. Thanks to him!!
    Scott Pregont
    Present build: 65 Daytona Coupe #393 - Forte 427 EFI crate w/TKX 2.87/ .81 - Ordered 11/16/21 - Delivered 6/23/2022
    Location: Mechanicville, NY
    Build Thread: https://thefactoryfiveforum.com/show...na-Coupe-build
    My Albums
    Build album: https://thefactoryfiveforum.com/album.php?albumid=2151
    Build album 2: https://thefactoryfiveforum.com/album.php?albumid=2437
    Special Tools, Custom Parts, misc supplies: https://thefactoryfiveforum.com/album.php?albumid=2045
    Garage Pics: https://thefactoryfiveforum.com/album.php?albumid=2041
    POR15 First Try: https://thefactoryfiveforum.com/album.php?albumid=2068
    Silicone application tips: https://thefactoryfiveforum.com/album.php?albumid=2063

  28. Thanks WIS89 thanked for this post
    Likes WIS89 liked this post
  29. #181
    Senior Member rhk118's Avatar
    Join Date
    Nov 2021
    Location
    Portland, Maine
    Posts
    362
    Post Thanks / Like
    Awesome! I too received the same driveshaft loop and power probe III....we also have similar "birthdays" in June Namrups...Your build space looking good.

  30. #182
    Namrups's Avatar
    Join Date
    Sep 2021
    Location
    Mechanicville, NY
    Posts
    1,172
    Post Thanks / Like
    Quote Originally Posted by rhk118 View Post
    Awesome! I too received the same driveshaft loop and power probe III....we also have similar "birthdays" in June Namrups...Your build space looking good.
    Thanks! The more I "prepare" the more excited I get.
    Scott Pregont
    Present build: 65 Daytona Coupe #393 - Forte 427 EFI crate w/TKX 2.87/ .81 - Ordered 11/16/21 - Delivered 6/23/2022
    Location: Mechanicville, NY
    Build Thread: https://thefactoryfiveforum.com/show...na-Coupe-build
    My Albums
    Build album: https://thefactoryfiveforum.com/album.php?albumid=2151
    Build album 2: https://thefactoryfiveforum.com/album.php?albumid=2437
    Special Tools, Custom Parts, misc supplies: https://thefactoryfiveforum.com/album.php?albumid=2045
    Garage Pics: https://thefactoryfiveforum.com/album.php?albumid=2041
    POR15 First Try: https://thefactoryfiveforum.com/album.php?albumid=2068
    Silicone application tips: https://thefactoryfiveforum.com/album.php?albumid=2063

  31. #183
    Namrups's Avatar
    Join Date
    Sep 2021
    Location
    Mechanicville, NY
    Posts
    1,172
    Post Thanks / Like
    I will be the first to admit that 1) I am a car nut. 2) I have done my own brakes, exhaust system, U-Joint replacement. Simple stuff! 3) Have never restored or built a car from scratch like this. For this reason I have developed this build thread not only to aid and guide other newbies like myself but to also give the "pro's" the ability to keep me from going down a rabbit hole. It will also give me the documentation to fall back on if I need to in the future. At 69 my memory is not what it used to be so I intend to make these updates quite detailed.
    Scott Pregont
    Present build: 65 Daytona Coupe #393 - Forte 427 EFI crate w/TKX 2.87/ .81 - Ordered 11/16/21 - Delivered 6/23/2022
    Location: Mechanicville, NY
    Build Thread: https://thefactoryfiveforum.com/show...na-Coupe-build
    My Albums
    Build album: https://thefactoryfiveforum.com/album.php?albumid=2151
    Build album 2: https://thefactoryfiveforum.com/album.php?albumid=2437
    Special Tools, Custom Parts, misc supplies: https://thefactoryfiveforum.com/album.php?albumid=2045
    Garage Pics: https://thefactoryfiveforum.com/album.php?albumid=2041
    POR15 First Try: https://thefactoryfiveforum.com/album.php?albumid=2068
    Silicone application tips: https://thefactoryfiveforum.com/album.php?albumid=2063

  32. #184
    Namrups's Avatar
    Join Date
    Sep 2021
    Location
    Mechanicville, NY
    Posts
    1,172
    Post Thanks / Like
    In-Tank Fuel Pump Assembly

    I will be running an EFI system. Following Paul's (EdwardB's) lead, I ordered the Walbro fuel pump, Pro-M high flow fuel hanger and the installation kit. I was also going to order the Molex Permaseal Heat Shrink Connecters. They come in a package of ten and Dan (Facultyofmusic) was kind enough to pay it forward and send me two of his extras. Thanks Dan.


    After receiving everything I had a question about the two different style clamps for the short rubber fuel line and thru a previous post decided to replace these clamps with smooth sided clamps.

    Scott Pregont
    Present build: 65 Daytona Coupe #393 - Forte 427 EFI crate w/TKX 2.87/ .81 - Ordered 11/16/21 - Delivered 6/23/2022
    Location: Mechanicville, NY
    Build Thread: https://thefactoryfiveforum.com/show...na-Coupe-build
    My Albums
    Build album: https://thefactoryfiveforum.com/album.php?albumid=2151
    Build album 2: https://thefactoryfiveforum.com/album.php?albumid=2437
    Special Tools, Custom Parts, misc supplies: https://thefactoryfiveforum.com/album.php?albumid=2045
    Garage Pics: https://thefactoryfiveforum.com/album.php?albumid=2041
    POR15 First Try: https://thefactoryfiveforum.com/album.php?albumid=2068
    Silicone application tips: https://thefactoryfiveforum.com/album.php?albumid=2063

  33. #185
    Namrups's Avatar
    Join Date
    Sep 2021
    Location
    Mechanicville, NY
    Posts
    1,172
    Post Thanks / Like
    In-Tank Fuel Pump Assembly cont.

    Step 1: Undo the 4 small screws holding the upper and lower halves of the hanger assembly.


    Step 2: Separate the upper and lower halve of the hanger assembly.


    Step 3: Remove the plastic caps from the top and bottom of the fuel pump.


    Step 4: Loosely attach the supplied preformed rubber hose to the fuel pump using the smooth sided clamp. I was not sure which way to align the hose or how far the hose was to be pushed on to the fuel pump.


    Step 5: Attach the electrical connector from the installation kit to the fuel pump. The electrical connections on the hanger would not fit the fuel pump but the connector from the installation kit did so they will have to be spliced together. Hence the need for the Permaseal connectors.
    Scott Pregont
    Present build: 65 Daytona Coupe #393 - Forte 427 EFI crate w/TKX 2.87/ .81 - Ordered 11/16/21 - Delivered 6/23/2022
    Location: Mechanicville, NY
    Build Thread: https://thefactoryfiveforum.com/show...na-Coupe-build
    My Albums
    Build album: https://thefactoryfiveforum.com/album.php?albumid=2151
    Build album 2: https://thefactoryfiveforum.com/album.php?albumid=2437
    Special Tools, Custom Parts, misc supplies: https://thefactoryfiveforum.com/album.php?albumid=2045
    Garage Pics: https://thefactoryfiveforum.com/album.php?albumid=2041
    POR15 First Try: https://thefactoryfiveforum.com/album.php?albumid=2068
    Silicone application tips: https://thefactoryfiveforum.com/album.php?albumid=2063

  34. #186
    Namrups's Avatar
    Join Date
    Sep 2021
    Location
    Mechanicville, NY
    Posts
    1,172
    Post Thanks / Like
    In-Tank Fuel Pump Assembly cont.

    Step 6: Loosely attach the fuel pump hose assembly to the upper half of the fuel pump hanger. Again not sure of how far to slide the hose on. At this point everything is still loose.


    Step 7: There is a rubber isolator gasket that goes between the bottom of the fuel pump and the lower half of the hanger. Slipping that into place, the upper and lower hanger halves were reassembled. Keeping everything loose it took a bit of fiddling to get everything lined up and in place. (Having three hands would have been a real help!) I then tightened everything down.


    Step 8: Splicing the electrical wires. Initially I was going to use the connectors supplied with the installation kit. (They should work right?) The more I thought about it the more I decided not to. The Permaseal connectors recommended by Paul were proven to work. These were not. I had no idea if these were "cheap knockoffs" or just cheap off the shelf ones and seeing that they would be immersed in gas I decided on using the Permaseal ones. Am I glad I waited.
    Kit supplied vs. Permaseal
    Scott Pregont
    Present build: 65 Daytona Coupe #393 - Forte 427 EFI crate w/TKX 2.87/ .81 - Ordered 11/16/21 - Delivered 6/23/2022
    Location: Mechanicville, NY
    Build Thread: https://thefactoryfiveforum.com/show...na-Coupe-build
    My Albums
    Build album: https://thefactoryfiveforum.com/album.php?albumid=2151
    Build album 2: https://thefactoryfiveforum.com/album.php?albumid=2437
    Special Tools, Custom Parts, misc supplies: https://thefactoryfiveforum.com/album.php?albumid=2045
    Garage Pics: https://thefactoryfiveforum.com/album.php?albumid=2041
    POR15 First Try: https://thefactoryfiveforum.com/album.php?albumid=2068
    Silicone application tips: https://thefactoryfiveforum.com/album.php?albumid=2063

  35. Likes JimStone liked this post
  36. #187
    Namrups's Avatar
    Join Date
    Sep 2021
    Location
    Mechanicville, NY
    Posts
    1,172
    Post Thanks / Like
    In-Tank Fuel Pump Assembly cont.

    Step 8 cont.:

    Permaseal connectors in place before heat shrinking.


    After heat shrinking.


    Step 9: Attach the filter sock to the bottom of the fuel pump. I had no idea how tight this fit.


    Completed assembly


    I know that for most of the folk on this forum this is child's play but I am proud of myself for taking on something that is completely new to me and completing it. It helps to build my confidence in my ability to learn new things and take on new challenges.
    Scott Pregont
    Present build: 65 Daytona Coupe #393 - Forte 427 EFI crate w/TKX 2.87/ .81 - Ordered 11/16/21 - Delivered 6/23/2022
    Location: Mechanicville, NY
    Build Thread: https://thefactoryfiveforum.com/show...na-Coupe-build
    My Albums
    Build album: https://thefactoryfiveforum.com/album.php?albumid=2151
    Build album 2: https://thefactoryfiveforum.com/album.php?albumid=2437
    Special Tools, Custom Parts, misc supplies: https://thefactoryfiveforum.com/album.php?albumid=2045
    Garage Pics: https://thefactoryfiveforum.com/album.php?albumid=2041
    POR15 First Try: https://thefactoryfiveforum.com/album.php?albumid=2068
    Silicone application tips: https://thefactoryfiveforum.com/album.php?albumid=2063

  37. Likes WIS89 liked this post
  38. #188
    Senior Member
    Join Date
    May 2021
    Location
    Fort Worth, Texas
    Posts
    477
    Post Thanks / Like
    Nicely done.
    My Type 65 Coupe: Ordered May 27, 2021. Arrived November 19, 2021.
    I would like to treat my gas pedal as a binary operator. It would be nice to get the cooperation of everyone in front of me.

  39. #189
    Namrups's Avatar
    Join Date
    Sep 2021
    Location
    Mechanicville, NY
    Posts
    1,172
    Post Thanks / Like
    Quote Originally Posted by Skuzzy View Post
    Nicely done.
    Thanks!
    Scott Pregont
    Present build: 65 Daytona Coupe #393 - Forte 427 EFI crate w/TKX 2.87/ .81 - Ordered 11/16/21 - Delivered 6/23/2022
    Location: Mechanicville, NY
    Build Thread: https://thefactoryfiveforum.com/show...na-Coupe-build
    My Albums
    Build album: https://thefactoryfiveforum.com/album.php?albumid=2151
    Build album 2: https://thefactoryfiveforum.com/album.php?albumid=2437
    Special Tools, Custom Parts, misc supplies: https://thefactoryfiveforum.com/album.php?albumid=2045
    Garage Pics: https://thefactoryfiveforum.com/album.php?albumid=2041
    POR15 First Try: https://thefactoryfiveforum.com/album.php?albumid=2068
    Silicone application tips: https://thefactoryfiveforum.com/album.php?albumid=2063

  40. #190
    Senior Member edwardb's Avatar
    Join Date
    Feb 2011
    Location
    Lake Orion, Michigan
    Posts
    10,875
    Post Thanks / Like
    Nice work on the pump. And nice you could get those shrink sleeves. The best I've found. It was a ways back, but a couple comments on the discussion regarding nutserts (aka rivnuts): (1) You'll like those insertion tools. I've tried every type, and those give me the best results by far. Like every one of the tools, some practice is required to set them properly. Too loose and they'll potentially spin. (An oversize hole can do that too.) Too tight and you can distort the nutsert (e.g. pull it off center) or damage the threads. (2) The thicker-walled DOM tubes in the frame (e.g. the main 4-inch tubes, plus others like the 2x2 square dash tube) have plenty of thickness to allow very adequate 10-32 (or even larger) tapped threads vs. using a nutsert. But the thinwall tubing used for much of the frame is not adequate. If planning to having it removable, then a nutsert is required. (3) But overwhelmingly for me anyway, the 10-32 nutserts are used for panel-to-panel connections. Like the splash guards. Or the access cover in the driver's side footbox. Etc. For those locations, a nutsert will always be required if you want threads for a removable connection. (4) Anyone who thinks a joint assembled with silicone can be easily taken back apart hasn't tried it. Don't plan on them coming apart without some damage and potentially ruining something. Been there done that. (5) How much a nutsert stands above the surface depends on the style. But generally it's not an issue.
    Last edited by edwardb; 02-09-2022 at 09:21 AM.
    Build 1: Mk3 Roadster #5125. Sold 11/08/2014. Build 2: Mk4 Roadster #7750. Sold 04/10/2017. Build Thread
    Build 3: Mk4 Roadster 20th Anniversary #8674. Sold 09/07/2020. Build Thread and Video. Build 4: Gen 3 Type 65 Coupe #59. Gen 3 Coyote. Legal 03/04/2020. Build Thread and Video
    Build 5: 35 Hot Rod Truck #138. LS3 and 4L65E auto. Rcvd 01/05/2021. Legal 04/20/2023. Build Thread. Sold 11/9/2023.

  41. Thanks WIS89 thanked for this post
    Likes rhk118 liked this post
  42. #191
    Namrups's Avatar
    Join Date
    Sep 2021
    Location
    Mechanicville, NY
    Posts
    1,172
    Post Thanks / Like
    Quote Originally Posted by edwardb View Post
    Nice work on the pump. And nice you could get those shrink sleeves. The best I've found. It was a ways back, but a couple comments on the discussion regarding nutserts (aka rivnuts): (1) You'll like those insertion tools. I've tried every type, and those give me the best results by far. Like every one of the tools, some practice is required to set them properly. Too loose and they'll potentially spin. (An oversize hole can do that too.) Too tight and you can distort the nutsert (e.g. pull it off center) or damage the threads. (2) The DOM tubes in the frame (e.g. the main 4-inch tubes, plus others like the 2x2 square dash tube) have plenty of thickness to allow very adequate 10-32 (or even larger) tapped threads vs. using a nutsert. But the thinwall tubing used for much of the frame is not adequate. If planning to having it removable, then a nutsert is required. (3) But overwhelmingly for me anyway, the 10-32 nutserts are used for panel-to-panel connections. Like the splash guards. Or the access cover in the driver's side footbox. Etc. For those locations, a nutsert will always be required if you want threads for a removable connection. (4) Anyone who thinks a joint assembled with silicone can be easily taken back apart hasn't tried it. Don't plan it them coming apart without some damage and potentially ruining something. Been there done that. (5) How much a nutsert stands above the surface depends on the style. But generally it's not an issue.
    I really appreciate any input you give me Paul. Whether its encouragement for a good job or constructive criticism. Having a builder of your caliber looking over my shoulder is a very good feeling.
    Scott Pregont
    Present build: 65 Daytona Coupe #393 - Forte 427 EFI crate w/TKX 2.87/ .81 - Ordered 11/16/21 - Delivered 6/23/2022
    Location: Mechanicville, NY
    Build Thread: https://thefactoryfiveforum.com/show...na-Coupe-build
    My Albums
    Build album: https://thefactoryfiveforum.com/album.php?albumid=2151
    Build album 2: https://thefactoryfiveforum.com/album.php?albumid=2437
    Special Tools, Custom Parts, misc supplies: https://thefactoryfiveforum.com/album.php?albumid=2045
    Garage Pics: https://thefactoryfiveforum.com/album.php?albumid=2041
    POR15 First Try: https://thefactoryfiveforum.com/album.php?albumid=2068
    Silicone application tips: https://thefactoryfiveforum.com/album.php?albumid=2063

  43. Likes rhk118, WIS89 liked this post
  44. #192
    Namrups's Avatar
    Join Date
    Sep 2021
    Location
    Mechanicville, NY
    Posts
    1,172
    Post Thanks / Like
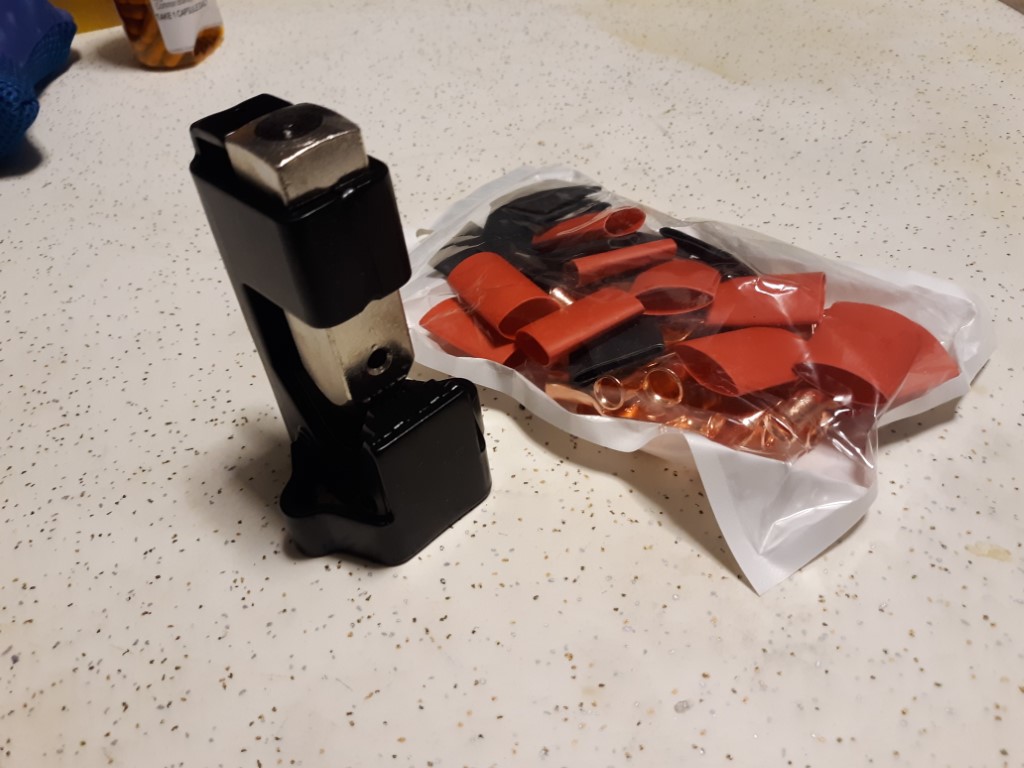
    Battery Cable Lug Crimping Tool

    Knowing that good connections in the electrical system are a must, I was searching for a tool to crimp battery cable lugs. I found some top line hydraulic tools that I drooled over. Then common sense smacked me in the back of the head. I will have less than a dozen heavy cable lugs to crimp. I do not need that kind of tool. On Amazon I found a simple tool that uses a hammer. It comes with a number of different size lugs and shrink wrap, all in one kit, all for $26.74. It arrived today!!
    Scott Pregont
    Present build: 65 Daytona Coupe #393 - Forte 427 EFI crate w/TKX 2.87/ .81 - Ordered 11/16/21 - Delivered 6/23/2022
    Location: Mechanicville, NY
    Build Thread: https://thefactoryfiveforum.com/show...na-Coupe-build
    My Albums
    Build album: https://thefactoryfiveforum.com/album.php?albumid=2151
    Build album 2: https://thefactoryfiveforum.com/album.php?albumid=2437
    Special Tools, Custom Parts, misc supplies: https://thefactoryfiveforum.com/album.php?albumid=2045
    Garage Pics: https://thefactoryfiveforum.com/album.php?albumid=2041
    POR15 First Try: https://thefactoryfiveforum.com/album.php?albumid=2068
    Silicone application tips: https://thefactoryfiveforum.com/album.php?albumid=2063

  45. #193
    Namrups's Avatar
    Join Date
    Sep 2021
    Location
    Mechanicville, NY
    Posts
    1,172
    Post Thanks / Like
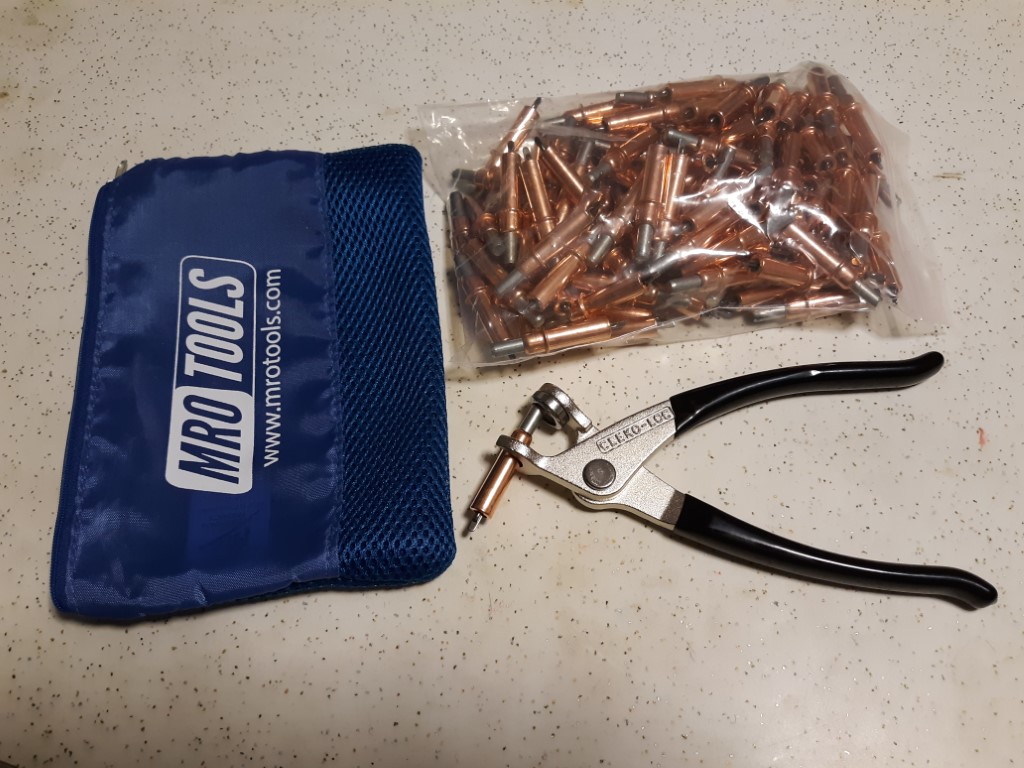
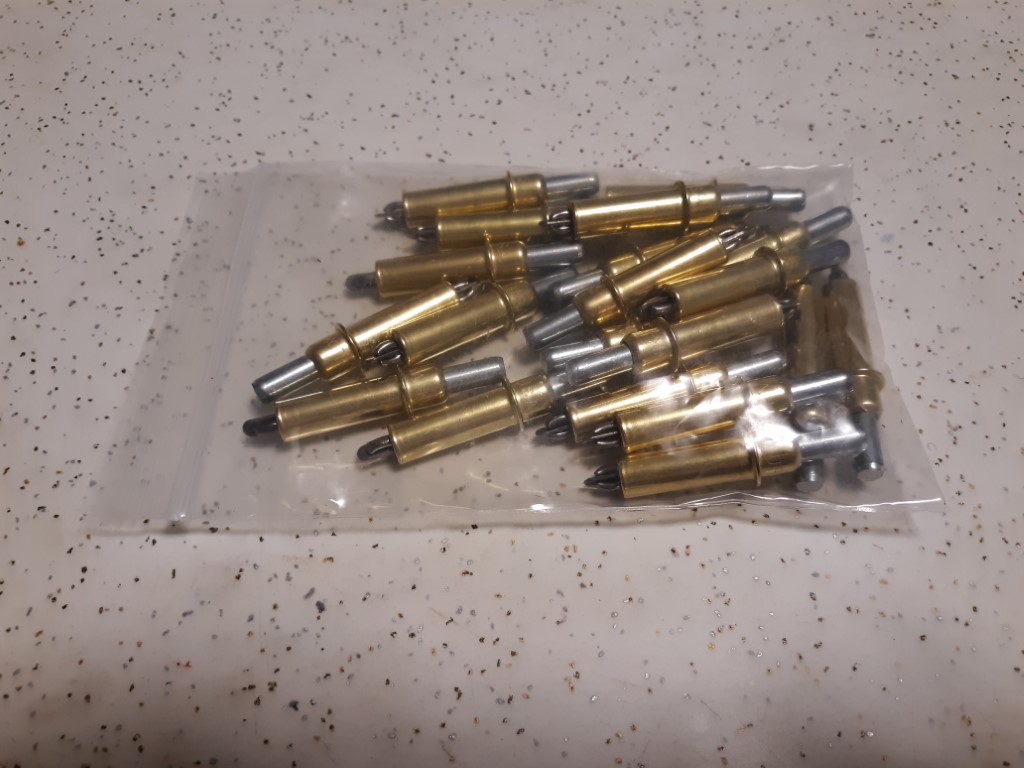
    Cleco's

    Received my Cleco's from Amazon.

    100 1/8" Cleco's with pliers and carry bag

    20 3/16" Cleco's
    Scott Pregont
    Present build: 65 Daytona Coupe #393 - Forte 427 EFI crate w/TKX 2.87/ .81 - Ordered 11/16/21 - Delivered 6/23/2022
    Location: Mechanicville, NY
    Build Thread: https://thefactoryfiveforum.com/show...na-Coupe-build
    My Albums
    Build album: https://thefactoryfiveforum.com/album.php?albumid=2151
    Build album 2: https://thefactoryfiveforum.com/album.php?albumid=2437
    Special Tools, Custom Parts, misc supplies: https://thefactoryfiveforum.com/album.php?albumid=2045
    Garage Pics: https://thefactoryfiveforum.com/album.php?albumid=2041
    POR15 First Try: https://thefactoryfiveforum.com/album.php?albumid=2068
    Silicone application tips: https://thefactoryfiveforum.com/album.php?albumid=2063

  46. #194
    Member James Morse's Avatar
    Join Date
    Feb 2020
    Location
    SW Virginia
    Posts
    32
    Post Thanks / Like
    Stupid question... the clecos are to hold panels in place temporarily, but then when you want to actually rivet or rivnut or whatever, you take them out... how? They are 'sort of' crimped in there so you need to do what, when ready to do the actual assembly?

  47. #195
    Senior Member
    Join Date
    May 2019
    Posts
    226
    Post Thanks / Like
    Quote Originally Posted by James Morse View Post
    Stupid question... the clecos are to hold panels in place temporarily, but then when you want to actually rivet or rivnut or whatever, you take them out... how? They are 'sort of' crimped in there so you need to do what, when ready to do the actual assembly?
    The clecos are spring loaded, there is a plier like tool that you use to compress them to put them in and take them out.

  48. Thanks James Morse thanked for this post
  49. #196
    Namrups's Avatar
    Join Date
    Sep 2021
    Location
    Mechanicville, NY
    Posts
    1,172
    Post Thanks / Like
    One of the batteries for my drills does not hold a charge anymore. I was online pricing an OEM replacement. $90.00! I've had these drills for over ten years. I decided to retire them to my HO Railroad I'm building. Has anyone had any luck with the cheap batteries? Having made that decision I now needed to go buy a new one!!! I recently ordered the battery operated Milwaukee M18 Pop Rivet gun so I figured a new Milwaukee M18 drill would keep it company nicely. A trip to Home Depot was in order. I found a set of a Drill, Impact Driver, 2 batteries, charger and case. Had my name all over it!


    As long as I was out I took a ride to my local Harbor Freight. Walked out with:
    26 piece SAE/Metric Ball End Hex Set


    Quinn Snap Ring Pliers


    Roller Seat
    Scott Pregont
    Present build: 65 Daytona Coupe #393 - Forte 427 EFI crate w/TKX 2.87/ .81 - Ordered 11/16/21 - Delivered 6/23/2022
    Location: Mechanicville, NY
    Build Thread: https://thefactoryfiveforum.com/show...na-Coupe-build
    My Albums
    Build album: https://thefactoryfiveforum.com/album.php?albumid=2151
    Build album 2: https://thefactoryfiveforum.com/album.php?albumid=2437
    Special Tools, Custom Parts, misc supplies: https://thefactoryfiveforum.com/album.php?albumid=2045
    Garage Pics: https://thefactoryfiveforum.com/album.php?albumid=2041
    POR15 First Try: https://thefactoryfiveforum.com/album.php?albumid=2068
    Silicone application tips: https://thefactoryfiveforum.com/album.php?albumid=2063

  50. #197
    Senior Member edwardb's Avatar
    Join Date
    Feb 2011
    Location
    Lake Orion, Michigan
    Posts
    10,875
    Post Thanks / Like
    You bought the M18 rivet puller? Are you sure? $900 and way overkill for these builds. Pretty sure it doesn't even pull the 1/8" size rivets, the most common. I'm betting you have the M12 version. I have one and it's perfect.

    I've actually found all the M12 tools (I think have have most of them... ) are well sized for these builds. Especially the ones indicated as "Fuel" as these are the brushless motor versions and are really excellent.
    Build 1: Mk3 Roadster #5125. Sold 11/08/2014. Build 2: Mk4 Roadster #7750. Sold 04/10/2017. Build Thread
    Build 3: Mk4 Roadster 20th Anniversary #8674. Sold 09/07/2020. Build Thread and Video. Build 4: Gen 3 Type 65 Coupe #59. Gen 3 Coyote. Legal 03/04/2020. Build Thread and Video
    Build 5: 35 Hot Rod Truck #138. LS3 and 4L65E auto. Rcvd 01/05/2021. Legal 04/20/2023. Build Thread. Sold 11/9/2023.

  51. #198
    Namrups's Avatar
    Join Date
    Sep 2021
    Location
    Mechanicville, NY
    Posts
    1,172
    Post Thanks / Like
    Quote Originally Posted by edwardb View Post
    You bought the M18 rivet puller? Are you sure? $900 and way overkill for these builds. Pretty sure it doesn't even pull the 1/8" size rivets, the most common. I'm betting you have the M12 version. I have one and it's perfect.

    I've actually found all the M12 tools (I think have have most of them... ) are well sized for these builds. Especially the ones indicated as "Fuel" as these are the brushless motor versions and are really excellent.
    You are correct Sir! It's the M12. Fingers working faster than the brain. Seems to happen more and more as I "mature" in age.
    Scott Pregont
    Present build: 65 Daytona Coupe #393 - Forte 427 EFI crate w/TKX 2.87/ .81 - Ordered 11/16/21 - Delivered 6/23/2022
    Location: Mechanicville, NY
    Build Thread: https://thefactoryfiveforum.com/show...na-Coupe-build
    My Albums
    Build album: https://thefactoryfiveforum.com/album.php?albumid=2151
    Build album 2: https://thefactoryfiveforum.com/album.php?albumid=2437
    Special Tools, Custom Parts, misc supplies: https://thefactoryfiveforum.com/album.php?albumid=2045
    Garage Pics: https://thefactoryfiveforum.com/album.php?albumid=2041
    POR15 First Try: https://thefactoryfiveforum.com/album.php?albumid=2068
    Silicone application tips: https://thefactoryfiveforum.com/album.php?albumid=2063

  52. #199
    Senior Member
    Join Date
    May 2019
    Posts
    226
    Post Thanks / Like
    I'm a fan of the RYOBI cordless stuff from Home Depot, works really well for me and a good bit less expensive than the Milwaukee or other bigger name brands.
    They don't offer the rivet gun though, at least not yet, but they are coming out with lots more of the HP brushless motor tools and higher capacity batteries.

    I also just picked up a new roller mechanic seat, they were on a one day sale yesterday at Northern, think it was $16.49.

  53. #200
    Namrups's Avatar
    Join Date
    Sep 2021
    Location
    Mechanicville, NY
    Posts
    1,172
    Post Thanks / Like
    Quote Originally Posted by Ltngdrvr View Post
    I'm a fan of the RYOBI cordless stuff from Home Depot, works really well for me and a good bit less expensive than the Milwaukee or other bigger name brands.
    They don't offer the rivet gun though, at least not yet, but they are coming out with lots more of the HP brushless motor tools and higher capacity batteries.

    I also just picked up a new roller mechanic seat, they were on a one day sale yesterday at Northern, think it was $16.49.
    I've heard both good and bad with the RYOBI. I had one that I had no trouble with. I have not heard anything but positive on the Milwaukee brand. Yes, more expensive but IMO worth it. The seat was an impulse buy. I was there, it was on the shelf, I put it into the cart. With items under $50.00 I usually don't shop for the best deal. Not worth my time. That's just me.
    Scott Pregont
    Present build: 65 Daytona Coupe #393 - Forte 427 EFI crate w/TKX 2.87/ .81 - Ordered 11/16/21 - Delivered 6/23/2022
    Location: Mechanicville, NY
    Build Thread: https://thefactoryfiveforum.com/show...na-Coupe-build
    My Albums
    Build album: https://thefactoryfiveforum.com/album.php?albumid=2151
    Build album 2: https://thefactoryfiveforum.com/album.php?albumid=2437
    Special Tools, Custom Parts, misc supplies: https://thefactoryfiveforum.com/album.php?albumid=2045
    Garage Pics: https://thefactoryfiveforum.com/album.php?albumid=2041
    POR15 First Try: https://thefactoryfiveforum.com/album.php?albumid=2068
    Silicone application tips: https://thefactoryfiveforum.com/album.php?albumid=2063

Page 5 of 28 FirstFirst ... 3456715 ... LastLast

Tags for this Thread

Posting Permissions

  • You may not post new threads
  • You may not post replies
  • You may not post attachments
  • You may not edit your posts
  •  

FFMetal

Visit our community sponsor