-
06-03-2022, 09:14 AM
#1481
Install update:
I have everything in place to finish up the install except for one special fitting that got damaged (don't ask) that I'm waiting on a replacement to arrive. Unfortunately, that fitting isn't expected to arrive until Monday of next week. Because of the location of the fitting, I want to wait until I have it installed before setting the manifold in place permanently. I'm hoping that next weekend will wrap this up and I'll have the car running again. I have a tuner identified that I can have dial it all in once I have it running.
-
Post Thanks / Like - 0 Thanks, 1 Likes
-
06-04-2022, 10:42 AM
#1482
I just got a text from USPS that my fitting will be delivered today! There is a real chance that I could have the car running this weekend. I'll post updates as I get them.
-
Post Thanks / Like - 0 Thanks, 2 Likes
-
06-04-2022, 12:17 PM
#1483
Senior Member

Very exciting - hope reassembly goes well!
Mk III 4880: 3:55 - 3 link, T-5, 347, Holley Sniper/dual sync distributor, Comp Cams XE274HR, Edelbrock RPM Heads
-
06-04-2022, 08:53 PM
#1484
-
06-04-2022, 09:16 PM
#1485
Senior Member


Originally Posted by
Papa

the distributor cap won't work with the 90 degree boots. I'm going to need to find straight boots to clear the fuel rails. I'm not seeing any easy solutions to this yet. If anyone has any recommendations, I'm all ears.
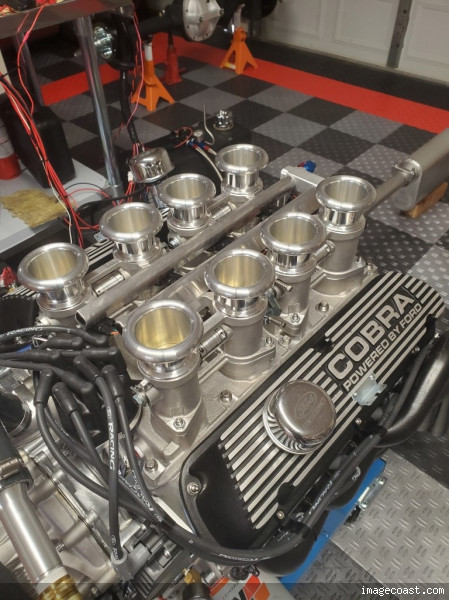
I used a Holley 565-201 Dual Sync distributor with Ford M-12259-M302 wires. It's tight but fits.
-
06-04-2022, 09:36 PM
#1486
The issue is the fuel rails interfere with the wires coming off at a 90 degree angle. I'm going to try to change the boots to these:
https://www.amazon.com/gp/product/B0...?ie=UTF8&psc=1
I'm also running the Holley Dual Sync distributor.
-
06-05-2022, 07:03 AM
#1487
Senior Member


Originally Posted by
Papa

Mine fit but very close.
-
06-05-2022, 02:16 PM
#1488
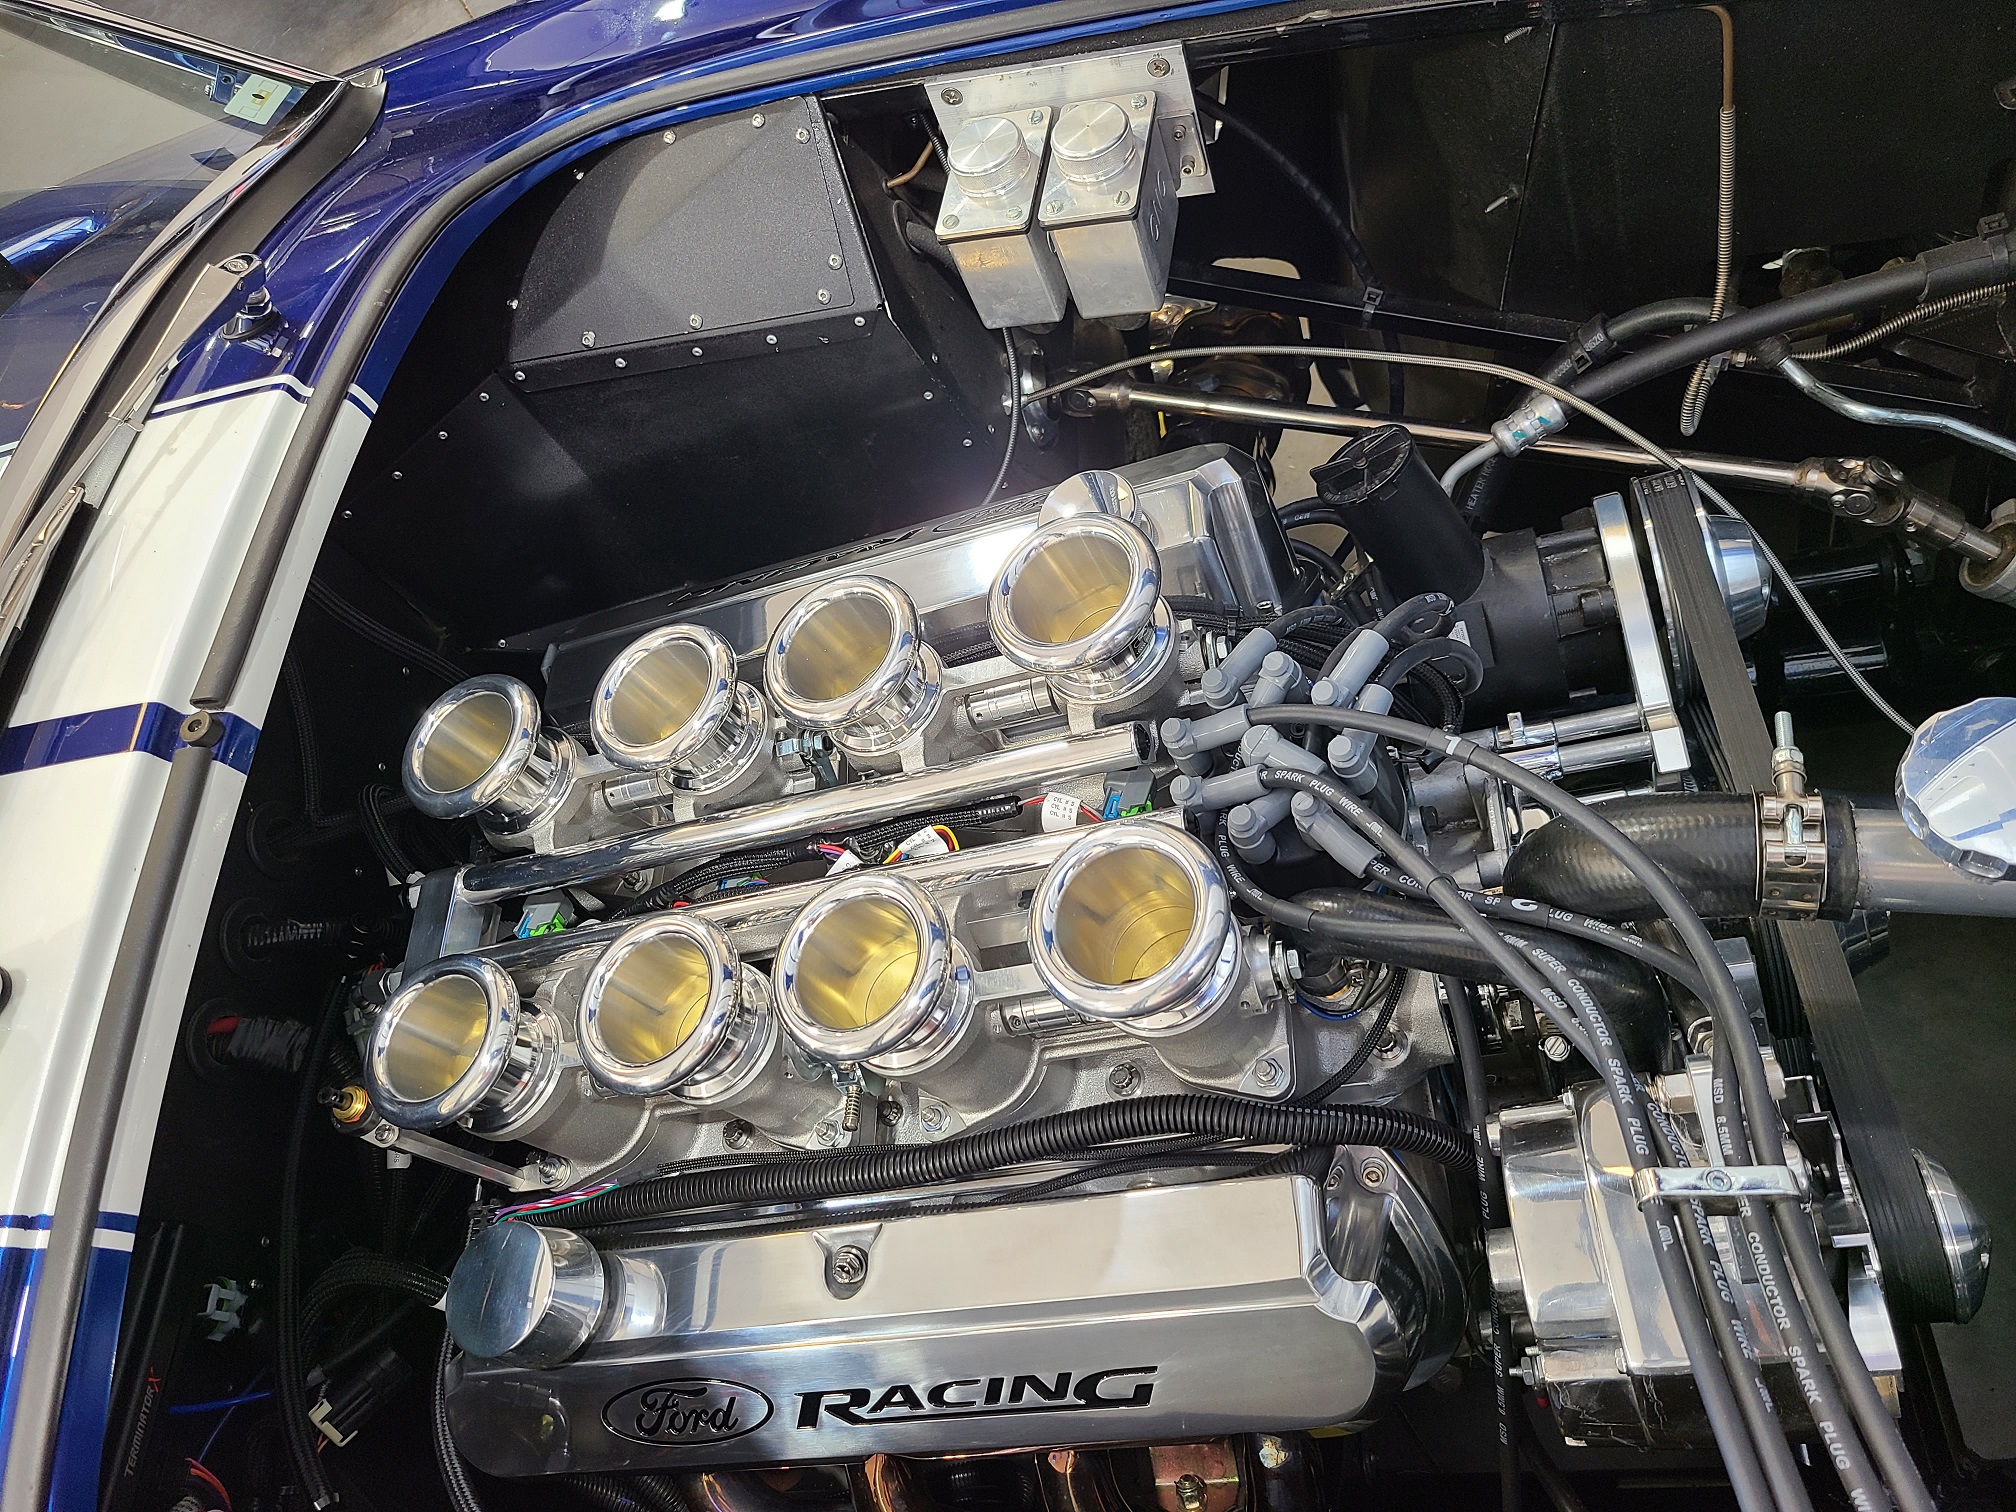
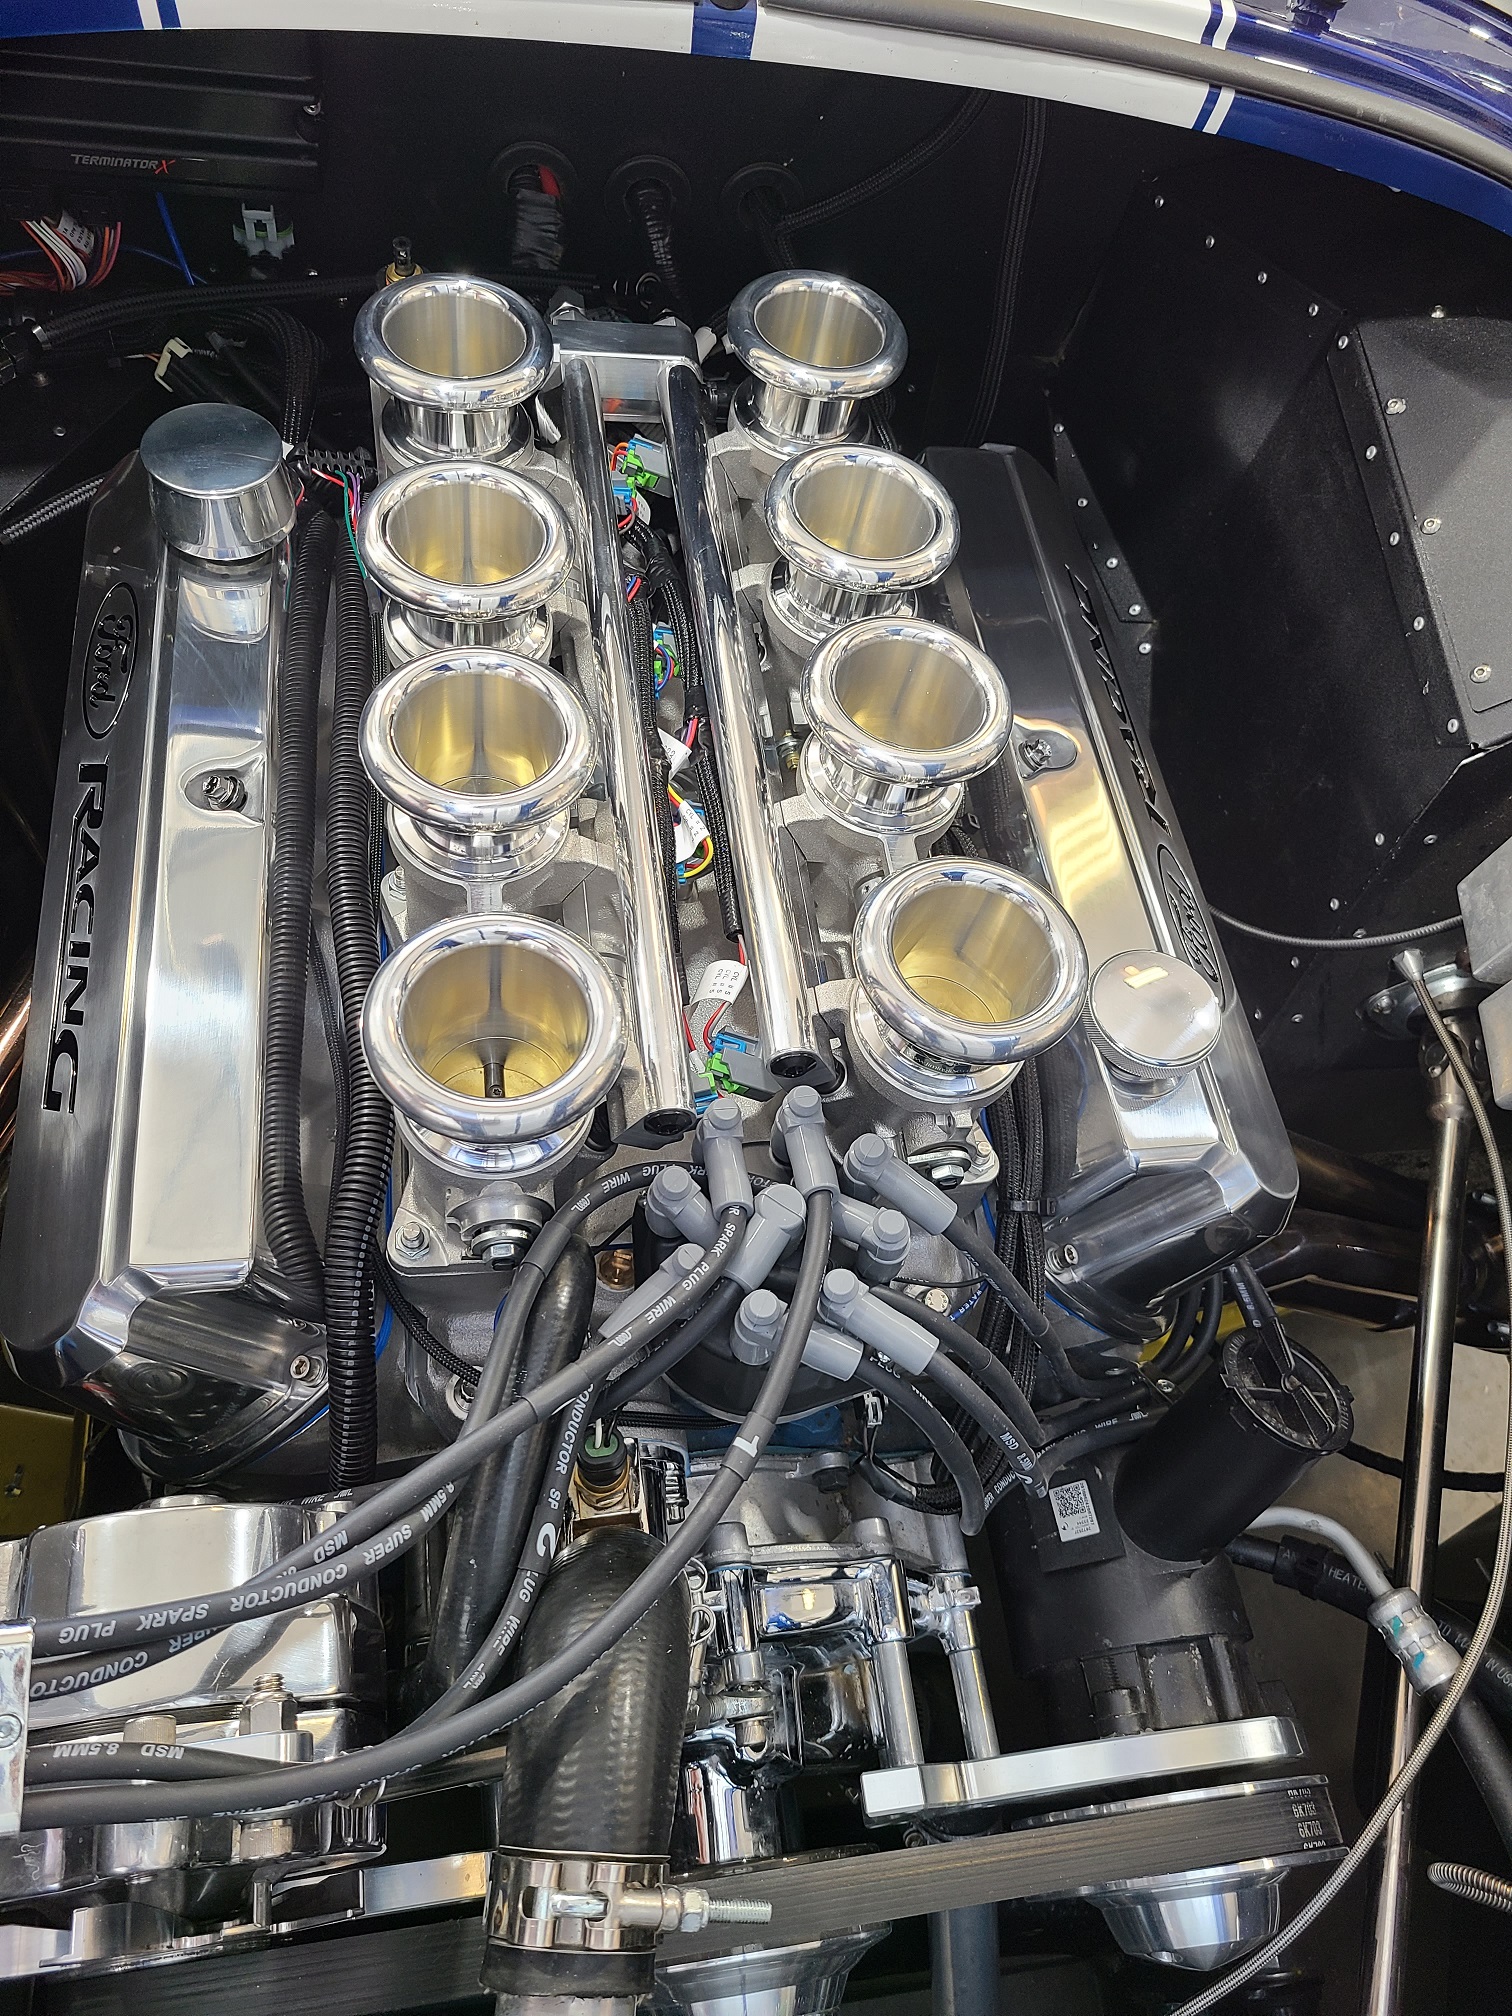
A bit more progress on the install today. All the electrical, sensor, water, and fuel connections are complete! I still need to figure out a clean way to connect the plug wires to the distributor. I've reached out to Jim Inglese to see if he has a recommendation. In the mean time, I'll wait for the 180 degree boots to arrive and may look at the wires Mike recommended. The boots look a lot smaller on those.
A few pictures with the new valve covers installed:
-
Post Thanks / Like - 1 Thanks, 6 Likes
-
06-05-2022, 02:35 PM
#1489
Man, that's just a great look. I've got engine bay envy.
MKIV complete kit w/powder coating and cut outs, serial #9189 delivered 10/10/17, first start - 10/5/18, legal - 10/08/20. Blueprint 306 w/Holley Sniper EFI, TKO 600, power steering, Breeze fan shroud, trunk cubby, & engine compartment battery kit, CNC brake reservoirs, RT turn signal & gas pedal, mechanical throttle linkage, METCO safety loop, GASN side pipes, drop trunk, dual chrome roll bars, vintage gauges, glove box, custom center console, cup holders, and speakers.
-
Post Thanks / Like - 1 Thanks, 1 Likes
 Papa
Papa thanked for this post
 Papa
Papa liked this post
-
06-05-2022, 03:53 PM
#1490
Senior Member

I agree - really clean installation. Great work!
Mk III 4880: 3:55 - 3 link, T-5, 347, Holley Sniper/dual sync distributor, Comp Cams XE274HR, Edelbrock RPM Heads
-
Post Thanks / Like - 1 Thanks, 1 Likes
 Papa
Papa thanked for this post
 Papa
Papa liked this post
-
06-05-2022, 04:53 PM
#1491
Looks like even straight boots won't clear. I'm sure Inglese has run across that problem. FYI, Holley makes a low profile Dual Sync distributor that might be the answer.
Mk IV Roadster, 347/516 HP, 8 stack injection, Holley HP ECU, Astro Performance T5, 3-Link 4.10 gears, A/C, PS, PB Purchased 08/2015, Graduated 02/2017
-
06-05-2022, 05:19 PM
#1492
Thanks for the tip, Bob. I took a look and the low profile version won't work with the intake because of the water neck. The regular distributor just barely clears it.
I think if I can get the thing to move enough to set the limits and then lock it down, I may be okay. I can do that without any wires attached and then "creatively" route the wires.
Last edited by Papa; 06-05-2022 at 05:41 PM.
-
06-06-2022, 07:43 AM
#1493
20th Anniversary Mk IV, A50XS Coyote, TKO 600, Trunk Drop Box, Trunk Battery Box, Cubby Hole, Seat Heaters, Radiator hanger and shroud.
-
Post Thanks / Like - 1 Thanks, 0 Likes
 Papa
Papa thanked for this post
-
06-06-2022, 08:00 AM
#1494

Originally Posted by
Railroad

I've looked at different caps, but don't see anything from Holley on using a different cap on the Dual Sync distributor.
-
06-06-2022, 08:47 AM
#1495
Senior Member

Is the concern with plug wires that you can't rotate the distributor to set timing? I thought the dual synch was set to a high number BTDC like 50 degrees then the controller software program dropped the timing as needed/programmed. In which case you really just drop the distributor in the correct spot like 50 degrees BTDC and don't need to turn it again. At least that is how it works with my MSD 6AL2 programmable ignition box.
I'm running Weber IDFs and had to grind my intake manifold a bit for the distributor to even drop in far enough. Not the same setup as you but very tight fit.
Last edited by svassh; 06-06-2022 at 08:52 AM.
MK2 Roadster - 347 - Boss 302 Crate 4x2 Weber 44 IDFs
-
06-06-2022, 11:27 AM
#1496


Originally Posted by
svassh

Is the concern with plug wires that you can't rotate the distributor to set timing? I thought the dual synch was set to a high number BTDC like 50 degrees then the controller software program dropped the timing as needed/programmed. In which case you really just drop the distributor in the correct spot like 50 degrees BTDC and don't need to turn it again. At least that is how it works with my MSD 6AL2 programmable ignition box.
I'm running Weber IDFs and had to grind my intake manifold a bit for the distributor to even drop in far enough. Not the same setup as you but very tight fit.
You're correct. I will set the distributor without the cap on initially. Once set, the cap goes on and then the timing is verified with the computer compared to the balancer. If they differ, the distributor is rotated until the balancer matched the computer and that's it. My initial concern was that when I installed the cap, I couldn't rotate the distributor at all. After removing the retainer that holds the boots tight and repositioning a couple of the wires near the fuel rail, I think I'll be okay. I may not be able to use the retainer, but have other boots that I can use.
-
06-07-2022, 08:00 PM
#1497
Another picture to share:
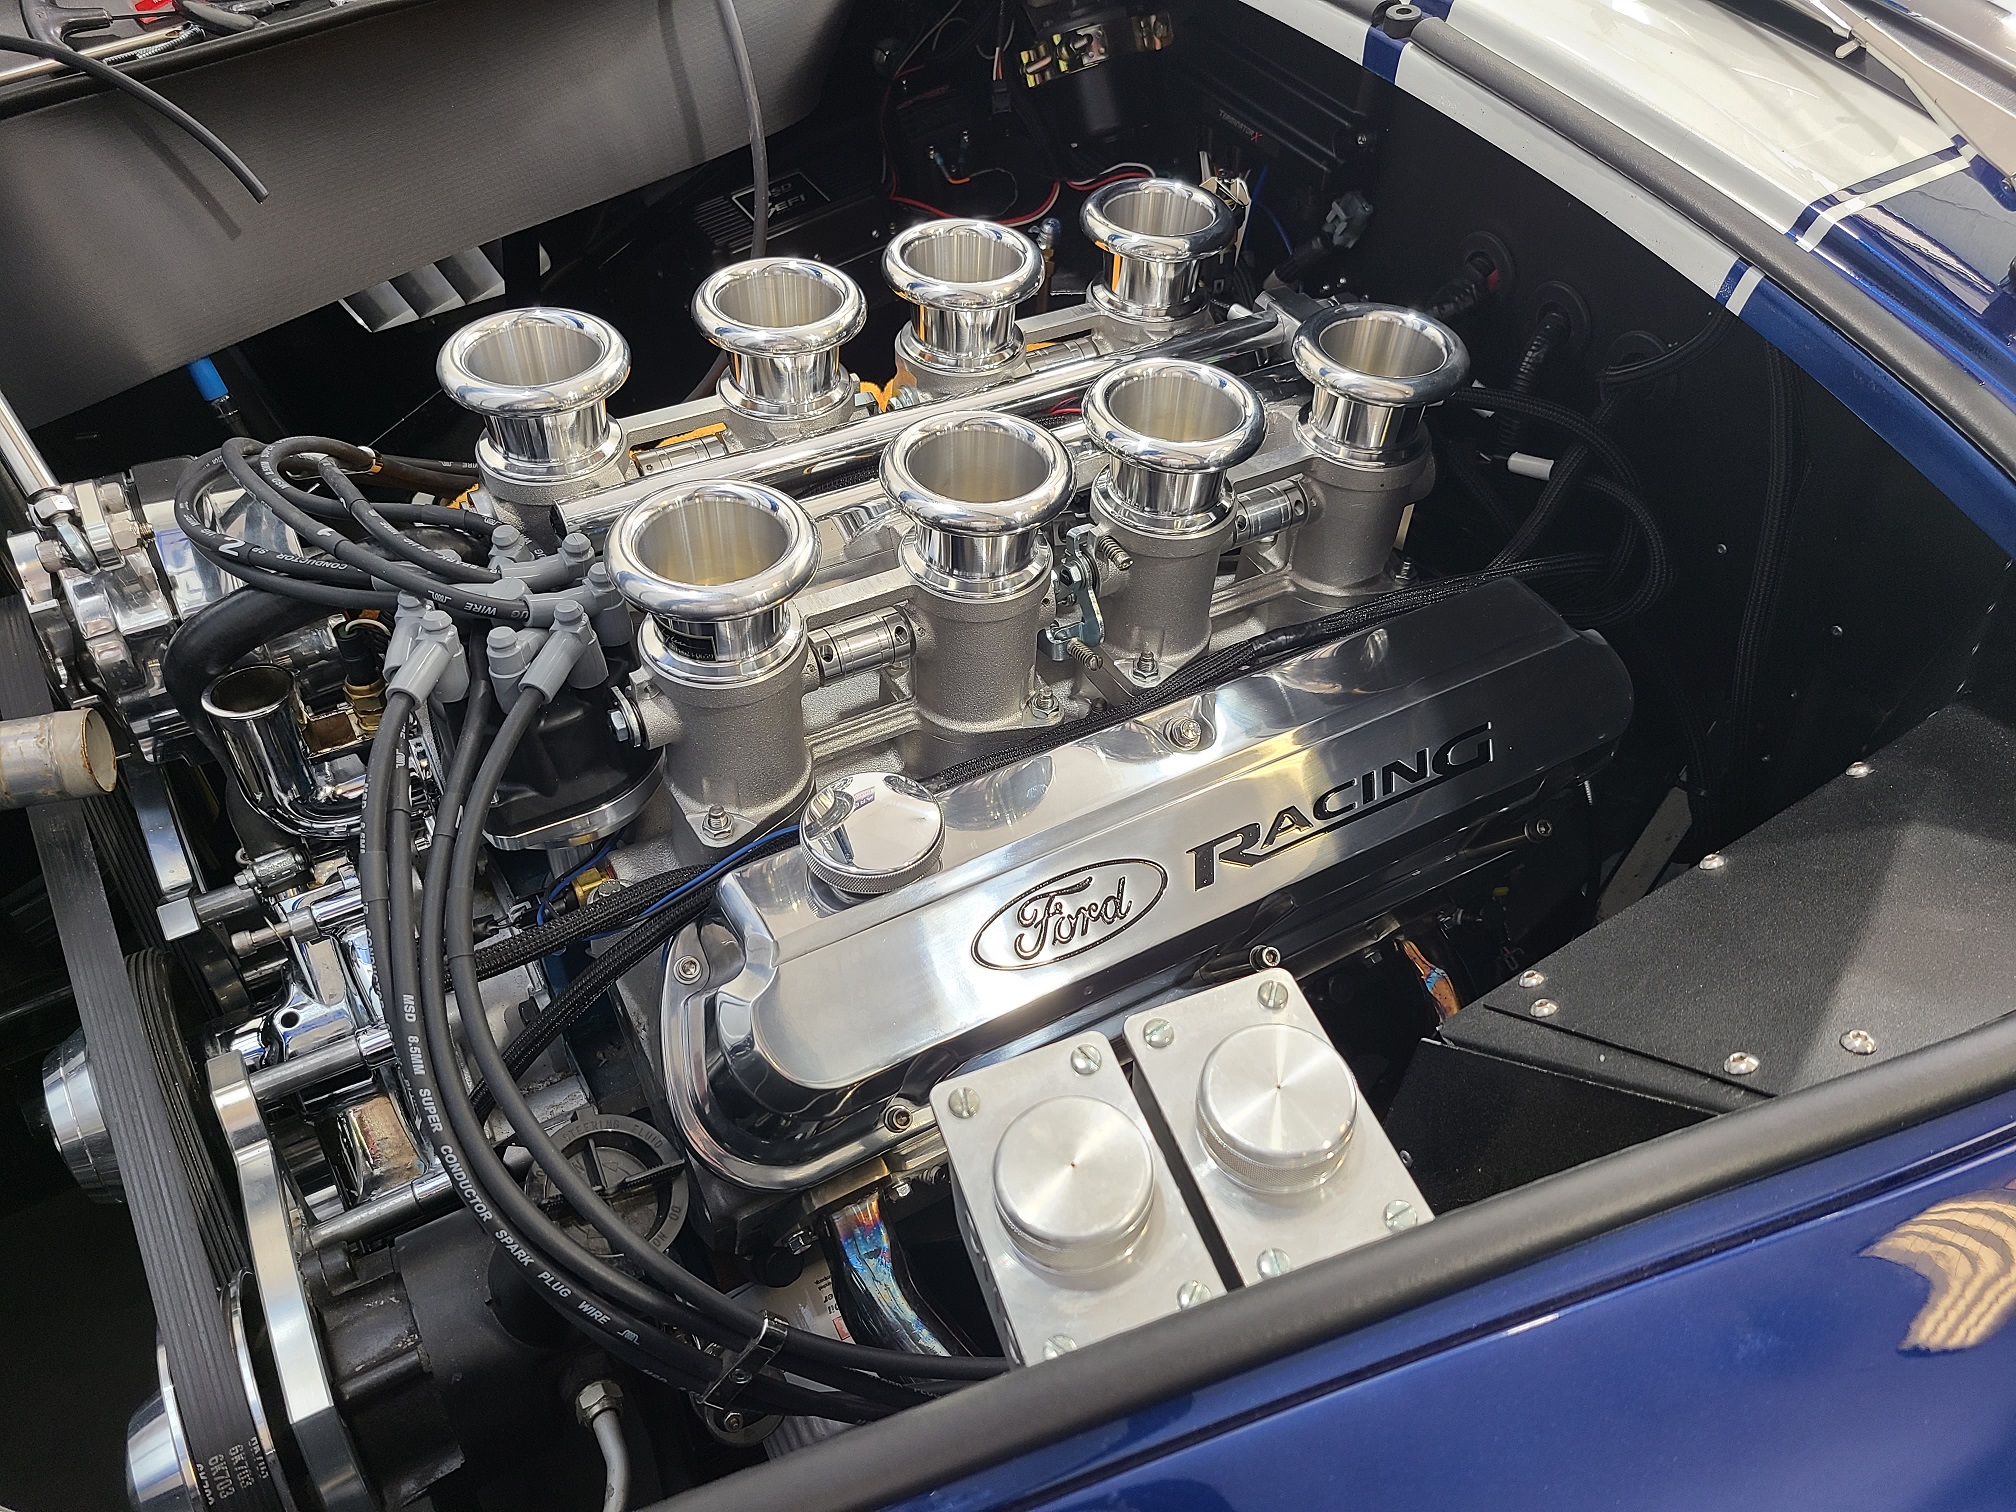
I'm very pleased that I decided to go with the polished valve covers.
-
Post Thanks / Like - 0 Thanks, 9 Likes
-
06-09-2022, 08:07 AM
#1498
Senior Member

That is beautiful. I really wish I had the spare cash to go that route. I'll add that to the dreams list.
Jack
289 Roadster complete kit ordered 8/2/21. Delivered 3/14/2022. Chassis #10306. 17"x9" Halibrands, 3.55 IRS, PS, Wilwood brakes, BPE 306 with EFI and close ratio TKX. First start 7/20/2023. First Movement 9/24/2023. First go-kart 9/25/2023.
Build thread -
https://thefactoryfiveforum.com/show...rida-289-Build
-
Post Thanks / Like - 1 Thanks, 1 Likes
 Papa
Papa thanked for this post
 Papa
Papa liked this post
-
06-09-2022, 11:51 PM
#1499
FYI, with the Holley ECU the engine will crank a couple of seconds before it starts. It seems to take a second or 2 to sync up and detect an RPM signal. Not a problem but something to be aware of. Can't wait to see it running.
Mk IV Roadster, 347/516 HP, 8 stack injection, Holley HP ECU, Astro Performance T5, 3-Link 4.10 gears, A/C, PS, PB Purchased 08/2015, Graduated 02/2017
-
Post Thanks / Like - 1 Thanks, 0 Likes
 Papa
Papa thanked for this post
-
06-10-2022, 09:05 AM
#1500

Originally Posted by
bobl

FYI, with the Holley ECU the engine will crank a couple of seconds before it starts. It seems to take a second or 2 to sync up and detect an RPM signal. Not a problem but something to be aware of. Can't wait to see it running.
Thanks, Bob. My goal is to finish up and have it running this weekend. I have a punch list of things left to do:
1. Battery fully charged
2. Connect throttle cable (also installing a new Russ Thompson pedal that I ordered from Mark at Breeze)
3. Fill coolant
4. Set distributor limits
5. Upgrade Terminator ECU and handheld to V2 firmware
6. Configure initial tune via wizard
7. Verify all sensor settings in ECU per Jim's setup instructions
8. Make final coil connection
9. Start!!!
-
06-10-2022, 09:38 AM
#1501
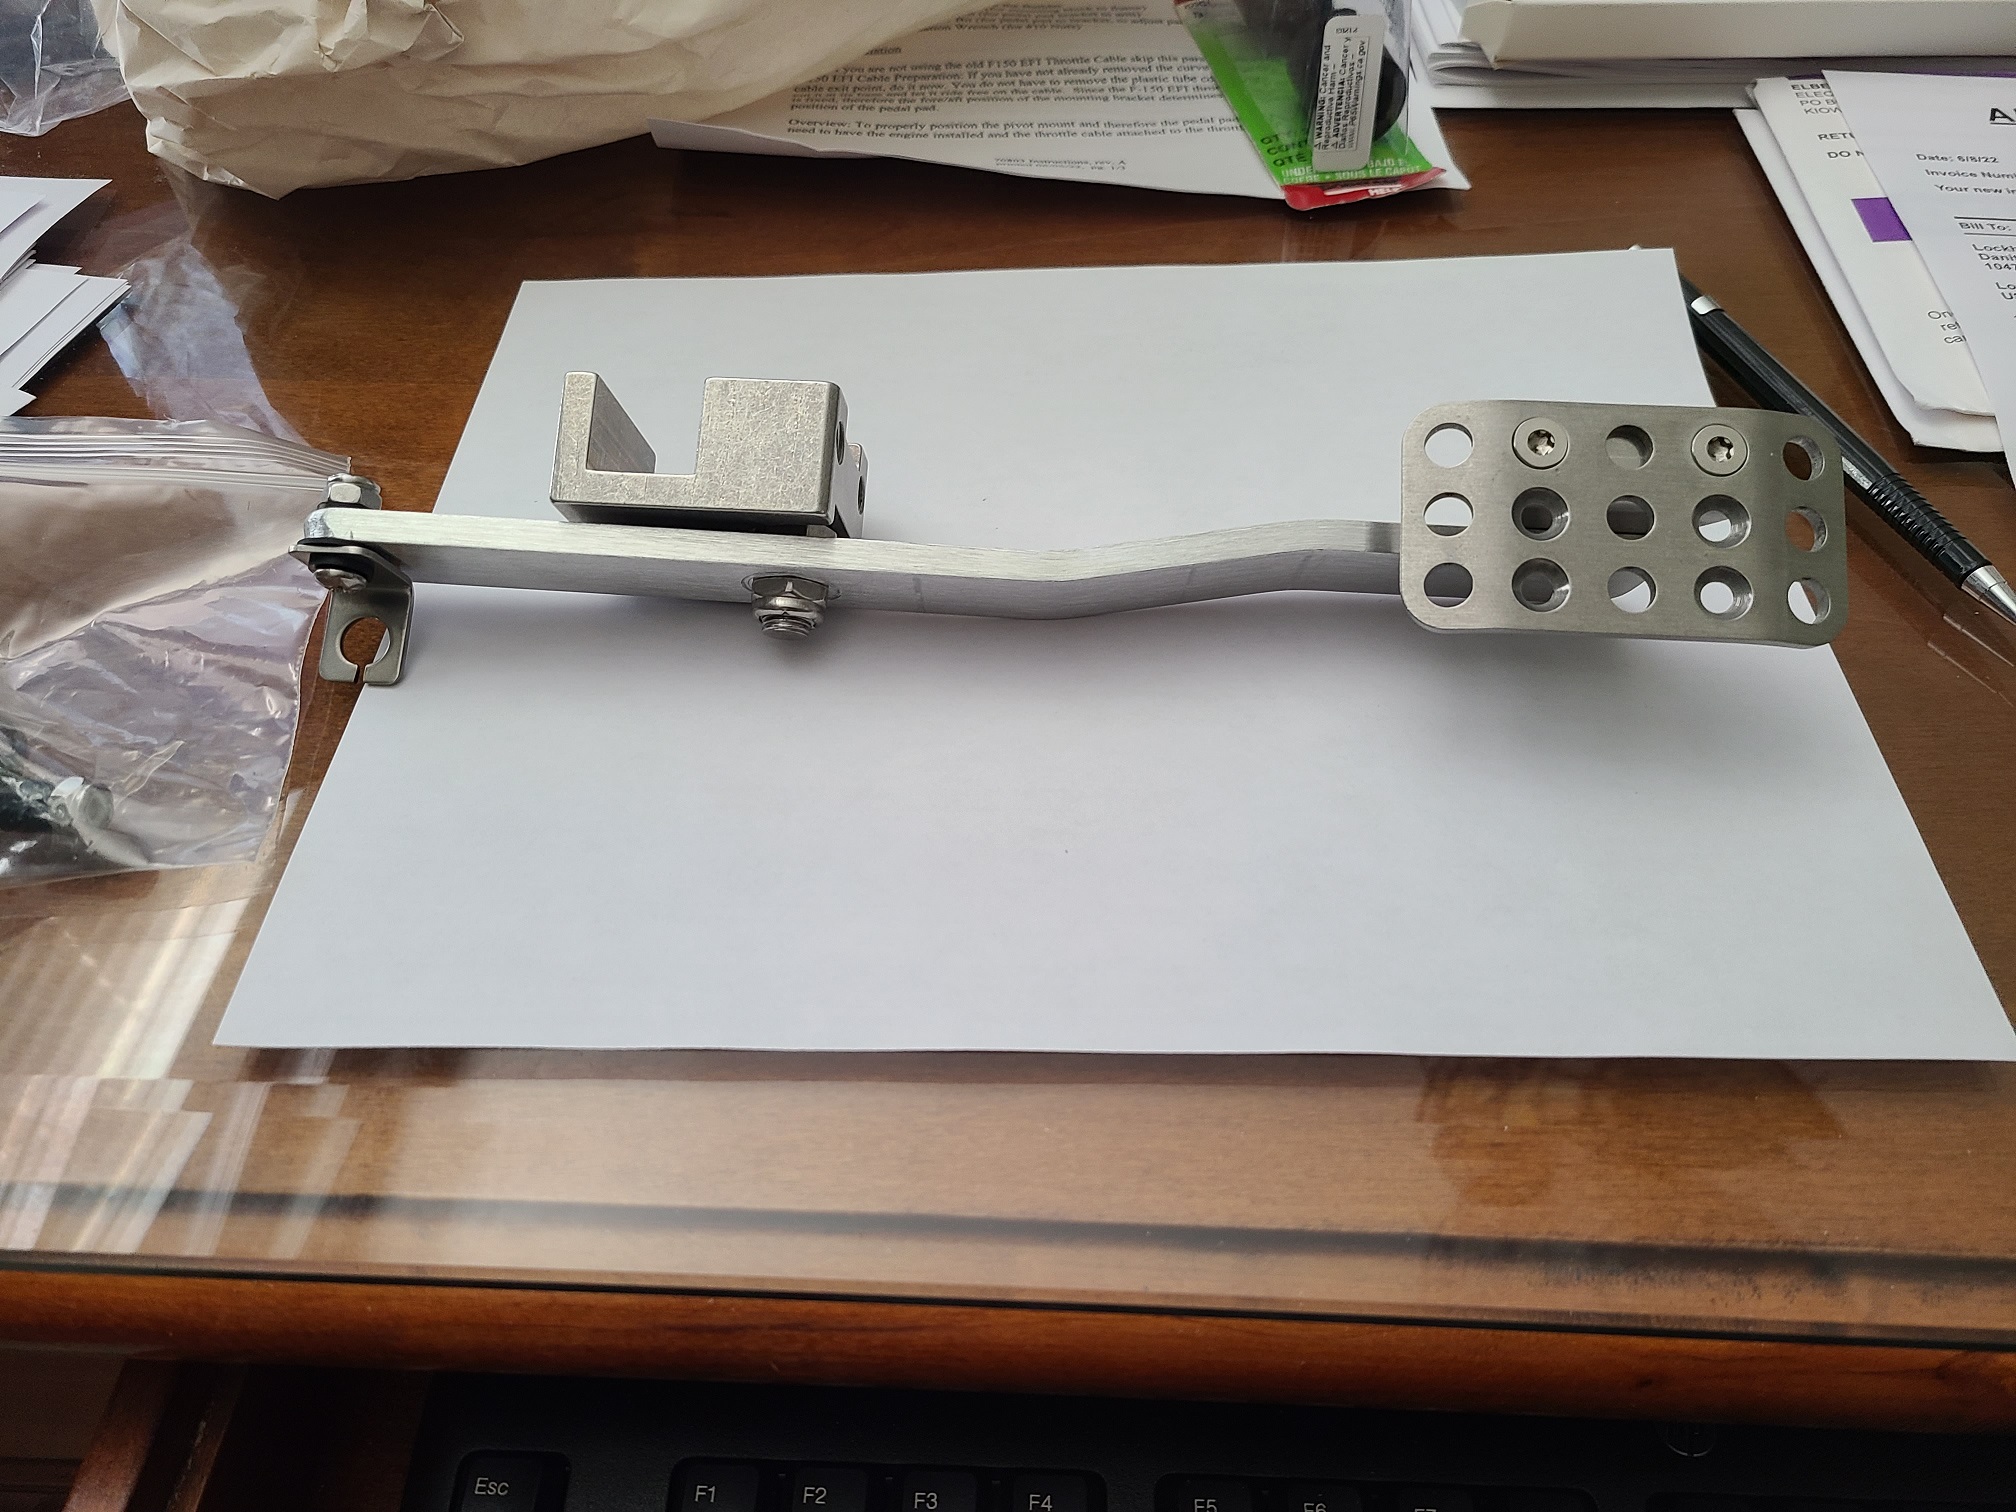
As I mentioned above in my punch list, I bought a new Russ Thompson pedal assembly. This is another upgrade I'd had on my list for a while but put off due to the thought of stuffing myself into the foot box to replace it. Well, since the easiest approach to installing the throttle cable on the stacks was to connect the cable on the stacks before installing the manifold, it made this the opportune time to do the pedal upgrade. All I can say is that if you haven't considered one of Russ' pedals for your build, you should. This is a very nice piece.
-
06-10-2022, 06:03 PM
#1502
Senior Member


Originally Posted by
Papa

As I mentioned above in my punch list, I bought a new Russ Thompson pedal assembly. This is another upgrade I'd had on my list for a while but put off due to the thought of stuffing myself into the foot box to replace it. Well, since the easiest approach to installing the throttle cable on the stacks was to connect the cable on the stacks before installing the manifold, it made this the opportune time to do the pedal upgrade. All I can say is that if you haven't considered one of Russ' pedals for your build, you should. This is a very nice piece.

That Russ Thompson pedal is a very nice piece, I bought one for my build.
I'm interested in two things from your stack conversion:
How well you're able to route the throttle cable.
How you handle the crankcase venting. I've had a few stack EFI setups and this has always been a struggle for me.
It's looking great! Just wait until you experience the response of that stack IR setup.
-
06-10-2022, 06:16 PM
#1503

Originally Posted by
Mike.Bray

That Russ Thompson pedal is a very nice piece, I bought one for my build.
I'm interested in two things from your stack conversion:
How well you're able to route the throttle cable.
How you handle the crankcase venting. I've had a few stack EFI setups and this has always been a struggle for me.
It's looking great! Just wait until you experience the response of that stack IR setup.
Mike,
The cable routing was simple. The throttle cable follows the same S shape as the standard route. Jim installs a fixture and capstan for the cable setup or for a solid linkage if you go that route. For crank case ventilation, I used a non-PCV vent cap (breather) from Billet Specialties that goes into the passenger valve cover.
Dave
-
Post Thanks / Like - 0 Thanks, 1 Likes
-
06-10-2022, 06:23 PM
#1504
I tried to start the car today, and it ran, but not very well. I have two issues that need to be fixed first. I had a fuel leak and had to remove the convoluted pressure regulator assembly from Jim and add some Locktite 592 thread sealer on the non-flared fittings. I'm also looking at a simpler regulator configuration using the Aeromotive pressure regulator I bought a few months ago. Second, I have a coolant leak on the thermostat housing. I will need to remove it, clean it, and try again with RTV and a new gasket. Once the car started, it sounded really rough. I think the timing is way off and I'll go back through the distributor install and settings for the Dual Sync to make sure I didn't miss something there. The fact that it started means I'm close.
Last edited by Papa; 06-10-2022 at 08:10 PM.
-
Post Thanks / Like - 0 Thanks, 1 Likes
-
06-11-2022, 03:09 PM
#1505
Today, before it got too hot, I was working on the coolant leak. I could see it was leaking at the water neck-to-manifold connection, so I took it apart and put a new gasket in and it still leaked. So, it came off again and got a bead of RTV with no paper gasket. It's finger tight right now and will get tightened up in an hour or two. I'm going to let it cure over night before filling it back up with coolant. The fuel system is ready to test with the exception of one fitting that will be delivered sometime today. Once that arrives, I'll check for leaks and hope that issue is solved.
-
06-11-2022, 04:41 PM
#1506
Senior Member

What water neck are you using? I had the same issue on my engine with a cheap off brand, after three failed attempts I ended up buying a Ford Motorcraft neck and it solved all my problems. Another tip I received was using a few dabs of RTV on the T-stat to hold it in place so it will not move when attaching the neck to the manifold. Your setup is looking awesome, those stack injection setups look fantastic.
Here is the water neck I ended up purchasing:
https://www.cjponyparts.com/ford-rac...CABEgIo3_D_BwE
-
06-11-2022, 08:21 PM
#1507
Long day in a hot shop today, but the result is a win!
https://www.youtube.com/shorts/0oYW9oeD2UI
Now I can start dialing things in. First step will be getting the idle set correctly and then I'll synchronize the stacks per Jim's procedure.
-
Post Thanks / Like - 0 Thanks, 5 Likes
-
06-11-2022, 08:22 PM
#1508
Another short video clip after the idle came down:
https://www.youtube.com/shorts/ZPhbcVeS-ew
-
Post Thanks / Like - 0 Thanks, 5 Likes
-
06-11-2022, 08:28 PM
#1509

Originally Posted by
Fman

What water neck are you using? I had the same issue on my engine with a cheap off brand, after three failed attempts I ended up buying a Ford Motorcraft neck and it solved all my problems. Another tip I received was using a few dabs of RTV on the T-stat to hold it in place so it will not move when attaching the neck to the manifold. Your setup is looking awesome, those stack injection setups look fantastic.
Here is the water neck I ended up purchasing:
https://www.cjponyparts.com/ford-rac...CABEgIo3_D_BwE
It's the neck BluePrint installed. I finally got it to seal by using the RTV without a paper gasket.
-
Post Thanks / Like - 0 Thanks, 1 Likes
 Fman
Fman liked this post
-
06-12-2022, 07:23 AM
#1510
Senior Member

That is a thing of beauty and she sounds good!
Kyle
Complete Kit pickup 09/05/2015, 351w, QF680, 3.55, 3-Link, 15" Halibrands with MT's, Painted Viking blue with Wimbledon white stripes on 03/15/2017. Sold in 08/2018 and totally regret it.
-
Post Thanks / Like - 1 Thanks, 1 Likes
 Papa
Papa thanked for this post
 Papa
Papa liked this post
-
06-12-2022, 09:03 AM
#1511
Dave-
Congratulations on getting her all buttoned up! She looks amazing and sounds just as good. It must feel extraordinary!! You must be so stoked!
Thanks for the update(s) and I am officially jealous!!
Nicely done Sir!
Regards,
Steve
-
Post Thanks / Like - 1 Thanks, 1 Likes
 Papa
Papa thanked for this post
 Papa
Papa liked this post
-
06-12-2022, 12:57 PM
#1512
Elation to deflation in less than 24 hours. Today I went to the next step and tried to synchronize the throttle bodies. While the car was running with me going back and forth turning screws, it started spraying coolant again and I have oil leaking at the rear of the passenger side valve cover. So, I ordered a replacement water neck (the Ford Racing part in cast aluminum. Once the car cools down again, I'll tackle the valve cover, drain the coolant and remove the water neck and clean it up in preparation for the replacement. I guess I'll do the oil change on the M550i while I can't work on the Cobra.
-
06-12-2022, 02:26 PM
#1513

Steve >> aka: GoDadGo

....Hang In There Papa Dave!
I Know You'll Get It Solved Soon!
-
Post Thanks / Like - 1 Thanks, 0 Likes
 Papa
Papa thanked for this post
-
06-13-2022, 08:59 AM
#1514
I ordered the Ford housing, Ford gasket, and sealant made specifically for this purpose. It never leaked before, so either I'm doing something wrong or the intake machining is not perfect. I had a friend recommend using a product called Hondabond. Has anyone used it for this purpose?
-
06-13-2022, 11:58 AM
#1515
Senior Member

Not sure where BP sources the thermostat housing, but if it is the chrome unit with the bypass pressed in you are not doing anything wrong. A similar model used to be sold by Ford Racing and was well known for leaking through the bypass joint. I did not seem to matter what people would do - once it started leaking it needed to be replaced. If you search the other forum you will see this history. Here is one post just as an example: https://www.ffcars.com/threads/therm.../#post-1091113
I think you made the right decision with the replacement housing. Looks fantastic!
Geoff
Mk III 4880: 3:55 - 3 link, T-5, 347, Holley Sniper/dual sync distributor, Comp Cams XE274HR, Edelbrock RPM Heads
-
06-19-2022, 08:35 PM
#1516
Well, another weekend and not much time to work on the leaks, but after replacing the water neck with the Ford part, and putting everything back together, I had a hunch my attempt at tapping the threads was not going to end well. When I was tapping the threads for the temp sensor, it just didn't go cleanly. The sensor threaded in, but it didn't feel smooth. As suspected, it leaked at the sensor. So, I get to do it again. New water neck will be here in a few days, but I'm not going to tap this one. I'm going to install the sensor in the heater port on the manifold. I will get this solved eventually, but at least when I started the car today, it fired right up and idled much better than last time. I'm pretty sure I resolved the oil leak on the valve cover. It looked like the cover wasn't seated fully and was hitting one of the throttle bodies that needed a small amount of clearance work. I hope that by the end of next weekend, I'm able to drive the car again.
-
06-19-2022, 09:54 PM
#1517
Senior Member

I did exactly the same thing on a water neck I had polished. It was the stock ford unit like the one you have. Had someone polish it for me, then tapped it for a fan sensor but did not get clean threads and it leaked. I had to buy another and chose to leave it alone.
My dad always says don't get too worked up - its life's tuition. I think I have paid enough in tuition to buy another ffr...
It will be amazing when you are done!
Geoff
Mk III 4880: 3:55 - 3 link, T-5, 347, Holley Sniper/dual sync distributor, Comp Cams XE274HR, Edelbrock RPM Heads
-
Post Thanks / Like - 0 Thanks, 1 Likes
-
06-20-2022, 08:23 AM
#1518

Originally Posted by
Geoff H

I did exactly the same thing on a water neck I had polished. It was the stock ford unit like the one you have. Had someone polish it for me, then tapped it for a fan sensor but did not get clean threads and it leaked. I had to buy another and chose to leave it alone.
My dad always says don't get too worked up - its life's tuition. I think I have paid enough in tuition to buy another ffr...
It will be amazing when you are done!
Geoff
As frustrating as it is, I won't let it deter me. I just keep the end state in mind. Every failure is a lesson learned. I'll forget all about the little things once I reach the finish line.
-
Post Thanks / Like - 0 Thanks, 2 Likes
-
06-24-2022, 05:35 PM
#1519
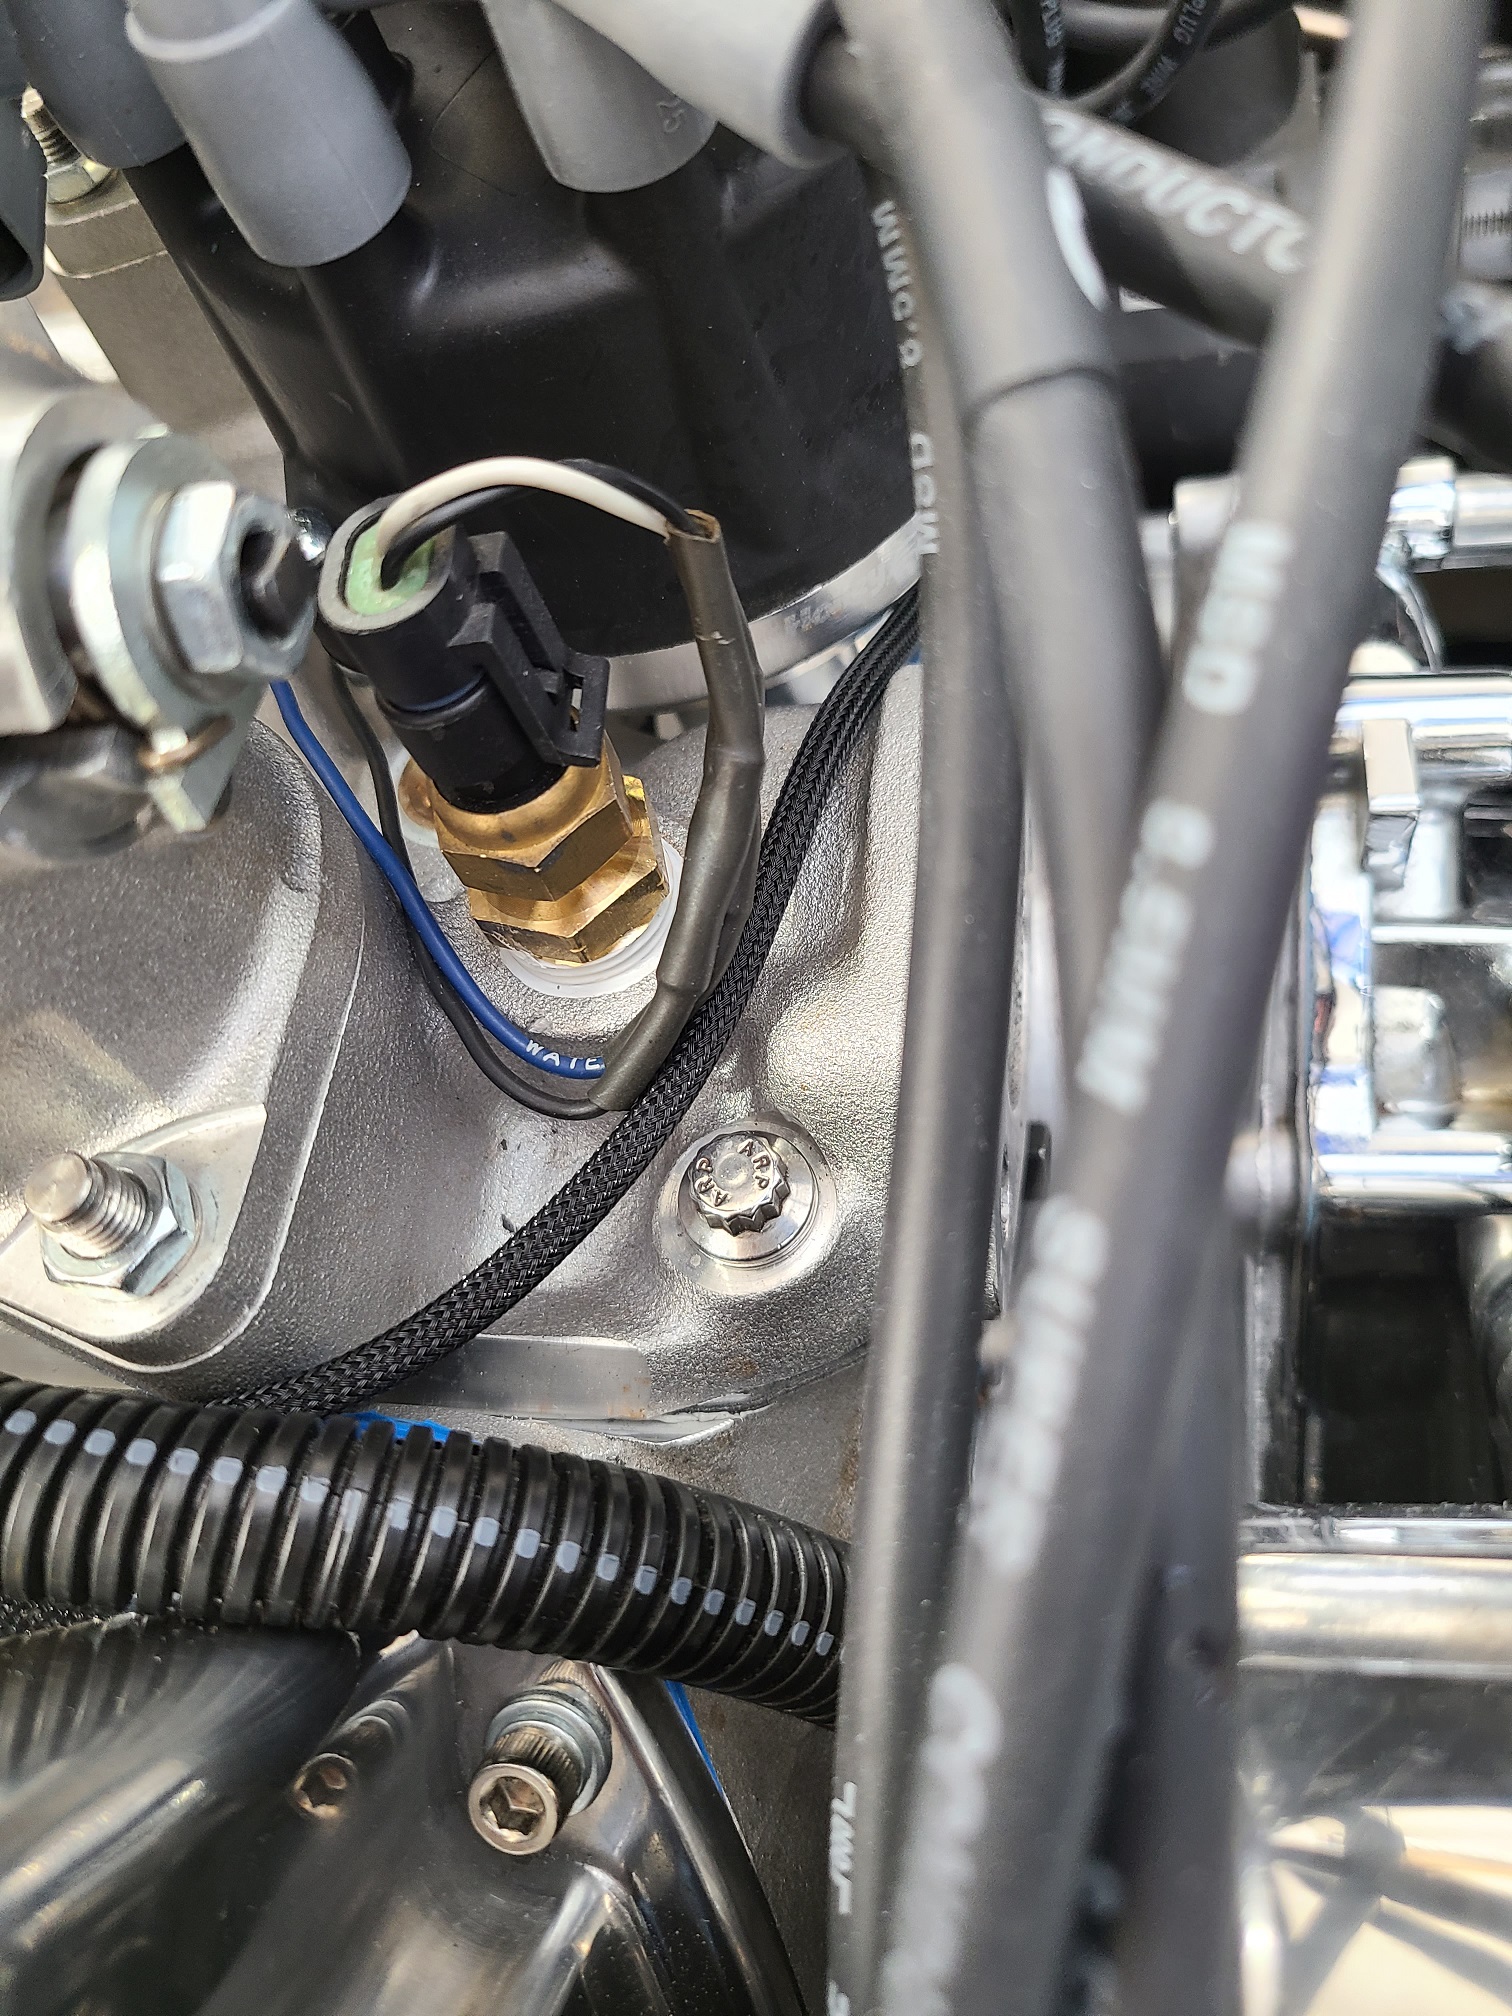
Back at it again today. I relocated the coolant temp sensor for my water temp gauge to the heater port on the new intake.
I also powder coated the second new water neck.
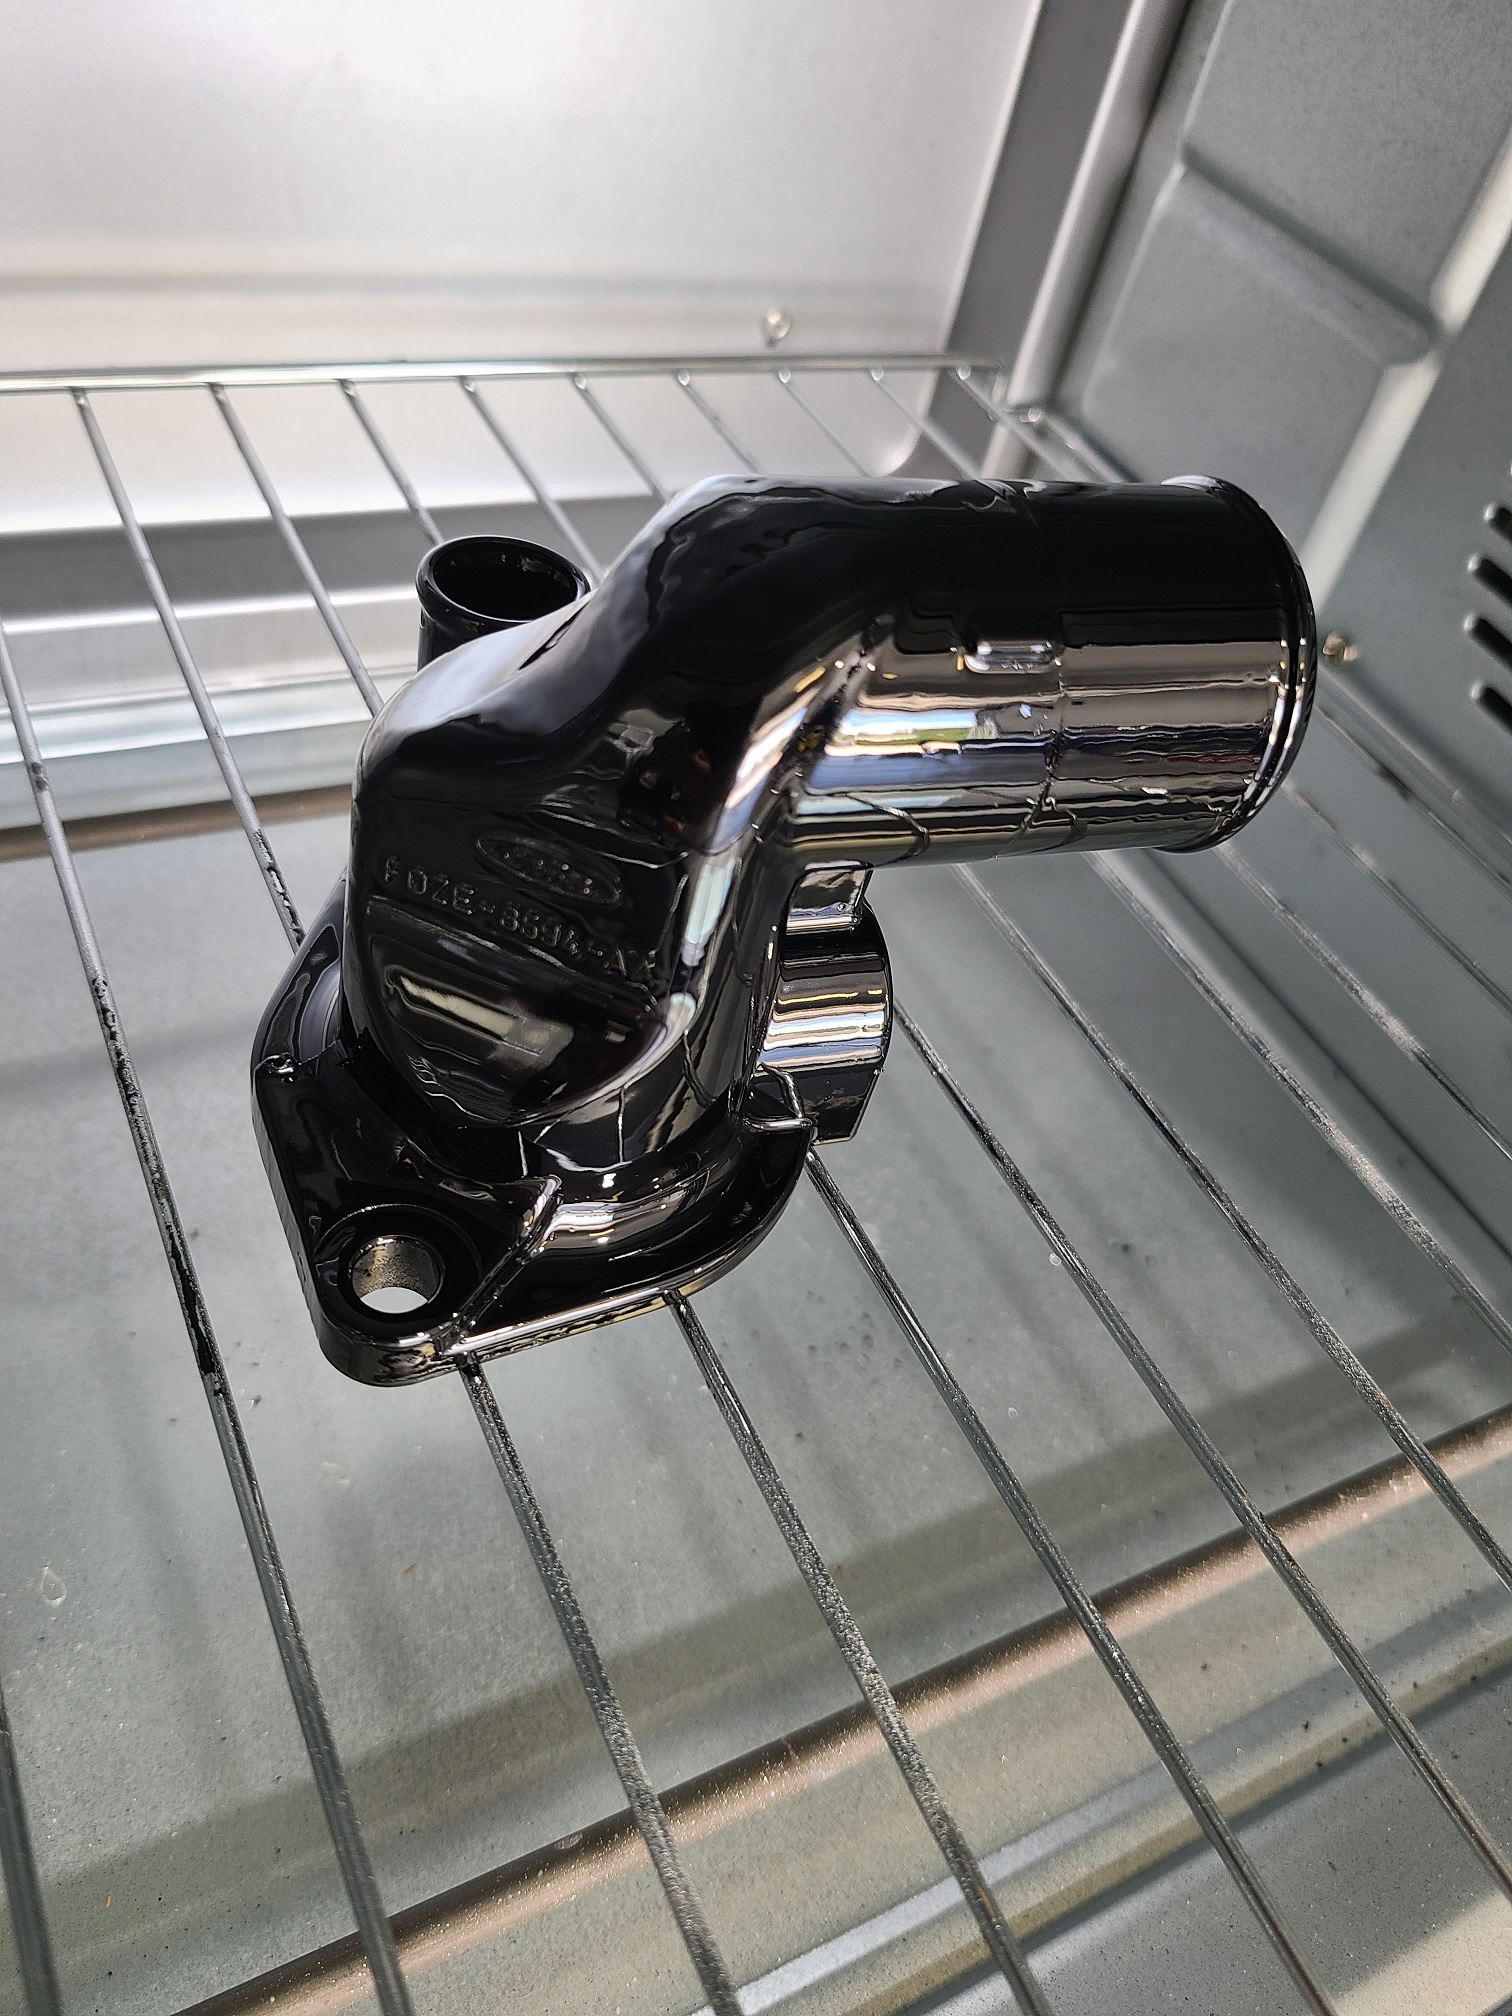
It's reinstalled and I'll give it 24 hours before I try to add coolant and fire up the engine to see if the leak is resolved.
-
Post Thanks / Like - 0 Thanks, 2 Likes
-
06-26-2022, 12:27 PM
#1520
Good news -- the coolant leak is fixed. The bad news -- the valve cover leak isn't. I ordered some Permatex High-Tach gasket sealer to see if that fixes the issue. I'm surprised that I can't get the darn cover to seal using the high-end FelPro silicone gaskets, but perhaps the cover isn't machined perfectly. At least it's an easy part to remove and reinstall.


 Thanks:
  Likes:


 Reply With Quote


