-
03-24-2024, 07:46 AM
#241
Senior Member

-
03-25-2024, 07:55 AM
#242
Senior Member
-
Post Thanks / Like - 0 Thanks, 1 Likes
-
03-27-2024, 08:14 AM
#243
Senior Member
-
04-01-2024, 07:57 AM
#244
Senior Member
-
04-03-2024, 08:16 AM
#245
Senior Member
Cab roof ribs added
Quick update.
Striping the old, flaking LizardSkin product was easy in some spots and very difficult in others. I ended up using my pressure washers to strip the difficult areas.... worked well. As I was cleaning, I was also thinking about the final finish for the roof of the cab. I decided to add some wood strips (ferring strips) to attach the roof cover to.
I simply ripped 1/2" strips from a 1 x 4 pine board and glued them in place with 3M 5200 polyurethane and weighed the strip down to match the contour of the roof.

I'll then cover the wood ribs masking tape and respray the cab with the two LizardSkind sound and heat products.
More later on all this,
Mark
-
04-05-2024, 08:09 AM
#246
Senior Member
Cab interior covered with two products for sound, vibration and heat
After cleaning and scuffing the cab's interior, I changed my mind on the LizardSkin. I had other sound and heat options from other builds I've done. And to be very honest, after my bad experience with LizardSkin peeling off and my plan to glue my interior cover to the side walls.... well, I was very concerned about the interior side cover not staying in place because of my fear LizardSkin would fail over time.
I first cleaned all the interior surfaces again with Acetone. Then proceed with a Dynamat type butyl rubber backed by aluminum foil.
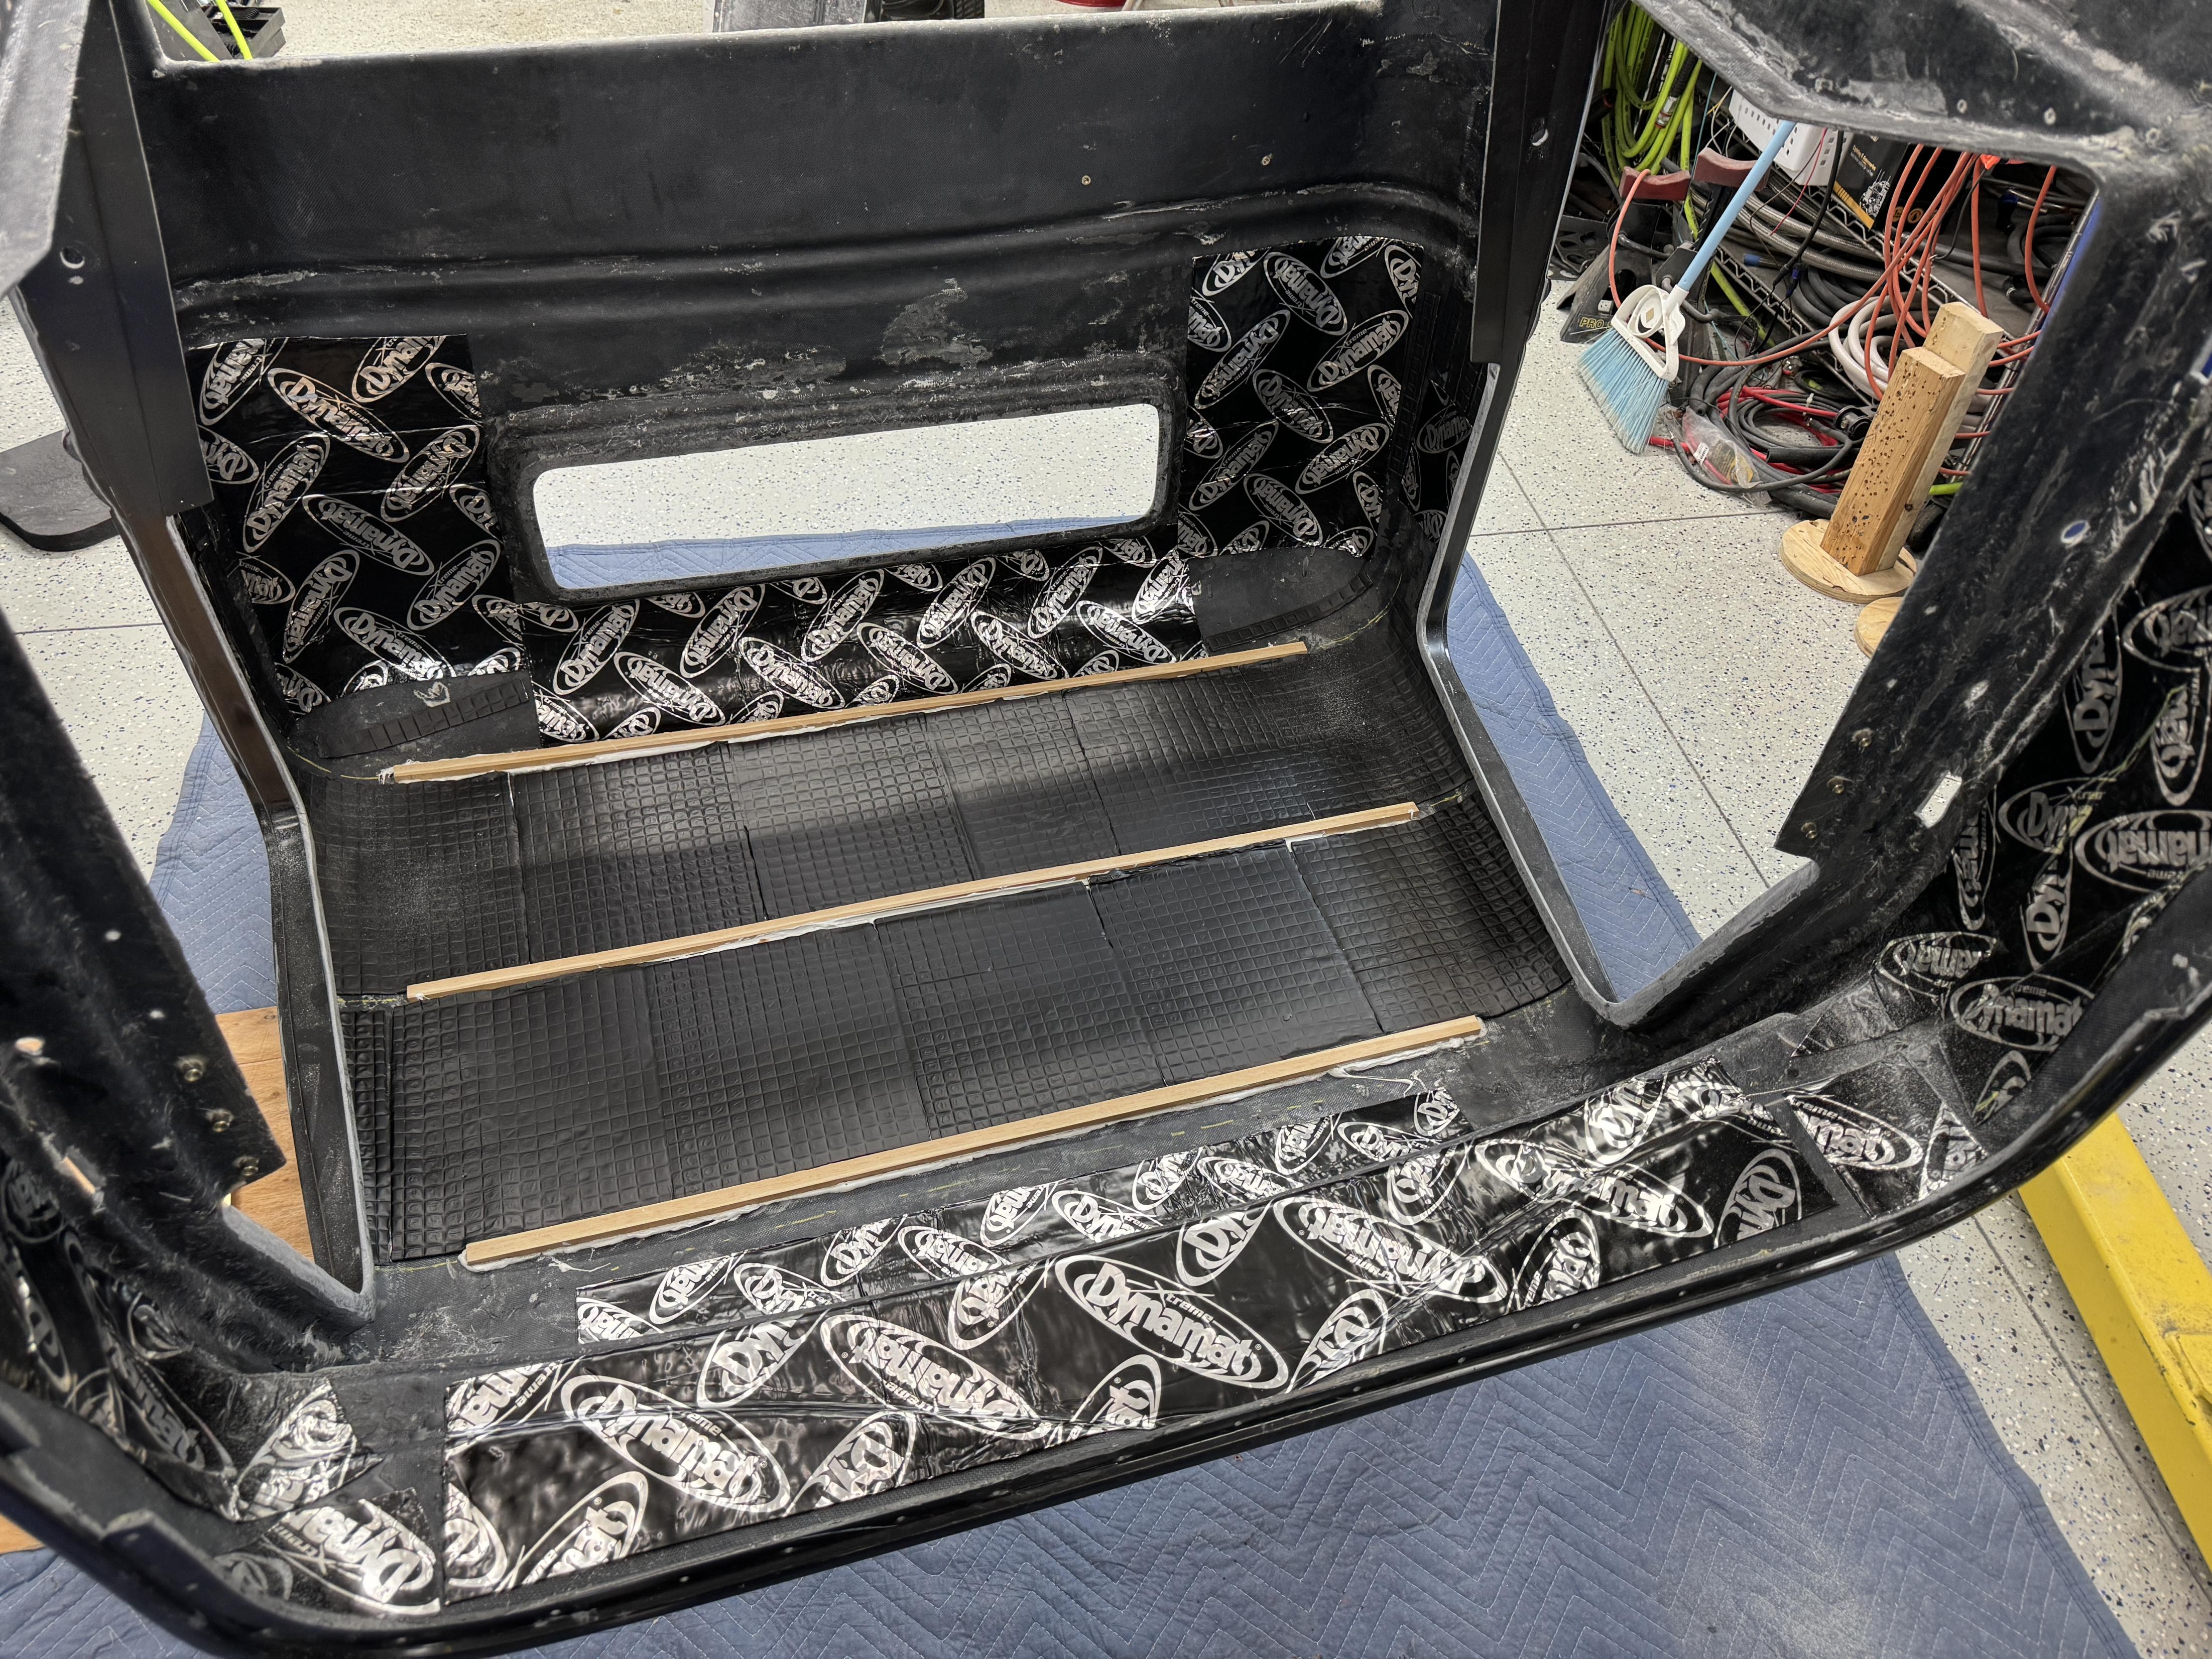
Then I covered most of the foil backed butyl rubber with this product.

This material is about 1/2" thick, heavy dense foam backed by a very sticky adhesive. Both the butyl rubber and foam will be great for sound, vibration and heat.

I also covered the back panels with the foam mats.

Lastly, I cut 1/4" lauan plywood to fit the roof that I'll cover with the diamond padded vinyl for the finish look and a fiber material for the sides. I'll add this after painting. Then I'll set the completed interior cab back on the chassis. It's much easier to do the interior while the cab is off the chassis.

Some of you may be wondering why the gap in front of the plywood. Well, you may recall from earlier posts I made an overhead gauge panel that fit tight to the cab's roof.... so, I had to leave room for the gauge panel to fit
Stay tuned,
Mark
-
04-08-2024, 07:15 AM
#247
Senior Member
Truck Cab base frame made and installed
Since I'm doing my Cab's body work and paint off the chassis, I had to build a frame system for the bottom of the cab to stiffen it up, with the cab to be up off the ground and be able to move it easily by myself.
Came up with the design below
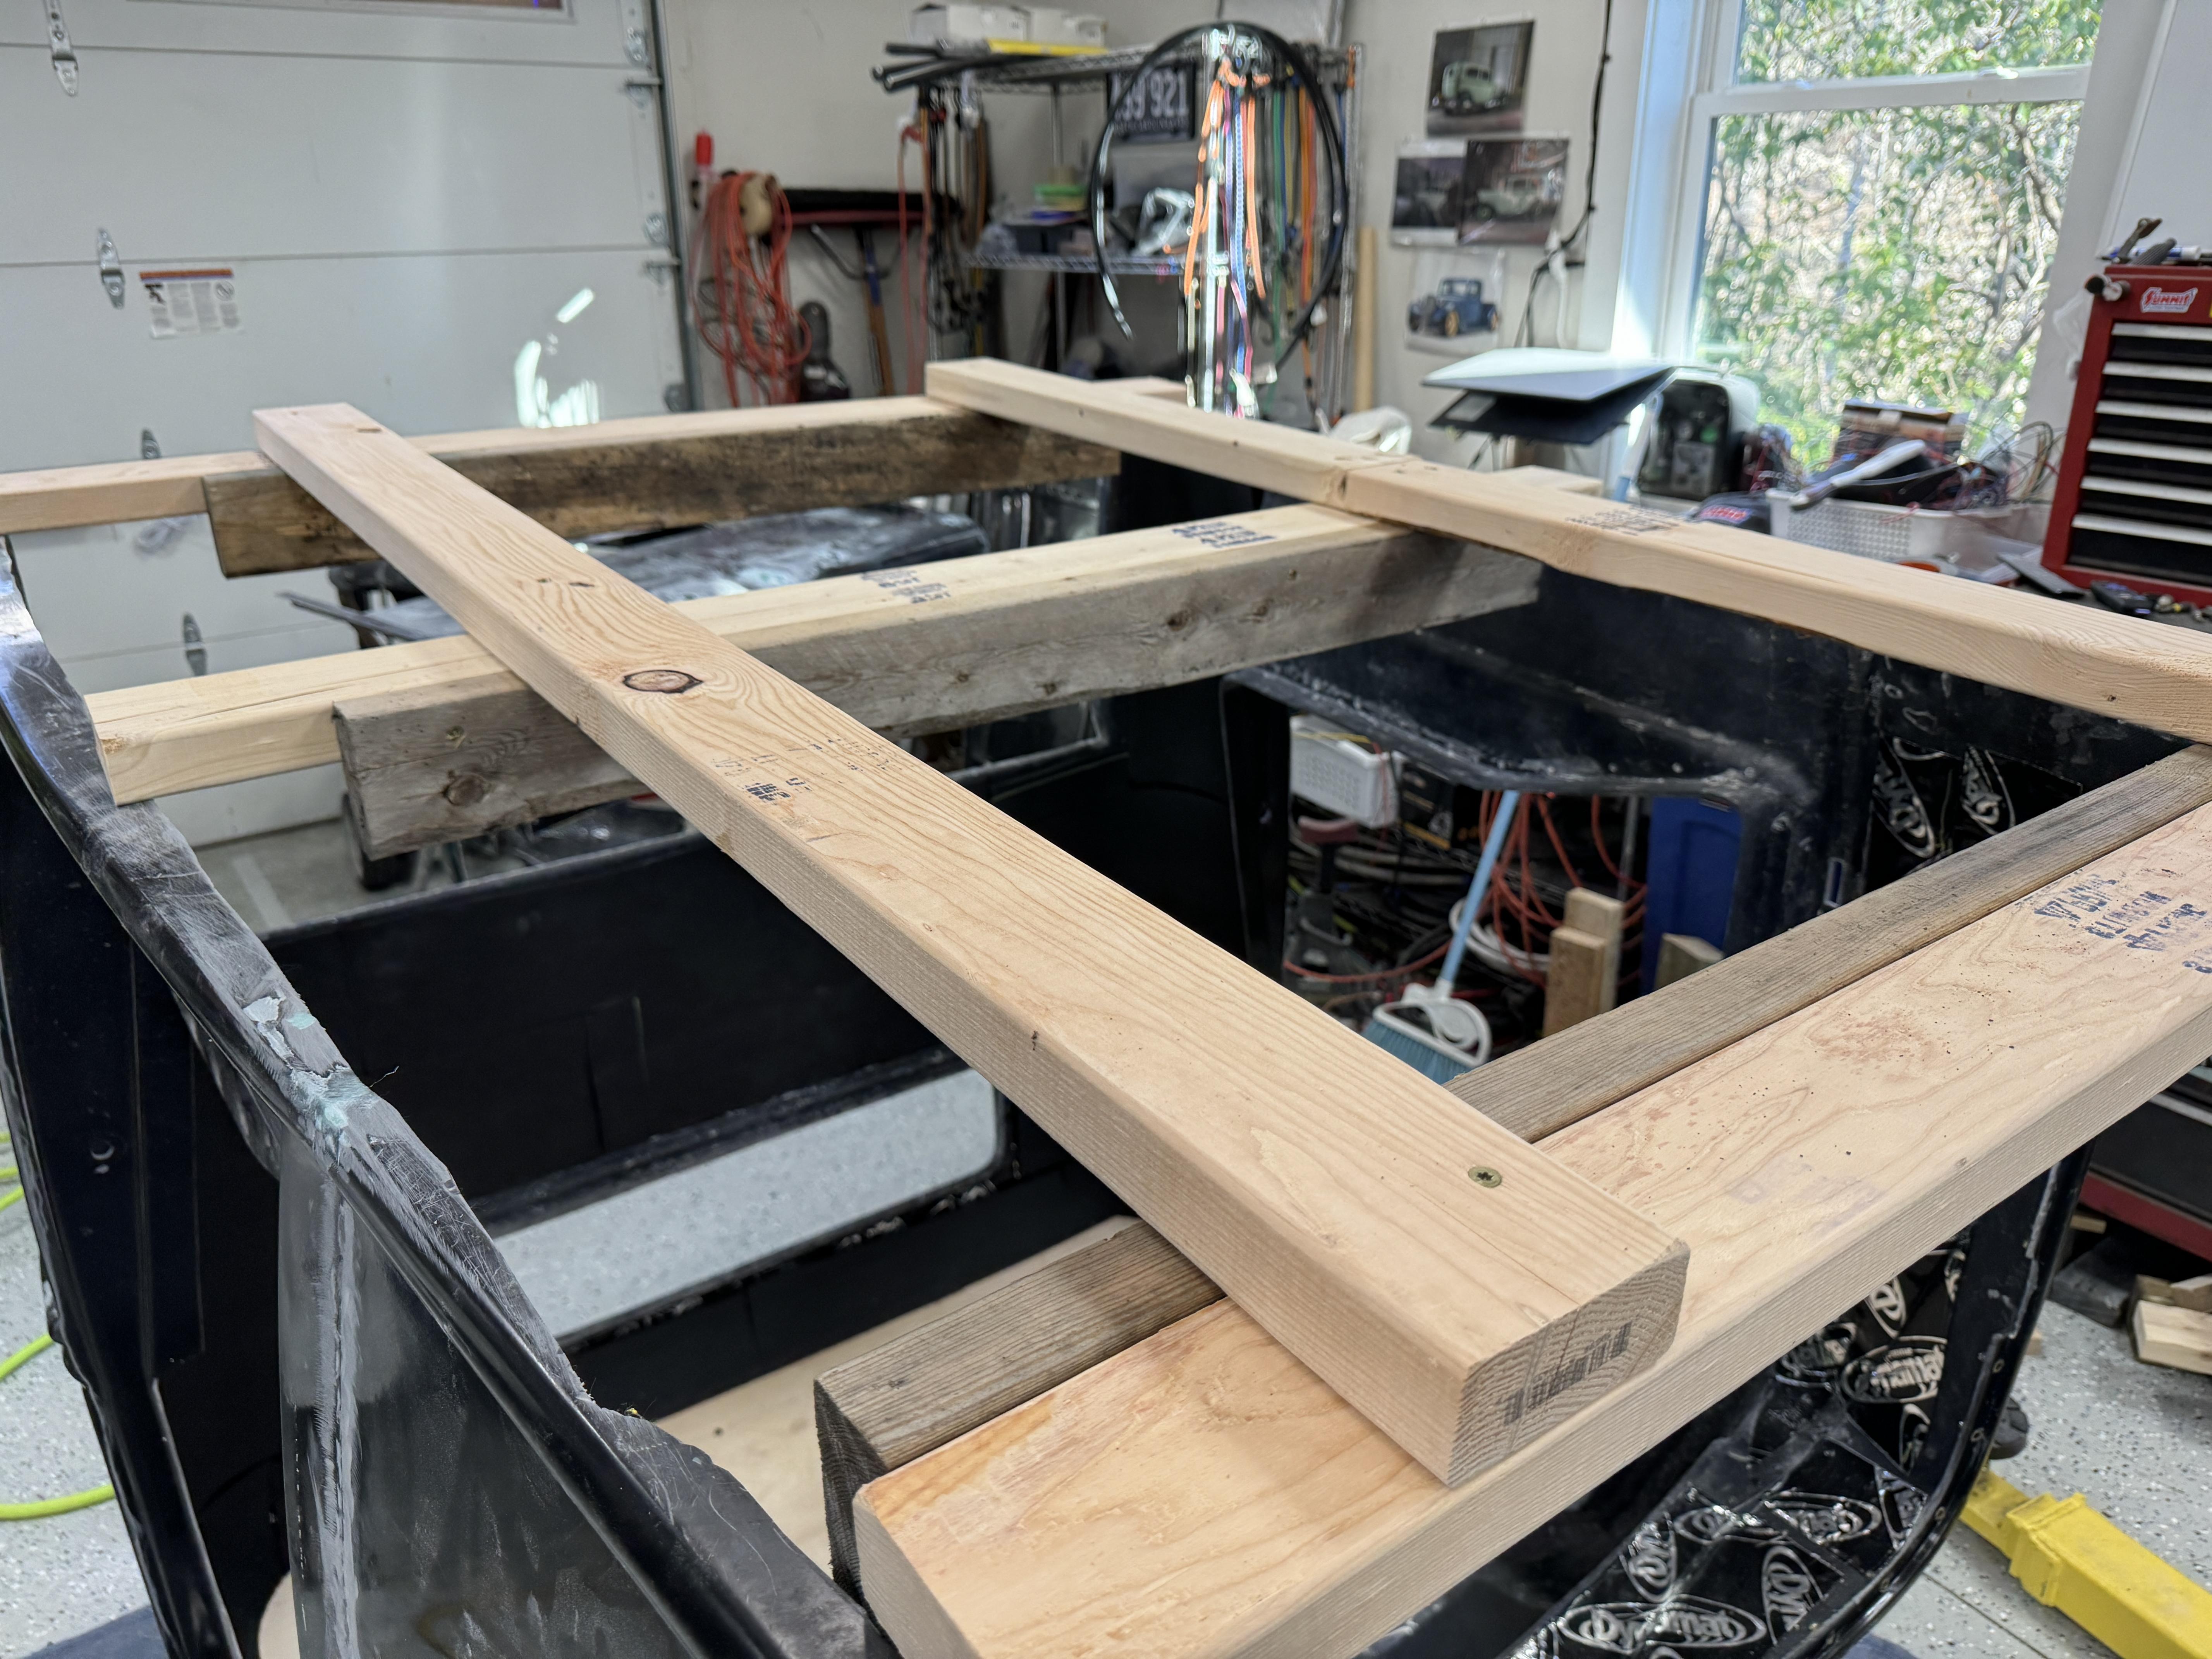
I didn't want to drill holes in the cab's base, so I used fender washers to hold the cab to the wood frame

In the picks below, note the long front to back runners.... they are 30" apart, the same as the moving dolly I have. I simply clamp the dolly to the frame to hold in place while I roll the cab where I want it. Then, I can unclamp it, lift the front of the cab to tilt backwards and simply remove the dolly for a firm cab stance on the ground for sanding, etc.


When I'm done with body and paint, I'll place the cab on my lift's arms to complete the interior while comfortably standing inside the cab. I'll also use the lift to lower the cab back on the chassis.
More to follow,
Mark
-
04-15-2024, 07:50 AM
#248
Senior Member
Stack Pocket mounting to Bed Sides
During my body work on the bed side panels, I had to add some "parts". You might recall that I bought from FFR the Stake Pockets option. Well, by installing the pockets you hide the rear mounting area and, thereby, can't access the mounting button head screw. So, my fix was to install a couple rivnuts to each of the rear side panels so I can install the screws from the inside vs the outside.
Since the side panel has pretty thick fiberglass and the upper hole also had the ss wrap, the standard rivnut wouldn't work, i.e., not enough grip area was exposed for proper rivnut expansion..... so, I found this type of rivnut which worked out great.

In the next pic, I bonded the stake pocket to the bed side with 3M's High Strength Repair Filler (HSRF). I scuffed up the bed side and stake pocket mounting surfaces with 40 grit and applied the HSRF to the stake pocket and pressed on the pockets to the bedside. 30 min's later, I was cleaning up the HSRF that squeezed out. I'll show the finished panel later in another post.

More to follow,
Mark
-
06-04-2024, 06:36 AM
#249
Senior Member
Why no updates?
It's been awhile since my last update.... well, a lot is happening. We decided to cash in on the housing market in our town and downsize. Our house when for sale about 30 days ago. We're moving to NE Tennessee by Johnson City, TN. We found a great home with a shop for me. So I decided to but the build on hold and finish the truck in TN. I'll keep updating as appropriate.
Thx Mark
-
08-19-2024, 07:37 AM
#250
Senior Member
-
10-04-2024, 08:21 AM
#251
Hi Mark,
I'm finally getting around to installing my grill cowl. And I found large gaps at the sides after the top edge was fitted. Sounds like I have the same problem you had with it being aggressively trimmed at FFR. I'll email them today and see what they say.
But I have another question: Did you use that T shaped piece of aluminum that is supposed to mount the lower chin of the cowl to the frame?
Thx for taking the time to reply,
Last edited by DonImbimbo; 10-04-2024 at 08:55 AM.
Reason: ignore question on screws
1990 Mustang 5.0 5sp, 2021 Bronco Sport Badlands, 1935 Extended Cab Build, 347 & 4R70W
-
10-04-2024, 10:06 AM
#252
Senior Member
Hey Don.... I did use the T-Aluminum..... however, as I stated in my posts, I had to trim the lower fiberglass and make my own support to hold the lower cowl together.
Mark
-
Post Thanks / Like - 1 Thanks, 0 Likes


 Thanks:
  Likes:


 Reply With Quote

