-
"Thinking about an angled cover that I can put over the top of the panel in the event of moisture getting in or the MCs leaking so that it drains away but haven't fabricated anything yet."
I was thinking about making something like that, too  if I decide to keep my fuseblock in the standard location. I like GoDadGo's approach (Passenger-side), but I also have the heater box and haven't checked all the fitment issues yet. Then there's a small possibility to mount in a central location since I'm going to make a glovebox/cubby like John Ibele
Looking good!
Craig C
-
Post Thanks / Like - 0 Thanks, 1 Likes
-
Senior Member

I played around trying to make a cover over the fuse panel a couple builds ago. It's a busy place and gave up after I decided my solution likely wouldn't help if one of the MC's decided to leak. Getting it actually sealed wasn't successful and decided even deflecting would eventually find the fuse panel. Brake fluid is just plain evil... Maybe you're more creative (or patient) than me. Fortunately, multiple builds with the MC's above the fuse panel and no brake fluid leaks to date. Now water infiltration from the windshield posts hitting the fuse panel? I was a slow learner on that one. Two failed turn signal flashers later decided I needed to seal around the posts. Problem solved.
Last edited by edwardb; 03-15-2024 at 07:56 AM.
Build 1: Mk3 Roadster #5125. Sold 11/08/2014.
Build 2: Mk4 Roadster #7750. Sold 04/10/2017.
Build Thread
Build 3: Mk4 Roadster 20th Anniversary #8674. Sold 09/07/2020.
Build Thread and
Video.
Build 4: Gen 3 Type 65 Coupe #59. Gen 3 Coyote. Legal 03/04/2020.
Build Thread and
Video
Build 5: 35 Hot Rod Truck #138. LS3 and 4L65E auto. Rcvd 01/05/2021. Legal 04/20/2023.
Build Thread. Sold 11/9/2023.
-
Post Thanks / Like - 1 Thanks, 0 Likes
-

Originally Posted by
edwardb

I Now water infiltration from the windshield posts hitting the fuse panel? I was a slow learner on that one. Two failed turn signal flashers later decided I needed to seal around the posts. Problem solved.
Thanks Paul. Didn’t think about that one. I’ll give it a go and see what evolves.
Last edited by cv2065; 03-15-2024 at 09:03 AM.
-
Senior Member

Too hot to work down there or what?!!
MK4 #11012 picked up 04/16/24
351W, 3 link, single roll bar
MK4 #10616 picked up 4/10/23
302w, 4 link, 17's, dual roll bar SOLD
MK4 #9759 picked up on 4/3/19
351C, 3 link, 17's, dual roll bars SOLD
-
Originally Posted by
Higgybulin
Too hot to work down there or what?!!
I'm up to 2 clothes changes a day in the garage. When I get to 3, then I know I'm into the true Summer.
Last edited by cv2065; 05-18-2024 at 10:48 PM.
-
Post Thanks / Like - 0 Thanks, 1 Likes
-
-
-
-


Carbon Fiber Dash
Ah, one of my favorite parts, the carbon fiber dash. Another one mistake and shell out the $$$ activity! The drill press really earned its purchase price with the one. I was able to get every bit of the dash underneath when cutting with the 6 different sizes of hole saws. As others have said, the fine CF dust can get everywhere, including your lungs, so I did use a respirator and also cleaned up with my shop vac after each cut. Bought my drill press off Facebook marketplace for $150 new. What a deal!
I bought custom gauges from Speedhut. I worked directly with one of their designers. The service is free and they are very patient to give you exactly what you want. After about 4 proofs, we were good to go. I'm going for a red/black Roush theme for the car, and Speedhut did not disappoint. I also went with oversized gauges instead of the standard FFR. That would be 4.5" gauges for the Speedo and Tach, as well as 2 5/8" gauges for the others. Shout out to Michael Craven (aka Hacksaw) for that idea.
In order to get my holes right, I ordered some metal discs off of Etsy in the exact sizes of the gauges faces and had a 1/8" hole put into the middle of each disk. Covered the dash in blue tape, aligned the discs the way that I wanted them and dotted the mid-point. Used that as my starting point with the hole saws and came out great. I buffered out 3/4" from the top of the dash to give me plenty of room after the initial fitting to the hoop. The larger gauges need some planning.
Not a lot of info out there yet for the CF dash, so winging it a little based on what I could find. When level, the dash is a little uneven to the hoop, especially on the far sides. I started by aligning the middle of the dash with the middle top of the hoop. The right side aligned about 3/16" under the tube, but the driver side was higher when the dash was level. I drew a line on the back of the dash where it exceeded the top of the hoop and measured 3/4" from that line which is where my gauges on that side started. Then I trimmed a little off the top right to level it out a bit. Came out nicely. Bottom of the dash was ~38.5" from the floor, side to side and the glove box butts up against the support, so can't go any further to the driver's side. That makes it really close to a vertical alignment with the trans tunnel. I think with every carbon fiber dash, there is a spot mid drivers side that doesn't align with the hoop like the rest of the dash. Seems to be the same for most everyone.
Measuring:
_IMG_9261.png?width=960&height=720&fit=bounds)
Drilling:

Hoop Fitting:


I also notched out a small area on the passenger side as it conflicted with the door hinge:

Test fit the gauges and am loving the look! Still need to powder coat the key bezels and add the turn signal mod, which I decided to get from Frank at i.e.427. I will have to say that the ignition key bezel that I received from FFR was a bit disappointing. I upgraded with one from Ron Francis. Once the bezel is powder coated black, RF includes a colored trim ring, which in this case will be red. All in the details!
URL=https://hosting.photobucket.com/images/c310/cv2065/(edited)_IMG_9346.png?width=960&height=720&fit=bou nds]_IMG_9346.png?width=960&height=720&fit=bounds) [/URL]
[/URL]
Last edited by cv2065; 05-18-2024 at 11:45 PM.
-
Post Thanks / Like - 0 Thanks, 1 Likes
-
-
Post Thanks / Like - 0 Thanks, 1 Likes
-
Senior Member

Originally Posted by
cv2065
I up to 2 clothes changes a day in the garage. When I get to 3, then I know I'm into the true Summer.
"Sweating like a gypsy with a mortgage"
Mk.4 FFR supplied Right hand drive
Received 12/2012 completed 12/2019
Gen1 Coyote / TKO600 / IRS
Lots of mods to make compliant for Australian design rules
-
Post Thanks / Like - 0 Thanks, 2 Likes
-
-
Post Thanks / Like - 1 Thanks, 2 Likes
-
Senior Member

-
Post Thanks / Like - 0 Thanks, 1 Likes
-
Senior Member
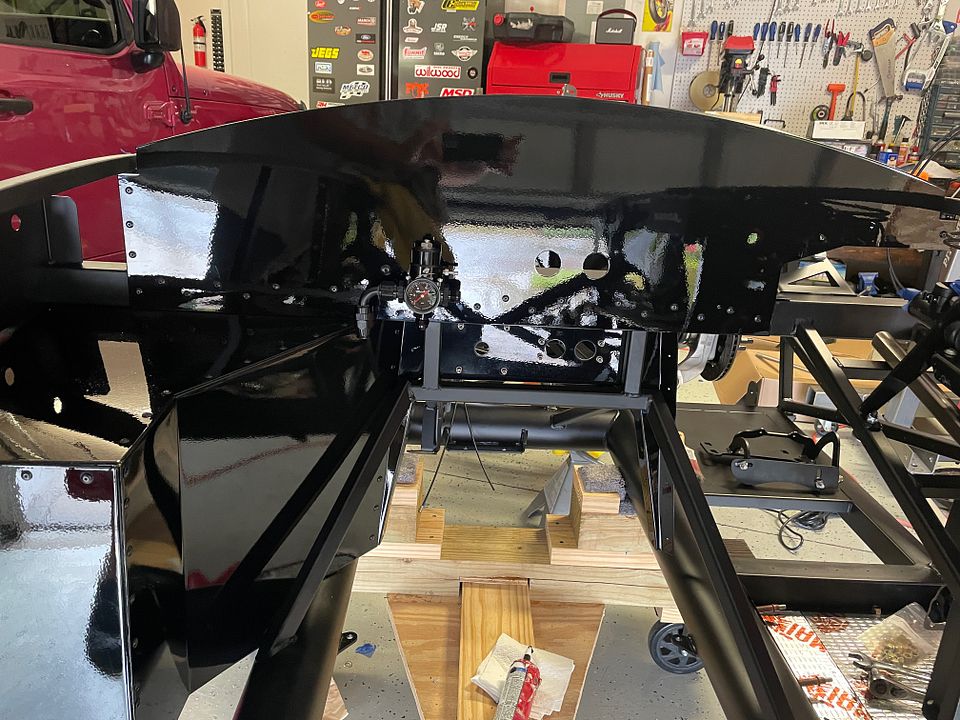
It’s funny you were just ahead of me the first time and now seem to be right about the same place the second time. I went with gloss black in the engine bay in my first one. I was pleasantly surprised how it held up. You know how hard a dark car is to keep clean. It obviously gets dusty but all the road grime blends in.
Lookin good man. Between you and me your first car had more design influence on my build than any other I followed. Maybe by a lot.
Your build is looking really clean so far.
Last edited by Blitzboy54; 06-08-2024 at 08:03 PM.
-
Originally Posted by
Blitzboy54
It’s funny you were just ahead of me the first time and now seem to be right about the same place the second time. I went with gloss black in the engine bay in my first one. I was pleasantly surprised how it held up. You know how hard a dark car is to keep clean. It obviously gets dusty but all the road grime blends in.
Lookin good man. Between you and me your first car had more design influence on my build than any other I followed. Maybe by a lot.
Your build is looking really clean so far.
Thanks man! I'm sure I've looked at your build thread many times as well. Trying to step this one up another notch. I thought about doing a hammered look but settled back on the gloss. Just have to be extra careful not to scratch it! Glad to see that you are venturing out again. I look forward to watching your build as well. I just have to get better at updating this thread.
Last edited by cv2065; 06-08-2024 at 09:58 PM.
-
Senior Member
Did you get to a final decsion on the power rack tie rods? I see someone else is asking about shorting the inners on a replacement they got from FF.
Higgy
MK4 #11012 picked up 04/16/24
351W, 3 link, single roll bar
MK4 #10616 picked up 4/10/23
302w, 4 link, 17's, dual roll bar SOLD
MK4 #9759 picked up on 4/3/19
351C, 3 link, 17's, dual roll bars SOLD
-
Originally Posted by
cv2065
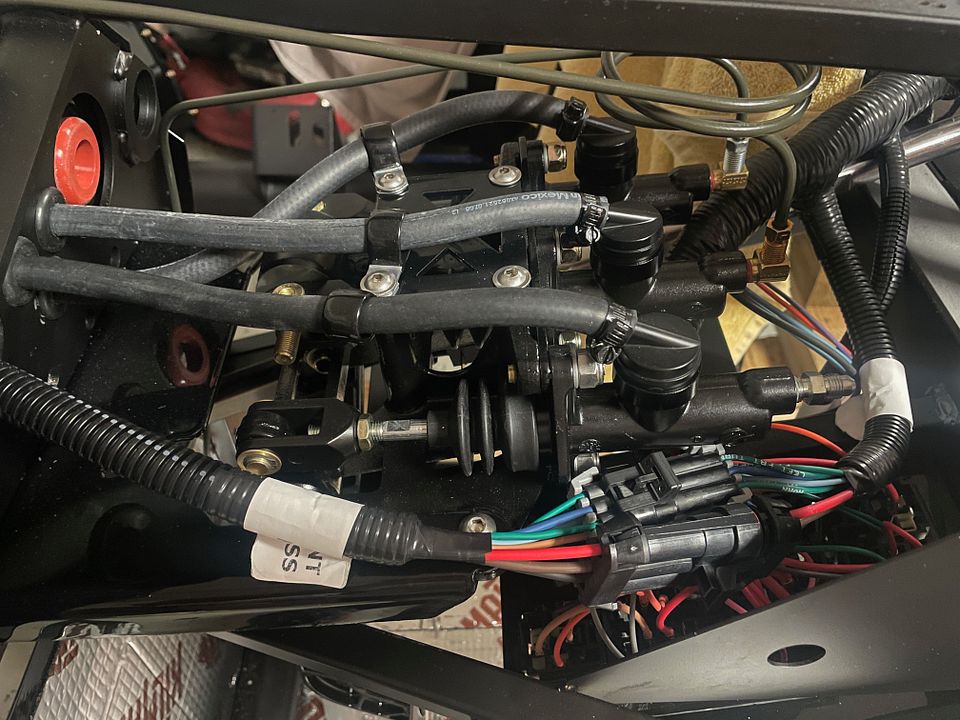
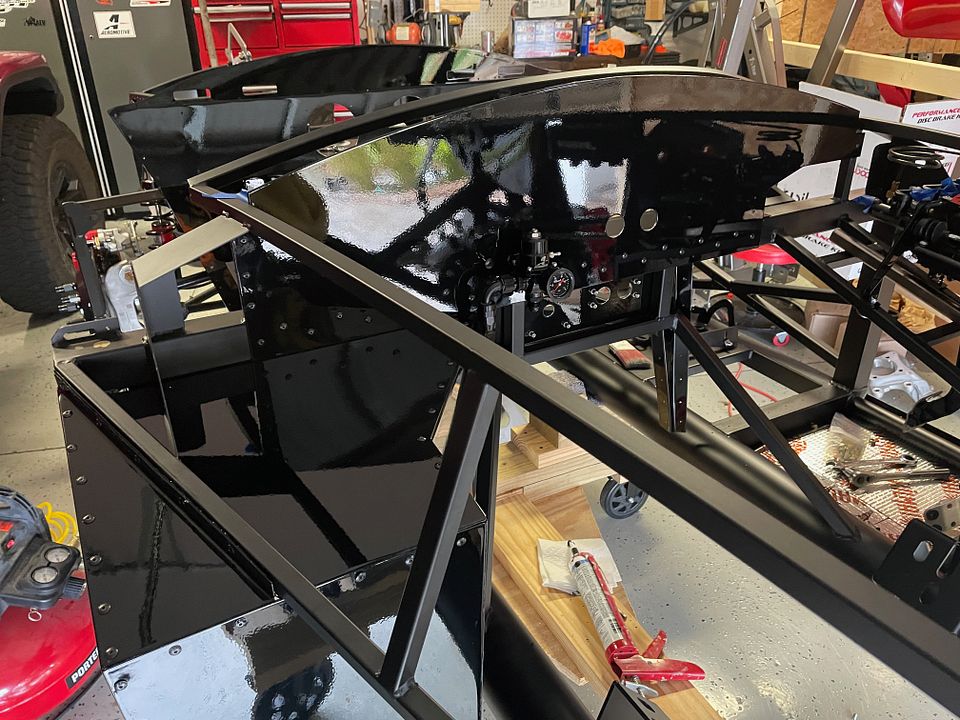
Completed the pedal box with no issues. I was going to use straight fittings instead of the 90 degree elbows with the MCs, but as I bent the brake lines, they seem to extend a bit far to the rear of the box and wasn't sure if I was going to have any clearance issues with the harness, as I like to run up the left side of the box instead of the right, so I went back to the 90 degree ones. The concern was rotating those around to the right position without overtightening. I think I'm good to go.
I cut 5/8" off of the MC rods and they fit perfectly. I also cut 3 separate holes for into the front of the box for the hoses. Drilling through that plate is NOT a great time. I also scored some grommets from McMaster car that were suited for 1/4" material thickness. Trying to get the grommet between the plate and sheet metal is difficult when all buttoned up. These fit perfectly. I used part #9307K63. The larger orange grommets are the only ones I could find that were high temp. Seemed like the Mac Truck grommet I found last time has a temperature issue, as it was always gooey during the build after a run. I had to take one of these out as the harness has its own grommet.
When I partially assembled the driver's foot box, I put the sound deadener in before hand. Last time I cut the patterns and put in after the fact, but its a small space, so makes it easier this way. I might have to go back and seal up a couple of spots when I do the 'light' test for heat leaks. I used the 80 mil Kil Mat this time around instead of the ThermoTec. It's a bit cheaper and also comes in smaller sheets so its easier to use for smaller panels and I don't seem to have as much waste. Function and material seems to be the same.
I received my Russ Thompson pedal from TJ at Mountain Metalworks. He's done a great job carrying on Russ' legacy with these pieces. They are identical to his design and function. That will be hooked up to Forte's throttle assembly once installed. Can't recall why I have those big washers under the cap screws that hold the pedal box, but I'll be replacing that hardware.
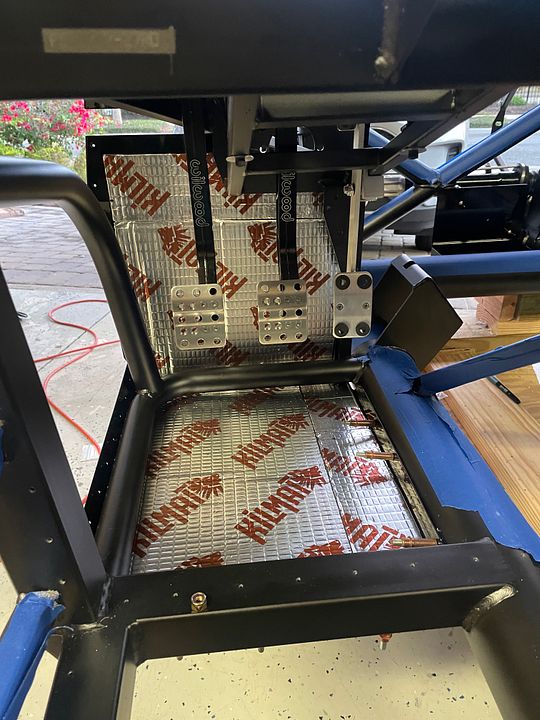
While I was at it, I also completed the passenger side footbox. I buttoned this up with black oversized headed rivets and more Kil Mat. I tucked all of my joining tabs inside the box for a smooth look top to bottom. Came out really nice.
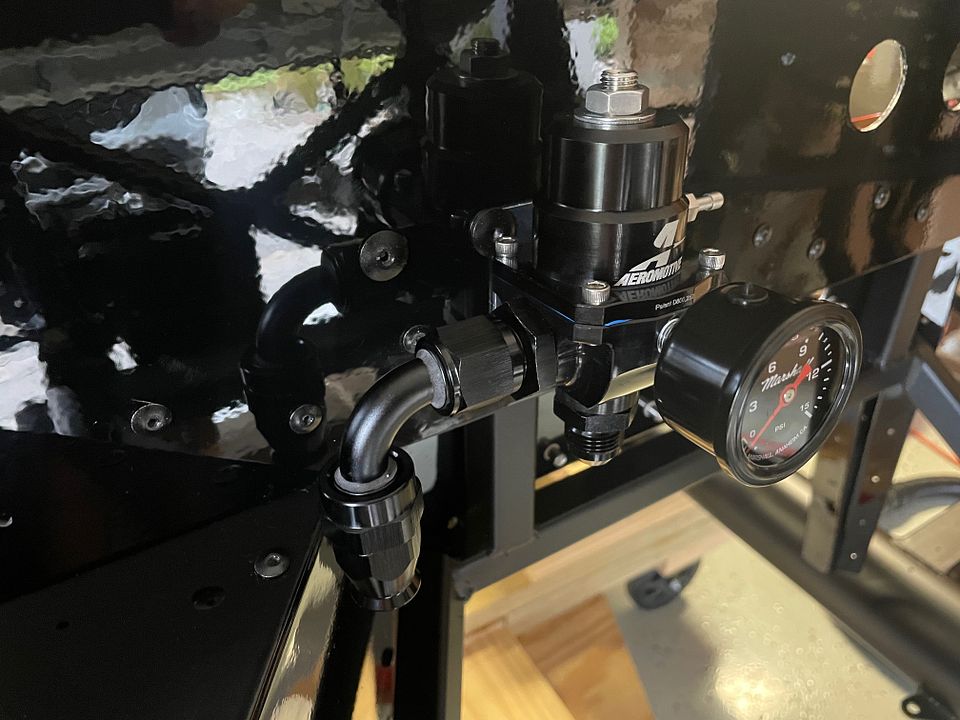
You'll also notice the Aeromotive X1 Series fuel regulator (13304) that I installed for my carb'd setup. Very versatile if I want to swap out to FI later. What a top-quality piece! I also added the Marshal Instruments Fuel Pressure Gauge as it was the only one I could find in black. You can find that here:
https://www.amazon.com/gp/product/B0...?ie=UTF8&psc=1
URL=https://hosting.photobucket.com/images/c310/cv2065/IMG_9106.JPG?width=960&height=720&fit=bounds]
[/URL]
Loving the build so far!! I have a quick question, as far as the sound deadening is concerned, are you only using the Killmat for this build or do you plan on using an additional layer of another material for the footboxes? I am concerned about the heat transfer from the exhaust headers and would like to use one material if possible. It seems that the Killmat is a sound deadening material, but it does offer some heat protection as it seems very similar to other products used by other builders like Fatmat and other similar butyl rubber products.
-
Originally Posted by
Jespinosa
Loving the build so far!! I have a quick question, as far as the sound deadening is concerned, are you only using the Killmat for this build or do you plan on using an additional layer of another material for the footboxes? I am concerned about the heat transfer from the exhaust headers and would like to use one material if possible. It seems that the Killmat is a sound deadening material, but it does offer some heat protection as it seems very similar to other products used by other builders like Fatmat and other similar butyl rubber products.
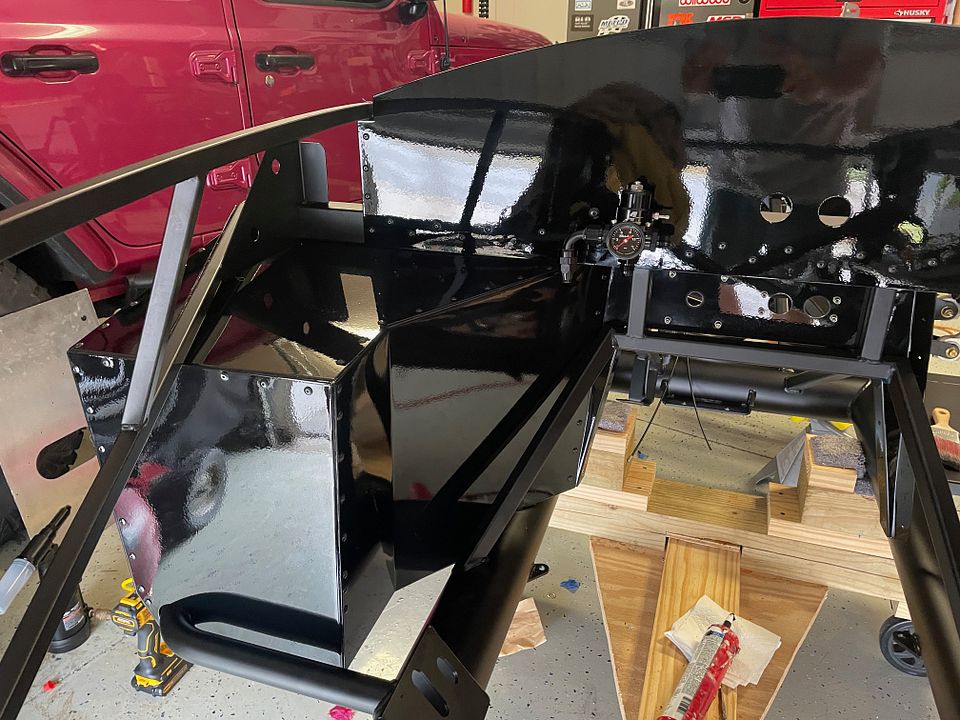
I used two different materials on the footboxes on my last build. I'm not sure how much the extra layer actually provided, but my footboxes were never hot. Others haven't used anything other than sound deadening with no crazy temps. What did get hot was the lower area by the driver's side door from the side pipes. I've insulated this build in that area with this stuff:
https://www.amazon.com/gp/product/B0...?ie=UTF8&psc=1
I've cut some for the front of the footboxes but haven't decided if I'm going to use or not. The gloss black is too pretty to cover up! 
-
Senior Member

Originally Posted by
cv2065
Seats did show up! Yay! But they had headrests..

Don't get me wrong, the headrests are a work of art, but they don't go with my build and one rollbar. So, reached out to Rob at Intatrim and he's making me a new set. Honest mix up and he's making it right.
I do have these and am helping him sell, so if anyone is interested, just hit me up! They are really nice marine upholstery with Cobra logo in the headrests. Black and Red diamond stitching. First picture is of the seat and second/third of the actual headrests. All still in shrinkwrap in the box.


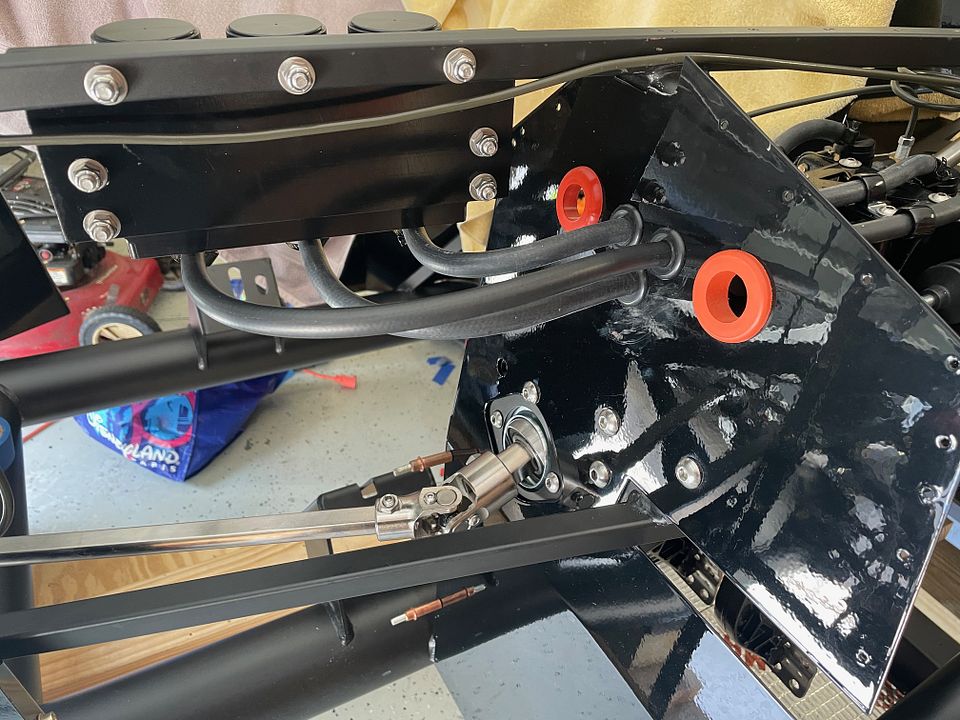
All I've got for now. I do need to revise a couple of things. One, the brake lines at the front of the car need 90 degree fittings. I had already purchased these but forgot to put them in place and the tires will rub, so I'll need to install and re-bleed the front end. Speaking of which, I'm using this vacuum bleeder from Harbor Freight. Best $99 I've spent in a long time. 5 minute bleed on each corner with no mess. In case anyone is interested:
https://www.harborfreight.com/pneuma...kit-57057.html
I am also fitting my wheels and it turns out that the studs I had pressed in at the local machine shop, one of the hubs has a flaw and the stud is not completely straight. Wish I had known this before as I'm going to have to tear down the rear passenger side and pull the hub.

Tried to pm you but your box is full…
Seats still available?
-
Originally Posted by
danmas
Tried to pm you but your box is full…
Seats still available?
I cleared it out. Thanks for the heads up. Seats were sold.
-
Build is really looking good so far.. The gloss black panels are sharp....
-
Post Thanks / Like - 0 Thanks, 1 Likes


 Thanks:
  Likes:


 Reply With Quote


