-
Trans tunnel stuff
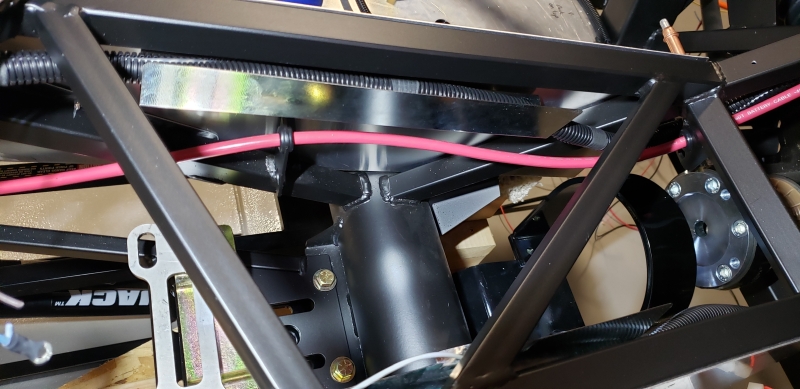
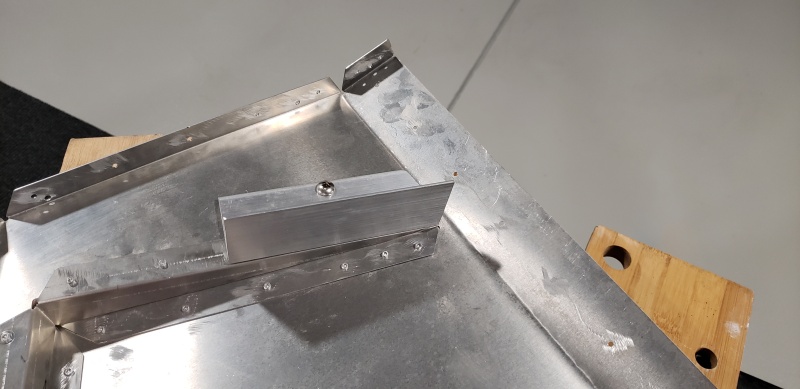
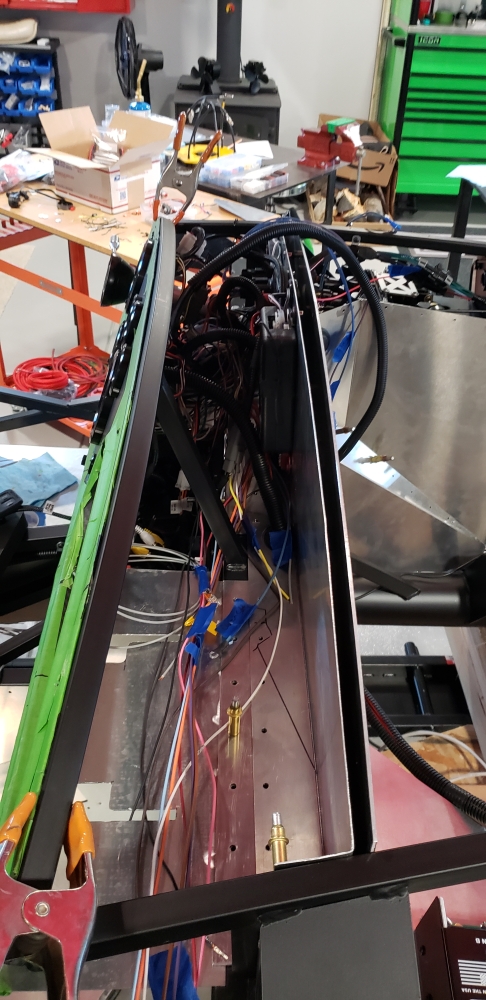
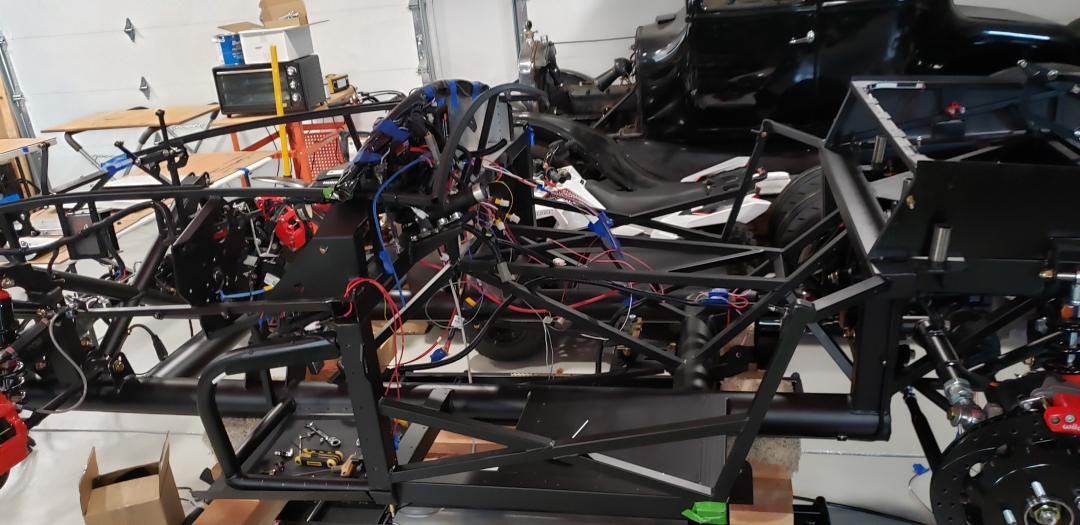
With some of the added electronic goodies I have, I'll have a lot of wiring going back and forth through the trans tunnel. So I test fit the trans A frame, the trans mount, and the drive shaft safety loop just to help reference the amount of free space I'll have. Since I was there I put the drive shaft adapter in as well. I couldn't find any of the spacer hardware with the trans mount... but I'll be more worried about that when I actually have a drivetrain on hand and fitting. Want to get wiring mostly complete and some panels finally finished before that happens. It's hard to see in this picture but I built a couple of Z channels out of galvanized steel for each side of the tunnel to help hold the wire looms out of the way. The loom on the north side of the picture holds all the audio cables... low voltage rca cables to the amp, one rca for the back up camera, and two normal two wire speaker cables. You'll see how I'm thinking I'll route the extra 4g cable from the front battery to power the rear supplemental fuse panel and amp. It's going through some rubber grommets installed in the bracketry normally used for the parking brake cables. I'll add loom later when I'm sure it's what I want to do. On the south side of the picture I have the rear wire harness from the Ron Francis kit.
Trans Tunnel:
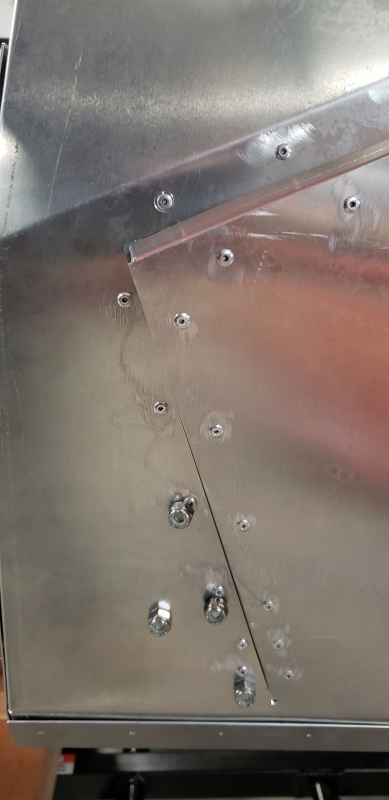
I plugged the ebrake cutout as most do when they aren't using the stock location or go with an electronic version. You can see some of the planned rivet locations for the z channel. They are the ones running horizontally up the middle here.
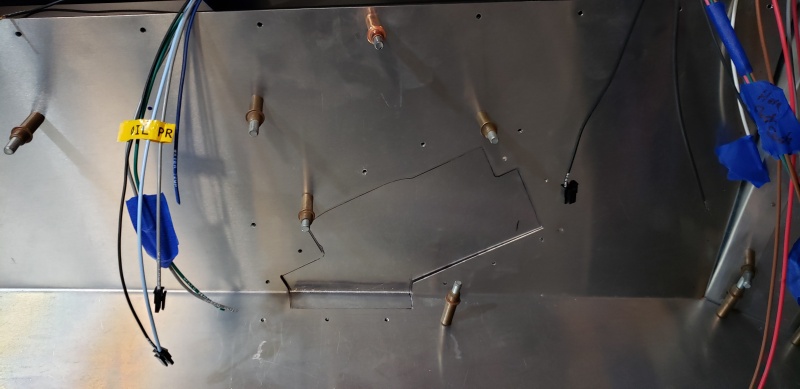
I figure I would likely like to get the tunnel top off for serviceability but that's a challenge with the way the dash overlaps the center console . I could redo the console so it would go up under the dash but I doubt I'd like the finished product there. So for now I'm submitting to the fact that I'll have to take the dash off in order to get behind the console. Better get that wiring done right! With that in mind I chopped the front of the tunnel off to allow it to stay in place while opening the rest of it. You can see the harness carrying the audio stuff poking through the passenger side grommet here. Also look at that wiring mess... sometimes I feel I would have been better off starting from scratch on that harness. I've pretty much taken the whole thing apart.
I added a rear panel to the console to mount the cross overs for the front speakers. I also de-pinned all the wires from the stereo harnesses I wasn't using to allow for less clutter once installed. I think I ended up taking about half of them out... even with less clutter it's going to be a challenge to get things hooked up in their final locations here. Again... better get the wiring done right the first time! Lots of testing.
Last edited by topherchrisb; 02-11-2024 at 03:45 PM.
MK4 #10255 project: "Mako"
Coyote Gen 3, TKX, IRS, Wilwood brakes, power steering
Order date: 6/24/21, Received date: 1/12/22, First Gocart date: TBD, Registration date: TBD
Build thread
-
Dead Pedal Fitting
Another thing I used as a break from all the wiring is the dead pedal fitment. I debated back and forth on actually doing a dead pedal at all. I have enough spacing between the clutch and the outside panel and my foot is skinny enough I could easily get my foot behind the clutch and into a nice cruising rest position. Probably a few cringe faces out there reading that statement with safety concerns. That's something I don't think I would be doing outside of long straight interstate travel but it's an option. I also bought the Breeze dead pedal kit to try out as another option. It's a simple kit with some angled aluminum and mounting hardware. The size of the pedal allows for the perfect fitment between the foot box chassis tubes when sitting flush with the kick out panel ledge. That also allows the ledge to increase the foot placement surface area somewhat. I won't really get to test it completely till I can get some seat positions finalized and make vroom noises.
I did have to drill some recesses into the pedal to allow for rivets to countersink and sit more flush:
Fitting:

From the outside:
MK4 #10255 project: "Mako"
Coyote Gen 3, TKX, IRS, Wilwood brakes, power steering
Order date: 6/24/21, Received date: 1/12/22, First Gocart date: TBD, Registration date: TBD
Build thread
-
Post Thanks / Like - 0 Thanks, 1 Likes
-
Rear wiring start
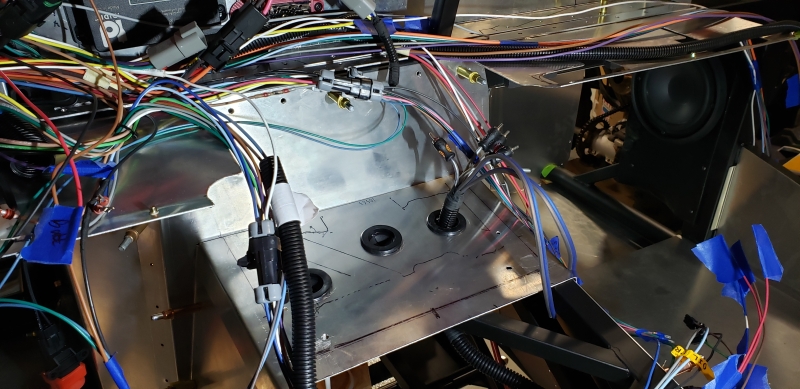
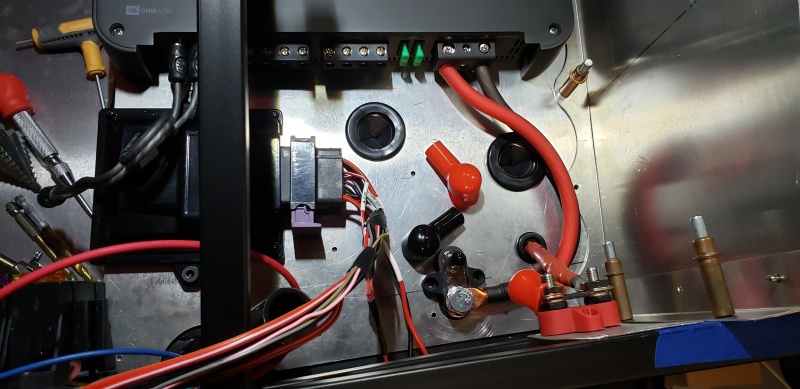
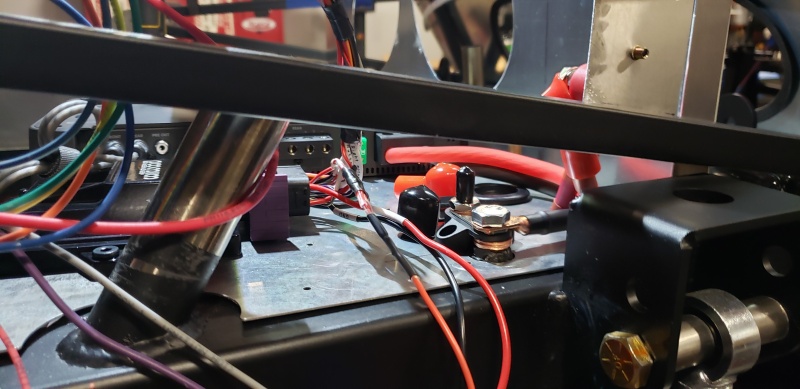
I have made a lot of progress on the behind the dash wiring but have also started the rear power distribution as well. The rear components that exist so far are a couple of two post distribution terminals, a four channel amp, the aux fuse panel seen previously, and the wilwood ebrake controller. Probably the most interesting thing I've done here is I drilled through the ground distro block, welded a flanged nut to the square tube frame and ran a bolt through the distro block into the welded nut. I've added similar grounding points in a few other places that'll pop up in future posts.
Top view:
Grounding post:
From the rear:

MK4 #10255 project: "Mako"
Coyote Gen 3, TKX, IRS, Wilwood brakes, power steering
Order date: 6/24/21, Received date: 1/12/22, First Gocart date: TBD, Registration date: TBD
Build thread
-
Post Thanks / Like - 0 Thanks, 1 Likes
-

Originally Posted by
Mike.Bray

Installing bulkhead fittings in rubber grommets for the transition from hard lines to flex lines makes me all kinds of nervous. The flex line is in constant motion when driving and when the grommet fails the stress from flexing will be transferred directly to the hard line. In time the hard line will probably see a fatigue failure. If I was a safety inspector I would fail the car based on those connections.
Get some aluminum angle and make a bracket to fit the bulkhead fitting proper so you have a good ridgid connection.
Mike
Hey Mike. I wasn't ignoring your advice here... I wanted to do some testing before I responded. I will go with your advice. The grommets I used are really robust and the way the bulkhead fits into them is surprisingly form fitting like they were meant for it. During my testing I saw something I wasn't expecting but should have in hindsight. The connection felt solid every time I tried to flex it. But your words "constant motion" made me change my testing behavior where I simulated flexing the line over and over as though the suspension was active over a period of time. Now I didn't have anything torqued to spec as the fittings are just temporary. What I found was it was easier for the fitting to twist in the grommet which started to introduce loosening of the hard line to the bulkhead connection and also the retaining nut itself. Likely torquing the hard to hard surface (flared surface) wouldn't allow that. But I can't really get reliable torque spec (especially over time) when mating metal to rubber. That is definitely concerning and not worth the worry. I won't get to fixing it just yet but it's on my list and will when I get some material.
MK4 #10255 project: "Mako"
Coyote Gen 3, TKX, IRS, Wilwood brakes, power steering
Order date: 6/24/21, Received date: 1/12/22, First Gocart date: TBD, Registration date: TBD
Build thread
-
Post Thanks / Like - 0 Thanks, 1 Likes
-
Impressive work. I would radius the corners of your dead pedal. Probably never know the difference, but something might get caught on the corners.
20th Anniversary Mk IV, A50XS Coyote, TKO 600, Trunk Drop Box, Trunk Battery Box, Cubby Hole, Seat Heaters, Radiator hanger and shroud.
-
Originally Posted by
Railroad
Impressive work. I would radius the corners of your dead pedal. Probably never know the difference, but something might get caught on the corners.
Thank you... I did think about trying to put some finishes on the dead pedal that make it look more cohesive with the wilwood pedals, but haven't executed yet. So rounding and a pattern of holes or something.
Last edited by topherchrisb; 03-05-2024 at 11:54 AM.
MK4 #10255 project: "Mako"
Coyote Gen 3, TKX, IRS, Wilwood brakes, power steering
Order date: 6/24/21, Received date: 1/12/22, First Gocart date: TBD, Registration date: TBD
Build thread
-
Post Thanks / Like - 0 Thanks, 1 Likes
-
More Wiring
Well... I've made some decent progress. Still a long ways to go but getting it done one wiring at a time, and sometimes redoing one wire at a time, and possibly redoing a wire a third time. Everyone knows the drill. I decided I really want to be able to go cart early summer so I need to get my butt in gear. I should probably call Forte and see what his leave time is on coyote/tkx packages are soon. I'm assuming they aren't that long these days, but you know how assuming goes. With the new sense of urgency I started getting up much earlier than I have in a long time, going straight to the shop and getting a couple hours of build time in before the house is active. Definitely have some momentum right now but soccer, spring break and yard work just around the corner. 
There are sooo many wires in this build due to all the tech goodies I'm adding. A few things that may be out of the ordinary but mostly done in some fashion before... keyless ignition, brights relay system, stereo/nav, warning speaker, supplemental rear fuse panel, possible AC, and a few others that I think are really unique I'm not ready to divulge yet.
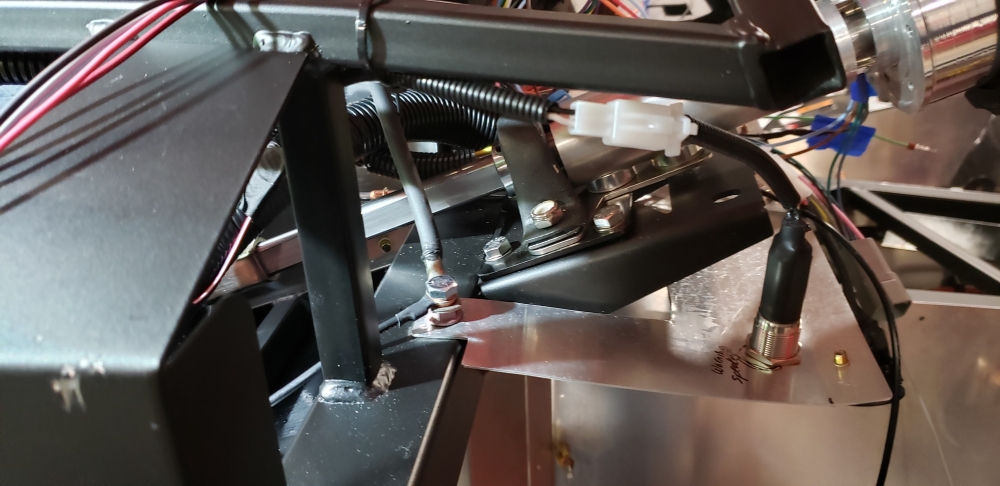
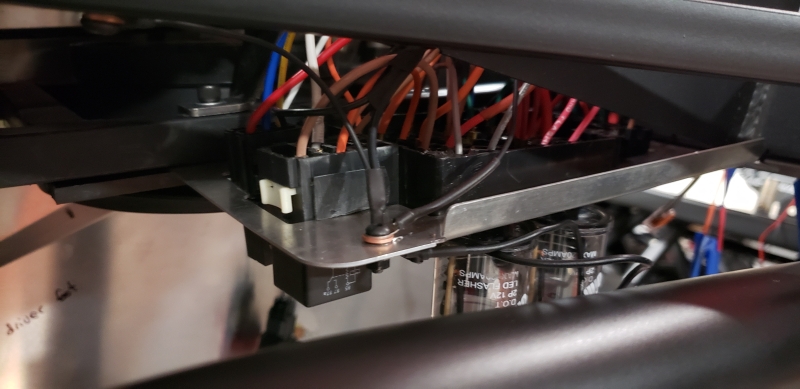
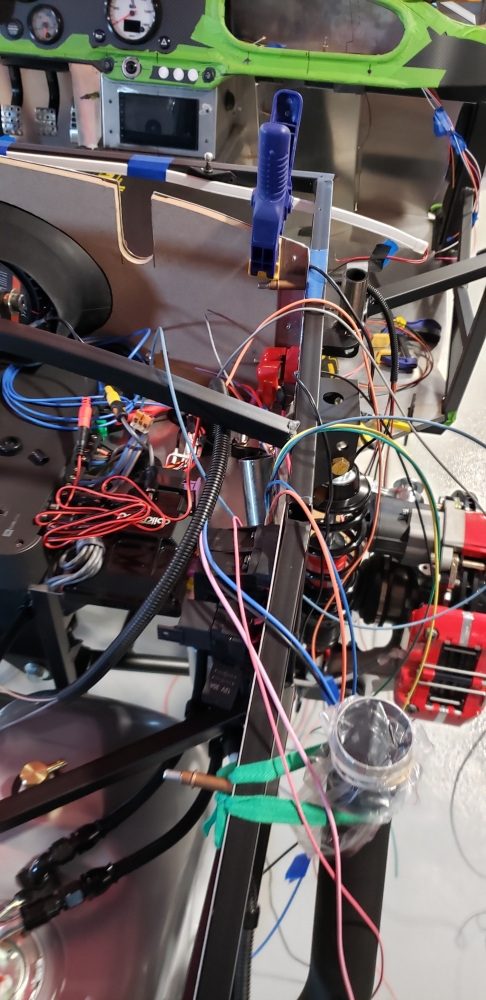
I did get a headlight warning speaker from watson's street works. It's got a good mid tone triple beep sound pattern to it. It also has a read light ring for a visual queue as well. I wanted to be stealthy with it and wasn't really worried about the light so I mounted it into the dash under panel, just left of the steering column bracket. I didn't use the relay that had come with it though. The provided relay is only a four wire with a normally closed circuit. I got a hair brained idea and also wanted to wire the fuel pump inertia switch into it as well. So I needed a normally open circuit added for when the ground breaks on that switch. So now when a combo of no ign/headlight on or no inertia ground/ign on the warning is active. I had read a couple instances where people didn't realize their inertia switch was open and it caused a large waste of time on the road, so this will sort me out in a hurry if that occurs. The load for the speaker is small so I went with a medium size relay you can barely see behind the fuel pump inertia relay in the second picture. Another thing you'll see here are additional grounds. The large one forward of the warning speaker that goes up to a ground distribution block, and a bolt through the fuse panel mount to supplement my additions and the flashers.
MK4 #10255 project: "Mako"
Coyote Gen 3, TKX, IRS, Wilwood brakes, power steering
Order date: 6/24/21, Received date: 1/12/22, First Gocart date: TBD, Registration date: TBD
Build thread
-
Wires... they're everywhere
Here are a number of pictures displaying the progress on the tidiness of the wires. Still doing tons of testing so will have to re-loom most things... but I was able to get the gauge/switch wiring cleaned up. Just five 6-pin molex style connectors and an extra run for sending units(and I don't even have AC controls picked out yet).
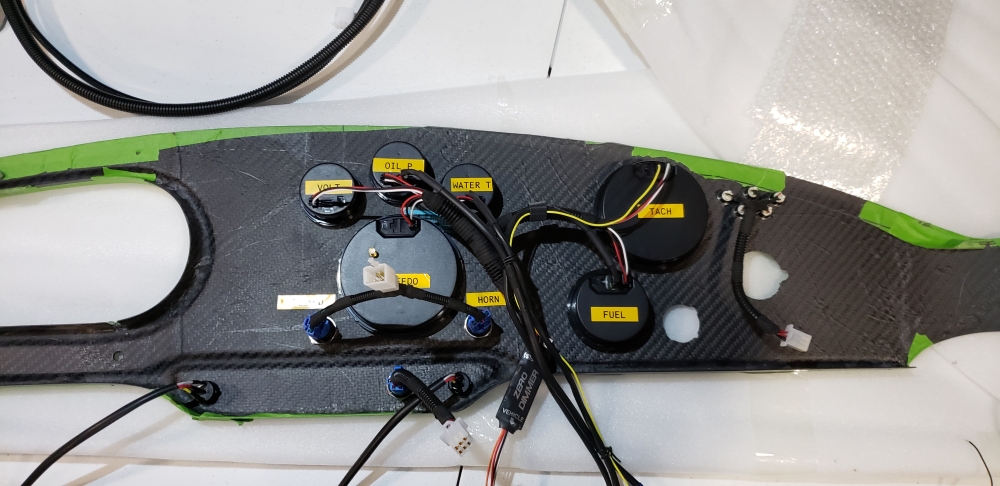
Behind the dash with it in place. Still not re-loomed
Some wires for the wipers and AC if I end up going that route. Plenty of room still too.
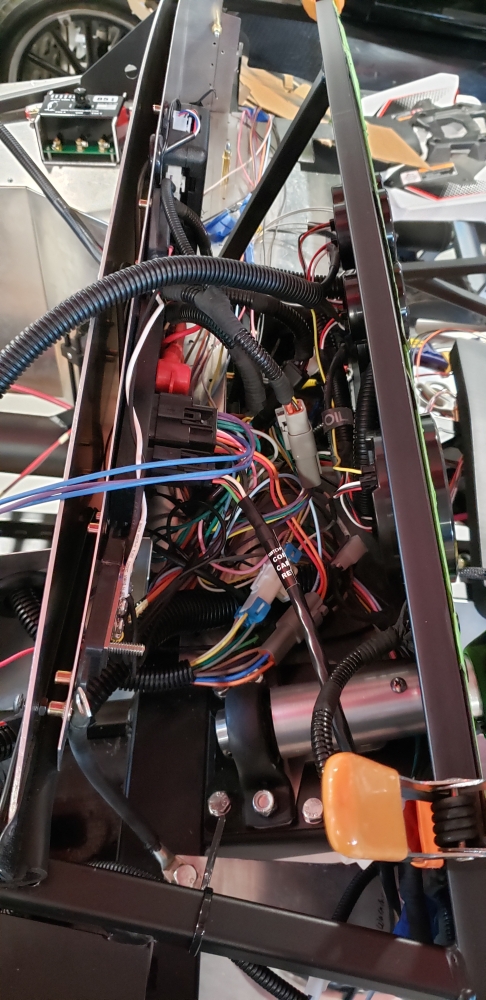
The rear is still even more of a disaster while testing. I did get extra wires ran for the cubby lighting, rear fuse ign trigger, rear view camera, etc...
MK4 #10255 project: "Mako"
Coyote Gen 3, TKX, IRS, Wilwood brakes, power steering
Order date: 6/24/21, Received date: 1/12/22, First Gocart date: TBD, Registration date: TBD
Build thread
-
Testing the wire mess.
I am constantly testing things as I add runs and connect them. I am making everything so I can get it apart once the body is on... but it's not going to be fun. So double and triple check everything!
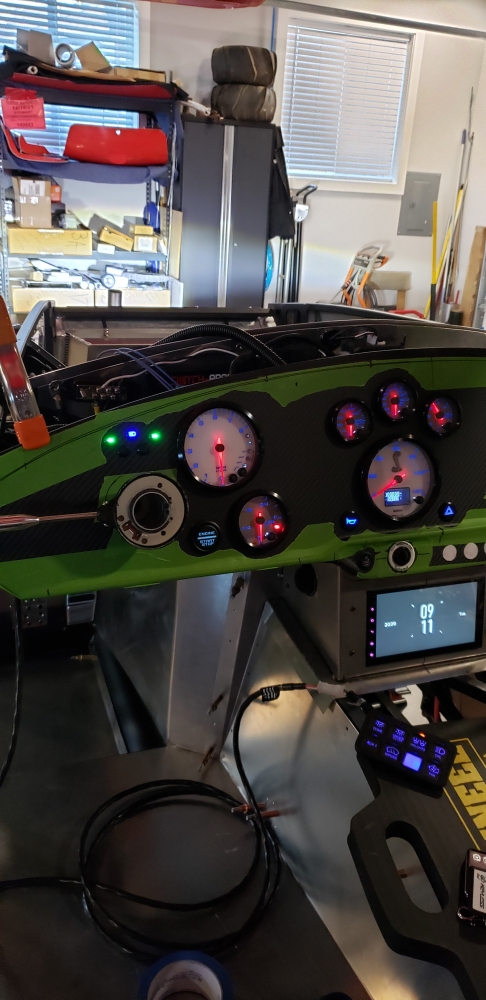
IGN, headlights, turn signals, brights, pilot lights, stereo power, fuel gauge, switch panel... check! The switch panel won't go in place till I get the transmission in and can properly space everything on the tunnel. You can see I still have one blank in there that I don't have a use for yet. I took the picture with the hazards on right when they flashed so I could get the pilots in an active state in the picture. I also did check the turn signals individually to make sure my diodes were wired properly with the single output hazard switch. I do have the speed hut dimmer that can cycle through six different gauge brightness levels. The button is mounted to the back side of the square framing behind the starter button. It also has the button for the manual override of the ignition system. Both of those tested with success as well. I also calibrated the fuel gauge and moved the float manually to verify it's in working condition. You can see the low fuel warning light active there.
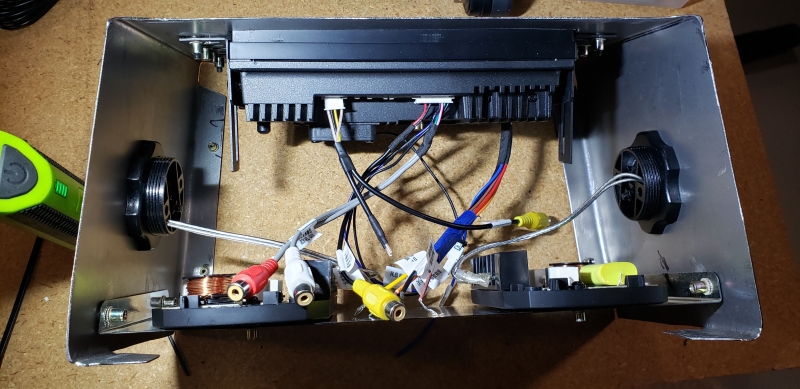
Speaker amp, stereo sound... check! I got these JBL GTO939s due to them being recommended for open air environments. Still it's an open air environment that'll hopefully get a more full sound with the body on and the trunk shut. I had to tune the EQ on the stereo quite a bit to get the low end depth I was looking for. I think I might add an all in one 8" sub enclosure to get the bass drum punches I like. I still have to finish the runs for the front speakers. Only have up to the cross overs wired there so far.

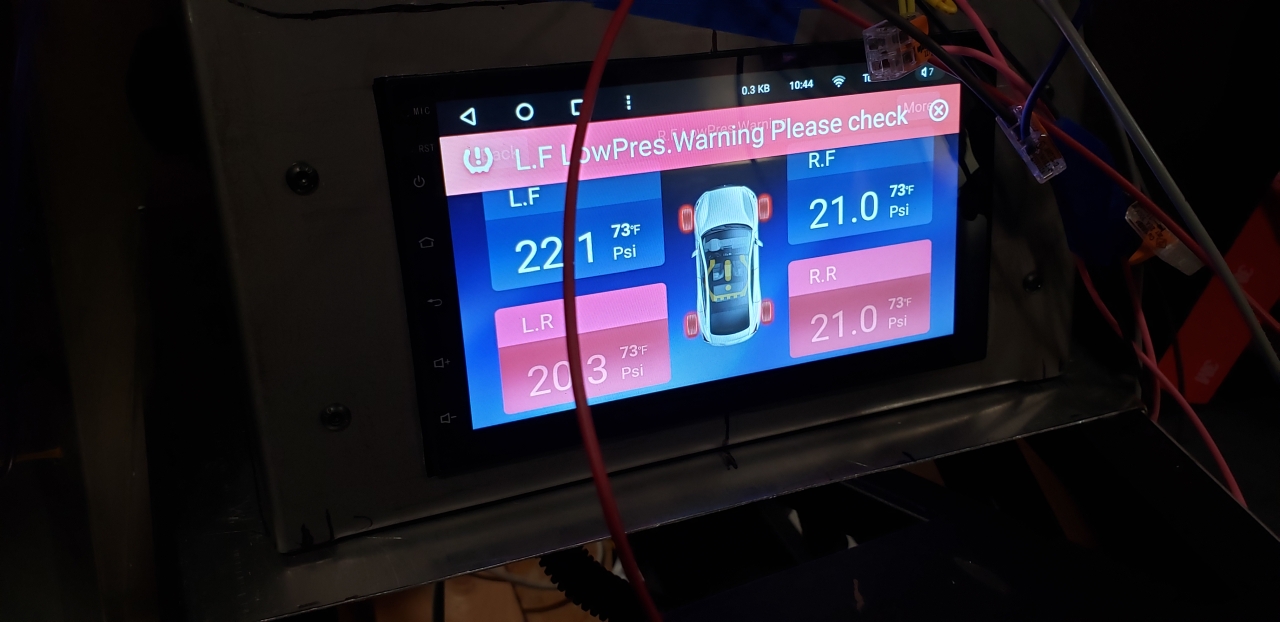
One of the reasons I went with the stereo I did go with. I don't have the antenna positioned or the sensors installed in the wheels yet... so nothing to display at the moment. I did do a bench test with everything connected and a tire pressure warning pop up appeared on the screen while in navigation mode. So pretty confident it'll work as intended.

Last edited by topherchrisb; 03-05-2024 at 12:46 PM.
MK4 #10255 project: "Mako"
Coyote Gen 3, TKX, IRS, Wilwood brakes, power steering
Order date: 6/24/21, Received date: 1/12/22, First Gocart date: TBD, Registration date: TBD
Build thread
-
Post Thanks / Like - 0 Thanks, 1 Likes
-
Brake/Reverse testing
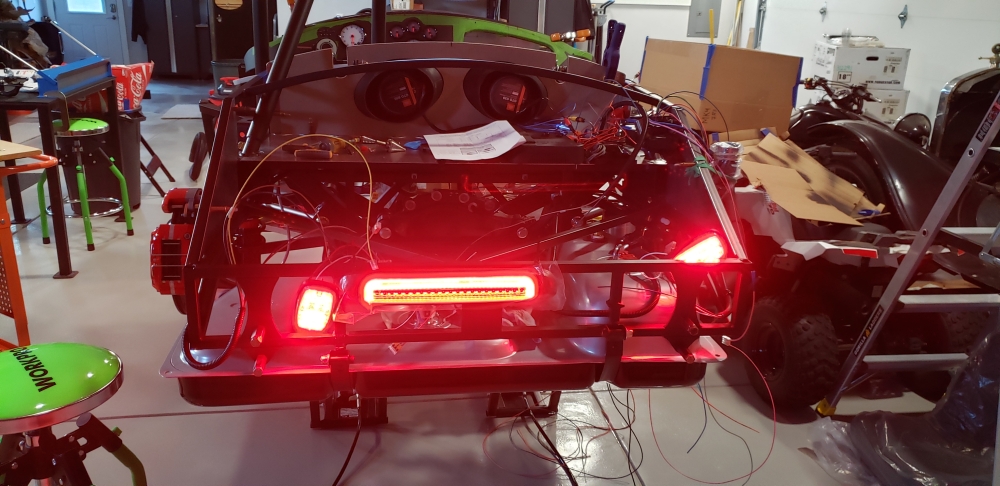
One thing I wanted the capability of doing but still on the fence is a reverse view camera. With that I wanted the stereo to show the camera view automatically when in reverse. I don't need the speed sensor wiring in the RF harness with a coyote/gps gauge setup so I repurposed those wires for a reverse switch I'll put in the transmission when I get to that point. I used the gray wire as an IGN feed and continued that feed to the rear fuse panel for it's IGN trigger source. Then I used the green wire for a reverse trigger to the stereo and ran an extra feed to the back feeding a reverse light through the drivers side rear harness. I put a clamp on my button so I could take the picture. I tried to capture the rear view mode on the stereo but it's too far away to tell it's working. I just temporarily set the camera on the top trunk shelf behind the pliers. It's hard to see as well.
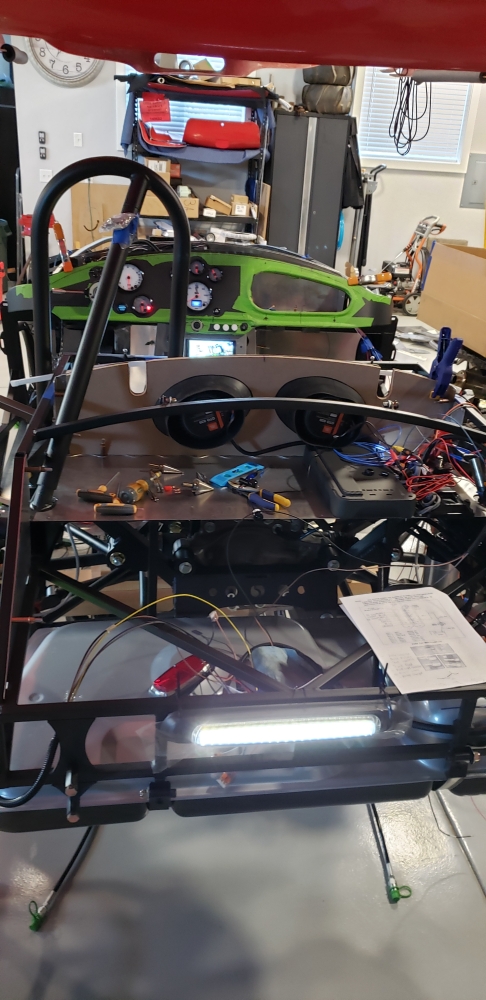
I'm still testing and on the fence about the third brake light as well. I re-added the purple brake light feed into the harness before the trailer light conversion in order to allow it to feed that possible third light. Here is my temp setup for that test.
MK4 #10255 project: "Mako"
Coyote Gen 3, TKX, IRS, Wilwood brakes, power steering
Order date: 6/24/21, Received date: 1/12/22, First Gocart date: TBD, Registration date: TBD
Build thread
-
Senior Member

Originally Posted by
topherchrisb
Another thing I used as a break from all the wiring is the dead pedal fitment. I debated back and forth on actually doing a dead pedal at all. I have enough spacing between the clutch and the outside panel and my foot is skinny enough I could easily get my foot behind the clutch and into a nice cruising rest position. Probably a few cringe faces out there reading that statement with safety concerns. That's something I don't think I would be doing outside of long straight interstate travel but it's an option. I also bought the Breeze dead pedal kit to try out as another option. It's a simple kit with some angled aluminum and mounting hardware. The size of the pedal allows for the perfect fitment between the foot box chassis tubes when sitting flush with the kick out panel ledge. That also allows the ledge to increase the foot placement surface area somewhat. I won't really get to test it completely till I can get some seat positions finalized and make vroom noises.
You have better foresight than I did. I put my dead pedal in almost the exact position you did. And I do use it. But for this six footer with narrow feet, while the dead pedal is plenty comfortable and still allows plenty of room on the pedals as well, my favorite cruising position is with my left foot stretched out under the clutch. Something I never anticipated and not great for safety but sure is comfortable.
MK4 #7838: IRS 3.55 TrueTrac T5z Dart 347
The drawing is from ~7th grade, mid-1970s
Meandering, leisurely build thread is
here
-
Low Profile Sub and Charcoal Canisiter
Two months can go by just like that. Soccer, spring break, school assemblies, field trips, colds and boom... you realize you haven't made progress on the project much at all. Another excuse I have is the lack of gen 3 coyote crates available. I really thought I had enough momentum going that I would want to order a motor in April. Well by the time I got around to it the Gen 4 hadn't been announced yet and the gen 4 aluminators didn't have wire harnesses available. I did get a quote for a gen 3 aluminator SC from Forte but I truly didn't want spend the extra money with no intention of forced induction. I was patient and the Gen 4x announcement happens. So I'll be looking to get one of those in the near future.
I mentioned earlier I would like to put a small sub in to have a little more thump behind the bass drum hits in the tunes. I ended up getting an "all in one" JBL enclosure that had some decent ratings. Some extra wiring in place, a few mount points configured and we are up and running. Nothing is permanently attached yet so it just rattles all the sheet at the moment, but it's very effective.

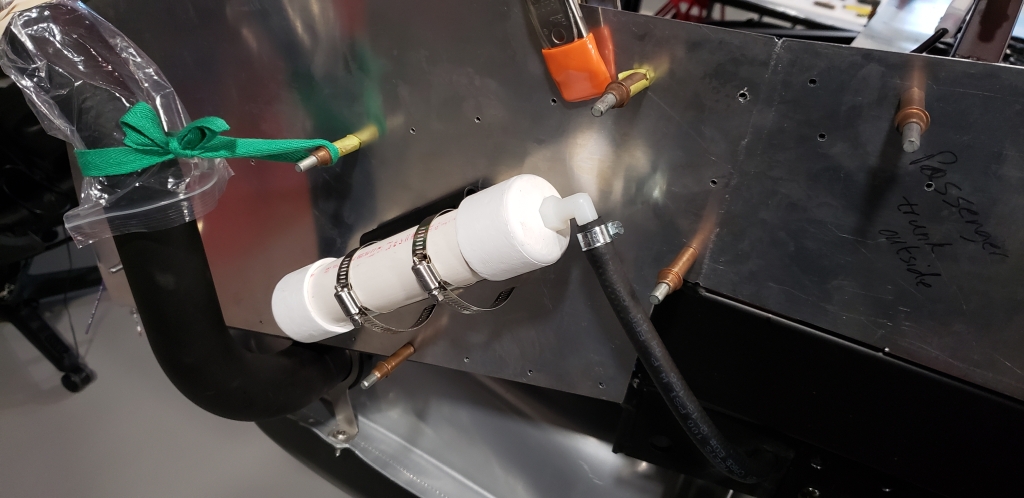
With that completed I just needed to run some wires off the supplemental fuse box to the seat positions for any electrical there and I was confident I had the rear wiring all figured out. I couldn't terminate the wires though as my connectors would not fit through the pass throughs I've put in the panels. I didn't want to make the holes any bigger than I had to... so I need to finish the panels and get them attached permanently before that happens. Part of that is something I've ignored for a while now but needed to find it's final resting position too, the Charcoal canister. Nothing crazy here... PVC, barbed fitting and an antenna pole mount and that was taken care of. Just need to put some paint on, find better fitting hose clamps, and fill it full of material.
Last edited by topherchrisb; 05-05-2024 at 01:26 PM.
MK4 #10255 project: "Mako"
Coyote Gen 3, TKX, IRS, Wilwood brakes, power steering
Order date: 6/24/21, Received date: 1/12/22, First Gocart date: TBD, Registration date: TBD
Build thread
-
Post Thanks / Like - 0 Thanks, 1 Likes
-
Trunk and Cubby lighting
In the previous post I said the rear wiring was done. But I hadn't mentioned any of the trunk lighting yet. I have a "cool blue" light working in the cubby location. I'll have the same color for the front courtesy lights working off the same trigger points. Those being grounding switches on the doors and one of the buttons on my programmable switch panel. The voltage runs through a fade in/out LED controller to give it a little more cool factor when they come on. Picture is just a side shot without the body on so the lighting is flooding everything but you get the idea.
In this picture you can see the inside trunk lighting. This LED strip is a "cool white" strip and runs directly off the electronic trunk latch. The wiring here was another one of those things I redid a couple times. I wanted a pilot light on the dash to come on if the ebrake was on or the trunk latch was open. Well not realizing the wilwood brake controller switch light was ground controlled I had wired the trunk with the opposite polarity in mind. After a few different setups and a new diode in place I got it all working. I don't have a picture of the dash light but it is a standard parking brake light in red matching the size of the turn signals I've shown previously. The wiring consists of the dash light always being charged positive while the trunk and wilwood switches completing the ground. The diode simply just keeps the wilwood switch from lighting up when the trunk is open. You'll also see the brackets I made to mount the lighting. Some simple flexible light C channel and some galvanized sheet I had sitting around.
Last edited by topherchrisb; 05-05-2024 at 01:31 PM.
MK4 #10255 project: "Mako"
Coyote Gen 3, TKX, IRS, Wilwood brakes, power steering
Order date: 6/24/21, Received date: 1/12/22, First Gocart date: TBD, Registration date: TBD
Build thread
-
Powder Coating
As I was starting to get pieces finalized and wanting to attach them in their final places permanently, I decided I wanted to take on powder coating the smaller pieces myself. I got a decent size toaster oven, a small paint tent, some powder and a powder coat gun off amazon to try my hand at it. I started with those lighting brackets I had shown in the previous post. Those I could mess up and no one would know the better. I don't have a picture of them complete at the moment... I'll try to remember to get one next time I'm out there taking pictures.

I want to go the black out route so TONS of parts to prep and coat. There are some bigger pieces I'll have to take to a pro shop but it feels good to get some of this stuff done myself. I got a flat black which I really like but worried about longevity when trying to clean it. I can imagine it slowly turns more satin as you try to keep it clean? I also tried multiple coats on a couple pieces to see if I could make things a little more robust. You couldn't tell looking at them but you can feel a difference. The second coat doesn't go on as smooth as just a single coat. Maybe just the way I'm doing it? Probably just need some more practice. I also need to figure out what I can do for some sort of clear coat on top. I think that'll help keep the finish more consistent over the long run but realize that'll probably add more sheen to the look. There are clear powders you can use but not sure if it's worth the effort over just finding a hard spray clear or maybe even a ceramic coat. If anyone has any experience/opinions there I'd love to hear them.
Last edited by topherchrisb; 05-05-2024 at 01:37 PM.
MK4 #10255 project: "Mako"
Coyote Gen 3, TKX, IRS, Wilwood brakes, power steering
Order date: 6/24/21, Received date: 1/12/22, First Gocart date: TBD, Registration date: TBD
Build thread
-
Body Lighting fitment
There are a couple of pieces I want to position with the body on. The main three right now are the coolant expansion tank, the cool guy fan controller, and the tilton brake/clutch reservoirs. I dropped the body down a bit and decided to do some light fitting before I put it on completely. That'd allow me to size up and finish weather packs for the lights.
I still need to take the bezels off for the rears and powder coat them but getting the placement down. They aren't exact with the shape of the body... but with the pre-drilled holes not much room for interpretation. I'm assuming a body guy will want to do the massaging there when it's time.

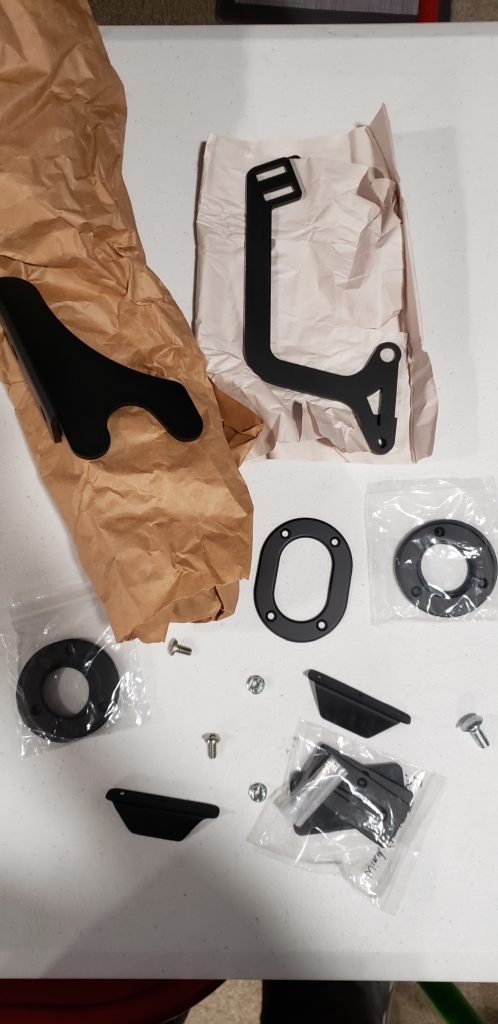
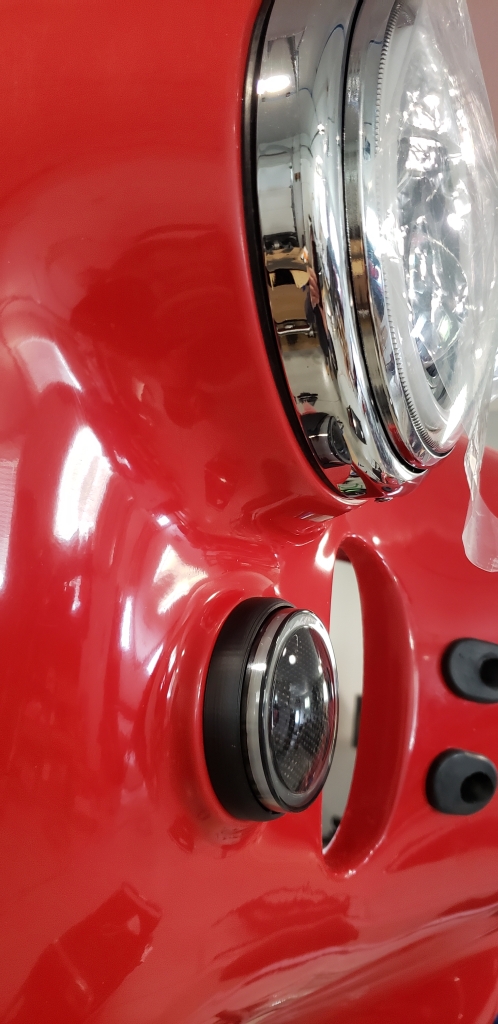
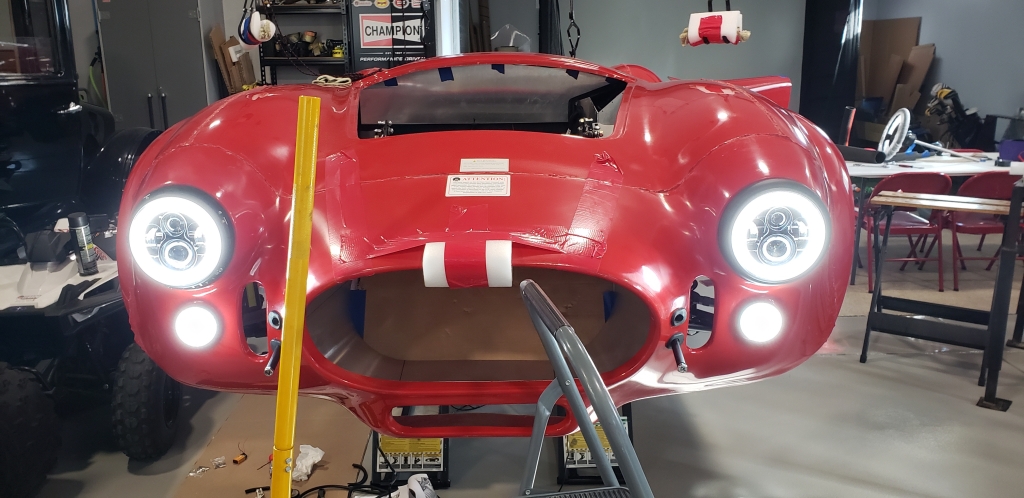
Now it was time for me to start working on the front turn signals. I got a set of jeep halo turn signals to match the look of the halo headlights. The have a smoke lens over them too which I like. I needed to figure out how to make them fit to my application though. Here you can see I had to un-soldiered the wiring in order to get it all taken apart. I had the one supplied in the kit torn apart too so I could try to create a plan. It ended up being fairly straight forward. Cut the square mounting plate to my needed round shape, re-soldier the connections, drill some holes in the matching mount positions, epoxy some machine screws, re-assemble with black sealant for weather proofing.

Finished turn signal

And here you can see the turn signal in place. I also fitted the headlights... one I had finished powder coating the trimmings black by this point.
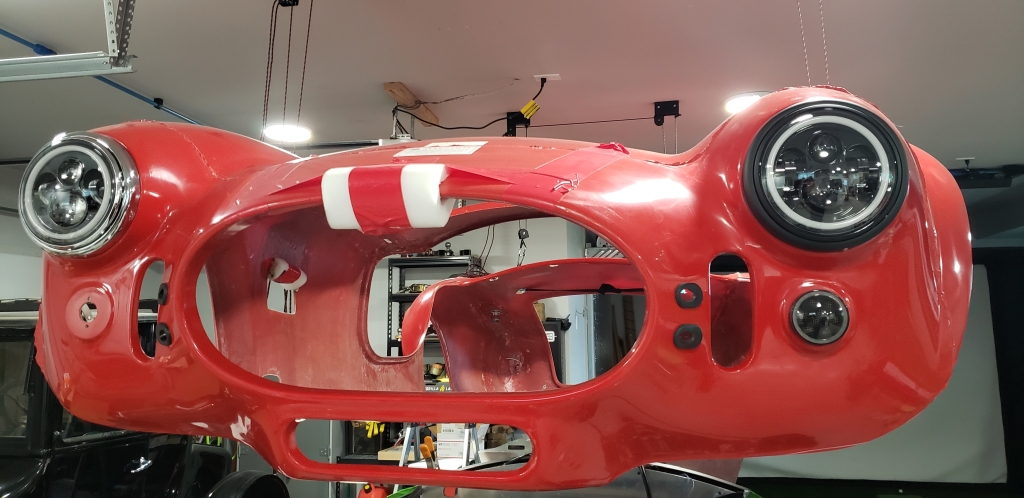
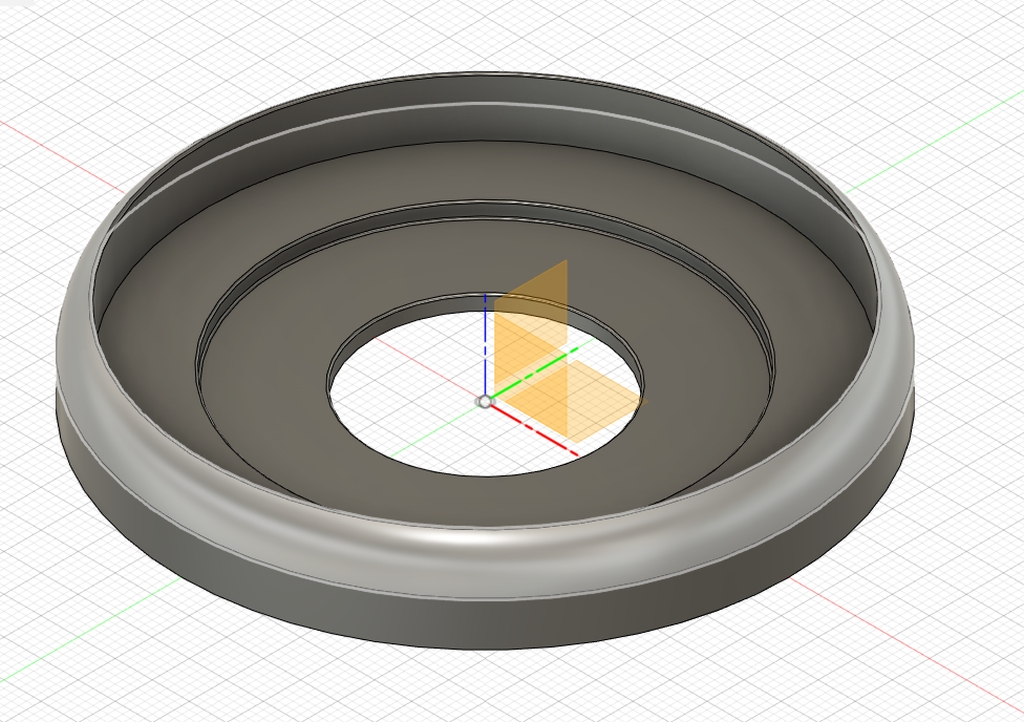
The turn signal does look a little goofy from the side as it has a pretty deep profile. I've started designing a bezel for them which should be a softer transition and fit the curves of the body molding better. This is my first CAD/3D printer project so plenty to learn here too.
Last edited by topherchrisb; 05-05-2024 at 01:42 PM.
MK4 #10255 project: "Mako"
Coyote Gen 3, TKX, IRS, Wilwood brakes, power steering
Order date: 6/24/21, Received date: 1/12/22, First Gocart date: TBD, Registration date: TBD
Build thread
-
Post Thanks / Like - 0 Thanks, 1 Likes
-
Very nice bro! I applaud your attention to detail! This is going to be killer when completed! Look forward to seeing more updates!
-
Originally Posted by
GTM_Vet
Very nice bro! I applaud your attention to detail! This is going to be killer when completed! Look forward to seeing more updates!
I appreciate the words. I've put a bit of time into this project. I really want to be able to drive it as much as possible. So trying to check all the creature comfort boxes. Honestly though... I could slap an engine in it, put the wheels on, drive it around in gel coat and probably be happy for a quite a while.
MK4 #10255 project: "Mako"
Coyote Gen 3, TKX, IRS, Wilwood brakes, power steering
Order date: 6/24/21, Received date: 1/12/22, First Gocart date: TBD, Registration date: TBD
Build thread
-
After yesterday's post I was able to spend a little time on the car.
I did get a picture of the completed rear courtesy lighting brackets. Here they are powder coated, riveted on, and with the lights pressed in place. I thought about painting the sides of the silicone encasing the LEDs to have them blend in more but the light does leak through the sides a bit. They'll also be tucked up under the body rolls and hardly visible anyway.
I also got my test turn signal bezel fitted to the light. Here you can see the profiles of one with the bezel and the other without.

Here is the initial test fitment to the body. You can see how far off center those holes are drilled from this angle. I think that's something the body person will probably be able to fix easily.
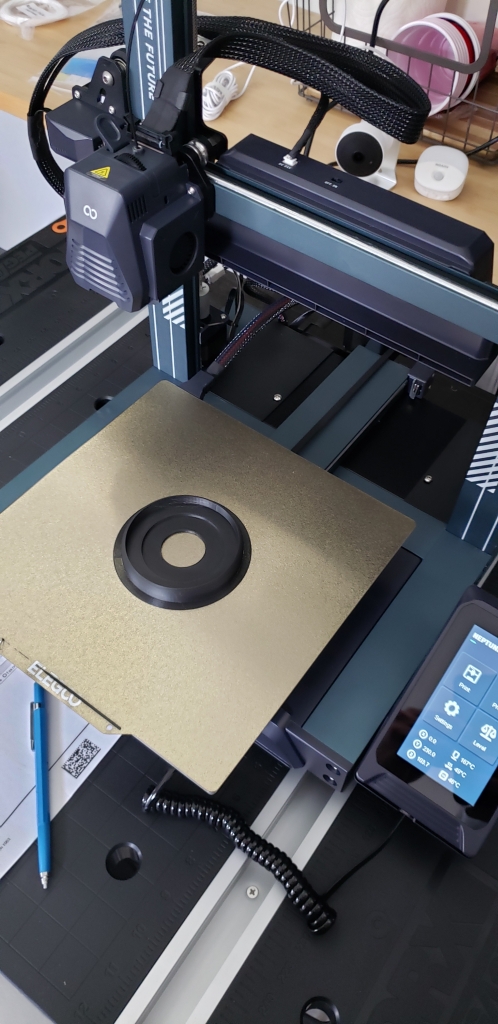
I liked the way the first version of the bezel fit so I printed another one. They had a deal on these elegoo neptune 4 printers a little bit ago. Very good ratings as a first 3D printer so I took the plunge. Took me a bit to get all the software working, calibrated and configured but it's working fine for what I want.
MK4 #10255 project: "Mako"
Coyote Gen 3, TKX, IRS, Wilwood brakes, power steering
Order date: 6/24/21, Received date: 1/12/22, First Gocart date: TBD, Registration date: TBD
Build thread
-
25th Anniversary #9772

awesome job on the 3d printing!!
are you using suitable product for UV protection and heat?
-
06-26-2024, 11:41 AM
#100
Originally Posted by
toadster
awesome job on the 3d printing!!
are you using suitable product for UV protection and heat?
I know I did get some UV resistant material but can't remember what it was exactly. I'm not much of a 3D printer guru and I put the printer in storage after I made these. I have a few more pieces to design but needed the table it was sitting on for some other stuff.
MK4 #10255 project: "Mako"
Coyote Gen 3, TKX, IRS, Wilwood brakes, power steering
Order date: 6/24/21, Received date: 1/12/22, First Gocart date: TBD, Registration date: TBD
Build thread
-
06-26-2024, 11:55 AM
#101
Front Courtesy Lights
I haven't updated in a while but I have made some progress. One thing to note is I do finally have an engine on order with Forte. He is getting a batch of gen4x coyotes in early August if things go according to plan. I have one of them reserved for myself. He did mention to me that the driver's side(if I remember correctly) exhaust flange has a different bolt pattern. Unfortunately I have a set of FFR catalytic converter headers for the gen 3. I'm hoping I can get an exhaust flange in the new pattern and find someone to do a welding switcheroo for me. Fingers crossed. Having the engine on order gives me a soft deadline of having everything else functional though. I always work better towards deadlines.
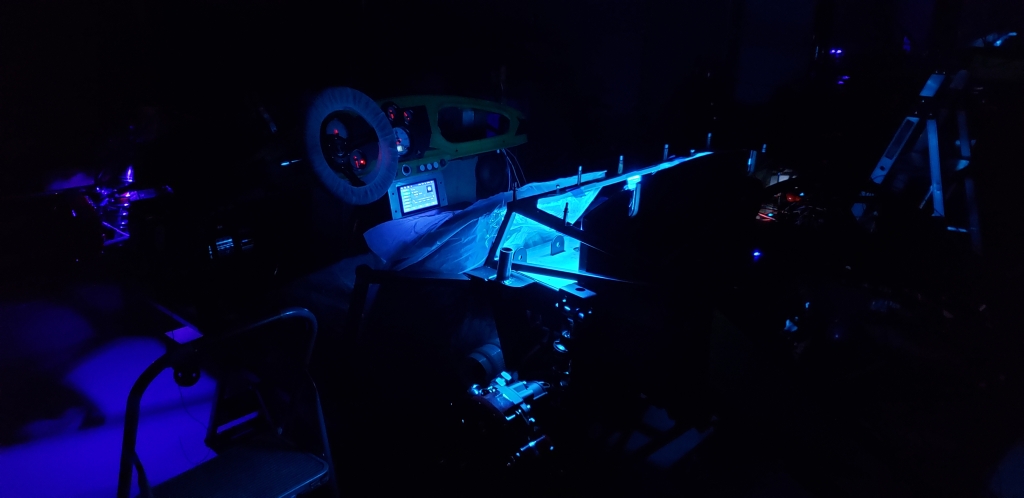
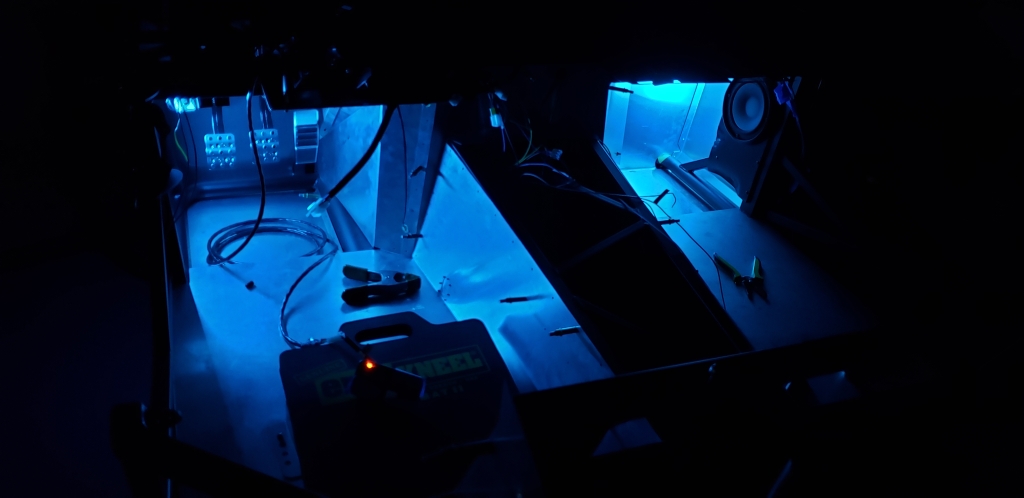
I tried a couple of methods for the foot well courtesy lights and liked this one the best. I wanted indirect lighting that mimic's something we have in one of our daily drivers. I shaped some scrap metal to some of the framing in the foot wells and added some of those c channel clamps mentioned previously on the trunk/cubby courtesy lighting post. I must have forgot to get a picture of the passenger side so you'll have to use your imagination there for the time being. I did powder coat the brackets as well but I did that after I took these pictures. They create a cool blue light concentrated in the foot wells and bleeds softer into the main cockpit. I don't have the cubby lights on in this test so there is additional light that bleeds from the back when fully functional.
Driver's side bracket:
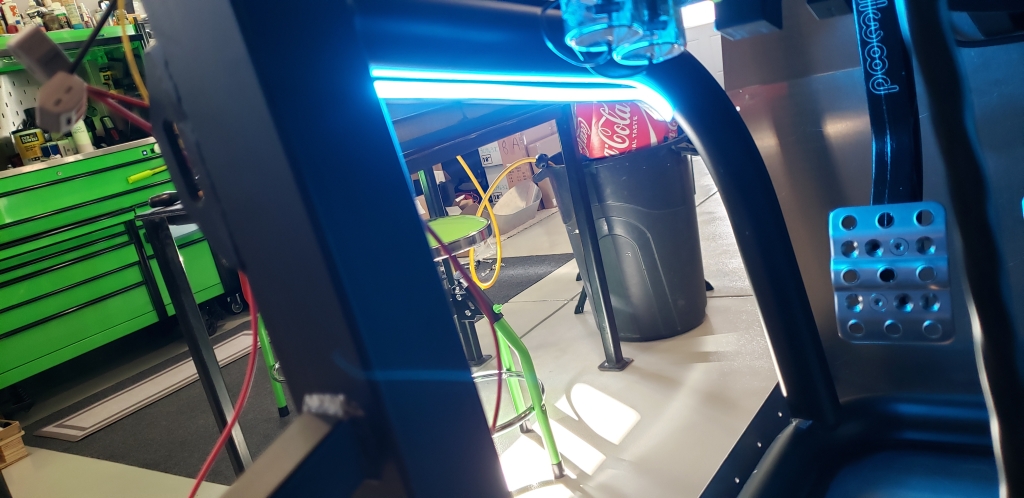
Lighting Test:
MK4 #10255 project: "Mako"
Coyote Gen 3, TKX, IRS, Wilwood brakes, power steering
Order date: 6/24/21, Received date: 1/12/22, First Gocart date: TBD, Registration date: TBD
Build thread
-
06-26-2024, 02:38 PM
#102
Body Fit Take 2
I wanted to start getting some of the panels coated on the external facing sides and mounted permanently. I started inventorying to do that and realized... what if I need to "massage" some of these panels still as the body gets fitted. So I put on some bulb seal, cut up some yard bags for "lube" between the mating surfaces and dropped the body on. I think I've got it in a pretty good initial spot but do feel it may still be sitting too high in the cockpit area. The body isn't sitting on the front and back firewalls in the middle as there is play in the center of the panels. It does feel pretty rigid on the outside edges though. So I'm thinking I need to trim the tight fitting panel edges to get rid of the "squeeze"?
Drop the nose:
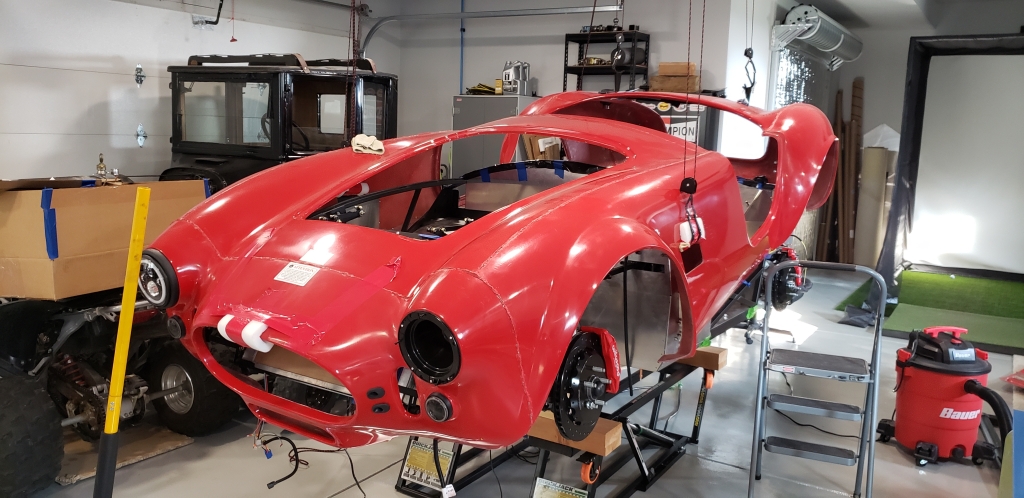
Slide the butt on:

Funny thing is I am having an easier time fitting the driver's door than I am the passenger door the way things are at the moment:
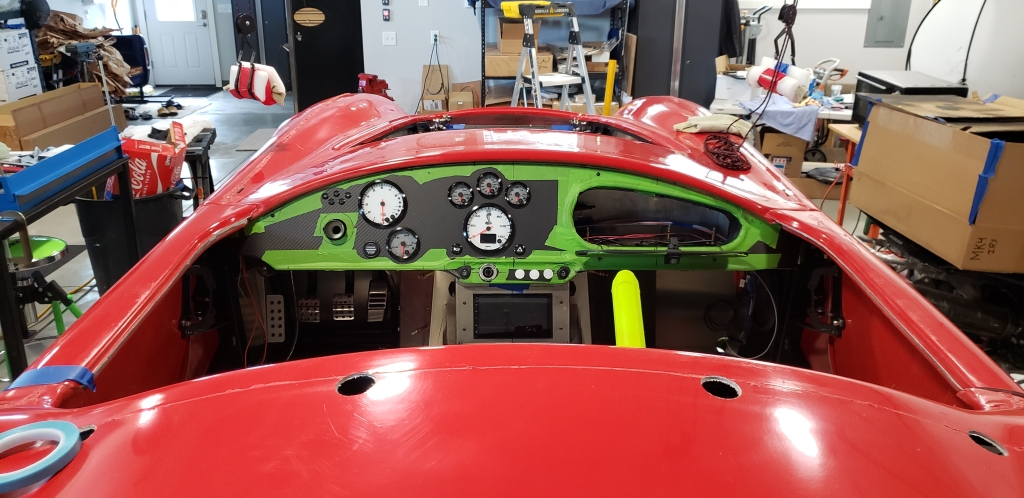
Dash reveal looks good. You can see I put the center gauge cluster off center. It fits the contour of the steering wheel from the driver's perspective well and I am always aware I'm likely not going to get anything centering on the stripes when they are in place. So intentional off center is the plan on anything i can get away with.
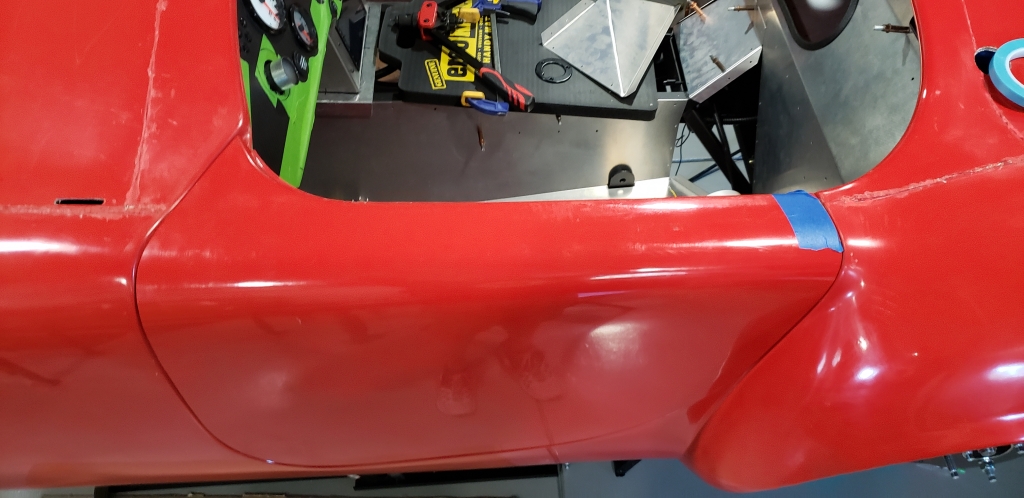
Everything seems like it's going well and then I notice this. Sorry for the grainy picture. I must have been shaking trying to extend my arm with the level.
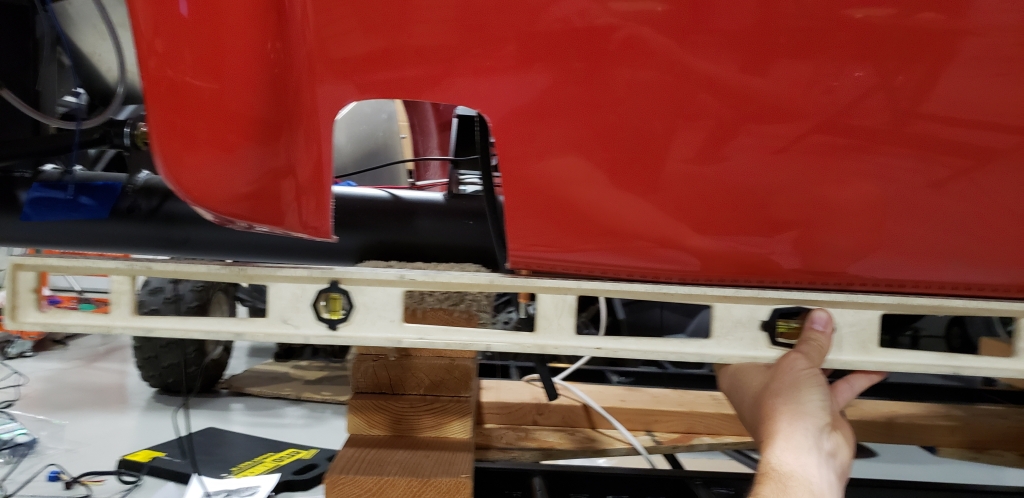
I was trying to look for some photos of finished cars without exhaust so I could see how the body line typically flows but didn't have much luck. Again... all I can think is I'm smashing that body around the cockpit instead of it sitting more naturally around the frame. I'll be gone for a week so maybe just need to do another attempt when I get back in a different mindset.
MK4 #10255 project: "Mako"
Coyote Gen 3, TKX, IRS, Wilwood brakes, power steering
Order date: 6/24/21, Received date: 1/12/22, First Gocart date: TBD, Registration date: TBD
Build thread
-
06-26-2024, 05:51 PM
#103
Body Wiring
And while you're trying to think about why the body isn't exactly lining up... you start to tackle more of the wiring and testing the repeatability of all the complexity you added. I removed and reinstalled the dash enough times to know I'll be able to do it whenever needed. I do sit on the trans tunnel while I'm doing it though so it'll be more of a challenge with the interior completed. I also wanted to get all the body mounted lighting terminations figured out since it's a good time for that.
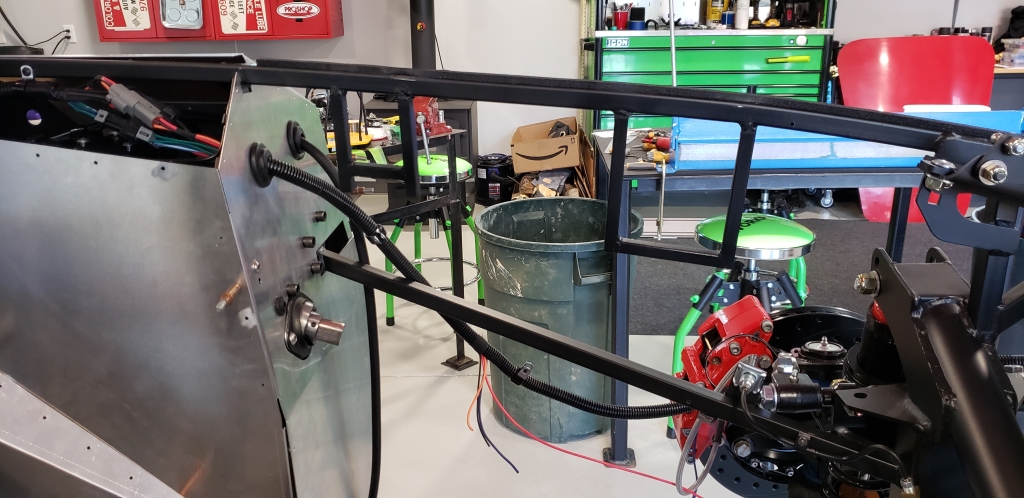
This is how I did my driver's side front light wiring. The loop under the frame and brake duct is to make it less visible when someone is looking at it from the front. I also added single wire connectors for the halos in each light to make it easy to disconnect them if I decide I'm not content with them in the future.
Similar setup on the passenger side outside of running out of wire due to my extra loop on the driver's side. I ended up adding a new hole in the light bucket and plugging the higher one with a grommet. I also made sure I reversed the connector patterns so it's easier to identify which side each bucket goes on. I'll probably still put them in backwards before the next time I install them.
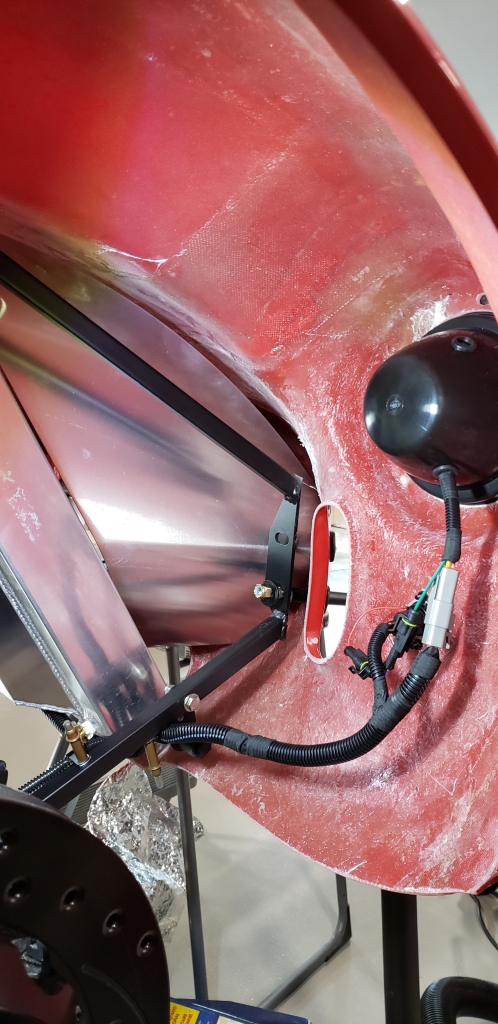
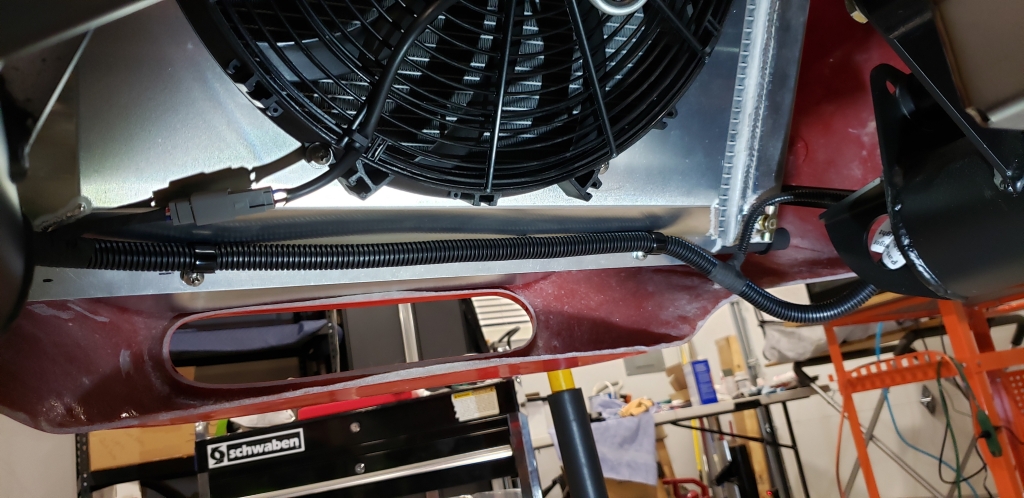
I crossed the harness using the breeze shroud mounting locations to keep it tight and out of sight. You can also see here I added a couple additional wires for the fan wiring. I'm using a cool guy fan controller so there is a dedicated ground and power off the battery there. I'm going to mount the controller inside the engine bay just off the driver's F panel. That update should be in the near future hopefully.
And they work:
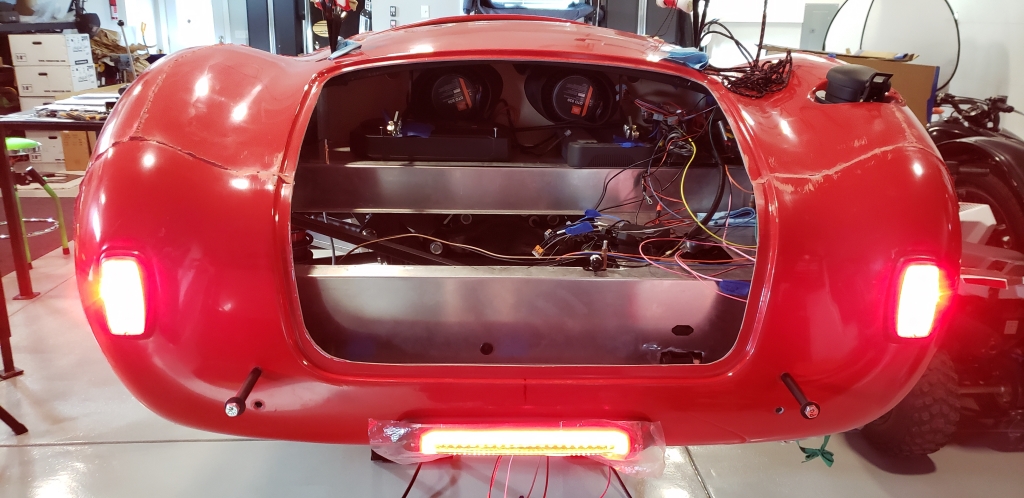
I didn't get a picture of my tail light terminations... but they are working as well. Also did decide to add the controversial third brake/reverse light combo I had mentioned earlier. It did shape nicely to the bottom of the body with just a few holes to patch if I decide otherwise. So why not for now.
MK4 #10255 project: "Mako"
Coyote Gen 3, TKX, IRS, Wilwood brakes, power steering
Order date: 6/24/21, Received date: 1/12/22, First Gocart date: TBD, Registration date: TBD
Build thread
-
06-27-2024, 09:57 AM
#104
LED turn signals are a great touch. Looks simple to install as well. You selling more bezels? 
-
07-17-2024, 09:58 AM
#105
Originally Posted by
cv2065
LED turn signals are a great touch. Looks simple to install as well. You selling more bezels?
I am happy with the way the bezels turned out... but I'm not sure I have confidence in them to sell them. I can provide the files for anyone who is interested in them though. Since then I've added a cut out for wiring and some holes for the bolt pass throughs. I wasn't impressed with the way the drill goes through this printed plastic stuff. :P
bezel_modified.png
And just so there is a direct relation for anyone seeing this in the future... these are the lights I modified for this.
https://www.amazon.com/gp/product/B0...e?ie=UTF8&th=1
Last edited by topherchrisb; 07-17-2024 at 11:16 AM.
MK4 #10255 project: "Mako"
Coyote Gen 3, TKX, IRS, Wilwood brakes, power steering
Order date: 6/24/21, Received date: 1/12/22, First Gocart date: TBD, Registration date: TBD
Build thread
-
07-17-2024, 10:22 AM
#106
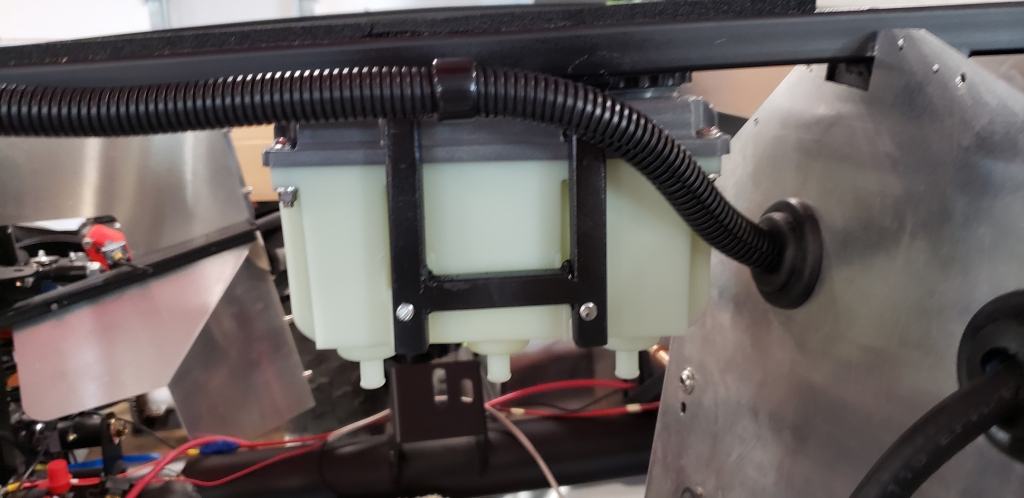
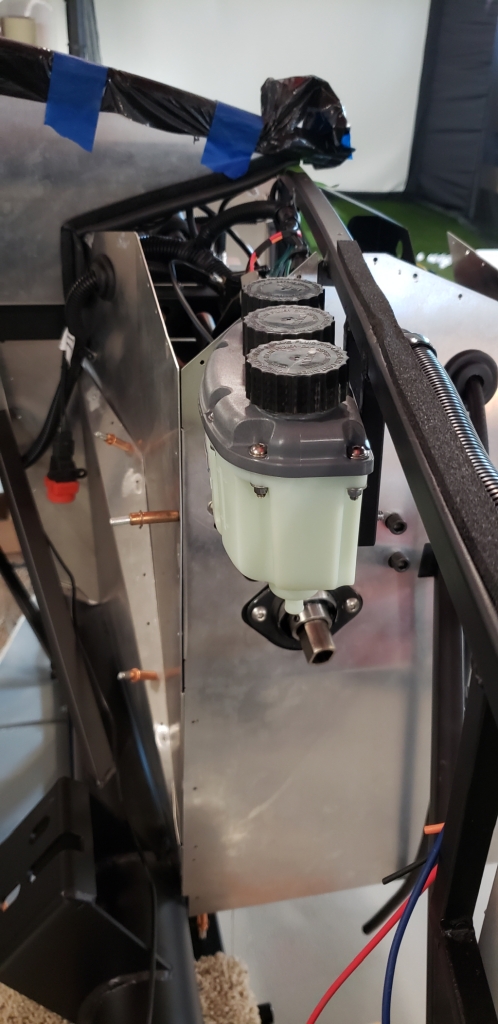
Some engine bay mods
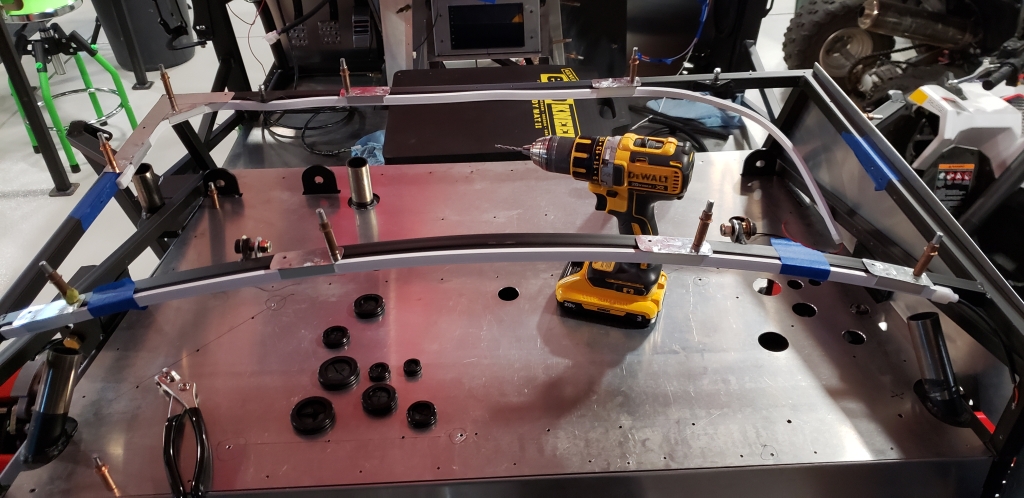
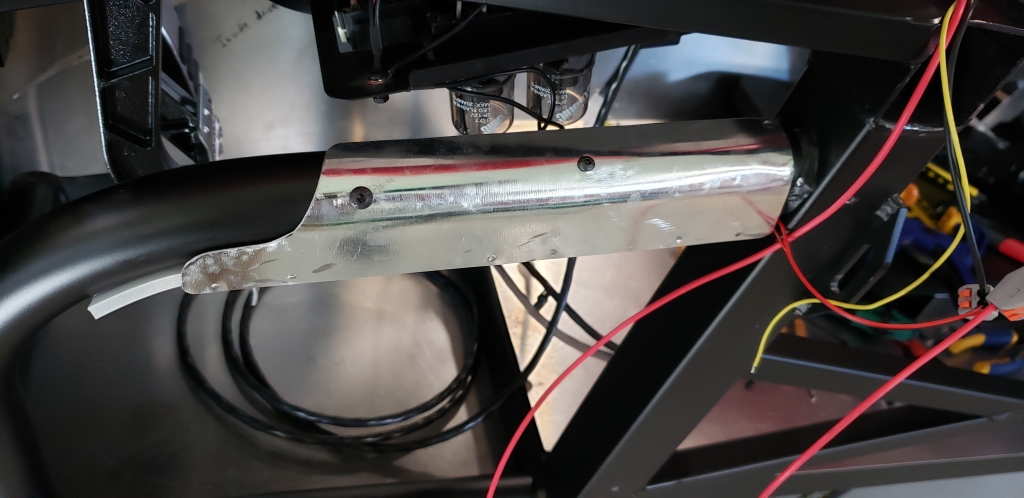
I've had these brackets I fabbed up for the reservoirs and the auto guy fan controller for a while now but hadn't really wanted to do prep/staging to weld on the body again. With the body fitment test I was able to have confidence in where I wanted to mount them... so it was time. They were hard to pick out so I highlighted them in green in the first photo. Front one is for the fan controller rear is for a tilton 3 chamber res set.
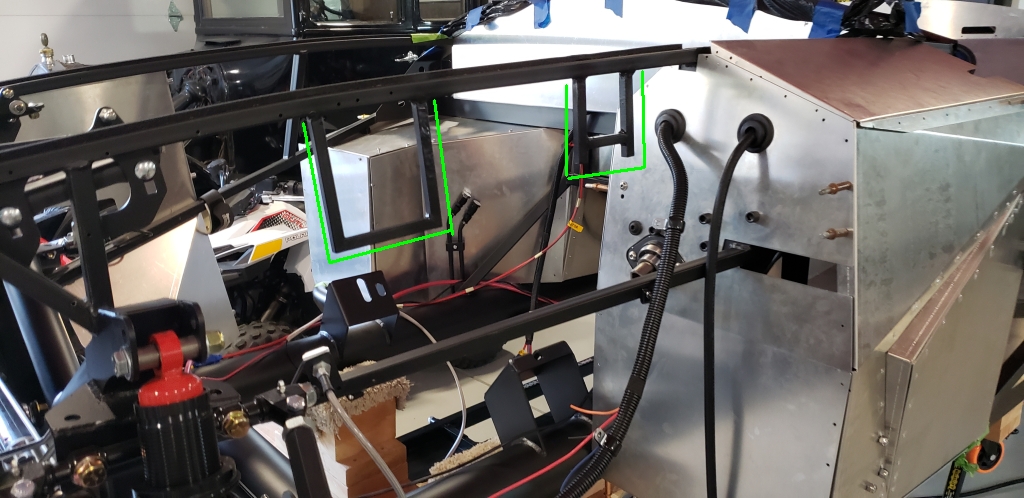
I drilled and tapped through both sides of the square tubing for the reservoirs... slightly off center. Was reaching over the bar and pulling the drill instead of pushing from the side I could see and the bit walked. No biggie.
I added all the needed wiring into the front harness for the fan controller. It works but I didn't take the warning of the fan pwm buzz as seriously as I should have. It is noisy. Would never hear it with the car running and it almost goes away with the fan noise even at low speeds but I went ahead and ordered a buzz box to supplement later anyway. I have four ways of triggering the fan now... radiator sensor, manual over ride button, AC trigger(if I end up there), and a fail safe 12v wire which I'll attach to the coyote ecu when I get it.
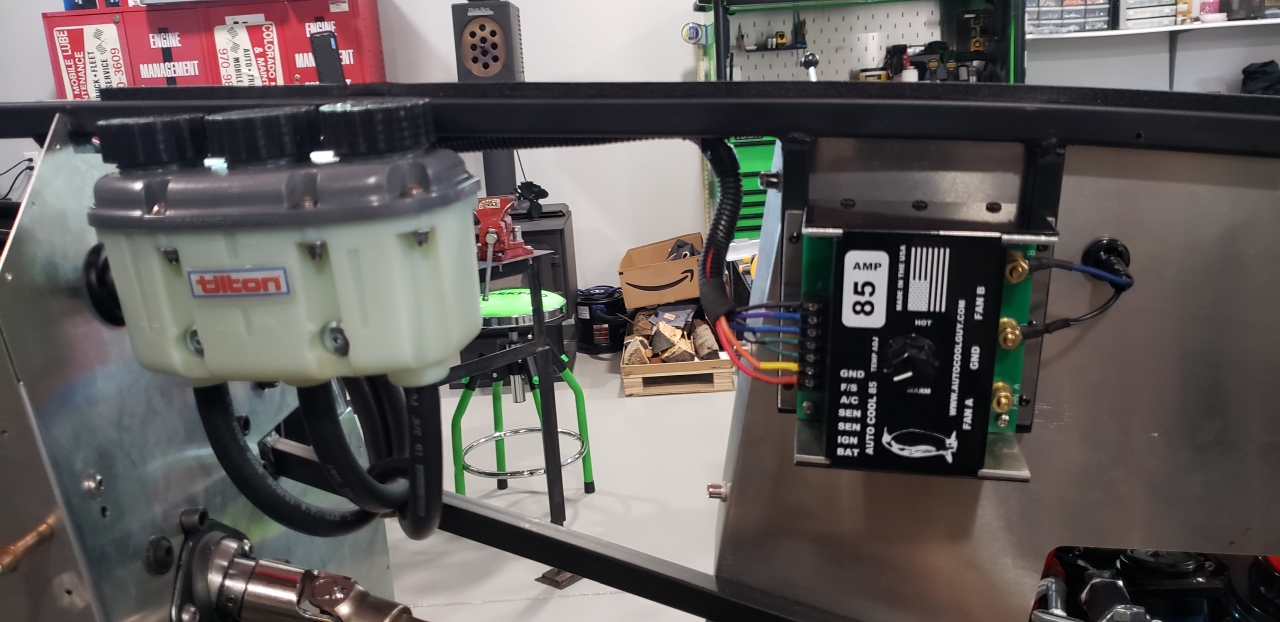
The rainbow coloring scheme was the kids' idea. I let them go into the wire box and pick out some colors for me to use.
MK4 #10255 project: "Mako"
Coyote Gen 3, TKX, IRS, Wilwood brakes, power steering
Order date: 6/24/21, Received date: 1/12/22, First Gocart date: TBD, Registration date: TBD
Build thread
-
07-17-2024, 11:13 AM
#107
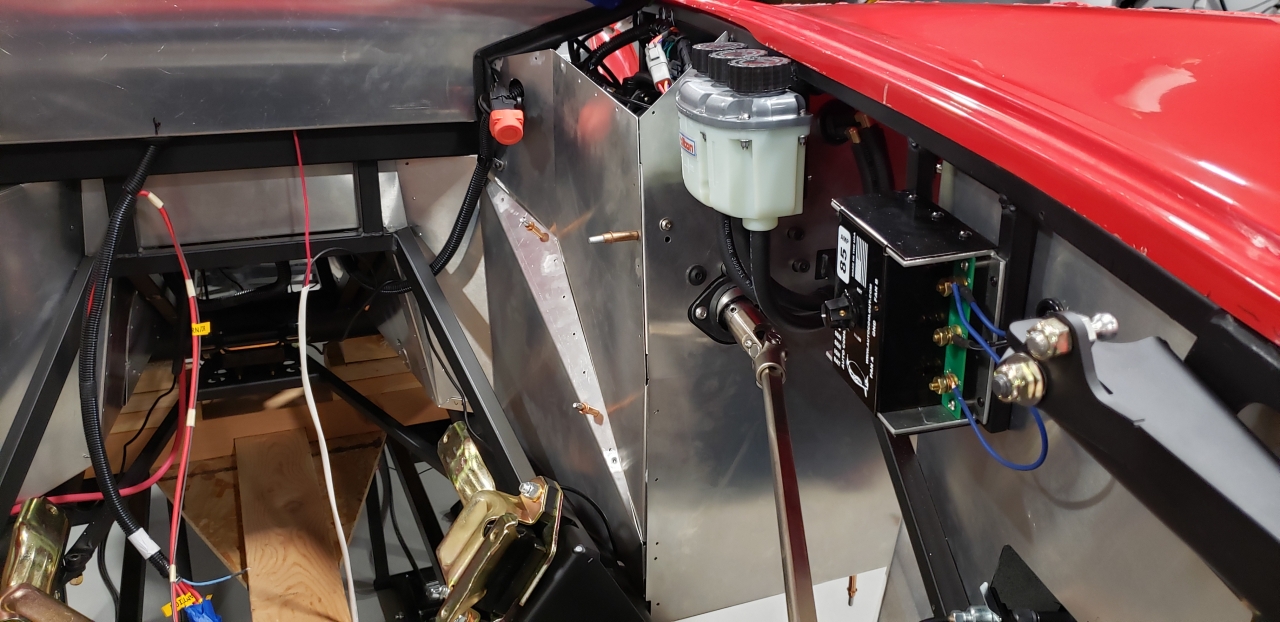
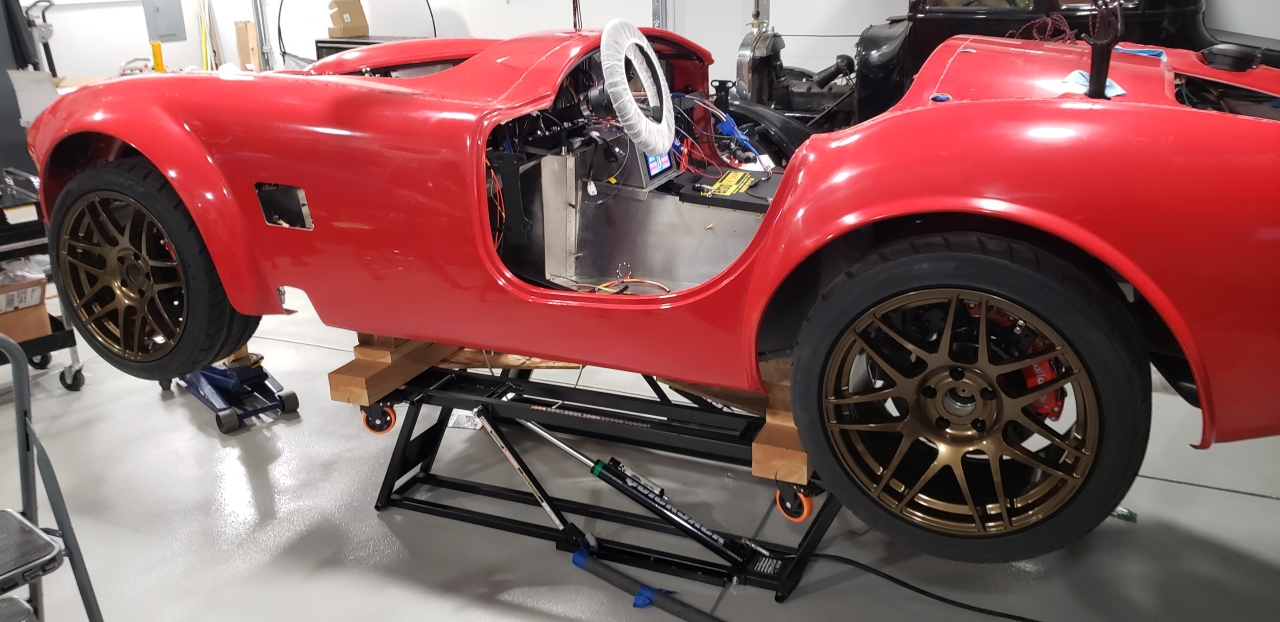
Body Fit 3 and new tires
I took a little bit of material off my engine bay firewall in places the body was fitting a little tight. This was with the hope of getting the body to settle down a little easier and more consistently. It worked... but didn't fix the body line for the front wheel wells to cockpit transition around the exhaust cut out. Look up a couple posts for clarification. It's as good as I'm going to be able to get it for now. The body can't really drop any lower without some major interference issues, but maybe I can use the wheel well aluminum to massage the front profile into place. I may be being just too picky. With the exhaust in the way I don't believe the transition will be noticeable anyway.
With the body back on we can test the final fitments of the new additions. Looks good.
I also wanted to start getting familiar with how the wheel wells will go together... and if you're doing that you might as well test some wheels too! Unfortunately the desired tires sets I wanted haven't had the desired sizes available for a bit now. Not too sure how that industry works but I couldn't find a good 315/255 combo anywhere. I was sure I read somewhere that staying around the 26" diameter size would be pretty safe for everything... so I did the best I could with that info and got nitto nt05s in 295/35 for the rear and 245/40 for the front. A little disappointing but it'll work for now.
When I took the wheels in I completely forgot about the TPMS system I had wanted to use and hence left the sensors at home. The installer asked me about that when I took them in though... so just a round trip home, searching for some batteries and doing a quick test it was back to the tire shop. After getting them back home I tested the TPMS app on the head unit and they are connecting but still have to do a calibrate and set thresholds.
MK4 #10255 project: "Mako"
Coyote Gen 3, TKX, IRS, Wilwood brakes, power steering
Order date: 6/24/21, Received date: 1/12/22, First Gocart date: TBD, Registration date: TBD
Build thread
-
07-17-2024, 12:14 PM
#108
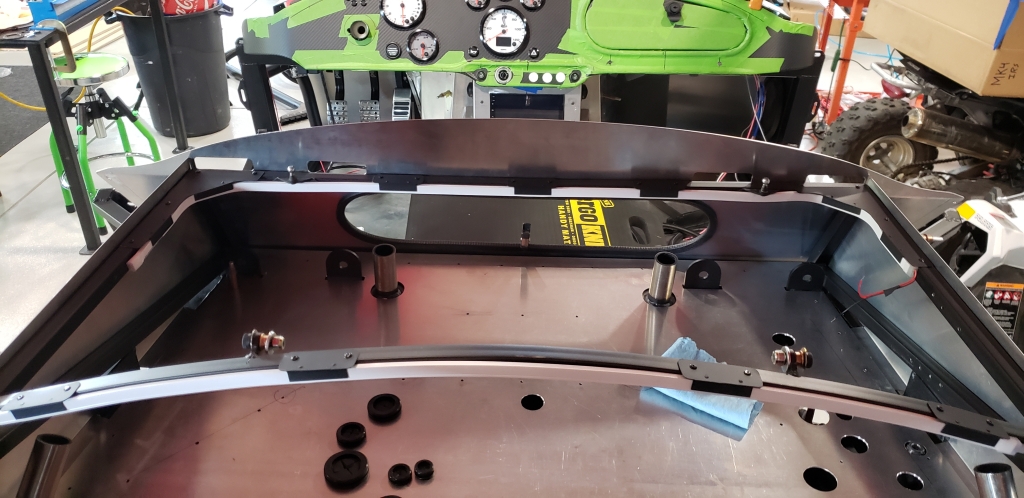
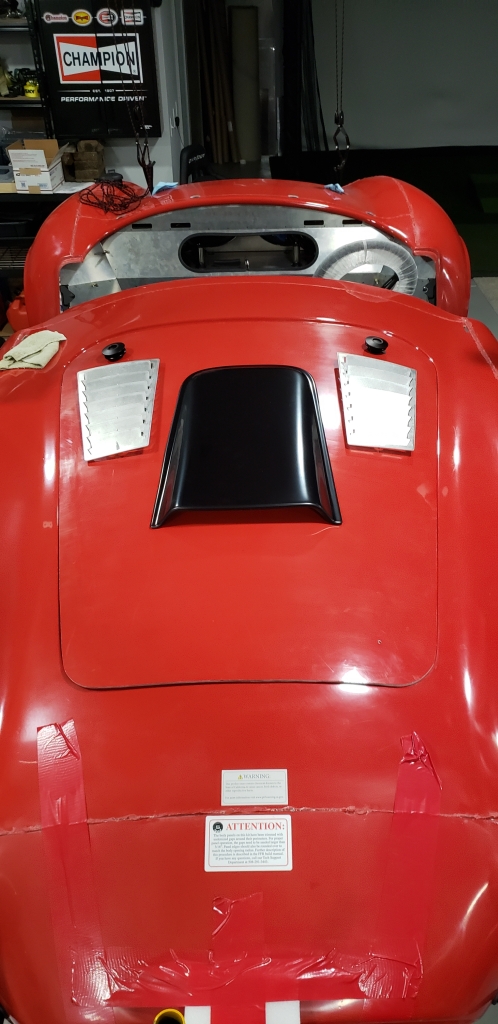
Hood configuration
One thing that's on the list is to figure out how I want to configure the hood. One thing that'll be difficult to integrate but I really want to do is push style latch releases. My best quick answer to that at the moment is building some extra framing off of the 3/4 tubes that run along the sides of the hood opening to mount them on. I also got some louvers from a vendor. I was originally thinking about powder coating them black but I'm more leaning towards them being painted to match the hood now. I'm also still undecided about the scoop, but I think if I do that I want to form a fiberglass one seamlessly instead of having the hardware mounted look.
This vs that:

MK4 #10255 project: "Mako"
Coyote Gen 3, TKX, IRS, Wilwood brakes, power steering
Order date: 6/24/21, Received date: 1/12/22, First Gocart date: TBD, Registration date: TBD
Build thread
-
07-17-2024, 12:55 PM
#109
Senior Member

Originally Posted by
topherchrisb
I'm also still undecided about the scoop, but I think if I do that I want to form a fiberglass one seamlessly instead of having the hardware mounted look.
CSX and Shell Valley have fiberglass scoops they sell if you're wanting to mold it in.
-
08-22-2024, 03:27 PM
#110
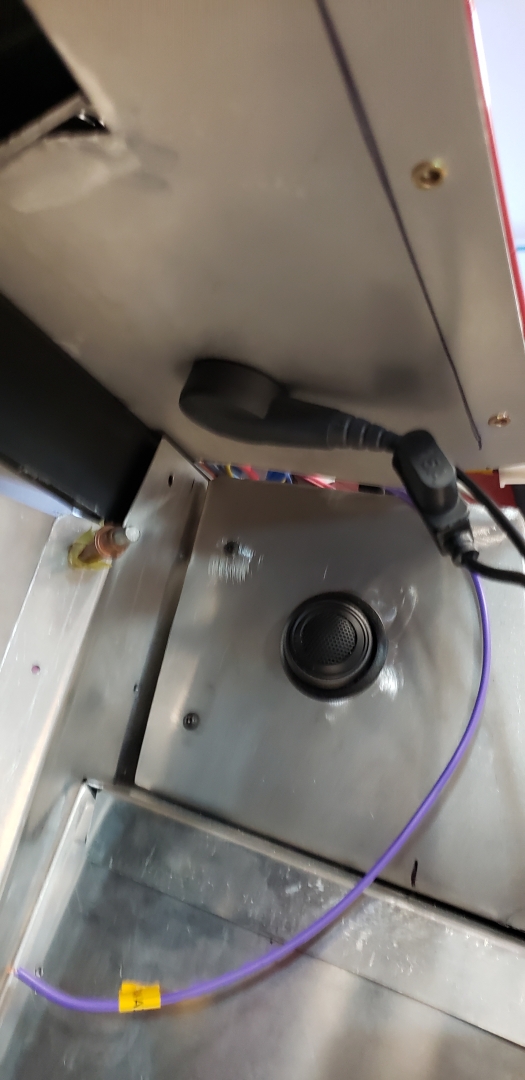
Charger hookup
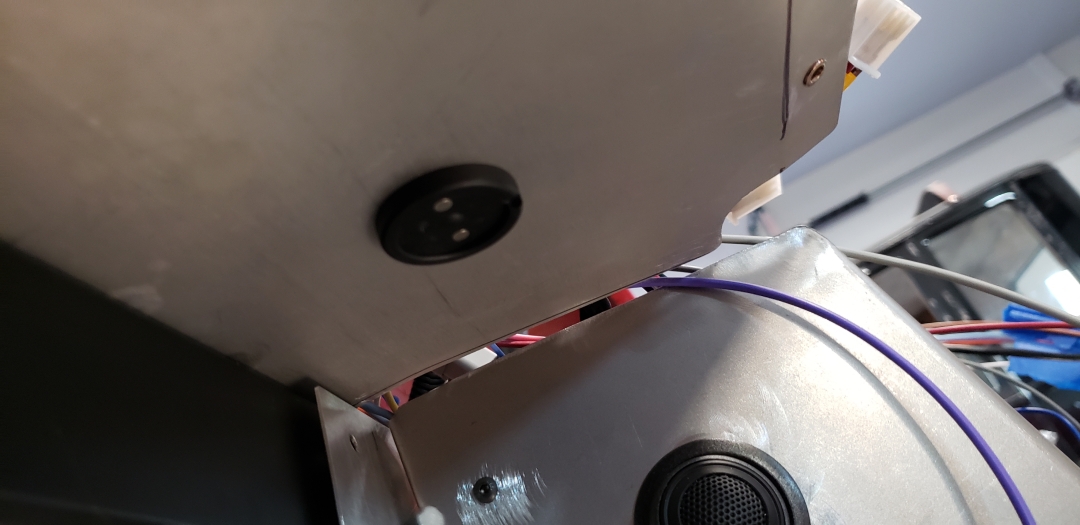
Well it's time for my monthly update I guess. Nothing too exciting over the last few weeks. In this small update I show how I handled setting up my trickle charger hookup. I got a cool magnetic connector that is keyed for a directional hookup and internally disconnects while the connecting end is not in place (identified by the magnet and it's polarity). It's called a MagCode power clip. It's sort of pricey... but it's really handy. I originally thought I was going to install this in the nose of the car sort of hidden out of the way. That's close to the battery and would be easy to reach from outside the car. Then when I was trying to test different locations I suddenly became worried that I could drive off with it still plugged in. Obviously the magnetic nature of the piece will help that action not be so destructive but I still didn't feel good about it. So I went with a more obvious route and hooked it up under the driver side dash. The hookups aren't any less efficient due to being able to tap it into the bus bars on the firewall and this also makes it completely obvious that the cable is in place when entering and exiting the car. Hopefully I don't forget to unplug it from there!
Blurry picture again. Cable in place:
No cable in place:
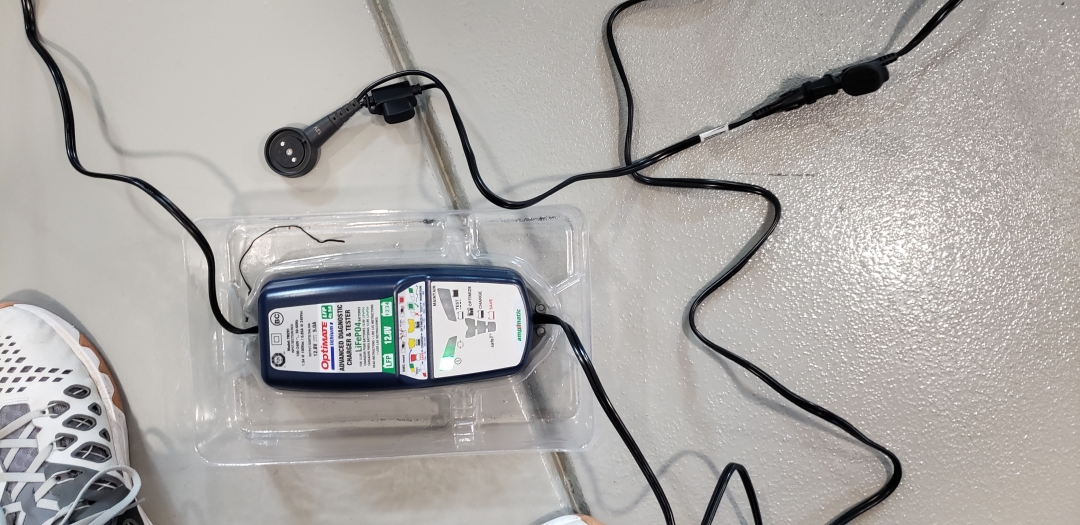
Charger I'm using:
MK4 #10255 project: "Mako"
Coyote Gen 3, TKX, IRS, Wilwood brakes, power steering
Order date: 6/24/21, Received date: 1/12/22, First Gocart date: TBD, Registration date: TBD
Build thread
-
08-22-2024, 03:48 PM
#111
Wheel Wells
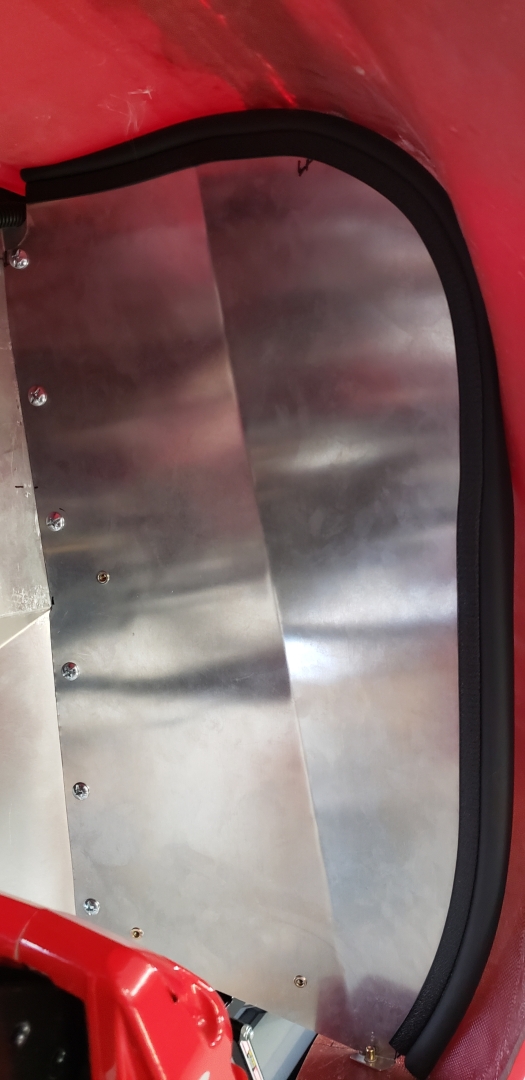
I have an engine coming soon. A gen4 coyote from Forte. So I wanted to get to the point I was comfortable attaching some of these panels around the engine bay and trunk permanently. The trunk pieces were more so I could get all that supplemental wiring terminated and fixed in place finally. I don't have pictures of everything but I tried to get the general ideas captured in this set. And as I'm typing this I realize I didn't capture any pictures of how I did the rear wells. I'll have to come back to that later.
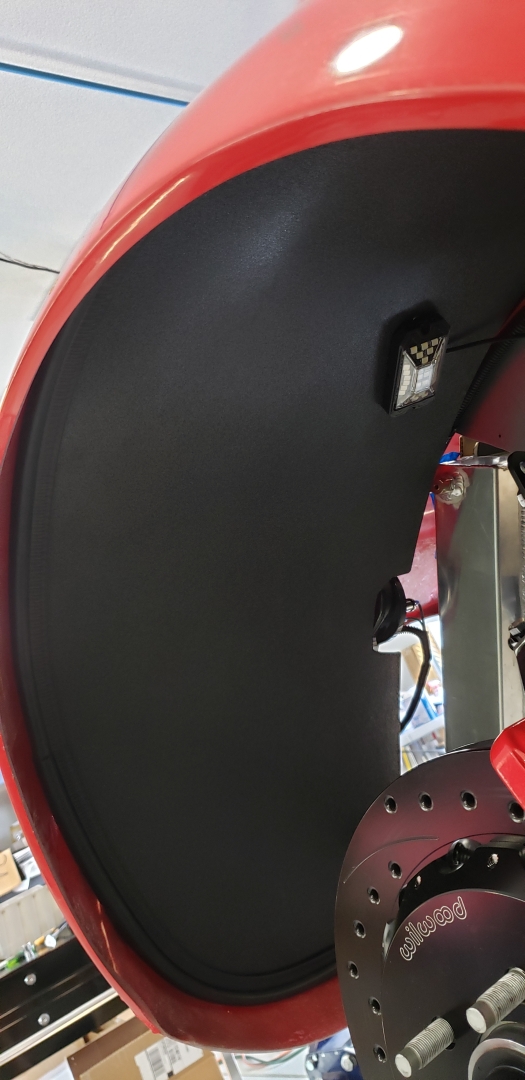
I went with the rivnut/bolt approach for attaching the panels. No reason other than personal taste really. I have the FFmetal large wheel f panels so some extra fitment love was needed. I feel they fit pretty well overall though. I also got some vraptor wheel well liners and in this first picture you can see the extra set of rivnuts in place to mount them.
Front driver raw format:
Vraptor in place:
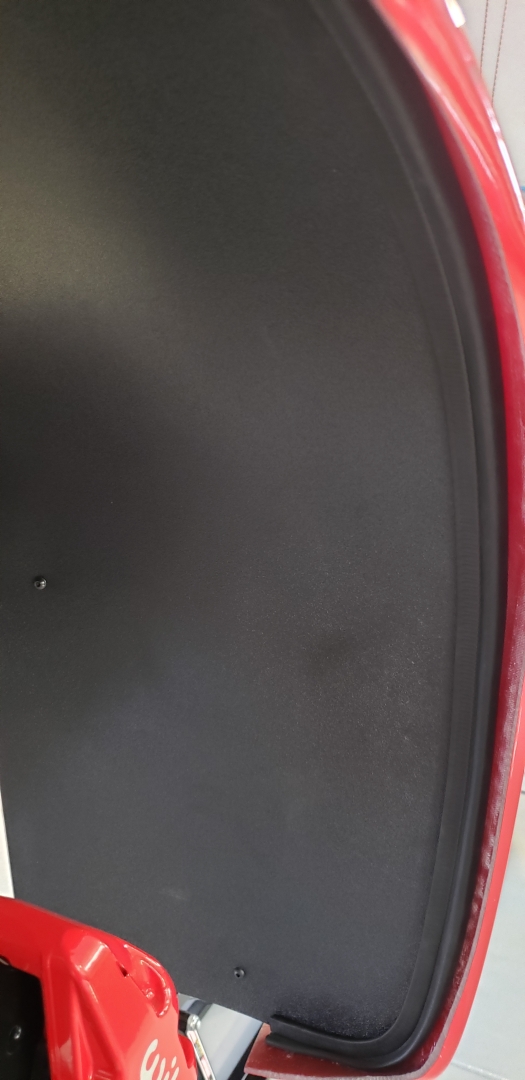
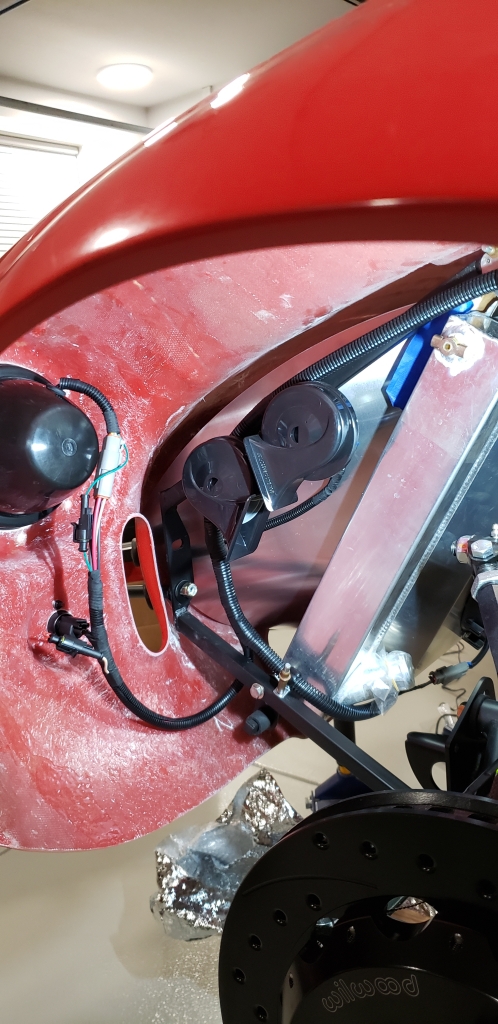
You can't see the other screw behind the brake rotor here holding the front in place. I use some simple angled aluminum off of the outriggers to place the front of the liners where I wanted. You can see I had to notch it out a bit for the horn. Didn't foresee that one coming. You can also see I added some extra lighting bling with rock lights. They are connected to my programmable buttons for power and the stereo for configuration. I can configure the buttons in sets and will be able to trigger these lights as well with the courtesy lights if so desired. Stupid... but makes me smile.
MK4 #10255 project: "Mako"
Coyote Gen 3, TKX, IRS, Wilwood brakes, power steering
Order date: 6/24/21, Received date: 1/12/22, First Gocart date: TBD, Registration date: TBD
Build thread
-
08-22-2024, 04:13 PM
#112
So yeah... engine is very close to complete. I got a message from Forte yesterday. Just trying to figure out a new oil pickup with moroso and the package should be able to be finished and shipped out. I did watch a youtube on how much the oiling package had changed on the gen4 engines yesterday. I'm a bit surprised it was only the pickup that was a challenge. I still need to find someone to be able to swap out the driver's exhaust flange for me but I'll worry about that more when I have the engine in hand.
Gen4 oiling changes
Panels mostly removed once again:
Using some acid etching degreaser. It's funny to think my cars floor pan can fit in my sink...
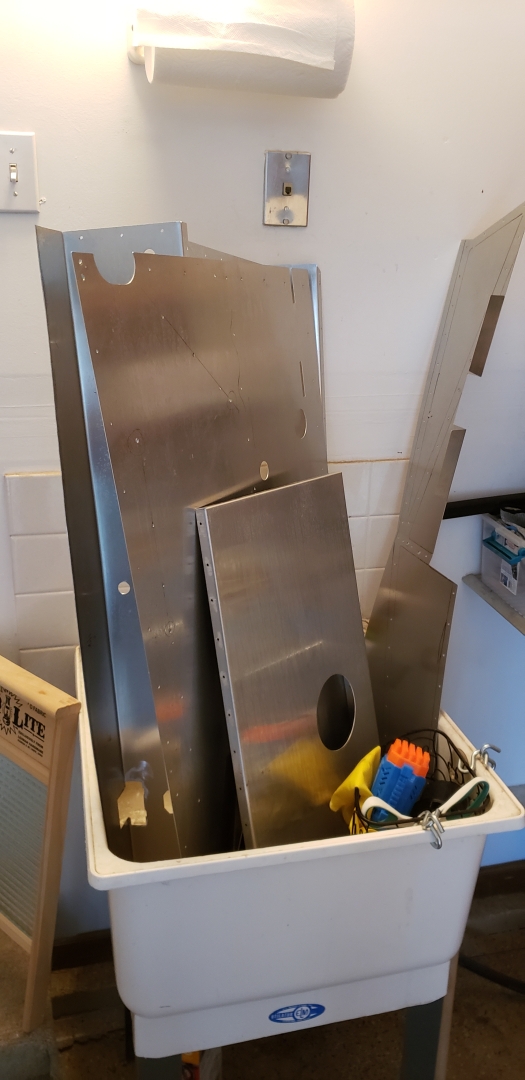
I did still use some sandpaper for some extra scuffing... then did some acetone... then laid out as much of the material to be coated as possible.
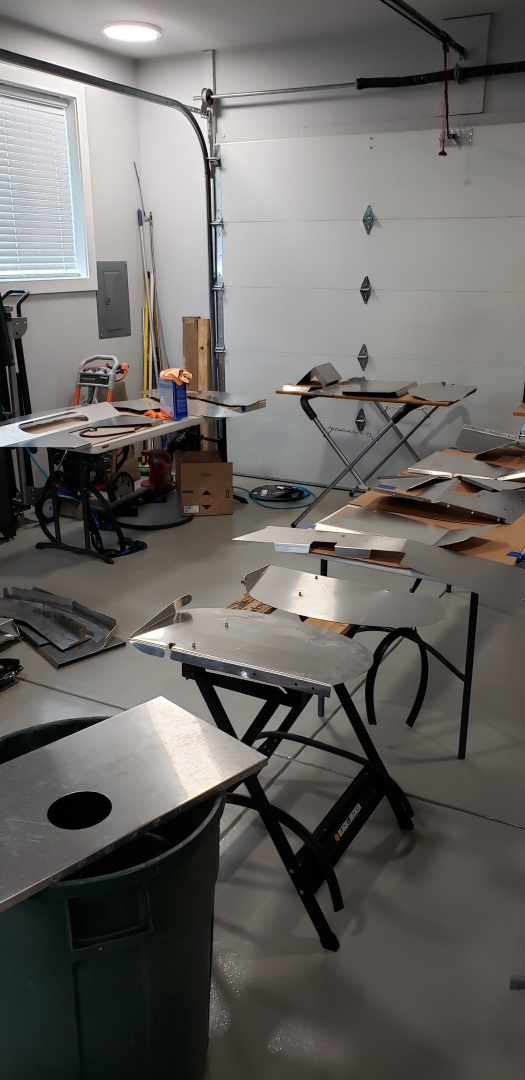
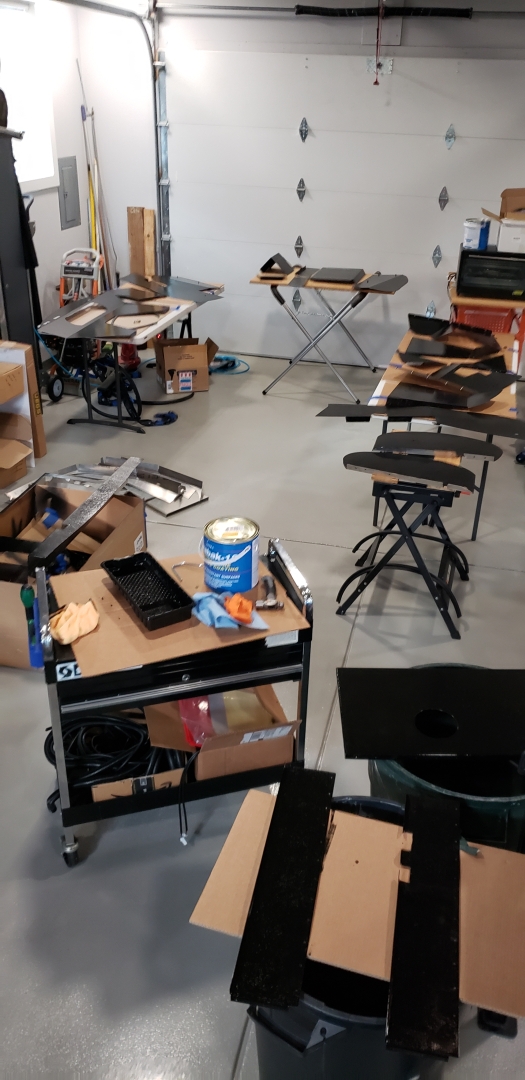
I used a paint that was closer to a bedliner type finish but still wanted a harder, smoother easier to clean finish. I used this durabak-18 stuff and like it. Got black for any outer facing panel faces... and a grey for any inward facing panels. Doing three layers spaced one day of drying time apart. Only through the black for now and prepping panels for grey at the moment.
MK4 #10255 project: "Mako"
Coyote Gen 3, TKX, IRS, Wilwood brakes, power steering
Order date: 6/24/21, Received date: 1/12/22, First Gocart date: TBD, Registration date: TBD
Build thread


 Thanks:
  Likes:


 Reply With Quote


