-
Thanks Paul. Yeah, you've inspired me to be creative. Then share the wealth.
With the 90 degree silicone induction tube rotated downward, the driver's side engine PVC hose no longer reached the driver's side vac. fitting on the silicone induction tube. So under that foam wrap there's a hose splice and its hose clamps. Kind of clugy looking, but should work.
Yes, I'm planning on moving the MAF Sensor more around towards the front yet still have it clear the hose and its fitting coming out of the degas tank. I don't want the MAF Sensor housing hitting anything solid during engine and car operation.
Like you had done, I'm planning on a Lund Tune very early in the car's running life.
Regarding your " Your won't need the connection on the RH side of the 90 degree silicone tube. So it will need to be capped.", do you mean the 90 degree silicone induction tube's port fitting on the passenger side?
On my Gen 2 Coyote, there's the CMVV hose with quick connect right next to where this fitting sits in my configuration. It's visible in the 1st and 5th photo above. I do believe that there's a vacuum port behind the throttle body and slightly to the right that some other Coyote's use for this same vac. purpose. So I figure I'll use the convenient Passenger side port with the existing hose and cap off that port fitting behind the throttle body.
OR does the Gen 2 Coyote not use this CMVV, despite it being in the FFR Coyote Install instructions Ver Z?
Thanks for your comments and recommendations.
Bob
-
Senior Member


Originally Posted by
Bob Brandle

With the 90 degree silicone induction tube rotated downward, the driver's side engine PVC hose no longer reached the driver's side vac. fitting on the silicone induction tube. So under that foam wrap there's a hose splice and its hose clamps. Kind of clugy looking, but should work.
Another alternative is just replace the Ford hose completely. I'm not a big fan of those thin wall preformed hoses they use anyway. Unless your routing is exactly like the OE setup, hard to make them work and look decent. You can cut the connectors out and put them in a regular hose cut to whatever length and routing you want. I've done that on both of my Coyote builds FWIW.

Originally Posted by
Bob Brandle

Regarding your " Your won't need the connection on the RH side of the 90 degree silicone tube. So it will need to be capped.", do you mean the 90 degree silicone induction tube's port fitting on the passenger side?
On my Gen 2 Coyote, there's the CMVV hose with quick connect right next to where this fitting sits in my configuration. It's visible in the 1st and 5th photo above. I do believe that there's a vacuum port behind the throttle body and slightly to the right that some other Coyote's use for this same vac. purpose. So I figure I'll use the convenient Passenger side port with the existing hose and cap off that port fitting behind the throttle body.
OR does the Gen 2 Coyote not use this CMVV, despite it being in the FFR Coyote Install instructions Ver Z?
This is a subject that's been talked about a lot. Plus unfortunately a lot of misinformation. I did a post several years ago explaining my experience with an early Gen 2. The thread ended up going around the world a few times, so it's pretty hard to follow. But the information is there. https://thefactoryfiveforum.com/show...-CMCV-Plumbing. The CliffsNotes version: Early Gen 2 Coyotes had a vent line to the intake. This was eliminated on later Gen 2's and the Gen 3. For those the CMCV vacuum motors vent directly to atmosphere at the back of the engine. I suspect that's what you have. Nothing further is required on those versions for the vent. All Coyotes need vacuum provided to the CMCV vacuum motors. This does not come from the intake tube but rather from a connection by the throttle body. Unfortunately this isn't addressed in the Ford Performance instructions and it's not correct in the Factory Five instructions. If you plumb it to the intake tube you will get CMCV DTC's and the system doesn't function.
Build 1: Mk3 Roadster #5125. Sold 11/08/2014.
Build 2: Mk4 Roadster #7750. Sold 04/10/2017.
Build Thread
Build 3: Mk4 Roadster 20th Anniversary #8674. Sold 09/07/2020.
Build Thread and
Video.
Build 4: Gen 3 Type 65 Coupe #59. Gen 3 Coyote. Legal 03/04/2020.
Build Thread and
Video
Build 5: 35 Hot Rod Truck #138. LS3 and 4L65E auto. Rcvd 01/05/2021. Legal 04/20/2023.
Build Thread. Sold 11/9/2023.
-
GRADUATION of D8YTONA, aka, Bob's Arizona Gen 3 Coupe
GRADUATION for D8YTONA, aka, Bob's Arizona Gen 3 Coupe
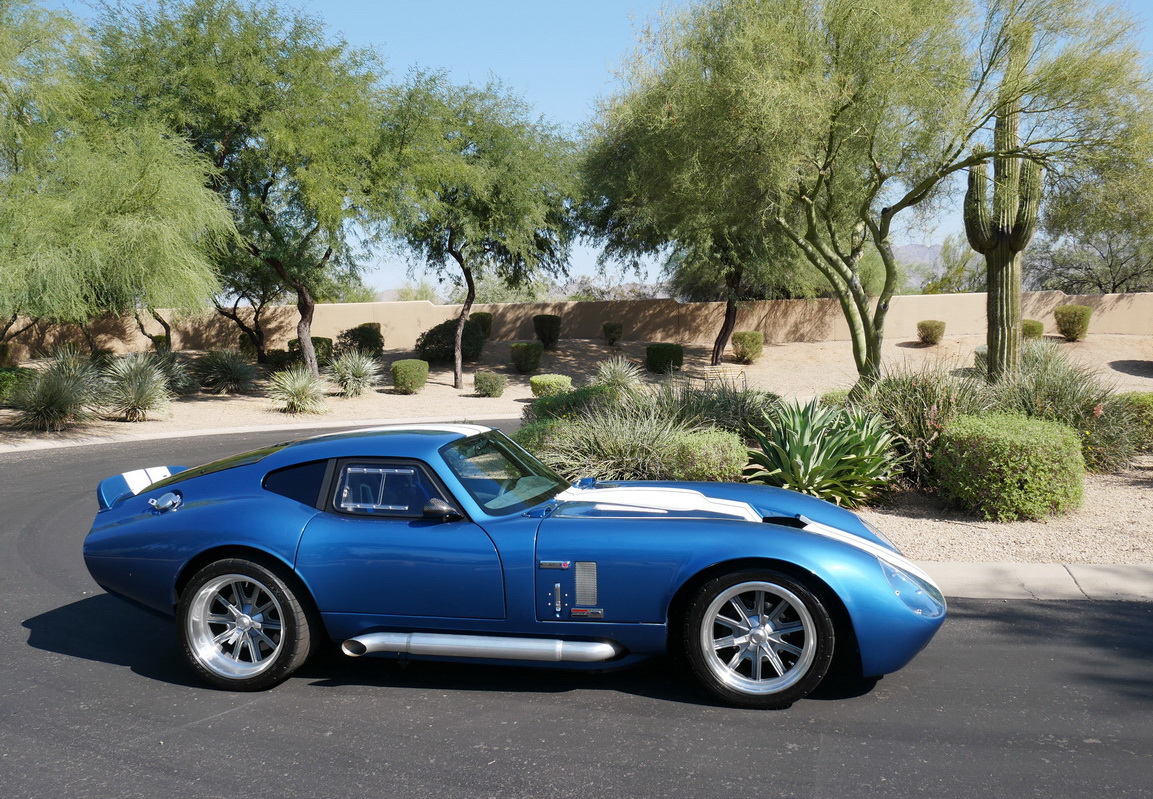
It’s been a few years without specific update posts on my build thread, but I have been working away at the build, especially on custom features and today, with Factory Five, reveal that my Type-65 Coupe, aka, D8YTONA has achieved GRADUATION.
On October-25-2023, D8YTONA passed Arizona MVD Inspection, was Registered and Plated.
On October-28-2023, D8YTONA Graduated with the family present to celebrate.
The Arizona License Plate (only one plate in AZ  ) reads: D8YTONA. I’ve held that AZ personalized plate for 3 years on two other vehicles of mine, because I just had to have it for my Type-65 / Cobra Daytona Coupe.
While I haven’t been making build thread progress postings, I have continued work on the car and have taken hundreds, no, actually, thousands of photos of the build, of both normal progress features, and more importantly, development and progress photos of the many custom features of my Coupe, so that I could reveal some of them in the future, and that future starts now.
I really appreciate Factory Five, first for both appreciating my car and then working directly with me to help reveal my project car to the community on the website and social media sites.
If I can encourage and inspire anyone out there with what I've done, that's great, for there are many FFR car owners, builders and enthusiasts on the Forum and other social media sites that have helped me greatly in numerous areas.
A special shout out to edwardb/Paul Borror for his excellent builds and help to me and so many others.
Introducing D8YTONA, a Custom Reimagined Replimod Factory Five Type-65 / Cobra Daytona Coupe - Reveal PART-1:


-
Post Thanks / Like - 0 Thanks, 2 Likes
-
That's really nice!
I like it alot!
-
Senior Member

Wow! Great looking Coupe! You should be very proud.
Enjoy!
-
Senior Member

Looks great. Congratulations on finishing it up and thanks for the shout-out. Great to see finished projects that I may have helped with a little. How about some interior and engine photos? Enjoy driving it. I don't get tired of driving ours and it's a hit everywhere it goes. Although looks like the event I attended last Saturday may be the last of the season. 
Build 1: Mk3 Roadster #5125. Sold 11/08/2014.
Build 2: Mk4 Roadster #7750. Sold 04/10/2017.
Build Thread
Build 3: Mk4 Roadster 20th Anniversary #8674. Sold 09/07/2020.
Build Thread and
Video.
Build 4: Gen 3 Type 65 Coupe #59. Gen 3 Coyote. Legal 03/04/2020.
Build Thread and
Video
Build 5: 35 Hot Rod Truck #138. LS3 and 4L65E auto. Rcvd 01/05/2021. Legal 04/20/2023.
Build Thread. Sold 11/9/2023.
-
-
Post Thanks / Like - 0 Thanks, 1 Likes
-
-
Post Thanks / Like - 0 Thanks, 6 Likes
-
Congrats on completion. The car looks great and it looks like you are in the Scottsdale area from the pics.
MK4 base kit, 2004 Mach 1 donor, 4.6L DOHC, TR-3650 5-speed, narrowed stock axle with 3.55 gears and TruTrac, PS, PB, ABS, 17" Halibrand replica wheels, started 12/2011, registered 9/2014, sold 3/1/2018.
1970 Mustang Fastback Coyote powered Boss 302 tribute. Started 10/14/16.
Gen 3 Coupe Base Kit non-donor build. Ordered 4/5/2024 to be received August 2024.
-
Alan,
Thank you for the congrats.
Yes, North Scottsdale. I'll be making the rounds of the various cars & coffees, shows and of course simply cruising.
Bob
-
Post Thanks / Like - 0 Thanks, 1 Likes
-
Senior Member

Looks like quality work! The changes are subtle enough to look like they're original but help with the added finishing touches.
What tail lights are those? I might have missed it in the thread but don't remember them mentioned.
Gen 3 Type 65 Coupe builder
-
q4stix, Thanks for the compliment.
Yes, exactly my intent, "organic", as if they were production feature custom changes.
The taillights are GRP (Greg Racing Products) aftermarket LED taillights for the Lotus Elise and Exige. Model GRP GT version 2 LED Taillights. They can be bought as single pairs or dual pairs (perfect for the Type-65 Coupe).The Version 2s have been replaced with the Version 3s that are even nicer and of the exact same fit. Not cheap, but fitted my custom design goals.
-
Senior Member

Gorgeous Bob! Love it, those rear quarter windows really blend in well and it looks great that way without the scoops. Congrats!
-
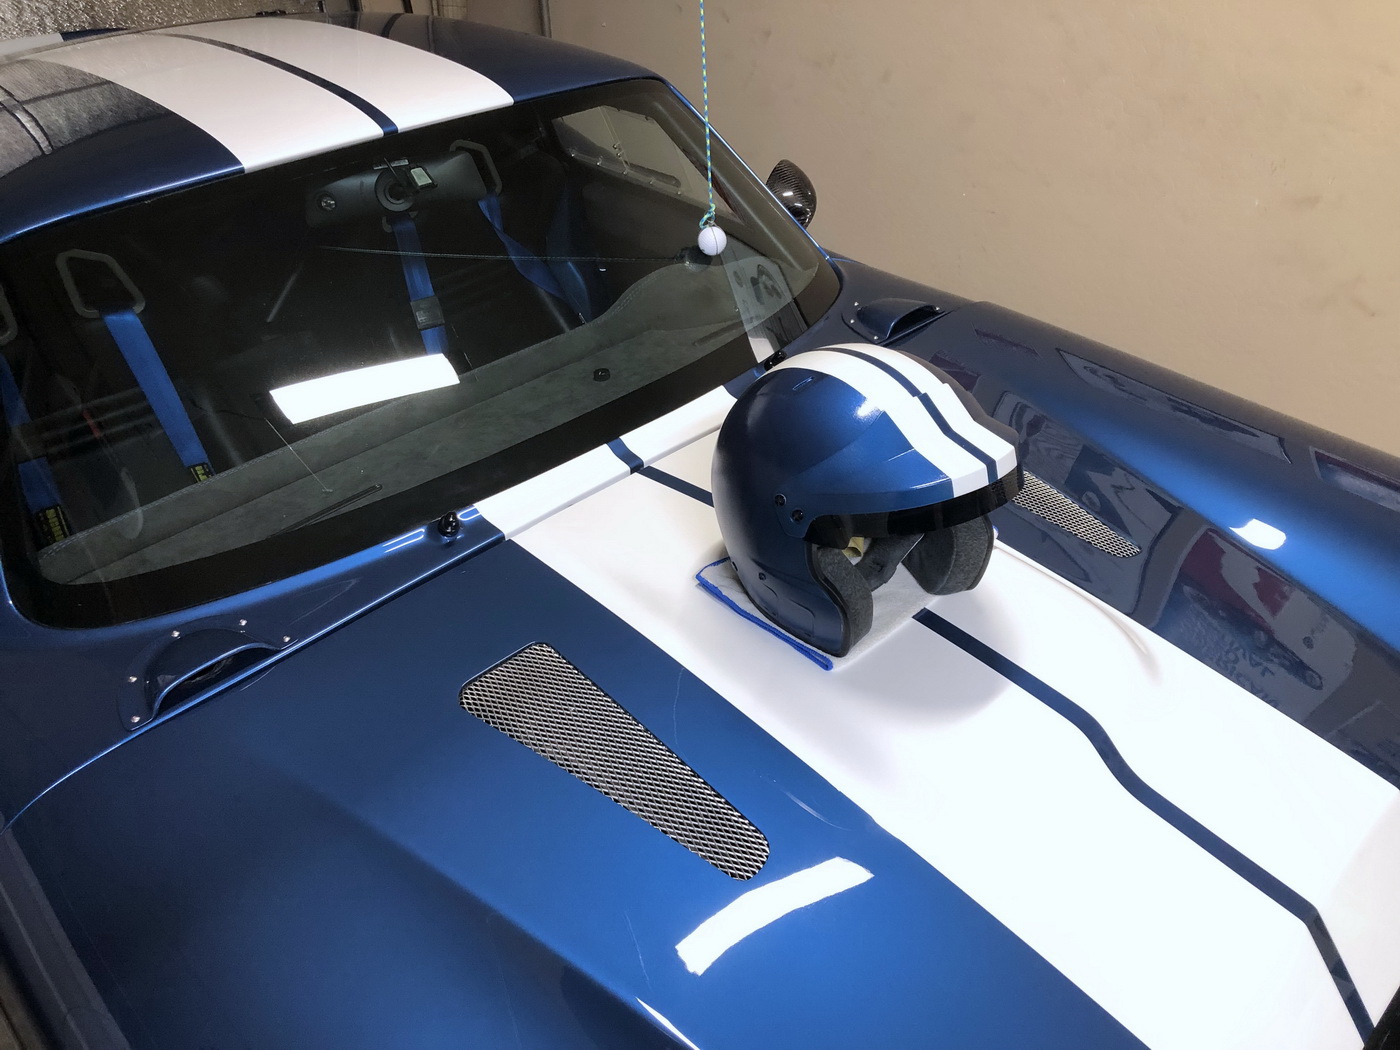
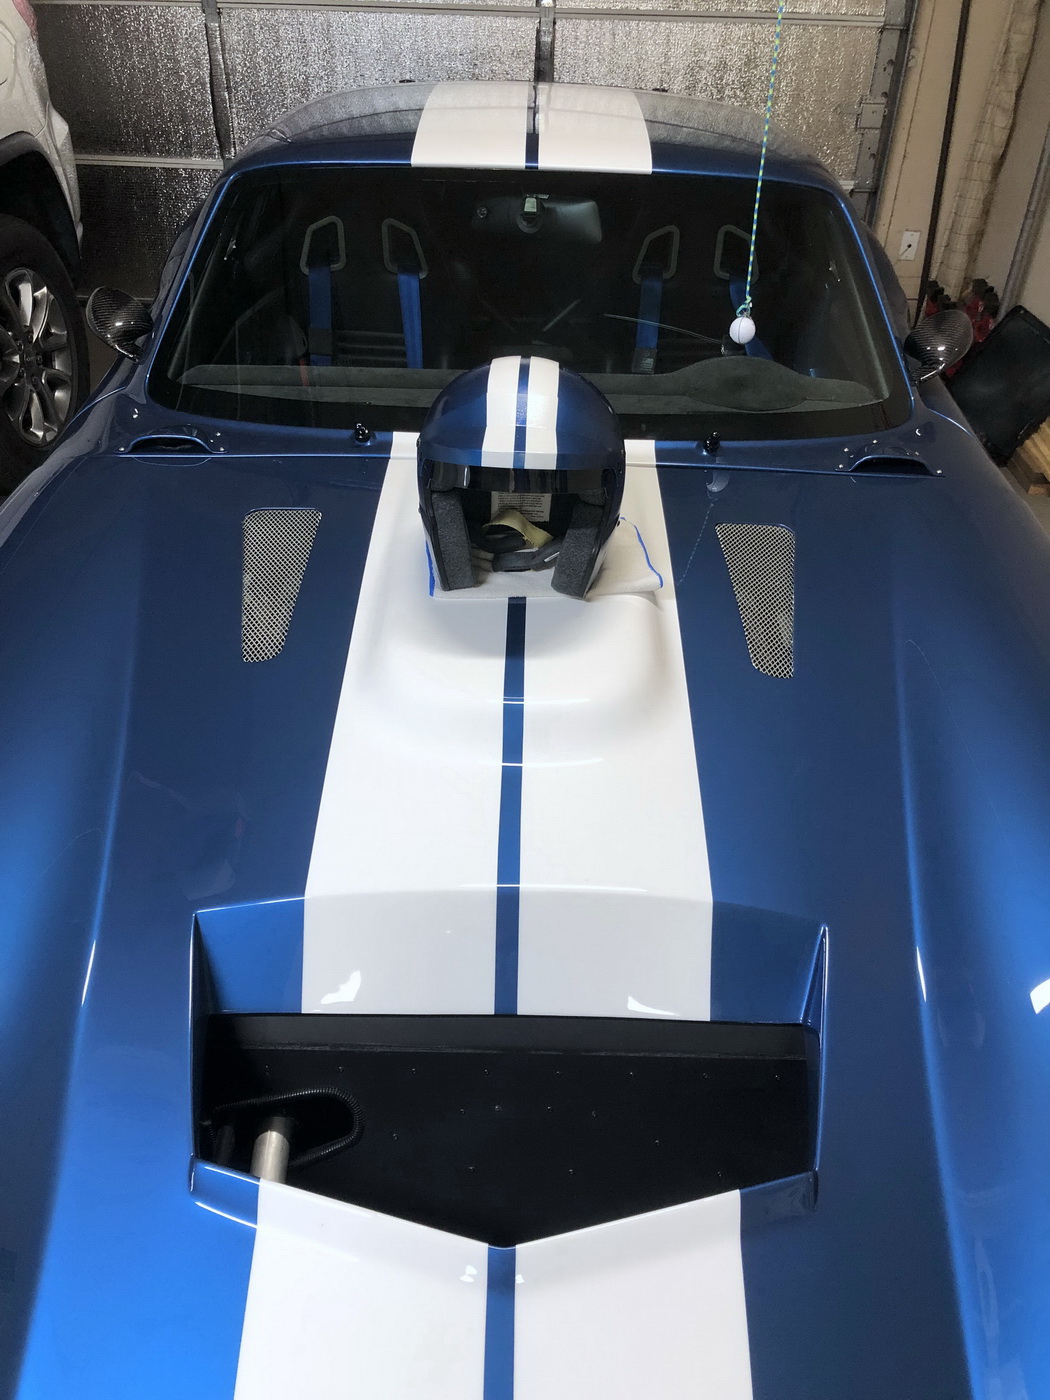
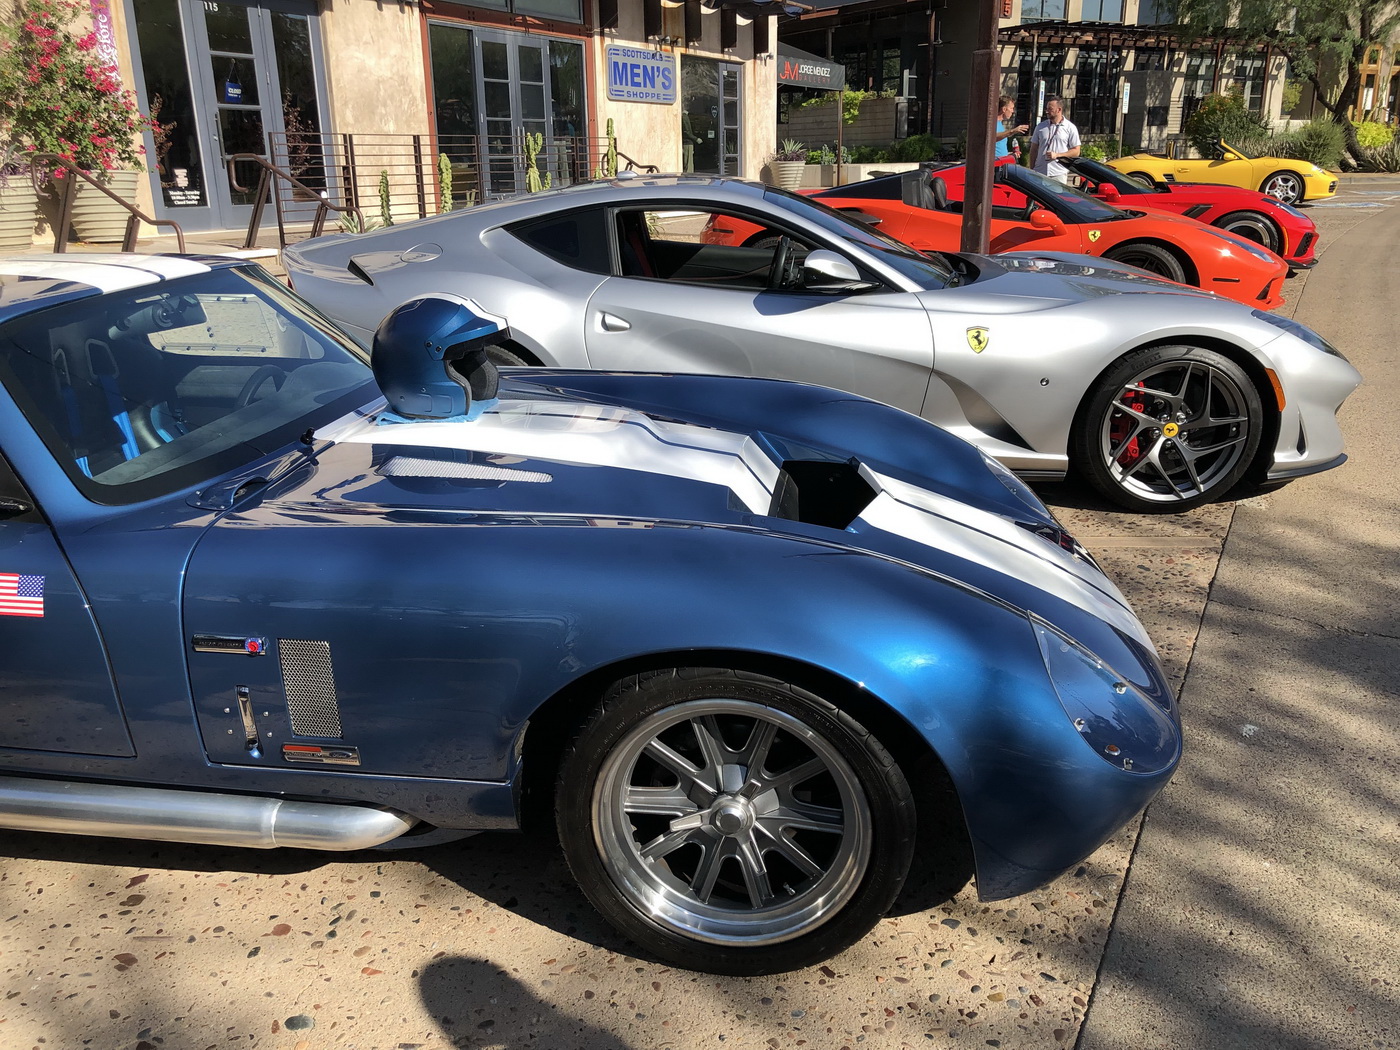
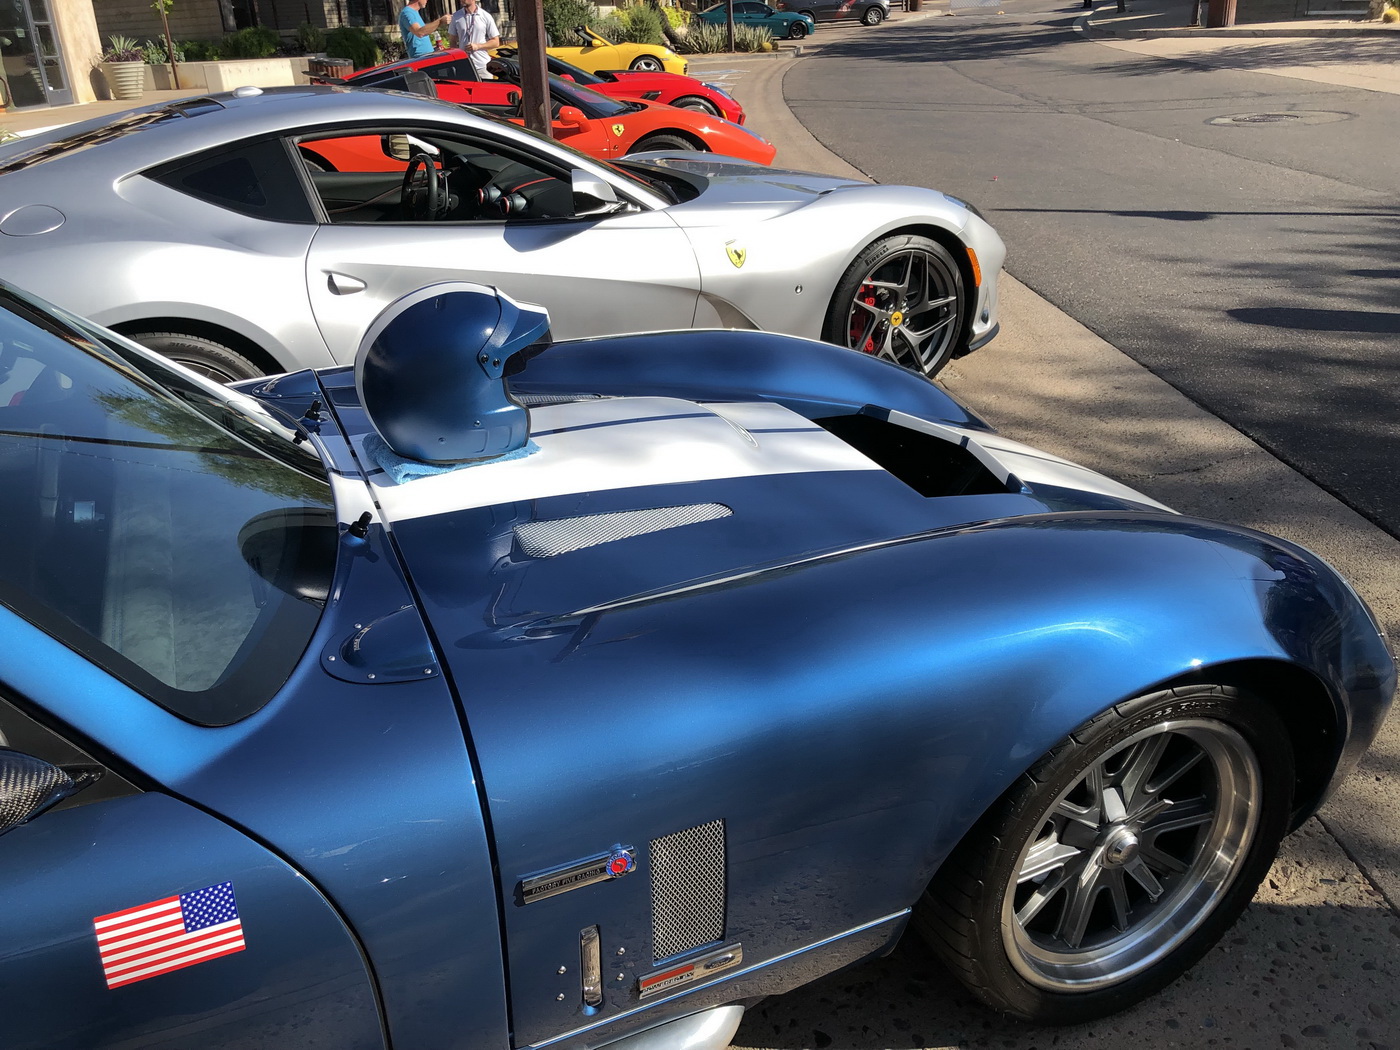
A custom helmet for my Type-65 Coupe, D8YTONA, for upcoming track days.
Helmet is a G-Force Racing GF-1 Open Face, White.
The first track experience with the Cobra will be Nov-24 at Arizona Motorsports Park
I DIY'd the painting of this helmet myself following typical stripes painting on any Cobra.
Remove the helmet bill. Prep, Sand and tape off, spray paint base primer Gray, spray paint the general Base White area, precisely tape cover the White, Spray Paint the whole helmet the desired primary color, Ford Performance Blue (FM) in this case, like the car. Carefully remove the stripe covering tape and touch up if necessary. Spray Paint the Clear. Remove all tapes and reassemble the helmet bill.
Here's some of my inspiration:
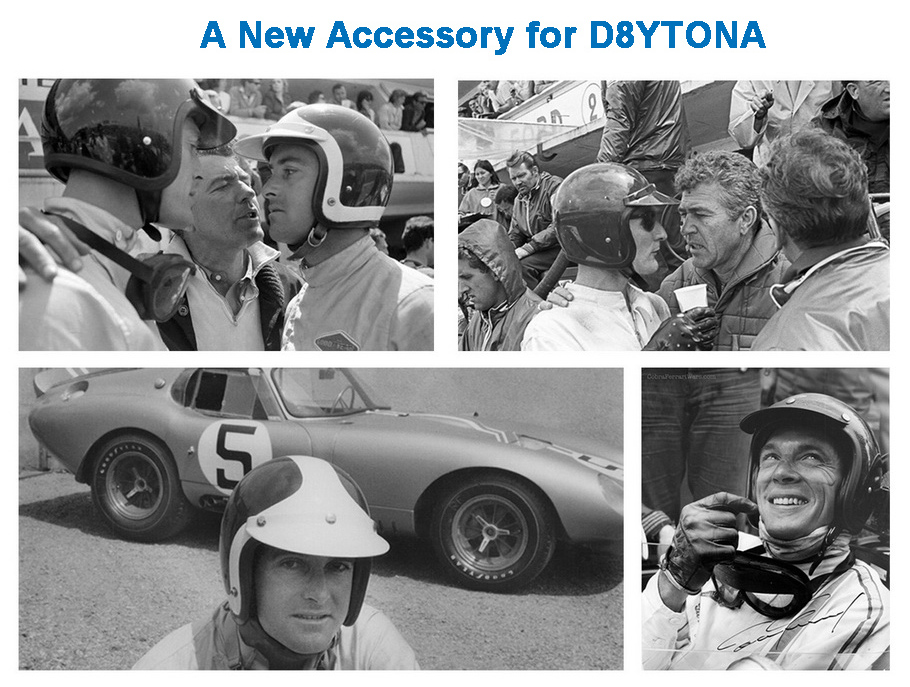
Here's the finished result.

Here's the debut at the Scuderia Southwest Motorsports Gathering (cars & coffee), Scottsdale, AZ:

Last edited by Bob Brandle; 10-29-2024 at 01:32 PM.
-
Post Thanks / Like - 0 Thanks, 3 Likes


 Thanks:
  Likes:

 Reply With Quote

 ) reads: D8YTONA. I’ve held that AZ personalized plate for 3 years on two other vehicles of mine, because I just had to have it for my Type-65 / Cobra Daytona Coupe.


