Midwest Classic Insurance

Visit our community sponsor

Thanks Thanks:  216
Likes Likes:  444
Page 15 of 15 FirstFirst ... 5131415
Results 561 to 572 of 572

Thread: Fmans Dart 427 build #9818 - 14" Leather steering wheel

  1. #561
    JohnK's Avatar
    Join Date
    Sep 2018
    Location
    SF Bay Area, CA
    Posts
    2,358
    Post Thanks / Like
    That looks really nice!
    MkIV Roadster build: Gen 2 Coyote, IRS, TKO600. Ordered 10/24/18. Delivered 1/29/19. Engine installed 8/8/21. First start 9/12/21. First go-kart 9/17/21. Off to paint 4/11/22. Back from paint 12/30/22. Build thread here.

  2. Thanks Fman thanked for this post
  3. #562
    Ted G's Avatar
    Join Date
    Aug 2021
    Location
    El Dorado Hills, CA
    Posts
    784
    Post Thanks / Like
    would love to see a before and after shot. Looks great!

  4. Thanks Fman thanked for this post
  5. #563
    Junior Member
    Join Date
    Aug 2020
    Posts
    20
    Post Thanks / Like
    Looks great! Have been planning on doing the same! PM Sent

    John

  6. Likes Fman liked this post
  7. #564
    Senior Member Geoff H's Avatar
    Join Date
    Feb 2011
    Location
    Edmonton, Alberta
    Posts
    197
    Post Thanks / Like
    I like the look! Did you have to change ride height?
    Mk III 4880: 3:55 - 3 link, T-5, 347, Holley Sniper/dual sync distributor, Comp Cams XE274HR, Edelbrock RPM Heads

  8. #565
    Senior Member Fman's Avatar
    Join Date
    Jan 2020
    Location
    State of Jefferson
    Posts
    1,341
    Post Thanks / Like
    Quote Originally Posted by Geoff H View Post
    I like the look! Did you have to change ride height?
    Hey thanks, no ride height change. Bolted them on and that was it.
    Build #9818 completed 04/2021 - Dart SBF 427, PF4 EFI, TKO600 Build thread: https://thefactoryfiveforum.com/show...utton-head-mod
    Build review video:https://www.youtube.com/watch?v=k6IAbo2sFt4&t=1111s My finished car: https://thefactoryfiveforum.com/atta...7&d=1638415131

  9. #566
    Junior Member
    Join Date
    Jun 2022
    Posts
    1
    Post Thanks / Like
    Quote Originally Posted by Fman View Post
    Hope everyone is doing well and if you live in Nor Cal, staying out of the smoke and heat!

    Finally getting some build time in and I have been able to make a little bit more progress...

    My dash is covered with the leather hyde I picked up, it is nice to see some fruits from your labor, I spent a lot of hours on the dash and I am pleasantly surprised I cant see anything under the leather! I guess even a blind squirrel can find a nut sometimes :-) The leather hyde quality is exactly what I was hoping for, even smells like a new car... I did make a last minute change and moved the headlight knob to the right side of the speedo. I was afraid of it hitting my hands being around the steering wheel and wanted everything around the wheel to be flat. I also moved the horn button from the left side to under the speedo.

    I was also able to come up with a very basic clutch stop, mounted my breeze 1/2" vent line with charcoal canister and mounted the Aeromotive fuel filter. One other highlight was getting my brakes bled out, I now have a car with working brakes!


    Clutch stop, simple but functional. Also totally adjustable the rubber stopper can go completely flat against 1/8" alum reinforcement plate if needed (by removing the nut). Can also be adjusted outward approx 1-1/4"


    Breeze 1/2" vent line with sprinkler charcoal canister, Aeromotive 10 micron fuel filter


    what is the push button under your tach? is that your horn?

  10. #567
    Senior Member Fman's Avatar
    Join Date
    Jan 2020
    Location
    State of Jefferson
    Posts
    1,341
    Post Thanks / Like
    Quote Originally Posted by Keith Lamberson View Post
    what is the push button under your tach? is that your horn?
    Yes sir, horn button.
    Build #9818 completed 04/2021 - Dart SBF 427, PF4 EFI, TKO600 Build thread: https://thefactoryfiveforum.com/show...utton-head-mod
    Build review video:https://www.youtube.com/watch?v=k6IAbo2sFt4&t=1111s My finished car: https://thefactoryfiveforum.com/atta...7&d=1638415131

  11. #568
    Senior Member Fman's Avatar
    Join Date
    Jan 2020
    Location
    State of Jefferson
    Posts
    1,341
    Post Thanks / Like

    14" FFR Leather steering wheel

    Life got real busy last year so I did not do much of anything with my car, only put about 300 miles on it. Car has 5700 miles now, recently I began to not like the wood rimmed steering wheel so I decided to pick up a FFR leather steering wheel. Was able to grab the 12 days of xmas sale from FFR for $99. Only a couple drives with it so far but it's been a nice change from the old school wood rimmed wheel. Definitely more comfortable on the hands when driving.

    Build #9818 completed 04/2021 - Dart SBF 427, PF4 EFI, TKO600 Build thread: https://thefactoryfiveforum.com/show...utton-head-mod
    Build review video:https://www.youtube.com/watch?v=k6IAbo2sFt4&t=1111s My finished car: https://thefactoryfiveforum.com/atta...7&d=1638415131

  12. Likes Mike.Bray, Ted G, toadster liked this post
  13. #569
    Ted G's Avatar
    Join Date
    Aug 2021
    Location
    El Dorado Hills, CA
    Posts
    784
    Post Thanks / Like
    Nice, I do prefer the leather wheel too. Looks good Travis!

  14. Thanks Fman thanked for this post
    Likes toadster liked this post
  15. #570
    Senior Member
    Join Date
    May 2018
    Location
    Milwaukee, WI
    Posts
    511
    Post Thanks / Like
    Quote Originally Posted by Fman View Post
    Was able to get my button head hood mod completed today. I wanted to thank Ken Pike for answering a few text messages to give me some guidance on how this was supposed to happen. I ended up deciding on 16 button heads, below are some pics of the process I used. Overall not too bad other than the stress of drilling 16 holes in your hood, it was definitely a measure twenty times pick up the drill then measure another ten times then actually drill.

    Here are the tools I ended up using for the project. The 2" nail in the picture was used as a guide to give me the proper distance around the perimeter of the hood. Ken advised me to make sure 2" would land all the button heads inside the rib of the hood and it did. You cant see anything under the hood, very clean doing it this way.

    For anyone wanting to do this mod here are some links to purchases I made.

    8/32 x 3/8" stainless button heads:https://www.amazon.com/dp/B0899P1WWN...roduct_details

    1/16" Cobalt pilot bit:https://www.amazon.com/dp/B07Q64J6LR...roduct_details

    5/32" Drill bit:https://www.amazon.com/dp/B07Q9XWGWT...roduct_details
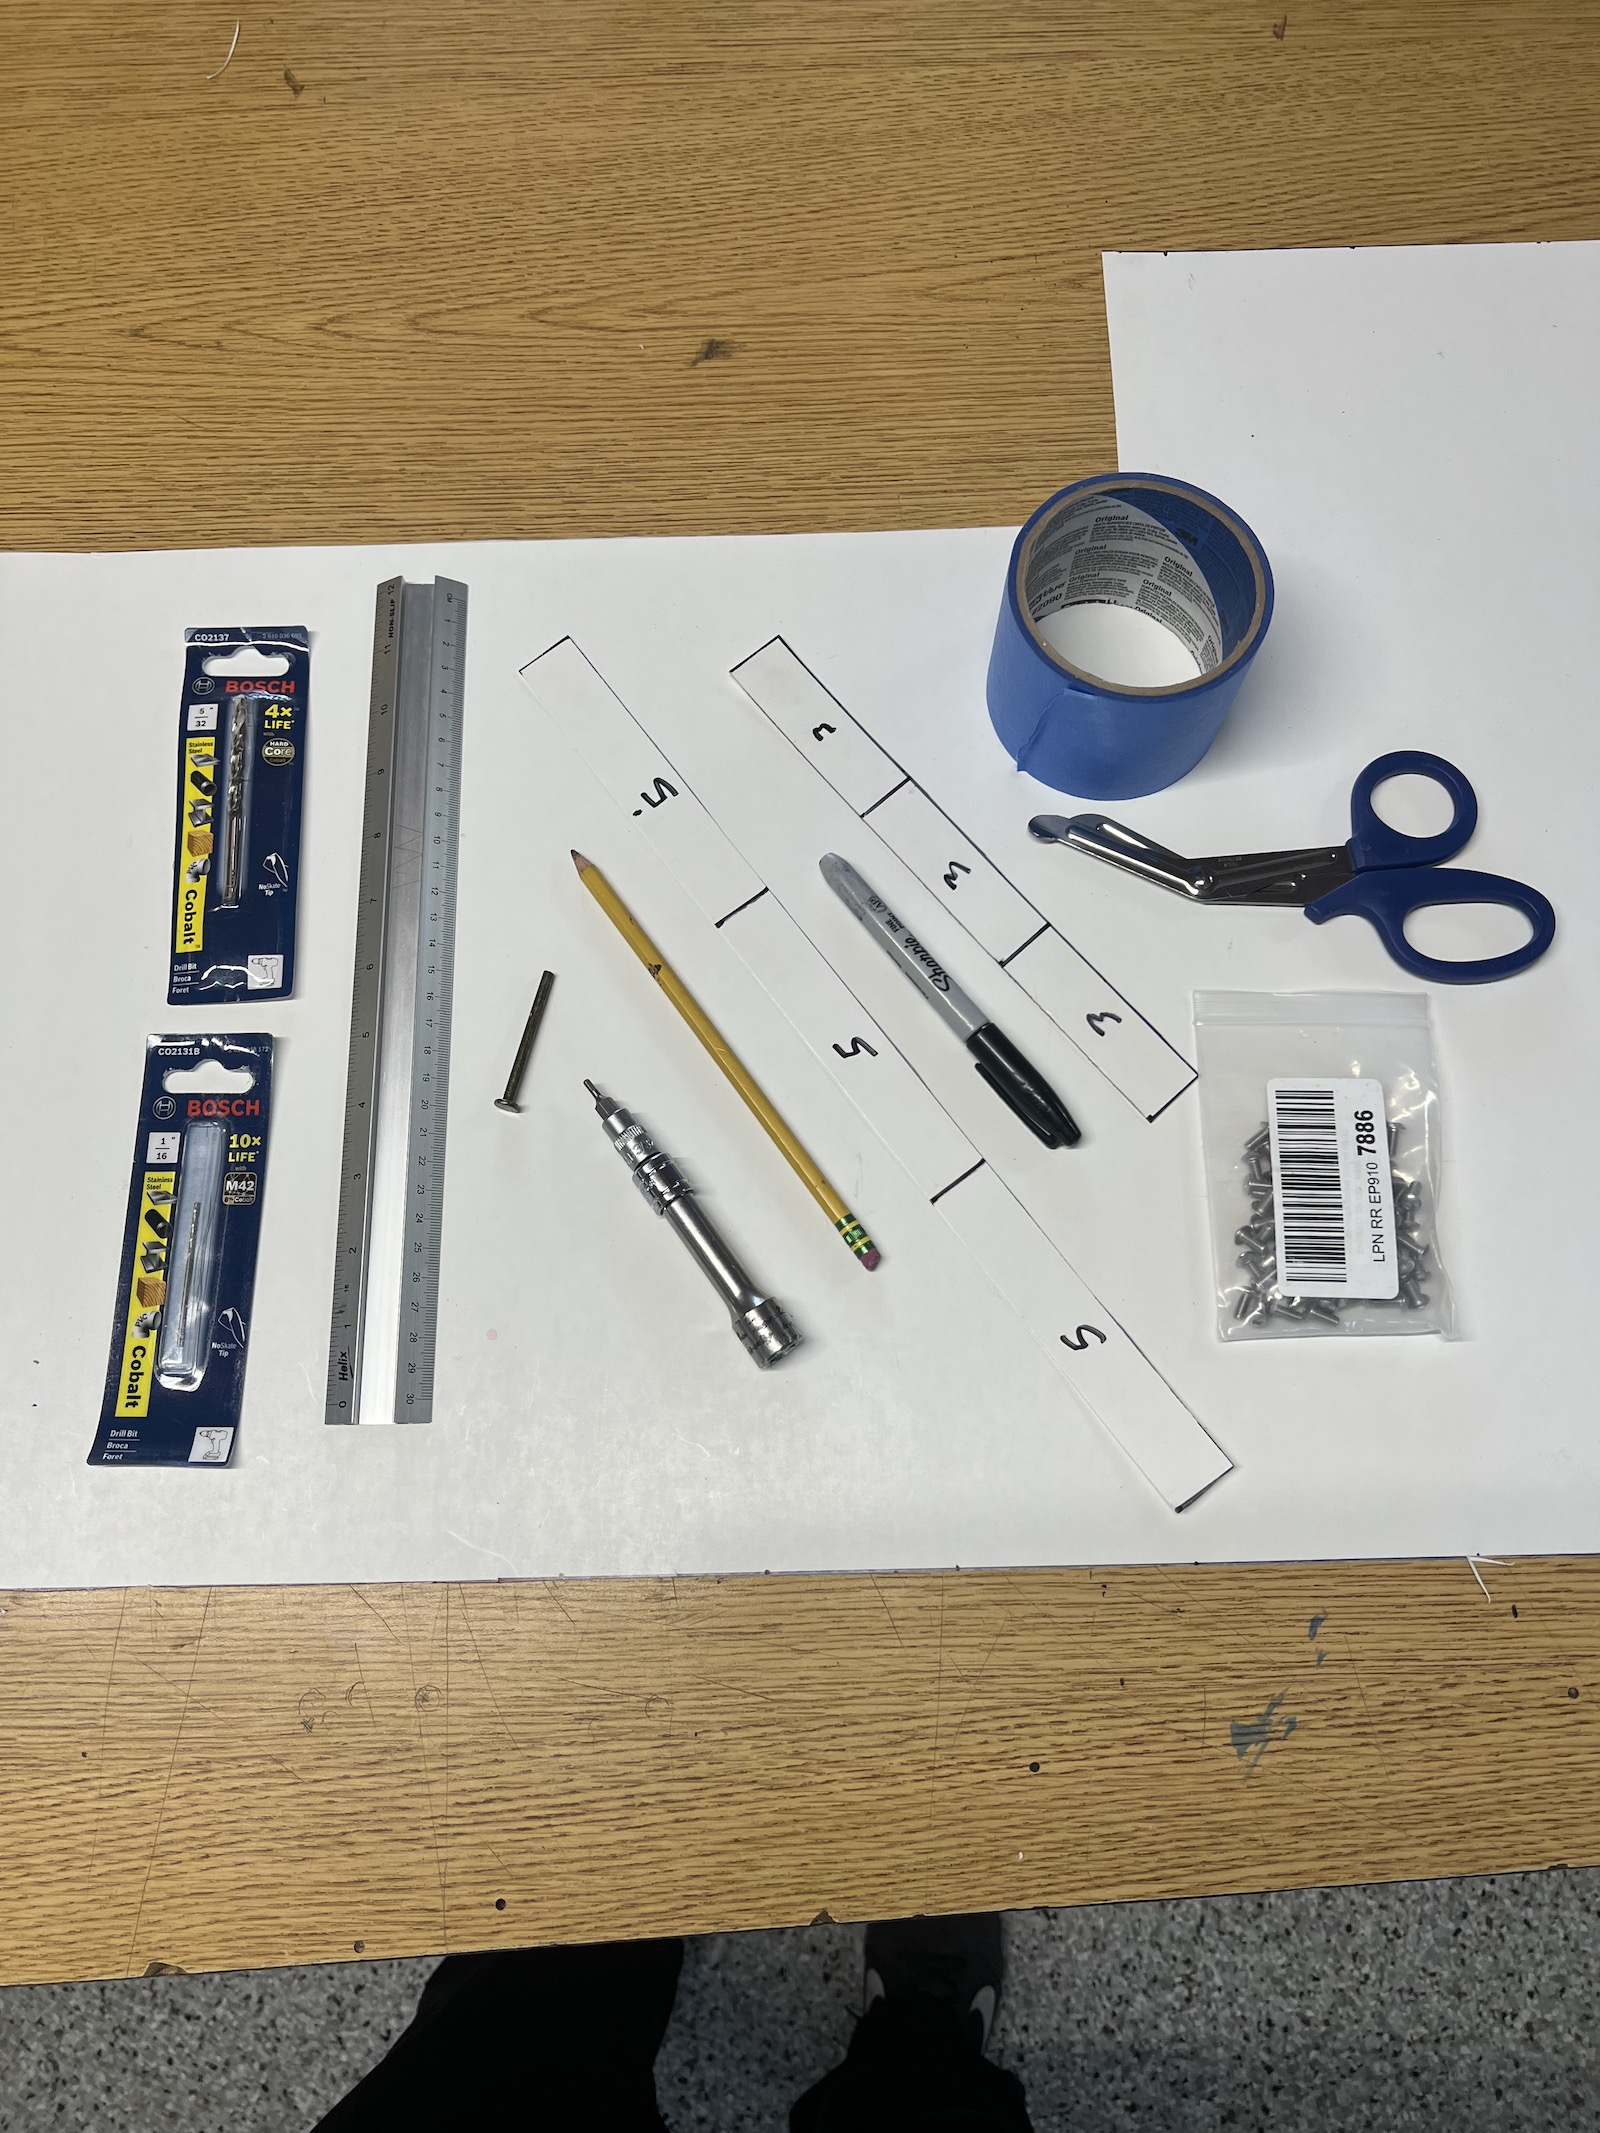


    This is the schematic I used with slight modification to the lower section of the hood. I decided to go 1" outward from dead center, this put the 3" spaced holes down below on the inside areas of my stripes, I did not want to run a button head through the edge of any stripe. The side button heads are 5" spaced.


    I used some low tack painters tape to mask off and create my template. Notice the small pieces of tape on the drill line, I ended up re-measuring about twenty times and realized I was about 1/8" off so I used the tape to mask the old hole and create the new one. The pencil line also works really good and with the eraser you can easily re-draw your lines. This is when I used the 2" nail to create my guide line around the perimeter hood.


    No turning back now! Holes are drilled. At this point I was like holy **** I hope I do not peel this tape and find some surprises. I used 1/16" pilot bit for the first hole followed up with the 5/32" bit and this worked really good.


    I was pleasantly surprised I had no issues with paint chipping, the cobalt bits worked like a champ just like Ken recommended.
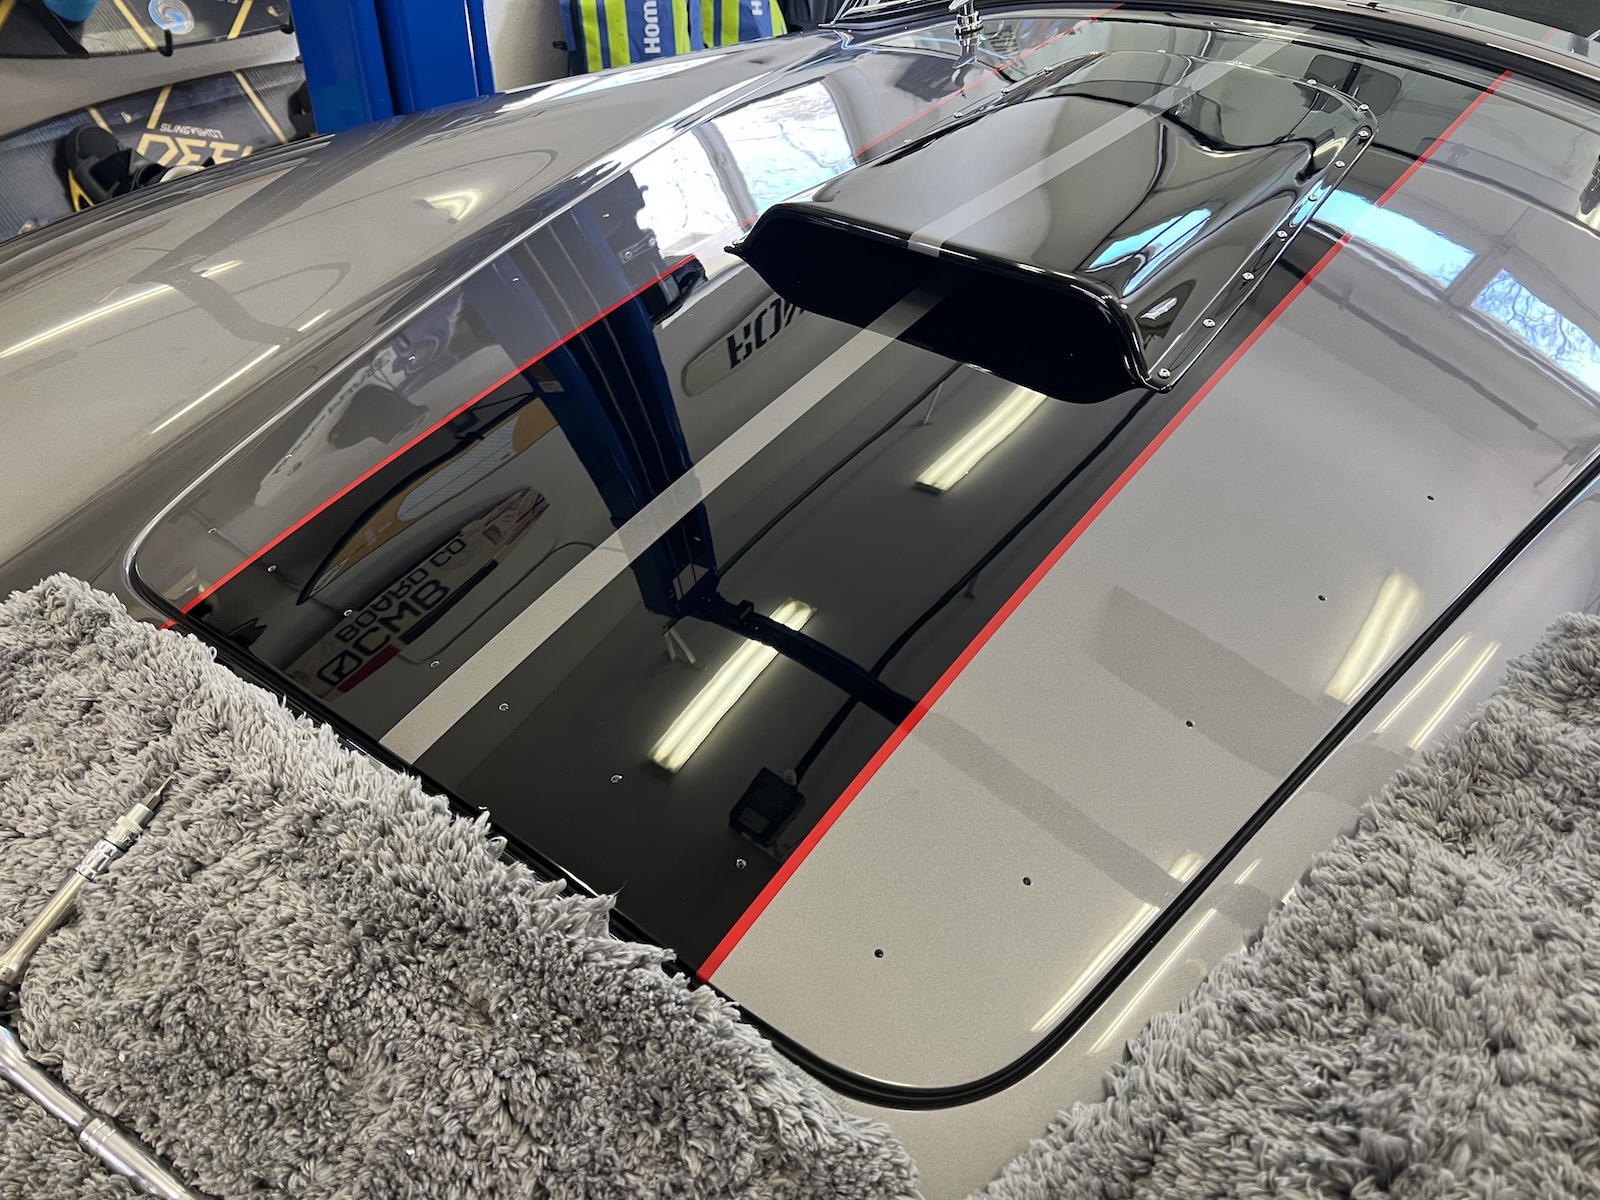


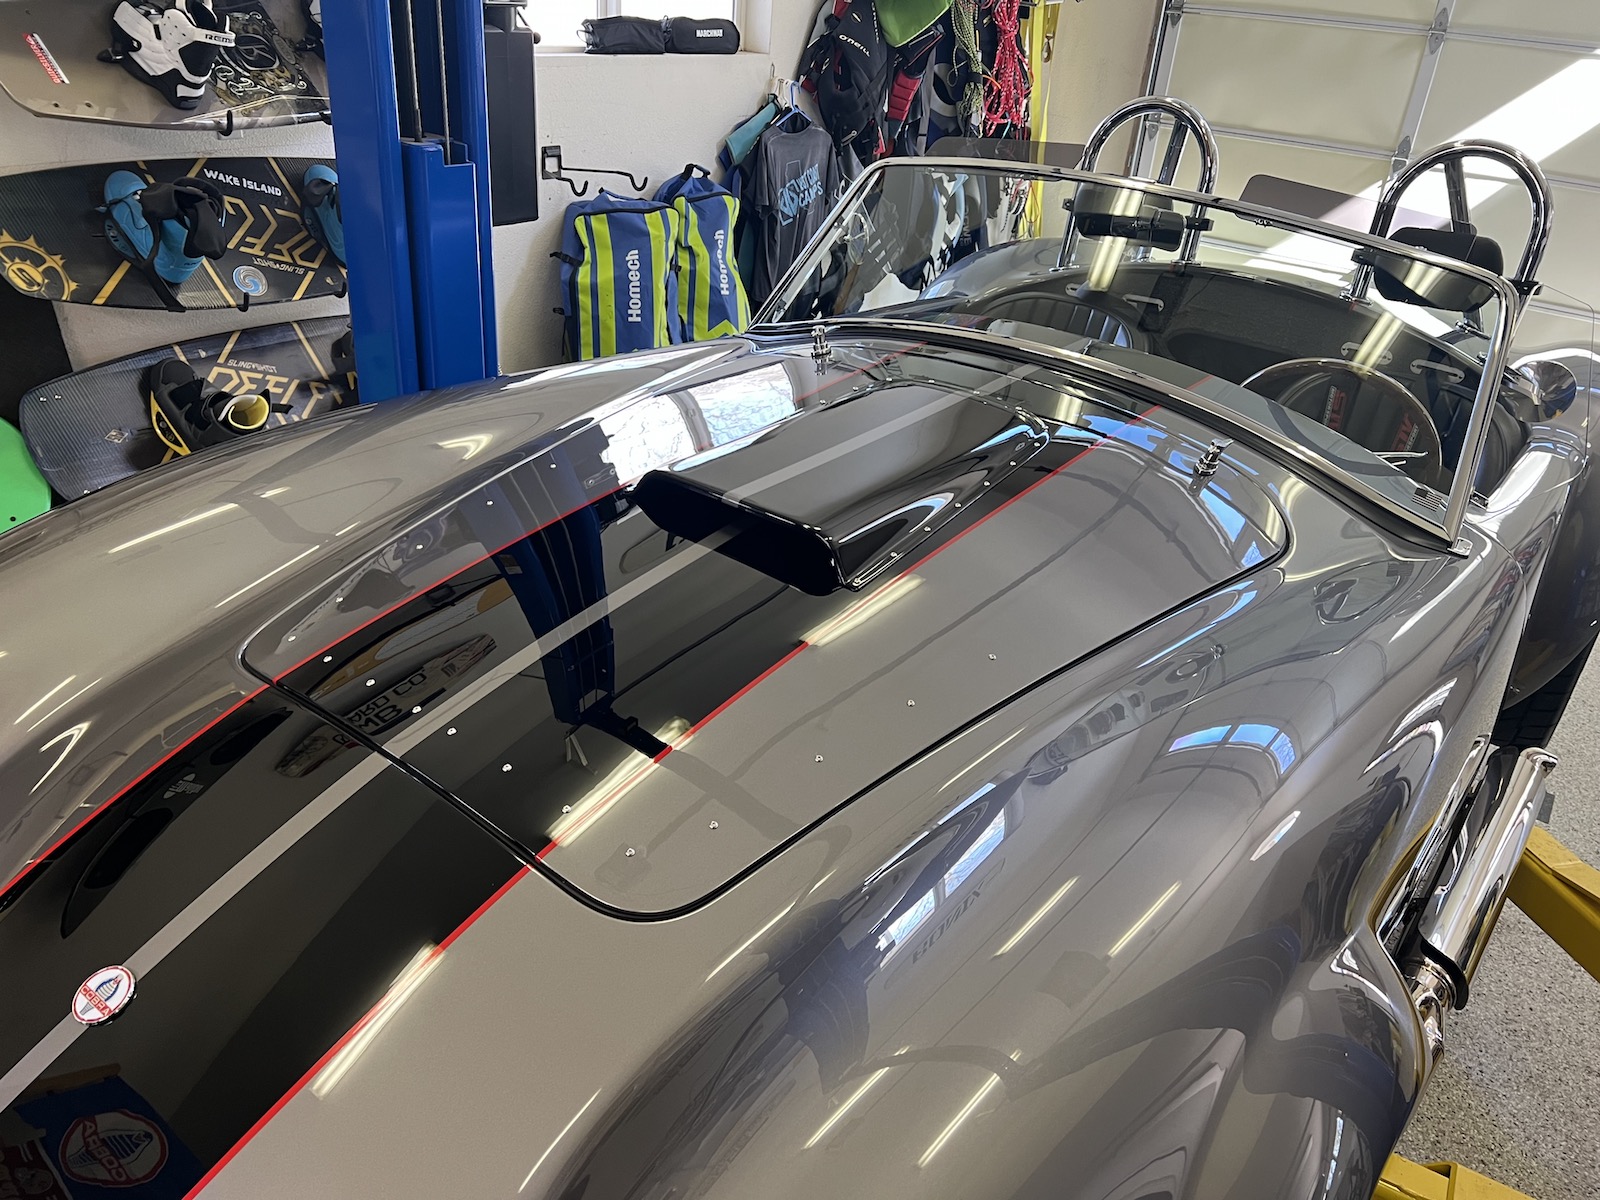
    The final product, the button heads all threaded perfectly into the holes and I stopped tightening immediately once I bottomed them out. Ken mentioned if you go too tight you will split the paint and have much bigger problems. I really like the look of the hood now with the added button heads, it might not be for everyone but I am diggin' it!


    And lastly my Carrol Shelby signature decal arrived and is installed on my dash.
    https://www.ebay.com/itm/275168439449


    Overall a great day in the shop!

    Cheers!
    Fman,

    I'm considering doing these "hood bolts" as well. Just a quick question, you say that you used 8/32 stainless button-head bolts for the hood. Did you use 8/32 for the scoop as well? I was considering using 10-32 for the scoop, which makes me wonder if I should do 10/32 for the hood bolts as well. Just curious if you matched yours.

    -Brew
    BUILD THREAD: The Brew City Cobra

    Current Build: MK4 Complete Kit, Delivered December 2021; First Start November 9, 2022; Go-Cart November 23, 2022; Carbureted 427W, TKX, IRS

  16. #571
    Senior Member Fman's Avatar
    Join Date
    Jan 2020
    Location
    State of Jefferson
    Posts
    1,341
    Post Thanks / Like
    Quote Originally Posted by BrewCityCobra View Post
    Fman,

    I'm considering doing these "hood bolts" as well. Just a quick question, you say that you used 8/32 stainless button-head bolts for the hood. Did you use 8/32 for the scoop as well? I was considering using 10-32 for the scoop, which makes me wonder if I should do 10/32 for the hood bolts as well. Just curious if you matched yours.

    -Brew
    The hood scoop was installed by Ken who painted my car, I will need to check and see what size they are. Whatever size bolt you use for the hood just make sure the hole you drill is the correct size to thread the bolt in tight enough to secure but not crack the paint.
    Build #9818 completed 04/2021 - Dart SBF 427, PF4 EFI, TKO600 Build thread: https://thefactoryfiveforum.com/show...utton-head-mod
    Build review video:https://www.youtube.com/watch?v=k6IAbo2sFt4&t=1111s My finished car: https://thefactoryfiveforum.com/atta...7&d=1638415131

  17. Likes BrewCityCobra liked this post
  18. #572
    Senior Member
    Join Date
    May 2018
    Location
    Milwaukee, WI
    Posts
    511
    Post Thanks / Like
    Thanks! I can certainly work with that.
    BUILD THREAD: The Brew City Cobra

    Current Build: MK4 Complete Kit, Delivered December 2021; First Start November 9, 2022; Go-Cart November 23, 2022; Carbureted 427W, TKX, IRS

Page 15 of 15 FirstFirst ... 5131415

Posting Permissions

  • You may not post new threads
  • You may not post replies
  • You may not post attachments
  • You may not edit your posts
  •  

LCD Gauge Systems

Visit our community sponsor