-
10-18-2024, 07:43 AM
#121

Originally Posted by
egchewy79

I might have missed it, but is the illuminated clock hands a new offering from speedhut?
News to me. My gauges came directly from Speedhut, not FFR. Regardless, it seems odd that Speedhut would illuminate the clock differently than the other gauges.
-
10-18-2024, 08:15 AM
#122
Senior Member

Looks great, but what are the access plans for the fuses behind the dash on the fire wall?
-
10-18-2024, 08:38 AM
#123

Originally Posted by
F500guy

Looks great, but what are the access plans for the fuses behind the dash on the fire wall?
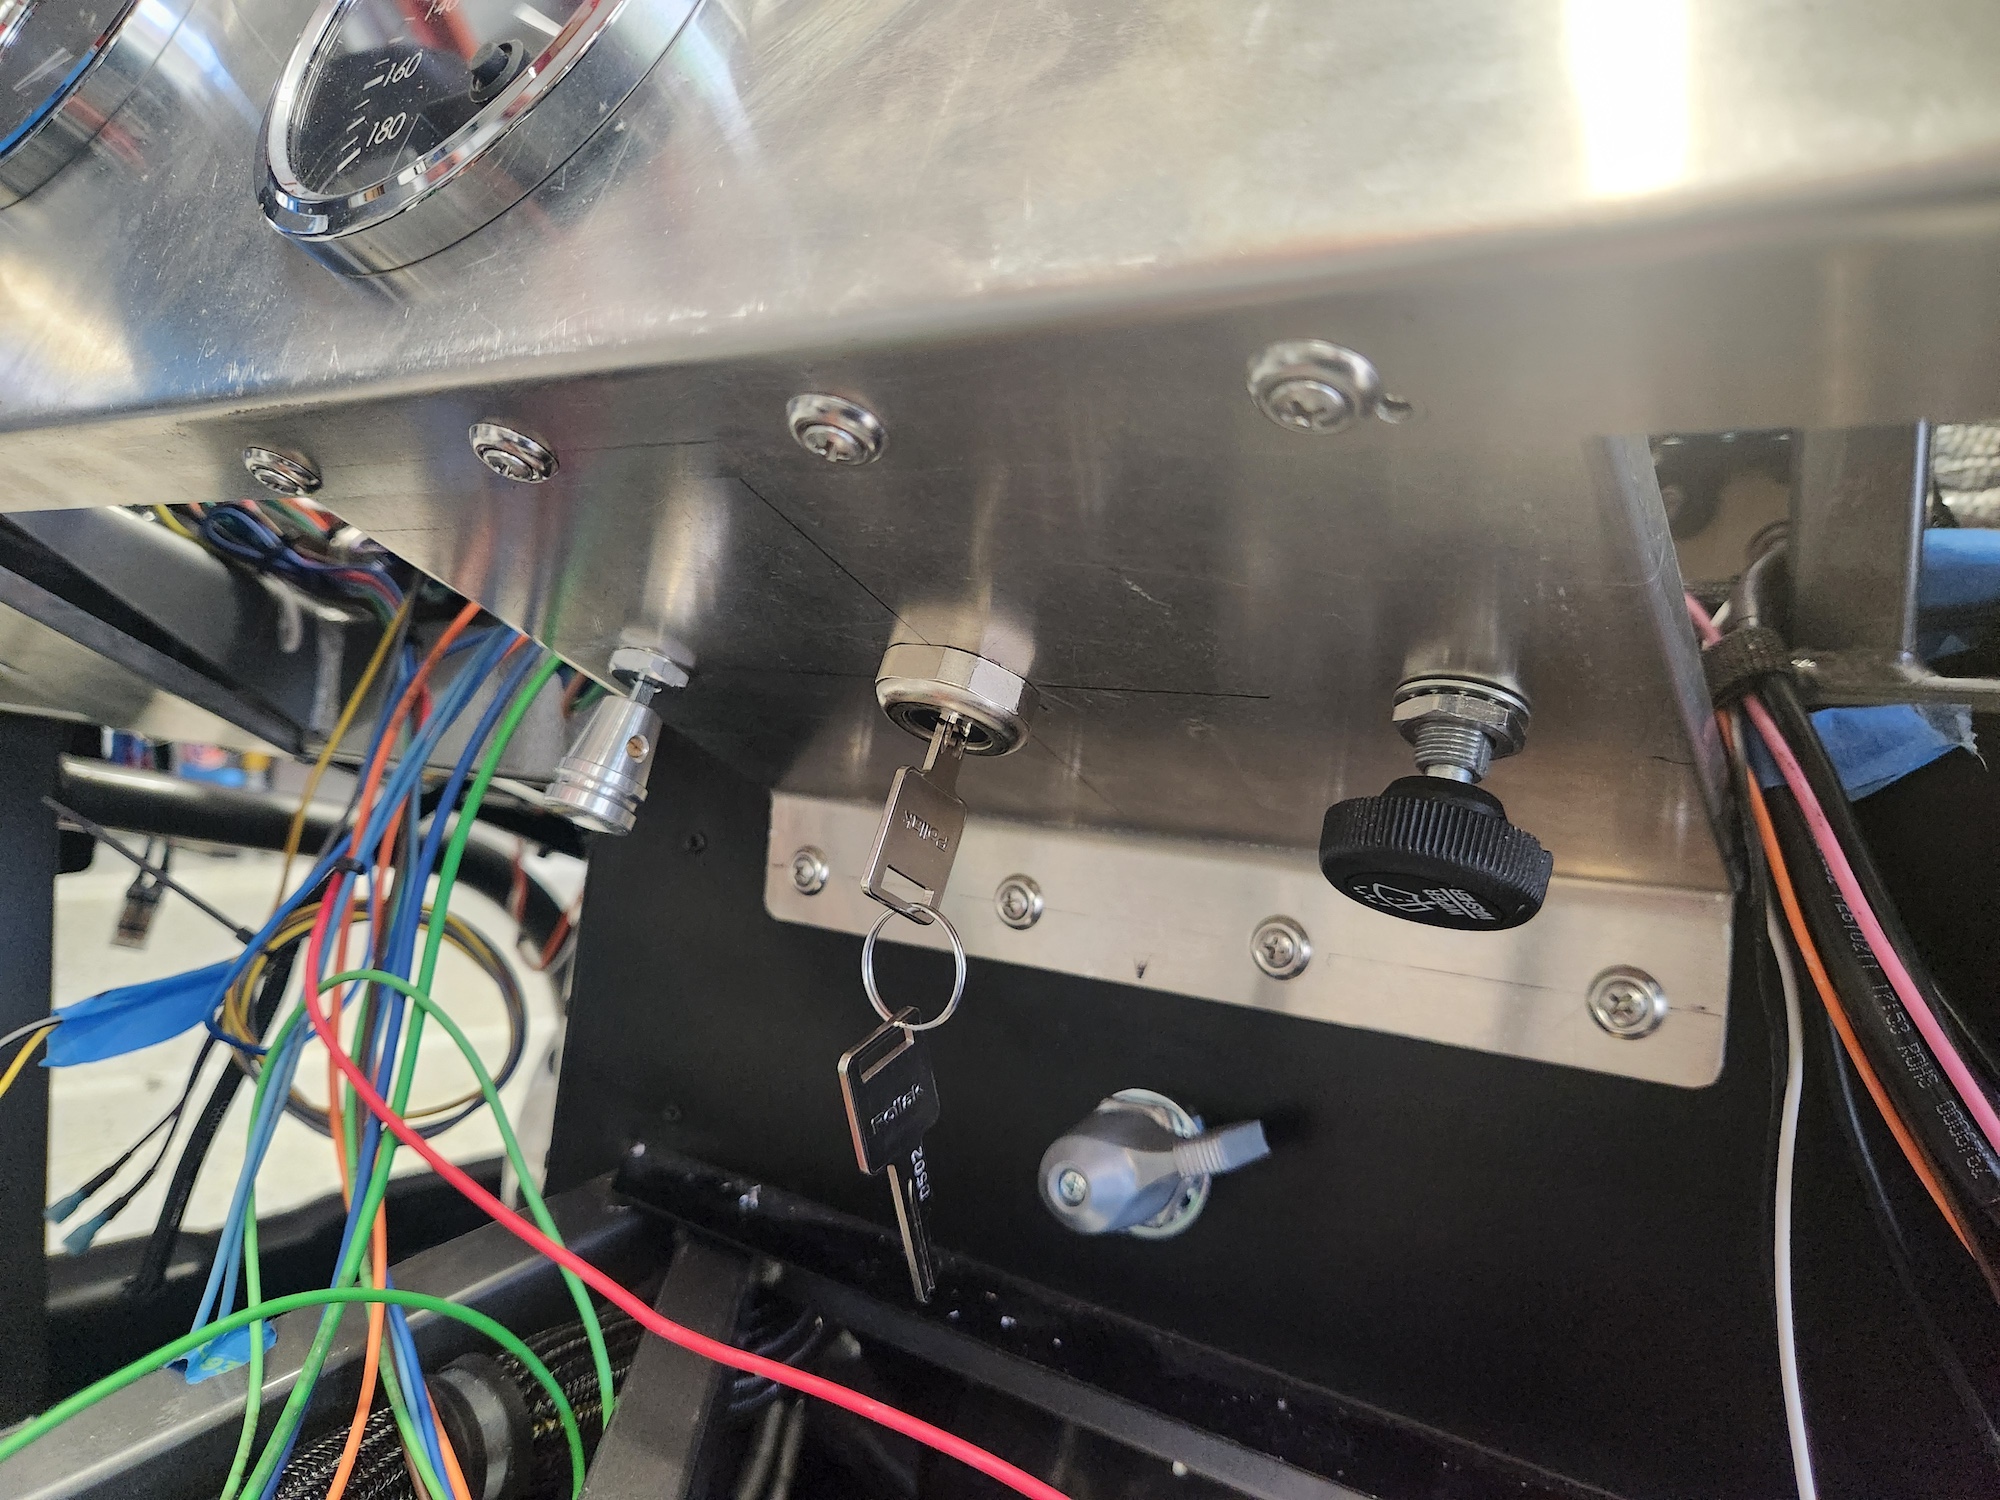
Good question, and something I've thought a lot about while putting this thing together. For a simple fuse replacement, it's easy to just reach up under the dash (I've tested that  ), and if further access is needed, the center panel is designed to be removed easily without disconnecting the switches it holds. I suppose another option is to remove the tach and reach through.
-
10-27-2024, 04:42 PM
#124
Didn't do much this weekend, but got the driver's side Thermo-Tec in, and installed the trunk hinge kit.
This is tedious work, but gratifying nonetheless.
20241027_144911.jpg
I originally thought the struts would interfere with the fuse box, but they do work nicely together afterall. I took Jeff Kleiner's advice and placed the front mounts between the belt holes to prevent interference with the belts.
20241027_144903.jpg
20241027_145607.jpg
-
11-04-2024, 05:18 PM
#125
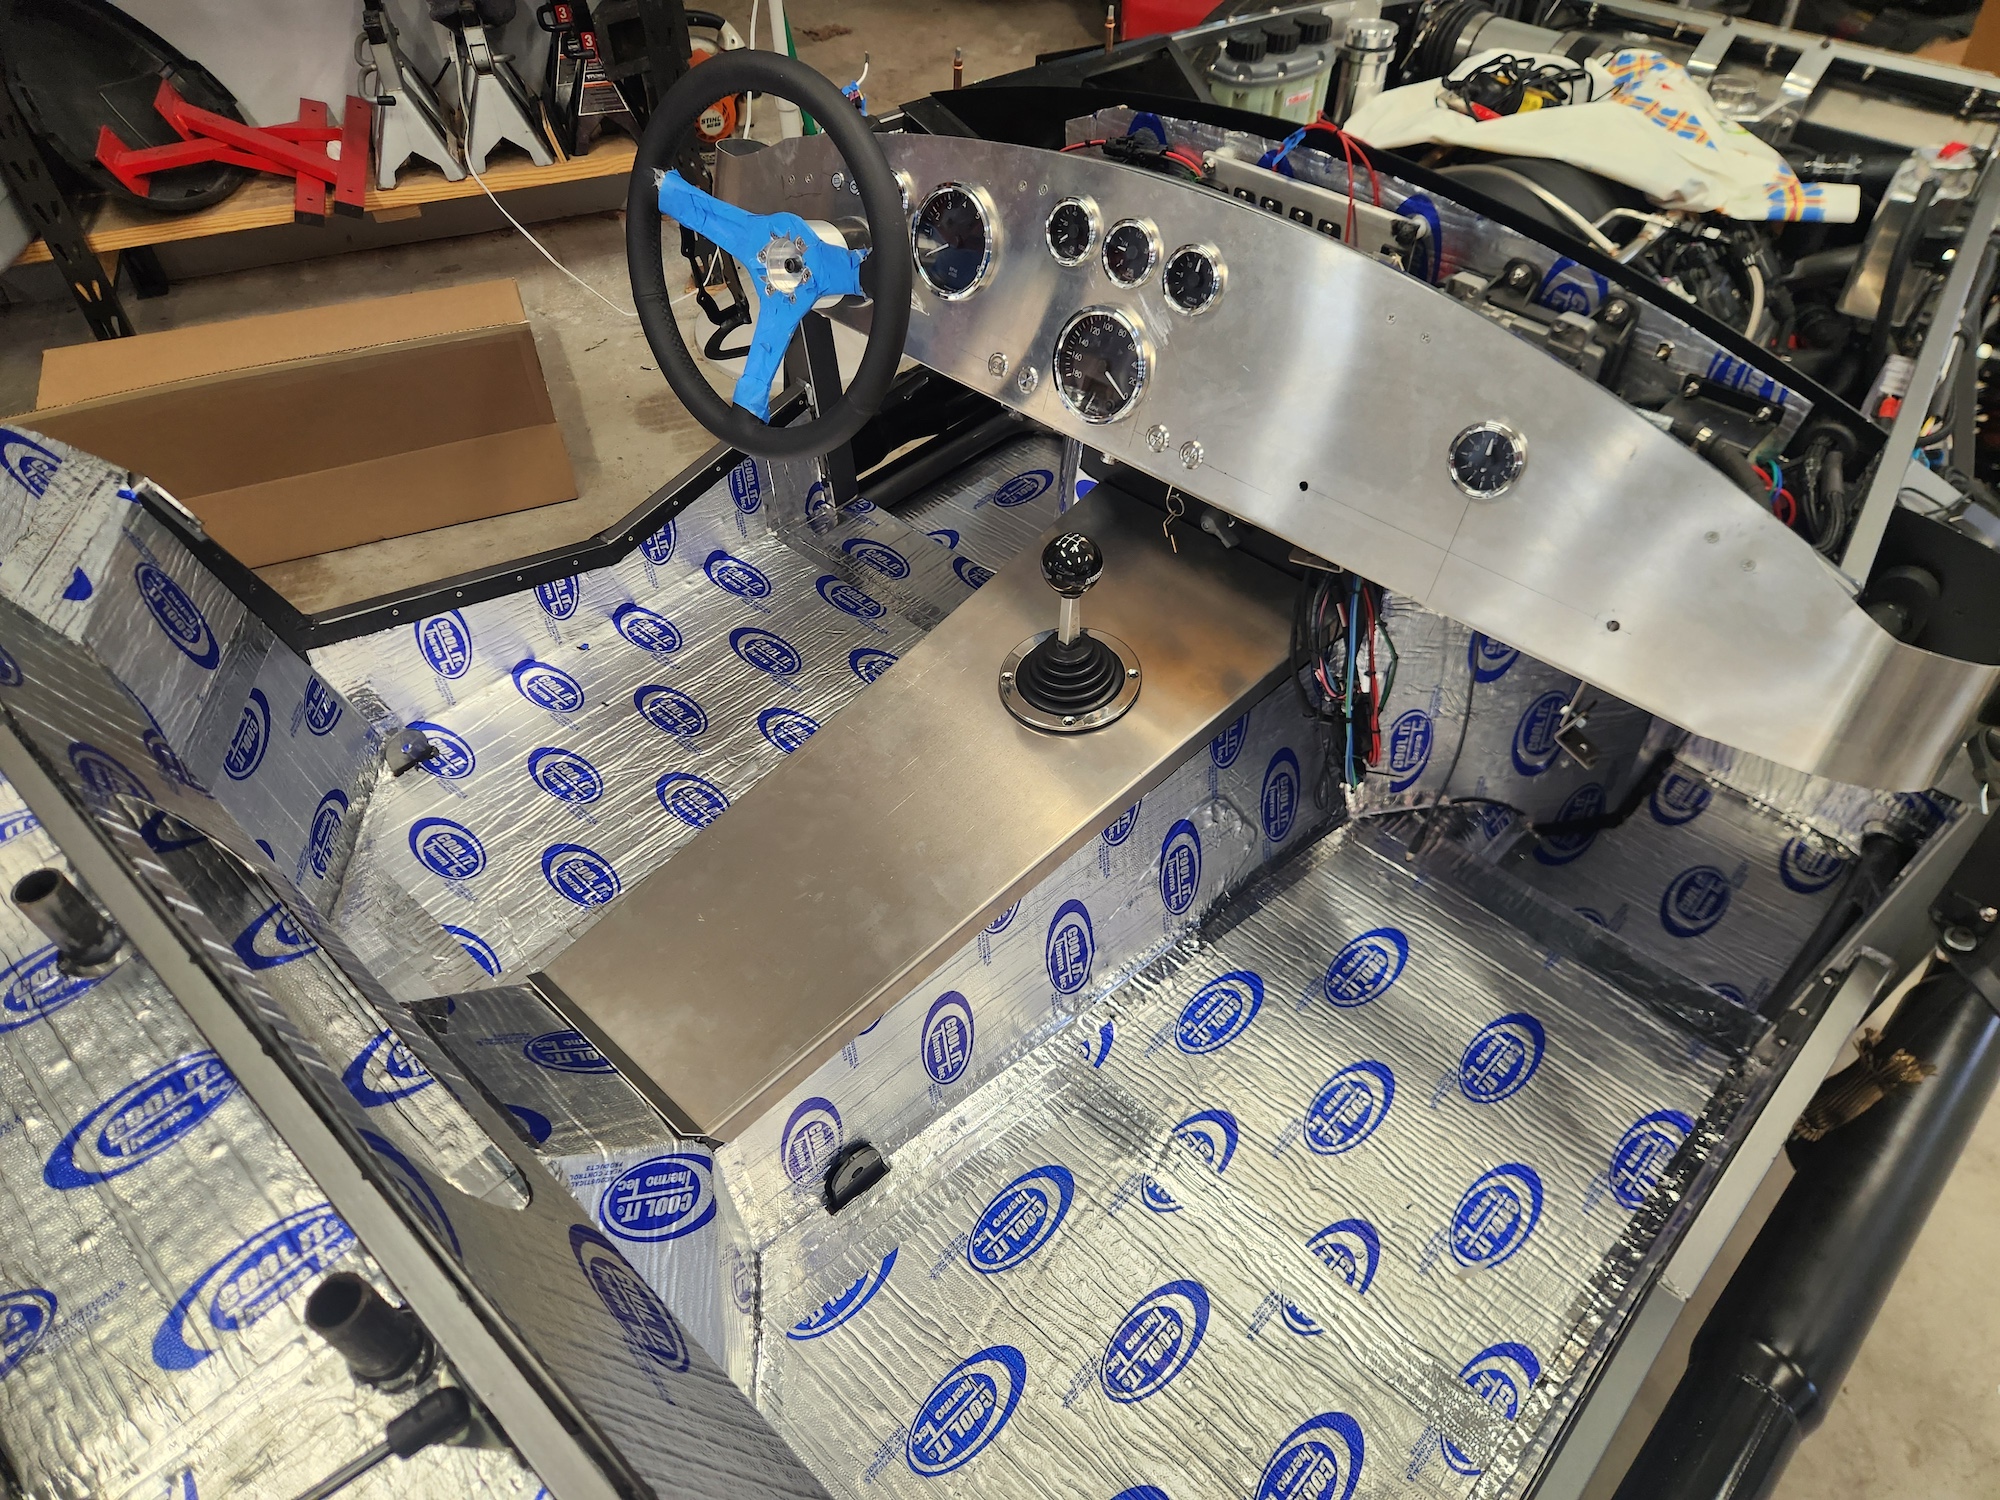
Starting to resemble a car...

-
Post Thanks / Like - 0 Thanks, 2 Likes
-
11-17-2024, 01:44 PM
#126
I've been working on getting some of the last wiring items completed, which should get me close to being done with this phase until I need to do other things when the body is on (license plate lights, reverse light, etc.). It seems like a never-ending phase of the build, but fortunately it's enjoyable.
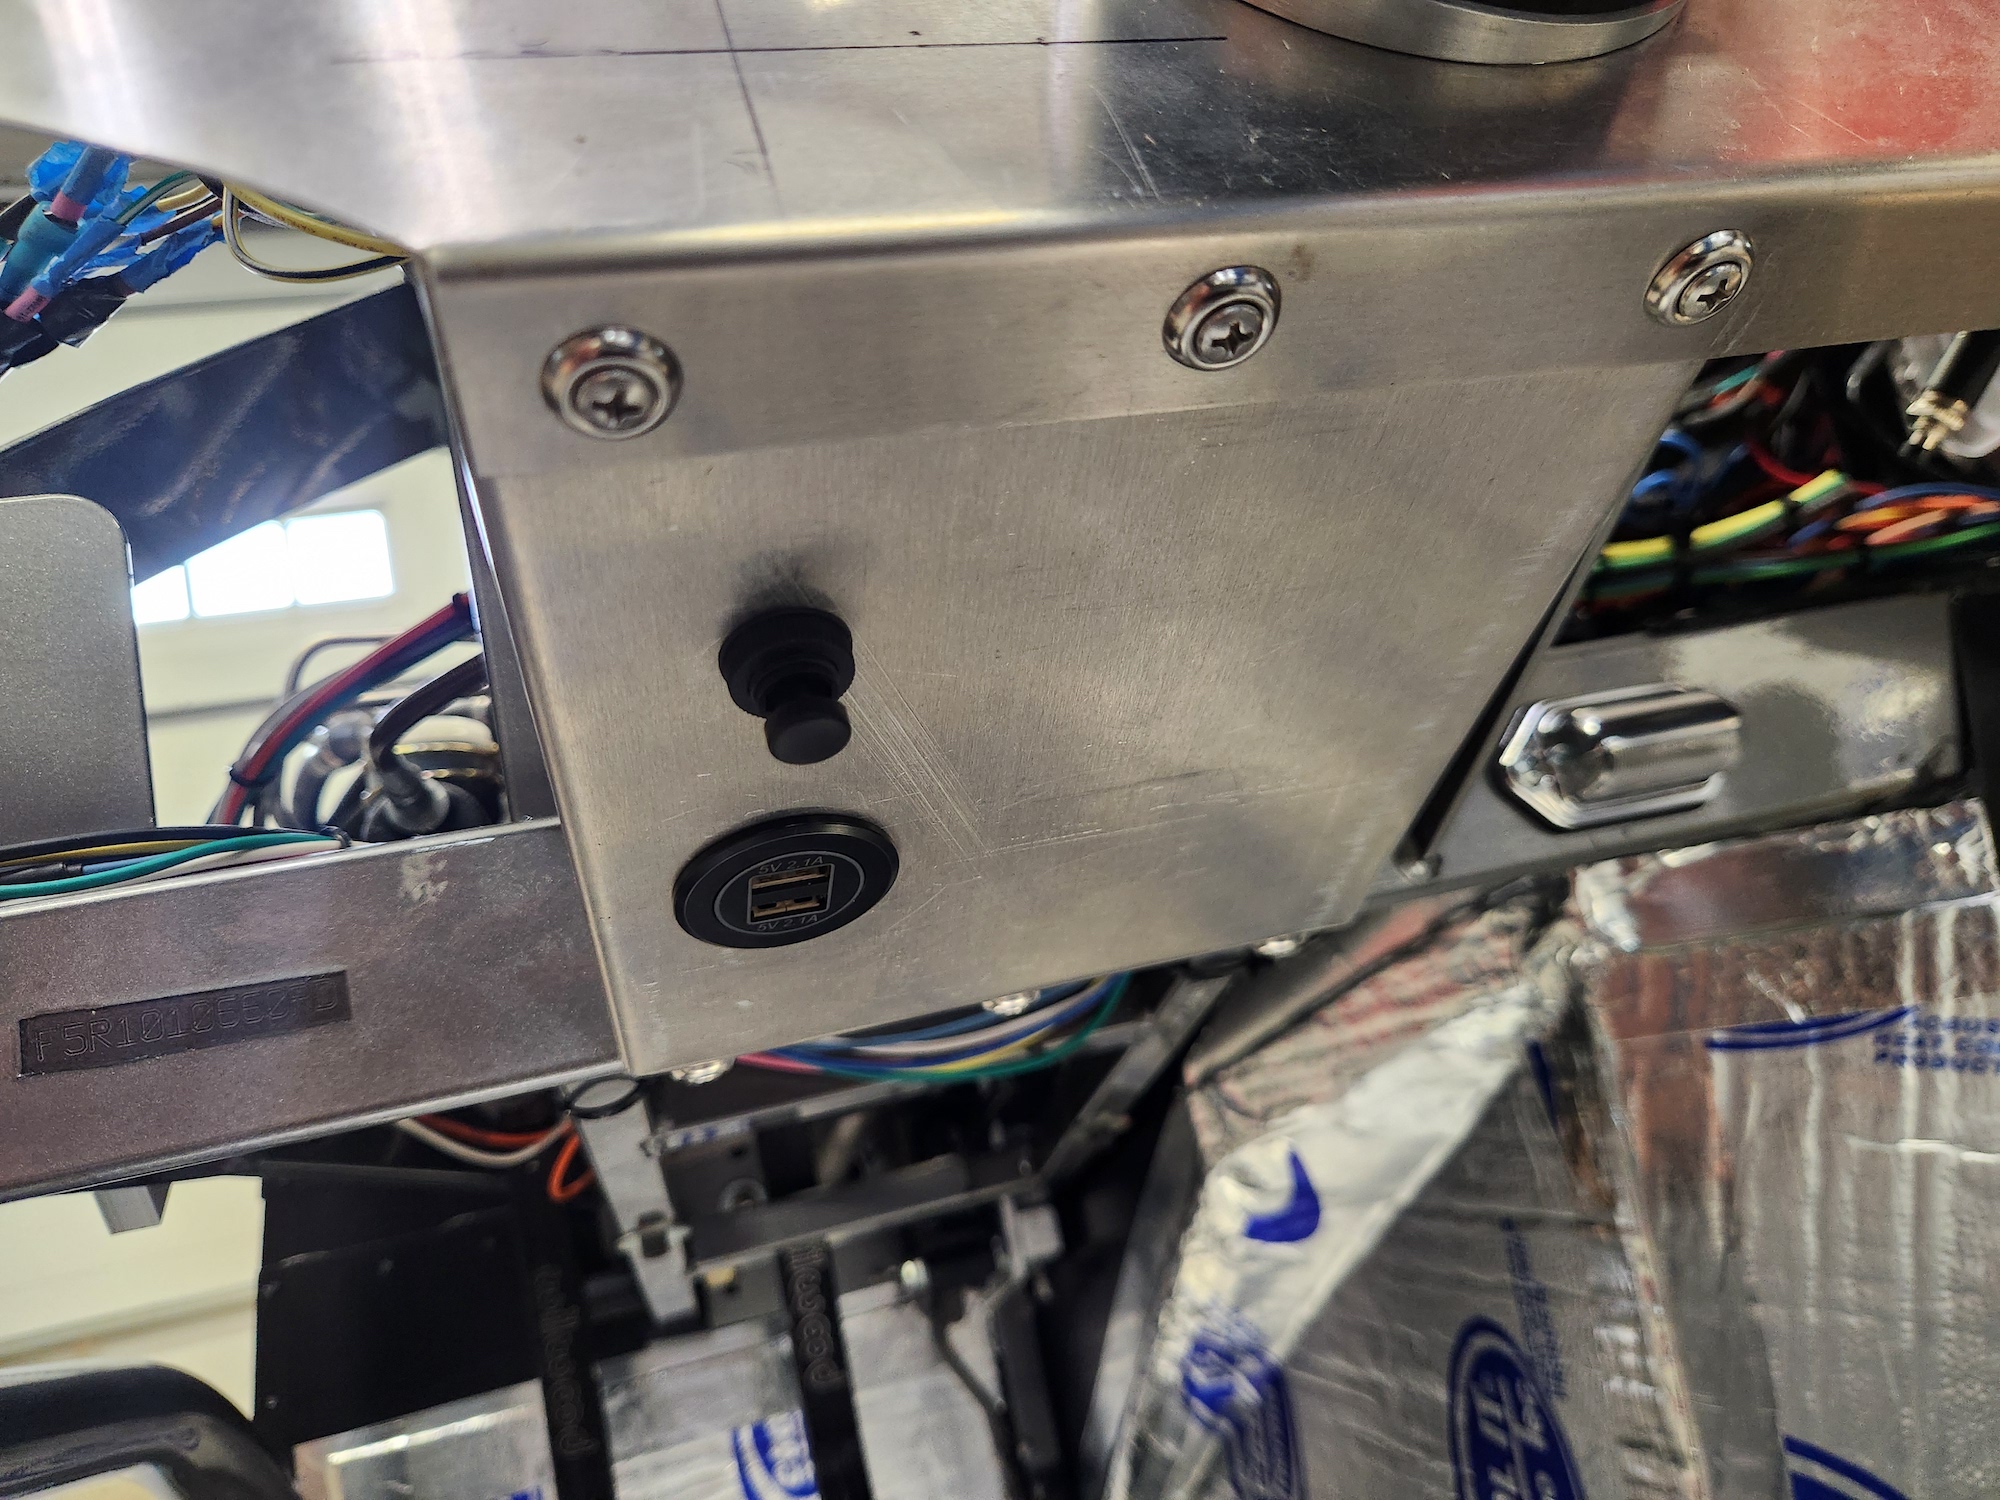
A couple of USB ports installed in the dash panels. The button in the first picture for the clutch safety switch override, which is super handy when you want to start the car without getting in it (just make sure it's in neutral). Unfortunately the neutral safety switch on the TKX is non-functional with the mid-shift kit, otherwise I would have used that instead of the clutch safety switch. The inertia switch is installed to interrupt the fuel pump relay ground.
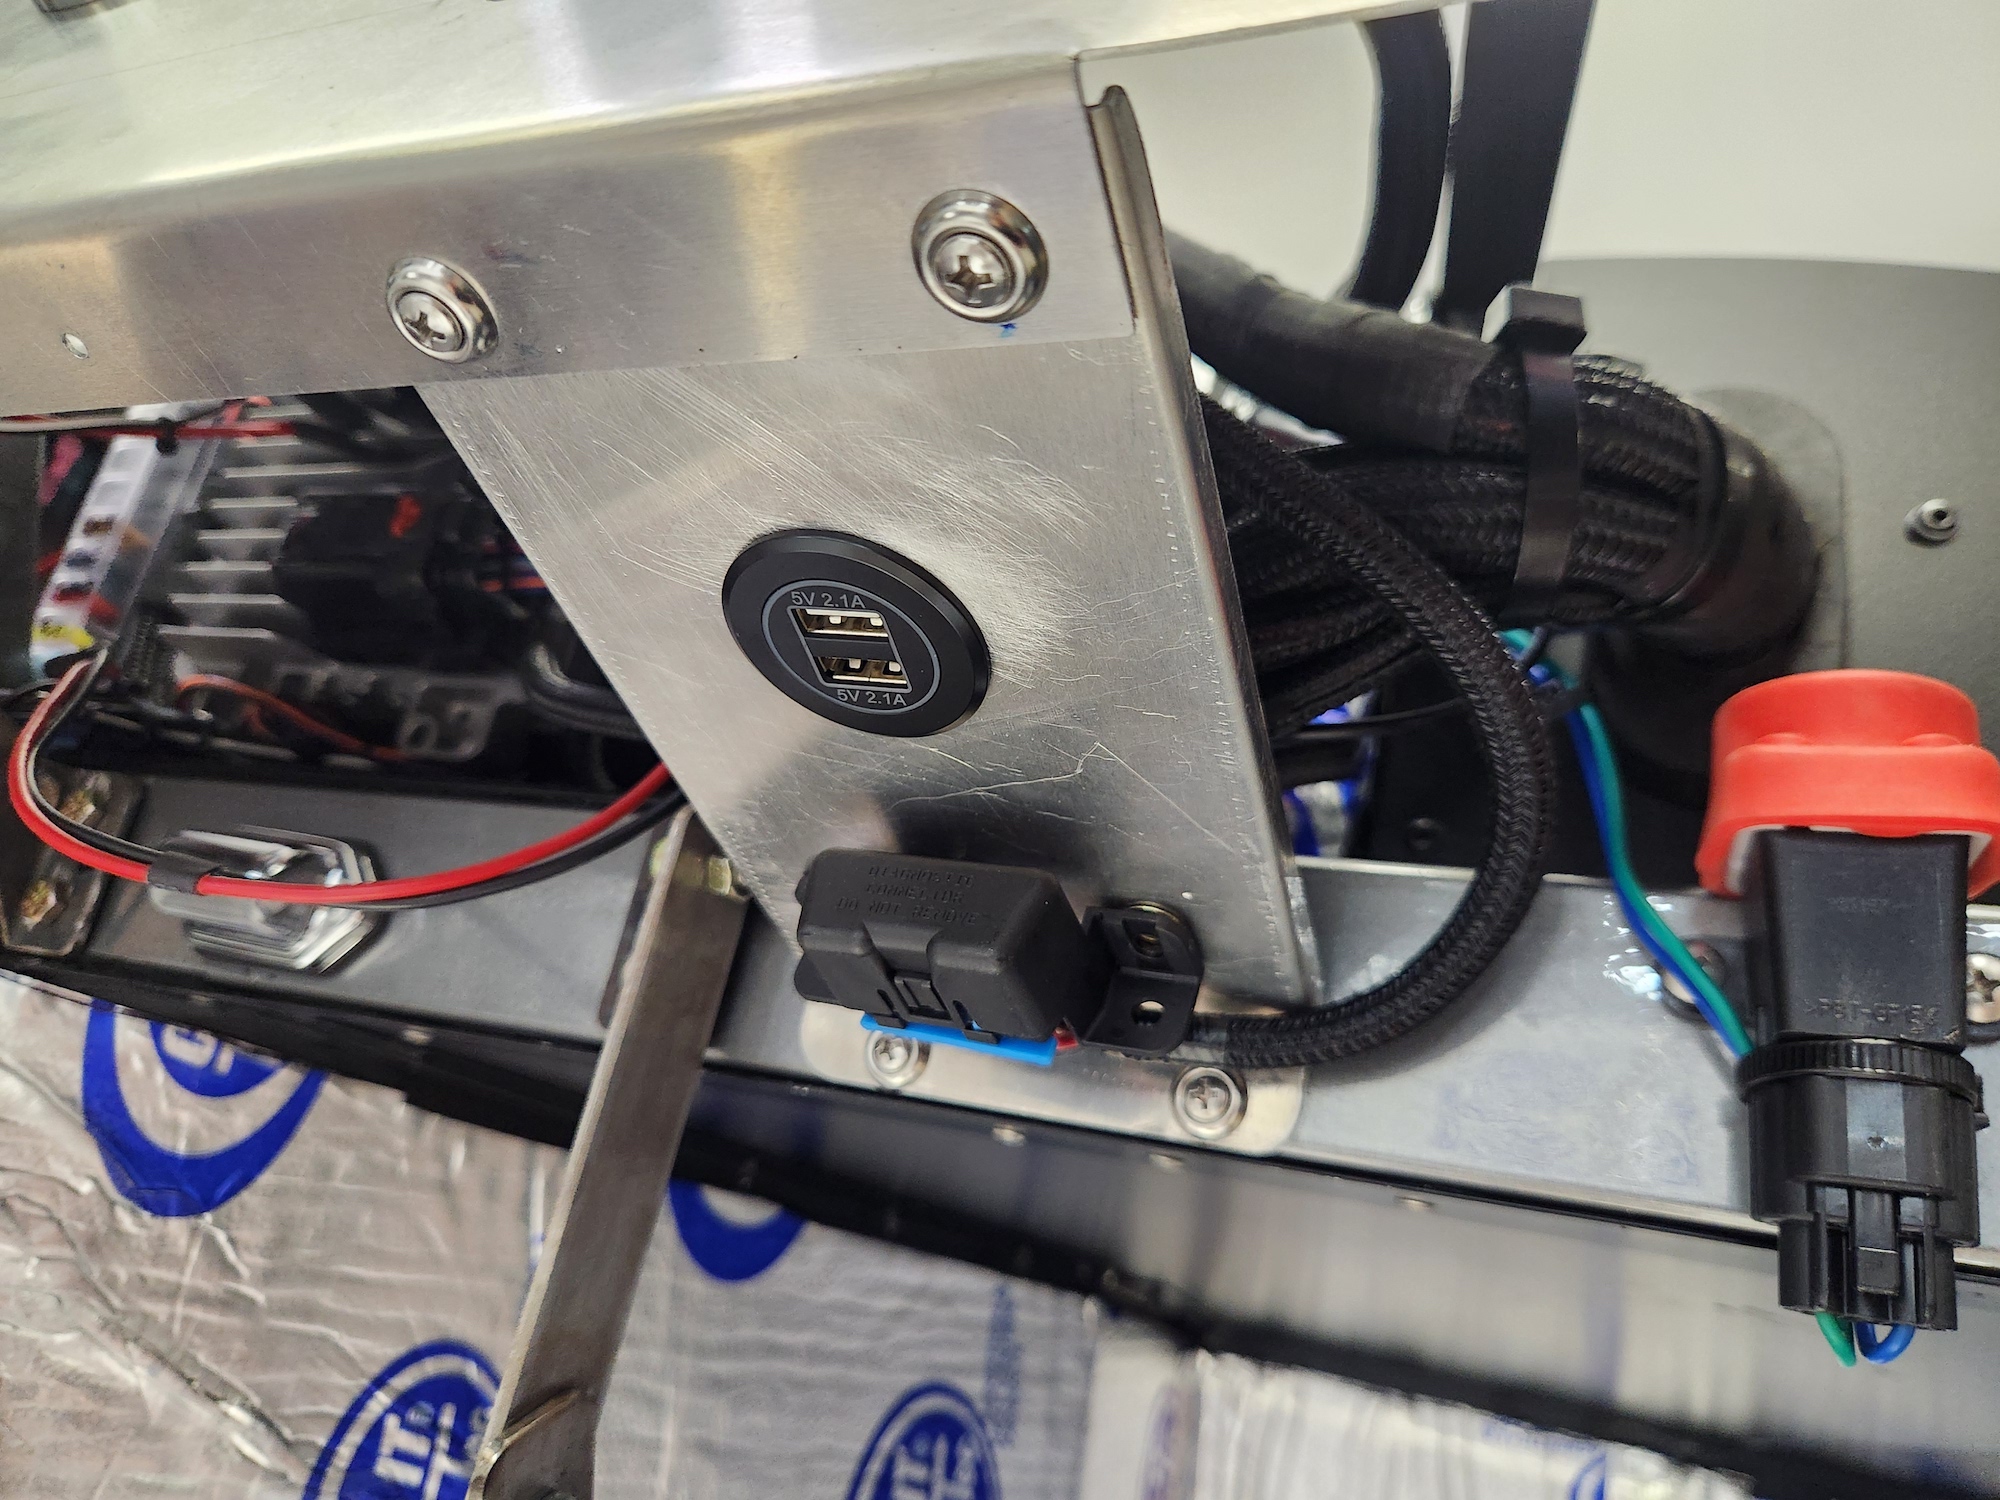
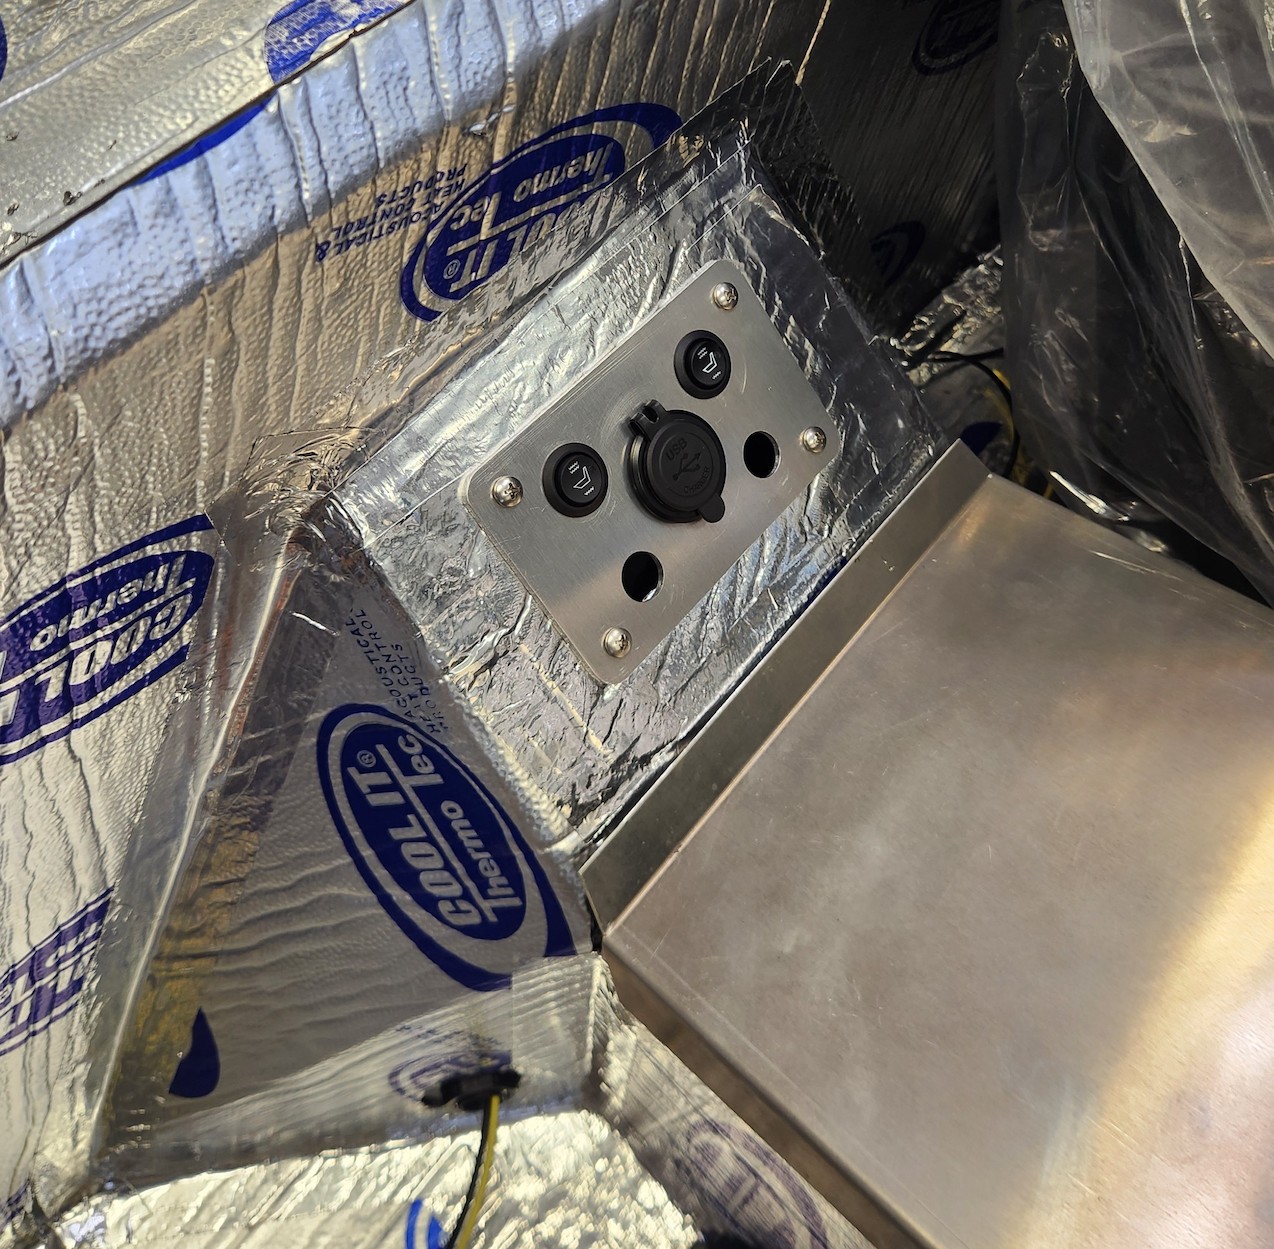
I have no plans to have multiple devices plugged in at the same time, but it can't hurt to have another 12V/USB source in another location, so I installed a panel with a port and four switches... two for the seat heaters, and two additional for foot box blowers like AA-Ron and Mike.Bray installed. All three (seat heaters, blowers, 12V/USB) are powered by separate dedicated circuits. My plan is to make this entire panel removable as one assembly without disconnecting everything on it. Like the dash, I'll use a couple weather packs to do this.
I have the following items to complete:
- One more round of clean-up/organization behind the dash when I remove it next.
- Change the courtesy lights to a battery circuit rather than the ignition-fed "dome light" circuit. I think the ability to turn those lights on without the key on would be helpful. Maybe others have a different opinion?
- Cleanup the connections between the turn signal and the harness. Right now I have each wire connected using a spade connector and I'm not thrilled with it. Unfortunately the hole they need to pass through isn't large enough for any sort of weather-pack or similar, so I may be limited to what I have.
- Run a battery-tender cable to a location where I don't need to open the hood every time. Any ideas? I'm thinking under the dash hear the OBD2 port.
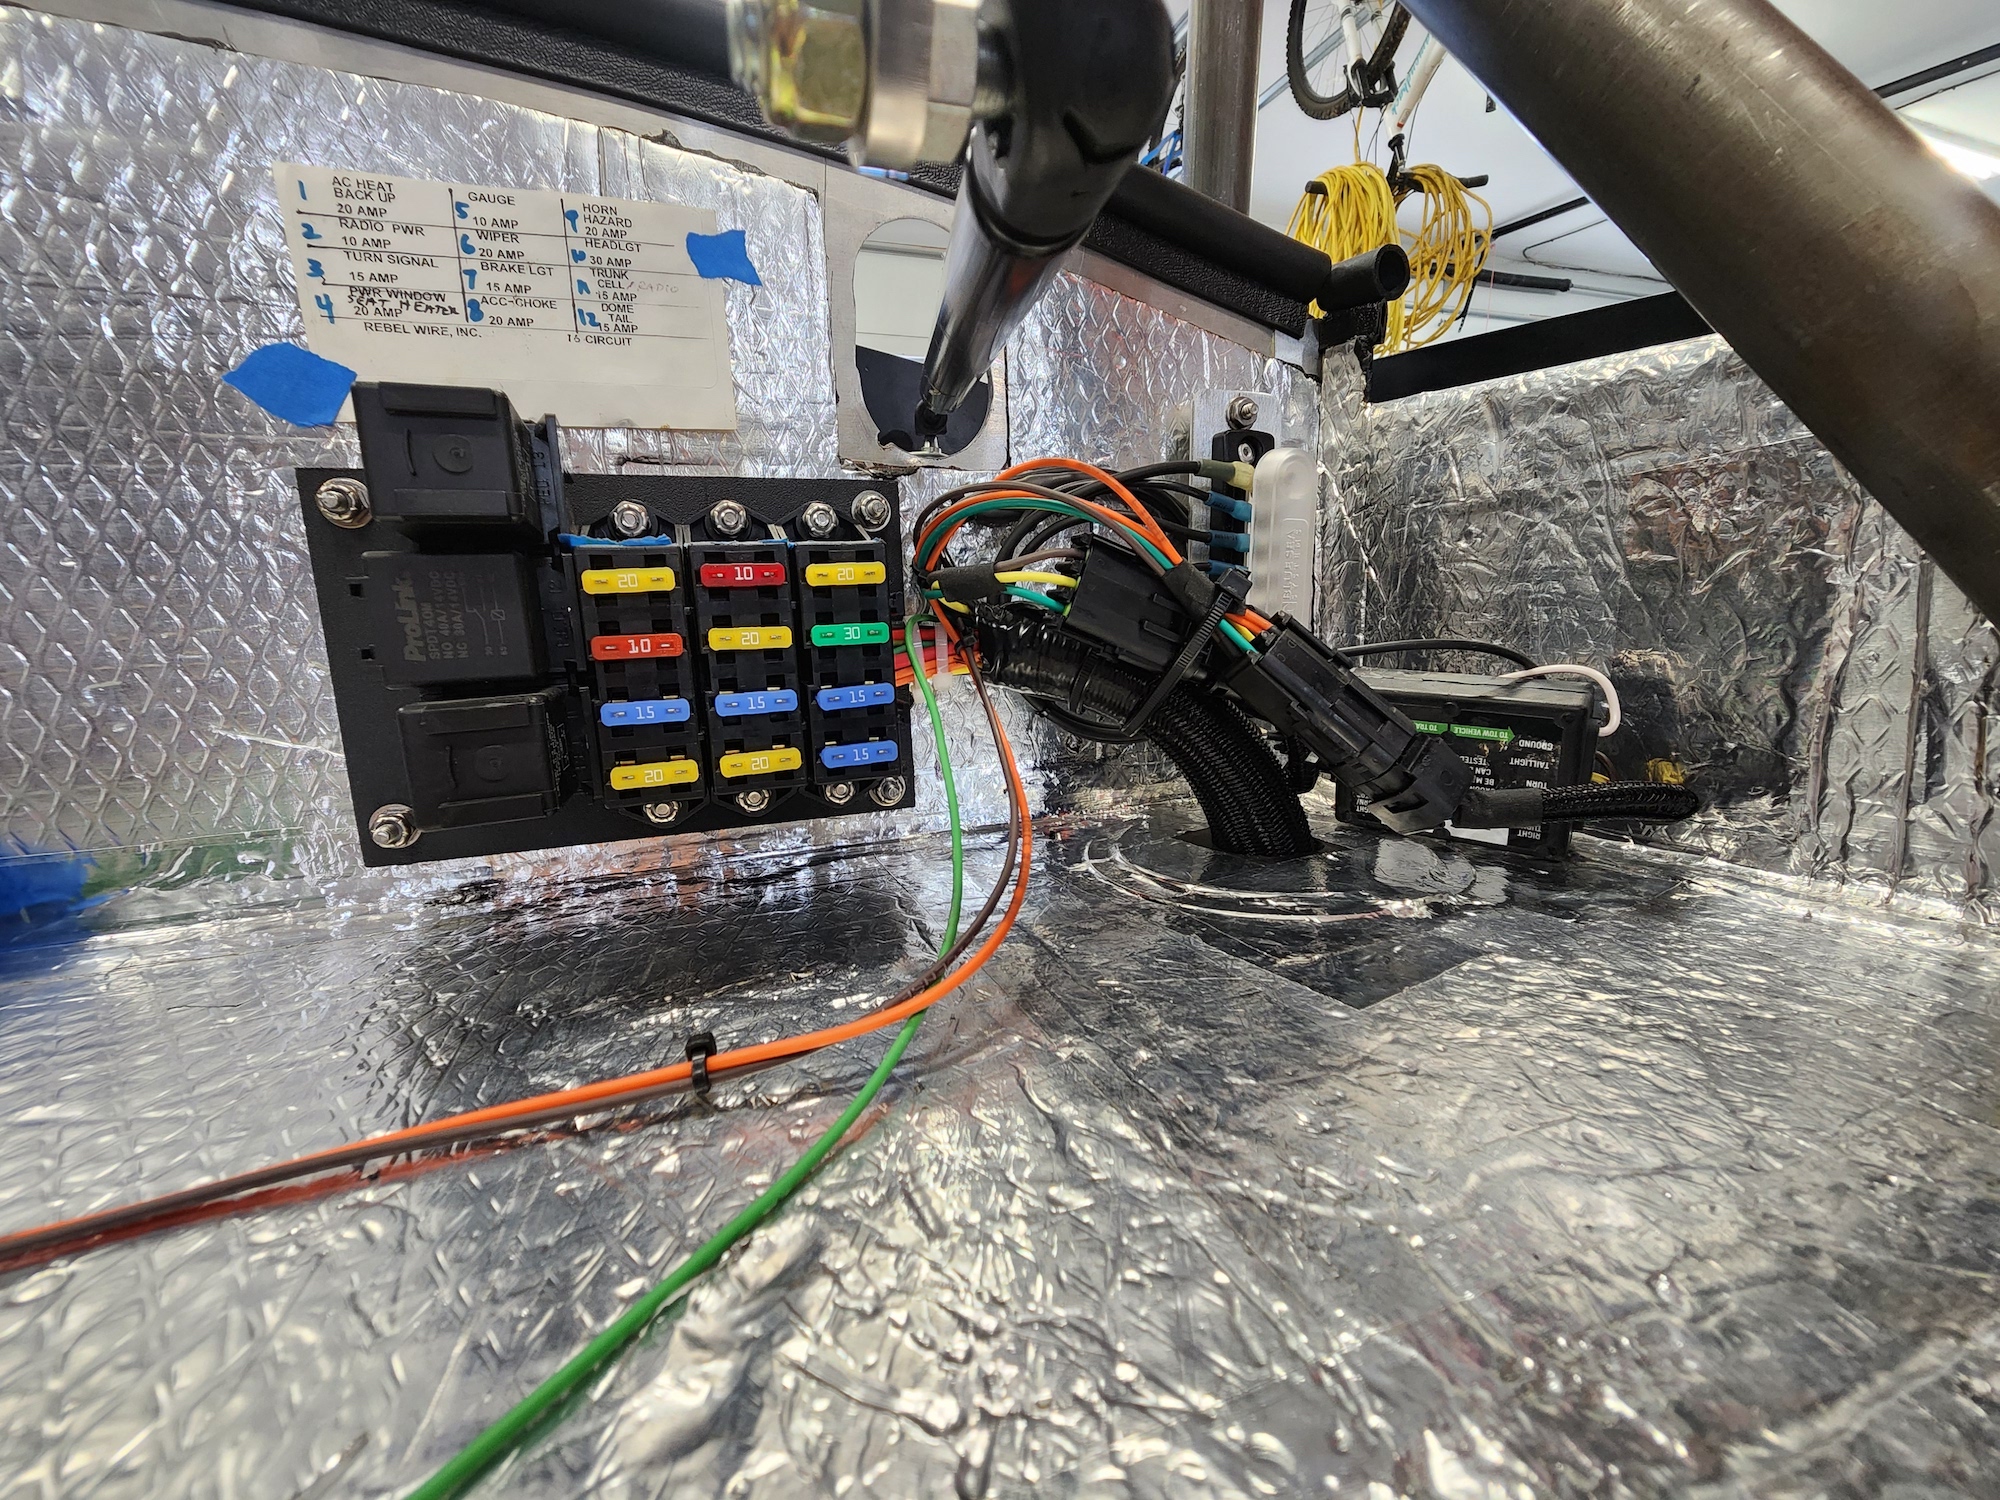
And finally, I cleaned up the fuse panel area a little more. More importantly, I sealed up where the harness comes through the trunk floor using this grommet from Seals-It.
Last edited by OB6; 11-17-2024 at 01:48 PM.
-
Post Thanks / Like - 0 Thanks, 1 Likes
-
11-17-2024, 03:44 PM
#127
Senior Member

Your work is looking really nice. In regards to this statement:
- Change the courtesy lights to a battery circuit rather than the ignition-fed "dome light" circuit. I think the ability to turn those lights on without the key on would be helpful. Maybe others have a different opinion?
I am guessing the "dome light" circuit is only on when the ignition is activated? Seems a little odd since a dome light circuit should be battery fed, not ignition fed but either way, I agree with you. Would be nice to be able to trigger those lights without the key.
Coupe complete kit ordered: 9/26/24. Gen 4 Coyote. T-56. IRS w/3.73. Wilwoods. PS. HVAC. Side windows.
-
11-29-2024, 08:49 PM
#128
Not much exciting to report. Taking care of a few electrical things, like dimming the LEDs of the dash switches. They're just too bright and would be very distracting. I spliced in a 3.6K Ohm resistor into each switch, which made a noticeable difference in the intensity (guessing 50%).
20241129_191356-COLLAGE.jpg
The switch looks green, but it's just the photo. Dimmed switch on left vs non-dimmed on right.
20241129_191309-COLLAGE.jpg
As I was working behind the dash, I discovered a loose connection on the ignition relay, and quickly fixed it. Evidently I must have grabbed the wrong female spade connector when I was assembling that relay -- this one didn't have the tab to keep it secure in the relay socket. Glad I found it now and not later when everything is buttoned up. I checked all the others and all is good.
Roll Bars
I've got the 1.5" roll bars installed, but i just can't get myself to really like them, especially after seeing the 2" bars on a few other cars. So I placed a call to FFR and ordered a set. More to come.
Last edited by OB6; 11-29-2024 at 08:53 PM.
-
11-30-2024, 04:30 AM
#129
Senior Member

You won’t regret the 2” bars. They look so much better.
-
Post Thanks / Like - 1 Thanks, 0 Likes
 OB6
OB6 thanked for this post
-
12-16-2024, 09:06 PM
#130
Changes...
The build is progressing slowly, but mostly because I've decided to make a few changes along the way.
Seats
Good grief, talk about indecision. I can't use the FFR seats because my wife recently had neck surgery and low-back seats are a no-go. I was set on buying high-backs until I was convinced in a thread I started that I should add headrests to the FFR seats. Cool, the decision was made and I even bought 2004 Audi A4 headrests for future install. Better yet, it would be inexpensive and maintain the look I had planned. That was until last week when I saw them on my shelf and thought "you know, I really should have her sit in the FFR seat and seat how this will all work." Glad I did, because that setup was clearly not going to work for her. Ok, back to buying high-back seats. After reaching the end of the internet looking for options and talking to a few fellow builders, I landed on the Intatrim Stonesleigh seat. I'm working with Robin at Intatrim on a design and will be ordering them this week. The bigger point though, is how these seats will change the entire look of the interior I had planned. It's not a bad thing, it's just a change in direction. I'm actually pretty excited about it.
Dash
I like the layout of my dash, but there are a few things I wish I had done differently or better. Since there's no better time to do it, I've decided to pull the dash and start over. FFR's blank dash is about $200 shipped, so I'm making my own. For less than half that, I ordered a piece of 5052 0.050 aluminum at a local supplier (slightly thicker than the FFR material). They'll bend the bottom lip for me too, which is a plus. I'll also be able to cut it even with the hoop, and won't have to worry about whether the body will cover it. The layout will remain the same, but the size of the holes will be more precise this time, and I'm moving away from the hidden mount system in favor of face-mounted screws like most people use. Nothing against the hidden mounts, but I feel like I'll end up cursing them in the long run when/if I need to remove the dash. I'll install tabs to avoid the screws from being hidden behind the body.
2" Roll Bars
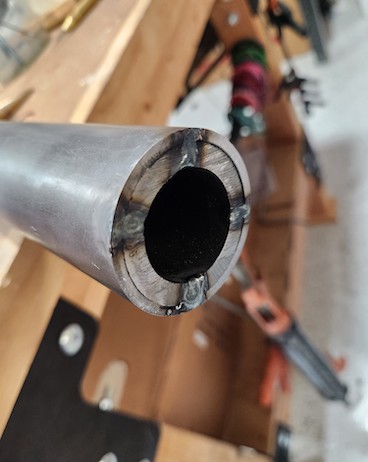
I mentioned previously that I was switching to FFR's 2" roll bars. I ordered the 1.75" OD x 0.25" DOM tubing for the adapters from the same place I ordered the dash material. I had them cut it into six 3.5" sections, and they were easily tapped into the roll bar ends with a rubber mallet. My neighbor Alex tack welded them in place:
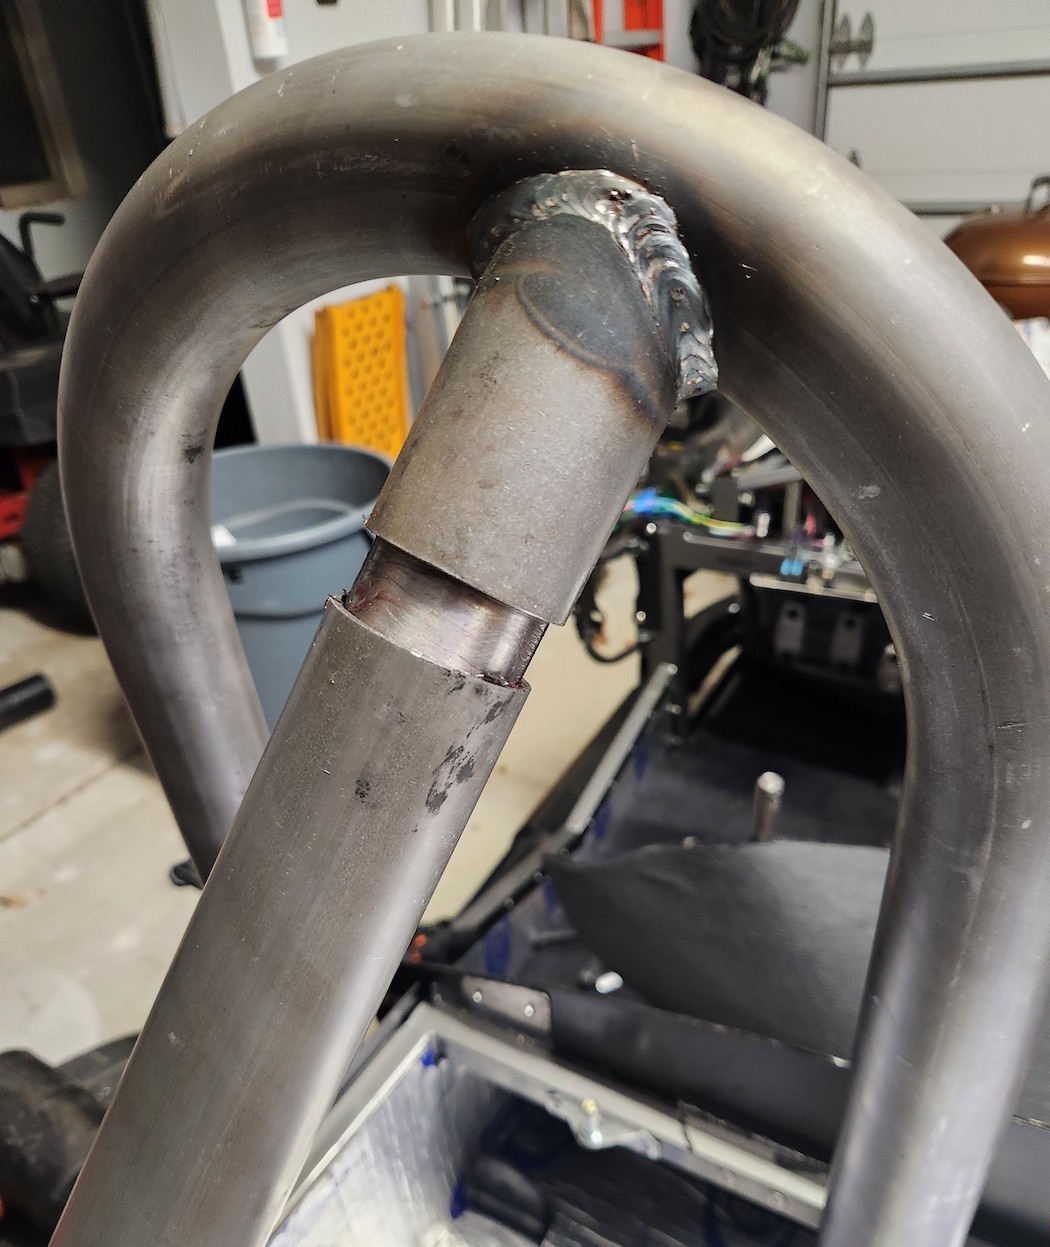
Now I'm working on getting them installed, and it's going to take some work as you can see in this photo. This is as far as I can get the diagonal into the main hoop stub, so I'll need to do some more work with the emory cloth and flap wheel. Also, the rear stub on the frame needs to be encouraged upward a little bit with a BFH, as it took quite a bit of muscle to get it to this point (an approach that won't work with the body on). It will all be worth it though, as they look much better IMO.
-
12-17-2024, 07:49 PM
#131
-
12-17-2024, 08:44 PM
#132
Senior Member

I took a shocking amount of material off to get them to mate without a hammer. I spent 4 hours in total removing material getting everything lined up.
-
12-17-2024, 09:16 PM
#133

Originally Posted by
Blitzboy54

I took a shocking amount of material off to get them to mate without a hammer. I spent 4 hours in total removing material getting everything lined up.
Yeah, I think that's what I'm heading into.
-
12-18-2024, 03:28 PM
#134

Originally Posted by
OB6

I've been working on getting some of the last wiring items completed, which should get me close to being done with this phase until I need to do other things when the body is on (license plate lights, reverse light, etc.). It seems like a never-ending phase of the build, but fortunately it's enjoyable.
A couple of USB ports installed in the dash panels. The button in the first picture for the clutch safety switch override, which is super handy when you want to start the car without getting in it (just make sure it's in neutral). Unfortunately the neutral safety switch on the TKX is non-functional with the mid-shift kit, otherwise I would have used that instead of the clutch safety switch. The inertia switch is installed to interrupt the fuel pump relay ground.


I have no plans to have multiple devices plugged in at the same time, but it can't hurt to have another 12V/USB source in another location, so I installed a panel with a port and four switches... two for the seat heaters, and two additional for
foot box blowers like AA-Ron and Mike.Bray installed. All three (seat heaters, blowers, 12V/USB) are powered by separate dedicated circuits. My plan is to make this entire panel removable as one assembly without disconnecting everything on it. Like the dash, I'll use a couple weather packs to do this.
I have the following items to complete:
- One more round of clean-up/organization behind the dash when I remove it next.
- Change the courtesy lights to a battery circuit rather than the ignition-fed "dome light" circuit. I think the ability to turn those lights on without the key on would be helpful. Maybe others have a different opinion?
- Cleanup the connections between the turn signal and the harness. Right now I have each wire connected using a spade connector and I'm not thrilled with it. Unfortunately the hole they need to pass through isn't large enough for any sort of weather-pack or similar, so I may be limited to what I have.
- Run a battery-tender cable to a location where I don't need to open the hood every time. Any ideas? I'm thinking under the dash hear the OBD2 port.

And finally, I cleaned up the fuse panel area a little more. More importantly, I sealed up where the harness comes through the trunk floor using
this grommet from Seals-It.

With regard to the battery tender port - I faced a similar situation (with a similar goal) and ended up going with a C-TEK unit positioned under the passenger end of the dash. I have a few points about it in my build thread. Thought you may find it helpful. To your point, it allows the battery to be on a tender with the hood closed, trunk closed, and even a cover over the car.
https://thefactoryfiveforum.com/show...l=1#post559614
BUILD THREAD:
The Brew City Cobra
Current Build: MK4 Complete Kit, Delivered December 2021; First Start November 9, 2022; Go-Cart November 23, 2022; Carbureted 427W, TKX, IRS
-
12-18-2024, 08:28 PM
#135

Originally Posted by
BrewCityCobra

With regard to the battery tender port - I faced a similar situation (with a similar goal) and ended up going with a C-TEK unit positioned under the passenger end of the dash. I have a few points about it in my build thread. Thought you may find it helpful. To your point, it allows the battery to be on a tender with the hood closed, trunk closed, and even a cover over the car.
https://thefactoryfiveforum.com/show...l=1#post559614
That's a really clean install. I'll definitely take a look at that setup. It would work well on my under-dash panels. Thanks!
-
12-18-2024, 08:30 PM
#136
One down, one to go. Then the drilling.
20241218_184857.jpg
-
12-19-2024, 09:09 PM
#137
I got the other rollbar done. This one went much faster because I knew what needed to be adjusted, but it's still not a fun job. On both of them, the hoop stud and rear leg were not perfectly aligned, as expected. This creates an uneven gap that I addressed by taking the end of the rear tube out of square to match the hoop stub (if that makes sense). Not unlike something you'd do in finish carpenty. This closes the gap a creates an illusion that things are aligned. I have a tiny bit of refinement to do, but overall I'm happy with the results. After that I'll drill for the bolts.
20241219_195749.jpg
20241219_195807.jpg
20241219_195817.jpg
-
12-19-2024, 09:35 PM
#138
Senior Member

Looks great! I did the same thing. I had a 1mm one sided gap. Shaved it down on the high spot to marry it up.
Bear of a job, all kinds of respect for you MKI-III folks 
-
12-21-2024, 02:53 PM
#139

Originally Posted by
Blitzboy54

Looks great! I did the same thing. I had a 1mm one sided gap. Shaved it down on the high spot to marry it up.
Bear of a job,
all kinds of respect for you MKI-III folks 
Thanks Jesse, and no kidding -- this was not a plug & play job, and I didn't expect it to be.
-
12-21-2024, 03:16 PM
#140
The roll bars are now installed and I'm happy with how they turned out. I'll clean up the ends before they go to powder coat, but the important part is done -- they're solid and level with each other. These things have some heft to them. I can't imagine trying to install these if they were powder coated or chromed... they would almost certainly get damaged (at least with me as the installer). I think Jesse mentioned this in his build thread.
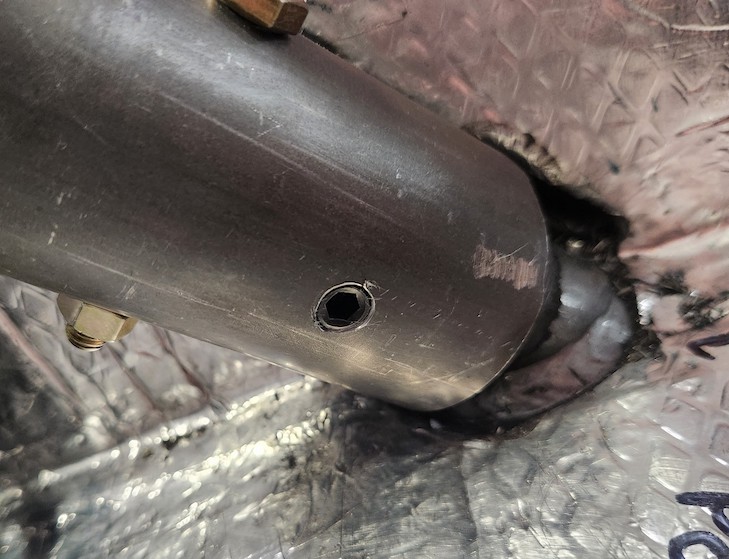
I chose to tap the sleeve where the rear leg mates to the hoop, and install 5/16-24 screws on opposite sides. Those in the picture are what I had. Maybe I'll keep them, or maybe I'll change them. Not important right now.

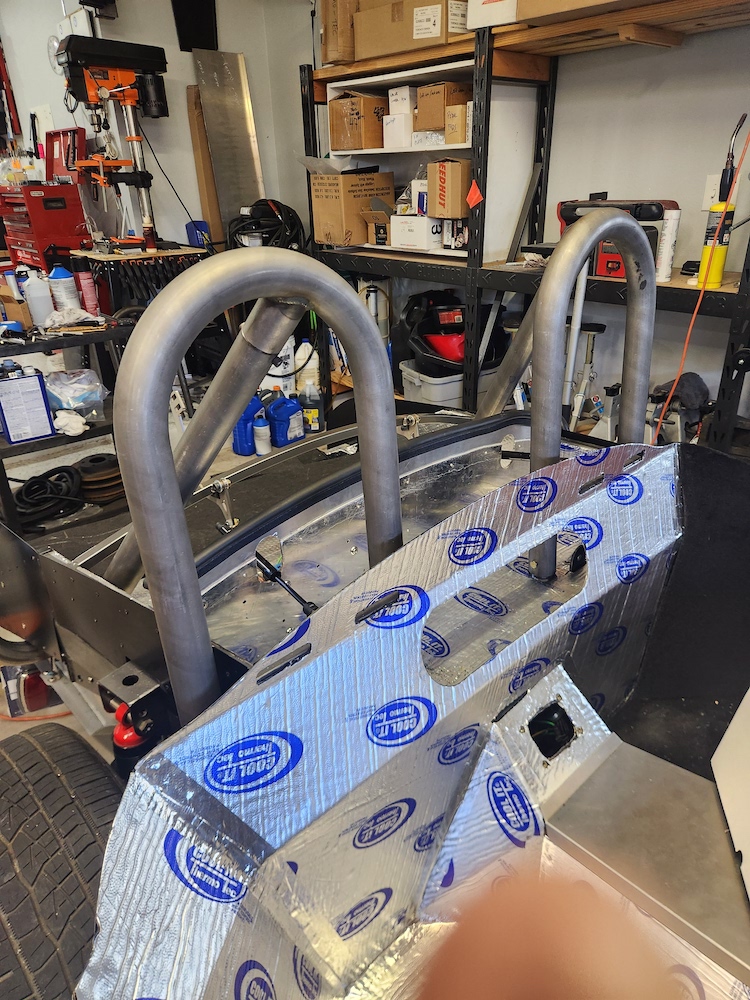
The rear leg on the passenger side had very slight movement when I shook the hoop back and forth with all my weight. I mean very slight, as in the leg would slide on the rear stub a hair, likely less. But enough to cause the thru-bolt to make a noise. This would inevitably drive me nuts, especially with the bar so close to my ears. Obviously tightening the thru-bolts does nothing because they don't actually tighten the bar to the stub. So I decided to tap for a 3/8-16 set screw on each of the rear legs. No more noise. I'll probably do the same on each of the other four legs -- maybe unnecessary but why not preempt noises where I can?
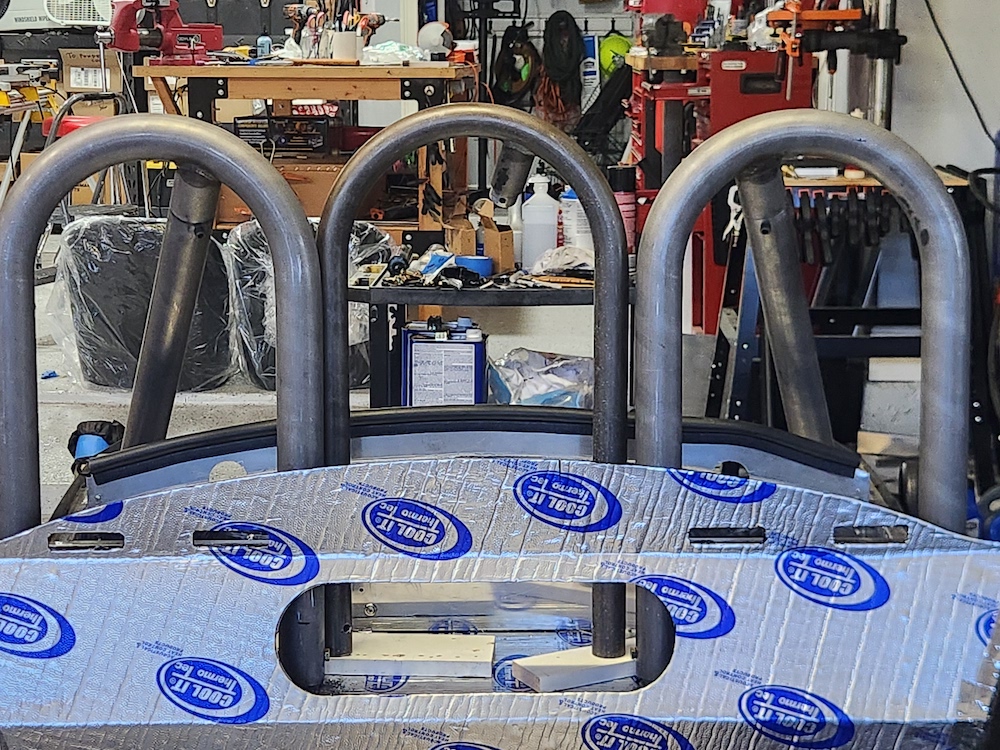
Lastly, since I still have the 1.5" bars, I decided to install one of them in the middle for triple rollover protection. I think it's a good look... what do you think?
No, I just wanted to see how the bars compared with the 1.5" placed at their install height. The picture doesn't show this well, but because the 2" bars need to slide all the way down to the base of the stubs, they end up being about 1/2" lower than the 1.5" bars. This, combined with their extra girth, makes them look lower than they really are (in my opinion).
Some may ask why I didn't do all of this a lot earlier when the aluminum wasn't installed. Well, my original plan was to have no roll bars. Not only do I now have two, they're even larger. I lost that argument, big time. It's safe to say this car will look nothing like my original vision, but I'm really liking where it's going.
Last edited by OB6; 12-21-2024 at 03:19 PM.
-
12-24-2024, 03:52 PM
#141
Got the new dash made. It's the same layout, but I wasn't happy with the way the gauges fit, and I'm changing the the mounting arrangement (the clecos in the picture have nothing to do with how I'll mount the dash; I only used them for fitting purposes). The 16 gauge panel is noticeably more rigid than the 18 gauge material from FFR.
20241224_143743.jpg
Because I was starting from a raw panel, I was able to fit it to the hoop:
20241224_143800.jpg


 Thanks:
  Likes:


 Reply With Quote
 ), and if further access is needed, the center panel is designed to be removed easily without disconnecting the switches it holds. I suppose another option is to remove the tach and reach through.


