Boig Motorsports

Visit our community sponsor

Thanks Thanks:  0
Likes Likes:  13
Page 11 of 51 FirstFirst ... 91011121321 ... LastLast
Results 401 to 440 of 2027

Thread: More progress made on the body : )

  1. #401
    Senior Member
    Join Date
    Apr 2011
    Posts
    641
    Post Thanks / Like
    There is a different style of a window trim that all you have to do is push it down in the gap. It would not requir you to remove the glass. Check with a glass shop. I would avoid removeing the glass unless you have to.

  2. #402
    Senior Member The Stig's Avatar
    Join Date
    Feb 2011
    Location
    Charlotte, NC
    Posts
    2,008
    Post Thanks / Like
    Quote Originally Posted by fastthings View Post
    There is a different style of a window trim that all you have to do is push it down in the gap. It would not requir you to remove the glass. Check with a glass shop. I would avoid removing the glass unless you have to.
    That seems to be the general consensus...

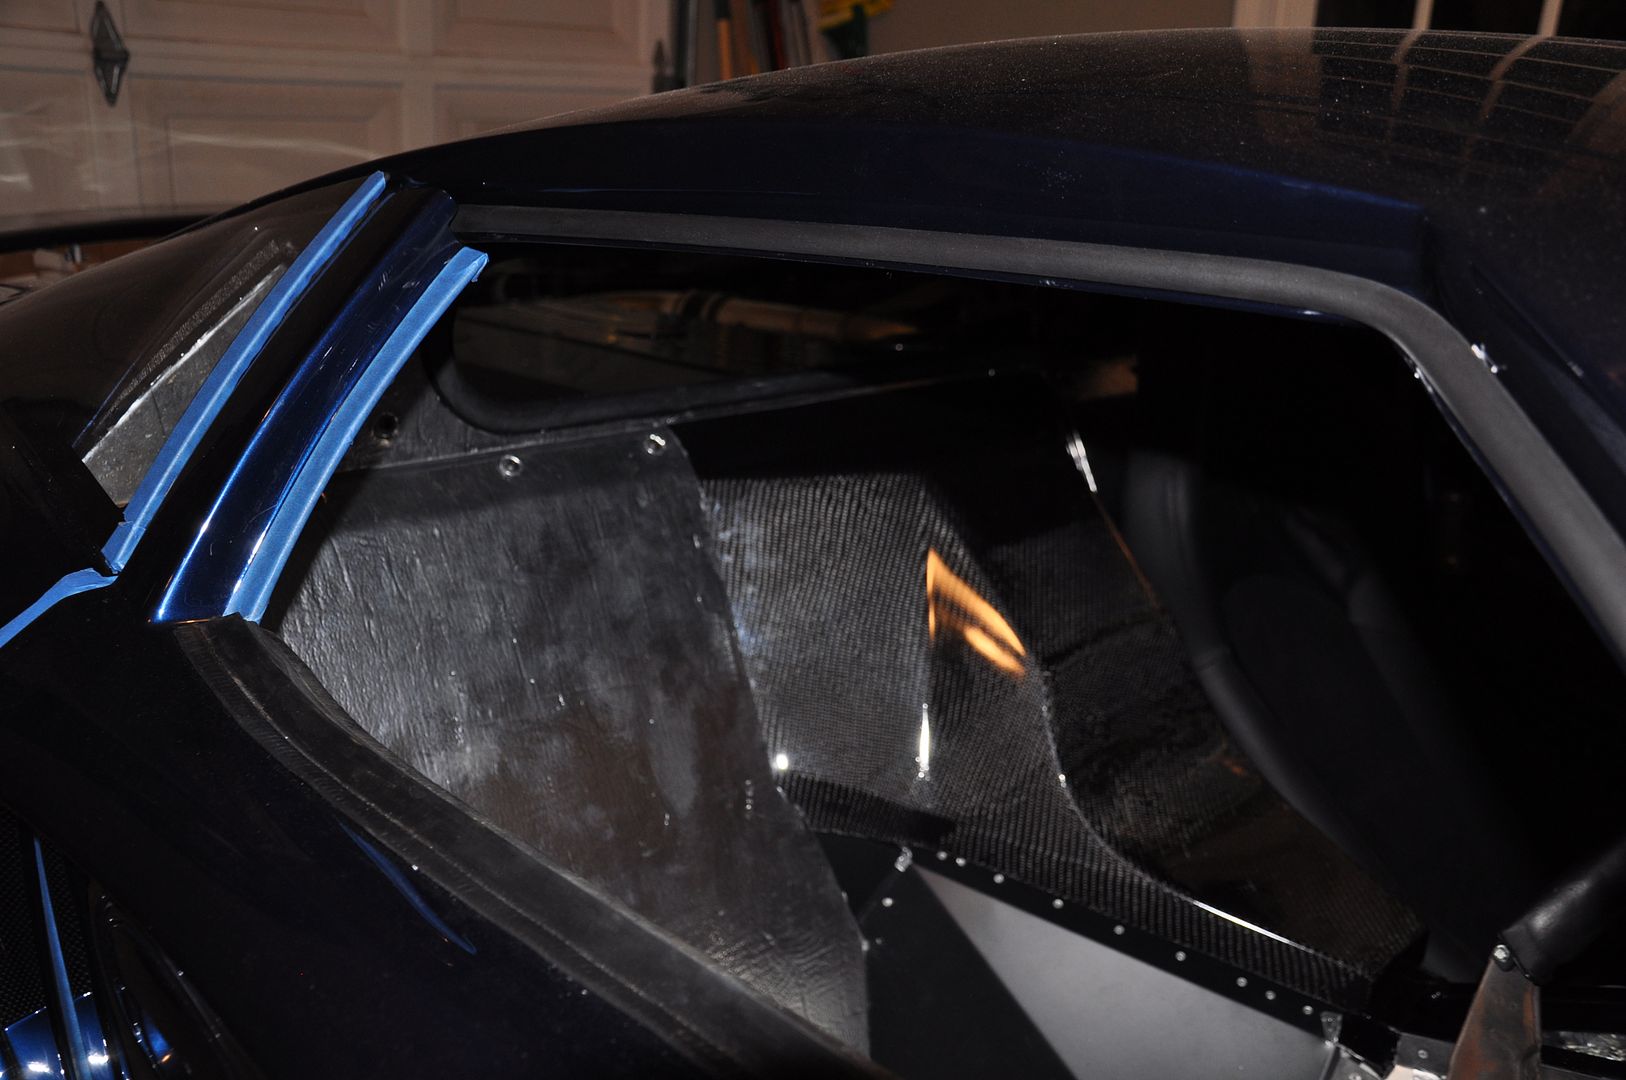
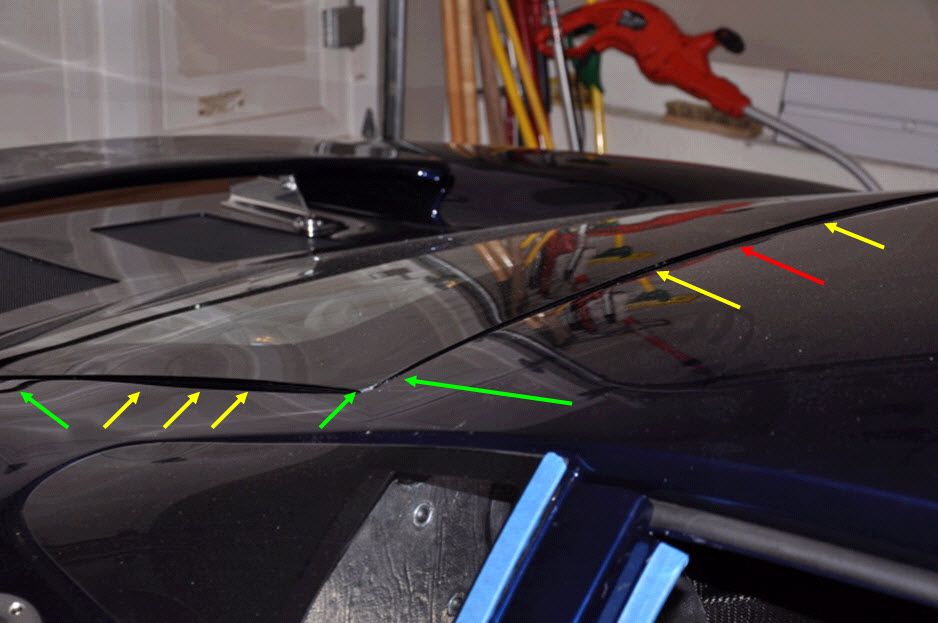
    The gap around the edge of the glass to the body edge isn't necessarily even. Also, it sticks up above the body level in some places, and is flush in other places. It's hard to imagine that a "press in" seal would look evenly placed all the way around. I also want something to seal the bottom at the "firewall" under the hood.

    That's why I thought I would check into having it reworked.

    I'll see what they tell me before actually doing anything with it.

    Thanks Gene.
    The Stig

    Some say, that I only know two facts about ducks, (both being wrong); and that if I could be bothered, I could solve the "da Vinci Code" in 47 seconds...
    All I know is that I'm called "The Stig".
    GTM #0081

  3. #403
    Senior Member The Stig's Avatar
    Join Date
    Feb 2011
    Location
    Charlotte, NC
    Posts
    2,008
    Post Thanks / Like
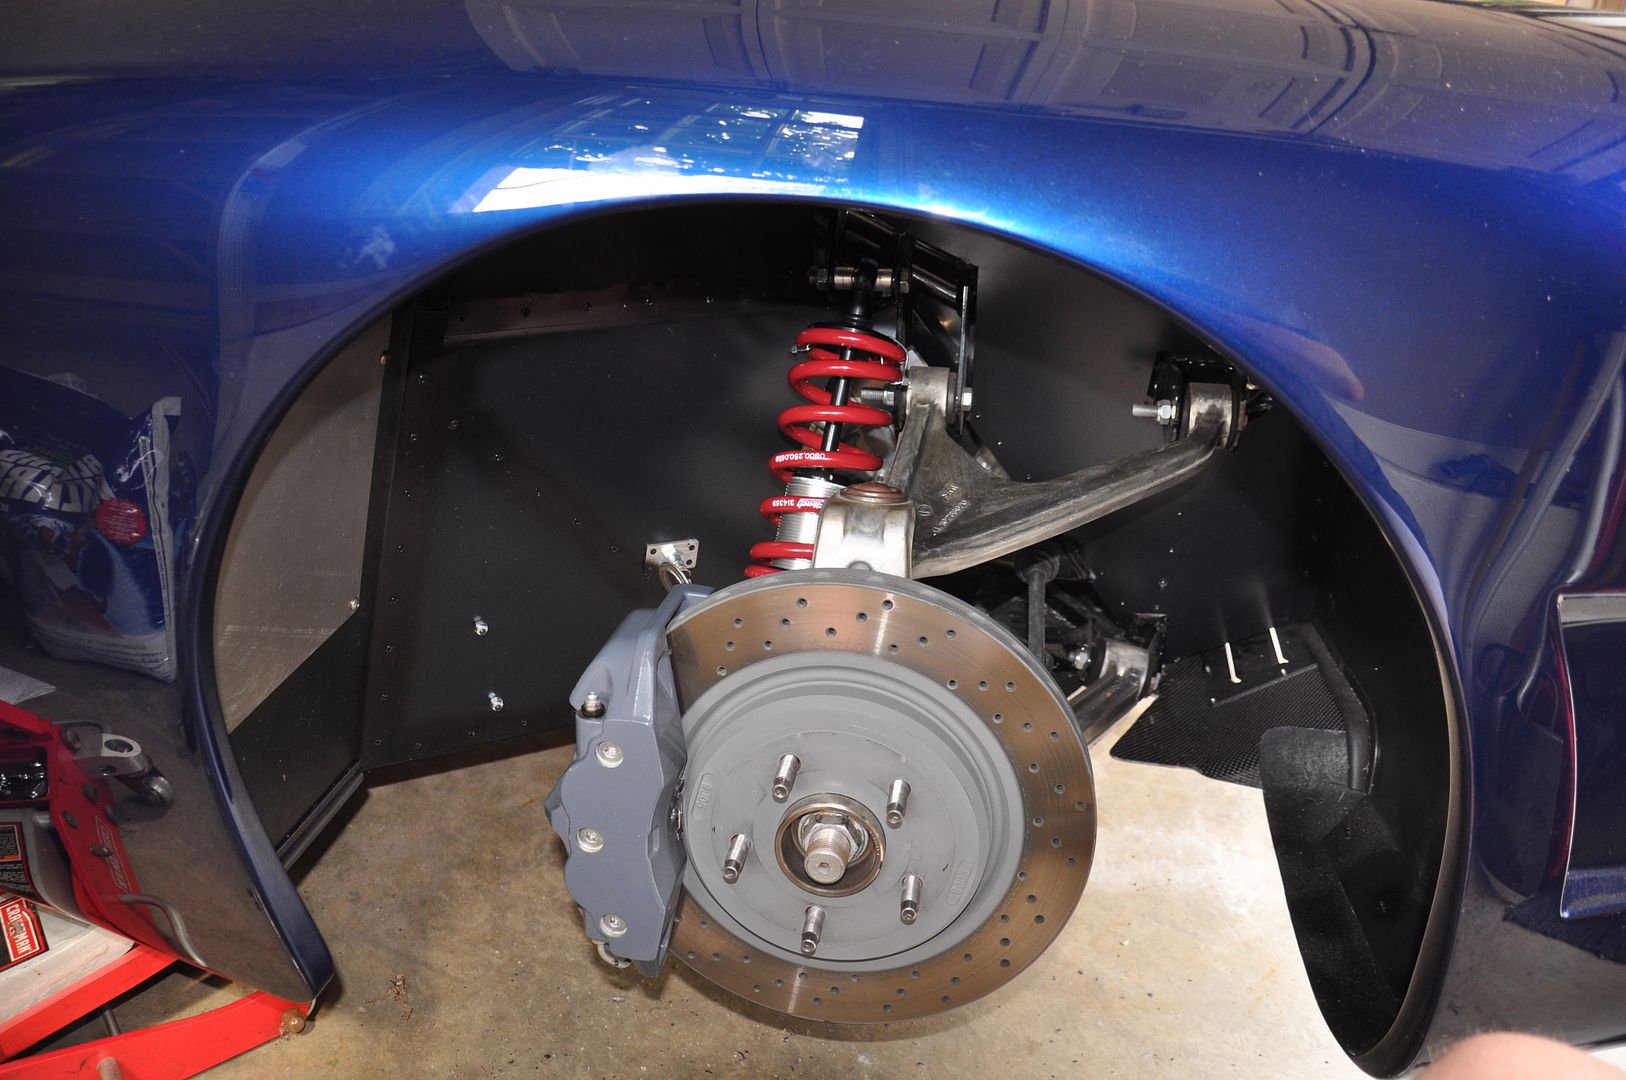
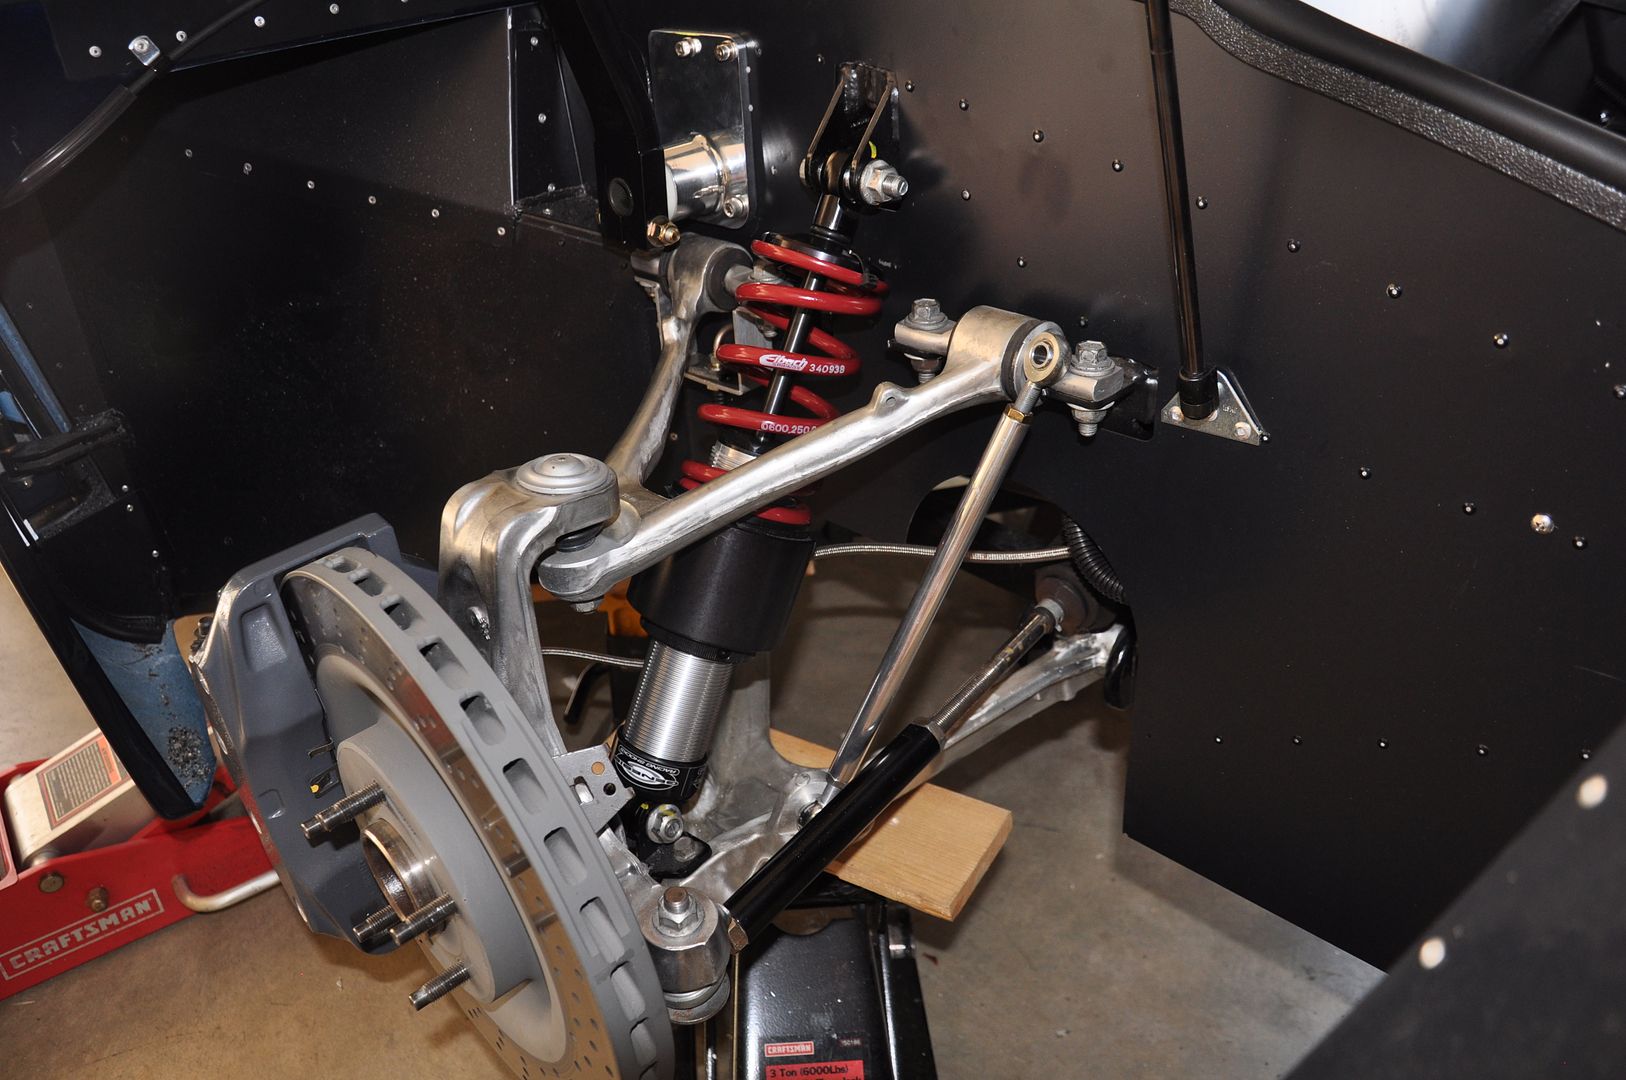
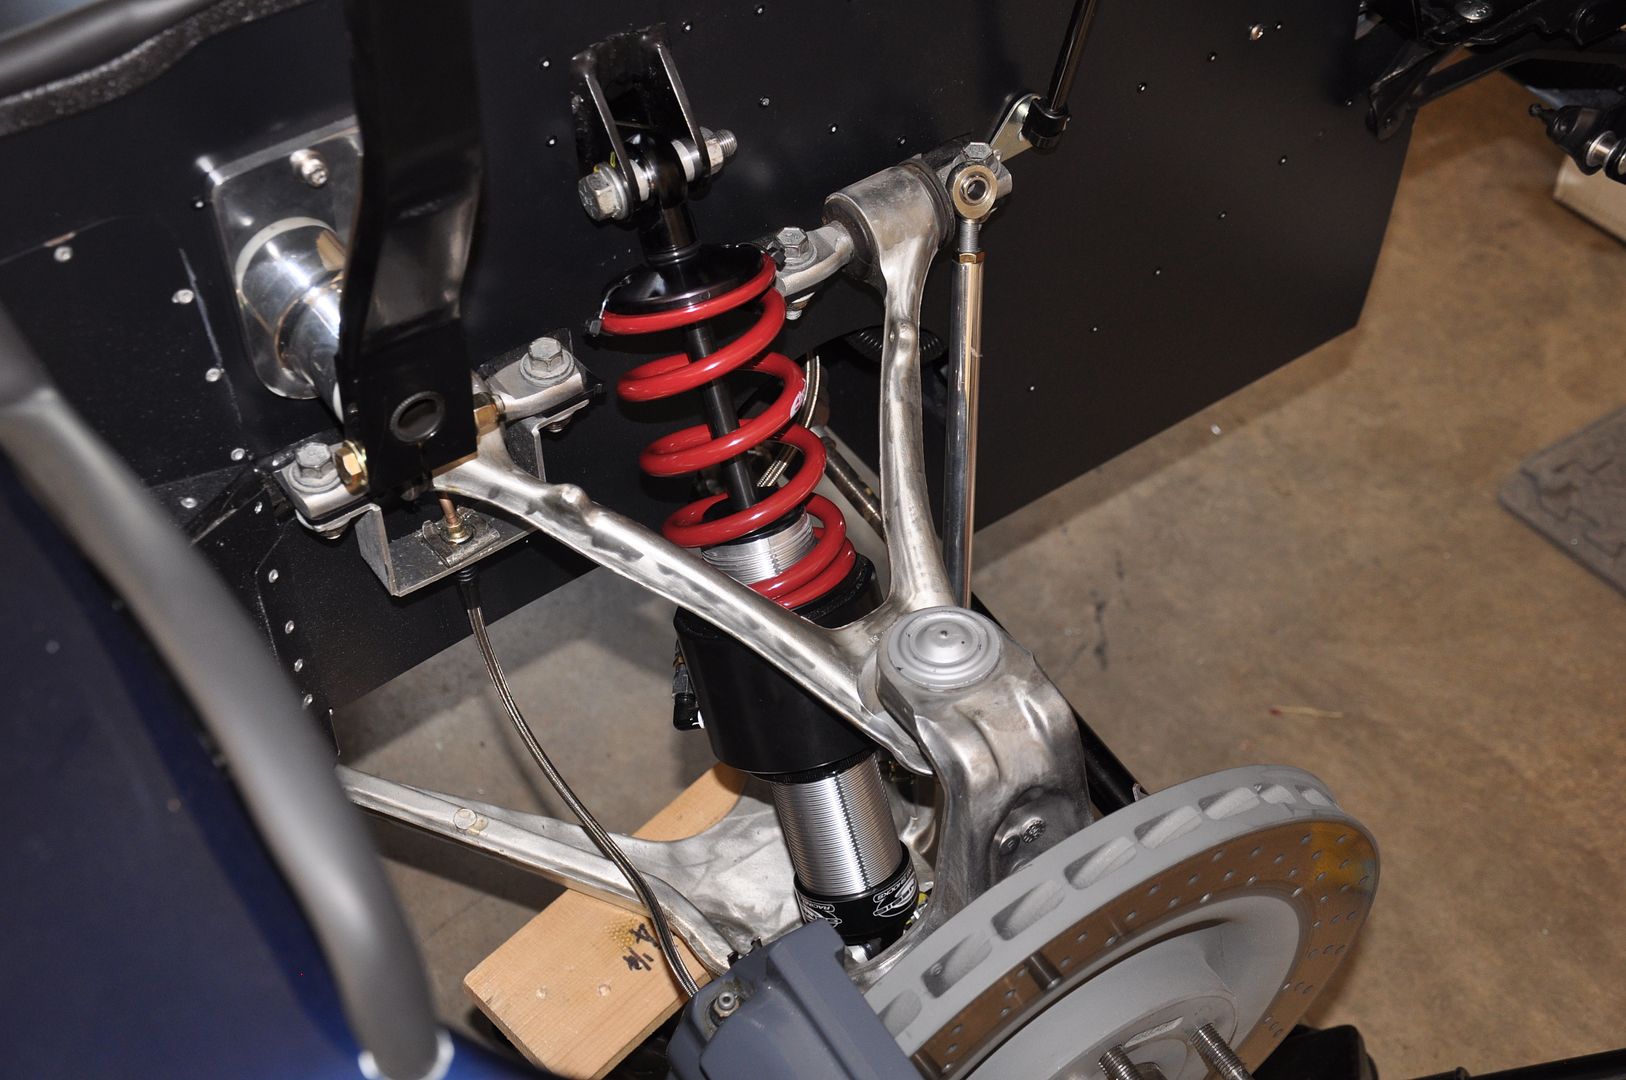
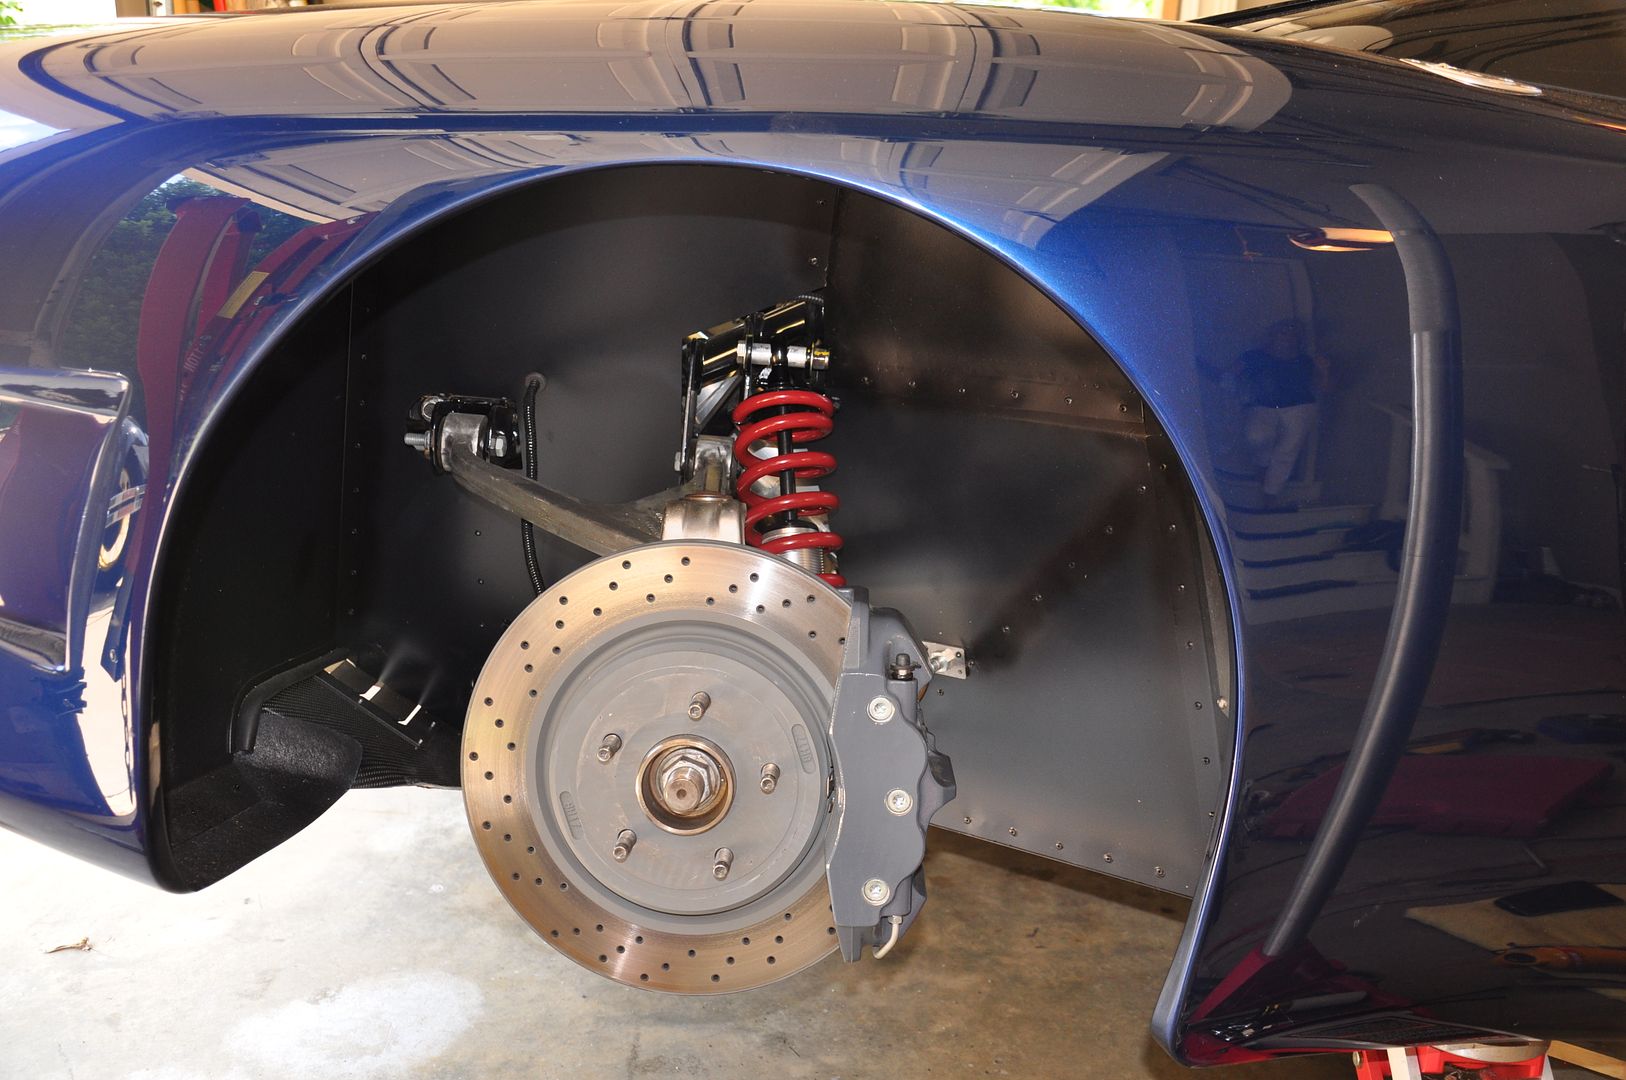
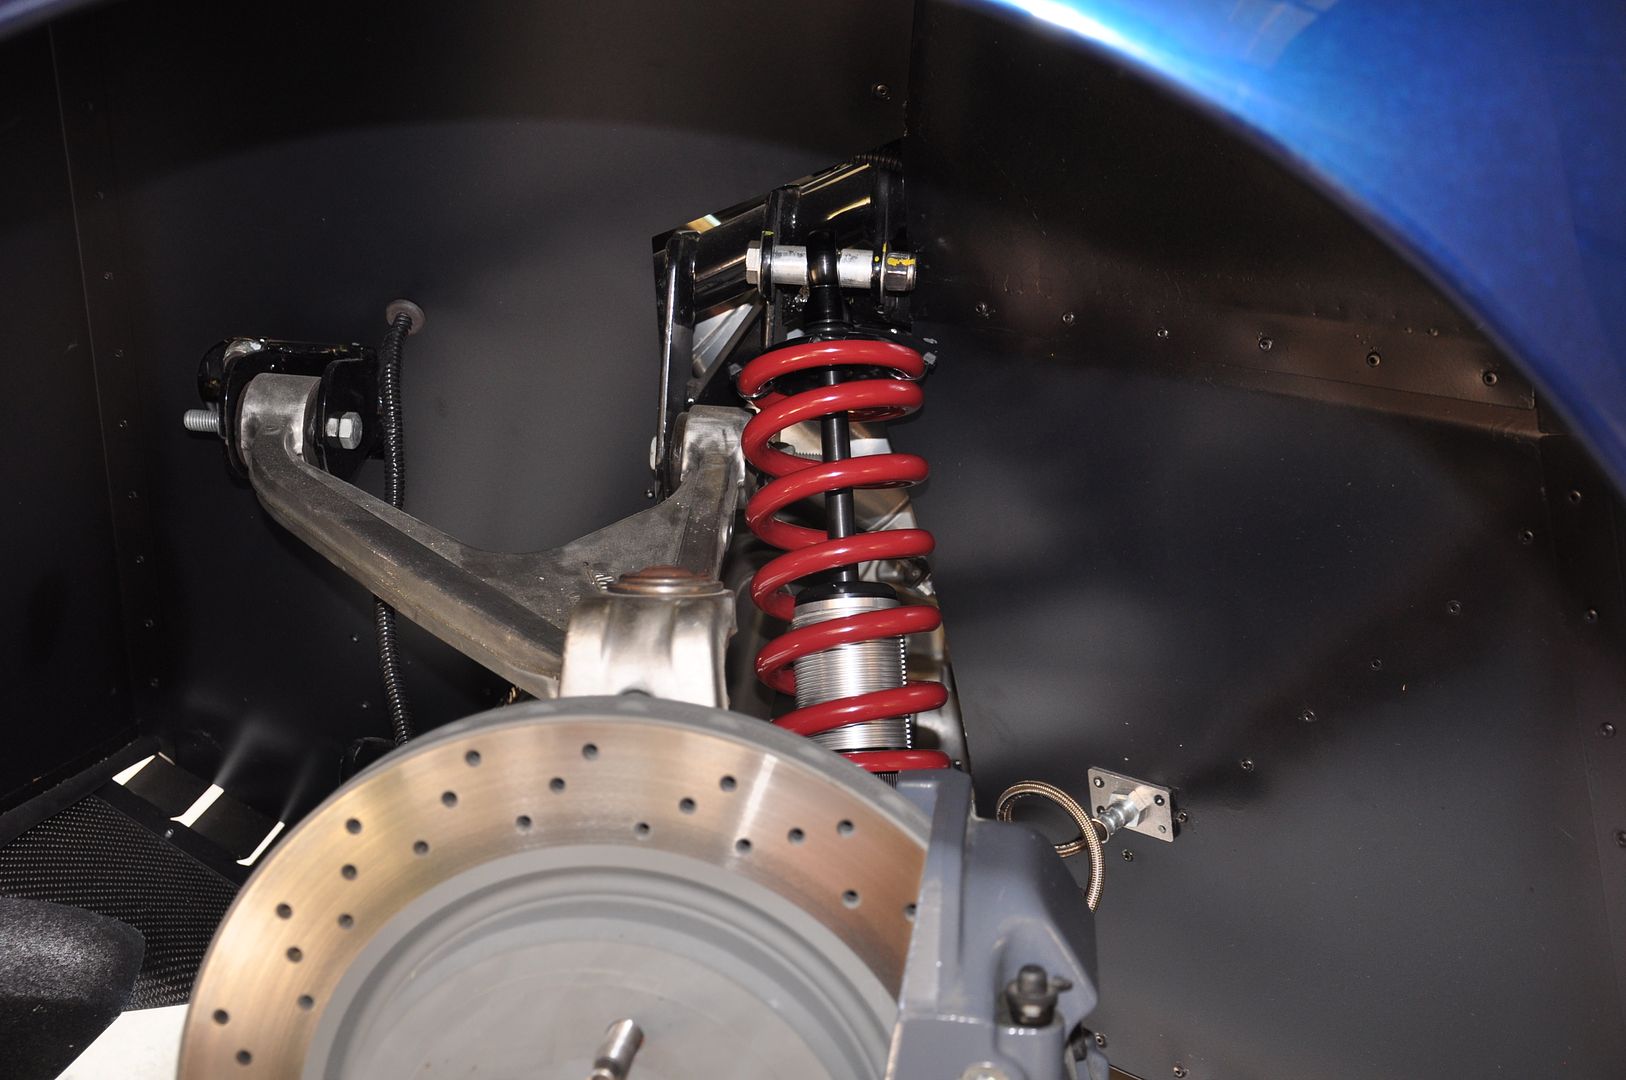
    I was able to change out the shocks today.


    Left Rear


    Front Right with Ramlift re-installed.


    Right Rear


    Right Rear
    The Stig

    Some say, that I only know two facts about ducks, (both being wrong); and that if I could be bothered, I could solve the "da Vinci Code" in 47 seconds...
    All I know is that I'm called "The Stig".
    GTM #0081

  4. #404
    Senior Member VD2021's Avatar
    Join Date
    Feb 2011
    Location
    Central, FL
    Posts
    960
    Post Thanks / Like
    Blog Entries
    2
    Mike,

    Nice. I'm sure you're eager to see how it rides.
    R/s
    Vidal
    CURRENT STATUS: Interior Rework and Bodywork.
    GenII GTM #331. Delivered (23/9/10)
    BUILD LOG AND WEBSITE:
    http://gtmbuild.weebly.com/ .

  5. #405
    Senior Member The Stig's Avatar
    Join Date
    Feb 2011
    Location
    Charlotte, NC
    Posts
    2,008
    Post Thanks / Like
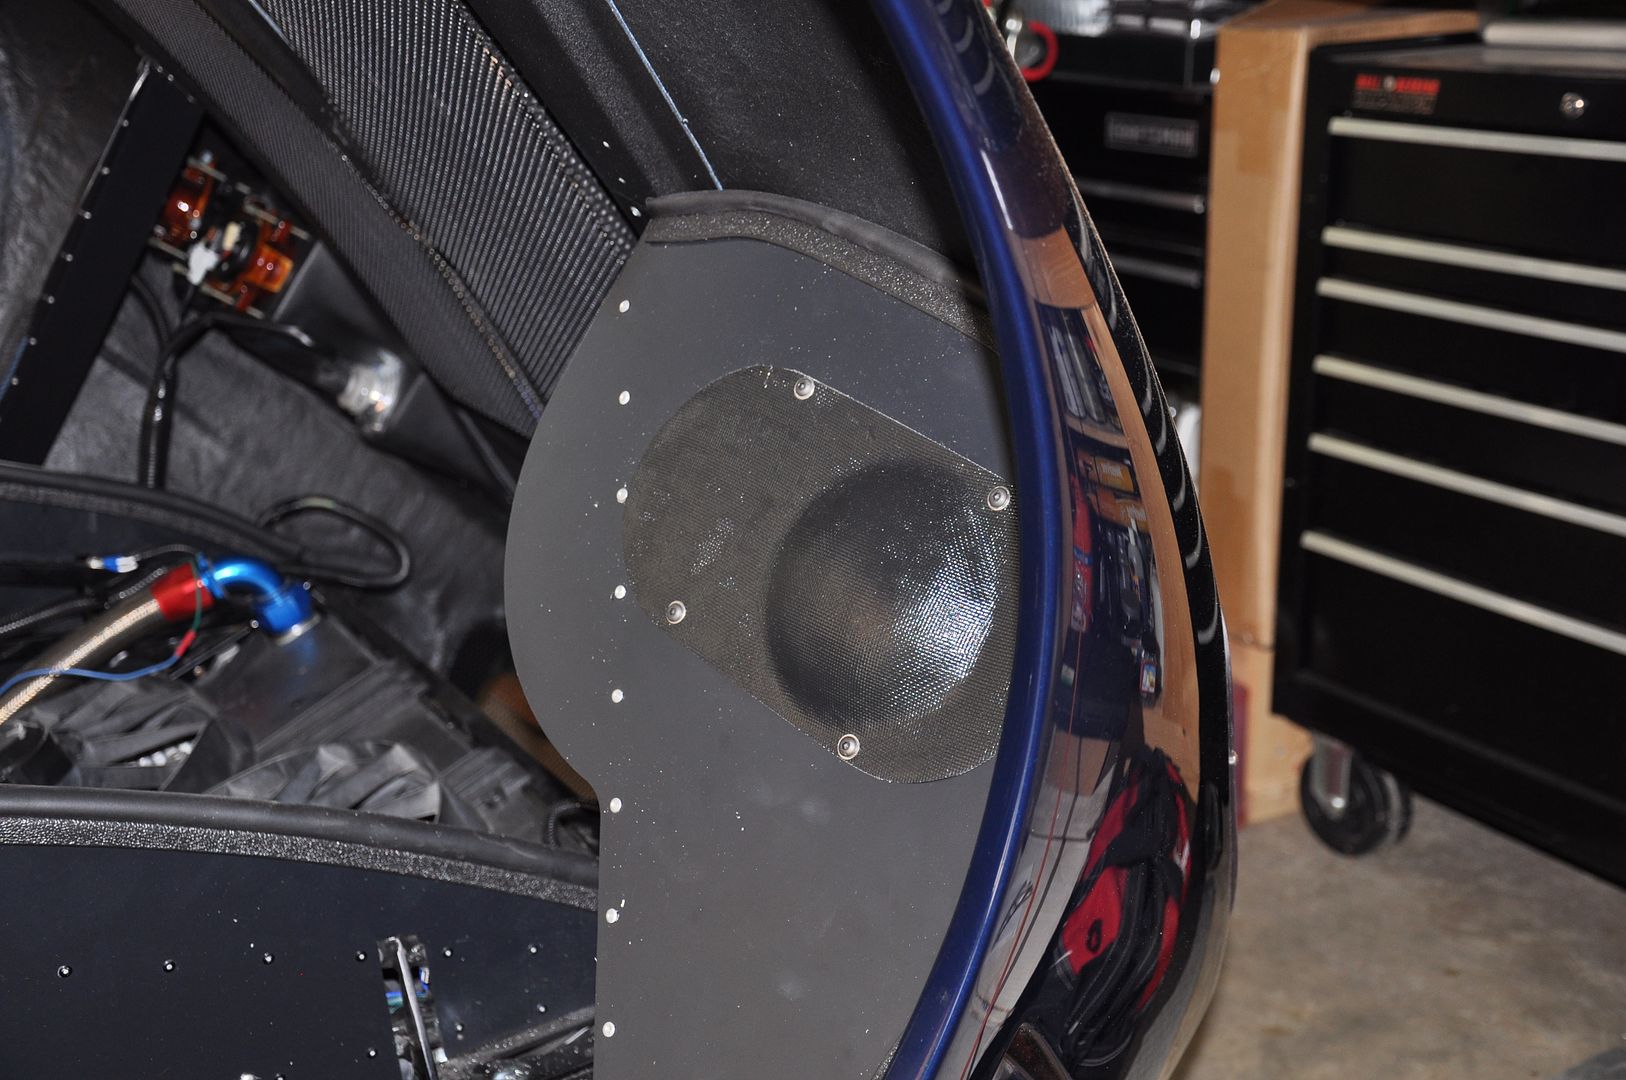
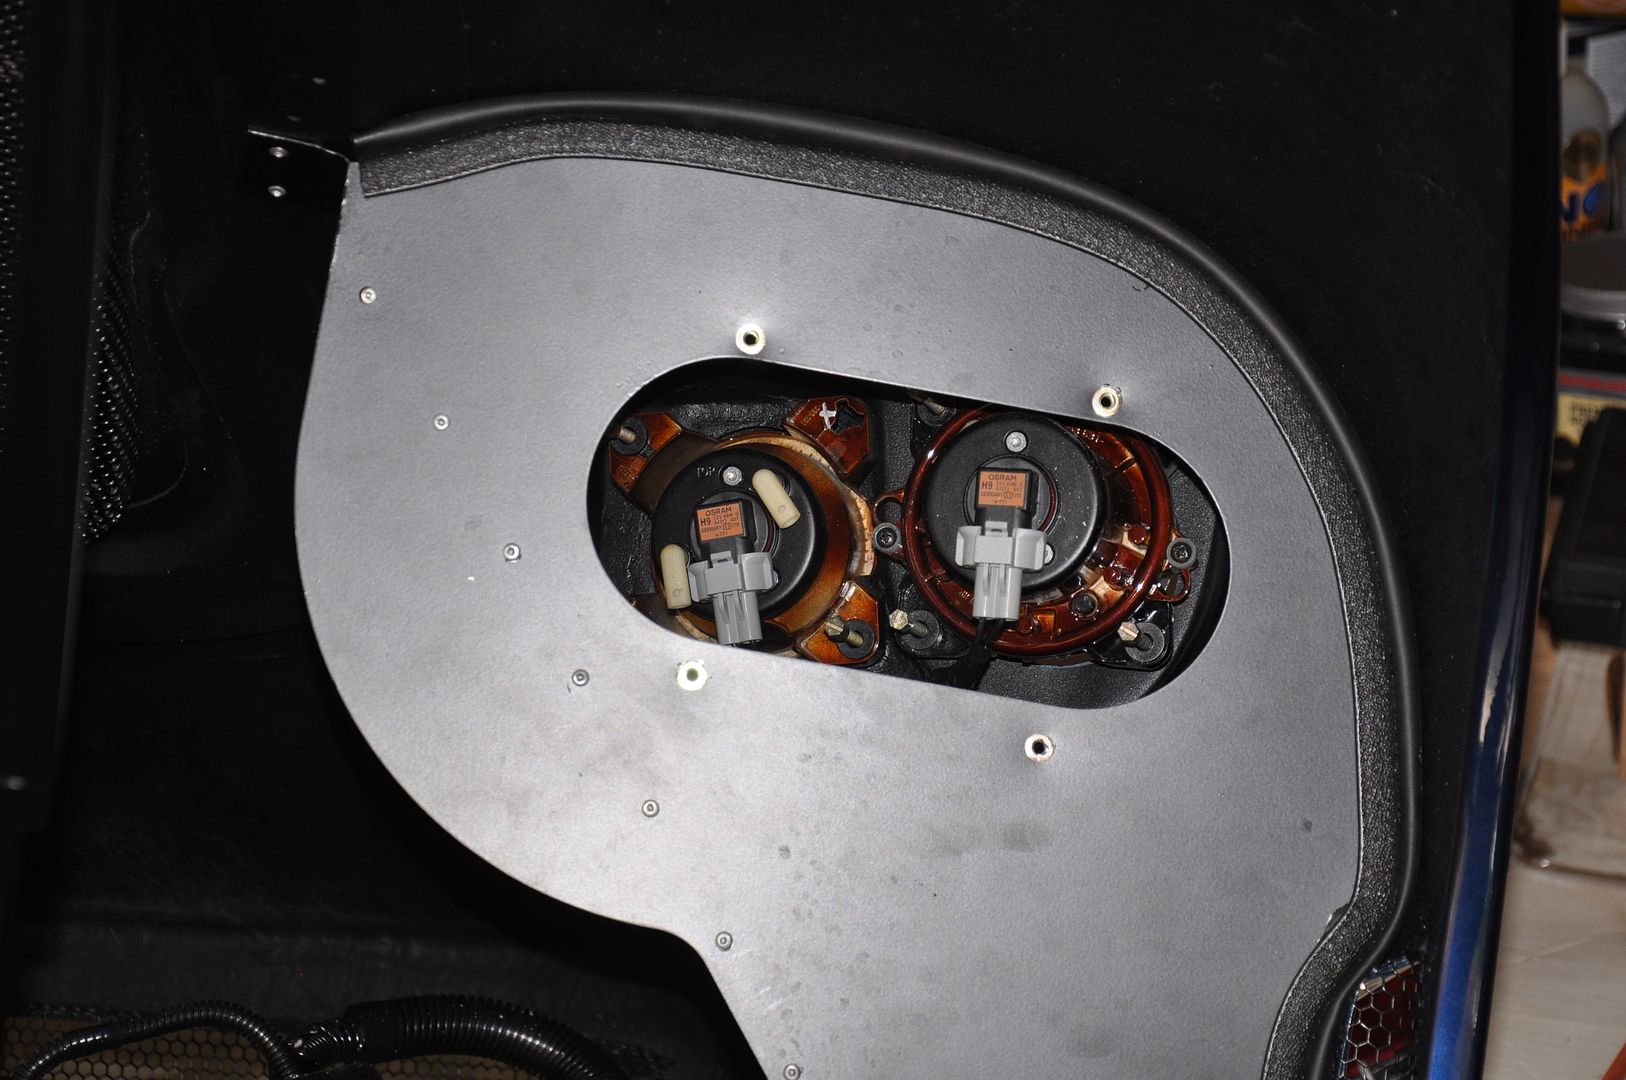
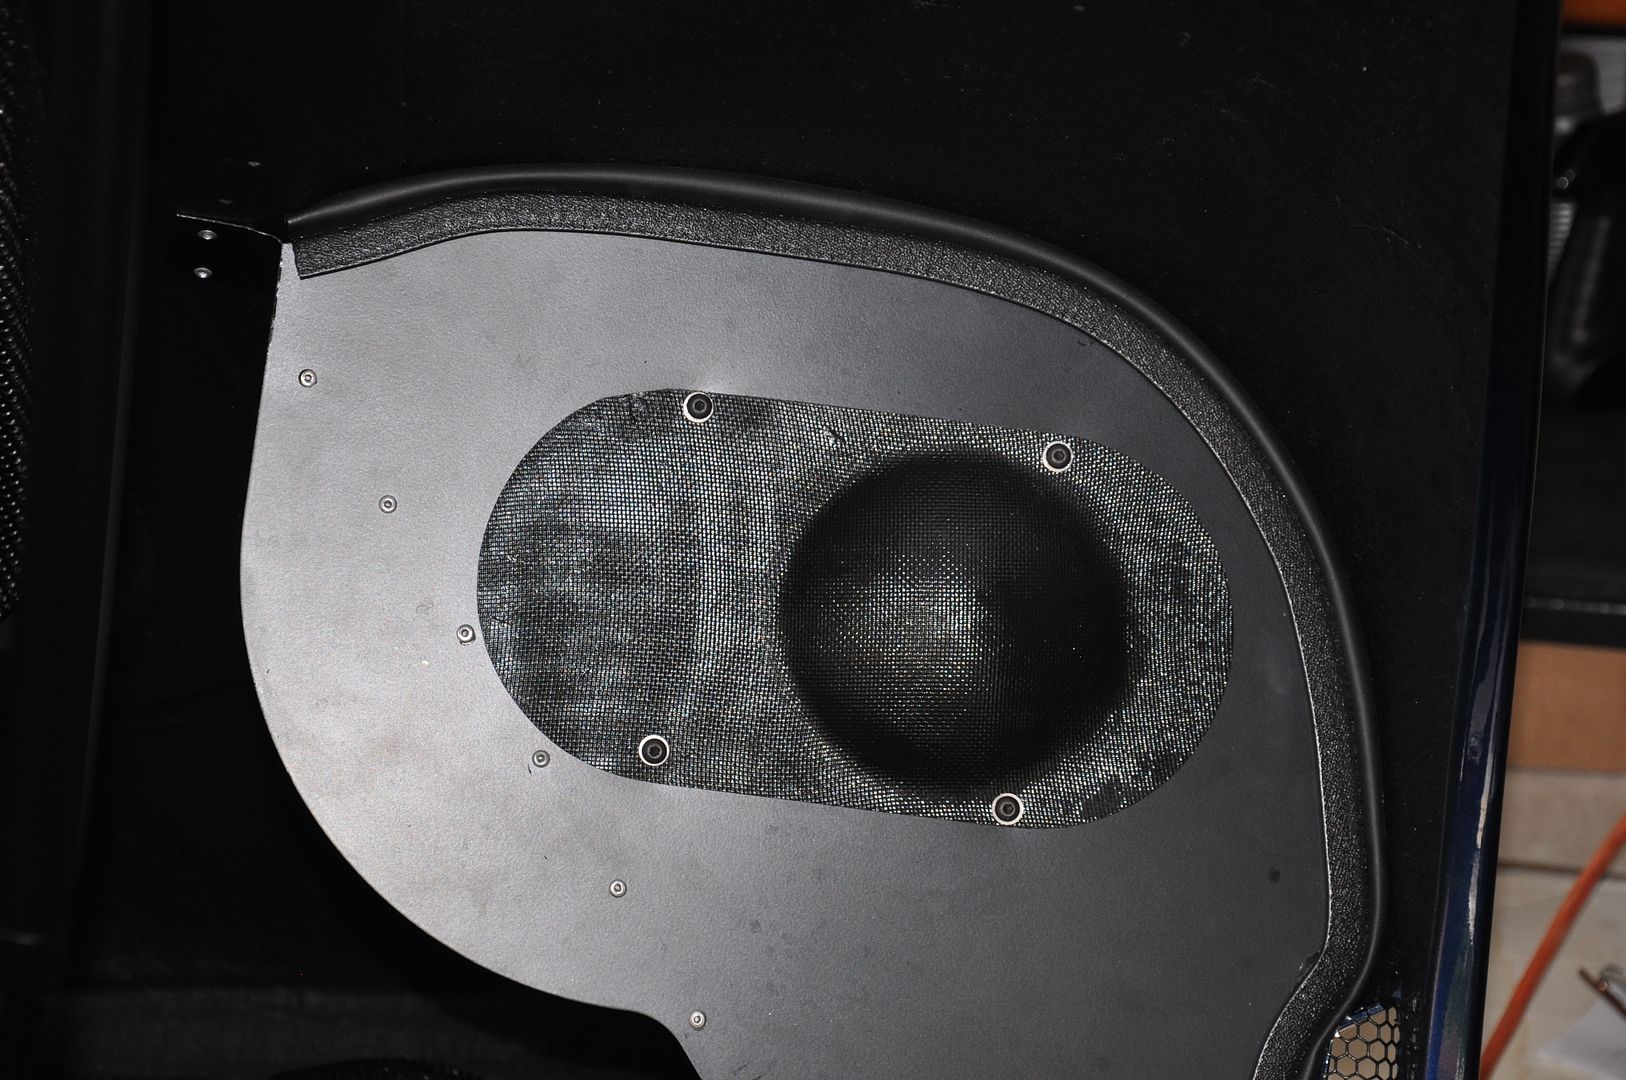
    I decided to use nutserts to attach the headlight access covers from Ted @ (QRP) Quick Racing Products.


    I really think that the covers work well and "bubble" allows enough room for the connectors.
    Last edited by The Stig; 06-10-2012 at 08:06 PM.
    The Stig

    Some say, that I only know two facts about ducks, (both being wrong); and that if I could be bothered, I could solve the "da Vinci Code" in 47 seconds...
    All I know is that I'm called "The Stig".
    GTM #0081

  6. #406
    Senior Member The Stig's Avatar
    Join Date
    Feb 2011
    Location
    Charlotte, NC
    Posts
    2,008
    Post Thanks / Like
    Quote Originally Posted by VD2021 View Post
    Mike,

    Nice. I'm sure you're eager to see how it rides.
    Hi Vidal,

    Yes! I've driven a couple and felt how fast they are in a straight line, and I can't wait to see how it feels in the turns. I think that getting used to the driving a car as low as the GTM will probably take a little time as well. But most of all, I'm just ready to drive MY new GTM.

    I remember how Ron Richmond said that the shocks improved the balance and feel of his GTM. With the tuned shocks, the sway bar kit, an accurate alignment, and corner weight balancing of the car, the handling should be fairly predictable. At least that's the hope. We'll see how it turns out before too long.
    Last edited by The Stig; 06-20-2012 at 09:11 AM.
    The Stig

    Some say, that I only know two facts about ducks, (both being wrong); and that if I could be bothered, I could solve the "da Vinci Code" in 47 seconds...
    All I know is that I'm called "The Stig".
    GTM #0081

  7. #407
    Senior Member The Stig's Avatar
    Join Date
    Feb 2011
    Location
    Charlotte, NC
    Posts
    2,008
    Post Thanks / Like
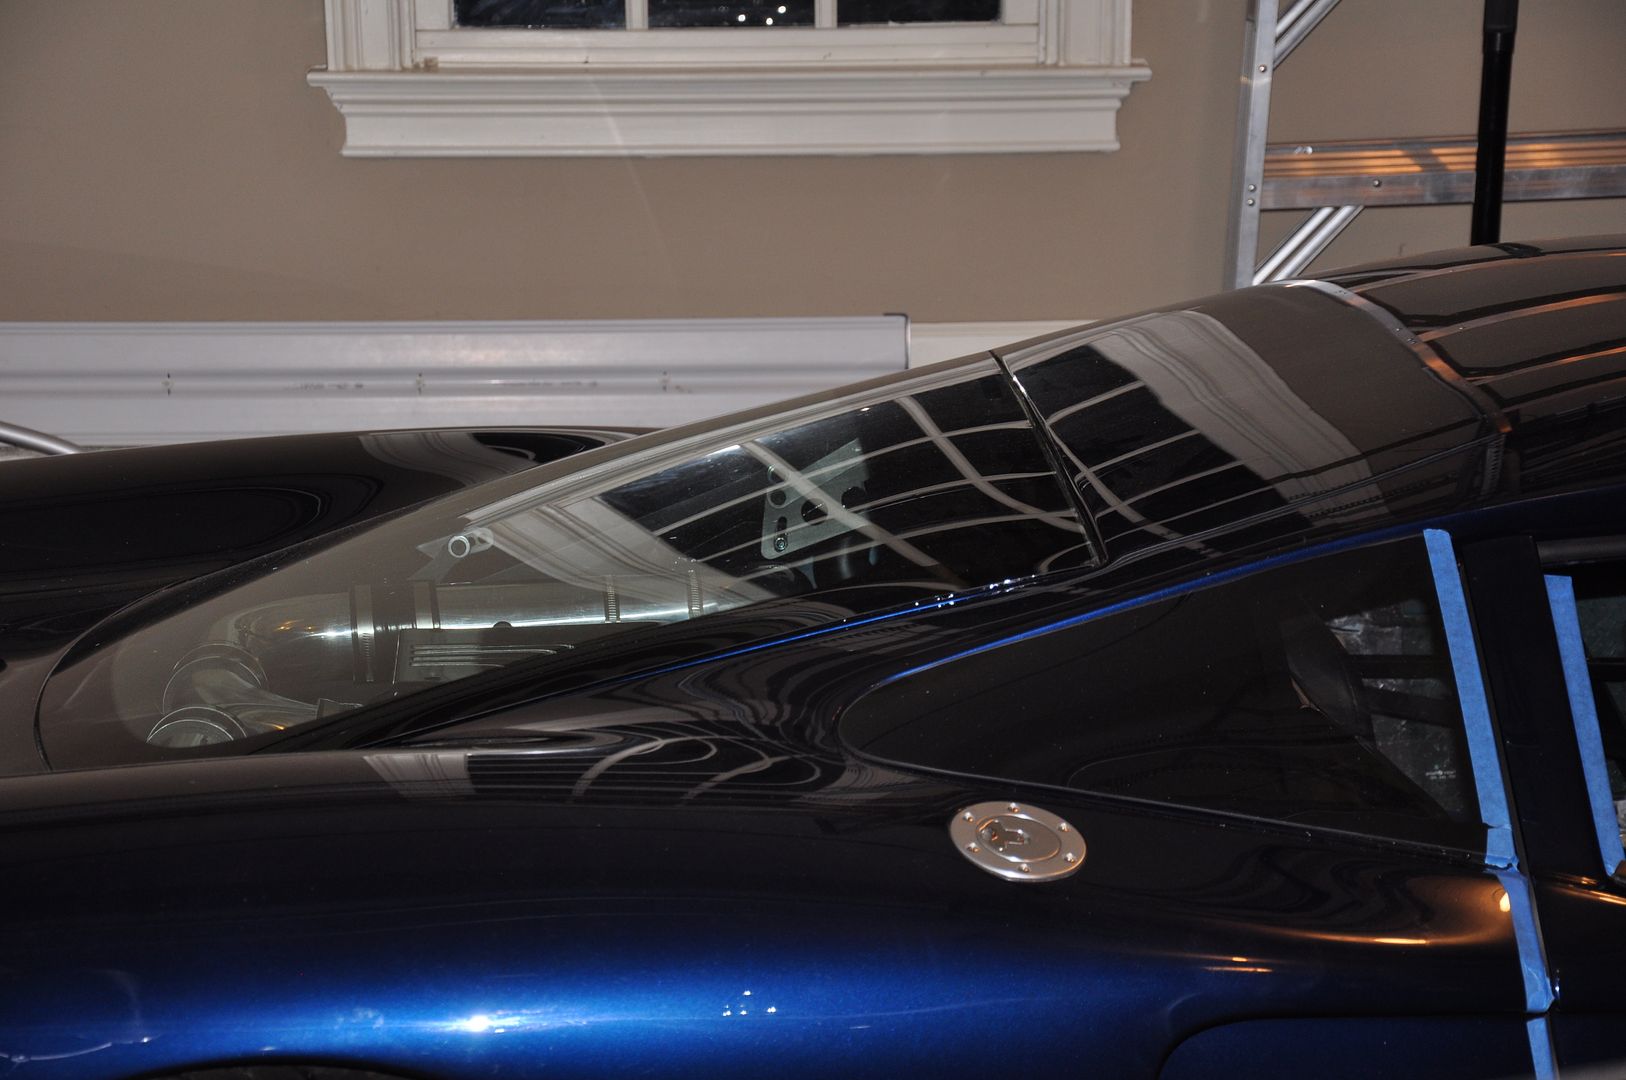
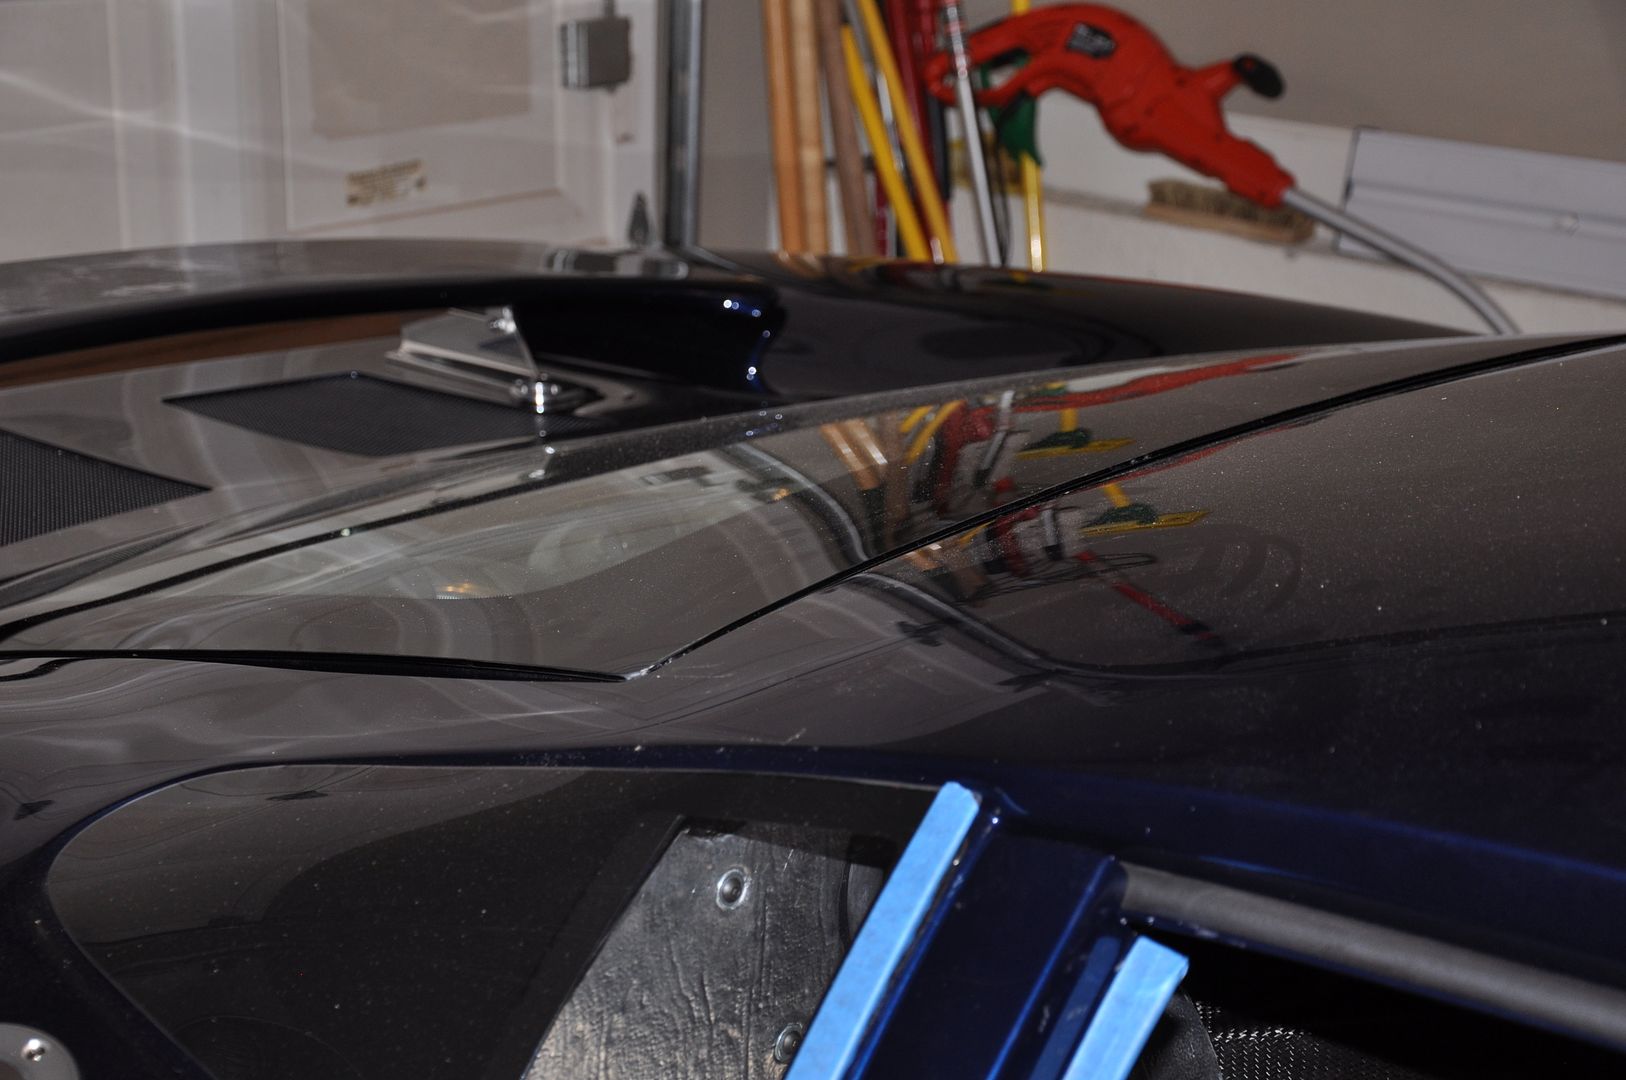
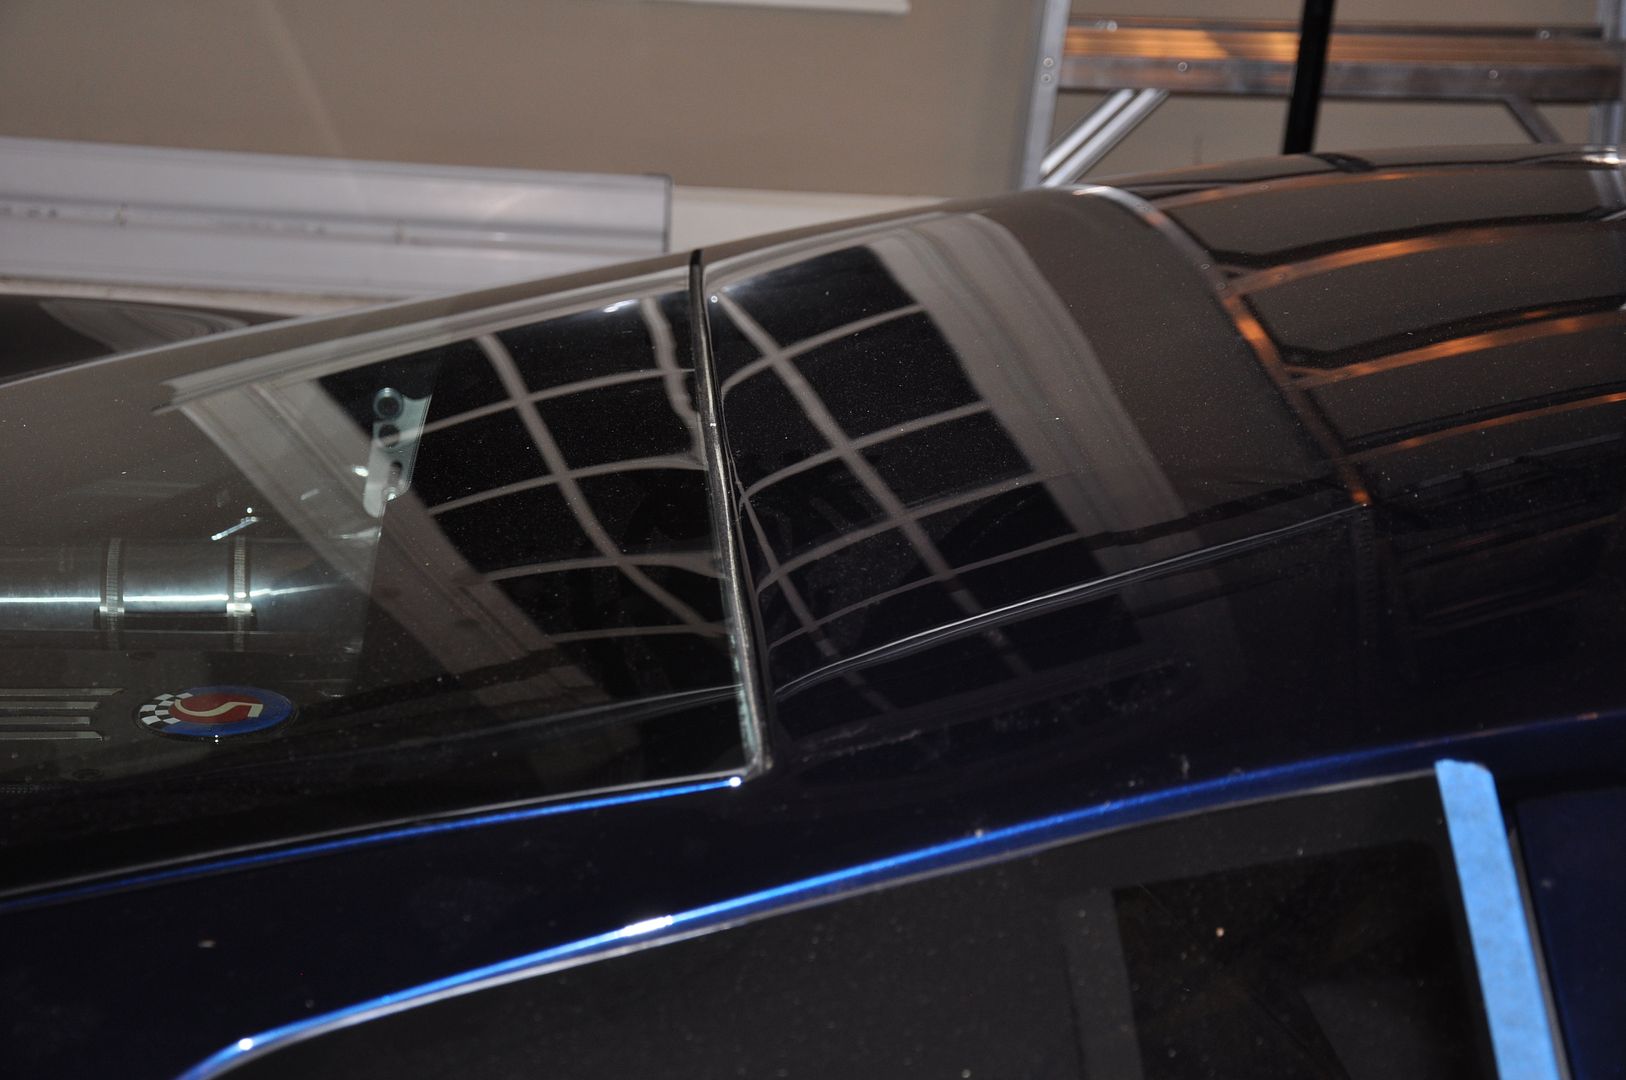
    My neighbor stopped by for a bit today, and helped me to adjust the rear hatch a little. We lowered the leading edge of the hatch to allow the leading edge of the glass to sit a bit lower into the body channel for the hatch. The curve of the glass doesn't follow the line of the body, so... I think it's about as good as it can be, unless I decide to have that whole area of the body reworked and re-painted at some point. It's not completely out of the question... But it'll have to wait, since I don't have an additional 15k to spend on paint and body right now.


    Last edited by The Stig; 06-11-2012 at 11:24 AM.
    The Stig

    Some say, that I only know two facts about ducks, (both being wrong); and that if I could be bothered, I could solve the "da Vinci Code" in 47 seconds...
    All I know is that I'm called "The Stig".
    GTM #0081

  8. #408
    Senior Member The Stig's Avatar
    Join Date
    Feb 2011
    Location
    Charlotte, NC
    Posts
    2,008
    Post Thanks / Like
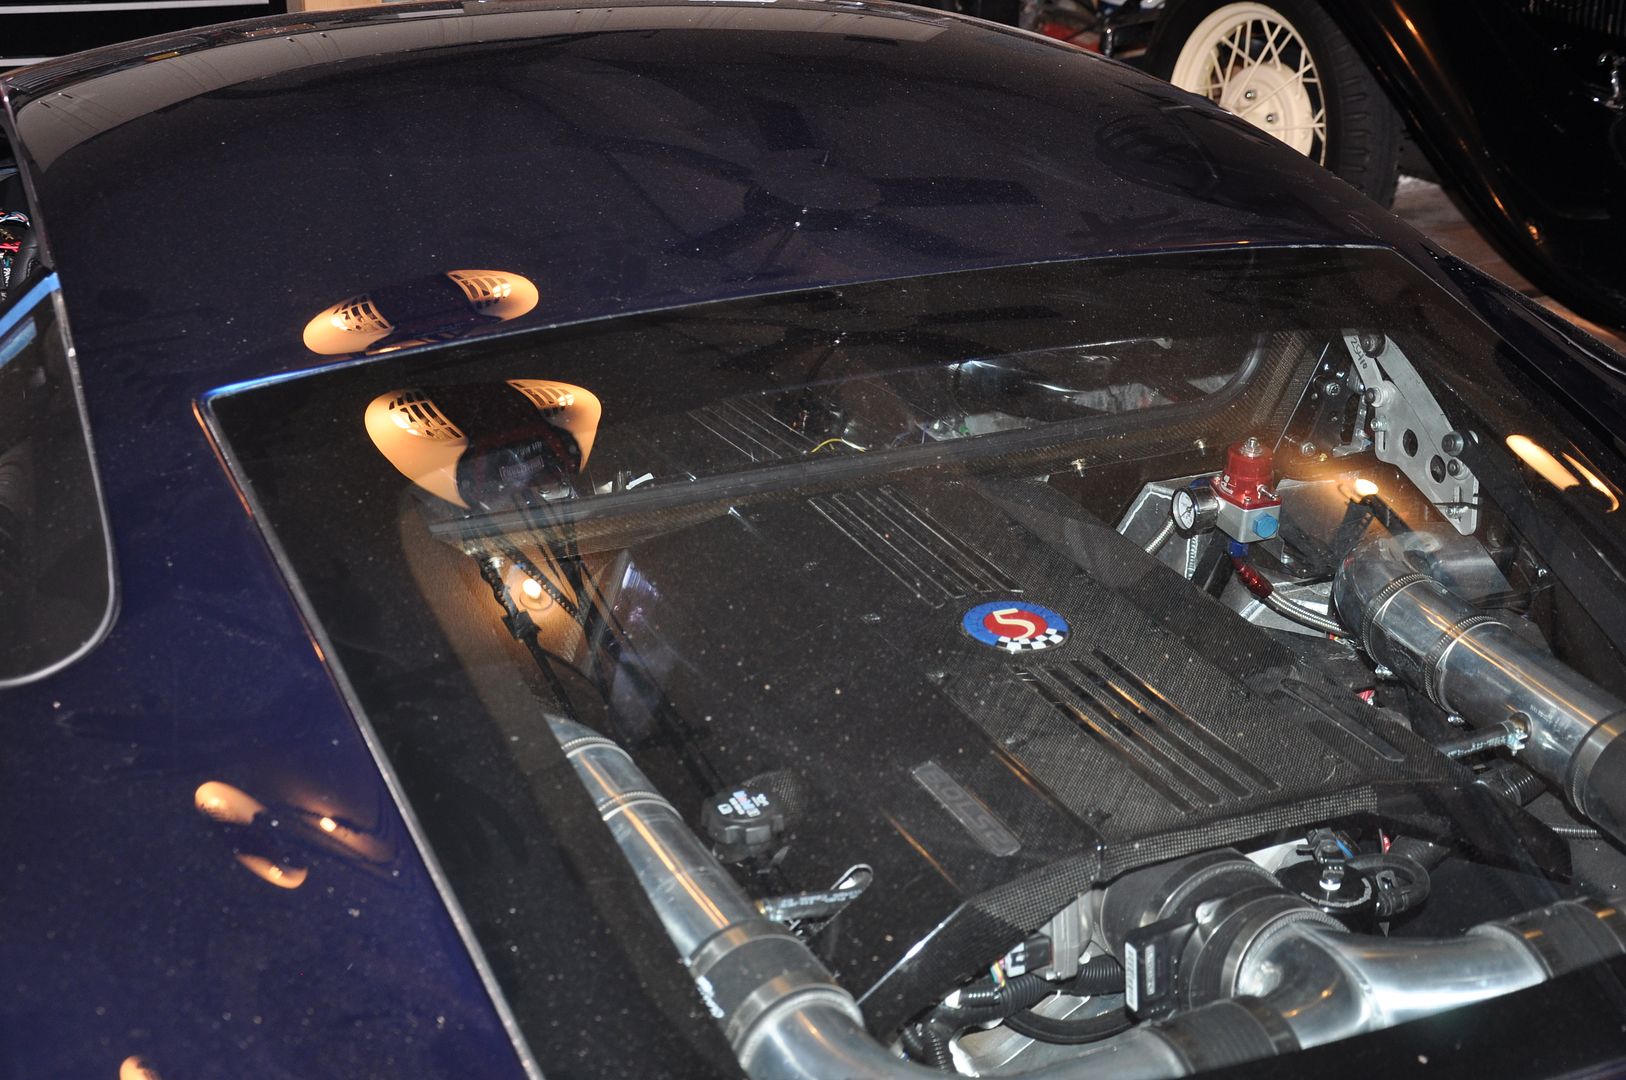
    I started fitting the engine cover. I still have to decide how I'm going to attach it to the frame rails. I'm thinking about using Velcro instead of screws. I'll sort it out next weekend. The interior guy is probably going to re-work it anyway. If it actually stays in the final design. Still to be determined...


    The Stig

    Some say, that I only know two facts about ducks, (both being wrong); and that if I could be bothered, I could solve the "da Vinci Code" in 47 seconds...
    All I know is that I'm called "The Stig".
    GTM #0081

  9. #409
    Senior Member VD2021's Avatar
    Join Date
    Feb 2011
    Location
    Central, FL
    Posts
    960
    Post Thanks / Like
    Blog Entries
    2
    Mike,
    You did a great job with the hatch adjustment. I'm with you on your cf cover. I'd hold off until you coordinate with your upholster.
    R/s
    Vidal
    CURRENT STATUS: Interior Rework and Bodywork.
    GenII GTM #331. Delivered (23/9/10)
    BUILD LOG AND WEBSITE:
    http://gtmbuild.weebly.com/ .

  10. #410
    Senior Member The Stig's Avatar
    Join Date
    Feb 2011
    Location
    Charlotte, NC
    Posts
    2,008
    Post Thanks / Like


    Thanks Vidal. At least I was able to get the corners of the glass to sit flush with the body.

    The only way to have any of the rest of the body to line up flush with the edges of the glass, would be to build up the body around the edges and define the correct gap. Then sand and prime, before the car is repainted.

    Most people who have seen the car "tell" me that they're too busy looking over the rest of the car to notice; (at least at first glance). But it stands out to me every time I walk past it, and I'm not thrilled about it.

    I'm afraid that in order for me to be able to feel good about it, I'll have to have the hatch and body sanded back down and built up the way it should be. And then hope that the paint matches up when it's finished. I can't remember if it was a straight paint mix or not. (It's a common Lexus color).

    I'm sure as heck not going to be very thrilled if I have to pull the body back off to have the whole thing re-painted.

    The only other thing that I can think of is to have a replacement "window" made of poly-carbonate that matches the body/hatch contours more closely. But I worry about how the engine heat will affect it. If I recall correctly, it doesn't take an extreme amount of heat for it to become pliable.

    The plus side of how it is right now, is that engine heat, can escape very easily through the upper edge and the sides...

    We'll see what happens when it happens.
    Last edited by The Stig; 06-13-2012 at 05:06 PM.
    The Stig

    Some say, that I only know two facts about ducks, (both being wrong); and that if I could be bothered, I could solve the "da Vinci Code" in 47 seconds...
    All I know is that I'm called "The Stig".
    GTM #0081

  11. #411
    Senior Member The Stig's Avatar
    Join Date
    Feb 2011
    Location
    Charlotte, NC
    Posts
    2,008
    Post Thanks / Like
    Getting ready to add the bump-steer kit for the GTM this weekend. I'm curious as to whether or not the tie rods have to be shortened again in order use this kit.

    Thanks.
    The Stig

    Some say, that I only know two facts about ducks, (both being wrong); and that if I could be bothered, I could solve the "da Vinci Code" in 47 seconds...
    All I know is that I'm called "The Stig".
    GTM #0081

  12. #412
    Senior Member The Stig's Avatar
    Join Date
    Feb 2011
    Location
    Charlotte, NC
    Posts
    2,008
    Post Thanks / Like
    Quote Originally Posted by LS MAN View Post
    Hey Mike, the shocks will be inverted, body side up, with the ranlift on the shock body. I like this better as there is less unsprung weight & less movement of the ram.
    With the shorter springs, the sway bar arm should clear. If not you can mount the ram under the spring also. Interested to see how it works, and if we have any issues, will will come up with solutions.

    Thanks again,
    Ted,

    FYI... I meant to send some pictures of the shocks with the RamLifts installed to show the clearance tolerances.

    I ended up mounting the Ram's on the shock body as you suggested, but below the spring. Otherwise it wouldn't have have enough room for me to be comfortable with it. As it is, I had to extend the rods almost to max in order to lift sway bar arms up enough to clear the top of the shock and the spring. It clears like this, but I think I may need to get a set of longer connecting rods or use a cross bar that is about an inch or so longer.

    The clearance issue isn't with the kit; but rather with the components that I have decided to use with the kit. If I didn't have to use the RamLift, and if I had the shocks installed right side up, they would clear with about 3/4". Plenty of room.

    I'll let you know what I come up with when I have a chance to focus on it again. (Right now, I'm working in the interior).
    The Stig

    Some say, that I only know two facts about ducks, (both being wrong); and that if I could be bothered, I could solve the "da Vinci Code" in 47 seconds...
    All I know is that I'm called "The Stig".
    GTM #0081

  13. #413
    Senior Member The Stig's Avatar
    Join Date
    Feb 2011
    Location
    Charlotte, NC
    Posts
    2,008
    Post Thanks / Like
    Quick question...

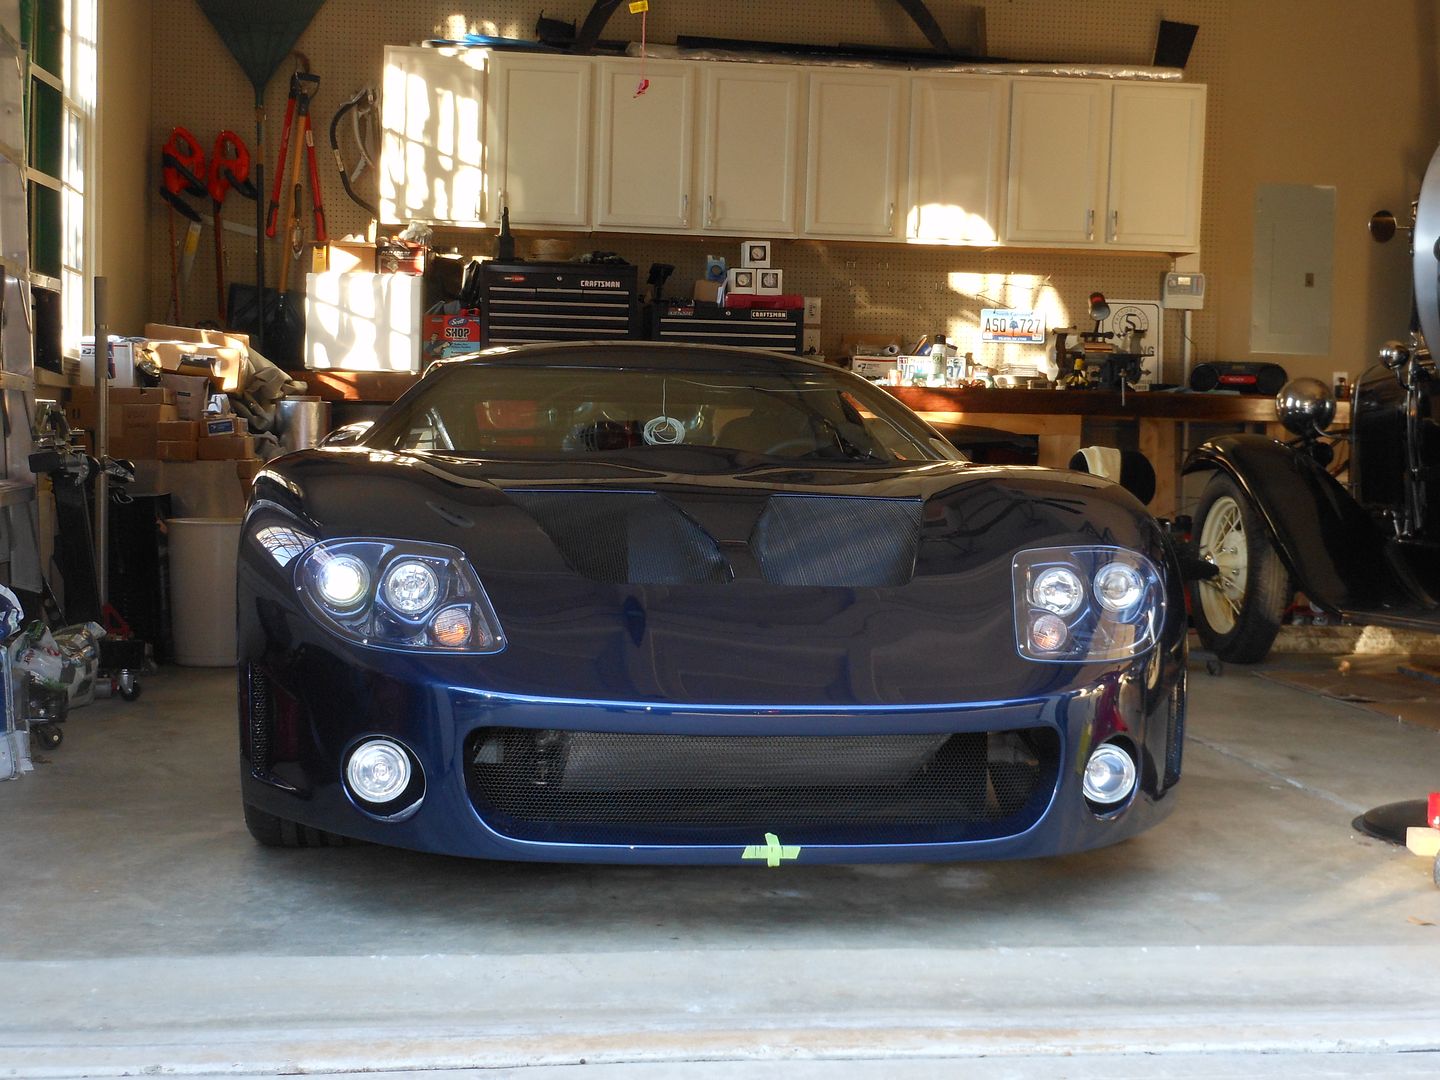
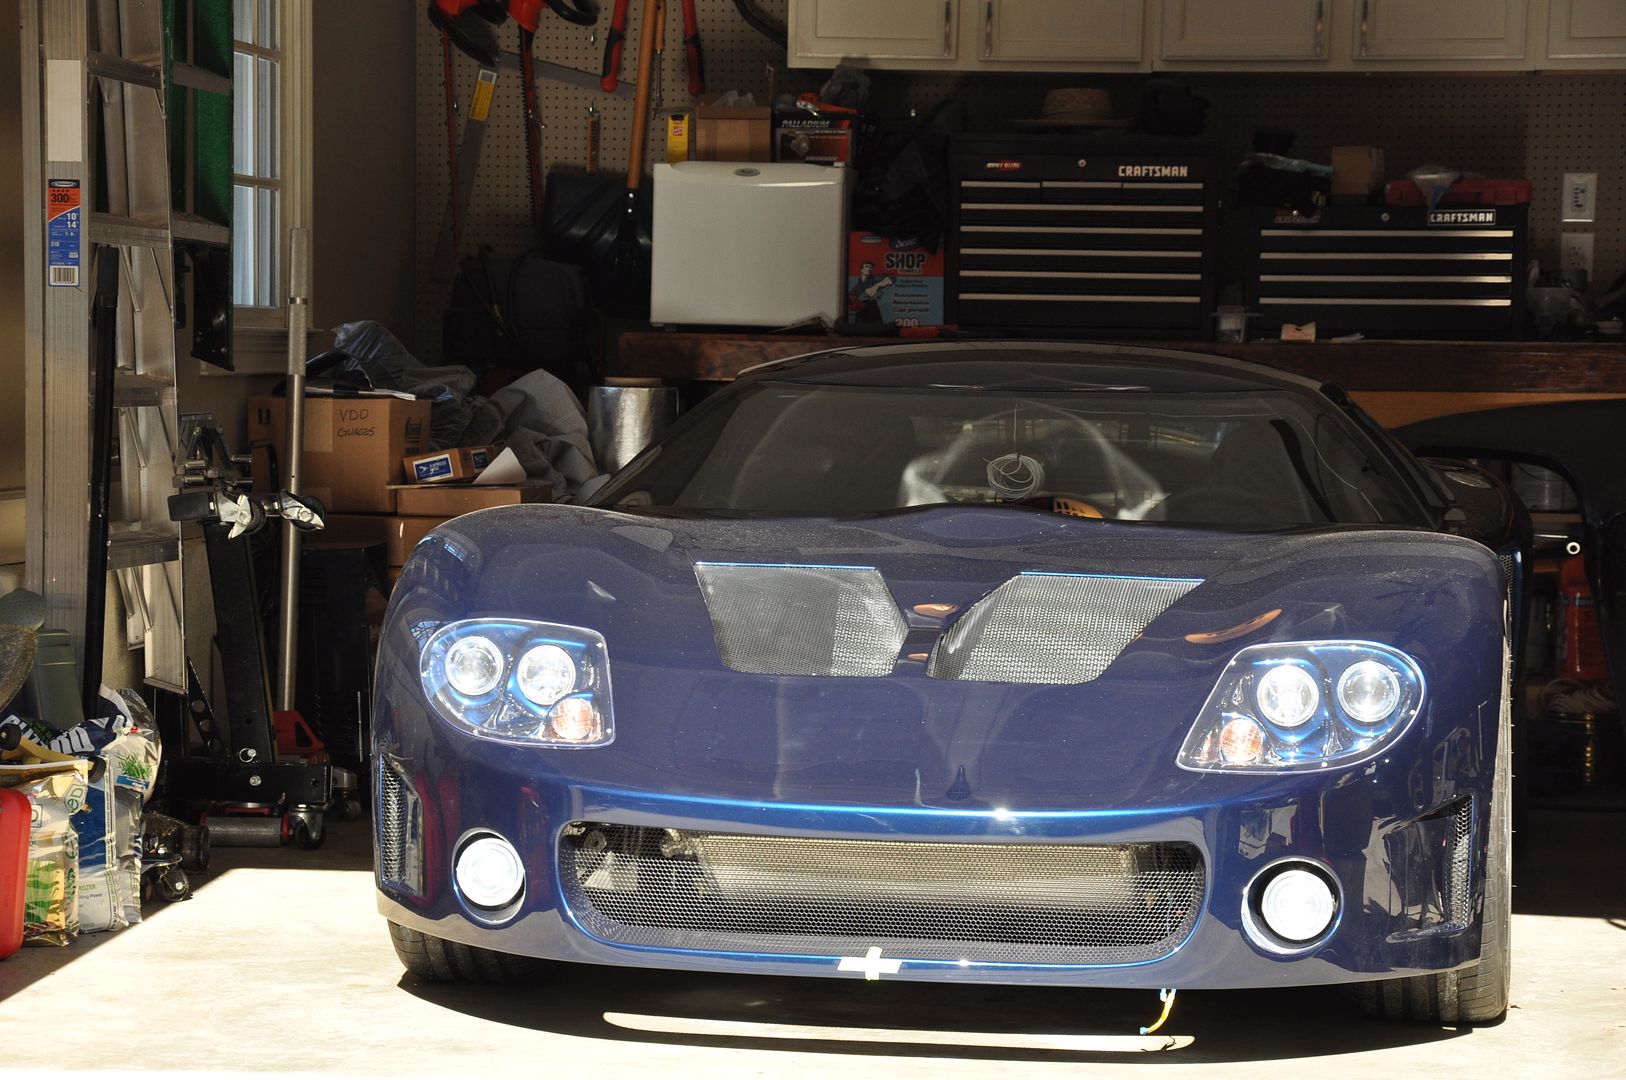
    Has anyone used radiator paint to paint their radiators? I think that I would like to paint mine in order to make it less visible through the grill mesh. I'm curious as to whether it goes on thinner than normal paint, without clogging between the aluminum fins.


    The Stig

    Some say, that I only know two facts about ducks, (both being wrong); and that if I could be bothered, I could solve the "da Vinci Code" in 47 seconds...
    All I know is that I'm called "The Stig".
    GTM #0081

  14. #414
    Senior Member
    Join Date
    Feb 2011
    Location
    Clarksville, MD
    Posts
    232
    Post Thanks / Like
    Mike,

    I can't speak from experience, but it seems that paint MUST impact airflow through the radiator fins.

    Have you looked at Shane's front grill? I bought one a few months back and it really gives the front a great finished look, and does an exceptional job of hiding the radiator as well.

    -Michael

  15. #415
    Senior Member VD2021's Avatar
    Join Date
    Feb 2011
    Location
    Central, FL
    Posts
    960
    Post Thanks / Like
    Blog Entries
    2
    Quote Originally Posted by The Stig View Post
    Quick question...

    Has anyone used radiator paint to paint their radiators? I think that I would like to paint mine in order to make it less visible through the grill mesh. I'm curious as to whether it goes on thinner than normal paint, without clogging between the aluminum fins.
    Mike,
    I did. I used Eastwood Black Radiator Paint. I used it on the forward side of the condenser and on the radiator where the condenser did not cover. I put on a light coat, but it is still very effective at making the area not stand out.
    http://www.eastwood.com/paints/detai...ack-paint.html
    Attached Images Attached Images
    Last edited by VD2021; 07-17-2012 at 07:10 PM.
    R/s
    Vidal
    CURRENT STATUS: Interior Rework and Bodywork.
    GenII GTM #331. Delivered (23/9/10)
    BUILD LOG AND WEBSITE:
    http://gtmbuild.weebly.com/ .

  16. #416
    Senior Member The Stig's Avatar
    Join Date
    Feb 2011
    Location
    Charlotte, NC
    Posts
    2,008
    Post Thanks / Like
    Quote Originally Posted by VD2021 View Post
    Mike,
    I did. I used Eastwood Black Radiator Paint. I used it on the forward side of the condenser and on the radiator where the condenser did not cover. I put on a light coat, but it is still very effective at making the area not stand out.
    http://www.eastwood.com/paints/detai...ack-paint.html
    Thanks Vidal. I bought a couple of cans of the same paint. Your pictures show that the radiator can become invisible. I like that much better.

    Thanks for posting the pics.

    Mike
    The Stig

    Some say, that I only know two facts about ducks, (both being wrong); and that if I could be bothered, I could solve the "da Vinci Code" in 47 seconds...
    All I know is that I'm called "The Stig".
    GTM #0081

  17. #417
    Senior Member VD2021's Avatar
    Join Date
    Feb 2011
    Location
    Central, FL
    Posts
    960
    Post Thanks / Like
    Blog Entries
    2
    Quote Originally Posted by The Stig View Post
    Thanks Vidal. I bought a couple of cans of the same paint. Your pictures show that the radiator can become invisible. I like that much better.

    Thanks for posting the pics.

    Mike
    Mike,

    No worries.

    I should have also noted that the nose aluminum is also installed.
    R/s
    Vidal
    CURRENT STATUS: Interior Rework and Bodywork.
    GenII GTM #331. Delivered (23/9/10)
    BUILD LOG AND WEBSITE:
    http://gtmbuild.weebly.com/ .

  18. #418
    Senior Member The Stig's Avatar
    Join Date
    Feb 2011
    Location
    Charlotte, NC
    Posts
    2,008
    Post Thanks / Like
    Quote Originally Posted by VD2021 View Post
    Mike,

    No worries.

    I should have also noted that the nose aluminum is also installed.
    Speaking of Nose Aluminum...
    I have that coming up on my list of "things to do", and I'm finding that there is very little good information in terms of how it needs to be correctly installed.

    I remember Nathan (Spytech) having an issue with the lower aluminum tray (under the radiator) flexing at high speeds (above 80-90 mph) to the extent that it actually dragged the ground. I read through his build log and saw the braes that he made to help resolve that issue.

    I also recall seeing a thread someplace that describes that a section of the nose tray should be cut and bent, in order to clear the radiator surround, when tilting the hood up.

    Are these things that have been documented some place, or is it simply trial and error? I would think that this is one of the few things that would be done the same on each car, unless the builders are doing some custom brake duct sort of stuff. But I haven't seen anything that show how it is supposed to be initially installed. The manual is vague, and it doesn't seem to be something that people tend to document...

    I have the digital manual on my laptop, and I've gone through it two or three times. Maybe I'm just missing it; but if so, I've missed it every time.
    The Stig

    Some say, that I only know two facts about ducks, (both being wrong); and that if I could be bothered, I could solve the "da Vinci Code" in 47 seconds...
    All I know is that I'm called "The Stig".
    GTM #0081

  19. #419
    Senior Member
    Join Date
    Feb 2011
    Posts
    119
    Post Thanks / Like
    I used this for help in figuring out the nose aluminum.

    http://www.ffcars.com/forums/42-fact...-aluminum.html

  20. #420
    Senior Member The Stig's Avatar
    Join Date
    Feb 2011
    Location
    Charlotte, NC
    Posts
    2,008
    Post Thanks / Like
    Quote Originally Posted by mmaragos View Post
    I used this for help in figuring out the nose aluminum.

    http://www.ffcars.com/forums/42-fact...-aluminum.html
    Thank You! That's exactly what I was looking for! I'm sure that it'll help a ton.
    The Stig

    Some say, that I only know two facts about ducks, (both being wrong); and that if I could be bothered, I could solve the "da Vinci Code" in 47 seconds...
    All I know is that I'm called "The Stig".
    GTM #0081

  21. #421
    Senior Member VD2021's Avatar
    Join Date
    Feb 2011
    Location
    Central, FL
    Posts
    960
    Post Thanks / Like
    Blog Entries
    2
    Quote Originally Posted by The Stig View Post
    Thank You! That's exactly what I was looking for! I'm sure that it'll help a ton.
    That's the nose aluminum thread I used. Shane sells a piece that is a combo under tray and splitter that may be an option for you. It is already cut to accommodate the radiator/condenser. http://thefactoryfiveforum.com/showt...light=SPLITTER

    IIRC the item that takes hits and need reinforcing is the leading edge of the lower radiator shroud. I don't recall any other reinforcement to the nose under tray outside of riveting on the piece that is trimmed. http://www.gtm-supercar.com/?cat=15
    R/s
    Vidal
    CURRENT STATUS: Interior Rework and Bodywork.
    GenII GTM #331. Delivered (23/9/10)
    BUILD LOG AND WEBSITE:
    http://gtmbuild.weebly.com/ .

  22. #422
    Senior Member The Stig's Avatar
    Join Date
    Feb 2011
    Location
    Charlotte, NC
    Posts
    2,008
    Post Thanks / Like
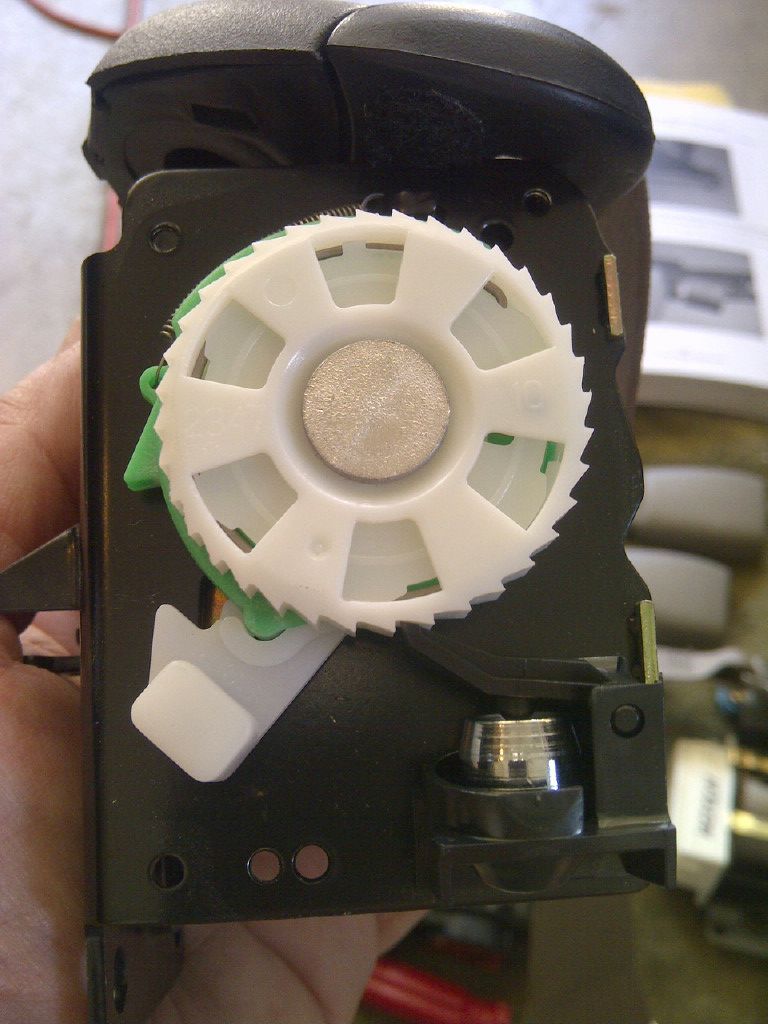
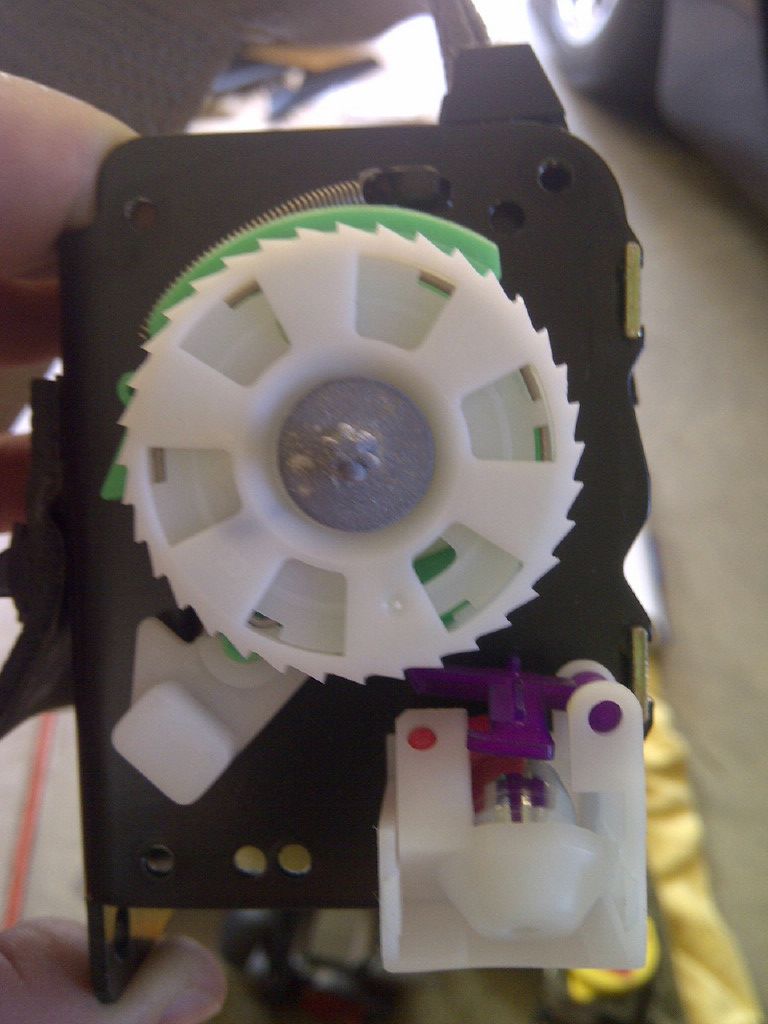
    I sat down this morning to get the seat belts installed. I haven't really decided whether or not I want to use the Corvette seat belts or if I want to use the 5 pt racing harness. Mainly because I haven't found a set that I like that also has the colors that I want to use in the interior of my car. So I decided that I would at least get the OEM seat belts set up. In doing so, I ran into a grey area of the manual that I need to ask...

    The manual says to remove the cog stop on the seatbelat retractors... Does this mean to remove the stops on all four retractor mechanisms, or just 2 of them. The manual shows a picture of just one of the stops, but not the other.


    Here's a picture of one of the stops (shown in the manual). The Passenger's side is colored black, while the Driver's side is blue.


    On the other retractor, the stops are white.

    Am I supposed to remove all of these, or just the black & blue stops?
    The Stig

    Some say, that I only know two facts about ducks, (both being wrong); and that if I could be bothered, I could solve the "da Vinci Code" in 47 seconds...
    All I know is that I'm called "The Stig".
    GTM #0081

  23. #423
    Senior Member VD2021's Avatar
    Join Date
    Feb 2011
    Location
    Central, FL
    Posts
    960
    Post Thanks / Like
    Blog Entries
    2
    Mike,

    The inertia sensor (circled in yellow, one per reel) is the part of the retractor mech the manual says to remove. However, this thread http://www.ffcars.com/forums/42-fact...ts-work-2.html steered me away from modifying the seat belts. I'm using a set of MikePMS's brackets http://www.ffcars.com/forums/42-fact...ml#post2610100. The brackets put the seat belt retractors in the same relative position as they were in the corvette. So they work as they were designed to.
    Attached Images Attached Images
    Last edited by VD2021; 07-30-2012 at 12:32 AM.
    R/s
    Vidal
    CURRENT STATUS: Interior Rework and Bodywork.
    GenII GTM #331. Delivered (23/9/10)
    BUILD LOG AND WEBSITE:
    http://gtmbuild.weebly.com/ .

  24. #424
    Senior Member The Stig's Avatar
    Join Date
    Feb 2011
    Location
    Charlotte, NC
    Posts
    2,008
    Post Thanks / Like
    Quote Originally Posted by VD2021 View Post
    Mike,

    The inertia sensor (circled in yellow, one per reel) is the part of the retractor mech the manual says to remove. However, this thread http://www.ffcars.com/forums/42-fact...ts-work-2.html steered me away from modifying the seat belts. I'm using a set of MikePMS's brackets http://www.ffcars.com/forums/42-fact...ml#post2610100. The brackets put the seat belt retractors in the same relative position as they were in the corvette. So they work as they were designed to.
    Hi Vidal,

    I actually read through these threads last night on the ffcars forum, as I watched the F1 Hungarian Gran-Prix. After doing so, I had pretty much resigned myself to the thought of just using the 5 pt harness, as it seems to be the safest option. I want to make the car as comfortable as possible for my wife to be able to ride and enjoy. But above all else, safety come first.

    You said that you're using a set of MikePMS's brackets... Are these something that he is willing to make and sell to the GTM public? If so, I would be willing to invest in a set.

    Also, could these be welded into place with the body on?
    The Stig

    Some say, that I only know two facts about ducks, (both being wrong); and that if I could be bothered, I could solve the "da Vinci Code" in 47 seconds...
    All I know is that I'm called "The Stig".
    GTM #0081

  25. #425
    Senior Member narkosys's Avatar
    Join Date
    May 2012
    Posts
    245
    Post Thanks / Like
    Have you thought of using a set of these: http://www.corbeau.com/products/seat...ble-seat-belt/

    P

  26. #426
    Senior Member rev2xs's Avatar
    Join Date
    Mar 2011
    Location
    Wysin, Poland
    Posts
    189
    Post Thanks / Like
    Here are the belts i used.

    http://www.autoloc.com/catalog/SeatB...tractable-Belt

    They do require a little welding modification to the seat belt mount where the retractor will go. You can also select whatever colour you want.

  27. #427
    Senior Member
    Join Date
    Feb 2011
    Location
    Clarksville, MD
    Posts
    232
    Post Thanks / Like
    Quote Originally Posted by The Stig View Post
    Hi Vidal,

    I actually read through these threads last night on the ffcars forum, as I watched the F1 Hungarian Gran-Prix. After doing so, I had pretty much resigned myself to the thought of just using the 5 pt harness, as it seems to be the safest option. I want to make the car as comfortable as possible for my wife to be able to ride and enjoy. But above all else, safety come first.

    You said that you're using a set of MikePMS's brackets... Are these something that he is willing to make and sell to the GTM public? If so, I would be willing to invest in a set.

    Also, could these be welded into place with the body on?
    Mike,

    Figured I'd chime in. I'm using a set of MikePMS's brackets as well. They actually bolt to the existing FFR seat belt locations, so no welding necessary (though Mike did weld his in - he made them "boltable" for Vidal and me). I know he sold me a set, so I'll assume he's willing to sell to 0thers as well. PM him.

    -Michael

  28. #428
    LCD Gauges's Avatar
    Join Date
    Apr 2011
    Location
    Toronto, Ontario
    Posts
    1,545
    Post Thanks / Like
    Blog Entries
    3
    Awesome Mike! I need to spend more time in your thread (and others); you're moving along quickly. I wish you all didn't live so far away, it would be so cool to see these cars up close.

    It's too bad you will have to re-work the rear glass. You are doing the right thing because molding a new piece will only show waves in the glass when viewed from the rear. I feel your pain,
    and am dreading the time when my windshield needs to be fitted.
    Custom LCD Gauges , Data Loggers, Control Touch Screens
    www.LCDdash.com \\ 647-522-9953 \\ Voice & Text
    Proud new owner of GTM Gen 1., #105 - 08/27/11
    LQ9 Powered, G96.00 6 speed transaxle

  29. #429
    Senior Member The Stig's Avatar
    Join Date
    Feb 2011
    Location
    Charlotte, NC
    Posts
    2,008
    Post Thanks / Like
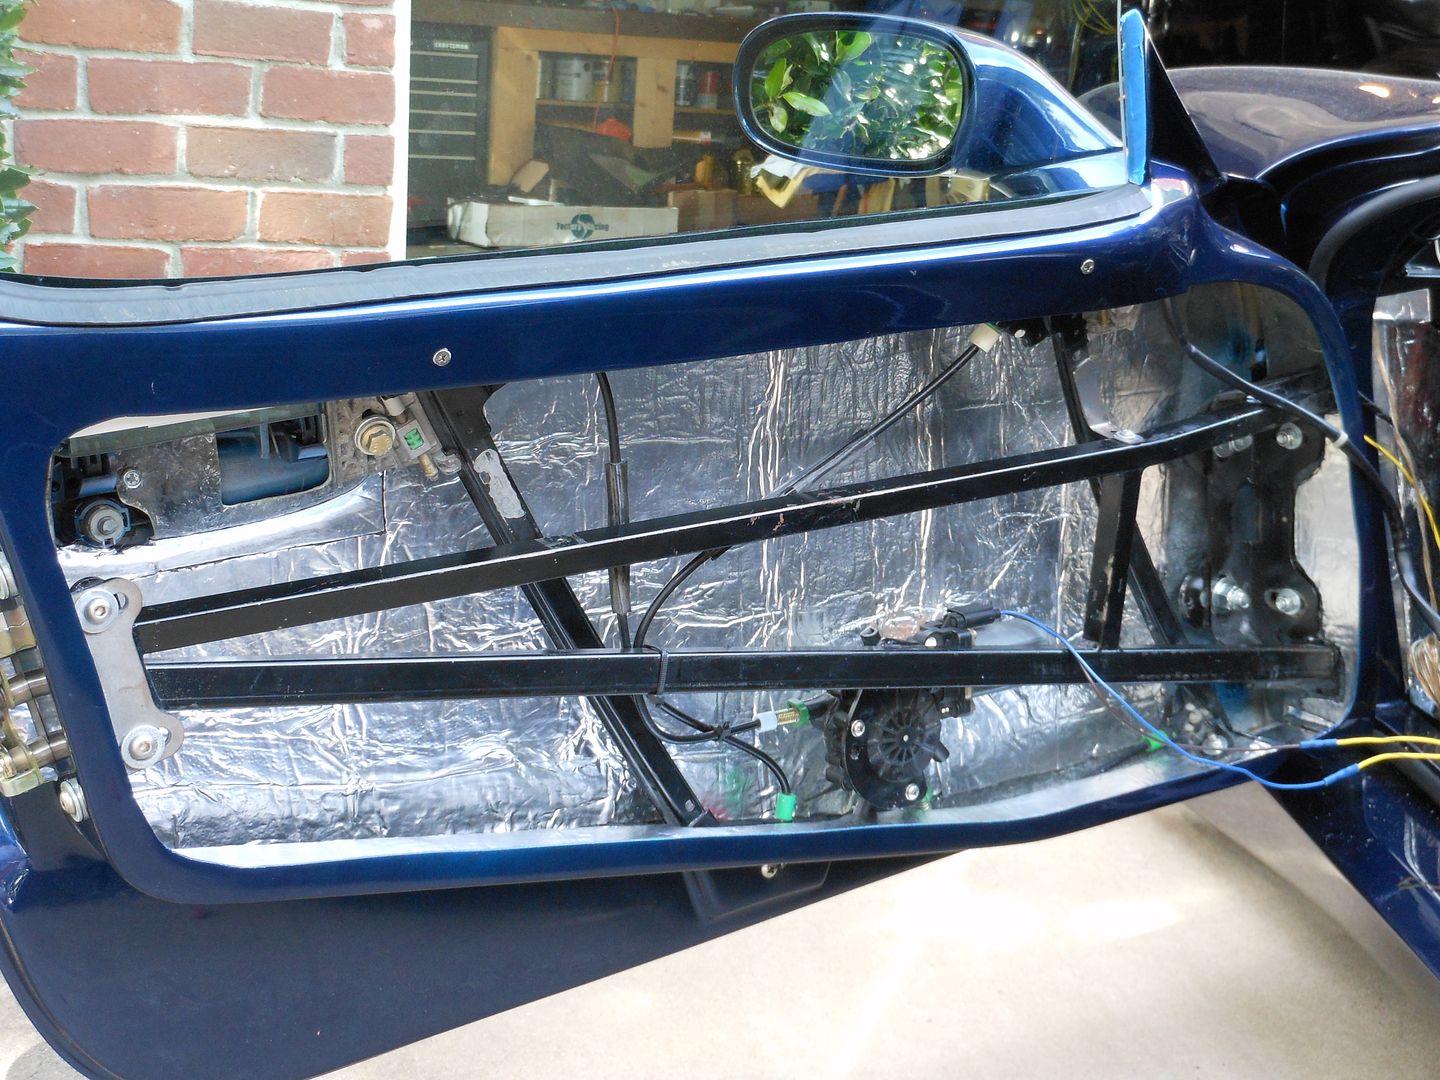
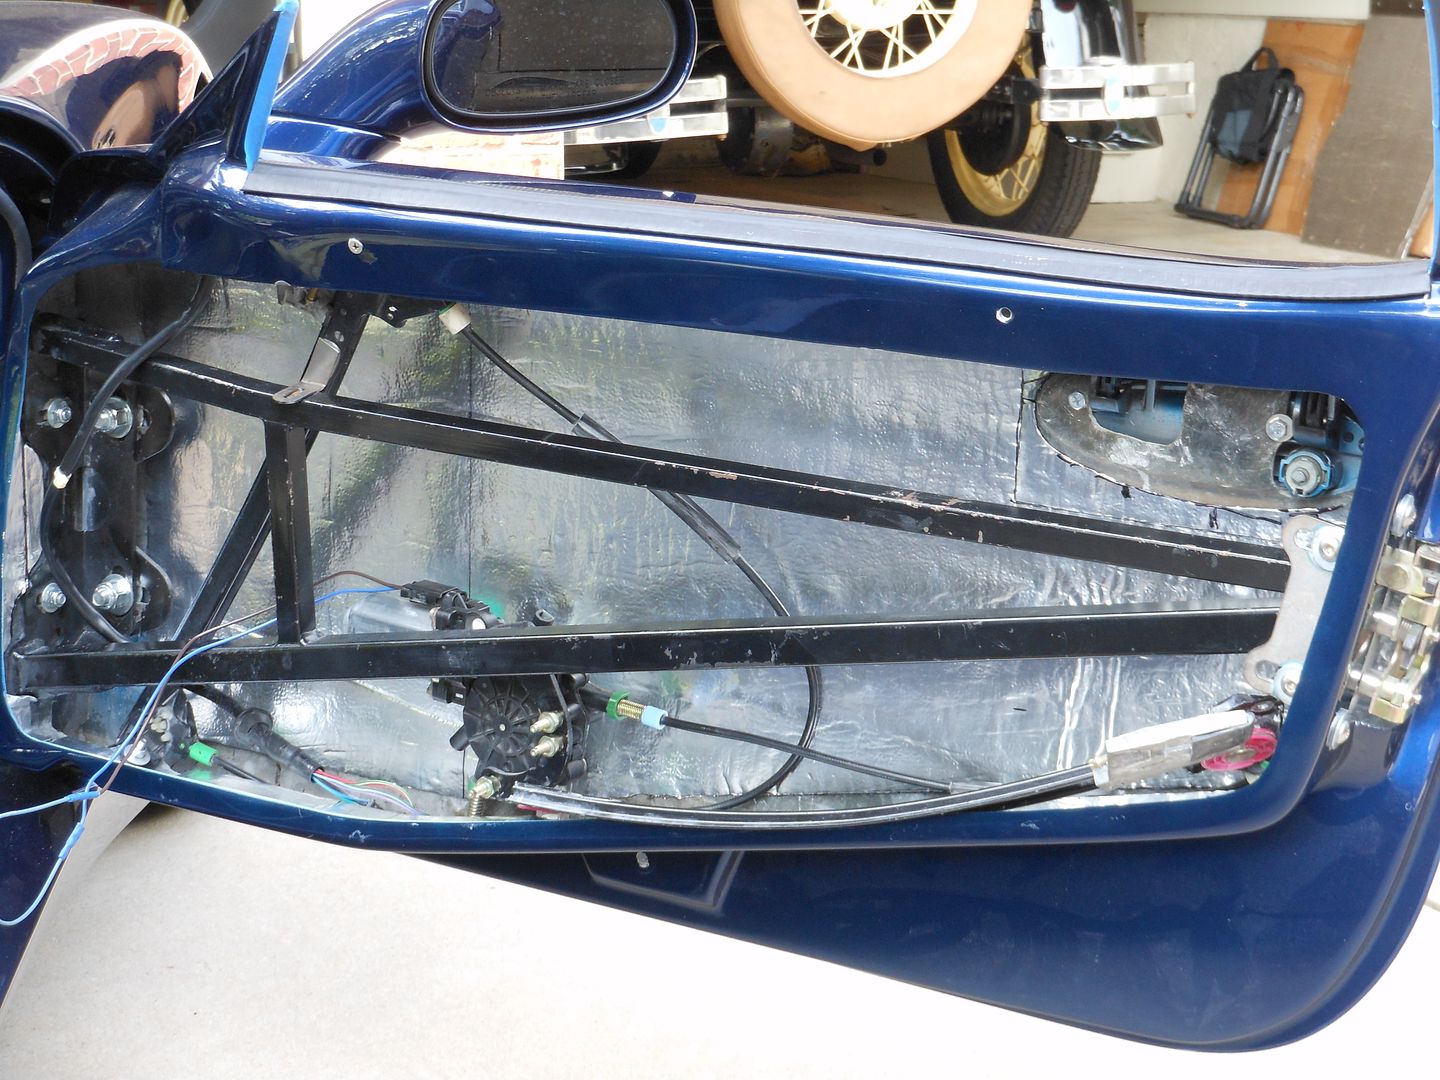
    In my attempt to get everything ready for the interior shop to start it 6 week ordeal with my interior, I spent a little time today getting the sound deadener installed in my doors.


    The Driver's side was a PITA because all of the components were in place. It was tough enough to simply get the Sound Deadener sheet into the space. But then I had to figure out how to peel the backing sheet off, and start rolling it out against the fiberglass...


    The Passenger side was a little easier, since I had the glass and the rear track out.

    I had planned to go ahead and install the seatbelts, but MikePMS agreed to make a set of brackets for me that allow the OEM seat belt retractors to sit at the correct angles to work as they are supposed to. So I'm waiting... I'm pretty happy about being able to use the stock belts.

    MikePMS
    The Stig

    Some say, that I only know two facts about ducks, (both being wrong); and that if I could be bothered, I could solve the "da Vinci Code" in 47 seconds...
    All I know is that I'm called "The Stig".
    GTM #0081

  30. #430
    Senior Member The Stig's Avatar
    Join Date
    Feb 2011
    Location
    Charlotte, NC
    Posts
    2,008
    Post Thanks / Like
    Quote Originally Posted by 00SS_M6LS1 View Post
    Awesome Mike! I need to spend more time in your thread (and others); you're moving along quickly. I wish you all didn't live so far away, it would be so cool to see these cars up close.

    It's too bad you will have to re-work the rear glass. You are doing the right thing because molding a new piece will only show waves in the glass when viewed from the rear. I feel your pain,
    and am dreading the time when my windshield needs to be fitted.
    Thanks Tino! I appreciate your positive comments. It means alot to me. I'm trying to do the best job that I can with this car. It's taking much longer than I had planned due to additional unexpected GTM expenses that really stretched the budget... After about 8 months, it's almost covered, and I can get my focus back onto getting everything finished up.

    You're right; it's a shame that the GTM community is spread so far apart... It would be great to have someone close by to ask questions and share knowledge (how-to's) and things to avoid. There are several GTMs that are reasonably close to Charlotte, but I'm not sure who owns them and where they are. (Except for Rick Williams in the Greenville / Spartanburg area). Maybe when everyone finishes their builds, they'll start reaching out to each other. It'll be really cool to see a line of GTM's at one of the local car shows here in Charlotte.

    In the meantime, I hope that there is some information here and there in my "build thread" that you can use in your build. It would be nice to know that I've contributed in some way here on the forum. I know that there have been many people who have given me TONs of help and encouragement along the way.

    There are lots of really good people here.

    Thanks again for the props!

    Take Care,

    Mike
    Last edited by The Stig; 08-05-2012 at 08:14 PM.
    The Stig

    Some say, that I only know two facts about ducks, (both being wrong); and that if I could be bothered, I could solve the "da Vinci Code" in 47 seconds...
    All I know is that I'm called "The Stig".
    GTM #0081

  31. #431
    Senior Member VD2021's Avatar
    Join Date
    Feb 2011
    Location
    Central, FL
    Posts
    960
    Post Thanks / Like
    Blog Entries
    2
    Quote Originally Posted by The Stig View Post
    In the meantime, I hope that there is some information here and there in my "build thread" that you can use in your build. It would be nice to know that I've contributed in some way here on the forum.
    Mike,
    I don't think you have to worry about that. No doubt you've contributed with an assist on many occasions with my build. Thanks again and keep up the outstanding work.
    R/s
    Vidal
    CURRENT STATUS: Interior Rework and Bodywork.
    GenII GTM #331. Delivered (23/9/10)
    BUILD LOG AND WEBSITE:
    http://gtmbuild.weebly.com/ .

  32. #432
    Senior Member sk7500's Avatar
    Join Date
    Feb 2011
    Posts
    377
    Post Thanks / Like
    Ditto that.

    Quote Originally Posted by VD2021 View Post
    Mike,
    I don't think you have to worry about that. No doubt you've contributed with an assist on many occasions with my build. Thanks again and keep up the outstanding work.

  33. #433
    Senior Member The Stig's Avatar
    Join Date
    Feb 2011
    Location
    Charlotte, NC
    Posts
    2,008
    Post Thanks / Like
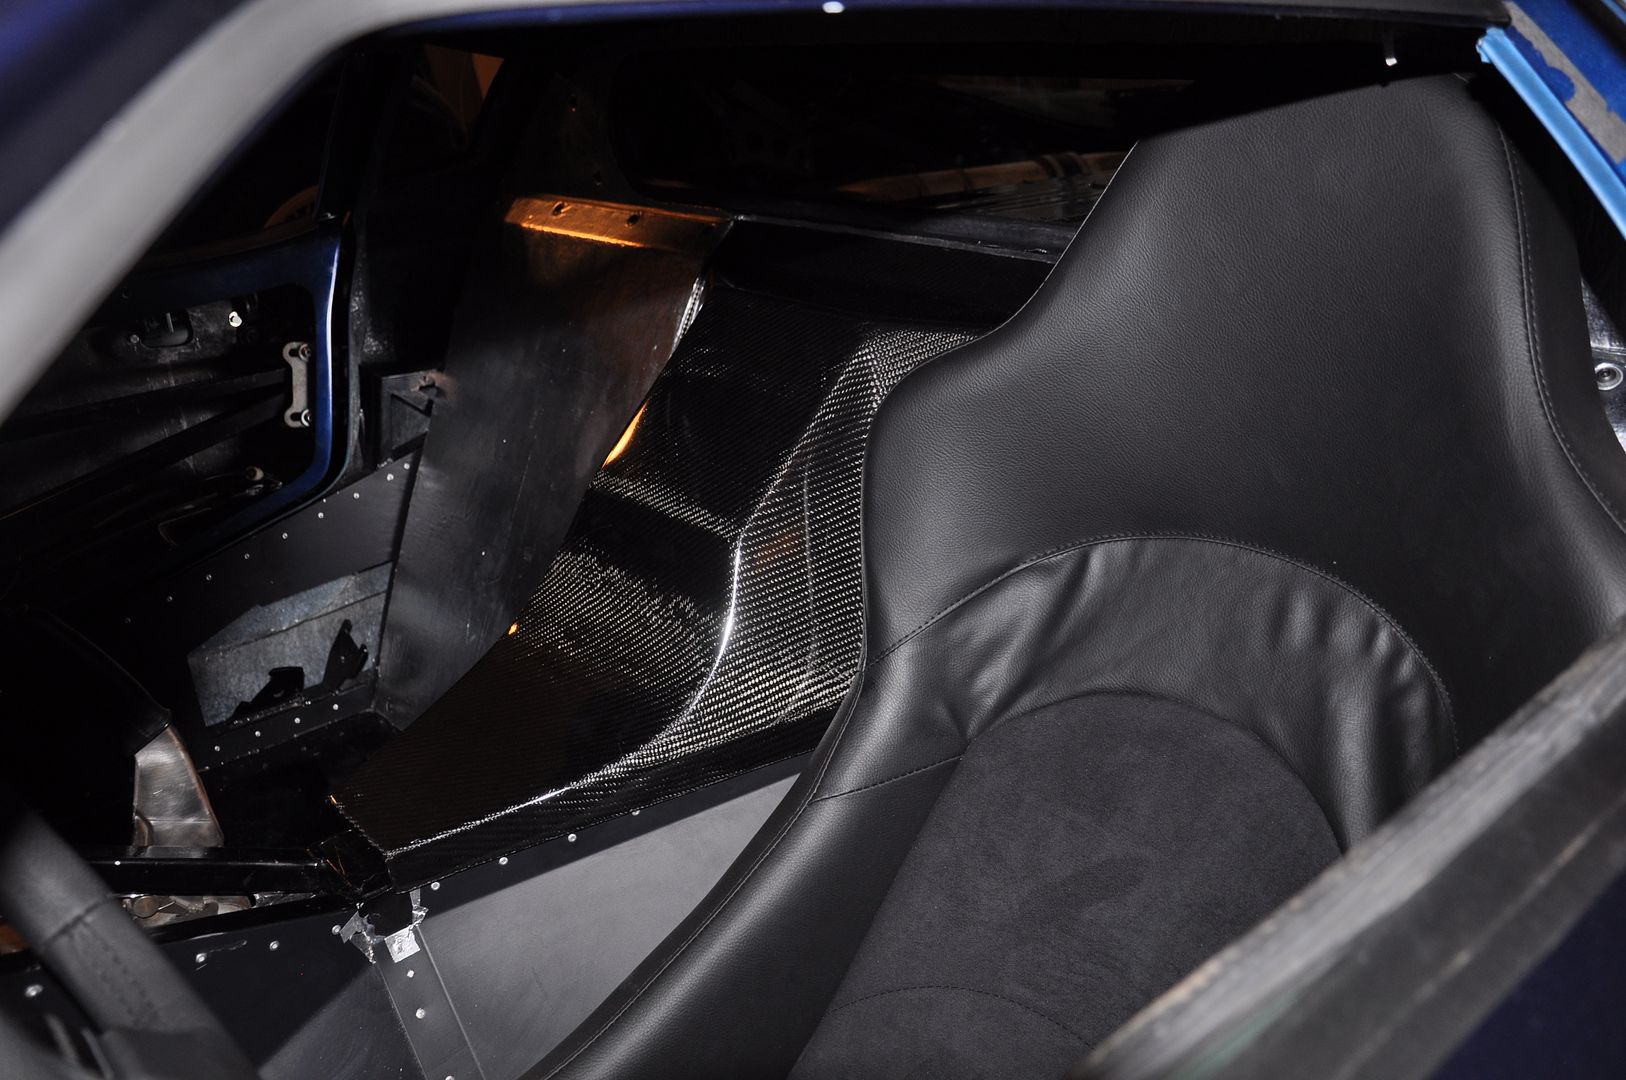
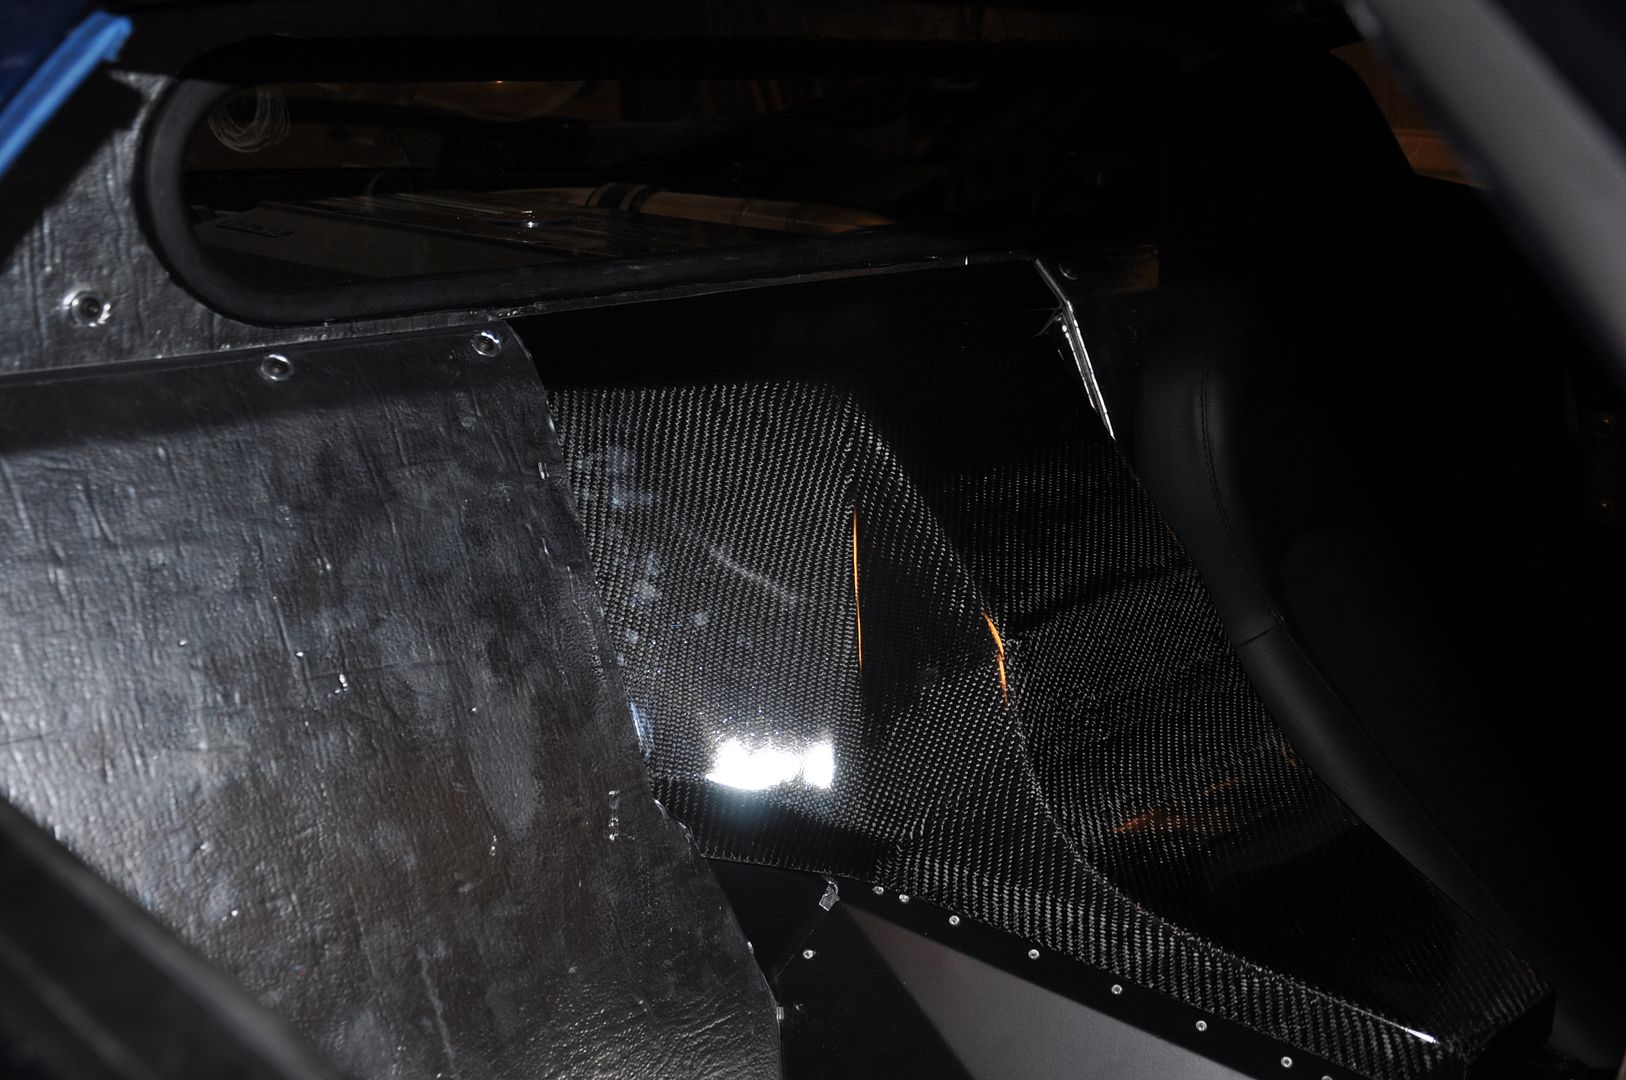
    What are you guys doing as far as sealing the body close out panels for the interior?


    This is the best picture that I have of the particular panel that I'm referring to.

    The Bulb seal makes contact on the sides as you would expect. But the corners seem to leave at least a 1/4 gap. I'd really like to insure that this is sealed to prevent (as much as possible) heat, odors, and fumes from finding their way into the cockpit.

    I am going to have to pull the lower side aluminum panels back out, in order to trim them a bit for the new seat belt brackets that I've just purchased, so now seems to be a great time to go back in and seal it all up.

    Also...
    Could someone post a picture that shows what the upper body close out panel should look like installed? I think I have an idea, just from trying different possibilities, but I'd really like to see a clear picture of it done right.

    You're comments and/or ideas are appreciated!

    As usual, Thank you.

    Mike
    The Stig

    Some say, that I only know two facts about ducks, (both being wrong); and that if I could be bothered, I could solve the "da Vinci Code" in 47 seconds...
    All I know is that I'm called "The Stig".
    GTM #0081

  34. #434
    Senior Member
    Join Date
    Feb 2011
    Location
    San Diego
    Posts
    1,995
    Post Thanks / Like
    I know it's a little late now for you, but my plan is to glass in a flange all the way around where the sheet metal "meets" the fiberglass on the rear firewall/bulkhead. This will give a surface to apply sealent to and the aluminum trim panels will not have to be as precise as when using the bulb seal. I am a bit anal about FIREwalls and such and this is the best I can come up with to make a really good, tight seal.
    www.myraceshop.com

    GTM solution kits
    Corvette and Race parts

  35. #435
    Senior Member The Stig's Avatar
    Join Date
    Feb 2011
    Location
    Charlotte, NC
    Posts
    2,008
    Post Thanks / Like
    Quote Originally Posted by crash View Post
    I know it's a little late now for you, but my plan is to glass in a flange all the way around where the sheet metal "meets" the fiberglass on the rear firewall/bulkhead. This will give a surface to apply sealant to and the aluminum trim panels will not have to be as precise as when using the bulb seal. I am a bit anal about FIRE walls and such and this is the best I can come up with to make a really good, tight seal.
    Hi Mike,

    I agree with you on the idea of using a flange. That would be something that could really make sealing the interior much easier. I'm not planning to take the body back off anytime soon so that's not an option for my right now. It would be a great improvement for FFR to make though.

    I think I'm left with just running a bead of black silicone around the edges in order to make sure that they seal. Is this a good option, or is there something better that I should consider using?

    Thanks,

    Mike
    The Stig

    Some say, that I only know two facts about ducks, (both being wrong); and that if I could be bothered, I could solve the "da Vinci Code" in 47 seconds...
    All I know is that I'm called "The Stig".
    GTM #0081

  36. #436
    Senior Member
    Join Date
    Feb 2011
    Location
    San Diego
    Posts
    1,995
    Post Thanks / Like
    I know Richard Migliori has been using a product designed for sealing gutters on houses for this purpose and it works REALLY well. It gets pretty hard, but is still slightly flexible and it also is paintable and sandable. Pretty cool stuff, but alas, appears to have become another victim of CARB. He says he is not able to find it any longer in CA. You might want to try looking where you are though. I think he referred to it as "gutter seal" or "gutter lap". It bonds much better than silicone and has pretty good shear strength as well.
    www.myraceshop.com

    GTM solution kits
    Corvette and Race parts

  37. #437
    Senior Member The Stig's Avatar
    Join Date
    Feb 2011
    Location
    Charlotte, NC
    Posts
    2,008
    Post Thanks / Like
    Thanks Mike.

    I'll take a look in NC, and see if we can buy it here.

    Mike
    The Stig

    Some say, that I only know two facts about ducks, (both being wrong); and that if I could be bothered, I could solve the "da Vinci Code" in 47 seconds...
    All I know is that I'm called "The Stig".
    GTM #0081

  38. #438
    Senior Member The Stig's Avatar
    Join Date
    Feb 2011
    Location
    Charlotte, NC
    Posts
    2,008
    Post Thanks / Like
    Since this crossed pages, I wanted to post this question again...

    Could someone post a picture(s) that shows what the upper body close out panel should look like installed? I think I have an idea, just from trying different possibilities, but I'd really like to see a clear picture of it done right.

    They are the panels the fit behind the seats and against the rear quarter windows. The one on the driver's side has the rear hatch release handle in it. I'm interested in how how the top of it fits. Does it get riveted to the side body brace that attaches to the rear window/fire wall section?
    The Stig

    Some say, that I only know two facts about ducks, (both being wrong); and that if I could be bothered, I could solve the "da Vinci Code" in 47 seconds...
    All I know is that I'm called "The Stig".
    GTM #0081

  39. #439
    Member kabacj's Avatar
    Join Date
    Mar 2011
    Location
    Long Island
    Posts
    1,103
    Post Thanks / Like
    Hi Mike,

    Another option would be to use the aluminum foil tape used by HVAC guys. There are a few kinds . I have some that is quite thick but still flexible. The stuff is easy to apply, fire proof, and when applied carefully, airtight.

    The stuff sticks well and is heat resistant. A layer on both sides will get the job done.

    It's what I plan on using.

    John
    XTF #2
    build start date June 19 2023

    GTM # 344
    Build Start December 2010
    First track day April 2013

  40. #440
    Senior Member The Stig's Avatar
    Join Date
    Feb 2011
    Location
    Charlotte, NC
    Posts
    2,008
    Post Thanks / Like
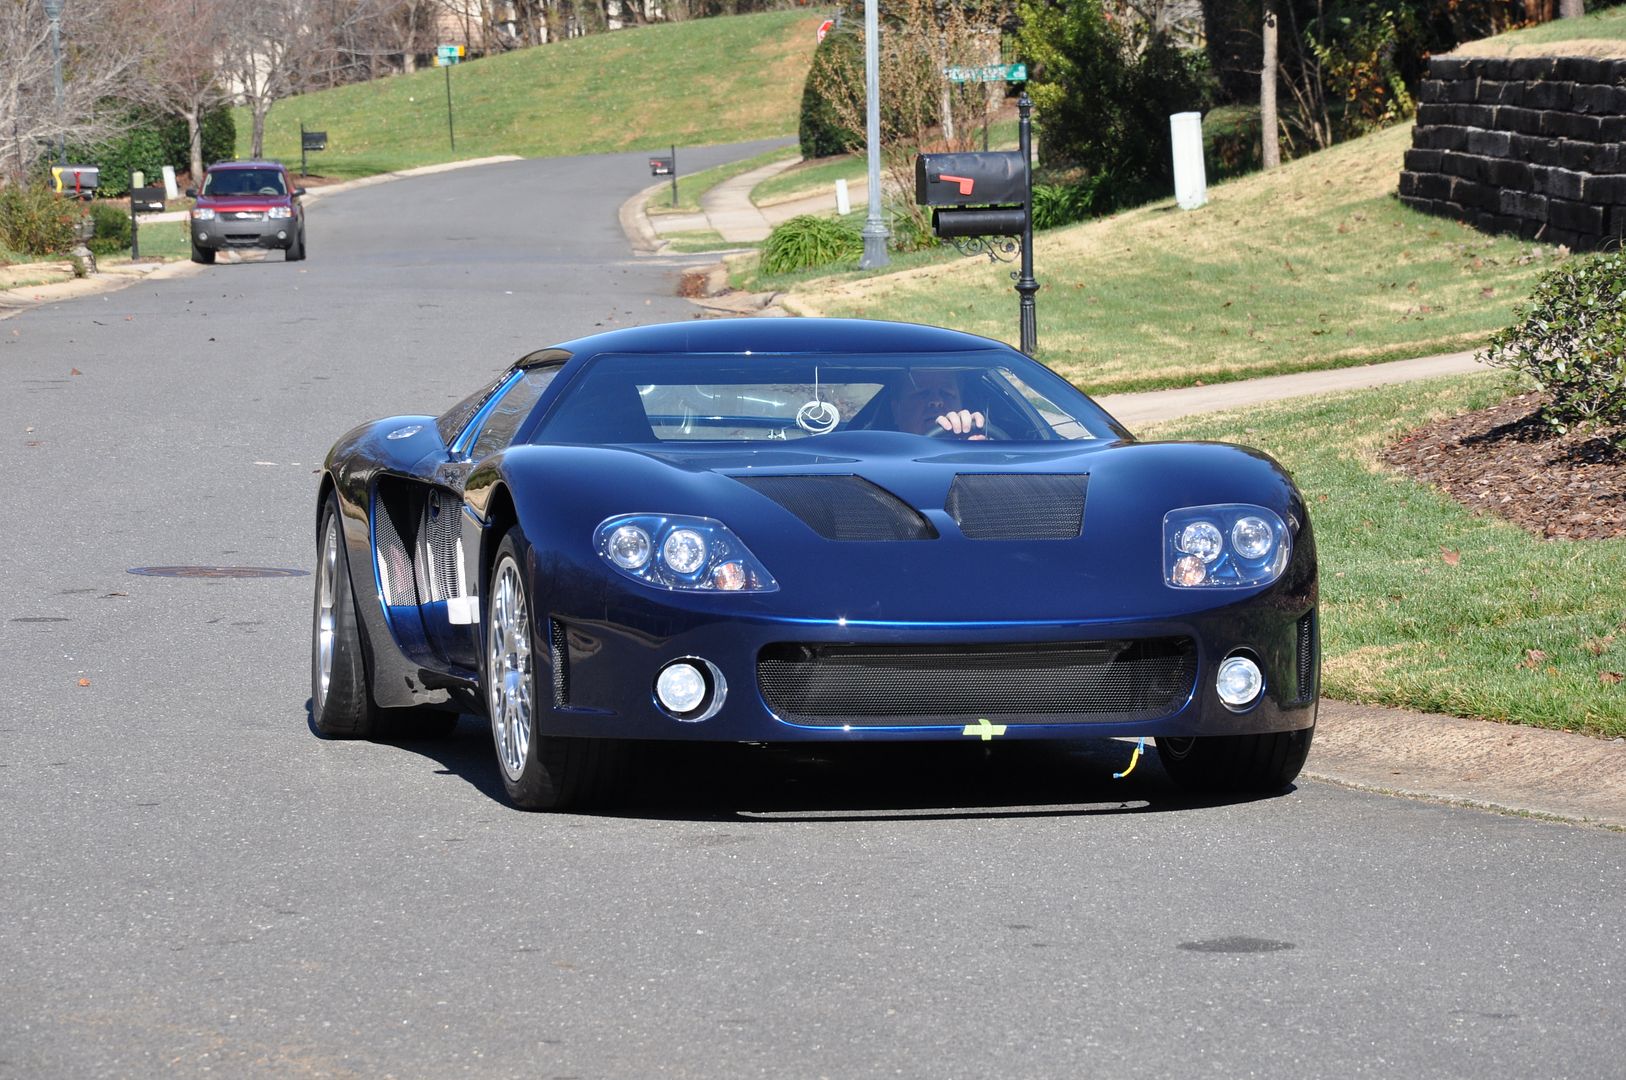
    I thought that this was sort of cool... "Cartoonizing" your car...

    http://thefactoryfiveforum.com/showt...onize-your-car

    Riptide posted the link in the General discussions section of the Forum.

    Last edited by The Stig; 08-09-2012 at 09:08 AM.
    The Stig

    Some say, that I only know two facts about ducks, (both being wrong); and that if I could be bothered, I could solve the "da Vinci Code" in 47 seconds...
    All I know is that I'm called "The Stig".
    GTM #0081

Page 11 of 51 FirstFirst ... 91011121321 ... LastLast

Tags for this Thread

Posting Permissions

  • You may not post new threads
  • You may not post replies
  • You may not post attachments
  • You may not edit your posts
  •  

Replica Parts

Visit our community sponsor