Visit our community sponsor

Thanks:
0

Likes:
1
-
PLATNUM Supporting Member


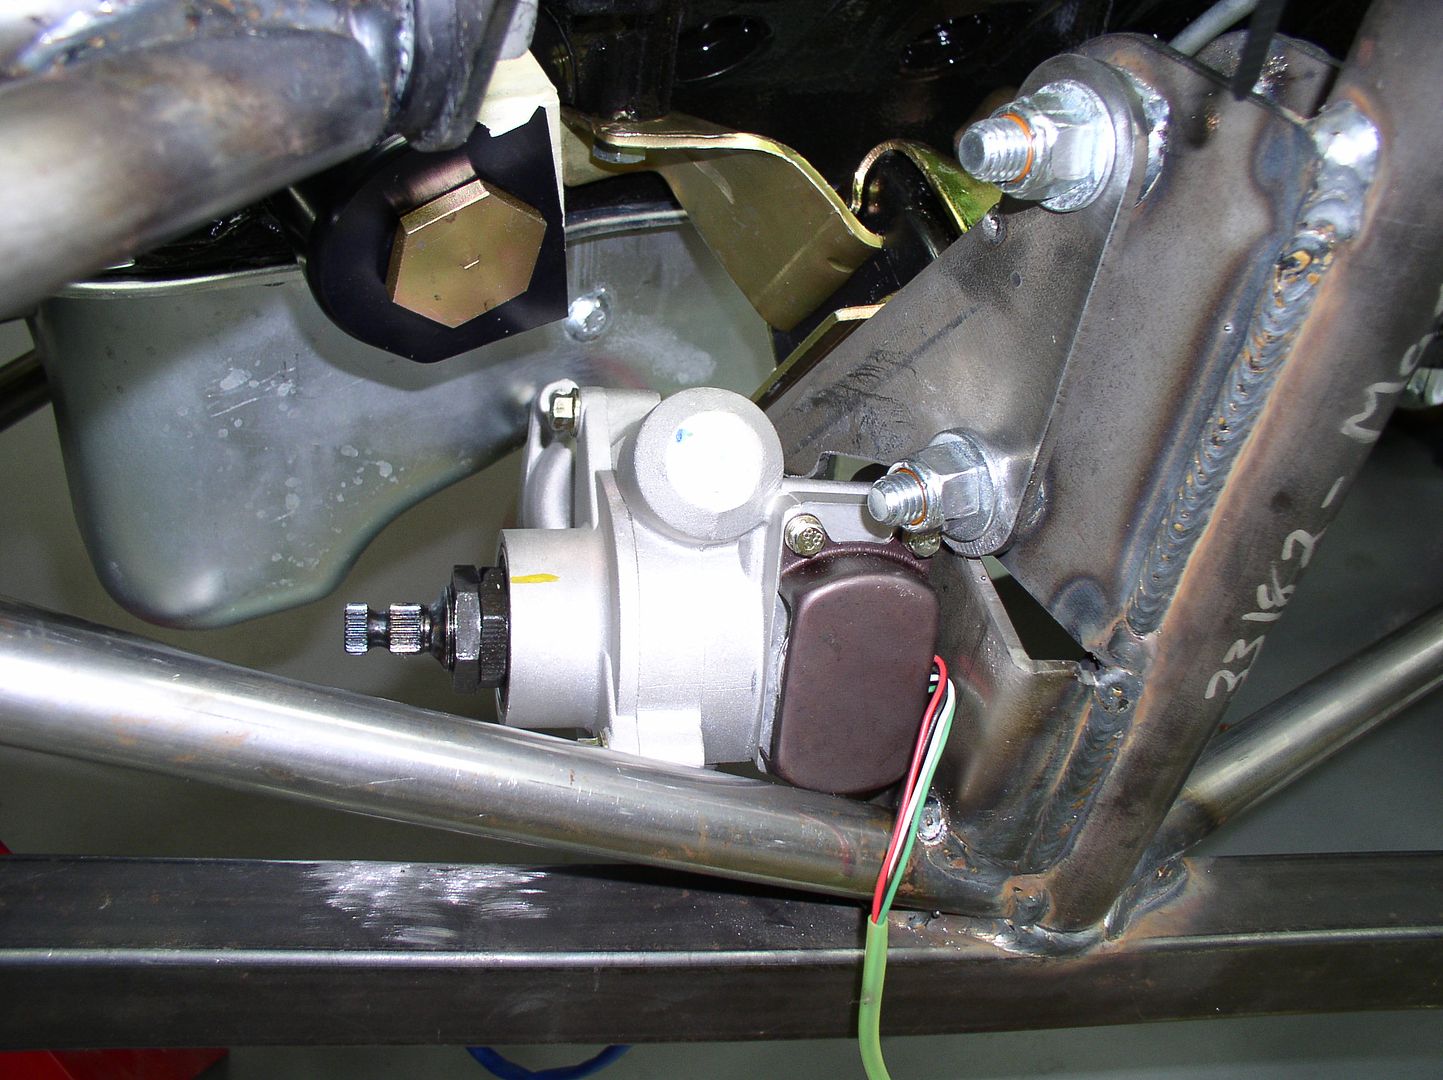
Looks good. I am using the same engine /trans combo. Could you take a picture of the P/S motor after you reclocked it? Thanks for such a good thread.
-
Senior Member

Evan, did your kit come with a hood liner and a trunk liner? If so can you post a pic? I don't remember seeing that on my parts list and its now on the FFR site as part of the package in the "what you get" list.
Nick Sebastian - 33 Hot Rod #495
Factory Five Forums - hdnik
FFCars - lowntubd
Build Site/Blog -
www.nicks33hotrod.com
-
Senior Member

Thanks. I cant wait to fire it up and see how it runs. I will see if I can get my camera in close enough to show you the bolt mounting locations. hdnik, I'm not sure if I have it either. I will have to go through my inventory again to check.
-
Senior Member
-
Senior Member

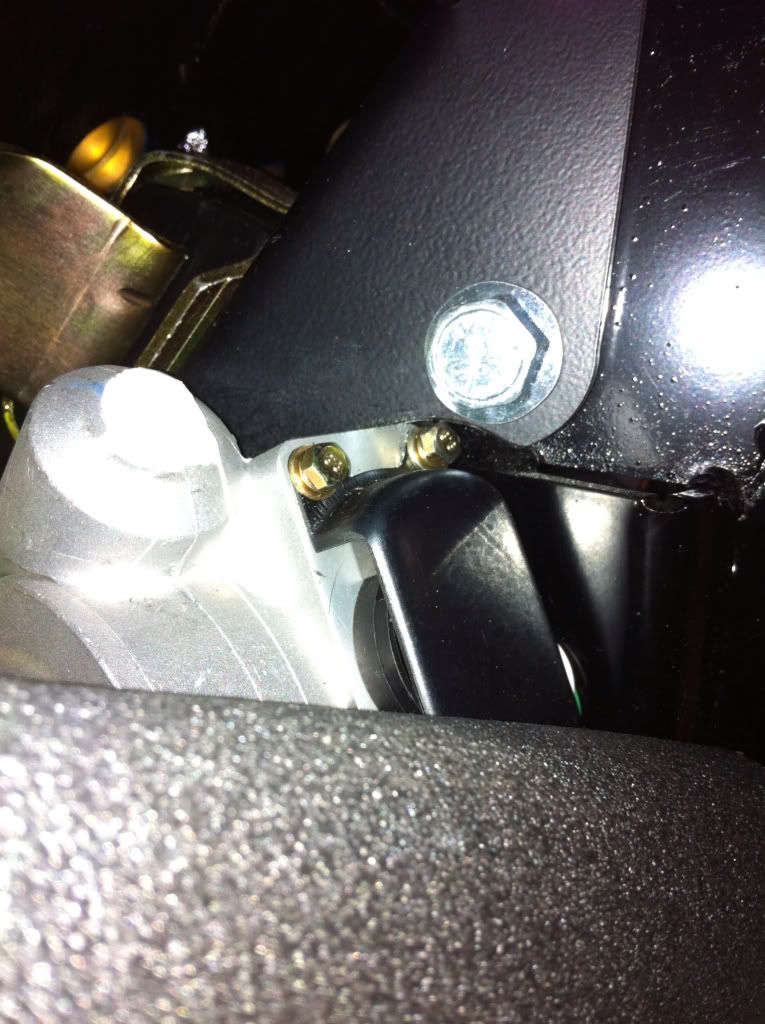
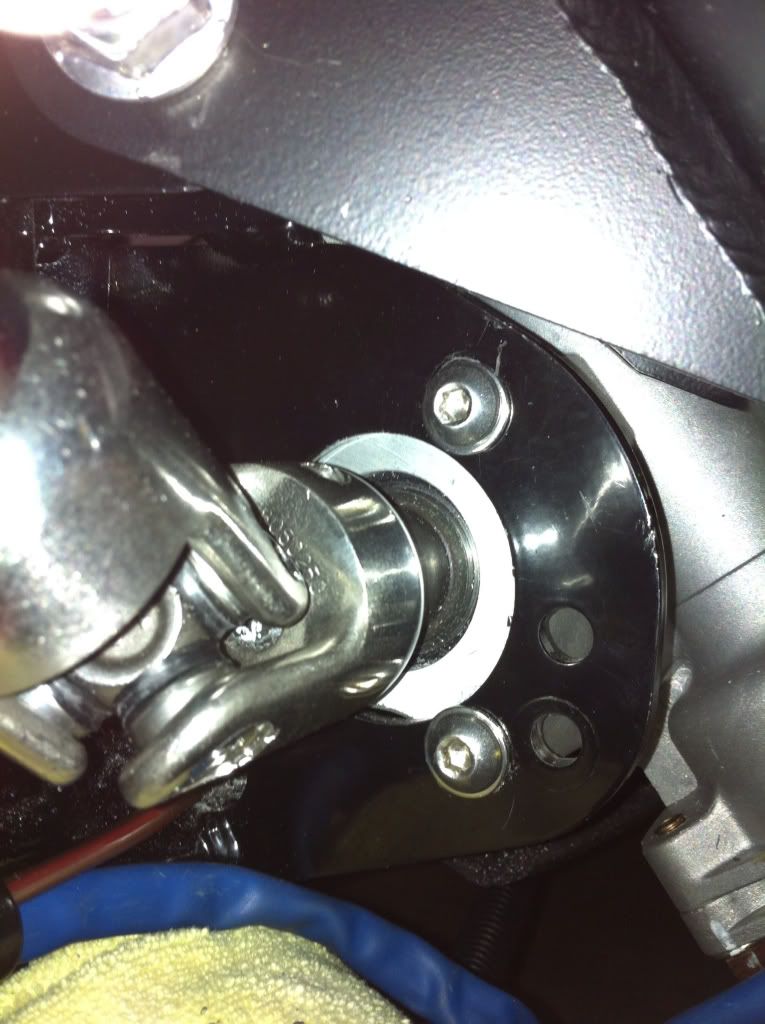
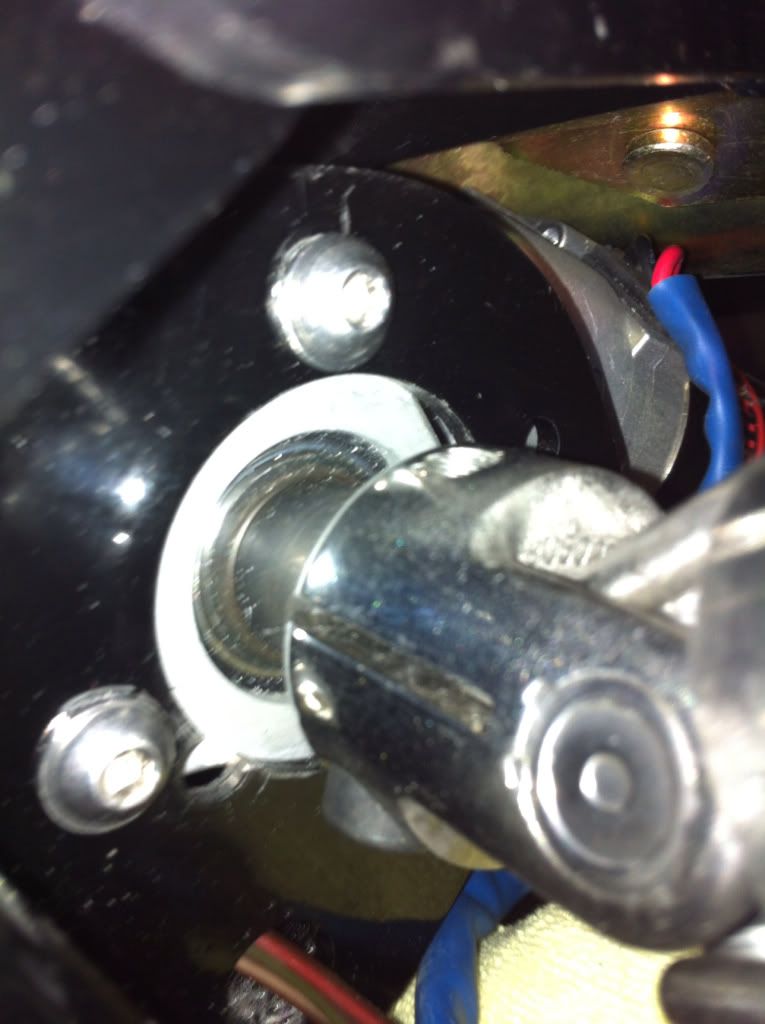
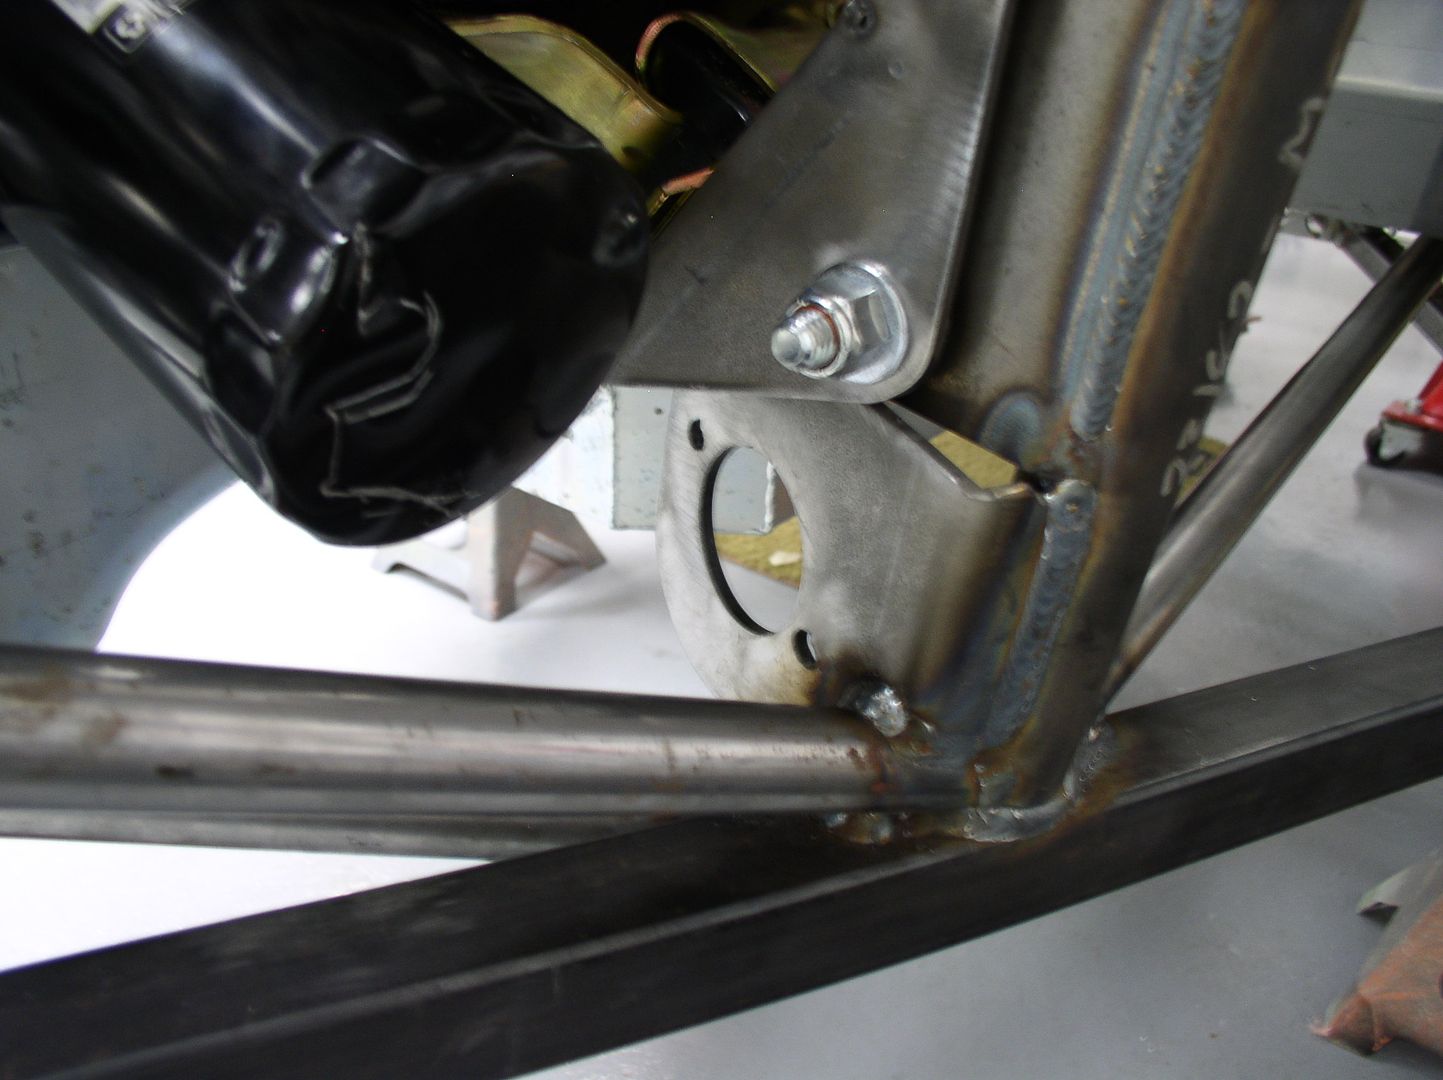
Hey Evan, you may need to take the old Italian reforming tool to that pan to give you some clearance.  Almost all of us had to rotate that steering unit so don't feel bad.
-
Senior Member

Originally Posted by
ehansen007

Hey Evan, you may need to take the old Italian reforming tool to that pan to give you some clearance.
Almost all of us had to rotate that steering unit so don't feel bad.
I figured it was a common problem... FFR keeping us on our toes.
-
Senior Member

It's a pre-planned modification, so everyone can feel like they've done something special. 
-
Senior Member
That's a good analogy jayguy. It adds to the sense of accomplishment I guess. 
-
-
PLATNUM Supporting Member
Thanks for the photos and hints. I will install mine after the motor is in. I like that light weight steering shaft to the dash. LOL
-
Senior Member
Thanks for the info Olli. Boy you had to remove a lot of material from your motor mount bracket. I agree that I probably should have put the motor in first. I will have to figure out a way to tighten that nut because the last thing I want to do is pull the motor again.
Last edited by esff32; 02-01-2013 at 06:39 PM.
-
Senior Member
-
PLATNUM Supporting Member
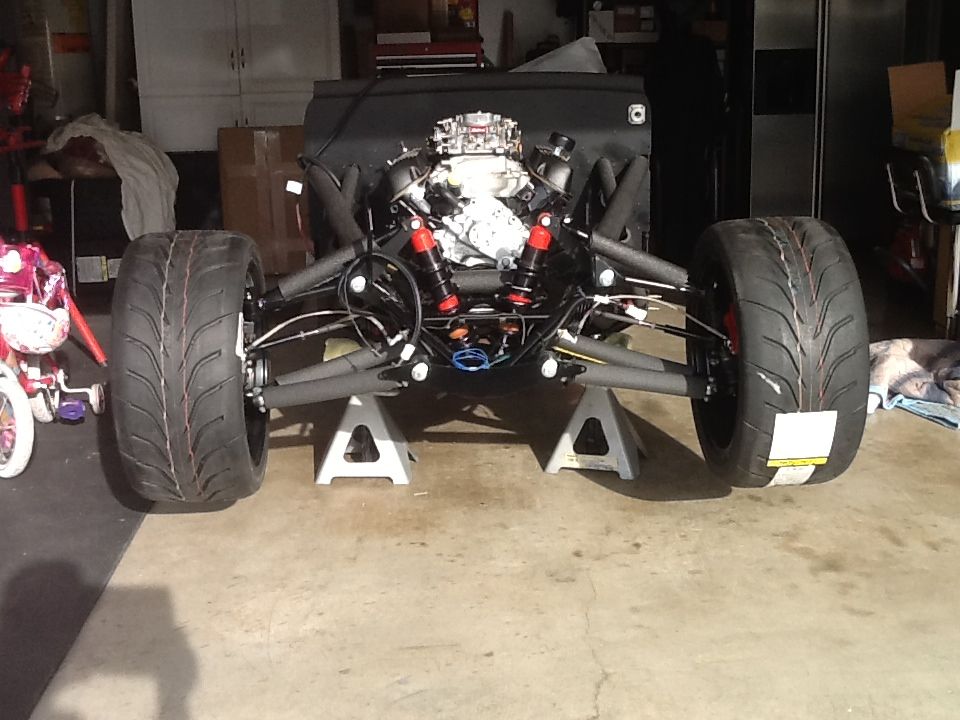
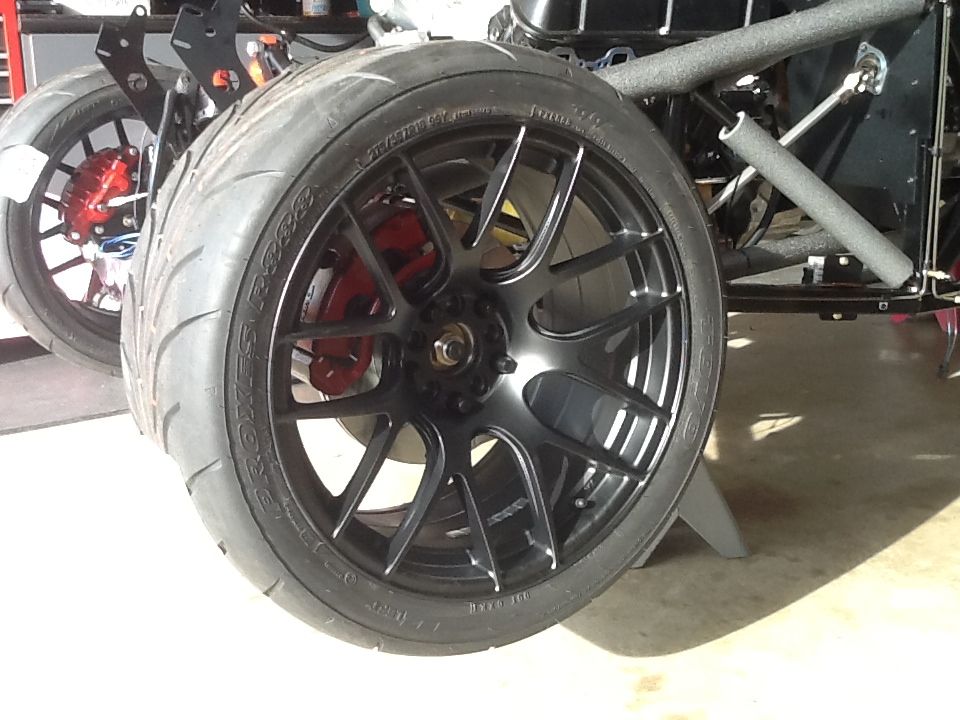
Awesome tires and wheels.
-
Senior Member
Originally Posted by
wallace18
Awesome tires and wheels.
Thank you. It was not an easy decision, not only the style but the sizing.
-
Senior Member
Frankly Evan I am blown away at your progress in just a few weeks. You got your kit just before Christmas right? I got mine mid January and only have the front end mocked up. I gotta get my *** in gear and start re-prioritizing things.
Kudos man!
Nick Sebastian - 33 Hot Rod #495
Factory Five Forums - hdnik
FFCars - lowntubd
Build Site/Blog -
www.nicks33hotrod.com
-
Senior Member
Thanks. I did, I got it on December 23rd. I was just looking at my progress today and I was thinking that I feel like I haven't been in the garage all that much. Just a couple hours here and there. I am trying to balance family time and we just had another baby so I would imagine I will probably slow down a bit. To this point I haven't spent one full day in the garage. My budget is starting to get thin but I have a vision of what I want the car to look like so I don't want to do it half ***. If it takes me longer to finish, so be it. Thanks for the kind words and I am looking forward to seeing your '33 come together. Nice '67 Chevelle by the way... I had one in college. It was one of my favorite cars.
Last edited by esff32; 02-02-2013 at 09:46 PM.
-
Senior Member
-
Junior Member

-
Senior Member
-
Senior Member
Originally Posted by
esff32
Evan,
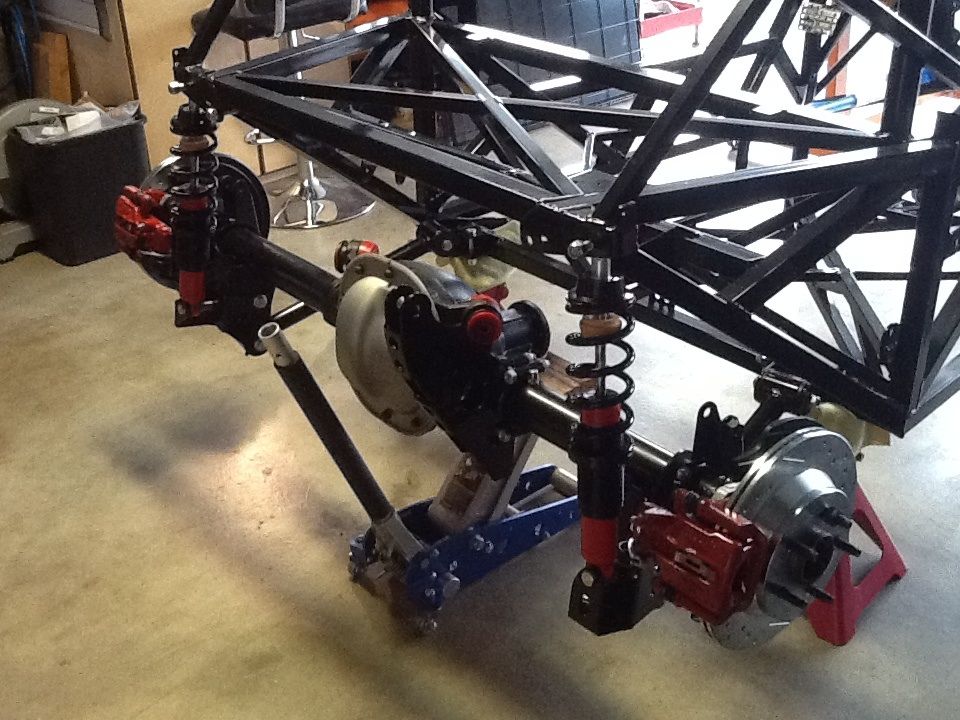
Getting ready to mock up the rear end. I was curious as to why you chose to install brakes on the backside of the axle. In speaking with Kevin Shea, he suggested that I mount them on the front side to facilitate parking brake cable reach. This was confirmed for me by the brake instructions. (Page 5)
6. Install the brake caliper brackets so that the caliper will mount on the front side of the axle. Use the four 3/8-16 flange bolts provided and torque them to 45-50 ft/lbs.
Last edited by hdnik; 02-03-2013 at 09:07 AM.
Nick Sebastian - 33 Hot Rod #495
Factory Five Forums - hdnik
FFCars - lowntubd
Build Site/Blog -
www.nicks33hotrod.com
-
Senior Member
The rear end is out of a '96-'98 Mustang Cobra. I bought it rebuilt and pre-assembled from a company on eBay. I just threw it in as is. I'm not sure if I can reverse them or not and if there is a benefit one way or the other. Have you purchased the parking break cables yet and if so what part # did you find. I have seen a lot of info about this subject but I have yet to find out a definite solution.
Last edited by esff32; 02-03-2013 at 12:11 PM.
-
Senior Member
I bought the 11.65 rear brake kit from FFR PN 14834. It came with 2 e- brake cables PN 14690. Like the front brakes I guess you have to swap left to right to keep bleeder up. Other than cables reaching I don't suppose there is any benefit functionally.
Maybe someone else can opine on this matter!
Nick Sebastian - 33 Hot Rod #495
Factory Five Forums - hdnik
FFCars - lowntubd
Build Site/Blog -
www.nicks33hotrod.com
-
Senior Member
That's what I was thinking, I looked at the bleeder screws and they are pointing upward. I can't seem to find that part #. Lokar makes a universal fit one but I understand people have had problems with that also.
-
Senior Member
I will be working on mine tomorrow nite and will take some pics. You can see if there are any differences between your set up and mine. Not sure if that'll help at all.
Nick Sebastian - 33 Hot Rod #495
Factory Five Forums - hdnik
FFCars - lowntubd
Build Site/Blog -
www.nicks33hotrod.com
-
Senior Member
-
Senior Member
-
Senior Member
They also make a shorty oil filter too that will work. Evan, you are flying man. Money held me up too. But look at it this way, you don't want to blow through it either. It's too much fun.
-
Senior Member
Do you happen to know what brand. I have looked at a couple short filters and have not been able to find something that will work. The filter needs to be no taller than 4". I'm addicted to buying parts, it's like Christmas all year! I may need your help on tackling the electrical. Remember Erik... Electrical assistance = Booze for you. 
On another note, do you know what steering wheel hub adapter application the hotrod uses. I put a seat in the car and it as I suspected, the steering wheel is too close to me. I need to get a short hub. I'm sure NRG has something.
Last edited by esff32; 02-04-2013 at 03:14 PM.
-
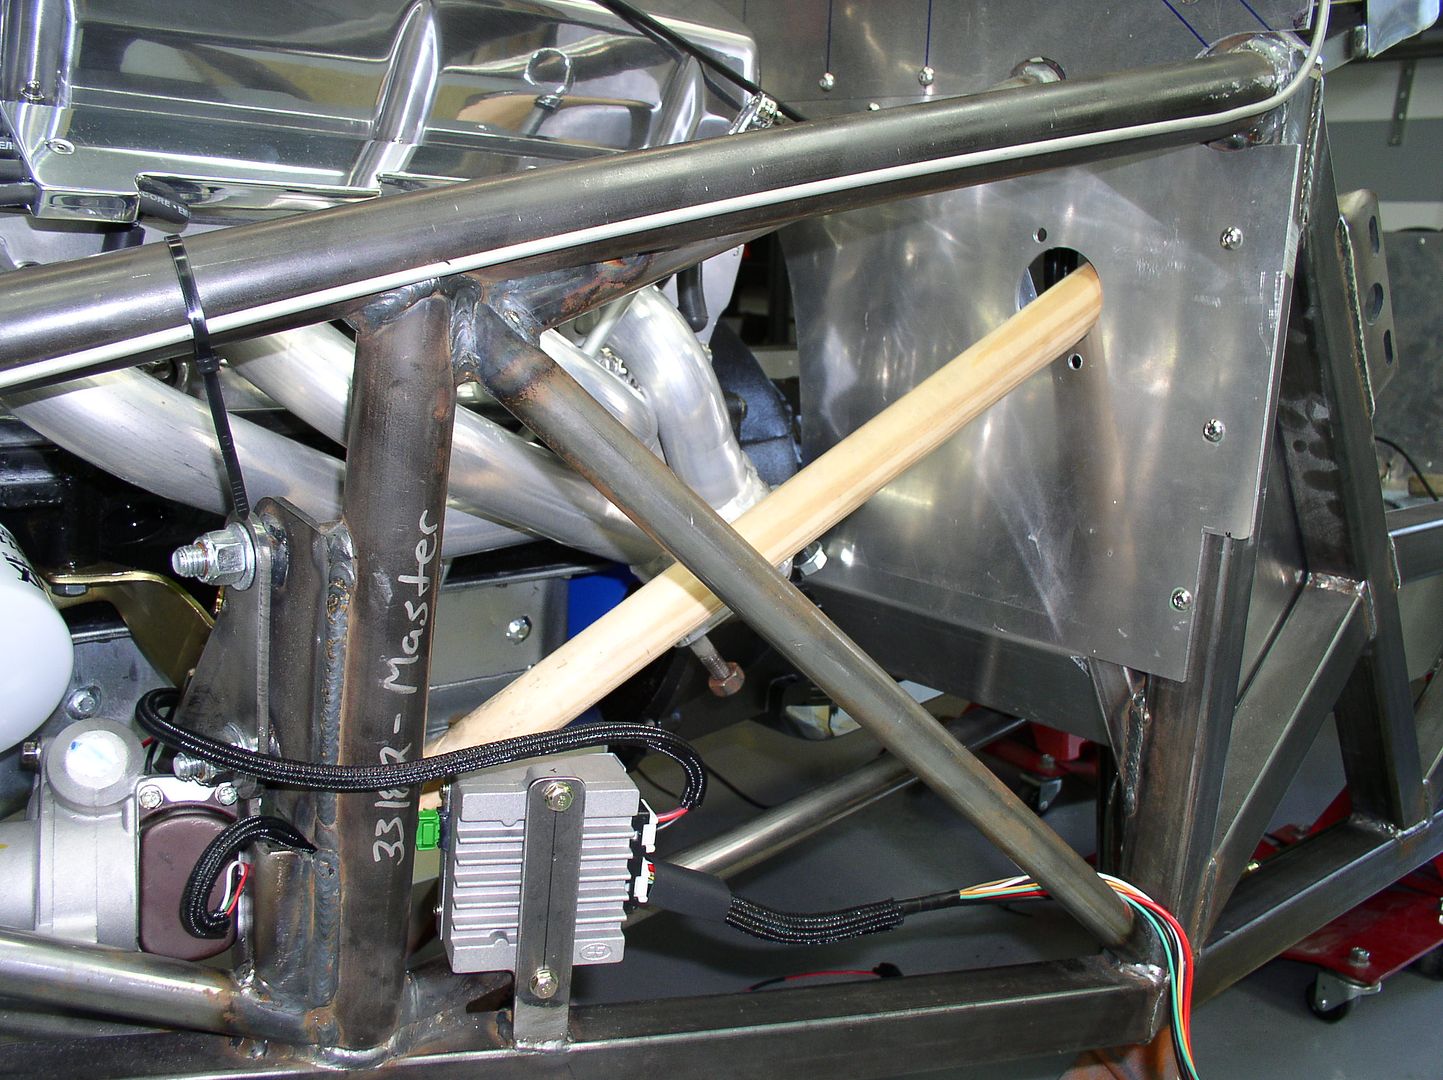
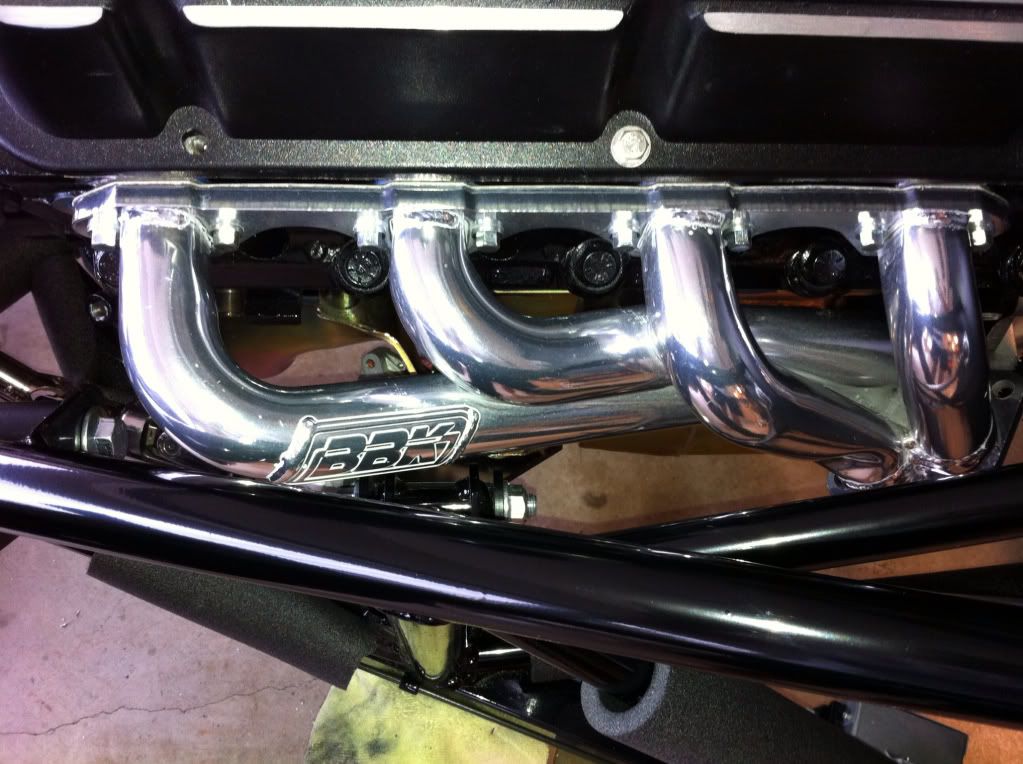
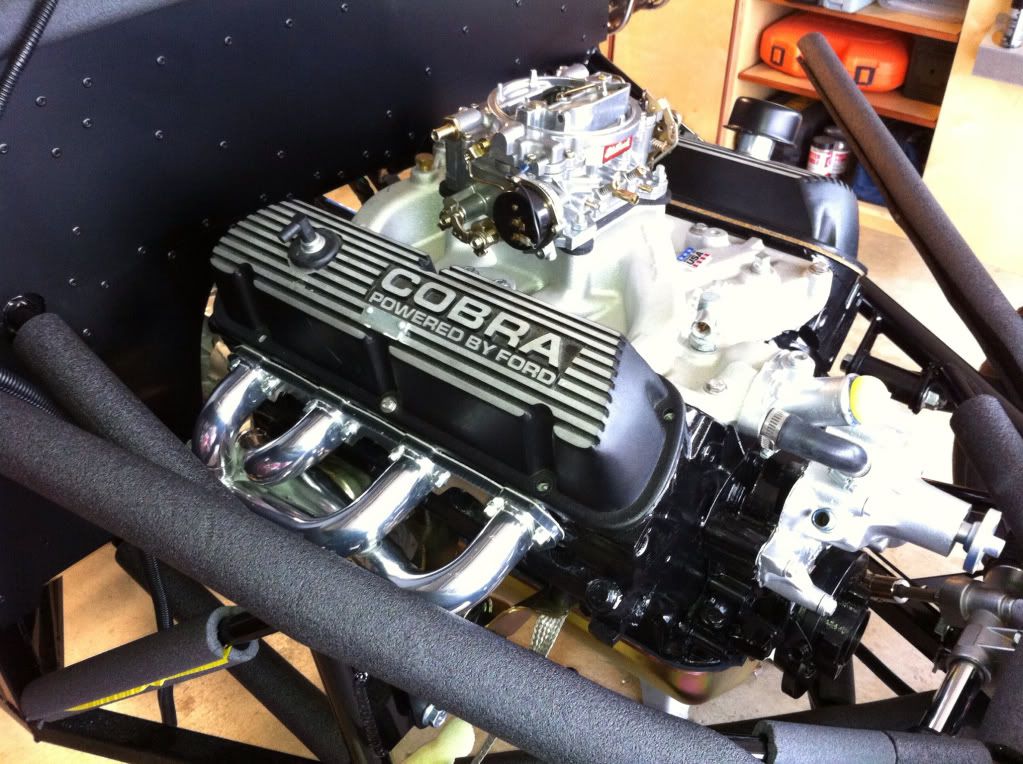
As I mentioned in the other thread, WIX 51311 (Napa 1311). The 51311 has a published height of 3.372" and the Purolator L17019 has a published height of 3.25". FFR actually mentions the L17019 in the manual. All of those filters are easy to buy. I use the WIX 51311 and keep a few on the shelf. You can see how it fits in the 4th picture that I posted earlier in the thread.
Olli
Last edited by Olli; 02-04-2013 at 04:40 PM.
-
Senior Member
Thanks Olli. I had a hard time finding the dimensions but after a little more research, I was able to find it. Hopefully one of those will work.
-
Senior Member
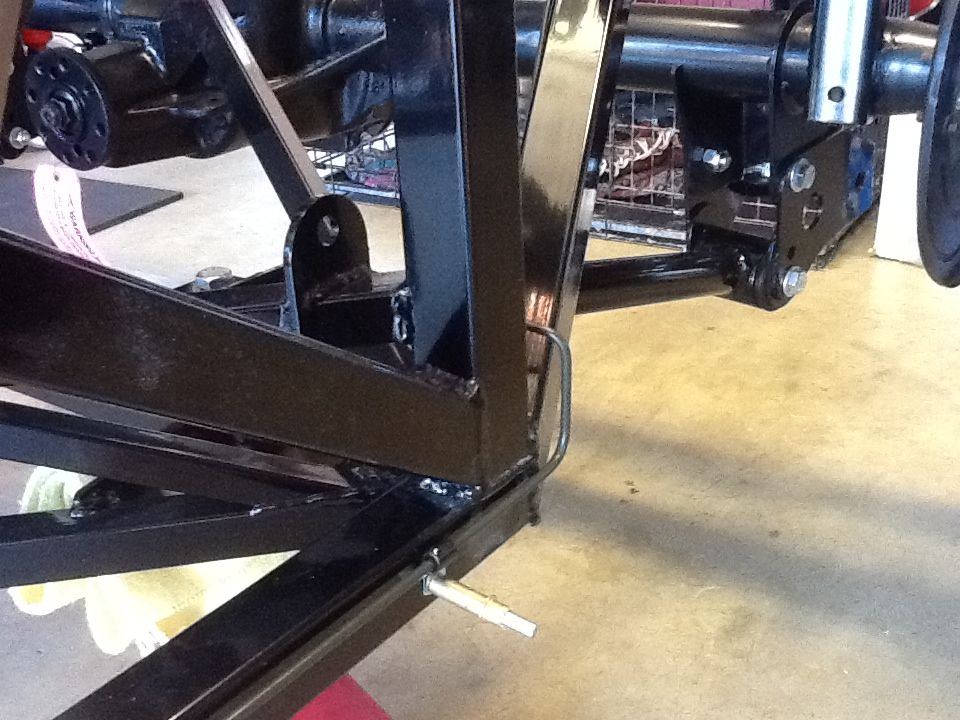
I haven't quite finished plumbing the rear brakes because I am not sure if the body will rub on the brake line where I ran it. I am holding it on with clecos until I have an opportunity to test fit the body. In the meantime, I was wondering if anyone has a photo of this area on their '33 so I can see if I need to re-plumb it. I know the manual says to keep the line inside that angled square tubing because the wheel well area is close. I'm not sure why i didn't turn it inward before the vertical tube but apparently I had a synapse collapse perhaps. Any help would be great.
Last edited by esff32; 02-04-2013 at 10:57 PM.
-
Senior Member
Originally Posted by
hdnik
I will be working on mine tomorrow nite and will take some pics. You can see if there are any differences between your set up and mine. Not sure if that'll help at all.
Evan. Rather than me posting here, go to the last post on my build page to view the rear end and brake brackets from my 8.8 here... http://thefactoryfiveforum.com/showt...(Canadian-33-)
Nick Sebastian - 33 Hot Rod #495
Factory Five Forums - hdnik
FFCars - lowntubd
Build Site/Blog -
www.nicks33hotrod.com
-
Senior Member
-
Senior Member
Originally Posted by
Olli
As I mentioned in the other thread, WIX 51311 (Napa 1311). The 51311 has a published height of 3.372" and the Purolator L17019 has a published height of 3.25". FFR actually mentions the L17019 in the manual. All of those filters are easy to buy. I use the WIX 51311 and keep a few on the shelf. You can see how it fits in the 4th picture that I posted earlier in the thread.
Olli
image.jpg
WIX - Oil Filter
Part # 51311
Product Details Compatibility
WIX - Oil Filter
Part Number: 51311
Line: WIX
1 Year Limited Warranty
UPC: 765809513112
Detailed Description
Style: Spin-On Lube Filter
Service: Lube
Type: Full Flow
Media: Paper
Height: 3.372 in.
Outside Diameter (Top): 3.661 in.
Micron Rating: 19
Thread Size: 3/4-16
By-Pass Valve Setting (PSI): 16
Anti-Drain Back Valve: Yes
Beta Ratio: 2/20=8/21
Burst Pressure (PSI): 331
Max Flow Rate: 7-9 GPM
Gasket Diameters
Outside Diameter: 2.834 in.
Inside Diameter: 2.462 in.
Thickness: 0.200 in.
Nick Sebastian - 33 Hot Rod #495
Factory Five Forums - hdnik
FFCars - lowntubd
Build Site/Blog -
www.nicks33hotrod.com
-
Senior Member
Thanks for the details. I will have to pick one up and give it a try.
-
Senior Member
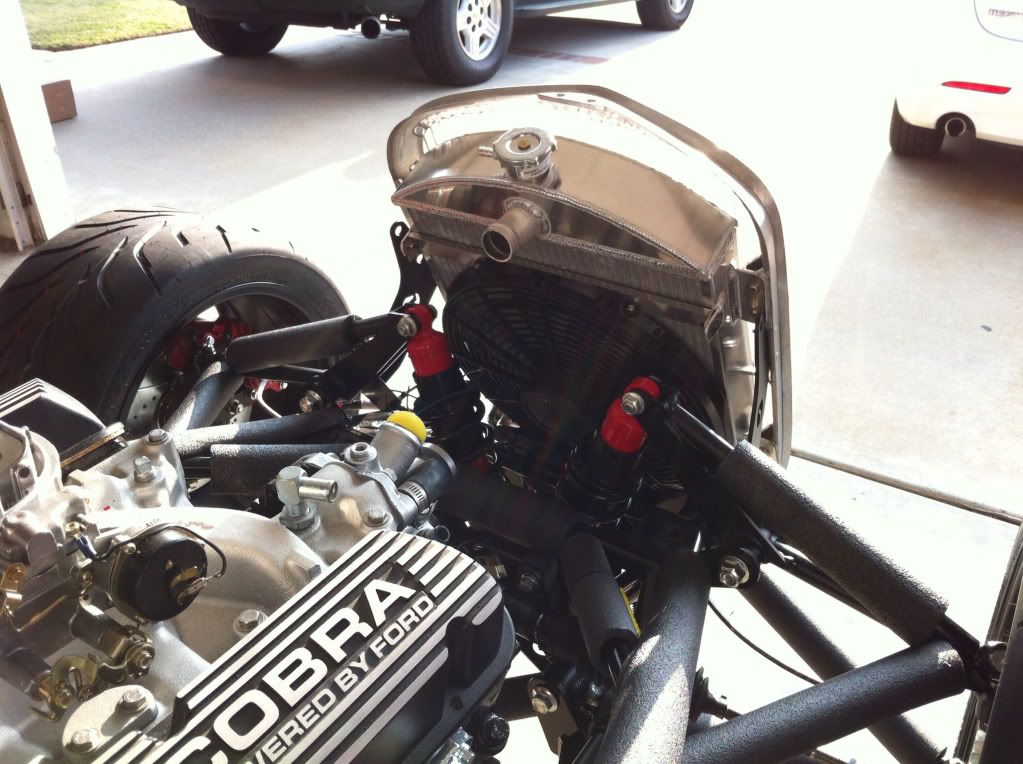
I mounted the radiator and grill this afternoon however I cannot figure out how the overflow tank mounts up to it. The manual has an exploded view of it however it does not give detail and it is a poor quality photocopy (blurry). It looks like it lines up with the tabs that mount the fan to the radiator but it the lock nuts hit the fan. I would appreciate it if someone could send me a few detailed pics of how it mounts.
Last edited by esff32; 02-07-2013 at 12:08 AM.
-
Senior Member
Looking great Evan. Wish I could help you on this question... Rest assured I'll be goin' to school on the reply you get.
Nick Sebastian - 33 Hot Rod #495
Factory Five Forums - hdnik
FFCars - lowntubd
Build Site/Blog -
www.nicks33hotrod.com
-
Tech Support Manager, FFR

HI Evan if you put it on the side of the radiator it really looks out of place , i had put it on the fire wall looked realy good!!
Tony@ffr
-
Senior Member
Your Honor, I'd like that last remark stricken from the record! haha just kidding Tony. I think a clean firewall looks better and when the expansion on the side of the radiator, it looks the part of the cooling system and it's all in one place. Just my opinion. Give me a call Evan and I'll let you know how it fits.
-
Senior Member
I will give you a call later today Erik. Also did you happen see the earlier photo of the 60" brake line going toward the rear end? In your opinion, is it going to hit the body? I haven't had help available to test fit the body to check. I don't want to permanently attach it until I verify it won't hit.
 Posting Permissions
- You may not post new threads
- You may not post replies
- You may not post attachments
- You may not edit your posts
-
Forum Rules

Visit our community sponsor


 Reply With Quote