Boig Motorsports

Visit our community sponsor

Thanks Thanks:  0
Likes Likes:  0
Page 4 of 24 FirstFirst ... 2345614 ... LastLast
Results 121 to 160 of 925

Thread: Brando's Newbie 818R Build Thread

  1. #121
    Senior Member C.Plavan's Avatar
    Join Date
    Mar 2011
    Location
    Clovis, Ca
    Posts
    2,225
    Post Thanks / Like
    Quote Originally Posted by Brando View Post
    I have been speaking to several well respected Subaru racers in the area and the input from them on the 5 x 100 wheel bearings seems the same. According to what they say, if the track has lines that run the car over the candy cane frequently then they are replacing their wheel bearings after 4-5 weekends of racing. Half the tracks in CA would fall within that category. In addition I plan on running hoosiers or slicks with spacers to offset so that will increase the strain on the bearings. Bottom line is I want to go with 5 x 114 wheel bearings.

    STI knuckles with pre-built 5 x 114 cost around $600 for all 4 corners which isn't much more than installing new 5 x 100's in my current hubs. Earlier in my build I had to replace my rear knuckles due to the fact the space between the holes for mounting to wilwood bracket was 3.75" where the correct WRX knuckles were 4.5" apart. I contacted wilwood and they claimed they didn't make a bracket for the STI hubs. So i source new rear hubs.

    What I am trying accomplish is have a rhobust 5 x 114 wheel bearings working with my 12" Wilwood brakes. There has to be a solution out there, does anyone have any idea how I can accomplish this?
    I understand the concern with the 5x100 wheel bearings on a heavy stock car, however I think the weight of the 818R will be the benefit for the bearing lasting much, much longer.
    Thanks- Chad
    818R-SOLD!!!- Go Karted 7/20/14/ Officially raced NASA ST2- 2/28/15
    2016 Elan NP01 Prototype Racecar Chassis #20
    1969 Porsche 911ST Vintage Race Car
    1972 Porsche 911T (#'s matching undergoing nut & bolt resto in my garage)

  2. #122
    Administrator David Hodgkins's Avatar
    Join Date
    Feb 2011
    Location
    Corona del Mar, CA
    Posts
    6,072
    Post Thanks / Like
    Blog Entries
    7
    Brandon, Call Jim Schenck @ FFR. I believe the Factory R is running Wilwoods...


    FFR 5369 Pin Drive, IRS, Trigos, Torsen, Wilwoods, FMS BOSS 302 "B" cam , Mass-flo. CA SB100 (SPCN) Registered
    Delivered 4/23/06. "Finished" 4/2012 (still not done!)


  3. #123
    Administrator
    Wayne Presley's Avatar
    Join Date
    Feb 2011
    Location
    Enterprise Alabama
    Posts
    2,804
    Post Thanks / Like
    Blog Entries
    3
    Brandon, the wheel bearings are going to survive much, much longer since they are only carrying half the weight...
    Wayne Presley www.verycoolparts.com
    Xterminator 705 RWHP supercharged 4.6 DOHC with twin turbos

  4. #124
    Senior Member Brando's Avatar
    Join Date
    Oct 2013
    Location
    Irvine, Ca
    Posts
    566
    Post Thanks / Like
    Blog Entries
    1
    Good stuff. I put the advice on this forum over all others. I will just do new stock bearings and call it a day. Thanks for the guidance

  5. #125
    Senior Member Brando's Avatar
    Join Date
    Oct 2013
    Location
    Irvine, Ca
    Posts
    566
    Post Thanks / Like
    Blog Entries
    1
    Quote Originally Posted by Racebrewer View Post
    Hi Brando,

    How did the build quality of the arms seem?

    Thanks,
    John
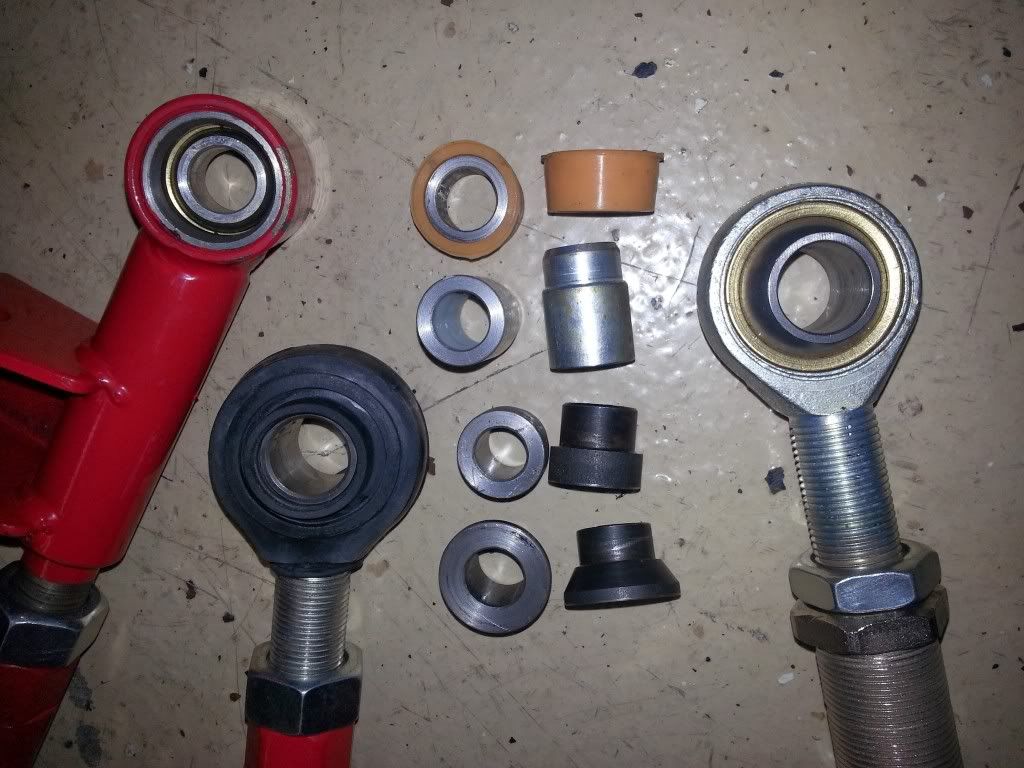
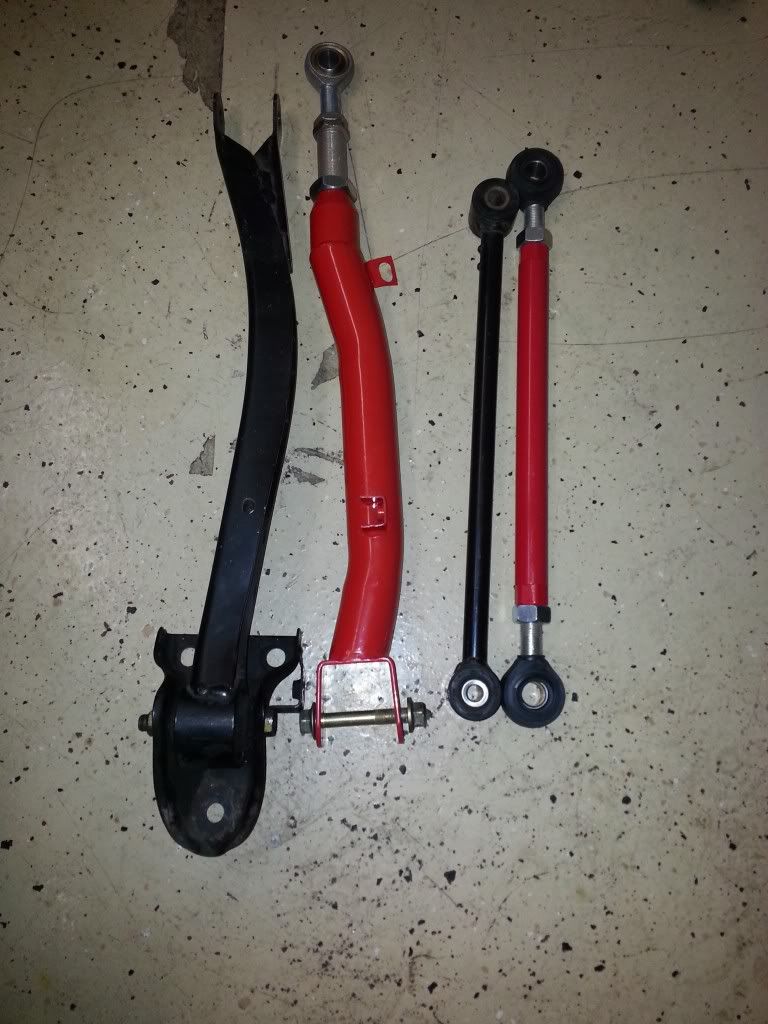
    I extended the arms to their fullest and they get around 1 1/4" inch more reach. They are slightly heavier than the stock arms. In the closeup you can see the silver where I had to machine off about 1/8" inch from the black spacers. In my opinion the quality seems fine. Hope this helps


  6. #126
    Senior Member RM1SepEx's Avatar
    Join Date
    Jul 2011
    Location
    Freeport, ME
    Posts
    3,801
    Post Thanks / Like
    I have the same transverse arms but did not buy the trailing arms. I also had to machine the bushings for th transverse arms, I cut equal amts from each side. IIRC they were approx. .100 too wide
    Dan

    818S #17 Picked up 8/1/13 First start 11/1/13 Go Kart 3/28/14

  7. #127
    fasterer and furiouser longislandwrx's Avatar
    Join Date
    Aug 2012
    Location
    Long Island
    Posts
    2,540
    Post Thanks / Like
    Blog Entries
    6
    LIC Motorsports machines sti front knuckles to fit WRX applications. you can get them with 5x100 hubs.

    I would see how fast your first set of bearings wears out before you drop the cash to swap them out.

    http://www.licmotorsports.com/produc...i_lic-03079012
    A well stocked beverage fridge is the key to any successful project.

  8. #128
    Senior Member FFRSpec72's Avatar
    Join Date
    Feb 2011
    Location
    Kirkland, WA
    Posts
    2,255
    Post Thanks / Like
    Quote Originally Posted by C.Plavan View Post
    I understand the concern with the 5x100 wheel bearings on a heavy stock car, however I think the weight of the 818R will be the benefit for the bearing lasting much, much longer.
    Agree, I just replaced all 4 spindles bearings, seals, etc. The rears were no fun to replace with the backing plate in the way. I expect that I will have no issues with the bearing for several years.
    Tony Nadalin
    2018 SOVREN Big Bore Champion
    2015 SCCA Oregon Region VP3 Champion
    2012 ICSCC ITE Class Champion
    FFR MkII Challenge Car, Spec Racer, Street Legal, SCCA, ICSCC and NASA Racing
    818R Build in progress

  9. #129
    Senior Member
    Join Date
    May 2012
    Location
    Suisun City, CA
    Posts
    851
    Post Thanks / Like
    Quote Originally Posted by Brando View Post

    Would you happen to know the distance of the stock trailing arm, from the center of each bolt hole?
    818S - #67 (SOLD IT!)
    Delivered: 18 November 2013
    Go Karted: 29 December 2013
    Titled/Registered: 28 March 2014
    Finished: NEVER!
    341 hp @ 4844 RPM / 389 tq @ 3717 RPM

  10. #130
    818 builder metalmaker12's Avatar
    Join Date
    Mar 2012
    Location
    Exeter R.I
    Posts
    2,834
    Post Thanks / Like
    Blog Entries
    1
    In this setup the wrx bearings will last a lifetime.

  11. #131
    Senior Member Brando's Avatar
    Join Date
    Oct 2013
    Location
    Irvine, Ca
    Posts
    566
    Post Thanks / Like
    Blog Entries
    1
    Quote Originally Posted by JeromeS13 View Post
    Would you happen to know the distance of the stock trailing arm, from the center of each bolt hole?
    trailing arms measure 20 3/8" and lateral links 16 1/8"

  12. #132
    Senior Member
    Join Date
    May 2012
    Location
    Suisun City, CA
    Posts
    851
    Post Thanks / Like
    Quote Originally Posted by Brando View Post
    trailing arms measure 20 3/8" and lateral links 16 1/8"
    Thanks!
    818S - #67 (SOLD IT!)
    Delivered: 18 November 2013
    Go Karted: 29 December 2013
    Titled/Registered: 28 March 2014
    Finished: NEVER!
    341 hp @ 4844 RPM / 389 tq @ 3717 RPM

  13. #133
    Senior Member FFRSpec72's Avatar
    Join Date
    Feb 2011
    Location
    Kirkland, WA
    Posts
    2,255
    Post Thanks / Like
    Quote Originally Posted by David Hodgkins View Post
    Brandon, Call Jim Schenck @ FFR. I believe the Factory R is running Wilwoods...

    I talked to John George and the one he was running at Watkins Glen had the 6 piston Willwoods.
    Tony Nadalin
    2018 SOVREN Big Bore Champion
    2015 SCCA Oregon Region VP3 Champion
    2012 ICSCC ITE Class Champion
    FFR MkII Challenge Car, Spec Racer, Street Legal, SCCA, ICSCC and NASA Racing
    818R Build in progress

  14. #134
    Senior Member C.Plavan's Avatar
    Join Date
    Mar 2011
    Location
    Clovis, Ca
    Posts
    2,225
    Post Thanks / Like
    6 piston brakes will be overkill- You can save the cash for something else. I have 2 piston fronts on a heavier race car that is 40+ years old..... Never had a braking issue with correct fluid and pads.
    Thanks- Chad
    818R-SOLD!!!- Go Karted 7/20/14/ Officially raced NASA ST2- 2/28/15
    2016 Elan NP01 Prototype Racecar Chassis #20
    1969 Porsche 911ST Vintage Race Car
    1972 Porsche 911T (#'s matching undergoing nut & bolt resto in my garage)

  15. #135
    Senior Member Brando's Avatar
    Join Date
    Oct 2013
    Location
    Irvine, Ca
    Posts
    566
    Post Thanks / Like
    Blog Entries
    1
    Either way the rear knuckle calipers need to be 4.5" between the holes. I wasn't able to find a solution to make the rear Wilwood caliper bracket work with a knuckle that will take a 5 x 114 (3.75" between holes) so I just opted to press new bearings in the rear. The 4 or 6 piston will still run into an issue if you get the rear STI knuckles to support 5 x 114.

    The solution I ended up going with is purchase new front knuckles with larger pre-pressed 5 x 100. I didn't want to locate & purchase 4 new axles to fit the 114's so this works well for me. Until a few days ago I wasn't aware they changed the front wheel bearing size after a certain year. It is my understanding these are more robust than the 2002 bearings I had from my donor but still 5 x 100. I will get more details unless someone else can elaborate further on this.

    Speaking of that POS...I think i need to take a moment to vent.
    For those of you building an R...I feel using a donor isn't the best way to go. I see many of the R builds are not going that route and you guys made a smart decision IMO. I think if you dig hard enough to find an ideal fit for the donor then perhaps it might be worth it if you wish to keep things stock. Not realistic especially for track use.

    What I have used at this point from my donor:
    • A peddle box that needed some bending to get to fit due to donor accident
    • Steering Rack (had to replace 1 tie rod end)
    • Axle pieces
    • A few nuts and bolts


    THATS IT!!

    Replacement List:
    • I tried to bleed my clutch last night but it shot a drop or 2 per compression. Trashed.
    • The master cylinder looked pretty tattered. The damage from the crash jacked up the bracket. Turns out you can't just order that bracket without the booster (that i could find). So i just ordered replacement brake & clutch cylinders
    • Tire & wheels are obvious replacements as are the seat(s)
    • Donor didn't come with a motor so I found one with $3k which supposedly had 45k mi. That's was for the motor, trans and they threw in a radiator for free.
    • My rear knuckles didn't work for the Wilwood setup and front i replaced for something with a slightly better bearings.
    • I'm assuming the Boyd tank that's coming my way wont need the donors fuel tank pieces
    • Some of my rear traverse/trailing arms were either bent or stripped/stuck together. Not to mention no ability to adjust them.
    • Crash damaged to the left front LCA, so went with 06 aluminum LCA's
    • Steering column i suppose I can use, but there was no key! I decided to purchase a second column. One will be stripped and painted and one will be street. Not sure how i will deal with the key situation being 1 column wont use it anyways
    • Wire harnes...I guess that's up to your patients level. I can't see myself spending weeks learning and dieting wires. I would blow a head gasket. I did still need 7 ends of the donor harness to splice into the TEC-S VCP sells so i suppose that might count for something.


    All in all I also chose poorly on my donor. Most of you found a much more usable WRX to dismantle.
    The time and energy spent stripping the donor probably wasn't a financially sound move...but it did help pass the time waiting for my kit and hacking away at it was a stress reliever
    Last edited by Brando; 02-09-2014 at 01:27 PM.

  16. #136
    Senior Member Brando's Avatar
    Join Date
    Oct 2013
    Location
    Irvine, Ca
    Posts
    566
    Post Thanks / Like
    Blog Entries
    1
    Does anyone have a clear shot of how this piece goes in? I can't seem to find one.


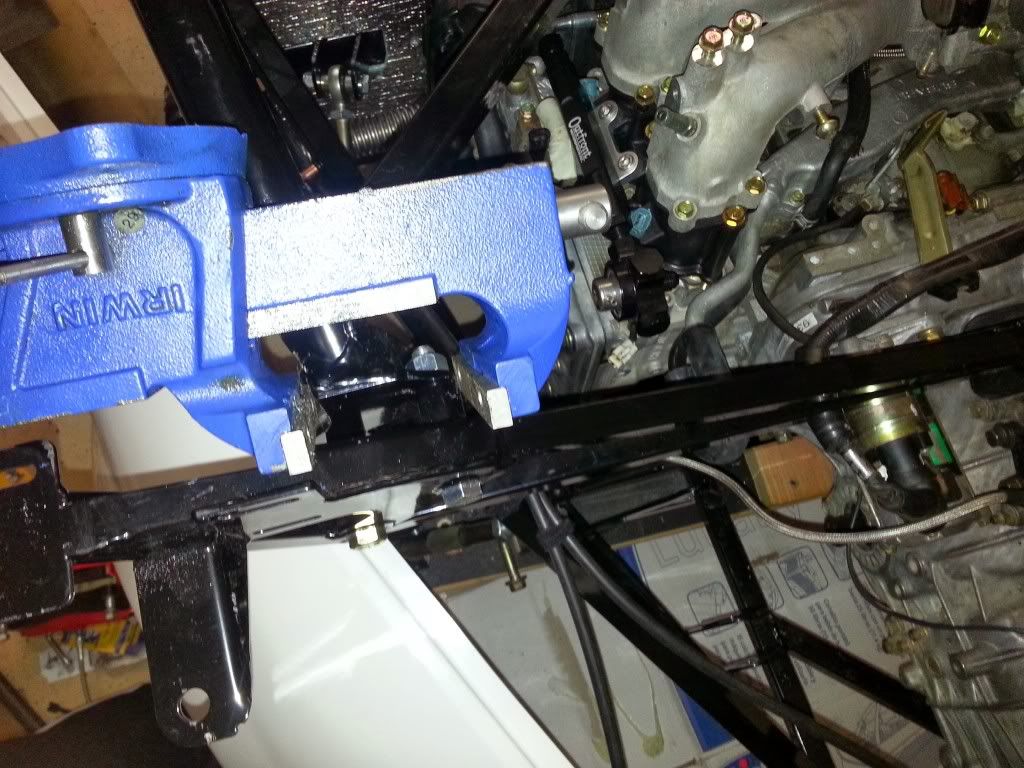
    The rear body mount brace didn't line up, it was about 1/8" off. The only way I could secure it was by using a vice


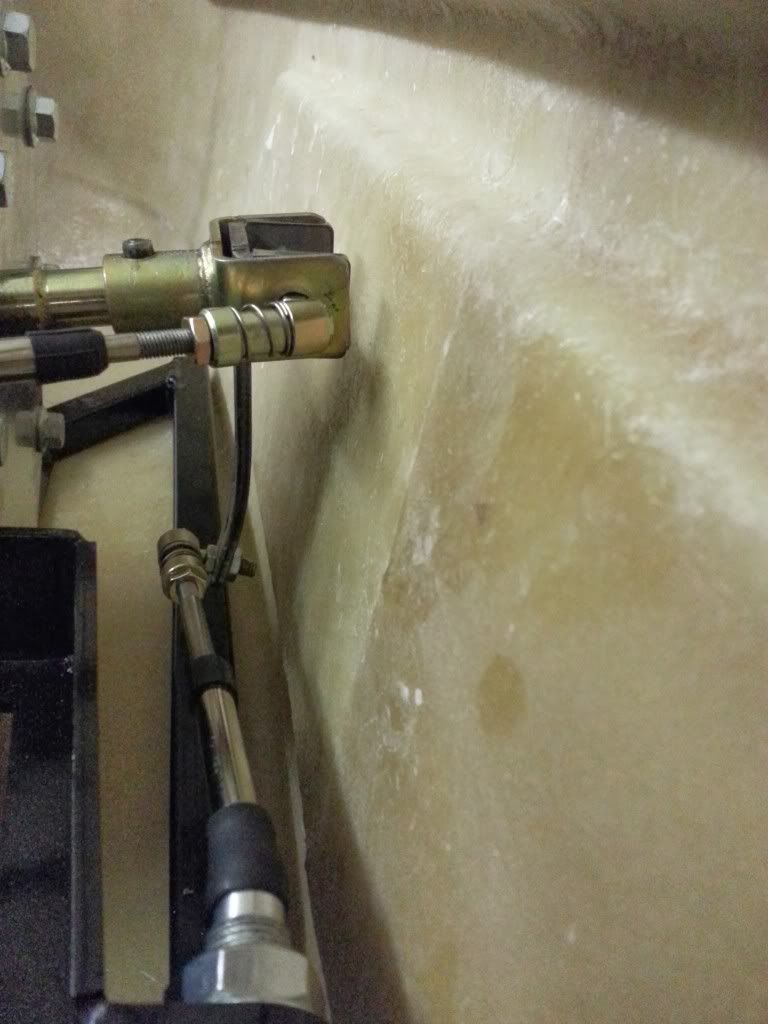
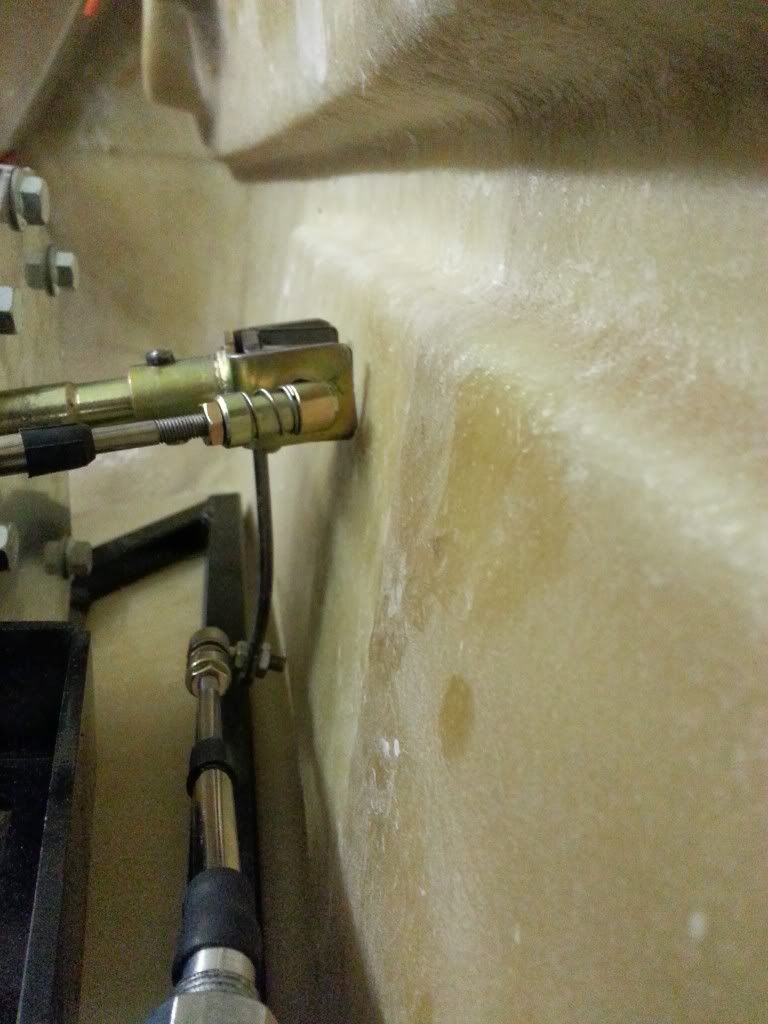
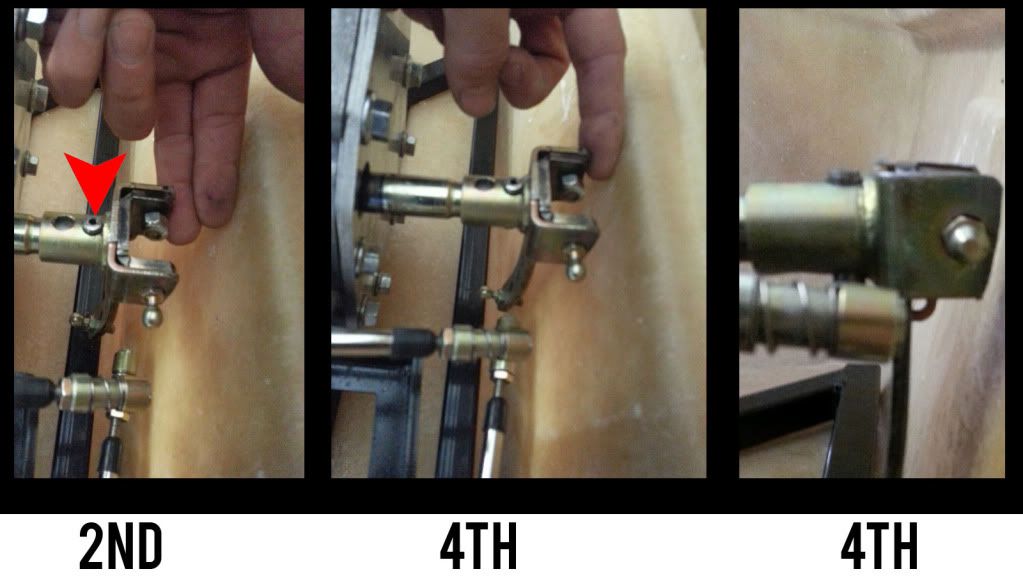
    I did a test fit and will be shaving off at least 1/4" of the linkage today so i can find 2nd, 4th and reverse.

    This is 3rd


    Here is neutral


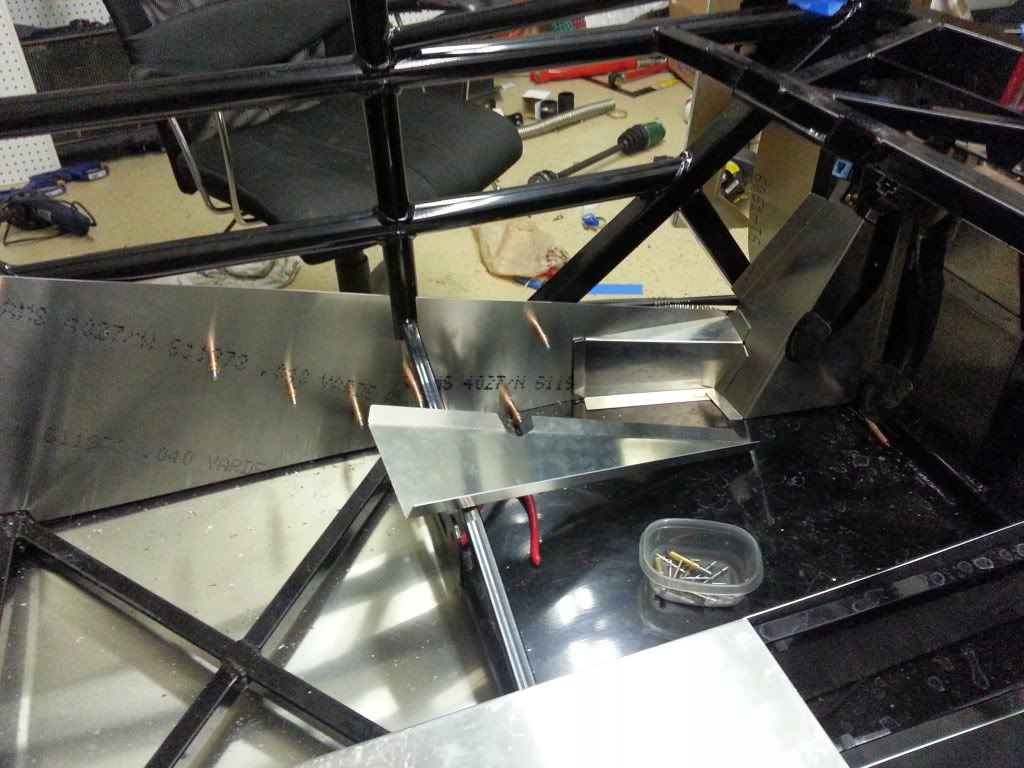
    What is the purpose of the aluminum in the scoop? Can this be omitted?


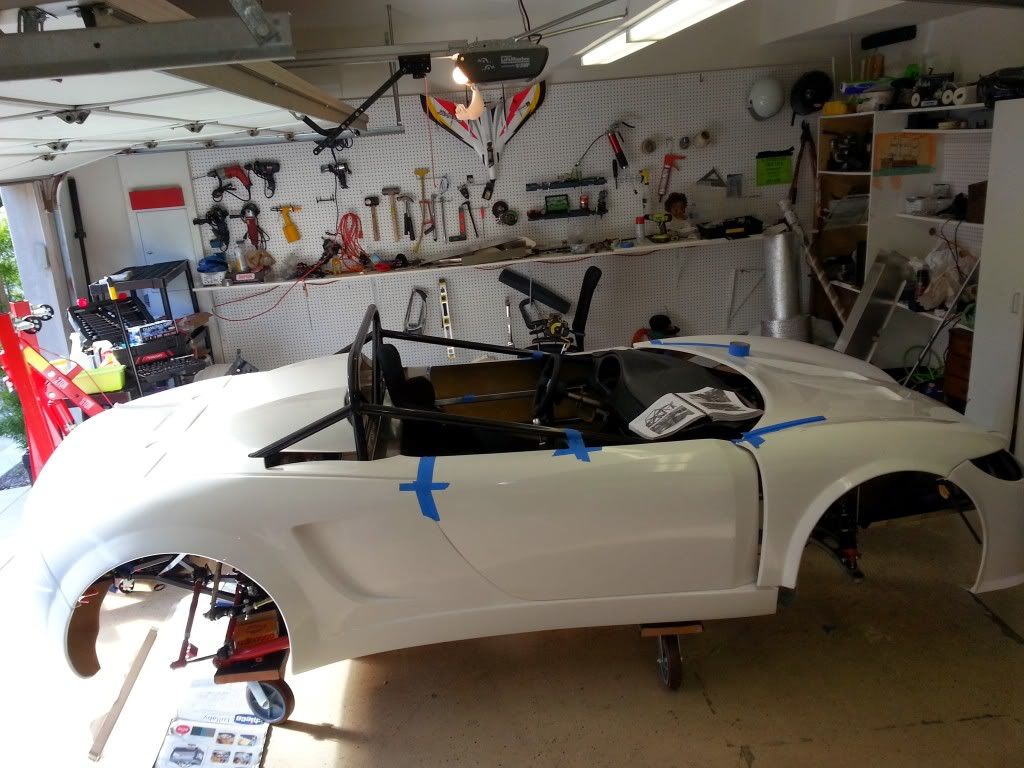
    Just for fun... a taste of months coming


    Just for fun. I treated myself and the family a preview of whats to come

  17. #137
    Senior Member RM1SepEx's Avatar
    Join Date
    Jul 2011
    Location
    Freeport, ME
    Posts
    3,801
    Post Thanks / Like
    that piece of aluminum is part of the IC ducting
    Dan

    818S #17 Picked up 8/1/13 First start 11/1/13 Go Kart 3/28/14

  18. #138
    818 builder metalmaker12's Avatar
    Join Date
    Mar 2012
    Location
    Exeter R.I
    Posts
    2,834
    Post Thanks / Like
    Blog Entries
    1
    I scraped it and vented it, I am in not using the FFR supplied ducting, my plans are different. I also plan on using the r winshield down the road.

  19. #139
    Senior Member RM1SepEx's Avatar
    Join Date
    Jul 2011
    Location
    Freeport, ME
    Posts
    3,801
    Post Thanks / Like
    I'm not a fan of that ducting system either, please keep posting alternatives
    Dan

    818S #17 Picked up 8/1/13 First start 11/1/13 Go Kart 3/28/14

  20. #140
    fasterer and furiouser longislandwrx's Avatar
    Join Date
    Aug 2012
    Location
    Long Island
    Posts
    2,540
    Post Thanks / Like
    Blog Entries
    6
    Quote Originally Posted by RM1SepEx View Post
    that piece of aluminum is part of the IC ducting
    I'm pretty sure that's not the IC aluminum, from what I can tell its a piece of front cockpit trim that doesn't fit the R... there should be another for the other side. You will need to make your own to fill the holes. Unless FFR sent me two sets, I have my IC aluminum wrapped up still. So I could be wrong.
    Last edited by longislandwrx; 02-10-2014 at 08:00 AM.
    A well stocked beverage fridge is the key to any successful project.

  21. #141
    Senior Member Brando's Avatar
    Join Date
    Oct 2013
    Location
    Irvine, Ca
    Posts
    566
    Post Thanks / Like
    Blog Entries
    1

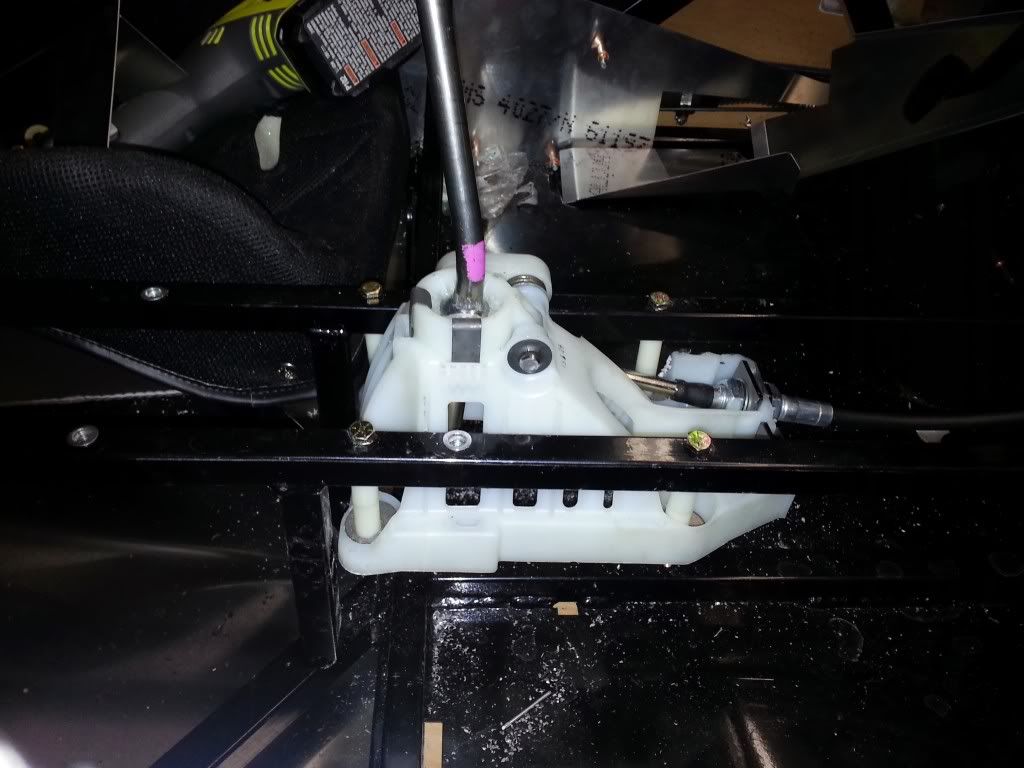
    Shift Linkage

    After grinding the shift bracket as far as I was willing it was still binding against the rear fiberglass panel.
    I ended drilling out the center of the shift bracket so I could slide it a bit deeper then redrilled the pin hole. It worked great, I have plenty of room now.


  22. #142
    818 builder metalmaker12's Avatar
    Join Date
    Mar 2012
    Location
    Exeter R.I
    Posts
    2,834
    Post Thanks / Like
    Blog Entries
    1
    That's what I did, great minds think alike .

  23. #143
    Senior Member RM1SepEx's Avatar
    Join Date
    Jul 2011
    Location
    Freeport, ME
    Posts
    3,801
    Post Thanks / Like
    FFR did send you two sets of IC ducting... the second came in that "upgrade box" that they sent to all of us! I wrote old on one set and revised on the other...
    Dan

    818S #17 Picked up 8/1/13 First start 11/1/13 Go Kart 3/28/14

  24. #144
    Senior Member Brando's Avatar
    Join Date
    Oct 2013
    Location
    Irvine, Ca
    Posts
    566
    Post Thanks / Like
    Blog Entries
    1
    Upgrade box? Haven't received but good to know. No B.O. shipments received either but i'm being patient as it hasn't even been a month yet since delivery.

  25. #145
    Senior Member Bob_n_Cincy's Avatar
    Join Date
    Sep 2012
    Location
    Cincinnati OH
    Posts
    3,904
    Post Thanks / Like
    Quote Originally Posted by Brando View Post
    Upgrade box? Haven't received but good to know. No B.O. shipments received either but i'm being patient as it hasn't even been a month yet since delivery.
    brando,
    the update box showed up in late September.
    That was to fix early design changes or missing parts.
    I don't think you will be getting an update box
    bob
    Last edited by Bob_n_Cincy; 02-11-2014 at 12:21 AM.

  26. #146
    818 builder metalmaker12's Avatar
    Join Date
    Mar 2012
    Location
    Exeter R.I
    Posts
    2,834
    Post Thanks / Like
    Blog Entries
    1
    Quote Originally Posted by RM1SepEx View Post
    FFR did send you two sets of IC ducting... the second came in that "upgrade box" that they sent to all of us! I wrote old on one set and revised on the other...
    Yea I scraped them all, aluminum is worth some money ya know lol. I honestly can't see how there ducting works that great. I am going to use the quarter vent holes I cut out to go to a vent in front of the rear well that deflects the air towards the cooler. Maybe it works, maybe I will try something else, but I will be checking for cooler temp and airflow readings before, after, different idea etc.

  27. #147
    Senior Member RM1SepEx's Avatar
    Join Date
    Jul 2011
    Location
    Freeport, ME
    Posts
    3,801
    Post Thanks / Like
    Quote Originally Posted by Brando View Post
    Upgrade box? Haven't received but good to know. No B.O. shipments received either but i'm being patient as it hasn't even been a month yet since delivery.
    mine is #17, PU 8/1/13, we got a box that included a bunch of stuff in September... no packing list :-( it did have a sheet of instructions for some of the stuff...

    for your B/O just keep calling, they don't really have a B/O process
    Dan

    818S #17 Picked up 8/1/13 First start 11/1/13 Go Kart 3/28/14

  28. #148
    Senior Member Brando's Avatar
    Join Date
    Oct 2013
    Location
    Irvine, Ca
    Posts
    566
    Post Thanks / Like
    Blog Entries
    1
    I will start bugging FFR for B.O. items once I run out of things to do.

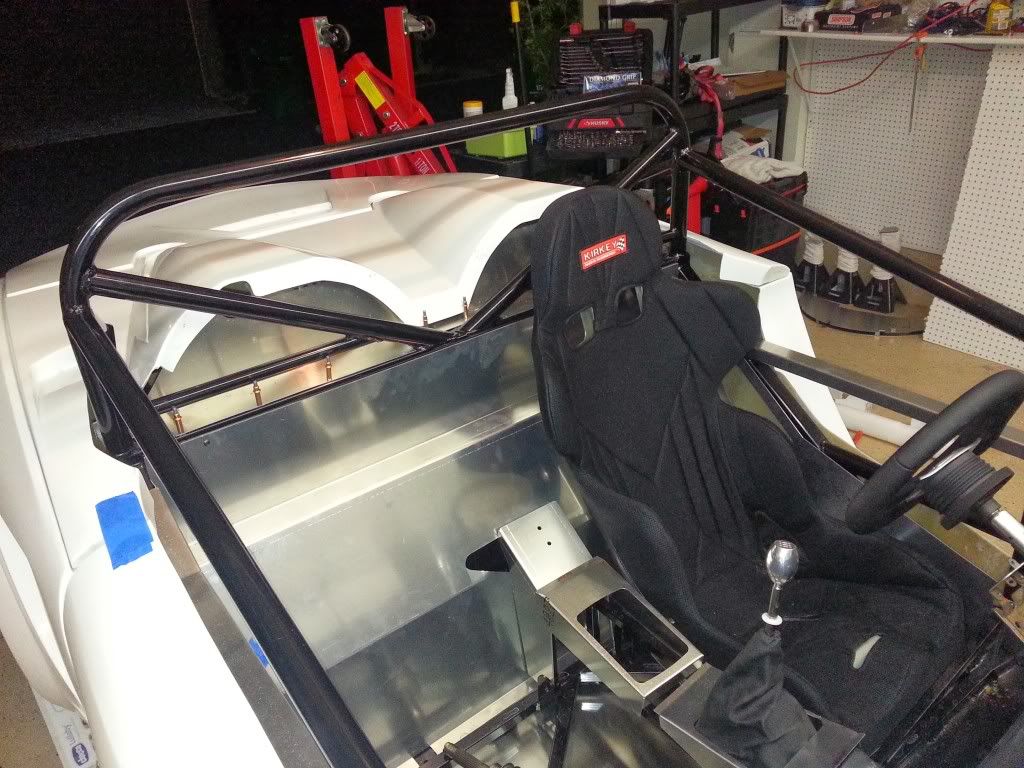
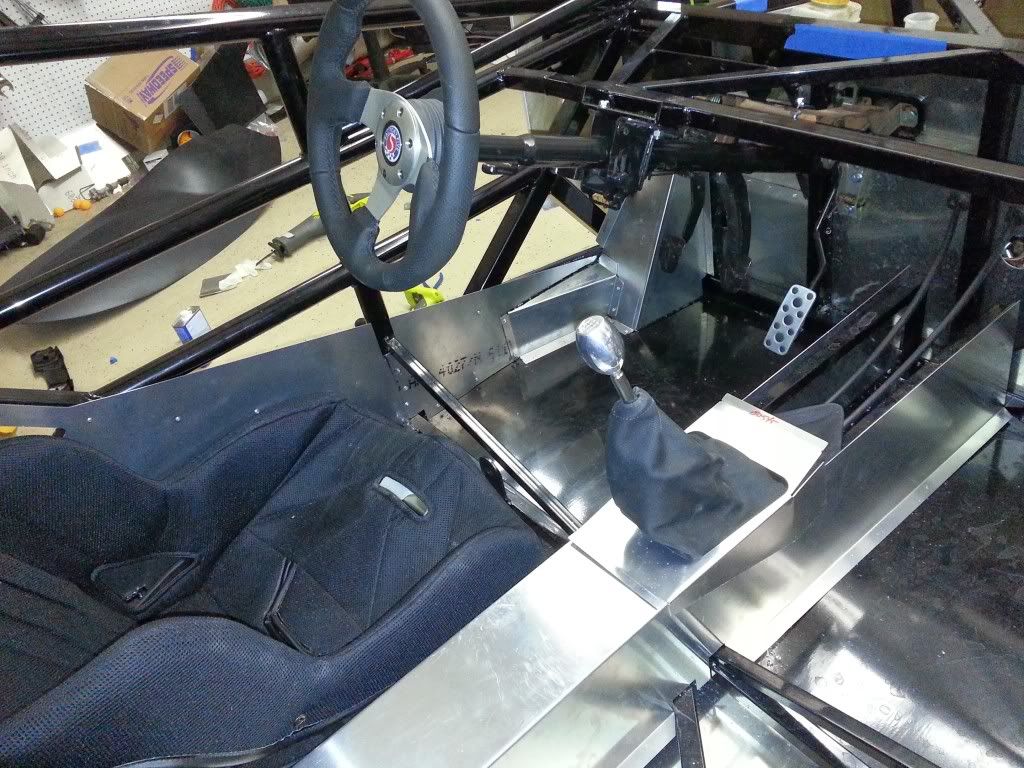
    My shift linkage is finally done and I'm really happy with the location. I installed the shifter in the stock location but it didn't feel right. I liked what longislandwrx did and positioned the shifter under the rails. It feels much better lower and more forward.


    I also installed the IC aluminum, gas pedal and removed unneeded aluminum from the steering column and painted it.
    Last edited by Brando; 02-11-2014 at 02:09 AM. Reason: Because I don't want people to know i misspelled the word pedal - hah

  29. #149
    fasterer and furiouser longislandwrx's Avatar
    Join Date
    Aug 2012
    Location
    Long Island
    Posts
    2,540
    Post Thanks / Like
    Blog Entries
    6
    Looks good man. Makes me want to put my tunnel in when I get home.

    I take it your are not going to drive this on the street, or are you just going to run a switch for turn signals?

    Quote Originally Posted by Bob_n_Cincy View Post
    brando,
    the update box showed up in late September.
    I picked up my kit after this. I will check them when I get home tonight.
    Last edited by longislandwrx; 02-11-2014 at 06:55 AM.
    A well stocked beverage fridge is the key to any successful project.

  30. #150
    Senior Member Brando's Avatar
    Join Date
    Oct 2013
    Location
    Irvine, Ca
    Posts
    566
    Post Thanks / Like
    Blog Entries
    1
    Thanks for showing me the way.

    I have 2 steering columns. One stripped the other stock. I do intend to get this registered and drive on the street occasionally. It too sweet a car not to

  31. #151
    fasterer and furiouser longislandwrx's Avatar
    Join Date
    Aug 2012
    Location
    Long Island
    Posts
    2,540
    Post Thanks / Like
    Blog Entries
    6
    Quote Originally Posted by Brando View Post
    Does anyone have a clear shot of how this piece goes in? I can't seem to find one.
    Quote Originally Posted by RM1SepEx View Post
    FFR did send you two sets of IC ducting... the second came in that "upgrade box" that they sent to all of us! I wrote old on one set and revised on the other...
    i'm pretty sure here's that piece, as seen on Eriks car.


    20140208_135018%20(Small).jpg
    A well stocked beverage fridge is the key to any successful project.

  32. #152
    Member
    Join Date
    Jul 2013
    Location
    Red Bluff, Ca
    Posts
    47
    Post Thanks / Like
    That looks like one of the pieces that close off the front fenderwell area of the car. There should be a left and a right one and they fasten to the frame just inside the front suspension.

  33. #153
    Senior Member Brando's Avatar
    Join Date
    Oct 2013
    Location
    Irvine, Ca
    Posts
    566
    Post Thanks / Like
    Blog Entries
    1
    L.I.wrx have you found a spot for panel pair 80129 on your R?
    Drdracing i think you might be referring to 80174, i was looking for 80129. I have received a few pairs of panels that belong exclusively for the S. I think panel 35 & 36 are a few of those

    Tonight I tried my luck in applying vinyl 4d wrap on my interior dash. FAIL. That turned out harder than it looks i will leave it to the pros. In hindsight i should have snapped a picture it was good for a laugh

    On a better note I received my clutch & brake master cylinders today. I know might seem trivial but after upgrading the clutch, mating the trans,installing motor, bleeding lines then finally pressing on the clutch pedal and having the pressure plate release felt like a milestone achieved. Easily pleased I suppose but I am going to bed satisfied

  34. #154
    Senior Member Brando's Avatar
    Join Date
    Oct 2013
    Location
    Irvine, Ca
    Posts
    566
    Post Thanks / Like
    Blog Entries
    1

    Took the Tire/Wheel plunge

    I'm ready for tires and wheels. I took the plunge today and went with the following

    Wheels: (from VCP)
    Enkei Kojin
    17x8 + 45 Front
    18x8.5 + 45 Rear

    Tires: (tirerack)
    Hoosiers R6
    225/40-17 Front heat cycled
    255/35-18 Rear heat cycled
    Last edited by Brando; 02-15-2014 at 11:22 PM.

  35. #155
    Senior Member AZPete's Avatar
    Join Date
    Feb 2011
    Location
    Scottsdale, AZ
    Posts
    2,374
    Post Thanks / Like
    Brando, I understand the thrill of the small victories like your clutch pedal. It's all the little victories that make the build so much fun. Last night I identified and tagged a bunch of the wiring harness ends, thanks to Mechie3's work, and left the garage feeling successful. It's all about hundreds of little victories.
    818S/C : Chassis #25 with 06 WRX 2.5 turbo, ABS, cruise, PS, A/C, Apple CarPlay, rear camera, power windows & locks, leather & other complexities. Sold 10/19 with 5,800 miles.
    Mk3 Roadster #6228 4.6L, T45, IRS, PS, PB, ABS, Cruise, Koni's, 17" Halibrands, red w/ silver - 9K miles then sold @ Barrett-Jackson Jan 2011 (got back cash spent).

  36. #156
    nkw8181's Avatar
    Join Date
    Sep 2013
    Location
    Dallas, TX
    Posts
    762
    Post Thanks / Like
    AZPete I'm right there with ya on the wiring. Following Mechie3's guide
    Quote Originally Posted by AZPete View Post
    Brando, I understand the thrill of the small victories like your clutch pedal. It's all the little victories that make the build so much fun. Last night I identified and tagged a bunch of the wiring harness ends, thanks to Mechie3's work, and left the garage feeling successful. It's all about hundreds of little victories.
    Nolan
    65 coupe Gen 3 "Phoenix" build
    http://thefactoryfiveforum.com/showt...032#post297032

    818 s (with r windscreen ) 350 rwhp. Registered and street legal (SOLD)

  37. #157
    fasterer and furiouser longislandwrx's Avatar
    Join Date
    Aug 2012
    Location
    Long Island
    Posts
    2,540
    Post Thanks / Like
    Blog Entries
    6
    Quote Originally Posted by Brando View Post
    L.I.wrx have you found a spot for panel pair 80129 on your R?

    Brando... no it wont fit, just saving it for spare aluminum. the bar it attaches to is absent on the R. This is where it goes:


    photo%203-1.JPG
    Last edited by longislandwrx; 02-17-2014 at 10:42 AM.
    A well stocked beverage fridge is the key to any successful project.

  38. #158
    Senior Member Brando's Avatar
    Join Date
    Oct 2013
    Location
    Irvine, Ca
    Posts
    566
    Post Thanks / Like
    Blog Entries
    1
    Finally the mystery is solved. Well played thanks.
    I wanted to ask you another question. Are you planning to cut your center dash to fit the shifters custom location or going with a aluminum custom piece like Aloha818 did?

  39. #159
    fasterer and furiouser longislandwrx's Avatar
    Join Date
    Aug 2012
    Location
    Long Island
    Posts
    2,540
    Post Thanks / Like
    Blog Entries
    6
    I think I'm going to end up with a combination of both. I'm going to start by having one of the "legs" of the tunnel sheared off, and then cut a hole on top for the shifter. Then I can rivet the top and left side as one but have the right hand rivnuted so it can be unscrewed for access. I have to see how the fiberglass piece fits without the shifter piece. I may need to make an adapter up front.
    A well stocked beverage fridge is the key to any successful project.

  40. #160
    Senior Member
    Join Date
    Oct 2012
    Posts
    556
    Post Thanks / Like
    Since I have my transfer case disassembled and therefore access to the shifter, I am thinking of re-drilling the hole in the rod and cutting off atleast 1/2 inch of shaft.

Page 4 of 24 FirstFirst ... 2345614 ... LastLast

Tags for this Thread

Posting Permissions

  • You may not post new threads
  • You may not post replies
  • You may not post attachments
  • You may not edit your posts
  •  

Replica Parts

Visit our community sponsor