BluePrint Engines

Visit our community sponsor

Thanks Thanks:  0
Likes Likes:  0
Results 1 to 28 of 28

Thread: Meatball's "Let's see if an idiot and 2 kids can build an S" thread

  1. #1
    Member
    Join Date
    Jun 2014
    Location
    Outside Memphis
    Posts
    51
    Post Thanks / Like

    Meatball's "Let's see if an idiot and 2 kids can build an S" thread

    Good day to everyone!

    I've been putting this off long enough and I have come up with lots of questions so I suppose it's time to start my own build thread. I don't know how much time I will have to post updates, but I figure I need to do this so you good folks know who I am when I do.

    A little background -- in June of last year I flew to Florida and picked up an '02 WRX that my buddy test drove/purchased for me, drove 800 miles back home, and started the tear down with my son and daughter then at 11 and 9 years old. My goal is for them to be able to turn a wrench when they get older, have build/troubleshooting skills, and know their way around a mechanical object larger than a lego set. I figure that if I can get 20 minutes at a time with them, it will be time well spent and they will have no problem taking ownership of it when we finish. "Look what my dad built with me!"

    Here it is. It was a trooper for that long trek from Florida in June with NO A/C.


    So far, our time together has been WAY more than 20 mins at a time. We had a blast dismantling it because it was fairly easy to just unscrew things and put them in piles.

    I received my kit about three weeks ago and we started the process. Needless to say putting it together brings up lots of questions. Many of those questions have been answered because of all you fine folks on this forum. Thank you all for your questions and answers. Because I have no experience save the occasional oil change/brake replacement, etc. this isn't as intuitive as one would imagine even following the manual. My engineering degree does help, but because I've never actually used my degree (thank God) the lack of practical experience leaves me scratching my head at times. Case in point, putting in the upper front ball joints requires you to orient the cotter pin holes PRIOR to tightening down the castle nut...just one of the lessons learned so far.

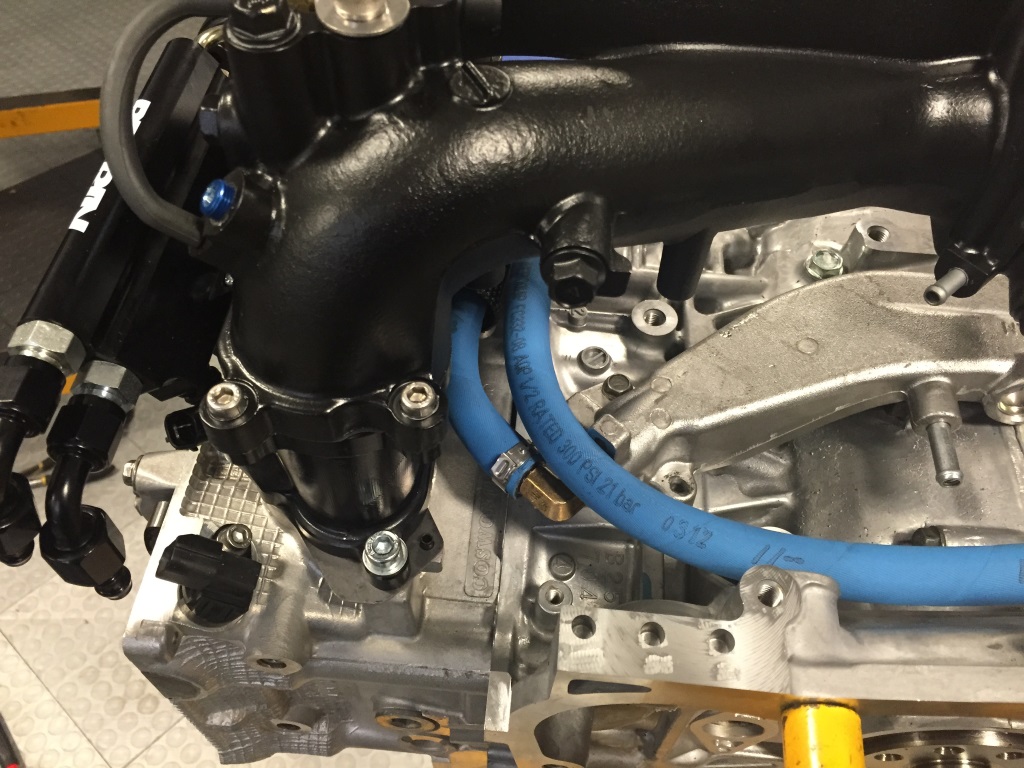
    As the engine install isn't far away, I need to get things ready. My first question starts with Wayne's coolant system mod...⅛" NPT Barb nipple to burp the coolant system. I went to Home Depot to find one of these, and because I'm unfamiliar them I'm not sure if I'm looking at the correct thing.

    What do you guys think? What exactly is 1/8 of an inch? Is it the threaded part OD, is it the barbed fitting ID? Would I be better off at a plumbing supply store? And now along those lines… because I've never tapped anything previously, what size tap and die set do I need?


    Hopefully, this post will be the first of many

    Thanks again all!

    Rob
    Last edited by Meatball; 05-10-2015 at 02:00 PM.

  2. #2
    Mechie3's Avatar
    Join Date
    May 2012
    Location
    Indianapolis
    Posts
    5,174
    Post Thanks / Like
    The 1/8" refers to the nominal pipe size. It corresponds to pretty much nothing on the thread itself. Here's a chart to correlate pipe size with actual NPT thread dimensions.

    http://www.engineersedge.com/hardwar...pe-threads.htm
    Zero Decibel Motorsports
    Check out my new website!
    www.zerodecibelmotorsports.com
    www.facebook.com/zero.decibel.motorsports

  3. #3
    Member
    Join Date
    Jun 2014
    Location
    Outside Memphis
    Posts
    51
    Post Thanks / Like
    Thanks for the quick reply.

    Mechie, do you think that photo I posted is what I am looking for? By the way, I purchased your relocation kit 2 weeks ago...Nicely done. Great kit all around.
    Last edited by Meatball; 05-07-2015 at 12:53 PM.

  4. #4
    Administrator David Hodgkins's Avatar
    Join Date
    Feb 2011
    Location
    Corona del Mar, CA
    Posts
    6,082
    Post Thanks / Like
    Blog Entries
    7
    Quote Originally Posted by Meatball View Post
    Thanks for the quick reply. Mechie, do you think that photo I posted is what I am looking for? By the way, I purchased your relocation kit 2 weeks ago...Nicely done. Great kit all around.
    Check your email... You're good to go, just watch out for adding links until you get to 10 posts or it will go into moderation.

    GREAT luck with the build!


    FFR 5369 Pin Drive, IRS, Trigos, Torsen, Wilwoods, FMS BOSS 302 "B" cam , Mass-flo. CA SB100 (SPCN) Registered
    Delivered 4/23/06. "Finished" 4/2012 (still not done!)


  5. #5
    Member
    Join Date
    Jun 2014
    Location
    Outside Memphis
    Posts
    51
    Post Thanks / Like
    Thanks David. The kids are excited for sure...my daughter wants to be done yesterday and my son wants to take every step in stride. It is fun to watch the dynamic...

    I'm not sure if I want to give the keys to this rocket to a 16 yr. old to drive when they come of age though

  6. #6
    Mechie3's Avatar
    Join Date
    May 2012
    Location
    Indianapolis
    Posts
    5,174
    Post Thanks / Like
    Thanks!

    That looks like a 1/8" barb with 1/4NPT/MIP. You'll need a smaller thread size if you're looking for 1/8" NPT.
    Zero Decibel Motorsports
    Check out my new website!
    www.zerodecibelmotorsports.com
    www.facebook.com/zero.decibel.motorsports

  7. #7
    Senior Member STiPWRD's Avatar
    Join Date
    Jan 2014
    Location
    Leesburg, VA
    Posts
    1,624
    Post Thanks / Like
    Rob, you may want to go to Fastenal (they sell fasteners and such) to pick up the 1/8" NPT fittings. A google search shows 3 locations around Memphis. Also, you'll want a 90 degree bend since a straight barb fitting (what you bought) will interfere with the turbo inlet pipe.

    https://www.fastenal.com/products/details/69942?term=barb&r=~|categoryl1:%22603388%20Hydraul ics%209and%20Pneumatics%22|~%20~|categoryl2:%22611 532%20Fittings%22|~%20~|categoryl3:%22612503%20Bar bed%20Fittings%22|~%20~|categoryl4:%22612505%20Bar b%20Elbows%22|~%20~|sattr02:^1/4%22$|~

  8. #8
    Senior Member
    Join Date
    Jan 2014
    Posts
    617
    Post Thanks / Like
    I used a straight barb, I just had to angle it about 45 degrees toward the driver's side.

    Ace Hardware is another place to check, there's two of them in the Memphis area.

  9. #9
    Member
    Join Date
    Jun 2014
    Location
    Outside Memphis
    Posts
    51
    Post Thanks / Like
    Man! You guys are awesome. I'll head to Fastenal tomorrow to see what I can scare up. Thanks so much all of you.

  10. #10
    Senior Member wleehendrick's Avatar
    Join Date
    Jul 2012
    Location
    Encinitas, CA
    Posts
    1,653
    Post Thanks / Like
    Blog Entries
    2
    FYI... I got my fitting for the coolant mod off Amazon. If you don't find what you need, I'll look up my order history and give you a P/N.

  11. #11
    Member
    Join Date
    Jun 2014
    Location
    Outside Memphis
    Posts
    51
    Post Thanks / Like
    Quote Originally Posted by wleehendrick View Post
    FYI... I got my fitting for the coolant mod off Amazon. If you don't find what you need, I'll look up my order history and give you a P/N.
    Yeah, that would be great. I looked online and Fastenal doesn't have one in stock anywhere around me and I think I am out of luck with Ace as well.

  12. #12
    Senior Member wleehendrick's Avatar
    Join Date
    Jul 2012
    Location
    Encinitas, CA
    Posts
    1,653
    Post Thanks / Like
    Blog Entries
    2
    Quote Originally Posted by Meatball View Post
    Yeah, that would be great. I looked online and Fastenal doesn't have one in stock anywhere around me and I think I am out of luck with Ace as well.
    Here's rhe description:

    Anderson Metals Brass Hose Fitting, 90 Degree Elbow, 5/16" Barb x 1/8" Male Pipe

    $7.50, Amazon Prime

    Hope it helps, make sure to tap deep enough so enough threads engage, and careful tightening rhe fitring.

  13. #13
    Harley818's Avatar
    Join Date
    Jan 2014
    Location
    Vancouver BC
    Posts
    788
    Post Thanks / Like
    check my thread below ....post #76 where I show pics of the process and where I drilled. This pic shows the part i used which I bought at home depot.
    DSCF4665.jpg

    good luck.

    http://thefactoryfiveforum.com/showt...y-s-818S/page2
    Last edited by Harley818; 05-08-2015 at 12:18 AM.
    Harley
    Bought 2002 Donor Jan 2014
    First Start Jan 18, 2015
    First Drive Feb 14, 2015

  14. #14
    Research Calibrator sponaugle's Avatar
    Join Date
    Apr 2013
    Location
    Portland, OR
    Posts
    401
    Post Thanks / Like
    I also did a similar mod, although I did it on the side of the pipe:


    The aluminum is pretty easy to tap.

    Jeff

  15. #15
    Member
    Join Date
    Jun 2014
    Location
    Outside Memphis
    Posts
    51
    Post Thanks / Like
    Any particular reason you did it on the side and not on top? Is that a clearance issue you have to worry about?

  16. #16
    Member
    Join Date
    Jun 2014
    Location
    Outside Memphis
    Posts
    51
    Post Thanks / Like
    Quote Originally Posted by sponaugle View Post
    I also did a similar mod, although I did it on the side of the pipe:


    The aluminum is pretty easy to tap.

    Jeff

    You must have a better Home Depot than I do. They didn't have anything smaller than 1/4" here.

    Harley, It looks like you did the mod after getting the engine installed. Any problem with waiting until then or should I get it done beforehand?

  17. #17
    Research Calibrator sponaugle's Avatar
    Join Date
    Apr 2013
    Location
    Portland, OR
    Posts
    401
    Post Thanks / Like
    Quote Originally Posted by Meatball View Post
    Any particular reason you did it on the side and not on top? Is that a clearance issue you have to worry about?
    No. It just looked like a good spot, and having more room above the pipe seemed more useful (for wire harnesses, etc).

    Quote Originally Posted by Meatball View Post
    You must have a better Home Depot than I do. They didn't have anything smaller than 1/4" here.
    Harley, It looks like you did the mod after getting the engine installed. Any problem with waiting until then or should I get it done beforehand?
    I got that fitting at Ace hardware, as they have a great selection of 1/8 NPT fittings.
    If you have the engine out, do it first as you can then easily clean out and metal flakes, etc .

    Also while I had the cross tube off, I removed the hard line to the heater core and put in a 90 degree fitting:


    Jeff

  18. #18
    Member
    Join Date
    Jun 2014
    Location
    Outside Memphis
    Posts
    51
    Post Thanks / Like
    Thanks again for everyone's help!!

    As I am sitting here looking at these pictures, I am thinking more and more about replacing the timing belt regardless of age. Should I? I am going to open it up to take a gander at it to see how it looks...is there a way to check just how old it is? I am trying to keep costs down as much as possible, but I also understand this thing won't be very happy after a broken timing belt. Timing belt kit is just going to add another $250~ish to this build...

  19. #19
    Member
    Join Date
    Jun 2014
    Location
    Outside Memphis
    Posts
    51
    Post Thanks / Like
    I am also sitting here looking at this thread realizing that you all have posted more photos that I have. As I said, it's an '02 and as far as I know has always been a Florida car. 158,000 miles on it with minimal rust...taking it apart was so nice after reading about what you guys up north have to deal with.

    Here is the beast...
    P1010431.JPG

    And the engine...haven't tested compression on it or anything, but it did really well on the trip back home.

    P1010485.JPG

    One of my boy doing some damage with his new friend...the impact wrench!

    P1010433.JPG
    Last edited by Meatball; 05-08-2015 at 10:33 PM.

  20. #20
    Harley818's Avatar
    Join Date
    Jan 2014
    Location
    Vancouver BC
    Posts
    788
    Post Thanks / Like
    I did mine while the engine was in the car. It wasn't difficult.
    If there is enough meat, then Jeff's location is probably better.
    If you look at the link for my thread, you'll see that the turbo intake touches the new fitting. In Jeff's location, nothing will touch.
    I just wasn't sure how much meat there was in the intake there.
    Harley
    Bought 2002 Donor Jan 2014
    First Start Jan 18, 2015
    First Drive Feb 14, 2015

  21. #21
    Senior Member TrickyPete's Avatar
    Join Date
    Feb 2015
    Location
    Lewiston ME
    Posts
    117
    Post Thanks / Like
    Will this coolant mod only work with a pressurized tank? The reason I'm asking is because I'm using an N/A motor and it doesn't have one. I was going to relocate the front recovery tank to tapped barb's location and use a stainless bottle out front for the overflow. Will using a non pressurized tank out back rob the pressure and not allow the coolant to reach the front of the car?
    I'm not trying to hyjack your build thread but since everyone is on the subject I would figure I'd ask...

  22. #22
    Mechie3's Avatar
    Join Date
    May 2012
    Location
    Indianapolis
    Posts
    5,174
    Post Thanks / Like
    A non pressurized tank will just drain the coolant system.
    Zero Decibel Motorsports
    Check out my new website!
    www.zerodecibelmotorsports.com
    www.facebook.com/zero.decibel.motorsports

  23. #23
    Senior Member
    Join Date
    Jul 2011
    Location
    Rochester, NY
    Posts
    229
    Post Thanks / Like
    Timing belt should've been replaced by now, but if it wasn't you really are asking for trouble. It's worth it for peace of mind to go ahead and replace it and while you're in there to take care of the water pump.

  24. #24
    Member
    Join Date
    Jun 2014
    Location
    Outside Memphis
    Posts
    51
    Post Thanks / Like
    I knew someone would say that, but I was hoping not. :-)
    ~Rob

    2002 WRX 158,000 miles purchased June 2014
    Disassembly completed October 2014
    818 kit #339 delivered 11 April 2015

  25. #25
    Member
    Join Date
    Jun 2014
    Location
    Outside Memphis
    Posts
    51
    Post Thanks / Like
    On my travels this week, I had some time to read through the newest version of the assembly manual for the 818 on my iPhone...revision O. This revision varies significantly from the one that was shipped with my car, revision M. Of course, to use revision O I have to look at it on an electronic device because FF won't ship the newest revisions in hard copy until the old ones on the shelf are used up. This is somewhat problematic I must admit but I shall prevail.

    Back to my point, upon reading through the front suspension, of which the kids and I are almost complete, I noticed once again that the LCA bolts are not to be torqued until the car is at ride height. Hmmmm...I know I'd read that before but it didn't sink in until this time. How in the world is this supposed to take place?! The new manual states to dent the firewall or cut the bolt in order for the LCA bolts to fit without rubbing, but it mentions nothing on how to get a torque wrench on the bolt to tighten everything up. I did read about AZPete cutting a hole in the firewall...then there is a big hole where there are supposed to be none...a completely sealed firewall. What have others done? The search function on this forum is kind of lacking...sorry.

    Thanks all
    ~Rob

    2002 WRX 158,000 miles purchased June 2014
    Disassembly completed October 2014
    818 kit #339 delivered 11 April 2015

  26. #26
    Member
    Join Date
    Jun 2014
    Location
    Outside Memphis
    Posts
    51
    Post Thanks / Like
    I am at a standstill with my build at the moment while I wait for parts for the engine. Unfortunately, I didn't think far enough ahead and now am having to wait for some hoses to come in from Subaru. Is there anything that I can skip ahead and do before the install of the engine? I certainly don't want to build something and then have to undo it later.
    ~Rob

    2002 WRX 158,000 miles purchased June 2014
    Disassembly completed October 2014
    818 kit #339 delivered 11 April 2015

  27. #27
    Senior Member Buzz Skyline's Avatar
    Join Date
    May 2013
    Location
    Greenbelt, MD
    Posts
    502
    Post Thanks / Like
    It would be a great time to swap in a KillerB oil pick up and bigger oil pan, if that's something you plan to do.

    As far as the LCA torquing goes, yep cutting a hole in the firewall seems to be the best bet. If you cut one the same size as one of the plugs off your donor, then you can seal it up pretty good (there are a couple to choose from, but I can't recall where at the moment. Maybe in the trunk under the spare). If you have the motor and gas tank behind you, it's not like it's a real firewall anyway - more like a waterwall.

    You're ordering hoses straight from Subaru? Why not get some cheaper (and often better/prettier) aftermarket ones?

  28. #28
    Member
    Join Date
    Jun 2014
    Location
    Outside Memphis
    Posts
    51
    Post Thanks / Like
    Quote Originally Posted by Buzz Skyline View Post
    It would be a great time to swap in a KillerB oil pick up and bigger oil pan, if that's something you plan to do.

    As far as the LCA torquing goes, yep cutting a hole in the firewall seems to be the best bet. If you cut one the same size as one of the plugs off your donor, then you can seal it up pretty good (there are a couple to choose from, but I can't recall where at the moment. Maybe in the trunk under the spare). If you have the motor and gas tank behind you, it's not like it's a real firewall anyway - more like a waterwall.

    You're ordering hoses straight from Subaru? Why not get some cheaper (and often better/prettier) aftermarket ones?
    I did find those plugs you are talking about. One was in the engine bay and the other in the trunk. As far as the hoses, they are for the water pump replacement. This thing had the original water pump even though the timing belt had been changed. At almost 160k miles, the hoses were done. I wanted to make sure they fit for such a crucial piece of the puzzle...I won't be seeing any of them anyway under the timing belt cover.

    Which cheaper aftermarket ones are you speaking of? Coolant lines? Fuel lines? I need them both...have a link for them?

    Thanks
    ~Rob

    2002 WRX 158,000 miles purchased June 2014
    Disassembly completed October 2014
    818 kit #339 delivered 11 April 2015

Posting Permissions

  • You may not post new threads
  • You may not post replies
  • You may not post attachments
  • You may not edit your posts
  •  

Breeze

Visit our community sponsor