-
01-04-2020, 04:13 PM
#641
Senior Member

Last edited by Hobby Racer; 01-04-2020 at 04:48 PM.
-
Post Thanks / Like - 2 Thanks, 0 Likes
-
01-05-2020, 10:53 AM
#642
Senior Member

Thank you very much for the tutorial
It opens up a new world for the 818 family
Jet
-
01-07-2020, 04:26 PM
#643
Senior Member
-
Post Thanks / Like - 0 Thanks, 4 Likes
-
01-07-2020, 05:22 PM
#644
Nicely done! Curious if they sell freeze plugs in those sizes for those that dont have access to a welder.
-
01-07-2020, 05:37 PM
#645
Senior Member

Originally Posted by
Kurk818

Nicely done! Curious if they sell freeze plugs in those sizes for those that dont have access to a welder.
Maybe, I didn't look. You could plug the four bolt holes with the bolts and thread sealant. The tough part would be the rectangular hole. Not sure how you would plug that one.
-
01-07-2020, 08:53 PM
#646
Senior Member

Looks very nice!
For the welding-challenged (like me)- 1 plate and a pack of JB weld would do the trick.
818S #332, EZ30R H6, California licensed 01/2019
-
01-08-2020, 08:33 AM
#647
-
01-08-2020, 10:02 AM
#648
I have really enjoyed following this build - one of my favorites (and I did my RX-8 in the same color scheme!). As you see my build unfold don't be surprised if it feels like deja vu; your work helped me rethink some important elements. Many-many thanks!
-john
-
Post Thanks / Like - 1 Thanks, 0 Likes
-
01-08-2020, 12:26 PM
#649
Originally Posted by
Hobby Racer
Maybe, I didn't look. You could plug the four bolt holes with the bolts and thread sealant. The tough part would be the rectangular hole. Not sure how you would plug that one.
That rectangular hole is still an issue (although a smaller hole) when you cut less off of the end. I ended up roughening and putting a two part epoxy in there suitable for aluminum.
-
01-10-2020, 10:37 AM
#650
Senior Member
The shortened tail housing looks like it will fit nicely behind the rear bumper.
Side profile.
IMG_20200110_102131854.jpg IMG_20200110_100931624.jpg
Top profile
IMG_20200110_100925180.jpg
Any one else think the outline of the welds and the ribs looks like a cartoon chicken? I might paint one on there 
Welded.jpg
-
01-10-2020, 04:16 PM
#651
Example of the other option for shortening
Before

After

-
01-11-2020, 04:53 PM
#652
I totally had the same "chicken" thought... Go for it - canary yellow
-
01-16-2020, 06:23 PM
#653
Senior Member
New Transmission Mount
I made a new transmission mount for the 6 speed. The only issue is that two of the bolts that mount the bracket to the transmission can only be installed when the transmission is out ")
Oh well, I don't plan to remove the transmission often.
IMG_20200116_125721080.jpg IMG_20200116_125736804.jpg IMG_20200116_154705250.jpg IMG_20200116_154716147.jpg
-
Post Thanks / Like - 1 Thanks, 0 Likes
 DSR-3
DSR-3 thanked for this post
-
01-19-2020, 05:42 PM
#654
Senior Member
Pulled the oil pan today in preparation for my dual oil pickup system. Look what I found stuck to the magnet in the stock pan. Anyone know what this is? Its got a spring loaded valve in the end. Looks like a small pressure valve.
IMG_20200119_162614548_HDR.jpg IMG_20200119_162620871.jpg IMG_20200119_162632570.jpg
-
01-19-2020, 11:06 PM
#655
Senior Member

Originally Posted by
Hobby Racer
I thought they might oil squirters for lubing the cylinder walls. so I searched for them and this is the picture I found. squart.jpg
-
01-21-2020, 12:32 PM
#656
Senior Member

Hobby--
your build thread is a bunch of fun to follow. I'm sorry we missed each other in CNY (Oswego until early 2017; right when your build started). I totally wanna check this thing out next time I'm up there!
-
01-21-2020, 09:08 PM
#657
Senior Member
Originally Posted by
Pearldrummer7
Hobby--
your build thread is a bunch of fun to follow. I'm sorry we missed each other in CNY (Oswego until early 2017; right when your build started). I totally wanna check this thing out next time I'm up there!
Next time your in town let me know and we can set something up.
-
01-30-2020, 06:17 PM
#658
Senior Member
Oil Pickup Tube Swing Arm Part 1
My quest to control oil pressures in high G corners while keeping my wet sump system has led me to start building a swing arm oil pickup. I have to give credit to Lance Corsi for putting this idea in my head years ago from a post I saw on this forum.
Instead of starting from scratch, I found a swing arm assembly made for big block Chrysler's and AMC cars that I could modify.

I started by fully disassembling the unit and sizing it to my oil system. Since the stock oil pump has an integrated mesh screen, I think I will not use the perforated sheet screen that came with the swivel pickup. No need for two screens, it just adds more restriction to flow in my opinion.
IMG_20200130_103933500.jpg IMG_20200130_103956857.jpg IMG_20200130_104118187.jpg IMG_20200130_104122854.jpg
It looks like I can modify the mounting block to mate up to my oil pump. Unfortunately I will have to fabricate a new oil pan as the stock one is about 1/2" too shallow to fit the new swing arm.
IMG_20200130_110130884.jpg IMG_20200130_110138998_BURST000_COVER_TOP.jpg IMG_20200130_113349378.jpg IMG_20200130_110356645.jpg
Next, its time for some work on a milling machine. I really need to get a Bridgport 
Last edited by Hobby Racer; 01-31-2020 at 07:38 AM.
-
Post Thanks / Like - 0 Thanks, 1 Likes
-
02-10-2020, 02:59 PM
#659
Senior Member
Oil Pickup Tube Swing Arm Part 2
I got over to my brother in laws to have the mount milled on his Bridgeport. The mounting came out nice. You can see in the second picture there are some threads from the original design that I left in the part. I needed to leave as much meat as I could in the part so I did not keep machining down to eliminate those threads as they are not part of the sealing surface of the oil pickup and will have no effect on its functionality.
IMG_20200209_112556048.jpg.png IMG_20200209_112546280.jpg
Here are some pictures of the swing arm mounted to the oil pump to check fitment. As you can see, a custom pan that kicks out in the front and possibly both sides will be needed. It does still fit below the diffuser though!
IMG_20200210_110956075.jpg IMG_20200210_110948961.jpg IMG_20200210_110906329.jpg IMG_20200210_110836749.jpg IMG_20200210_110923626.jpg IMG_20200210_111030507.jpg
Next I need to test it in my test rig before I spend too much time fabricating the pan.
Last edited by Hobby Racer; 02-10-2020 at 03:15 PM.
-
Post Thanks / Like - 1 Thanks, 2 Likes
DSR-3 thanked for this post
-
02-10-2020, 08:23 PM
#660
Senior Member
Moving all the electrical
I decided I no longer liked having all the electrical and electronics buried in the center console. Each time I needed to access something, I had to remove most of the interior.
I'm starting by moving the major electrical components into the nose of the car. I made a "power control center" that houses the battery, main relay, main circuit breaker and auxiliary fuses and relays. Nice part is that by unscrewing four screws and unplugging two connectors I can lift out the entire "power control center" for easy access and service.

Last edited by Hobby Racer; 02-10-2020 at 08:26 PM.
-
02-10-2020, 09:26 PM
#661
Looks nice, are you not worried about water in the nose? Never race in the rain?
-
02-10-2020, 10:15 PM
#662
Senior Member
I'm a wimp, never race in the rain.
-
02-11-2020, 06:04 PM
#663
Senior Member
Oil pickup swing arm issue
So I tested the oil pickup swing arm in the test rig today and it did not go well 
Seems there is too much friction between the arm and the mount. The arm does not swing with the oil when I tilt the test rig until way after the pickup gets uncovered. The diameter of the circular section of the arm that fits into the mount is 1.500" and the hole in the mount is 1.503" making for a nice flip fit. The arm moves freely, but I think the torque generated by its own weight that is overhung past the pivot point is causing it to bind just enough to hinder its movement. Since the coefficient of static friction is higher than kinetic friction, getting it to start moving seems to be the issue.
It seems as though this would need something like needle bearings to eliminate the friction and allow smooth movement at low tilt angles.
@Lance Corsi - Have you tested your swing arm yet? Do you have bushings or bearings in the swivel joint?
Any thoughts on how to overcome this issue?
Last edited by Hobby Racer; 02-11-2020 at 06:34 PM.
-
02-11-2020, 08:03 PM
#664
Senior Member
Just a thought, with .003" clearance and it binds a bit I wonder what it will do when the oil gets to operating temp and the clearance is reduced, will it become more of a interface fit or will it swing easier...
I would try warming/heating the joint and pouring some hot/warm oil in the point of contact...another thing is the effect of the pump suction in the sealing joint....
Jet...?
-
02-13-2020, 06:36 PM
#665
Senior Member
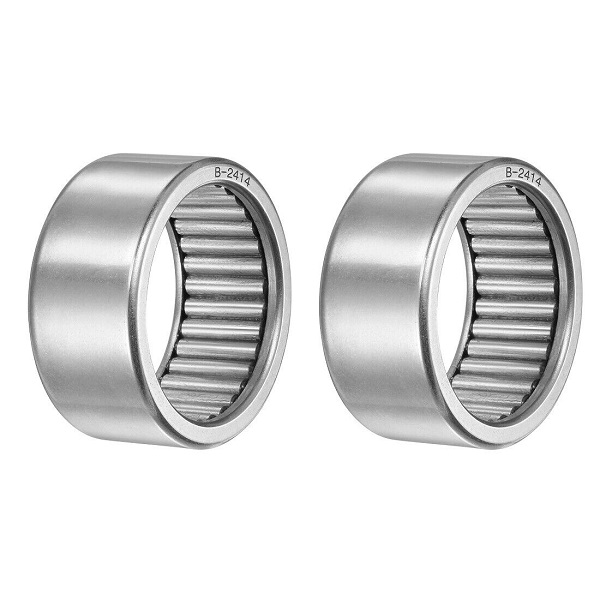
I ordered some drawn cup needle bearings. The bearing will be a slip fit to the swing arm and a light press fit to the mount. I hope this will cure my bind and friction issue. Not sure how this will effect the sucking of air in through the spaces between the bearings. I won't know the overall effect until I test it. The entire unit is submerged under normal conditions so it might only be an issue under hard cornering.
-
Post Thanks / Like - 0 Thanks, 2 Likes
-
02-21-2020, 06:05 PM
#666
Senior Member
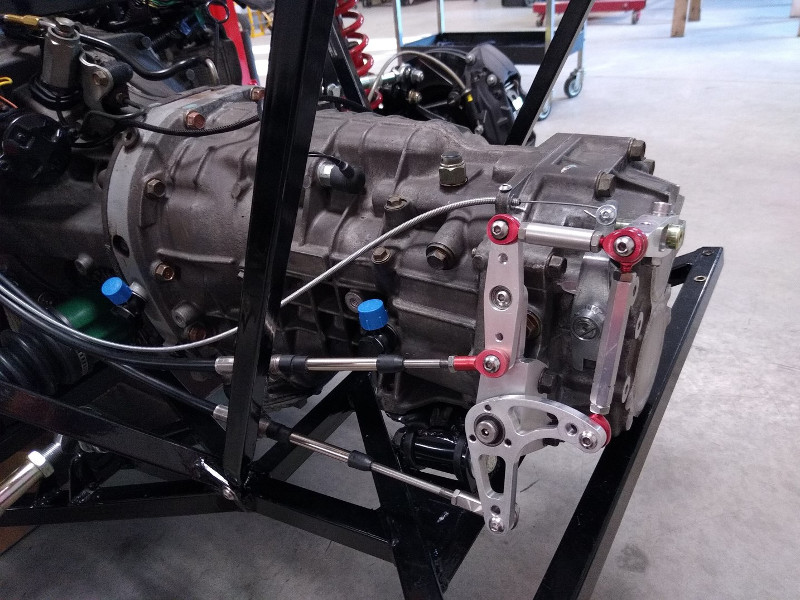
6 Speed Bell Crank
I needed to update my bell crank adapter after changing from a 5 speed to a 6 speed. I made two new brackets and used some of the good bits from my 5 speed setup. The pic below is not complete as I still need to secure the cable bulkheads to my wing strut upright to finish the job.

The adapter was easy to make with common garage tools and required no machining.
IMG_20200221_162700271.jpg IMG_20200221_162714538.jpg IMG_20200221_165938798.jpg
I chose to attach the bracket lower on the transmission case to give me plenty of room at the top near the reverse lockout mechanism. I plan to fabricate something to work the lockout mechanism next.
IMG_20200221_171403247.jpg IMG_20200221_171859456.jpg IMG_20200221_171941219.jpg
-
Post Thanks / Like - 1 Thanks, 6 Likes
Blu thanked for this post
-
02-23-2020, 11:32 AM
#667
Senior Member
-
Post Thanks / Like - 0 Thanks, 4 Likes
-
02-23-2020, 06:48 PM
#668

Yes, I love Technology

-
03-05-2020, 05:58 PM
#669
Senior Member
Reverse Lockout Added
To eliminate any difficulties finding 5th gear when on track, I decided to hookup a functioning reverse lockout on my 6 speed. I wanted something small, functional and aesthetically pleasing since it sits so close to my nice looking bell cranks 
Let me take you through the process step by step.
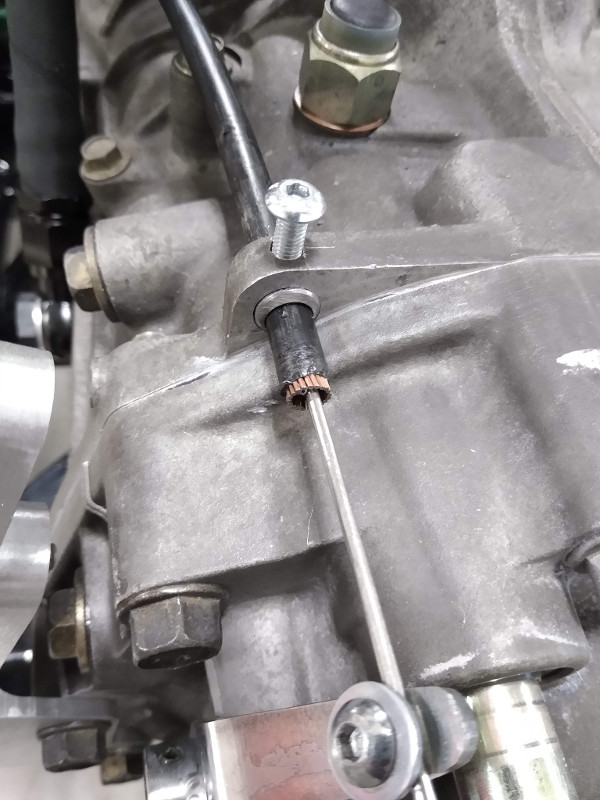
I removed the OEM lockout lever by driving out the roll pin that holds it in place. Next I cut off the collar that is welded to the original lever arm so I could reuse it on my new lever arm. Then I welded the original collar onto my new lever arm and bent the top so it would be inline with the control cable.
roll_pin.jpg cut_collar.jpg IMG_20200304_160842501.jpg IMG_20200305_163524428.jpg
I then prepared the case by drilling out the 10 mm hole in the top of the case to 7/16" so I could fit in the shank of a bolt I cut up to act as a bushing to locate the small diameter push pull cable in the larger hole. Next I drilled and taped a small hole perpendicular thru the case top and bushing that accepts a set screw to lock the cable in place.
IMG_20200305_100030886.jpg IMG_20200305_100316574.jpg
The case has another small hole just below the lockout shaft that is the perfect size for a roll pin. I inserted a roll pin to use as a stop so the lever would not over travel in either direction. Finally I ground off some of the casting flash on the case to ensure the new lever would not bind.
IMG_20200305_100038758.jpg
I installed my new reverse lockout lever with the original roll pin. Note the new roll pin limiter below the lockout shaft is positioned in the cutout I made in the lever arm and limits travel in both directions. I finished it up by placing the cable knob in the center console near my other controls so it will be easy to access while strapped in.
IMG_20200305_164955368.jpg IMG_20200305_164944576.jpg IMG_20200305_164856971.jpg
On thing I noticed is that the choke cable I used has a lot of friction and can be hard to pull. Anyone have a better cable option? Bicycle cable maybe?
Last edited by Hobby Racer; 03-05-2020 at 06:29 PM.
-
Post Thanks / Like - 1 Thanks, 3 Likes
DSR-3 thanked for this post
-
03-05-2020, 07:02 PM
#670
A bicycle brake cable should work much better. I'm wondering if you could even use the brake handle from a bike and mount it to the shifter so that you just needed to squeeze the lever while holding the shifter to get into reverse (would need a return spring added).
-
03-05-2020, 08:56 PM
#671
Senior Member
Originally Posted by
Ajzride
A bicycle brake cable should work much better. I'm wondering if you could even use the brake handle from a bike and mount it to the shifter so that you just needed to squeeze the lever while holding the shifter to get into reverse (would need a return spring added).
I thought about that, but I don't want anything on the shifter. The bike cable should have a smoother pull. I just need to figure out how to connect it to a knob like the choke cable is connected.
-
03-06-2020, 06:55 AM
#672
Senior Member

Your solution is very elegant. I used the locking push pull cable from McMaster. It has a nice looking T-handle and locks in any position. The movement is smooth because there is a liner in the cable. The wire is solid stainless steel. The cable is more beefy, however, and the bend radius is larger than bike cable would be. I wanted to be able to lock mine though. All my bike cables are braided. I don't know how well, or positively, they would "push". I suppose over a small range, they might be fine. The solid wire in the choke/McMaster cable does that well. Bike brakes are used in tension only, with a hefty spring return.
-
03-06-2020, 08:06 AM
#673
Senior Member
Originally Posted by
Rob T
I used the locking push pull cable from McMaster. ... The movement is smooth because there is a liner in the cable.
That's what I need, a cable with a liner. I'll check McMaster. Thx!
-
03-07-2020, 09:57 AM
#674
Yes, I love Technology
I used this for my throttle cable, I think I found a spec on it, pull good for around 100# if I remember correctly.
Venhill VWK003-BK Universal Motorcycle Shop Multi Throttle Cable (Kit = 5 meters, ~15 feet, AMAZON.com
-
03-08-2020, 11:39 PM
#675
Hobby, have you thought about the impact of engine/trans movement relative to the frame on your cable attachment? I know it only takes a few millimeters of motion at the shifter input shaft to change gear or knock into neutral. We know that with the OEM rubber bushings the engine/trans moves/shakes around a lot. It will probably still move some with poly bushings. Could happen that you mash the throttle and get bumped into neutral or a whole other gear.
-
03-09-2020, 07:02 AM
#676
Senior Member
Originally Posted by
Zach34
Hobby, have you thought about the impact of engine/trans movement relative to the frame on your cable attachment? I know it only takes a few millimeters of motion at the shifter input shaft to change gear or knock into neutral. We know that with the OEM rubber bushings the engine/trans moves/shakes around a lot. It will probably still move some with poly bushings. Could happen that you mash the throttle and get bumped into neutral or a whole other gear.
I thought about that, but the bushings on the motor and especially the trans are rock solid. I do not anticipate enough movement to be an issue. Also the shifter free floats in the forward and back direction so any movement that would tend to move it in / out of gear will simply move the shifter slightly forward or back. The side to side movement can not pull the trans in / out of gear. I think it should be ok.
-
03-09-2020, 08:40 AM
#677
Hobby Racer, this is awesome work, both on the tail housing and shift linkage. I just started my build (and thread) the other day. I am currently working through the 6MT trans and really did not like the idea of zip tying the reverse lockout out of existence. I was going to attempt the bike cable route when the time comes. If you did need a return spring you could source a long skinny one and slide it over the cable between your cable end mount on the trans and your fabbed rotational level. It would push between the casing and crank to reestablish the lock out.
-
03-11-2020, 04:44 PM
#678
Senior Member
I found a much better cable for the reverse lockout. I ended up using a tractor PTO push/pull cable. It has a plastic inner and outer liners and a thicker cable. The only issue is I need to find a smaller knob as it comes with a big honking red one
I did need to make a new bushing for the back to accommodate the thinker cable. It also had to be drilled offset so that there was enough meat left to run a tap through it.
-
03-11-2020, 04:57 PM
#679
Senior Member
6MT Transmission Cooler
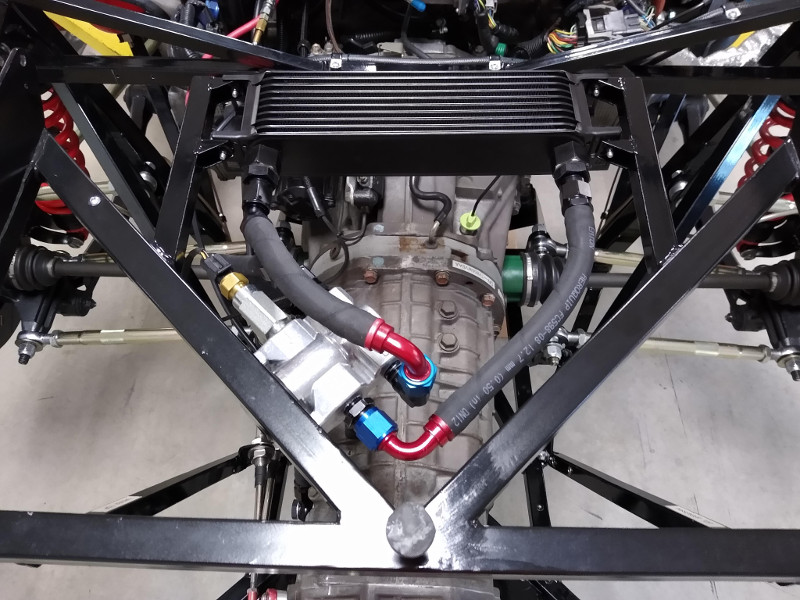
I know from my data logging last year that you need to run a trans cooler if you push these cars hard so I added one to my 6 speed setup. This is a bit different than the 5MT version I had before as the early 6MT's have internal oil pumps that make it very easy to add external coolers. The pump has an external oil line that can easily be removed and diverted to a cooler and then re-inserted back into the transmission.
IMG_20200311_155132825.jpg IMG_20200311_155140182.jpg
I used a better bar and plate cooler from Derale this time. The unit is smaller than my previous one but is also more efficient. I used a thermal bypass that skips the cooler until the temp reaches 180 degrees F. That is also where I mounted my temperature sensor. Still want to track my temps!
IMG_20200311_155122528.jpgIMG_20200311_155114185.jpg
Last edited by Hobby Racer; 03-11-2020 at 05:02 PM.
-
Post Thanks / Like - 0 Thanks, 3 Likes
-
03-15-2020, 09:43 AM
#680
Very nice looking! I love how simple and clean it is. So you are saying that the oil pump in your transmission had a tap into the discharge and that it was is going up to your cooler? That is super slick. Do you have any insight as to how much flow can be safely diverted? I remember talking about your scavenger pump you had to slow down which I guess was on your 5 speed. My first thought on these pics was how do you pick up oil half way up the case? A 'free' oil cooler, so much easier than adding a pump with the plumbing and wiring.
I have never use that style of AN connector. It looks like barbs, but I do not see anything holding the hose onto the barbs like a compression ring....Are they pressure rated or are you just banking on very low pressures?
Also in looking back at your open trans picks I do see the circular oil router piece in the left over output shaft race. It looks like that is the same idea as the piece that is behind the gear bolted into the tail housing. It puts oil into the shaft center. The lower one for the pinion shaft we both cut off handles the needle bearings (no longer in play). I think my output shaft was solid but I'm thinking your must have had something on it with a bleed hole or two. I looks like that is probably unnecessary now unless you think the size of the orifice actually holds some back pressure providing flow elsewhere. I would think behind it looks very similar to the same size hole, which is what mine has.


 Thanks:
  Likes:


 Reply With Quote