FormaCars

Visit our community sponsor

Thanks Thanks:  0
Likes Likes:  5
Results 1 to 40 of 2016

Thread: More progress made on the body : )

Hybrid View

Previous Post Previous Post   Next Post Next Post
  1. #1
    Senior Member VD2021's Avatar
    Join Date
    Feb 2011
    Location
    Central, FL
    Posts
    958
    Post Thanks / Like
    Blog Entries
    2
    Quote Originally Posted by The Stig View Post
    Thanks Vidal. I bought a couple of cans of the same paint. Your pictures show that the radiator can become invisible. I like that much better.

    Thanks for posting the pics.

    Mike
    Mike,

    No worries.

    I should have also noted that the nose aluminum is also installed.
    R/s
    Vidal
    CURRENT STATUS: Interior Rework and Bodywork.
    GenII GTM #331. Delivered (23/9/10)
    BUILD LOG AND WEBSITE:
    http://gtmbuild.weebly.com/ .

  2. #2
    Senior Member The Stig's Avatar
    Join Date
    Feb 2011
    Location
    Charlotte, NC
    Posts
    2,004
    Post Thanks / Like
    Quote Originally Posted by VD2021 View Post
    Mike,

    No worries.

    I should have also noted that the nose aluminum is also installed.
    Speaking of Nose Aluminum...
    I have that coming up on my list of "things to do", and I'm finding that there is very little good information in terms of how it needs to be correctly installed.

    I remember Nathan (Spytech) having an issue with the lower aluminum tray (under the radiator) flexing at high speeds (above 80-90 mph) to the extent that it actually dragged the ground. I read through his build log and saw the braes that he made to help resolve that issue.

    I also recall seeing a thread someplace that describes that a section of the nose tray should be cut and bent, in order to clear the radiator surround, when tilting the hood up.

    Are these things that have been documented some place, or is it simply trial and error? I would think that this is one of the few things that would be done the same on each car, unless the builders are doing some custom brake duct sort of stuff. But I haven't seen anything that show how it is supposed to be initially installed. The manual is vague, and it doesn't seem to be something that people tend to document...

    I have the digital manual on my laptop, and I've gone through it two or three times. Maybe I'm just missing it; but if so, I've missed it every time.
    The Stig

    Some say, that I only know two facts about ducks, (both being wrong); and that if I could be bothered, I could solve the "da Vinci Code" in 47 seconds...
    All I know is that I'm called "The Stig".
    GTM #0081

  3. #3
    Senior Member
    Join Date
    Feb 2011
    Posts
    119
    Post Thanks / Like
    I used this for help in figuring out the nose aluminum.

    http://www.ffcars.com/forums/42-fact...-aluminum.html

  4. #4
    Senior Member The Stig's Avatar
    Join Date
    Feb 2011
    Location
    Charlotte, NC
    Posts
    2,004
    Post Thanks / Like
    Quote Originally Posted by mmaragos View Post
    I used this for help in figuring out the nose aluminum.

    http://www.ffcars.com/forums/42-fact...-aluminum.html
    Thank You! That's exactly what I was looking for! I'm sure that it'll help a ton.
    The Stig

    Some say, that I only know two facts about ducks, (both being wrong); and that if I could be bothered, I could solve the "da Vinci Code" in 47 seconds...
    All I know is that I'm called "The Stig".
    GTM #0081

  5. #5
    Senior Member VD2021's Avatar
    Join Date
    Feb 2011
    Location
    Central, FL
    Posts
    958
    Post Thanks / Like
    Blog Entries
    2
    Quote Originally Posted by The Stig View Post
    Thank You! That's exactly what I was looking for! I'm sure that it'll help a ton.
    That's the nose aluminum thread I used. Shane sells a piece that is a combo under tray and splitter that may be an option for you. It is already cut to accommodate the radiator/condenser. http://thefactoryfiveforum.com/showt...light=SPLITTER

    IIRC the item that takes hits and need reinforcing is the leading edge of the lower radiator shroud. I don't recall any other reinforcement to the nose under tray outside of riveting on the piece that is trimmed. http://www.gtm-supercar.com/?cat=15
    R/s
    Vidal
    CURRENT STATUS: Interior Rework and Bodywork.
    GenII GTM #331. Delivered (23/9/10)
    BUILD LOG AND WEBSITE:
    http://gtmbuild.weebly.com/ .

  6. #6
    Senior Member The Stig's Avatar
    Join Date
    Feb 2011
    Location
    Charlotte, NC
    Posts
    2,004
    Post Thanks / Like
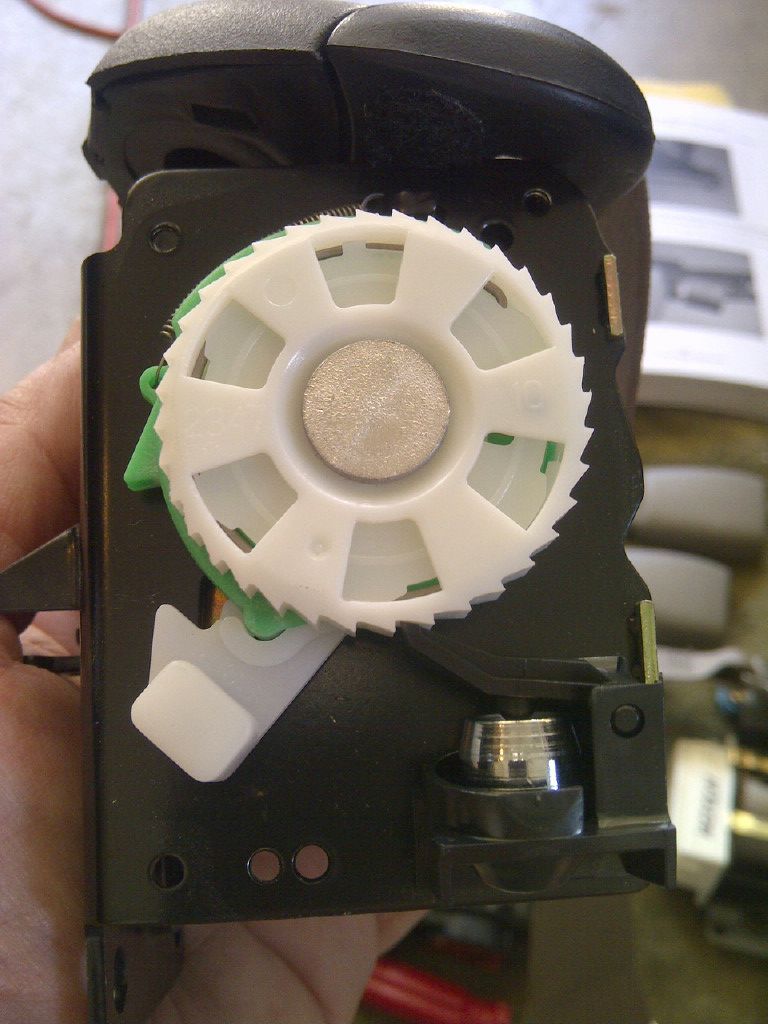
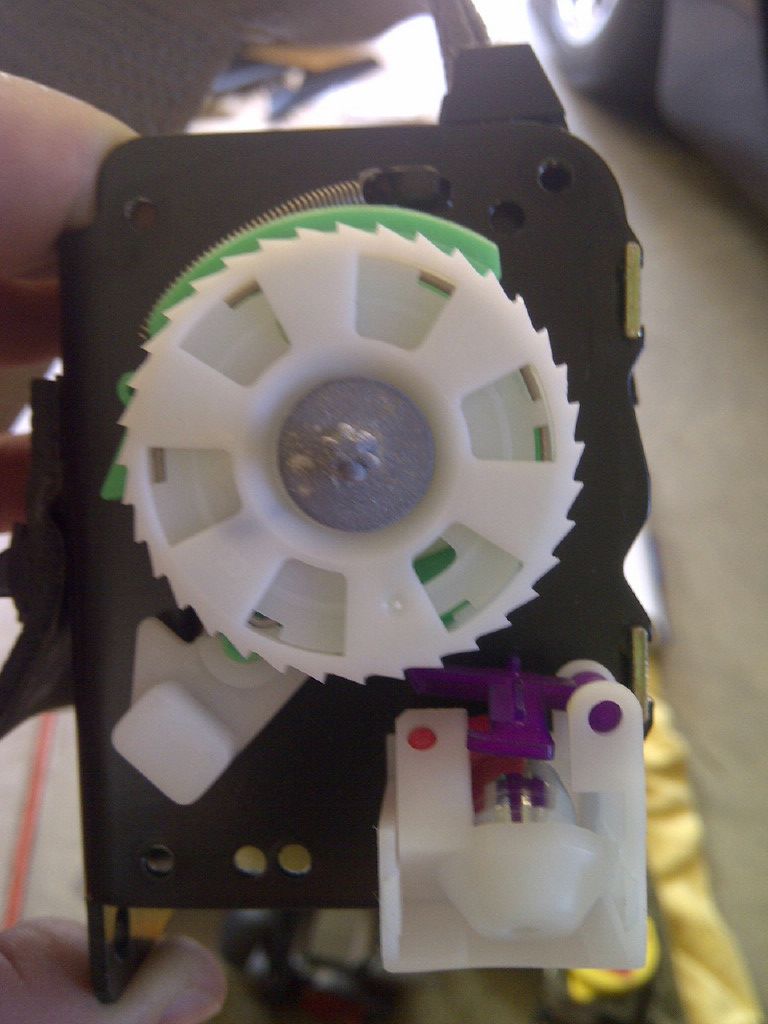
    I sat down this morning to get the seat belts installed. I haven't really decided whether or not I want to use the Corvette seat belts or if I want to use the 5 pt racing harness. Mainly because I haven't found a set that I like that also has the colors that I want to use in the interior of my car. So I decided that I would at least get the OEM seat belts set up. In doing so, I ran into a grey area of the manual that I need to ask...

    The manual says to remove the cog stop on the seatbelat retractors... Does this mean to remove the stops on all four retractor mechanisms, or just 2 of them. The manual shows a picture of just one of the stops, but not the other.


    Here's a picture of one of the stops (shown in the manual). The Passenger's side is colored black, while the Driver's side is blue.


    On the other retractor, the stops are white.

    Am I supposed to remove all of these, or just the black & blue stops?
    The Stig

    Some say, that I only know two facts about ducks, (both being wrong); and that if I could be bothered, I could solve the "da Vinci Code" in 47 seconds...
    All I know is that I'm called "The Stig".
    GTM #0081

  7. #7
    Senior Member VD2021's Avatar
    Join Date
    Feb 2011
    Location
    Central, FL
    Posts
    958
    Post Thanks / Like
    Blog Entries
    2
    Mike,

    The inertia sensor (circled in yellow, one per reel) is the part of the retractor mech the manual says to remove. However, this thread http://www.ffcars.com/forums/42-fact...ts-work-2.html steered me away from modifying the seat belts. I'm using a set of MikePMS's brackets http://www.ffcars.com/forums/42-fact...ml#post2610100. The brackets put the seat belt retractors in the same relative position as they were in the corvette. So they work as they were designed to.
    Attached Images Attached Images
    Last edited by VD2021; 07-30-2012 at 12:32 AM.
    R/s
    Vidal
    CURRENT STATUS: Interior Rework and Bodywork.
    GenII GTM #331. Delivered (23/9/10)
    BUILD LOG AND WEBSITE:
    http://gtmbuild.weebly.com/ .

Tags for this Thread

Posting Permissions

  • You may not post new threads
  • You may not post replies
  • You may not post attachments
  • You may not edit your posts
  •  

Replica Parts

Visit our community sponsor