BluePrint Engines

Visit our community sponsor

Thanks Thanks:  10
Likes Likes:  99
Page 1 of 48 12311 ... LastLast
Results 1 to 40 of 1910

Thread: Mechie3's 818S

  1. #1
    Mechie3's Avatar
    Join Date
    May 2012
    Location
    Indianapolis
    Posts
    5,176
    Post Thanks / Like

    Mechie3's 818S

    Can I have my own thread too!

    I might as well start from the beginning.

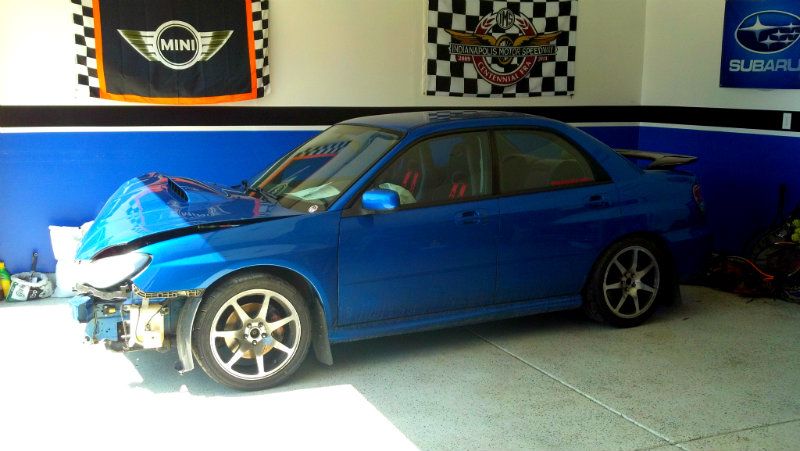
    Bought myself a brand new 2006 WRX a few months out of college. Autocrossed it from 2007 to 2010 and daily drove it until it's demise in 2012. Coming home from work, some lady ran a red light and I t-boned her passenger side. The motor was still running after the impact and I had enough wits about me to turn off the car. Insurance gave me a nice settlement and I bought the car back specifically to build an 818.

    The day I brought it back home where it belonged:


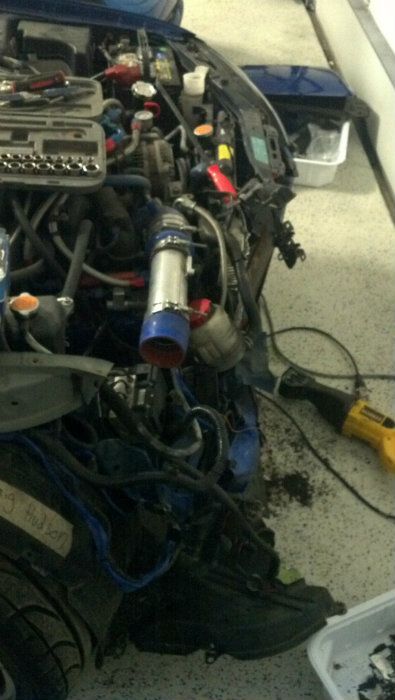
    Took a sawzall to the front bumper beam as the bolts were no longer accessible.


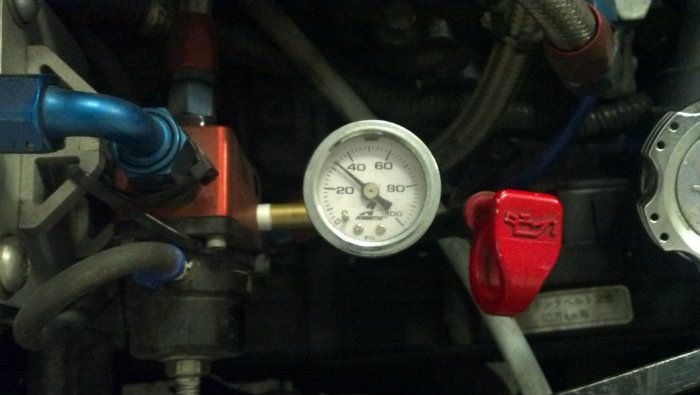
    FPR still showing pressure after sitting for over 1.5 weeks. Always a good sign.


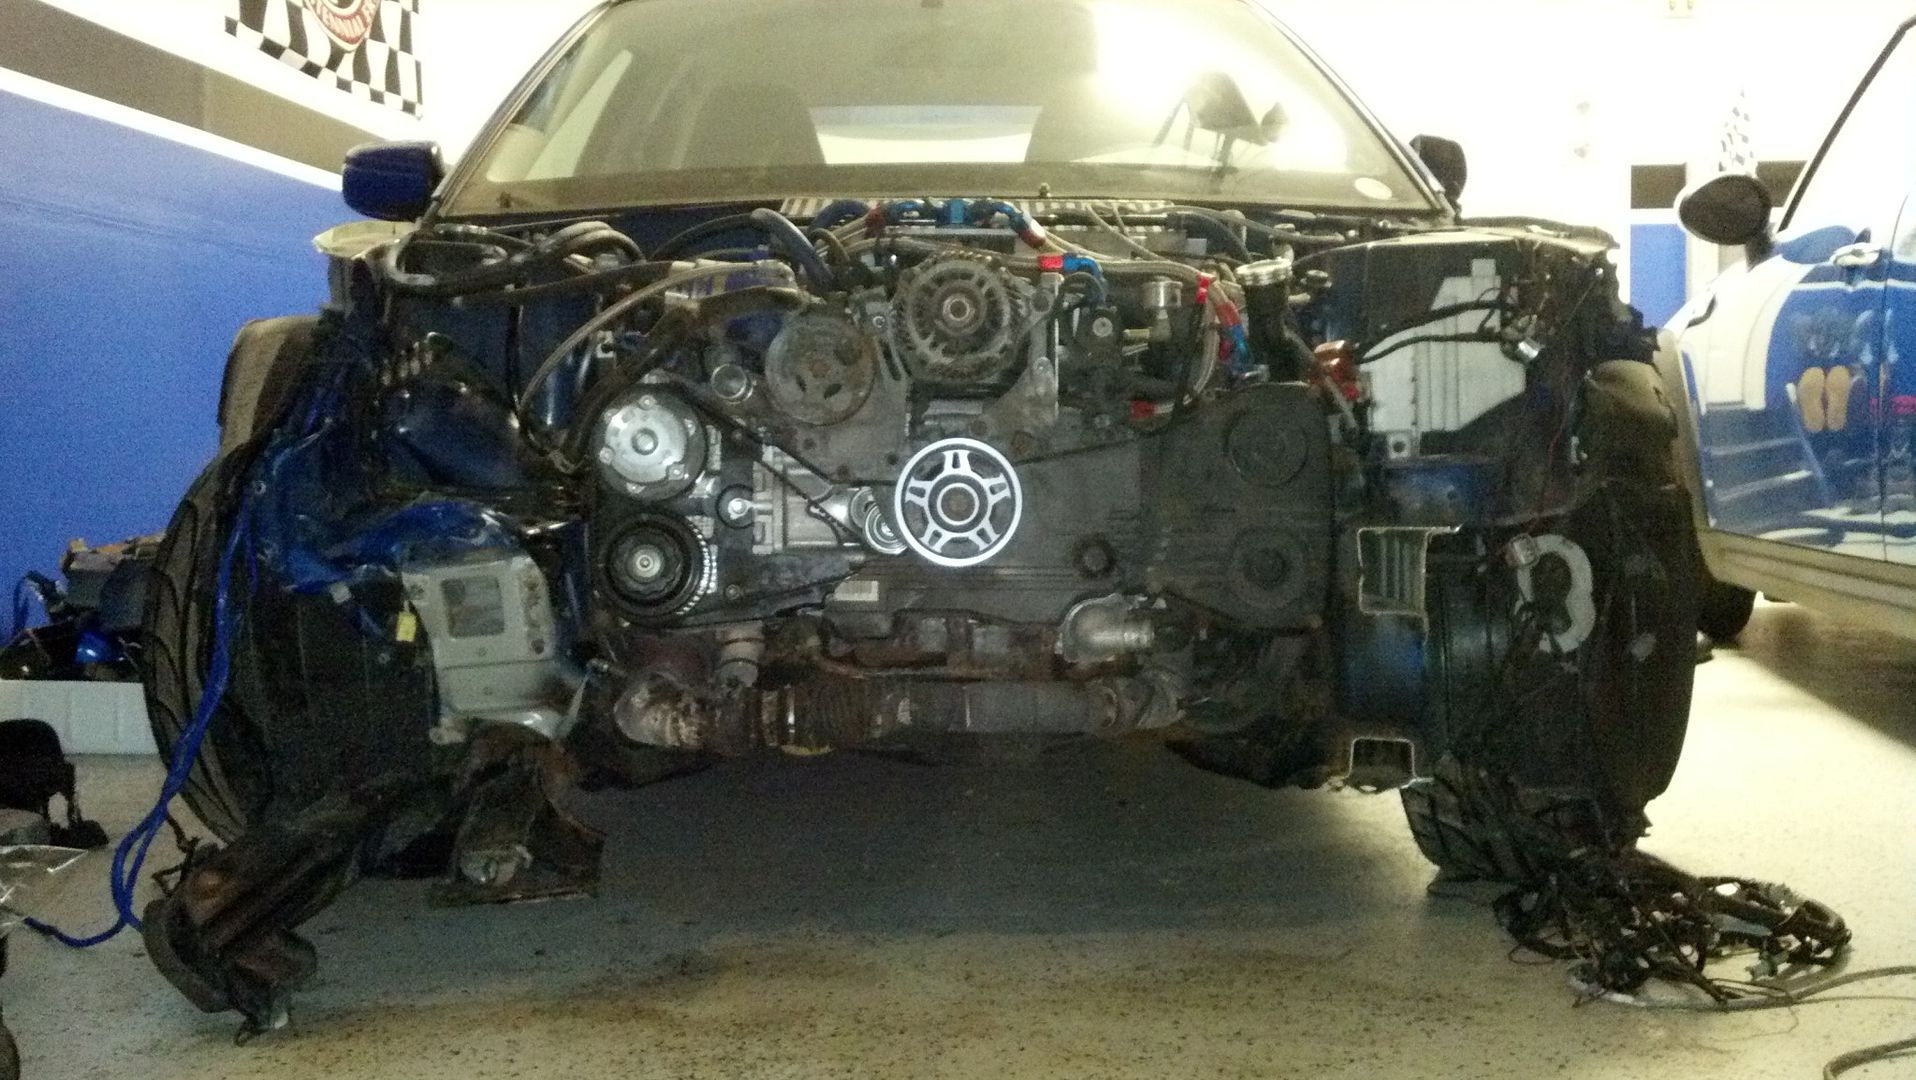
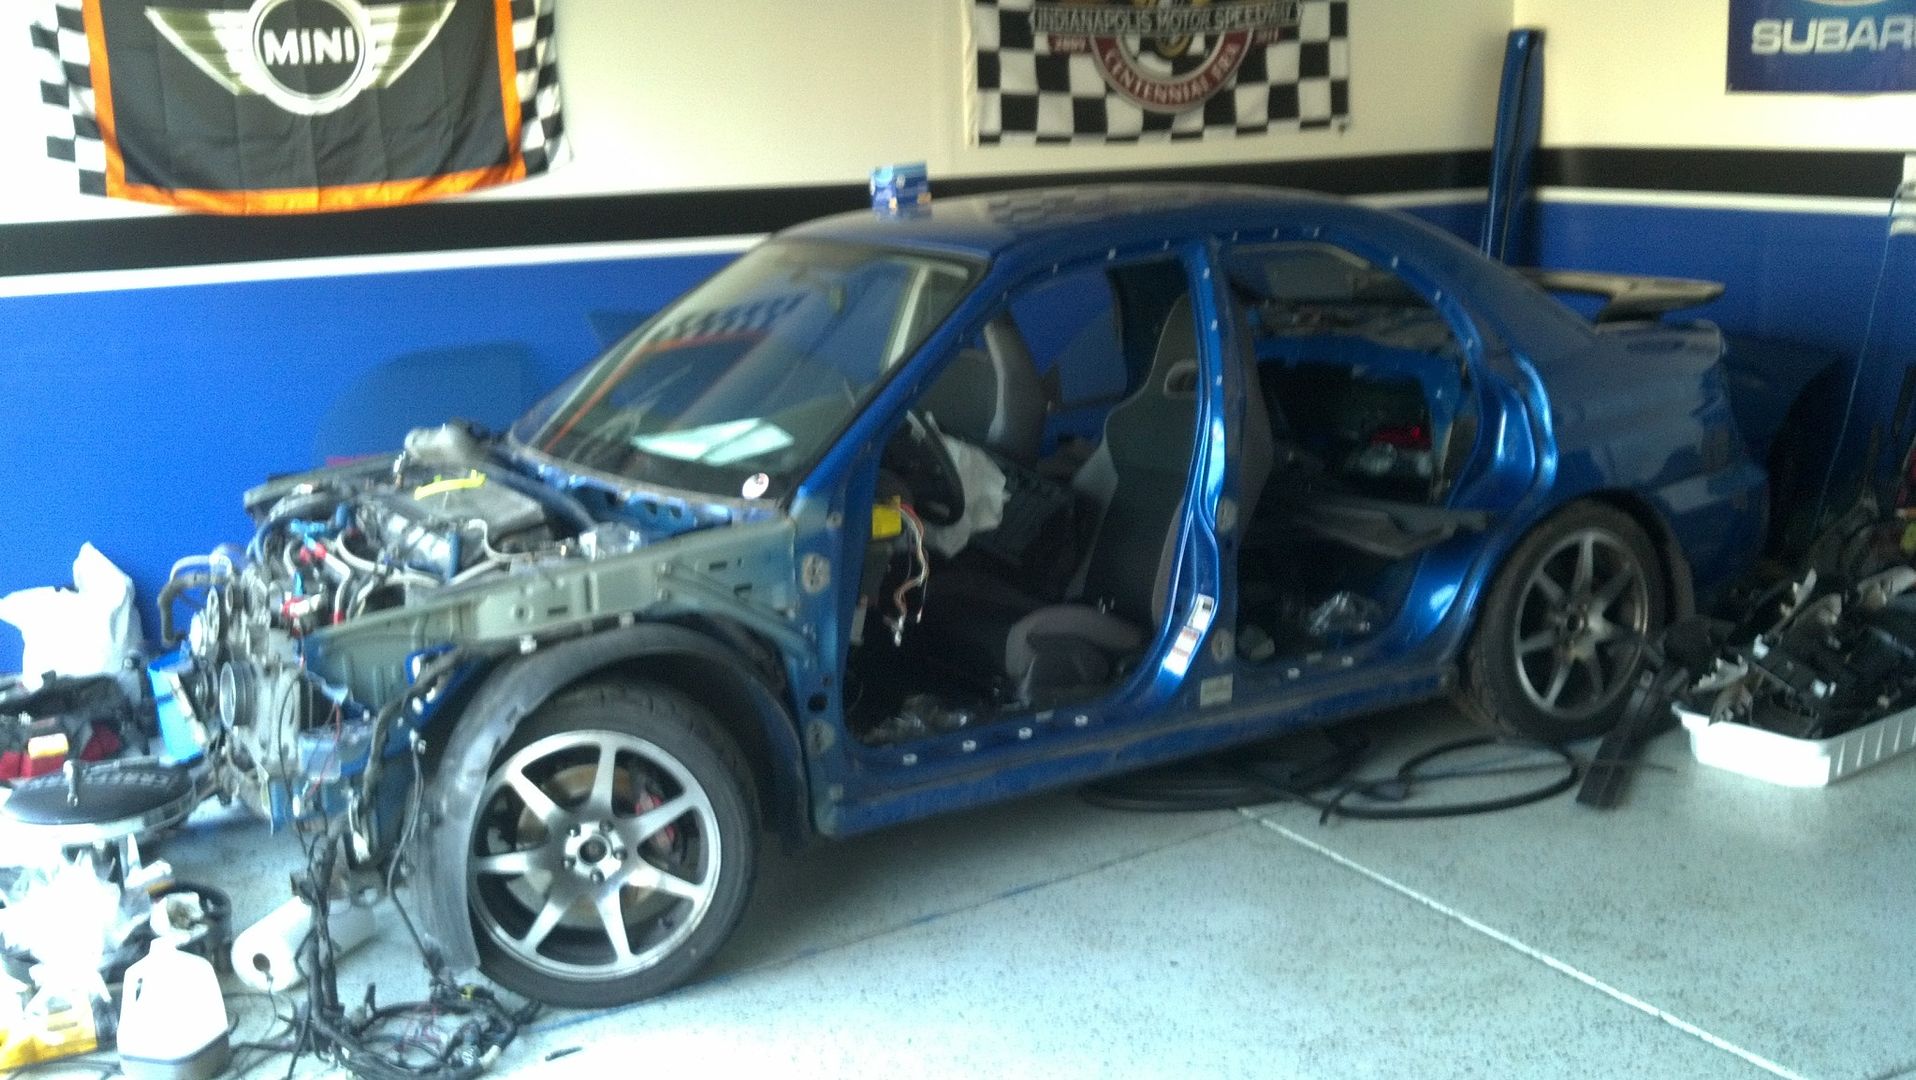
    Got the front end cut off:


    Doors off:


    At this point someone gave me the idea to just time lapse video the entire thing, so I did.

    https://vimeo.com/46070474
    Zero Decibel Motorsports
    Check out my new website!
    www.zerodecibelmotorsports.com
    www.facebook.com/zero.decibel.motorsports

  2. #2
    Mechie3's Avatar
    Join Date
    May 2012
    Location
    Indianapolis
    Posts
    5,176
    Post Thanks / Like
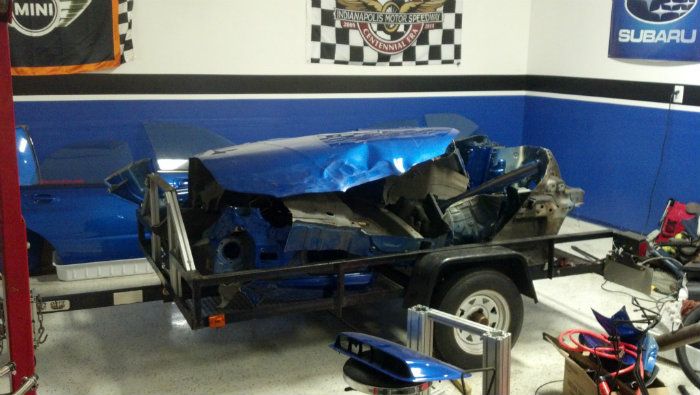
    The scrap metal condensed onto a trailer:


    After that, working on parts began.


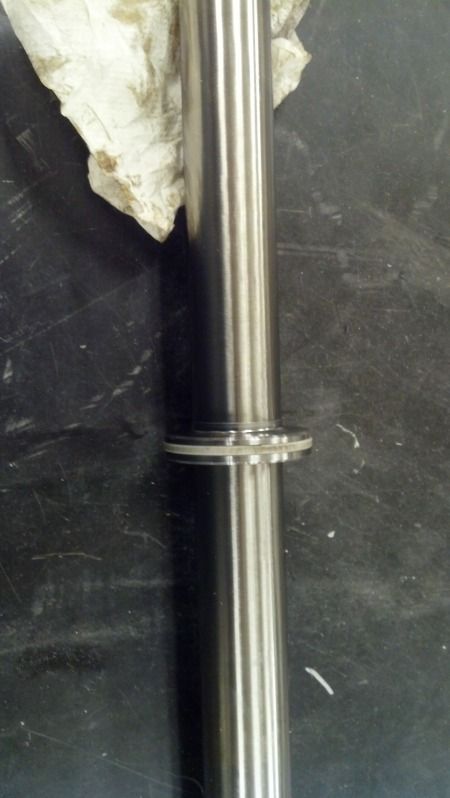
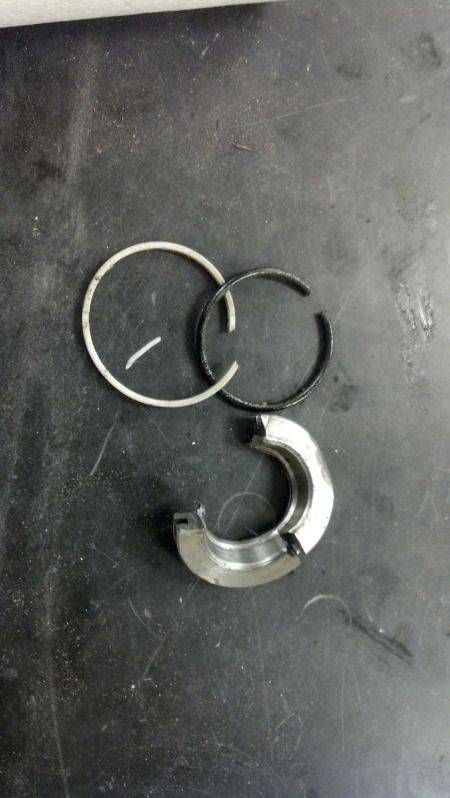
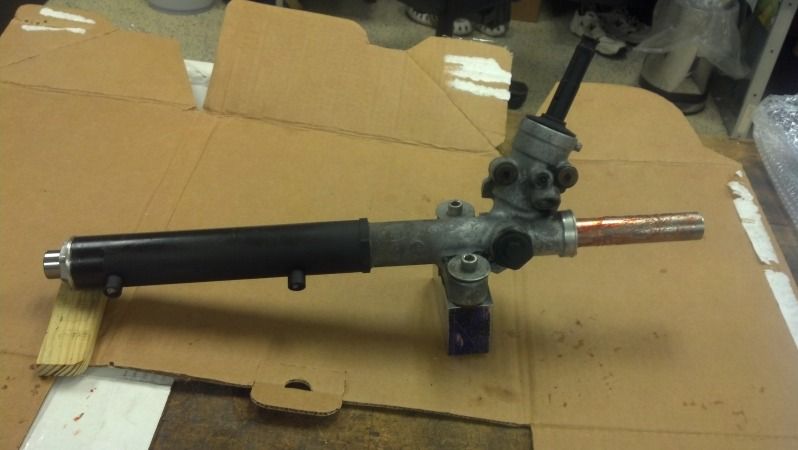
    Depowering the steering rack. Took all the lines off, removed the tie rods, took off teh end caps, remove the pinion, pressed the rack out, and depowered it. Depowering (fully, not just looping lines) requires you cut off the piston used for power steering. It's a rather tight fitting seal so it creates a decent amount of drag. Removing it improves feel and reduces the effort required.

    Here is the piston:


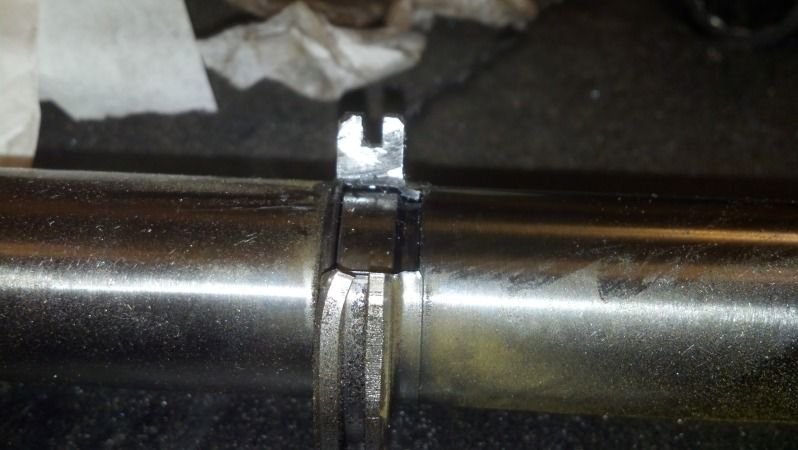
    Cutting it off. It has a lip that is roll formed onto the shaft, so cutting it is the only way to remove it.


    Here is what I cut off. There's the steel piston, a rubber backup o-ring, and then the surface seal:


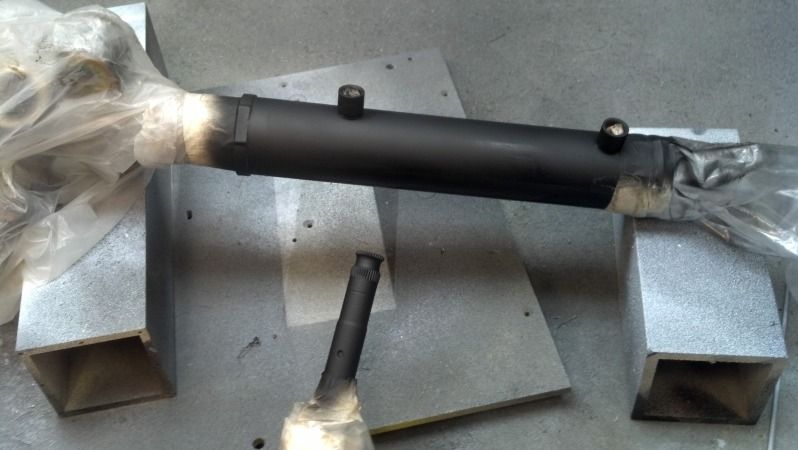
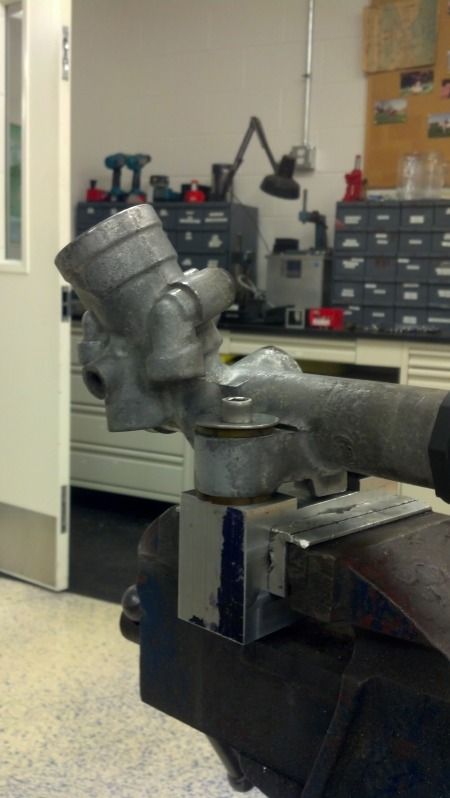
    Thoroughly degreased everything, bagged and tapped sensitive components, wire wheeled problem spots, and hit it with some rustoleum.


    The fixture I made.


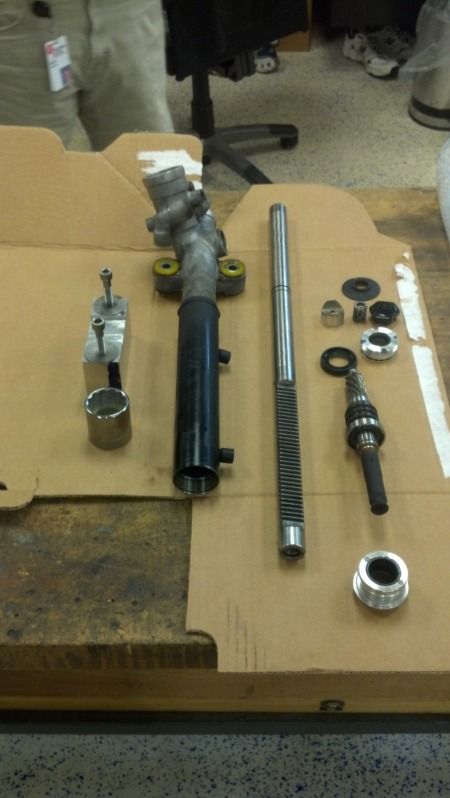
    All parts laid out for reassembly:
    Last edited by Mechie3; 02-04-2013 at 02:48 PM.
    Zero Decibel Motorsports
    Check out my new website!
    www.zerodecibelmotorsports.com
    www.facebook.com/zero.decibel.motorsports

  3. #3
    Mechie3's Avatar
    Join Date
    May 2012
    Location
    Indianapolis
    Posts
    5,176
    Post Thanks / Like
    Back together:

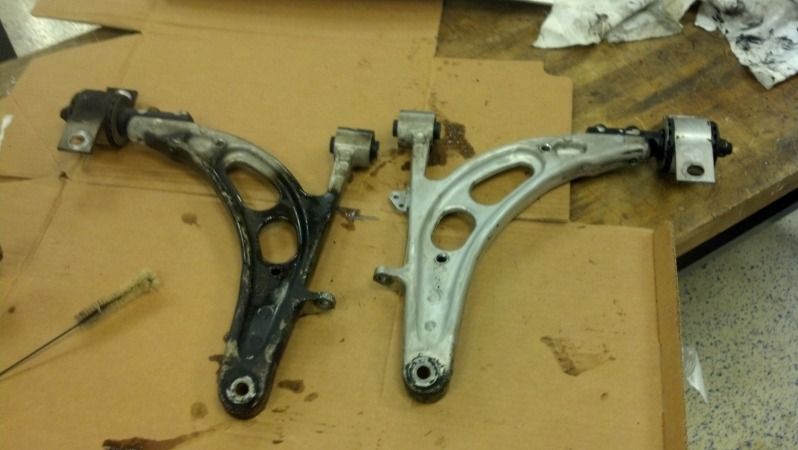
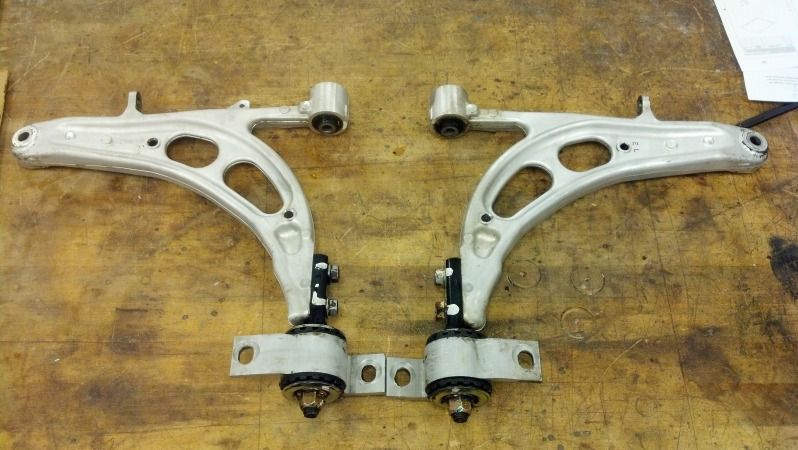
    Cleaned up the lower control arms today.

    Halfway:


    Done:


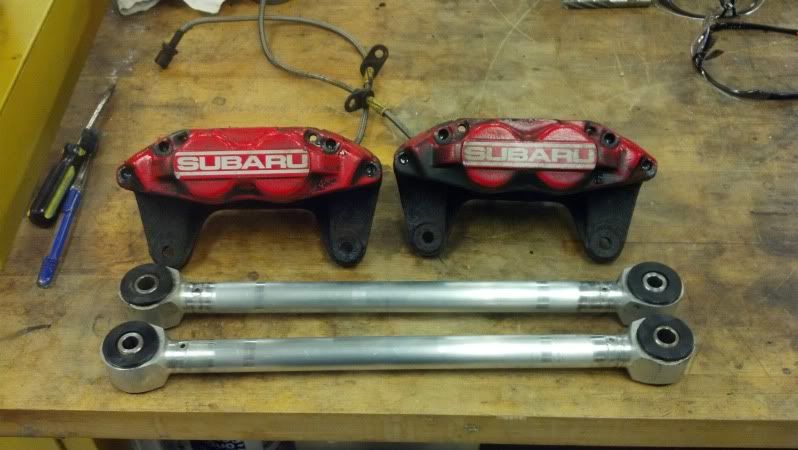
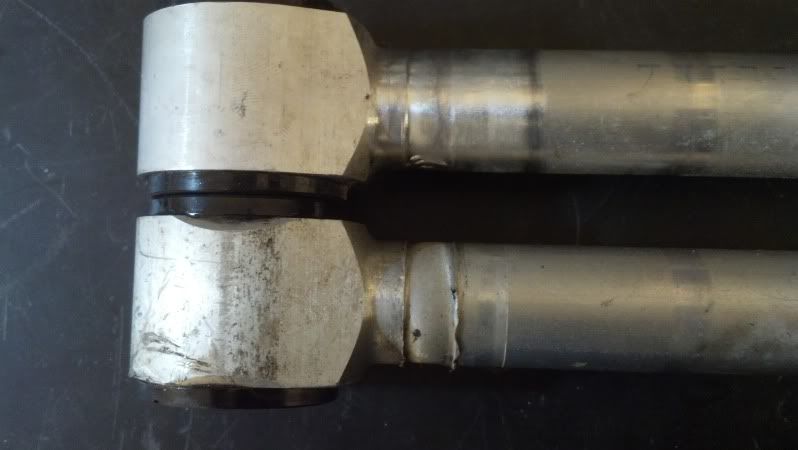
    Cleaned up my brakes and the aluminum lateral links today. I daily drove with Hawk DTC-30's (track pads) for over a year so I would never expect to get all of the dust off. These are cleaner than they've been in 3 years. I've since decided to sandblast and powder coat the brakes.


    Also belt sanded off the sharp edges from the weld and wire wheeled it to even up the appearance. Top is complete, bottom is stock to show the difference.


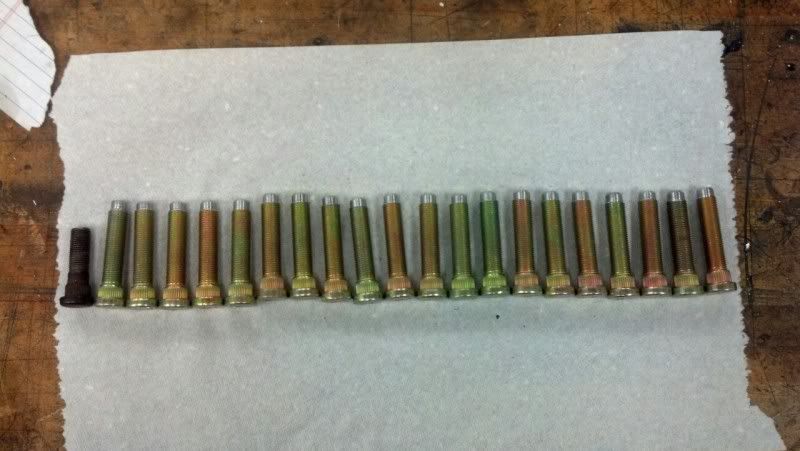
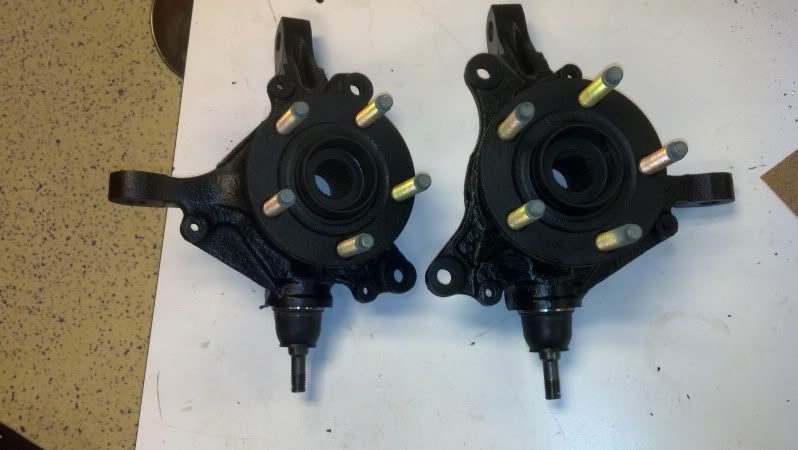
    I previously pressed out all the studs so I could easily clean up the hubs. I'd replaced 2 or 3 of the studs over the years from multiple autocross wheel changes. ARP extended studs were $30 for 5 studs. Touge Factory had extended studs for around $28/10. hmmmm.... Stock would certainly have been fine (~$2/stud), so the slightly upgraded TF studs were an acceptable solution and 1/2 the cost of ARP studs. They didn't have the bullet nose quick start though. Put them on the lathe and took care of that. Too bad I don't yet know how to run the CNC lathe. Doing 20 studs by hand was a pain. You can see a stock stud on the far right. The TF studs are 2.5", factory was 1.8". I took .25" off to make the quick start nose, so I still have just under a 1/2 gain in total length. I'll need to coat the ends though so it's not bare steel.


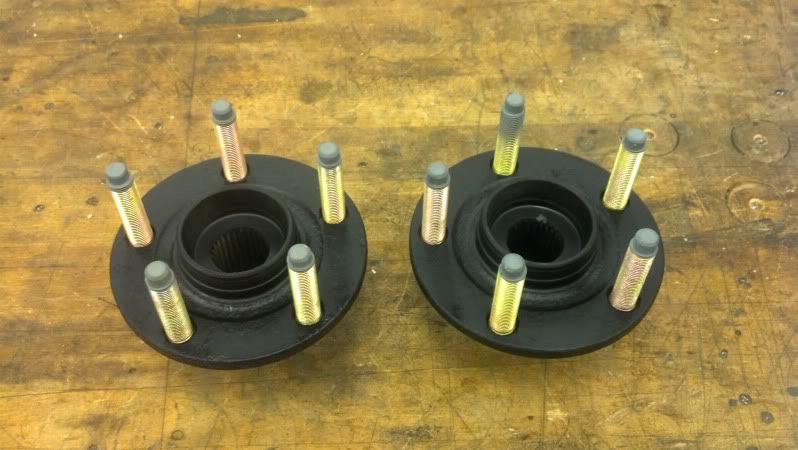
    Wire wheeled then sand blasted and painted the hubs. Sprayed a cold galvanizing product on the non coated tips of the studs (I machined bullet noses on them) and pressed in the studs today.

    Last edited by Mechie3; 02-04-2013 at 02:51 PM.
    Zero Decibel Motorsports
    Check out my new website!
    www.zerodecibelmotorsports.com
    www.facebook.com/zero.decibel.motorsports

  4. #4
    Mechie3's Avatar
    Join Date
    May 2012
    Location
    Indianapolis
    Posts
    5,176
    Post Thanks / Like
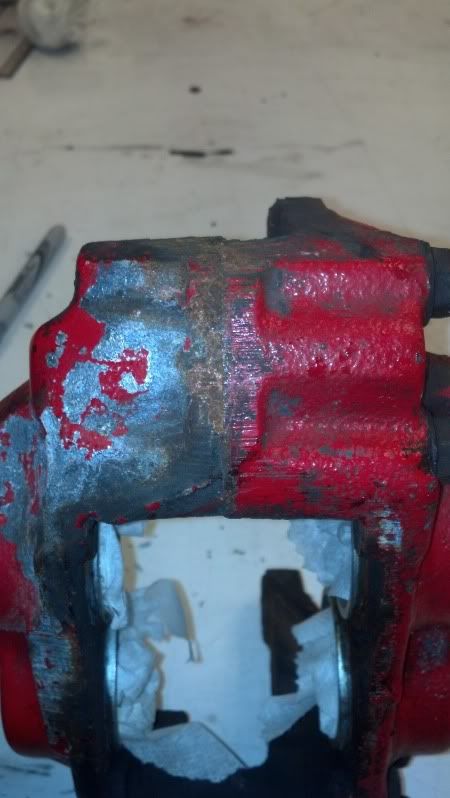
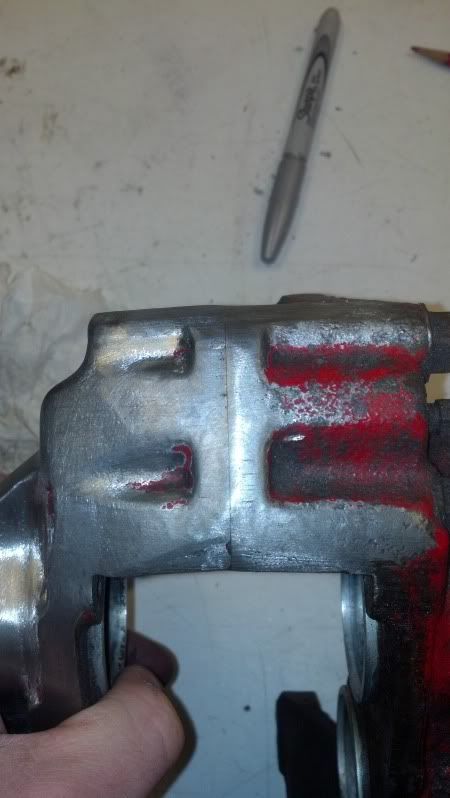
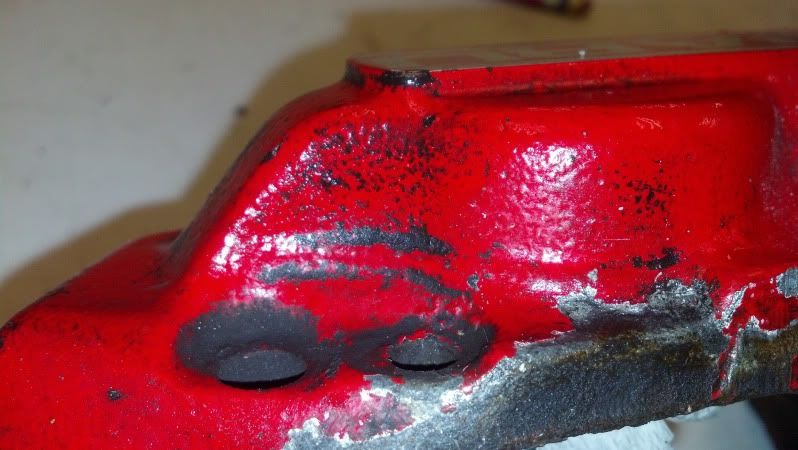
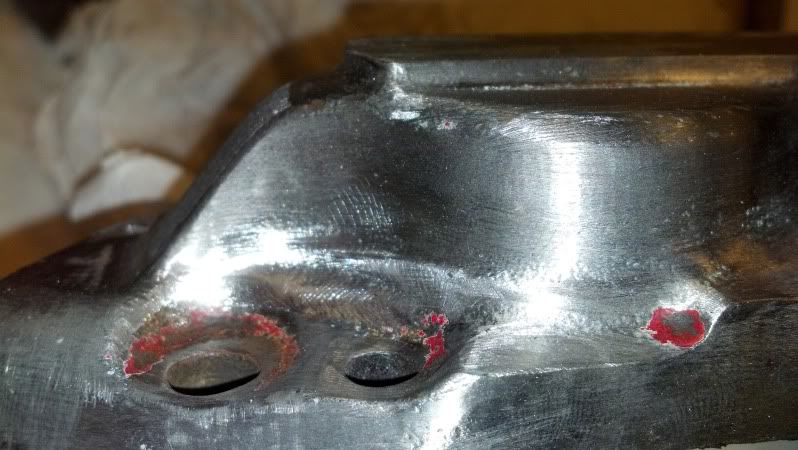
    Since I'm powdercoating the brakes, I've been cleaning up the castings. Some of the parting lines weren't flush, other areas looked like they band sawed off excess casting material. The entire casting itself also had a rougher mottled texture to it. These tended to trap dirt and make them impossible to ever get fully clean.

    Handful of before and after pics. I still need to fully blast these and finish cleaning them up.


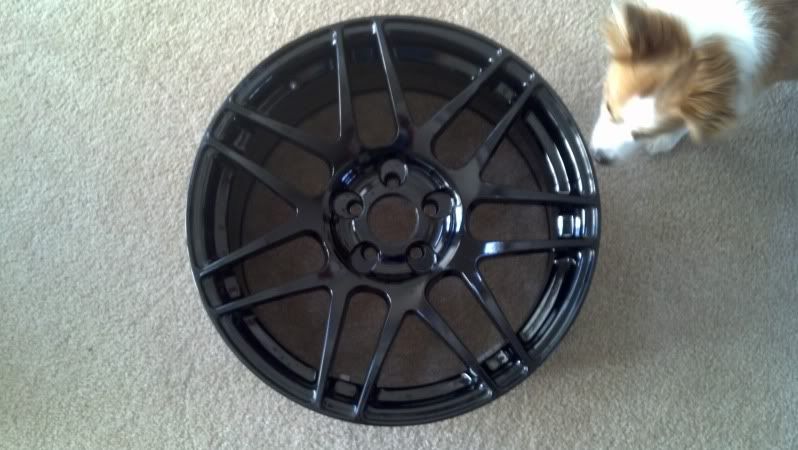
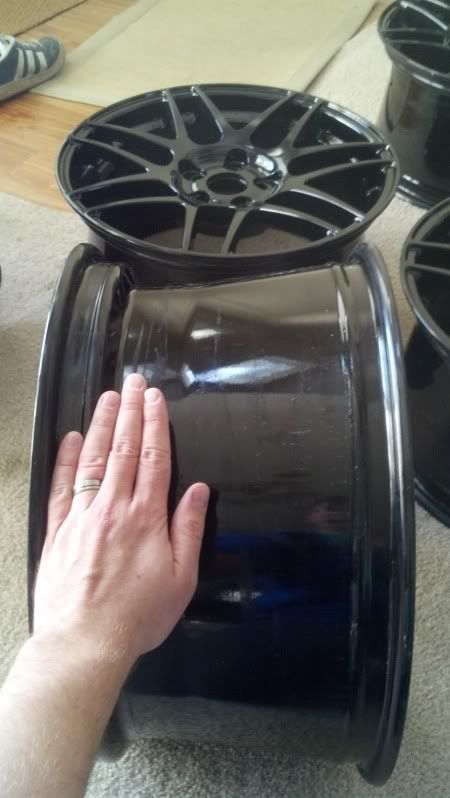
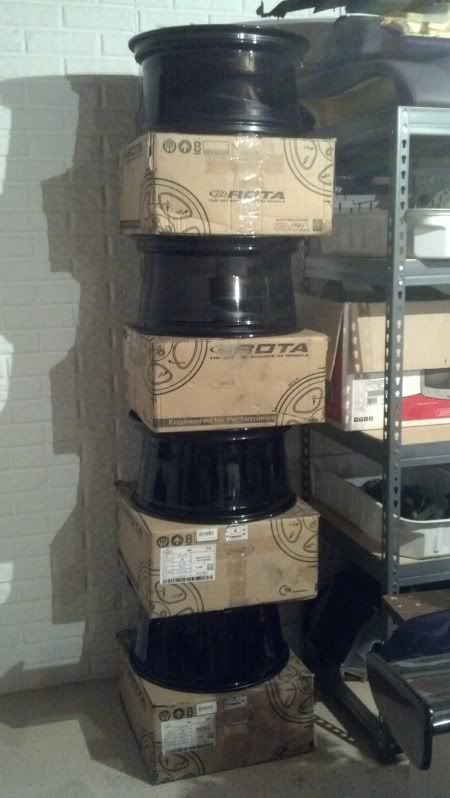
    Here's a shot of the wheels I picked up. Still not sure if I'm going to leave them black or have them powdercoated gold.

    One of the dogs doing quality control:


    Yeah...that's wide. 9.5" wide to be exact.


    Right side is wire wheeled and coated with Eastwoods version of POR15. Left side is the same plus a gloss black paint sprayed on it.

    Last edited by Mechie3; 02-04-2013 at 02:53 PM.
    Zero Decibel Motorsports
    Check out my new website!
    www.zerodecibelmotorsports.com
    www.facebook.com/zero.decibel.motorsports

  5. #5
    Mechie3's Avatar
    Join Date
    May 2012
    Location
    Indianapolis
    Posts
    5,176
    Post Thanks / Like
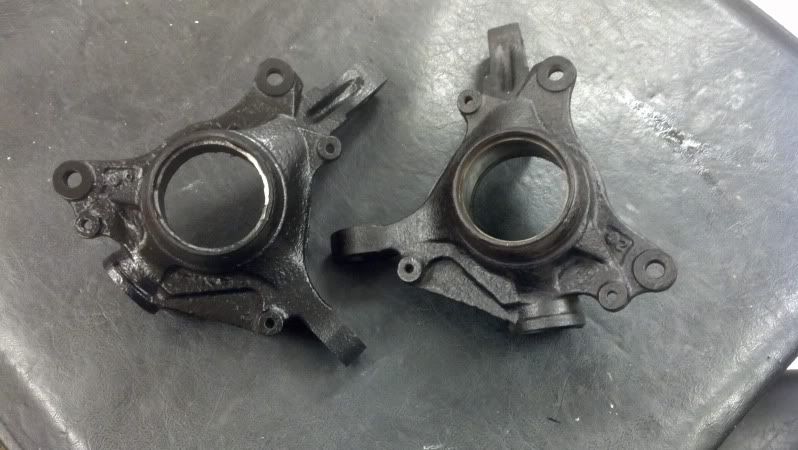
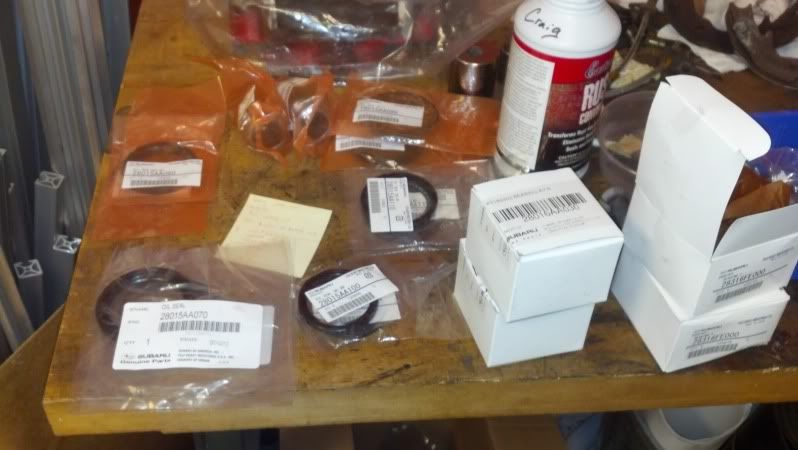
    A few hundred bucks worth of bearings, seals, and ball joints.


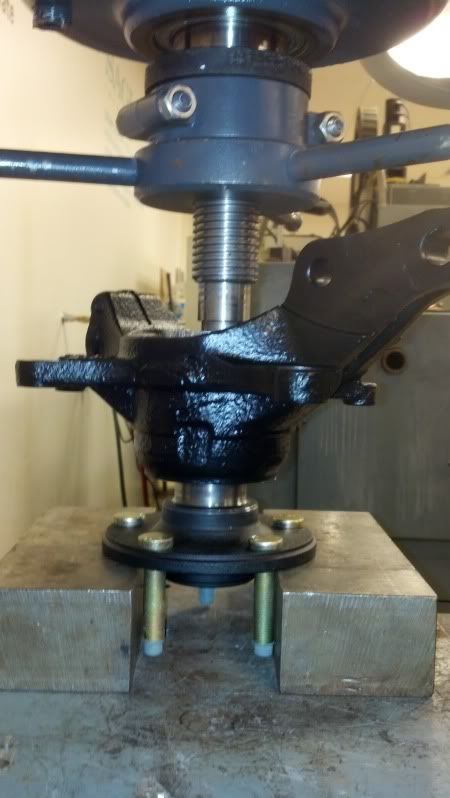
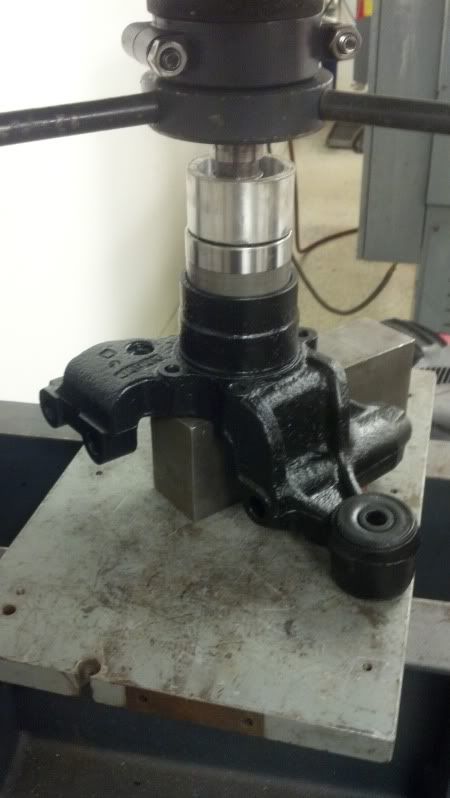
    Pressing in a hub:


    Fronts complete:


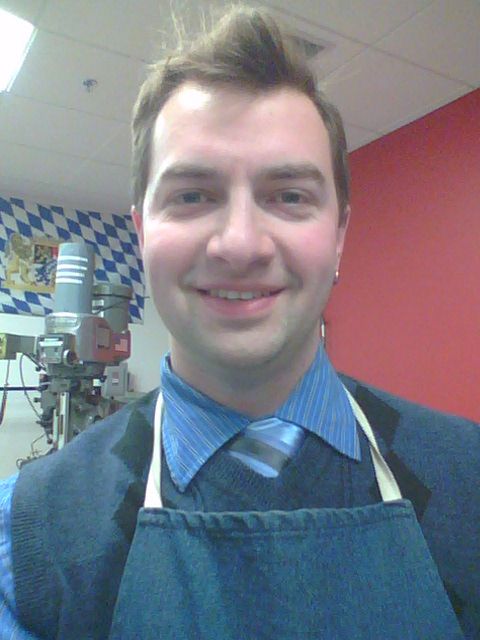
    And because I'm such a stylish fellow, I did all the work while wearing a dress shirt, sweater vest, and a tie. :lol:


    (ok, so it wasn't all done in a tie, and I was wearing a shop apron too....but that isn't a funny story )
    Last edited by Mechie3; 02-04-2013 at 02:54 PM.
    Zero Decibel Motorsports
    Check out my new website!
    www.zerodecibelmotorsports.com
    www.facebook.com/zero.decibel.motorsports

  6. #6
    Mechie3's Avatar
    Join Date
    May 2012
    Location
    Indianapolis
    Posts
    5,176
    Post Thanks / Like
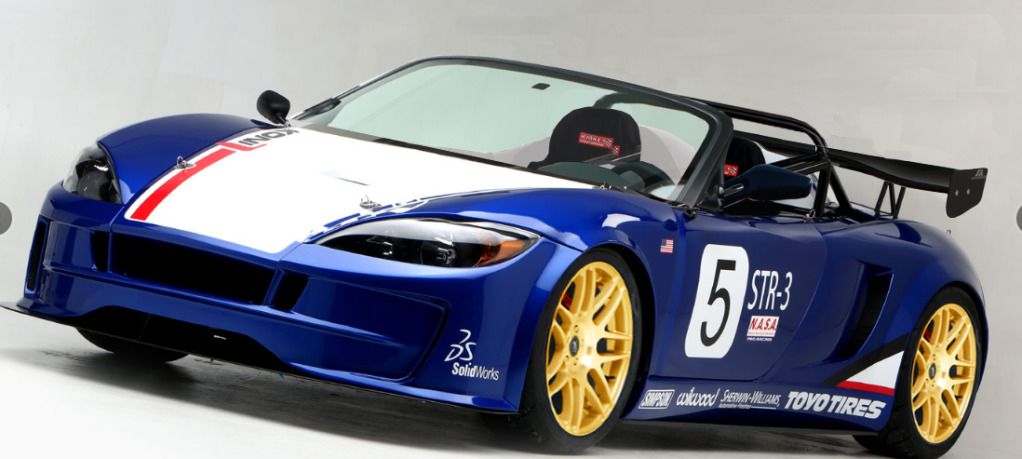
    Here's the end goal. Someone was nice enough to photoshop this for me (and apparently I wasn't nice enough to remember their name... )


    More to come as it gets done. It's a little slow going. I have until July 20th, and tend to do most of the work in 1 hour increments during my lunch break at work.
    Last edited by Mechie3; 02-04-2013 at 02:56 PM.
    Zero Decibel Motorsports
    Check out my new website!
    www.zerodecibelmotorsports.com
    www.facebook.com/zero.decibel.motorsports

  7. #7
    Senior Member Tom Veale's Avatar
    Join Date
    Mar 2011
    Location
    Wisconsin
    Posts
    455
    Post Thanks / Like
    Nice work M3, Looks like you'll have your parts bin ready when the chassis and body arrive.

    Do a Time Laps video of the assembly, too! I lost track of how many times you got on and off your creeper!

    Best regards,

  8. #8
    Senior Member rjh2pd's Avatar
    Join Date
    Jul 2012
    Location
    Detroit MI
    Posts
    159
    Post Thanks / Like
    I'm leaning towards that look as well, but without the decals and still debating the white hood. Good work!

  9. #9

    Join Date
    Feb 2011
    Location
    Norton, MA USA earth
    Posts
    3,443
    Post Thanks / Like
    Love those wheels.
    Mike

  10. #10
    Member
    Join Date
    Mar 2012
    Posts
    57
    Post Thanks / Like
    Nice job. It looks like it is coming along well.

    What are your plans for the engine and turbo?

  11. #11
    Senior Member AZPete's Avatar
    Join Date
    Feb 2011
    Location
    Scottsdale, AZ
    Posts
    2,374
    Post Thanks / Like
    Beautiful! Please reply with your address so we can send stuff for polishing and primping.
    818S/C : Chassis #25 with 06 WRX 2.5 turbo, ABS, cruise, PS, A/C, Apple CarPlay, rear camera, power windows & locks, leather & other complexities. Sold 10/19 with 5,800 miles.
    Mk3 Roadster #6228 4.6L, T45, IRS, PS, PB, ABS, Cruise, Koni's, 17" Halibrands, red w/ silver - 9K miles then sold @ Barrett-Jackson Jan 2011 (got back cash spent).

  12. #12
    fasterer and furiouser longislandwrx's Avatar
    Join Date
    Aug 2012
    Location
    Long Island
    Posts
    2,540
    Post Thanks / Like
    Blog Entries
    6
    Those hubs look great! Can you post a list of all the bearings/races/seals you needed and the p/ns? Also let us know who coats your calipers and the charge. I found a place near me that will do 4 for $200, not sure what a fair price is.

    Awesome work.
    A well stocked beverage fridge is the key to any successful project.

  13. #13
    Mechie3's Avatar
    Join Date
    May 2012
    Location
    Indianapolis
    Posts
    5,176
    Post Thanks / Like
    Quote Originally Posted by papajon1000 View Post
    What are your plans for the engine and turbo?
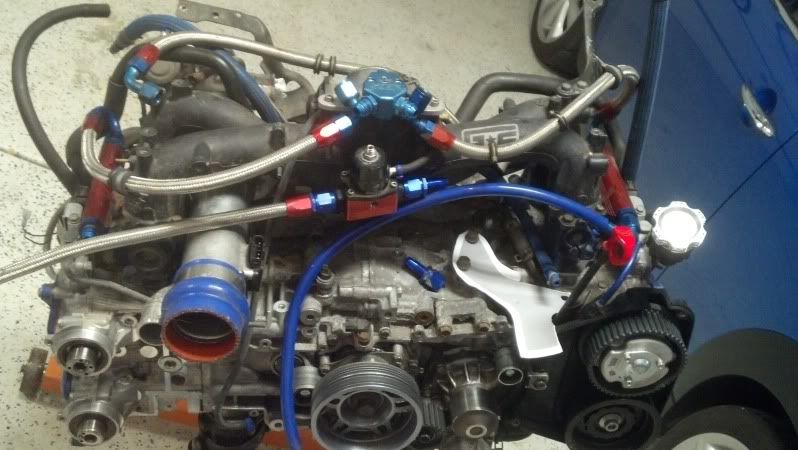
    It'll be the motor/turbo as it was in the WRX. Stock block, stock heads (they were gasket matched 1" from the inlet a while back), TGV delete, Grimmspeed intake manifold, aeromotive fuel rails (for the bling), AC delete, PS delete (new for 818), PnP throttle body, big aluminum TMIC, silicone/aluminum Y pipe, stock TD04 turbo, silicone turbo inlet, aluminum intake, propsort header (new for 818).

    Quote Originally Posted by AZPete View Post
    Beautiful! Please reply with your address so we can send stuff for polishing and primping.
    The aluminum isn't polished, just cleaned. I let it soak in simple green then wipe it down and used a tooth brush as needed.

    Quote Originally Posted by longislandwrx View Post
    Those hubs look great! Can you post a list of all the bearings/races/seals you needed and the p/ns? Also let us know who coats your calipers and the charge. I found a place near me that will do 4 for $200, not sure what a fair price is.

    Awesome work.
    Calipers: A friend is doing them at a shop he works at. I traded him a front swaybar a few years back in exchange for future services. I finally got a chance to need services. :lol:

    Here are the part numbers. The local dealership gives the Subaru club 20% off list, 25% off if you spend over $500, and $28% off if it's your birthday. I compiled a huge list and went in on my bday. haha! Prices listed are the 28% off price I paid.

    Front
    28015AA070 OIL SEAL 6.36
    28015AA080 OIL SEAL 7.70
    28316FE000 BEARING F AX 61.02

    Rear
    28015AA090 OIL SEAL 7.52
    28015AA100 OIL SEAL 7.29
    28015AA110 OIL SEAL 8.60
    7 28016AA030 PT180303 BEA 58.28

    Ball joint:
    20206AJ000 29.93

    Also bought some new bands for the boots on the PS rack:
    34128AE010 1.39
    34128FE010 3.28

    Needed new axle nuts too:
    902170049 3.24

    These are all parts correct for a 2006 WRX. They might be slightly different for other years, but at least give you a place to start.
    Zero Decibel Motorsports
    Check out my new website!
    www.zerodecibelmotorsports.com
    www.facebook.com/zero.decibel.motorsports

  14. #14
    PLATNUM Supporting Member
    wallace18's Avatar
    Join Date
    Apr 2012
    Location
    Trenton, Florida
    Posts
    5,388
    Post Thanks / Like
    Great Thread. I like all the pictures.

  15. #15
    Senior Member
    Join Date
    Oct 2011
    Posts
    179
    Post Thanks / Like
    Wow, a non TR WRX. Those are a rarity big time. Sad to see it destroyed from the wreck At least it'll become something awesome now instead of rusted out junkyard scrap.

  16. #16
    Mechie3's Avatar
    Join Date
    May 2012
    Location
    Indianapolis
    Posts
    5,176
    Post Thanks / Like
    That was my thought. I toyed with selling it a few months prior and couldn't do it. My first new car, the car I learned to work on cars with, and way too much emotional history. Now I got to "sell" it without really selling it and get an 818 out of the deal.
    Zero Decibel Motorsports
    Check out my new website!
    www.zerodecibelmotorsports.com
    www.facebook.com/zero.decibel.motorsports

  17. #17
    Not a waxer Jeff Kleiner's Avatar
    Join Date
    Feb 2011
    Location
    Bloomington, Indiana
    Posts
    8,533
    Post Thanks / Like
    Nice work on the documentation Craig! Keep it up man, this Subie stuff is all new to me and I'll need all the help I can get

    Looks like we're thinking along the same lines; an R fitted with a full S type windshield. I don't need operational doors. Waiting to get up close and personal with one to see what can be done to make for a (relatively) quick change from full to short screen.

    Carry on!
    Jeff

  18. #18
    Mechie3's Avatar
    Join Date
    May 2012
    Location
    Indianapolis
    Posts
    5,176
    Post Thanks / Like
    I'm actually doing an S, but with R aero bits (price depending FFR or make my own) and color scheme. I already have a dedicated AX car, and the wife will be more likely to want to ride in this if she doesn't need a step stool to get in and out. haha!
    Zero Decibel Motorsports
    Check out my new website!
    www.zerodecibelmotorsports.com
    www.facebook.com/zero.decibel.motorsports

  19. #19
    Member
    Join Date
    Oct 2012
    Location
    Livonia, Michigan
    Posts
    38
    Post Thanks / Like
    Nice job. Great thread.

    Any thoughts on how to store / palletize all of the parts until the kit comes?

  20. #20
    Mechie3's Avatar
    Join Date
    May 2012
    Location
    Indianapolis
    Posts
    5,176
    Post Thanks / Like
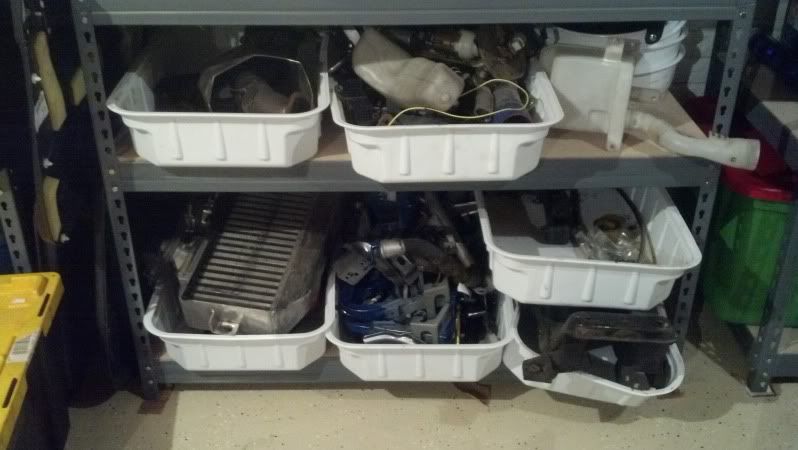
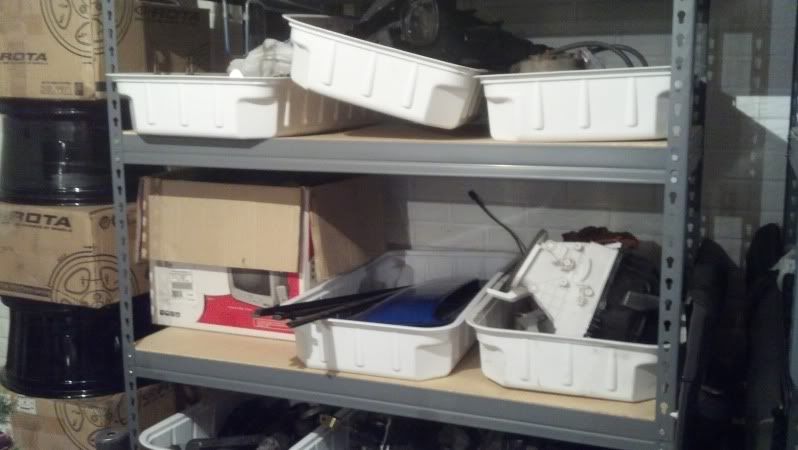
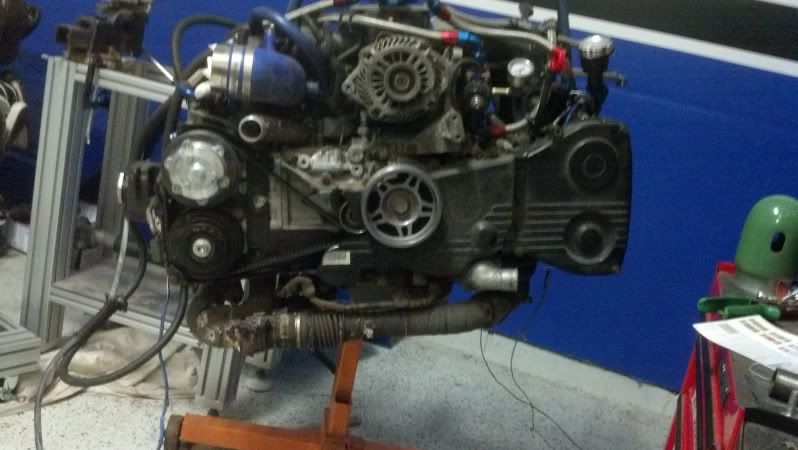
    Right now I have a few cabinets in the garage and shelves in the basements. My wife is a perfusionist at the hospital and their consumable supplies come in these 3'x18" x 4" thick plastic trays. They throw the trays out so she brings them home. They make excellent disposable storage bins for dirty parts. When the parts are clean, I put them in a new tray and throw out the dirty one. Transmission is on a wheeled cart in the garage. Motor is on an engine stand.


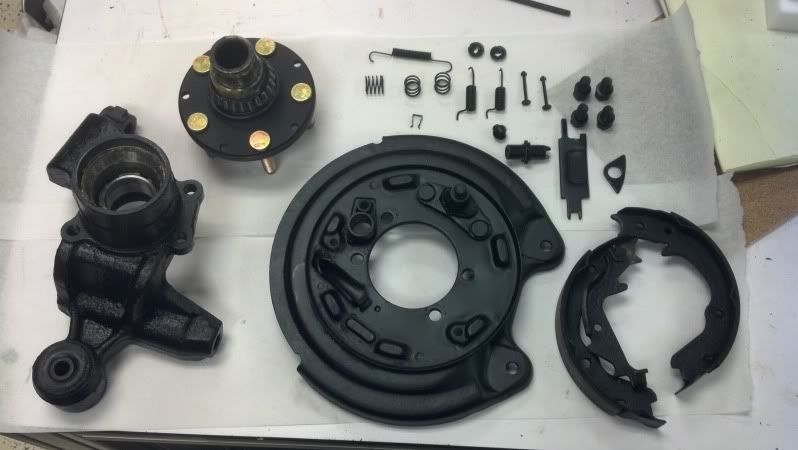
    Here's a rear hub I did.

    Pressing in the bearing:


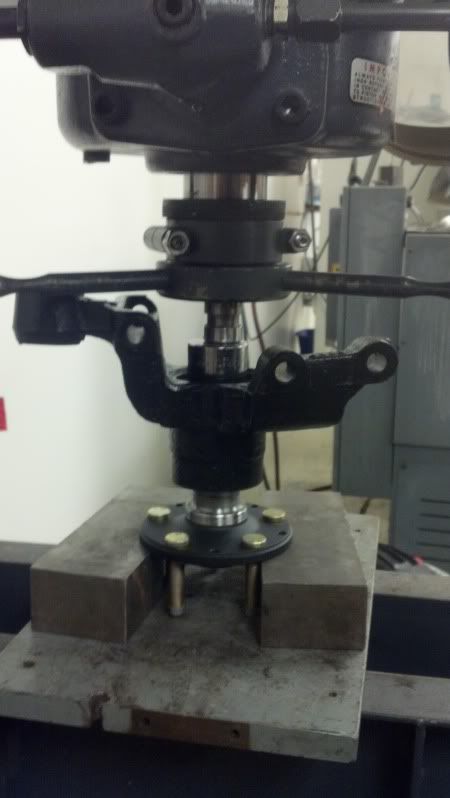
    Pressing in the hub:


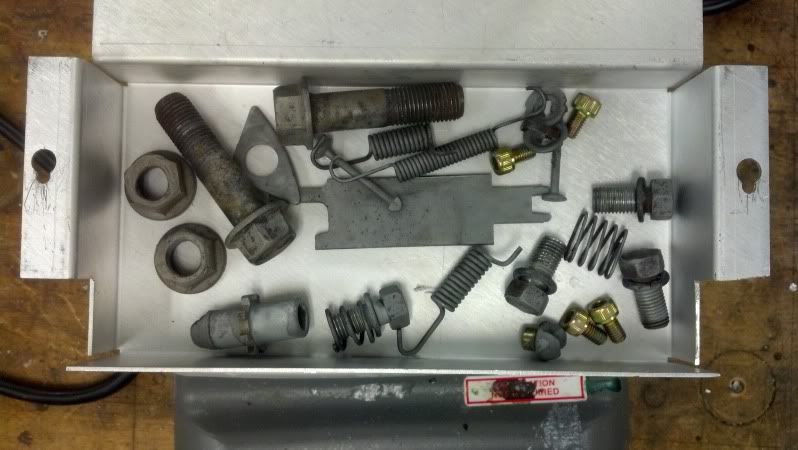
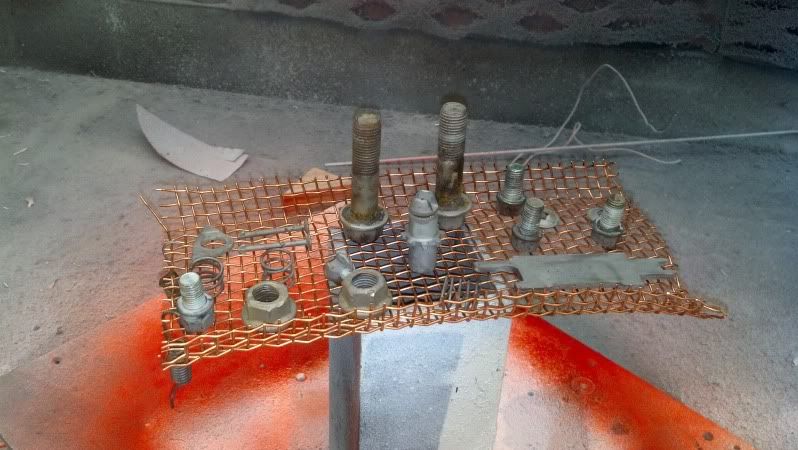
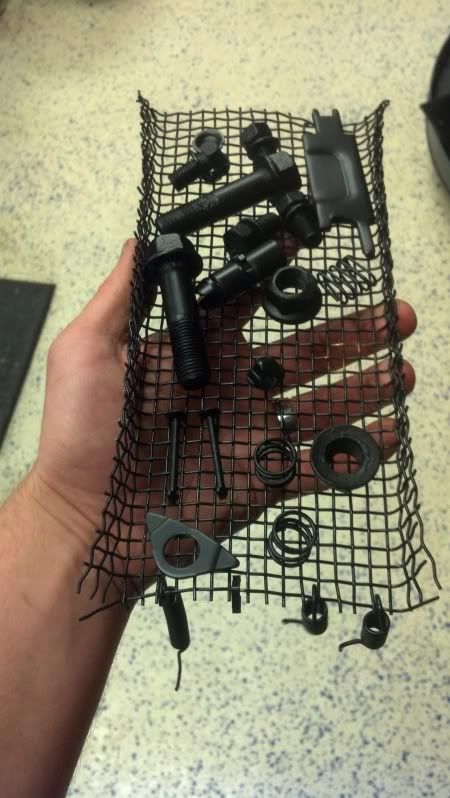
    Sandblasted one set of hardware for the E brake. These were all quite rusty. Just going to paint them black to slow down future rusting.
    Zero Decibel Motorsports
    Check out my new website!
    www.zerodecibelmotorsports.com
    www.facebook.com/zero.decibel.motorsports

  21. #21
    Senior Member wleehendrick's Avatar
    Join Date
    Jul 2012
    Location
    Encinitas, CA
    Posts
    1,653
    Post Thanks / Like
    Blog Entries
    2
    Quote Originally Posted by Red Tag View Post
    Nice job. Great thread.
    Agreed... a road-map for prepping my donor (although I probably won't be as thorough)!

    Quote Originally Posted by Red Tag View Post
    Any thoughts on how to store / palletize all of the parts until the kit comes?
    I'd like to know people's thoughts on that, particularly the motor. I'll be getting my parts soon and my delivery is in October. Do you think using a fogging oil in the cylinders and/or storing the motor in a desiccant bag is necessary for that length of time? I'm about a mile from the ocean, which could be a big concern, but luckily my parts will be stored much further inland.

  22. #22
    Mechie3's Avatar
    Join Date
    May 2012
    Location
    Indianapolis
    Posts
    5,176
    Post Thanks / Like
    Quote Originally Posted by wleehendrick View Post
    (although I probably won't be as thorough)!
    Some of the guys at work give me a (friendly) hard time for wanting things to always look nice. My theory has always been I want someone to look at something I made and say "oh, nice! I bet Craig made that!" not "oh....yeah, I bet you Craig probably made that piece of crap".


    E brake hardware ready for paint:


    Painted:
    Zero Decibel Motorsports
    Check out my new website!
    www.zerodecibelmotorsports.com
    www.facebook.com/zero.decibel.motorsports

  23. #23
    Mechie3's Avatar
    Join Date
    May 2012
    Location
    Indianapolis
    Posts
    5,176
    Post Thanks / Like
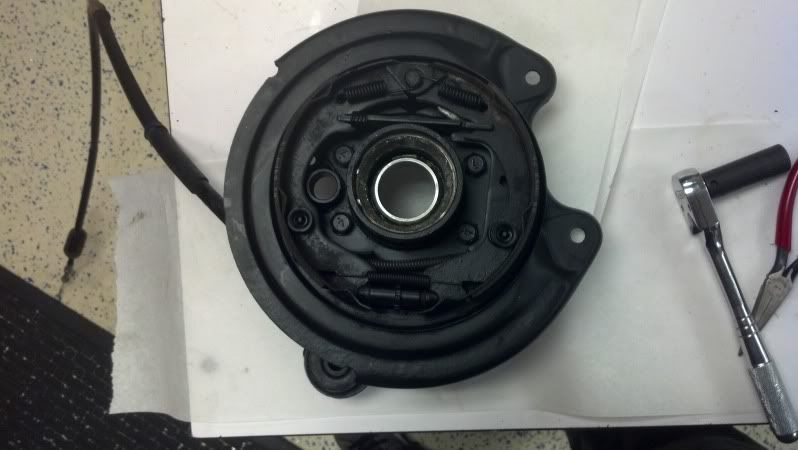
    Looks like I got a little too excited. I had to press the rear hub back out to install the ebrake. My bad. Wasn't terrible to undo it, but it's never fun undoing stuff you just did.

    Everything all lined up to go.


    All done.


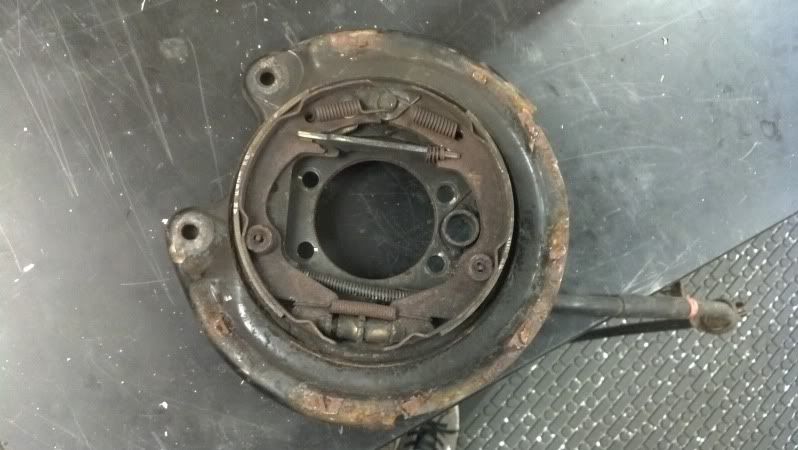
    What it used to look like. I chiseled off the dust sheild that was spot welded to the back plate.
    Zero Decibel Motorsports
    Check out my new website!
    www.zerodecibelmotorsports.com
    www.facebook.com/zero.decibel.motorsports

  24. #24
    818 builder metalmaker12's Avatar
    Join Date
    Mar 2012
    Location
    Exeter R.I
    Posts
    2,834
    Post Thanks / Like
    Blog Entries
    1
    I was going to call you out on that, but figured you would learn from it,,,lol, plus it was a pic of what you did, so I figured you already did it.
    818S frame #13 Jdm version 8 ej207

  25. #25
    Mechie3's Avatar
    Join Date
    May 2012
    Location
    Indianapolis
    Posts
    5,176
    Post Thanks / Like
    haha! It was my first time doing wheel bearings. Luckily I only did 1. I left the other assembled to use as a guide.
    Zero Decibel Motorsports
    Check out my new website!
    www.zerodecibelmotorsports.com
    www.facebook.com/zero.decibel.motorsports

  26. #26
    Mechie3's Avatar
    Join Date
    May 2012
    Location
    Indianapolis
    Posts
    5,176
    Post Thanks / Like
    Forgot I had these pics. This is where a lot of my smaller components are now. The shelves are 5 tier shelves, metal frame, MDF shelves. Supposed to hold 500lbs per shelf? not that I trust it to hold that much. The white trays are the hospital trays that they throw out and my wife brings home.


    Zero Decibel Motorsports
    Check out my new website!
    www.zerodecibelmotorsports.com
    www.facebook.com/zero.decibel.motorsports

  27. #27
    Mechie3's Avatar
    Join Date
    May 2012
    Location
    Indianapolis
    Posts
    5,176
    Post Thanks / Like
    It was warm(er) out today, so I snuck outside for about 30 mins before my wife went looking for me and I sweet talked myself into another 30 minutes.

    Started like this:


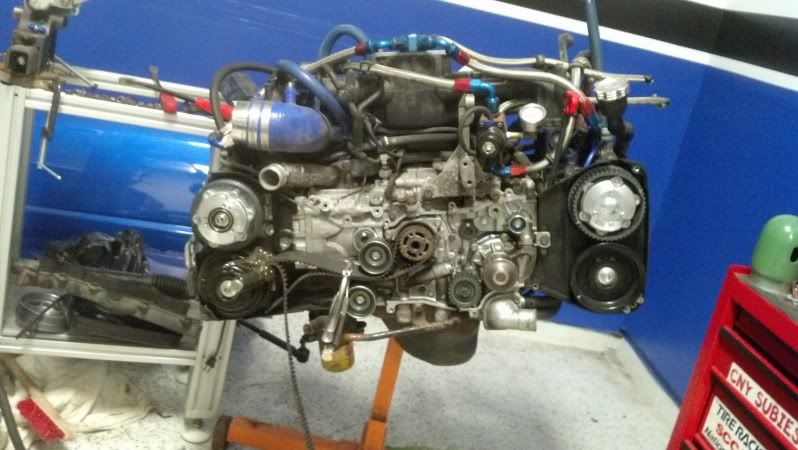
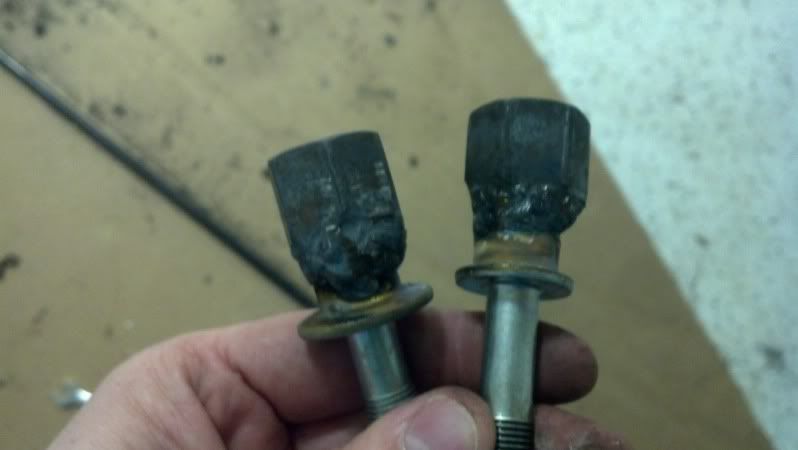
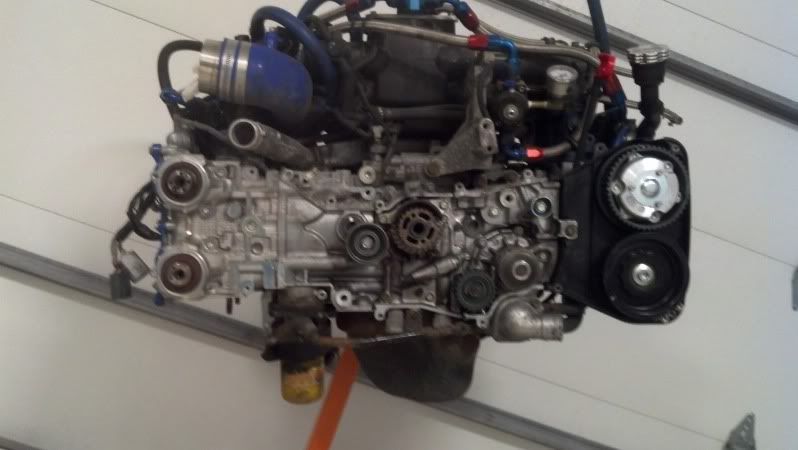
    Got the broken timing belt covers off and got stuck at the cam gears. Both of the passenger side bolts started to strip. Fun times. I'll have to find some 10mm hex stock tomorrow and weld it to the bolt and use an impact. Not a fan of the cap bolt design, but it is what it is. Took the manifold, crosspipe, upipe, 02 sensor, and alternator off. I'll probably end up mounting the alternator off to the driver side so I can center the FPR underneath the Y block.

    Here's how I ended. Not as far as I wanted to get but...eh. I've got time.
    Zero Decibel Motorsports
    Check out my new website!
    www.zerodecibelmotorsports.com
    www.facebook.com/zero.decibel.motorsports

  28. #28
    Senior Member Flamshackle's Avatar
    Join Date
    Jun 2011
    Location
    Aotearoa (New Zealand)
    Posts
    648
    Post Thanks / Like
    great updates. I like your work!
    __________________________________________________ _____________

    That man is no fool, who gives what he cannot keep to gain what he cannot lose
    __________________________________________________ _____________

  29. #29
    Member
    Join Date
    Oct 2012
    Posts
    91
    Post Thanks / Like
    Great work,
    For those with hydrulic presses you need to watch out because a common fault when installing Subaru bearing is to over press and this results in damage to the cone and the bearing will fail prematurly. My approach to Subaru bearings is to not to press the wheel hub into the bearing while its in the cone as that is how the damage can be done, mainly if you are using a hydrulic press.
    Tony

  30. #30
    Mechie3's Avatar
    Join Date
    May 2012
    Location
    Indianapolis
    Posts
    5,176
    Post Thanks / Like
    Quote Originally Posted by Flamshackle View Post
    great updates. I like your work!
    Thanks!

    Quote Originally Posted by Desertrunner View Post
    Great work,
    For those with hydrulic presses you need to watch out because a common fault when installing Subaru bearing is to over press and this results in damage to the cone and the bearing will fail prematurly. My approach to Subaru bearings is to not to press the wheel hub into the bearing while its in the cone as that is how the damage can be done, mainly if you are using a hydrulic press.
    Tony
    Hopefully I didn't do it wrong. It did press in quite easily and smoothly. I don't think the gauge registered much pressure at all in the cylinder. Once it bottomed out I let it be and didn't try to give it an extra push.
    Zero Decibel Motorsports
    Check out my new website!
    www.zerodecibelmotorsports.com
    www.facebook.com/zero.decibel.motorsports

  31. #31
    818 builder metalmaker12's Avatar
    Join Date
    Mar 2012
    Location
    Exeter R.I
    Posts
    2,834
    Post Thanks / Like
    Blog Entries
    1
    Mechie, It is true you can damage the bearings cone this way. However, do the hubs spin and have no odd sounds, are they seated all the way in, if so you should be ok. Most of the time, if you screw it up, you will know right away. I think you will be ok, looking good, I meant your parts btw lol. I will post my facebook pic in my thread if anyone cares. Next time just push the hub in and support the spindle, or say whatever and do it the way you did. I have done both like a lot, so either has worked, I did mess one up awhile back in my learning years, which are still going on daily btw.
    Last edited by metalmaker12; 02-11-2013 at 04:34 PM.
    818S frame #13 Jdm version 8 ej207

  32. #32
    Mechie3's Avatar
    Join Date
    May 2012
    Location
    Indianapolis
    Posts
    5,176
    Post Thanks / Like
    They spin smoothly with no noises.
    Zero Decibel Motorsports
    Check out my new website!
    www.zerodecibelmotorsports.com
    www.facebook.com/zero.decibel.motorsports

  33. #33
    818 builder metalmaker12's Avatar
    Join Date
    Mar 2012
    Location
    Exeter R.I
    Posts
    2,834
    Post Thanks / Like
    Blog Entries
    1
    ah go with it, 9 out of 10 your good
    818S frame #13 Jdm version 8 ej207

  34. #34
    Mechie3's Avatar
    Join Date
    May 2012
    Location
    Indianapolis
    Posts
    5,176
    Post Thanks / Like
    Finally got the cam bolts out. Had to weld nuts onto them. Not the prettiest weld, but when I did pretty welds my impact was able to rip the nut off the bolt. Pulled the cam gears and the broken timing belt cover before my wife went looking for me. haha.


    Zero Decibel Motorsports
    Check out my new website!
    www.zerodecibelmotorsports.com
    www.facebook.com/zero.decibel.motorsports

  35. #35
    Senior Member
    Join Date
    Apr 2012
    Location
    Nepa
    Posts
    685
    Post Thanks / Like
    Mechie. What are your braking the motor down for? Or you just planning to do a nice write up on how to reassemble a motor from a short block for us dummy's (hint hint).

  36. #36
    fasterer and furiouser longislandwrx's Avatar
    Join Date
    Aug 2012
    Location
    Long Island
    Posts
    2,540
    Post Thanks / Like
    Blog Entries
    6
    IIRC his car took a hit to the front passenger side and it broke the timing cover, you need to pull the cam gears to replace the rear cover.
    A well stocked beverage fridge is the key to any successful project.

  37. #37
    Mechie3's Avatar
    Join Date
    May 2012
    Location
    Indianapolis
    Posts
    5,176
    Post Thanks / Like
    ^^ Ding ding! Need to replace the timing cover. Thankfully I already had most of the parts I needed in the basement.

    The FSM is the best for reassembly from a shortblock. It has good instructions and diagrams.
    Zero Decibel Motorsports
    Check out my new website!
    www.zerodecibelmotorsports.com
    www.facebook.com/zero.decibel.motorsports

  38. #38
    Senior Member Xusia's Avatar
    Join Date
    Oct 2011
    Location
    Eugene, OR, USA
    Posts
    2,343
    Post Thanks / Like
    Hey Mechie3, didn't have a running list somewhere of parts you've sold and prices obtained? If so, where is that? It doesn't seem to be in this thread...

  39. #39
    Mechie3's Avatar
    Join Date
    May 2012
    Location
    Indianapolis
    Posts
    5,176
    Post Thanks / Like
    I think it's called "Sell of finances" something or other. Bstuke started a thread recently, and I linked to it in that thread.
    Zero Decibel Motorsports
    Check out my new website!
    www.zerodecibelmotorsports.com
    www.facebook.com/zero.decibel.motorsports

  40. #40
    Mechie3's Avatar
    Join Date
    May 2012
    Location
    Indianapolis
    Posts
    5,176
    Post Thanks / Like
    Wife is in Peru, so I got some guilt free garage time in. Monday was pretty good, Tuesday I ran out of propane for my heater 5 minutes into it. I managed 2 hours, but it was cold and snowing outside and my garage wasn't much better.

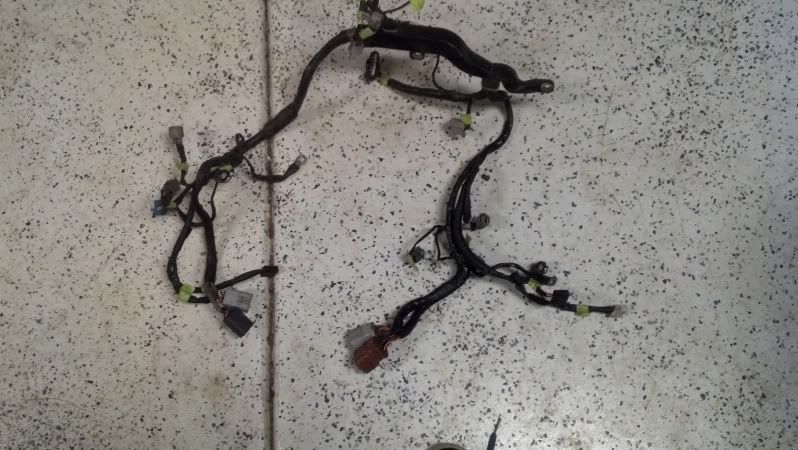
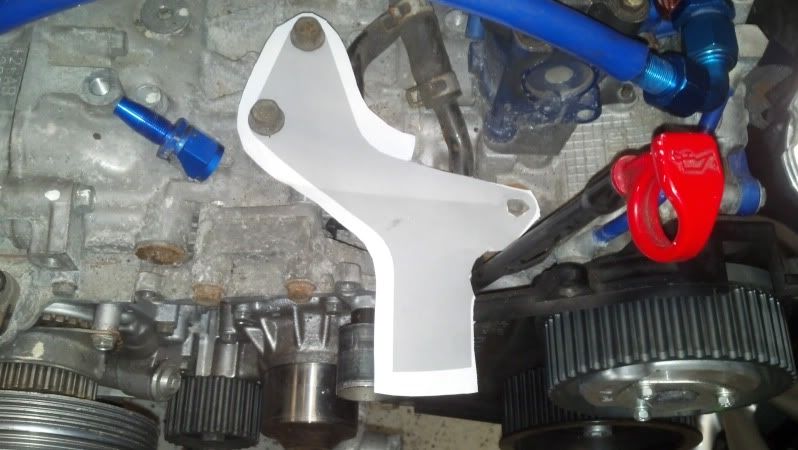
    Got some random bits taken off, started designing a bracket to relocate my alternator, marked the engine harness and pulled it out.

    Engine harness. Should be able to remove quite a few wires (cut off connectors years ago, never removed the wires).


    Figuring out how I want to run my fuel lines this time. Thinking of a custom turbo inlet so I can use a 90deg fitting on the front of the passenger fuel rail and make both sides look identical.


    Paper bracket test fit. Not bad. I used a piece of paper, punched holes, and did a bunch of measurements, averaged the two results. One hole was off by .050 and I needed to trim a radius. Second test tonight, then test piece on Thursday on the CNC.
    Zero Decibel Motorsports
    Check out my new website!
    www.zerodecibelmotorsports.com
    www.facebook.com/zero.decibel.motorsports

Page 1 of 48 12311 ... LastLast

Posting Permissions

  • You may not post new threads
  • You may not post replies
  • You may not post attachments
  • You may not edit your posts
  •  

Brown County Customs

Visit our community sponsor