-
Senior Member

Fmans Dart 427 build #9818 - 14" Leather steering wheel
Hello all,
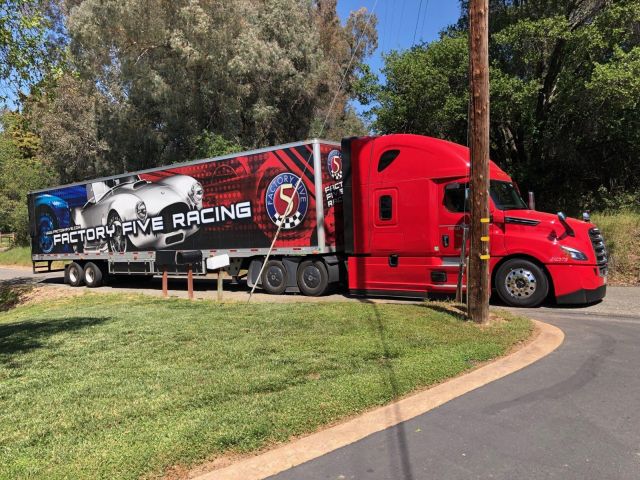
The day finally arrived! What a great feeling to finally get this car in my shop. I decided to start a build thread like many others to hopefully help other people down the road but more importantly let me get help from the experienced builders on this forum to double check my work. I have already reached out to a few of you and have got some great information to help me get started. I have worked on a few different cars and trucks throughout my life but never have tackled a project from chassis up. As excited as I am hopefully my blue collar brain can figure this out, I need every cell working for me!
A little about myself... my name is Travis, married for 27 years to my highschool sweetheart, three kids, one grandchild. Our last son leaves for college this fall, so we are heading toward being empty nesters. I have worked in public safety for 24 years, this journey of building a car is definitely on my bucket list. The Cobra has always been a favorite of mine and I always thought if I ever was fortunate enough to own one it would be built with my own two hands.
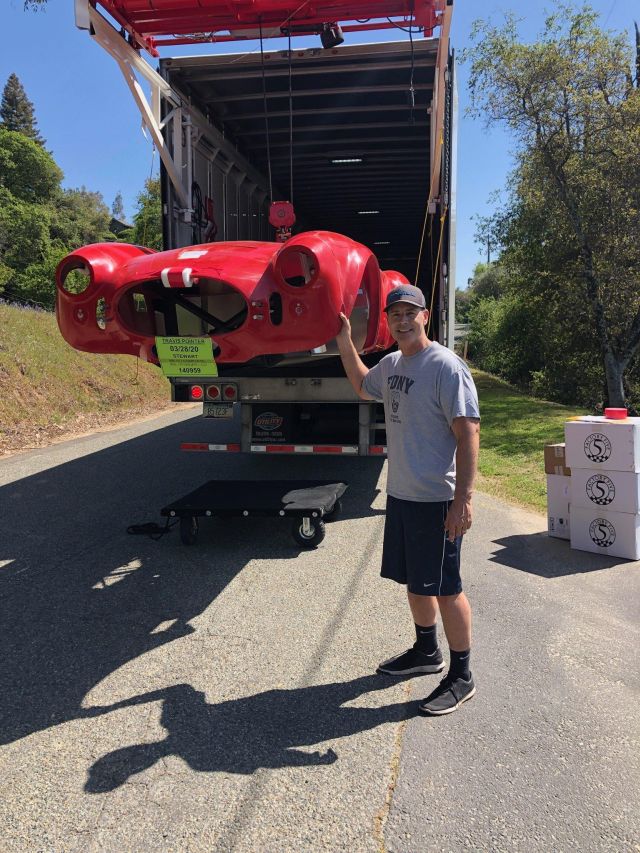
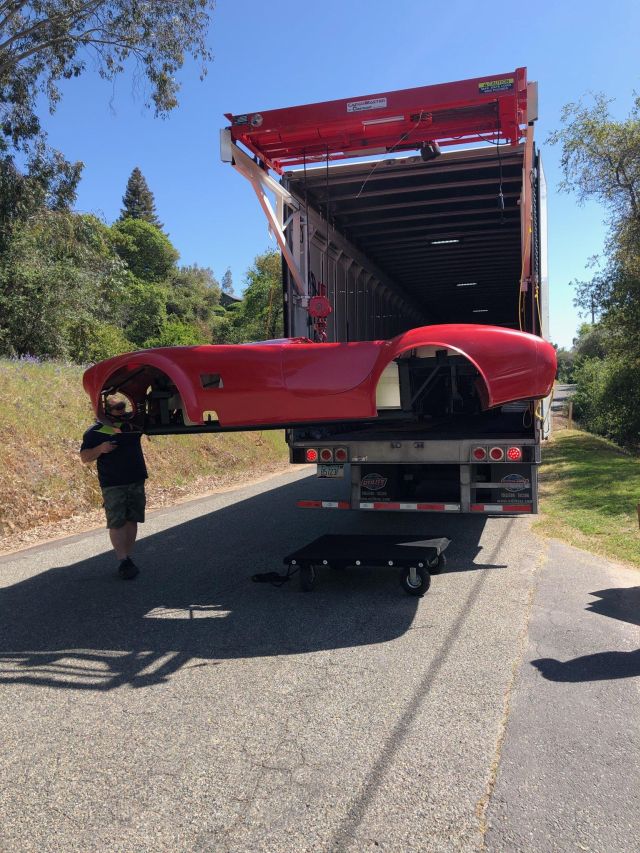
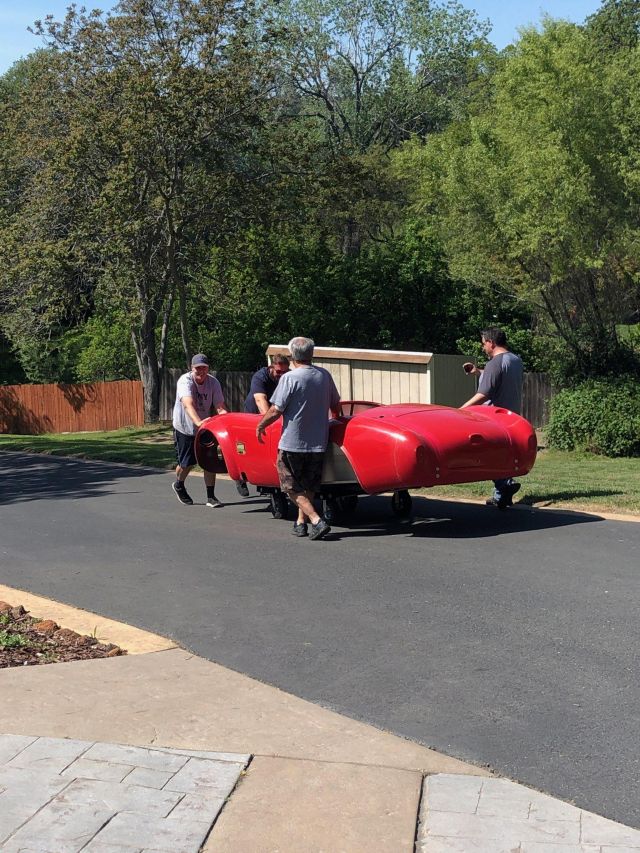
I wanted to also thank Eric from Stewart, he was super cool and easy to work with. We just ended up walking the car down my driveway which ended up being easy.
My build:
Mk4 w/IRS
17" Halibrands (PC black)
Dual chrome cages
Leather seats
Full leather interior
Heated seats
Jones Racing power steering from Gordon Levy
Mustang brakes w/powerstop upgraded rotors and pads
Forte Hydraulic clutch
Vintage GPS gauges
Old school wheel
Engine:
Dart 427 (Edelbrock Pro flo 4 EFI) 520 HP
Engine builder: Elliot Franklin at Mustang Corral in Grass Valley, CA (530) 268-8403
Tko 600
Stereo: Gas 'n pipes (touring) w/drummer mike heat shields
Paint:
Ken Pike - Yuba City, CA - Kens Customs
Color BMW Sterling gray, Mercedes black stripes, Ford race red pin stripe
Budget? Blown already 
Variety of goodies from Breeze, FFmetals, Russ Thompson, Herb, Boig and a few other vendors that will help me spend way too much money.

Last edited by Fman; 01-07-2024 at 11:54 AM.
-
Post Thanks / Like - 0 Thanks, 4 Likes
-
Congratulations Fman! You are about to embark an an incredible journey. You build plan looks solid and I love your garage.
I am located in Half Moon Bay so not too far from you.
-
Post Thanks / Like - 0 Thanks, 1 Likes
 Fman
Fman liked this post
-
CONGRATS Fman!! Looks like your build specs and shop are perfect for the task! I'm in Roseville and have a MKIII - Ken did the work on mine and nothing but THUMBS-UP for his talent and knowledge. Keep us posted on the build - be safe!!
-
Post Thanks / Like - 0 Thanks, 1 Likes
Fman liked this post
-
Congratulations! I live in Elk Grove and you could reach out if you have questions or need any help. I’m a Jakey in SF.
build thread:
http://thefactoryfiveforum.com/showt...-USRRC-vspeeds
Build School: July 14-16, 2017
Kit purchased: July 25, 2017
Kit delivered: September 13, 2017
First Start: December 22, 2018
Body painted and kit completed and drivable: July 2019 (but still not done)
CA SB100 Registration: January 2020
Mk4 - 289 USRRC Roadster kit, Roush 427SR with Schneider Racing custom camshaft, Fitech EFI, TKO600 (.64-5th gear), 15" wheels, stock brake calipers, under car exhaust with Spintech 7000 muffler, no roll bar, Russ Thompson turn signal, removable steering wheel, and many other small upgrades and modifications
-
Post Thanks / Like - 0 Thanks, 1 Likes
Fman liked this post
-
Senior Member
Hey thanks everyone I appreciate the support... maybe someone can help me learn how to post a full size pic rather than a small thumbnail? I cant seem to figure it out.
-
Senior Member

I made a video recently for someone else with the same questions on pictures. It does't address every possible approach, but might give you an idea on how to get your setup to work:
Last edited by GTBradley; 06-18-2021 at 07:01 PM.
Bradley
Build thread - Mk4, Coyote, IRS, Wilwood brakes, old-style soft top and accessories.
The distance between "finished" and finished is literally infinite.
-
Post Thanks / Like - 2 Thanks, 3 Likes
-
Senior Member

Congrats and welcome to the family!
-
Post Thanks / Like - 0 Thanks, 1 Likes
Fman liked this post
-
Senior Member
-
Post Thanks / Like - 0 Thanks, 2 Likes
-
Fman, sorry for the late welcome... Looks like your off to a great start. Crank up the tunes and enjoy the journey...
-
Senior Member
-
Post Thanks / Like - 0 Thanks, 2 Likes
-
Question:
My manual shows the passenger side UCA oriented like this
Screen Shot 2020-04-25 at 10.40.30 AM.png
Your photo shows the UCA installed backwards
Screen Shot 2020-04-25 at 6.49.05 PM.png
There should be a right and left hand UCA
Screen Shot 2020-04-25 at 10.40.10 AM.png
What's happening with this?
Thanks
Joe
-
Senior Member


Originally Posted by
Joe D

You posted the same thing in another thread: https://thefactoryfiveforum.com/show...l=1#post408891. I see you recently joined. This has been talked about frequently in the past. The UCA's have a fixed (welded) connection on one side of the ball joint plate, and an adjustable connection on the other side. This fixed portion can be on either the front or the back. They work just fine that way. The front end alignment allows them to be dialed in perfectly. There was an issue with people putting them on upside down, but haven't seen that lately. Zerks have to up, ball joint spindle connection angled out. Factory Five has made multiple supplier changes on this part, and maybe they've just changed again? Not sure. And if they did, possibly the pictures in the build manual aren't the current parts. But I'd suggest not being confused (or giving incorrect advice) regarding the fixed vs. adjustable connections on the ball joint plate.
Last edited by edwardb; 04-25-2020 at 08:18 PM.
Build 1: Mk3 Roadster #5125. Sold 11/08/2014.
Build 2: Mk4 Roadster #7750. Sold 04/10/2017.
Build Thread
Build 3: Mk4 Roadster 20th Anniversary #8674. Sold 09/07/2020.
Build Thread and
Video.
Build 4: Gen 3 Type 65 Coupe #59. Gen 3 Coyote. Legal 03/04/2020.
Build Thread and
Video
Build 5: 35 Hot Rod Truck #138. LS3 and 4L65E auto. Rcvd 01/05/2021. Legal 04/20/2023.
Build Thread. Sold 11/9/2023.
-
Post Thanks / Like - 1 Thanks, 0 Likes
 Fman
Fman thanked for this post
-
Sorry for the double post nobody said anything on the other thread. So I thought I would elaborate.
-
Senior Member
Originally Posted by
Joe D
Sorry for the double post nobody said anything on the other thread. So I thought I would elaborate.
Don't care about the double post. You're posting information that's not correct, and I'd suggest you delete the posts.
Last edited by edwardb; 04-25-2020 at 10:02 PM.
Build 1: Mk3 Roadster #5125. Sold 11/08/2014.
Build 2: Mk4 Roadster #7750. Sold 04/10/2017.
Build Thread
Build 3: Mk4 Roadster 20th Anniversary #8674. Sold 09/07/2020.
Build Thread and
Video.
Build 4: Gen 3 Type 65 Coupe #59. Gen 3 Coyote. Legal 03/04/2020.
Build Thread and
Video
Build 5: 35 Hot Rod Truck #138. LS3 and 4L65E auto. Rcvd 01/05/2021. Legal 04/20/2023.
Build Thread. Sold 11/9/2023.
-
Senior Member
Originally Posted by
Joe D
Joe, at first I actually thought FFR sent me the same side. I contacted the FF tech line (via email pics) and a few other builders regarding using them on either side and it was confirmed they are correctly installed. I triple checked this before I made any cuts to the sleeves. I am complete rookie but everyone I spoke with said they are correct on either side, the important thing is to have the upper ball joint correctly orientated and the three bolt heads on top.
-
Senior Member

Congrats Fman! Looks like it's going to be a nice build. I think your delivery might have been in the same truck as mine. Mine was delivered 4/11/20 in Virginia and was the first of 10 off the truck. I remember Eric mentioning that his last stop would be in California. Was yours the last off the truck? Anyway, I'm glad to have a fellow builder at the same stage as me. FWIW, my front LCAs are also on back order, so I've been focusing on the rear axle for now. I know FFR is on shutdown, so it might be a while before back orders start to flow.
-
Senior Member
Originally Posted by
BadAsp427
Fman, sorry for the late welcome... Looks like your off to a great start. Crank up the tunes and enjoy the journey...
Thank you, hopefully you guys can keep an eye on my work! I am trying to triple check everything. As little as I have done yet I am enjoying the challenge and slowly beginning to gain some confidence... one bolt at a time
-
Senior Member
Originally Posted by
JB in NOVA
Congrats Fman! Looks like it's going to be a nice build. I think your delivery might have been in the same truck as mine. Mine was delivered 4/11/20 in Virginia and was the first of 10 off the truck. I remember Eric mentioning that his last stop would be in California. Was yours the last off the truck? Anyway, I'm glad to have a fellow builder at the same stage as me. FWIW, my front LCAs are also on back order, so I've been focusing on the rear axle for now. I know FFR is on shutdown, so it might be a while before back orders start to flow.
Hey thanks! I am super stoked, still cant believe I have it in my garage. Yep, that would be me...last one one off the truck. Eric was great to deal with and got her in one piece to me. I am also hoping to move forward on the rear IRS because of the missing LCA's. Good luck with your build and congrats to you! I will be following your build.
Last edited by Fman; 04-25-2020 at 10:27 PM.
-
Originally Posted by
Fman
Joe, at first I actually thought FFR sent me the same side. I contacted the FF tech line (via email pics) and a few other builders regarding using them on either side and it was confirmed they are correctly installed. I triple checked this before I made any cuts to the sleeves. I am complete rookie but everyone I spoke with said they are correct on either side, the important thing is to have the upper ball joint correctly orientated and the three bolt heads on top.
Thanks for the explanation 
Joe
-
Senior Member
-
Post Thanks / Like - 1 Thanks, 1 Likes
-
Congrats on the new build! Maybe we can find time to swing by and say hi this summer! Please keep the posts coming so we can follow along!
Mk3.1 347 AFR 205cc Heads A9L EFI siemens deca 60lb injectors MSD 6AL ignition Vortech V-3 3 Link PS/PB
-- If you cant fix it with a hammer, you have an electrical problem !
-
Looking good so far! Awesome that you got to spend time with your pops working on the roadster. Have fun and keep it going!
MKIV Complete Kit: 3-link, vintage gauges, glove-box dash, chrome roll bars, 17" wheels, B/T leather seats, Gas-N side pipes and headers; Drive train: Levy 408w w/carb, TKO600, Moser 8.8 with 3.55s and GT rear brakes; Paint: Jeff Miller Ford Magnetic Grey Metallic with BMW Titan Silver stripes
Ordered: 4/5/16, Order completion: 5/14/16, Delivered: 5/24/16, First start: 6/22/19, Registered and legal: 10/28/19
-
Post Thanks / Like - 1 Thanks, 1 Likes
Fman thanked for this post
Fman liked this post
-
25th Anniversary #9772

Great job Travis! We need to hang out when we are allowed to again!!
-
Post Thanks / Like - 1 Thanks, 0 Likes
Fman thanked for this post
-
Senior Member
Nice work and progress. Great you get to work on it with your Dad. That gap on the center section mount is fine. It's against the inner sleeve. And as you've probably found, that lump is solidly mounted and not going anywhere. As for the wheel studs, I wouldn't try to remove them while mounted, but sounds like you won't either. I think you could get new ones in with everything together. Looking at pictures of mine, seems they would go in. Maybe you saw in my build thread. I use a couple hardened washers (grade 8 from the local Ace) and nut with liberal amounts of chassis grease between everything. They pull right in with an air impact driver. Just don't use your finish lug nuts. They will get chewed up. I'm a little surprised a common part like that is on backorder. Plus with Factory Five still mostly closed, could be a while. If you're impatient, I had to replace mine during my Coupe build (builder screw-up...) and used Dorman 610-290 wheel studs. Come as a package of 10. Seemed same quality and less than $20. Summit, Amazon, etc.
Build 1: Mk3 Roadster #5125. Sold 11/08/2014.
Build 2: Mk4 Roadster #7750. Sold 04/10/2017.
Build Thread
Build 3: Mk4 Roadster 20th Anniversary #8674. Sold 09/07/2020.
Build Thread and
Video.
Build 4: Gen 3 Type 65 Coupe #59. Gen 3 Coyote. Legal 03/04/2020.
Build Thread and
Video
Build 5: 35 Hot Rod Truck #138. LS3 and 4L65E auto. Rcvd 01/05/2021. Legal 04/20/2023.
Build Thread. Sold 11/9/2023.
-
Post Thanks / Like - 0 Thanks, 1 Likes
-
Senior Member
Originally Posted by
Just puttering
Congrats on the new build! Maybe we can find time to swing by and say hi this summer! Please keep the posts coming so we can follow along!
Come by anytime, I would love to check out your ride!
-
Senior Member
Originally Posted by
toadster
Great job Travis! We need to hang out when we are allowed to again!!
Hey Thanks Todd, I feel like each part I put on the car is one more foot forward up the mountain. And there is no doubt I am following your build learning a bunch.
I was going to try and make it out to a cars and coffee sometime to meet you and some Cobra owners. My work schedule changes weekly, but hopefully when they start meeting up again and I have a Saturday off I will make it out.
-
Senior Member
Originally Posted by
edwardb
Nice work and progress. Great you get to work on it with your Dad. That gap on the center section mount is fine. It's against the inner sleeve. And as you've probably found, that lump is solidly mounted and not going anywhere. As for the wheel studs, I wouldn't try to remove them while mounted, but sounds like you won't either. I think you could get new ones in with everything together. Looking at pictures of mine, seems they would go in. Maybe you saw in my build thread. I use a couple hardened washers (grade 8 from the local Ace) and nut with liberal amounts of chassis grease between everything. They pull right in with an air impact driver. Just don't use your finish lug nuts. They will get chewed up. I'm a little surprised a common part like that is on backorder. Plus with Factory Five still mostly closed, could be a while. If you're impatient, I had to replace mine during my Coupe build (builder screw-up...) and used Dorman 610-290 wheel studs. Come as a package of 10. Seemed same quality and less than $20. Summit, Amazon, etc.
Paul, thank you clarifying the center diff mounting that will make me sleep a little better tonight! FFR sent me an email about the studs available from a local auto parts store so I ended up picking up some Dorman #610-368 today from Napa auto for $20. Tomorrow I am planning on trying to finish up the rear IRS. I might not see any POL parts for quite awhile with the FFR being shutdown for awhile longer.
-
Senior Member
-
Post Thanks / Like - 0 Thanks, 1 Likes
-
Senior Member

With hydraulic clutch you wont need the quadrant assembly.
On your painted parts, I cant say I recall what the small square with the X through it is for.
-
Post Thanks / Like - 2 Thanks, 2 Likes
-
Senior Member
Is anyone running a clutch safety start switch on the pedal box? In the manual it is an option and thought it would be a good safety feature. FFR sent me two identical brake switches, I believe I should have one brake switch and one clutch switch according to the manual?
-
Post Thanks / Like - 0 Thanks, 1 Likes
-

Originally Posted by
Fman
Is anyone running a clutch safety start switch on the pedal box? In the manual it is an option and thought it would be a good safety feature. FFR sent me two identical brake switches, I believe I should have one brake switch and one clutch switch according to the manual?
Travis
You sure are making good progress. I was sent two identical switches. However, i opted to not use the clutch safety switch.
Sorry, I should have called you...I was in Roseville and the Lincoln airport today with my cobra. Next time i’ll call you
build thread:
http://thefactoryfiveforum.com/showt...-USRRC-vspeeds
Build School: July 14-16, 2017
Kit purchased: July 25, 2017
Kit delivered: September 13, 2017
First Start: December 22, 2018
Body painted and kit completed and drivable: July 2019 (but still not done)
CA SB100 Registration: January 2020
Mk4 - 289 USRRC Roadster kit, Roush 427SR with Schneider Racing custom camshaft, Fitech EFI, TKO600 (.64-5th gear), 15" wheels, stock brake calipers, under car exhaust with Spintech 7000 muffler, no roll bar, Russ Thompson turn signal, removable steering wheel, and many other small upgrades and modifications
-
Post Thanks / Like - 0 Thanks, 1 Likes
Fman liked this post
-
Senior Member
Originally Posted by
Fman
Is anyone running a clutch safety start switch on the pedal box? In the manual it is an option and thought it would be a good safety feature. FFR sent me two identical brake switches, I believe I should have one brake switch and one clutch switch according to the manual?
The switch mounting and switches themselves are the same for both the brake light switch and the clutch safety start switch. Assume you're using the Ron Francis harness? It has wires for both and is pretty much a standard feature and applicable for your Dart 427 w/tko600 build. (Coyote builds have a different setup.) Not going to turn your build thread into another debate about the clutch switch. Been done a bunch of times. Also possible to use the neutral switch on your TKO instead. But that's also another topic. If you don't want it, leave the switch off and attach the two RF wires together.
Build 1: Mk3 Roadster #5125. Sold 11/08/2014.
Build 2: Mk4 Roadster #7750. Sold 04/10/2017.
Build Thread
Build 3: Mk4 Roadster 20th Anniversary #8674. Sold 09/07/2020.
Build Thread and
Video.
Build 4: Gen 3 Type 65 Coupe #59. Gen 3 Coyote. Legal 03/04/2020.
Build Thread and
Video
Build 5: 35 Hot Rod Truck #138. LS3 and 4L65E auto. Rcvd 01/05/2021. Legal 04/20/2023.
Build Thread. Sold 11/9/2023.
-
Post Thanks / Like - 0 Thanks, 1 Likes
Fman liked this post
-
Senior Member
Last edited by Fman; 05-10-2020 at 05:17 PM.
-
Post Thanks / Like - 1 Thanks, 1 Likes
Moniz thanked for this post
-
Senior Member
I have a question regarding drivers side footbox inside cover. I wanted to make it easily removable so I added some rivnuts to it. I was not sure how far I could go towards to the outside before the screw head would be under the lip of the fender becoming inaccessible. Could someone please take a look at attached pic and let me know how far I can extend, I would like to add one more rivnut where the red arrow is indicating
From pictures I can find it appears I can run another rivnut almost to upper corner?
Thank you

Last edited by Fman; 05-10-2020 at 05:20 PM.
-
Congratulations on the build progress so far. That's awesome that you can work on it with your dad.
I think you're on the right track with the holes in the footbox cover. I asked the same question a few months ago here. Based on the responses I got, it looks like it's OK to drill holes along the front edge of the cover.
MkIV Roadster build: Gen 2 Coyote, IRS, TKO600. Ordered 10/24/18. Delivered 1/29/19. Engine installed 8/8/21. First start 9/12/21. First go-kart 9/17/21. Off to paint 4/11/22. Back from paint 12/30/22.
Build thread here.
-
Senior Member
Originally Posted by
JohnK
Congratulations on the build progress so far. That's awesome that you can work on it with your dad.
I think you're on the right track with the holes in the footbox cover. I asked the same question a few months ago
here. Based on the responses I got, it looks like it's OK to drill holes along the front edge of the cover.
John, thanks for the reply back I appreciate it. I ended up putting one more rivnut on the upper corner and called it good. I don't really see the need for any along the backside, the six I have holding it down seem to be plenty. I will more than likely add some type of gasket/seal on underside lip to help with vibrations.
-
Senior Member
-
If you have large or wide feet, now is the time to get all the space you can between the throttle pedal and the brake pedal.
I have made adjustments to help mine, but would have looked at moving the Wilwood pedal box toward the outside, if I had known the issues. Nice looking project.
20th Anniversary Mk IV, A50XS Coyote, TKO 600, Trunk Drop Box, Trunk Battery Box, Cubby Hole, Seat Heaters, Radiator hanger and shroud.
-
Senior Member
Originally Posted by
Railroad
If you have large or wide feet, now is the time to get all the space you can between the throttle pedal and the brake pedal.
I have made adjustments to help mine, but would have looked at moving the Wilwood pedal box toward the outside, if I had known the issues. Nice looking project.
Thank you, I am really enjoying the build thus far, amazing how fast a full day goes by while working on the car. I did set brake/clutch to the furthest outside position, I have size 13 feet so having as much space as possible will definitely help. Seeing as everything is bolted down not sure there is much more I can do to open more space up. I need to check the Russ Thompson pedal to see if the pedal is adjustable side to side.
Last edited by Fman; 05-06-2020 at 03:47 PM.
-
Post Thanks / Like - 0 Thanks, 1 Likes
-
25th Anniversary #9772
well you're officially past my progress Travis!
I love that hammered powdercoat - did you end up going to Orangevale? or other PC place?


 Thanks:
  Likes:


 Reply With Quote

