Very Cool Parts

Visit our community sponsor

Thanks Thanks:  0
Likes Likes:  5
Page 10 of 51 FirstFirst ... 8910111220 ... LastLast
Results 361 to 400 of 2016

Thread: More progress made on the body : )

  1. #361
    Senior Member The Stig's Avatar
    Join Date
    Feb 2011
    Location
    Charlotte, NC
    Posts
    2,004
    Post Thanks / Like
    Quote Originally Posted by Roger Reid View Post
    After notching the tank for bar clearance, could you add a barb fitting at the bottom to connect to another lower mounted reservoir to increase capacity?
    Hi Roger. I would imagine that as long as you had the other container at the same level, you could do a remote reservoir. If it were lower, I'm not sure if the pump would be able to draw the fluid. But as long as you can find a little room, I'm sure that it could be worked out.
    The Stig

    Some say, that I only know two facts about ducks, (both being wrong); and that if I could be bothered, I could solve the "da Vinci Code" in 47 seconds...
    All I know is that I'm called "The Stig".
    GTM #0081

  2. #362
    Senior Member The Stig's Avatar
    Join Date
    Feb 2011
    Location
    Charlotte, NC
    Posts
    2,004
    Post Thanks / Like
    I found a set of "correct" pigtails for the Hella blinkers, complete with the rubber boot to seal the connectors. Well, let me rephrase that... My neighbor found them on line for me. I searched and searched using the part numbers on the light housing, and came up with zip. My neighbor is some sore of Internet Search Guru, and found them. That gets all of the headlight wiring sealed by weather pack connections as they should be. The Fog Lights will be wired through male / female weather packs as well. (Instead of the "bullet connectors" that come with them). So a little more progress is being made.

    I'll take a few pictures of the connectors, and post the part numbers and contact info when I get home. (Probably Friday).

    Next up will be the window switches, and finishing out the gauges...
    Last edited by The Stig; 04-03-2012 at 10:14 AM.
    The Stig

    Some say, that I only know two facts about ducks, (both being wrong); and that if I could be bothered, I could solve the "da Vinci Code" in 47 seconds...
    All I know is that I'm called "The Stig".
    GTM #0081

  3. #363
    Senior Member Kempo's Avatar
    Join Date
    Feb 2011
    Location
    Cabo Rojo,PR. USA
    Posts
    723
    Post Thanks / Like
    Do you have a link to where we can get them?
    GenII GTM #354
    Delivered (02/09/11)

  4. #364
    Senior Member
    Join Date
    Feb 2011
    Location
    San Diego
    Posts
    1,964
    Post Thanks / Like
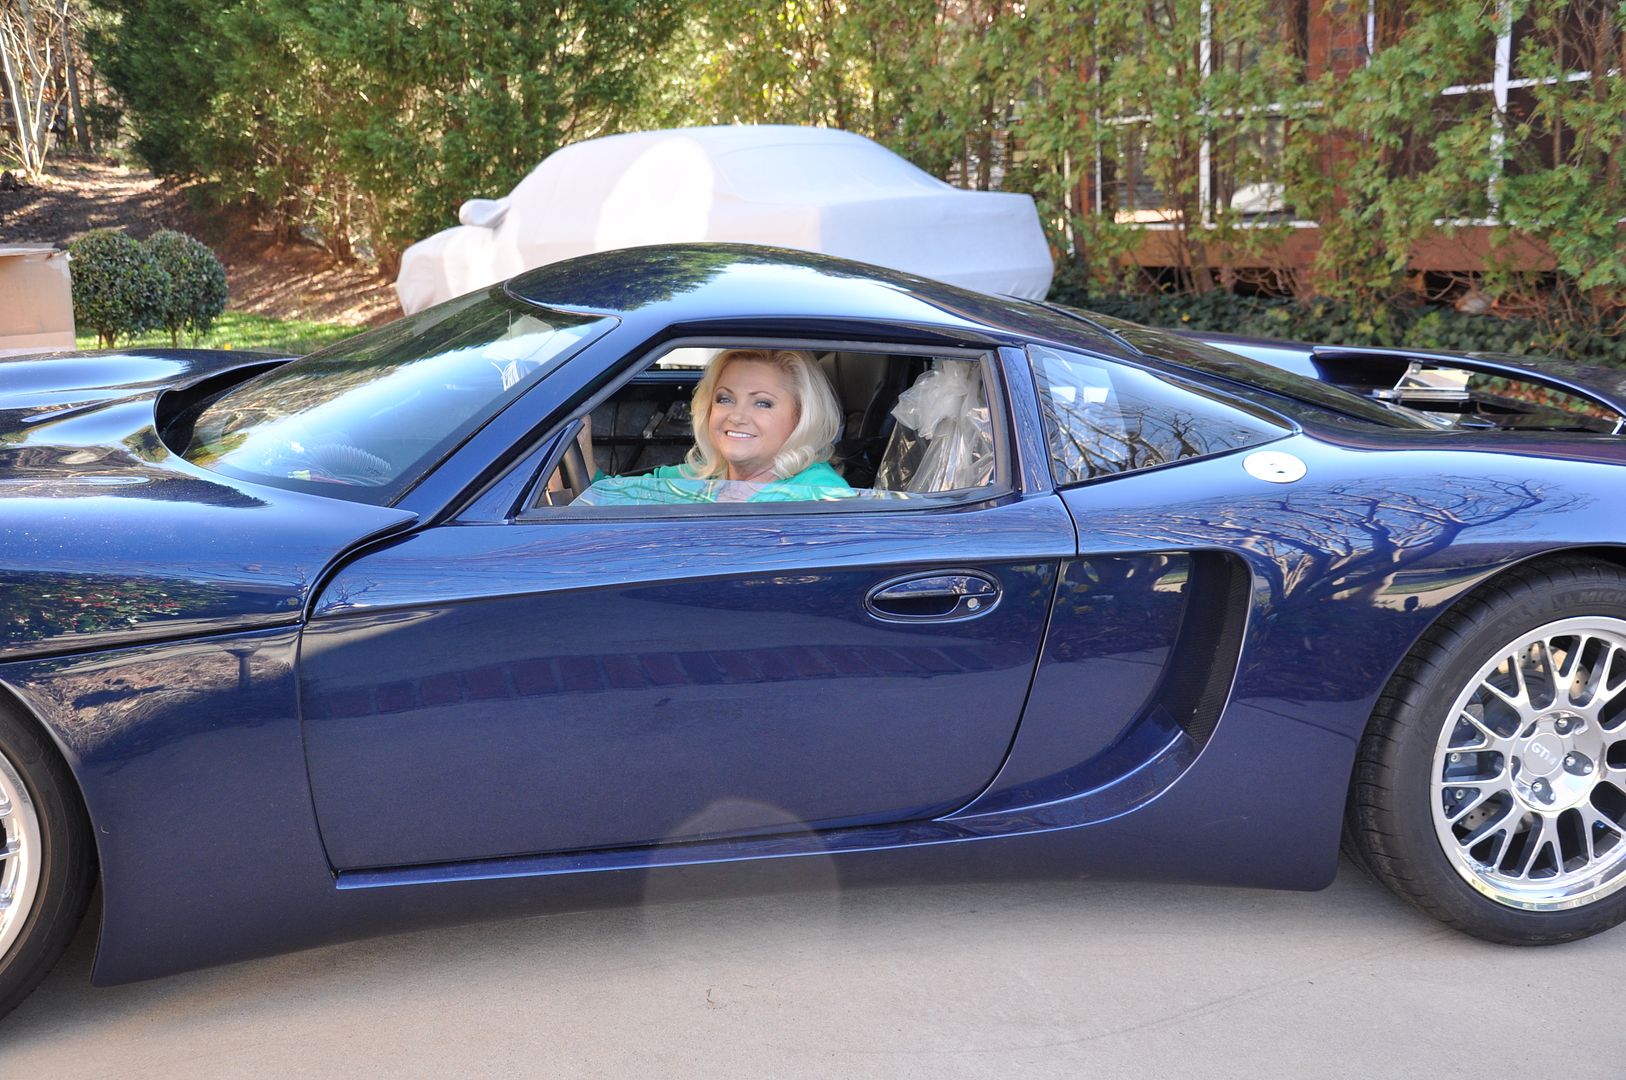
    You've got a pretty amazing wife there...but I'm sure you already know that!

    I think you are the first one to post on here that has found the proper plugs for the lights. Those look much better and more finished than soldering in wires or push on connectors.
    www.myraceshop.com

    GTM solution kits
    Corvette and Race parts

  5. #365
    Senior Member The Stig's Avatar
    Join Date
    Feb 2011
    Location
    Charlotte, NC
    Posts
    2,004
    Post Thanks / Like
    Quote Originally Posted by Kempo View Post
    Do you have a link to where we can get them?
    Hi Hugo. I haven't had a chance to follow up with him to find out where the heck he found them, other than a shop near Philadelphia, PA. I think Ralph said that they were $14.00 each, plus shipping. So I asked him to order a set.

    I'll definitely post the part number, and contact info when I get home.

    Quote Originally Posted by crash View Post
    You've got a pretty amazing wife there...but I'm sure you already know that!

    I think you are the first one to post on here that has found the proper plugs for the lights. Those look much better and more finished than soldering in wires or push on connectors.
    Yep! My wife is amazing. She's my soul-mate and my best friend.


    I was tired of hearing from everyone that all you could do was plug spade connectors to the prongs. It didn't make sense to me that a company would manufacture bulbs which obviously accepted a weather pack connector, and not have the connector available anywhere. So while Ralph (my neighbor, and next best friend) and I were installing the QRP Swaybar Kit, Pam decided that she would go on a search and rescue mission. She took the bulbs around to several parts stores asking them if they had pig-tails that would fit.

    She said that at the last store (Autozone) that she went to, the guy behind the counter, looked at it and said that he didn't think they had anything that would fit the bulb. Then a lady that also works there asked to see it, and disappeared for a few minutes. She was back there taking parts out of boxes to physically check to see if what they had would fit. She kept on until she found the one that did. My wife said that the guy at the counter was fairly embarrassed that she came back with the correct plugs for the headlights. And my wife had a sweet little "I told you so" smile when she pulled into the driveway.

    Yep. She's pretty cool!

    But with that said, it was my neighbor who found the plugs for the blinkers...

    He's also helping me to finish out the wiring, since I don't have the expertise to do it yet. But I'll definitely be the one to wire my wife's Mk-IV Roadster when it's time!
    Last edited by The Stig; 04-03-2012 at 11:24 AM.
    The Stig

    Some say, that I only know two facts about ducks, (both being wrong); and that if I could be bothered, I could solve the "da Vinci Code" in 47 seconds...
    All I know is that I'm called "The Stig".
    GTM #0081

  6. #366
    LS MAN's Avatar
    Join Date
    Feb 2011
    Location
    Stockton, CA
    Posts
    111
    Post Thanks / Like
    Hey Stig, keep up the good work. Got your shocks ordered for you.
    Now I know why you are a happy man, Oh, and it also helps having a beautiful car also.
    Last edited by LS MAN; 04-03-2012 at 12:43 PM.

  7. #367
    Senior Member The Stig's Avatar
    Join Date
    Feb 2011
    Location
    Charlotte, NC
    Posts
    2,004
    Post Thanks / Like
    Quote Originally Posted by LS MAN View Post
    Hey Stig, keep up the good work. Got your shocks ordered for you.
    Now I know why you are a happy man, Oh, and it also helps having a beautiful car also.
    Thank you Ted. And Yes, I have many reasons to be happy with my life. Picked right up on that, I see.

    I have a question regarding the shocks and the use of the RamLift kit. Will the spring be at the top near the Sway bar Arm as mine currently is? Or will they be mounted right side up, with more clearance? Right now, I have roughly 3/8" to 1/2" clearance between the spring and the arm. Of course, when the shocks compress, the arm will move up and away from the springs. But I believe that if they were to extend, the arms would be hitting the springs. What do you think?
    The Stig

    Some say, that I only know two facts about ducks, (both being wrong); and that if I could be bothered, I could solve the "da Vinci Code" in 47 seconds...
    All I know is that I'm called "The Stig".
    GTM #0081

  8. #368
    Junior Member
    Join Date
    Apr 2011
    Location
    Fitzgerald Georgia
    Posts
    25
    Post Thanks / Like
    Here is a link for the turn signals, maybe someone else can find them cheaper!
    http://www.rallylights.com/detail.aspx?ID=4459

  9. #369
    LS MAN's Avatar
    Join Date
    Feb 2011
    Location
    Stockton, CA
    Posts
    111
    Post Thanks / Like
    Quote Originally Posted by The Stig View Post
    Thank you Ted. And Yes, I have many reasons to be happy with my life. Picked right up on that, I see.

    I have a question regarding the shocks and the use of the RamLift kit. Will the spring be at the top near the Sway bar Arm as mine currently is? Or will they be mounted right side up, with more clearance? Right now, I have roughly 3/8" to 1/2" clearance between the spring and the arm. Of course, when the shocks compress, the arm will move up and away from the springs. But I believe that if they were to extend, the arms would be hitting the springs. What do you think?
    Hey Mike, the shocks will be inverted, body side up, with the ranlift on the shock body. I like this better as there is less unsprung weight & less movement of the ram.
    With the shorter springs, the sway bar arm should clear. If not you can mount the ram under the spring also. Interested to see how it works, and if we have any issues, will will come up with solutions.

    Thanks again,

  10. #370
    Senior Member The Stig's Avatar
    Join Date
    Feb 2011
    Location
    Charlotte, NC
    Posts
    2,004
    Post Thanks / Like
    Sounds good.

    Thanks Ted.
    The Stig

    Some say, that I only know two facts about ducks, (both being wrong); and that if I could be bothered, I could solve the "da Vinci Code" in 47 seconds...
    All I know is that I'm called "The Stig".
    GTM #0081

  11. #371
    Senior Member The Stig's Avatar
    Join Date
    Feb 2011
    Location
    Charlotte, NC
    Posts
    2,004
    Post Thanks / Like
    Quote Originally Posted by dm65 View Post
    Here is a link for the turn signals, maybe someone else can find them cheaper!
    http://www.rallylights.com/detail.aspx?ID=4459
    That sure looks like them. The pig tails will look pretty good on the blinker lights, and provide a seal around the connectors.
    The Stig

    Some say, that I only know two facts about ducks, (both being wrong); and that if I could be bothered, I could solve the "da Vinci Code" in 47 seconds...
    All I know is that I'm called "The Stig".
    GTM #0081

  12. #372
    Senior Member The Stig's Avatar
    Join Date
    Feb 2011
    Location
    Charlotte, NC
    Posts
    2,004
    Post Thanks / Like
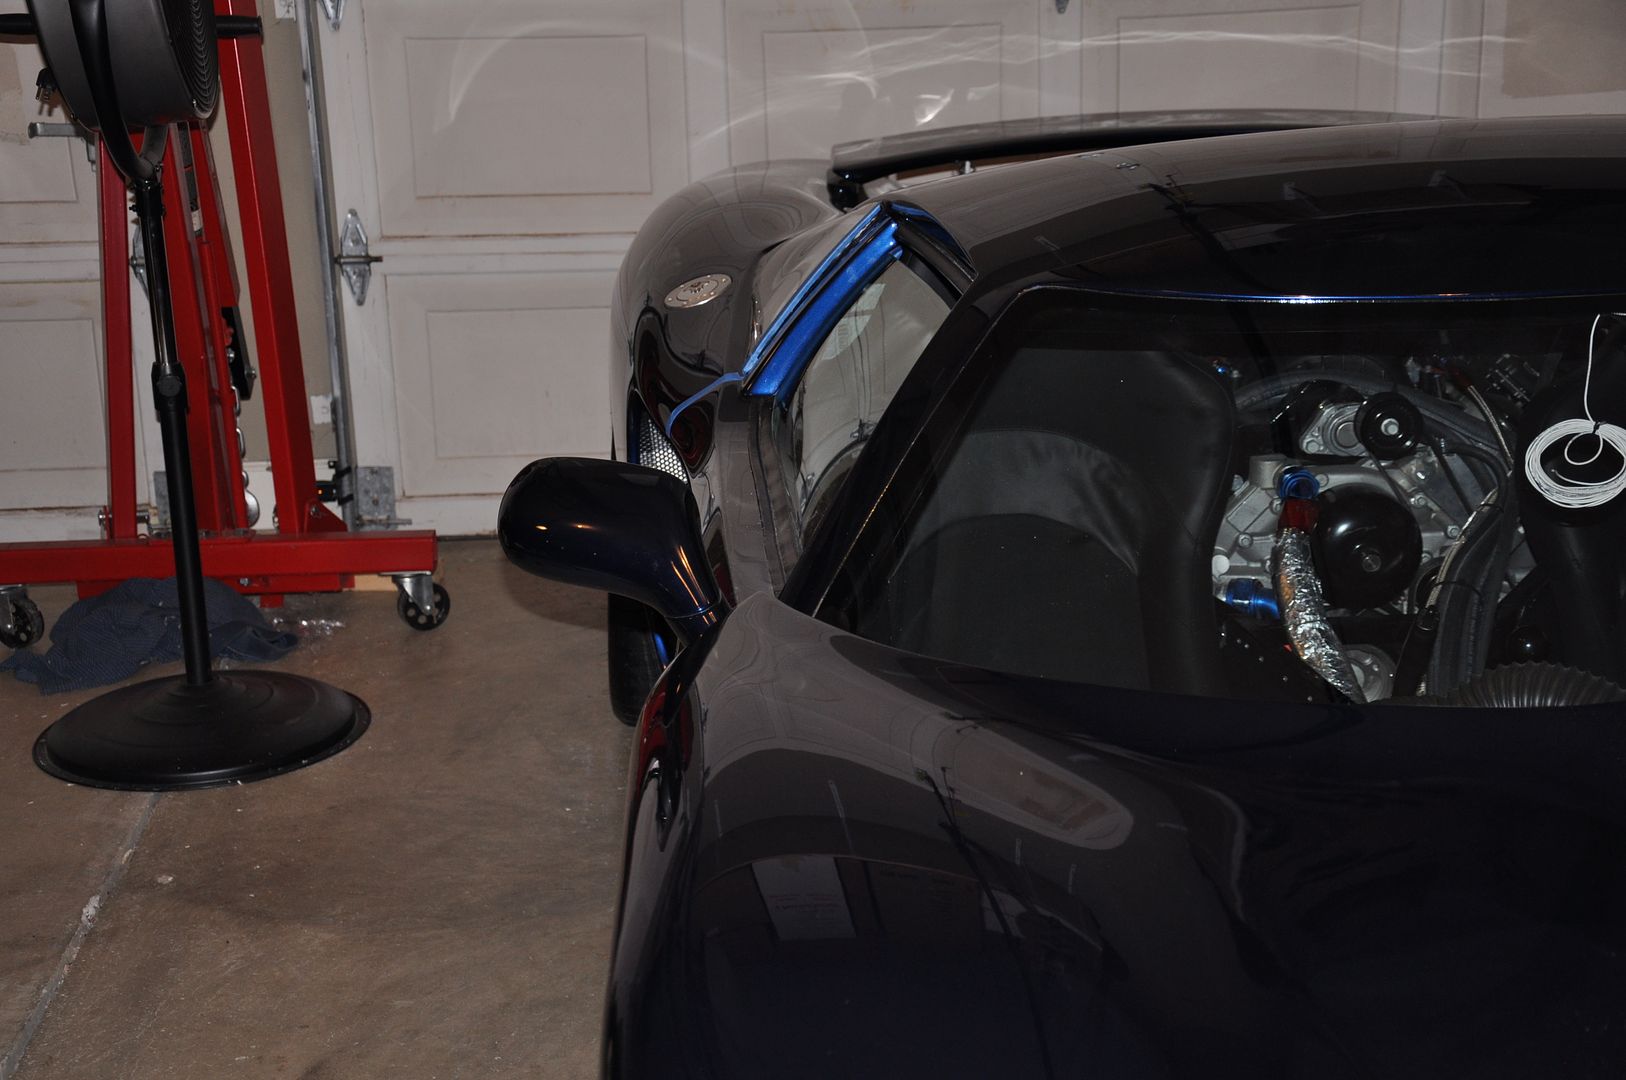
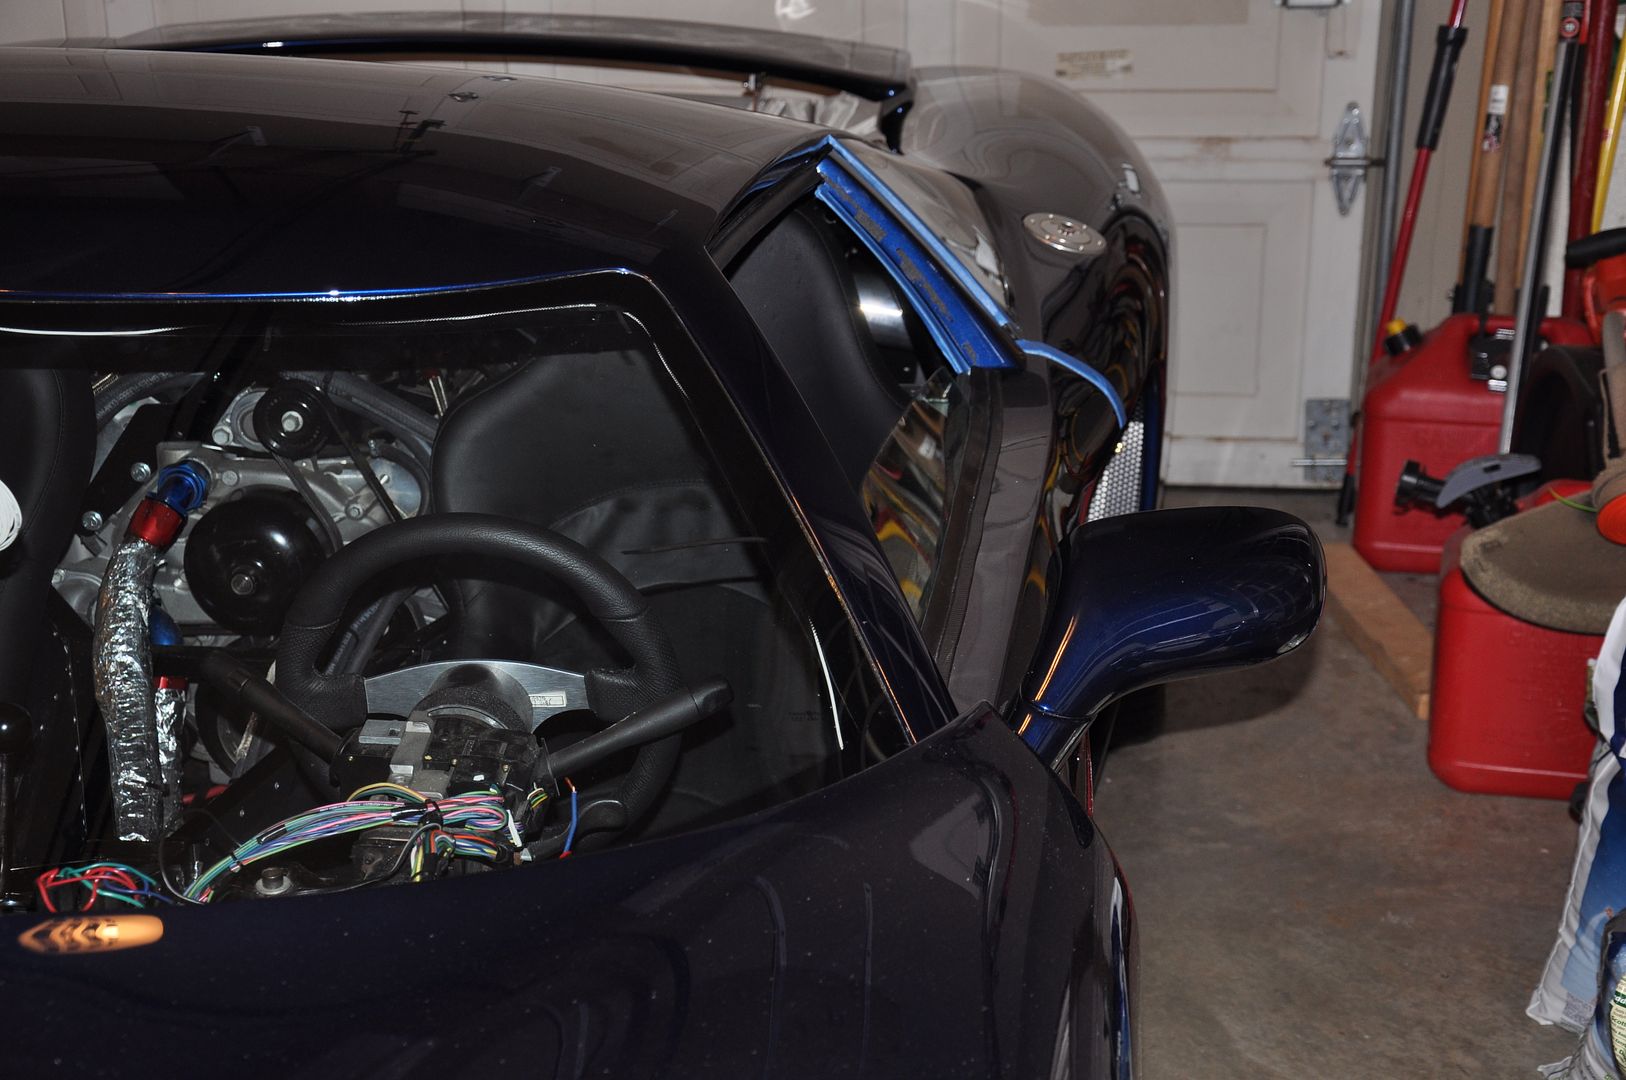
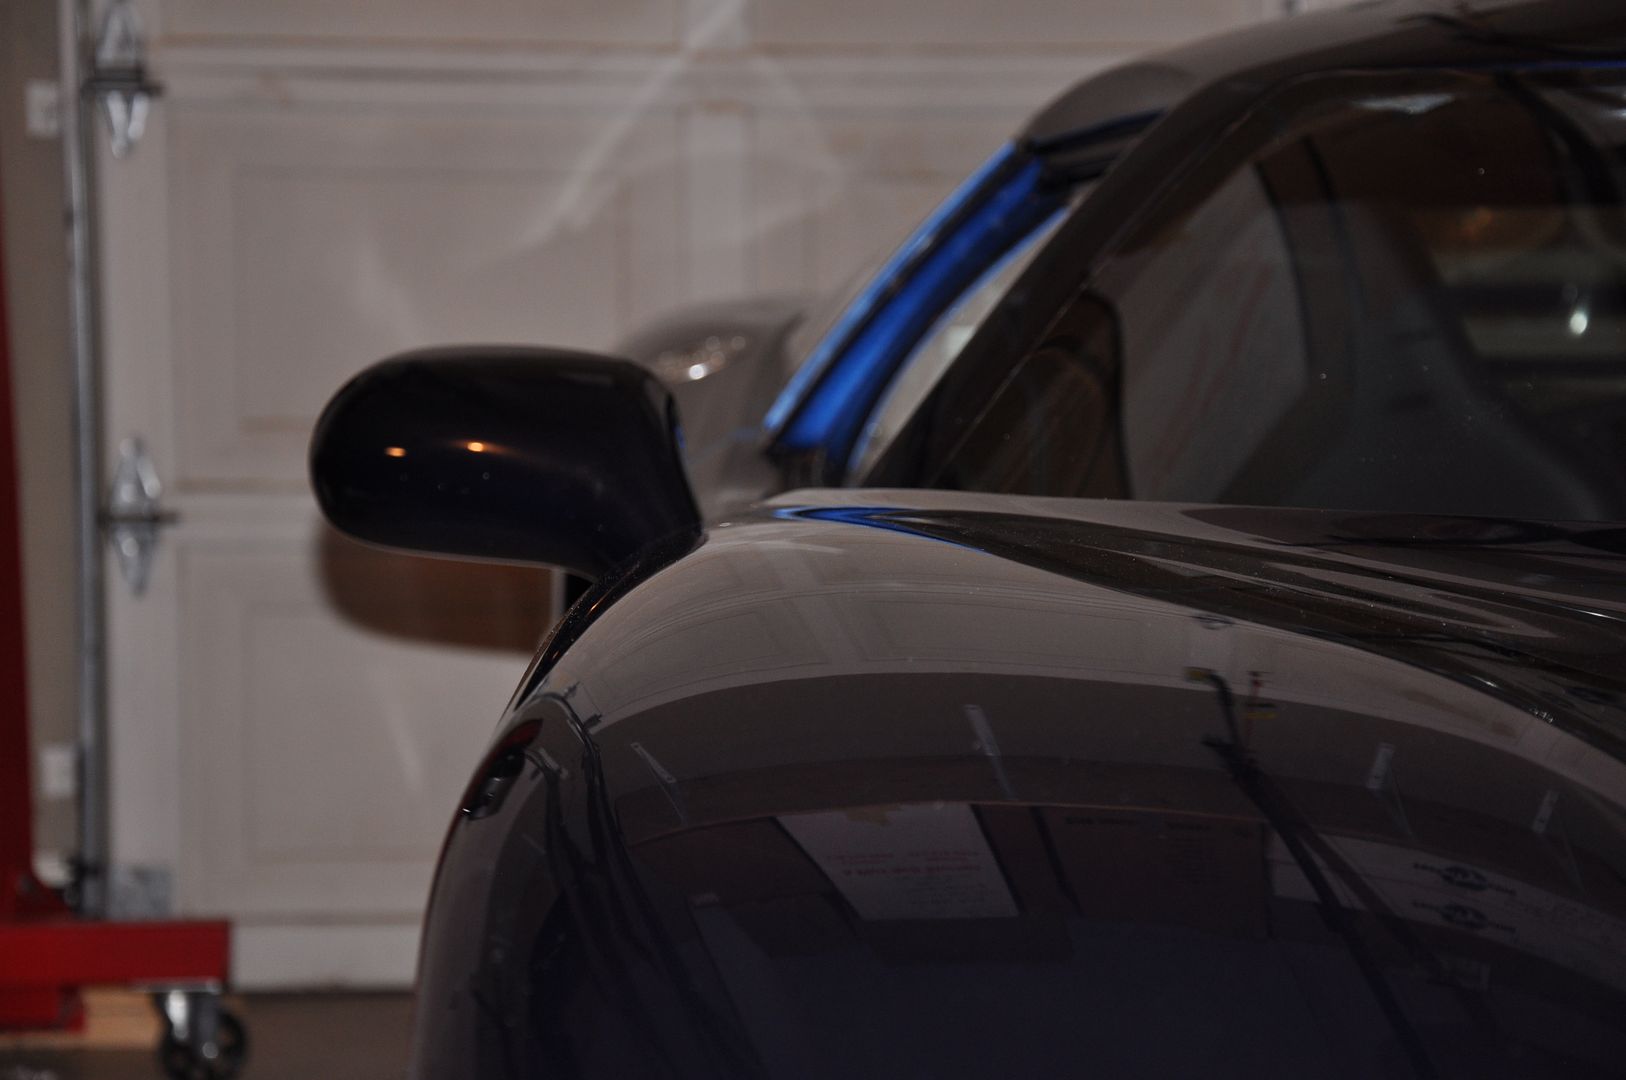
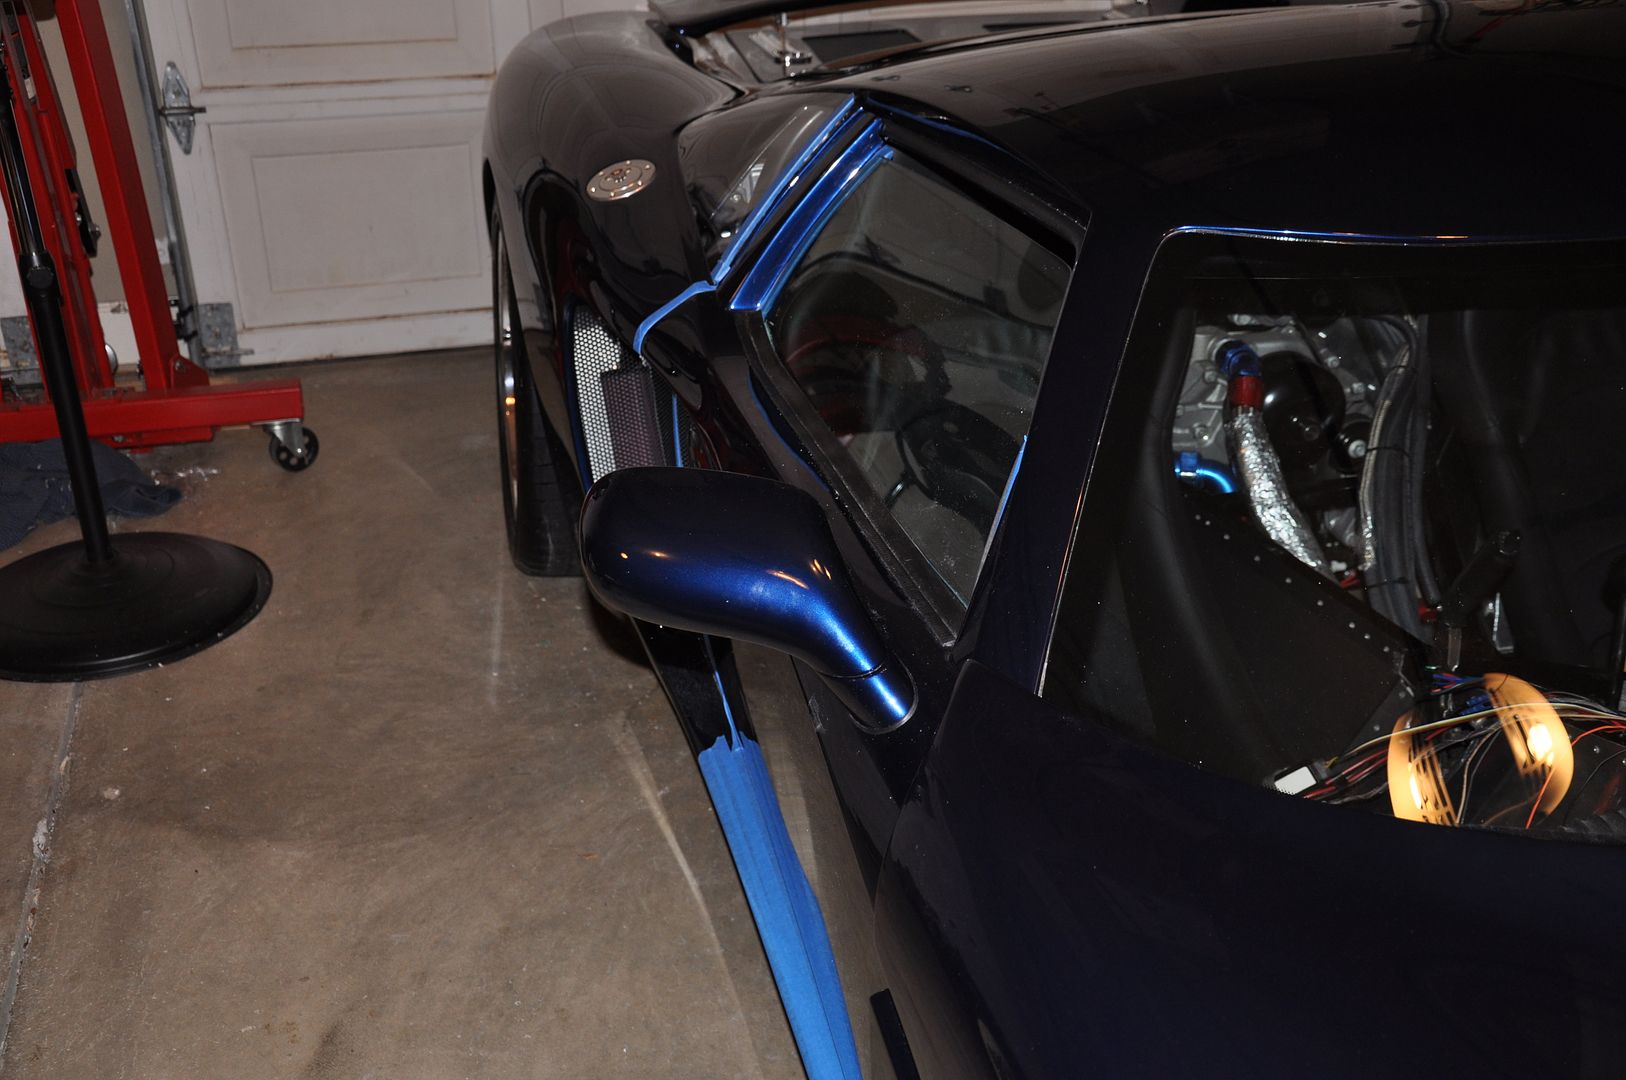
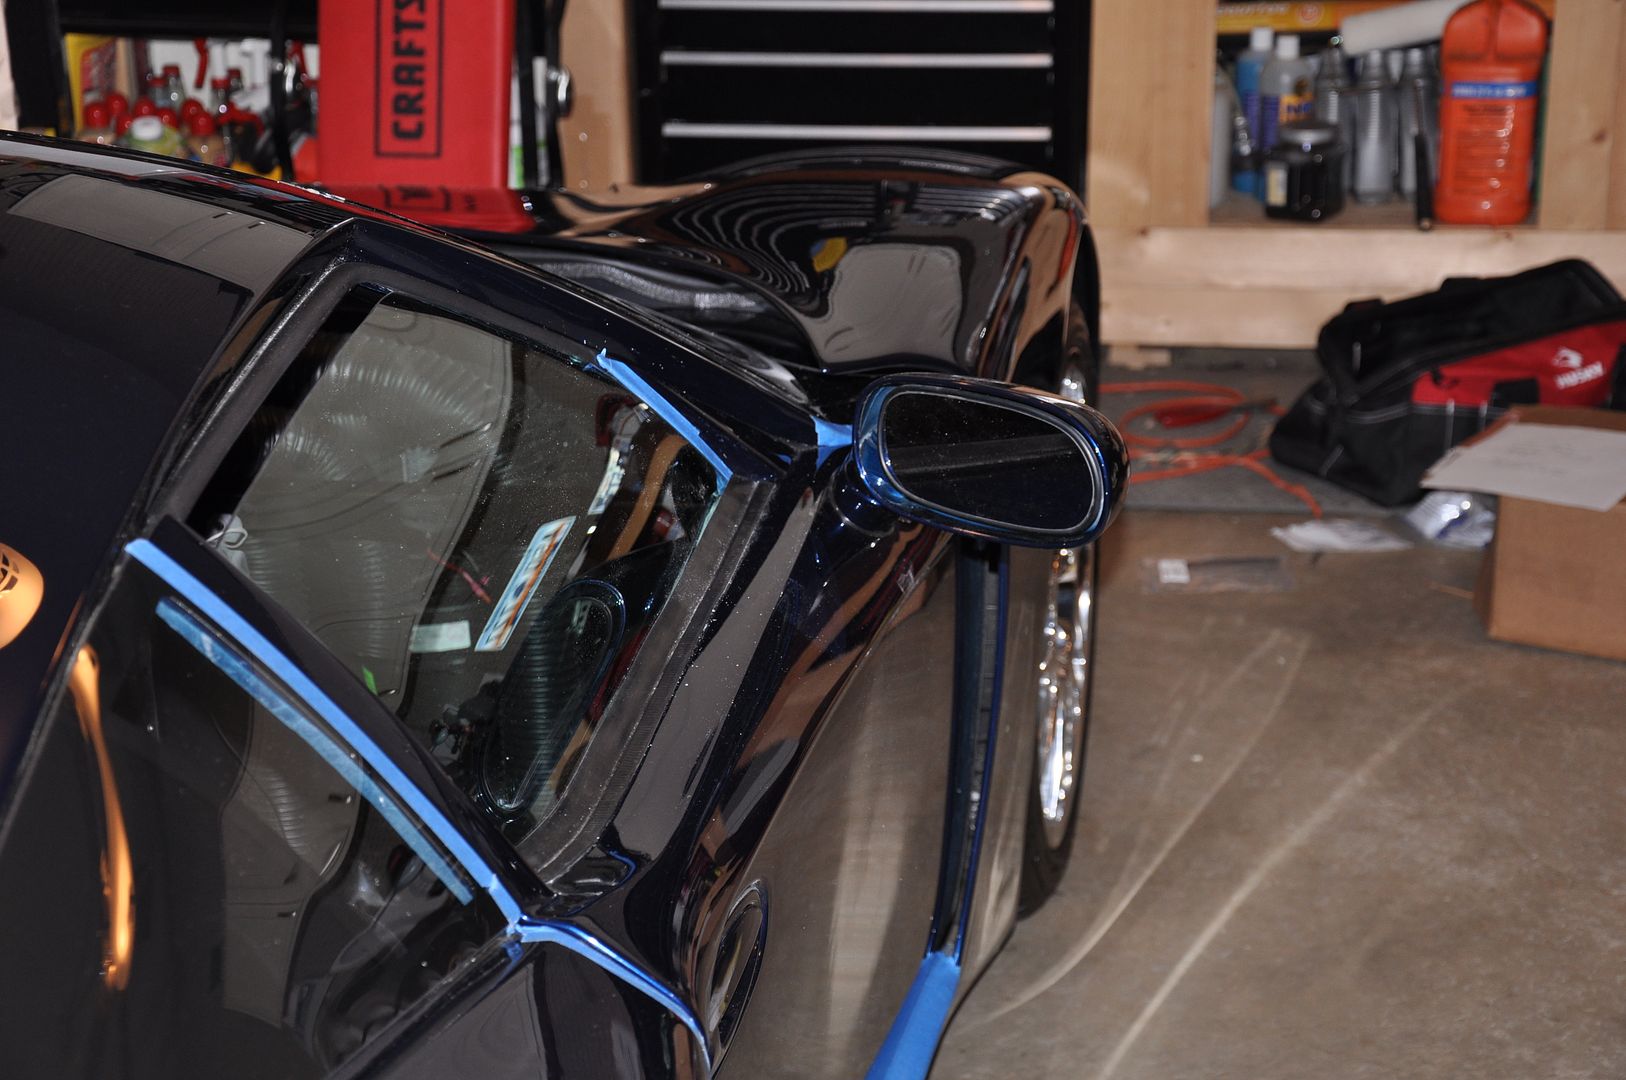
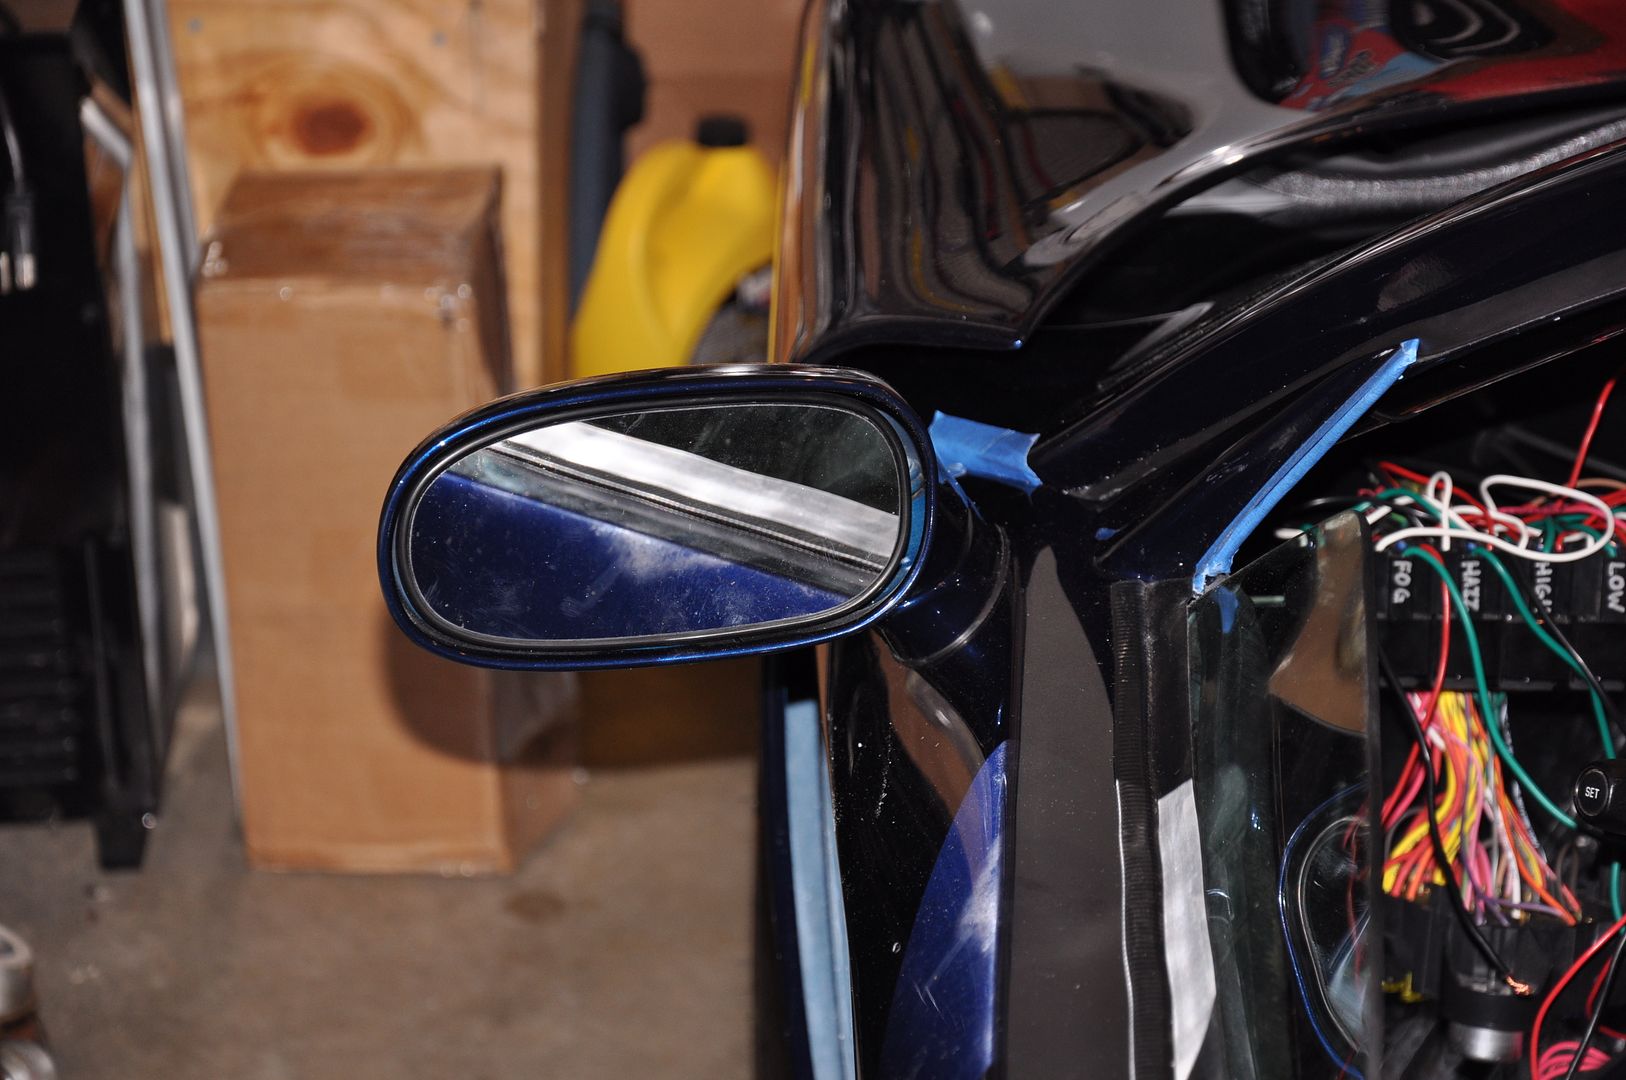
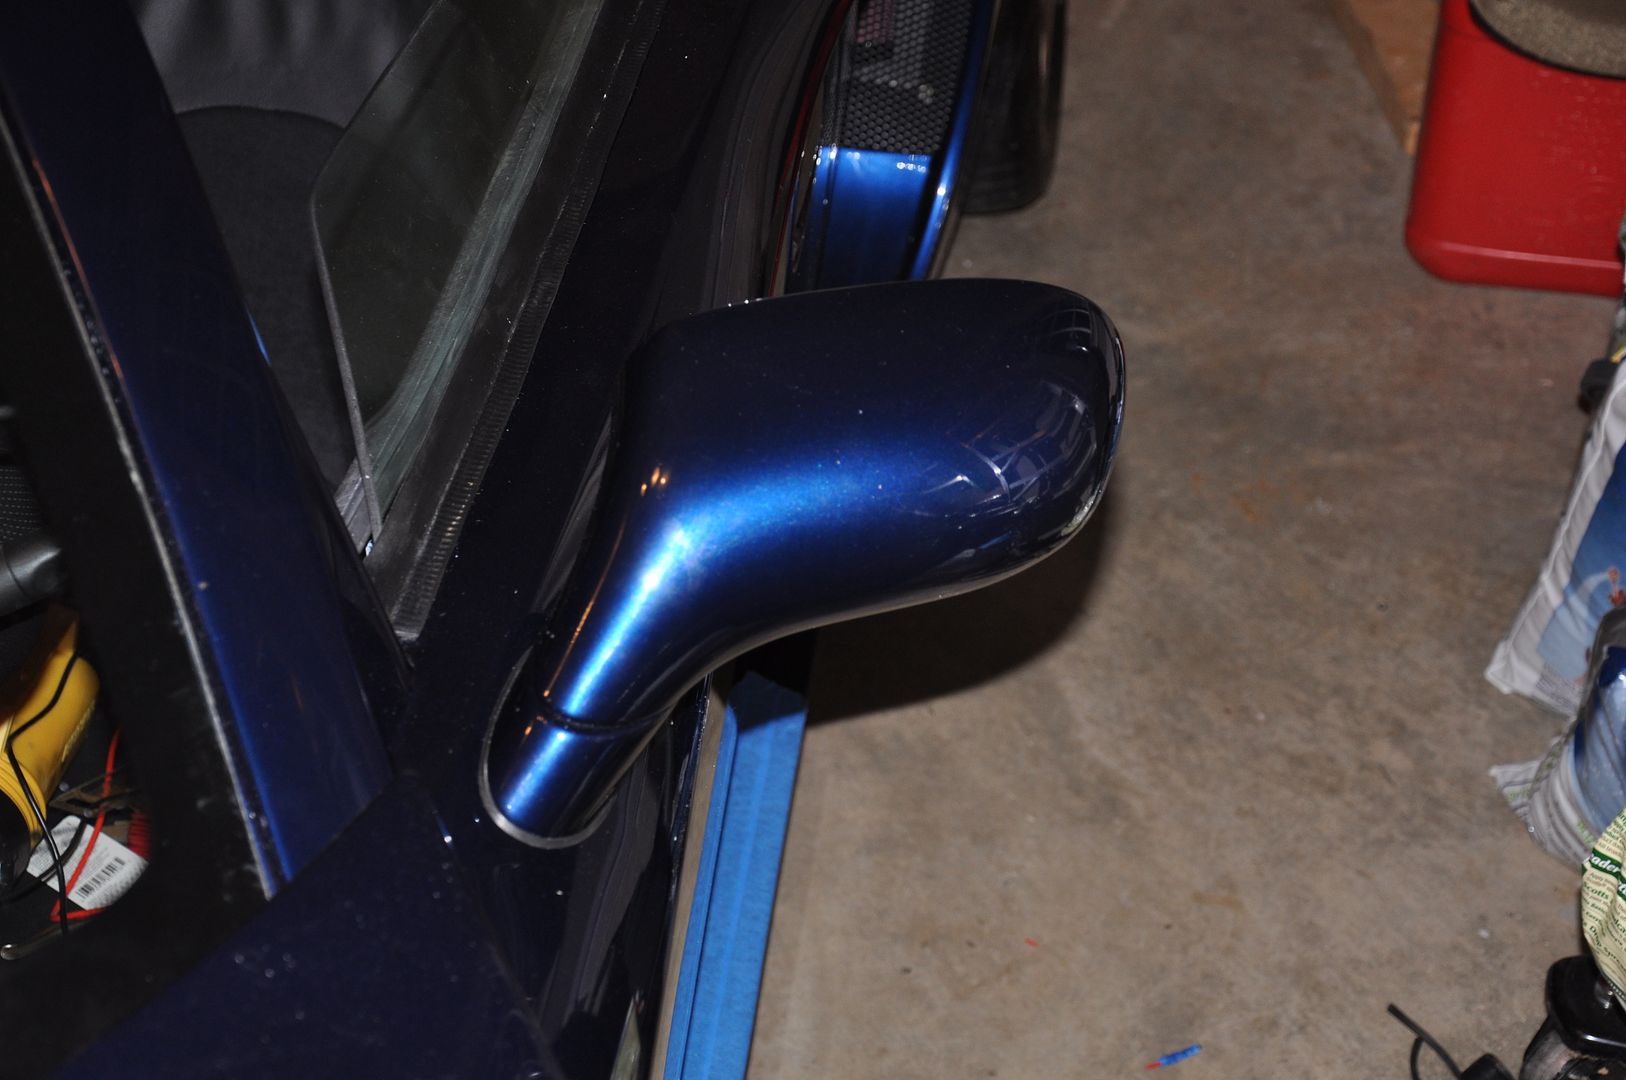
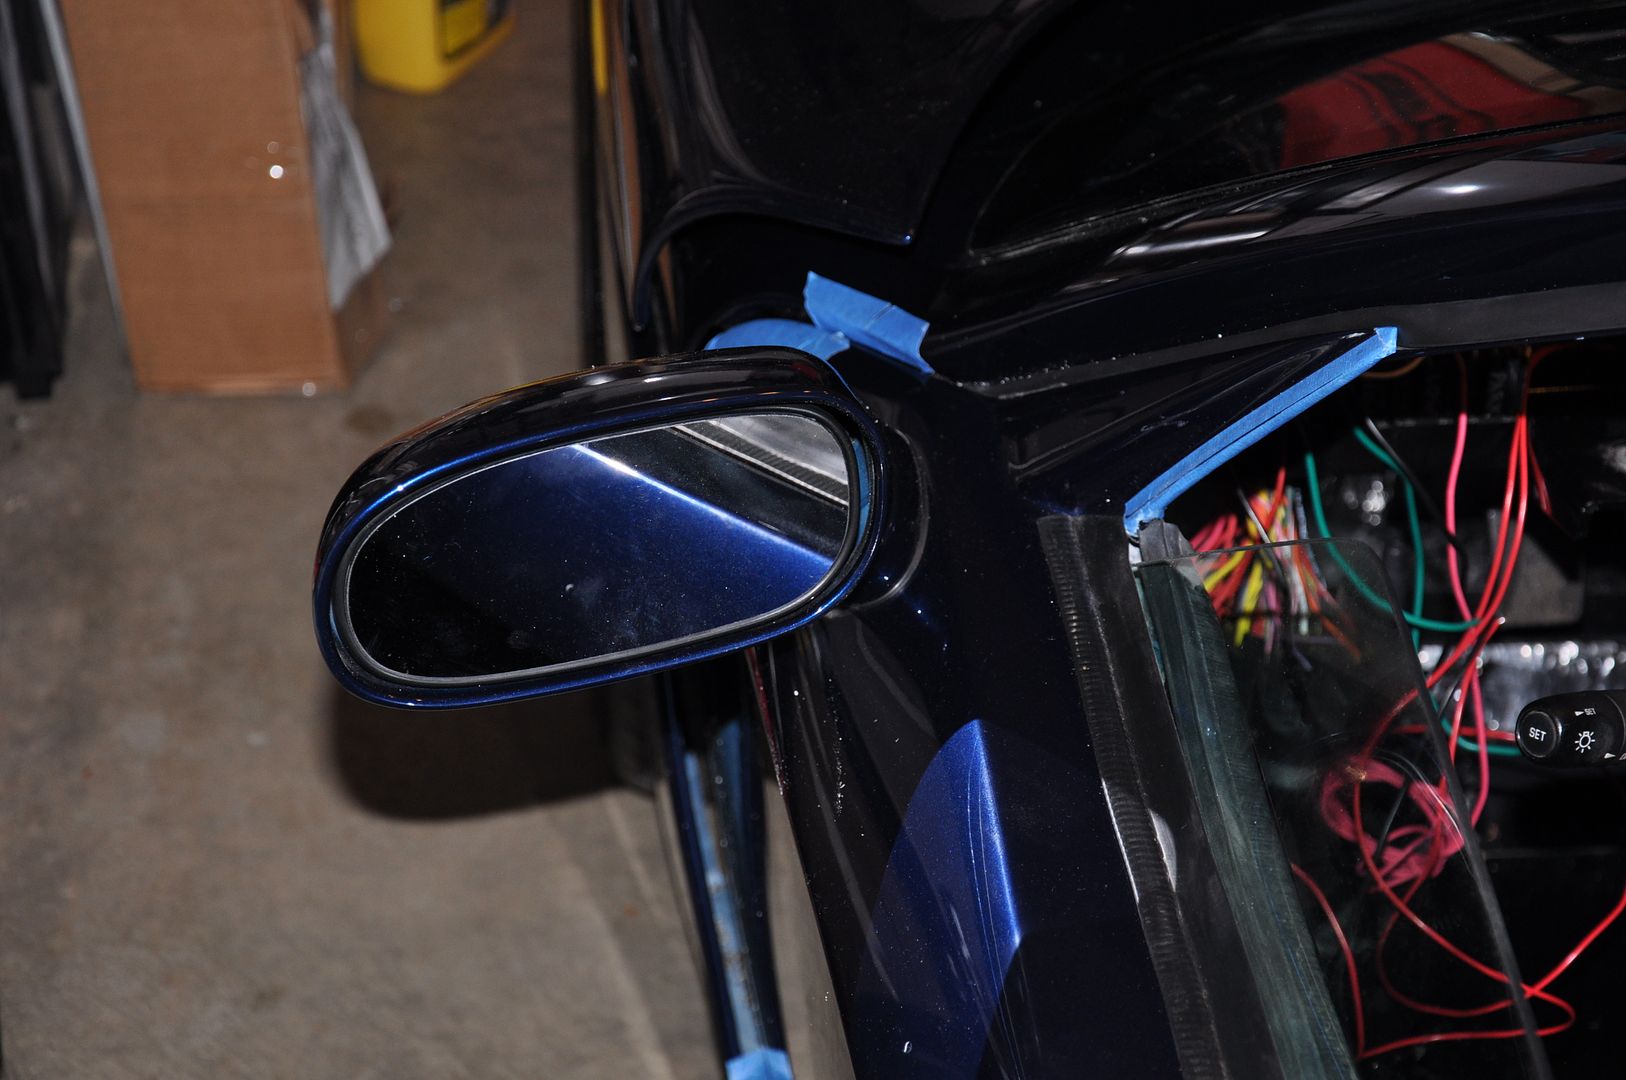
    I spent a couple of hours today getting the mirrors installed on my car. I know it's probably not such a big deal for most of the people here, but to me it was kind of stressful, since I had to drill through the painted door. But it turned out well. They're evenly spaced and really look good.

    I spent the rest of my afternoon with my neighbor trying to chace down the cause of why the headlights that were working this morning, suddenly stopped working this afternoon. After going back through the "wiring", we finally realized that the cause was a blown fuse. It was a 30 Amp fuse that was located over the "Accessories" lable on the fusebox; but had an arrow which pointed towards the Headlight fuse... Frustrating.

    Anyway, The mirrors are on, and that's a little more progress made this weekend.


    It's getting there a little at a time.
    Last edited by The Stig; 04-07-2012 at 10:11 PM.
    The Stig

    Some say, that I only know two facts about ducks, (both being wrong); and that if I could be bothered, I could solve the "da Vinci Code" in 47 seconds...
    All I know is that I'm called "The Stig".
    GTM #0081

  13. #373
    Senior Member The Stig's Avatar
    Join Date
    Feb 2011
    Location
    Charlotte, NC
    Posts
    2,004
    Post Thanks / Like


    The Stig

    Some say, that I only know two facts about ducks, (both being wrong); and that if I could be bothered, I could solve the "da Vinci Code" in 47 seconds...
    All I know is that I'm called "The Stig".
    GTM #0081

  14. #374
    Senior Member sk7500's Avatar
    Join Date
    Feb 2011
    Posts
    377
    Post Thanks / Like
    It's always hard for me to click on your new posts. First problem is the color. I always have to find a bib to keep from drooling all over the keyboard. Then, when I get that taken care of I have to come to terms with the fact that your pulling ahead of us big time in build progress. I've been working like crazy and can't even get anything worth taking pictures of. Then I stop looking at the trees and just see the forest and I feel good again seeing what I have to look forward to. Keep up the awesome work, It keeps me off the couch.

  15. #375
    Senior Member The Stig's Avatar
    Join Date
    Feb 2011
    Location
    Charlotte, NC
    Posts
    2,004
    Post Thanks / Like
    LOL. Thanks Steve. I sure don't feel as though I'm pulling ahead of anything or anyone. I have to agree with you regarding the color. I really like it. It was the right choice for me, and I think it really looks good on the GTM. I have a feeling that you're about to catch up and pass me pretty soon though. I've had to go back through the wiring for the headlights, High beams, fog lights, and blinkers. It's been pretty frustrating. Also, I seem to have issues with the Fog Light and Hazard light buttons. I can make the fog lights work when I cross the leads for the switches. But when I connect them to the Fog Light switch, and press the button, they will not work. I switched over to the hazard light button (since they are the same), and got the same result.

    I could really use some thoughts as to whether or not you (or anyone else) saw the same issues with their fog or hazard lights...

    When we finally get these cars finished, I'd like to have some sort of GTM Owners meet. I'm not sure of what the logistics would be since we all live so far away from each other. but it would really be a cool thing.

    Take care, and I can't wait to see your car when you're done.

    Mike
    Last edited by The Stig; 04-09-2012 at 02:41 PM.
    The Stig

    Some say, that I only know two facts about ducks, (both being wrong); and that if I could be bothered, I could solve the "da Vinci Code" in 47 seconds...
    All I know is that I'm called "The Stig".
    GTM #0081

  16. #376
    Senior Member sk7500's Avatar
    Join Date
    Feb 2011
    Posts
    377
    Post Thanks / Like
    The switches you're talking about sure look cool, but I had the same issues you are describing. Especially if you try to pull them out and re assemble a couple of times. For the hazzard button I had to build a special relay set up to separate the front and rear blinkers. Probably just ignorance on my part but it got me past one problem. The fog lights don't always work. I think they might be tied into the original c-5 electronics, and as such I might not have the proper sequence of components activated. But then you push the button too many times and the face pops of and the switch guts come out. Then the fog lights really don't work. Our dash is out right now and I have something else in mind. I'm sure the problems are self inflicted. So while I'm sorry you're haveing the same challenge, I'm glad to hear I'm not the only one.

  17. #377
    Senior Member The Stig's Avatar
    Join Date
    Feb 2011
    Location
    Charlotte, NC
    Posts
    2,004
    Post Thanks / Like
    Hi Steve,

    Yep. It sounds like we may have stumbled across the same issue. It's really strange.

    I think I may go ahead and get a set of replacement switches and try those, just to determine if it's the switch or the wiring. Although, I really think that the wiring is right since the fog lights turn on when I cross the connectors to complete the circuit. The light comes on inside the switch, but it doesn't appear to be making the connection for the circuit.

    I'm lucky to have my neighbor helping finish out the wiring. He (unlike me) knows what he's doing.

    Mike

    Quote Originally Posted by sk7500 View Post
    The switches you're talking about sure look cool, but I had the same issues you are describing. Especially if you try to pull them out and re assemble a couple of times. For the hazard button I had to build a special relay set up to separate the front and rear blinkers. Probably just ignorance on my part but it got me past one problem. The fog lights don't always work. I think they might be tied into the original c-5 electronics, and as such I might not have the proper sequence of components activated. But then you push the button too many times and the face pops of and the switch guts come out. Then the fog lights really don't work. Our dash is out right now and I have something else in mind. I'm sure the problems are self inflicted. So while I'm sorry you're having the same challenge, I'm glad to hear I'm not the only one.
    The Stig

    Some say, that I only know two facts about ducks, (both being wrong); and that if I could be bothered, I could solve the "da Vinci Code" in 47 seconds...
    All I know is that I'm called "The Stig".
    GTM #0081

  18. #378
    Senior Member The Stig's Avatar
    Join Date
    Feb 2011
    Location
    Charlotte, NC
    Posts
    2,004
    Post Thanks / Like

    Thank you Vidal!

    I'll tell you... We have a great group of people and friends on this forum and in the Factory Five Community.

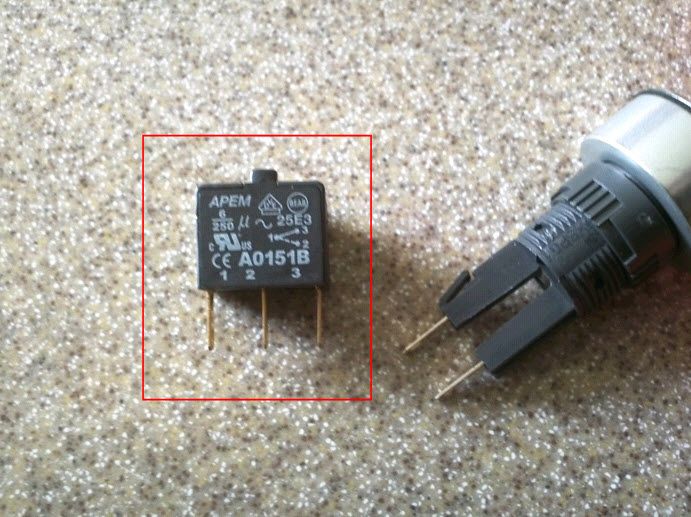
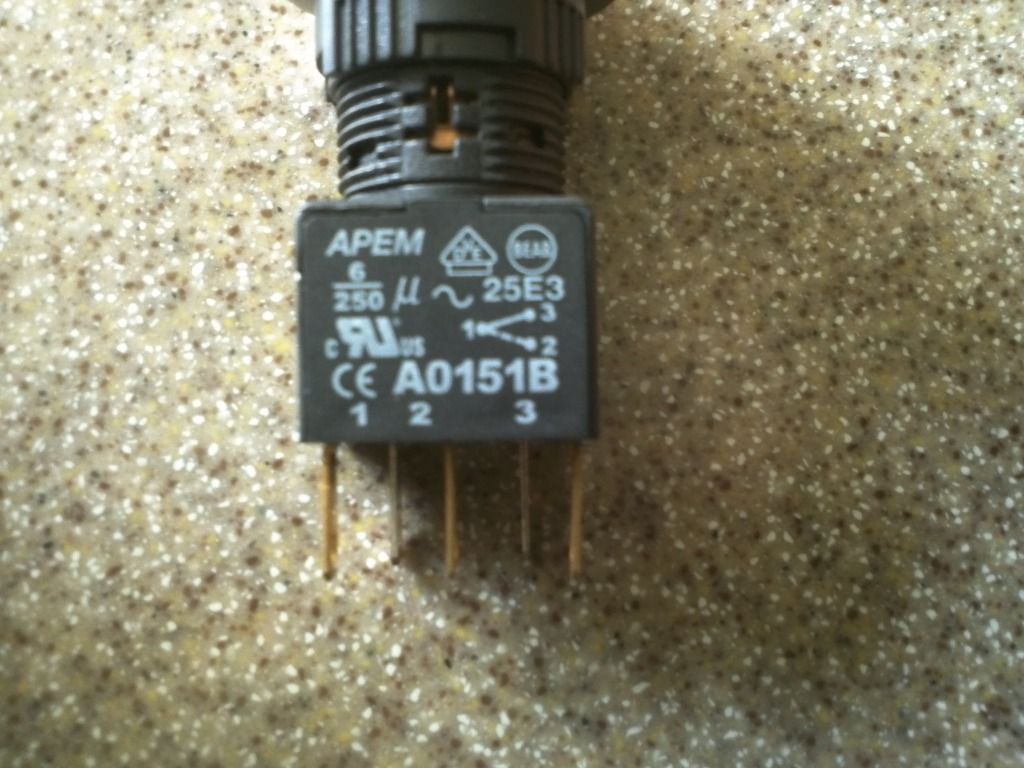
    My neighbor and I tried and tried to figure out why we couldn't get the fog light switch to work. And with a single picture, Vidal answered my question.


    I am missing the square section with the three prongs that enable the the circuit to close... I just have the main switch body with the two prongs. These two prongs allow the switch light to power on, but they don't complete the circuit to turn the fog lights on.


    So I would have never known that I was missing the enabling part, had Vidal not sent the pictures of his switch to me.

    Again, Thank you Vidal for your help and encouragement. We have a lot of good people here on the forum, but we could always use a lot more people like you.

    Thanks, and take care Buddy!

    Mike
    Last edited by The Stig; 04-10-2012 at 10:13 AM.
    The Stig

    Some say, that I only know two facts about ducks, (both being wrong); and that if I could be bothered, I could solve the "da Vinci Code" in 47 seconds...
    All I know is that I'm called "The Stig".
    GTM #0081

  19. #379
    Senior Member
    Join Date
    Feb 2011
    Location
    Clarksville, MD
    Posts
    232
    Post Thanks / Like
    Mike,

    I'm not using my FFR switches. They're yours if you want them. PM me your address and I'll get them in the mail tomorrow.

    -Michael

  20. #380
    Senior Member The Stig's Avatar
    Join Date
    Feb 2011
    Location
    Charlotte, NC
    Posts
    2,004
    Post Thanks / Like
    Awesome! PM sent.

    Mike

    Quote Originally Posted by RumRunner View Post
    Mike,

    I'm not using my FFR switches. They're yours if you want them. PM me your address and I'll get them in the mail tomorrow.

    -Michael
    The Stig

    Some say, that I only know two facts about ducks, (both being wrong); and that if I could be bothered, I could solve the "da Vinci Code" in 47 seconds...
    All I know is that I'm called "The Stig".
    GTM #0081

  21. #381
    Senior Member The Stig's Avatar
    Join Date
    Feb 2011
    Location
    Charlotte, NC
    Posts
    2,004
    Post Thanks / Like

    Thank you!

    Quote Originally Posted by The Stig View Post
    Awesome! PM sent.

    Mike
    Hi Michael,

    I got the switches, and wanted to let you know that I appreciate the gesture.

    I would imagine that we'll get them in the car this weekend, and finally have the fog & hazard lights working.

    Thank you.

    Mike
    The Stig

    Some say, that I only know two facts about ducks, (both being wrong); and that if I could be bothered, I could solve the "da Vinci Code" in 47 seconds...
    All I know is that I'm called "The Stig".
    GTM #0081

  22. #382
    Senior Member The Stig's Avatar
    Join Date
    Feb 2011
    Location
    Charlotte, NC
    Posts
    2,004
    Post Thanks / Like
    The Hella blinker light pig tails finally came. Nice connectors with a rubber "plug" cover to make the connection watertight. They'll give the blinkers a nice "OEM" finish. I'll take some pictures this weekend.

    DM65 Sent a link to the following info. Thank you buddy!

    http://www.rallylights.com/detail.aspx?ID=4459

    Here's the contact info as well as Part Numbers, in case anyone else is interested.


    Hella Blinker (3 Prong) Pig Tail


    Hella Blinker Light

    The wiring for the lights is almost finished!

    Woo Hoo!
    Last edited by The Stig; 04-16-2012 at 09:01 PM.
    The Stig

    Some say, that I only know two facts about ducks, (both being wrong); and that if I could be bothered, I could solve the "da Vinci Code" in 47 seconds...
    All I know is that I'm called "The Stig".
    GTM #0081

  23. #383
    Senior Member
    Join Date
    Feb 2011
    Location
    Clarksville, MD
    Posts
    232
    Post Thanks / Like
    Quote Originally Posted by The Stig View Post
    Hi Michael,

    I got the switches, and wanted to let you know that I appreciate the gesture.

    I would imagine that we'll get them in the car this weekend, and finally have the fog & hazard lights working.

    Thank you.

    Mike
    Mike,

    Glad you could use them. They were sitting in my garage getting lonely and feeling slighted having not been included in my build. I'm sure they're in a happier place now.

    -Michael

  24. #384
    Junior Member
    Join Date
    Apr 2011
    Location
    Fitzgerald Georgia
    Posts
    25
    Post Thanks / Like
    Hey Stig, very glad to help. This forum is the best I have ever seen for sharing information.
    Looking forward to your completed car photos!!!!!!!!!
    Don

  25. #385
    Senior Member The Stig's Avatar
    Join Date
    Feb 2011
    Location
    Charlotte, NC
    Posts
    2,004
    Post Thanks / Like
    Quote Originally Posted by dm65 View Post
    Hey Stig, very glad to help. This forum is the best I have ever seen for sharing information.
    Looking forward to your completed car photos!!!!!!!!!
    Don
    I know what you mean. There are some unbelievable people here. The finished car is getting closer each week. I've been making some good progress over the past few weekends. So you may see those pictures before you know it. I have plans of having a really nice custom interior designed and installed by a local award winning shop. So when that happens, is when I'll really feel that it's "close" to being 100% finished. (Until then, I'll probably have the FFR interior in place).

    God knows when I'll ever have it on the road... But there should be some pictures before long.

    Thanks for the cool words!

    Mike
    Last edited by The Stig; 04-18-2012 at 07:58 PM.
    The Stig

    Some say, that I only know two facts about ducks, (both being wrong); and that if I could be bothered, I could solve the "da Vinci Code" in 47 seconds...
    All I know is that I'm called "The Stig".
    GTM #0081

  26. #386
    Senior Member The Stig's Avatar
    Join Date
    Feb 2011
    Location
    Charlotte, NC
    Posts
    2,004
    Post Thanks / Like
    I was able to help a forum friend out. I got a PM asking whether or not I still had my Gen-I seats, and if so, would I like to sell them. since I couldn't imagine what other project I might use them in, I told him that he could have them as long as he paid for shipping. He agreed, and now they have a new home, and I have a little more shelf space in the garage.

    Last night, I think I accidentally learned the he's one of our "cousins" from the GT40 forum. Looks like the GTM seats will occupy a very nice spot in his RCR-SLC.

    Enjoy Sharkey! I can't wait to see your car when you're done!

    Mike
    Last edited by The Stig; 04-26-2012 at 08:09 AM.
    The Stig

    Some say, that I only know two facts about ducks, (both being wrong); and that if I could be bothered, I could solve the "da Vinci Code" in 47 seconds...
    All I know is that I'm called "The Stig".
    GTM #0081

  27. #387
    Senior Member VD2021's Avatar
    Join Date
    Feb 2011
    Location
    Central, FL
    Posts
    958
    Post Thanks / Like
    Blog Entries
    2
    Mike,
    Outstanding! This community could write the book on how a forum community should be.

    So what seats are you running now?
    R/s
    Vidal
    CURRENT STATUS: Interior Rework and Bodywork.
    GenII GTM #331. Delivered (23/9/10)
    BUILD LOG AND WEBSITE:
    http://gtmbuild.weebly.com/ .

  28. #388
    Senior Member The Stig's Avatar
    Join Date
    Feb 2011
    Location
    Charlotte, NC
    Posts
    2,004
    Post Thanks / Like
    Quote Originally Posted by VD2021 View Post
    Mike,
    Outstanding! This community could write the book on how a forum community should be.

    So what seats are you running now?
    Hi Vidal,

    I agree. This forum really is full of good people.

    Back in Sept or Oct of last year, I bought a set of Gen II seats from "CarbonFiber" here on the forum. I believe he has a nice design for a set of custom seats that he's planning to use, and he made me an offer that I couldn't refuse. I sent him a check, and he delivered the seats to Whitby's for me. So when the opportunity came up, I decided to try and keep the good Karma going, and "pay it forward" with my seats.

    Anyway, the Gen II seats allow my wide butt to get in and out a little easier. They'll be re-covered to match the new interior when I have that work done.

    Chuck Hanna (Hot Rod Interiors by Chuck) called last Thursday to start getting ideas together and get me onto his schedule. I can't wait to see this thing when he gets done with it. When that happens, I'm calling it finished. Done. No More...

    Until I build the Roadster for my wife...
    The Stig

    Some say, that I only know two facts about ducks, (both being wrong); and that if I could be bothered, I could solve the "da Vinci Code" in 47 seconds...
    All I know is that I'm called "The Stig".
    GTM #0081

  29. #389
    Senior Member The Stig's Avatar
    Join Date
    Feb 2011
    Location
    Charlotte, NC
    Posts
    2,004
    Post Thanks / Like
    Got a little more done this weekend...

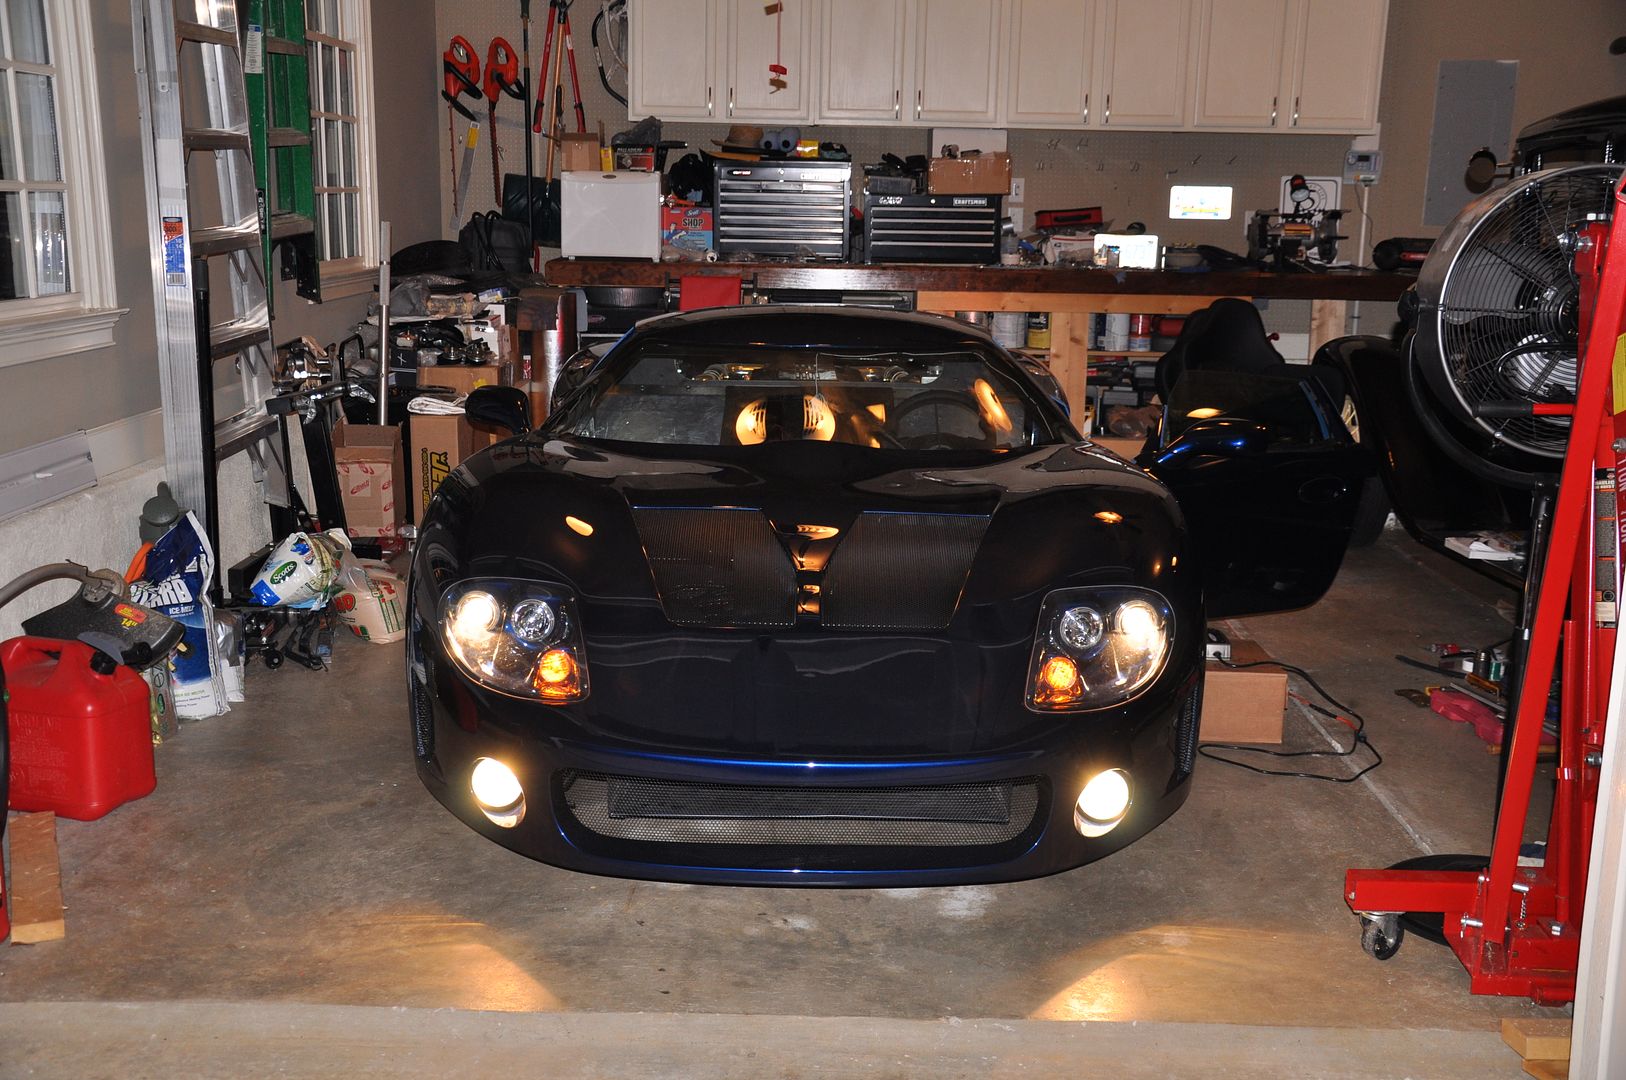
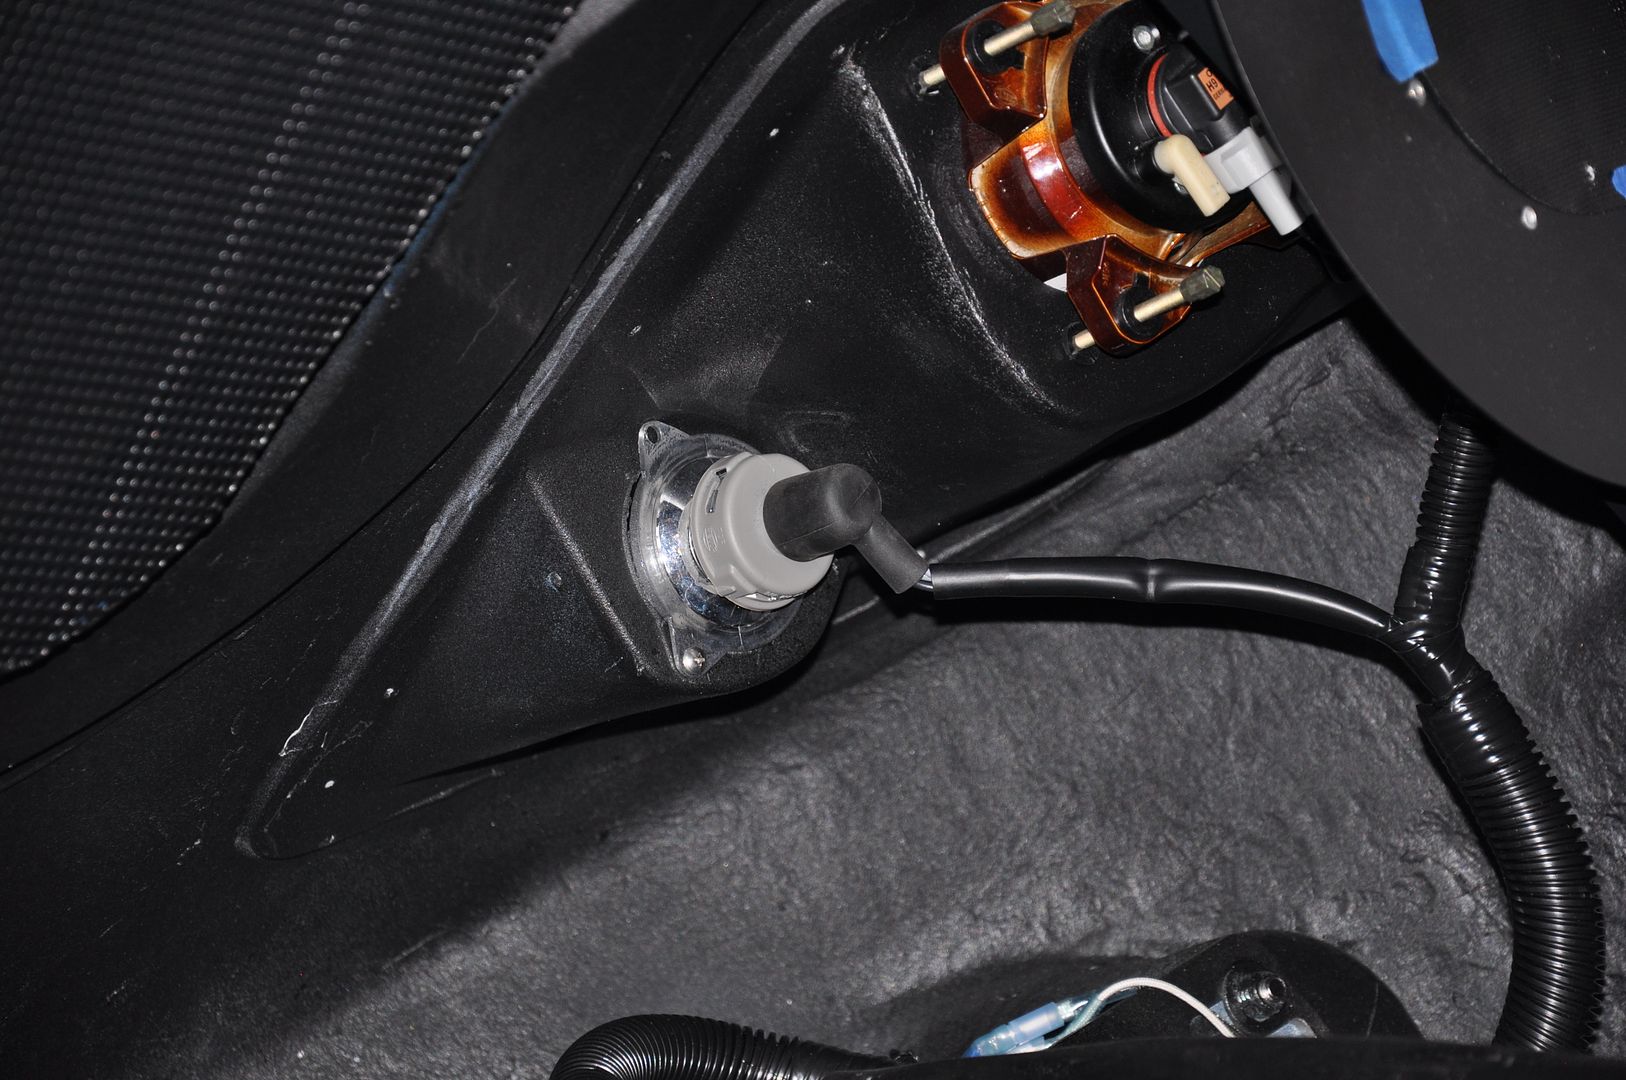
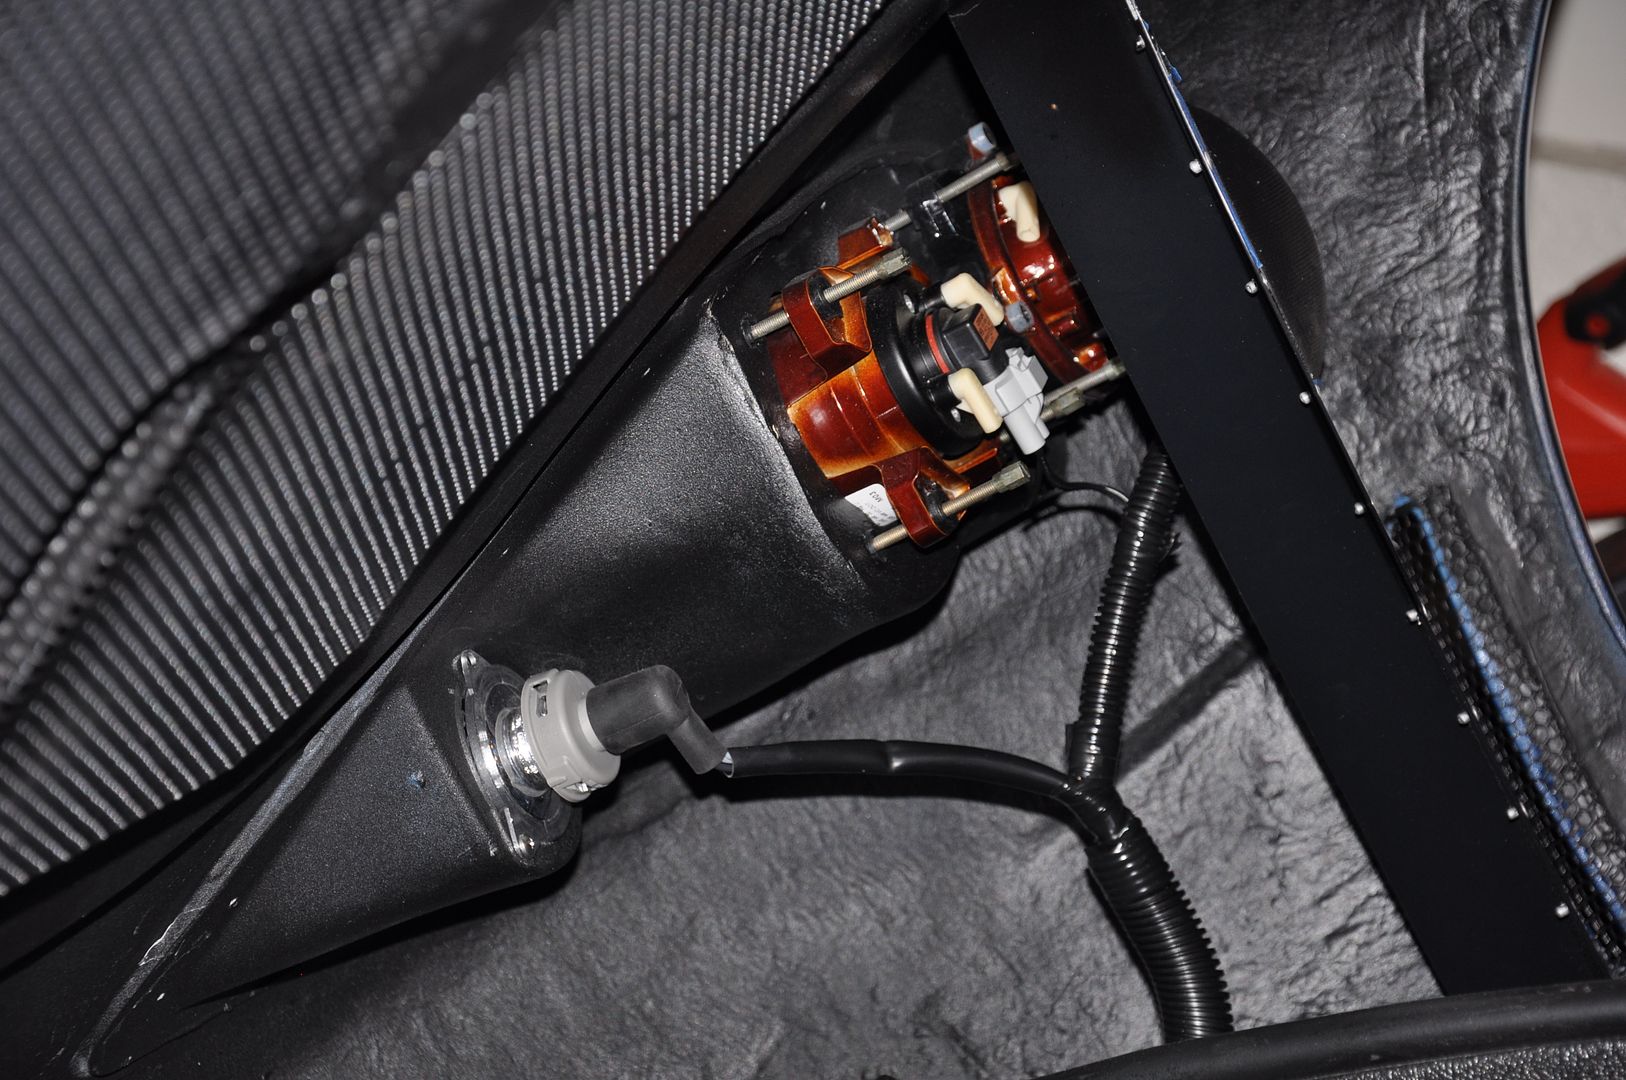
    Got the wiring for the headlights completely finished (except for the hazard light switch).

    The headlights, bright lights, parking lights, and blinkers.


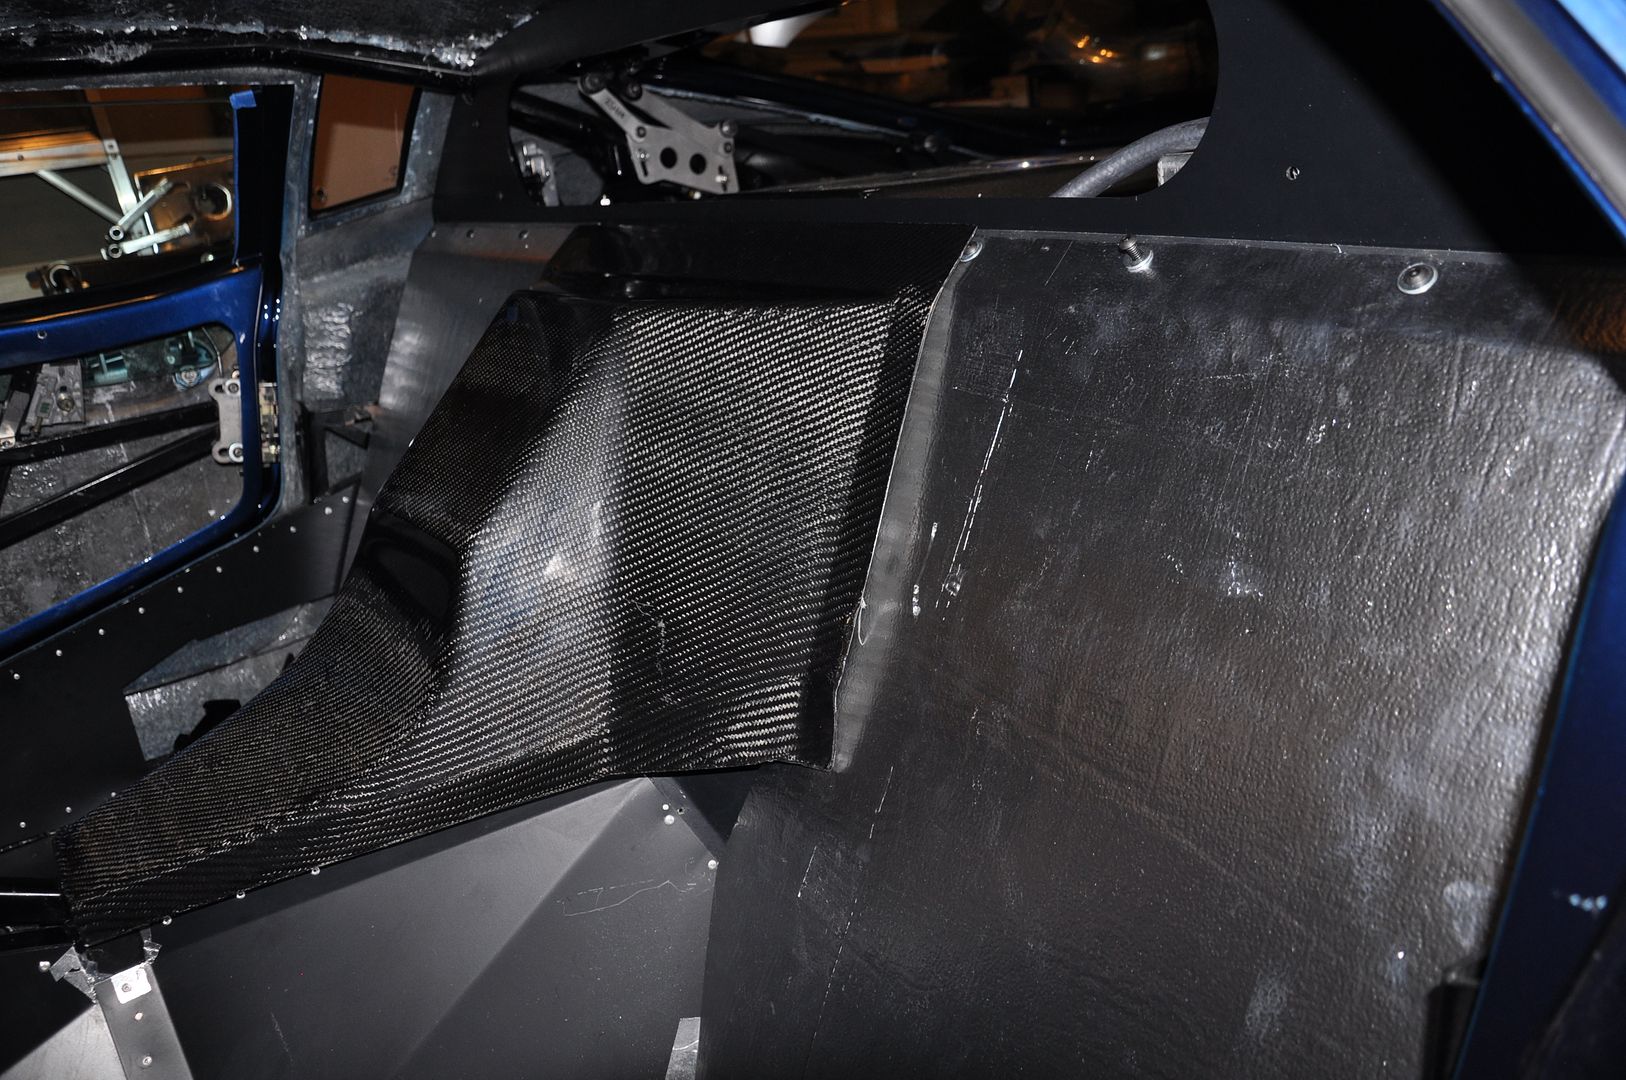
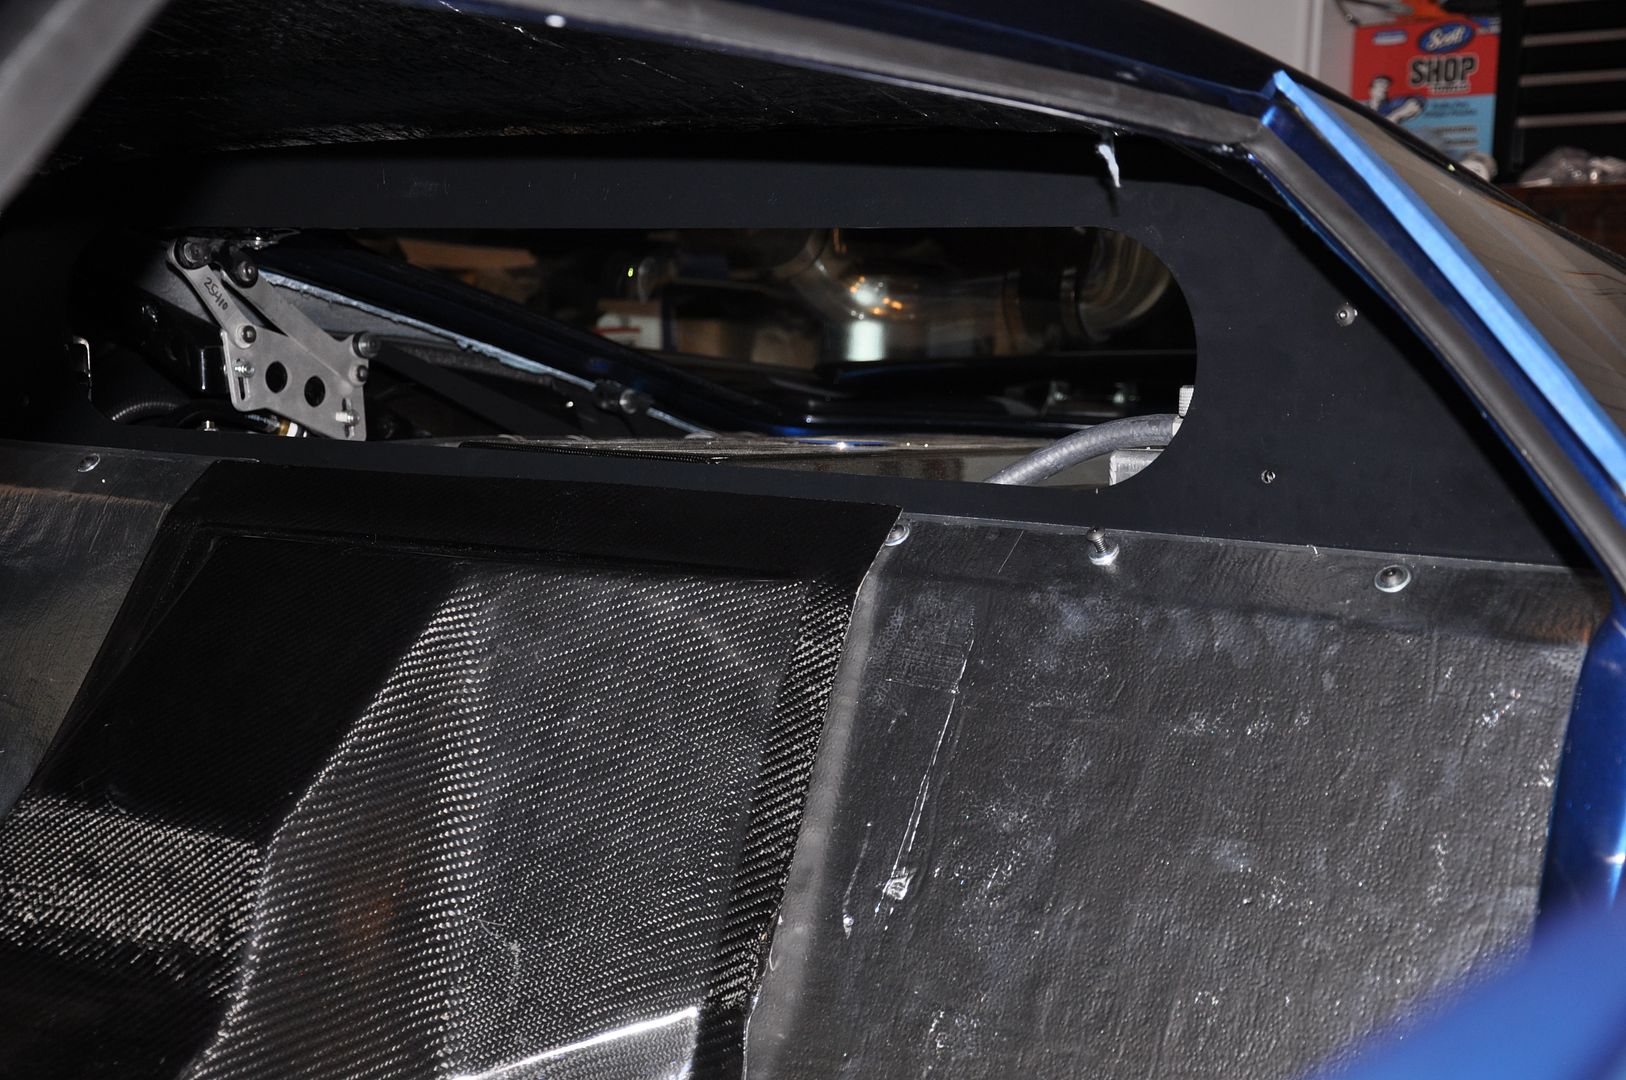
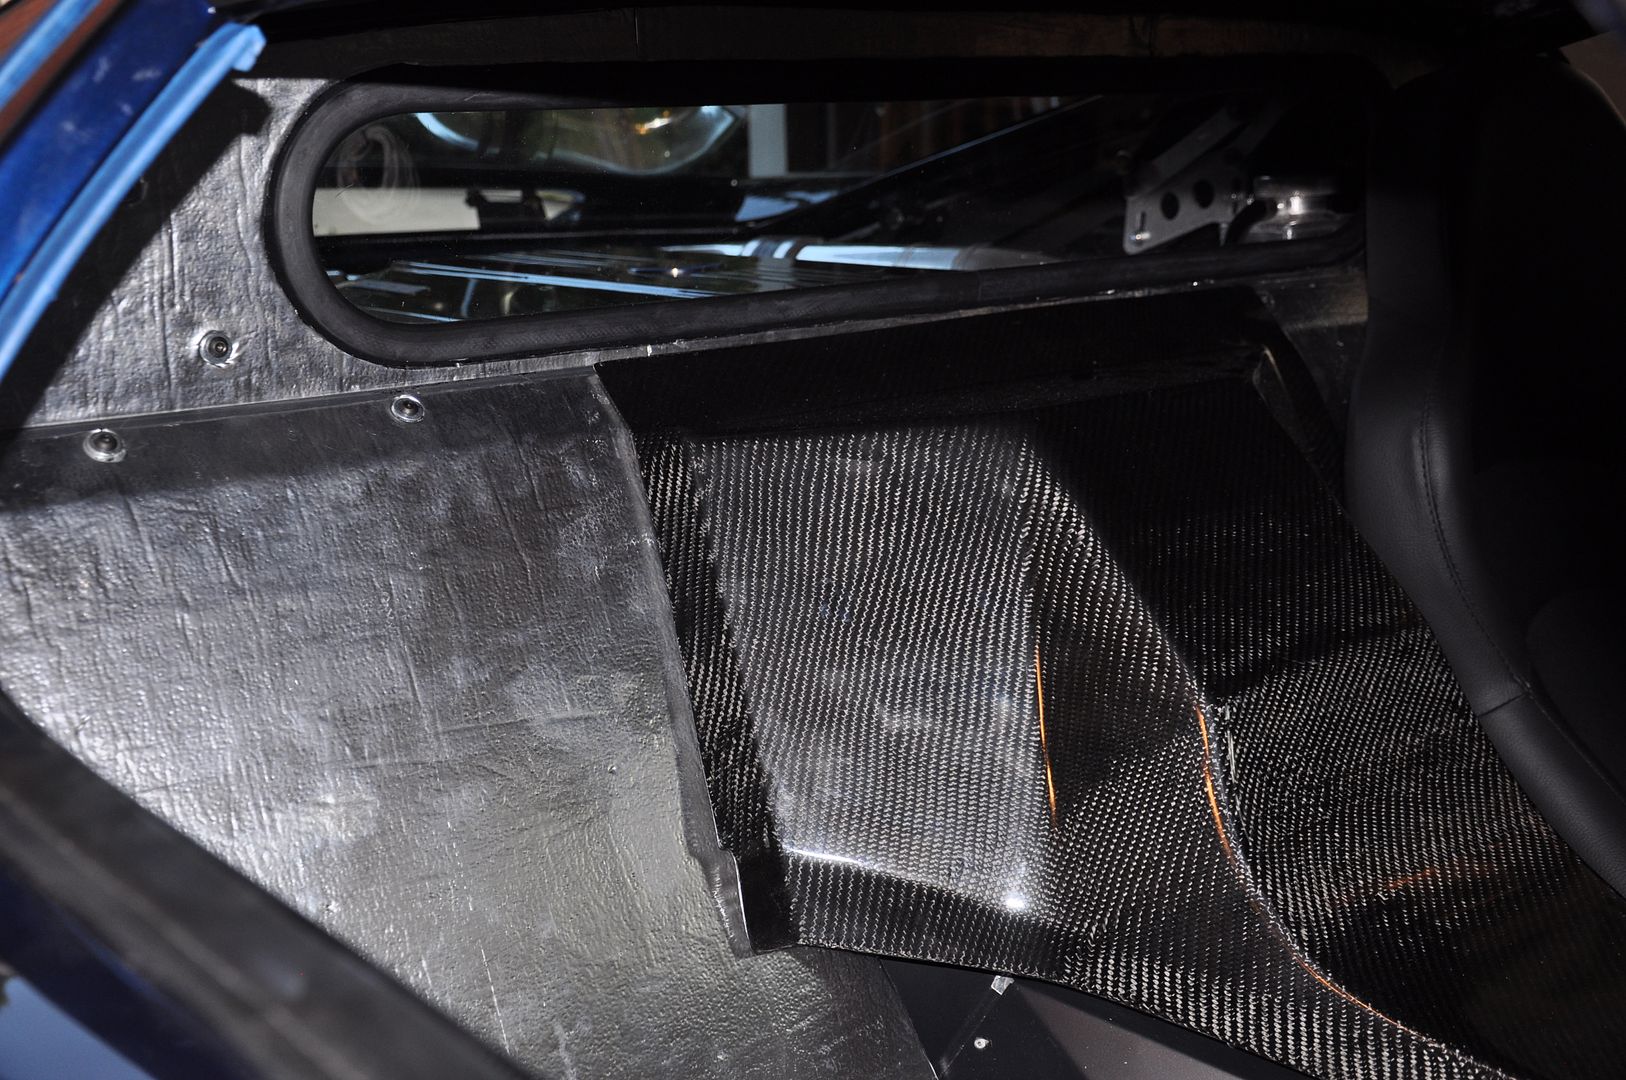
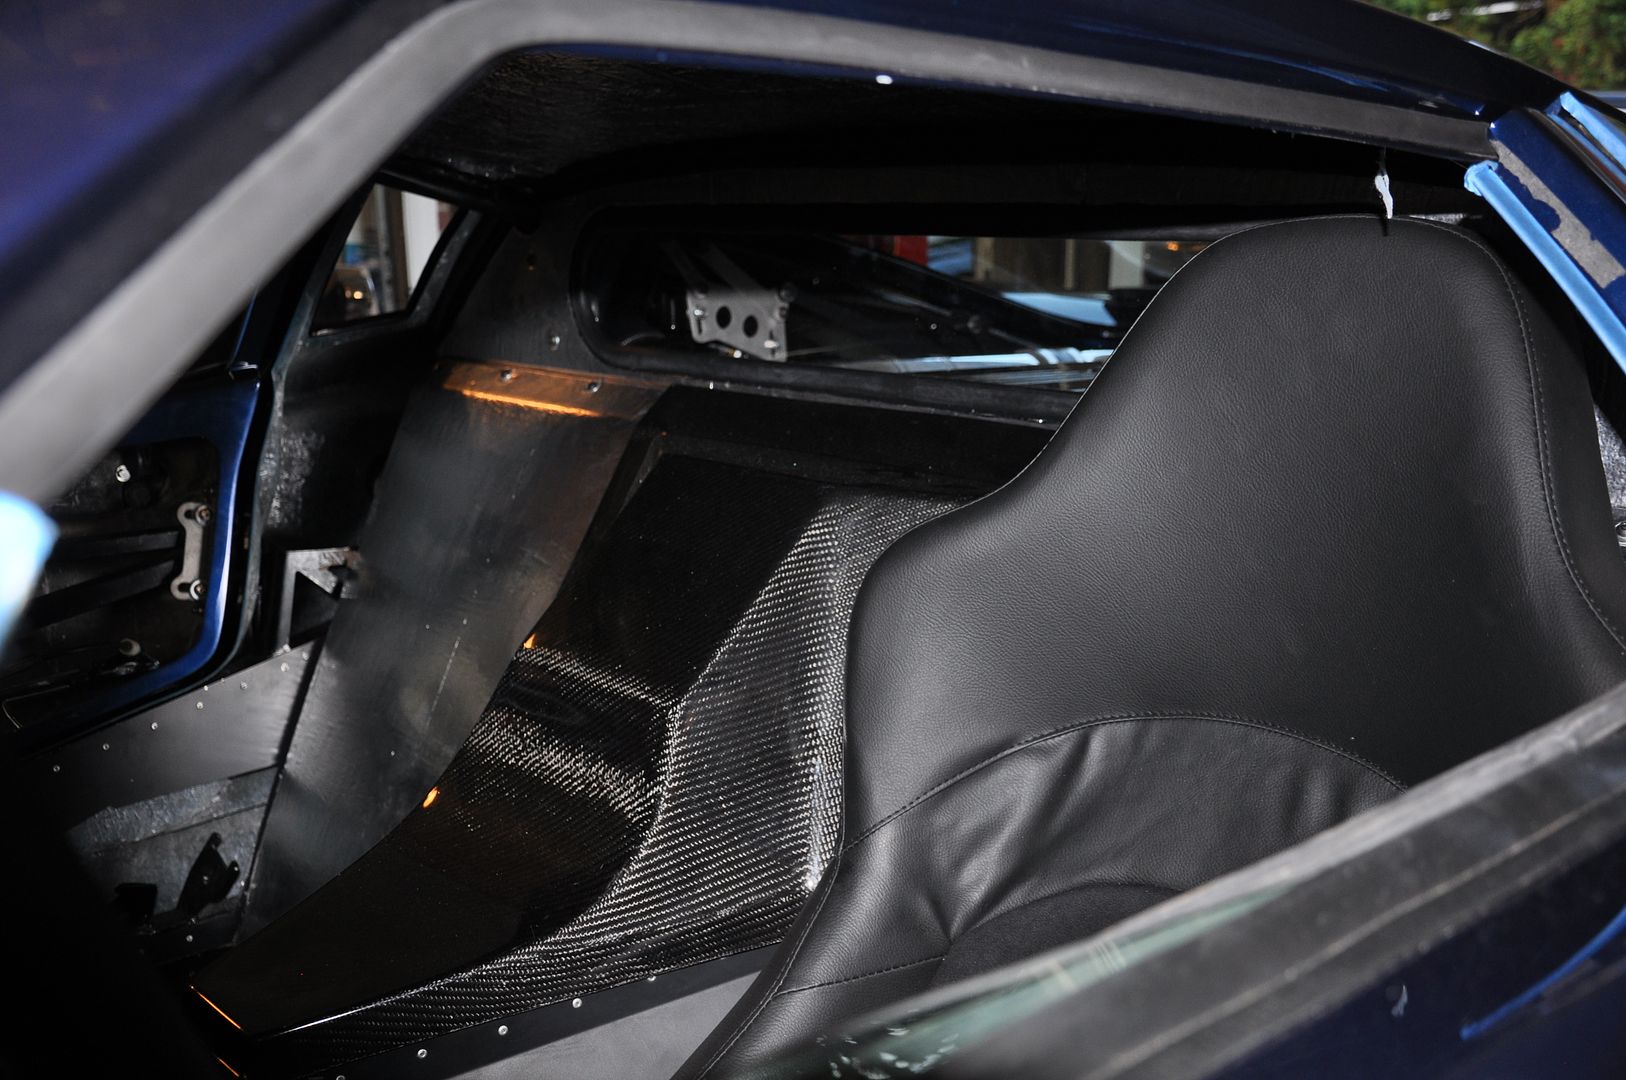
    I got the firewall fitted in place. I'll make it permanent as soon as I get the "lava mat" that I want to use on the engine side of the tank covers, fuel tanks, and window frame...

    I was able to get the sound deadener on the cockpit side of the tank covers.


    The pig tail for the headlights and blinkers worked out well. It gives a nice "finished" look to the wiring.


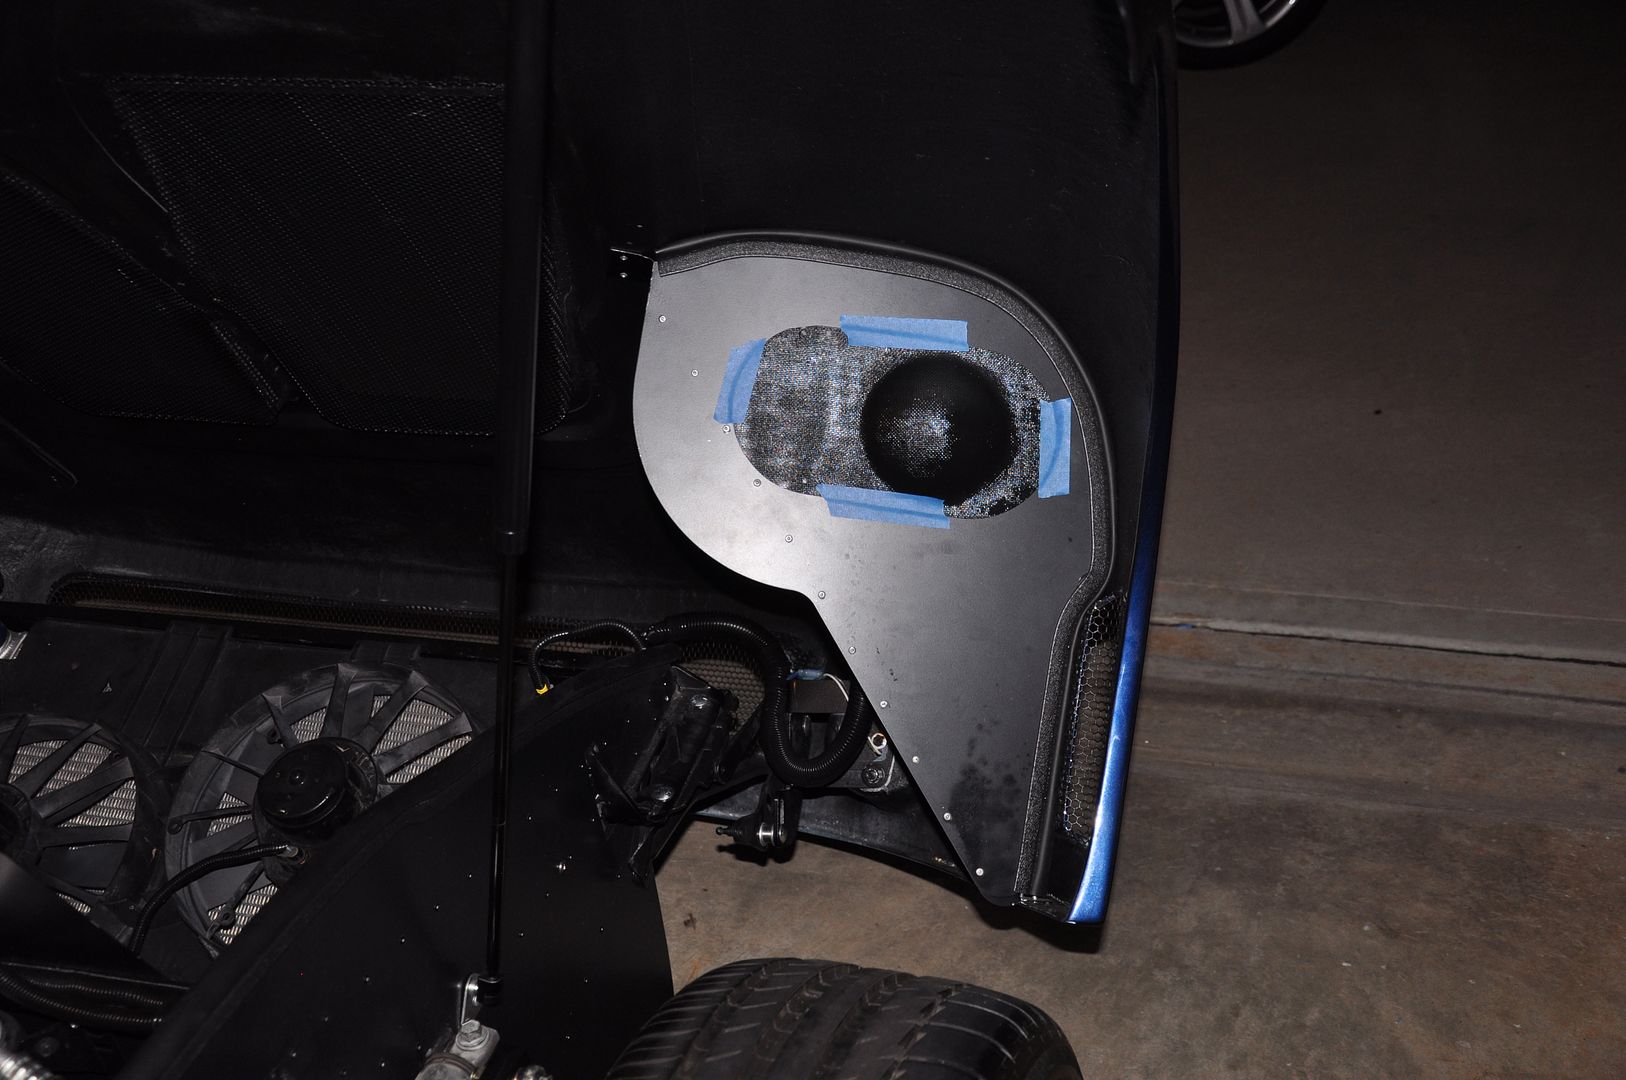
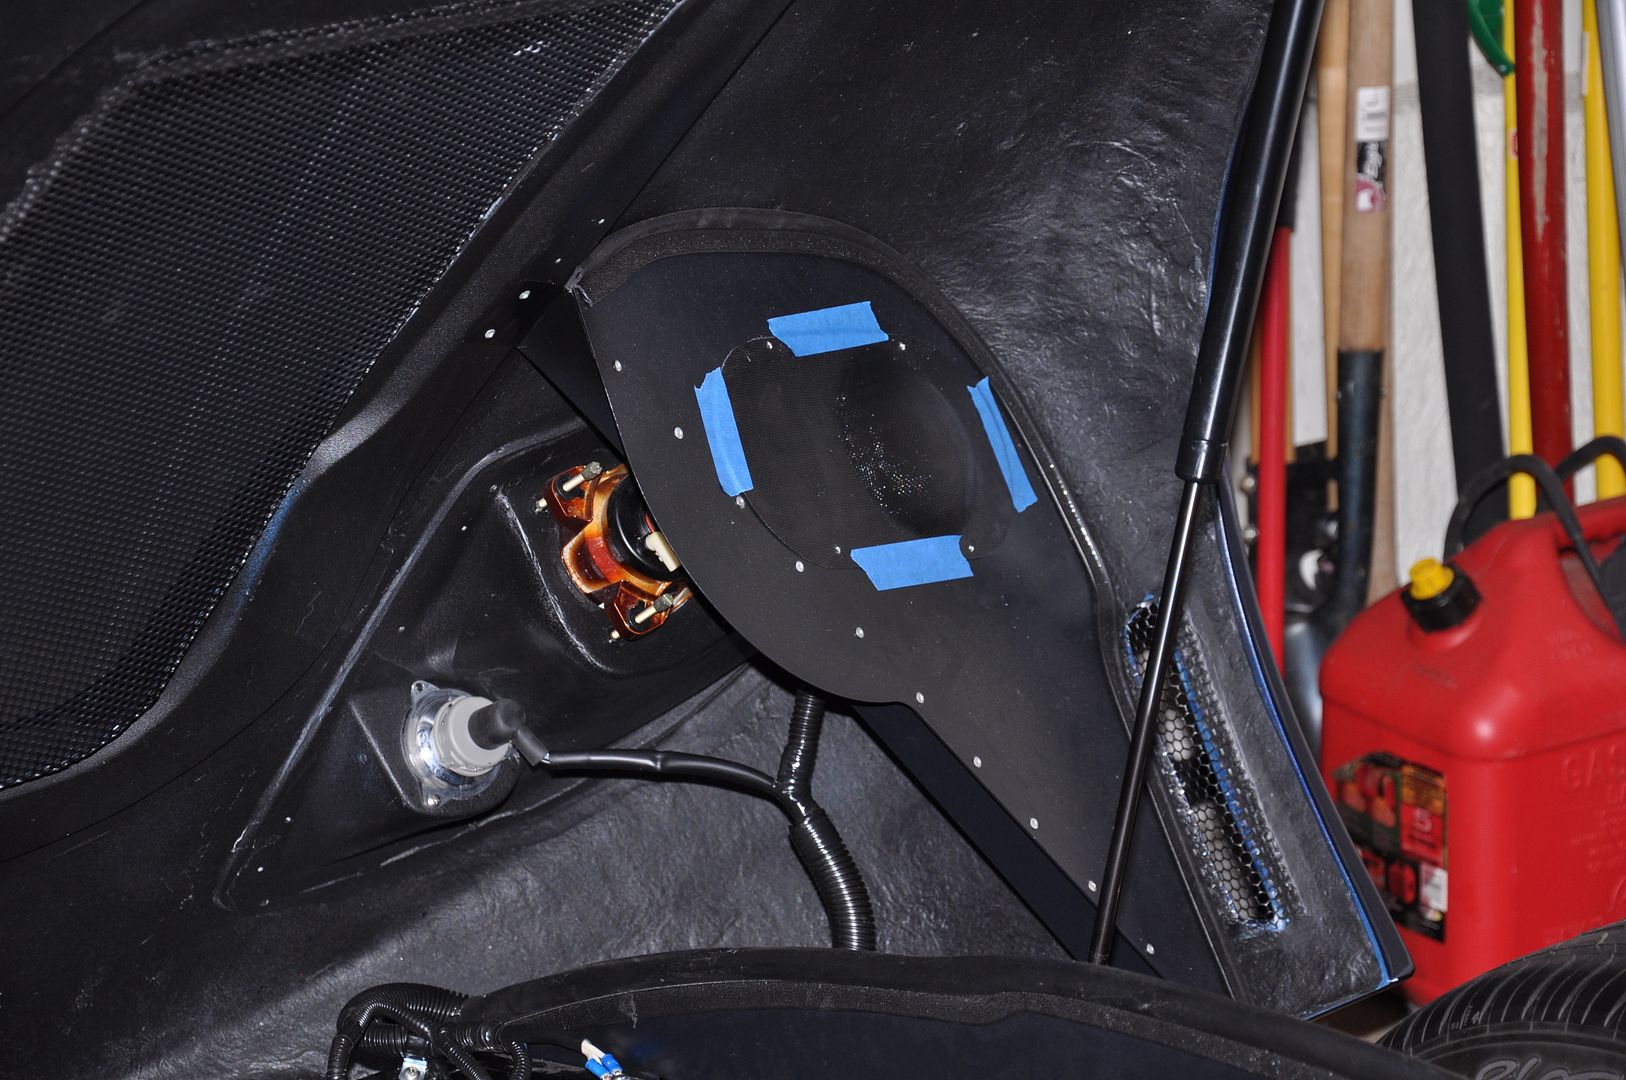
    Quick Racing Products makes a cover for the headlight access, that has a bubble to clear the wiring connectors.
    I have them taped into place, until I decide if I want to use nut-certs or just self tapping screws to hold them.


    Getting closer...
    Last edited by The Stig; 05-08-2012 at 07:32 AM.
    The Stig

    Some say, that I only know two facts about ducks, (both being wrong); and that if I could be bothered, I could solve the "da Vinci Code" in 47 seconds...
    All I know is that I'm called "The Stig".
    GTM #0081

  30. #390
    Senior Member Kempo's Avatar
    Join Date
    Feb 2011
    Location
    Cabo Rojo,PR. USA
    Posts
    723
    Post Thanks / Like
    Very nice progress Mike. Looks good.
    GenII GTM #354
    Delivered (02/09/11)

  31. #391
    Senior Member VD2021's Avatar
    Join Date
    Feb 2011
    Location
    Central, FL
    Posts
    958
    Post Thanks / Like
    Blog Entries
    2
    Mike,

    Nice wire detailing. Clean and professional.
    R/s
    Vidal
    CURRENT STATUS: Interior Rework and Bodywork.
    GenII GTM #331. Delivered (23/9/10)
    BUILD LOG AND WEBSITE:
    http://gtmbuild.weebly.com/ .

  32. #392
    Senior Member The Stig's Avatar
    Join Date
    Feb 2011
    Location
    Charlotte, NC
    Posts
    2,004
    Post Thanks / Like
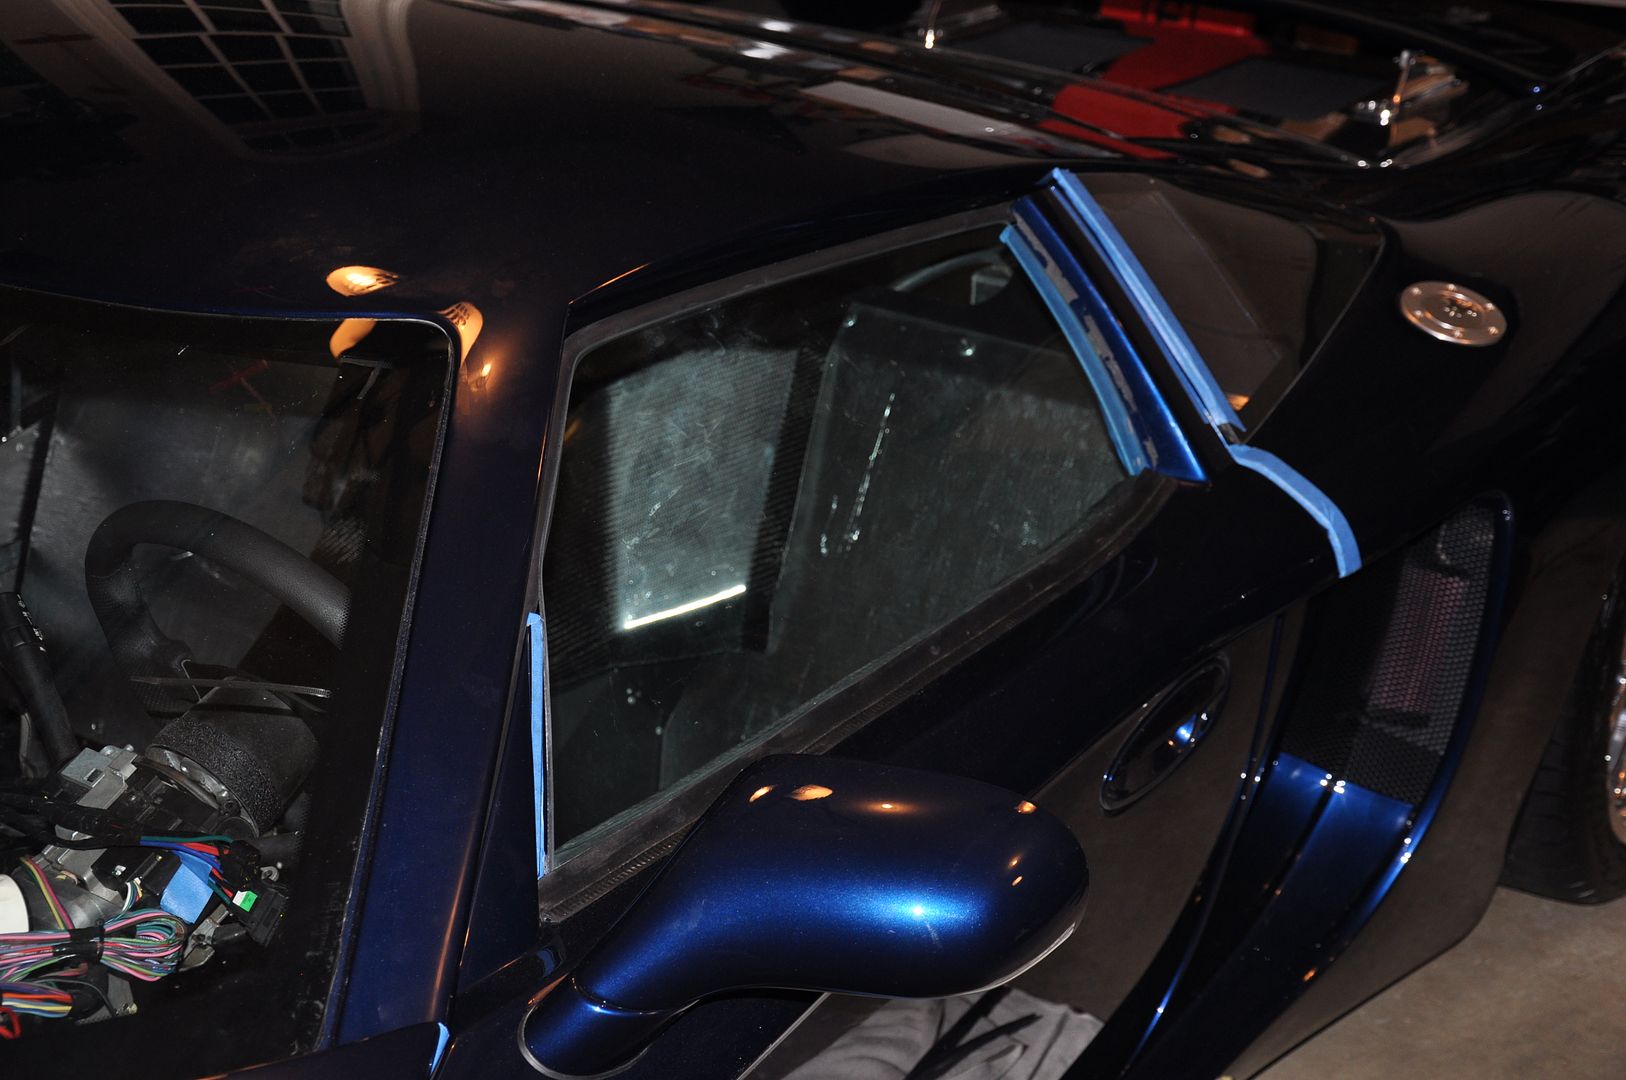
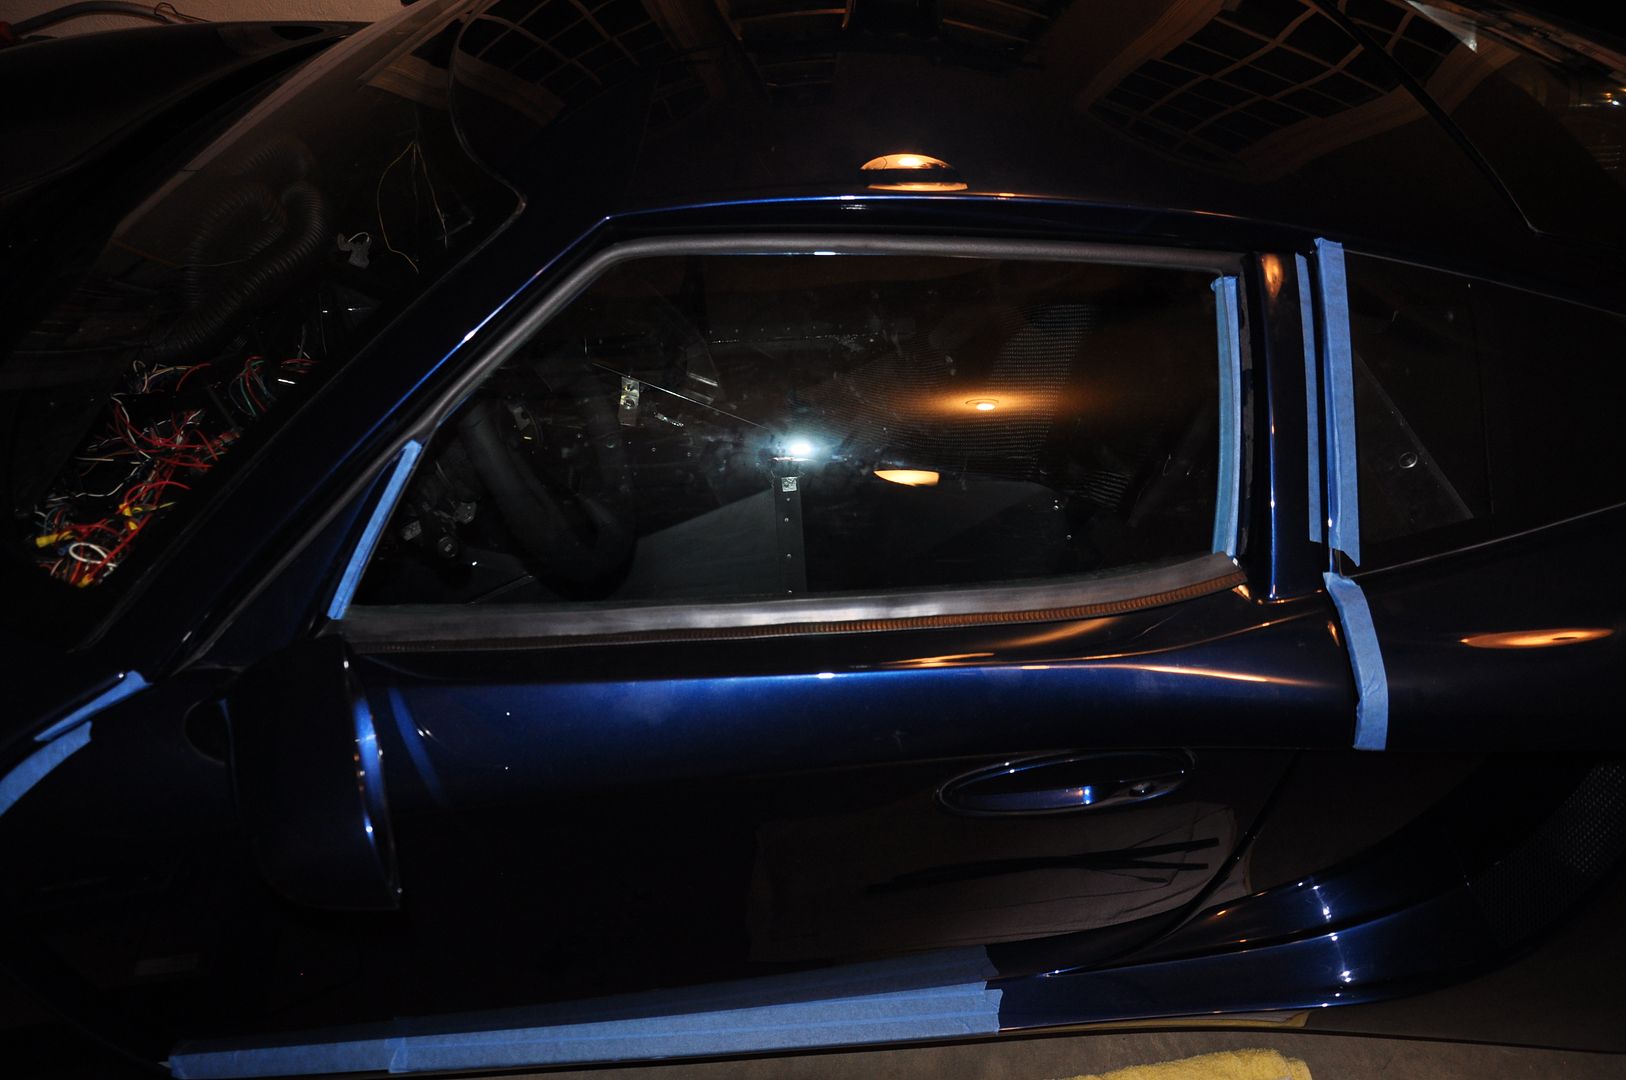
    Also finalized the placement of the window alignment of the Drivers Side door.

    My neighbor and I had to cut open the wiring zip ties and tape, in order to trace the wires for the power window switches. They ran into the 1 1/2" cross bar for the dash area. I guessed that they ran out to the end of the bar, but I couldn't find them. Then I looked back into the upper front wheel wells, and guess what I found... I found the power window switch wires, power door lock wires, and some speaker wire, all rolled up, and zip tied. I wouldn't have known that they were there, but I caught a glimpse of a yellow wire behind the roll-bar on the passenger side dash.

    Once we found them, we were able to get the power windows and switches wired and working.


    The window is in contact with the upper body trim all the way across the top side. I had removed the weather stripping on the leading edge of the door, and at the rear of the door because they forced the window to stand out about 1/2" at the top. I need something to clean the weather strip that peeled off and stuck to the door. I'm concerned about messing up the pain finish if I use something too strong.

    I'm looking for a different type of push on seal for these two areas that will better seal the front and rear edges of the glass.


    It's sort of hard to tell by these pictures... but we made some final adjustments to the windows and got them pretty much where they need to be. When Dave and I worked on them we had the windows moving perfectly into place, but I didn't have the tracks positioned and tightened down. When I did that, the window didn't want to move into the same place. So a little tweaking was in order.

    I'm also making a bracket that will allow me to move the window motors up onto the lower door bar. This will give enough room for the window to move all the way down without the track clamps hitting the door skin. Before, it was hitting when the windows were about 2/3 down. I'll keep you posted as to how that turns out. So far it's looking good though.
    Last edited by The Stig; 06-07-2012 at 09:01 PM.
    The Stig

    Some say, that I only know two facts about ducks, (both being wrong); and that if I could be bothered, I could solve the "da Vinci Code" in 47 seconds...
    All I know is that I'm called "The Stig".
    GTM #0081

  33. #393
    Senior Member The Stig's Avatar
    Join Date
    Feb 2011
    Location
    Charlotte, NC
    Posts
    2,004
    Post Thanks / Like
    Made a little more progress on the GTM today.

    Ralph came over and worked on the window alignment a little more. The driver's side window is perfectly aligned and tighly sealed against the weather stripping. Just a bit more tweaking with the bear claw latch, and get the "B" pillar to clear the rear quarter windows.

    Re-wired the Fog Light Switch and set it into the billet aluminum console cover. The Hazard Switch is next...

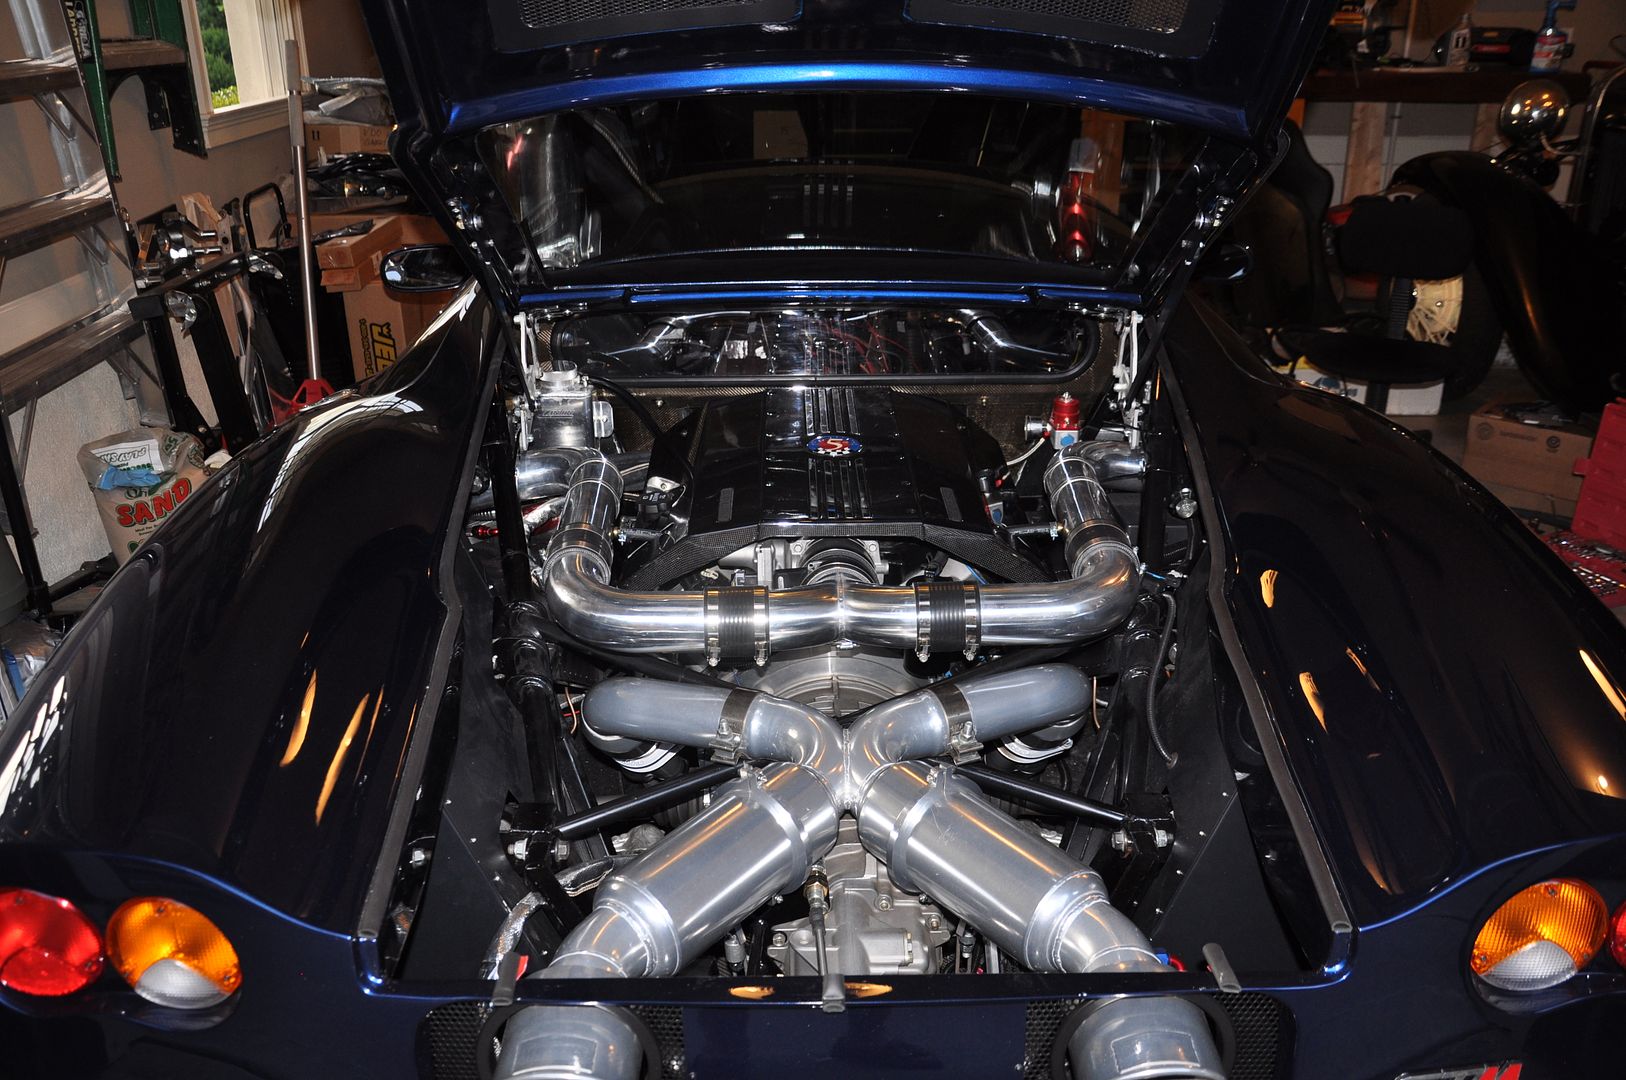
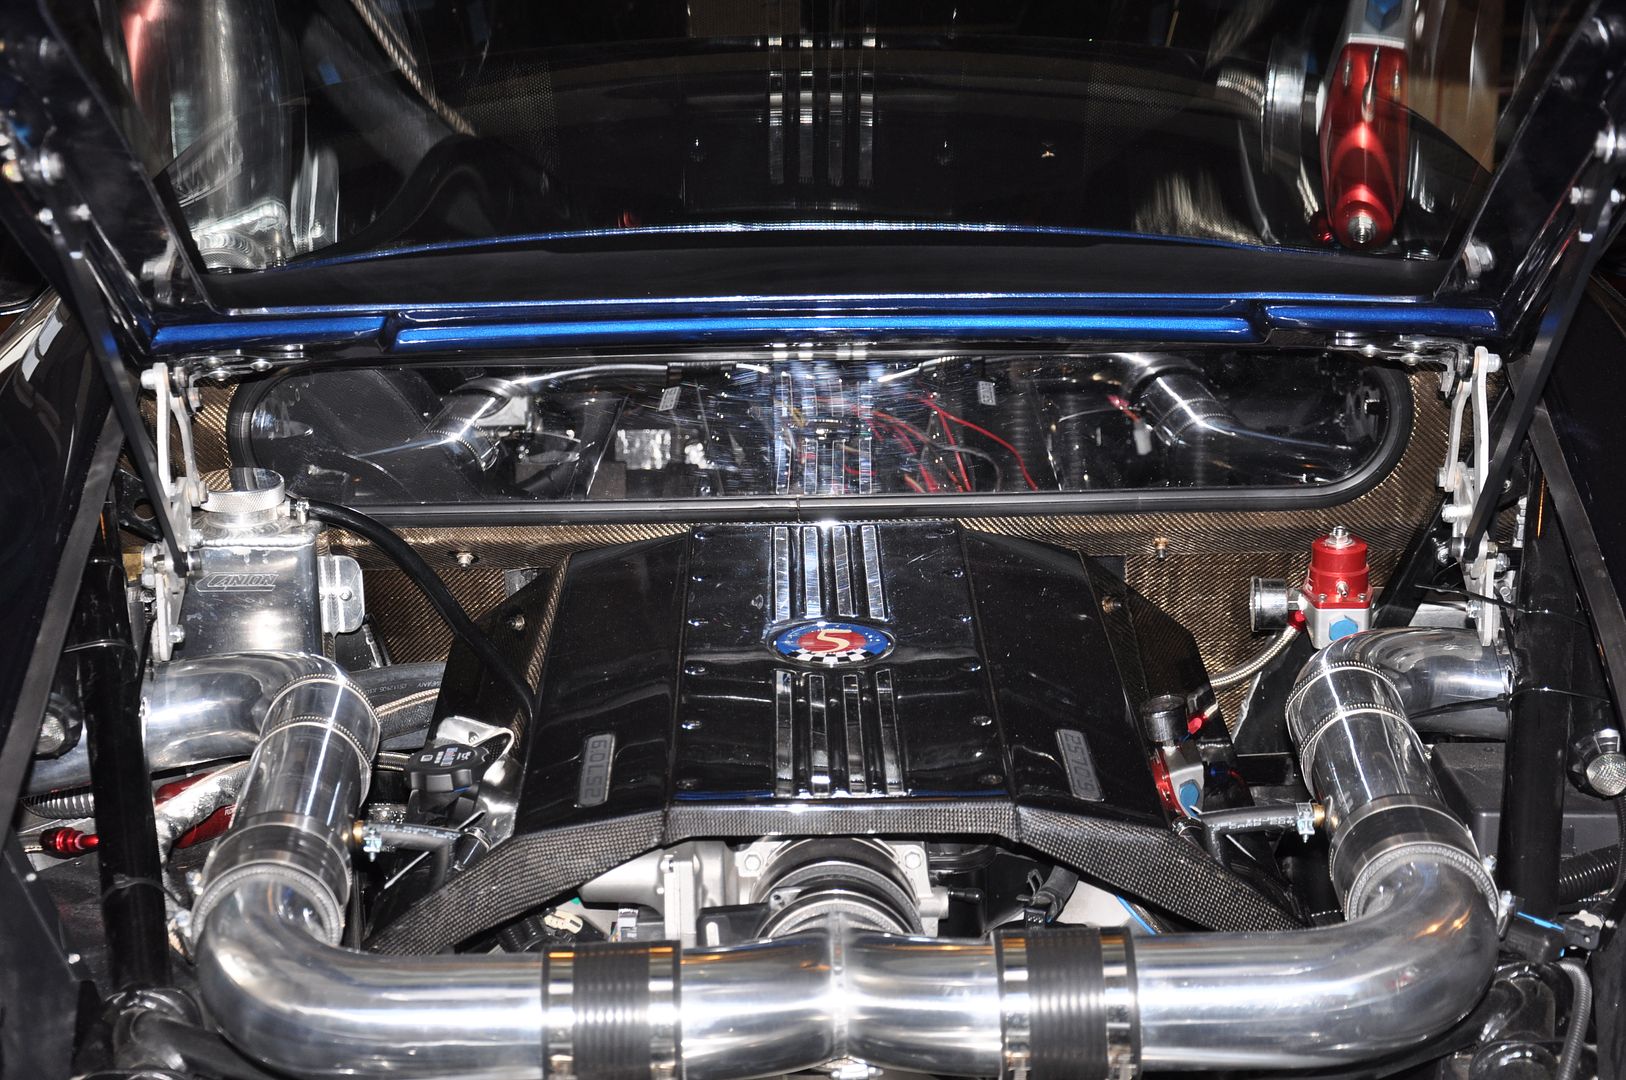
    I had a set a valve covers that I was finally able to switch out, along with a really nice set of chromed coil brackets, and stainless button head hardware.

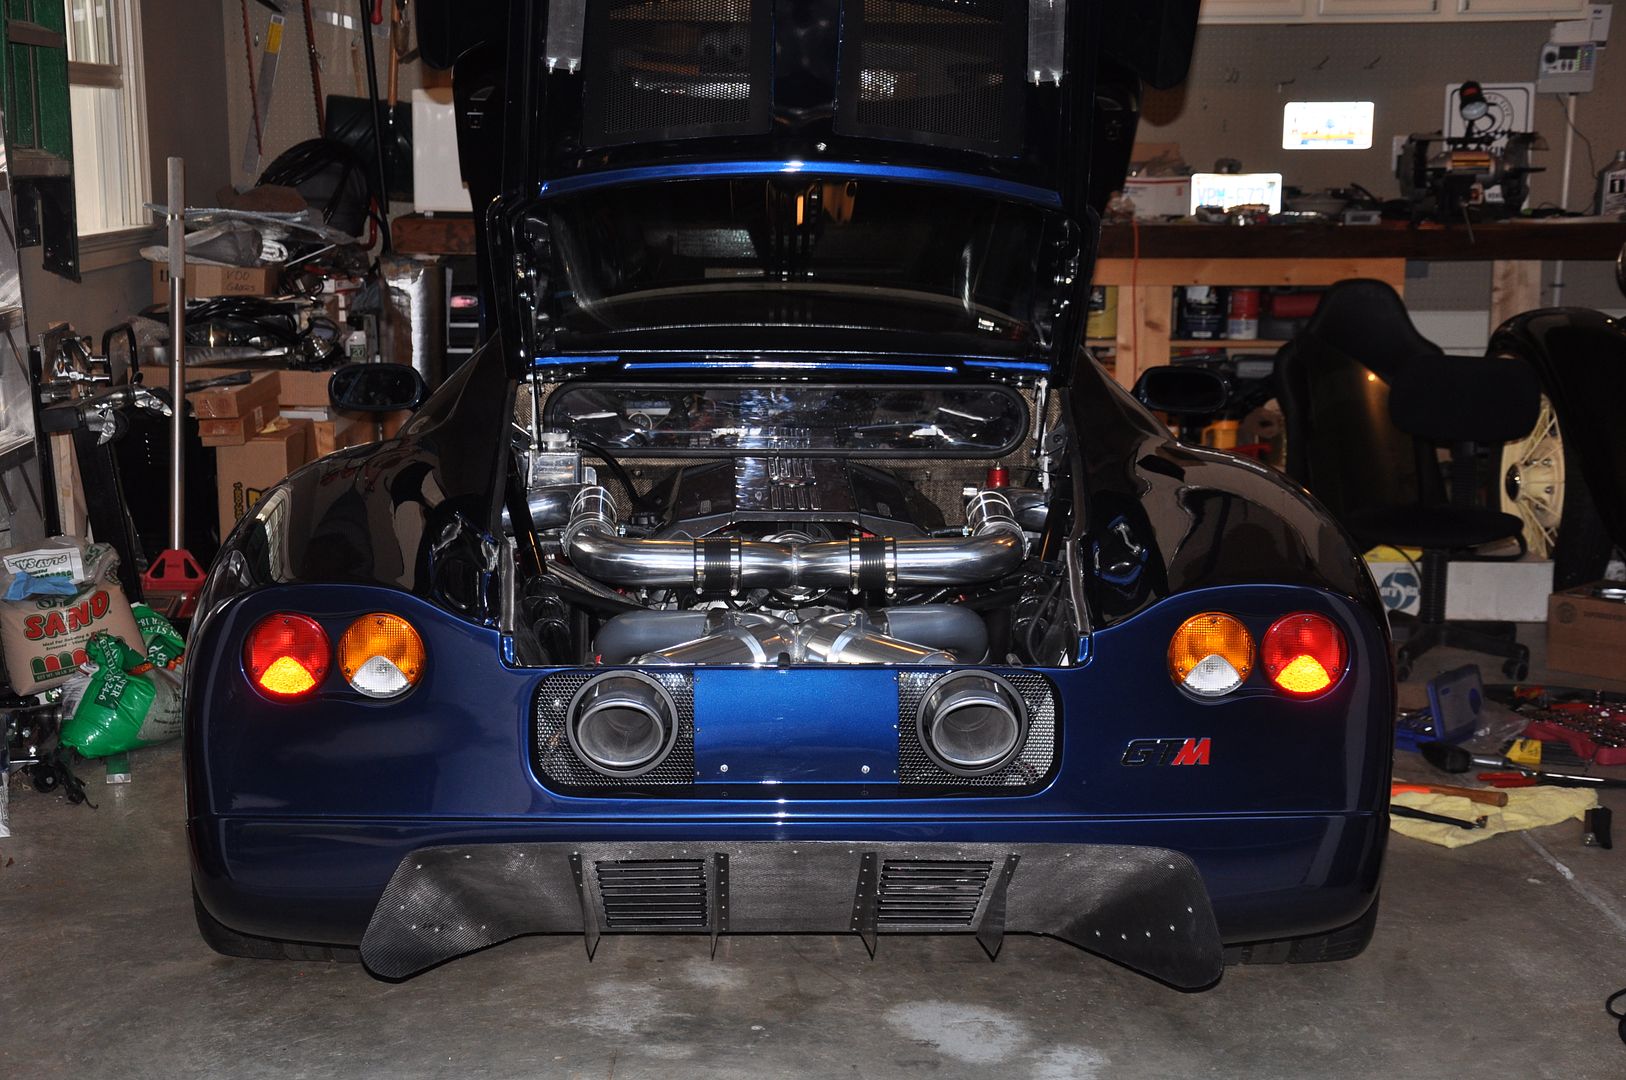
    Pulled the firewall back out, and added "Lava Mat" to the engine side of the fuel tank covers, and the rear window. I'm planning to install the plexiglass window tomorrow. (If I can figure out how that weather-strip tool works. ). Then I'll reinstall the firewall.
    Also planning to start the suspension re-build tomorrow afternoon, if I have time. I'm going to pull the control arms and change the OEM bushings with a set of Pfadt Poly Bushings. I've also recieved the new shocks that I ordered from Ted Harrison (Quick Racing Products). Eibach springs will hold the car up quite nicely.

    I went ahead and assembled the shocks today. I'll do the rear first, since I'm not ready to take the RamLift Pro System on the front shocks apart yet.
    Last edited by The Stig; 06-07-2012 at 09:07 PM.
    The Stig

    Some say, that I only know two facts about ducks, (both being wrong); and that if I could be bothered, I could solve the "da Vinci Code" in 47 seconds...
    All I know is that I'm called "The Stig".
    GTM #0081

  34. #394
    Senior Member The Stig's Avatar
    Join Date
    Feb 2011
    Location
    Charlotte, NC
    Posts
    2,004
    Post Thanks / Like
    I spent the entire day trying to get the freakin' Rivnuts set for the fire wall. I had to do them a couple of times, because I couldn't get them compressed enough to be able to tighten the panels down without the Rivnuts spinning. Pretty maddening. But I kept at it (using up the entire day)...

    Here are a few pictures of the engine bay with the firewall finally installed.


    Now that this is out of the way, the suspension is next.
    Last edited by The Stig; 06-05-2012 at 12:23 PM.
    The Stig

    Some say, that I only know two facts about ducks, (both being wrong); and that if I could be bothered, I could solve the "da Vinci Code" in 47 seconds...
    All I know is that I'm called "The Stig".
    GTM #0081

  35. #395
    Senior Member Steven K's Avatar
    Join Date
    Feb 2011
    Location
    Denver, NC
    Posts
    140
    Post Thanks / Like
    Looks great. I suspect we'll be seeing it at cars and coffee soon?
    Steve K
    FFR 3906

  36. #396
    Senior Member
    Join Date
    Apr 2011
    Posts
    641
    Post Thanks / Like
    Lookin real good. You can use wax and grease remover to remove the glue from the weather strip. It won't hurt the paint. Don't rub, just keep it moist with a cloth and it will come off.

    And remember, with fresh paint, always try a real small spot just to make sure of a bad reaction.

  37. #397
    Senior Member VD2021's Avatar
    Join Date
    Feb 2011
    Location
    Central, FL
    Posts
    958
    Post Thanks / Like
    Blog Entries
    2
    Mike,

    Very nice. I really like the weave in the Lava Mat.
    R/s
    Vidal
    CURRENT STATUS: Interior Rework and Bodywork.
    GenII GTM #331. Delivered (23/9/10)
    BUILD LOG AND WEBSITE:
    http://gtmbuild.weebly.com/ .

  38. #398
    Senior Member The Stig's Avatar
    Join Date
    Feb 2011
    Location
    Charlotte, NC
    Posts
    2,004
    Post Thanks / Like
    Quote Originally Posted by Steven K View Post
    Looks great. I suspect we'll be seeing it at cars and coffee soon?
    Hi Steven,

    I hope that it'll be there soon. I'll make sure and send you a PM when I know that I'll be bringing it to Cars & Coffee.
    My wife is looking forward to us being able to take there also.
    I think I must have crossed an invisible "line", where now when I make progress, I don't still feel overwhelmed by what's left on the punch list to finish it up. It has suddenly become very do-able.

    I read that they've moved it from Northlake, to the Music Factory. That was a surprise...
    Last edited by The Stig; 06-05-2012 at 07:24 AM.
    The Stig

    Some say, that I only know two facts about ducks, (both being wrong); and that if I could be bothered, I could solve the "da Vinci Code" in 47 seconds...
    All I know is that I'm called "The Stig".
    GTM #0081

  39. #399
    Senior Member The Stig's Avatar
    Join Date
    Feb 2011
    Location
    Charlotte, NC
    Posts
    2,004
    Post Thanks / Like
    Quote Originally Posted by VD2021 View Post
    Mike,

    Very nice. I really like the weave in the Lava Mat.
    I like it too. It really cleans up the firewall, and gives the engine bay a more "complete" look. (At least, I think it does).

    I had a neighbor who came by last Friday, and saw the car for the first time. He seemed pretty pumped about it in general. (I had it backed into the garage, and he was looking at it from the front 1/4 view). Then he saw the engine through the cockpit, and made his way to the rear of the car. I lifted the hatch, and out came the cell phone camera!

    People really like to see the engine/transaxle/exhaust. But it was when I put the CF Engine Cover (Shane) on that it really started getting the "over the top" reactions from people.

    I can't wait to take it out for a shake down cruise!

    I've got to figure out how my Go-Pro camera works and get some decent video before long.
    Last edited by The Stig; 06-04-2012 at 02:50 PM.
    The Stig

    Some say, that I only know two facts about ducks, (both being wrong); and that if I could be bothered, I could solve the "da Vinci Code" in 47 seconds...
    All I know is that I'm called "The Stig".
    GTM #0081

  40. #400
    Senior Member The Stig's Avatar
    Join Date
    Feb 2011
    Location
    Charlotte, NC
    Posts
    2,004
    Post Thanks / Like
    Quote Originally Posted by fastthings View Post
    Lookin real good. You can use wax and grease remover to remove the glue from the weather strip. It won't hurt the paint. Don't rub, just keep it moist with a cloth and it will come off.

    And remember, with fresh paint, always try a real small spot just to make sure of a bad reaction.
    Thanks Gene. I appreciate it. I'll pick some up this week, and start cleaning it up.

    I also need to dig through McMaster-Carr for some weather stripping that is a better fit for the leading and trailing edges of the windows.

    I've pretty much decided that I want to have the windshield taken out and reinstalled (with the overlapping seal this time). I'll time that at about the same time that I send it out to the interior shop. I think that'll make life a little easier on them.

    We'll see how it goes.
    The Stig

    Some say, that I only know two facts about ducks, (both being wrong); and that if I could be bothered, I could solve the "da Vinci Code" in 47 seconds...
    All I know is that I'm called "The Stig".
    GTM #0081

Page 10 of 51 FirstFirst ... 8910111220 ... LastLast

Tags for this Thread

Posting Permissions

  • You may not post new threads
  • You may not post replies
  • You may not post attachments
  • You may not edit your posts
  •  

Brown County Customs

Visit our community sponsor