-
Sheetmetal Updates
I have been working on putting a second skin of sheetmetal on the frame. The plan is to spray in urethane foam to help with noise and heat. This will give me at least an inch thickness. This also gives me a decent amount of addition space below the console to route and mount things.
20231112_162716.jpg
20231112_113251.jpg
I also have been working on closing off the underside of the back end and closing off the rear wheel wheels.
20231112_162654.jpg
Once everything is fit, I will spray it with Upol under coating. Hopefully this is worth the investment in time, it takes a while to do all this.
-
Post Thanks / Like - 0 Thanks, 1 Likes
-
Senior Member

Brent - that is an impressive amount of work and looks great!
-

Originally Posted by
rhk118

Brent - that is an impressive amount of work and looks great!
Thanks. I am hoping that closing off the rear end doesn't cause any issues at speed. I was doing some research on the spray foam and it apparently causes the sheetmetal to warp, so I may have to put some sort of flexible barrier on the sheetmetal before spraying it in.
-
Post Thanks / Like - 0 Thanks, 1 Likes
-
Forte Accelerator Pedal Mod
I was asked how I modified the Forte gas pedal to use the FFR supplied pedal pad. Here are some pictures of it. I cut off the pedal pad, drilled a hole for the pivot, and used the arm to support the return spring. This will get painted black when I am done with fabricating everthing. I also bent the arm some to get the angle right.
20231126_124301.jpg
20231126_124255.jpg
Last edited by burchfieldb; 01-05-2024 at 02:30 PM.
-
Post Thanks / Like - 0 Thanks, 1 Likes
-
Sheetmetal Continues
The never ending project of sheetmetal continues.  I got the back wall of the cockpit closed in and the underside of the trunk. Also made a new firewall that is better fitting. Kind of hard to see.
20231126_170815.jpg
20231126_171240.jpg
20231126_171333.jpg
-
Driveshaft Safety Hoop
I picked up this driveshaft safety hoop from Summit, it is really beefy, and well made. Comes with grade 8 hardware and bolts right to the TKX. No need for any welding or drilling more holes in the frame. It does add some thickness to the mount, but I have to make a spacer anyways.
Stifflers Suspension Driveshaft Safety Loops DSL-M02
20231218_141640.jpg
20231218_141648.jpg
-
Post Thanks / Like - 0 Thanks, 1 Likes
-
Being canatlevered off the transmission mount, I wonder how much vibration there will be and how much clearance with the crossmembers. I am very interested with this setup so keep us updated!
-
More Sheet Metal and Brake Bias Cable
I got some more time in the garage and was able to get the inside skin done on the drivers footbox. This will give me 1-1.5 inches of air gap from the engine bay. I also added a pocket for a foot rest on the outside wall. All of this will get covered with capet when done and I plan to seal any gaps with seam sealer.
20240102_171603.jpg
20240102_171357.jpg
In preparation for powder coating the frame, I modifed the frame so that I could run my brake bias cable out the right side of the pedal box, through the engine bay, and back into the car.
Screenshot_20240102_200021_Gallery.jpg
I found these universal rubber grommets on that jungle website. They fit really well around the cable and should provide a fair amount of room for play.
Screenshot_20240102_200248_Amazon Shopping.jpg
20240102_171252.jpg
20240102_171239.jpg
20240102_171210.jpg
Next up is the passager side, it is mostly done, but I need to finish trimming out the pocket for the foot rest.
-
Center Console and Dash Updates
I made some more progress on interior stuff this weekend. I constructed some panels to close off under the dash in front of the foot boxes and made a one piece cover for the top of the transmission tunnel. I plan on using some sentra to cap the edges of the transmission tunnel and to cover the sides of the transmission tunnel. All of these panels will be covered with leather when done.
20240107_191416.jpg
20240107_191403.jpg
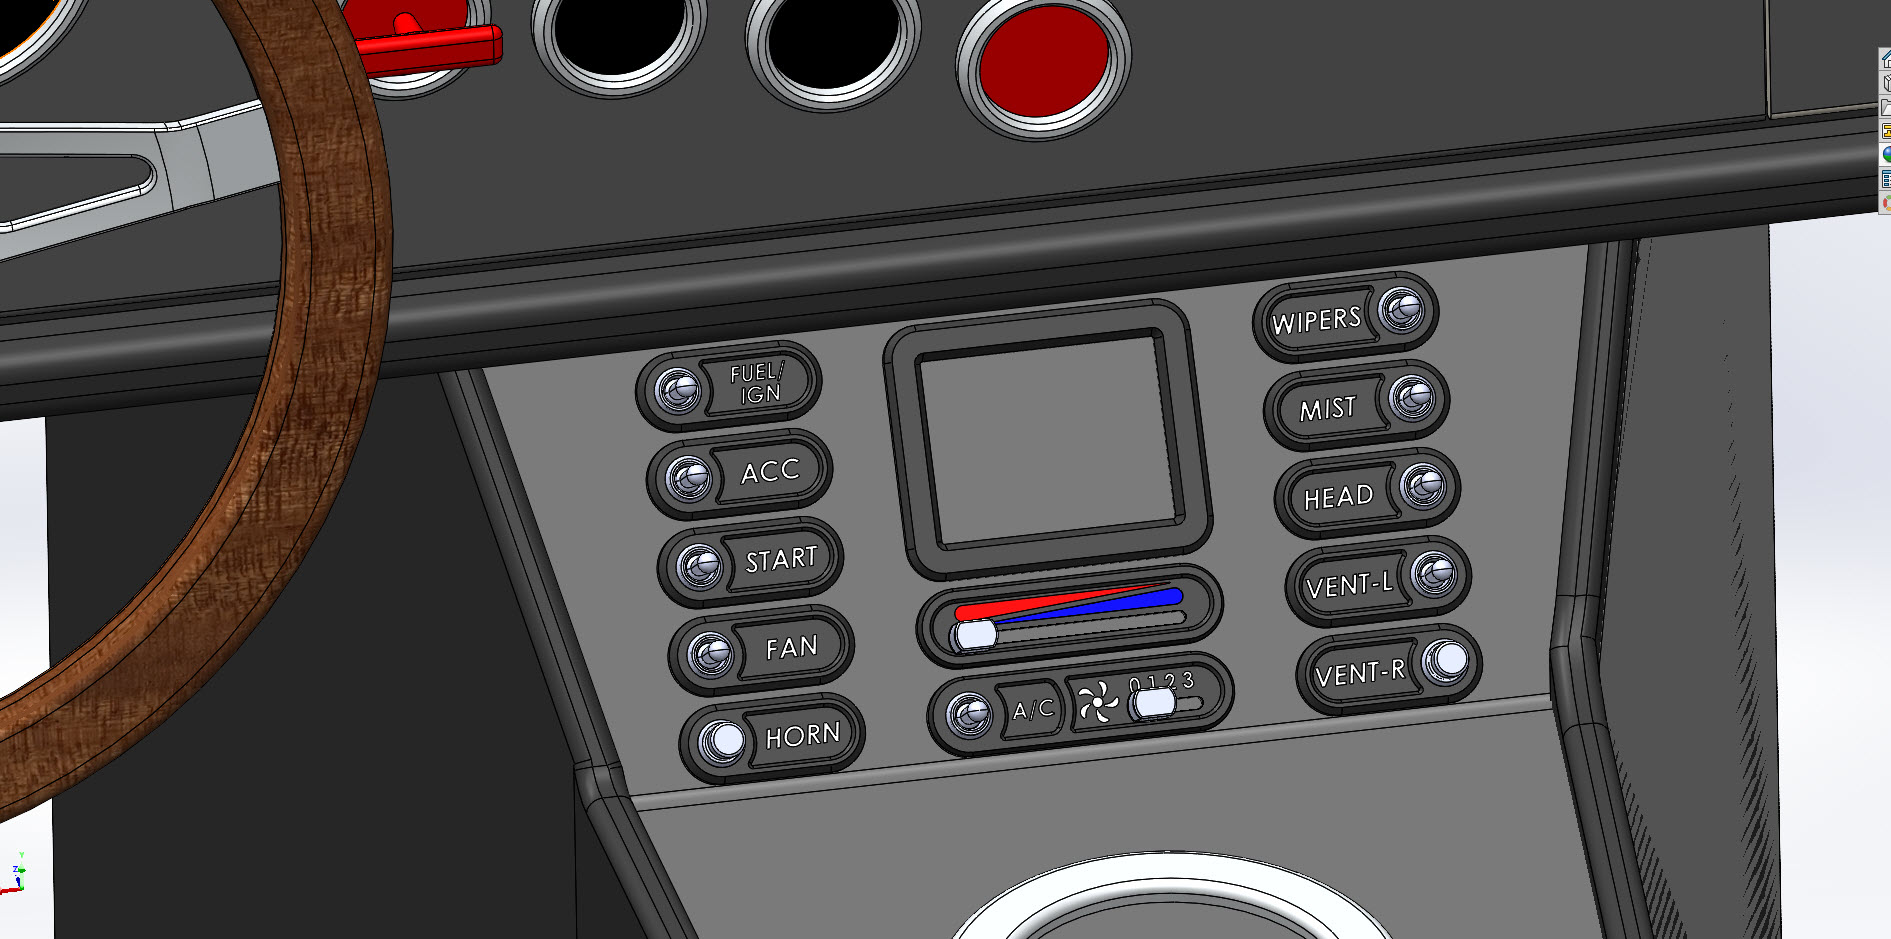
I have also done some layout work on the lower dash section for the efi screen and toggle switches. The text and temp controls will be backlit through white translucent acrylic. The housing will be 3D printed out of glass filled nylon and then painted black with Gunkote.
CTR CONSOLE SWITCH 2.jpg
CTR CONSOLE 2.jpg
I plan on using a linear pot for the temp control and a 4 postion linear switch for the fan speed. I will custom machine the knobs to match the other knobs in the car. I should be able to make some progress on the dash controls while waiting on the frame to be powder coated.
-
Your dash looks great. Very nice work! Your double skin work wiht the aluminum sheeting is impressive - what a lot of work! I had wondered about doing something similar but much less extensive than what you are doing. But have chosen not to, at least for now. I've taken my own approach to the dash and made a fiberglass box to cover my fuse box - but it is all much less extensive than what your are doing. Very impressed!
-
Originally Posted by
jgray
Your dash looks great. Very nice work! Your double skin work wiht the aluminum sheeting is impressive - what a lot of work! I had wondered about doing something similar but much less extensive than what you are doing. But have chosen not to, at least for now. I've taken my own approach to the dash and made a fiberglass box to cover my fuse box - but it is all much less extensive than what your are doing. Very impressed!
Thanks! The Harbor Freight box brake makes easy work of it. Had to make lots of cardboard floor protector templates before actually cutting metal. Using a track saw with a non ferrous blade makes short work of the cuts and makes them clean.
-
Got one of the switches mocked up and tested the backlighting. This is 3D printed out of nylon and then I laser cut some translucent white acrylic, laser cut black vinyl for the text and put that on the white acrylic, and then there is a laser cut piece of clear acrylic to protect the vinyl. I will have some led's mounted to a plate in the back that screws on, waiting for those to come from Digikey. These will get painted black with Gunkote. I used the Carling switches that others have used on the forum. Lots of options for switch configurations and they have a collar to hide the threads. Gives it a nice finished look. The top bezel and lower bezel will form a clamshell through holes in the dash and threading the nut over the switch will hold it all in place. I will post more details as they develop.
Switches.jpg
20240112_180706.jpg
20240112_180616.jpg
-
Post Thanks / Like - 0 Thanks, 1 Likes
-
Your work is impressive Brent. The 3D rendering is very cool and your use of a 3D printer and laser cut is nice work. You sure have a lot of great tools and are putting them to good use. The outcome will be quite unique with all the double skin work you are doing too
Do you know of a source for bezels for the regular switches that FFR provides? I would like something simple to just hide the threads. I’ve also been looking at various forms of labels but with my layout of switches on my custom switch panel it could look to busy. I’ll post some pictures of the panel soon. But I do know I would like to cover the threads
-
Originally Posted by
jgray
Your work is impressive Brent. The 3D rendering is very cool and your use of a 3D printer and laser cut is nice work. You sure have a lot of great tools and are putting them to good use. The outcome will be quite unique with all the double skin work you are doing too
Do you know of a source for bezels for the regular switches that FFR provides? I would like something simple to just hide the threads. Ive also been looking at various forms of labels but with my layout of switches on my custom switch panel it could look to busy. Ill post some pictures of the panel soon. But I do know I would like to cover the threads
Thanks! I do product development for a living and have a lot of toys at work that I have access to. I was looking at this site before I found these switches. They have several options at a good price.
https://lovemyswitches.com/search.ph...ry=Dress%20nut
If you google decorative toggle switch nut you will find more. I would love to see what you have for your dash layout.
-
Senior Member
Originally Posted by
burchfieldb
Thanks! I do product development for a living and have a lot of toys at work that I have access to. I was looking at this site before I found these switches. They have several options at a good price.
https://lovemyswitches.com/search.ph...ry=Dress%20nut
If you google decorative toggle switch nut you will find more. I would love to see what you have for your dash layout.
Wow, love that site Brent, it's totally nuts!  ...totally off topic but I had found this site: newwiremarine.com and they will make custom switch panels and have all marine-grade switches, distribution blocks/fuse panels and they sell stainless switch nuts. I think I like the black ones on the site you found better.
-

Originally Posted by
rhk118
Wow, love that site Brent, it's totally nuts!
...totally off topic but I had found this site:
newwiremarine.com and they will make custom switch panels and have all marine-grade switches, distribution blocks/fuse panels and they sell stainless switch nuts. I think I like the black ones on the site you found better.
That is a cool site. I like the custom panel configurator and the different custom switch and button options. I have been looking for different options for a fused relay holder and came across this Bussman holder that GT_Rich used. I still need to determine how many relays I am going to need. It looks like new wire has 2 relay blocks, I wonder if they have ones with more. I am open to other options if you know of other larger format ones. I think I will need at least 6. I really am not a fan of the prewired relay sockets, I have had issues in the past with the socket connections not being good.
https://racespeconline.com/products/...BoCYDEQAvD_BwE
-
-
Loving the custom work on the dash - it looks fantastic! The switch lights are very clean! One other comment on the above, LittelFuse also makes a larger format PDMs (18 and 60 cavity) that you may want to look at for options (I have never used them, but they seem very similar to GEP/Bussman)
-
Originally Posted by
GT77
Loving the custom work on the dash - it looks fantastic! The switch lights are very clean! One other comment on the above, LittelFuse also makes a larger format PDMs (18 and 60 cavity) that you may want to look at for options (I have never used them, but they seem very similar to GEP/Bussman)
Thanks, this is super helpful. Where do you usually buy them from? How far are you on your build?
- Brent
-
Waytek, I will PM you with more details. My build is a bit behind yours at this point - you have been making solid progress (well done!). It would help if I stopped modifying everything.  However, my build thread is very out of date. Perhaps soon I will take some time to update with some of the various diversions. Keep up the good work!
-Thomas
Last edited by GT77; 01-14-2024 at 11:03 PM.
Reason: add signature
-
I decided to address the side bars of the roll cage. It was just too close to my head when sitting in the car. So I decided to cut them out, make new ones with a slight arc bending outward to give more head clearance, and then moved them up some.
20240117_162740.jpg
20240117_162809.jpg
View of the arc.
20240117_162817.jpg
-
Made some more progress today. Mounted the sun visors that I made using some Scott Drake visor rods, some hard board, a piece of stainless that I bent around the rod, and binding post to hold the hardboard to the stainless.
Screenshot_20240121_202017_Amazon Shopping.jpg20240121_101005.jpg20240121_095417.jpg
20240121_095349.jpg20240121_095343.jpg
I will finish welding out the visor frame mount brackets tomorrow. I plan on 3D printing some covers to go over the visor mount brackets. I also closed off the ends of all the open frame tubes. There were 14 in all.
20240121_184032.jpg
Need to weld and grind the seams on the hinges and then drop everything off to the powder coater tomorrow afternoon.
-
Got the frame back from powder coating today. It turned out really nice. For anyone in the Columbus Ohio area, Columbus Powder Coat does really good work.
20240206_190207.jpg
Last edited by burchfieldb; 05-11-2024 at 08:08 PM.
-
Started tackling the body this weekend and decided to build a body buck that moves up and down with a strap wench. This should make it easier to access different areas at a good standing height.
20240511_134611.jpg20240511_134600.jpg20240511_134650.jpg20240511_134631.jpg
Last edited by burchfieldb; 05-12-2024 at 08:04 AM.
-
-
That was odd, see if you can see them now.
-
My Type 65 Coupe: Ordered May 27, 2021. Arrived November 19, 2021.
I would like to treat my gas pedal as a binary operator. It would be nice to get the cooperation of everyone in front of me.
-
Post Thanks / Like - 1 Thanks, 0 Likes
-
Originally Posted by
burchfieldb
That was odd, see if you can see them now.
good to go.
-
Post Thanks / Like - 1 Thanks, 0 Likes
-
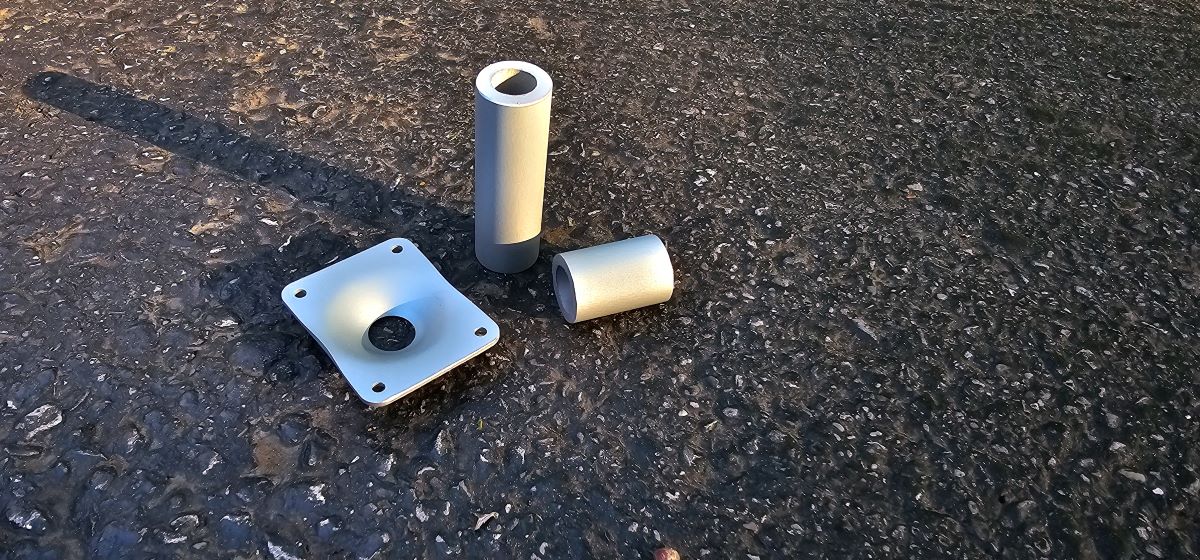
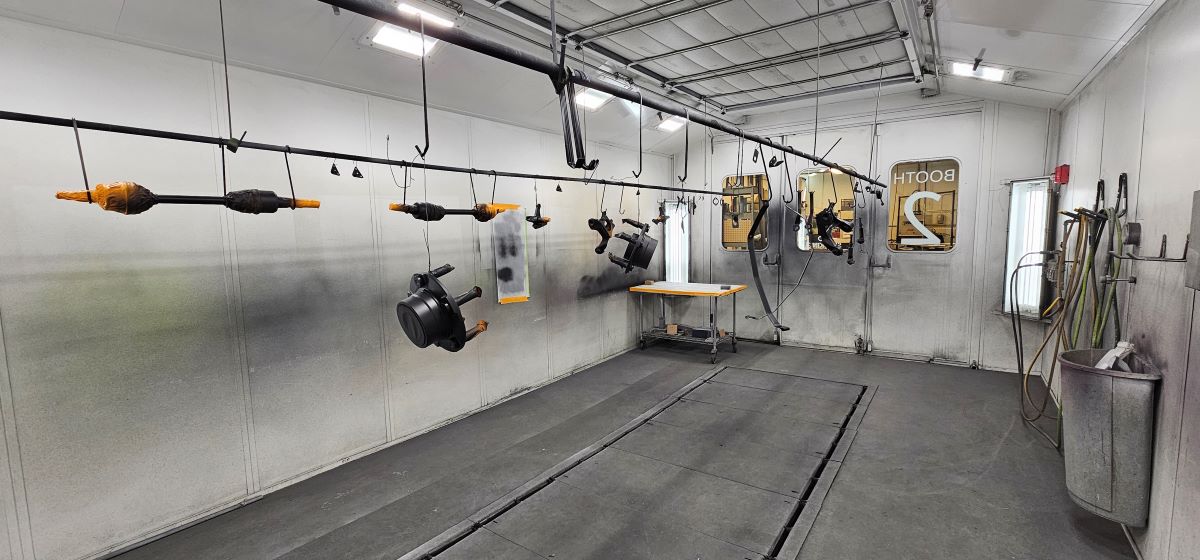
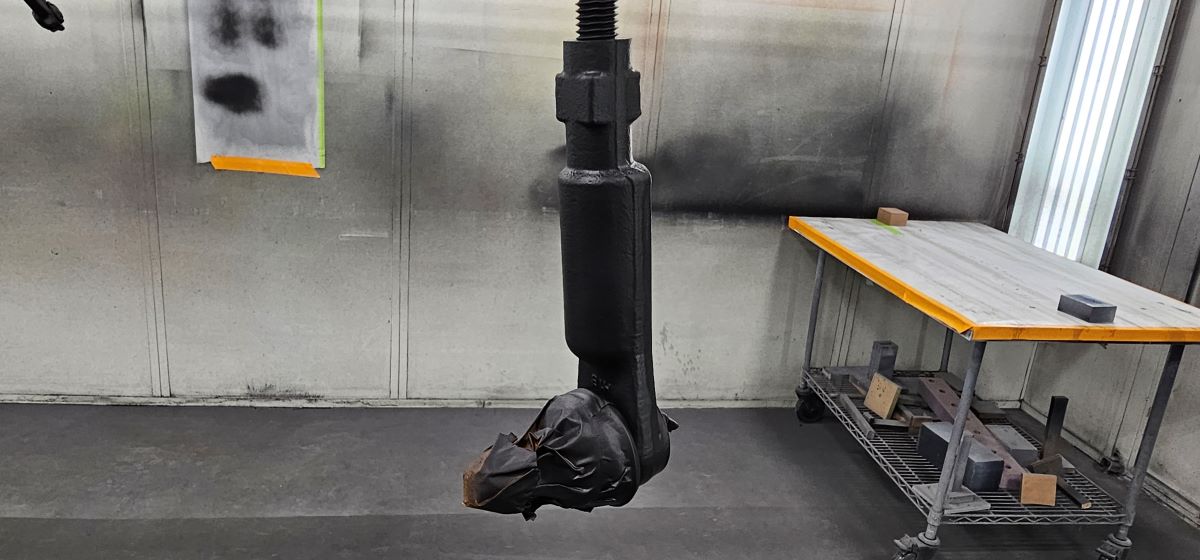
Ceramic Coating of Parts
My OCD kicked in and I spent the last 4 days grinding off the parting lines from the castings, deburring sheet metal brackets, masking, sand blasting, unmasking, degreasing, masking again for paint, degreasing, and then painting. I painted all of the bushings and hood alignment plates with a silver metallic Gun-Kote from KG Industries. It is a hard abrasion and corrosion resistant ceramic coating, it is about a .0003 to .0004 of an inch thick coating, and you can apply it directly to metal without a primer. It won't scratch and is resistant to brake fluid and other chemicals.
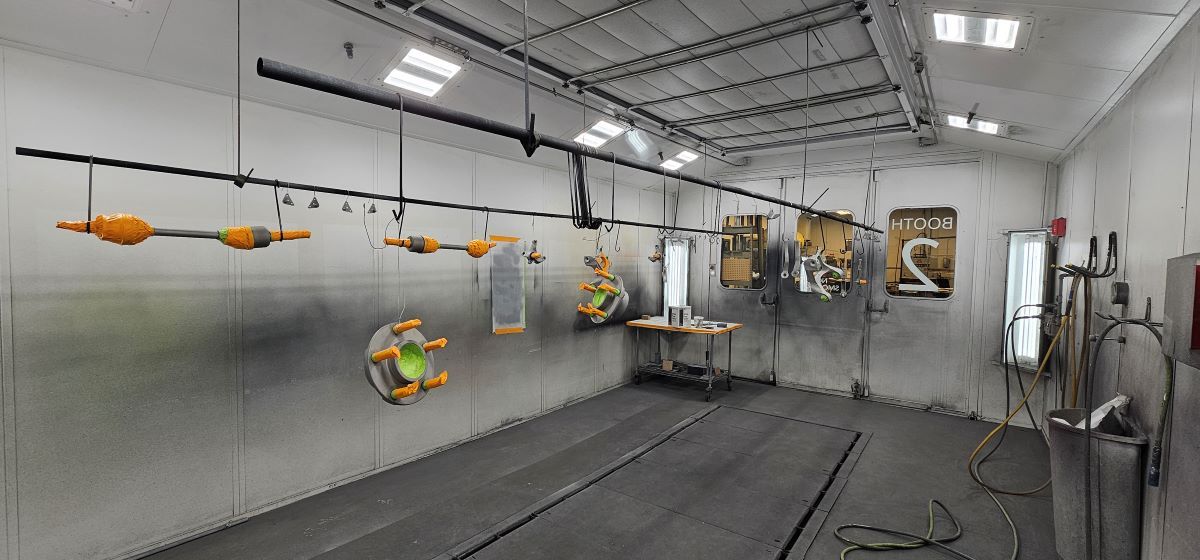
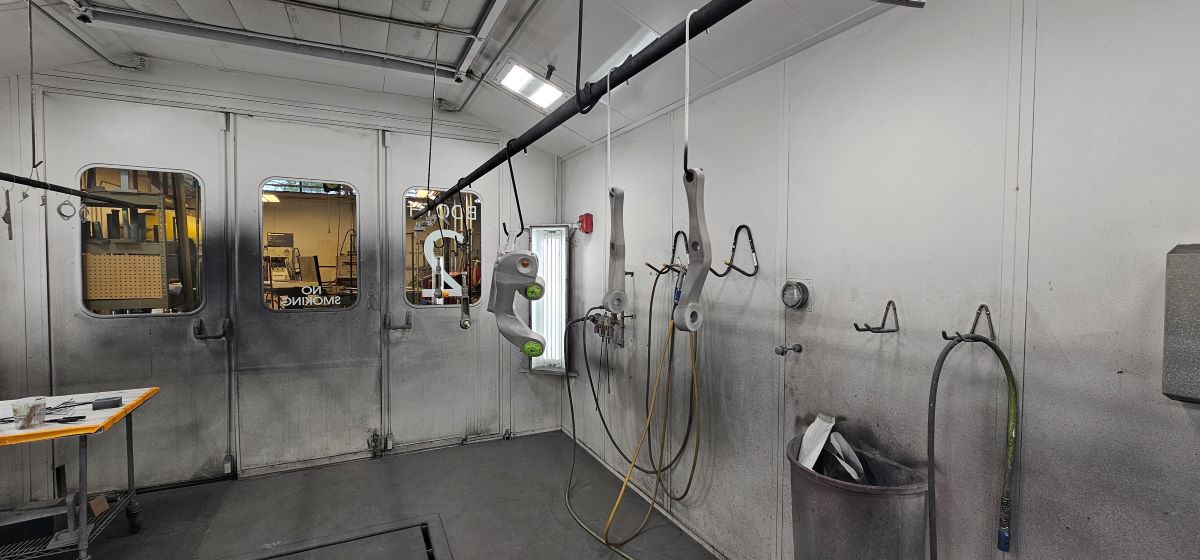
I coated the other castings and sheet metal brackets with Cerakote's black velvet ceramic coating and it matches the color and sheen of the FFR black powder coating on the control arms. This is an air cure coating, where as the Gun-Kote needs to be baked at 180 deg for 1 hour. Both are one part coatings, so you do not need to add a hardener. For the Gun-Kote you do have to add a temperature lowering additive for the Gun-Kote to get it down to 180 degs, or you have to cure at 300 deg. Here are some photos of the painted parts in the booth.


-
-
Senior Member

That's an interesting coating. Kind of sounds like the perfect coating actually, especially if you don't need to bake it.
I'm powder coating smaller items in an old kitchen oven, but no way could I fit any body panels.
Do you have experience with this coating previously? How does it hold up?
-
Originally Posted by
JimStone
That's an interesting coating. Kind of sounds like the perfect coating actually, especially if you don't need to bake it.
I'm powder coating smaller items in an old kitchen oven, but no way could I fit any body panels.
Do you have experience with this coating previously? How does it hold up?
Yeah, it is what people use on guns to protect the surface and make parts slide together without actual lubricant. This is from the Gun Kote site and Cerakote has similar information:
"Gun Kote has a pencil hardness of 9H, will provide a 180-degree bend without fracturing and exhibits excellent impact resistance, lubricity (meets military dry firing specifications), heat dissipation, chemical resistance, corrosion protection, durability, scratch resistance and will not attract dirt or dust."
You do need to make sure to follow all of the surface prep and application instructions or the coating will not perform. You can also use it on plastic parts to give them a good protective coating. Cerakote has a high gloss clear as well, that I am going to try on the polished aluminum parts of the car. I talked with them on the phone and they said you can apply it directly to polished aluminum.
https://www.cerakote.com/shop/cerako...clear-aluminum
My coworkers have used these coatings for years on stuff and have not seen any issues. It is not completely bullet proof, but is extremely durable.
-
Post Thanks / Like - 1 Thanks, 0 Likes


 Thanks:
  Likes:


 Reply With Quote


