Forte's

Visit our community sponsor

Thanks Thanks:  0
Likes Likes:  0
Page 2 of 12 FirstFirst 1234 ... LastLast
Results 41 to 80 of 445

Thread: JeromeS13's 818S

  1. #41
    Senior Member RM1SepEx's Avatar
    Join Date
    Jul 2011
    Location
    Freeport, ME
    Posts
    3,801
    Post Thanks / Like
    I outlined the wiring diet on my thread and Craig (Mechie3) has a great thread on it in the wiring section. Was a lot easier than it looks!
    Dan

    818S #17 Picked up 8/1/13 First start 11/1/13 Go Kart 3/28/14

  2. #42
    Senior Member Silvertop's Avatar
    Join Date
    Mar 2011
    Location
    Forest Lake MN
    Posts
    880
    Post Thanks / Like
    Quote Originally Posted by RM1SepEx View Post
    I outlined the wiring diet on my thread and Craig (Mechie3) has a great thread on it in the wiring section. Was a lot easier than it looks!
    THAT is comforting. I have not been looking forward to the wiring project. I dread it!

  3. #43
    Senior Member
    Join Date
    May 2012
    Location
    Suisun City, CA
    Posts
    851
    Post Thanks / Like
    Quote Originally Posted by BC Huselton View Post
    How the heck do you know what to take out and not compromise the ECU...where is that described...or have I missed it?

    BC
    As they've pointed out, there are a few threads on it. For me, I already have a working knowledge of the Subaru system and know what sensors I do and do not need. Couple that with being an experienced aircraft electrician and you see the results that I've posted.

  4. #44
    Senior Member
    Join Date
    May 2012
    Location
    Suisun City, CA
    Posts
    851
    Post Thanks / Like
    More slow progress. Still waiting on parts. :-/

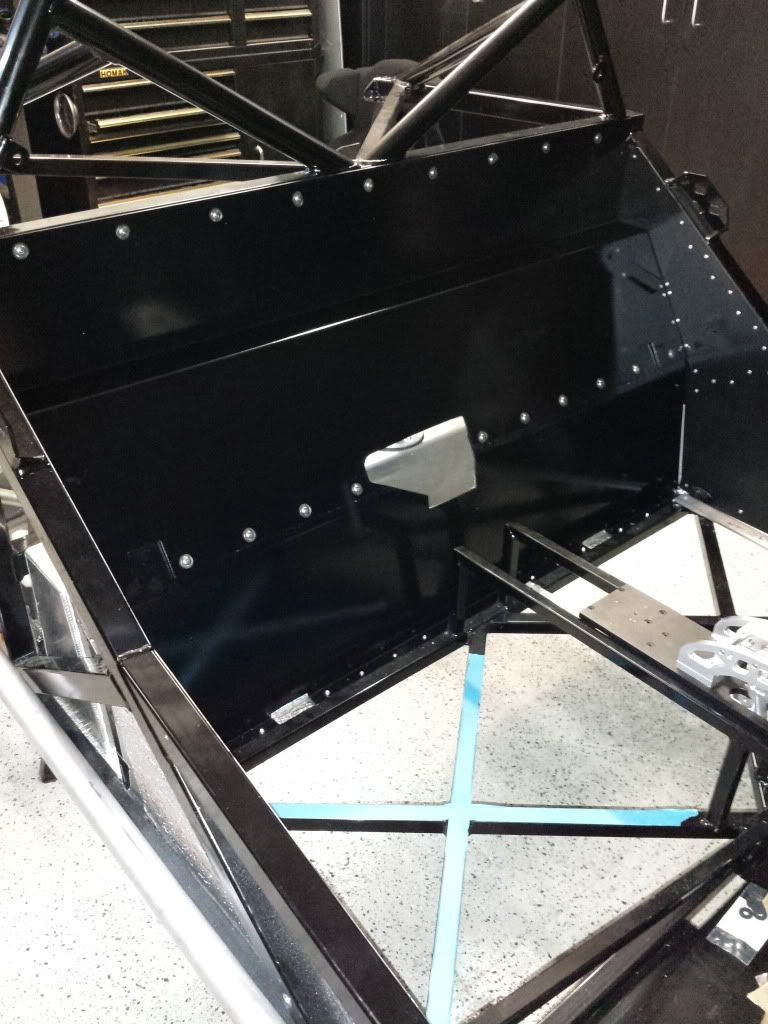
    Got the rear firewall temp installed just to make sure everything fits well. I used rivet nuts to make the upper panel removable.


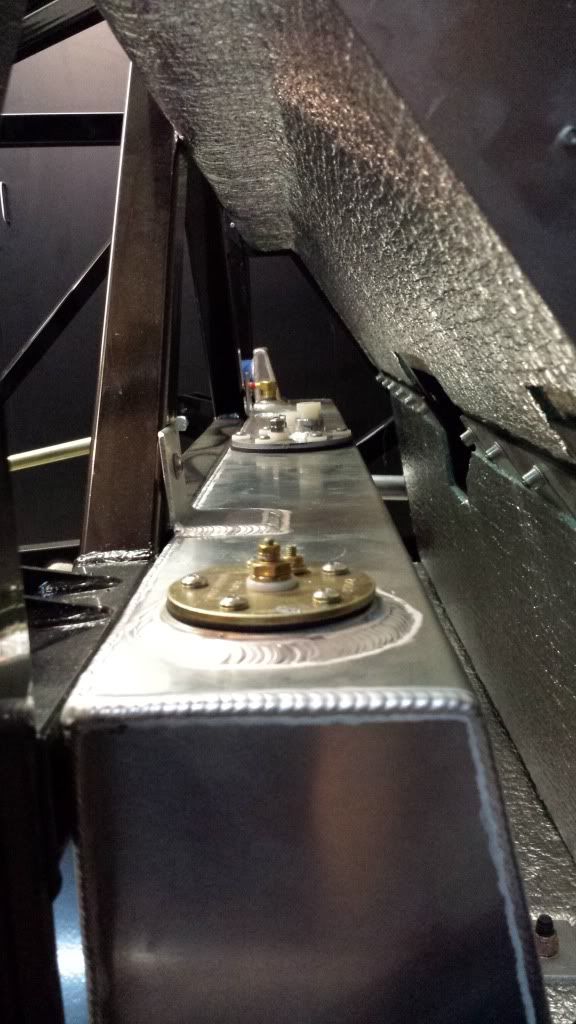
    This is the area between the tank and the firewall. I should have plenty of room to make the wiring and ECU pretty tidy. I believe I'll also route the passenger rear brake line through here to keep it away from the engine/exhaust heat.


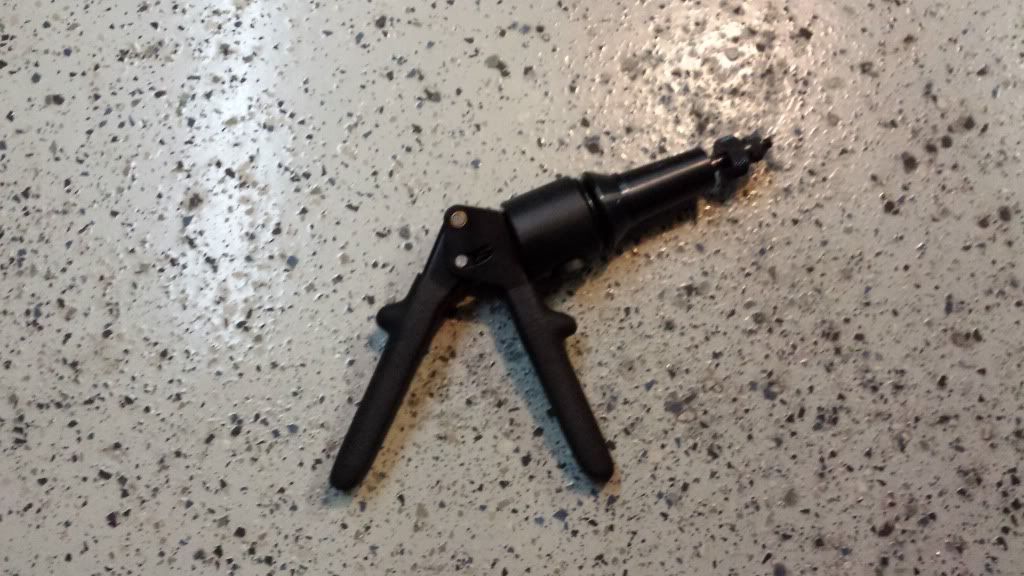
    All of these rivet nuts would suck with a standard rivet nut/gun tool. Good thing I have some great neighbors that'll let me borrow their cool tools. This one is a hydraulic rivet nut gun. Makes things sooooooo much easier.


  5. #45
    Senior Member waruaki's Avatar
    Join Date
    Aug 2013
    Location
    Salem, Oregon
    Posts
    168
    Post Thanks / Like
    Nicely done.

  6. #46
    Senior Member wleehendrick's Avatar
    Join Date
    Jul 2012
    Location
    Encinitas, CA
    Posts
    1,653
    Post Thanks / Like
    Blog Entries
    2
    Quote Originally Posted by JeromeS13 View Post
    Got the rear firewall temp installed just to make sure everything fits well. I used rivet nuts to make the upper panel removable.
    Looks great! I see you're using a Boyd Tank. I ordered one this weekend. Did you modify your rear firewall Al panels at all?

  7. #47
    Senior Member Oppenheimer's Avatar
    Join Date
    Feb 2011
    Location
    Milford, CT
    Posts
    946
    Post Thanks / Like
    Nasty sticky car wiring on the living room carpet. Guessing either you're not married or she was out of town.

  8. #48
    Senior Member
    Join Date
    May 2012
    Location
    Suisun City, CA
    Posts
    851
    Post Thanks / Like
    Quote Originally Posted by wleehendrick View Post
    Looks great! I see you're using a Boyd Tank. I ordered one this weekend. Did you modify your rear firewall Al panels at all?
    Thanks! No modifications, aside from installing the rivet nuts.

    Quote Originally Posted by Oppenheimer View Post
    Nasty sticky car wiring on the living room carpet. Guessing either you're not married or she was out of town.
    My harness wasn't really too dirty/sticky. *I'm also single and live alone*

  9. #49
    Mechie3's Avatar
    Join Date
    May 2012
    Location
    Indianapolis
    Posts
    5,174
    Post Thanks / Like
    My wife was home when I did it. She's used to it by now after I put engine heads in the oven to dry after washing. I did put down cardboard for the wiring though.
    Zero Decibel Motorsports
    Check out my new website!
    www.zerodecibelmotorsports.com
    www.facebook.com/zero.decibel.motorsports

  10. #50
    Senior Member
    Join Date
    May 2012
    Location
    Suisun City, CA
    Posts
    851
    Post Thanks / Like
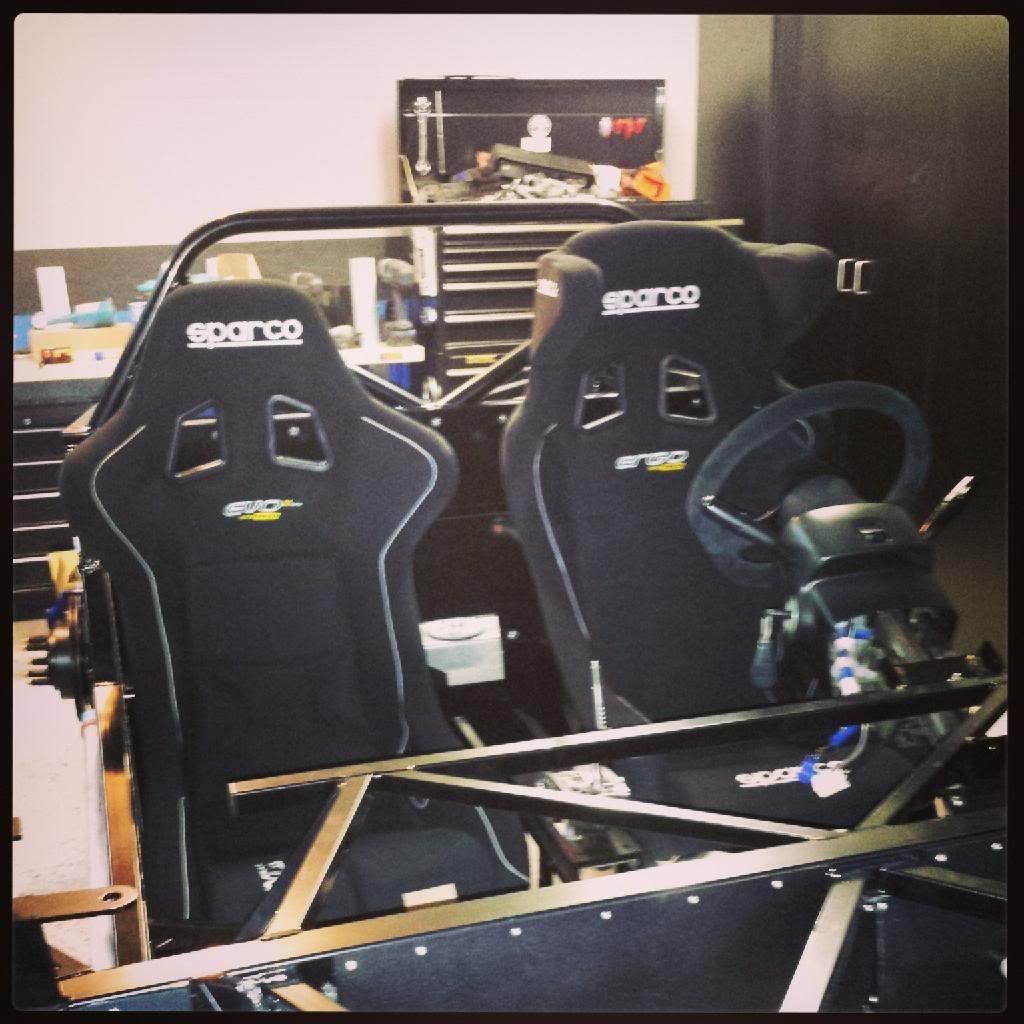
    Passenger seat came in today, so I decided to test fit (it's not mounted yet). Sparco Evo II (US Spec).


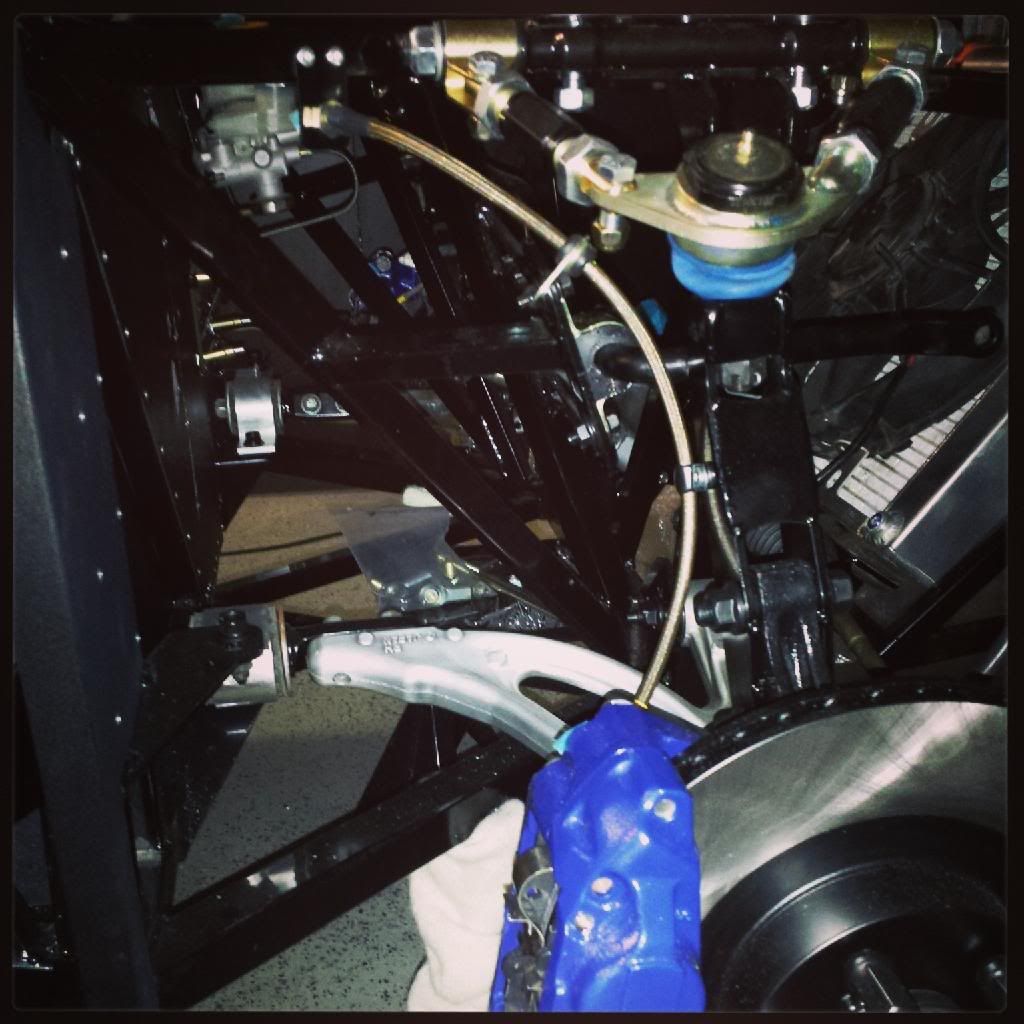
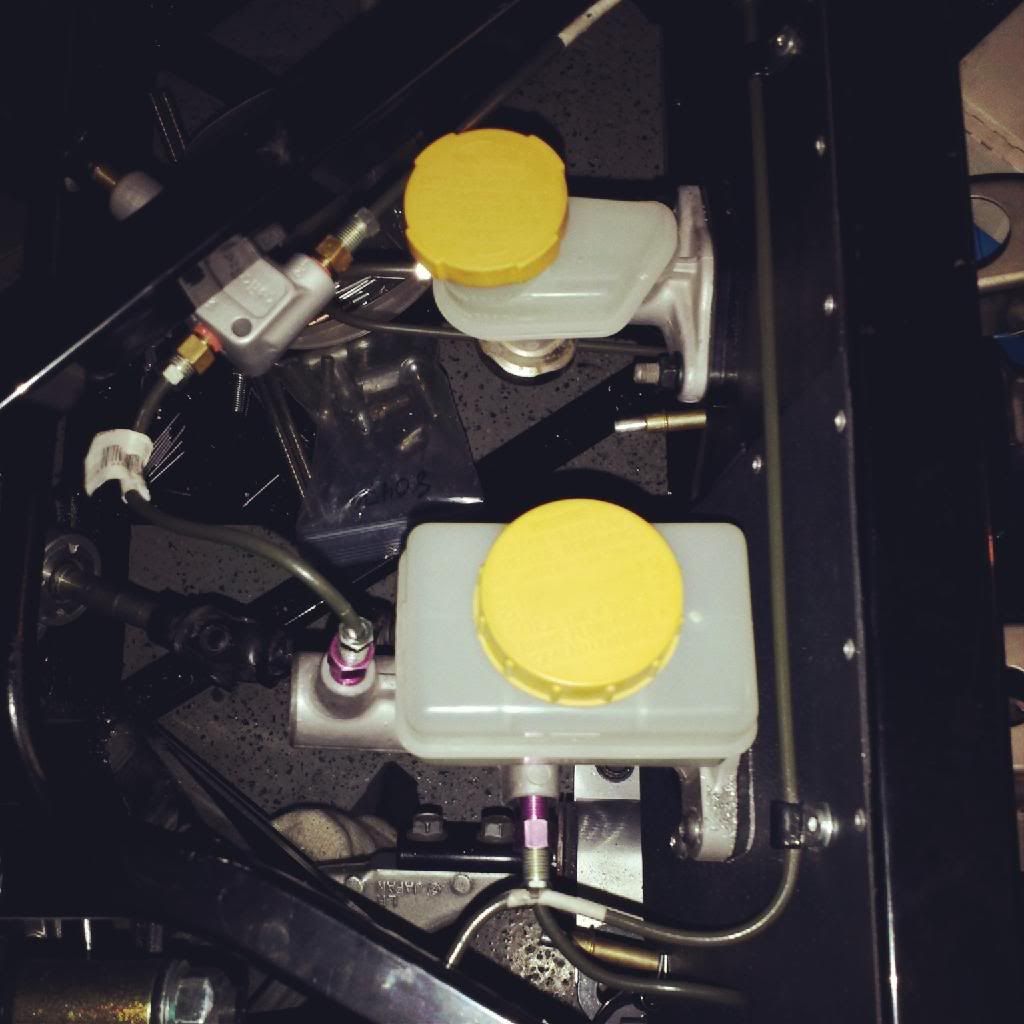
    Also got my Stoptech stainless brake lines. And installed those.


    Then I finished running my front brake hardlines and proportioning valve.


    That's all for today!

  11. #51
    Senior Member
    Join Date
    May 2012
    Location
    Suisun City, CA
    Posts
    851
    Post Thanks / Like
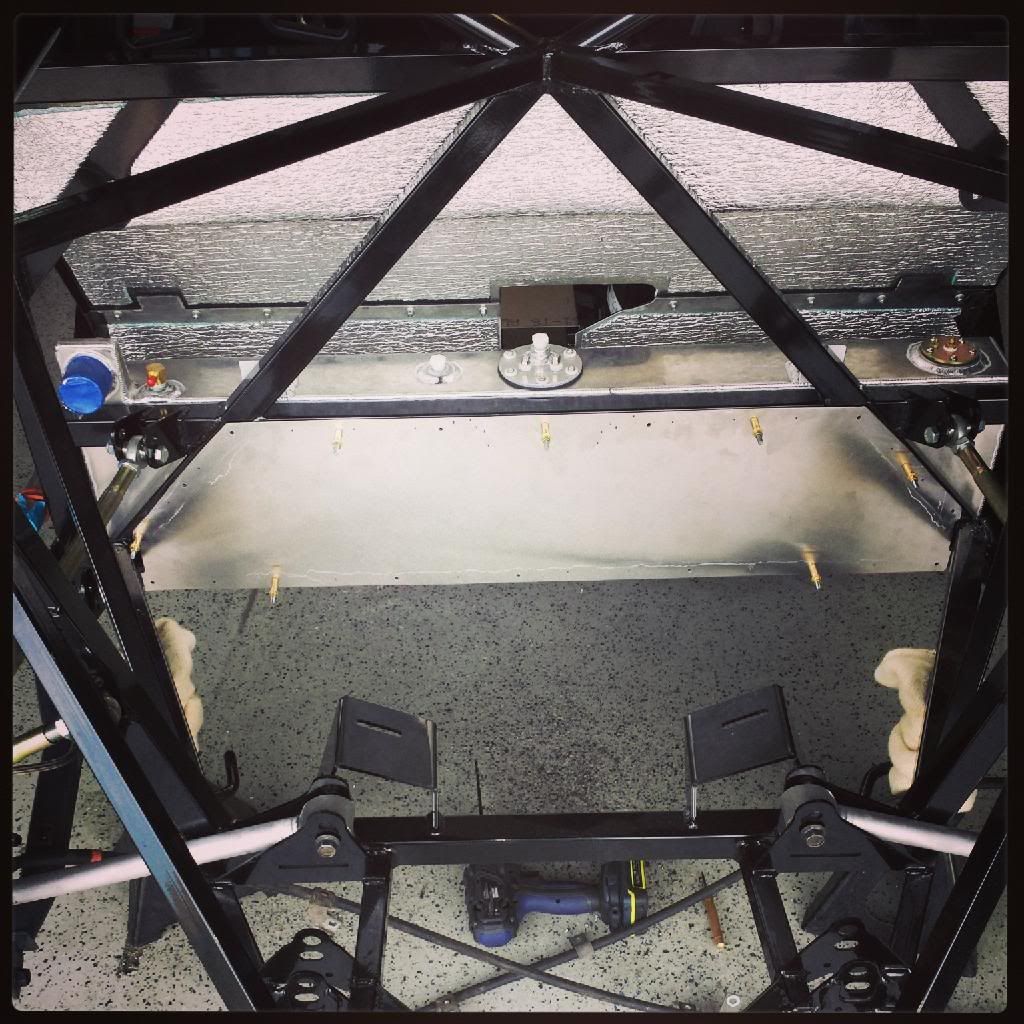
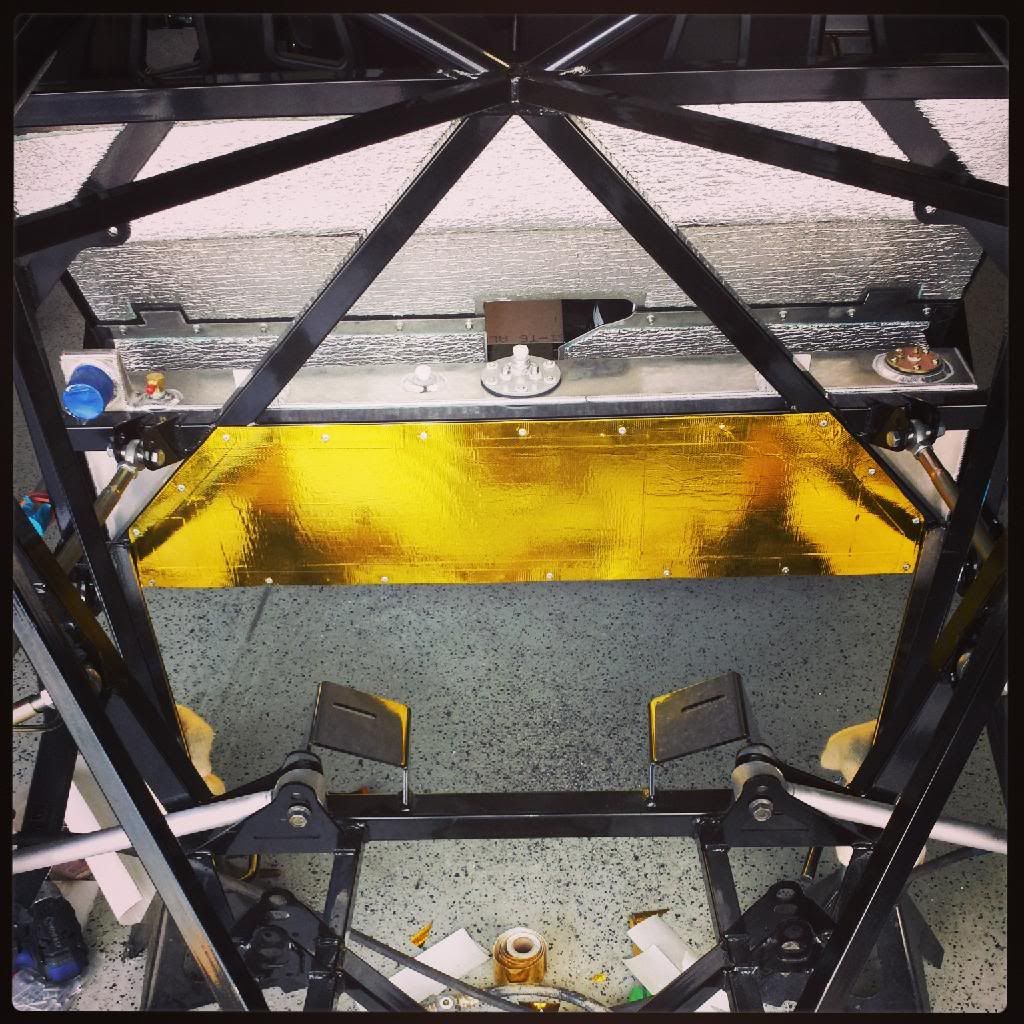
    I started making a rear firewall to place between the hot exhaust manifolds and the fuel tank. I've placed a layer of the EZ Cool material (can be seen on the inner firewall in the picture) on the backside of the fuel tank. This firewall panel will have another layer of the EZ Cool on the back side and gold foil on the exposed side. I'm also making an upper panel, that will cover all but the outside triangular area behind the driver (this is where the wiring harness, etc. will be ran.

    Fitting:


    Final product:


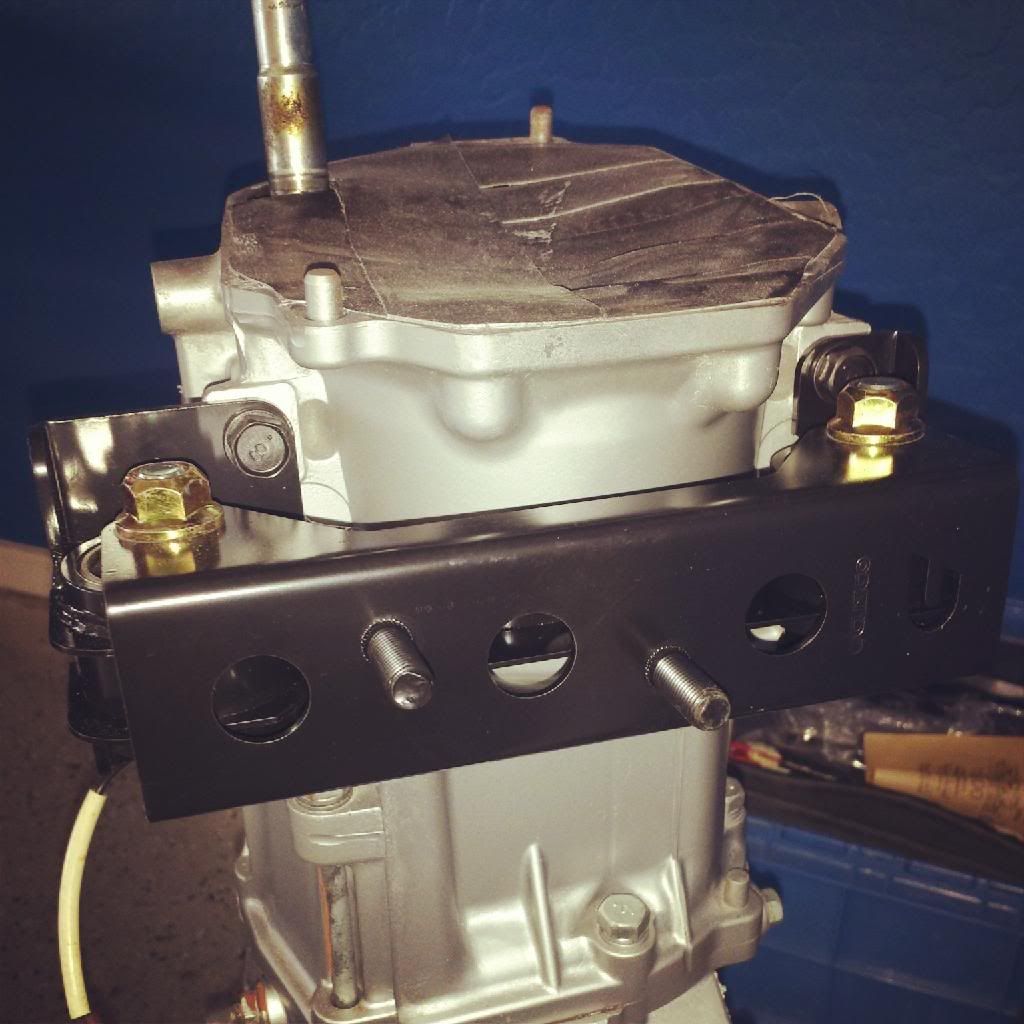
    Cusco engine and transmission mounts. :-D **Note to self: the bottom bracket pictured is on BACKWARDS!! This made for a short, irritating delay in sitting the motor/trans in place...**


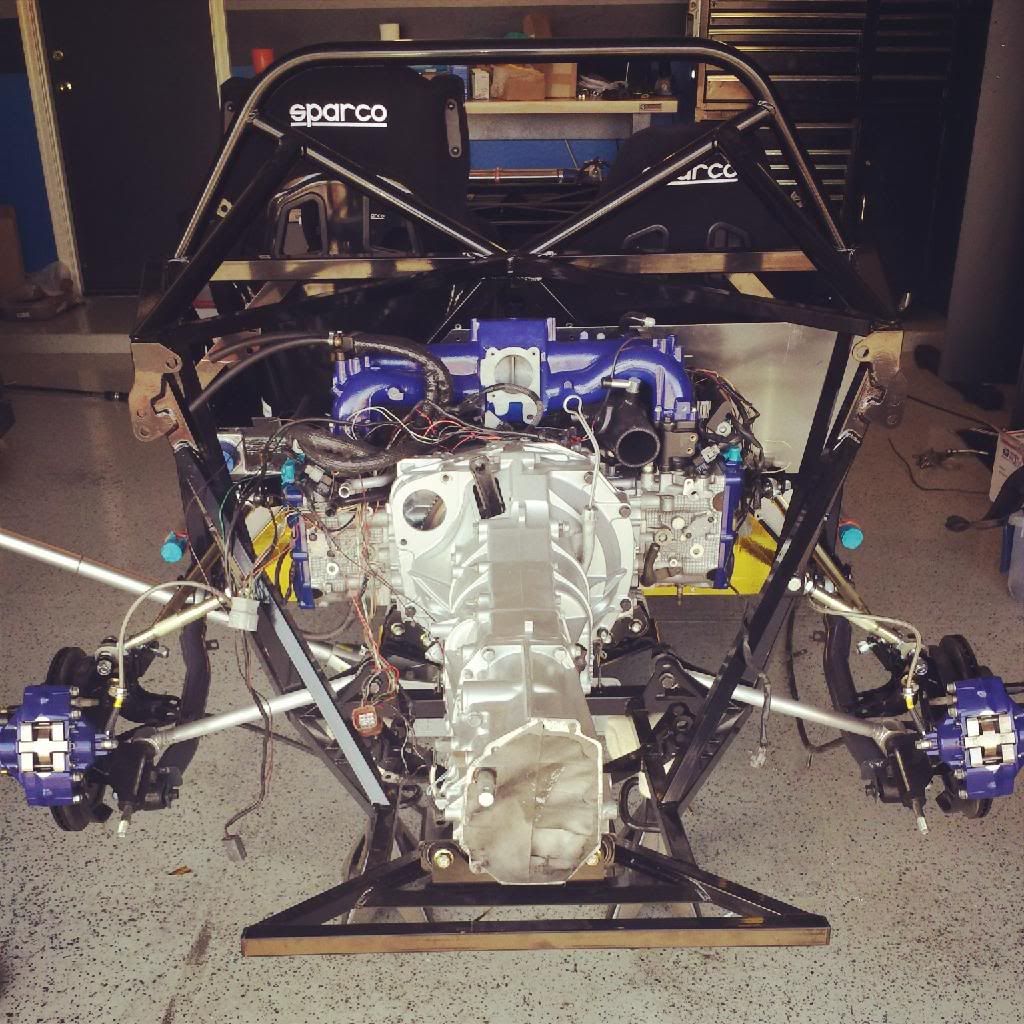
    Heart transplant complete (well, complete enough for now):


  12. #52
    PLATNUM Supporting Member
    wallace18's Avatar
    Join Date
    Apr 2012
    Location
    Trenton, Florida
    Posts
    5,382
    Post Thanks / Like
    Looking good!

  13. #53
    Senior Member
    Join Date
    May 2012
    Location
    Suisun City, CA
    Posts
    851
    Post Thanks / Like
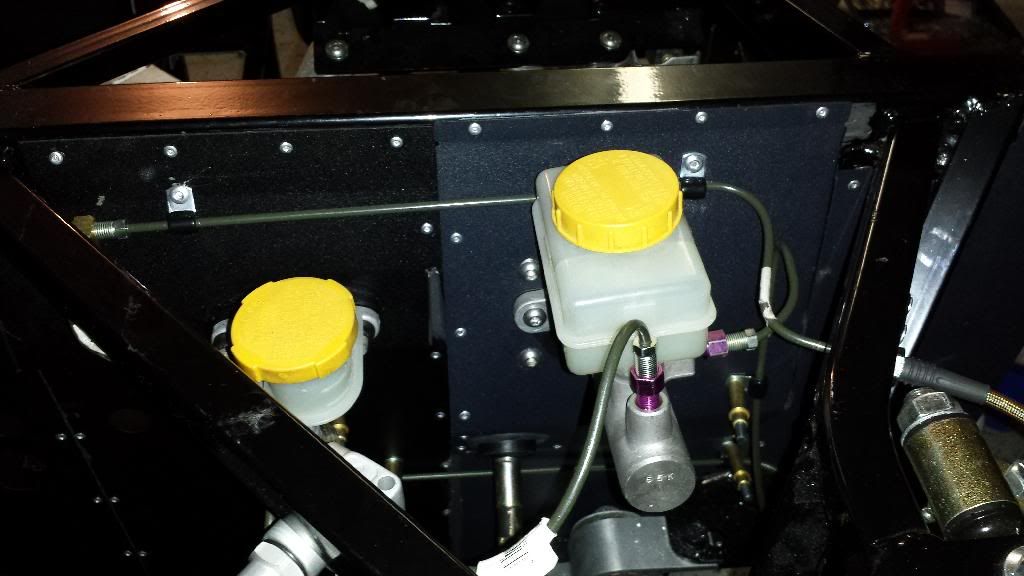
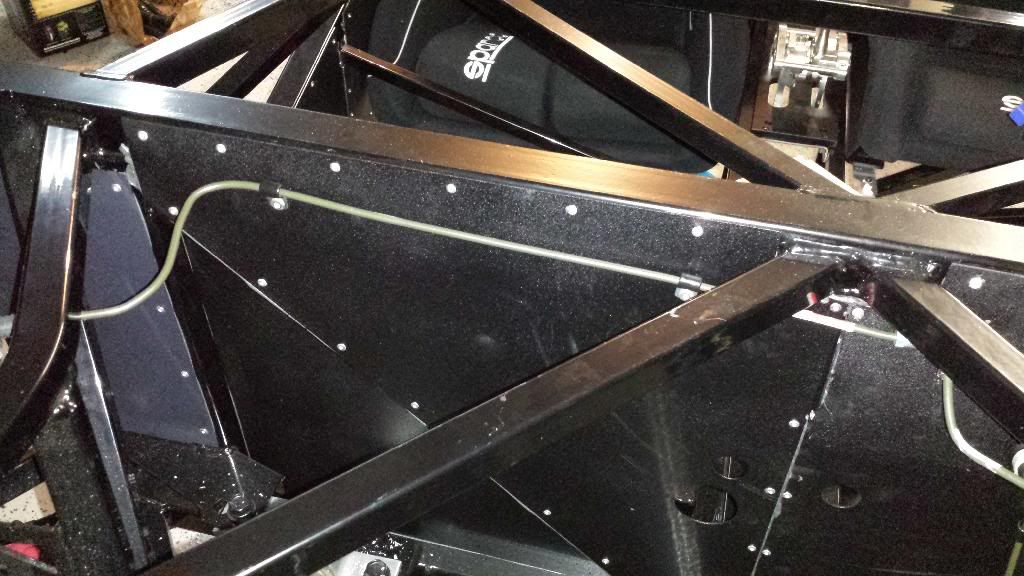
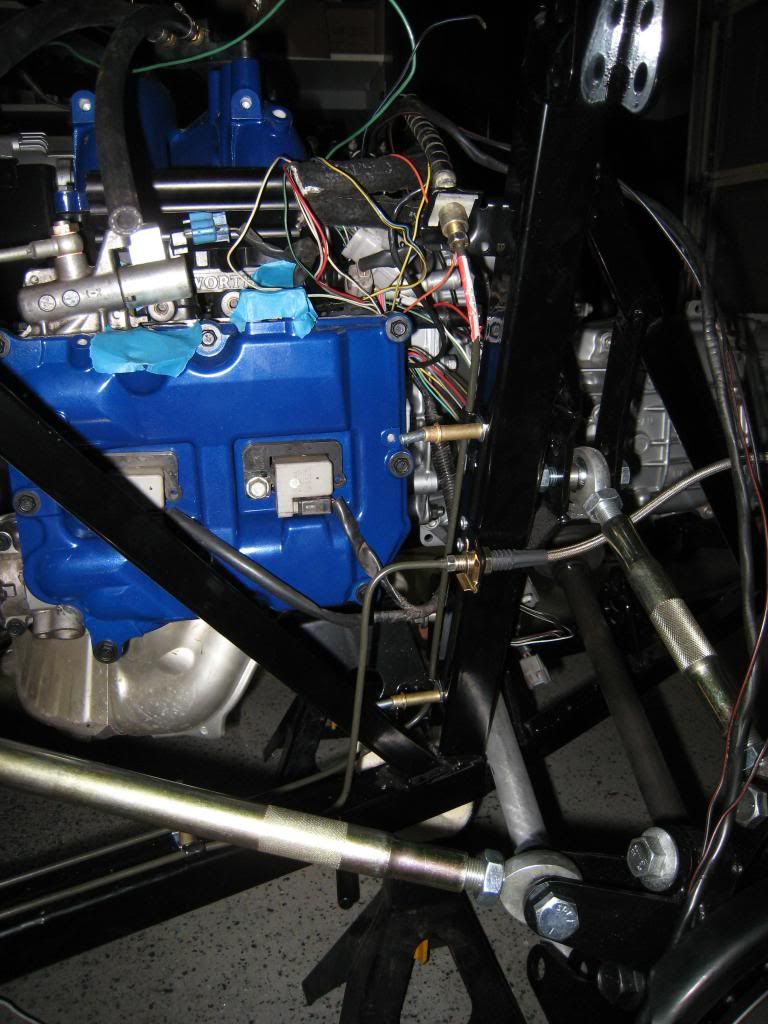
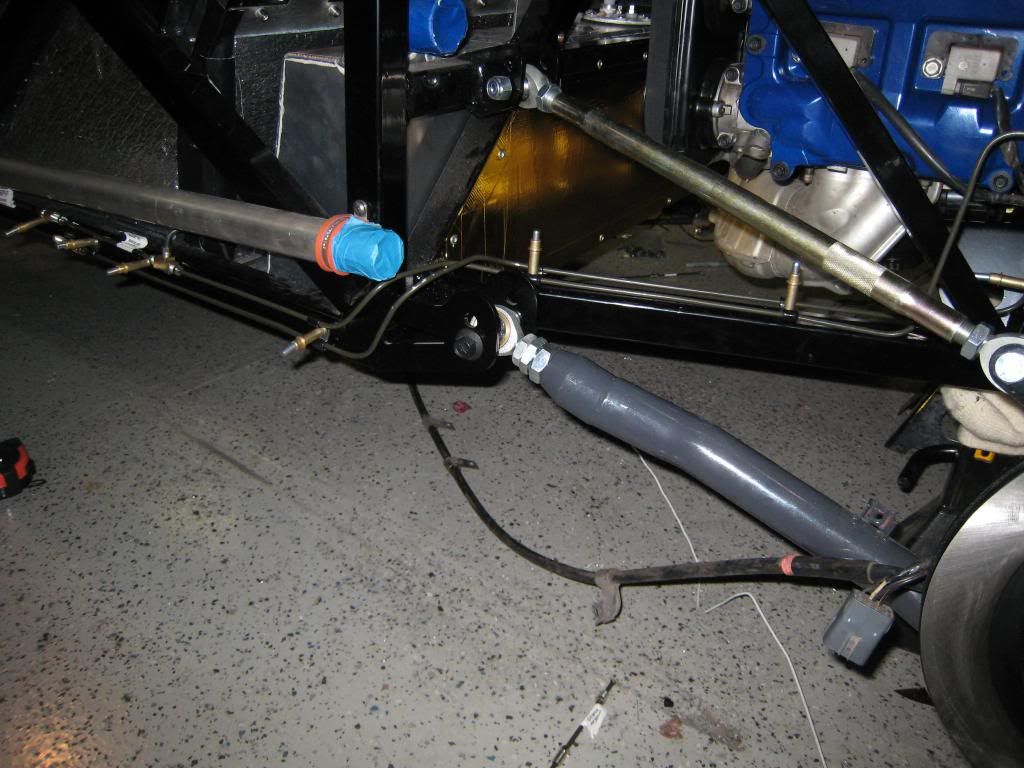
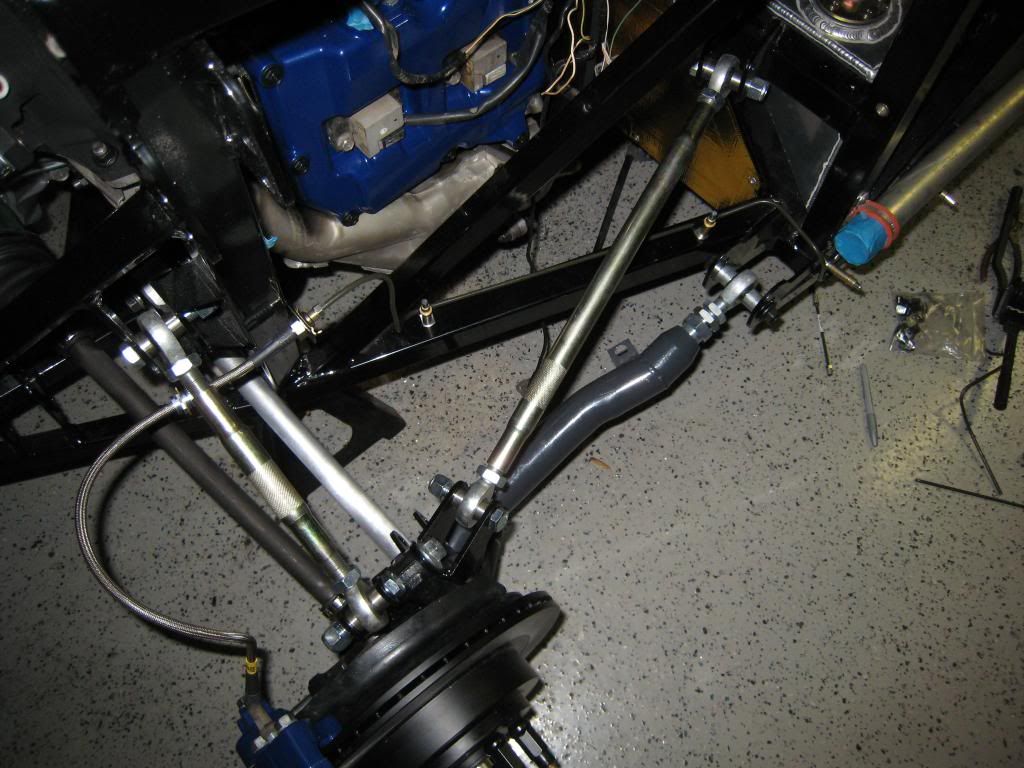
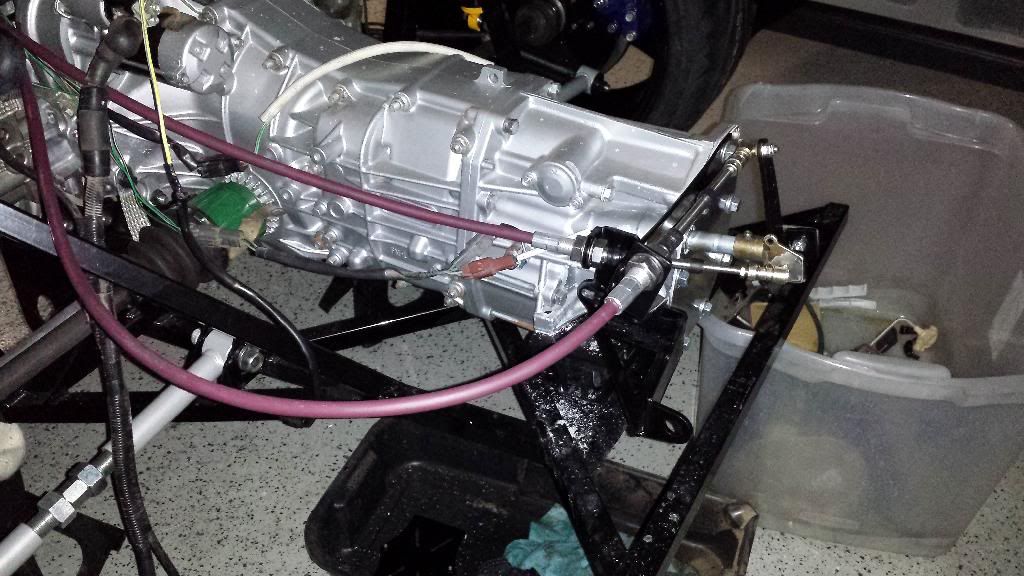
    Today's objective? Finish the clutch hard line and rear brake hard lines.

    I terminated the clutch soft line at the driver's rear of the car, instead of the FFR recommended place in the front of the engine. I modified and used the OEM bracket. You can also see the driver side rear brake hard line. There's plenty of clearance around both lines.


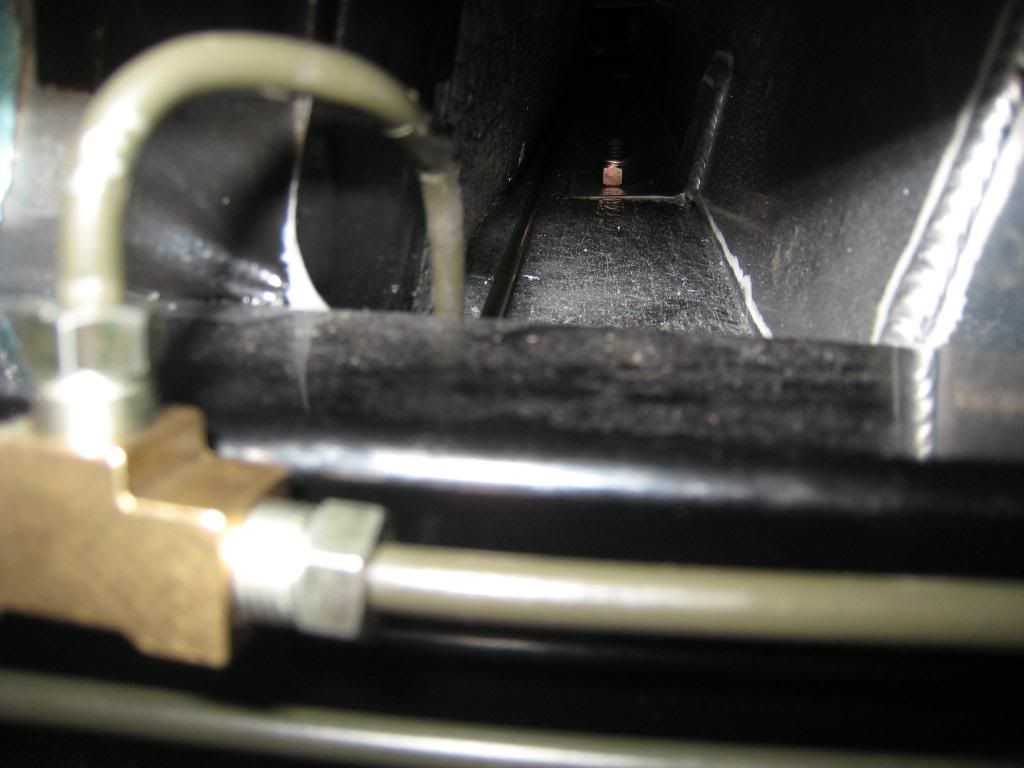
    Since I had plenty of room in front of the fuel tank, I decided to route the passenger rear brake line through there. This will keep it out of the engine bay and minimize heat transfer from the exhaust/engine.


    And finally the passenger side.


  14. #54
    Senior Member C.Plavan's Avatar
    Join Date
    Mar 2011
    Location
    Clovis, Ca
    Posts
    2,225
    Post Thanks / Like
    Great work.
    Thanks- Chad
    818R-SOLD!!!- Go Karted 7/20/14/ Officially raced NASA ST2- 2/28/15
    2016 Elan NP01 Prototype Racecar Chassis #20
    1969 Porsche 911ST Vintage Race Car
    1972 Porsche 911T (#'s matching undergoing nut & bolt resto in my garage)

  15. #55
    Senior Member Frank818's Avatar
    Join Date
    Jun 2013
    Location
    QC, Canada
    Posts
    5,732
    Post Thanks / Like
    Where did you get that golf doil? Sorry, I mean gold foil?
    Frank
    818 chassis #181 powered by a '93 VW VR6 Turbo GT3582R
    Go-karted Aug 5, 2016 - Then May 19+21, 2017
    Tracked May 27/July 26, 2017
    Build time before being driveable on Sep 27, 2019: over 6000h
    Build Completed Winter 2021

  16. #56
    818 builder metalmaker12's Avatar
    Join Date
    Mar 2012
    Location
    Exeter R.I
    Posts
    2,834
    Post Thanks / Like
    Blog Entries
    1
    The gold foil type heat wrap is all over the internet, I am doing a similar thing in that area.

  17. #57
    Senior Member
    Join Date
    May 2012
    Location
    Suisun City, CA
    Posts
    851
    Post Thanks / Like
    Quote Originally Posted by Frank818 View Post
    Where did you get that golf doil? Sorry, I mean gold foil?
    Quote Originally Posted by metalmaker12 View Post
    The gold foil type heat wrap is all over the internet, I am doing a similar thing in that area.
    Yup. What metalmaker12 said. I got it from a friend. It's available in roll tape form, as well as larger sheet form. I used a combination of the two.

  18. #58
    Senior Member Frank818's Avatar
    Join Date
    Jun 2013
    Location
    QC, Canada
    Posts
    5,732
    Post Thanks / Like
    But is it really efficient or the quality is average to keep prices low?
    Frank
    818 chassis #181 powered by a '93 VW VR6 Turbo GT3582R
    Go-karted Aug 5, 2016 - Then May 19+21, 2017
    Tracked May 27/July 26, 2017
    Build time before being driveable on Sep 27, 2019: over 6000h
    Build Completed Winter 2021

  19. #59
    Administrator David Hodgkins's Avatar
    Join Date
    Feb 2011
    Location
    Corona del Mar, CA
    Posts
    6,066
    Post Thanks / Like
    Blog Entries
    7
    Really nice work! Very tidy.


    FFR 5369 Pin Drive, IRS, Trigos, Torsen, Wilwoods, FMS BOSS 302 "B" cam , Mass-flo. CA SB100 (SPCN) Registered
    Delivered 4/23/06. "Finished" 4/2012 (still not done!)


  20. #60
    Senior Member
    Join Date
    May 2012
    Location
    Suisun City, CA
    Posts
    851
    Post Thanks / Like
    Quote Originally Posted by Frank818 View Post
    But is it really efficient or the quality is average to keep prices low?
    Honestly, I'm not sure. I think the stuff I used is from DEI? Their info states 80% reflective. I've seen some stuff commercially available that claims 95% reflective. But, I'm not too concerned about it, since I have three layers of various products between the exhaust and the tank.

    Here's a link to the 95% reflective stuff.

    http://www.hrpworld.com/store/defaul...ve+Film+Silver

  21. #61
    Senior Member Frank818's Avatar
    Join Date
    Jun 2013
    Location
    QC, Canada
    Posts
    5,732
    Post Thanks / Like
    DEI usually makes nice stuff, no? My doubts about DEI would be less than some Chinese import.
    I too plan on having multiple layers of everything I can find that reflects heat. lolll
    Frank
    818 chassis #181 powered by a '93 VW VR6 Turbo GT3582R
    Go-karted Aug 5, 2016 - Then May 19+21, 2017
    Tracked May 27/July 26, 2017
    Build time before being driveable on Sep 27, 2019: over 6000h
    Build Completed Winter 2021

  22. #62
    Senior Member
    Join Date
    May 2012
    Location
    Suisun City, CA
    Posts
    851
    Post Thanks / Like
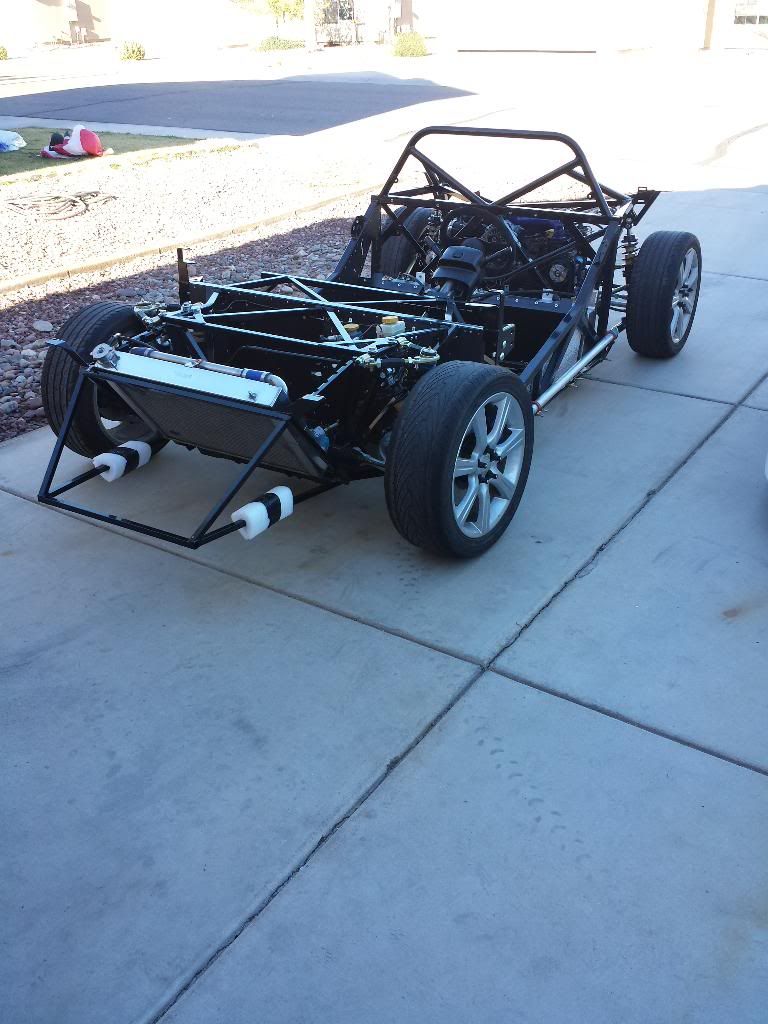
    Fuel system is plumbed.


    Also, I finally received (on Tuesday) my coilover collars and threaded bodies. I now have a roller, sans brakes. All brake lines are ran, I'm just waiting to get a remote reservoir kit. This thing is super low to the ground and feels tiny! Haha *Still waiting on my wheels, too**


    Now I'm starting on the craziness that is my wiring harness......

  23. #63
    818 builder metalmaker12's Avatar
    Join Date
    Mar 2012
    Location
    Exeter R.I
    Posts
    2,834
    Post Thanks / Like
    Blog Entries
    1
    Nice!!

  24. #64
    Senior Member Frank818's Avatar
    Join Date
    Jun 2013
    Location
    QC, Canada
    Posts
    5,732
    Post Thanks / Like
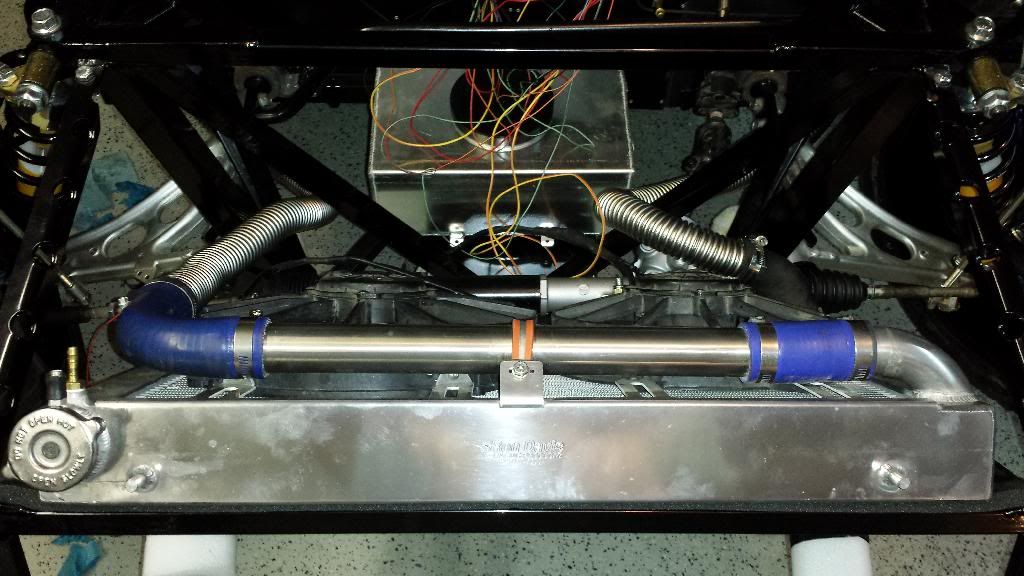
    I like your front rad inlet (or is it the outlet over there). Seems to save space at the top.
    Frank
    818 chassis #181 powered by a '93 VW VR6 Turbo GT3582R
    Go-karted Aug 5, 2016 - Then May 19+21, 2017
    Tracked May 27/July 26, 2017
    Build time before being driveable on Sep 27, 2019: over 6000h
    Build Completed Winter 2021

  25. #65
    Senior Member
    Join Date
    May 2012
    Location
    Suisun City, CA
    Posts
    851
    Post Thanks / Like
    Quote Originally Posted by Frank818 View Post
    I like your front rad inlet (or is it the outlet over there). Seems to save space at the top.
    That is the inlet. It's a dual pass unit from Ron Davis. So, the inlet and outlet are on the same side. The hard pipe should give me plenty of hood clearance (or so I'm hoping).

  26. #66
    Senior Member Frank818's Avatar
    Join Date
    Jun 2013
    Location
    QC, Canada
    Posts
    5,732
    Post Thanks / Like
    Somewhere in here? http://www.rondavisradiators.com/Welcome.htm

    They show Subaru at the end of the page, but no link to it. Is there a web page I can see one?
    Or a price, at the minimum, so I can potentially budget one.
    Frank
    818 chassis #181 powered by a '93 VW VR6 Turbo GT3582R
    Go-karted Aug 5, 2016 - Then May 19+21, 2017
    Tracked May 27/July 26, 2017
    Build time before being driveable on Sep 27, 2019: over 6000h
    Build Completed Winter 2021

  27. #67
    Senior Member
    Join Date
    May 2012
    Location
    Suisun City, CA
    Posts
    851
    Post Thanks / Like
    Quote Originally Posted by Frank818 View Post
    Somewhere in here? http://www.rondavisradiators.com/Welcome.htm

    They show Subaru at the end of the page, but no link to it. Is there a web page I can see one?
    Or a price, at the minimum, so I can potentially budget one.
    I believe you would need to contact them directly. Last I spoke with them, one for a Subaru was ~ $716 + shipping.

  28. #68
    Senior Member Frank818's Avatar
    Join Date
    Jun 2013
    Location
    QC, Canada
    Posts
    5,732
    Post Thanks / Like
    Ok great, tnx!
    Frank
    818 chassis #181 powered by a '93 VW VR6 Turbo GT3582R
    Go-karted Aug 5, 2016 - Then May 19+21, 2017
    Tracked May 27/July 26, 2017
    Build time before being driveable on Sep 27, 2019: over 6000h
    Build Completed Winter 2021

  29. #69
    Senior Member Rasmus's Avatar
    Join Date
    Mar 2012
    Location
    Las Vegas, USA
    Posts
    983
    Post Thanks / Like
    Quote Originally Posted by JeromeS13 View Post
    Cleaned nuts/bolts by soaking in vinegar, then placing in a vibratory tumbler. Finally had them coated with black oxide to prevent rust/corrosion. I don't have a picture prior the vinegar or before the tumbling.
    Jerome, what sort of vibratory tumbler do you use? Brand? Model? Pictures?

  30. #70
    Senior Member
    Join Date
    May 2012
    Location
    Suisun City, CA
    Posts
    851
    Post Thanks / Like
    Quote Originally Posted by Rasmus View Post
    Jerome, what sort of vibratory tumbler do you use? Brand? Model? Pictures?
    Brand: El Cheapo de Harbor Freight

    http://www.harborfreight.com/5-lb-me...ler-67617.html

    Coupled with walnut shell.

  31. #71
    Senior Member
    Join Date
    May 2012
    Location
    Suisun City, CA
    Posts
    851
    Post Thanks / Like
    Not much going on lately... Still waiting on coolant adapters so I can go-kart...

  32. #72
    Senior Member
    Join Date
    May 2012
    Location
    Suisun City, CA
    Posts
    851
    Post Thanks / Like
    Well, at least I know that I didn't COMPLETELY ruin my harness when I removed 16 lbs of it!

    http://s157.photobucket.com/user/Jer...i7ekj.mp4.html

  33. #73
    Senior Member
    Join Date
    May 2012
    Location
    Suisun City, CA
    Posts
    851
    Post Thanks / Like
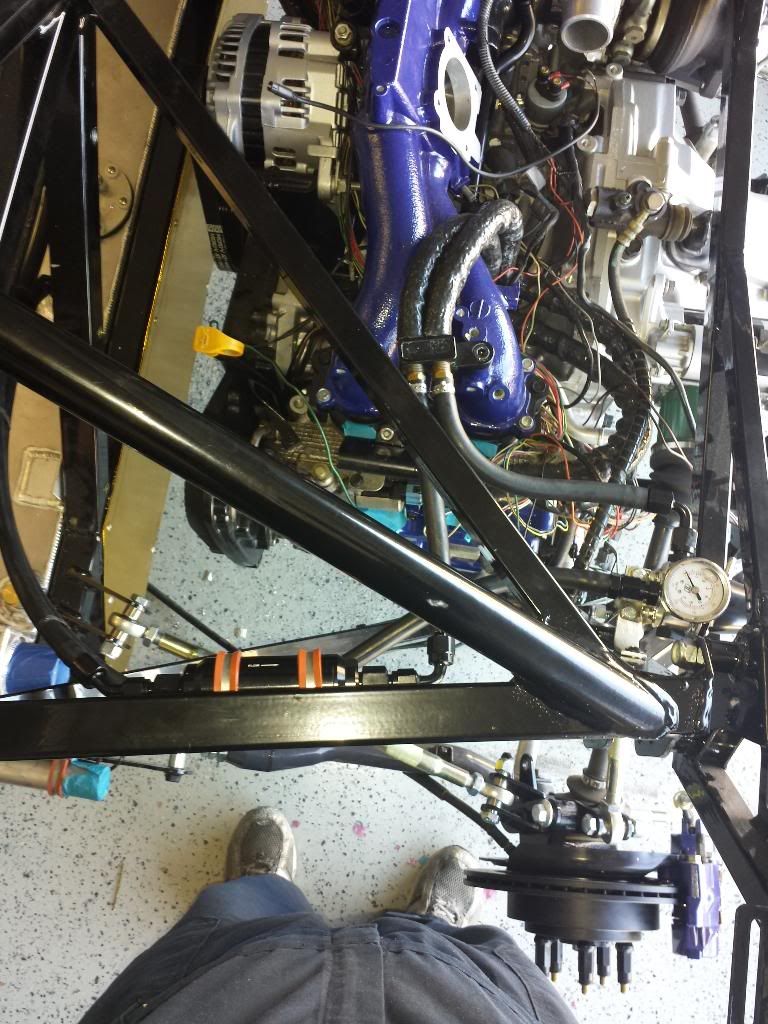
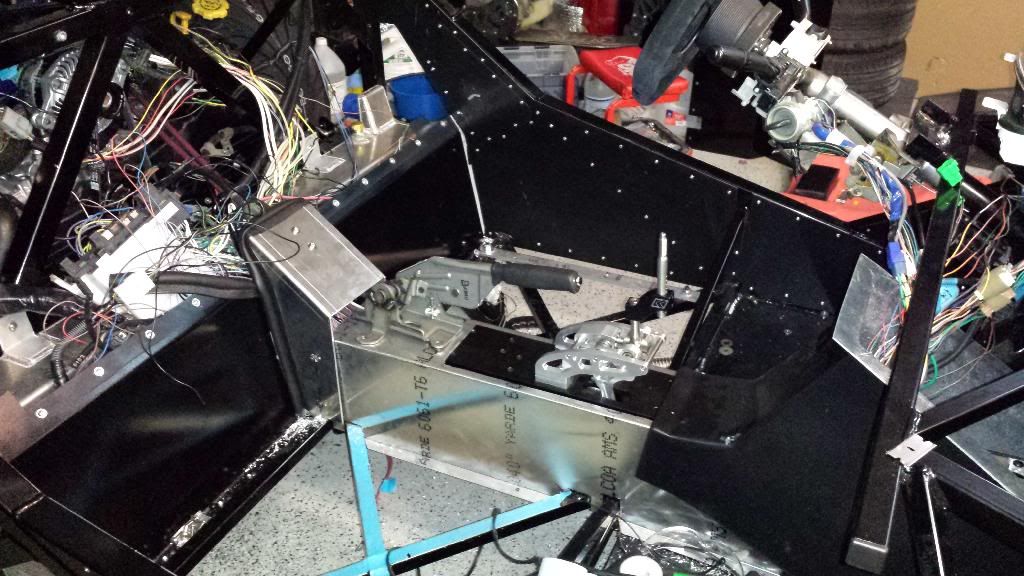
    Shifter is mounted. I still need to trim down the FFR bracket.


    E-brake cable is connected, just need to secure the handle.


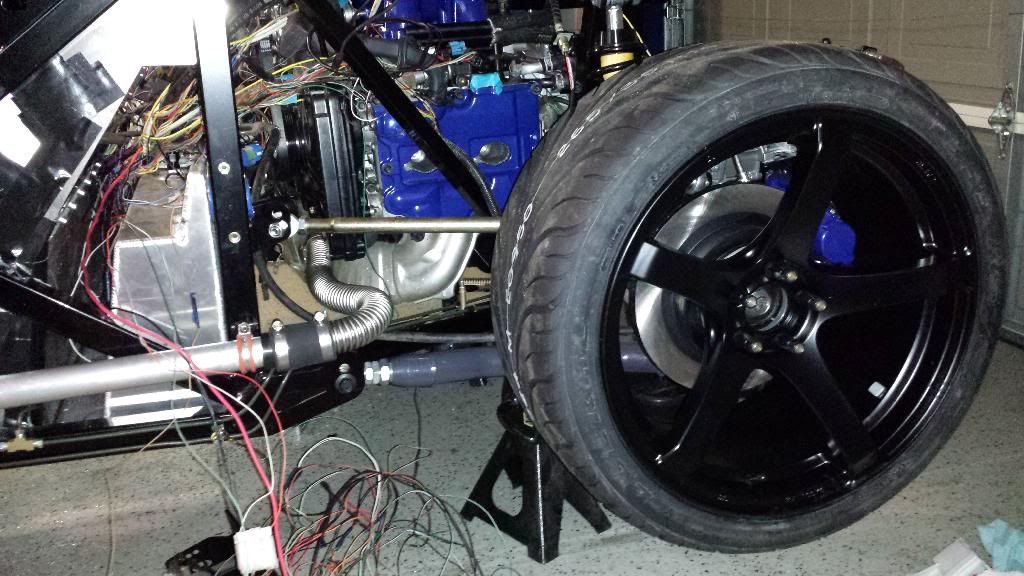
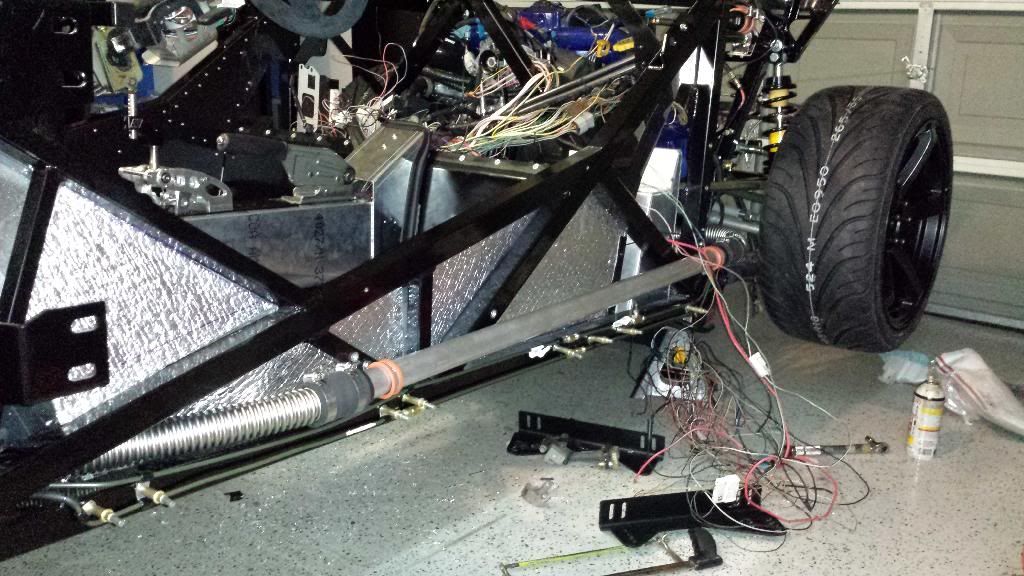
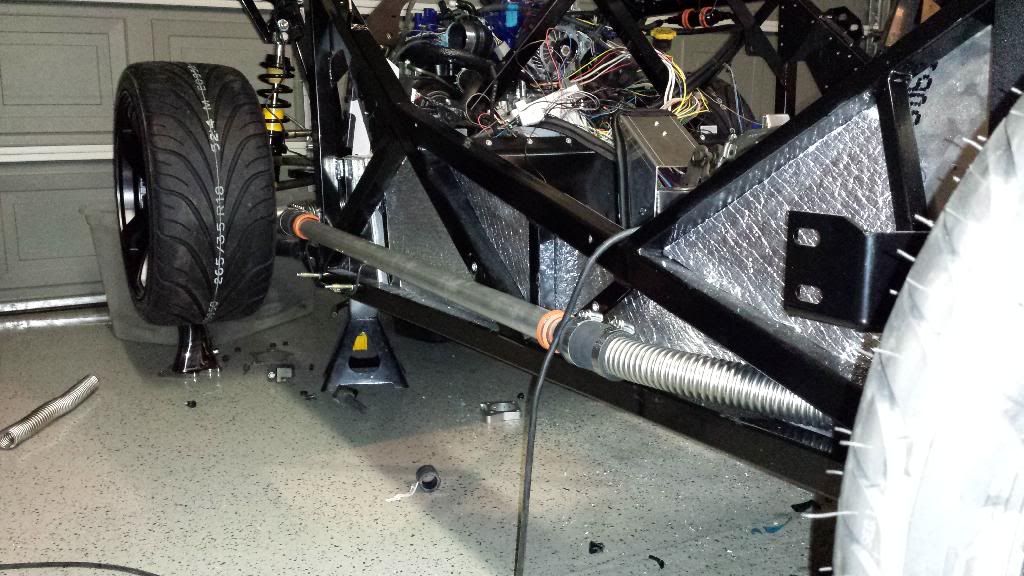
    A peek at the wheels and freshly installed coolant lines.


  34. #74
    818 builder metalmaker12's Avatar
    Join Date
    Mar 2012
    Location
    Exeter R.I
    Posts
    2,834
    Post Thanks / Like
    Blog Entries
    1
    VCP I can see, looking good!

  35. #75
    Senior Member Xusia's Avatar
    Join Date
    Oct 2011
    Location
    Eugene, OR, USA
    Posts
    2,343
    Post Thanks / Like
    I like those tires!

  36. #76
    Senior Member
    Join Date
    May 2012
    Location
    Suisun City, CA
    Posts
    851
    Post Thanks / Like
    First start!


  37. #77
    Senior Member waruaki's Avatar
    Join Date
    Aug 2013
    Location
    Salem, Oregon
    Posts
    168
    Post Thanks / Like
    Congratulations. Did you get the radiator hose adapter set from Factory Five or come up with a different alternative? I'm still waiting for mine as well as the push pull cable.

  38. #78
    Senior Member
    Join Date
    May 2012
    Location
    Suisun City, CA
    Posts
    851
    Post Thanks / Like
    Quote Originally Posted by waruaki View Post
    Congratulations. Did you get the radiator hose adapter set from Factory Five or come up with a different alternative? I'm still waiting for mine as well as the push pull cable.
    Nope. AZPete ended up letting me use his. I'll be giving him mine when they arrive. I'm still waiting on my diffuser, Race front splitter, gas cap and of course the radiator hose adapter set.

  39. #79
    Member Slatt's Avatar
    Join Date
    Mar 2012
    Location
    Anchorage, AK
    Posts
    85
    Post Thanks / Like
    Quote Originally Posted by metalmaker12 View Post
    VCP I can see, looking good!
    Just to confirm. Are those VCP? Or Cusco? Or is Cusco/VCP the same thing?

  40. #80
    Senior Member
    Join Date
    May 2012
    Location
    Suisun City, CA
    Posts
    851
    Post Thanks / Like
    Quote Originally Posted by Slatt View Post
    Just to confirm. Are those VCP? Or Cusco? Or is Cusco/VCP the same thing?
    VCP Shifter Kit
    VCP trailing arms.

    Cusco is a very distinct blue color.

Page 2 of 12 FirstFirst 1234 ... LastLast

Posting Permissions

  • You may not post new threads
  • You may not post replies
  • You may not post attachments
  • You may not edit your posts
  •  

Brown County Customs

Visit our community sponsor