Boig Motorsports

Visit our community sponsor

Thanks Thanks:  0
Likes Likes:  0
Page 2 of 20 FirstFirst 123412 ... LastLast
Results 41 to 80 of 779

Thread: 818Rasmus E Modified

  1. #41
    Senior Member Rasmus's Avatar
    Join Date
    Mar 2012
    Location
    Las Vegas, USA
    Posts
    983
    Post Thanks / Like

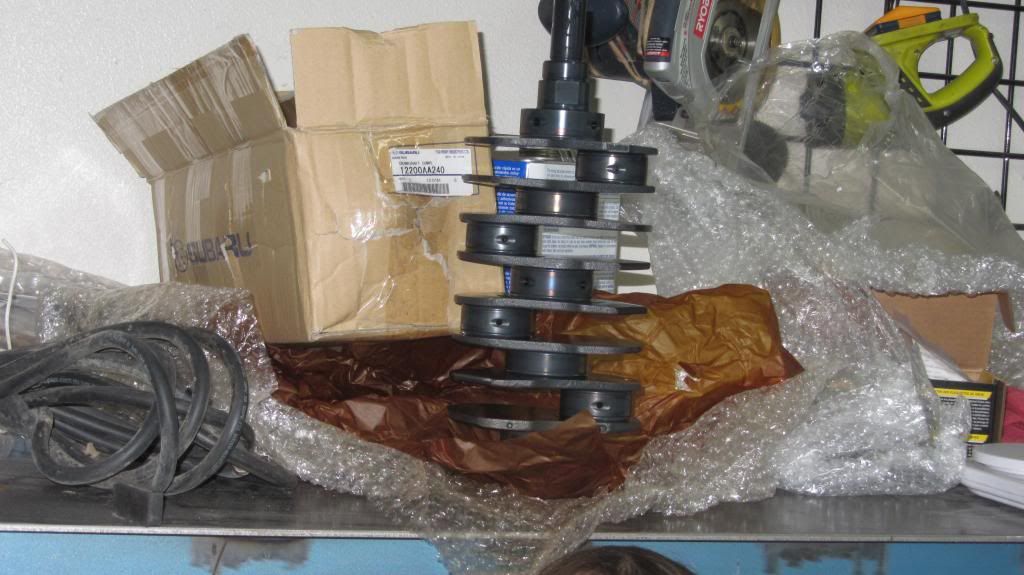
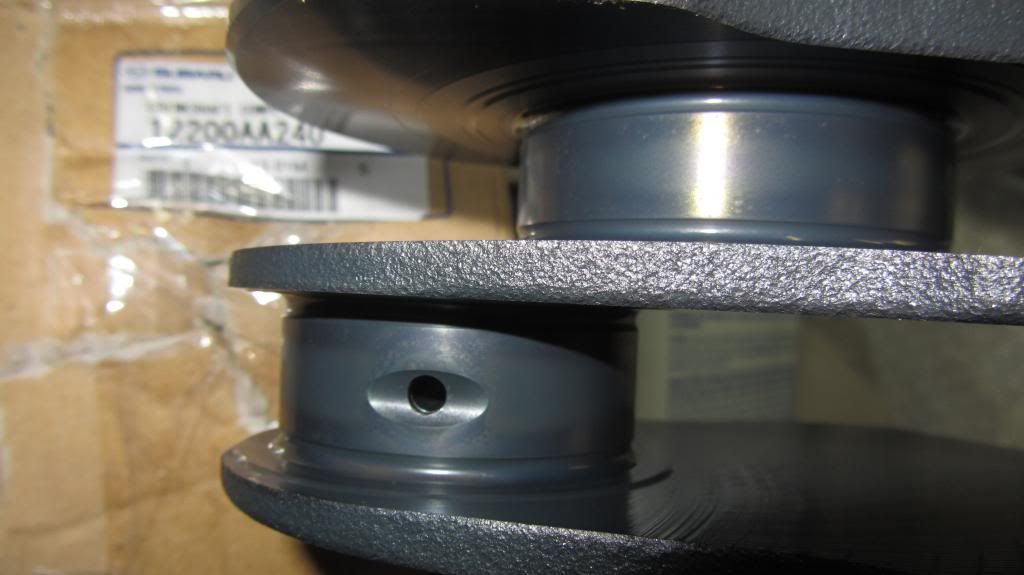
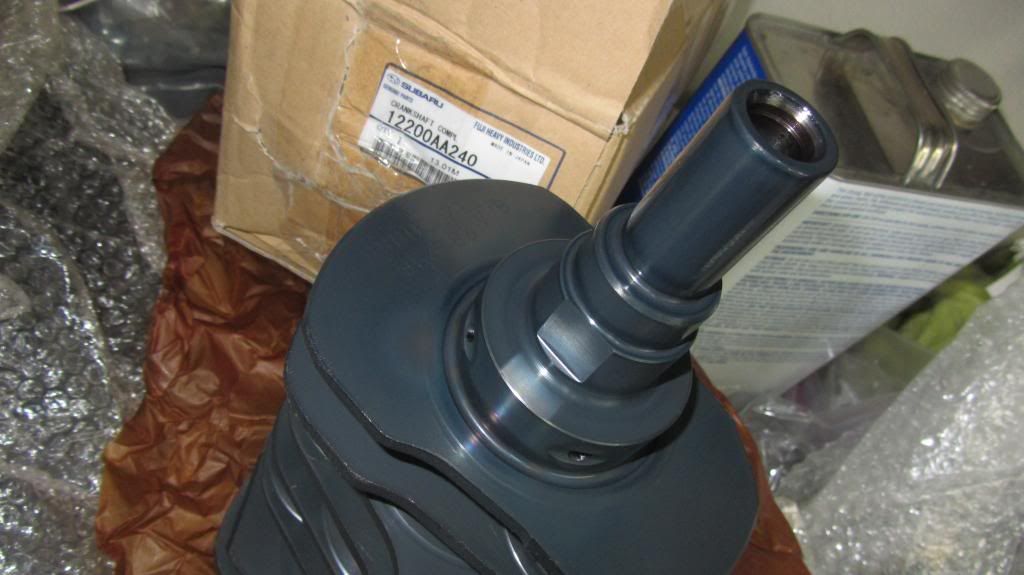
    OEM EJ205 75mm stoke P/N 12200AA240. Yep it's a de-stroker. Comes OE with the good crossdrilling for better oiling at high rpm.


    Weird coloring is from the nitriding process 3MI Racing had done to it.


    It's a beauty, too.


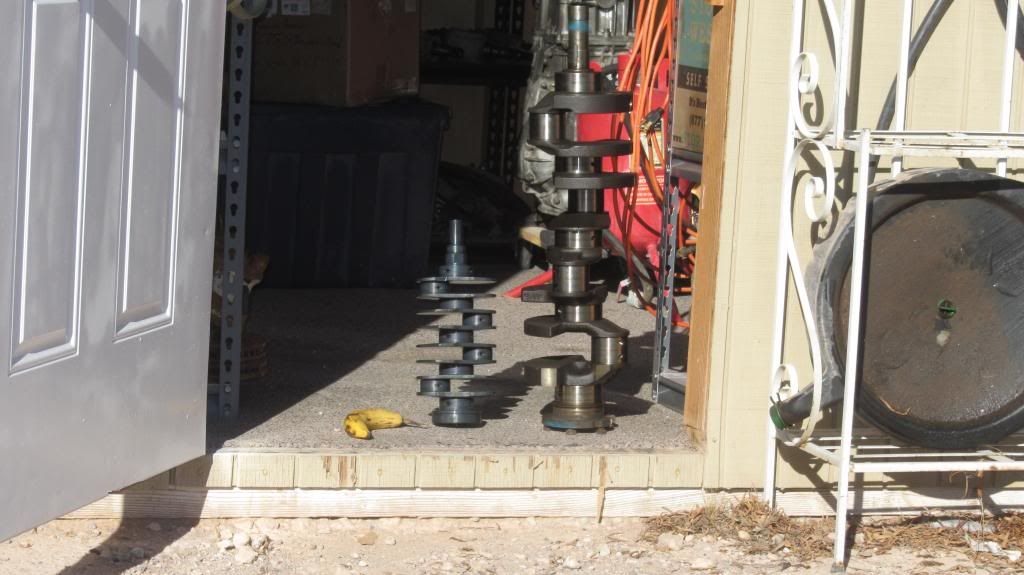
    And as promised. A Subaru EJ205 75mm stroke crankshaft next to a Cadillac 500, 4.304" stroke (~109.3mm) crankshaft. Banana for scale.
    Last edited by Rasmus; 12-28-2013 at 06:29 PM.

  2. #42
    fasterer and furiouser longislandwrx's Avatar
    Join Date
    Aug 2012
    Location
    Long Island
    Posts
    2,540
    Post Thanks / Like
    Blog Entries
    6
    Nice score.

    Are they still offering this for $2k? I'm telling you people this is the 818 motor to have.


    ps you can send me the 4 extra rods. k thx.
    Last edited by longislandwrx; 12-30-2013 at 07:27 AM.
    A well stocked beverage fridge is the key to any successful project.

  3. #43
    818 builder metalmaker12's Avatar
    Join Date
    Mar 2012
    Location
    Exeter R.I
    Posts
    2,834
    Post Thanks / Like
    Blog Entries
    1
    Lol that comparison pic is funny, nice setup.

  4. #44
    nkw8181's Avatar
    Join Date
    Sep 2013
    Location
    Dallas, TX
    Posts
    762
    Post Thanks / Like
    I want Popeye forearms! Lol

  5. #45
    nkw8181's Avatar
    Join Date
    Sep 2013
    Location
    Dallas, TX
    Posts
    762
    Post Thanks / Like
    A little late on the Popeye I know. I do like the banana as your ref lol

  6. #46
    Senior Member Rasmus's Avatar
    Join Date
    Mar 2012
    Location
    Las Vegas, USA
    Posts
    983
    Post Thanks / Like

    Welded up some angle steel to make a base to roll the blast cabinet around the garage. I knew I'd propbably need a bit of space for my foot to balance myself which is why that "A" is in there.


    Designed it to hold a bucket under the dump.


    A bit of advice, don't take your salvage yards word that they "drained all the fluids" to mean that they drained all the fluids. Mine was full of 5 liters of oil.


    Installed a tray under the engine stand to deal with drips and leaks as I disassemble.


    More disassembly.

  7. #47
    Senior Member Rasmus's Avatar
    Join Date
    Mar 2012
    Location
    Las Vegas, USA
    Posts
    983
    Post Thanks / Like

    Ground off the heat shield stand-offs and casting flash from the exhaust manifolds. Porting will happen later.

  8. #48
    Senior Member Rasmus's Avatar
    Join Date
    Mar 2012
    Location
    Las Vegas, USA
    Posts
    983
    Post Thanks / Like

    Looking at the fitting of the 2.5i NA intake manifold.


    Reverse angle.


    Left side looking down.

    Numerous issues came up with my 2006 D25 heads and the 2.5i NA manifold


    The above is the right side head. Pistons 1 and 3. Notice the hole for the Camshaft Position Sensor is partially blocked by the manifold. Also the gasket locating pin is completely covered by the manifold. I had to pull the pin out to get the manifold to sit flush.


    The above is the left side. Pistons 2 and 4. Camshaft Position Sensor is partially blocked on this side also.


    Left side still. Gasket locating pin blocked on this side also. I removed the pin so the manifold would sit flush.


    Four of the eight bolt holes used to attached the manifold to the engine aren't lined up. These are the outermost holes. The above photo shows the misalignment. It's not a parallax issue. I'm shooting the cameras view straight down the hole. Notice the threads are partially blocked.

    I didn't get a photo of it but it also looked like fuel injectors 1 and 2 would get close, if not touch, the AVCS solenoids when installed. I'll have to do a mock install and see.

  9. #49
    Senior Member Bob_n_Cincy's Avatar
    Join Date
    Sep 2012
    Location
    Cincinnati OH
    Posts
    3,904
    Post Thanks / Like
    Quote Originally Posted by Rasmus View Post

    Looking at the fitting of the 2.5i NA intake manifold.

    .
    Hi Rasmus,
    I have a intake off an 06 NA Ej25. I asked my buddies at TIC (Turn In Concepts) if I could use it instead of doing the TGV delete modification.
    They told me it would be difficult. I believe the fuel injectors are different also.

    Is there a way to clean you engine block to make it as clean as your intake without taking it apart?
    Bob

  10. #50
    fasterer and furiouser longislandwrx's Avatar
    Join Date
    Aug 2012
    Location
    Long Island
    Posts
    2,540
    Post Thanks / Like
    Blog Entries
    6
    Would 8mm phenolics reduce the amount you need to grind?
    A well stocked beverage fridge is the key to any successful project.

  11. #51
    Senior Member Rasmus's Avatar
    Join Date
    Mar 2012
    Location
    Las Vegas, USA
    Posts
    983
    Post Thanks / Like
    Quote Originally Posted by Bob_n_Cincy View Post
    They told me it would be difficult.
    It's looking that way.

    Quote Originally Posted by longislandwrx View Post
    Would 8mm phenolics reduce the amount you need to grind?
    It'd clear the gasket locator pins with an 8 mm spacer in there. I think you'd clear the left-head camshaft position sensor also. The right-head camshaft position sensor you'd probably still have to grind. I don't know about the injectors.

    The mounting holes would still be misaligned.

  12. #52
    fasterer and furiouser longislandwrx's Avatar
    Join Date
    Aug 2012
    Location
    Long Island
    Posts
    2,540
    Post Thanks / Like
    Blog Entries
    6
    I had to b@stard file the heck out of my intake just to fit the composite TGV deletes. With the right file it goes super fast though.

    I can't wait to assemble the motor.

    edit:
    haha censorship.
    A well stocked beverage fridge is the key to any successful project.

  13. #53
    Senior Member Rasmus's Avatar
    Join Date
    Mar 2012
    Location
    Las Vegas, USA
    Posts
    983
    Post Thanks / Like
    Quote Originally Posted by longislandwrx View Post
    I had to b@stard file the heck out of my intake just to fit the composite TGV deletes. With the right file it goes super fast though.
    Good idea. That'll work easy. Only have 2-3 mm to file out. Looking at my photos again you can tell the holes aren't centered in the tab to start with.

    Other issues with a 2.5i NA (Naturally Aspirated) intake:


    Above is the 2006 WRX mainifold. Notice the angle the injectors are mounted.


    Now the 2.5i intake. Injector mounting angle is shallower. Both photos were shot with the camera flat on my work table. So it's not an issue of me holding the camera at an angle.


    Just millimeters of clearance, and I don't even have the fuel rails installed. I hypothesize that the injector mounting angle is the primary reason they have clearance issues with the AVCS solenoids. I'll have to think on this one. Sure I can add a thick spacer in there to make room, but I worry about what the injector is pointing at. Ideally, I'd want them pointed at the intake valves. If it targets the walls of the intake, I may have to rethink this whole thing.

  14. #54
    Senior Member Rasmus's Avatar
    Join Date
    Mar 2012
    Location
    Las Vegas, USA
    Posts
    983
    Post Thanks / Like

    Front lower control arms as received.


    Removed the casting flash and parting lines. Then baking soda blasted in the blast cabinet. Looking good.

  15. #55
    fasterer and furiouser longislandwrx's Avatar
    Join Date
    Aug 2012
    Location
    Long Island
    Posts
    2,540
    Post Thanks / Like
    Blog Entries
    6
    what about switching to side feeds?


    btw is your workbench 1/4 plate steel? remind me not to stop by on moving day lol.
    Last edited by longislandwrx; 01-13-2014 at 12:50 PM.
    A well stocked beverage fridge is the key to any successful project.

  16. #56
    nkw8181's Avatar
    Join Date
    Sep 2013
    Location
    Dallas, TX
    Posts
    762
    Post Thanks / Like
    Looking good looking good!
    Nolan
    65 coupe Gen 3 "Phoenix" build
    http://thefactoryfiveforum.com/showt...032#post297032

    818 s (with r windscreen ) 350 rwhp. Registered and street legal (SOLD)

  17. #57
    Senior Member Rasmus's Avatar
    Join Date
    Mar 2012
    Location
    Las Vegas, USA
    Posts
    983
    Post Thanks / Like

    Front knuckles and hubs as received.


    I don't trust that the bearings haven't been contaminated by rust/dirt so I'm gonna replace them. The hubs are looking crusty but I think I can salvage them.
    Last edited by Rasmus; 01-13-2014 at 12:56 PM. Reason: engrish be reel hard, yo

  18. #58
    fasterer and furiouser longislandwrx's Avatar
    Join Date
    Aug 2012
    Location
    Long Island
    Posts
    2,540
    Post Thanks / Like
    Blog Entries
    6
    Adios dust shield tabs?
    A well stocked beverage fridge is the key to any successful project.

  19. #59
    Senior Member Rasmus's Avatar
    Join Date
    Mar 2012
    Location
    Las Vegas, USA
    Posts
    983
    Post Thanks / Like
    Quote Originally Posted by longislandwrx View Post
    what about switching to side feeds?
    THAT....

    is a good idea. I'll look into it.


    Quote Originally Posted by longislandwrx View Post
    is your workbench 1/4 plate steel?
    3/16". Same thickness I use on the Cadillac frame.

    Quote Originally Posted by longislandwrx View Post
    Adios dust shield tabs?
    I'd considered this, but those tabs are an excellent place to mount brake ducts for a twice-a-year track day. I think 1 of the 3 can definitely come off though.

  20. #60
    Senior Member Rasmus's Avatar
    Join Date
    Mar 2012
    Location
    Las Vegas, USA
    Posts
    983
    Post Thanks / Like

    Suspended my rusty hubs into an old-school anti-rust system. 5 gallons of water 5 tablespoons of Sodium Carbonate (i.e. washing soda) and a battery charger. The hubs are the cathode and the rebar is the anode.


    Turned it on and in 60 seconds you can see the hydrogen bubbles forming.


    After only one hour. Look at all that rust removed that now floats on the surface.


    After 6 hours.

  21. #61
    Senior Member Xusia's Avatar
    Join Date
    Oct 2011
    Location
    Eugene, OR, USA
    Posts
    2,343
    Post Thanks / Like
    Wow. I can't wait to see the part!

  22. #62
    fasterer and furiouser longislandwrx's Avatar
    Join Date
    Aug 2012
    Location
    Long Island
    Posts
    2,540
    Post Thanks / Like
    Blog Entries
    6
    orson_wells_Slow-Clap.gif

    why so many pieces of rebar, are they wired together under water?
    Last edited by longislandwrx; 01-15-2014 at 07:49 AM.
    A well stocked beverage fridge is the key to any successful project.

  23. #63
    Senior Member Rasmus's Avatar
    Join Date
    Mar 2012
    Location
    Las Vegas, USA
    Posts
    983
    Post Thanks / Like
    Quote Originally Posted by longislandwrx View Post
    orson_wells_Slow-Clap.gif

    why so many pieces of rebar, are they wired together under water?
    The rebar is all weld together to sit in the bucket just right. There's a cross-bar spanning the bottom of the bucket welded the two sets of rebar you see above the water. I'll take it out and take a picture. The whole thing acts as one anode.

  24. #64
    Tazio Nuvolari wannabe Scargo's Avatar
    Join Date
    Nov 2013
    Location
    south-central CT
    Posts
    1,611
    Post Thanks / Like
    Great stuff! I have the same intake that I have put a lot of time into porting, matching and beautifying. I cut away all the extraneous stuff and intend to weld a bridging mounting bracket for the fuel rails. I've not seen any fitment issues so far besides the spring-pins, but I'm not quite as far along as you and have only had it on a non DAVCS-headed engine mockup, so I wasn't aware of the solenoid interference issue.
    I just looked at my current DAVCS motor, with Boomba fuel rails and no spacers, and to my calibrated eyeball (good to 5 BCH), I thought stuff might clear, as-is. If anything, it looked like some minor grinding on the solenoid bracket and possibly some judicious clearancing would do the trick. I cannot say that I can point to a motor where the intake was used in combo with solenoids sitting there. I do not intend to use any spacers. Again, this was with Boomba fuel rails. Worst case? Fill in and re-machine the injector holes?

  25. #65
    Senior Member Rasmus's Avatar
    Join Date
    Mar 2012
    Location
    Las Vegas, USA
    Posts
    983
    Post Thanks / Like
    Quote Originally Posted by Scargo View Post
    Fill in and re-machine the injector holes?
    Good idea. I'll keep that on the list of things to consider.

    Just for you LongIsland:


    There's my anode. Notice how the sections submerged below the water/sodium-carbonate are covered in rust. That's the rust from my hubs. It's more like a rust foam. Just wipe it off with a paper towel and the anode's ready to go again.


    After I take them out I hit them with acetone immediately to prevent surface rust from starting on exposure to air. Then five minutes with a wire wheel and they look like this. Put the rotor hat one of them was mated to next to them. Kind of a before/after.
    Last edited by Rasmus; 01-15-2014 at 10:20 PM.

  26. #66
    Senior Member RM1SepEx's Avatar
    Join Date
    Jul 2011
    Location
    Freeport, ME
    Posts
    3,801
    Post Thanks / Like
    very nice I use eastwood's rust products like www.eastwood.com/eastwood-s-fast-etch.html

    I used it by spraying surfaces and soaking bolts etc.. It leaves a slight zinc phosphate layer on the surface
    Dan

    818S #17 Picked up 8/1/13 First start 11/1/13 Go Kart 3/28/14

  27. #67
    fasterer and furiouser longislandwrx's Avatar
    Join Date
    Aug 2012
    Location
    Long Island
    Posts
    2,540
    Post Thanks / Like
    Blog Entries
    6
    That is awesome. How long did you end up leaving it? I can't wait to see the knucks.
    A well stocked beverage fridge is the key to any successful project.

  28. #68
    Senior Member Rasmus's Avatar
    Join Date
    Mar 2012
    Location
    Las Vegas, USA
    Posts
    983
    Post Thanks / Like
    Quote Originally Posted by RM1SepEx View Post
    very nice I use eastwood's rust products like www.eastwood.com/eastwood-s-fast-etch.html

    I used it by spraying surfaces and soaking bolts etc.. It leaves a slight zinc phosphate layer on the surface
    Isn't that stuff just phosphoric acid? If it is, it's another good way to knock out surface rust.

    Quote Originally Posted by longislandwrx View Post
    That is awesome. How long did you end up leaving it? I can't wait to see the knucks.
    Left 'em overnight. Rotated 'em twice. The work(cathode) needs line-of-site to the anode. Rotating helps it "see" all the rust spots. You don't have to leave it over-night. You can kind of tell when it's ready to be rotated/removed when the hydrogen bubbling slows down. Some parts will be ready in about an hour. Great-gran-pappys plow you pulled in out of the south-40 after 70 years in the muck, might need two overnight dips with a light scrubbing in between.
    Last edited by Rasmus; 01-15-2014 at 06:15 PM.

  29. #69
    Senior Member Frank818's Avatar
    Join Date
    Jun 2013
    Location
    QC, Canada
    Posts
    5,732
    Post Thanks / Like
    Pretty nice stuff here!!!
    Frank
    818 chassis #181 powered by a '93 VW VR6 Turbo GT3582R
    Go-karted Aug 5, 2016 - Then May 19+21, 2017
    Tracked May 27/July 26, 2017
    Build time before being driveable on Sep 27, 2019: over 6000h
    Build Completed Winter 2021

  30. #70
    Senior Member RM1SepEx's Avatar
    Join Date
    Jul 2011
    Location
    Freeport, ME
    Posts
    3,801
    Post Thanks / Like
    Quote Originally Posted by Rasmus View Post
    Isn't that stuff just phosphoric acid? If it is, it's another good way to knock out surface rust.
    yes, low % solution, also slows down activity when "done" leaves a nice dull finish the buffs up really nicely. Worked awesome on the bolts and I use as a prep for any bare steel to be painted. treat, neutralize, dry, eastwood "pre" paint prep then paint, POR 15 etc...

    And yes, sometime a second run at the rust after abrasion helps finish the job

    Rasmus, you do nice work!
    Dan

    818S #17 Picked up 8/1/13 First start 11/1/13 Go Kart 3/28/14

  31. #71
    Senior Member fateo66's Avatar
    Join Date
    Oct 2011
    Location
    Golden, Co
    Posts
    229
    Post Thanks / Like
    Quote Originally Posted by Rasmus View Post
    Good idea. That'll work easy. Only have 2-3 mm to file out. Looking at my photos again you can tell the holes aren't centered in the tab to start with.

    Other issues with a 2.5i NA (Naturally Aspirated) intake:


    Above is the 2006 WRX mainifold. Notice the angle the injectors are mounted.


    Now the 2.5i intake. Injector mounting angle is shallower. Both photos were shot with the camera flat on my work table. So it's not an issue of me holding the camera at an angle.


    Just millimeters of clearance, and I don't even have the fuel rails installed. I hypothesize that the injector mounting angle is the primary reason they have clearance issues with the AVCS solenoids. I'll have to think on this one. Sure I can add a thick spacer in there to make room, but I worry about what the injector is pointing at. Ideally, I'd want them pointed at the intake valves. If it targets the walls of the intake, I may have to rethink this whole thing.

    In order for the 2.5I manifold to clear any head with an AVCS solenoid you will need a 5/8" or 16mm phenolic spacer. Also if you haven't noticed yet the 2.5I manifolds have a different fuel rail bolt style compared to WRX or STI topfeeds. If you need help sourcing either the spacers or some billet rails for the 2.5I manifold let me know.
    1997 RSVX Impreza Awesomeness!
    1999 RHD 22B RSTI
    2002 WRX
    2005 Saabaru
    2008 STI
    2013 FFR 818 #30

  32. #72
    Senior Member Rasmus's Avatar
    Join Date
    Mar 2012
    Location
    Las Vegas, USA
    Posts
    983
    Post Thanks / Like

    Factory Five called me yesterday. They wanted money.

    So I sent them balance I owe. My 818R should arrive in the next 2-4 weeks.

    The only options I ordered were:
    Chassis Powder Coat, black (only option)
    Kirkey Intermediate Road Race seats and covers, black, count 2
    Simpson Racing 5 point harness', black, count 2

  33. #73
    fasterer and furiouser longislandwrx's Avatar
    Join Date
    Aug 2012
    Location
    Long Island
    Posts
    2,540
    Post Thanks / Like
    Blog Entries
    6
    pay up sucka! get those 1/8" drill bits ready.
    A well stocked beverage fridge is the key to any successful project.

  34. #74
    Senior Member Brando's Avatar
    Join Date
    Oct 2013
    Location
    Irvine, Ca
    Posts
    566
    Post Thanks / Like
    Blog Entries
    1
    I'm looking forward to this thread taking flight. Rasmus, it's meant as a compliment when i say you remind me of a mad scientist.

  35. #75
    fasterer and furiouser longislandwrx's Avatar
    Join Date
    Aug 2012
    Location
    Long Island
    Posts
    2,540
    Post Thanks / Like
    Blog Entries
    6
    Quote Originally Posted by Brando View Post
    I'm looking forward to this thread taking flight. Rasmus, it's meant as a compliment when i say you remind me of a mad scientist.
    haha yup, I expected his order list to be more like:

    Quote Originally Posted by Rasmus View Post
    The only options I ordered were:
    Chassis Powder Coat, black (only option)
    Flux Capacitor, count 1
    Kirkey Intermediate Road Race seats and covers, black, count 2
    Simpson Racing 5 point harness', black, count 2
    Knight Industries Two Thousand, count 1
    A well stocked beverage fridge is the key to any successful project.

  36. #76
    Senior Member Rasmus's Avatar
    Join Date
    Mar 2012
    Location
    Las Vegas, USA
    Posts
    983
    Post Thanks / Like

    Thanks fellas. I tried to order a Flux Capacitor but they were on back order. I'll try again in the future.

  37. #77
    Senior Member Frank818's Avatar
    Join Date
    Jun 2013
    Location
    QC, Canada
    Posts
    5,732
    Post Thanks / Like
    Why don't you just go back to the future to get it?
    Oh that's right, you don't have the flux in the first place so you can't go. loll
    Frank
    818 chassis #181 powered by a '93 VW VR6 Turbo GT3582R
    Go-karted Aug 5, 2016 - Then May 19+21, 2017
    Tracked May 27/July 26, 2017
    Build time before being driveable on Sep 27, 2019: over 6000h
    Build Completed Winter 2021

  38. #78
    Senior Member flynntuna's Avatar
    Join Date
    Apr 2011
    Location
    San Diego Ca 92106
    Posts
    1,972
    Post Thanks / Like
    GREAT SCOTT!!!

  39. #79
    Administrator David Hodgkins's Avatar
    Join Date
    Feb 2011
    Location
    Corona del Mar, CA
    Posts
    6,069
    Post Thanks / Like
    Blog Entries
    7
    Quote Originally Posted by Brando View Post
    I'm looking forward to this thread taking flight. Rasmus, it's meant as a compliment when i say you remind me of a mad scientist.
    As long as he's no Rocket Scientist!

    BTW that's joke that the old time forum members will get...


    FFR 5369 Pin Drive, IRS, Trigos, Torsen, Wilwoods, FMS BOSS 302 "B" cam , Mass-flo. CA SB100 (SPCN) Registered
    Delivered 4/23/06. "Finished" 4/2012 (still not done!)


  40. #80
    Senior Member Bob_n_Cincy's Avatar
    Join Date
    Sep 2012
    Location
    Cincinnati OH
    Posts
    3,904
    Post Thanks / Like
    fluxdrive.jpg
    flux cap.jpg
    I am running a FluxDrive 7 motor controller in my 818Se.
    I do have 90 kilojoule 75 kilowatts Flux Capacitor.
    You need 1.21 gigawatts for time travel at 88 mph.
    Maybe I just need more speed.
    I'm giving her all she's got, Captain!
    Bob

Page 2 of 20 FirstFirst 123412 ... LastLast

Posting Permissions

  • You may not post new threads
  • You may not post replies
  • You may not post attachments
  • You may not edit your posts
  •  

Replica Parts

Visit our community sponsor