Boig Motorsports

Visit our community sponsor

Thanks Thanks:  8
Likes Likes:  31
Results 1 to 40 of 1012

Thread: Frank's 818R build

Hybrid View

Previous Post Previous Post   Next Post Next Post
  1. #1
    Senior Member Frank818's Avatar
    Join Date
    Jun 2013
    Location
    QC, Canada
    Posts
    5,732
    Post Thanks / Like
    Remounting the hard line bracket on the front side of the tube. That's where I fitted mine after test fitting with my custom length braided lines.
    Frank
    818 chassis #181 powered by a '93 VW VR6 Turbo GT3582R
    Go-karted Aug 5, 2016 - Then May 19+21, 2017
    Tracked May 27/July 26, 2017
    Build time before being driveable on Sep 27, 2019: over 6000h
    Build Completed Winter 2021

  2. #2
    Senior Member Pearldrummer7's Avatar
    Join Date
    Feb 2014
    Location
    Asheville, NC
    Posts
    1,230
    Post Thanks / Like
    Quote Originally Posted by Frank818 View Post
    Remounting the hard line bracket on the front side of the tube. That's where I fitted mine after test fitting with my custom length braided lines.
    I did exactly that! It fit just right now. Tightened up the brakes and I'm just about ready for wheels!


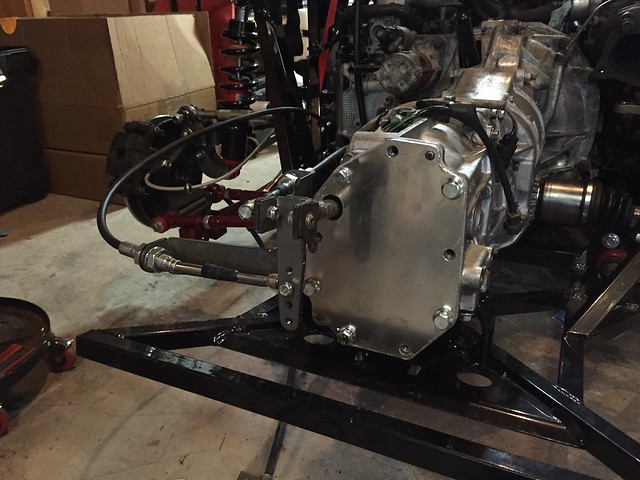
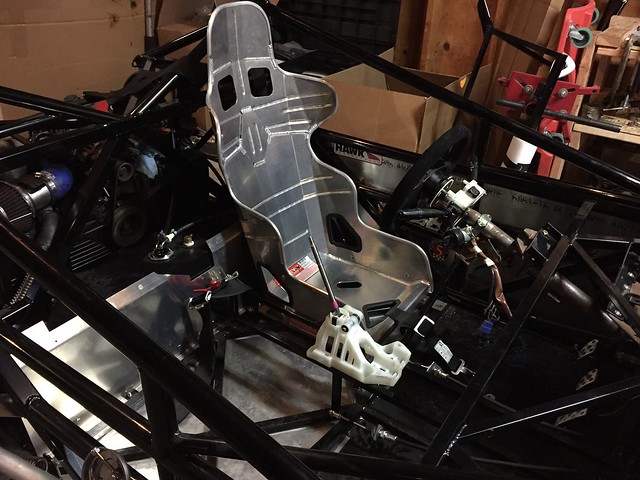
    Also got into some shifter work this weekend. Man, those cables are cool!

    Test fit with the seat so I can pretend to slam gears

  3. #3
    Senior Member Pearldrummer7's Avatar
    Join Date
    Feb 2014
    Location
    Asheville, NC
    Posts
    1,230
    Post Thanks / Like
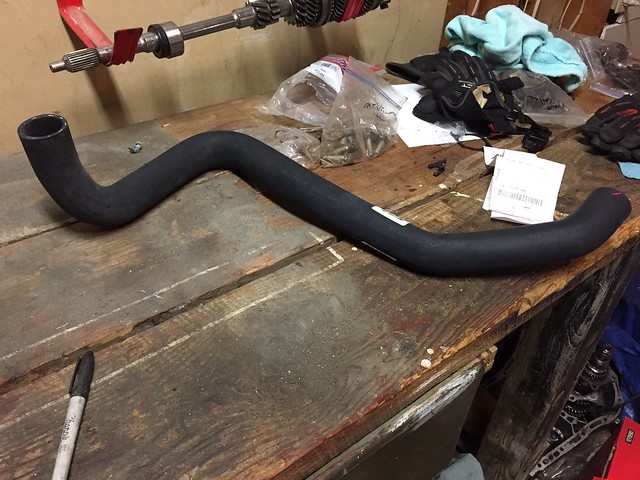
    Also found this gem of a coolant hose in Advanced Auto. It was $13 I think, and it's so long! Has some cool bend in it, too. I'm using this to reroute my coolant lines on the passenger side of the car.


  4. #4
    Senior Member TouchStone's Avatar
    Join Date
    Sep 2014
    Location
    Dallas, TX
    Posts
    512
    Post Thanks / Like
    Blog Entries
    1
    Quote Originally Posted by Pearldrummer7 View Post
    Also found this gem of a coolant hose in Advanced Auto. It was $13 I think, and it's so long! Has some cool bend in it, too. I'm using this to reroute my coolant lines on the passenger side of the car.

    Why did you route both coolant lines on the passenger side? I may want to do this as well but I'm not sure what the benefit would be.
    818S Chassis #288 2.5L 323hp
    Ordered: 9/19/14 Received Kit: 11/2/14 First Start: 5/31/15 First Drive: 6/7/15 Registered: 3/10/2016 Completed: 2/10/2017
    Status: Complete Build Thread Sold 9/22/2017
    joshuajach.com

  5. #5
    Senior Member Pearldrummer7's Avatar
    Join Date
    Feb 2014
    Location
    Asheville, NC
    Posts
    1,230
    Post Thanks / Like
    Quote Originally Posted by mikeb75 View Post
    For your ball-joint problem, I had the same issue. Used a long 1/2" impact drive extension and a mini-sledge on the threaded stud. Needed to really shock the ball joint to get it to release. Pickle fork would be an easier/nicer way to go.
    Quote Originally Posted by RM1SepEx View Post
    I used a pickle fork and wasted the boot, the ball joint was cheap
    Quote Originally Posted by Hindsight View Post
    Balljoints.... I had the same problem. This removed them quickly without even having to remove the spindle bracket from the car: http://www.harborfreight.com/3-4-qua...tor-99849.html

    I got one at the local auto parts store. Autozone didn't have them but Advance Auto Parts did. Won't damage the boot and works fast. No fiddling.
    I ended up using a pickle fork and getting it off pretty easily. They're awesome tools.

    Quote Originally Posted by TouchStone View Post
    Why did you route both coolant lines on the passenger side? I may want to do this as well but I'm not sure what the benefit would be.
    Weight distribution! I figure it helps offset the fact that I'm on the driver side. I figure besides me, there is steering and fuel filler neck, probably nearly offset by the extra exhaust stuff on the right. I bet left to right, with coolant run on the pass. side it's pretty close to even.

  6. #6
    Senior Member Pearldrummer7's Avatar
    Join Date
    Feb 2014
    Location
    Asheville, NC
    Posts
    1,230
    Post Thanks / Like
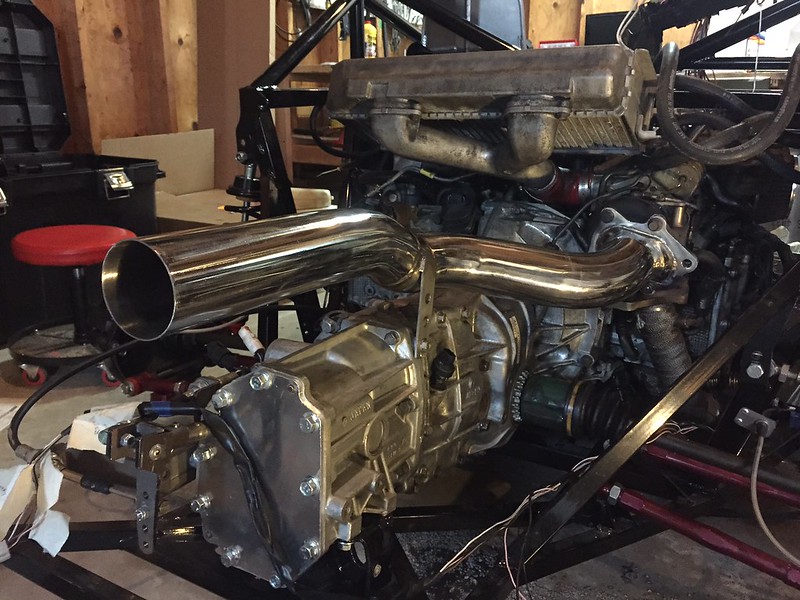
    AJW exhaust is mounted! What a beautiful exhaust! Huge thanks, guys. Waiting on installing the cat until I have the body mounted.


Tags for this Thread

Posting Permissions

  • You may not post new threads
  • You may not post replies
  • You may not post attachments
  • You may not edit your posts
  •  

Breeze

Visit our community sponsor