BluePrint Engines

Visit our community sponsor

Thanks Thanks:  1
Likes Likes:  0
Page 2 of 3 FirstFirst 123 LastLast
Results 41 to 80 of 93

Thread: Bren's Build Thread

  1. #41
    Senior Member Bren's Avatar
    Join Date
    Dec 2013
    Location
    Build: Sugar Land, TX; Live: Madison, WI
    Posts
    271
    Post Thanks / Like
    Quote Originally Posted by aks801 View Post
    LOVE reading what you've put up so far. Enjoy the process!
    While you're down here, make sure and enjoy some local grub. Larry's Mexican Restaurant, in Richmond/Rosenberg, is not far from you and is a taste of old-school Tex-Mex. Place has been open forever.
    The area has been built up so much we don't get down that way much anymore, but we used to go to Larry's all the time.
    Build Blog
    #8203, carbed 427W (611 hp), TKO 600, IRS
    Delivered: May 27, 2014
    Mechanically "Complete": October 1, 2014

  2. #42
    Senior Member Bren's Avatar
    Join Date
    Dec 2013
    Location
    Build: Sugar Land, TX; Live: Madison, WI
    Posts
    271
    Post Thanks / Like
    I know how much you guys love photos, so here are a few my engine builder just sent me:

    IMAG0767.jpg

    IMAG0769.jpg

    IMAG0770.jpg

    IMAG0771.jpg

    IMAG0772.jpg

    It should be on its way tomorrow!
    Build Blog
    #8203, carbed 427W (611 hp), TKO 600, IRS
    Delivered: May 27, 2014
    Mechanically "Complete": October 1, 2014

  3. #43
    Member aks801's Avatar
    Join Date
    Feb 2011
    Location
    Houston, TX
    Posts
    64
    Post Thanks / Like
    Pretty 427!

    Nice graph, how's that for a mighty high and flat torque curve?

  4. #44
    Senior Member 68GT500MAN's Avatar
    Join Date
    Feb 2011
    Location
    Fresno, CA
    Posts
    1,808
    Post Thanks / Like
    That looks like a very sweet engine.
    Doug

  5. #45
    Senior Member Bren's Avatar
    Join Date
    Dec 2013
    Location
    Build: Sugar Land, TX; Live: Madison, WI
    Posts
    271
    Post Thanks / Like
    Well, I was expecting the car to arrive on Thursday of this week, but on Monday, the driver called me and said that he was running a day early, so the car will arrive on Tuesday (I know, the math doesn’t add up to me either). Sure enough, the driver showed up yesterday with my kit. He couldn’t get the truck into the neighborhood, so we had to load the boxes into Dad’s truck. Then we put the chassis on the dolly and wheeled the car half of a mile in the pouring rain. But don’t worry, Dad was comfortably dry in the truck following the driver and I.

    We started inventory last night and we’re missing quite a few bits. Being so meticulous takes a long time. I plan on finishing up inventory today, and start on disassembly of the car.


    Last edited by Bren; 06-10-2014 at 11:38 AM.
    Build Blog
    #8203, carbed 427W (611 hp), TKO 600, IRS
    Delivered: May 27, 2014
    Mechanically "Complete": October 1, 2014

  6. #46
    Junior Member
    Join Date
    May 2014
    Posts
    4
    Post Thanks / Like
    Looking forward to following your build. I'm planning on getting a kit later in the year, (have to sell off toys to have room first) I'm in Fort Worth so would like to pay a visit when you get further along with your build.

    Dave

  7. #47
    Senior Member Bren's Avatar
    Join Date
    Dec 2013
    Location
    Build: Sugar Land, TX; Live: Madison, WI
    Posts
    271
    Post Thanks / Like
    Quote Originally Posted by k98dave View Post
    Looking forward to following your build. I'm planning on getting a kit later in the year, (have to sell off toys to have room first) I'm in Fort Worth so would like to pay a visit when you get further along with your build.

    Dave
    Just let me know when. I'll be here.
    Build Blog
    #8203, carbed 427W (611 hp), TKO 600, IRS
    Delivered: May 27, 2014
    Mechanically "Complete": October 1, 2014

  8. #48
    Member
    Join Date
    Sep 2013
    Posts
    76
    Post Thanks / Like
    Was Steve the truck driver?

    He and I had a nice adventure on Friday when he delivered mine...great guy.

  9. #49
    Senior Member Bren's Avatar
    Join Date
    Dec 2013
    Location
    Build: Sugar Land, TX; Live: Madison, WI
    Posts
    271
    Post Thanks / Like
    Quote Originally Posted by Pylons View Post
    Was Steve the truck driver?

    He and I had a nice adventure on Friday when he delivered mine...great guy.
    Yes, it was. He was great. We pushed the car half a mile in the pouring rain and he didn't complain one bit. In fact, he was thanking me (don't know why)! He was awesome. Very nice and VERY helpful.

    I hope your adventure wasn't problematic...
    Build Blog
    #8203, carbed 427W (611 hp), TKO 600, IRS
    Delivered: May 27, 2014
    Mechanically "Complete": October 1, 2014

  10. #50
    Member
    Join Date
    Sep 2013
    Posts
    76
    Post Thanks / Like
    Quote Originally Posted by Bren View Post
    Yes, it was. He was great. We pushed the car half a mile in the pouring rain and he didn't complain one bit. In fact, he was thanking me (don't know why)! He was awesome. Very nice and VERY helpful.

    I hope your adventure wasn't problematic...
    I live kinda out in the middle of nowhere...not the friendliest roads for a semi. And my driveway is about 3/8 mile long and gains about 200' of elevation in the last 2/3 of it. It's paved and I actually have enough room at the top to get a tractor-trailer turned around, but he couldn't make the turn at the bottom of the climb...the combination of the turn and elevation change had him losing traction and wheelhopping. He ended up being able to back onto a flat-ish part of the driveway, pull into a grassy clearing and turn around...then I brought my truck and trailer down to him. Then there was the 818 and its boxes in the way...and another roadster and its boxes in the way. It took a while, but nothing bad happened. Fortunately, we had beautiful weather.

    When Steve left Friday evening:


  11. #51
    Senior Member Bren's Avatar
    Join Date
    Dec 2013
    Location
    Build: Sugar Land, TX; Live: Madison, WI
    Posts
    271
    Post Thanks / Like
    Today was pretty uneventful. I finished up inventorying everything, including all of the aluminum panels. As we pulled them off the chassis we numbered them and took a bunch of pictures so that we know exactly where they go back on (which panels overlap which ones, where the frame touches, etc.). So, now we have the frame bare:


    It looked more like a car before we started, but at least now we’re done moving backwards and can start adding things to the frame.

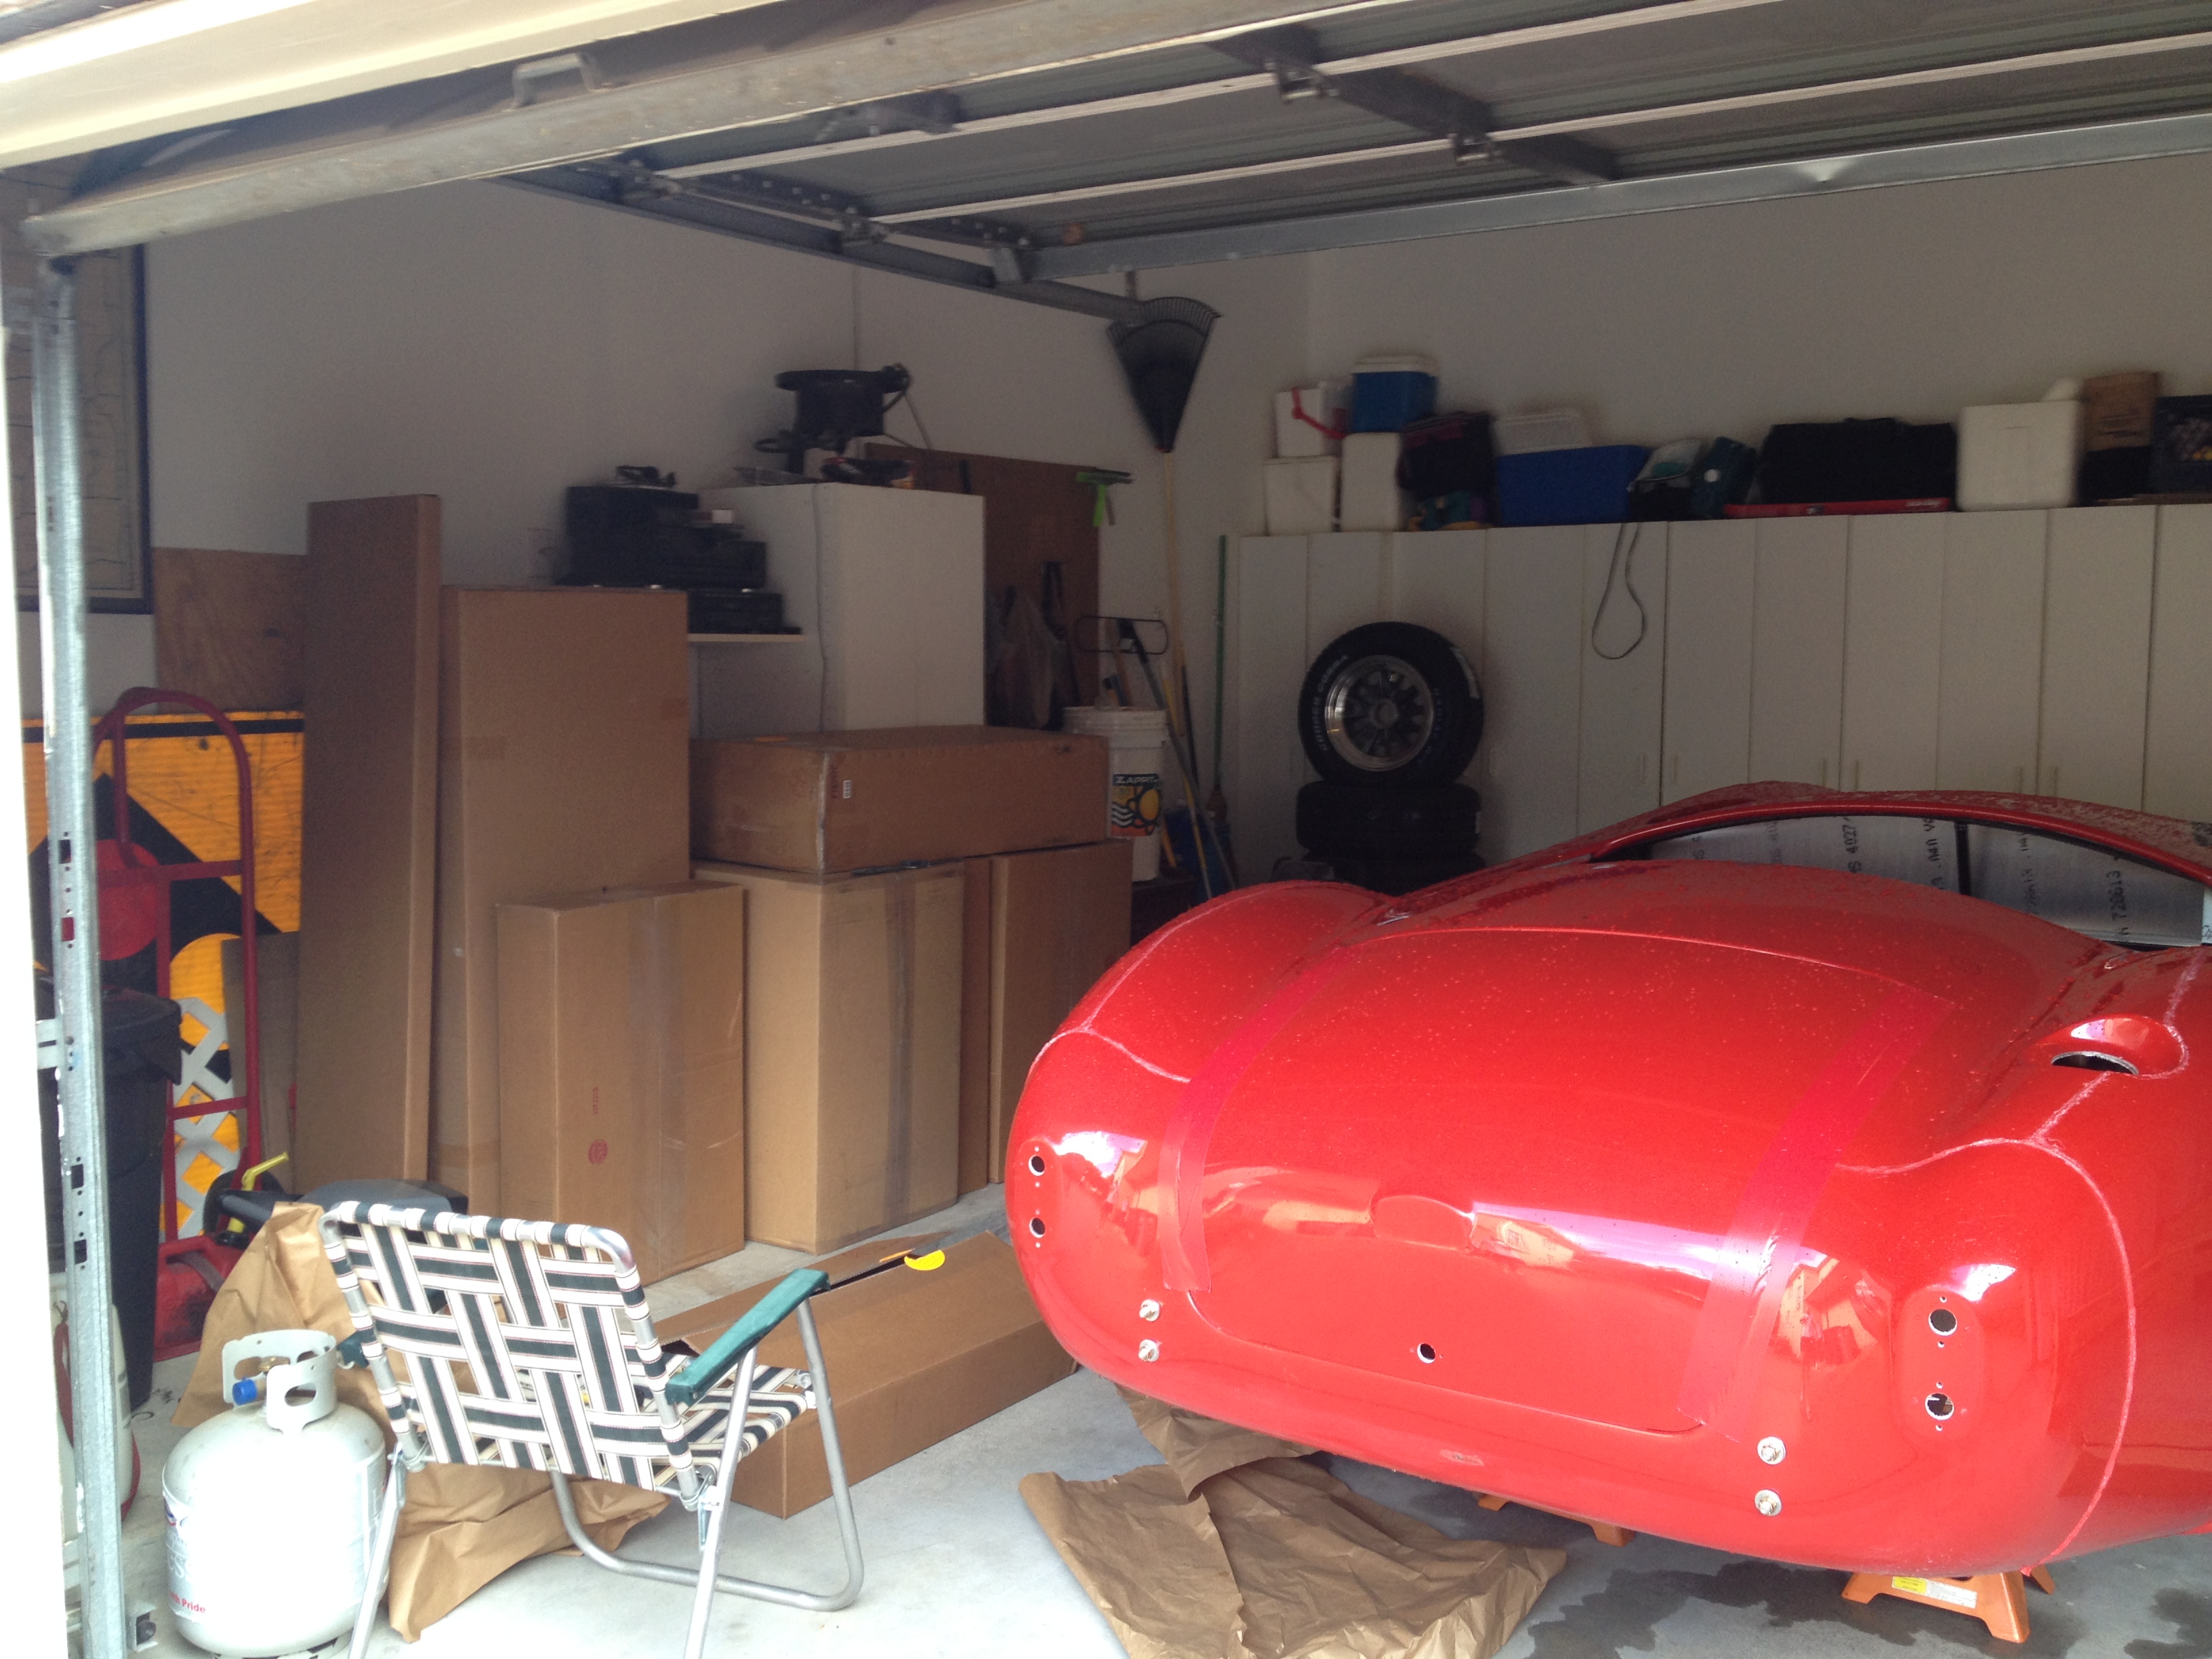
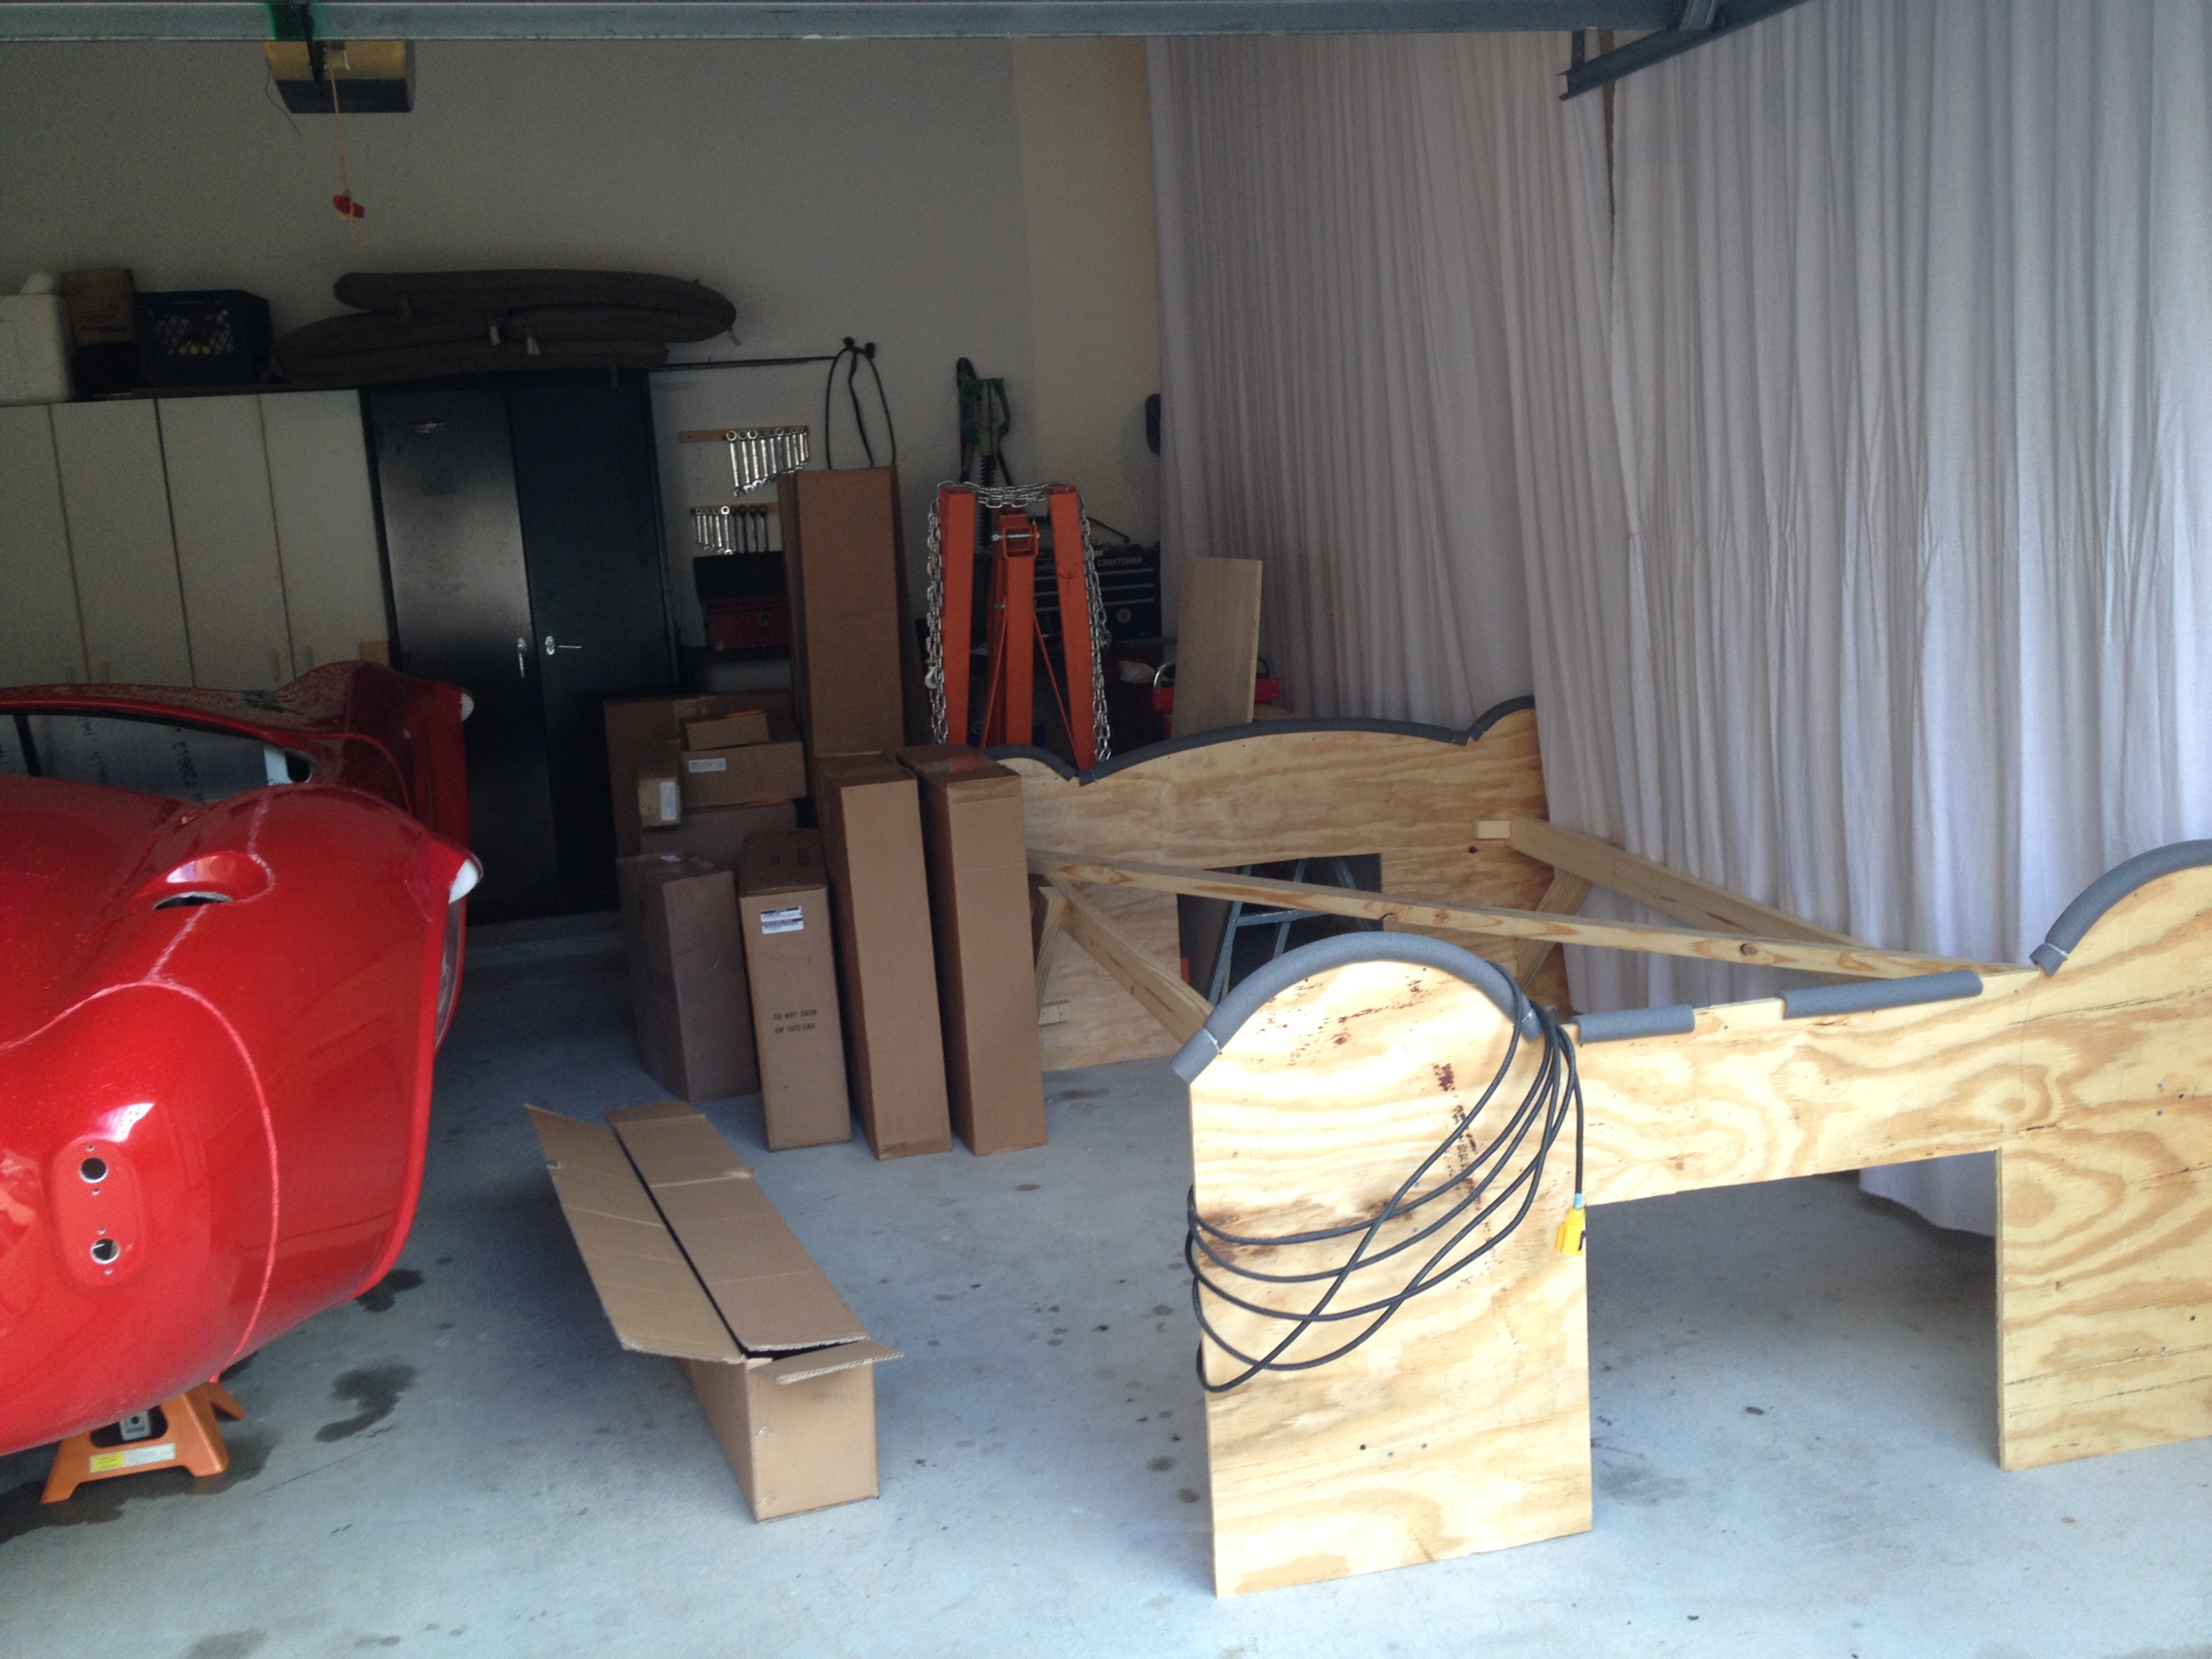
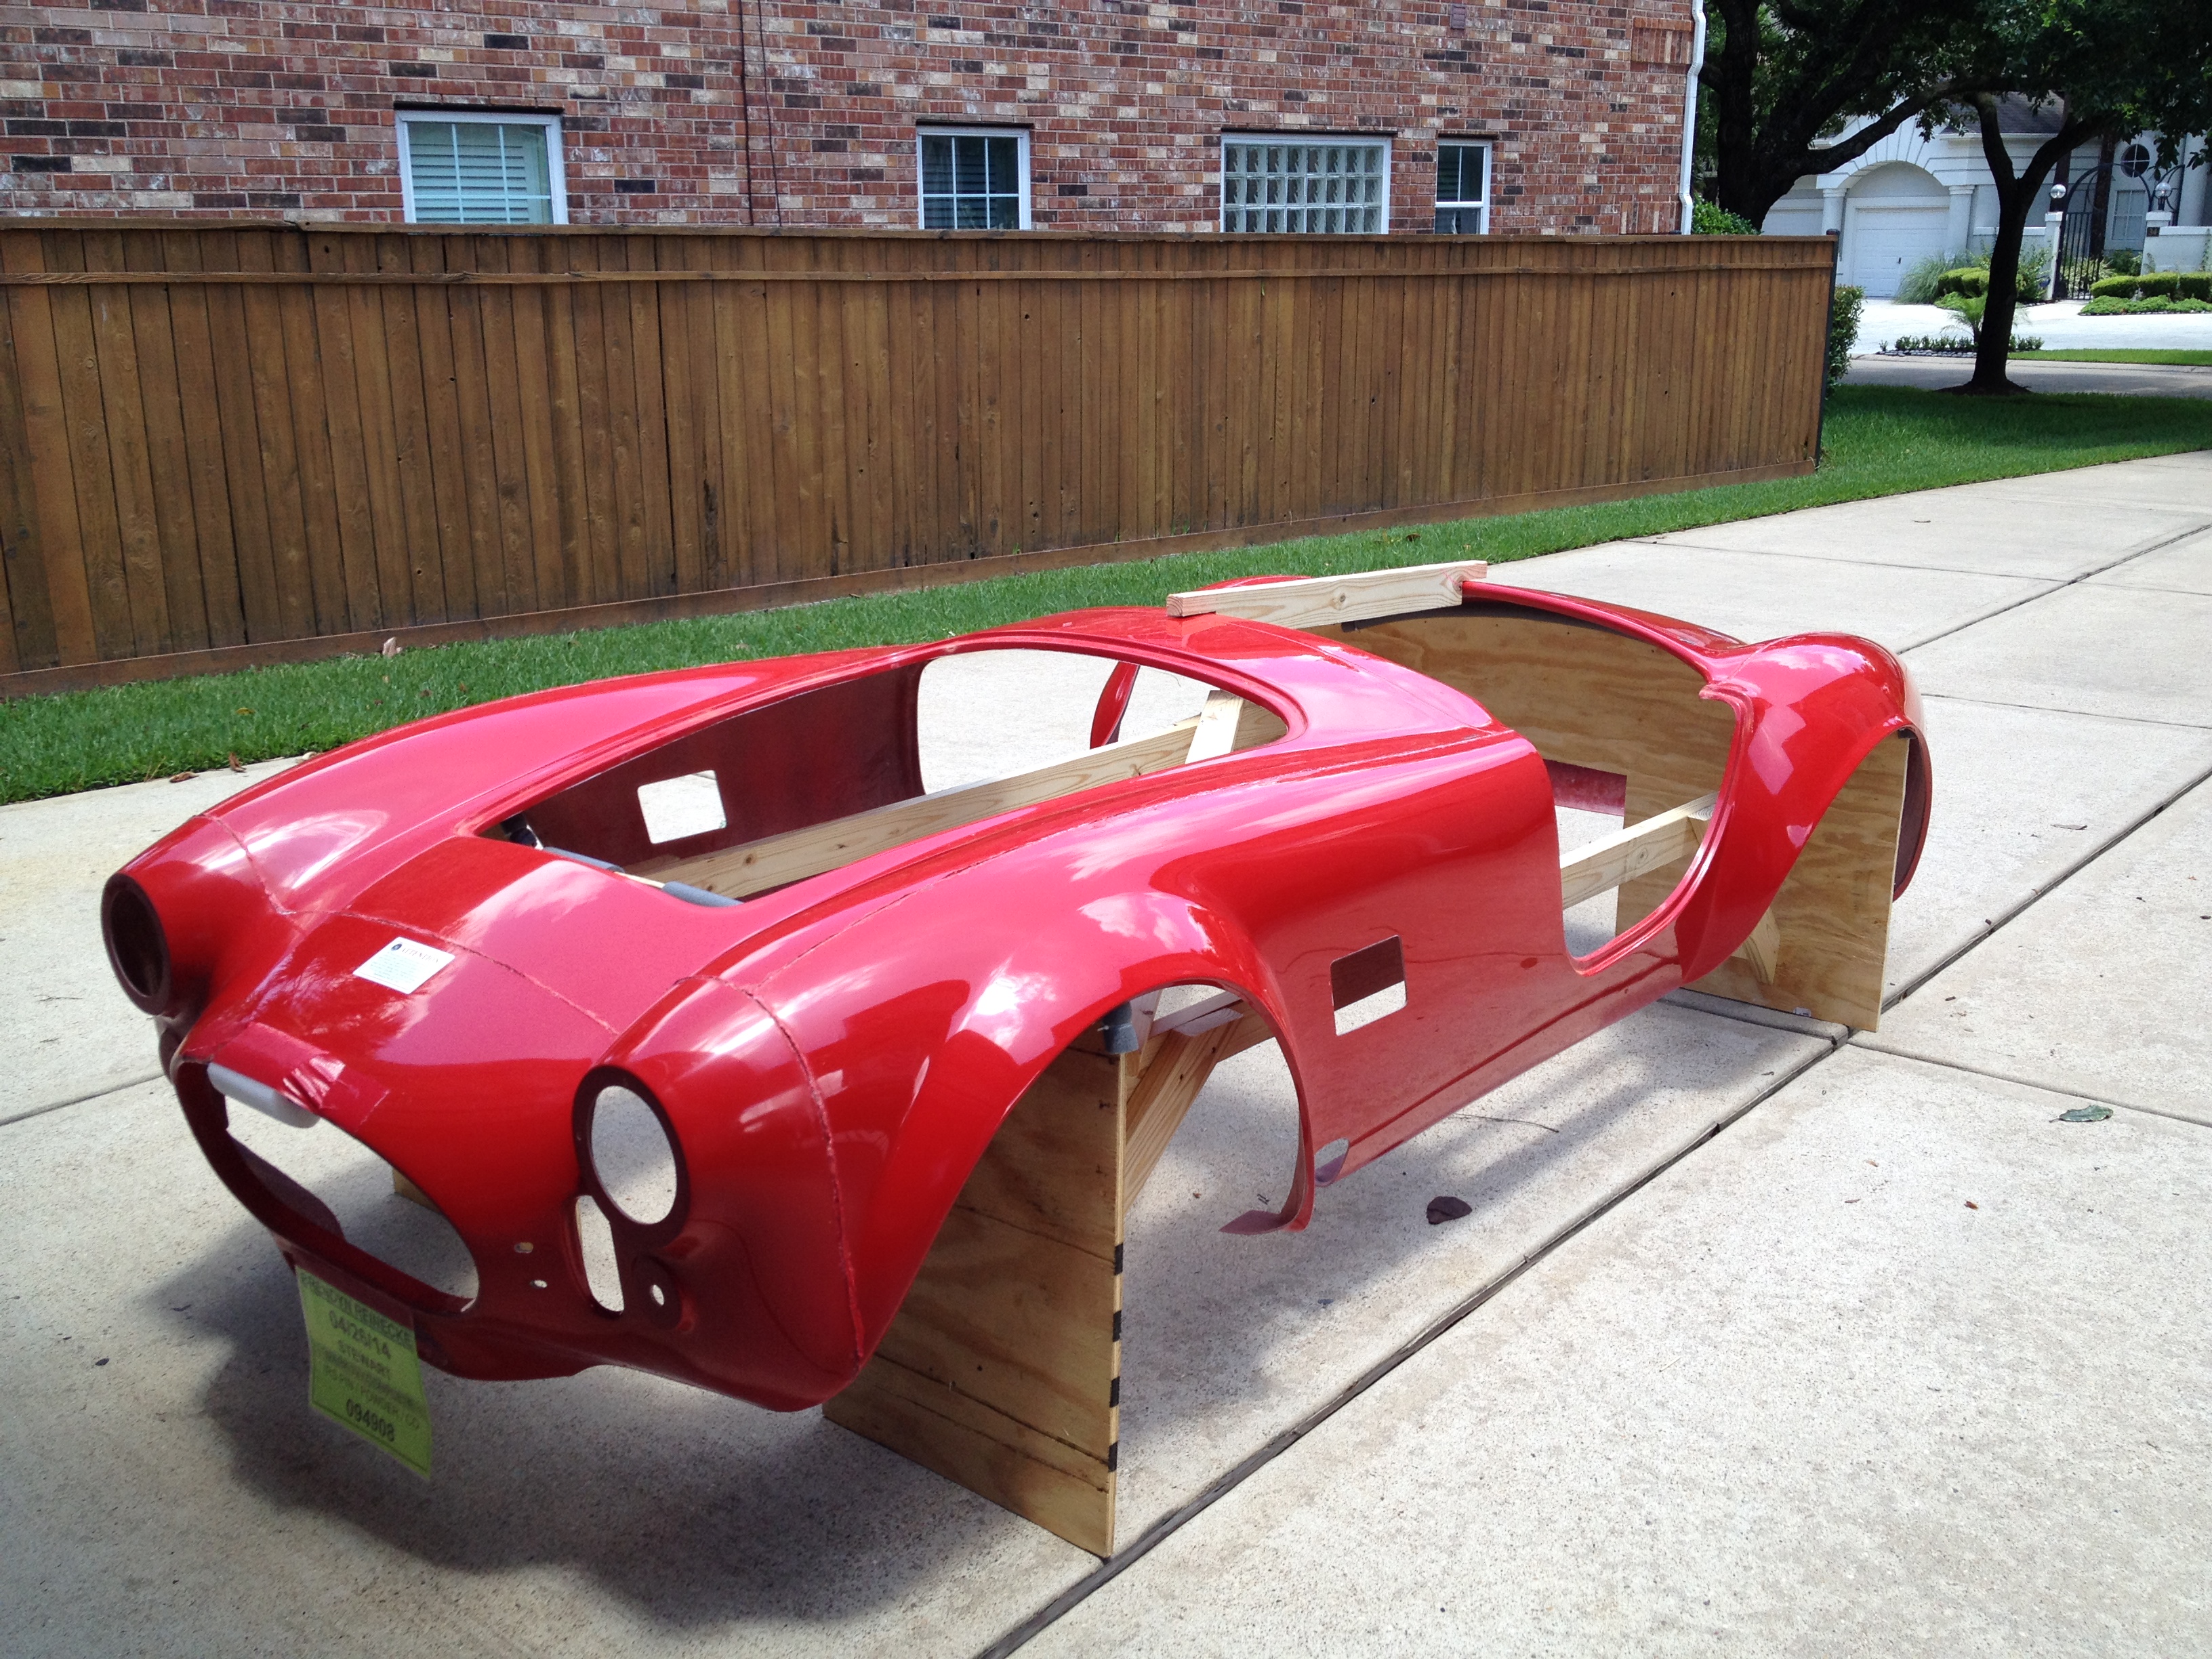
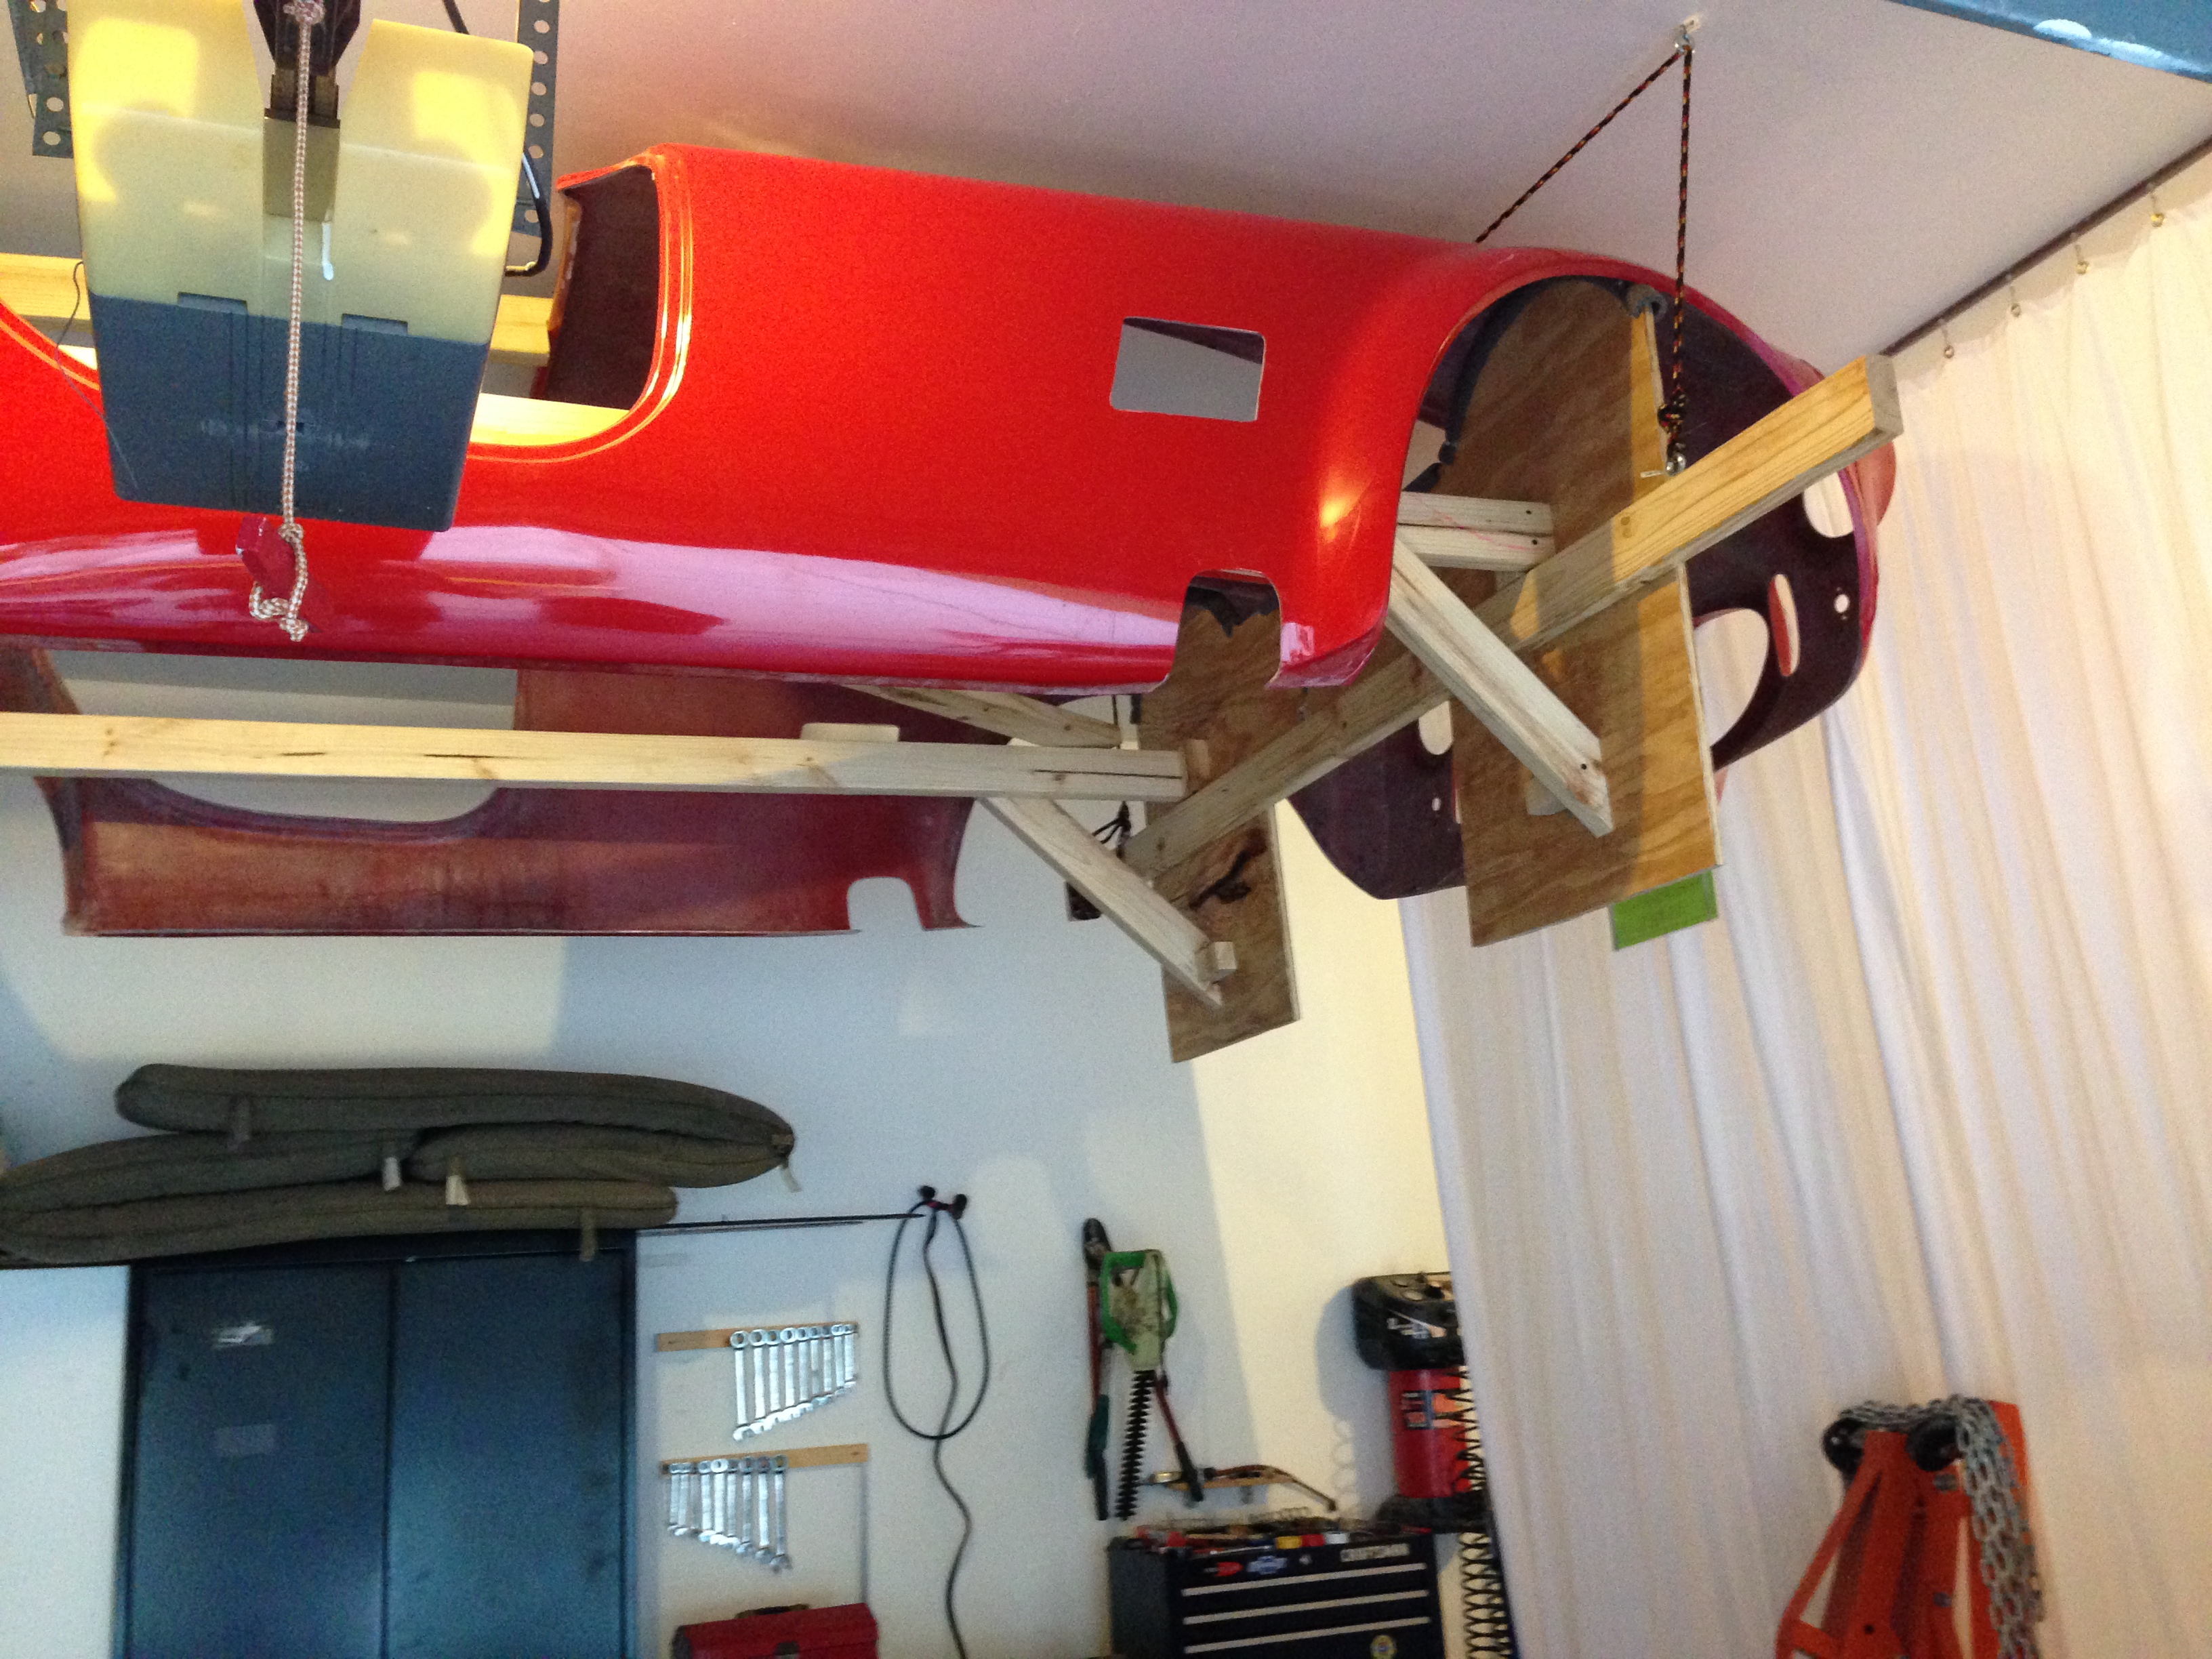
    Obviously, we also took the body off and placed it on the body buck. That part went fine, but getting it up in the air was a bit of a task. We had to hang the body from the rafters (as opposed to just the drywall, for obvious reasons), so the only place we could put it was partly above the chassis. Well, the chassis doesn’t move right now, so hanging the body without moving the chassis was a bit perplexing, but I think we did a pretty good job. At least we didn’t knock the chassis off the stands in the process.

    We got it on the buck:


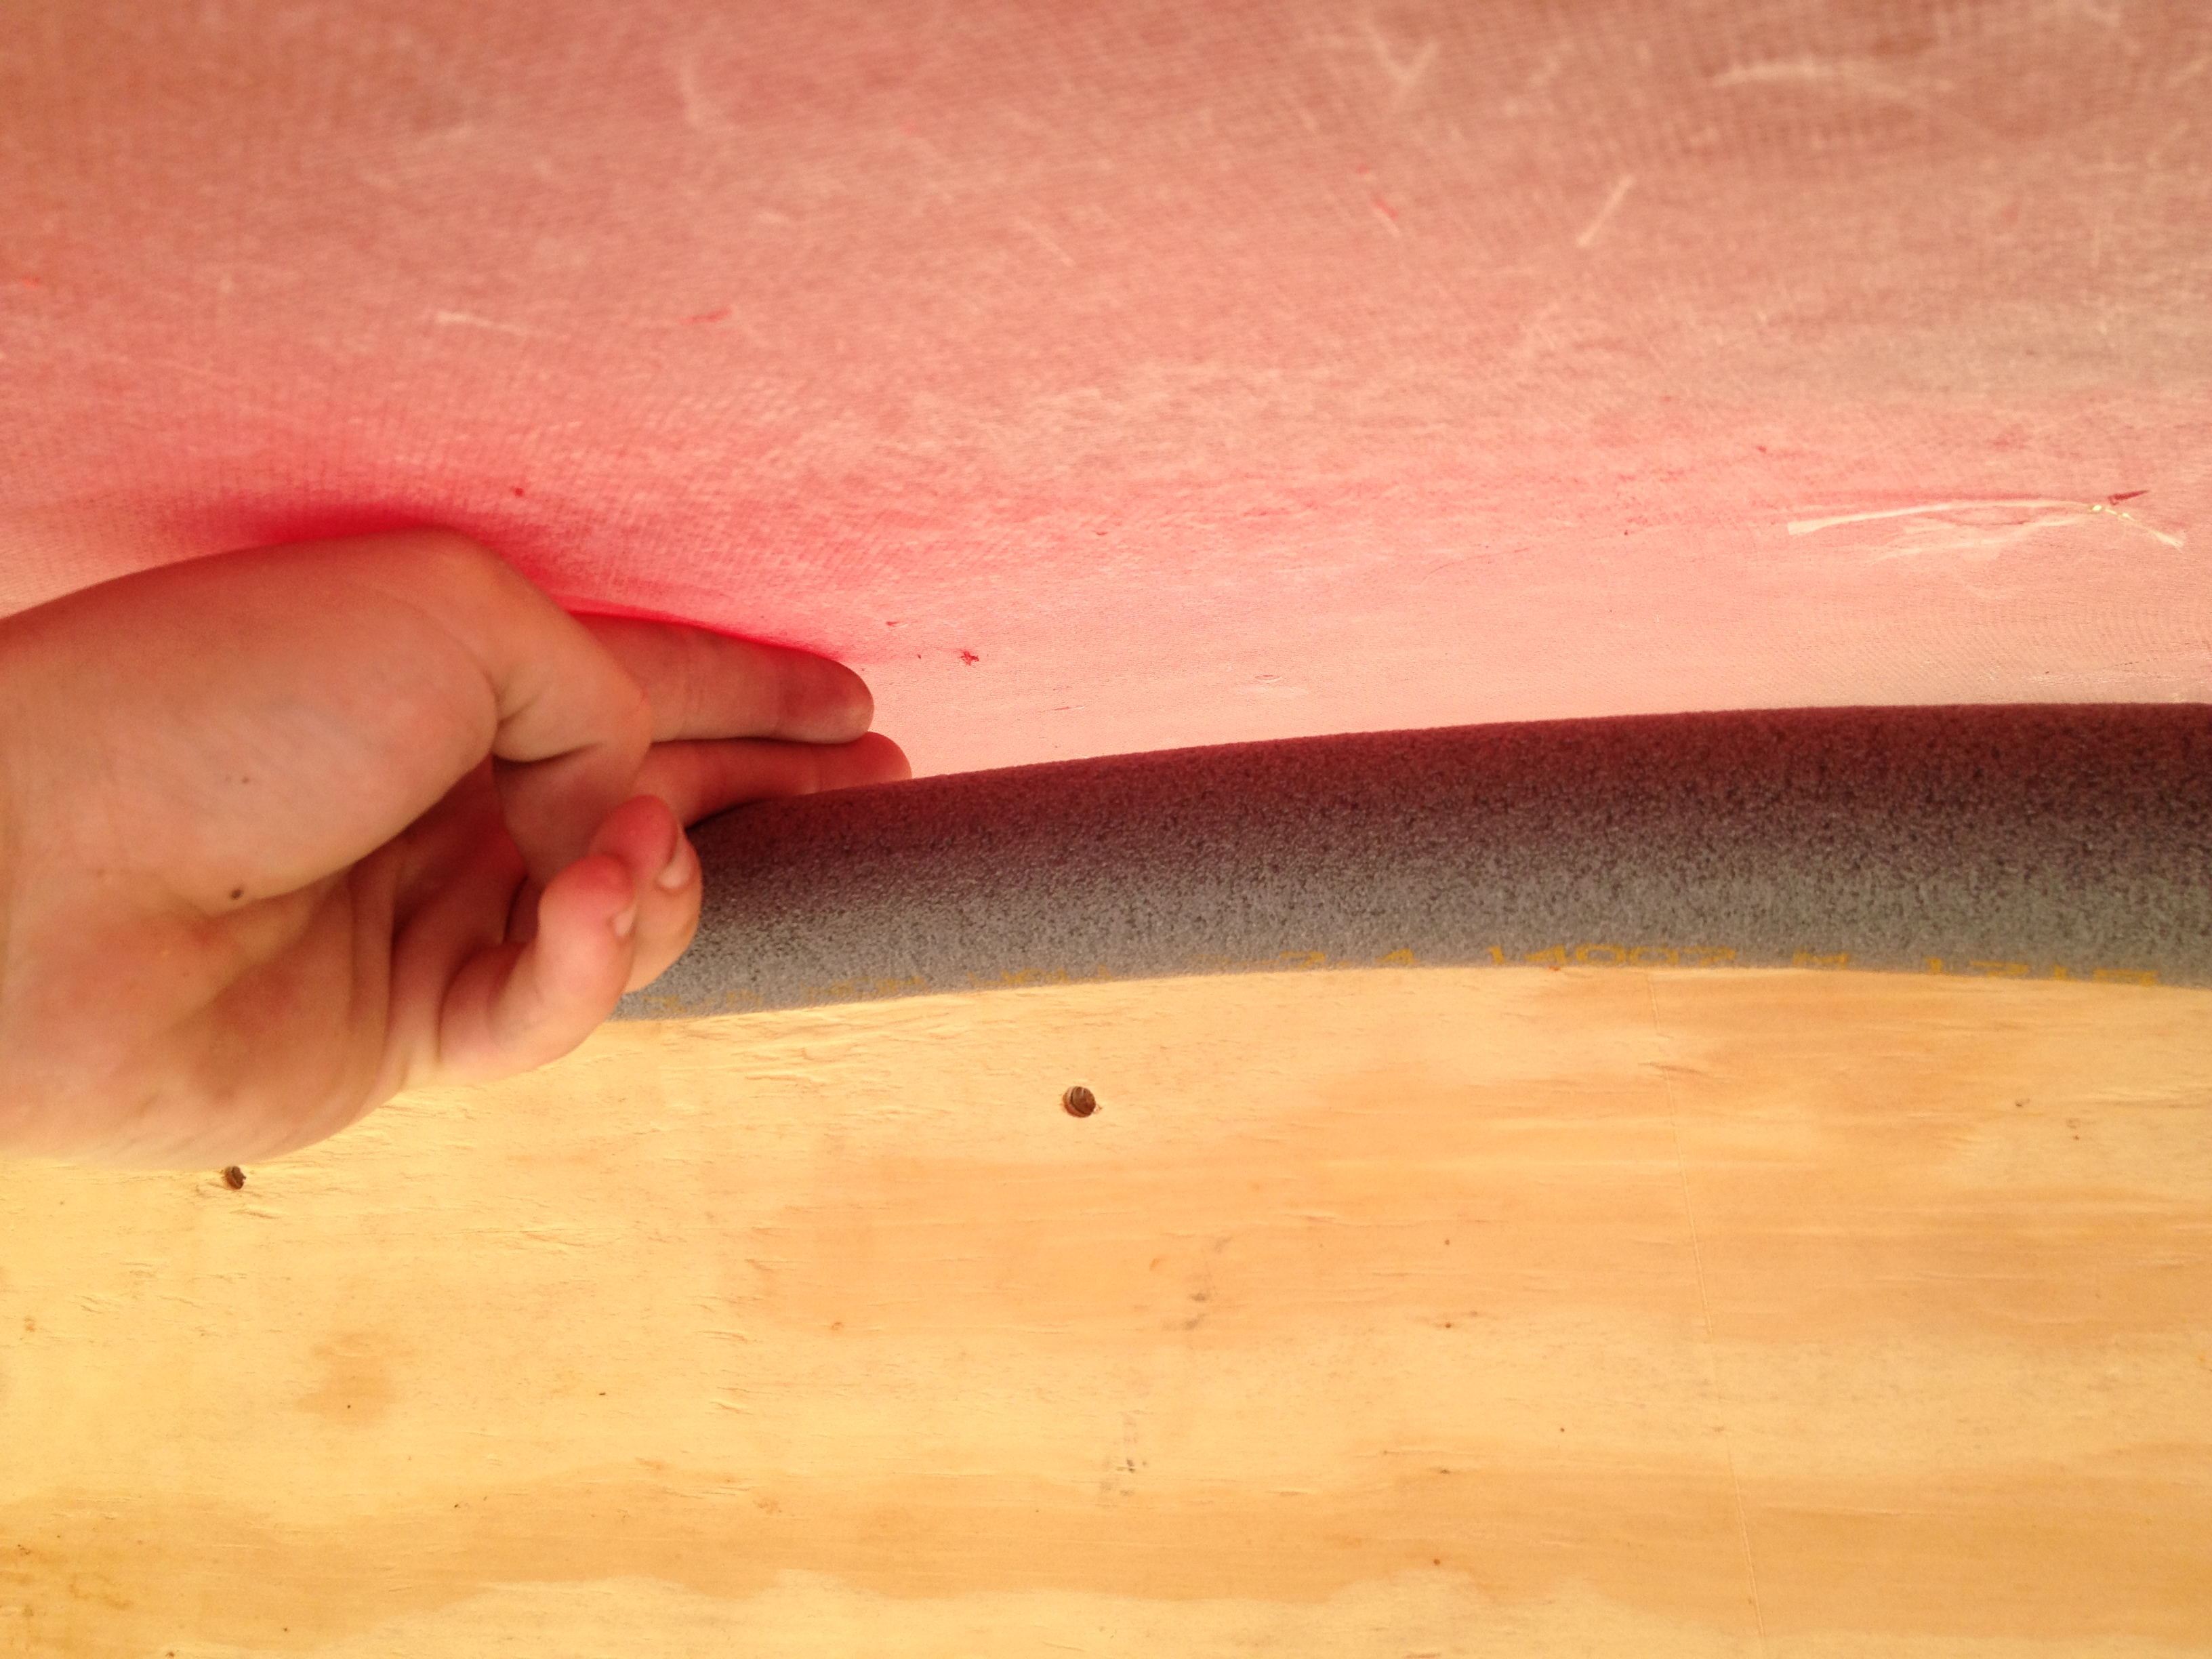
    Here’s the buck touching the front of the body:


    Here’s the back of the buck touching the body:


    Here’s the body hanging a few inches from the ceiling:


    Anyway, today I’m starting on the front suspension and I’ll call FF to let them know which parts I don’t have yet.
    Last edited by Bren; 06-10-2014 at 11:39 AM.
    Build Blog
    #8203, carbed 427W (611 hp), TKO 600, IRS
    Delivered: May 27, 2014
    Mechanically "Complete": October 1, 2014

  12. #52
    Senior Member Bren's Avatar
    Join Date
    Dec 2013
    Location
    Build: Sugar Land, TX; Live: Madison, WI
    Posts
    271
    Post Thanks / Like
    Well, I’ve been making sporadic progress on the car. Remember how I mentioned that some parts were backordered from FFR and how some of the parts just weren’t shipped properly? Well, it turns out that some of those parts are actually needed to finish the car.

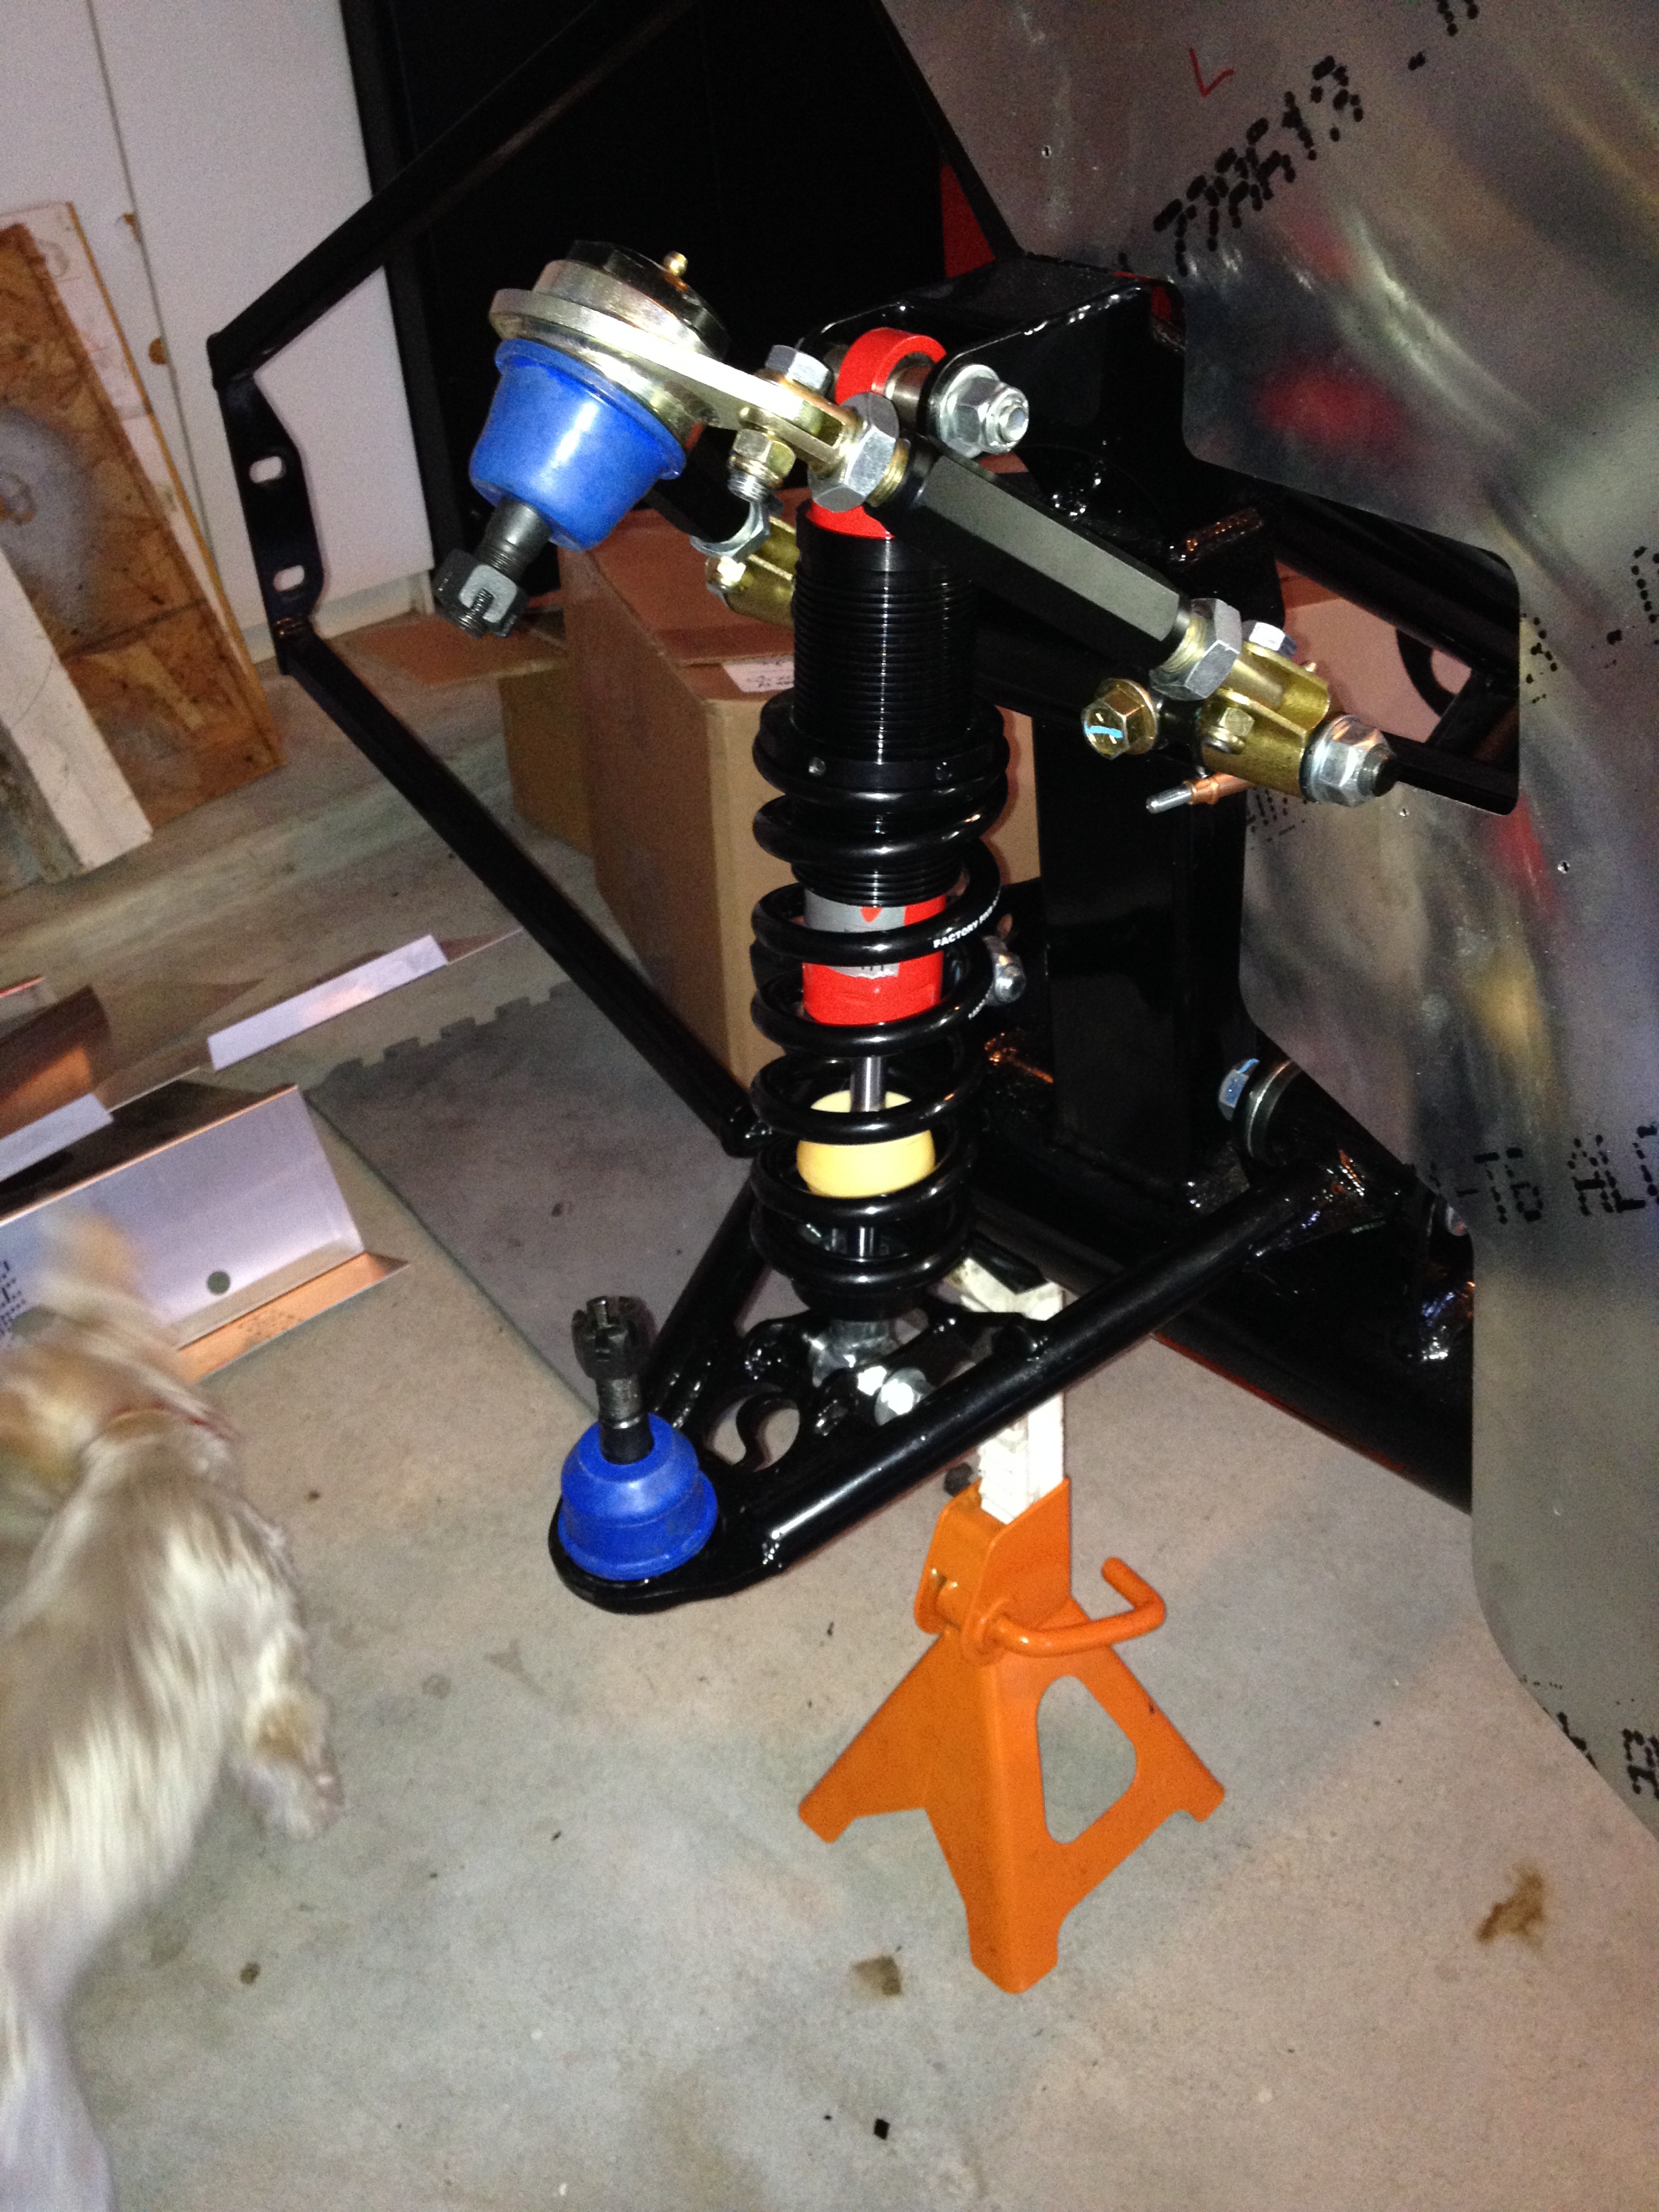
    I got started on the front suspension, but couldn’t finish because the spindles haven’t arrived yet. Then I was going to work on the rear end, but I don’t have the differential carrier bushings, so those had to be special ordered from the local parts shop (won’t be here until Monday) and I don’t have the right shocks for the rear end (mistake from FFR). Then I was going to work on the pedal box, but I don’t have it yet. So, on to the steering – another part missing.

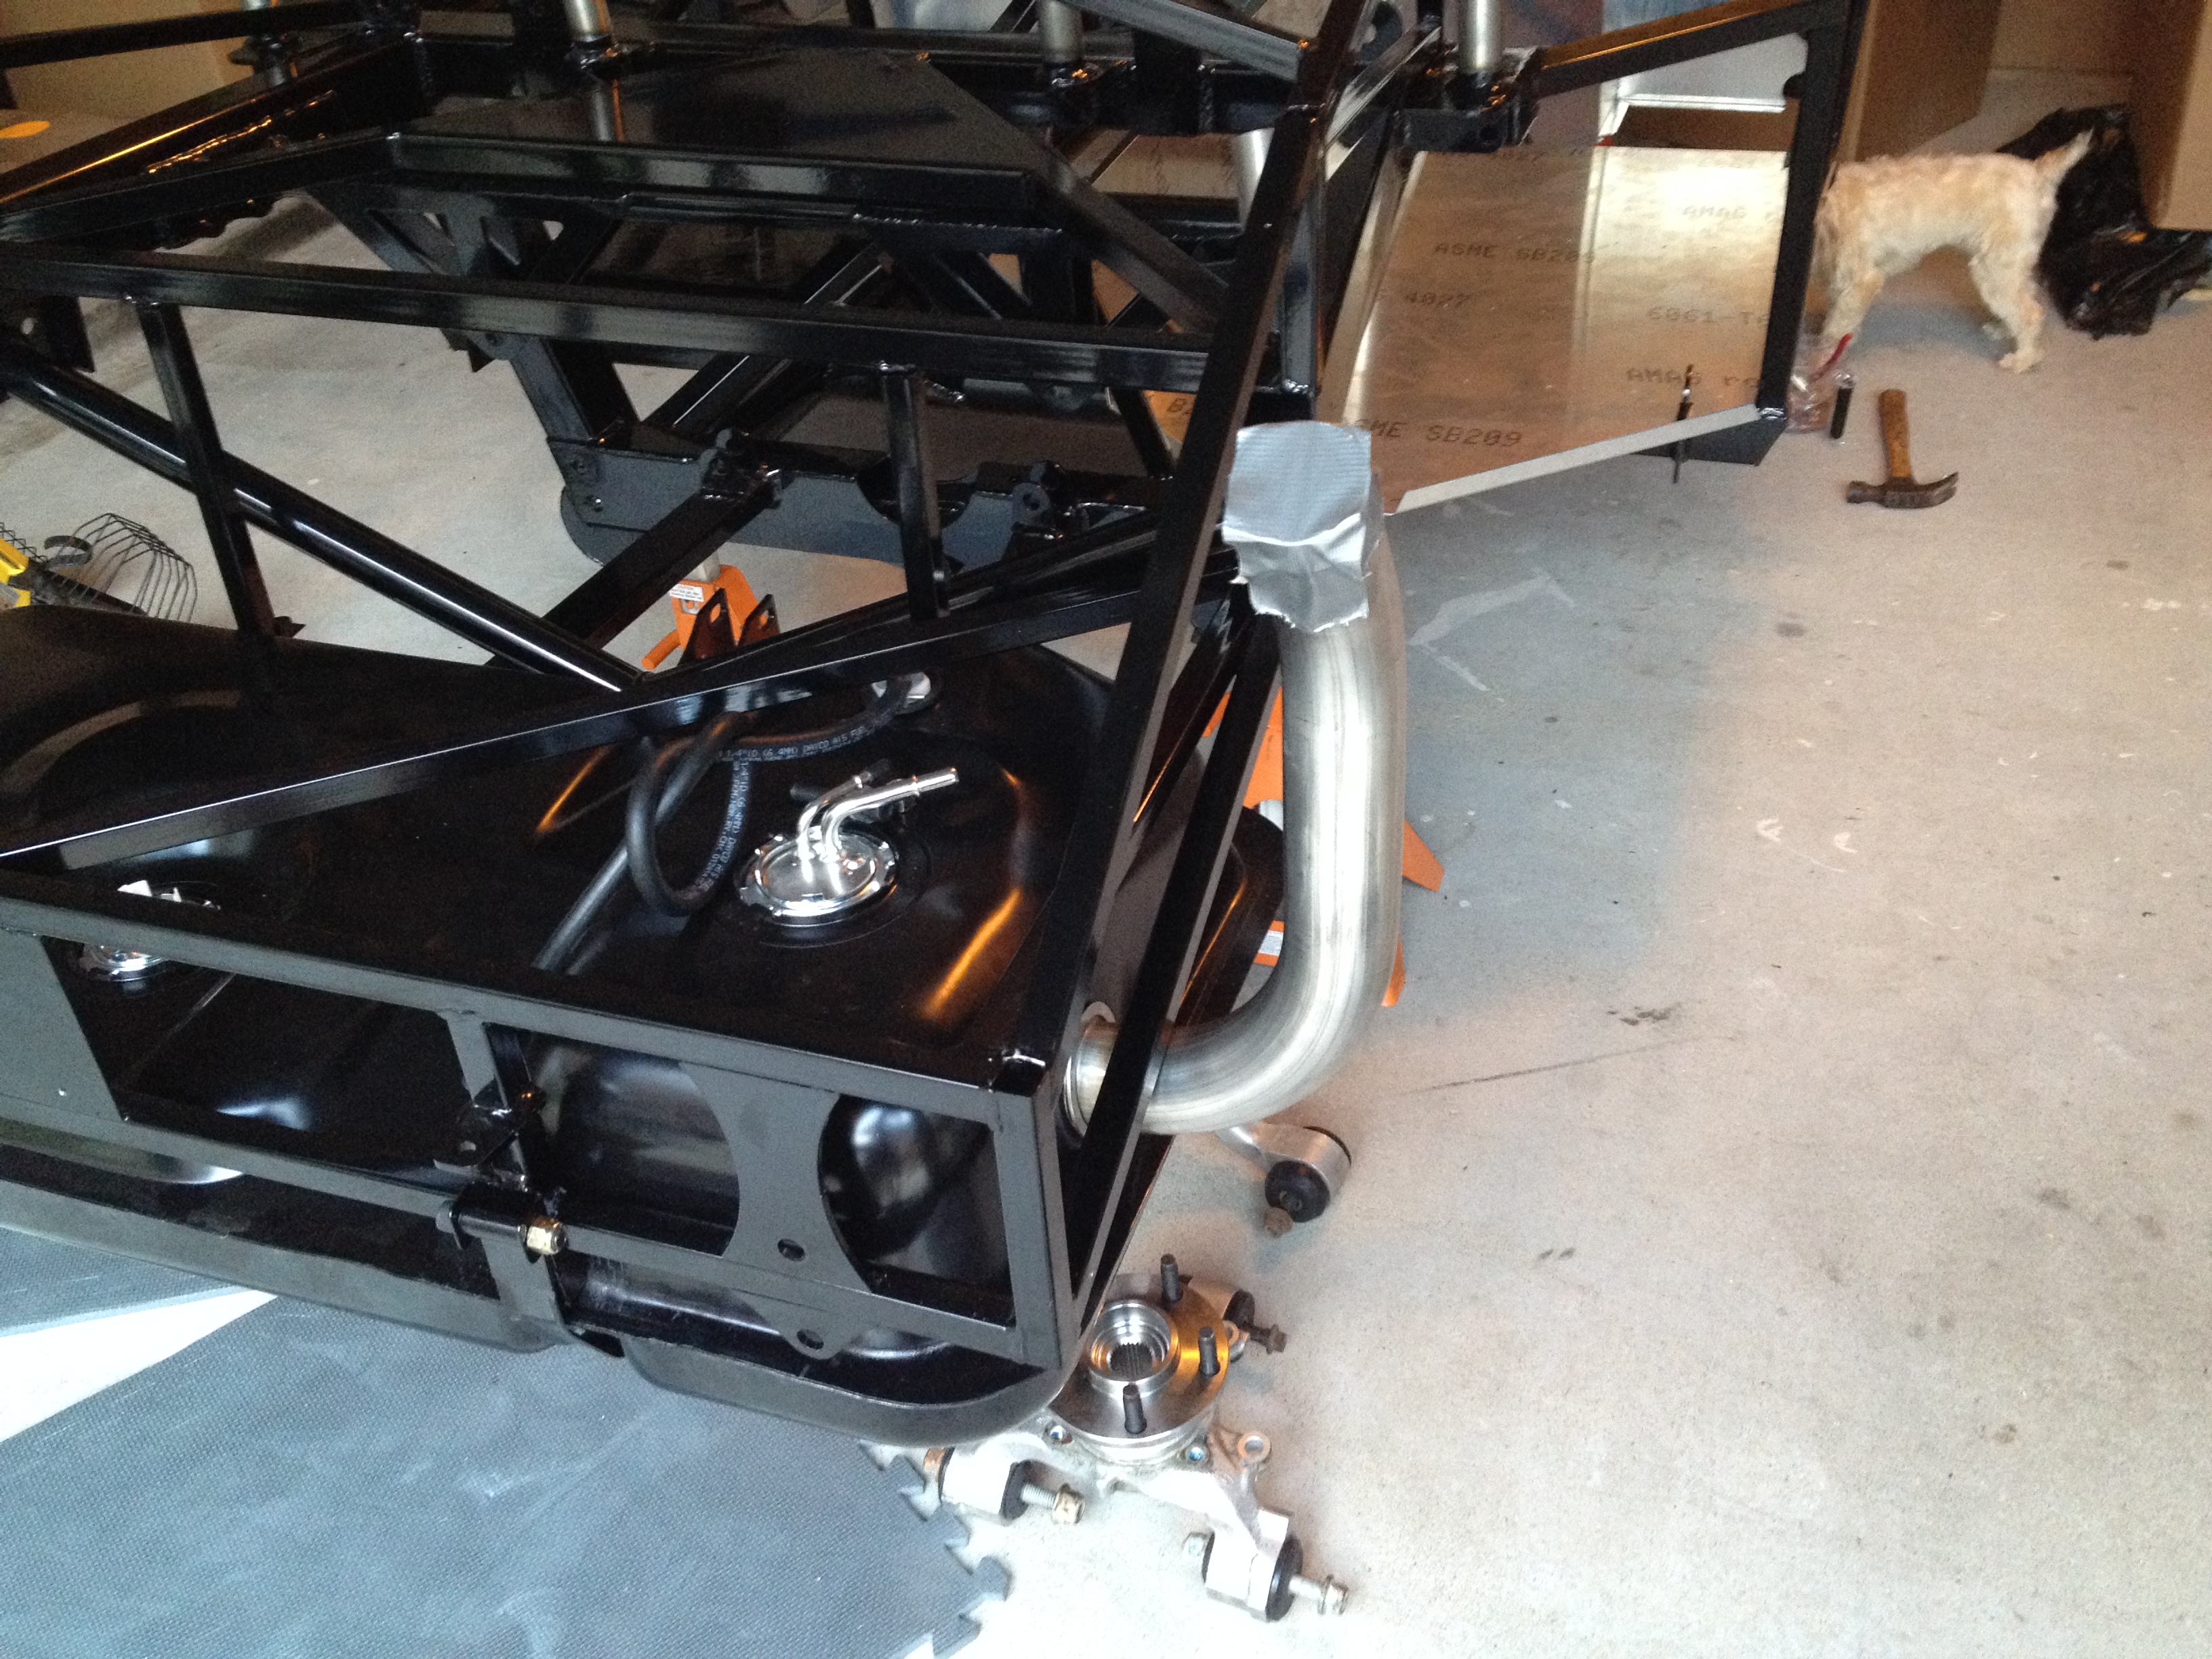
    So, Dad and I moved on to installing the fuel tank. It was a pain in the *** to get the passenger side strap bolted down. We’ve come to the realization that we need to buy a bolt that’s just a bit (1/2″) longer. This realization came after beating on the gas tank to make it fit snugger in the frame, and straining to get the bolt to reach.

    After that, we started working on getting the cockpit aluminum fitted. We’re still working on that.

    In other news, the engine was delivered last night! It looks great and I can’t wait to get that thing in the car! Here’s the progress we’ve made so far:


    Here's where we need the longer bolt:


    So far it's been a lot of fun. Sometimes frustrating, but fun. I'm still excited that I get to do this project and I'm constantly looking forward to making more progress (e.g., I woke up at 5:30 this morning and couldn't fall back asleep because I kept thinking about the car). My body hurts when I wake up from all of the physical labor, but it's fun nonetheless.
    Last edited by Bren; 06-10-2014 at 11:39 AM.
    Build Blog
    #8203, carbed 427W (611 hp), TKO 600, IRS
    Delivered: May 27, 2014
    Mechanically "Complete": October 1, 2014

  13. #53
    Senior Member edwardb's Avatar
    Join Date
    Feb 2011
    Location
    Lake Orion, Michigan
    Posts
    10,578
    Post Thanks / Like
    The too short bolt for the gas tank straps is a commonly reported problem. Pretty easy fix with a longer bolt. Something I would suggest before beating on the gas tank. Just a build hint -- any time something doesn't work as intended, expected, instructed, whatever -- stop and check your work and maybe also search the forums. Probably has been reported before and probably has an agreed solution. Many times I thought something was wrong, needed to be "adjusted" or whatever and found out I was the problem. Sometimes the best solution is to step back, take a breath, and think about it some. I've had some evenings where nothing was going right and the best solution was just to walk away for a time. With a clear head the next day (or whenever) everything magically worked out.

    Looks like your gas tank filler tube is clearing the chassis frame OK. That's another area of interference some (including me) had to deal with. Can't tell for sure. Do you have the rubber doughnut seal in the gas tank hole for the filler tube? Needless to say, that's a critical part.
    Build 1: Mk3 Roadster #5125. Sold 11/08/2014. Build 2: Mk4 Roadster #7750. Sold 04/10/2017. Build Thread
    Build 3: Mk4 Roadster 20th Anniversary #8674. Sold 09/07/2020. Build Thread and Video. Build 4: Gen 3 Type 65 Coupe #59. Gen 3 Coyote. Legal 03/04/2020. Build Thread and Video
    Build 5: 35 Hot Rod Truck #138. LS3 and 4L65E auto. Rcvd 01/05/2021. Legal 04/20/2023. Build Thread. Sold 11/9/2023.

  14. #54
    Senior Member Bren's Avatar
    Join Date
    Dec 2013
    Location
    Build: Sugar Land, TX; Live: Madison, WI
    Posts
    271
    Post Thanks / Like
    Quote Originally Posted by edwardb View Post
    The too short bolt for the gas tank straps is a commonly reported problem. Pretty easy fix with a longer bolt. Something I would suggest before beating on the gas tank. Just a build hint -- any time something doesn't work as intended, expected, instructed, whatever -- stop and check your work and maybe also search the forums. Probably has been reported before and probably has an agreed solution. Many times I thought something was wrong, needed to be "adjusted" or whatever and found out I was the problem. Sometimes the best solution is to step back, take a breath, and think about it some. I've had some evenings where nothing was going right and the best solution was just to walk away for a time. With a clear head the next day (or whenever) everything magically worked out.

    Looks like your gas tank filler tube is clearing the chassis frame OK. That's another area of interference some (including me) had to deal with. Can't tell for sure. Do you have the rubber doughnut seal in the gas tank hole for the filler tube? Needless to say, that's a critical part.
    Yeah, it was so close it looked like we just needed to bend the tank a bit. We got the longer bolt and it works fine.

    We have the seal in the gas tank with the filler tube. I didn't notice a problem, but I'll double check. Thanks for that.
    Build Blog
    #8203, carbed 427W (611 hp), TKO 600, IRS
    Delivered: May 27, 2014
    Mechanically "Complete": October 1, 2014

  15. #55
    2bking's Avatar
    Join Date
    Jul 2013
    Location
    Garland, Texas
    Posts
    799
    Post Thanks / Like
    I had the same gas tank strap problem and the IRS frame interferes with the strap tab end. I couldn't solve that one - it's just going to rub there and makes tightening the bolt harder. Another inch of strap length would fix both problems.

    When you get to the installation of the rear shock on the LCA, the bushings used to space the shock on the bolt are wrong. You will need to make new ones of equal length, 3/4" long if I remember right. Otherwise the shock contacts and binds the LCA at end of travel.
    King
    Roadster #8127, ordered 7/12/13, received 9/11/13
    http://thefactoryfiveforum.com/showt...4-Coyote-Build

  16. #56
    Senior Member Bren's Avatar
    Join Date
    Dec 2013
    Location
    Build: Sugar Land, TX; Live: Madison, WI
    Posts
    271
    Post Thanks / Like
    Quote Originally Posted by 2bking View Post
    When you get to the installation of the rear shock on the LCA, the bushings used to space the shock on the bolt are wrong. You will need to make new ones of equal length, 3/4" long if I remember right. Otherwise the shock contacts and binds the LCA at end of travel.
    Thanks for the heads up. I'm sure you just saved me about an hour of frustrated cursing.
    Build Blog
    #8203, carbed 427W (611 hp), TKO 600, IRS
    Delivered: May 27, 2014
    Mechanically "Complete": October 1, 2014

  17. #57
    Senior Member Bren's Avatar
    Join Date
    Dec 2013
    Location
    Build: Sugar Land, TX; Live: Madison, WI
    Posts
    271
    Post Thanks / Like
    Well, progress has come to a complete halt for now. When Dad and I were lifting the body to the ceiling, I probably hurt my shoulder. At first I thought it was just muscle pain, like the pain after a tough workout. It didn’t get any better, and then it started getting worse. Yesterday I couldn’t hardly use my right arm at all. I saw a doctor today and he said it was inflammation in my shoulder (rotator cuff) from working it so hard after I haven’t been to the gym in years. I got a shot, and I can start using it in a few days, and should be back to 100% in a week and a half, or so. But, until then, I’m stuck inside wishing I was working on the car.

    Before the pain got too bad, I was able to get most of the aluminum panels on the car. I ordered brake and fuel Cunifer (off brand) lines from Amazon, which should be in today. I also ordered rear brakes, flexible fuel line and connections, some sheet metal extras (trunk battery box, under dash support, etc.), a pulley kit, and an alternator. I was going to try to make the sheet metal stuff myself, but the prices of sheet aluminum is really expensive, especially compared to the cost of the vendor’s products. I should be getting close to getting everything bought (I still need a starter). I did NOT think it was going to cost this much, but there’s nothing I can do now.

    Anyway, I can watch Dad do some work for now. In a few days I can start doing light work. Until then, I’ll be inside with ants in my pants.
    Build Blog
    #8203, carbed 427W (611 hp), TKO 600, IRS
    Delivered: May 27, 2014
    Mechanically "Complete": October 1, 2014

  18. #58
    Senior Member Bren's Avatar
    Join Date
    Dec 2013
    Location
    Build: Sugar Land, TX; Live: Madison, WI
    Posts
    271
    Post Thanks / Like
    Well, I can move my shoulder again, so of course I’ve been working on the car. My biggest frustration lately has been buying parts that don’t fit. For example, I bought a pulley kit for the engine, but the bolt holes on the water pump didn’t fit. I also bought an alternator, but the mounting bolts were the wrong pattern. I bought some brakes for a Mustang, but they didn’t fit properly on my calipers. It seems like it’s always two steps forward, one step back.

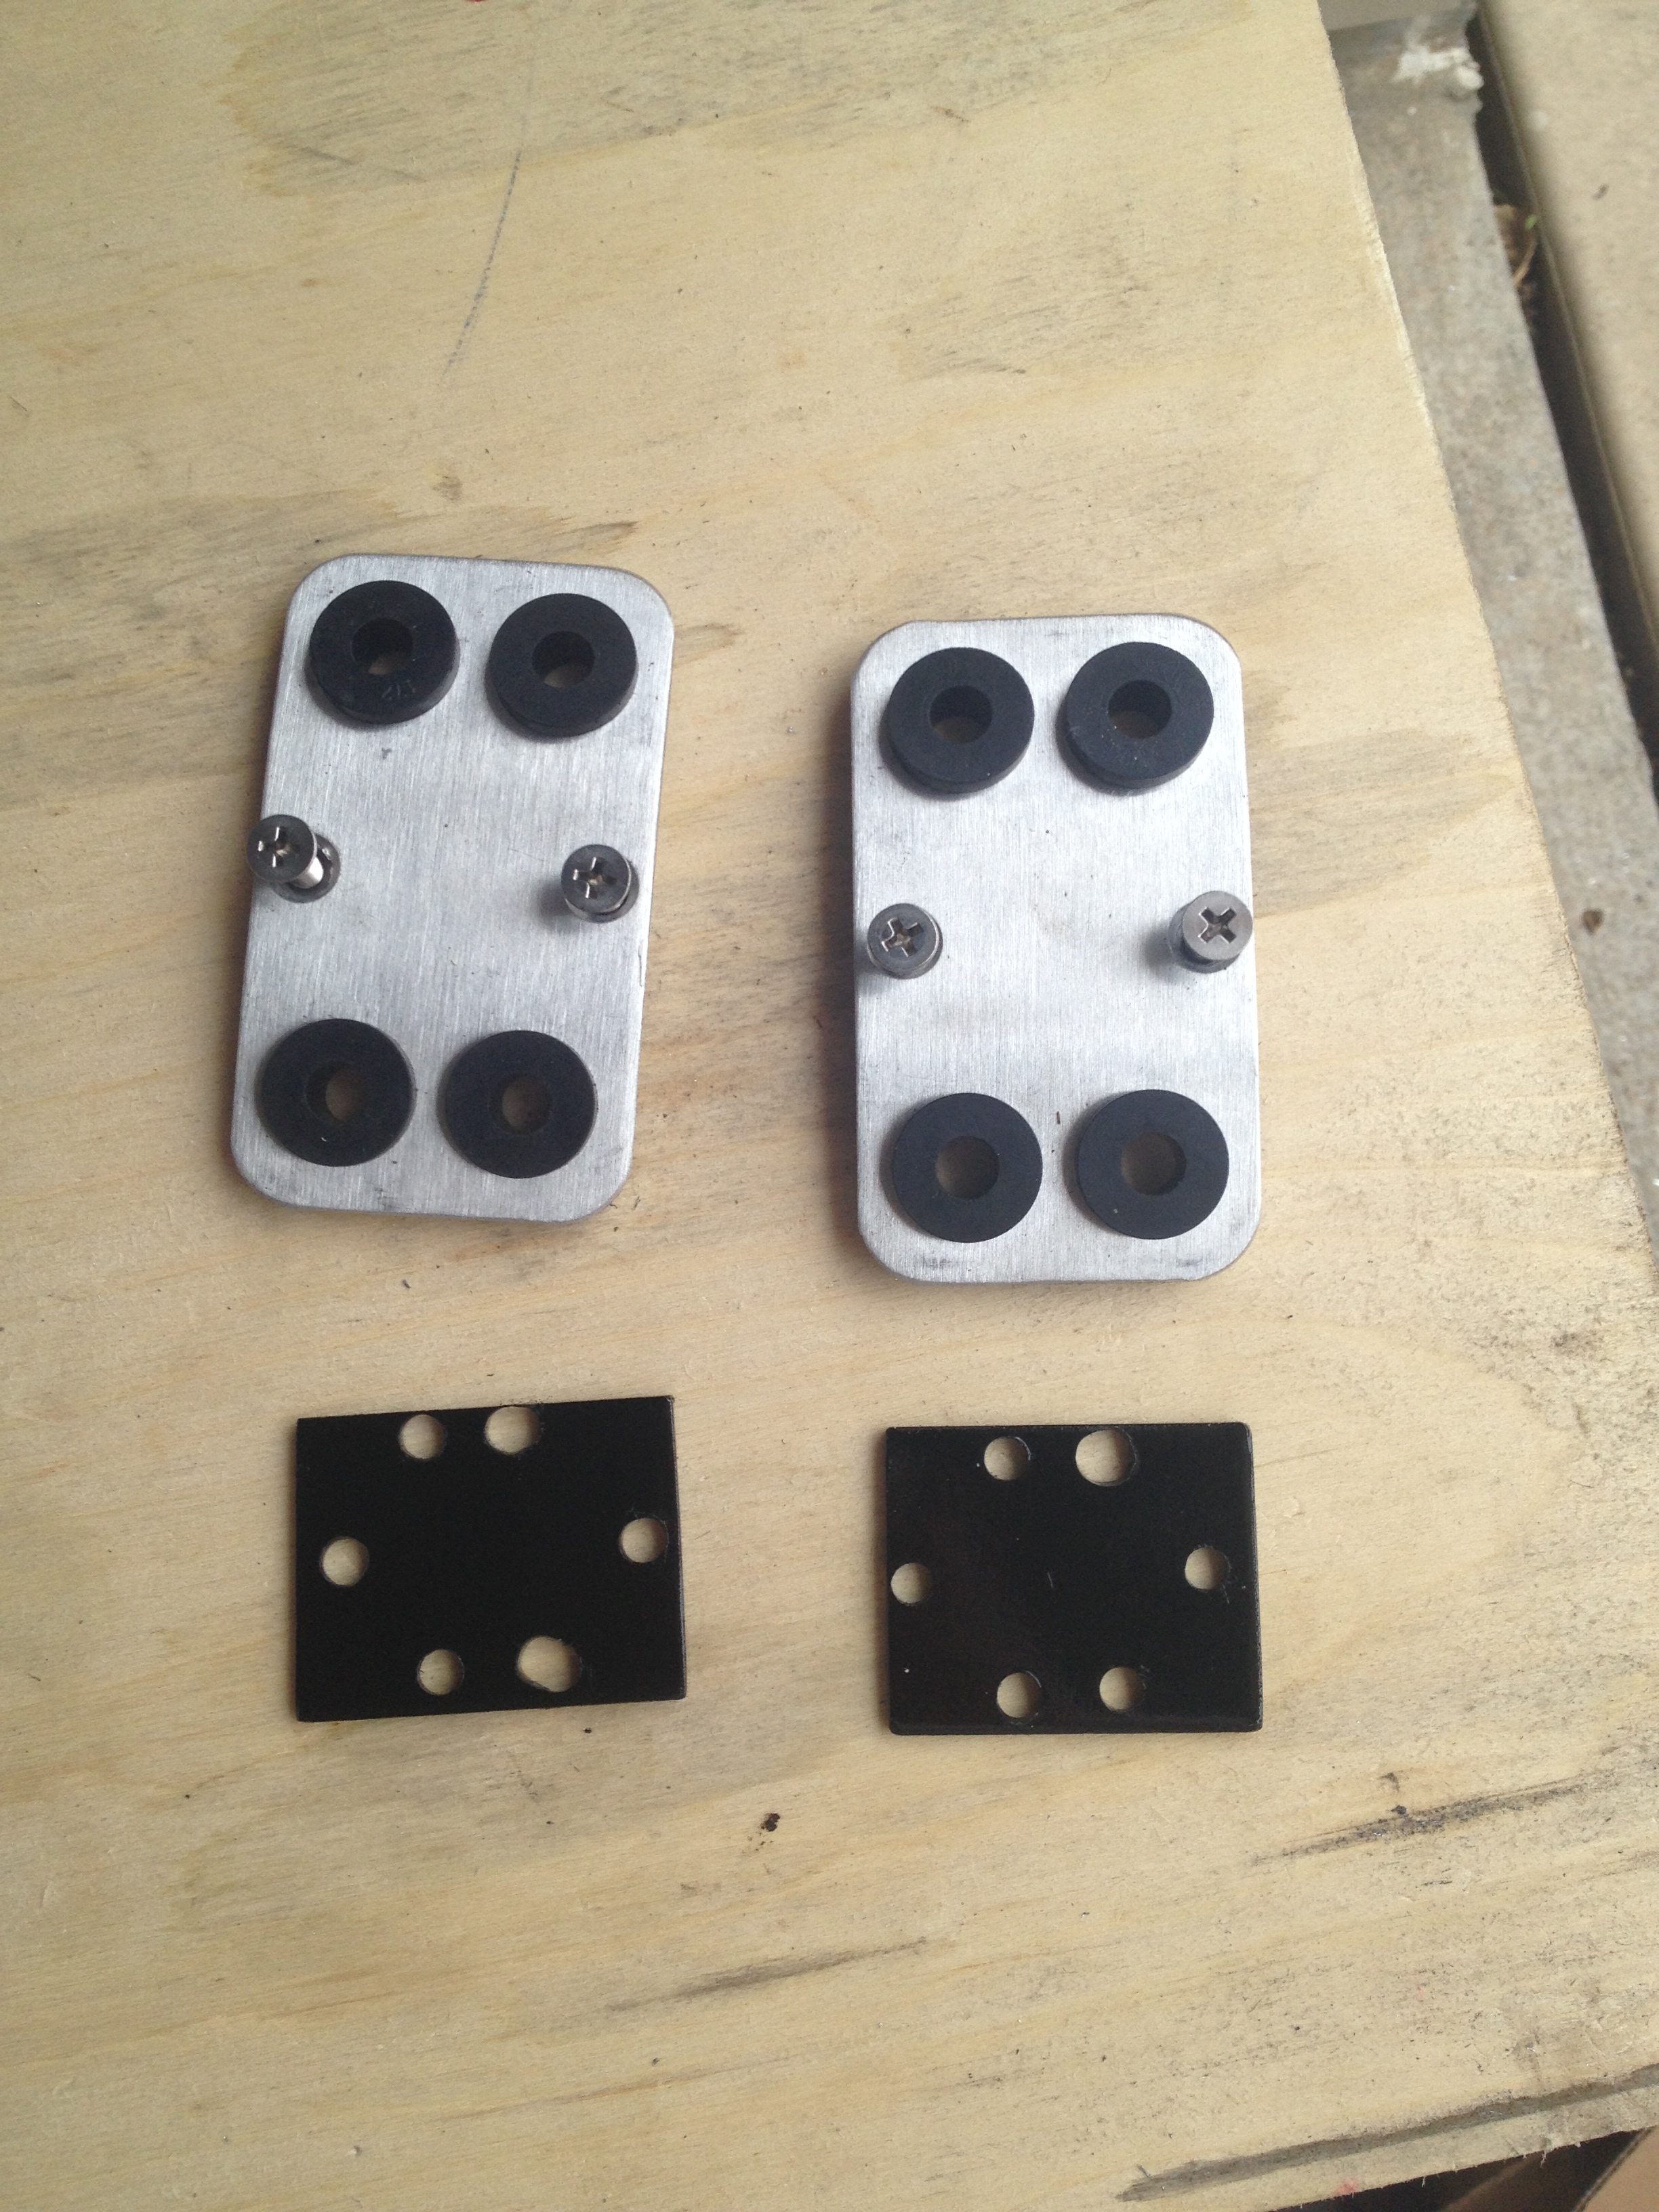
    But progress has been made. We got the pedal box in the car. I bought Russ Thompson’s pedal pads to match the gas pedal, but they don’t just bolt on to the Wilwood pedals, so we had to make a bracket for them. They’re not pretty, but they do work, and they won’t be seen.


    We also got the steering rack in place (which was a pain because the mounting bolt holes didn’t line up without a bit of persuading) and everything (except brakes) in on the rear end. I’m also getting close to finishing up all of the aluminum on the cockpit (hopefully I’ll finish today).

    No big news, just small progress.
    Last edited by Bren; 06-10-2014 at 11:40 AM.
    Build Blog
    #8203, carbed 427W (611 hp), TKO 600, IRS
    Delivered: May 27, 2014
    Mechanically "Complete": October 1, 2014

  19. #59
    Senior Member DaleG's Avatar
    Join Date
    Mar 2013
    Location
    Prescott, AZ; formerly from the Bay Area
    Posts
    829
    Post Thanks / Like
    Small steps are what it takes.
    SOLD 03/2013: MK II #5004: 5.0 EFI: 8.8, 3.55, E303, TW heads, GT40 intake, 24#, 70mm MAF

    Ordered MK IV Coyote Complete Kit.

  20. #60
    Senior Member MPTech's Avatar
    Join Date
    Feb 2011
    Location
    St. Louis, MO
    Posts
    1,188
    Post Thanks / Like
    Blog Entries
    8
    Don't let it get you down, believe me, we've all been there.
    The personal requirements for these builds are:
    #1. Patience (if something frustrates you walk away or come-back tomorrow. Don't let it get to you)
    #2. Problem solving (there are MANY challenges on these cars, they are not Tab A in Slot B. they require thought and work to get it right)
    #3. Persistence (work through the challenges with the final goal in mind)

    I ordered hose clamps for the radiator 3 times, to get the right size! D'oh!
    I also had an O2 bung welded to the header, only to find the sensor hitting dead-smack in the middle of the engine mount! Double D-oh!
    Then there was the time I drilled a drain hole in the floor pan and hit the fuel line.

    yep, walked away, but always came back!

    hang in there

    quick comment. when posting pictures. put "[IMG]" and "[/IMG]" on the other side of the link. They will appear in-line and you don't have to click away and return to the post.
    like this:
    "[IMG]htps://cobraproject2014.files.wordpress.com/2014/06/img_0727.jpg[/IMG]"

    Last edited by MPTech; 06-10-2014 at 07:18 PM.
    F5R #7446: MK4, 302, T5 midshift, 3.55 Posi IRS, 17" Halibrands
    Delivered 4/4/11, First start 9/29/12, Licensed 4/24/13, off to PAINT 2/15/14!! Wahoo!

  21. #61
    Senior Member Bren's Avatar
    Join Date
    Dec 2013
    Location
    Build: Sugar Land, TX; Live: Madison, WI
    Posts
    271
    Post Thanks / Like
    Quote Originally Posted by MPTech View Post

    quick comment. when posting pictures. put "[IMG]" and "[/IMG]" on the other side of the link. They will appear in-line and you don't have to click away and return to the post.
    like this:
    "[IMG]htps://cobraproject2014.files.wordpress.com/2014/06/img_0727.jpg[/IMG]"

    THANK YOU for that! I'm going to go back and change all of them.
    Build Blog
    #8203, carbed 427W (611 hp), TKO 600, IRS
    Delivered: May 27, 2014
    Mechanically "Complete": October 1, 2014

  22. #62
    Senior Member Bren's Avatar
    Join Date
    Dec 2013
    Location
    Build: Sugar Land, TX; Live: Madison, WI
    Posts
    271
    Post Thanks / Like
    How long did you guys have to wait for your backordered FF parts to arrive? I still don't have my front spindles which is pretty annoying.
    Build Blog
    #8203, carbed 427W (611 hp), TKO 600, IRS
    Delivered: May 27, 2014
    Mechanically "Complete": October 1, 2014

  23. #63
    Member
    Join Date
    May 2012
    Location
    Hudson Valley, NY
    Posts
    67
    Post Thanks / Like
    Since you mentioned the gas tank, search the forum(s) for the thread about modifying the quick jack bolt attachments. You will have to undo the straps again to do the mod, but is easier now and will prevent you from having to drop the tank later to mount the body. Could probably even do it with the bum shoulder.

  24. #64
    Member
    Join Date
    Apr 2014
    Posts
    62
    Post Thanks / Like
    The Front Spindles will not get to FFR for another 10 to 14 days....do you still have a bit of a wait ahead of you. At least you got your wheels which have had quality problems and are now behind.

  25. #65
    Member
    Join Date
    May 2012
    Location
    Hudson Valley, NY
    Posts
    67
    Post Thanks / Like
    I just got my last back ordered part (roll bar) from my October pick up.

  26. #66
    Senior Member Bren's Avatar
    Join Date
    Dec 2013
    Location
    Build: Sugar Land, TX; Live: Madison, WI
    Posts
    271
    Post Thanks / Like
    Quote Originally Posted by Feen View Post
    Since you mentioned the gas tank, search the forum(s) for the thread about modifying the quick jack bolt attachments. You will have to undo the straps again to do the mod, but is easier now and will prevent you from having to drop the tank later to mount the body. Could probably even do it with the bum shoulder.
    I've seen those mods and have decided to just drop the tank when the time comes.

    Were the parts that you've just received from your October delivery big/important parts?
    Build Blog
    #8203, carbed 427W (611 hp), TKO 600, IRS
    Delivered: May 27, 2014
    Mechanically "Complete": October 1, 2014

  27. #67
    Member
    Join Date
    Sep 2013
    Posts
    76
    Post Thanks / Like
    Quote Originally Posted by Bren View Post
    How long did you guys have to wait for your backordered FF parts to arrive? I still don't have my front spindles which is pretty annoying.
    I am waiting on those as well. Was told "july timeframe" this morning, which if estimates on getting my rear end are representative probably means August at the earliest.

  28. #68
    Senior Member MPTech's Avatar
    Join Date
    Feb 2011
    Location
    St. Louis, MO
    Posts
    1,188
    Post Thanks / Like
    Blog Entries
    8
    Quote Originally Posted by Bren View Post
    I've seen those mods and have decided to just drop the tank when the time comes.
    Are you thinking of dropping the tank instead of the mod(?) or is that when you were going to do the mod?

    Make SURE you do the mod, it will save you time and headache going forward (like when you take the body off for paint and re-install it).
    You don't want to have to drop the tank after it's assembled and/or has fuel! (unless you HAVE to)
    F5R #7446: MK4, 302, T5 midshift, 3.55 Posi IRS, 17" Halibrands
    Delivered 4/4/11, First start 9/29/12, Licensed 4/24/13, off to PAINT 2/15/14!! Wahoo!

  29. #69
    Member
    Join Date
    May 2012
    Location
    Hudson Valley, NY
    Posts
    67
    Post Thanks / Like
    Quote Originally Posted by Bren View Post
    Were the parts that you've just received from your October delivery big/important parts?
    No, when I picked up my kit it had most everything I needed. The following was backordered: wiring harness (arrived quickly), wheels (drop shipped after a few weeks), roll bars (received DS after a couple months, just got PS), e brake cables and parts (few weeks), sidepipes (got after 4 months), few misc fasteners that were unaccounted for in inventory (they shipped right out)

  30. #70
    Carl carlewms's Avatar
    Join Date
    May 2012
    Location
    Nokesville, VA
    Posts
    1,125
    Post Thanks / Like
    Bren,

    Fantastic build thread...I too am in the middle of a similar Mk 4 build but with a SBF 347 cu in power plant (http://thefactoryfiveforum.com/showt...Roadster-Build).

    I echo MPTech's comments on the mod for the rear quick jack mounts...it is a relatively simple mod which pays benefits in the future. His recommendations in post 60 are soooo true as well.

    Again, thanks for the great posts.

    Carl
    Mk 4 Roadster
    October 25, 2012 - Kit Arrives
    April 8, 2013 - Build Starts
    August 23, 2015 - Rolling Chassis/Engine & Transmission Installed
    March 26, 2016 - Go Cart

  31. #71
    Senior Member Bren's Avatar
    Join Date
    Dec 2013
    Location
    Build: Sugar Land, TX; Live: Madison, WI
    Posts
    271
    Post Thanks / Like
    Well, we got some work done late last week. We’ve got the battery box in and mocked up the fuel and front brake lines. To figure out where the fuel lines should terminate in the engine bay (where the hard lines go to flex) we had to know where the engine connections were going to be. So, we got the engine hooked up to the hoist, cut it out of the crate, and temporarily placed it in the chassis. Now I think I know where I want to put the MSD box and the fuel regulator (on top of the passenger footbox). We also made a support for the reservoir tanks from the aluminum we cut out of the trunk for the battery box.


    But, I can’t run the fuel lines until I know for sure what fittings I’m going to use on the gas tank side. I’ll get those ordered today, but I’ll wait until they get in before I start bending the pipes. Also, I can’t run the brake lines until I get the rear brakes in, which will be this week hopefully. I’m also hoping to get the transmission in this week. Once the tranny is in, then it and the engine can go in, and I can start working on everything engine related.

    Until then, though, I’ll be hanging around with the dogs. Saturday Dad and I took a break from the car and took Maxine (’37 Chevy Business Coupe) and Ash’s ’86 Merc 560SL convertible to a car show. We took a look around, but there weren’t many Fords there, although most all of the cars were hot rods. It was a good place to get some ideas of how things should look in my car.

    I called Factory Five today to check on the backordered pieces and it sounds like most of it will be coming by the end of the week. The front spindles, though, won't be ready to go out until the beginning of July (first week, is what I was told, but we'll see).

    What do you guys think about putting the MSD box and the fuel regulator on top of the passenger footbox? I'm trying to leave the firewall as plain as possible. I've already got the heater and the wiper motors there. I'm also not sure how close the throttle linkage will get to the firewall.
    Last edited by Bren; 06-18-2014 at 01:34 PM.
    Build Blog
    #8203, carbed 427W (611 hp), TKO 600, IRS
    Delivered: May 27, 2014
    Mechanically "Complete": October 1, 2014

  32. #72
    Senior Member Bren's Avatar
    Join Date
    Dec 2013
    Location
    Build: Sugar Land, TX; Live: Madison, WI
    Posts
    271
    Post Thanks / Like
    One of the reason’s I started this blog was to answer questions for people who were just starting off and to provide guidance on subjects that most posts seem to take as a given. I got a couple of questions via email, which showed that I’ve been slacking in my explanations, so I’ll answer them here:

    I’m going the carburetor route….do I need a fuel regulator?

    There are two scenarios with a carb where you need a fuel regulator. The first is if you’re using an electric fuel pump. The electric pumps create more pressure than the carb should take, so you need the regulator to reduce the pressure at the carb. The second (and the reason I have a regulator) is if you’re using a fuel return line. The return line pumps gas from the carb back to the fuel tank so that you always have gas flowing through the lines. So, when at idle, you don’t have fuel in the line next to the engine getting hot, boiling, and creating vapor lock in the line.

    Did you already mount your battery box? was it from FF? Where did you place it?

    I mounted the battery box in the trunk using the FFmetals.com kit. It is awesome and I recommend it. I couldn’t build it myself for the cost I paid. I don’t know how he makes any money.

    Is the reservoir mount necessary to give access once the body is on?

    The reservoir mount was necessary for me because I’m going to have three reservoirs: front brakes, rear brakes, and clutch. The FF kit comes with one reservoir for the brakes, and that’s it. You only NEED one for the brakes, but I wanted to separate the front and rear just in case something goes wrong with the, for example, the front, the rear brakes would still have their own reservoir. I’m using a hydraulic clutch, so that needs its own reservoir. The instructions tell you to mount the reservoir on the front of the driver’s foot box, but there’s not enough space for three. Thus, I needed a new place to put it. A lot of people on the forums use the CNC triple brake reservoir (http://www.cncbrakes.com/images/1483.jpg), but I went with the FF reservoirs just because of the look (they match the FF water expansion tank).
    Build Blog
    #8203, carbed 427W (611 hp), TKO 600, IRS
    Delivered: May 27, 2014
    Mechanically "Complete": October 1, 2014

  33. #73
    Senior Member Bren's Avatar
    Join Date
    Dec 2013
    Location
    Build: Sugar Land, TX; Live: Madison, WI
    Posts
    271
    Post Thanks / Like
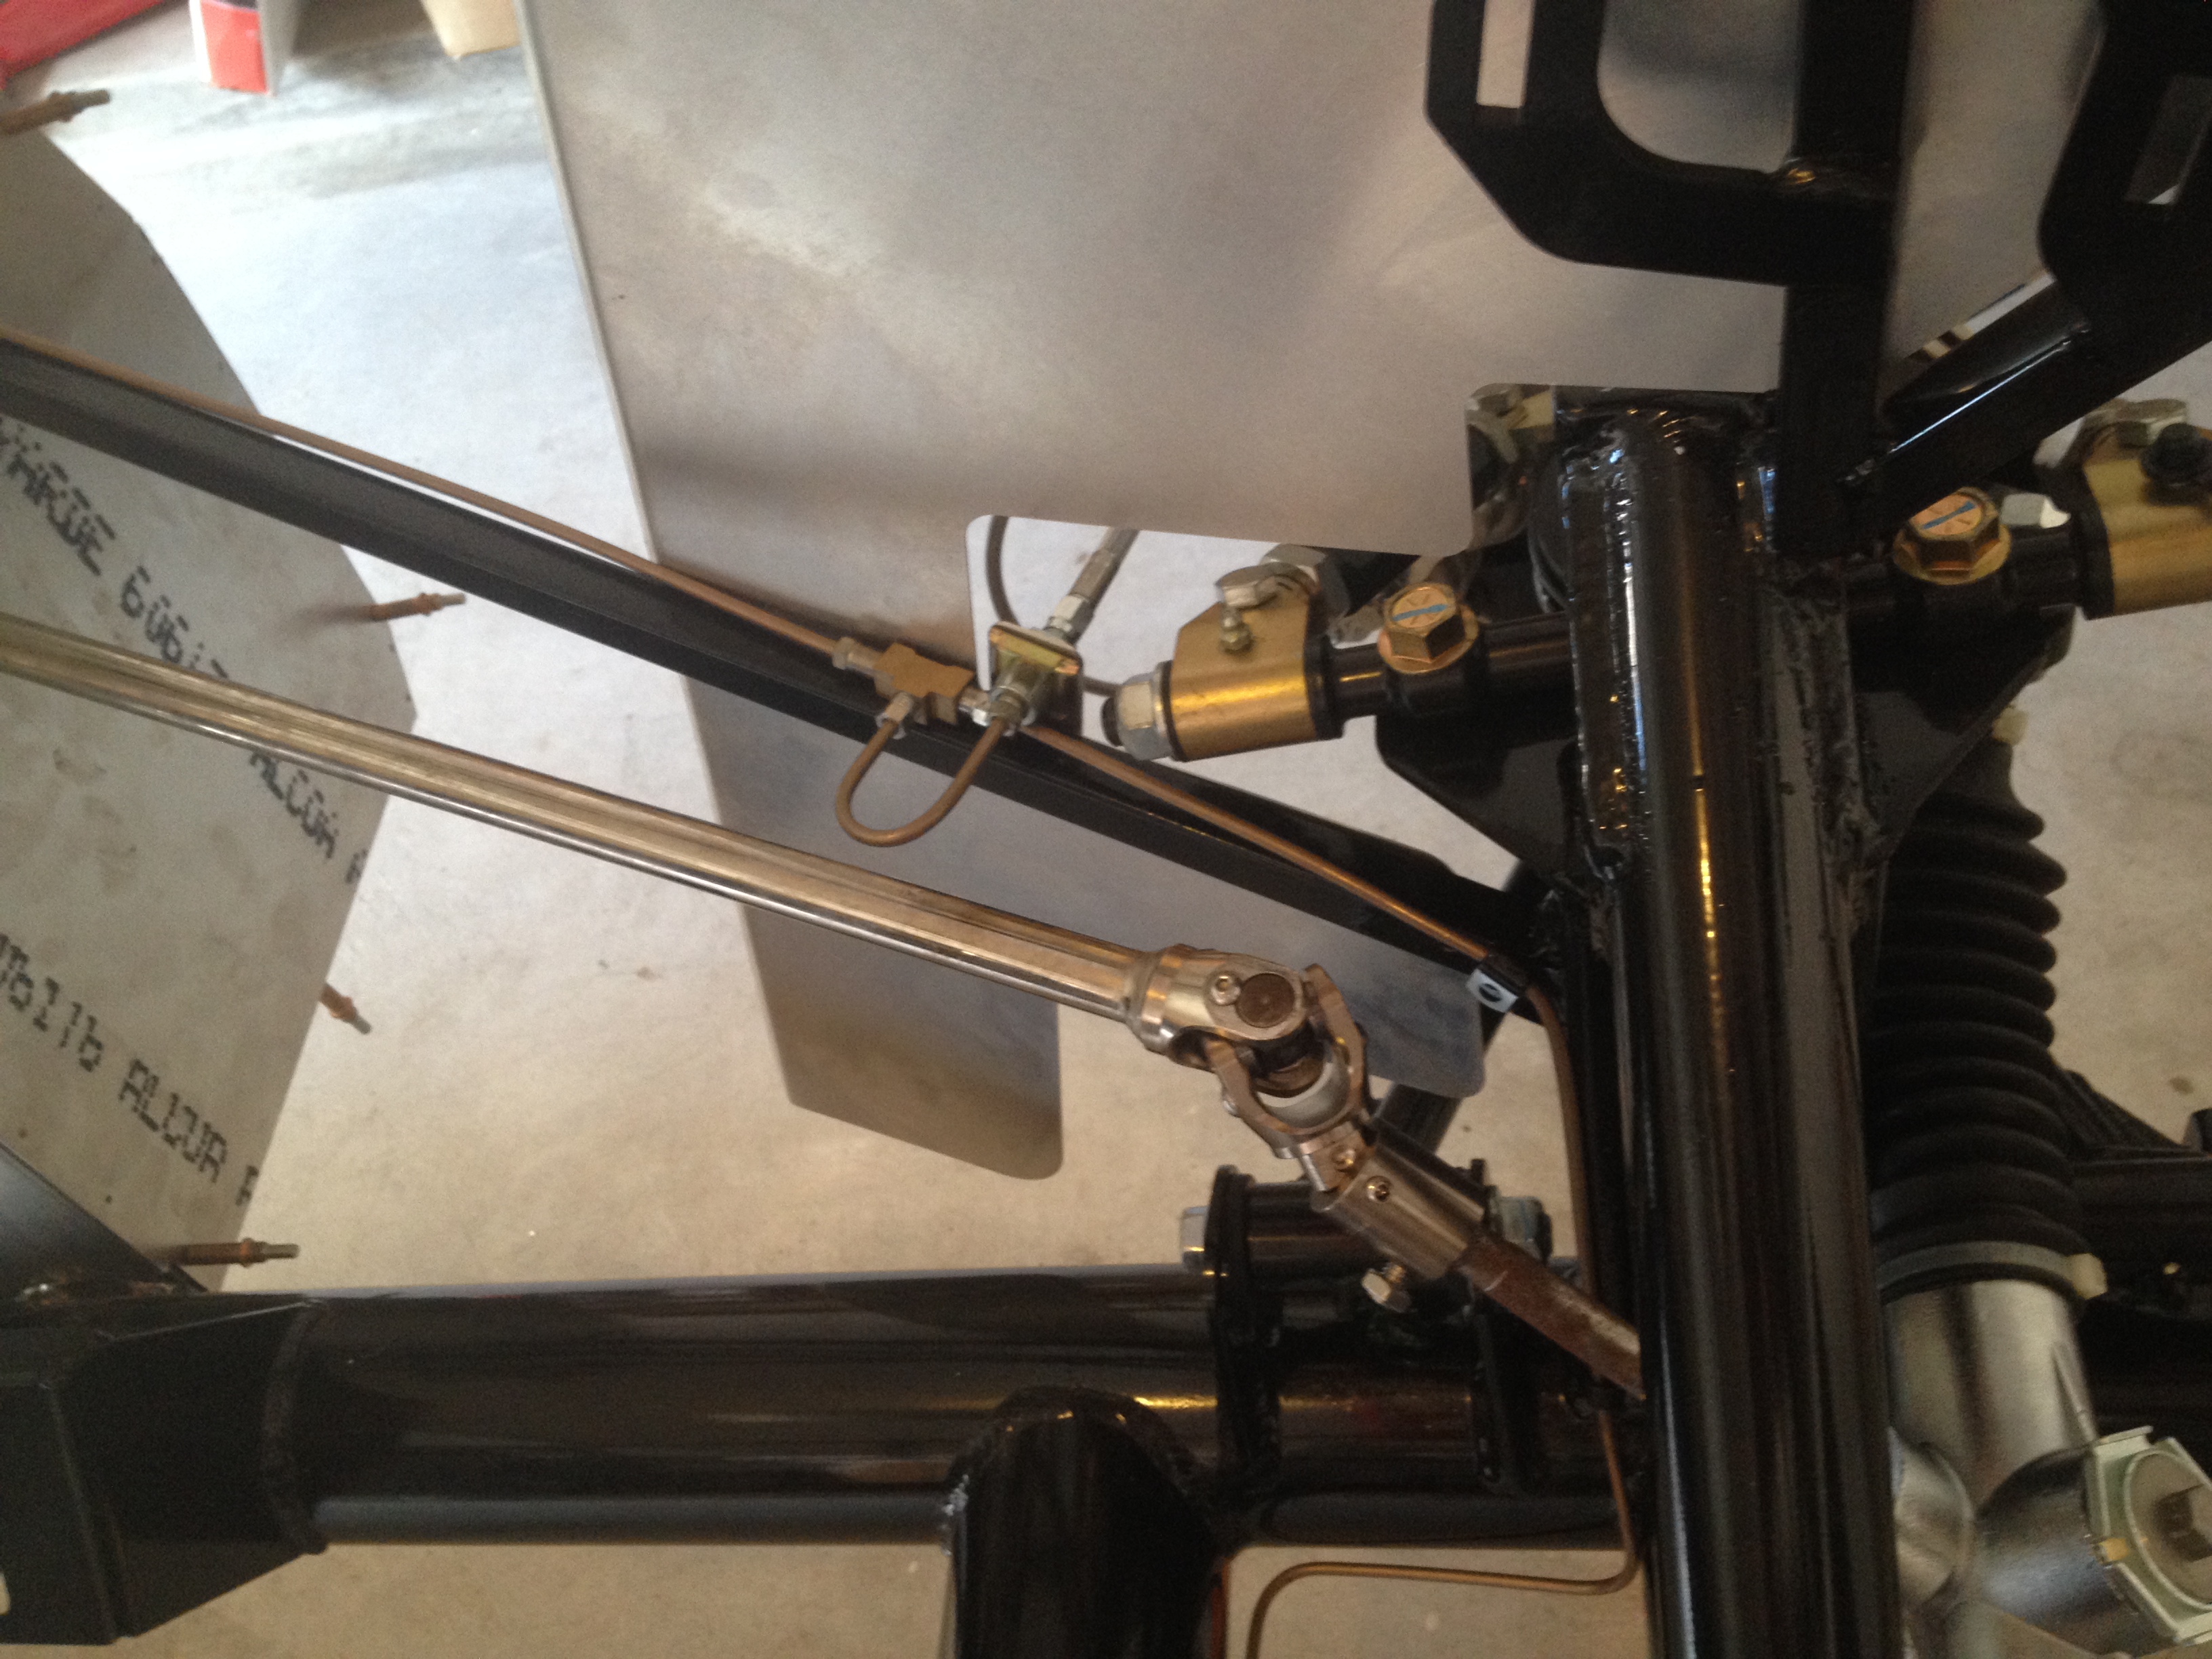
    For the front brakes, the FFR manual says to make some loops in the brake lines right in front of the driver’s side brake line hookup. Like this:

    LeftFrontRouting3.jpg

    …more or less. The reason for the loop is the configuration of the tee fitting, which had one male and two female fittings. Instead of that, we decided to clean it up a bit and bought a tee with all female fittings so that the loop can be simplified to this:


    By the way, the transmission should be delivered today. I'm still STILL waiting on the rear brakes and the hydraulic clutch kit. But if the tranny gets here today, I'll have a bunch of stuff to keep me busy until that stuff gets in.
    Build Blog
    #8203, carbed 427W (611 hp), TKO 600, IRS
    Delivered: May 27, 2014
    Mechanically "Complete": October 1, 2014

  34. #74
    Senior Member QSL's Avatar
    Join Date
    Nov 2011
    Location
    CORONA, CA
    Posts
    700
    Post Thanks / Like
    looking really good. Congrats on the build. The gas tank is the hardest part. don't worry. One thing though you may want to check is if the filler tube is being pushed down by the frame. We had to space down our tank so that would clear. Good luck!
    MK4 delivery 12/17/11
    Build thread: HERE
    Epic First start video HERE

    Type 65 Coupe Ordered 01/17/13
    Build thread: HERE

  35. #75
    Senior Member Bren's Avatar
    Join Date
    Dec 2013
    Location
    Build: Sugar Land, TX; Live: Madison, WI
    Posts
    271
    Post Thanks / Like


    Last Thursday was a big day for us. We got the transmission and rear brakes delivered. I got to work on the transmission right away, and by the end of Friday night, Dad and I had the engine and transmission physically in the car, but not installed.

    Because we only have a 1 ton engine hoist, we couldn't install the engine and transmission together (already aligned and bolted together). Instead, we lifted the transmission into place, then got the engine put in the engine bay, and then tried to mate them together, which is not easy. There was a lot of frustration and sheer muscle power to get everything in, but we got it. The moral of this story is to buy a 2 ton hoist. At it's full length, the 1 ton was only strong enough to carry the engine, and still wasn't long enough to get the engine all the way to the back of the engine bay from the front. A 2 ton would allow you to mate the engine and transmission outside of the car where it is MUCH more convenient, and then it would allow you to install everything from the front, like you're supposed to.

    Anyway, from the point that we started lifting the engine to final positioning and bolting was less than 24 hours, so not too bad considering that everything else has been taking much longer than expected and we had to do it the hard way with the little hoist.

    The rear brakes were also delivered, but we're kind of stuck on those right now because I'm having a hard time tracking down the proper lug studs. None of the local auto stores seem to have them, but I'm going back out on the search today.

    Dad and I started on the cooling system, but hit a few hardware problems before deciding that we had already accomplished quite a bit that weekend and settled down to a few beers and some grilled ribs. All in all, a very successful weekend, and I'm looking forward to moving forward on the build.
    Build Blog
    #8203, carbed 427W (611 hp), TKO 600, IRS
    Delivered: May 27, 2014
    Mechanically "Complete": October 1, 2014

  36. #76
    Senior Member Mslone's Avatar
    Join Date
    Feb 2014
    Location
    Katy, TX
    Posts
    130
    Post Thanks / Like
    Look good buddy! You'll be firing her up soon! I want a ride before you leave TX...

  37. #77
    Member rwantin's Avatar
    Join Date
    Jun 2014
    Location
    Royal Oak, MI
    Posts
    95
    Post Thanks / Like
    Thanks for all the posts. I recently acquired a MK II a month ago and am madly in love with it. I've done some work to it already, but obviously, I did not build it. In a way, I kind of feel like I cheated. I suppose I live a bit vicariously through these build threads (I have read this one in its entirety), as it is great to see what actually goes into one of these beasts. Keep up the great work!

    -Robert

  38. #78
    Senior Member Bren's Avatar
    Join Date
    Dec 2013
    Location
    Build: Sugar Land, TX; Live: Madison, WI
    Posts
    271
    Post Thanks / Like
    Quote Originally Posted by Mslone View Post
    Look good buddy! You'll be firing her up soon! I want a ride before you leave TX...
    No problem, if I can get it registered in time...

    Quote Originally Posted by rwantin View Post
    Thanks for all the posts. I recently acquired a MK II a month ago and am madly in love with it. I've done some work to it already, but obviously, I did not build it. In a way, I kind of feel like I cheated. I suppose I live a bit vicariously through these build threads (I have read this one in its entirety), as it is great to see what actually goes into one of these beasts. Keep up the great work!

    -Robert
    Thanks! There's no such thing as cheating when it comes to these cars. To each their own. But, if you do have the money, skills, garage space, patience, sympathetic spouse (or in my case, none), and passion to build one yourself, maybe it's a good time to start thinking about ordering a kit yourself!!
    Build Blog
    #8203, carbed 427W (611 hp), TKO 600, IRS
    Delivered: May 27, 2014
    Mechanically "Complete": October 1, 2014

  39. #79
    Senior Member Bren's Avatar
    Join Date
    Dec 2013
    Location
    Build: Sugar Land, TX; Live: Madison, WI
    Posts
    271
    Post Thanks / Like
    It’s been a while since I’ve posted, but it’s because I’ve been busy. It’s already August and I haven’t even started the engine. I’ve only got about two more months before I have to leave Texas to go back to Wisconsin.

    Well, we finally got the rear brakes installed. I wanted to buy lug studs that were the proper length to begin with, but there is no such thing. So, I too, the studs that I had and cut them myself. It turned out to be much easier than I thought, and none of the threads are messed up. I was fretting about that before but it turned out to be no big deal at all. Now I wish that I hadn’t wasted all that time tracking down something that doesn’t exist. Anyway, we got the lugs in, then the brakes on and the wheels on. I’m working on finishing up a mounting bracket for the e-brake today, and that should be it for brakes, except for running the brake lines, which we’ll do as soon as the panels come back from powder coating (we wanted to wait because it would be next to impossible to get the front driver’s footbox off if all of the hydraulic lines were already run).

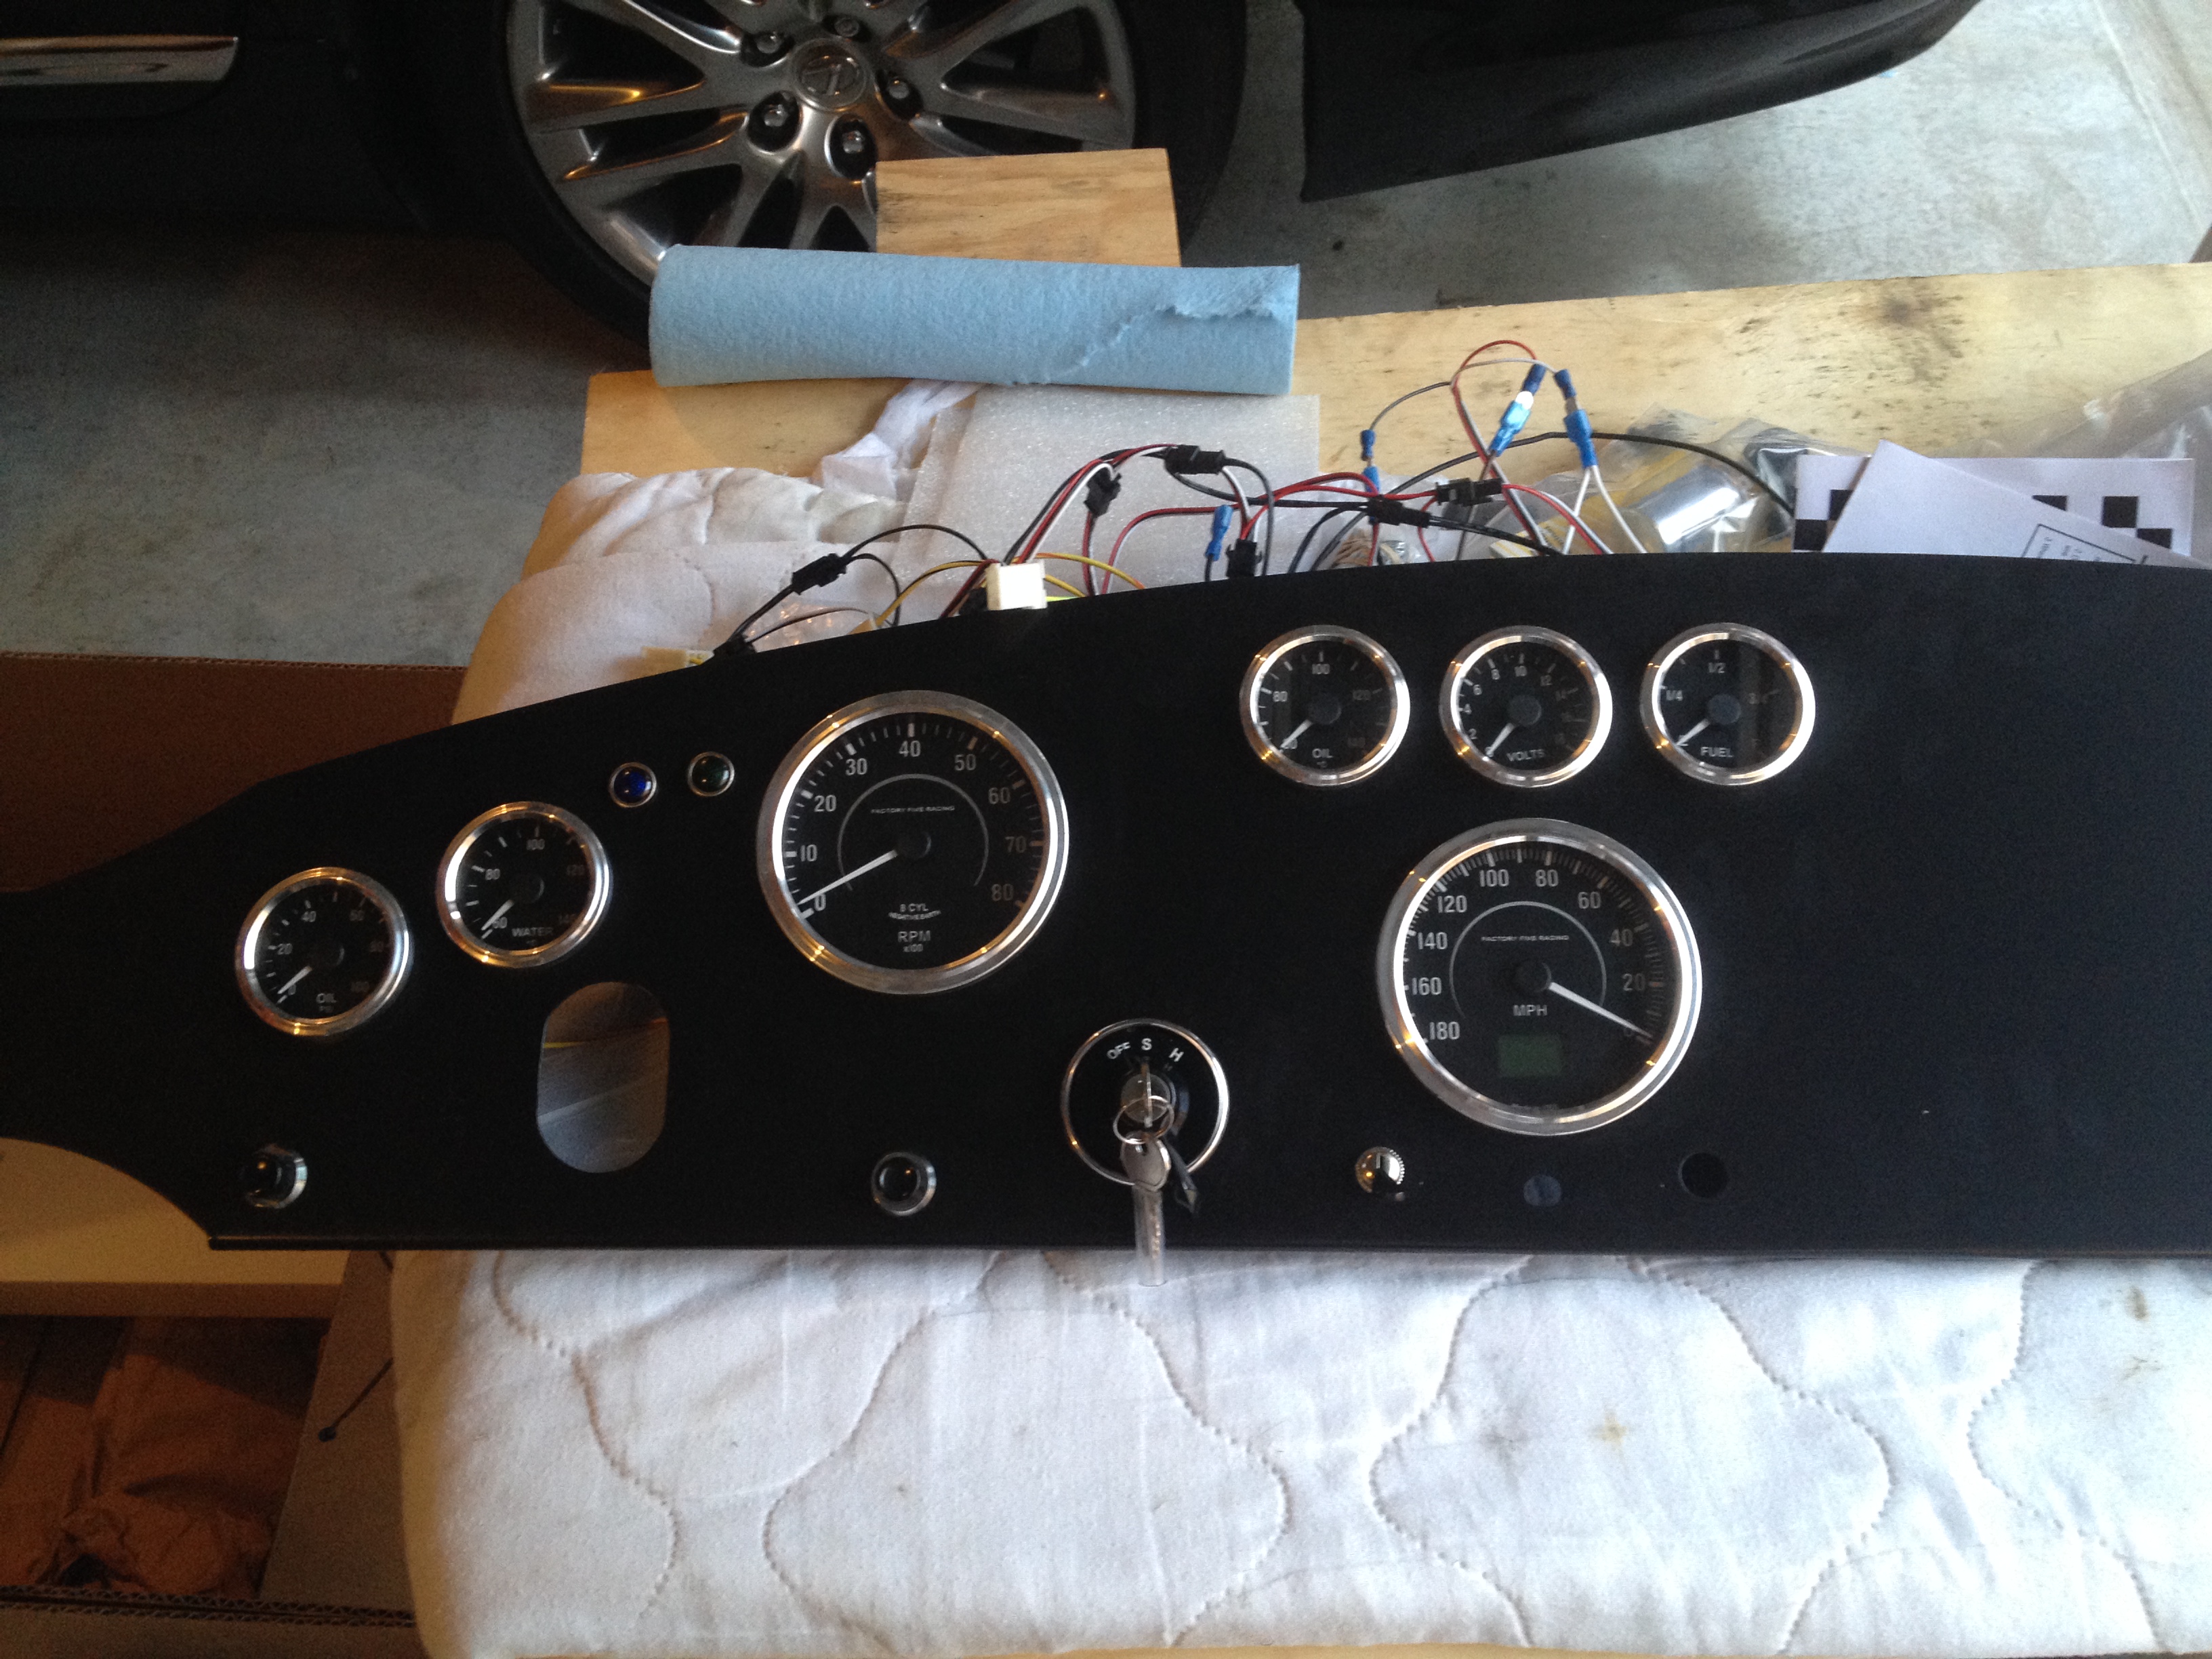
    We also got the car on it’s wheels and we set the ride height and wheel base width of the rear. Then we got the body on the car to see how everything was lining up and to see if my dash layout would work. It did, mostly, and so I got the dash cut out (which took an entire day!). I’m not planning on finishing the dash with padded vinyl, like most people, so my cut outs had to be pretty precise and snug. I think it turned out pretty good. It’ll look even better after the dash is powder coated.


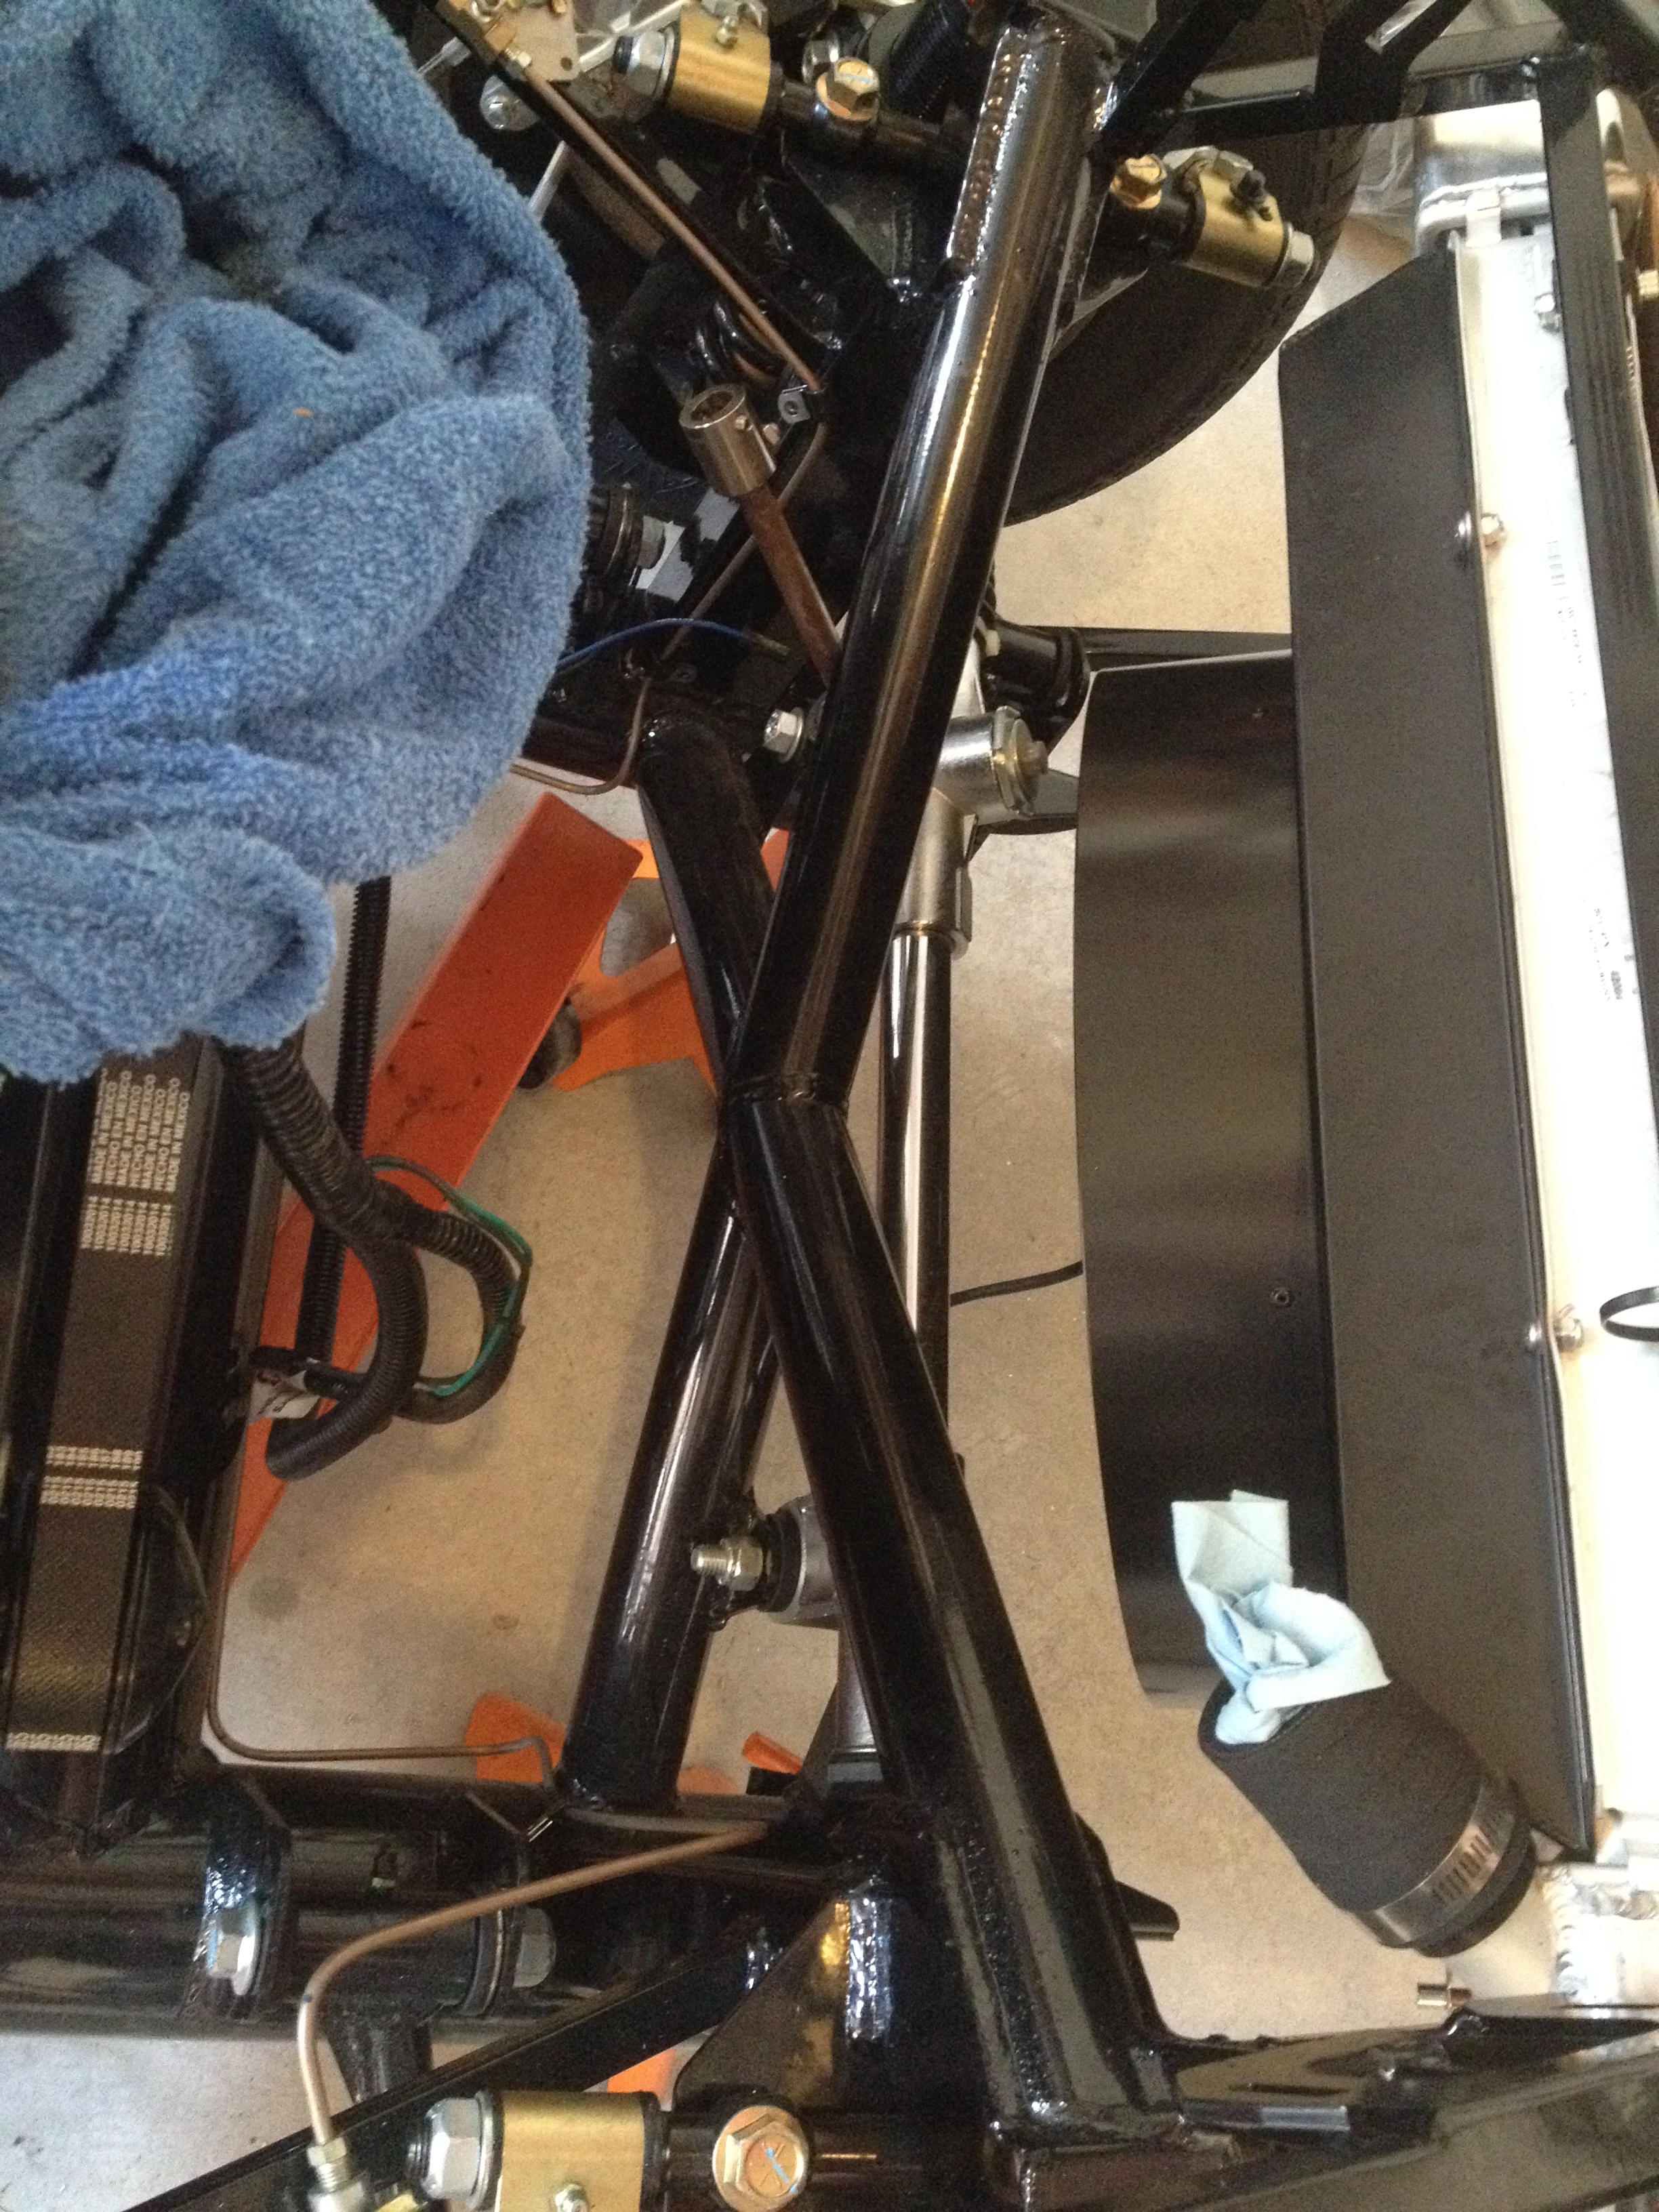
    I also got the radiator mounted with the radiator shroud. The shroud was actually in the way of the inlet of the radiator, so I cut a piece of it off to fit. Apparently this is a common problem. No big deal, I just don’t like cutting into pieces that are supposed to just bolt on. The shroud kit I bought from Breeze is for a car with a fan mounted to the crank shaft. (Sorry I don’t have any pictures of this to help explain – I know it would help a lot.) The way the kit is supposed to work is that the radiator shroud fits across the radiator to gather all of the air. Then, there is a circular part that fits around the mechanical fan to pull air from the radiator. It’s basically an extension. Well, because we’re using an electric fan that can mount directly to the shroud, the round extension part isn’t needed. We had the idea to use the extension anyway. It basically hides the electric fan for a cleaner look. I’m sure I’m not the first to do this, but I thought it was a good idea. I’ll try to remember to post pictures when it’s re-assembled.

    As the title suggests, today I dropped all of the aluminum panels off for powder coating which means all last week I worked to finish drilling all of the holes in the aluminum. I also used acetone to get all of the paint and Sharpie marks off of the aluminum (you can see the paint on the sheet aluminum I’m talking about in the dash picture above). I did this because I didn’t have full faith in whatever powder coater I chose to get all of the paint off. If the aluminum isn’t raw, then the paint won’t stick properly, and you can see it in the final product. In most cases, it’s not an issue because it will never be seen, but I like to do things properly, regardless. I decided on a matte black color. It matches the seats and the carpet (and maybe the color of the car? black with white stripes? I’m still wavering on the color). I went matte because a glossy black will be really really hard to keep clean instead of a matte black which will only be really hard.

    I’m going to share my experience so that in the future, others can know what to expect (I had no idea). So, you can search the forums for discussions on how best to treat the aluminum body parts. No coating is “necessary.” Some use a product called Sharkhide that is basically a lacquer that protects the aluminum from corroding and turning a dull color. Some people said it only lasted a few years before it had to be re-done, so I didn’t want to go that route (also, you have to finish the aluminum however you like it: polished, brushed, swirled, whatever). Some people paint it themselves with spray cans. I’ve done this on some parts, but I wanted something a bit more durable, so I went with powder coating. Most of what will be seen is the front nose aluminum and the engine bay aluminum, but I wanted to protect everything, front and back, seen or covered.

    I went to about six different shops today. One was just some house that was for lease, so I didn’t even stop for that. The next was a small powder coating shop that did (I think) mostly automotive stuff. They quoted me $600. I kind of expected this is what I was going to have to pay. Other forum members paid as low as $200-300, but I figured they were just lucky. The next place, a swing set company that also does powder coating, took pictures and said they would get back to me by 1:00. It’s now 3:15 and I still haven’t heard from them (I gave them until 2:30 before I decided to ignore them). The next two places, found on Google maps either never existed or went out of business. The next, a fencing company that also does powder coating, said they’d call me back when they had someone who could give me a quote. By now I was getting pretty tired of driving all over West Houston.

    The next place I went to looked like a serious shop. They had a conveyor belt that ran through a couple of chemical sprayers, a paint booth, and, I imagine, an oven. They first said that they weren’t interested because it was automotive, and they don’t do car parts. But I explained that they weren’t regular, greasy car parts, just brand new aluminum panels. She got her painter to come look, and he quoted me $200. Not bad! Especially since they do mostly industrial stuff (that usually means heavy-duty). They also use DuPont paint, which I also assume is good. He only allowed me to choose from a few colors, because if I chose another one, then I’d have to pay for the paint. So, I think he’s doing this job on the side with leftover paint. They do mostly large quantity jobs. So, I dropped them off and he said he’d have them done in less than a week. I just hope he doesn’t lose any parts.

    So, the moral of the story here for all of you who are thinking about whether to do powder coating or not is this: shop around; describe them as aluminum panels, not car parts; call the place before stopping by as they may not even exist, or they can give you a quote via pictures/email.

    Ah, I almost forgot about the header fiasco last week: So, we decided it was time to paint the panels, but before we took them all off, I thought it would be a good idea to test fit the headers to make sure there aren’t any clearance issues. There aren’t any clearance issues, but there were fitment issues. I posted this problem to the forum thinking someone would come back and say that Factory Five sent me the wrong headers. Nope. Not so simple. Instead, the heads on the engine are not standard 351W heads. Gordon Levy knew exactly what the problem was and promptly called me to explain the situation and some possible solutions. To make a long story short, the possible options are to get an entirely new exhaust system, new and custom headers, or replace the heads. Replacing the heads would void the warranty on my engine, and the custom headers are less expensive than a custom exhaust system, so I ordered some headers from a place that already had a template they could use. So, now I’m getting some stainless steel headers, which are going to look really cool (the stainless steel will turn a golden color from the heat, and the pipes will be thicker than the ones that came with the kit). Aside from delaying me from starting the engine a few more weeks, it wasn’t such a bad deal. Factory Five will rebate me the cost of the headers (minus 15% restocking fee), so it’s not a completely out of pocket expense.
    Build Blog
    #8203, carbed 427W (611 hp), TKO 600, IRS
    Delivered: May 27, 2014
    Mechanically "Complete": October 1, 2014

  40. #80
    Senior Member Bren's Avatar
    Join Date
    Dec 2013
    Location
    Build: Sugar Land, TX; Live: Madison, WI
    Posts
    271
    Post Thanks / Like
    Less than 24 hours since I dropped the panels off for powder coating, I have them all finished in my garage. Well, probably all of them. I haven’t counted yet, but what I have seen looks awesome! Here are some photos of the radiator shroud, painted and finally installed.


    Last edited by Bren; 08-06-2014 at 07:57 PM.
    Build Blog
    #8203, carbed 427W (611 hp), TKO 600, IRS
    Delivered: May 27, 2014
    Mechanically "Complete": October 1, 2014

Page 2 of 3 FirstFirst 123 LastLast

Posting Permissions

  • You may not post new threads
  • You may not post replies
  • You may not post attachments
  • You may not edit your posts
  •  

FFMetal

Visit our community sponsor