Boig Motorsports

Visit our community sponsor

Thanks Thanks:  0
Likes Likes:  0
Results 1 to 20 of 20

Thread: IRS brake line routing. How did you do yours?

  1. #1
    Senior Member 2FAST4U's Avatar
    Join Date
    Feb 2011
    Posts
    1,013
    Post Thanks / Like

    IRS brake line routing. How did you do yours?

    Anyone care to share how they routed their brake hardlines to the back with IRS?

    Thanks
    Bill

  2. #2
    Administrator David Hodgkins's Avatar
    Join Date
    Feb 2011
    Location
    Corona del Mar, CA
    Posts
    6,086
    Post Thanks / Like
    Blog Entries
    7
    Bill, This is not the best shot in the world but I'll try to describe it for you. I'm running Willwood Pedals and Brakes. I have IRS like you:


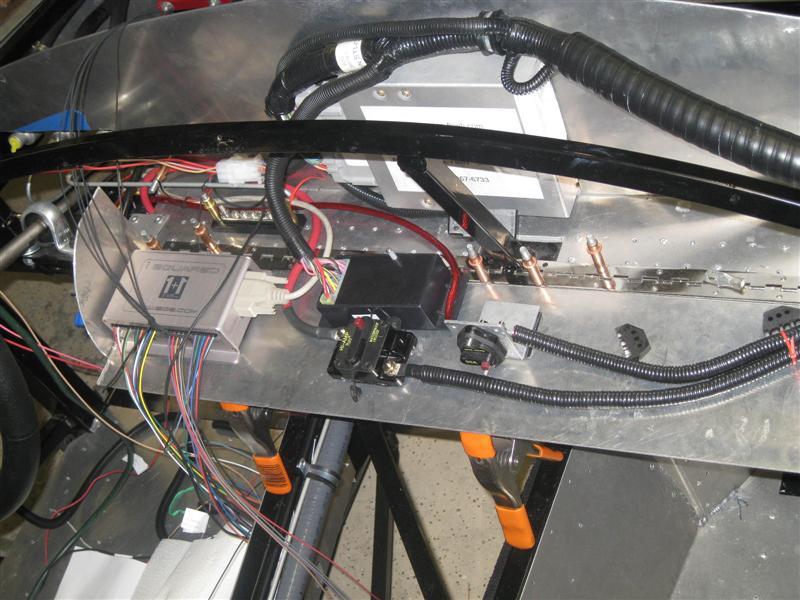
    So What I did was run out the front of the master cylander and immediately turn 90 degrees and go across the inside of the FFMetal Firewall Forward until I was on top of the tunnel. Then I do a 90 degree turn and go down through the bottom of the firewall floor to the tunnel and then another ~85 bend, go down the tunnel, bend at the bottom, another bend to vertical at the rear bulkhead and then a "T" on the back of the 3X2 Bulkhead square tube.

    If I can find better pics I'll post them. Look at the pic above and you will see the hard line behind the dash, see it disappear when it turns down, and see it reappear running down the upper corner of the tunnel beside the electrical.

    EDIT: Here is a shot from the engine bay. The brake tube is on the right hand side in this pic:


    HTH,


    FFR 5369 Pin Drive, IRS, Trigos, Torsen, Wilwoods, FMS BOSS 302 "B" cam , Mass-flo. CA SB100 (SPCN) Registered
    Delivered 4/23/06. "Finished" 4/2012 (still not done!)


  3. #3
    Senior Member 2FAST4U's Avatar
    Join Date
    Feb 2011
    Posts
    1,013
    Post Thanks / Like
    Thanks Dave

  4. #4
    Senior Member 2FAST4U's Avatar
    Join Date
    Feb 2011
    Posts
    1,013
    Post Thanks / Like
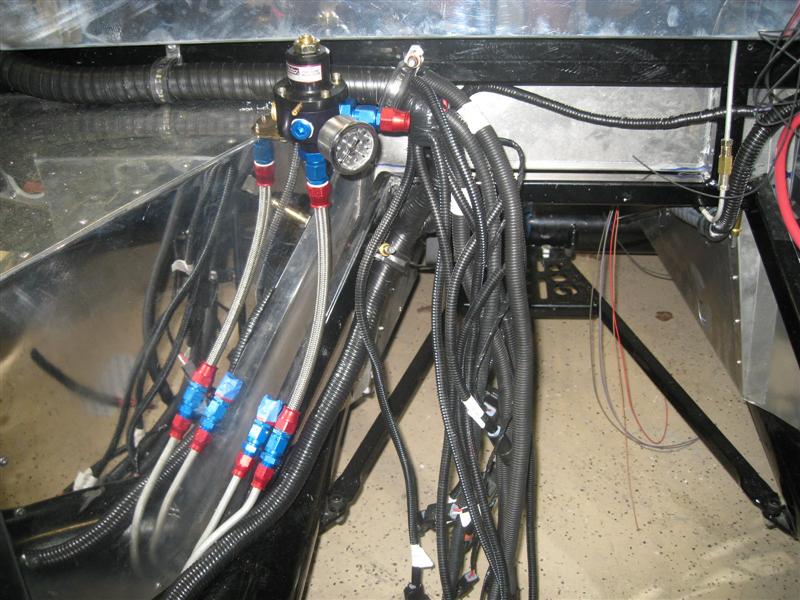
    According to a Rick, my fuel line routing has a high probability of hitting the LCA. now I get to rip it out and start over.

  5. #5
    Administrator David Hodgkins's Avatar
    Join Date
    Feb 2011
    Location
    Corona del Mar, CA
    Posts
    6,086
    Post Thanks / Like
    Blog Entries
    7
    Bill, Any reason why you are routing the fuel down the driver's side?


    FFR 5369 Pin Drive, IRS, Trigos, Torsen, Wilwoods, FMS BOSS 302 "B" cam , Mass-flo. CA SB100 (SPCN) Registered
    Delivered 4/23/06. "Finished" 4/2012 (still not done!)


  6. #6
    Senior Member 2FAST4U's Avatar
    Join Date
    Feb 2011
    Posts
    1,013
    Post Thanks / Like
    Two reasons. First, the mechanical fuel pump is on the drivers side. Second, the fuel inlet to the Webers is also on the drivers side due to the mechanical fuel pump

  7. #7
    Senior Member 2FAST4U's Avatar
    Join Date
    Feb 2011
    Posts
    1,013
    Post Thanks / Like
    I redid the fuel lines and now have clearance.

  8. #8
    East Coast Speed Machines Erik W. Treves's Avatar
    Join Date
    Feb 2011
    Location
    Huntsville, Al
    Posts
    2,112
    Post Thanks / Like
    my lines go down the driver's side too...
    FFR 1879, Blown DSS 306,REDLINE management, VeryCoolParts Tuned 460RWHP

    FFR 818S, The Flash, Chassis #5, 2.0L, LSD, Electromotive TEC-S, VCP Tuned, 278RWHP 265 RWTQ

    FFR 6651, Green Lantern, 408W Crate, Hellion 66mm Turbo, JGS Waste gate / Blowoff valve, Tec-GT management, VCP Tuned, 575 RWHP, 690 RWTQ

    FFR 8335, Black Mamba, 289 FIA CSX 2001 tribute car, 347, 48 IDA webers, VCP Tuned, 311 RWHP 386 RWTQ, 3-link, Trigo's

    FFR 0004, Gen 3 , Hawk Coupe, Coyote twin turbo, 683 RWHP 559 RWTQ, IRS, VCP Tuned. "not too shabby"

    US ARMY Maintenance Test Pilot (CW4 Retired)

  9. #9
    Senior Member EZ$'s Avatar
    Join Date
    Feb 2014
    Location
    San Ramon, CA
    Posts
    933
    Post Thanks / Like
    Bill,
    I'm also doing a Bruce C. body on my car. I also wish I could have waited to get FFR's FIA kit, but... I'll try to get some pictures of my brake line routing in the back. I'm running IRS as well, and the brake lines run up the passenger side, mostly because of the chosen location of the ABS pump, and the fuel lines up the drivers side, for the same reasons as you posted. If I can shake this cold I've been fighting, I'll get in the garage this weekend, and get some pictures. Don't know that they'll help, but judging by everything else I've done, it might show you how you don't want to do this!
    Rick

  10. #10
    Junior Member BULLITT428's Avatar
    Join Date
    Mar 2011
    Location
    North Vancouver Canada
    Posts
    19
    Post Thanks / Like
    Bill I hope this is what your looking for and if it helps? Let me know if you have any question at all. Follow the numbers in order They start from the driver side front foot box to the rear both sides.

    Ed.


    337.JPG338.JPG339.JPG340.JPG345.JPG346.JPG347.JPG348.JPG349.JPG350.JPG
    Last edited by BULLITT428; 01-31-2015 at 12:10 AM.

  11. #11
    Junior Member BULLITT428's Avatar
    Join Date
    Mar 2011
    Location
    North Vancouver Canada
    Posts
    19
    Post Thanks / Like
    and more? sorry about the way the pictures came out? Not sure how do do it with the picture showing. Hope they help a bit?

    Ed.

    Ed.351.JPG352.JPG353.JPG355.JPG356.JPG357.JPG358.JPG359.JPG360.JPG361.JPG

  12. #12
    Junior Member BULLITT428's Avatar
    Join Date
    Mar 2011
    Location
    North Vancouver Canada
    Posts
    19
    Post Thanks / Like
    Seems I miss some.

    Ed.

    341.JPG342.JPG343.JPG

  13. #13
    Senior Member 2FAST4U's Avatar
    Join Date
    Feb 2011
    Posts
    1,013
    Post Thanks / Like
    Thanks Ed. Very helpful.

    Rick. I can wait until you feel better. Are you doing an FIA or Slabside? Did you go with his fiberglass footboxes and trunkpan?

  14. #14
    Senior Member 2FAST4U's Avatar
    Join Date
    Feb 2011
    Posts
    1,013
    Post Thanks / Like
    Another question with regards to the brake lines in the back; where did you terminate the hardline to transition to the braided lines? I'm using the Mustang brakes

  15. #15
    Senior Member EZ$'s Avatar
    Join Date
    Feb 2014
    Location
    San Ramon, CA
    Posts
    933
    Post Thanks / Like
    Bill, I'm doing an FIA with an * next to that. Basically, I'm doing a bunch of items that you would never see on an FIA, but I'm building it for me. I'm staying with the aluminum foot boxes, and trunk where I did a drop mod on the floor of the lower trunk. I think Bruce was doing the mods on yours just before I received mine. I was watching your thread, and was getting a bit jealous. It looks like it came out awesome! I can't wait to see the completed car. I terminated the brake lines basically where the manual recommends, but I did run into a problem. Since I didn't have the wheels on yet, I didn't pick up on the fact that the braided lines they sold me interfered with the wheels and tires. Had to put a 90 degree fitting to change the way the lines ran. It worked, but it was disappointing that FFR's own lines, working with the build manual, would have that kind of issue. Like I always say, "two steps forward, one step back".
    I'm still feeling like s**t, but if I get a little bit of time where I'm not hacking up a lung, I'll try to get you those pictures.
    Rick

  16. #16
    Carl carlewms's Avatar
    Join Date
    May 2012
    Location
    Nokesville, VA
    Posts
    1,125
    Post Thanks / Like
    I routed them down the outside of the 4 in tube on the DS and the up and over the IRS frame. Here is my post on the subject.

    I finished the rear brakes, finalized riveting the run from the foot box to the DS rear. Two L shaped brackets were made to mount the brake transitions from the hard tube to the Wilwood flexible lines provided with the brakes. I used 1/8 in steel plate attached to the frame with two 10-24 1/2 in screws. This required drilling and tapping the holes to accept the screws since I was attaching to the quad shock location on the frame which was fairly thick (about 5/8th of an inch) as well as had interference from the rear x frame tubing. I made sure not to violate the integrity of the welds which connect the x tube to the quad shock mounting point.

    Attachment 17794 Attachment 17795

    If I were to do this again I would run the line across the rear x member and through one of the mounting holes for the quad shock.

    Here are photos of the full installation:

    Attachment 17796 Attachment 17797
    Mk 4 Roadster
    October 25, 2012 - Kit Arrives
    April 8, 2013 - Build Starts
    August 23, 2015 - Rolling Chassis/Engine & Transmission Installed
    March 26, 2016 - Go Cart

  17. #17
    Senior Member EZ$'s Avatar
    Join Date
    Feb 2014
    Location
    San Ramon, CA
    Posts
    933
    Post Thanks / Like
    Bill,
    Finally had an afternoon where this cold decided that I could keep some of my lungs. I took some pictures and I just hope I can get them attached. I'm more used to the FFCars site for posting, so I hope it's the same here. First picture is the passenger side.This is where I brought the line down the 4" frame rail, up the square tube to the split, and ran the braided to the caliper. The next is the crossover to the drivers side.I ran this under the 2x3 tube under the roll bar anchor points. Last is the drivers side. This shows best how I had to add the 90 degree fitting to avoid the braided line from going straight out into the tire/wheel. Could have probably avoided this by turning the termination of the hard line 90 degrees to face the rear of the car. I hope that helps. I also hope that it's all going to work once I get the car complete! Some of the work I'm doing on this kit is new to me, or it's something I haven't done in over 40 years, or maybe I just forgot I had done it years ago.
    Rick

  18. #18
    Senior Member 2FAST4U's Avatar
    Join Date
    Feb 2011
    Posts
    1,013
    Post Thanks / Like
    Perfect Carl. Exactly what I was looking for

  19. #19
    Senior Member EZ$'s Avatar
    Join Date
    Feb 2014
    Location
    San Ramon, CA
    Posts
    933
    Post Thanks / Like
    Bill,
    tried to post with pictures, but I guess with as few posts as I have on this forum, they must have denied my post. Maybe they'll eventually allow it. Sorry
    Rick

  20. #20
    Senior Member 2FAST4U's Avatar
    Join Date
    Feb 2011
    Posts
    1,013
    Post Thanks / Like
    No problem Rick

Posting Permissions

  • You may not post new threads
  • You may not post replies
  • You may not post attachments
  • You may not edit your posts
  •  

Breeze

Visit our community sponsor