Very Cool Parts

Visit our community sponsor

Thanks Thanks:  21
Likes Likes:  218
Page 7 of 9 FirstFirst ... 56789 LastLast
Results 241 to 280 of 338

Thread: Art's 818 build

  1. #241

    Yes, I love Technology
    aquillen's Avatar
    Join Date
    Feb 2016
    Location
    NW Indiana
    Posts
    753
    Post Thanks / Like

    Hood louvers

    While we're in the vincinity, I tackled getting more air out of that hood. The 3.0 engine is known to need more cooling than the four bangers, at least in Internet lore. Having looked at the market options, and as always hoping to DIY, I dropped back to a memory of louvers I always liked. Ferrari 308 over the front wheels. So I cut a bunch of.03 thick aluminum strips, bent them in half to make 15mm wide strips with nice curved surface along the edge (via the bent side). Milled slots in side rails on the CNC machine. Aluminum soldered all of them into place (with the flea market variety of 700 F degree solder sticks). And of course powder coat. Had a big goof in my powder coat "box" whereby previous white powder fell from the inside top of the box onto the grills. Made each one look like it was dusty.

    Holy cow !!! sand blasting off powder coat takes a LONG time - at least if using new 80 grit coal slag media.

    Anyway they are sexy enough for my taste:


    .

    .
    Last edited by aquillen; 04-23-2020 at 10:10 PM.

  2. Likes Hobby Racer liked this post
  3. #242

    Yes, I love Technology
    aquillen's Avatar
    Join Date
    Feb 2016
    Location
    NW Indiana
    Posts
    753
    Post Thanks / Like

    Front aluminum

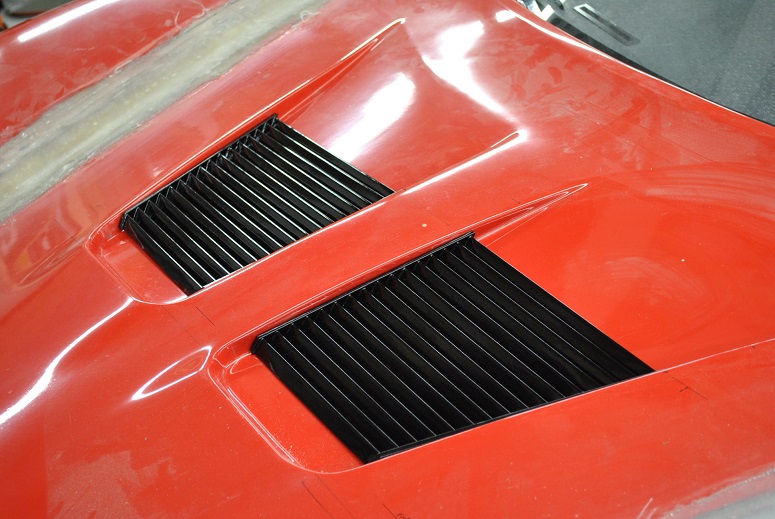
    With the hood work pretty much done, time to finish up the front close off aluminum. I worked these parts over by adding material wherever needed to get a close fit to the hood, etc. Then made some extra parts to help close the gaps and omissions. I started with the cheap spray on underbody stuff (Duplicolor), but already knew it would not bond really well to raw aluminum. Cleaned it off the initial couple panels after a few days and not in the least impressed, and it is messy crap going on and off. Got self etch primer from TCPGlobal and completely sanded, cleaned and primed all. Then got cheap again and just painted it all with Rustoleum. Probably not my first choice since it is gloss, but I had lots of cans of the stuff and it's one of those "good enough, let's go" deals. But at last I can put them all back on with the zillion screws I previously established and move on... hooaaa!

    Everything that contacts the hood is setup to use rubber bulb seal too.


  4. #243

    Yes, I love Technology
    aquillen's Avatar
    Join Date
    Feb 2016
    Location
    NW Indiana
    Posts
    753
    Post Thanks / Like

    Rear end stuff

    So way back when Rori's build showed his Kia Soul rear fascia adaption I took note. LKQ let me have this for $12.00 on sale day. How can you go wrong for that? Except it gave me ideas on a split exhaust instead of my original 2 into 1 setup. That ran up the bill a little bit, but still happy here.

    With just a little careful moto-tool work you can get that fascia to fit like a glove to the rear of the 818. And here is a look at my custom tail lights. The turn signal sweep function works , and someday I'll get a video of it and post.


    .

    .

    .
    The exhaust tips are SS flat plate formed to fit inside the slots in the Kia grille. They have air flow between the steel and the grill plastic, and then the front of the steel ovals have funnel shaped bellmouths that each muffler flows "out-into" the mouths. This lets air come in through the inside of the steel ovals along with the fumes. My 2014 Chargers have this same setup to prevent melting the rear bumpers.

    I only have about 12" of room for mufflers unless I hack up the entire exhaust system. So on my first search I only found some 12" magnaflow glass-packs. I put it all together and then when I ran the motor it was "ooh-ohh - they'll pull me over for sure" ... THAT LOUD.

    On a new search for solutions I found the Thrush Turbo's in 11" body length. Those are going in next and... don't laugh too loud ... I duct-taped them in place the other day and ran it. Still pretty loud but now sounds good. Plenty of bark, but not likely to get pulled over by even the nicest guys like the previous setup. Very sporty-porchey.

    Gotta get rid of the glass-packs. In the way.


    I'm thinking CNC up some nice 'Factory Five" letters to fill out that empty real-estate on the back between the tail lghts. Sort of Ferrari like again.
    Last edited by aquillen; 04-24-2020 at 09:16 AM.

  5. Likes Mitch Wright, AZPete, DSR-3 liked this post
  6. #244

    Yes, I love Technology
    aquillen's Avatar
    Join Date
    Feb 2016
    Location
    NW Indiana
    Posts
    753
    Post Thanks / Like

    Wheels

    I got a good deal on these banged up wheels back when I got the engine and suspension parts. Came from a Japan car via JDM Motors in Cincinnati. Actually by the time I cleaned them up, painted them, then decided to get them powder coated a couple months back, not such a good deal. About the only work I farmed out as they don't fit in my oven. But I always liked this style wheel and they did turn out right. Fixing up the hubs was no small endeaver but worth the effort. The wheels had Japanese in marker on the insides, don't know what it said but guess they probably did come from over there. Looks like these were made by a division of Ray's and were pretty popular outside the US. The scuffs either just cleaned up by sandblasting or a bit of JB Weld in some spots (powder coat sticks to JB just fine in my experience). Powder coater charged $75 per wheel to strip my new paint and then coat them.

    Before -

    .

    .
    After -

  7. Likes AZPete, Ipassgas liked this post
  8. #245

    Yes, I love Technology
    aquillen's Avatar
    Join Date
    Feb 2016
    Location
    NW Indiana
    Posts
    753
    Post Thanks / Like

    Interior - visors and overhead console

    2007 Saturn Aura donated these parts. Based on - small enough center console to fit in the 818 space. Visors small enough to fit, and can extend out to cover sun in the side windows. Next to nothing at LKQ Pick your part
    .
    I recovered the visors by popping out the mirror frame, pulling the cloth out, and putting my vinyl on. The neat thing is the split line around the perimeter which the covering tucks into, and this makes it easier to do a good job of fitting the cover with a good look.

    The mounting is tricky for the visors - needs to be just right or they won't swing to the side correctly - hanging goofy instead of straight. So I made mount plates trapped inside tubes that I could rotate. Those tubes will get epoxy bonded next time I have the top off and upside down.

    I haven't fiddled with the helper clips that go on the ends of the visors, but expect that will be easy.


    .

    .
    .

  9. Thanks redbudrr thanked for this post
    Likes redbudrr, AZPete liked this post
  10. #246
    Senior Member Rob T's Avatar
    Join Date
    Feb 2016
    Location
    Woodruff, SC
    Posts
    504
    Post Thanks / Like
    I am in awe every time I see your work. Amazing.

  11. #247
    Senior Member
    Join Date
    Jan 2017
    Posts
    184
    Post Thanks / Like
    Wow. Very impressive. You keep me inspired to make progress on mine.

    My favorite part was that you use lots of tape too! Now I know it is ok. Just went out and taped on my exhaust pipe like Art did

  12. #248

    Yes, I love Technology
    aquillen's Avatar
    Join Date
    Feb 2016
    Location
    NW Indiana
    Posts
    753
    Post Thanks / Like
    Just remember to keep your drive times under 30 seconds. After that the tape cooks off, exhaust falls off.

  13. Thanks grabera7, Shawn818c thanked for this post
  14. #249

    Yes, I love Technology
    aquillen's Avatar
    Join Date
    Feb 2016
    Location
    NW Indiana
    Posts
    753
    Post Thanks / Like

    Overhead console from Saturn Aura

    The overhead console from the same 2007 Saturn Aura, was just the right size too. Everything else I looked at in the scrap yard was bigger. These have 4 frame/rings which get bigger and bigger. I used the main body and first trim ring. Chopped the second ring down to just the part that holds the lamps. My favorite thing about this is it has a built in universal garage door remote. For fun it also has "ambiance lights", small LEDs that shine down onto the shifter console area to light that up a bit at night - whoopee ha.

    I made a skirt first from cardboard then with the shape figured out, made a flimsy one from scrap aluminum flashing. That piece hot glued & epoxied into the frame, then a couple layers of fiberglass to give it some backbone. Will cover with cloth eventually. I'm thinking maybe a couple strong magnets will hold this up there, but open to other ideas that come along.

    I'm trying to resist the presence of that sun roof control switch. Making it functional is an interesting prospect.


    .

    .

    .

    .
    Last edited by aquillen; 07-06-2020 at 08:03 PM.

  15. Likes Mitch Wright, AZPete, Santiago liked this post
  16. #250
    Member
    Join Date
    Aug 2018
    Location
    Chicago
    Posts
    44
    Post Thanks / Like
    Hi Art,

    If you find yourself needing to sandblast tough finishes like powder coat, Menards sells a fairly aggressive black blasting media for $8 per 50lb bag. The SKU is 1891331. It tends to chew right through those finishes in a hurry.

  17. #251

    Yes, I love Technology
    aquillen's Avatar
    Join Date
    Feb 2016
    Location
    NW Indiana
    Posts
    753
    Post Thanks / Like
    Jake - thanks - good info !

  18. #252
    Senior Member beeman's Avatar
    Join Date
    Feb 2011
    Location
    Indiana
    Posts
    1,490
    Post Thanks / Like
    Art-
    Loved reading through your thread! Thanks for sharing some great ideas, you have me thinking about a couple of things. Looking forward to seeing your sequential tail lights. Keep up the great 818 build!
    Dave
    MK3.1 2004 Mach 1 donor. ABS, PS, TC.
    GTM #304 LPE 525hp LS3
    2000 C5 Lingenfelter LS1@489hp
    1999 Corvette FRC/Z06 track car

  19. #253

    Yes, I love Technology
    aquillen's Avatar
    Join Date
    Feb 2016
    Location
    NW Indiana
    Posts
    753
    Post Thanks / Like

    Headliner and Console

    Wrapped this bit of the project over the last few days. The black headliner is a very thin vinyl with diamond embossed pattern from my local upholstery fiend.


    .


    I bent the ceiling aluminum plate so it has a strong upward bow. Will put a couple metal clips on the left and right sides near the front edge to trap it. Some foam up underneath to kill rattle. Firewall will also hold it in place. Glued with the DLT Litebond 2065 Landau adhesive I mentioned before.
    Last edited by aquillen; 05-26-2020 at 10:20 AM.

  20. Likes Mitch Wright liked this post
  21. #254

    Yes, I love Technology
    aquillen's Avatar
    Join Date
    Feb 2016
    Location
    NW Indiana
    Posts
    753
    Post Thanks / Like

    Coupe roof intake air channels - leaks

    Examining the air channels I found a number of water leak opportunities. Spent some time locating and sealing these up, or in one case helping the leaks work better. Even if they don't leak they will trap and hold water in a couple places. Seems like something should be done, so...

    There is a molded in fiberglass wall at this line. One side was close to sealed, the other was not at all. Access to these is impossible without cutting openings. I sealed these and then closed the "access ports" with some fiberglass discs cut from scraps left from other mods.


    In some places along the edges of the entire inner air-port fiberglass to roof interface I worked body repair epoxy into cracks and gaps that would allow water to probably leak into the cabin from overhead. I guess spending a year and a half underwater in a submarine has made me somewhat fussy about water getting in where it shouldn't.

    There is a another blank off hidden near this line. Inspection with an endoscope camera showed one side would leak for sure, the other probably not. But again water would collect to about 1/4 pint or more above that plate and just rot there. I decided this can be forcibly ported to let the water drain. Hence the deep well drilling rig was deployed from the end like so:


    .
    Last edited by aquillen; 05-26-2020 at 10:24 AM.

  22. Likes AZPete liked this post
  23. #255

    Yes, I love Technology
    aquillen's Avatar
    Join Date
    Feb 2016
    Location
    NW Indiana
    Posts
    753
    Post Thanks / Like

    Firewall window can fall out - oh and some carpet

    I just had to do a little carpet work to see how it will come out. Pretty happy so far. Easy part done.

    Did you know there are times when reading the manual is actually a good idea, after all. But you need to turn the page and read it all. I installed the window in the firewall. Next thing I know I'm moving things around and the glass falls out on the concrete floor.

    My mentor from my seat upholstery project stopped in. He used to be a glass guy at a shop. Looked at my seal install and got me in the groove literally. That is why the back lips looked odd to me but I didn't investigate further. Later on I found that the next page in the manual showed closing that locking lip in the rubber seal. Sometimes you just get lucky and the glass doesn't break.

    Last edited by aquillen; 05-26-2020 at 10:17 AM.

  24. Likes AZPete liked this post
  25. #256

    Yes, I love Technology
    aquillen's Avatar
    Join Date
    Feb 2016
    Location
    NW Indiana
    Posts
    753
    Post Thanks / Like

    Closing the side wall behind the seat

    There are a couple aluminum pieces in the kit for this area. They don't fit nicely - at least not in my scheme. Made some fiberglass covers that will get vinyl or carpet at some point. Probably stuff some foam or rubber bulb like stuff behind them. Magnets or some screws will keep them in place when the time comes.

    First some screen that can be hand shaped to desired form:


    Next some duct tape (TIP: you should get some of this stuff, could come in handy ) to prevent resin from sticking. This tape is the only reason the finished part was less than perfect smooth. Sandpaper.


    Here is a great way to handle fiberglass and resin, especially for odd parts being worked "in place". You eliminate fraying of the glass edges and overall work is un-messy (at least better than a free-for-all with loose cloth).

    1) plastic sheet on bottom
    2) fiberglass cloth
    3) paint with some resin
    4) plastic sheet on top then roll out excess= lightweight and smooth later
    5) paper template on top
    6) trace template onto plastic sheet
    7) cut the whole sandwitch. Milwaukee Tool scissors are fantastic. Cuts aluminum sheet, then fiberglass, then carbon fiber, then cloth, then paper and still razor sharp months later.
    8) peel off bottom layer plastic sheet
    9) place on target and work into position
    10) peel off top plastic
    11) repeat next layer of glass


    .

    .
    Voila!

    .
    Peel off the duct tape (packing tape works if your local hardware store doesn't sell "duct/duck" tape). Save the screen template for your next 818, since you know you love building these things.
    Last edited by aquillen; 05-26-2020 at 10:29 AM.

  26. Likes mikeb75, DSR-3 liked this post
  27. #257

    Yes, I love Technology
    aquillen's Avatar
    Join Date
    Feb 2016
    Location
    NW Indiana
    Posts
    753
    Post Thanks / Like

    Steering wheel and cruise lever

    Trust me, covering a steering wheel and getting nice looking stitching is no small endeavor. Don't let those Youtube shows make you think it is easy! You can do this, just set aside a lot of time.

    Subaru steering wheel was messed up. 818 building friend JB offered me an NRG wheel he bought, they shipped him the wrong one, then sent another and said "keep both" (I think). He sold me this one for a bargain. but it had red stitching and velour black cloth. The red clashed with my blue theme.

    Pigskin to the rescue. Made a matching shifter boot just for looks. I stitched this twice. First time was an real education and a flop. Good think it was a big pig, I needed to cut new parts for the second round. And just so you know, using original pieces as templates just doesn't work - it is stretched out of shape even if you don't think so. You have to fit and mark the leather on the wheel or it won't come out right (IMOANEO) ... in my honest and now experienced opinion. And, every hole must be prepunched and in the correct - matching - across from each other - spot or you're doomed.


    .

    .
    Cruise lever
    .

  28. Likes AZPete, DSR-3 liked this post
  29. #258

    Yes, I love Technology
    aquillen's Avatar
    Join Date
    Feb 2016
    Location
    NW Indiana
    Posts
    753
    Post Thanks / Like

    Exhaust shields

    Finally wrapped up my exhaust. 0.2mm embossed stainless steel from Pectec in Spartanburg SC. Be advised they only sell in 20 foot rolls for about $200 + shipping. But cool stuff and I'm using it for some other things here and there. Ceramic fiber blanket 2300F temperature rating. Ebay $17.00 for 25 ft.

    Mostly pop-riveted (steel rivets).


    .

    .

    .
    Forming the header shield peices:
    .

    .

    .

  30. #259

    Yes, I love Technology
    aquillen's Avatar
    Join Date
    Feb 2016
    Location
    NW Indiana
    Posts
    753
    Post Thanks / Like
    The header covers get held on using stainless steel straps. These are like "ty-raps" but all steel. Napa is one source for these. This lets me cut the straps off to so I can work the pipes out off the car without raising the engine to get clearance. Band clamps work too but not so "pretty". Here are two shield stuffed with the insulation and ready to go on.


    .
    All in.

    .
    And then out -

  31. Likes AZPete, Mitch Wright liked this post
  32. #260
    Senior Member Frank818's Avatar
    Join Date
    Jun 2013
    Location
    QC, Canada
    Posts
    5,732
    Post Thanks / Like
    2 beautiful mufflers, one on each side, super symmetric!! You are a robot!
    Frank
    818 chassis #181 powered by a '93 VW VR6 Turbo GT3582R
    Go-karted Aug 5, 2016 - Then May 19+21, 2017
    Tracked May 27/July 26, 2017
    Build time before being driveable on Sep 27, 2019: over 6000h
    Build Completed Winter 2021

  33. #261
    Senior Member AZPete's Avatar
    Join Date
    Feb 2011
    Location
    Scottsdale, AZ
    Posts
    2,374
    Post Thanks / Like
    Always astounding work! Inspiring!
    818S/C : Chassis #25 with 06 WRX 2.5 turbo, ABS, cruise, PS, A/C, Apple CarPlay, rear camera, power windows & locks, leather & other complexities. Sold 10/19 with 5,800 miles.
    Mk3 Roadster #6228 4.6L, T45, IRS, PS, PB, ABS, Cruise, Koni's, 17" Halibrands, red w/ silver - 9K miles then sold @ Barrett-Jackson Jan 2011 (got back cash spent).

  34. #262
    Senior Member
    Join Date
    Mar 2011
    Location
    Denver, CO
    Posts
    1,362
    Post Thanks / Like
    wow, i can not believe this build!! it is amazing.

  35. #263
    Member
    Join Date
    Aug 2017
    Posts
    90
    Post Thanks / Like
    Art, you're inspiring. . .
    Inspiring me to sell my half done kit. It'll never be a third as cool as yours. ��

  36. #264

    Yes, I love Technology
    aquillen's Avatar
    Join Date
    Feb 2016
    Location
    NW Indiana
    Posts
    753
    Post Thanks / Like
    Quote Originally Posted by Ipassgas View Post
    Art, you're inspiring. . .
    Inspiring me to sell my half done kit. It'll never be a third as cool as yours. ��
    No No No NO. You better be jesting. I see other 818's that make me drool and go for more. No two should be alike and your stamp on yours is as good as anyone's. Level of skill is way less important than level of effort - give it what you got and yours becomes the best.

    If it was any other way we would all be driving one model, one style and one boring vehicle, world wide. And God forbid that day comes.

  37. Likes Frank818, Jetfuel, AZPete liked this post
  38. #265
    Member
    Join Date
    Aug 2017
    Posts
    90
    Post Thanks / Like
    I'm jesting. It'll get finished. My plan was race car with a license plate anyway, so it needn't be factory perfect.

  39. #266

    Yes, I love Technology
    aquillen's Avatar
    Join Date
    Feb 2016
    Location
    NW Indiana
    Posts
    753
    Post Thanks / Like

    Body painted

    With a little help from my friends it is painted and it was all a blast!

    Thanks to Jetfuel's arranging booth access, my last month of body paint prep work culminated in shooting it all in a pro booth inside an incredible complex of aircraft hangars at the Eagle Creek Airport in Indy. Grandson who went with me to get the kit years back, and of course Jet, credited for several hours of final sanding prep, helping me keep my suit and air hose from dragging on everything wet during the shoot. Especially Jet helped find and sort out technique, goof and application fixes, keeping the paint coming, cleaning the gun and just plain making the whole thing fun and worth.

    Inside a Tyvek suit much of Fri and Sat in 90F+ heat - I should be 10# lighter, which would be good so I can get in and out of this thing when it is finished....

    Tips:

    Don't reuse a disposible Kups cap or can on your paint gun's reservoir unless scrubby clean, the previous day's residue will soften and blow out onto your work at the worst times.

    Oh, and before Jetfuel enjoys tattling on me, bring all your paint with you on the first trip. Wife had to meet us from 120 miles away to pass over the clearcoat catalyst I left at home. Wife says I owe her big... as in new diamond

    Crammed in just right you can get the entire 818C on the floor of a 16' Penske truck. They are hurting for business so came down from 99c per mile to final of 25c and a great daily rate. Screw everything down on 2x4's and those to each other for a matrix that stays together on the bumpy roads.

    Have better skills or use a pro to do the shoot so you don't have to cut and buff when finished. I had some nice smooth spots but the majority to make me happy will need some after-paint elbow grease this week.

    I would do it all again in a heartbeat, Jet - I owe you man!

    Last edited by aquillen; 07-06-2020 at 07:54 PM.

  40. Likes Hobby Racer, DSR-3, lsfourwheeler, AZPete liked this post
  41. #267
    Senior Member
    Join Date
    Feb 2019
    Location
    Houston, TX
    Posts
    1,032
    Post Thanks / Like
    Art i've looked at the picture on 3 monitors, and I can't tell if it is grey or white.

  42. #268

    Yes, I love Technology
    aquillen's Avatar
    Join Date
    Feb 2016
    Location
    NW Indiana
    Posts
    753
    Post Thanks / Like
    Championship White - very white. A Honda paint - actually from TCP Global.

  43. #269
    Senior Member Hobby Racer's Avatar
    Join Date
    Feb 2011
    Location
    Syracuse, NY
    Posts
    1,292
    Post Thanks / Like
    Nothing like the pride of showing off your car and being able to say, yes, I painted it myself!

    Great work.
    MK3.1 Roadster completed 2011
    818R built with EZ36R H6 completed 2018
    818R rebuild with a JDM Honda K24A

  44. #270
    Senior Member Frank818's Avatar
    Join Date
    Jun 2013
    Location
    QC, Canada
    Posts
    5,732
    Post Thanks / Like
    Jetfuel!!! Him again! I also owe him a big one!
    Frank
    818 chassis #181 powered by a '93 VW VR6 Turbo GT3582R
    Go-karted Aug 5, 2016 - Then May 19+21, 2017
    Tracked May 27/July 26, 2017
    Build time before being driveable on Sep 27, 2019: over 6000h
    Build Completed Winter 2021

  45. #271
    Senior Member Jetfuel's Avatar
    Join Date
    Aug 2018
    Location
    Indianapolis
    Posts
    395
    Post Thanks / Like
    Art, it was our pleasure having you down down here for the weekend.
    It was a lot of hard work but it was a heck of a lot of fun for sure.
    All I hope for is that riding in my car lit a bit of a fire under your feet to get you to the finish line...
    IMG_5319.jpg
    Checking for imperfections with a sun lamp
    IMG_5322.jpg
    Hard at work
    IMG_5327.JPG
    Learning from grandpa

    Jetfuel
    Last edited by Jetfuel; 07-05-2020 at 08:49 PM.

  46. Likes Kurk818 liked this post
  47. #272
    Senior Member Hobby Racer's Avatar
    Join Date
    Feb 2011
    Location
    Syracuse, NY
    Posts
    1,292
    Post Thanks / Like
    I've never had the pleasure of painting a car in a real paint booth. I always end up doing it my garage in a rigged up paint room. Being able to space the parts out and have a downdraft system clear the fog as you spray must be great! That plus the great lighting make it a lot easier to get good results.
    MK3.1 Roadster completed 2011
    818R built with EZ36R H6 completed 2018
    818R rebuild with a JDM Honda K24A

  48. #273

    Yes, I love Technology
    aquillen's Avatar
    Join Date
    Feb 2016
    Location
    NW Indiana
    Posts
    753
    Post Thanks / Like
    Hobby - all for sure. I tossed up a quick booth in my garage and put the first layer of epoxy primer on so I could find and dress any gross issues. So I had all that "fun" as well. Then the trip to Indy, we 320 grit sanded it since it only had a 24 hour window to coat over and I was well past that. Then we touched pin-holes and funny spots. Next reduced same primer = sealer, and so on. Didn't mind the primer going on in a quick and dirty garage booth since it was subject to sand and fix. I've done 6 cars before in home made booths but man, a full paint system (with oven to boot which we used on the clear) is in another world of goodness. Space was tight - easy to bump something - but we made it. This booth is there to do ailerons and other smaller airplane parts. Sure got lucky the day Jetfuel asked to come up and see my build last summer, he is another great 818'er.
    Last edited by aquillen; 07-06-2020 at 08:22 AM.

  49. Thanks Hobby Racer thanked for this post
  50. #274

    Yes, I love Technology
    aquillen's Avatar
    Join Date
    Feb 2016
    Location
    NW Indiana
    Posts
    753
    Post Thanks / Like

    How much paint to do my 818C

    Your mileage will vary of course. This was TCP Globals "custom shop" paint line.

    I rough measured the body to 115 sq ft, but don't hold me to this.

    Epoxy primer:
    ..... 6/10 gallon one full coat
    ..... 4/10 gallon + 1/10 gallon reducer = "sealer", one full coat with 5 drops paint left (yikes), but I didn't scrimp near end. Did not paint where it can't be seen later on this coat.

    White base
    ..... 8/10 gallon, 2 parts base 1.5 part reducer, 3 coats (book says 1 part reducer but things happen sometimes)

    Urethane clear
    .... 6/10 gallon, 4 parts clear 1 part activator, 2 coats

    Jetfuel suggested I shoot an additional reduced clear to get a final flow-out. I chickened out on that but wish I knew how that would have worked out. I'm now doing 1000, 1500, 2000 wet by hand followed by rubbing, polishing and swirl mark pastes with my old beat up Wen DA polisher/buffer. Working out nicely but will take probably 3 maybe 5 days to wrap it up. Coming out pretty nice so far.
    Last edited by aquillen; 07-06-2020 at 07:45 PM.

  51. Thanks Hobby Racer thanked for this post
    Likes DSR-3, AZPete, Mitch Wright, Kurk818 liked this post
  52. #275

    Yes, I love Technology
    aquillen's Avatar
    Join Date
    Feb 2016
    Location
    NW Indiana
    Posts
    753
    Post Thanks / Like

    Headliner rework

    Part of my headliner (the ceiling aluminum panel, visors) was done with the Morbern Hex marine vinyl - same as I put on the seats, door panels and dash. The pillars and such were done with a very cool pattern of thin, unbacked, embossed vinyl that was also a headliner product. During the baking of the paint (about 130F) something between the adhesive (Weldwood landau top and trim adhesive) and that vinyl went south. The Morbern did not have a problem but the thin stuff must have released something into the adhesive which softened it, and the vinyl curled and peeled.

    Found this after doing the polish work, whereupon I removed the paint masking and paper covering the headliner and found a mess:


    Given that was about 2 days work it was a bummer, but good training on getting headliner in. I did that job in sections because the vinyl was difficult to fit and curve. But now that I had done one I felt brave enough to give it another go in all-one peice.

    Local shop had some foam back charcoal cloth, a lot easier to work with than the vinyl. I did the entire roof with one piece from the tip of the pillars to behind the aluminum headliner. Material was $60.00, and I'm glad it failed the first time, this is much better anyway:


    With the roof suspended upside down from the ceiling, I could sit on a stool inside the window frames and from each side to comfortably work on the interior.

  53. #276

    Yes, I love Technology
    aquillen's Avatar
    Join Date
    Feb 2016
    Location
    NW Indiana
    Posts
    753
    Post Thanks / Like

    Spoiler

    Ford Fusion 2006-2009

    The paint is indeed white... some views of the spoiler I picked up at LKQ Pick your part for $9.00


    .

    .

    .

    .
    Grandson visited and we hatched a design for the mounts. He shaped some pine, then we folded aluminum around it and tig'd the tails shut. A simple round aluminum piece will go in the middle as it wants to flex more than I like. It had a crack near one end on the underside, I think from flex on the Ford it lived on, likely from slamming the trunk over the years.
    .

    .
    For wire passage I put some 1" pipe to keep the resin fill out, and also a smaller tube goes in there for the pass through mount bolts. I filled the thing with plain old fiberglass resin, but filled with kitty litter which is light, fluffy of sorts, cheap, and saves resin. It also has about the right density so it floats around in the resin nicely, neither settling or floating to the top.
    .

  54. #277

    Yes, I love Technology
    aquillen's Avatar
    Join Date
    Feb 2016
    Location
    NW Indiana
    Posts
    753
    Post Thanks / Like

    Wiring

    Two and a half weeks ago. Started putting in the body wiring. At the end of the first day it was like this:
    .

    .
    My process started with making new wiring diagrams for everything throughout. Using all Subaru connectors, adding Deutch connectors for my custom stuff. Harnesses were cut away so I had things cut down to pigtails ranging from a couple inches to a couple feet at each connector. Mount components, plug those connectors in, then run interconnect wires using scraps from the cut out harness wires (to keep color codes) from each pigtail to its mating other end/s. Everything is done with crimp splices covered with internal melt/seal heat shrink. Told the wife this would take a week. She doubles everything I tell her and was about right.

    I'm down to installing power antenna, running speaker wires. Everything else has been tested and working, with exception of OBDII diag tool is not seeing the ECU. Expect to sort that today. All my wiring except the antenna runs down the left sail, nothing goes in the center as I wanted free access to pulling the rear firewall, and fuel tank. Antenna will go down the right side to behind the passenger area, keeping it away from the other wires just in case it wants to pick up any electrical noise - especially more likely without a steel body.

    Some more pics later this week when it looks "nice"...

  55. Likes Bob_n_Cincy, AZPete, Rob T liked this post
  56. #278
    Senior Member AZPete's Avatar
    Join Date
    Feb 2011
    Location
    Scottsdale, AZ
    Posts
    2,374
    Post Thanks / Like
    As always: Amazing work.
    Art, I really like your sun visors and the other interior trim. Of course, your wing and the finishing of the body panels are outstanding, too.
    818S/C : Chassis #25 with 06 WRX 2.5 turbo, ABS, cruise, PS, A/C, Apple CarPlay, rear camera, power windows & locks, leather & other complexities. Sold 10/19 with 5,800 miles.
    Mk3 Roadster #6228 4.6L, T45, IRS, PS, PB, ABS, Cruise, Koni's, 17" Halibrands, red w/ silver - 9K miles then sold @ Barrett-Jackson Jan 2011 (got back cash spent).

  57. #279

    Yes, I love Technology
    aquillen's Avatar
    Join Date
    Feb 2016
    Location
    NW Indiana
    Posts
    753
    Post Thanks / Like
    Thanks Pete, you set the pace, I just follow along...

  58. #280
    Member
    Join Date
    Feb 2011
    Posts
    29
    Post Thanks / Like
    Hi Art,
    I just read through your build thread, and all I can say is you have mad skills and ingenuity. Wish I had these skills, but alas, my talents lye elsewhere.

    Paul

Page 7 of 9 FirstFirst ... 56789 LastLast

Posting Permissions

  • You may not post new threads
  • You may not post replies
  • You may not post attachments
  • You may not edit your posts
  •  

Stewart Transport

Visit our community sponsor