Boig Motorsports

Visit our community sponsor

Thanks Thanks:  29
Likes Likes:  194
Page 3 of 16 FirstFirst 1234513 ... LastLast
Results 81 to 120 of 603

Thread: What did you do on your roadster today?

  1. #81
    Senior Member LuckyWinner's Avatar
    Join Date
    Feb 2011
    Location
    Fort Huachuca, Sierra Vista, AZ
    Posts
    779
    Post Thanks / Like
    my RAM HDX clutch from Forte arrived at my house...now it waits in storage with my trans for me to get home.

  2. #82
    Junior Member al1957's Avatar
    Join Date
    Feb 2011
    Posts
    5
    Post Thanks / Like
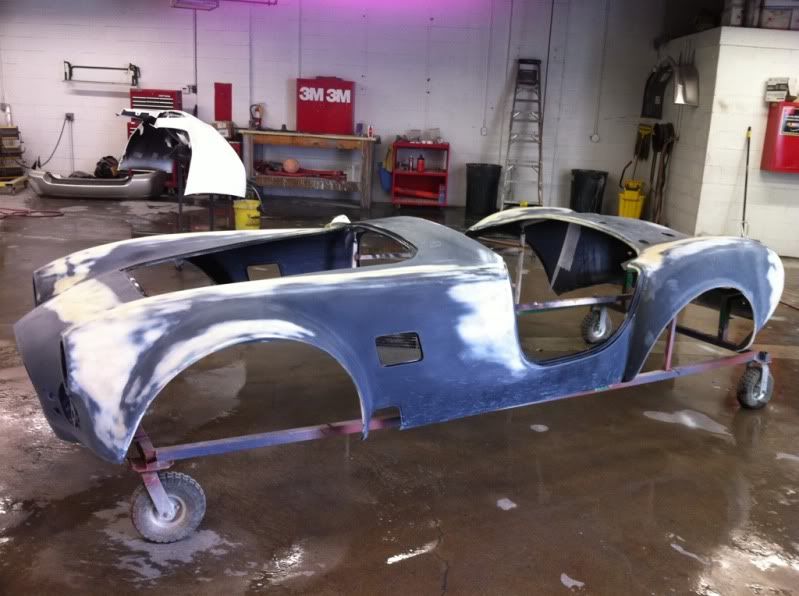
    Painted the under hood, inside of doors and trunk with the final color, Ford Royal Blue Metallic. Just trying to save a few bucks, the paint shop will do the rest. Looks good.

  3. #83
    Senior Member astglenn's Avatar
    Join Date
    Feb 2011
    Location
    Rescue CA
    Posts
    142
    Post Thanks / Like
    I installed heat shields on the side pipes. Black on black. Hung out with Mr. David Borden for a while, as I used his 4 post lift to do the install. Good day.

  4. #84
    Member ipsale's Avatar
    Join Date
    Feb 2011
    Location
    Topsfield, MA
    Posts
    68
    Post Thanks / Like
    I took Glenn's AWSOME Coyote flanges and fit them to the 4.6 headers.

  5. #85
    Senior Member rich grsc's Avatar
    Join Date
    Feb 2011
    Location
    O'Fallon, MO
    Posts
    3,101
    Post Thanks / Like
    About a 30 mile drive.

  6. #86
    Tool Baron frankeeski's Avatar
    Join Date
    Feb 2011
    Location
    "The I.E." SoCal
    Posts
    1,356
    Post Thanks / Like
    I spent a few hours today trying to get her road worthy again. Started on replacing the front coil-over springs and working towards the install of the front sway-bar. I'll be back at it at least for a few hours tomorrow as well.
    Frank
    __________________________
    Factory Five Racing MKIII Super Snake Replica. Cannonball Cobra Drop Trunk Box, Horn Button and other machined Do Dads.
    i.e.427 Chromed Full Width Roll Bar with integrated LED Third Brake Light.
    I will never forget My Buddy Paul.

  7. #87
    Member Greg_M's Avatar
    Join Date
    Feb 2011
    Location
    Knoxville, TN
    Posts
    38
    Post Thanks / Like
    Finished the ABS and tested it. Man this car will stop now!

    Greg

  8. #88
    Member ipsale's Avatar
    Join Date
    Feb 2011
    Location
    Topsfield, MA
    Posts
    68
    Post Thanks / Like
    I welded Glenn's Coyote flanges to the 4.6 headers after doing the fit up yesterday.

  9. #89

    Super Moderator
    R. Button's Avatar
    Join Date
    Feb 2011
    Location
    Elmira, NY
    Posts
    524
    Post Thanks / Like
    Blog Entries
    13
    After Mass when out for a ride only to find myself in Memphis, Tn when I stopped for gas! Forgot about the papers I have to write and the exam I need to do. It was time for a ride! Full tank of gas and the open road! Now I'll pay for it as I sit up late tonight studying... but it was worth it!

    Time to head back home to Arkansas and return to my studies!

    175.jpg
    Last edited by R. Button; 03-13-2011 at 06:15 PM.
    Ralph Button
    FFR 1436 (PROUD Owner of an Original Mark I)
    400,013 miles as of 11/1/2009
    417,840 miles as of 8/12/2010
    435,021 miles as of 12/19/2011
    Now a well broken in 347 engine
    523,145 miles as of 7/29/2014
    601,165 miles as of 6/1/2018
    615,215 miles as of 4/23/2022

    "It's not about the destination, it's the about the journey. And where is your journey taking you?"

    "... Not all who wander are lost!... --J.R.R. Tolkien

  10. #90
    Senior Member dallas_'s Avatar
    Join Date
    Feb 2011
    Location
    Dallas, TX
    Posts
    449
    Post Thanks / Like
    Blog Entries
    2
    Sprayed on a couple more coats of Slick Sand.

    Back to block sanding.
    FFR 7123 tilt front, Levy 5link/wilwoods/LCA's, webers.
    SL-C, LS3 525, Mendeola SDR5,

  11. #91
    Junior Member al1957's Avatar
    Join Date
    Feb 2011
    Posts
    5
    Post Thanks / Like
    Marked the centers on the body for stripes using a home built frame, tape measure, level, and a plumb bob. Removed the body from the chassis, off to the paint shop Wednesday. Great day.

  12. #92
    Member ipsale's Avatar
    Join Date
    Feb 2011
    Location
    Topsfield, MA
    Posts
    68
    Post Thanks / Like
    Today I got my tires mounted and then went on to modify a 35 degree 3-1/2 inch elbow by welding on a boss for the mass airflow sensor and a boss for the factory supplied hose from the breather. The elbow will bethe only thing between the coyote and a conical air filter. I'm trying to keep it as compact and clean as possible.

  13. #93
    Junior Member ThreePointTwo's Avatar
    Join Date
    Feb 2011
    Location
    Utah
    Posts
    29
    Post Thanks / Like


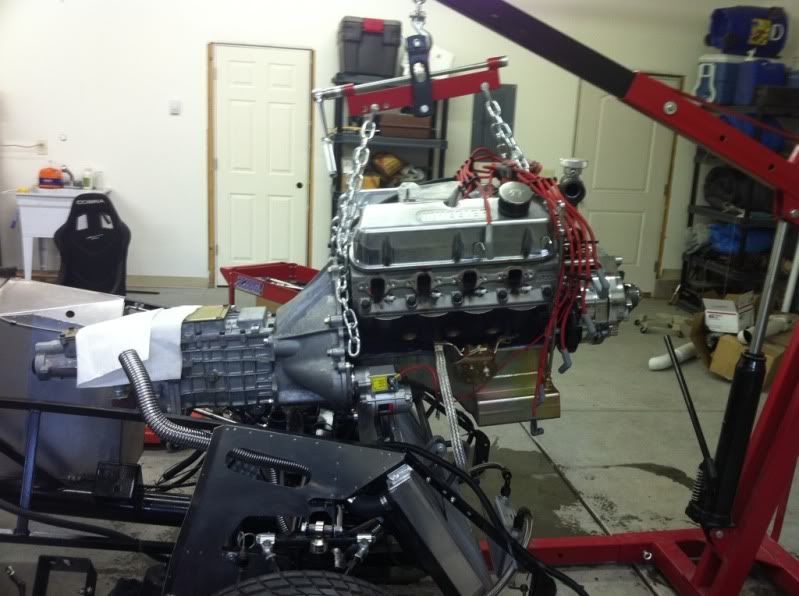
    Pulled the engine to fix a pan leak.

    Picked up August 2010, first start 12/22/10, first go-kart 12/23/10, first donuts 1/12/11. 427W, TKO500, 3.73 gears

    Graduation thread:
    http://thefactoryfiveforum.com/showt...duate-FFR-5979

  14. #94
    Member cwhoofgator's Avatar
    Join Date
    Feb 2011
    Location
    Orlando FL
    Posts
    78
    Post Thanks / Like
    Don't be so happy with that clutch. 1500 miles and pressuer plate failure. Spring broke on PP and you don't want to fix that in chassis.. Ask Ron????
    Currently re-building FFR5066K 5.0 T5 3:55 four link.

  15. #95
    Senior Member 68GT500MAN's Avatar
    Join Date
    Feb 2011
    Location
    Fresno, CA
    Posts
    1,808
    Post Thanks / Like
    Working on what I thought was a spark issue, now looking for a vacume leak.
    Doug

  16. #96
    Senior Member rich grsc's Avatar
    Join Date
    Feb 2011
    Location
    O'Fallon, MO
    Posts
    3,101
    Post Thanks / Like

  17. #97
    Senior Member
    Join Date
    Feb 2011
    Location
    Brookeville, Maryland
    Posts
    129
    Post Thanks / Like
    Got my side pipes back from the Ceramic coater and back on the car. New belts/harnesses. Man this car is a blast to drive!
    Attached Images Attached Images

  18. #98
    Senior Member Cobradavid's Avatar
    Join Date
    Feb 2011
    Location
    League City, Texas
    Posts
    517
    Post Thanks / Like
    I re-installed my seats with the seat mounting plates from Breeze. Of course, I had to test drive the seats. I took my son to Sunday night Youth group and he said "Dad, your new seats feel GREAT!" I have to agree with him - the tilt that the Breeze mounting plates have add a huge amount of comfort to the low-back seats.

    David
    My Saving Grace: John 3:16

    FFR6687, Graduate #39 in the Class of 2009
    The Factory Five Forum March 2012 POM

  19. #99
    Senior Member ClemsonS197's Avatar
    Join Date
    Feb 2011
    Location
    Marietta, GA
    Posts
    346
    Post Thanks / Like
    Cut out the drivers side footbox and added new 1.5" square and 1.5" DOM to open it up and allow room for my size 13's. Also had the 3-link bracket welded to the frame. Finally I dropped it off to have the blue paint stripped and it powdercoated black. Should be ready next weekend.

    MK3.1 #7076 - Under Construction....
    Coyote 5.0/Solid 8.8/Tremec 3650
    How to:
    Coyote Power Steering
    05-09 T3650 in a Roadster

  20. #100
    Tool Baron frankeeski's Avatar
    Join Date
    Feb 2011
    Location
    "The I.E." SoCal
    Posts
    1,356
    Post Thanks / Like
    Member Antny from Hemet came by to help me corner weight the car today. Not perfect but very close to perfect. I recently changed the spring rates in the car all the way around and added a front anti-sway bar. Ride height and corner weights were really close out of the box. We only had to make minimal changes to get it as close to spot on as it's ever been.
    Frank
    __________________________
    Factory Five Racing MKIII Super Snake Replica. Cannonball Cobra Drop Trunk Box, Horn Button and other machined Do Dads.
    i.e.427 Chromed Full Width Roll Bar with integrated LED Third Brake Light.
    I will never forget My Buddy Paul.

  21. #101
    Senior Member
    Join Date
    Feb 2011
    Posts
    390
    Post Thanks / Like
    still nothing =)
    FFR cobra
    RCR Superlite
    RCR 917
    04 Cobra/Z06/Diablo/bunch of other junk

  22. #102
    Not a waxer Jeff Kleiner's Avatar
    Join Date
    Feb 2011
    Location
    Bloomington, Indiana
    Posts
    8,094
    Post Thanks / Like
    60ish degrees and sunny so I pulled Steve's Mk4 out to the driveway to sand/apply/sand Rage, keeping the dust out of the garage. Later I took mine to the grocery store. First drive of the season (I took the long way there and back )!

    Jeff

  23. #103
    Senior Member OttawaFFRer's Avatar
    Join Date
    Feb 2011
    Location
    Ottawa, Canada
    Posts
    219
    Post Thanks / Like
    Started laying flooring in the new garage, just need to wire, insulate and drywall!
    10 years after my roadster build....
    289 FIA (pickup 28/08/20 if covid permits)
    currently building a 289 and accumulating parts needed to finish a Canadian Kit.

  24. #104
    Out Drivin' Gumball's Avatar
    Join Date
    Feb 2011
    Location
    Blackberry Township, IL
    Posts
    2,653
    Post Thanks / Like
    Installed Breeze battery tray in engine compartment and installed master cylinder and modified offset (now adjustable) brake pushrod.

    Edited to add information on making stock pushrod adjustable:

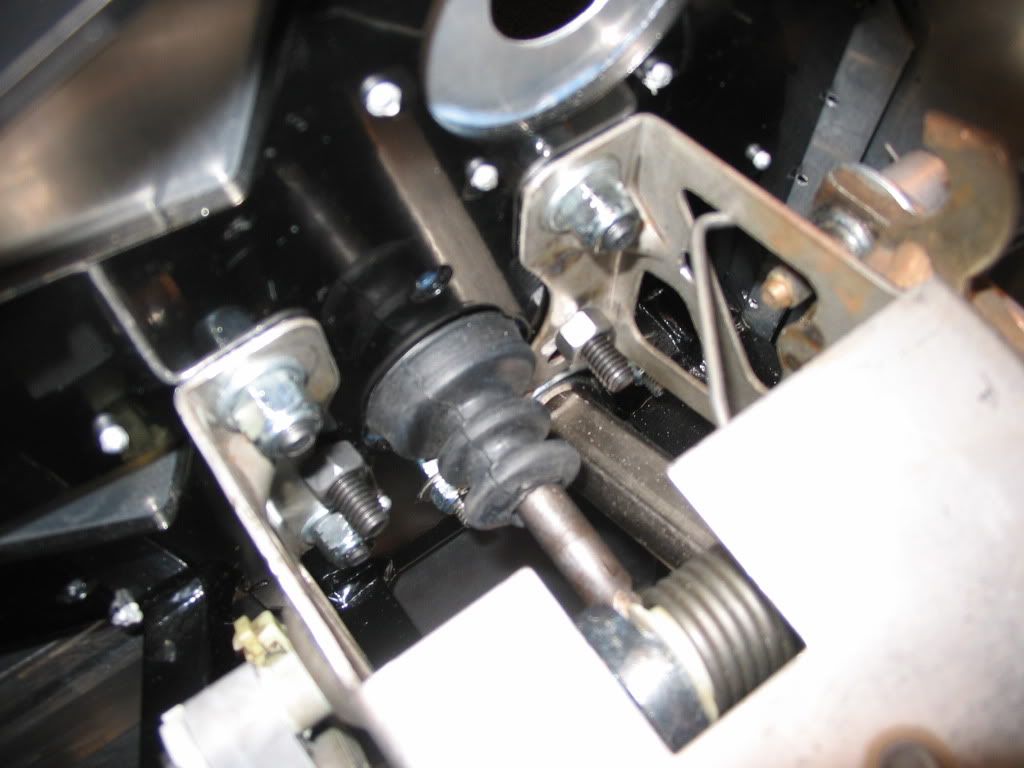
    Sorry, but the stock pushrod is installed in the car, but here's a description of what I did - I'd also be happy to answer questions if anyone wants to contact me via PM. After modifying the brake pedal ('94 pedal box) to work with manual brakes and installing the master cylinder ('94 - '95 SVT version - new from FFR), I found that the pivot stud on the pedal lever put the large end of the pushrod about 3/8" lower than the master cylinder, meaning that there was a slight vertical misalignment between the pushrod and the master cylinder planes. At the time, I was using an aftermarket adjustable pushrod - the type that is a two-piece version connected via a sleeve nut. Unfortunately, that type of pushrod is only available with the large end in line with the rod, not offset like the power brake booster version that is shown in the FFR manual. I sourced an OEM part from an early '90s Mustang power booster locally, but found that I didn't like how the end of the rod fit into the master cylinder piston recess - it was way too loose. Plus it was too short for my tastes and I wanted to still have some adjustability in addition to just using the spacer plates provided in the kit. The adjustable pushrod that I had was a much better fit in the master cylinder piston recess and even included a spring in a groove at the end that helped keep the rod seated in the master cylinder piston recess. The solution was to cut the OEM pushrod in half so that I could use the offset end of that pushrod with the better fitting end of the adjustable aftermarket pushrod. To make this work, since the OEM pushrod was much thicker at the end where it mounts to the brake lever, all I had to do was use a lathe to gun-drill the rod, then tread it internally to accept the other half of the adjustable pushrod. The finished product gave me the offset I needed to bring the pushrod into alignment vertically with the master cylinder, while also giving a nice fit for the rod inside of the master cylinder pushrod recess. I topped it all off with a rubber boot from a '65 / '66 Mustang brake pushrod and have a nice, finished installation - here's a pic:


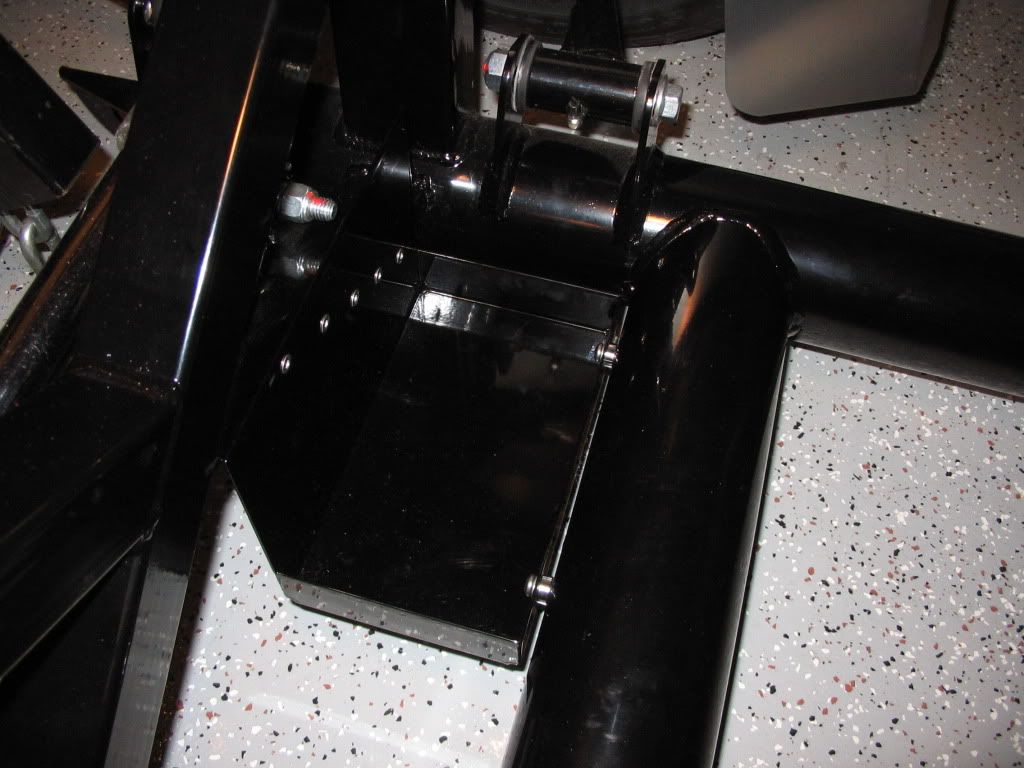
    And here's a picture of the installed Breeze battery tray. I had it powdercoated to blend in with the rest of the engine compartment, then used a pair of chrome 1/4" bushings instead of a stack of washers for the gap between the tray and the 4" round frame tube. For those who are concerned about the difficulty of installation, don't be - it was a snap. You'll need a 90 degree drill to make the lower holes in the X member and the two that go into the 4" round tube as well as a 1/4-20 tap for the holes in the 4" round tube. The instructions are very clear and easy to follow and the part fits as described.


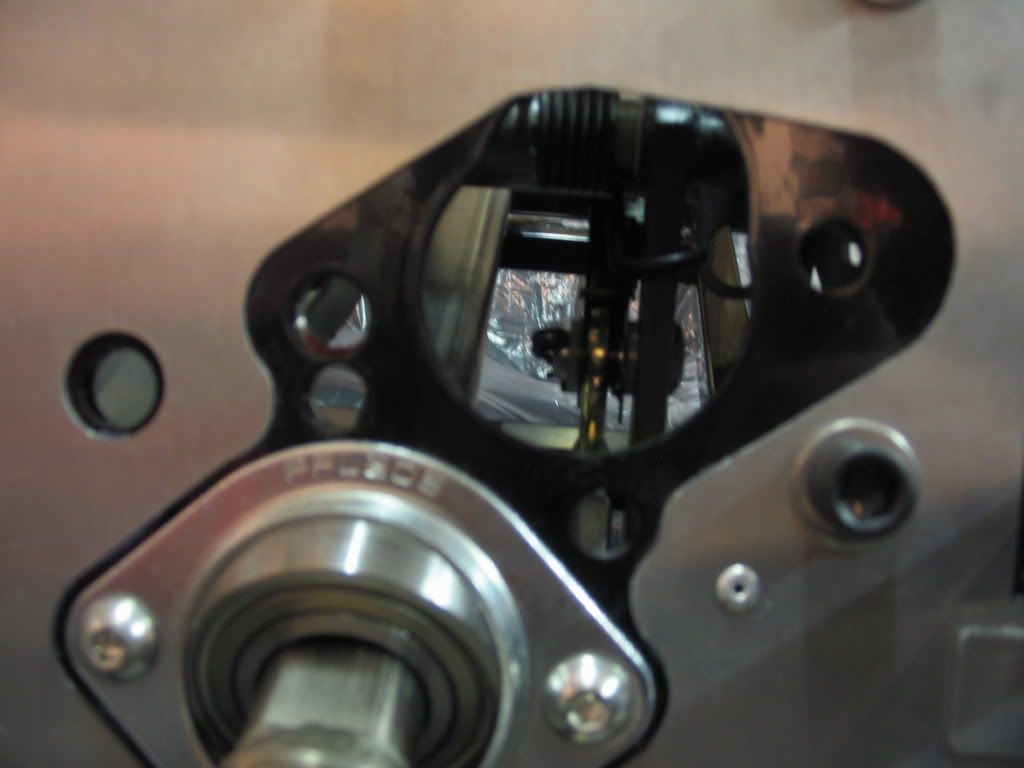
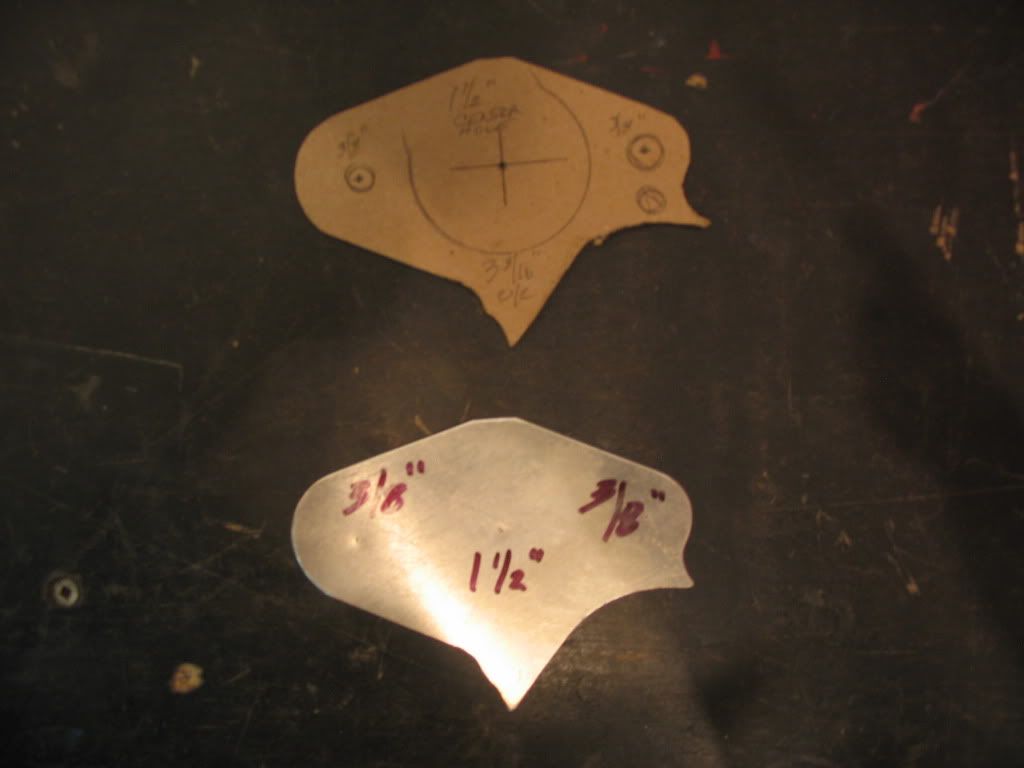
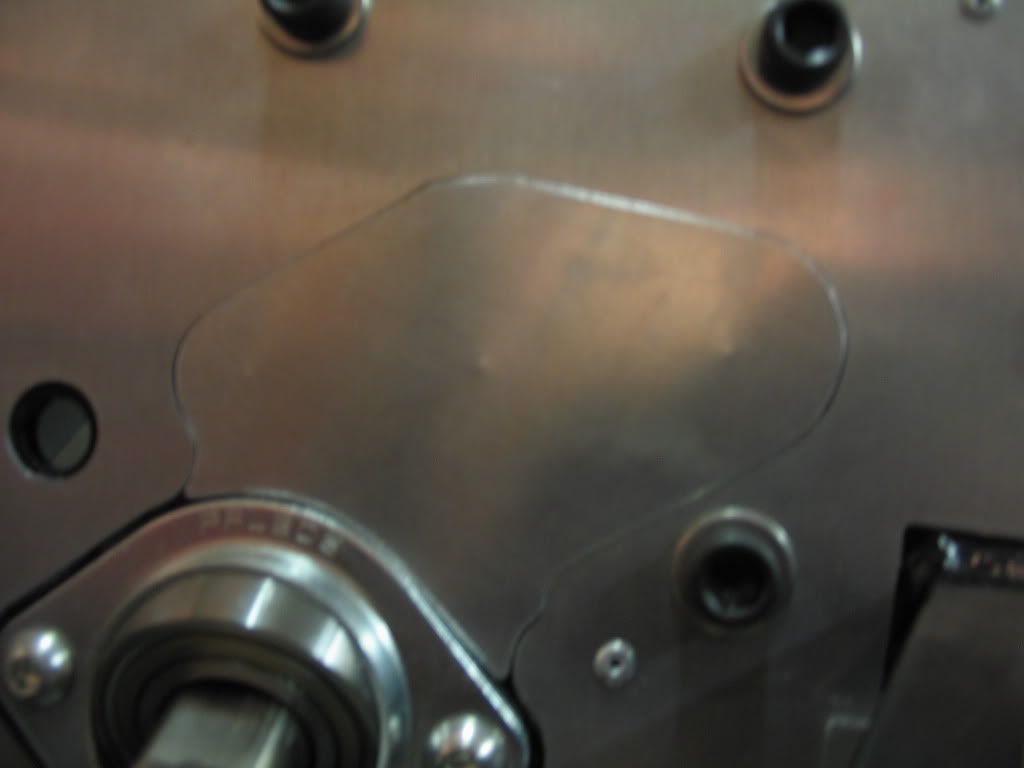
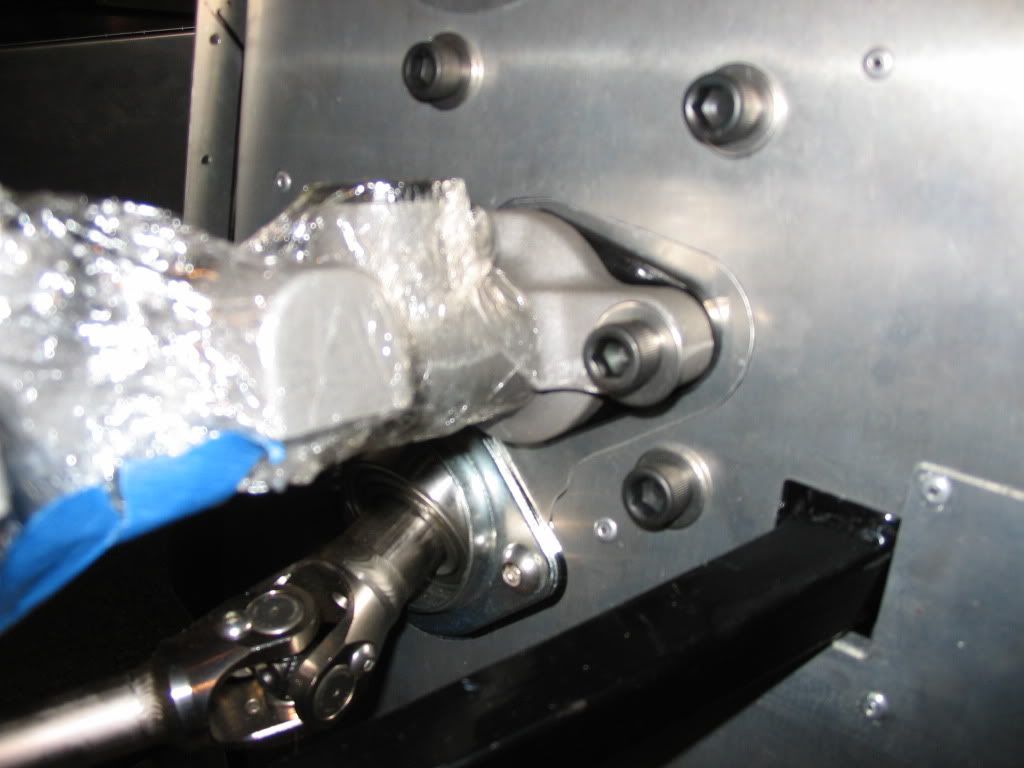
    I thought some of you may also appreciate pictures of the block-off plate I made using some scrap aluminum sheet I had laying around. I was unhappy with the large gap around the master cylinder, particularly at the top where the hole is not concentric, so I made this plate. Below are pictures of the before, during, and after:

    Before:


    Mock-up:


    Test fit:


    Installed behind master cylinder with one FFR spacer:
    Last edited by Gumball; 03-23-2011 at 08:43 PM.
    Later,
    Chris

    "There are no more monsters to fear, and so, we have to build our own."
    Mk3.1 #7074

  25. #105
    Out Drivin' Gumball's Avatar
    Join Date
    Feb 2011
    Location
    Blackberry Township, IL
    Posts
    2,653
    Post Thanks / Like
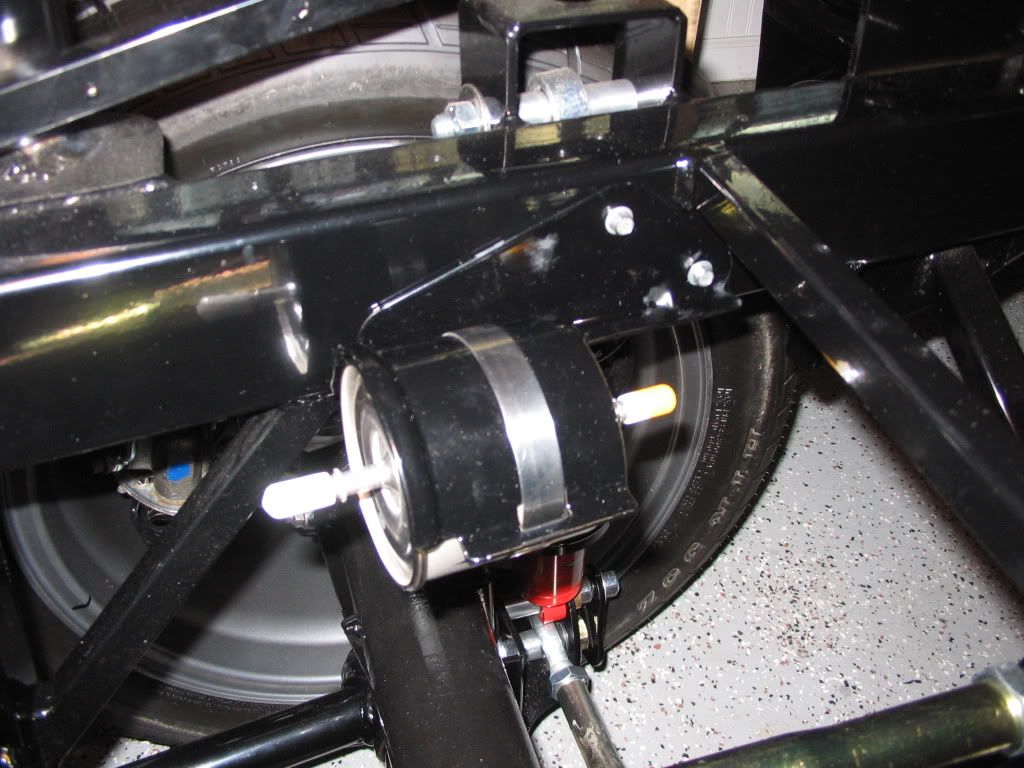
    Installed fuel filter bracket, finished master cylinder / pushrod installation, and began mocking-up brake and fuel lines using a very stiff wire to make templates.

    I used the stock Mustang fuel filter bracket (powdercoated) and mounted it in the location shown in the FFR manual. I even re-used the Ford self-tapping screws (use a #10 bit to drill the holes). The filter is a stock Ford Motorcraft part #FG-800A (E7DZ-9155-A).


    Pics of the mocked-up brake and fuel lines to follow.
    Last edited by Gumball; 03-23-2011 at 08:46 PM.
    Later,
    Chris

    "There are no more monsters to fear, and so, we have to build our own."
    Mk3.1 #7074

  26. #106
    Administrator David Hodgkins's Avatar
    Join Date
    Feb 2011
    Location
    Corona del Mar, CA
    Posts
    6,069
    Post Thanks / Like
    Blog Entries
    7

    Lightbulb

    Quote Originally Posted by Gumball
    Installed Breeze battery tray in engine compartment and installed master cylinder and modified offset (now adjustable) brake pushrod.
    Quote Originally Posted by Gumball View Post
    Installed fuel filter bracket, finished master cylinder / pushrod installation, and began mocking-up brake and fuel lines using a very stiff wire to make templates.
    There are a LOT of posts in here that would make good threads in themselves. Take the posts quoted, for example (no offense Chris, it's just an example). It would be cool if these was posted with pics, and a good description of the different techniques included. How did you make your pushrod adjustable? What route did you decide to use for the fuel lines? Where did you put the fuel filter? What type of filter, etc...

    Just an observation. Looking for good threads / posts to start filling the Wiki...


    FFR 5369 Pin Drive, IRS, Trigos, Torsen, Wilwoods, FMS BOSS 302 "B" cam , Mass-flo. CA SB100 (SPCN) Registered
    Delivered 4/23/06. "Finished" 4/2012 (still not done!)


  27. #107
    Junior Member ThreePointTwo's Avatar
    Join Date
    Feb 2011
    Location
    Utah
    Posts
    29
    Post Thanks / Like
    Visited my baby at the paint shop.

    Picked up August 2010, first start 12/22/10, first go-kart 12/23/10, first donuts 1/12/11. 427W, TKO500, 3.73 gears

    Graduation thread:
    http://thefactoryfiveforum.com/showt...duate-FFR-5979

  28. #108
    Out Drivin' Gumball's Avatar
    Join Date
    Feb 2011
    Location
    Blackberry Township, IL
    Posts
    2,653
    Post Thanks / Like
    Updated to add pictures and descriptions of my brake pushrod mod and other projects per David's request.
    Later,
    Chris

    "There are no more monsters to fear, and so, we have to build our own."
    Mk3.1 #7074

  29. #109
    Senior Member dallas_'s Avatar
    Join Date
    Feb 2011
    Location
    Dallas, TX
    Posts
    449
    Post Thanks / Like
    Blog Entries
    2
    More block sanding.

    Block_sanding_013a.jpg
    FFR 7123 tilt front, Levy 5link/wilwoods/LCA's, webers.
    SL-C, LS3 525, Mendeola SDR5,

  30. #110
    Senior Member Cobradavid's Avatar
    Join Date
    Feb 2011
    Location
    League City, Texas
    Posts
    517
    Post Thanks / Like
    Quote Originally Posted by Marty Prario View Post
    I am going to replace my intake manifold today.
    Marty,
    I've got a 2001 4.6 SOHC with the original intake manifold. Yes, the ones that have the all plastic coolant passage that is prone to cracking and was the subject of a recall. I've been keeping my eye on the failure-prone area, and I'm contemplating just swapping it out. But I can't decide if I should just wait until it starts to fail or just bight the bullet and do it now.

    So, I'm wondering, why did you replace your intake manifold? Did yours fail? Did you swap it out to prevent it from failing?

    David
    My Saving Grace: John 3:16

    FFR6687, Graduate #39 in the Class of 2009
    The Factory Five Forum March 2012 POM

  31. #111
    Junior Member al1957's Avatar
    Join Date
    Feb 2011
    Posts
    5
    Post Thanks / Like
    Picked up the body at the paint shop, looks great. Hope to be finished in 3-4 weeks.

  32. #112
    Out Drivin' Gumball's Avatar
    Join Date
    Feb 2011
    Location
    Blackberry Township, IL
    Posts
    2,653
    Post Thanks / Like
    This weekend was fuel tank installation, quick-connect fuel line at pump preparation (used just the pump fittings, flex line, and the first few inches of hard line which were partially flared to accept a rubber jumper to the fuel filter and the return hard-line on the chassis), as well as fabrication of a bracket to hold the remote Girling brake reservoirs. I'll post photos of the bracket as soon as it comes back from the powdercoater.
    Later,
    Chris

    "There are no more monsters to fear, and so, we have to build our own."
    Mk3.1 #7074

  33. #113
    Member 03SC's Avatar
    Join Date
    Feb 2011
    Location
    Fleming Island Fl.
    Posts
    36
    Post Thanks / Like
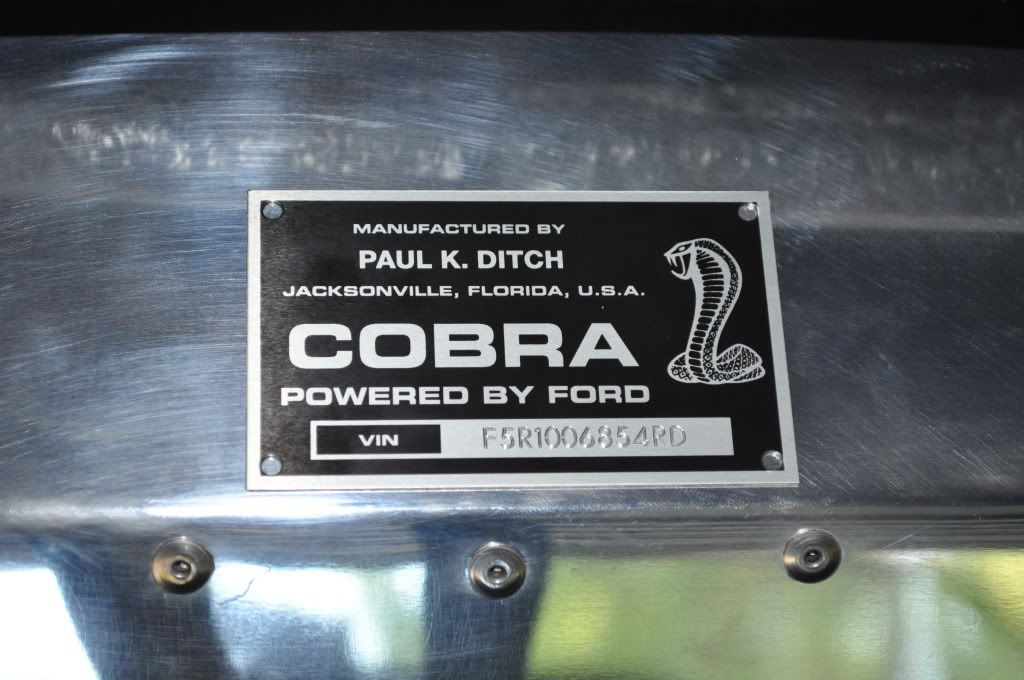
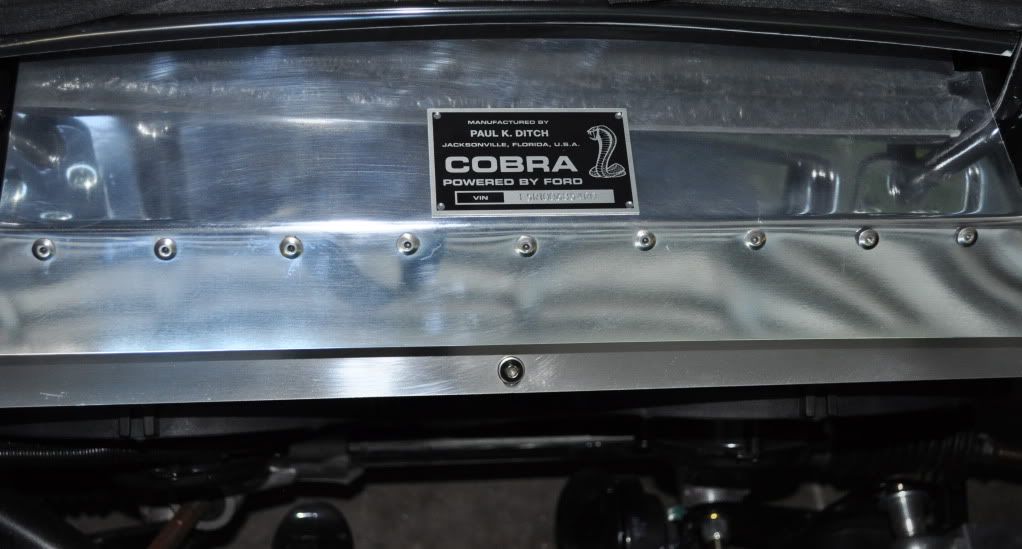
    Took the roadster out this morning and calibrated the Speedhut GPS Speedometer. Works like a champ. Also installed the Breeze Automotive radiator shroud and a custom VIN Plate (thanks to Ron Shofield).


    Last edited by 03SC; 04-03-2011 at 04:00 PM.
    MK3.1 Base Kit non-donor
    Levy Stage 5.5 408W, Levy Super Alloy Plus T-5, Levy DA shocks, Wilwood 6/4, Levy Comp Bump Steer
    Levy Billet Front LCA's, Levy Custom headers/sidepipes, Levy narrowed rearend, SAI mod, Northracecars 17" Team III wheels.
    Build pics:
    http://s239.photobucket.com/home/03SC

  34. #114
    Junior Member
    Join Date
    Feb 2011
    Location
    Virginia
    Posts
    19
    Post Thanks / Like
    I added a CHMSL.

    Unlit.


    Lit.


    Closeup.


    I got it off of a 1998 S-10 Blazer at the junkyard for $2.21 including tax. My wiring harness already had a provision for a third brake light so it was quite simple to wire it in.
    Last edited by CoryB; 04-04-2011 at 04:47 PM.

  35. #115
    Junior Member PBXII's Avatar
    Join Date
    Mar 2011
    Posts
    16
    Post Thanks / Like
    Just ordered Breeze's Cubby or trunk bulkhead kit today!! The DWC trunk kit is also planned.

  36. #116
    Senior Member The Stig's Avatar
    Join Date
    Feb 2011
    Location
    Charlotte, NC
    Posts
    2,004
    Post Thanks / Like

    Always great to see members of the family!

    Quote Originally Posted by PBXII View Post
    Just ordered Breeze's Cubby or trunk bulkhead kit today!! The DWC trunk kit is also planned.
    Cousin Stig!!!! How've you been? We missed you at the last family reunion. Silverstone is great this time of year!
    The Stig

    Some say, that I only know two facts about ducks, (both being wrong); and that if I could be bothered, I could solve the "da Vinci Code" in 47 seconds...
    All I know is that I'm called "The Stig".
    GTM #0081

  37. #117
    Not a waxer Jeff Kleiner's Avatar
    Join Date
    Feb 2011
    Location
    Bloomington, Indiana
    Posts
    8,094
    Post Thanks / Like
    Good news/bad news

    Good
    The weather cooperated so I was able to run my own car for the first time this season rather than co-driving someone else's!


    Bad
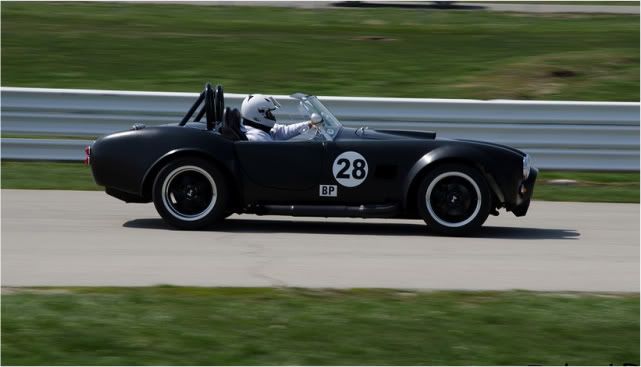
    The track is monitoring sound this year and I blew >100dB. Got a free pass yesterday but I'll have to quiet it down to below 100 or get booted in the future.

    Jeff

  38. #118
    EH!, EH? mydream's Avatar
    Join Date
    Feb 2011
    Location
    Vaudreuil Quebec Canada
    Posts
    65
    Post Thanks / Like
    HMMMMM, not much we can do to quiet these down... cats?
    I guess you will need to lay of the throttle....NOT!!!!!


    Quote Originally Posted by Jeff Kleiner View Post
    Good news/bad news

    Good
    The weather cooperated so I was able to run my own car for the first time this season rather than co-driving someone else's!


    Bad
    The track is monitoring sound this year and I blew >100dB. Got a free pass yesterday but I'll have to quiet it down to below 100 or get booted in the future.

    Jeff

  39. #119
    Out Drivin' Gumball's Avatar
    Join Date
    Feb 2011
    Location
    Blackberry Township, IL
    Posts
    2,653
    Post Thanks / Like
    Installed a set of OEM style cold air dampers (footwell ducts). Still need to finish by plumbing the 3" ductwork to the nose area and hook-up the cables, but the hard work of locating and cutting the 3" holes in the footboxes is done (whew!) - photos when the install is finalized.
    Later,
    Chris

    "There are no more monsters to fear, and so, we have to build our own."
    Mk3.1 #7074

  40. #120
    Senior Member MPTech's Avatar
    Join Date
    Feb 2011
    Location
    St. Louis, MO
    Posts
    1,186
    Post Thanks / Like
    Blog Entries
    8
    Had my roadster delivered today! Couldn't be happier!

    F5R #7446: MK4, 302, T5 midshift, 3.55 Posi IRS, 17" Halibrands
    Delivered 4/4/11, First start 9/29/12, Licensed 4/24/13, off to PAINT 2/15/14!! Wahoo!

Page 3 of 16 FirstFirst 1234513 ... LastLast

Posting Permissions

  • You may not post new threads
  • You may not post replies
  • You may not post attachments
  • You may not edit your posts
  •  

Breeze

Visit our community sponsor