-
03-30-2021, 09:16 PM
#121
David aka Ducky2009

Check out the Coyote install instructions dated 11/30/16. I didn't receive the mounting bracket that you have. Mine has a flat bracket that bolts on to the frame welded bracket. The bottom of my gas pedal is almost even to the bottom of the welded on bracket. Also, because it's flat, it has plenty of clearance to the 3/4" frame cross-bracket.
MK4 Build #9035 Delivered 2/17/17, First Start & Go-Kart 6/2/17, Licensed 9/1/17
Paint - Lightning Blue Metallic, No Hood Scoop, No Stripes
Gen 2 Coyote Engine & TKO-600. Solid Axle, 8.8-3.55, Power Steering, Power Brakes, Dual Roll Bars
Heater and Glove Box, Drop Trunk, Wipers, Radio, FFR Vintage Gauges, Custom Dash
Build Thread:
http://thefactoryfiveforum.com/showt...MK4-Build-9035
-
04-01-2021, 10:02 PM
#122
Senior Member

Thanks for the tip, David.
I still can't see any way to use the F5 supplied bent bracket that will provide the proper positioning of the pedal, and the clearance for the DBW connection at the top of the assembly. I'm in the process of making a flat bracket now. It's basically the same idea I saw Edwardb come up with on his 20th anniv. build. I'll share when complete.
Chris
Coupe complete kit delivered: 4/22/24.
Build Thread. Coyote. T-56. IRS w/3.55. Wilwoods. PS. HVAC. Side windows.
MK4 Complete kit.
Build Thread Index. Delivered: 10/15/2020. Legal: 7/25/23. Coyote Gen3. TKO600 (0.64 OD). IRS w/3.55. PS. Wilwoods. Sway bars. This build is dedicated to my son, Benjamin.
Build Thread.
-
04-03-2021, 10:50 PM
#123
Senior Member
Coyote Gas Pedal Solution! (Part 1)
Happy Easter! So, I have the Coyote gas pedal mounting challenge resolved. More about that in a minute.
I really liked what Shark92651 came up with to improve the mounting of the Coyote gas pedal pad to the arm: both in its location (more clearance away from FB inner wall), and the position of the pedal (right side up compared to F5 does it
upside down). Combining his mod with the new flat mounting bracket I made provided abundant clearance for the DBW connection at the top (see my second update). It was a very low dollar cost mod, but it did take me quite a bit of time (understatement).
Link to Shark92651's mod - Part 1:
https://thefactoryfiveforum.com/show...l=1#post330500
Part 2:
https://thefactoryfiveforum.com/show...l=1#post330764
Part 3:
https://thefactoryfiveforum.com/show...l=1#post331713
He did a great job designing the mod, and documenting, so no need for me to go into much detail. Here's how my copy of his approach turned out.
The first (and scariest) step is to cut up the Coyote gas pedal even more than the F5 instructions show--reminds me of cutting into the rear spindles. Scary indeed, but I found it to be very worthwhile, and I think the finished product is very solid.
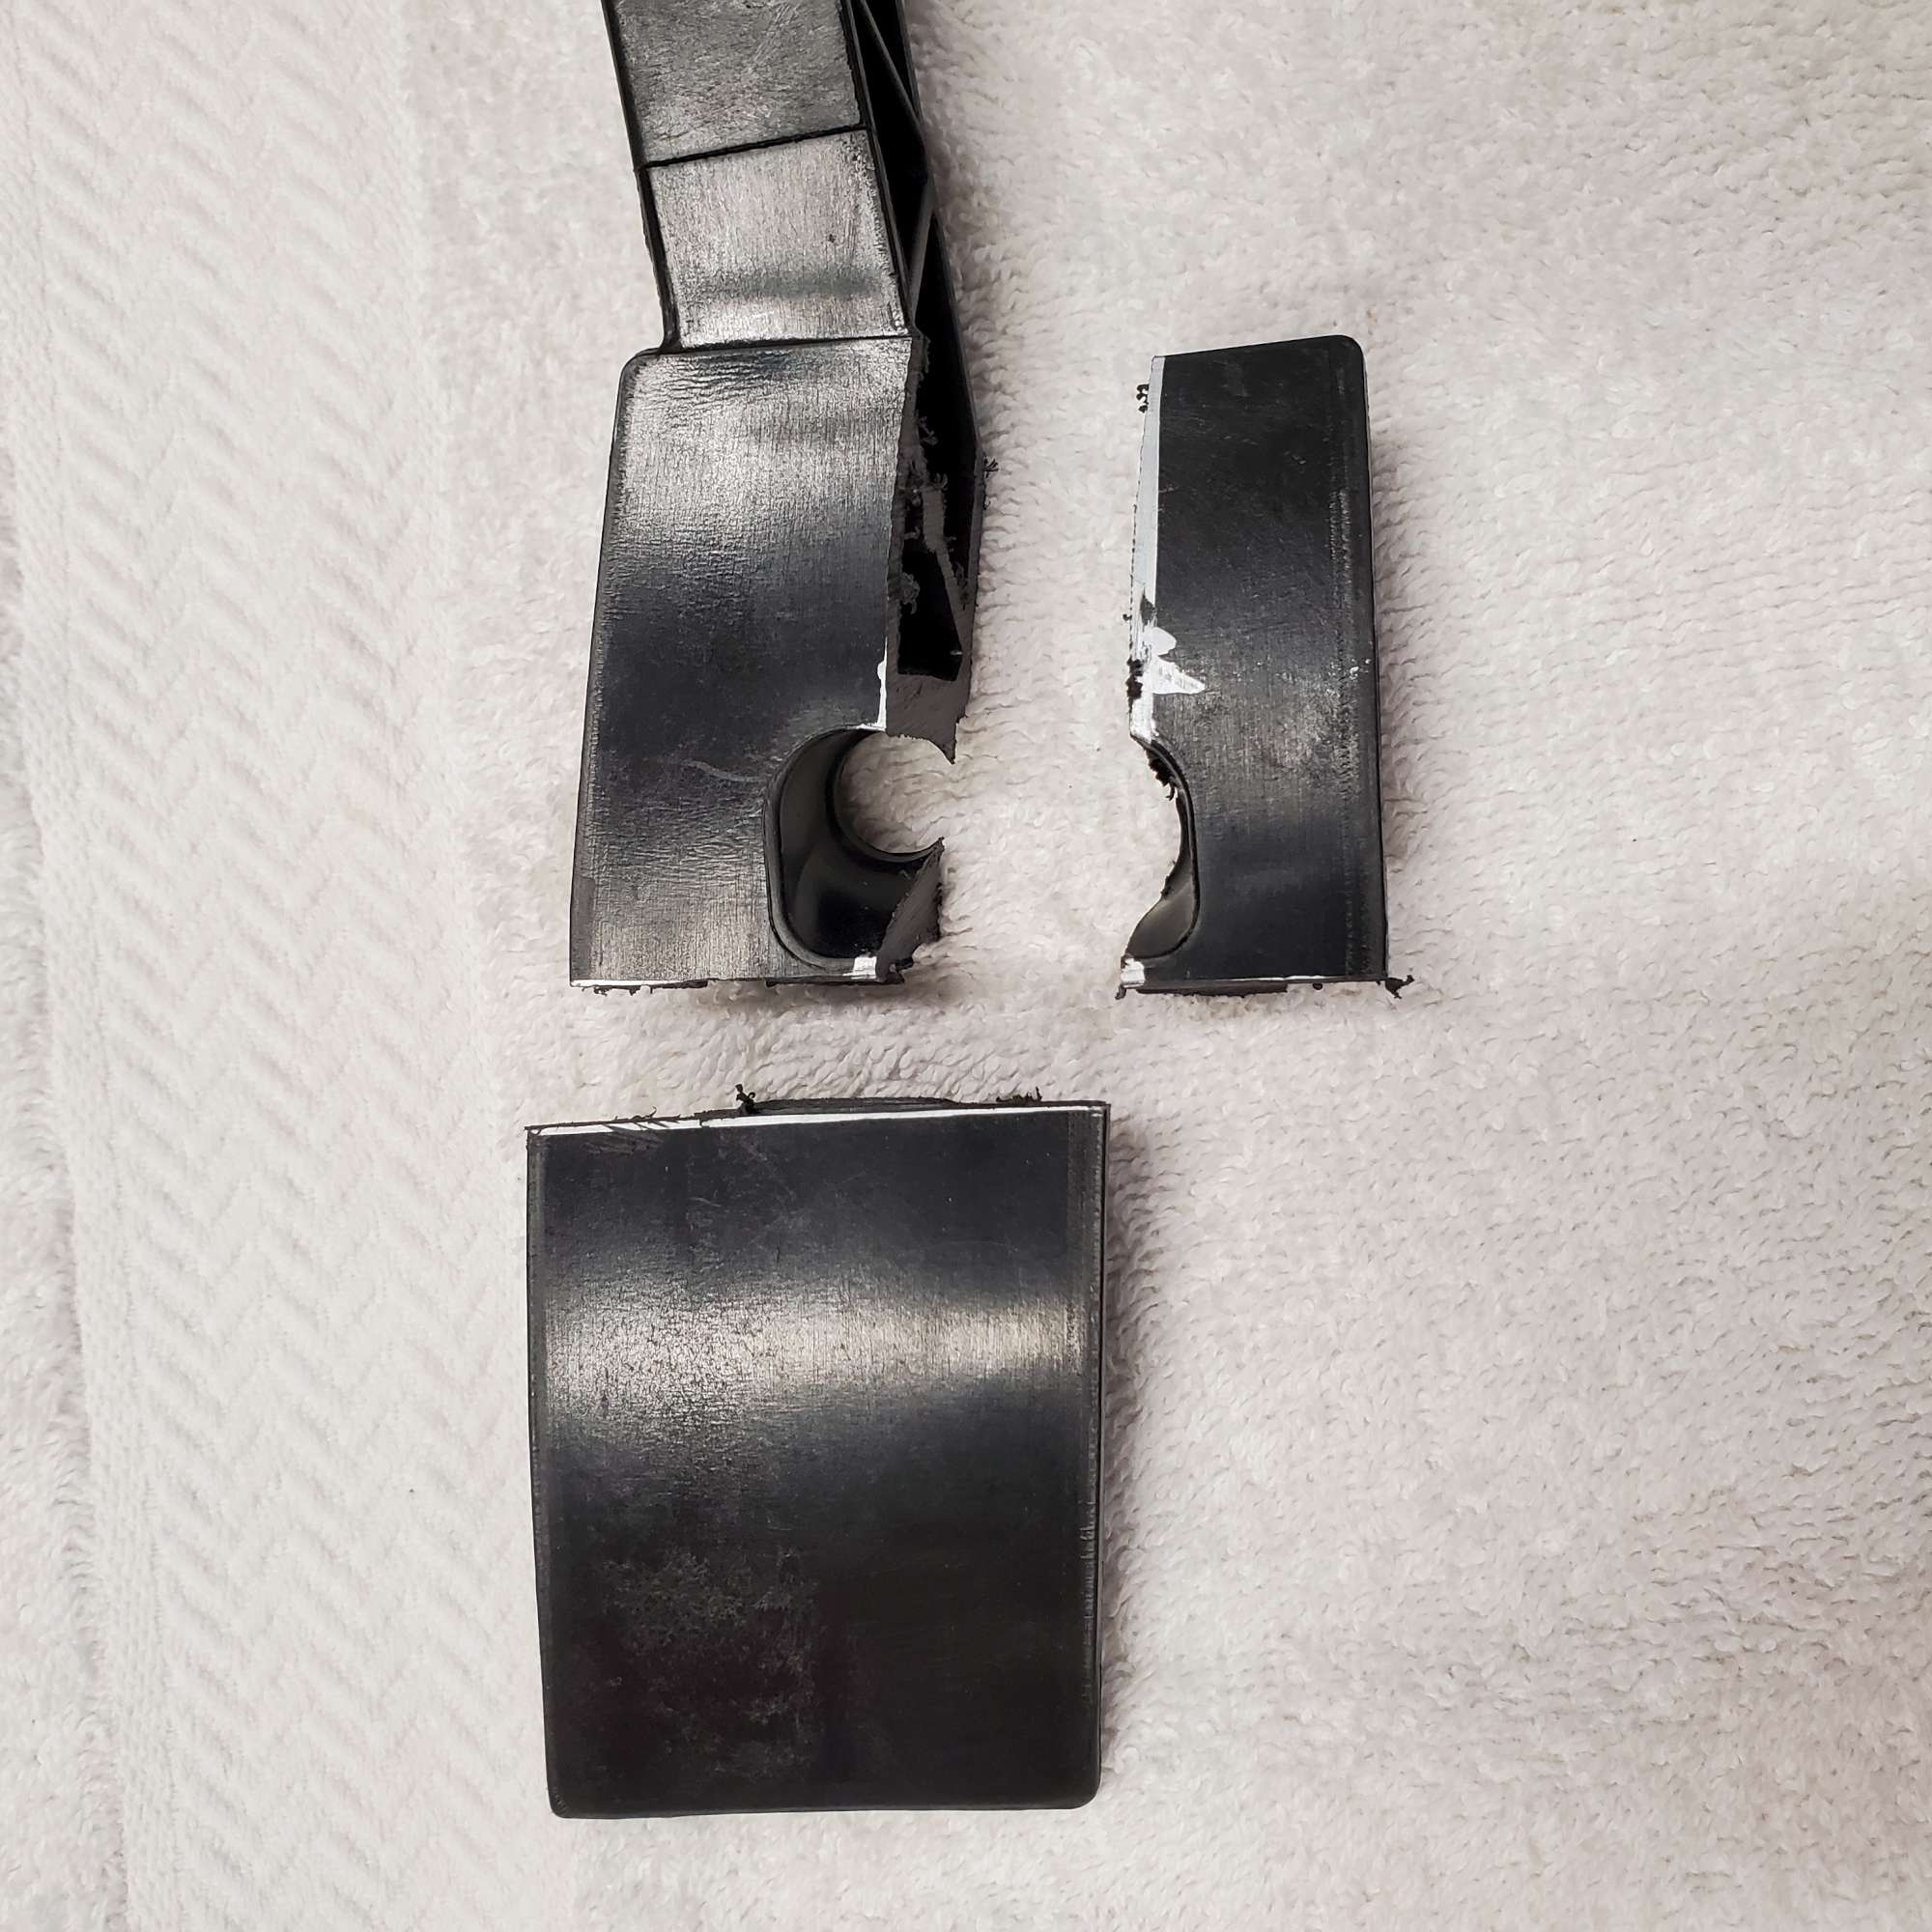
The next step is to make an insert that nestles into the back side of the pedal. It needs to be about 3/16" thick. I have some scrap left over from the 0.090 firewall, so I cut two pieces and used JB Weld to glue them together (.090 + .090 =.180 = 3/16"). Then, some time with the hand file, and it fits well.

The center screw that comes with the pedal is reused. It just needed to be cut down the same amount I removed from the plastic nut that's molded on the center of the pedal pad.

Following Shark92651's example I made two small brackets to secure the pedal to the aluminum insert.

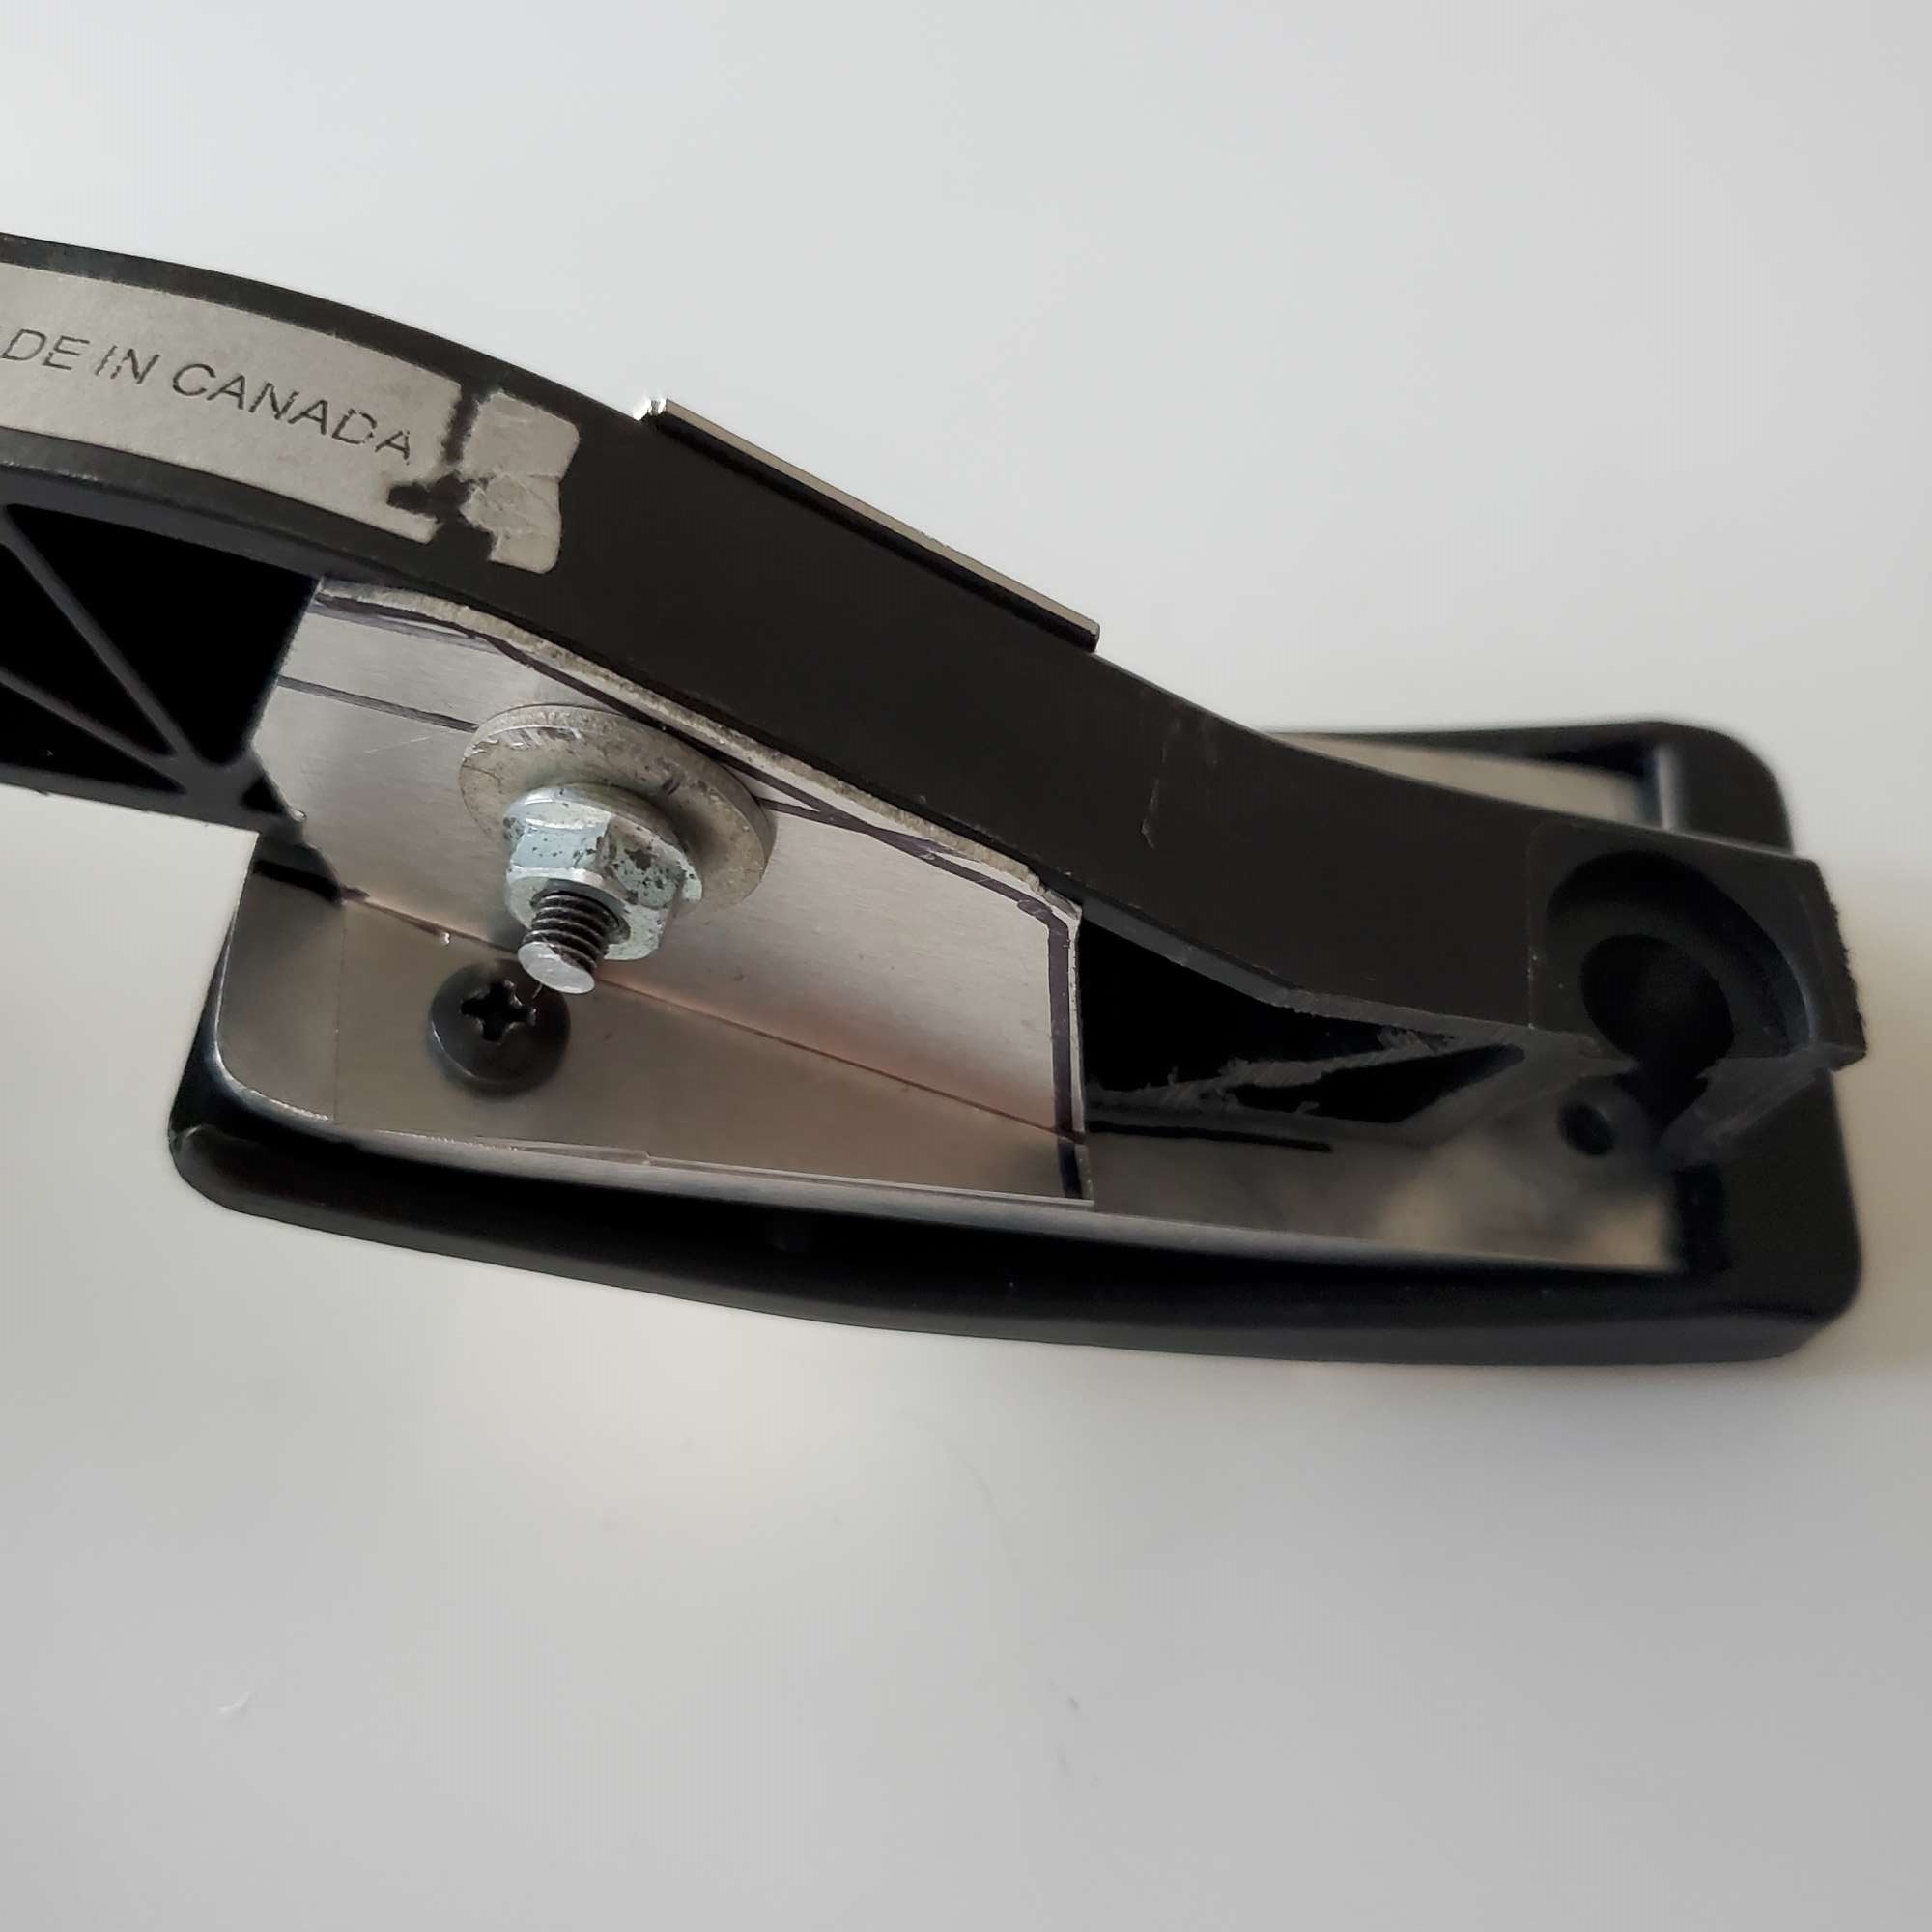
Here's how it looks all mocked up together.

Chris
Coupe complete kit delivered: 4/22/24.
Build Thread. Coyote. T-56. IRS w/3.55. Wilwoods. PS. HVAC. Side windows.
MK4 Complete kit.
Build Thread Index. Delivered: 10/15/2020. Legal: 7/25/23. Coyote Gen3. TKO600 (0.64 OD). IRS w/3.55. PS. Wilwoods. Sway bars. This build is dedicated to my son, Benjamin.
Build Thread.
-
04-03-2021, 11:09 PM
#124
Senior Member
Coyote Gas Pedal Solution! (Part 2)
Now that the pad for the gas pedal is mocked up I turned to the mounting bracket for the pedal assembly. As I mentioned, the bent bracket that came with my kit placed the pedal too high, provided virtually no clearance for the DBW plug, and the holes in the bracket didn't line up with the holes in the pedal assembly. After thinking on it a bit, and reaching out to the forum, I decided a flat bracket would be the solution.
I remembered reading Edwarb's solution for his 20th anniversary build, which gave me inspiration to try to do the same.
Link to Edwardb's bracket solution:
https://thefactoryfiveforum.com/show...l=1#post215569
I took lots of measurements and through trial and error made a template for a flat bracket. Still having plenty of scrap left over from the thick (.090) firewall I made, I again cut two pieces and glued them together with JB Weld. After giving them some hand file treatment, I drilled holes in the flat bracket, and through the welded mount on the chassis. Lots of measuring here to ensure all the holes would line up, and that the final pedal assembly position would be correct.
Mocking up the flat bracket:

Then I gave all of the aluminum brackets (all five) powder coat treatment using my Eastwood powder coating gun and small toaster oven.
Benefits: lots of clearance for the DBW connection on top, and it butts against the 3/4" tube on the right hand side for additional support. However, like Shark92651 I wanted to make it as solid as possible so I added a small aluminum bracket to the right hand side. Note: this position is at least two if not almost three inches lower than where the F5 bent bracket puts the pedal.
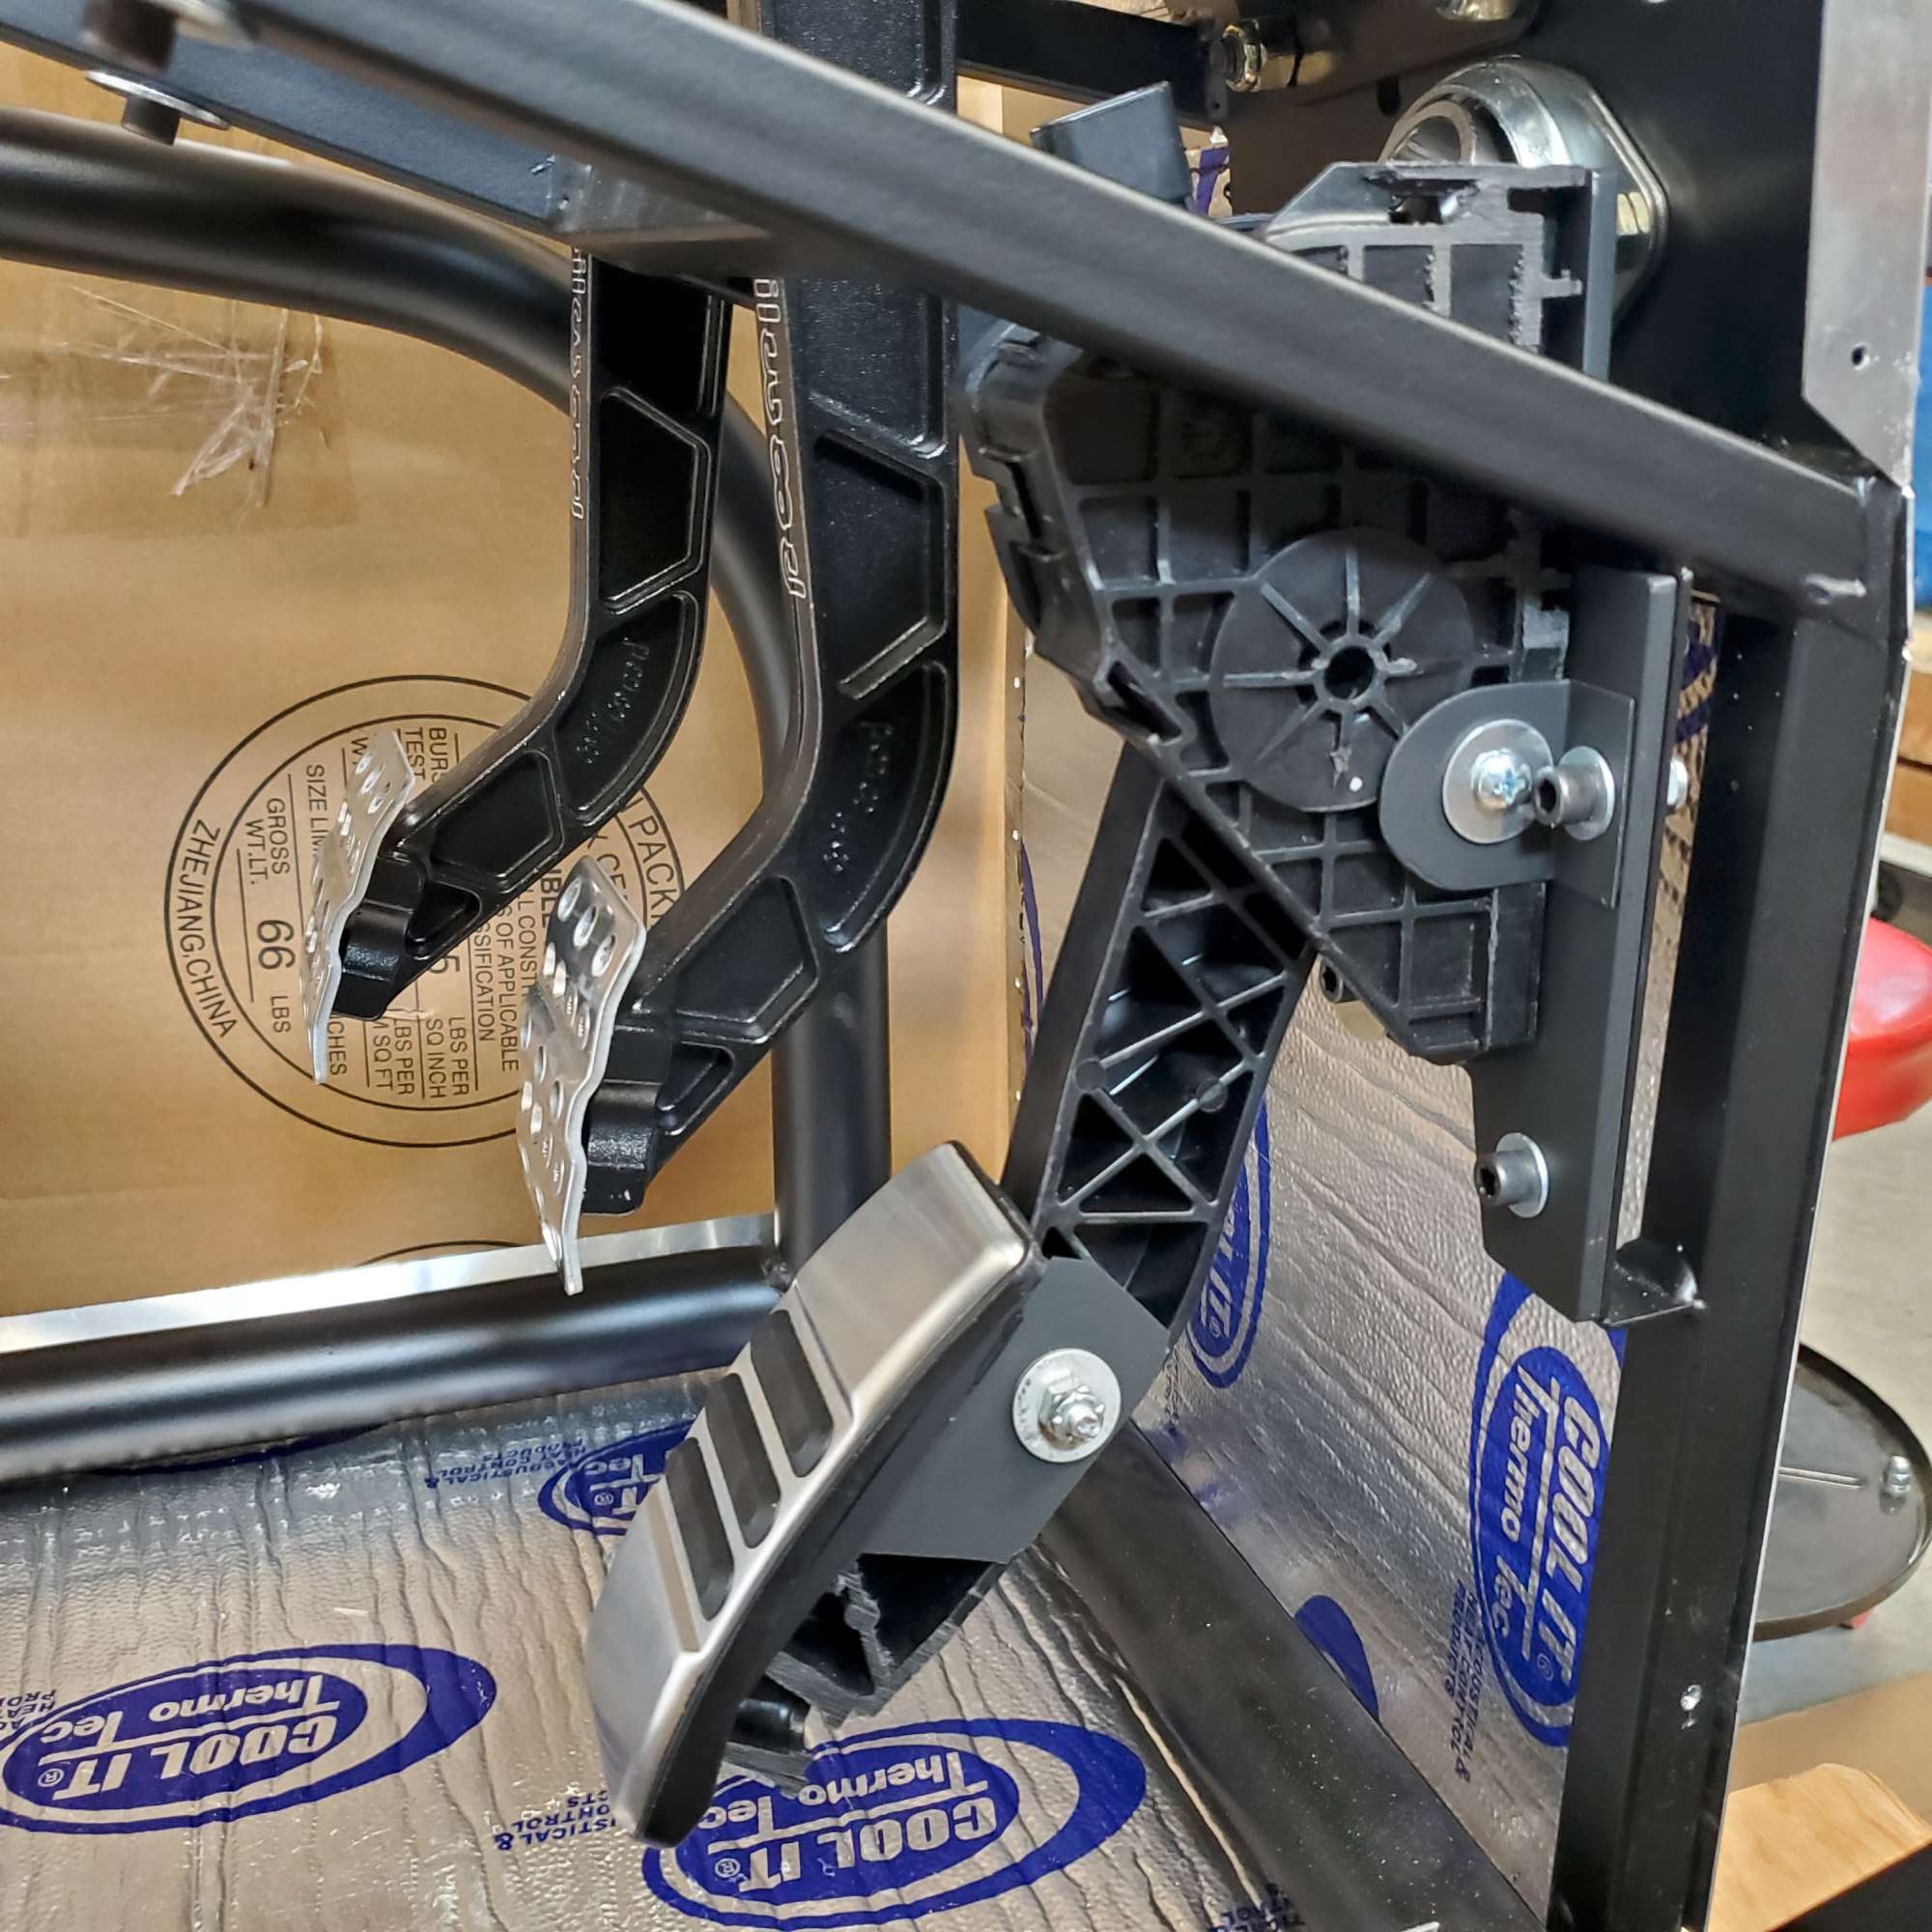
View of the flat bracket from the left hand side:

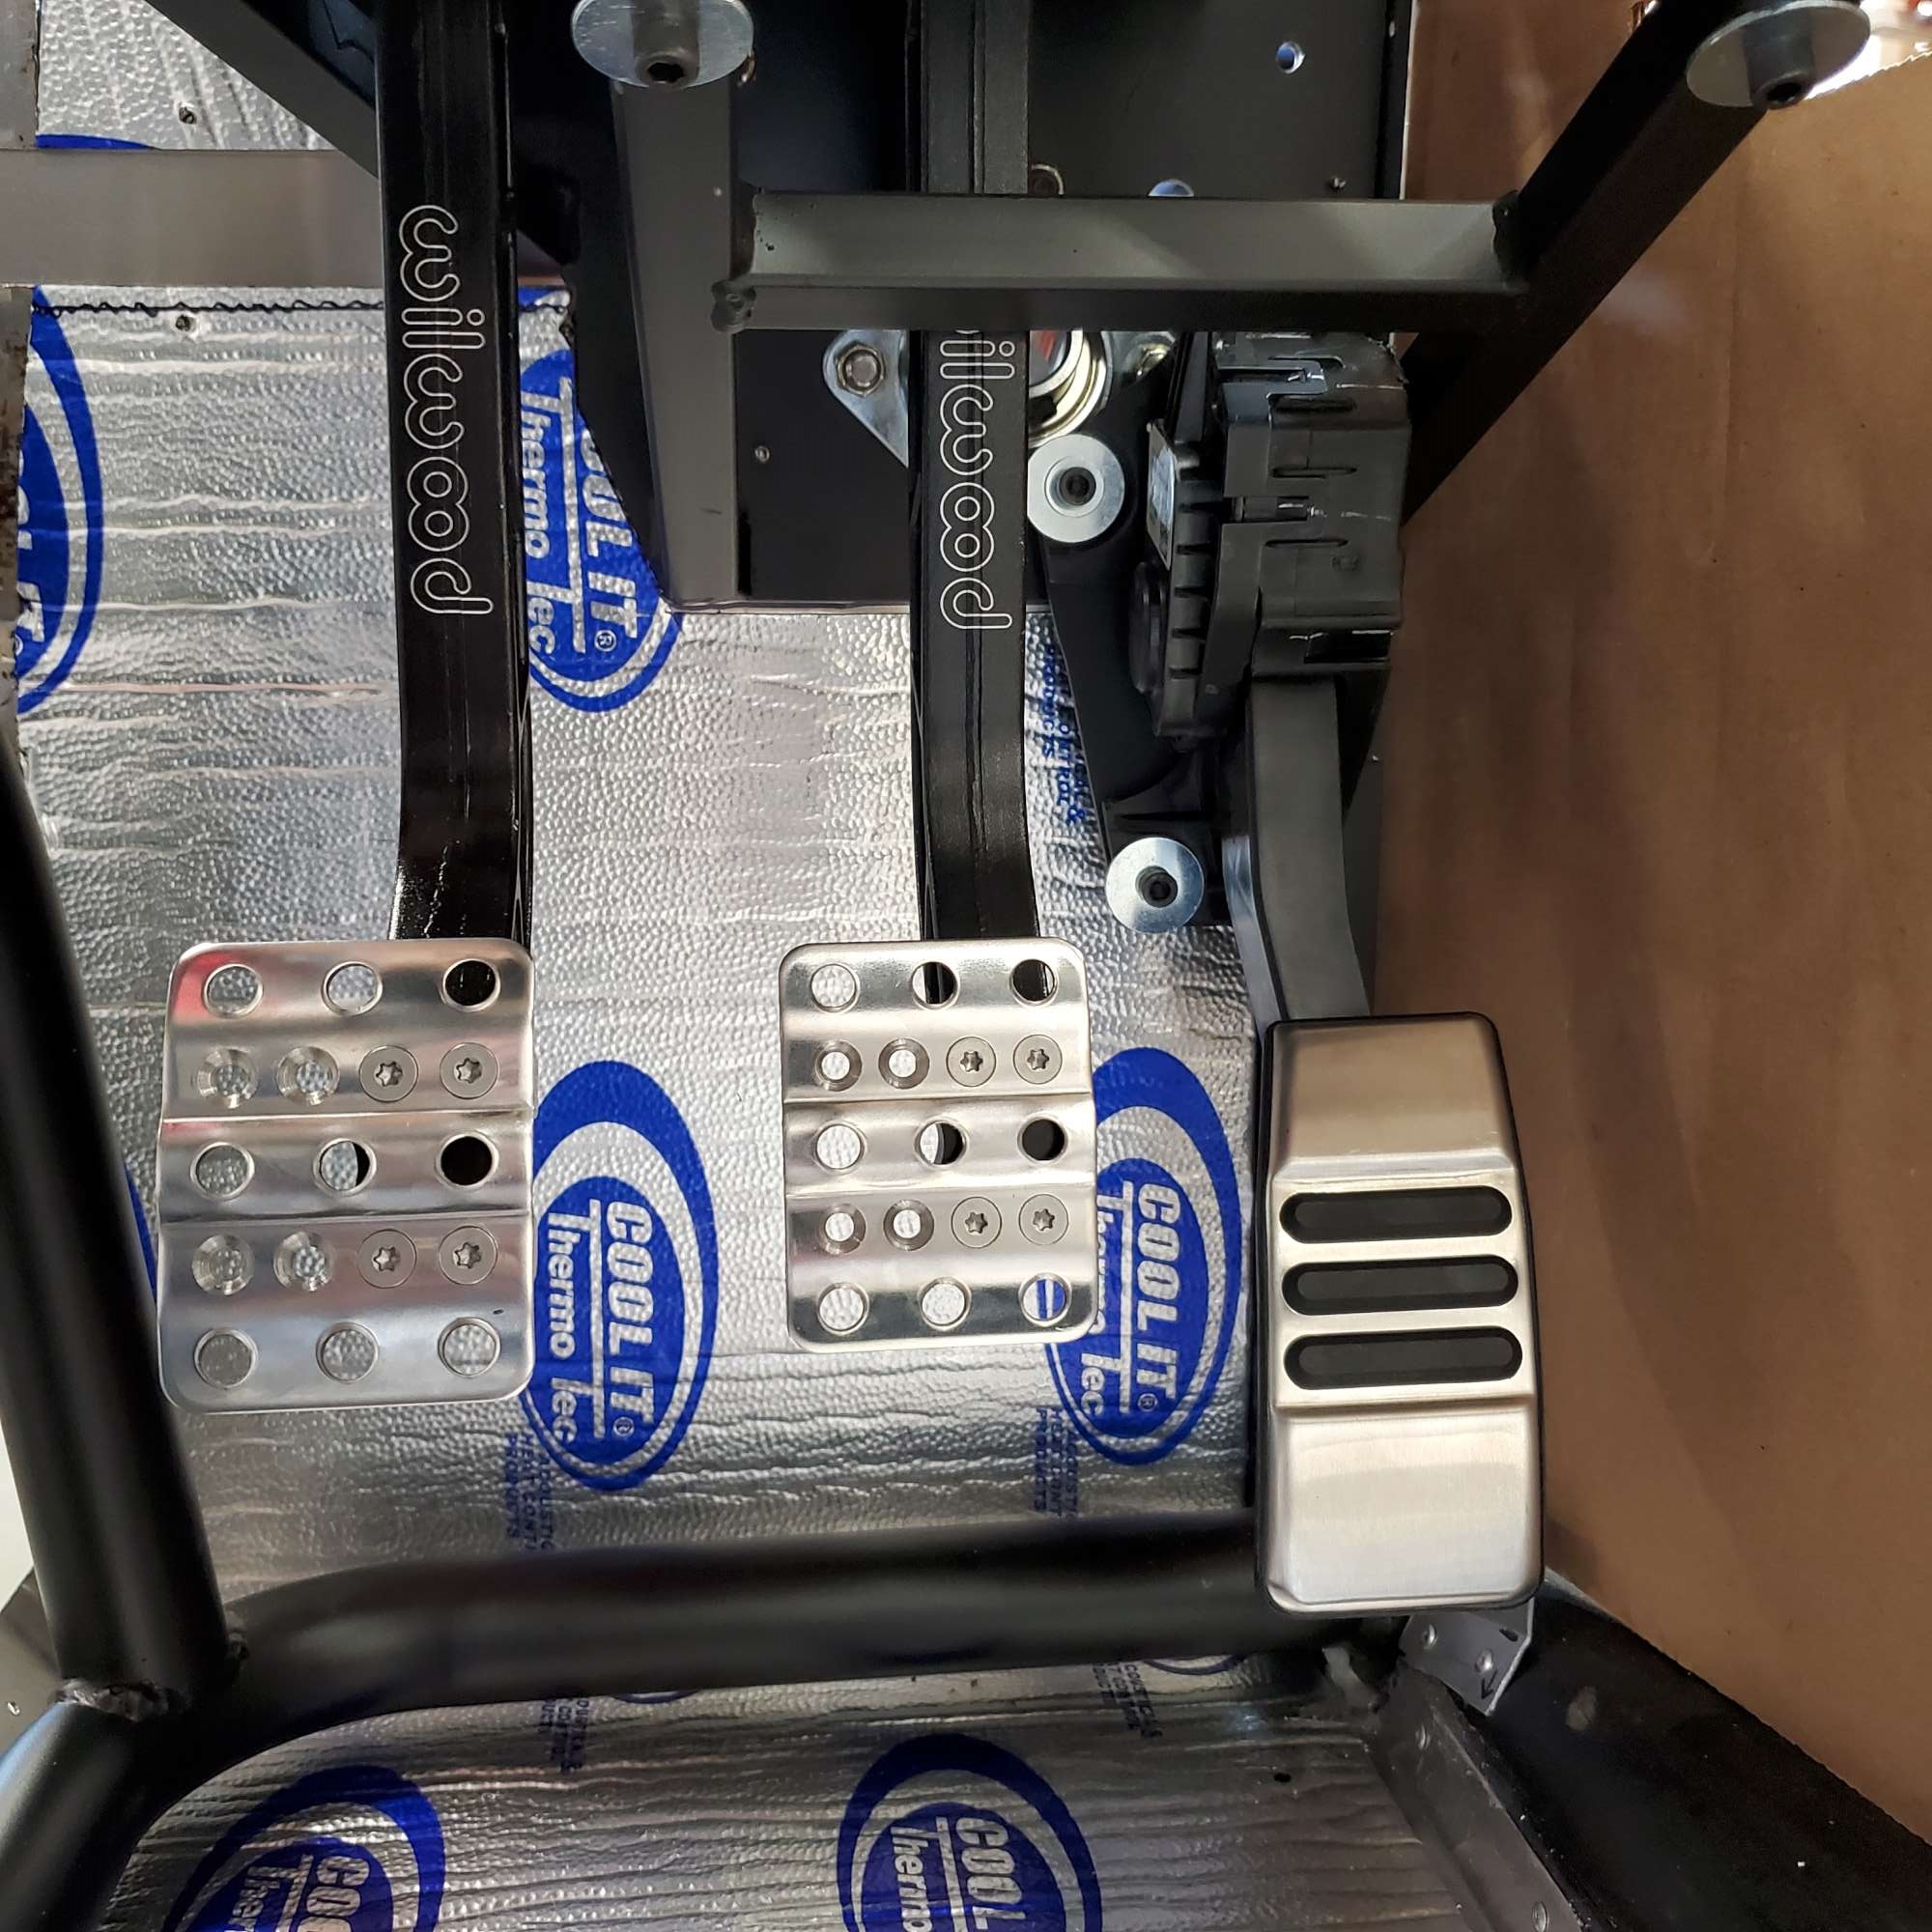
The finished product:
Chris
Coupe complete kit delivered: 4/22/24.
Build Thread. Coyote. T-56. IRS w/3.55. Wilwoods. PS. HVAC. Side windows.
MK4 Complete kit.
Build Thread Index. Delivered: 10/15/2020. Legal: 7/25/23. Coyote Gen3. TKO600 (0.64 OD). IRS w/3.55. PS. Wilwoods. Sway bars. This build is dedicated to my son, Benjamin.
Build Thread.
-
04-03-2021, 11:19 PM
#125
Senior Member
DIY Powder Coating
I'm enjoying powder coating various items. My oven is a toaster oven, so space is quite limited. It's a challenge to fit items in there, but I've been able to do a few now. I like it because it's fast, the PC is more durable than rattle can, the powder is cheap, and no smell in the garage.
Here's a mount I made to PC the Breeze forward battery box. I cobbled together some spare strapping I had laying around, and ground down the tips of 1/4" bolts to minimize the contact area when I set the Breeze battery box on it in the oven.

Will this thing (Breeze battery box) fit in here? Yes...barely!

Breeze battery kit powder coated. This was pretty satisfying.

The big challenge for me is minimizing the amount of dry powder that comes off when I transfer the parts into the oven. If it's noticeable, I touch it up tiny spots with enamel and a foam brush.
Chris
Coupe complete kit delivered: 4/22/24.
Build Thread. Coyote. T-56. IRS w/3.55. Wilwoods. PS. HVAC. Side windows.
MK4 Complete kit.
Build Thread Index. Delivered: 10/15/2020. Legal: 7/25/23. Coyote Gen3. TKO600 (0.64 OD). IRS w/3.55. PS. Wilwoods. Sway bars. This build is dedicated to my son, Benjamin.
Build Thread.
-
Post Thanks / Like - 0 Thanks, 1 Likes
-
04-25-2021, 06:35 PM
#126
Senior Member
Breeze Forward Battery Box Installed
It's been very difficult to get any garage time over the last month. Lots of Spring outdoor To Dos taking precedence. So, it was nice to get a few hours this weekend.
I tackled the Breeze forward battery box. Like Mark's instructions note, the forward 2" tube cross members may not be parallel to the 4" chassis tube. This is true on my chassis. However, nothing that the supplied spacers (SS washers) won't fix. Instead of installing the spacers between the rear of the box and 4" chassis tube, I found by placing them between the 2" cross tube members and the front of the tray it fit more squarely. This small project should have been a no-brainer to install, right? Right! Except....
I have minimal (zero?) experience tapping threads. Because I placed the spacers on the front of the box, the supplied 3/16" rivets were no longer an option. So, I decided to tap 1/4"-20 threads. (I recently tapped a number of 10-32 threads in the aluminum brackets for my Coyote gas pedal, so I figured I had some experience). Well, I got the first 1/4"-20 hole tapped, but the T-handle turned pretty hard. On my second hole the tap broke off in the hole. I've never been accused of being a body builder, so my first thought was "I should have bought a better grade tap/die set". Which is probably correct--I have cobalt taps on their way from McMaster-Carr. Well, it turns out TAP Magic Cutting Fluid is pretty handy for tapping holes in steel. I know, I know...big Rookie mistake!
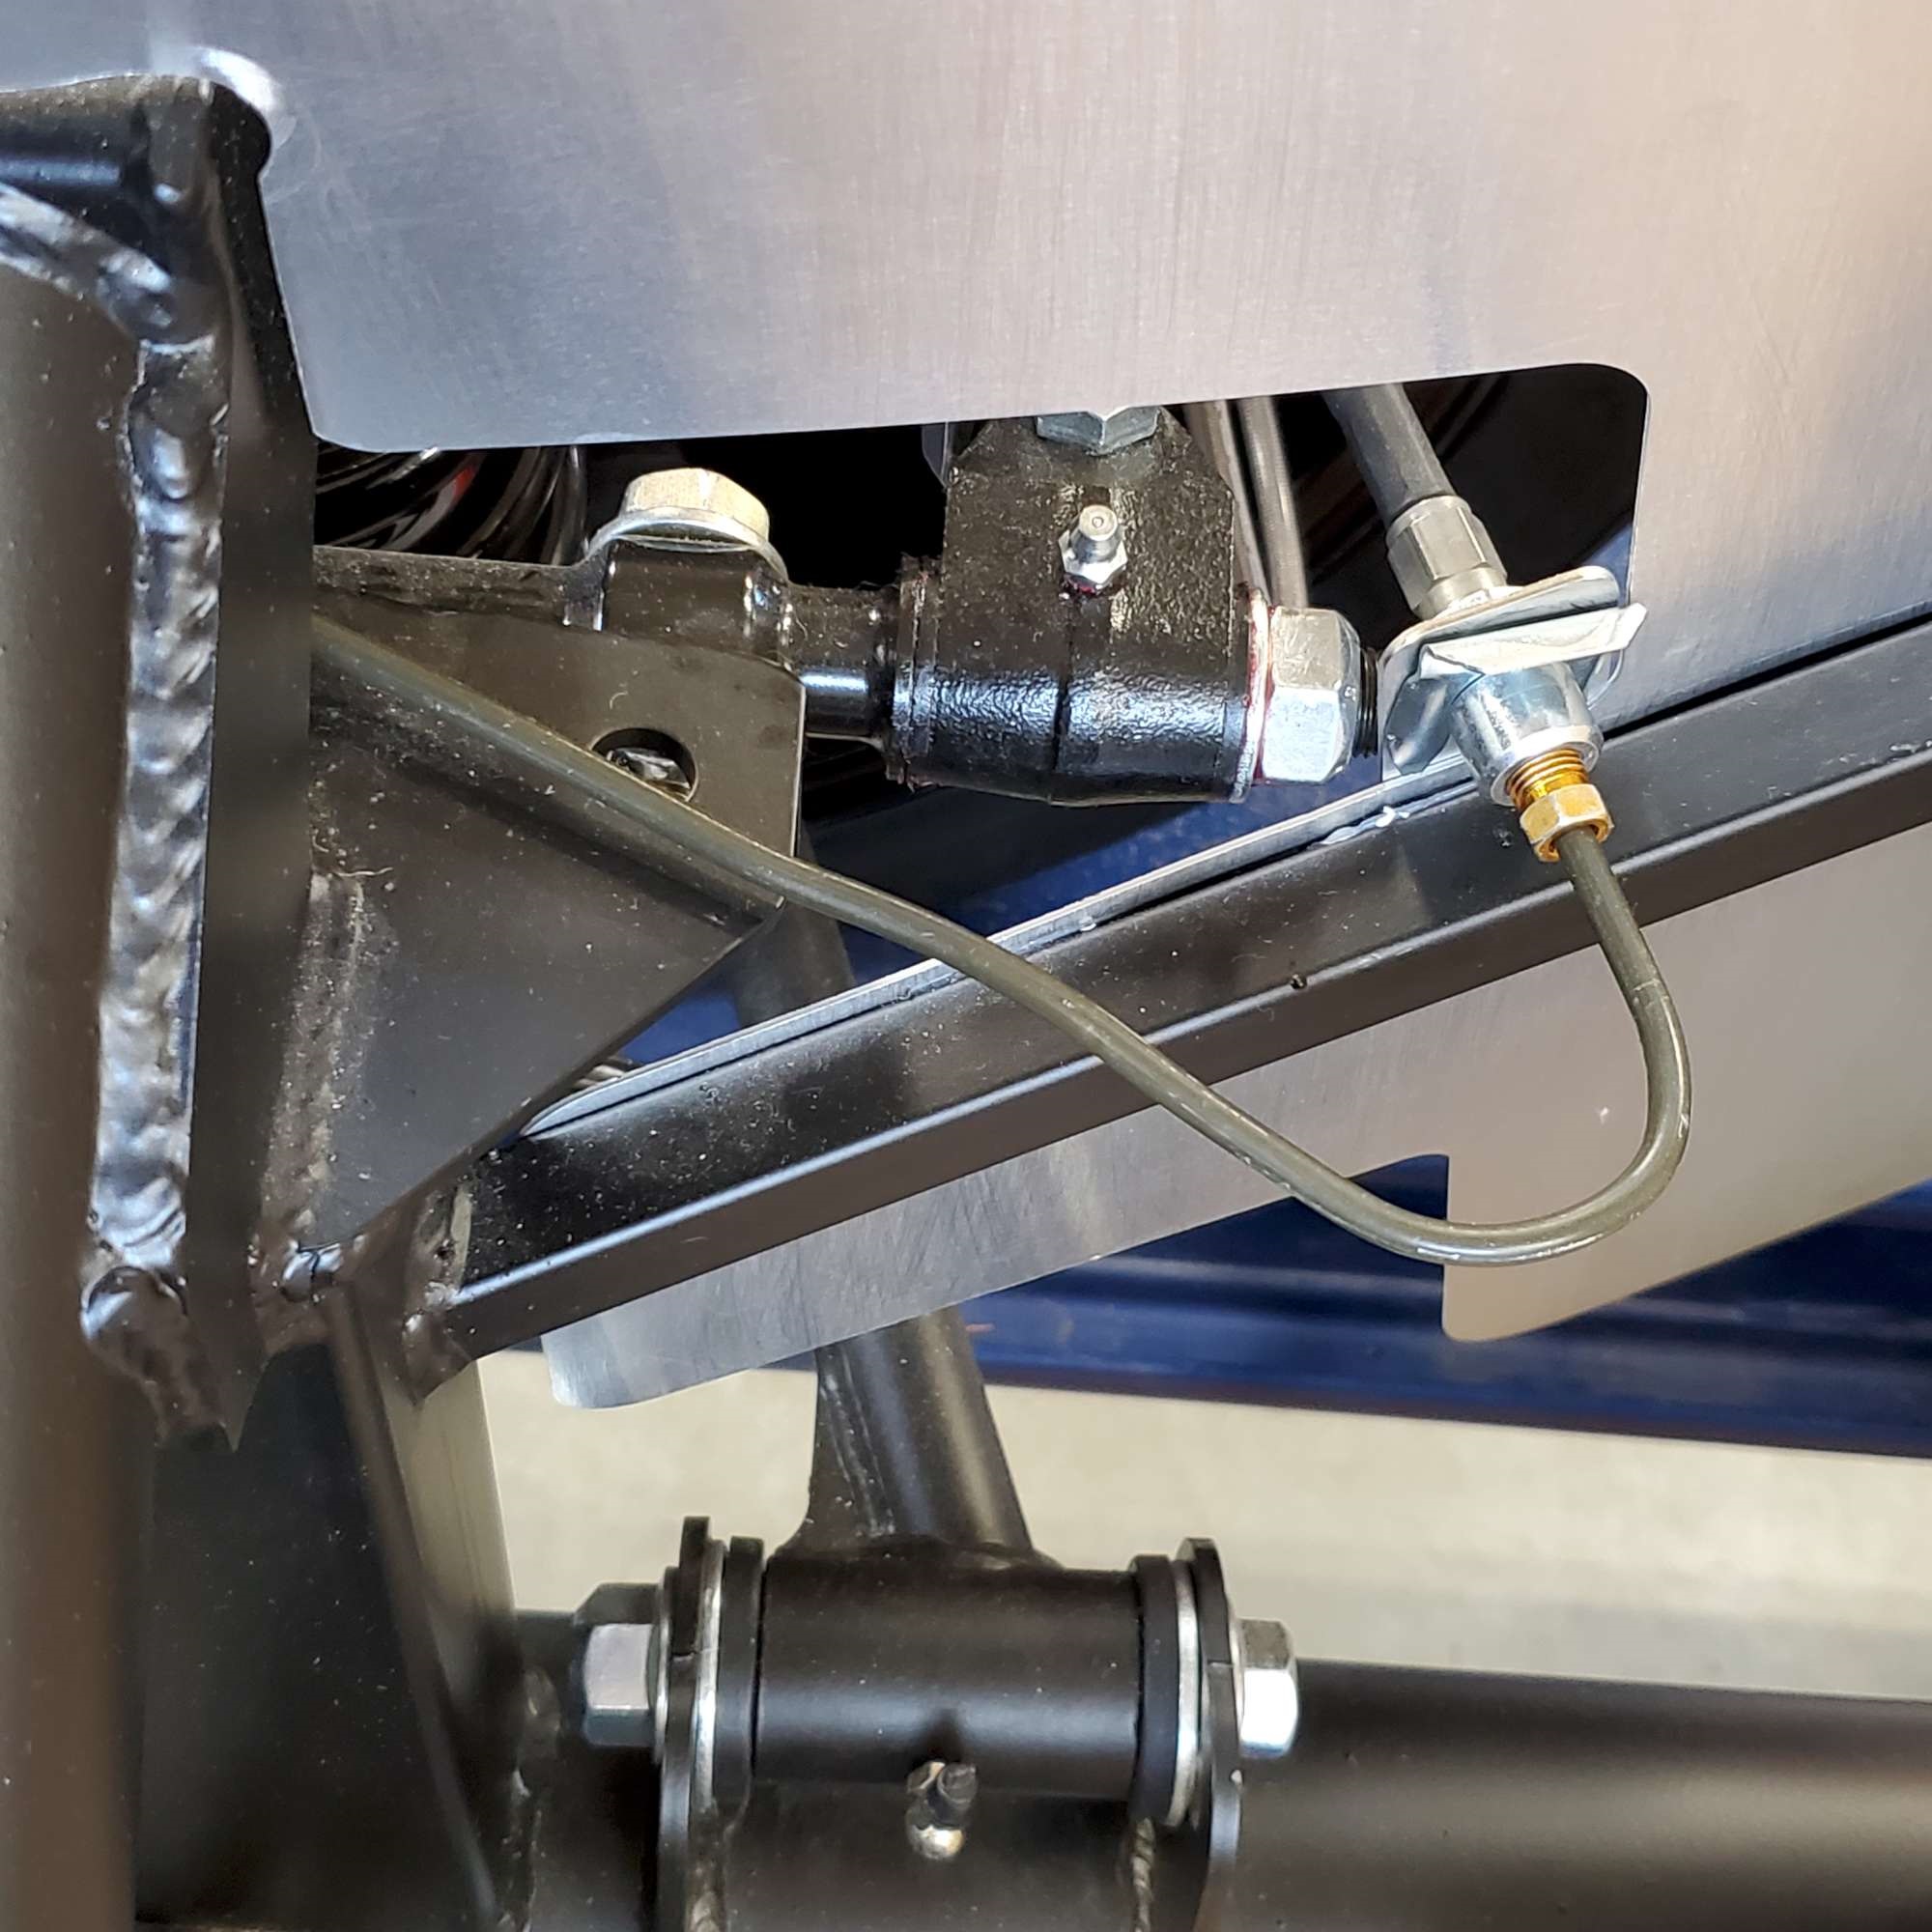
I decided to take the easier (and less frustrating!) route of abandoning that hole, and drilling a new one next to it. Yep, another opportunity to drill through stainless steel (Breeze kit is SS). Did I mention how much I dislike drilling stainless steel? In the picture below, the red down arrow points to the abandoned tap bit/hole. The right pointing arrow points to the 90 deg. grease fitting Breeze supplied. This will make it reachable without having to remove the battery. This Breeze kit is quality.

I'm learning so much. Though frustrating at times, this is a blast!
Last edited by 460.465USMC; 04-26-2021 at 09:57 PM.
Reason: Spelling and clarity
Chris
Coupe complete kit delivered: 4/22/24.
Build Thread. Coyote. T-56. IRS w/3.55. Wilwoods. PS. HVAC. Side windows.
MK4 Complete kit.
Build Thread Index. Delivered: 10/15/2020. Legal: 7/25/23. Coyote Gen3. TKO600 (0.64 OD). IRS w/3.55. PS. Wilwoods. Sway bars. This build is dedicated to my son, Benjamin.
Build Thread.
-
Post Thanks / Like - 0 Thanks, 1 Likes
 Fman
Fman liked this post
-
04-25-2021, 08:20 PM
#127
Senior Member

Speaking as one who has broken off his share of taps, I feel your pain. Two other hints in addition to using lubricant. If you start to feel the tap drag, back it out and clear the chips. Don't just power through. It's a matter of feel based on the size of the tap and the material. But in general clear the chips a few times and you reduce the chance of breaking it. The other thing is taps just plain get dull and wear out. Some better than others. I use 10-32's a lot, and always have a couple spares. Once they start getting dull, you're one good twist away from breaking. The carbide ones are nice and should last a long time. But they're also brittle. So just be careful.
BTW, that same cutting oil you're using for cutting threads can also be used when drilling in metal. Especially for SS. It really helps.
Build 1: Mk3 Roadster #5125. Sold 11/08/2014.
Build 2: Mk4 Roadster #7750. Sold 04/10/2017.
Build Thread
Build 3: Mk4 Roadster 20th Anniversary #8674. Sold 09/07/2020.
Build Thread and
Video.
Build 4: Gen 3 Type 65 Coupe #59. Gen 3 Coyote. Legal 03/04/2020.
Build Thread and
Video
Build 5: 35 Hot Rod Truck #138. LS3 and 4L65E auto. Rcvd 01/05/2021. Legal 04/20/2023.
Build Thread. Sold 11/9/2023.
-
Post Thanks / Like - 1 Thanks, 0 Likes
-
04-26-2021, 10:11 PM
#128
Senior Member
Thanks for the advice, Paul! I think I know what you mean by "it's a matter of feel". After drilling more than a few holes through the aluminum panels and into the steel chassis, I now have a "feel"--and ear--for when the bit is about to bust through the material, so I reduce the drill's RPM. I'm thinking the tap feel you're describing may be sort of similar. I'll be on the lookout for it next time...AND skip the breakfast Wheaties. 
Chris
Coupe complete kit delivered: 4/22/24.
Build Thread. Coyote. T-56. IRS w/3.55. Wilwoods. PS. HVAC. Side windows.
MK4 Complete kit.
Build Thread Index. Delivered: 10/15/2020. Legal: 7/25/23. Coyote Gen3. TKO600 (0.64 OD). IRS w/3.55. PS. Wilwoods. Sway bars. This build is dedicated to my son, Benjamin.
Build Thread.
-
04-28-2021, 10:56 PM
#129
Senior Member

Chris, I had also never tapped a threaded hole until installing the Breeze forward battery box, so my learning curve was exactly like yours. I broke a tap fairly early (not on the Breeze install but shortly thereafter). Just as Paul advises, it's all about clearing the debris. When tapping into the 4" frame tubes (e.g., for mounting fuel or brake line brackets), it is especially important to take it slow -- 1/2 turn clockwise (or less), followed by 1/2 CCW turn to clear the debris, repeat until finished. If you feel the tool starting to strain under the torque, stop immediately and back out. The tool won't break while backing out -- only going forward. I haven't broken a tap since I started following this advice. Good luck!
MKIV Complete Kit #9822 l BluePrint 347 EFI l TKO600 l Power Steering l Heater/Defrost l
Build Thread
-
Post Thanks / Like - 1 Thanks, 0 Likes
-
04-29-2021, 09:00 AM
#130
To save drilling and tapping on stuff like line clamps, I used tec screws that drill and will self tap. I removed the tec screw and used a self tapping machine screw to hold the clamp in place. The caution here is, if using a impact to run the screws in, do not let it hammer and snap the head off the screw. You will have to relocate the hole and clamp. A friend told me so.
I found this much easier and faster than drilling and tapping.
To help keep your clamps and lines straight pull a strip of painters tape down the frame rail or run of metal.
20th Anniversary Mk IV, A50XS Coyote, TKO 600, Trunk Drop Box, Trunk Battery Box, Cubby Hole, Seat Heaters, Radiator hanger and shroud.
-
Post Thanks / Like - 1 Thanks, 0 Likes
-
04-29-2021, 09:57 AM
#131
Senior Member

Originally Posted by
JB in NOVA

Chris, I had also never tapped a threaded hole until installing the Breeze forward battery box, so my learning curve was exactly like yours. I broke a tap fairly early (not on the Breeze install but shortly thereafter). Just as Paul advises, it's all about clearing the debris. When tapping into the 4" frame tubes (e.g., for mounting fuel or brake line brackets), it is especially important to take it slow -- 1/2 turn clockwise (or less), followed by 1/2 CCW turn to clear the debris, repeat until finished. If you feel the tool starting to strain under the torque, stop immediately and back out. The tool won't break while backing out -- only going forward. I haven't broken a tap since I started following this advice. Good luck!
Great tips! Thanks for chiming in, JB!
Chris
Coupe complete kit delivered: 4/22/24.
Build Thread. Coyote. T-56. IRS w/3.55. Wilwoods. PS. HVAC. Side windows.
MK4 Complete kit.
Build Thread Index. Delivered: 10/15/2020. Legal: 7/25/23. Coyote Gen3. TKO600 (0.64 OD). IRS w/3.55. PS. Wilwoods. Sway bars. This build is dedicated to my son, Benjamin.
Build Thread.
-
04-29-2021, 10:09 AM
#132
Senior Member

Originally Posted by
JB in NOVA
Chris, I had also never tapped a threaded hole until installing the Breeze forward battery box, so my learning curve was exactly like yours. I broke a tap fairly early (not on the Breeze install but shortly thereafter). Just as Paul advises, it's all about clearing the debris. When tapping into the 4" frame tubes (e.g., for mounting fuel or brake line brackets), it is especially important to take it slow -- 1/2 turn clockwise (or less), followed by 1/2 CCW turn to clear the debris, repeat until finished. If you feel the tool starting to strain under the torque, stop immediately and back out. The tool won't break while backing out -- only going forward. I haven't broken a tap since I started following this advice. Good luck!
This is right. I tap all the time at work. Use oil, go slow and every few threads you go twist backwards. No shame in backing out, cleaning your tap and starting back again.
MK4 #10008 - Ordered 10/06/20, Delivered 03/03/21, First Start 7/22/21, First Go Kart 7/24/21
Paint by Metal Morphous 5/14/22, Legally registered 6/8/22, Graduated 7/20/22
Build Thread
https://thefactoryfiveforum.com/show...been-delivered
Complete Kit, Ford 306, Sniper/Dual Sync, T5, Hydraulic clutch
-
Post Thanks / Like - 1 Thanks, 0 Likes
-
04-29-2021, 10:14 AM
#133
Senior Member
Originally Posted by
Railroad
To save drilling and tapping on stuff like line clamps, I used tec screws that drill and will self tap. I removed the tec screw and used a self tapping machine screw to hold the clamp in place. The caution here is, if using a impact to run the screws in, do not let it hammer and snap the head off the screw. You will have to relocate the hole and clamp. A friend told me so.
I found this much easier and faster than drilling and tapping.
To help keep your clamps and lines straight pull a strip of painters tape down the frame rail or run of metal.
Hi Railroad. Been a while...I always appreciate your insight and ideas. I will have to look up tec screws, as I'm not familiar.
I like your idea on the painter's tape. Coming up very soon is to run my supply and return fuel lines. I'm using the Breeze braided fuel line kit, so the painter's tape idea will see immediate implementation! I was hoping my wheels and tires would have arrived by now, so I could do this task on my four-post lift, but they're 2+ months on back order...and still waiting (I didn't order them from F5). Thanks again!
Chris
Coupe complete kit delivered: 4/22/24.
Build Thread. Coyote. T-56. IRS w/3.55. Wilwoods. PS. HVAC. Side windows.
MK4 Complete kit.
Build Thread Index. Delivered: 10/15/2020. Legal: 7/25/23. Coyote Gen3. TKO600 (0.64 OD). IRS w/3.55. PS. Wilwoods. Sway bars. This build is dedicated to my son, Benjamin.
Build Thread.
-
05-04-2021, 07:59 PM
#134
Senior Member
Thread Sealant on Aeromotive Fittings?
Quick question for the forum: I'm installing my Aeromotive pressure regulator. I know 06AN fittings do not get thread sealant, but what about the 06AN to radius port adapter? In other words, the side that threads into the regulator, does it need thread sealant? If so, am I okay using Permatex thread sealant, or should I use the stretch tape that comes on a roll (same stuff I've used for plumbing connections in my house).
Please advise, and thanks in advance!
Chris
Coupe complete kit delivered: 4/22/24.
Build Thread. Coyote. T-56. IRS w/3.55. Wilwoods. PS. HVAC. Side windows.
MK4 Complete kit.
Build Thread Index. Delivered: 10/15/2020. Legal: 7/25/23. Coyote Gen3. TKO600 (0.64 OD). IRS w/3.55. PS. Wilwoods. Sway bars. This build is dedicated to my son, Benjamin.
Build Thread.
-
05-04-2021, 08:39 PM
#135
Senior Member
Originally Posted by
460.465USMC
Quick question for the forum: I'm installing my Aeromotive pressure regulator. I know 06AN fittings do not get thread sealant, but what about the 06AN to radius port adapter? In other words, the side that threads into the regulator, does it need thread sealant? If so, am I okay using Permatex thread sealant, or should I use the stretch tape that comes on a roll (same stuff I've used for plumbing connections in my house).
Please advise, and thanks in advance!
Nope. That's an O-ring fitting. The O-ring does the sealing not the threads. So no sealant. Generally speaking, only use thread sealant on pipe thread (NPT) fittings. They're the ones using tapered threads for sealing. Side comment -- I'd save the Teflon tape tape your home plumbing projects and where needed only use Permatex or something similar.
Build 1: Mk3 Roadster #5125. Sold 11/08/2014.
Build 2: Mk4 Roadster #7750. Sold 04/10/2017.
Build Thread
Build 3: Mk4 Roadster 20th Anniversary #8674. Sold 09/07/2020.
Build Thread and
Video.
Build 4: Gen 3 Type 65 Coupe #59. Gen 3 Coyote. Legal 03/04/2020.
Build Thread and
Video
Build 5: 35 Hot Rod Truck #138. LS3 and 4L65E auto. Rcvd 01/05/2021. Legal 04/20/2023.
Build Thread. Sold 11/9/2023.
-
Post Thanks / Like - 1 Thanks, 0 Likes
-
05-05-2021, 02:25 PM
#136
Senior Member
Thanks for the helpful info., Paul. Can't believe how much I'm learning. I guess this old dog Can learn new tricks.
Chris
Coupe complete kit delivered: 4/22/24.
Build Thread. Coyote. T-56. IRS w/3.55. Wilwoods. PS. HVAC. Side windows.
MK4 Complete kit.
Build Thread Index. Delivered: 10/15/2020. Legal: 7/25/23. Coyote Gen3. TKO600 (0.64 OD). IRS w/3.55. PS. Wilwoods. Sway bars. This build is dedicated to my son, Benjamin.
Build Thread.
-
05-05-2021, 07:23 PM
#137
Senior Member
Another 06AN Installation Question
Another question for the forum: I can't seem to keep the stainless hose from turning with the coupling nut as I tighten it to the fitting body. I followed Mark's (Breeze) installation instructions, and it clearly states to tighten the coupling nut to the fitting body, i.e. fitting body remains stationary during the tightening process. I have used my bench vise to hold the fitting body, as well as an adjustable wrench. Either way, the hose twists with the coupling nut. It does, however, tighten just fine, and I'm left with a small gap (<1/16") when complete.
I've watched several 06AN installation videos on stainless hose and it doesn't seem like the hose twists with the coupling nut. Is this normal? Am I doing something wrong?
Question answered: Later this evening....I believe I answered my own question. I watched (and re-watched) a couple videos (one by Aeromotive) for installing 06AN on PFTE with stainless braided jacket. These videos do not demonstrate what I stated above: the tube nut side is put into the vice, and the fitting body is threaded into the tube nut, not the other way around. This makes sense to me. I'm going to proceed with this procedure. Not sure what Mark is describing in his instructions (weird, because his products and directions have been otherwise solid). Also, I need to reopen the connections I completed to verify the PFTE is seated all the way in to the lip on the ferule.
Moving on, but always welcome advice and comments from the forum.
Last edited by 460.465USMC; 05-05-2021 at 11:47 PM.
Reason: Updated with answer to my question.
Chris
Coupe complete kit delivered: 4/22/24.
Build Thread. Coyote. T-56. IRS w/3.55. Wilwoods. PS. HVAC. Side windows.
MK4 Complete kit.
Build Thread Index. Delivered: 10/15/2020. Legal: 7/25/23. Coyote Gen3. TKO600 (0.64 OD). IRS w/3.55. PS. Wilwoods. Sway bars. This build is dedicated to my son, Benjamin.
Build Thread.
-
05-06-2021, 12:03 AM
#138
Senior Member

Chris, one tip on those AN fittings make sure and use lube on the threads especially if they are aluminum. I used a little dab of engine assembly lube, recommended by my local speed shop. Without lube you take a chance of stripping them out (ask me how I know), and they do not need to be bottomed out to be leak free. Sometimes they will not completely bottom out and that is ok.
-
Post Thanks / Like - 1 Thanks, 0 Likes
-
05-06-2021, 09:39 AM
#139
Senior Member
Thanks for the tips, Travis. I've been putting a small amount of grease on the threads per Mark's instructions. Good to know your fittings didn't need to be bottomed out. The Aeromotive video confirmed this as well. Appreciate very much the confirmation on both items!
Chris
Coupe complete kit delivered: 4/22/24.
Build Thread. Coyote. T-56. IRS w/3.55. Wilwoods. PS. HVAC. Side windows.
MK4 Complete kit.
Build Thread Index. Delivered: 10/15/2020. Legal: 7/25/23. Coyote Gen3. TKO600 (0.64 OD). IRS w/3.55. PS. Wilwoods. Sway bars. This build is dedicated to my son, Benjamin.
Build Thread.
-
05-06-2021, 10:32 PM
#140
Senior Member
Fuel Lines Complete
At last my fuel lines are installed! I bought 3/8" stainless braided PFTE fuel lines (supply and return) from Breeze. It was definitely a learning curve working with the 06AN connectors and the stainless braid.
I also installed a 3/8" return fuel kit from Breeze. I wasn't excited about drilling a 9/16" hole in the top of the gas tank, but it turned out okay. I used blue painters tape inside the tank, just beneath the hole to try to collect as many metal chips as possible. But there were still a few escapees inside the tank. Vacuum with a narrow nozzle made quick work of the chips. It was a little challenging to hold the bulkhead connector against the top wall of tank from the inside with just two fingers. I only had to fish out the small o-ring once...not too bad for a guy with two left thumbs.
The parts I bought from Breeze came with Ham-Let Let-Lok connecters: one installed on the engine side of the fuel filter, and one on the 3/8" fuel rail on the motor. Installation seemed too easy. I watched a YouTube video just to make sure. Guess I got to hit the Easy button on that one. These connectors seem quite solid.
It took me a bit to learn how to assemble the 06AN connections to the stainless braided PFTE fuel lines. Stainless is not particularly fun to work with--get ready for your thumb to turn into a pin cushion! Between Breeze's instructions, YouTube videos, advice from Edwardb, and advice from Fman, I think (hope) the connectors are correctly installed.
My first step was to make a bracket for the Aeromotive pressure regulator. Following Edwardb's advice, I made the bracket so there would be a 1" gap for the Coyote harness to go behind it. It attaches to the bottom side of the 2" square tube where the firewall attaches. It just so happens I had this metal bracket in my goodie stash. [Editor's note: my goodie stash only contains hardware. Not to be confused with other types of stashes]. Miraculously, the existing holes in the scrap bracket I found matched the regulator perfectly. I just had to shape the half moon cut out with my bench grinder, than clean it up a bit with my Dremel.
The top bracket came with the Aeromotive pressure regulator.

Pressure regulator installed.

As far as routing, I followed the typical route:
Underneath the PS footbox. I added a piece of clear tube around the braided hose to protect it from contact/vibration.

Down the PS 4" chassis tube.
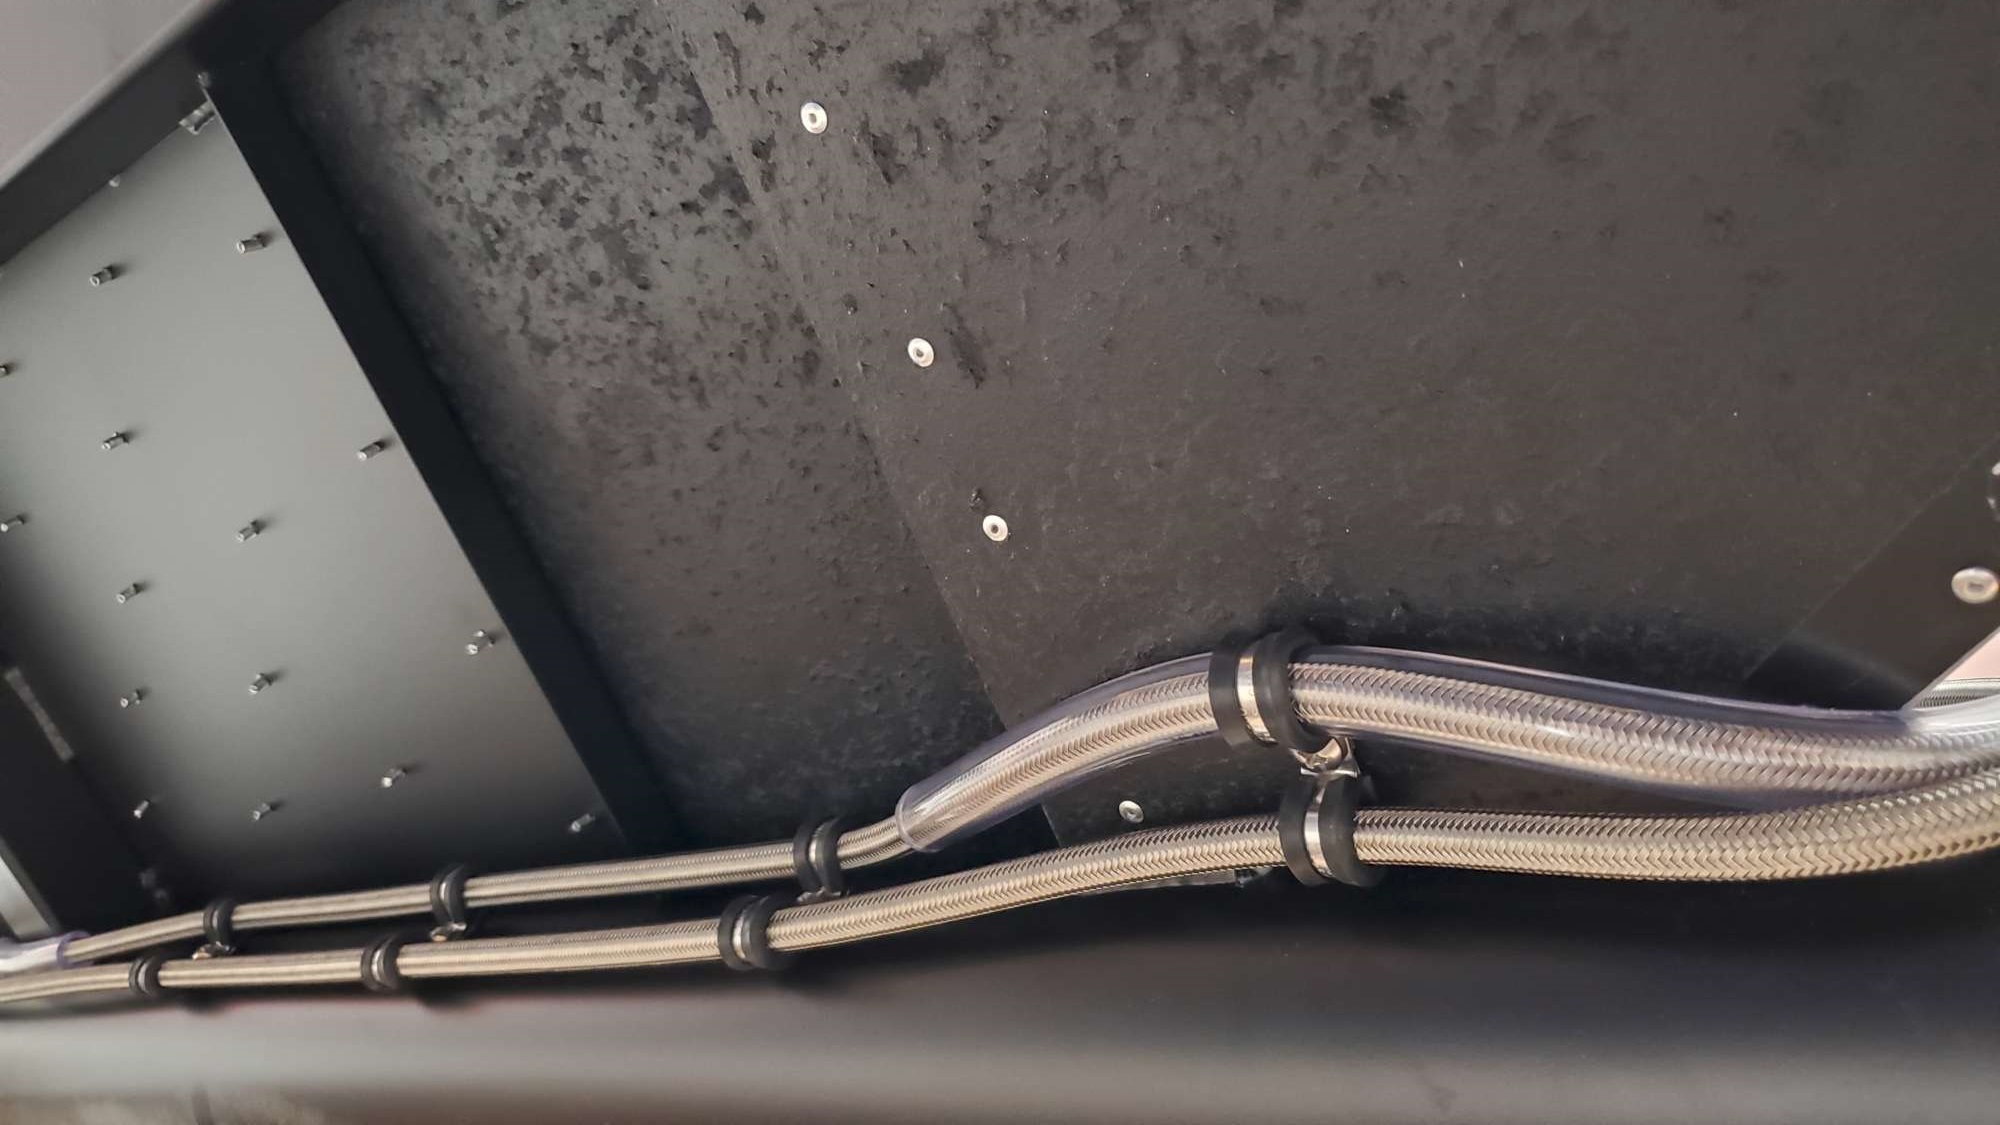
Up the PS 2" square vertical
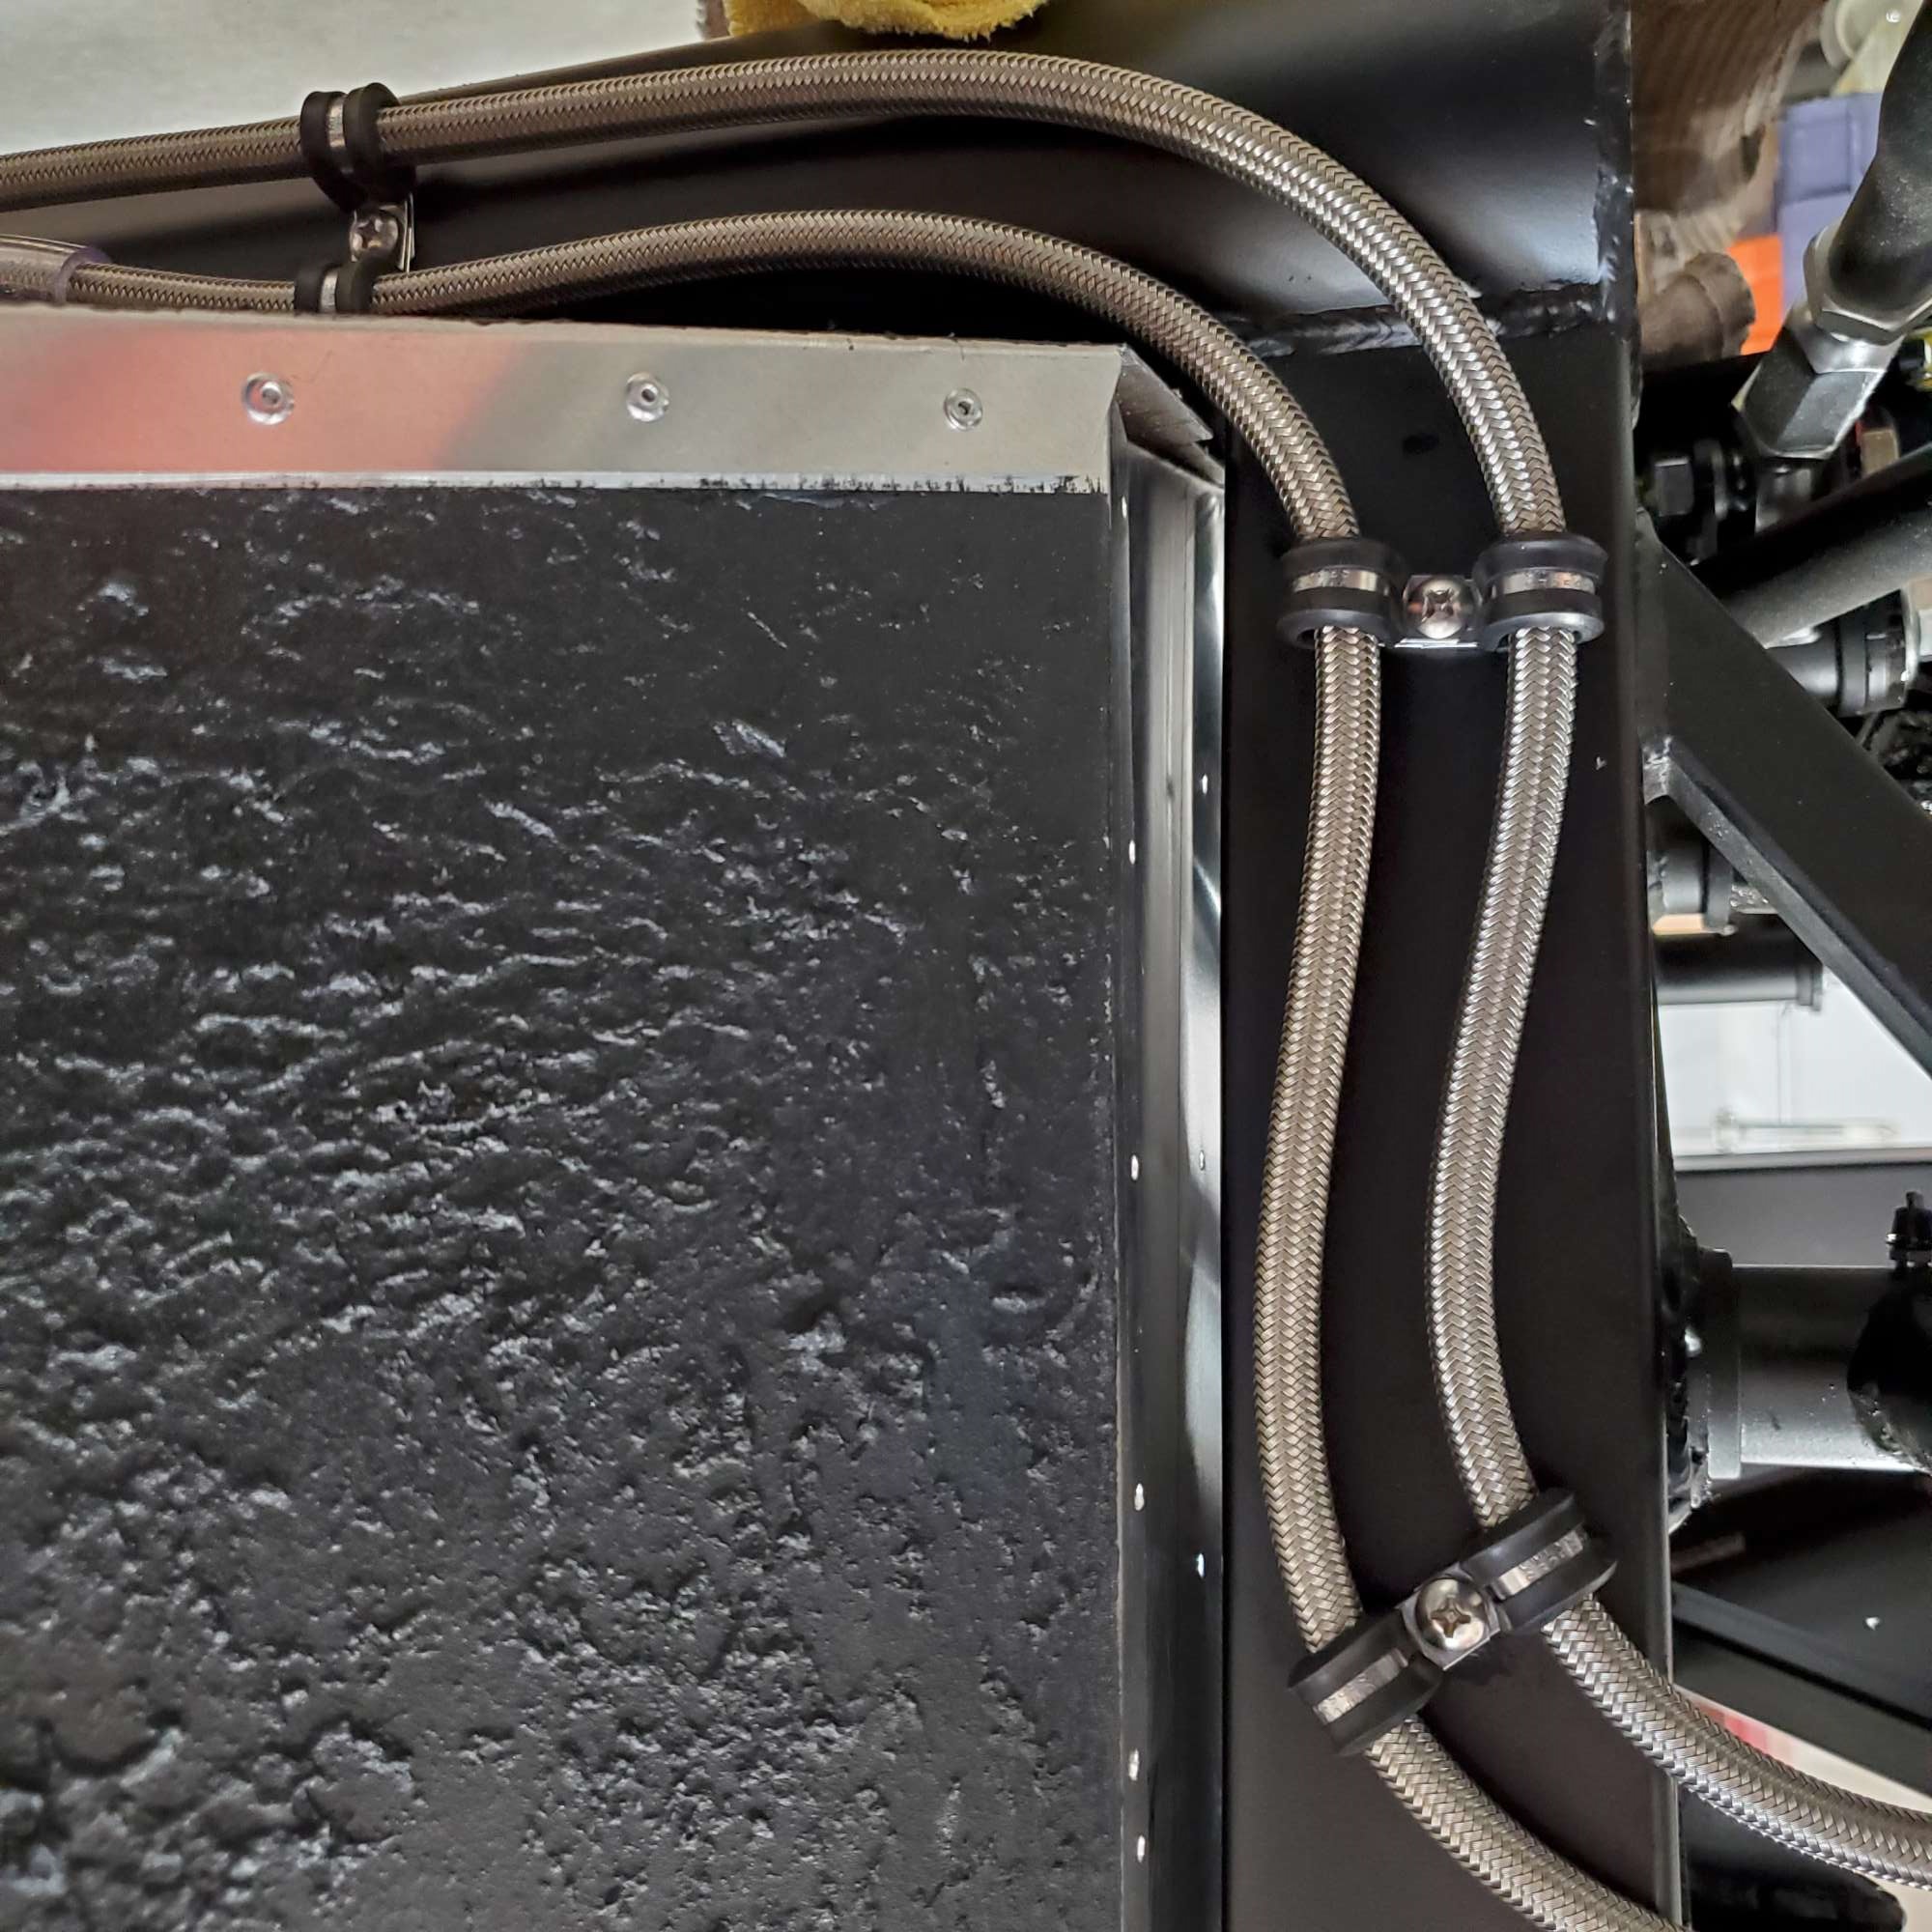
Chris
Coupe complete kit delivered: 4/22/24.
Build Thread. Coyote. T-56. IRS w/3.55. Wilwoods. PS. HVAC. Side windows.
MK4 Complete kit.
Build Thread Index. Delivered: 10/15/2020. Legal: 7/25/23. Coyote Gen3. TKO600 (0.64 OD). IRS w/3.55. PS. Wilwoods. Sway bars. This build is dedicated to my son, Benjamin.
Build Thread.
-
05-06-2021, 10:43 PM
#141
Senior Member
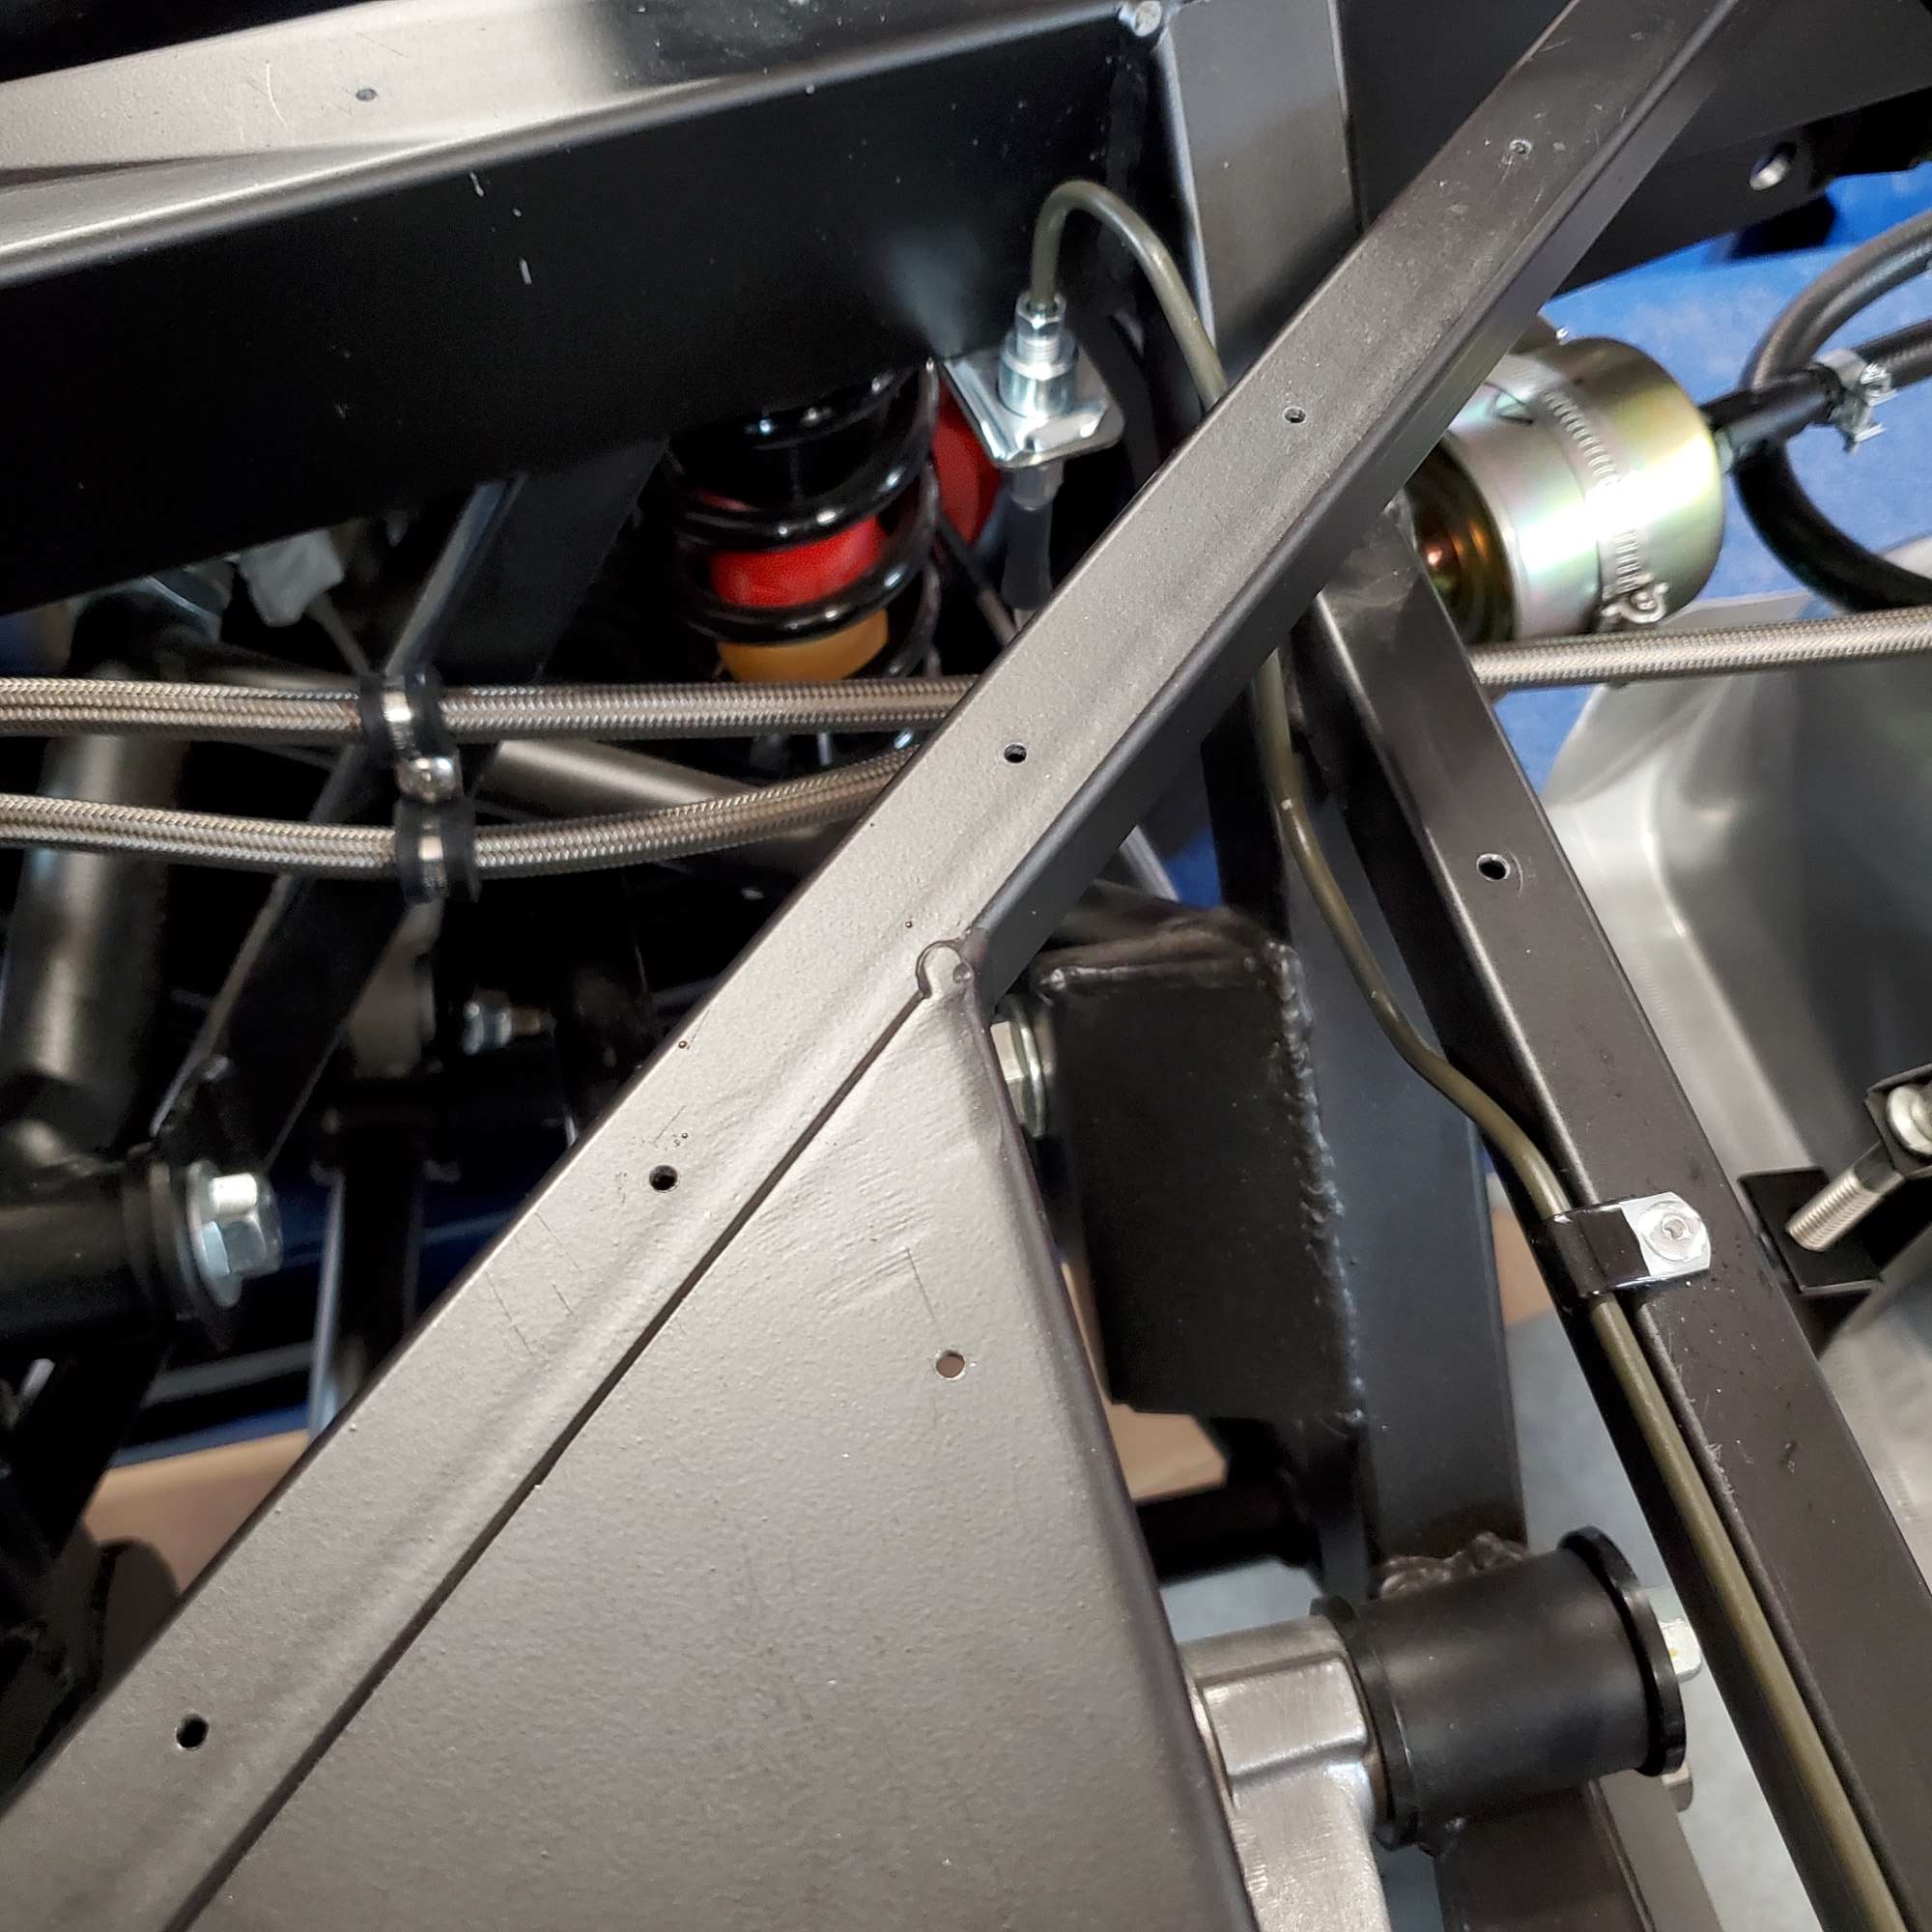
Fuel Lines Complete (continued)
Attached to the diagonal cross support above the rear UCA, and headed toward the tank and filter. The Ham-let Let-lok adapter on the front of the fuel filter is partially visible.
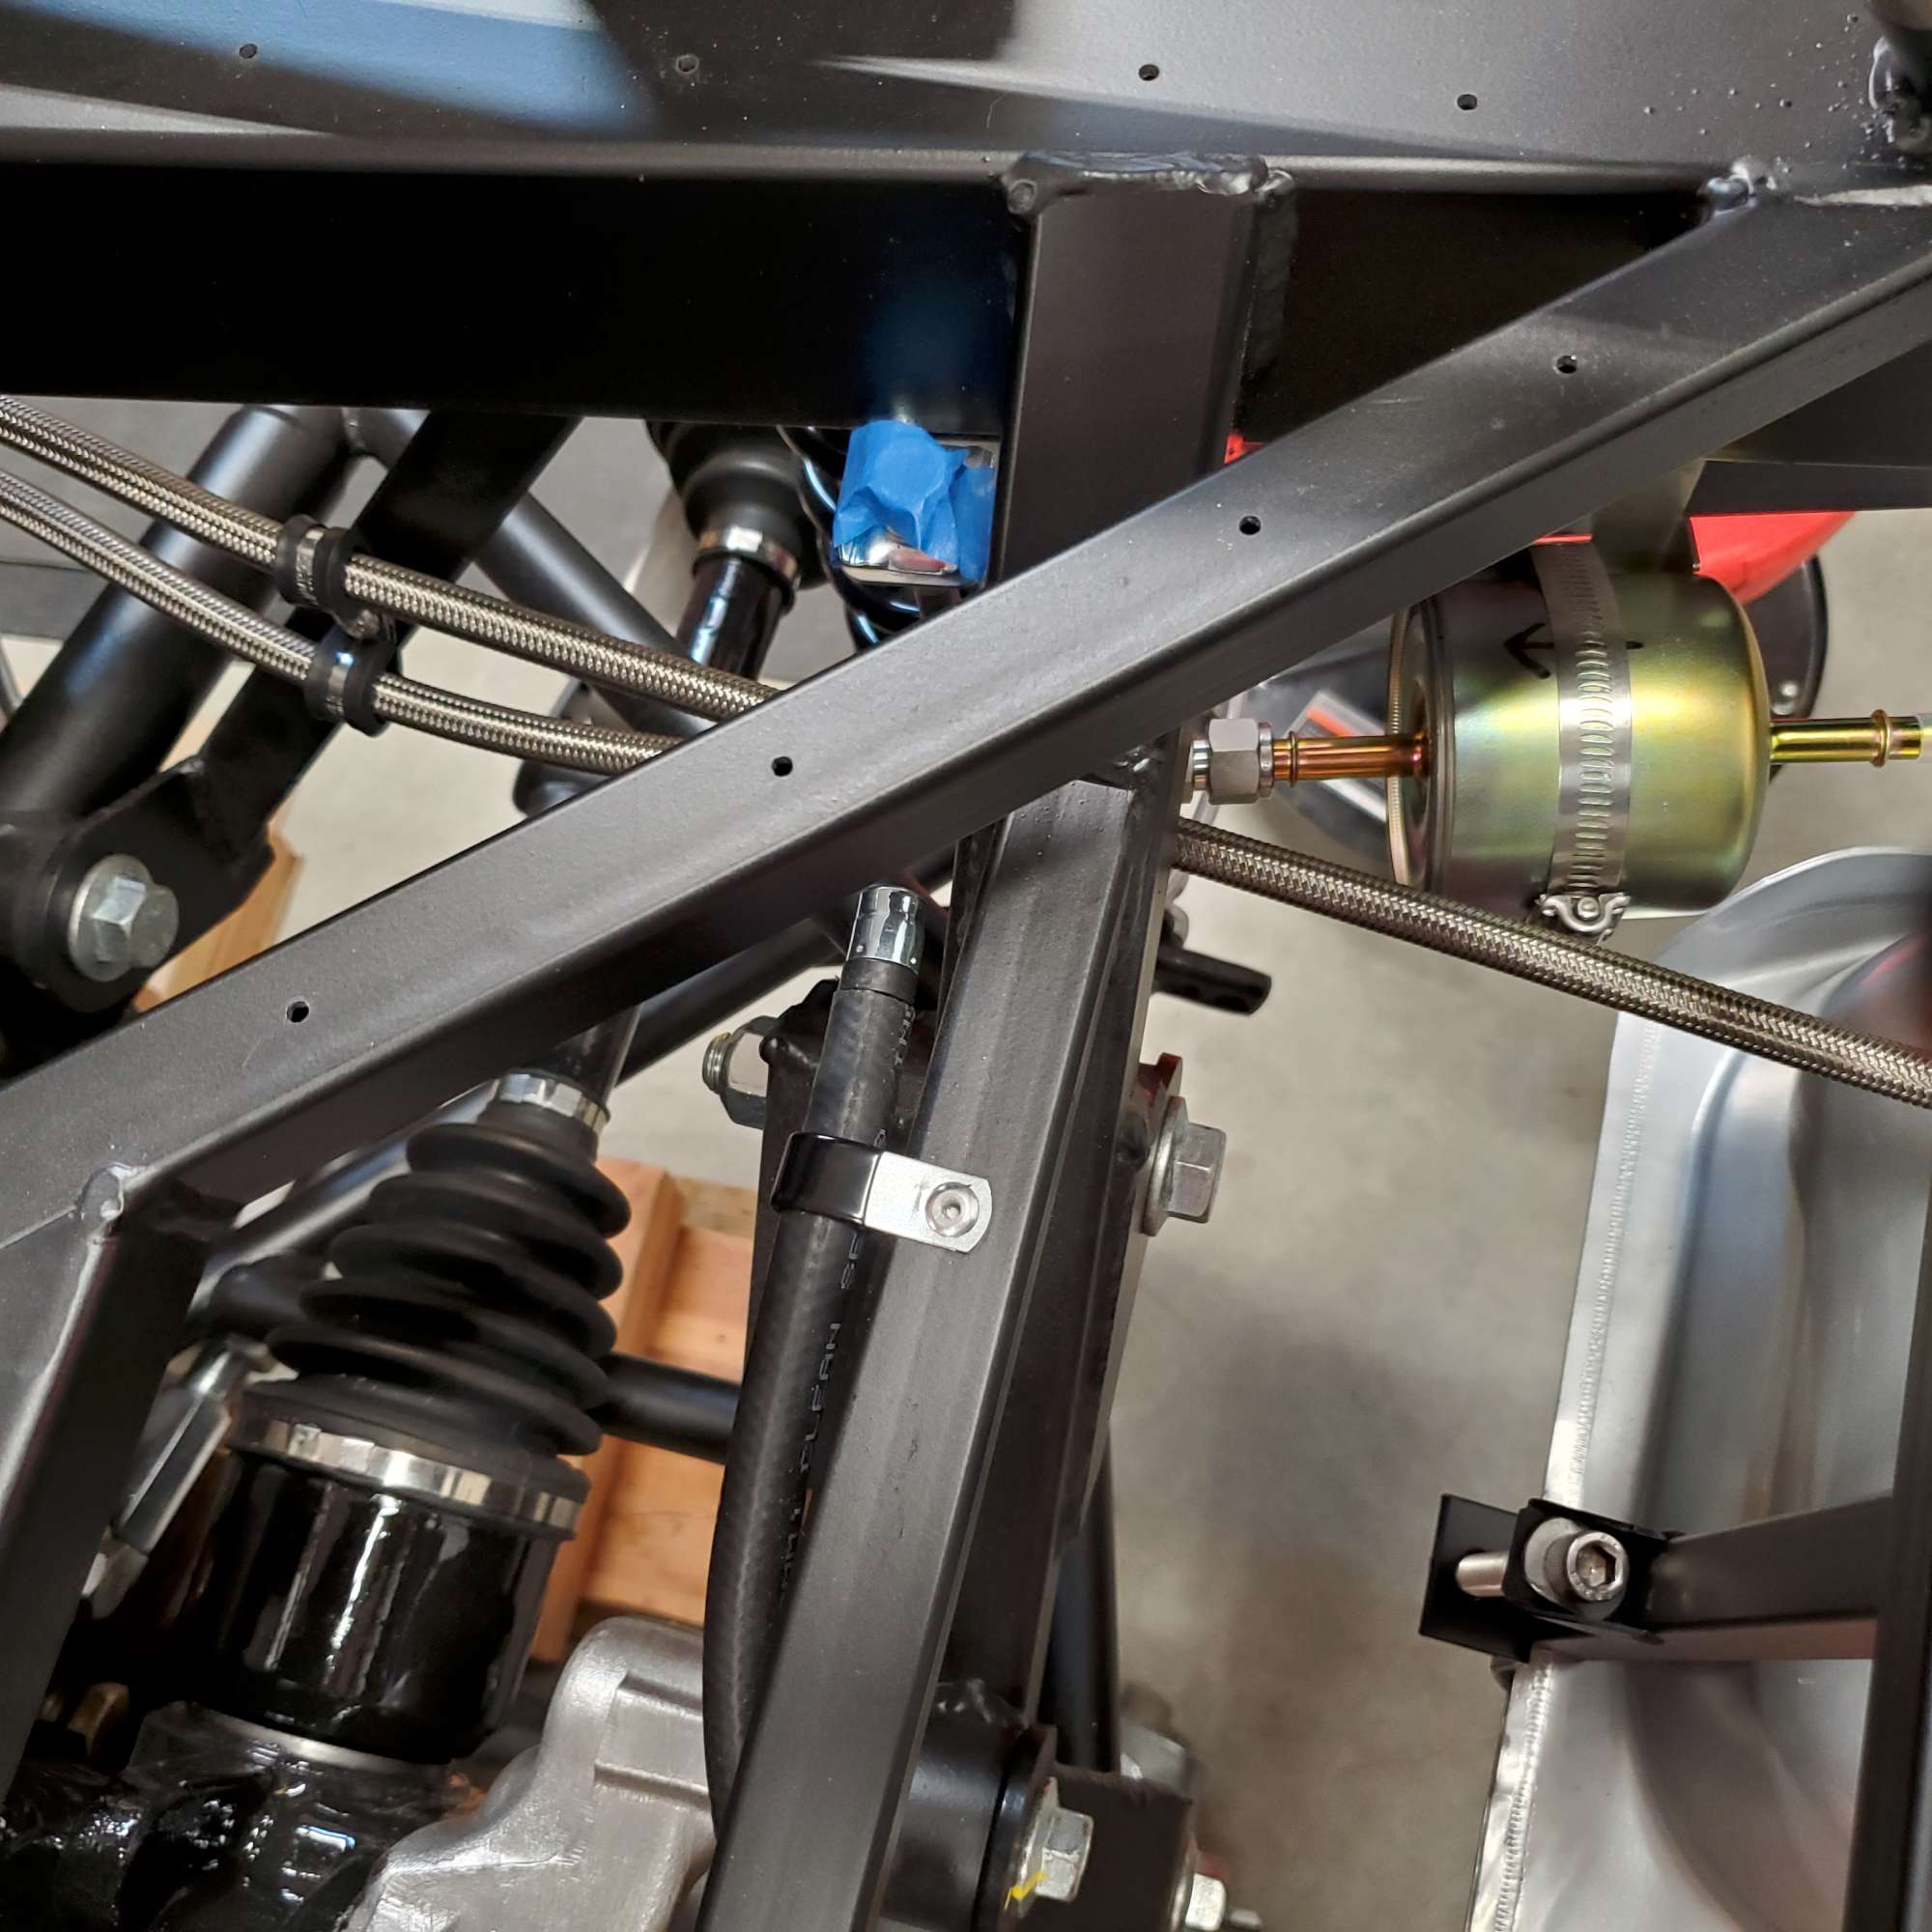
And, connections to the fuel filter and return on the tank. I followed Mark's recommendation to go with the longer rubber hose in the unlikely scenario I need to drop the tank. This should make that task easier.

Close-up view of the return connection/adapter, and the pinched off 1/4" return line--using the recommended 3/8" return line instead.

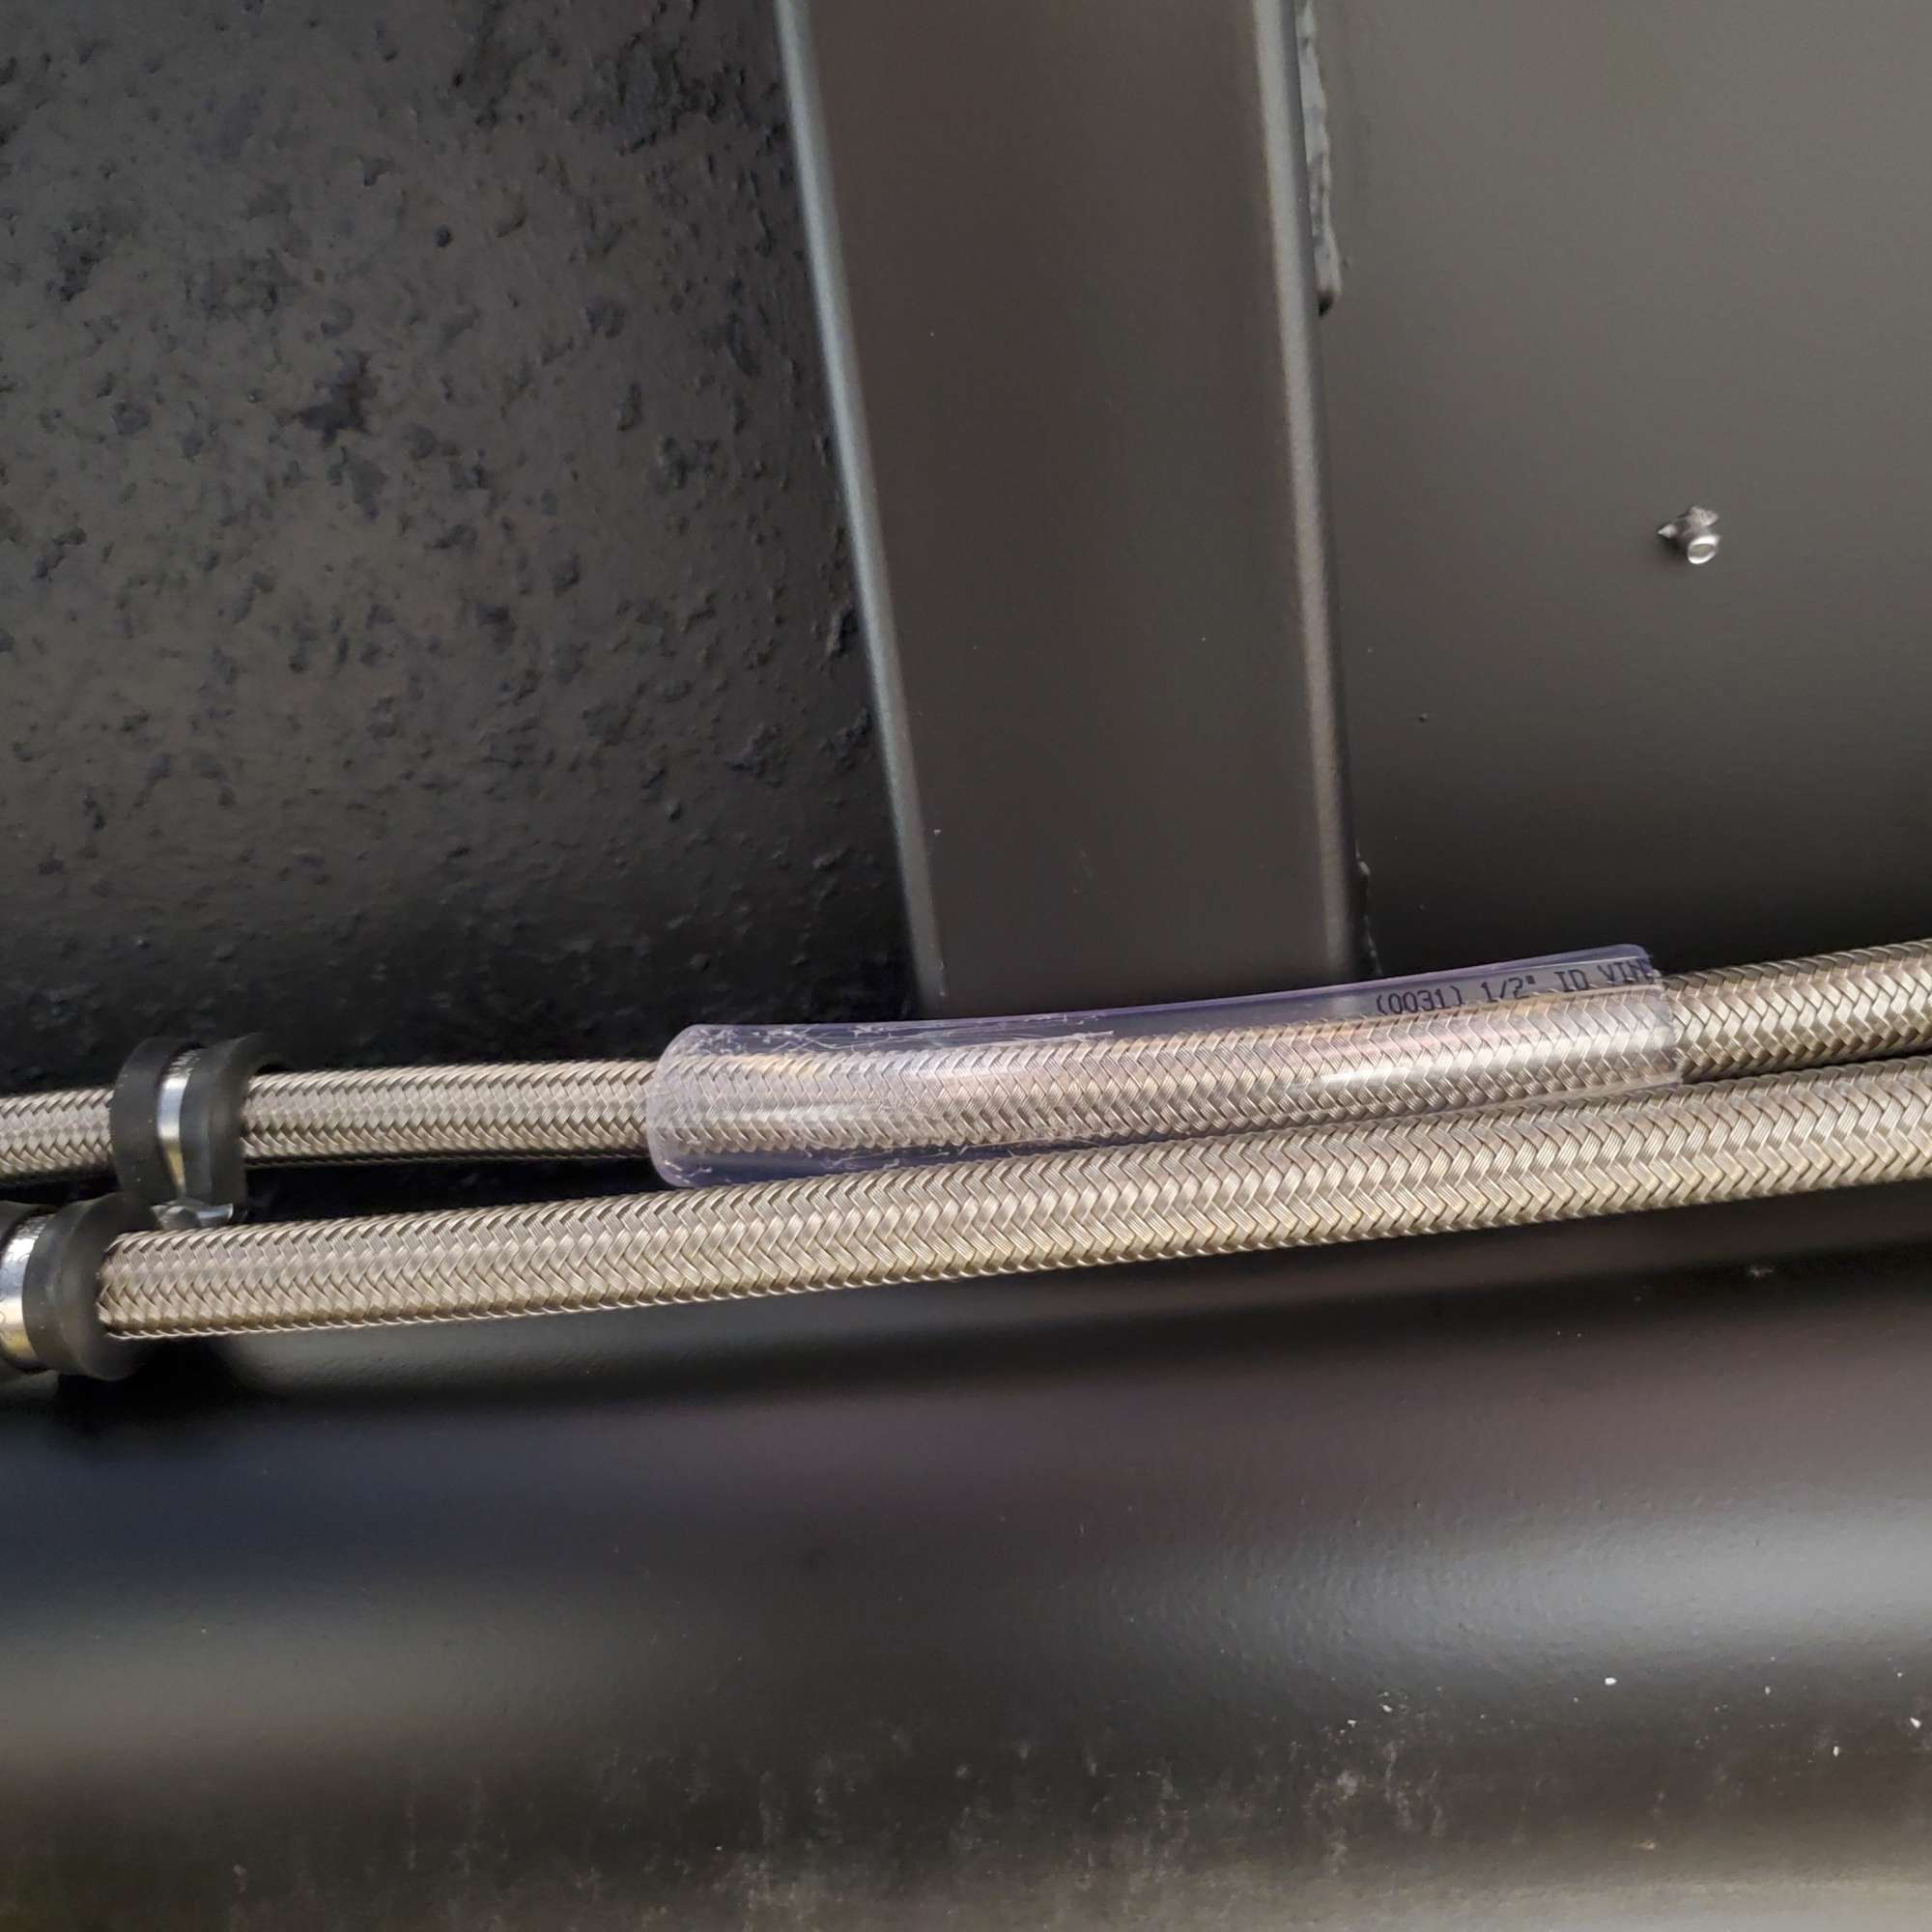
Here's a close-up of the protective tube I slid on over the stainless braided line where it makes contact with the cross support tube under the PS floor.
It was good to complete this portion of the build. If I ever have the opportunity to try it again, I would like to try hard lines (Ni-Copp).
P.S. I forgot to mention I opened up the 3/8" ends on the fuel filter (both sides) and the 3/8" supply on the fuel pump. The manufacturers taper these ends, and by opening them up with a 19/64" drill bit I increased the openings 10% - 20%. Pretty substantial.
Last edited by 460.465USMC; 05-09-2021 at 12:01 PM.
Reason: Note re: 3/8" openings
Chris
Coupe complete kit delivered: 4/22/24.
Build Thread. Coyote. T-56. IRS w/3.55. Wilwoods. PS. HVAC. Side windows.
MK4 Complete kit.
Build Thread Index. Delivered: 10/15/2020. Legal: 7/25/23. Coyote Gen3. TKO600 (0.64 OD). IRS w/3.55. PS. Wilwoods. Sway bars. This build is dedicated to my son, Benjamin.
Build Thread.
-
Post Thanks / Like - 0 Thanks, 1 Likes
-
05-09-2021, 04:07 PM
#142
Senior Member
Looking great! Nice progress, Chris.
MKIV Complete Kit #9822 l BluePrint 347 EFI l TKO600 l Power Steering l Heater/Defrost l
Build Thread
-
Post Thanks / Like - 1 Thanks, 0 Likes
-
05-09-2021, 09:16 PM
#143
Senior Member
Thanks, JB. I started on the brake lines. This will be a challenge area for me, like so much of what I've done so far. But is it ever fun...and like Straversi said: addicting!
Chris
Coupe complete kit delivered: 4/22/24.
Build Thread. Coyote. T-56. IRS w/3.55. Wilwoods. PS. HVAC. Side windows.
MK4 Complete kit.
Build Thread Index. Delivered: 10/15/2020. Legal: 7/25/23. Coyote Gen3. TKO600 (0.64 OD). IRS w/3.55. PS. Wilwoods. Sway bars. This build is dedicated to my son, Benjamin.
Build Thread.
-
05-18-2021, 07:05 PM
#144
Senior Member
Wheels/Tires Arrived! (And a Question)
Today was a fun day, as my long-awaited wheels and tires arrived. I ordered them Feb. 20, and after too many weeks of no improvement on the delivery date, I found very similar wheels at a different online vendor for about the same price. Ordered them last week. One of the front and one of the rear arrived this afternoon. The other two should arrive by day's end per FedEx.
As I mentioned, I wanted something other than the Halibrand replica look. According to the vendor's website (LMR) this style wheel was available on the 2003-2004 Mustang: they are Cobra style wheels. Has a good ring to it.
I didn't waste any time getting them on to check fit, and see how they look. I'm prepared to make an adjustment to the power steering rack if necessary (add rack spacers) if contact with the F-panel is an issue. I don't have my rough alignment done yet, so can't really tell yet if this will be an issue. I suspect it will based upon other forum members' experience with this size wheel/tire combo in the front.
Rear: 315/35/R17 | 17X9 wheel
Front: 275/40/R17 | 17X10.5 wheel
Rear wheel

Rear wheel has a decent lip. The fronts are flush. Here's the rear:
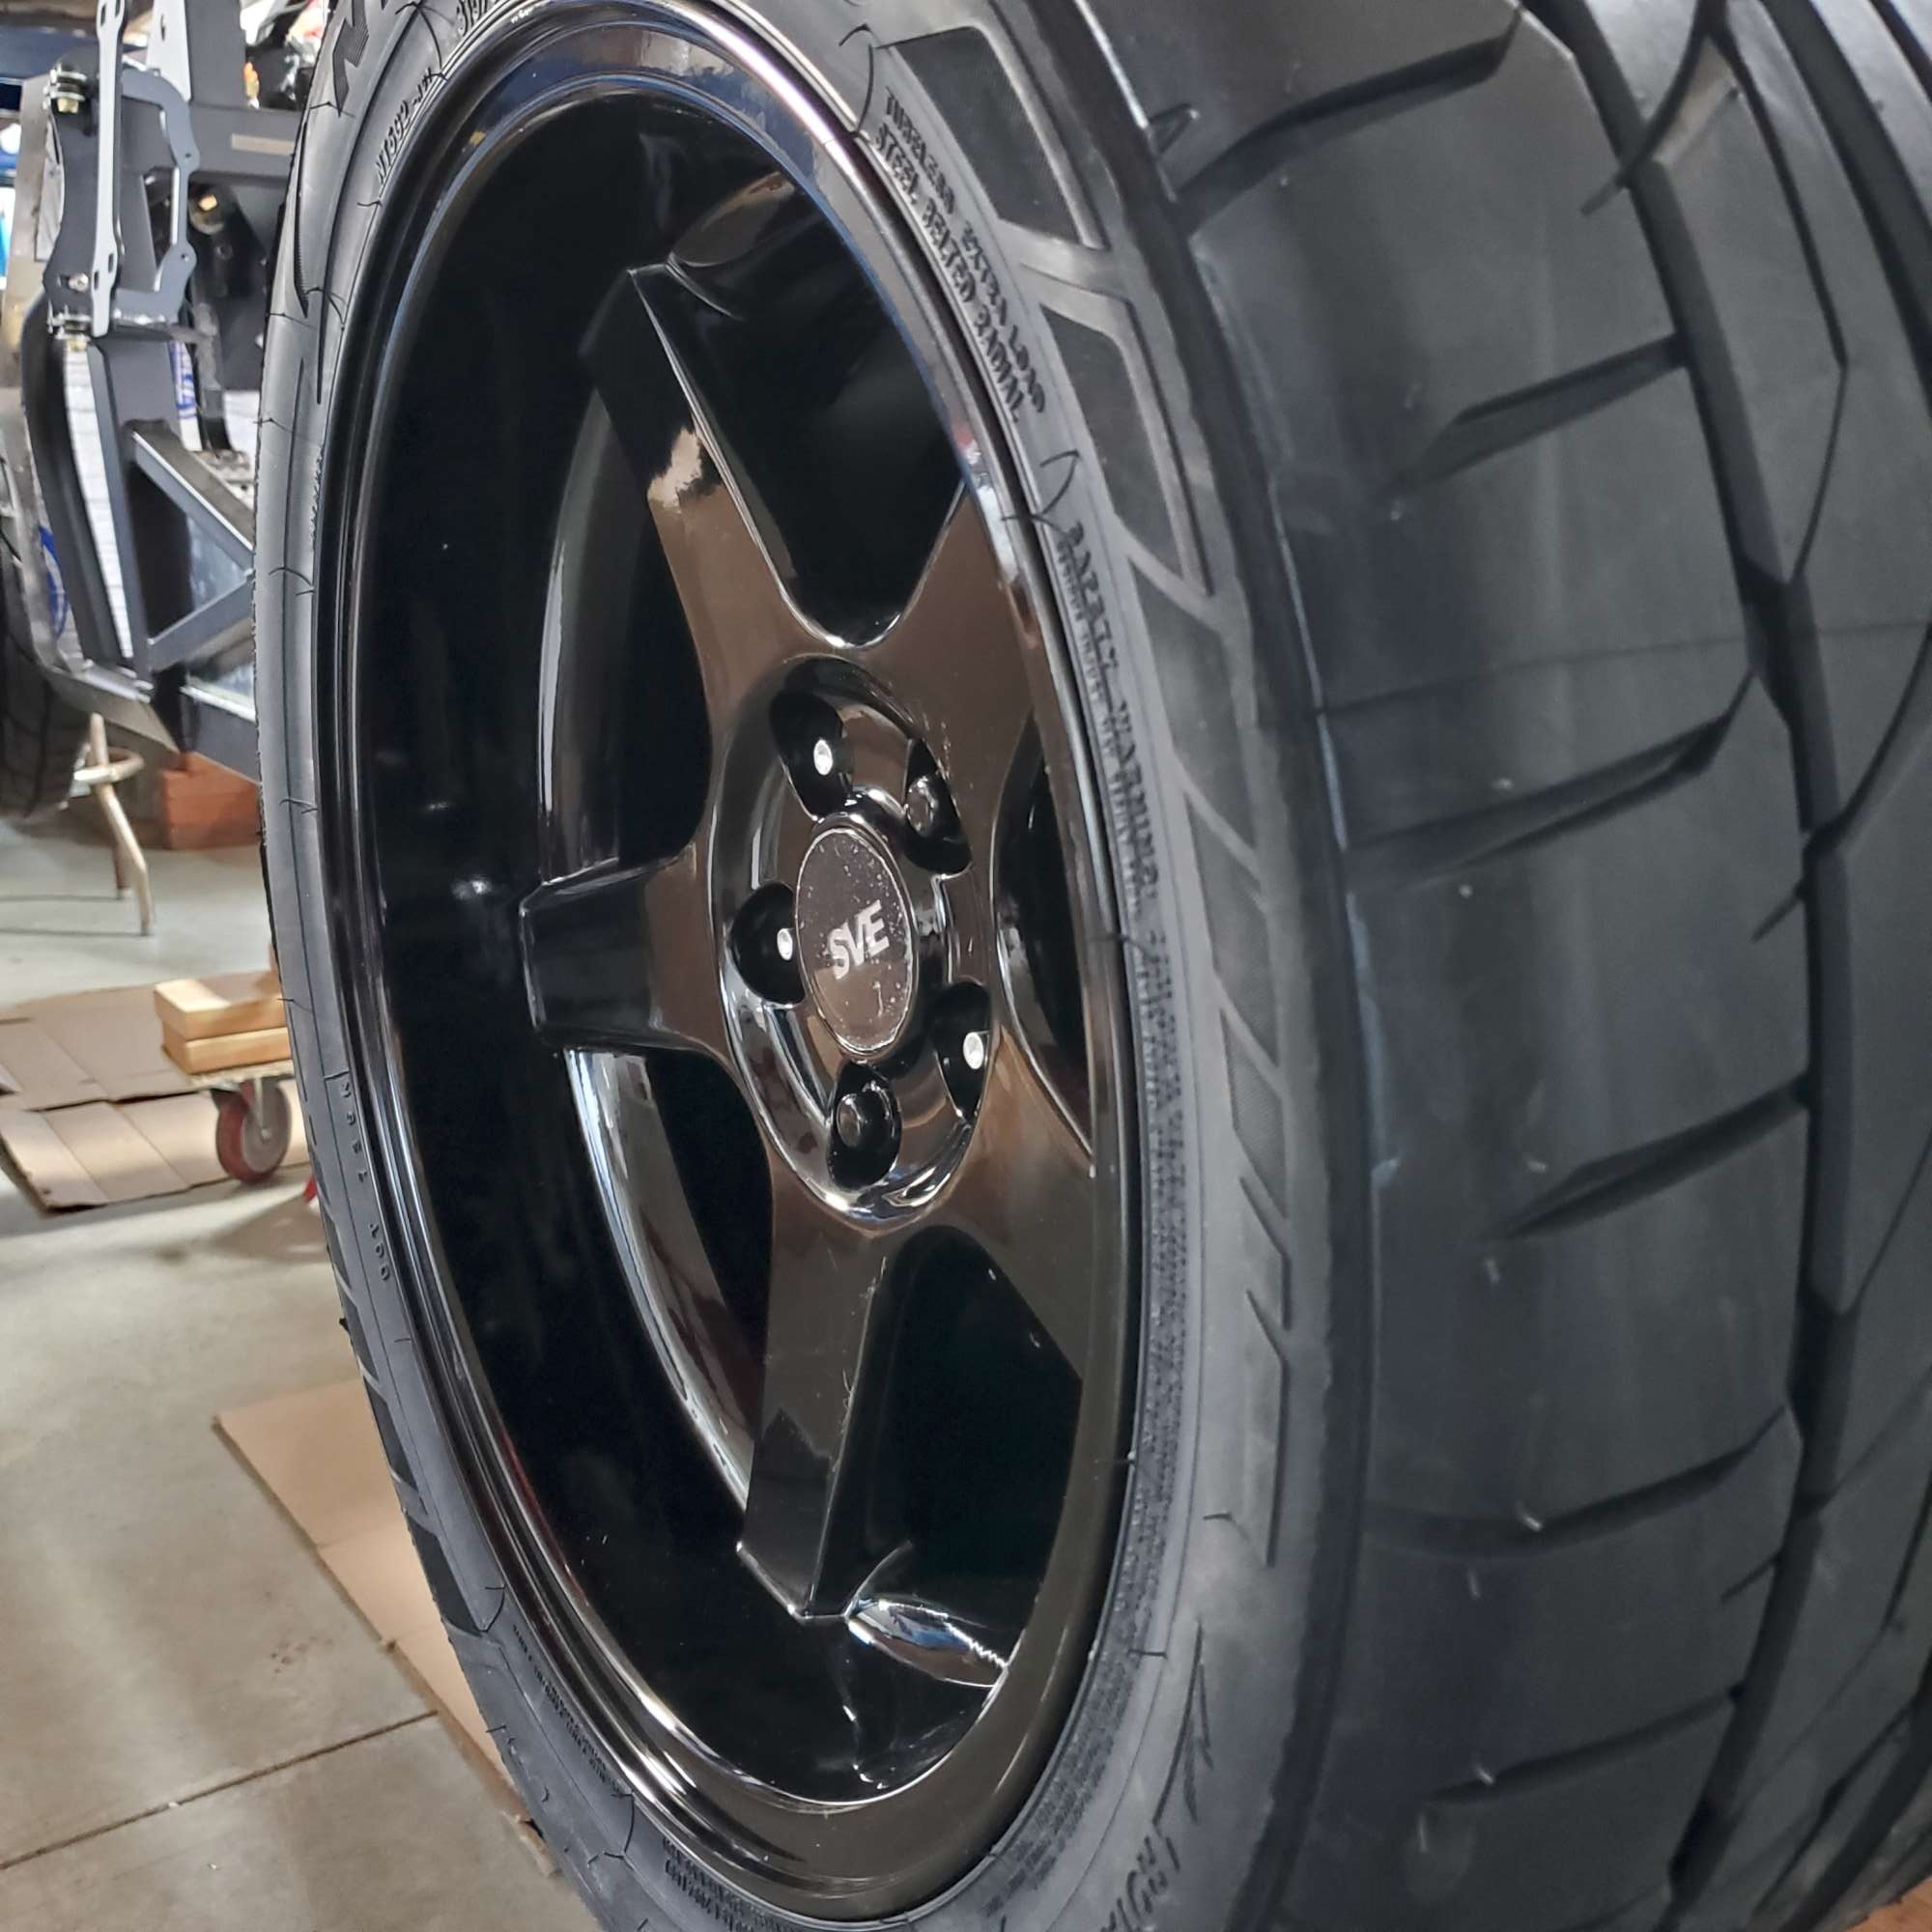
I think I have a roller.
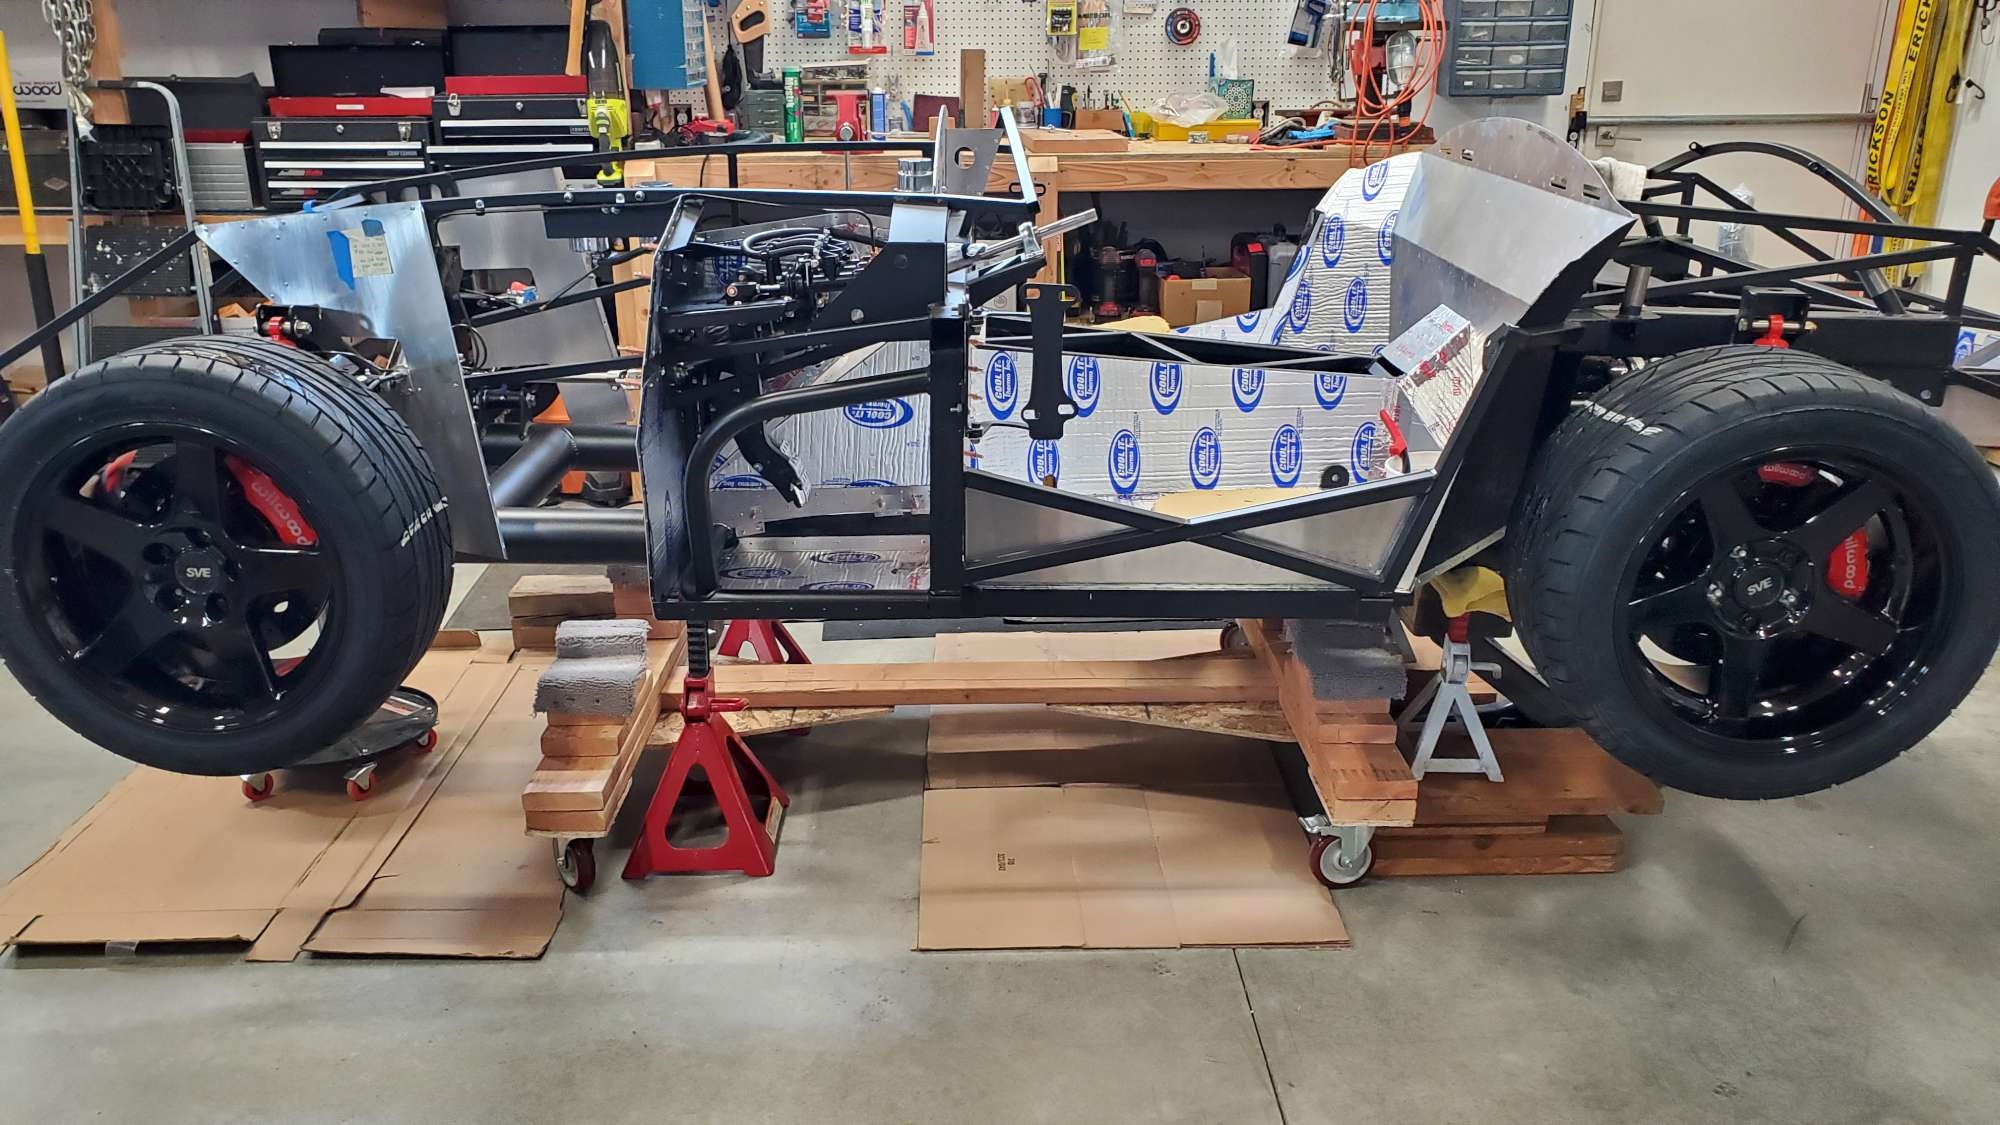
Noobie question for the forum: is it the wheel that secures the brake disc to the hub? While awaiting for the wheels to arrive I've had them secured with a nut. The calipers hold them loosely in place, but it seems kind of odd to me there isn't something else that secures the disc to the hub besides the lug nuts? Am I missing something?
Chris
Coupe complete kit delivered: 4/22/24.
Build Thread. Coyote. T-56. IRS w/3.55. Wilwoods. PS. HVAC. Side windows.
MK4 Complete kit.
Build Thread Index. Delivered: 10/15/2020. Legal: 7/25/23. Coyote Gen3. TKO600 (0.64 OD). IRS w/3.55. PS. Wilwoods. Sway bars. This build is dedicated to my son, Benjamin.
Build Thread.
-
05-18-2021, 07:13 PM
#145
Originally Posted by
460.465USMC
Noobie question for the forum: is it the wheel that secures the brake disc to the hub? While awaiting for the wheels to arrive I've had them secured with a nut. The calipers hold them loosely in place, but it seems kind of odd to me there isn't something else that secures the disc to the hub besides the lug nuts? Am I missing something?
Looks great! Nope you're not missing anything. I've seen some rotors that have screws holding them to the hub but most are just sandwiched with the rim and lug nuts.
MK4 Complete Kit, EFI 427W/TKO 600, 2015 IRS
Ordered: 11/6/20, Kit Completion: 2/13/21, Picked Up: 2/16/21, Build Started: 2/19/21, First Start: 6/13/21, Go Kart: 8/15/21, Sent for Paint: 12/23/21, Back From Paint: 6/16/22, Street Legal: 7/11/22
-
Post Thanks / Like - 1 Thanks, 0 Likes
-
05-18-2021, 07:19 PM
#146
Senior Member
Originally Posted by
NYMike
Looks great! Nope you're not missing anything. I've seen some rotors that have screws holding them to the hub but most are just sandwiched with the rim and lug nuts.
Thanks, Mike! That makes me feel better.
Chris
Coupe complete kit delivered: 4/22/24.
Build Thread. Coyote. T-56. IRS w/3.55. Wilwoods. PS. HVAC. Side windows.
MK4 Complete kit.
Build Thread Index. Delivered: 10/15/2020. Legal: 7/25/23. Coyote Gen3. TKO600 (0.64 OD). IRS w/3.55. PS. Wilwoods. Sway bars. This build is dedicated to my son, Benjamin.
Build Thread.
-
05-18-2021, 08:23 PM
#147
Senior Member
As Mike said, they are held on with the lug nuts. The Wilwoods are nice because they have the center spacer that keeps them near perfect. The issue with rotors that have a set screw holding them on is they corrode and then round trying to remove (often a torx or phillips head).
I like your wheels, I got my setup from LMR as well. If you look around you can find all sorts of other center caps if you want to dress it differently. Your wheel choice will make your build unique.
MK4 #10008 - Ordered 10/06/20, Delivered 03/03/21, First Start 7/22/21, First Go Kart 7/24/21
Paint by Metal Morphous 5/14/22, Legally registered 6/8/22, Graduated 7/20/22
Build Thread
https://thefactoryfiveforum.com/show...been-delivered
Complete Kit, Ford 306, Sniper/Dual Sync, T5, Hydraulic clutch
-
Post Thanks / Like - 1 Thanks, 0 Likes
-
05-19-2021, 08:36 AM
#148
Senior Member
Those wheels are really nice, great choice!
-
Post Thanks / Like - 1 Thanks, 0 Likes
-
05-19-2021, 02:07 PM
#149
Senior Member
Originally Posted by
Blitzboy54
As Mike said, they are held on with the lug nuts. The Wilwoods are nice because they have the center spacer that keeps them near perfect. The issue with rotors that have a set screw holding them on is they corrode and then round trying to remove (often a torx or phillips head).
I like your wheels, I got my setup from LMR as well. If you look around you can find all sorts of other center caps if you want to dress it differently. Your wheel choice will make your build unique.
Thanks for the confirmation, Mike. I'm not sure what I was expecting, but wanted to ask to make sure I didn't brain-fart (again).
Any recommended sources on the center caps?
Chris
Coupe complete kit delivered: 4/22/24.
Build Thread. Coyote. T-56. IRS w/3.55. Wilwoods. PS. HVAC. Side windows.
MK4 Complete kit.
Build Thread Index. Delivered: 10/15/2020. Legal: 7/25/23. Coyote Gen3. TKO600 (0.64 OD). IRS w/3.55. PS. Wilwoods. Sway bars. This build is dedicated to my son, Benjamin.
Build Thread.
-
05-19-2021, 02:11 PM
#150
Senior Member
Originally Posted by
Fman
Those wheels are really nice, great choice!
Thanks, Travis! It's a lot of fun to have so many options out there.
Chris
Coupe complete kit delivered: 4/22/24.
Build Thread. Coyote. T-56. IRS w/3.55. Wilwoods. PS. HVAC. Side windows.
MK4 Complete kit.
Build Thread Index. Delivered: 10/15/2020. Legal: 7/25/23. Coyote Gen3. TKO600 (0.64 OD). IRS w/3.55. PS. Wilwoods. Sway bars. This build is dedicated to my son, Benjamin.
Build Thread.
-
05-22-2021, 02:35 PM
#151
Senior Member
Time to try out the lift
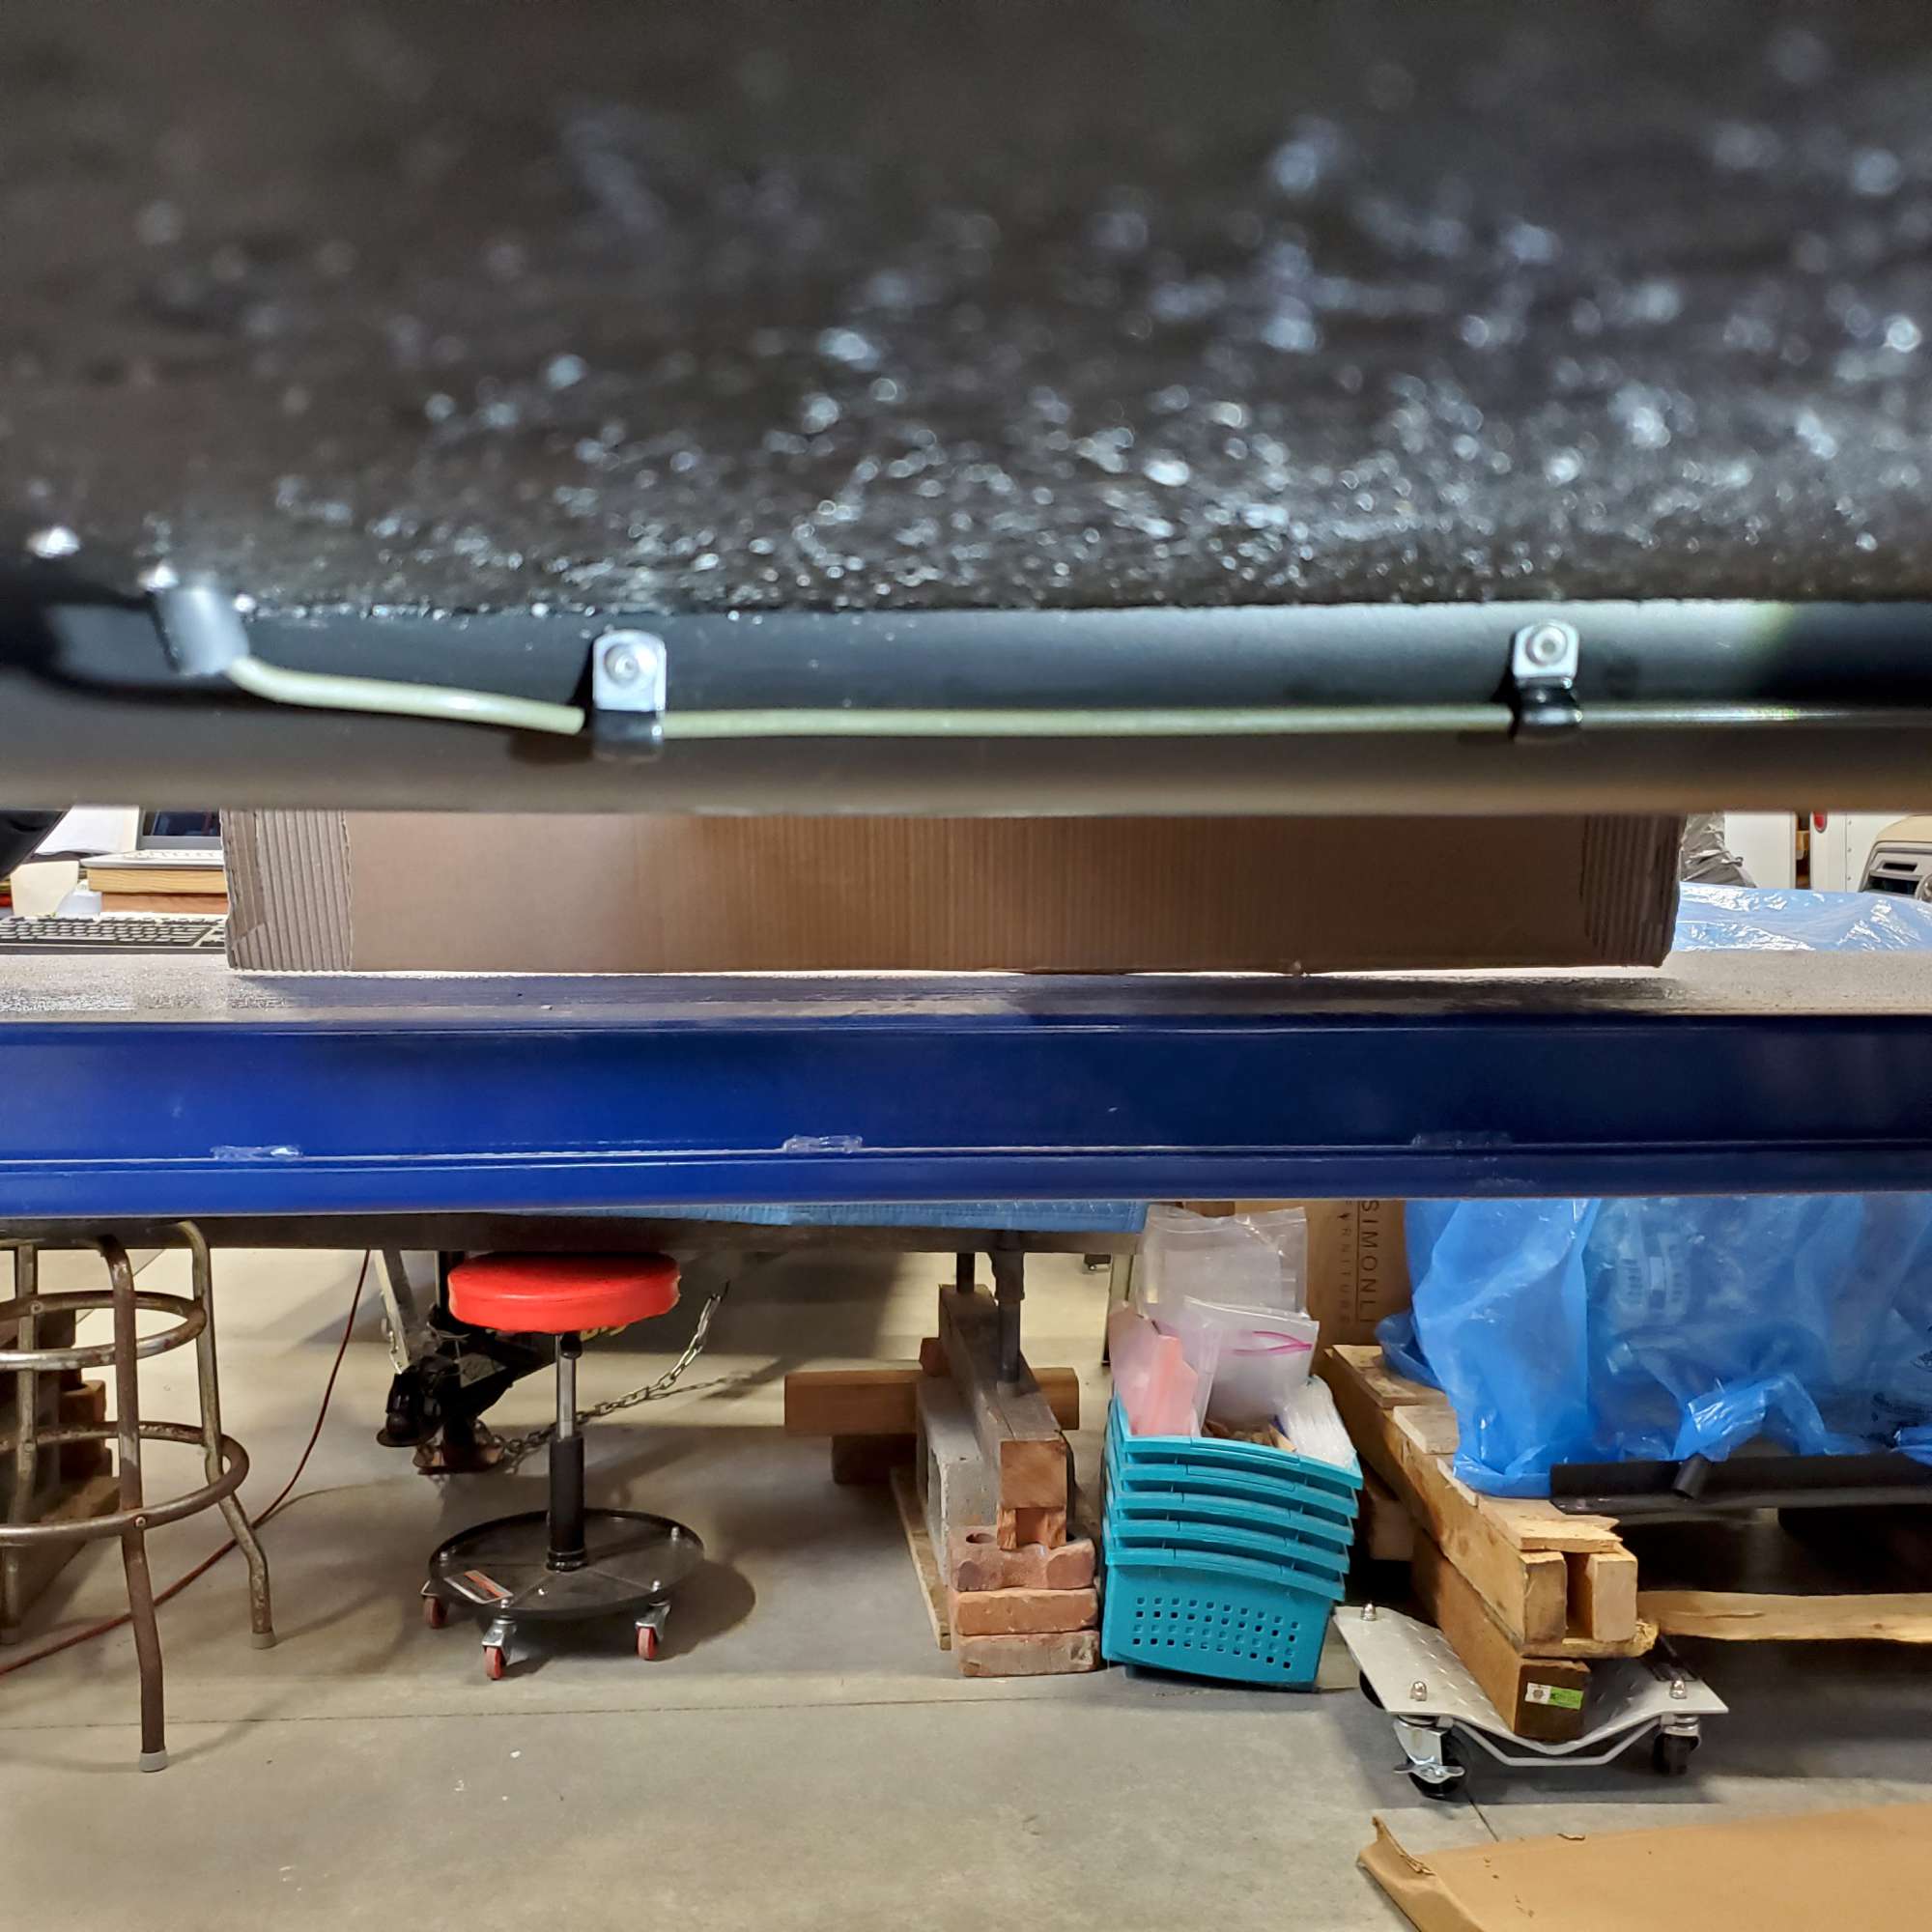
Now that I have a roller, thinking it's time to try out my four post lift. I bought this four-post lift in 2016 for doing maintenance on the 1969 Nova. Tore down the lift, and set it back up when we moved a couple years ago: the long blue runways are scary heavy (300-500 lbs?). I first saw JohnK use his four-post, and have since seen at least one other builder do the same. After Blitzboy54's comment about the joys of installing the e-brake on the ground, figured now is the perfect time.
I'm currently working on rear brake lines, so will get a taste right away and see how it works. I'm a little concerned the long runways might get in the way. Better stability is a great benefit of four post v. two post, but the tradeoff is ease of access around the vehicle.

That's my drive train under the blue plastic on the right, patiently waiting to drop in.
Looking forward to standing/sitting underneath as I run the rear brake lines. I did the low crawl when I recently installed the fuel lines (and the rest of the build to this point).
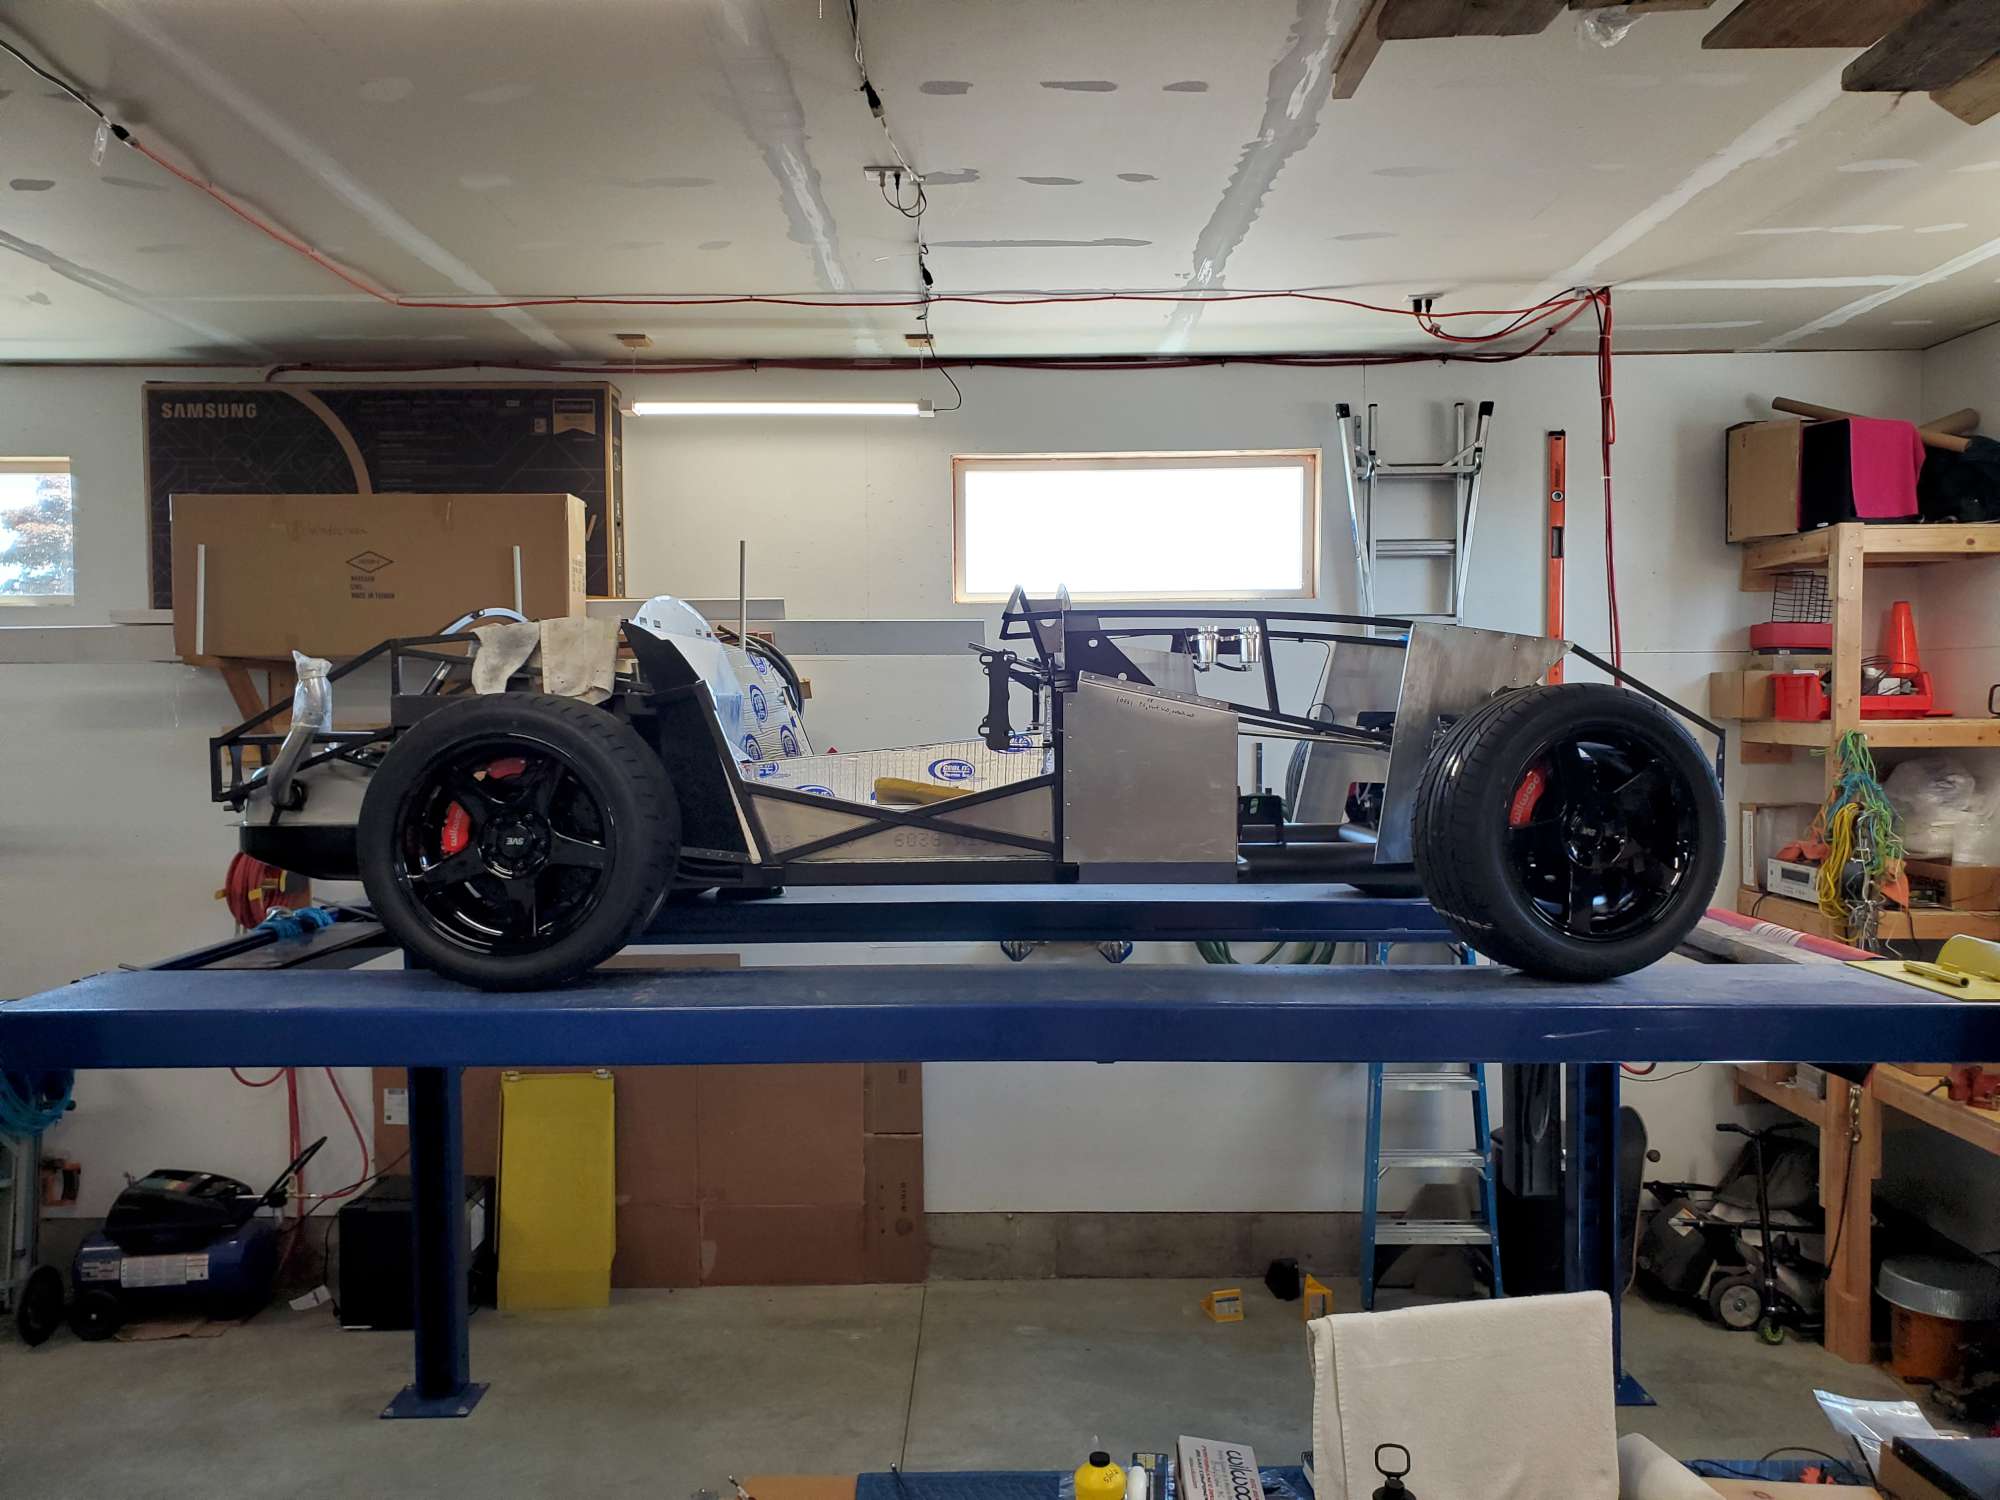
First time for my roadster on all four shoes on the ground. Wow, this thing sits low! Really something to see first hand.
Last edited by 460.465USMC; 05-24-2021 at 11:26 AM.
Reason: Updated "ramps" to "runways" for clarification.
Chris
Coupe complete kit delivered: 4/22/24.
Build Thread. Coyote. T-56. IRS w/3.55. Wilwoods. PS. HVAC. Side windows.
MK4 Complete kit.
Build Thread Index. Delivered: 10/15/2020. Legal: 7/25/23. Coyote Gen3. TKO600 (0.64 OD). IRS w/3.55. PS. Wilwoods. Sway bars. This build is dedicated to my son, Benjamin.
Build Thread.
-
Post Thanks / Like - 0 Thanks, 2 Likes
-
05-22-2021, 02:43 PM
#152
Very nice Chris! Congratulations on the lift. I think you'll really like it. Do yourself a favor and pick up one of these:
https://www.amazon.com/gp/product/B0...?ie=UTF8&psc=1
It makes rolling around underneath a lot easier.
Also Race Ramps make some really nice, lightweight ramps that are MUCH easier to move around and store than the crazy-heavy ramps that come with the lift. I put the ramps that came with my lift in the basement and haven't touched them again.
-John
MkIV Roadster build: Gen 2 Coyote, IRS, TKO600. Ordered 10/24/18. Delivered 1/29/19. Engine installed 8/8/21. First start 9/12/21. First go-kart 9/17/21. Off to paint 4/11/22. Back from paint 12/30/22.
Build thread here.
-
Post Thanks / Like - 1 Thanks, 0 Likes
-
05-24-2021, 10:20 AM
#153
Senior Member
That is stinkin sweet. Would love to have something like that. Congrats
MK4 #10008 - Ordered 10/06/20, Delivered 03/03/21, First Start 7/22/21, First Go Kart 7/24/21
Paint by Metal Morphous 5/14/22, Legally registered 6/8/22, Graduated 7/20/22
Build Thread
https://thefactoryfiveforum.com/show...been-delivered
Complete Kit, Ford 306, Sniper/Dual Sync, T5, Hydraulic clutch
-
Post Thanks / Like - 0 Thanks, 1 Likes
-
05-24-2021, 09:49 PM
#154
Senior Member
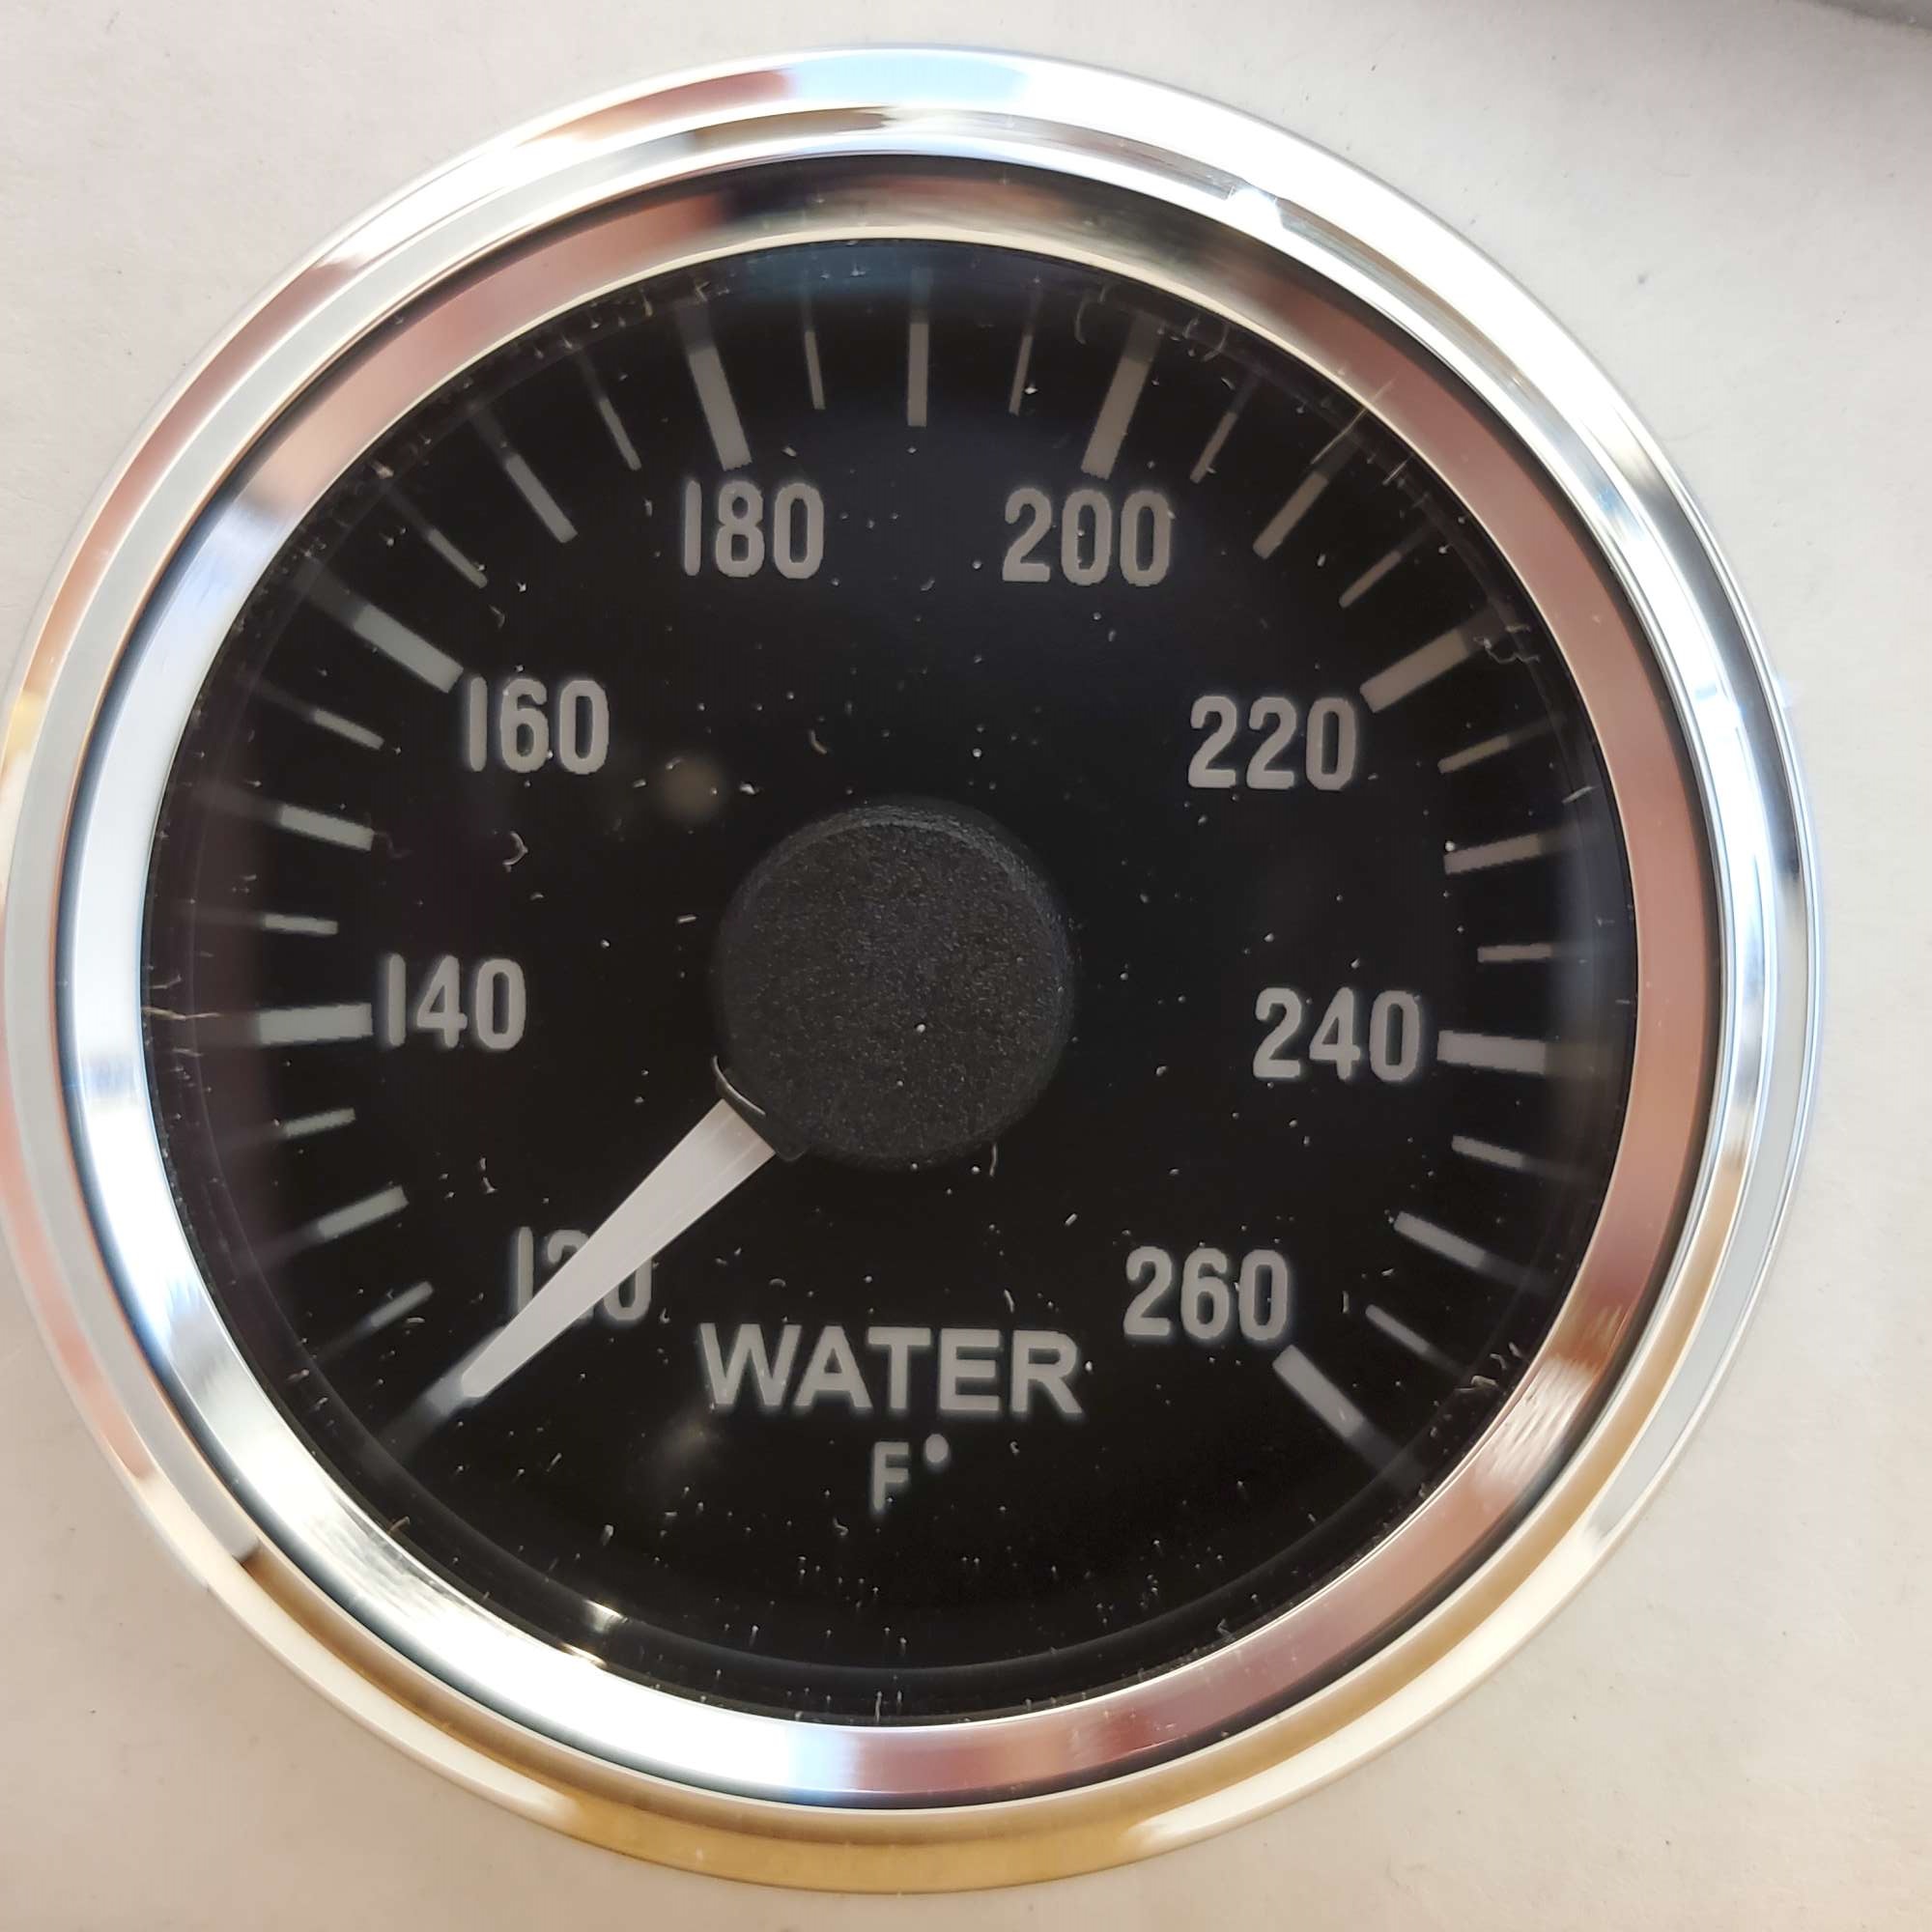
H2O Temp Guage Converted to Fahrenheit
Today, I received my water temp. gauge back from Speedhut. I ordered the vintage guage set with my complete kit from F5. I'm sure most of you know these are Speedhut gauges. The water temp guage comes from F5 in degrees Celsius.
I recently saw Fman get his converted to Fahrenheit. I prefer deg. in Fahrenheit as well, so followed suit. As Fman stated, it's $14 for the conversion; about twice that for shipping round trip. Anyway, one more thing to check off my list. Speedhut took about one week to turn it around. I thought it was pretty fast.
The white specs are dust/debris from packaging, and my picture turned out a bit fuzzy, but you get the idea.
Chris
Coupe complete kit delivered: 4/22/24.
Build Thread. Coyote. T-56. IRS w/3.55. Wilwoods. PS. HVAC. Side windows.
MK4 Complete kit.
Build Thread Index. Delivered: 10/15/2020. Legal: 7/25/23. Coyote Gen3. TKO600 (0.64 OD). IRS w/3.55. PS. Wilwoods. Sway bars. This build is dedicated to my son, Benjamin.
Build Thread.
-
05-25-2021, 07:51 PM
#155
Looks awesome as a roller. Cant wait until we get there. Who did you contact at speedhut to get the temp gauge converted? It looks great!
MK4 Complete Kit, EFI 427W/TKO 600, 2015 IRS
Ordered: 11/6/20, Kit Completion: 2/13/21, Picked Up: 2/16/21, Build Started: 2/19/21, First Start: 6/13/21, Go Kart: 8/15/21, Sent for Paint: 12/23/21, Back From Paint: 6/16/22, Street Legal: 7/11/22
-
05-26-2021, 11:52 AM
#156
Senior Member
Thanks, Mike. You guys are making such great progress you'll zoom right past my turtle build pace.
I emailed "[email protected]". They replied with a RMA number, and the Ship To address.
Chris
Coupe complete kit delivered: 4/22/24.
Build Thread. Coyote. T-56. IRS w/3.55. Wilwoods. PS. HVAC. Side windows.
MK4 Complete kit.
Build Thread Index. Delivered: 10/15/2020. Legal: 7/25/23. Coyote Gen3. TKO600 (0.64 OD). IRS w/3.55. PS. Wilwoods. Sway bars. This build is dedicated to my son, Benjamin.
Build Thread.
-
05-27-2021, 11:06 PM
#157
Senior Member
Brake Lines Installed.
Phew! My brake lines and reservoirs are installed! I knew this was going to be a challenge for me, but it turned out to be more difficult than I imagined. Figuring out the angles and figuring out how to get the fixed length tubes to arrive at the connection point with precision taxed my brain. Given the additional tools I've purchased so far and a few more coming on the horizon, I chose not to buy a flaring tool. So, I used the 51" lines that come with the kit.
I will say now that they are installed it's a very satisfying feeling. I won't celebrate too much until the brake lines are filled and bled.
I bought a 36" piece of scrap aluminum stock (3/16" thick) from my local metal supplier for $11. I cut off a 9.25" section, so plenty left for future brackets. I angled the rear side of the bracket to match the slope of the upper DS footbox. Then, I applied black powder coat. You can see I'm using the F5 supplied reservoirs (one front, one rear, and one for hydraulic clutch). Now I know one reason why so many builders abandon the F5 reservoirs for other options as the mounting brackets are quite wide. Two stacked end-to-end is about 9.25".
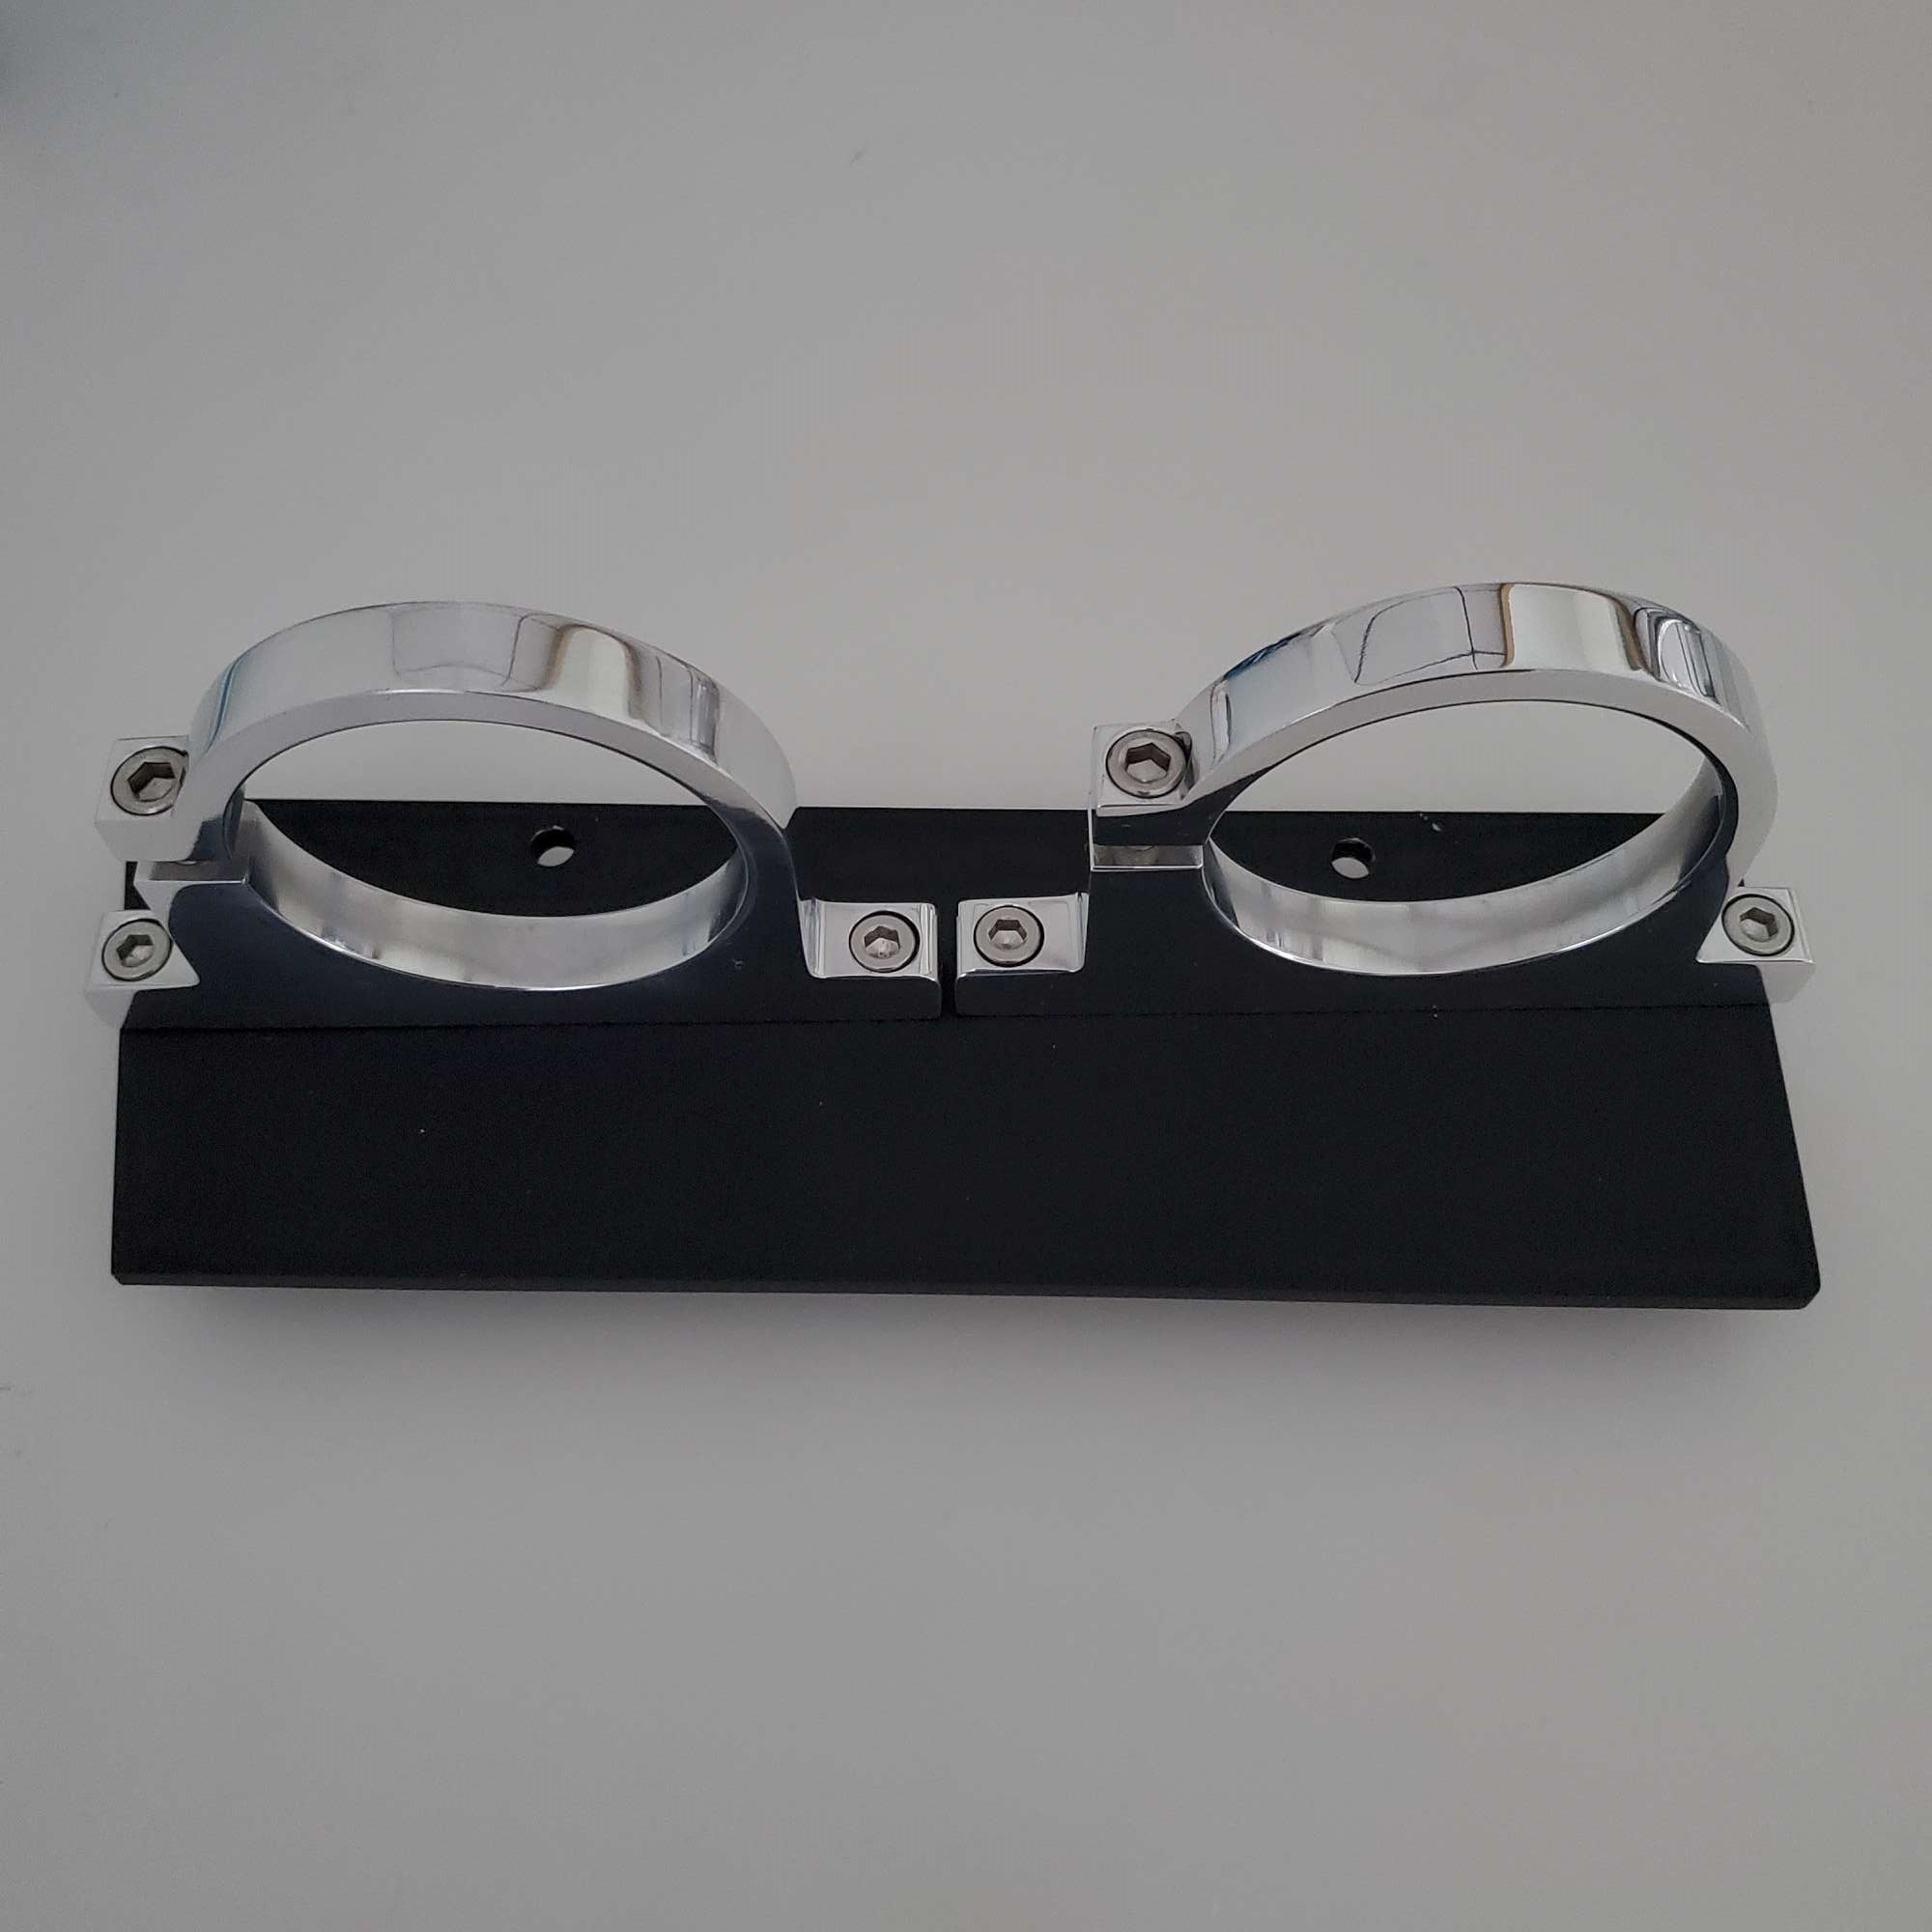
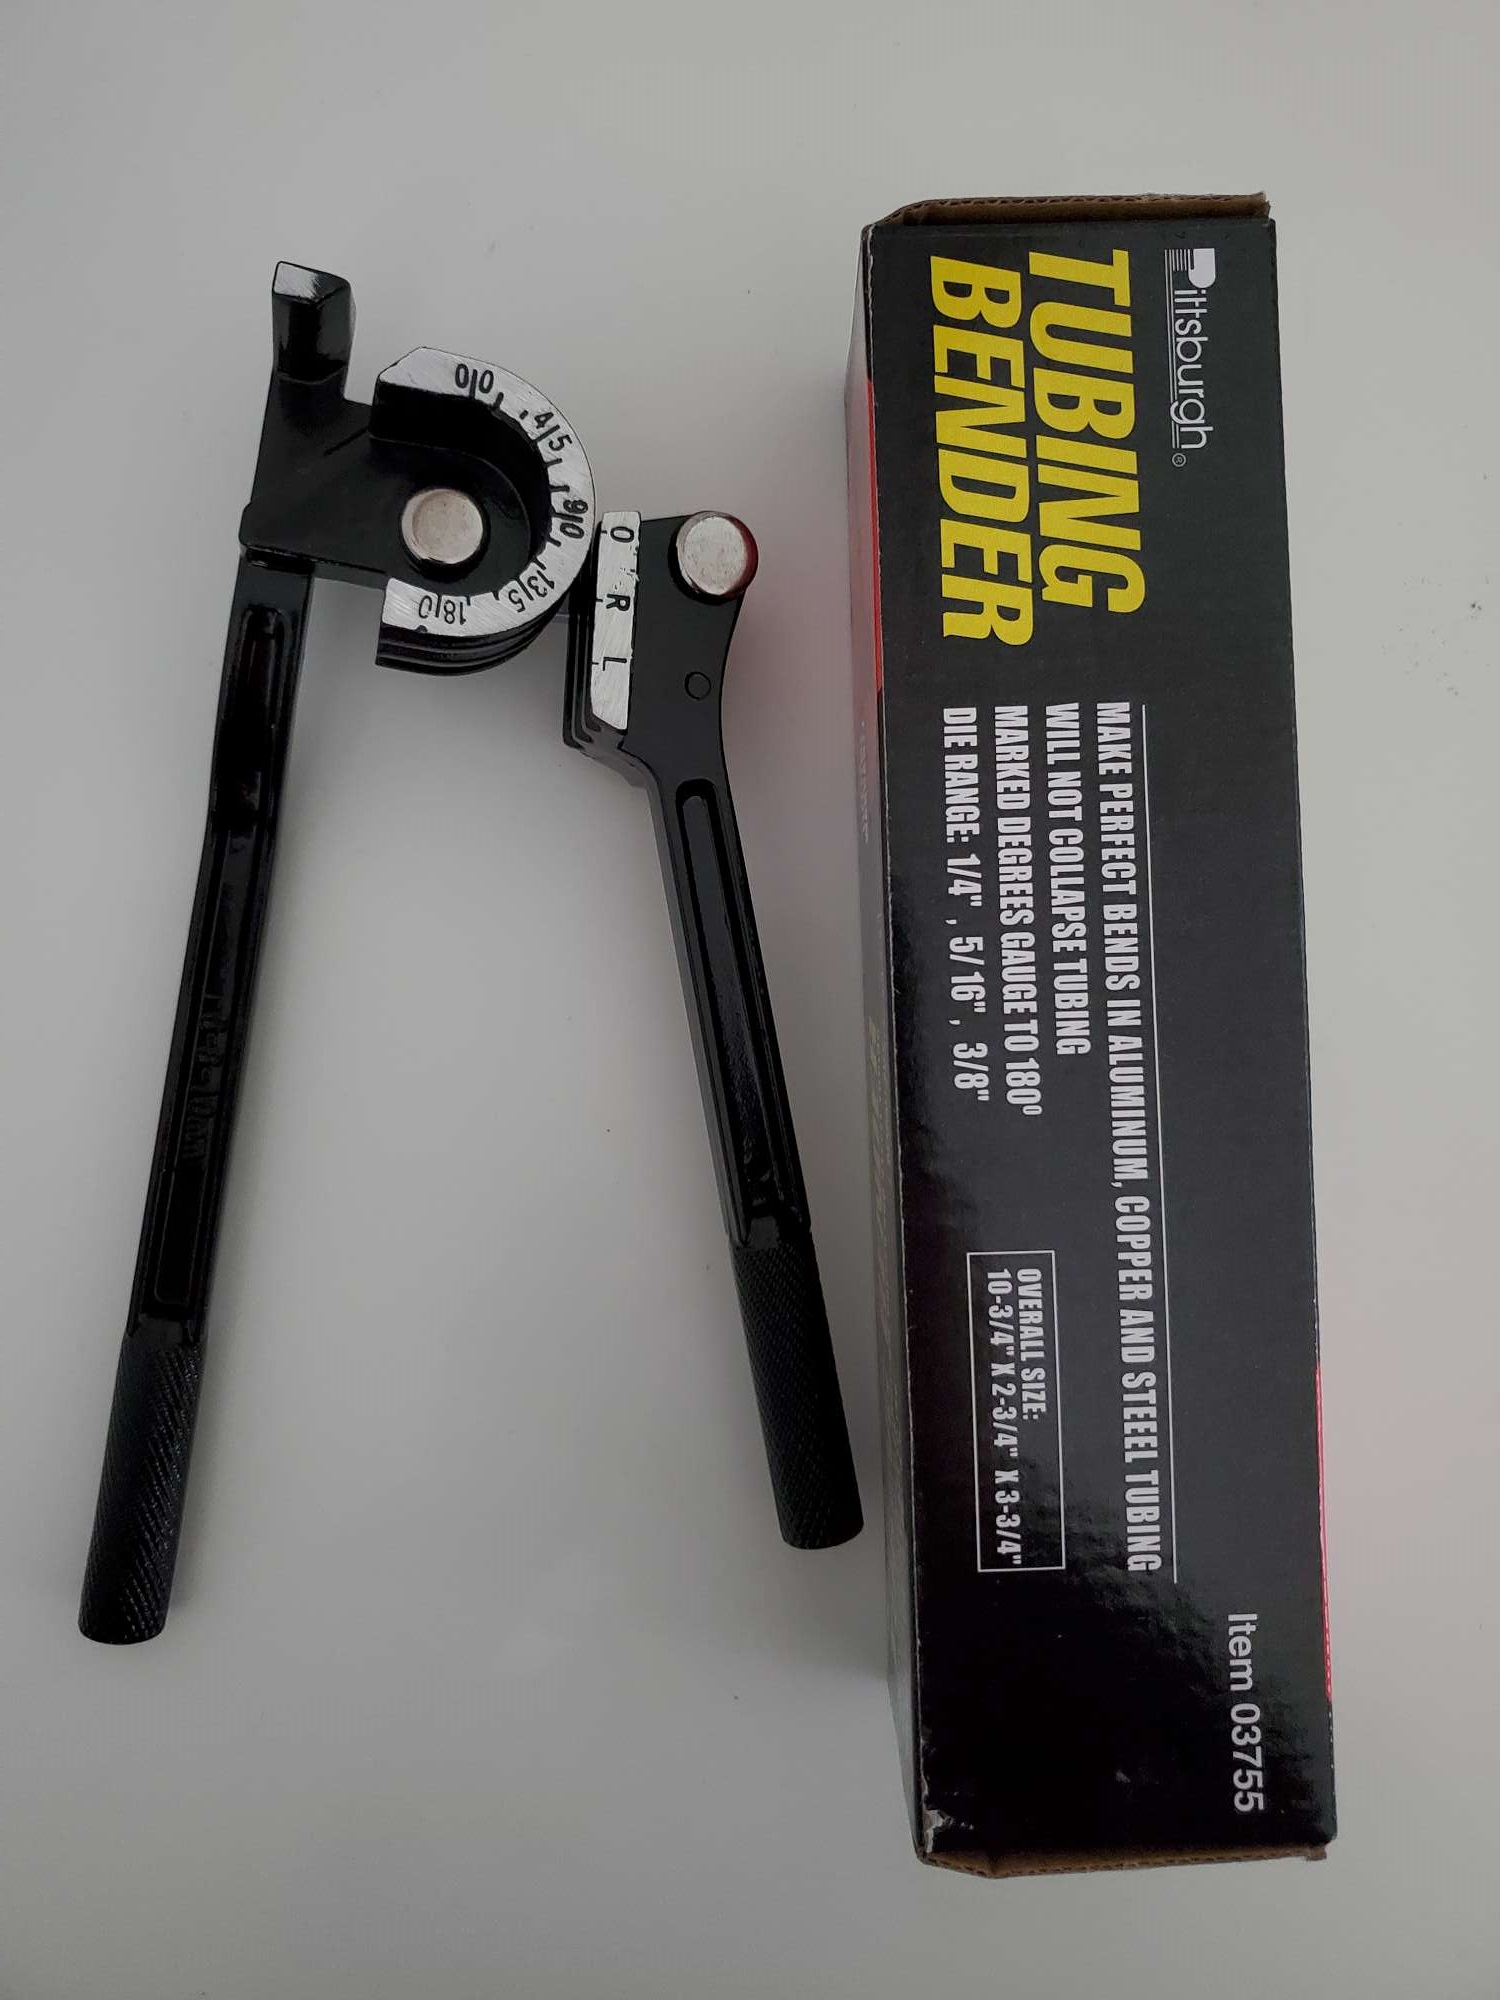
Then, I set out to start installing the lines. I picked up a bender from Harbor Freight for about $10.
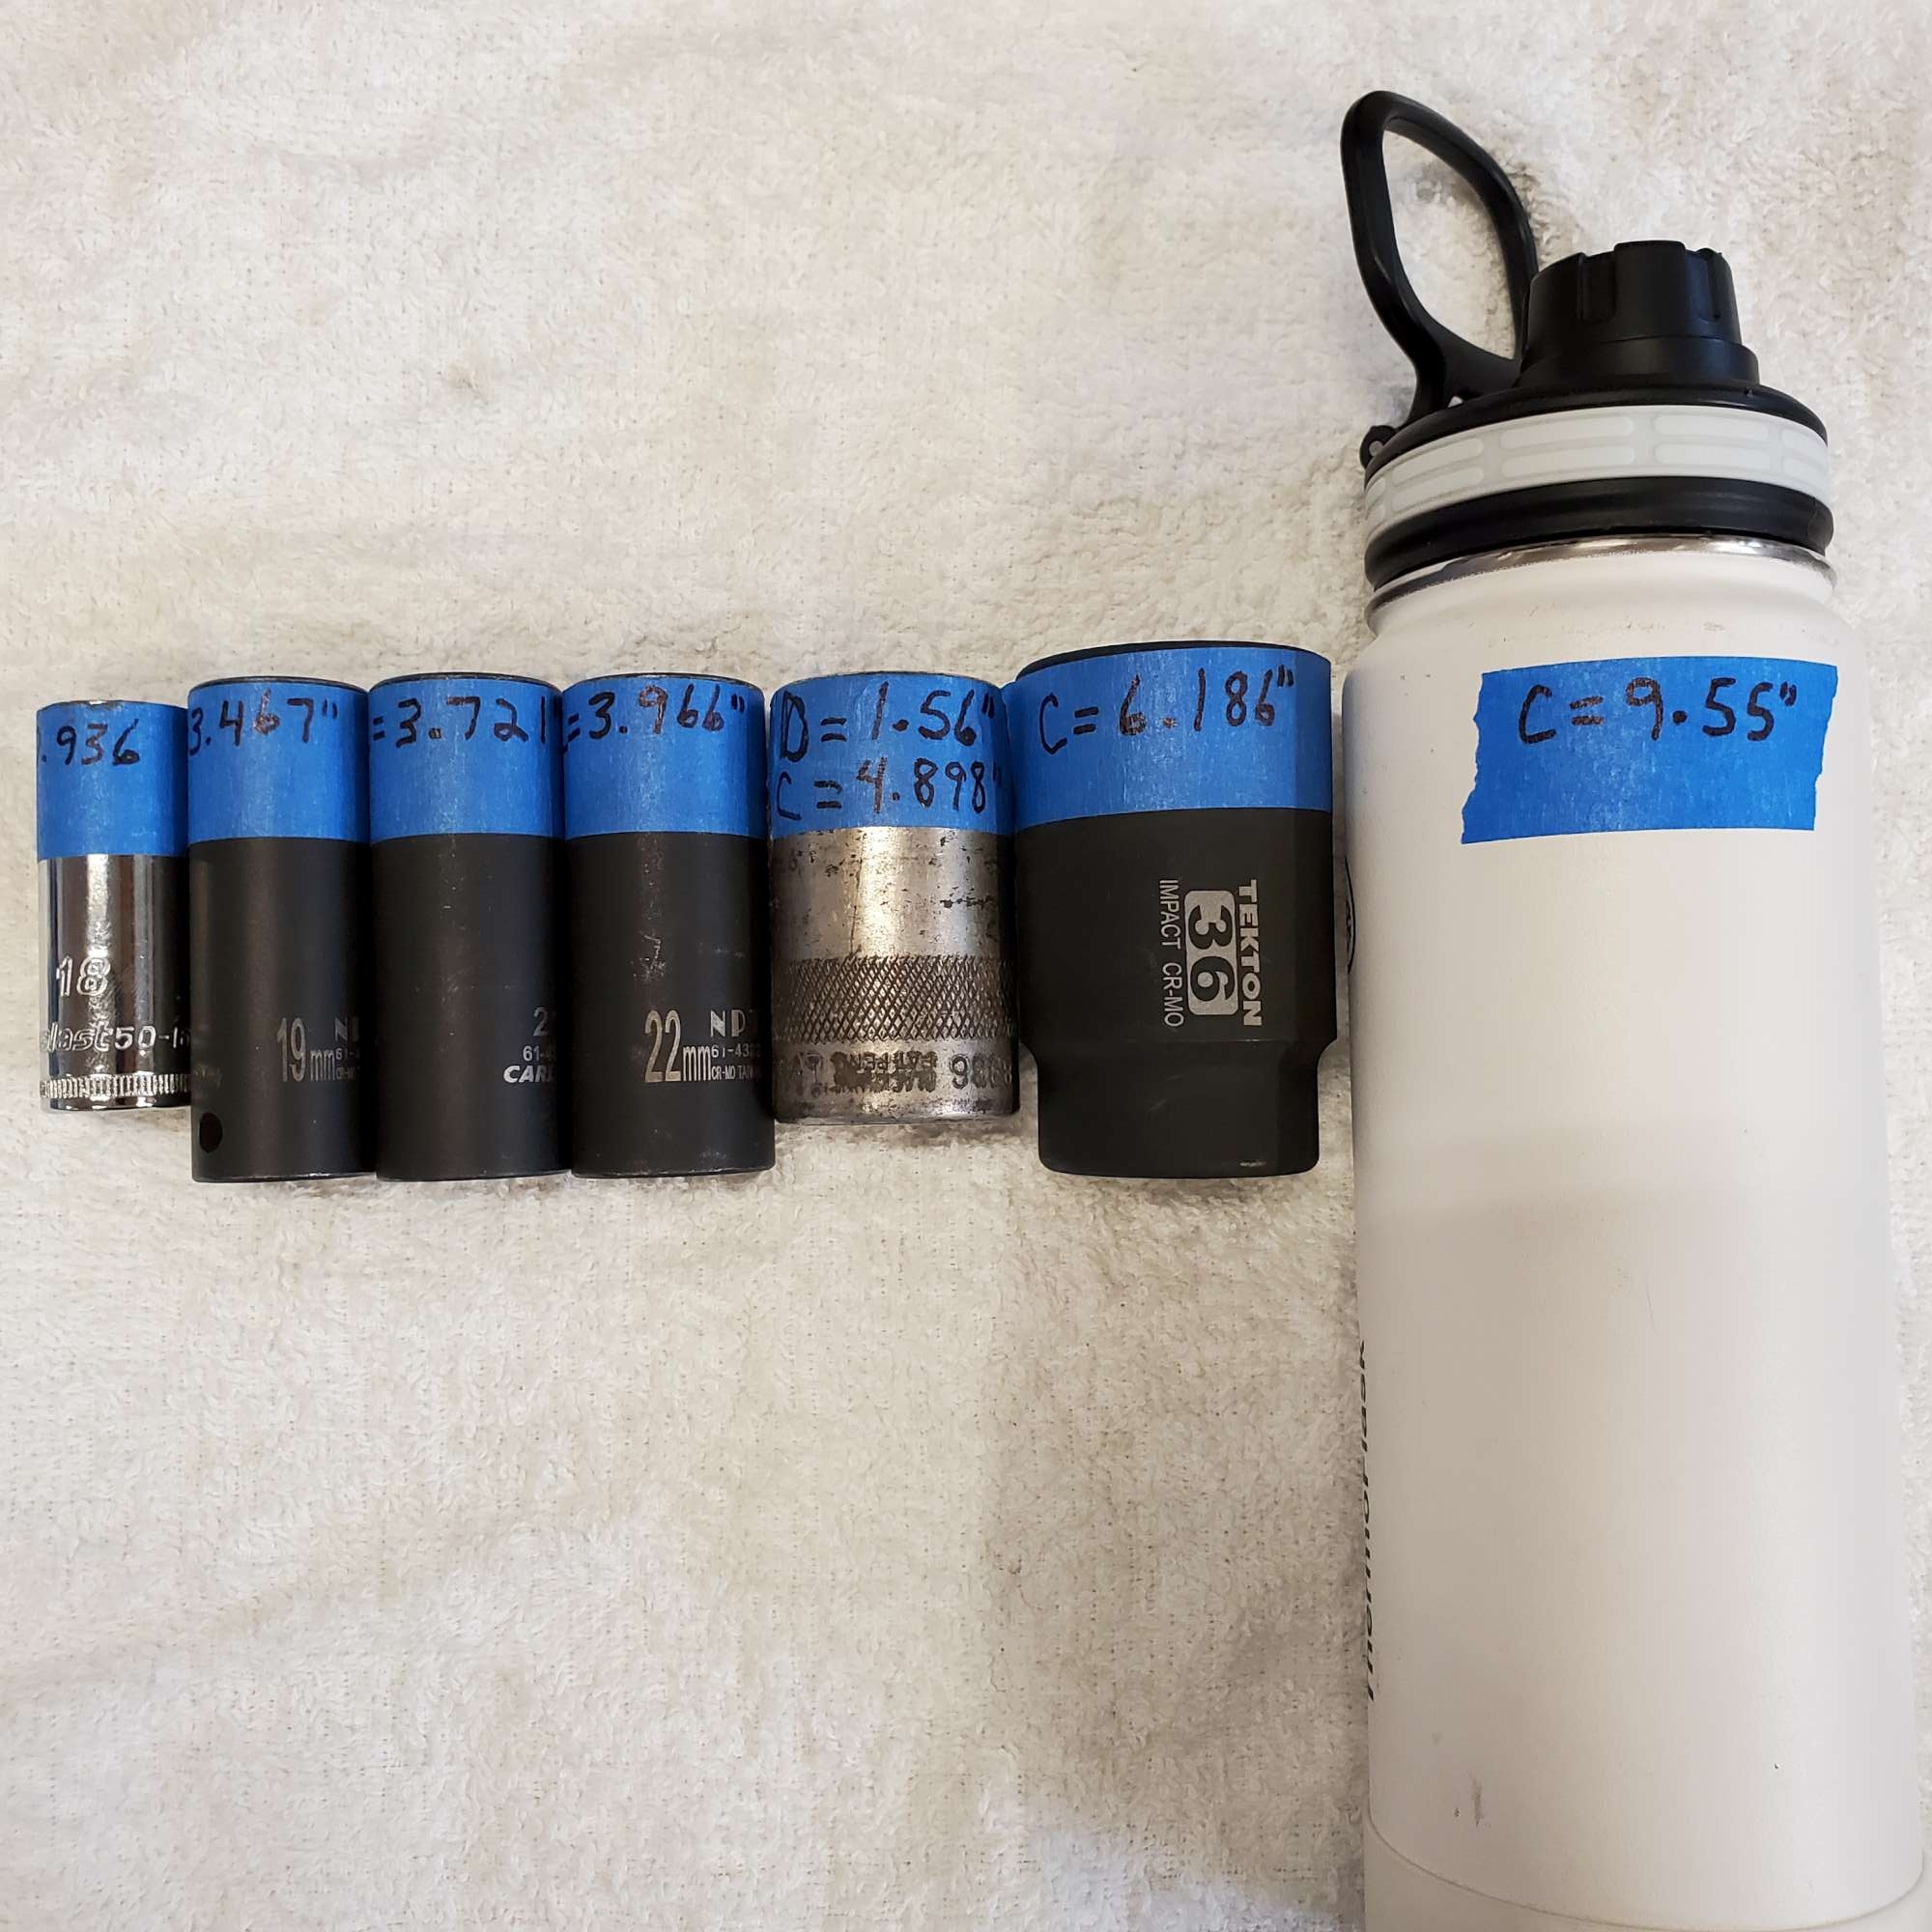
Here are my other bending "tools". I didn't expect to need to dredge my memory banks for circumference formula on this build, but needed a quick and accurate way to know the circumference on these sockets for different size bends.
For the front brake line, I notched the DS footbox top where it meets the outside of the 3/4" tube to allow the 3/16" brake line to run by.

Followed the 3/4" tube (good separation from exhaust), then down along edge of F-panel.
Coming out the existing inside hole, I followed JohnK's great idea of a solid panel plug. I picked up the set of hole bits for soft materials at HF, and like he said they worked like a champ. McMaster-Carr sells the solid hole plugs in a package of 10. Here's the plug drilled and ready for install.
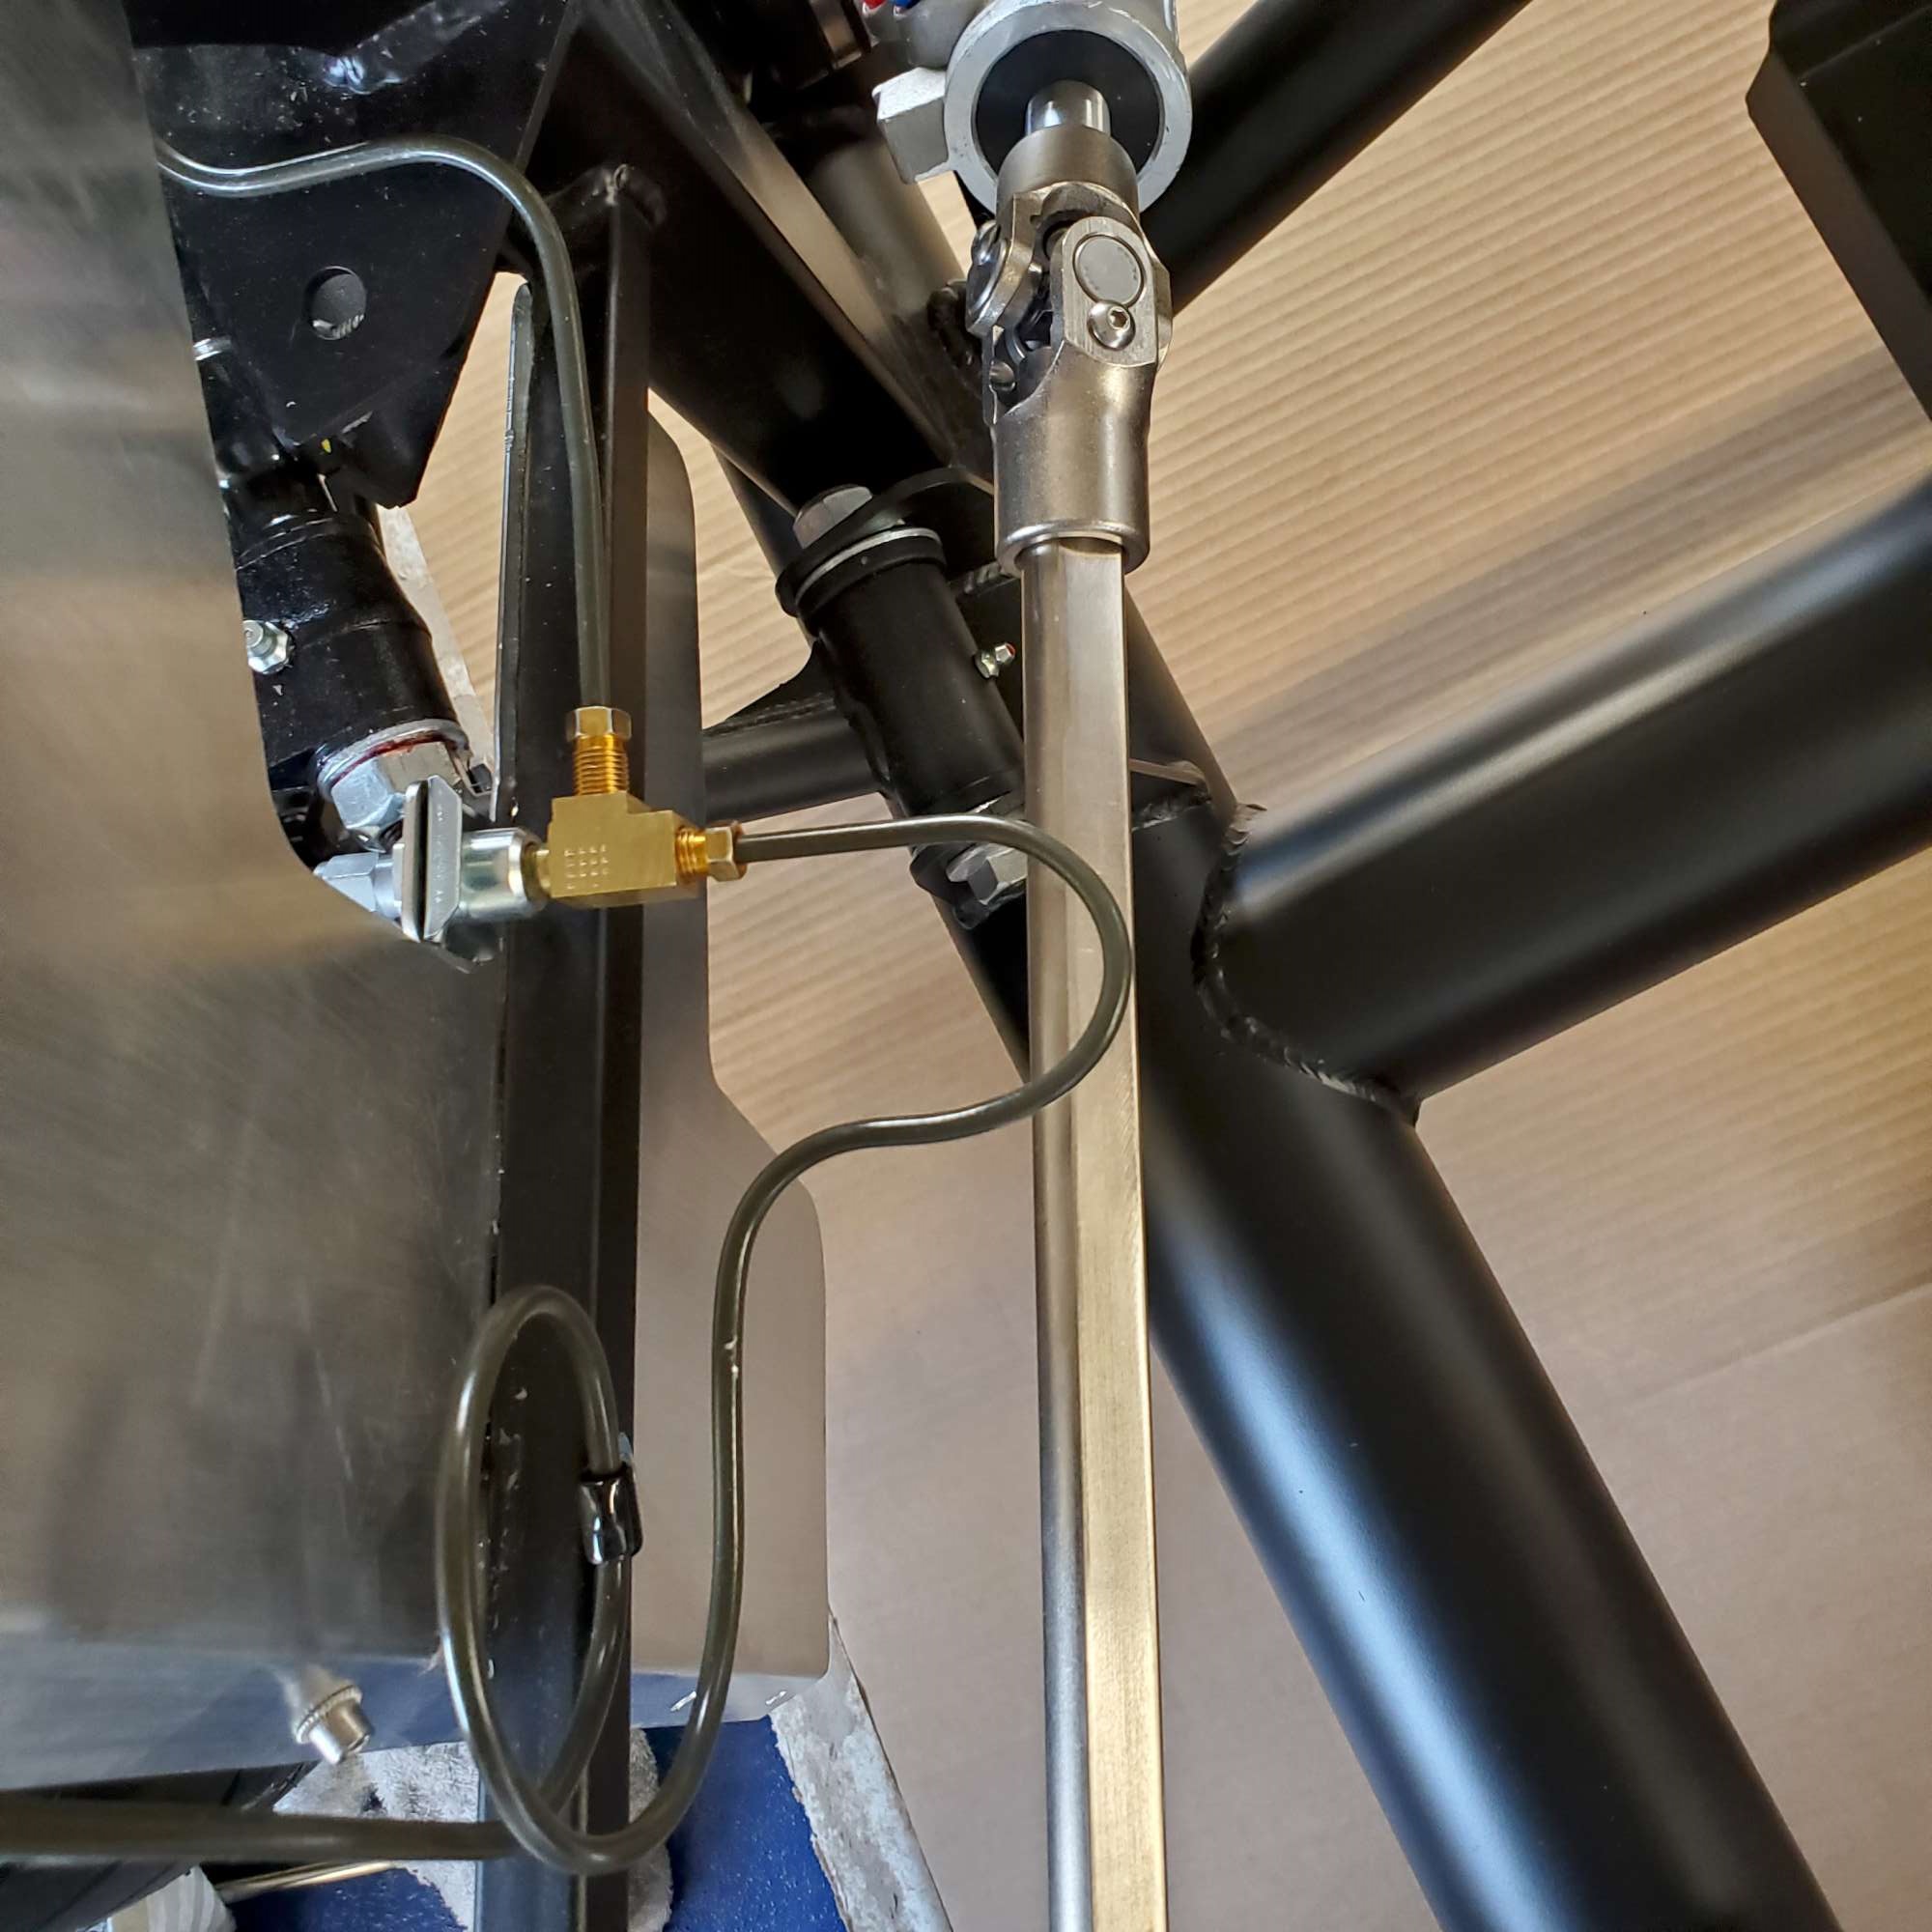
The downside of not having a flaring tool is what to do with the extra length. I used an aerosol paint can to coil up the extra--got the paint can idea from NYMike. There is plenty of clearance between the steering shaft and the brake line. This was my first line: after ruining two, I called it good. Both O'Reilly's and Napa carry 3/16" brake lines for less than $10 each. Napa has a better assortment of different lengths.
Chris
Coupe complete kit delivered: 4/22/24.
Build Thread. Coyote. T-56. IRS w/3.55. Wilwoods. PS. HVAC. Side windows.
MK4 Complete kit.
Build Thread Index. Delivered: 10/15/2020. Legal: 7/25/23. Coyote Gen3. TKO600 (0.64 OD). IRS w/3.55. PS. Wilwoods. Sway bars. This build is dedicated to my son, Benjamin.
Build Thread.
-
05-27-2021, 11:21 PM
#158
Senior Member
Brake lines installed (part 2)
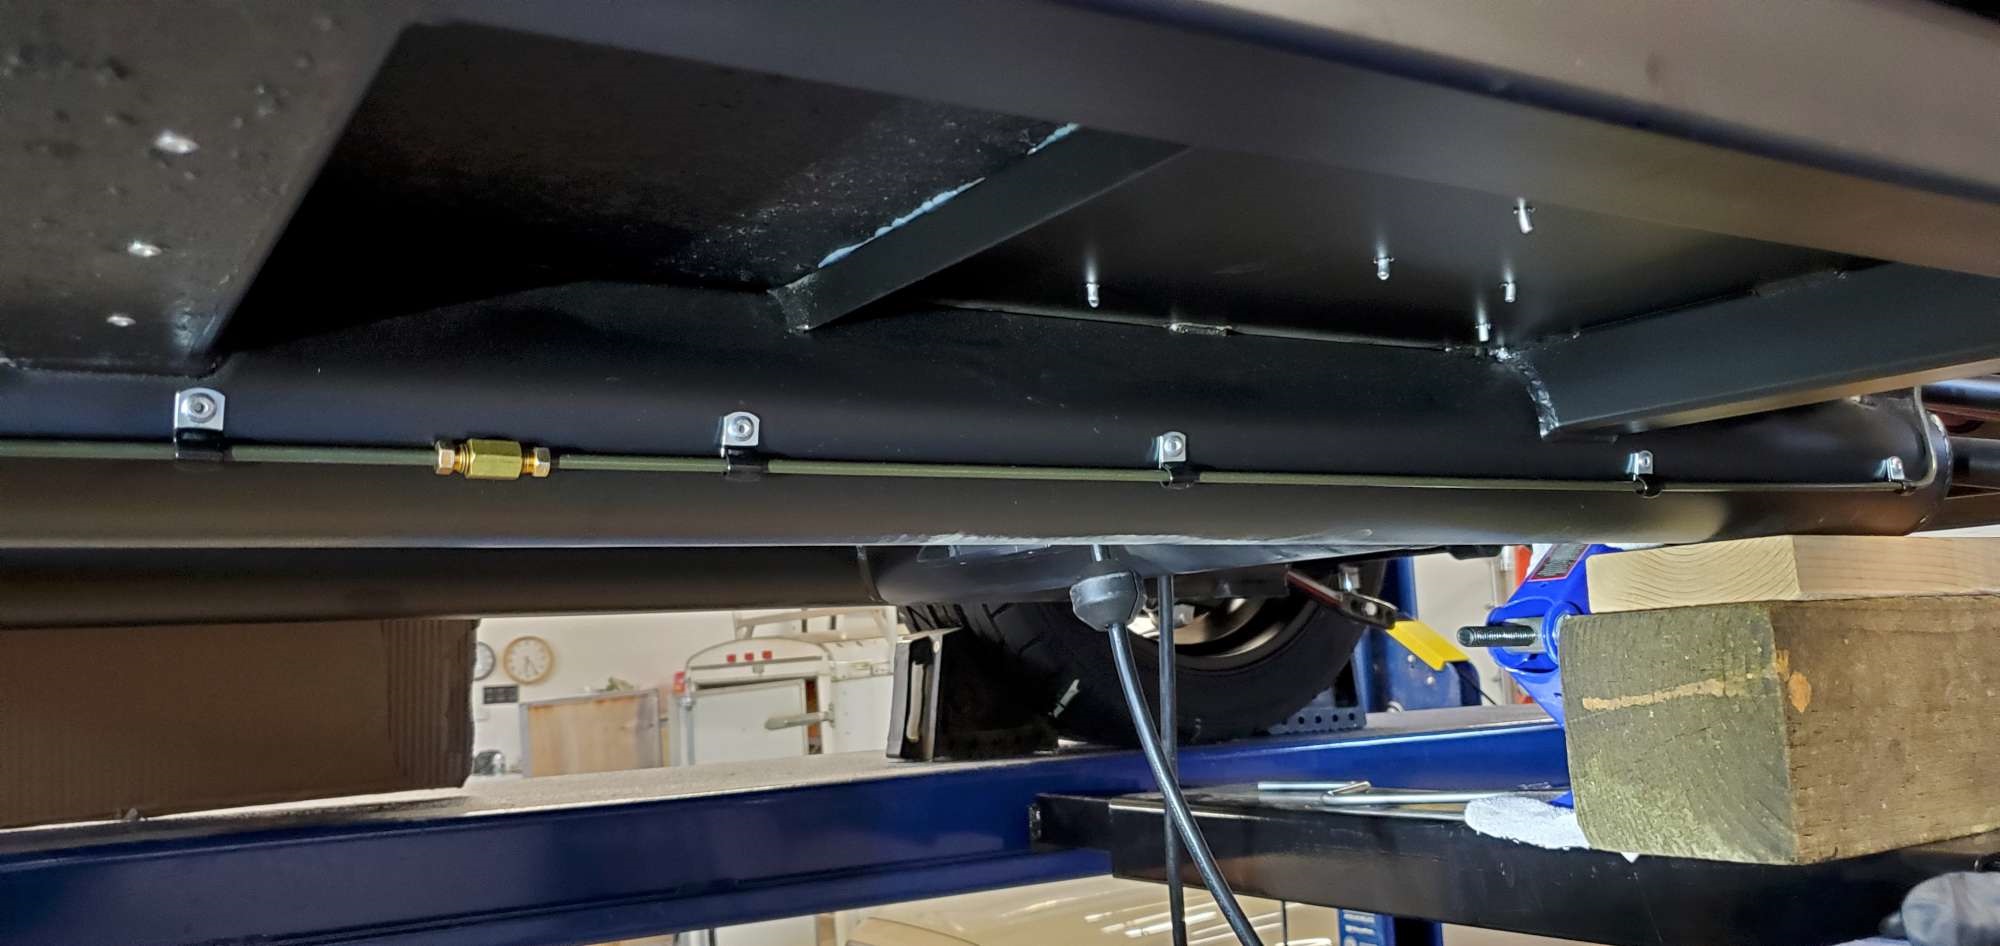
Then came off the T fitting, across the front of the X-tubes and over to the PS front.

For the rear brake line run I followed Edwardb and Shark92651 and ran it down inside the footbox, along the 3/4" tube.
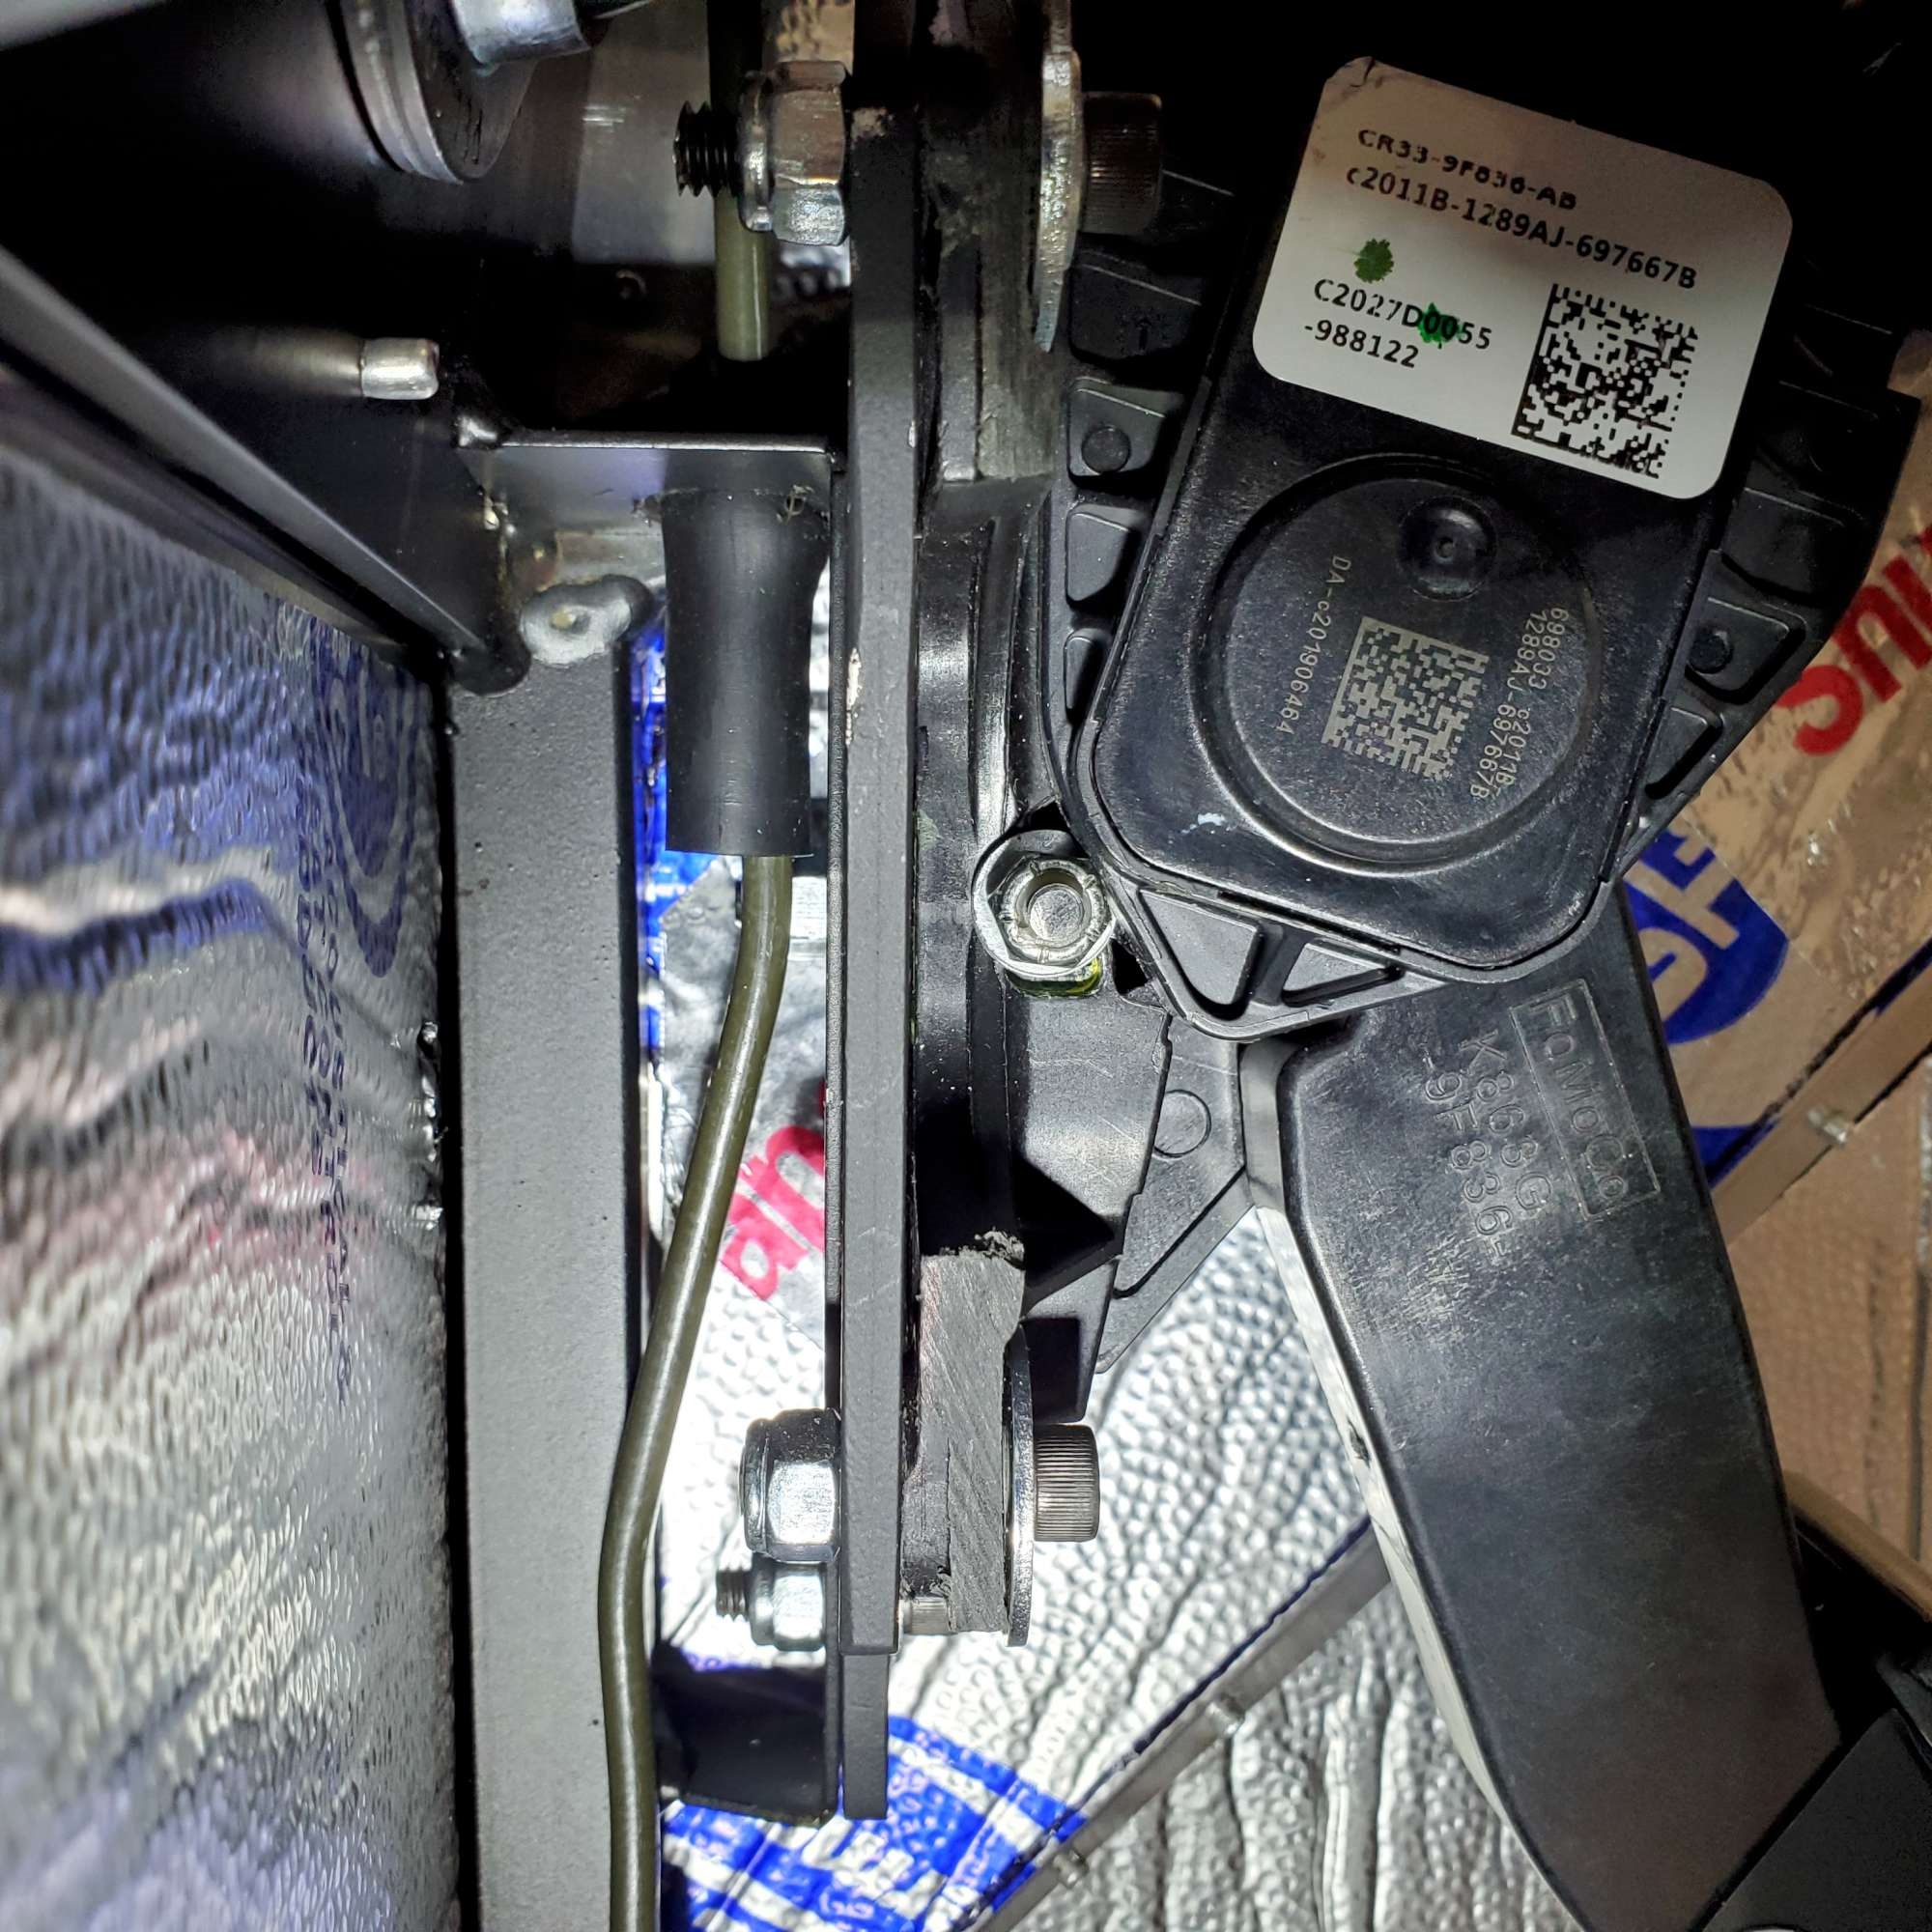
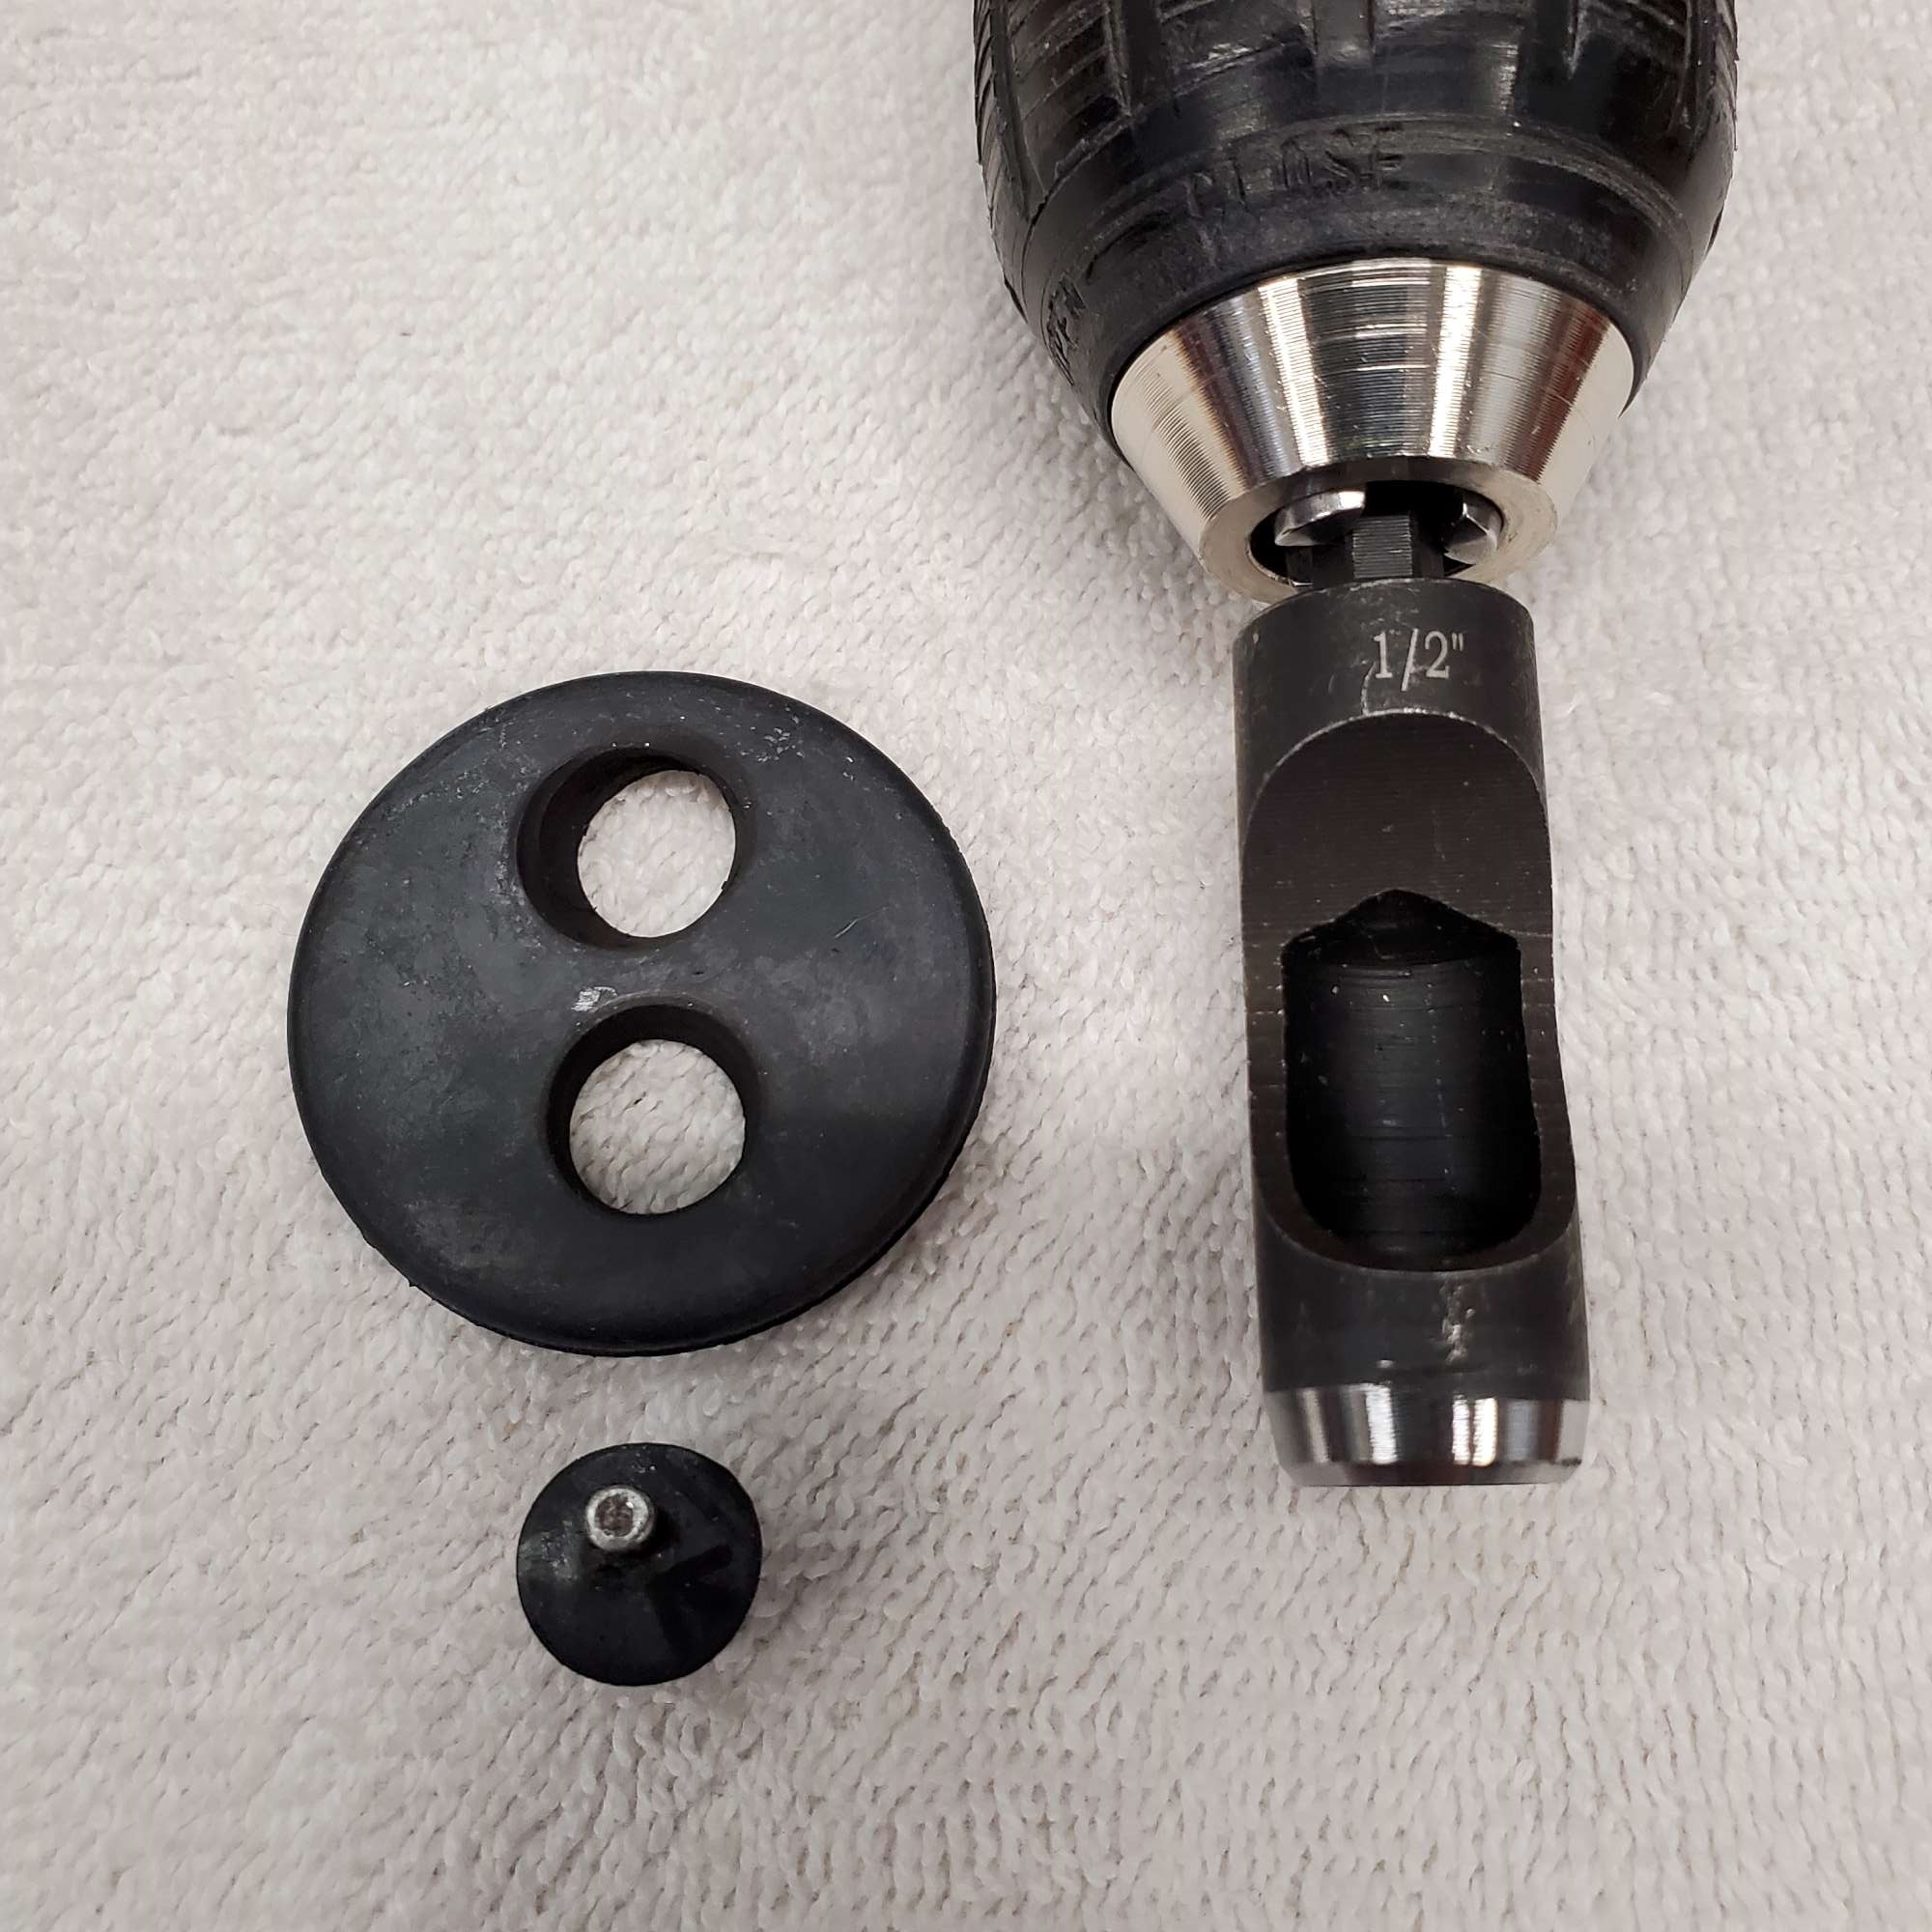
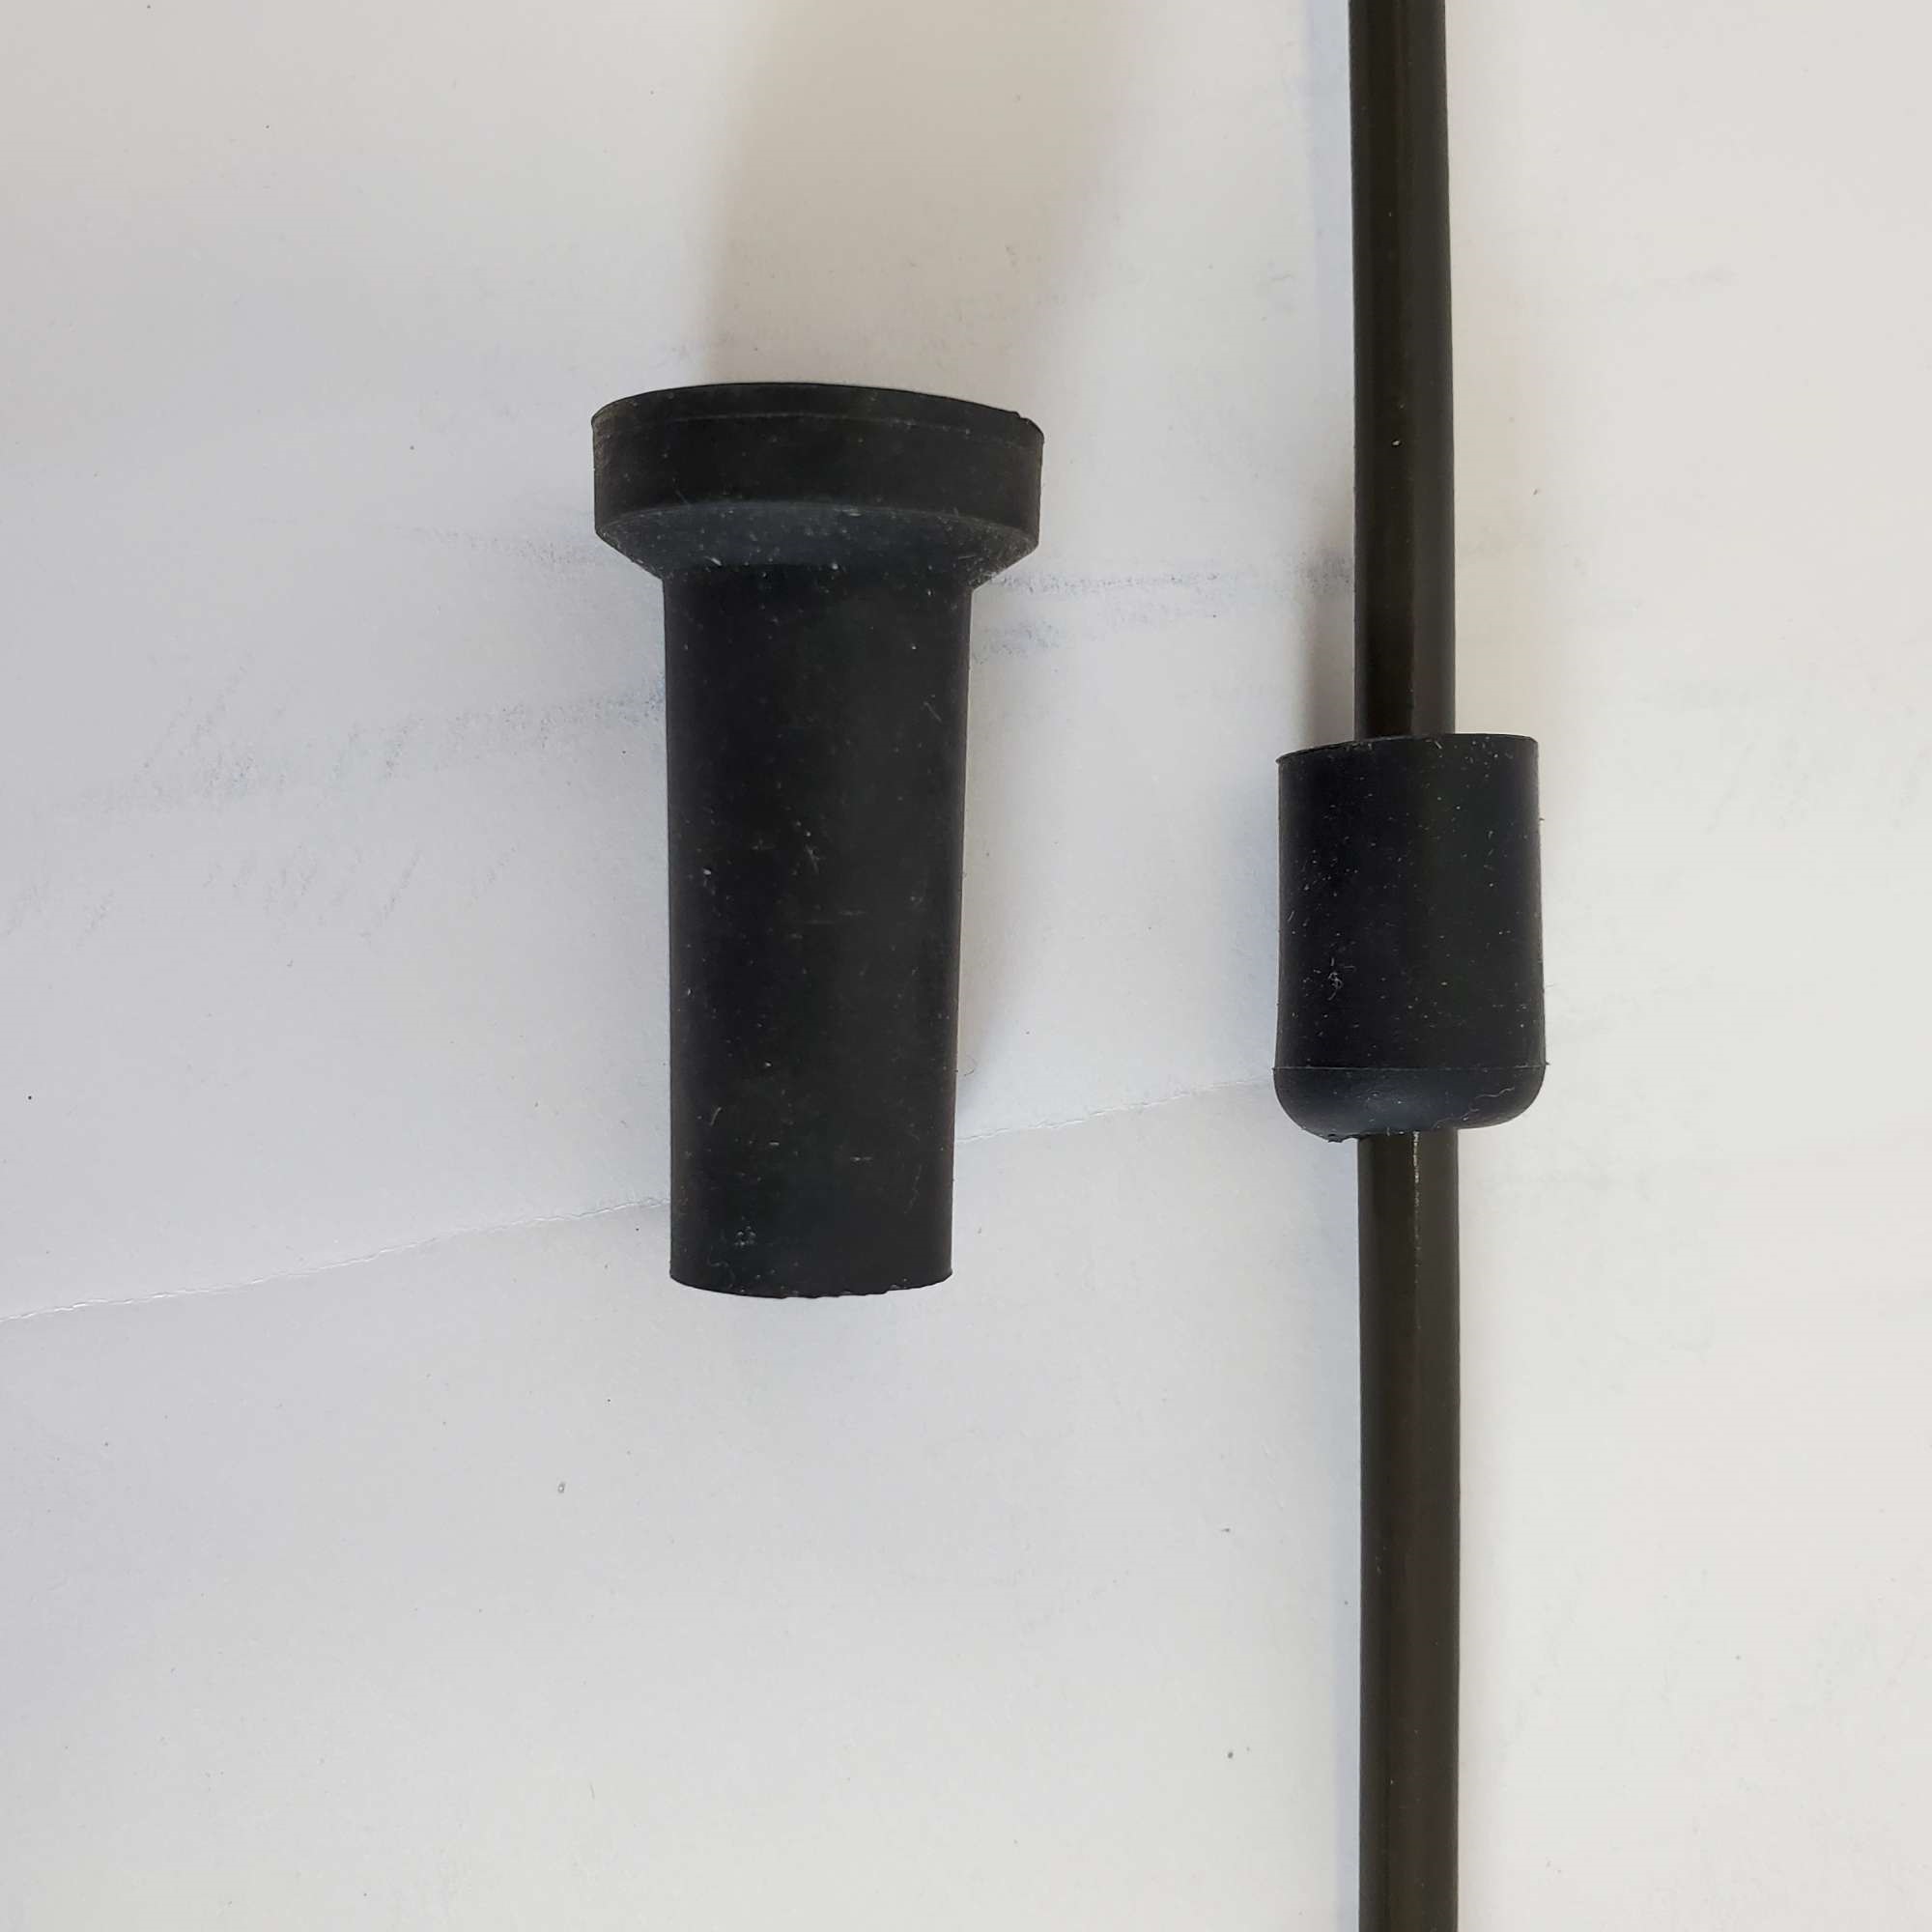
In my goodie bag I happened to have a couple rubber boots of sorts, and a cylinder shaped rubber piece to slide on to the line, and push it up into the boot. This centered the line in the boot, and protected it as it went through a hole I drilled in the accelerator bracket, as well as protecting/sealing the line where it exits the footbox floor. Here's what they look like:

Out of the footbox.
Down the 4" chassis tube to the rear. I ended up with one coupling nut. You can see it here. For the rest of the lines I was able to avoid couplers and go direct.
Chris
Coupe complete kit delivered: 4/22/24.
Build Thread. Coyote. T-56. IRS w/3.55. Wilwoods. PS. HVAC. Side windows.
MK4 Complete kit.
Build Thread Index. Delivered: 10/15/2020. Legal: 7/25/23. Coyote Gen3. TKO600 (0.64 OD). IRS w/3.55. PS. Wilwoods. Sway bars. This build is dedicated to my son, Benjamin.
Build Thread.
-
05-27-2021, 11:30 PM
#159
Senior Member
Brake lines installed (part 3)
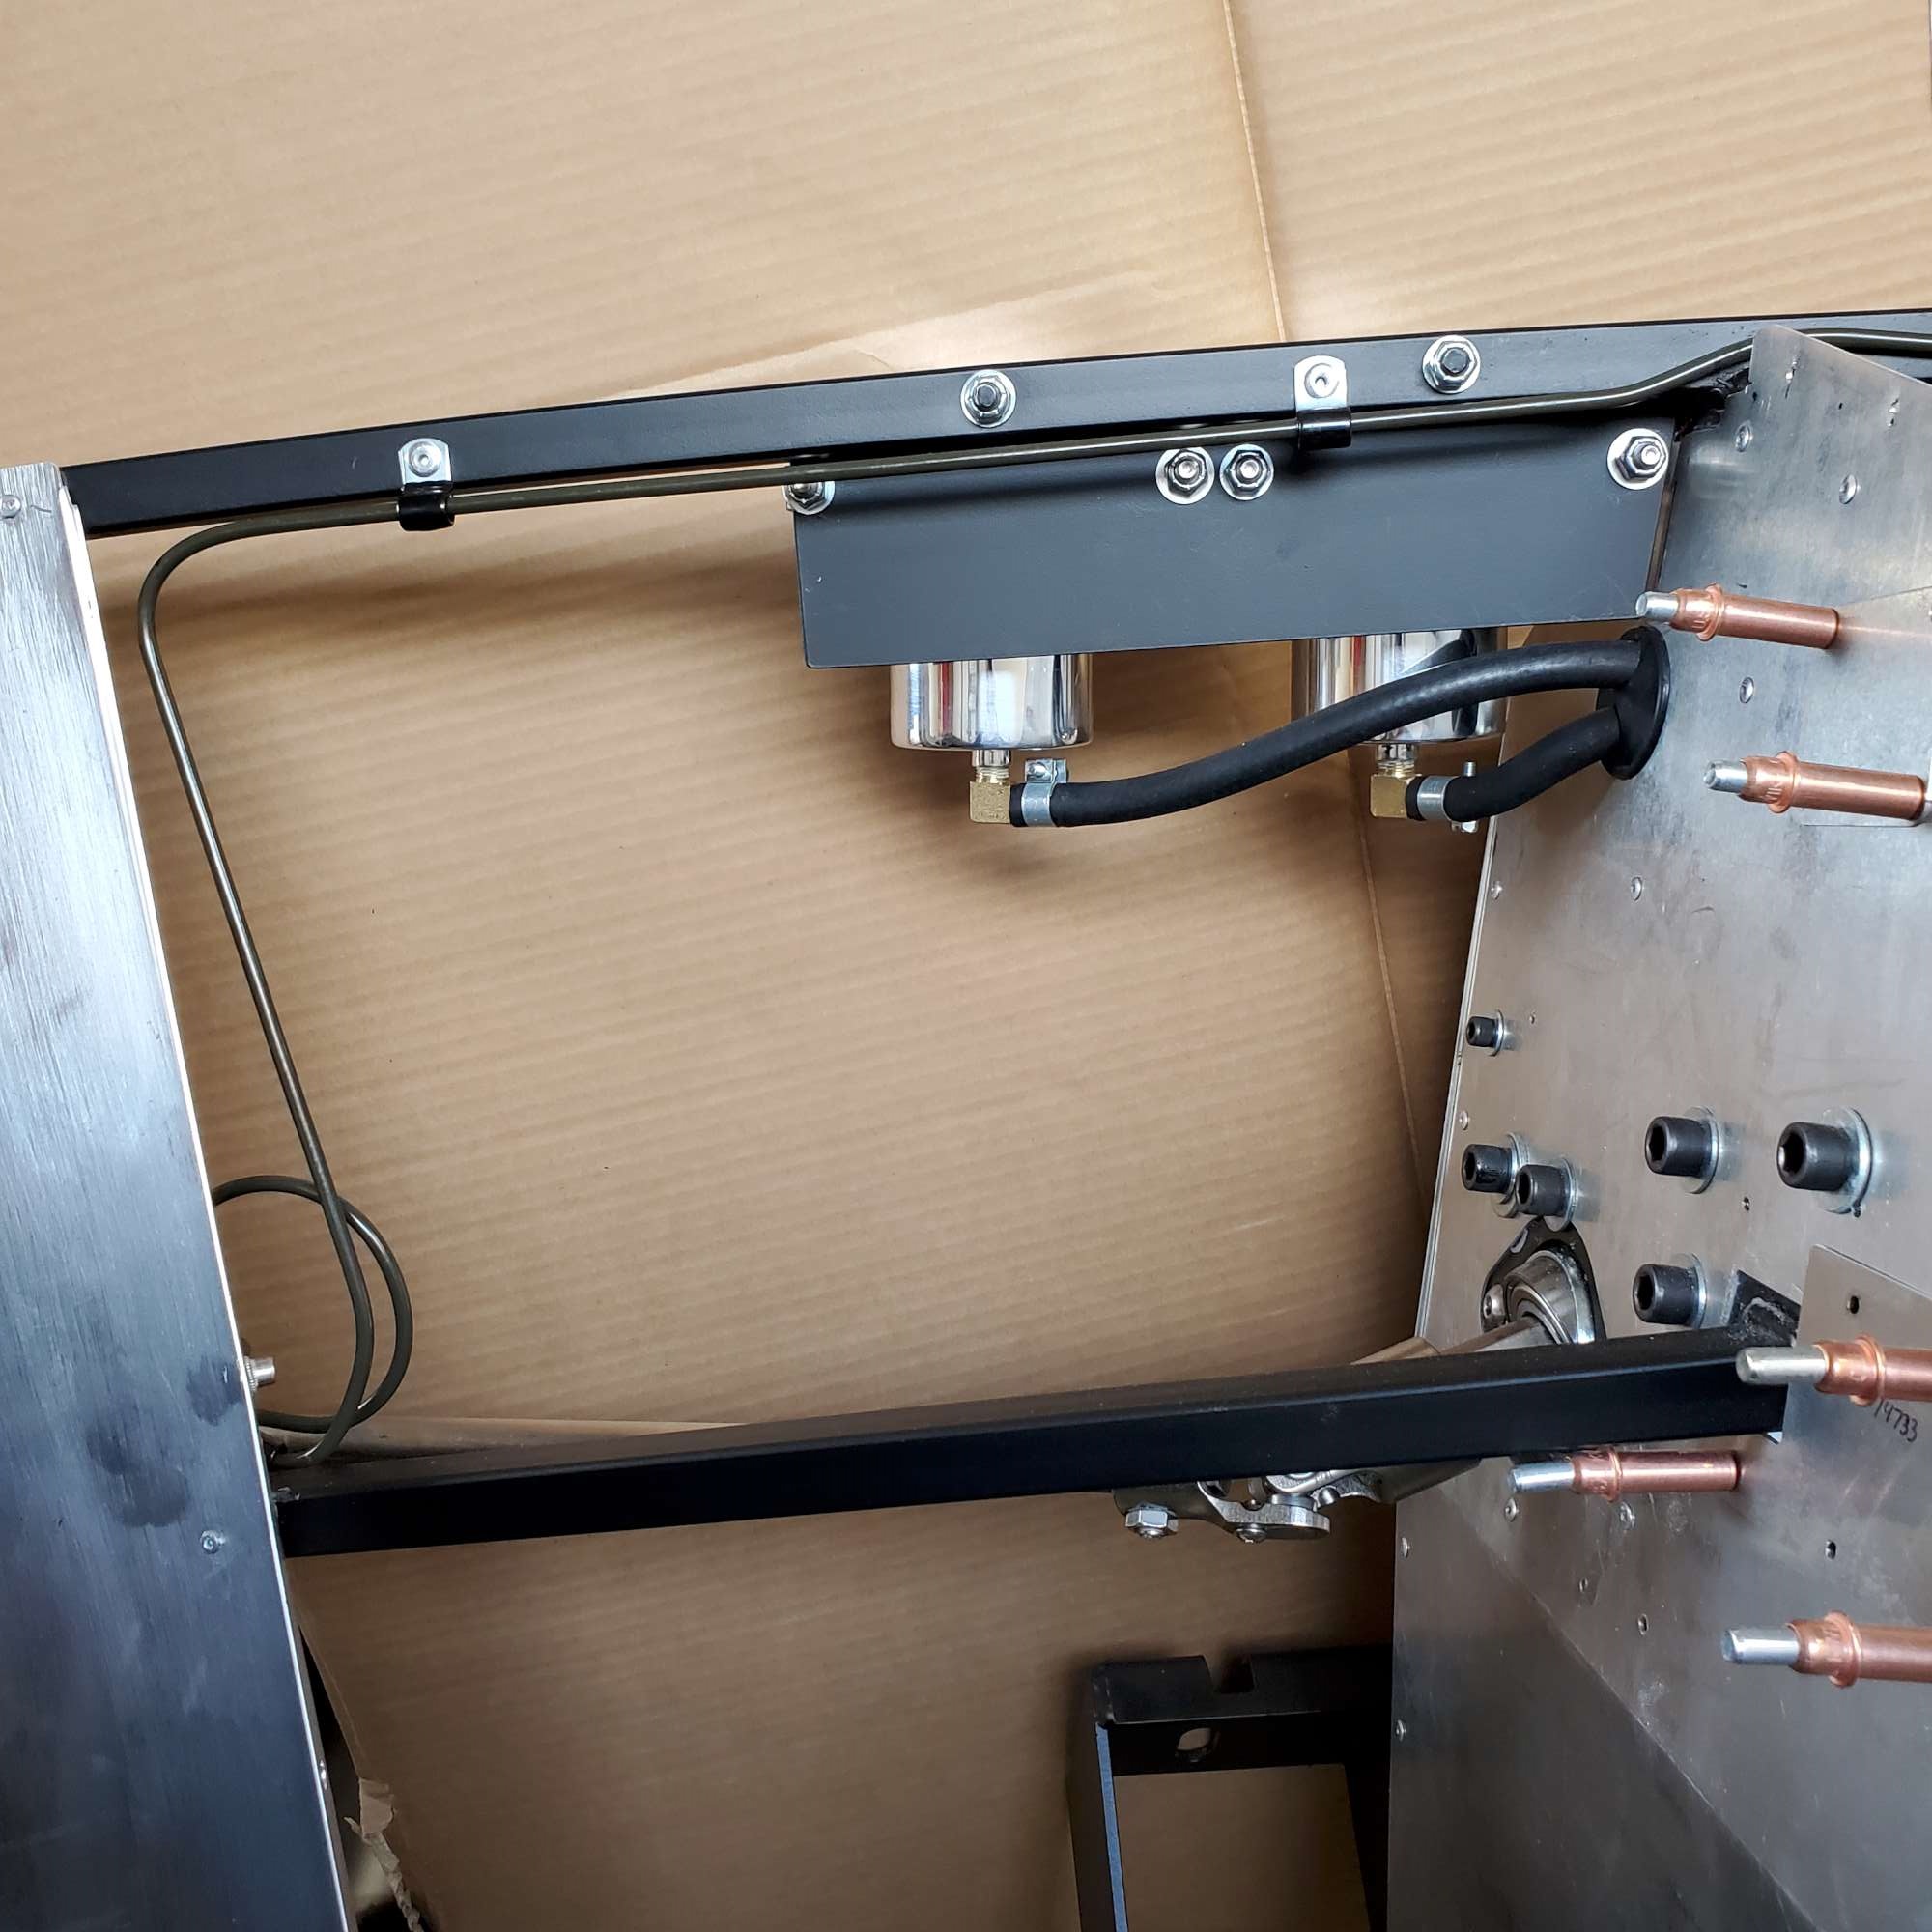
Then up the 2" tube.
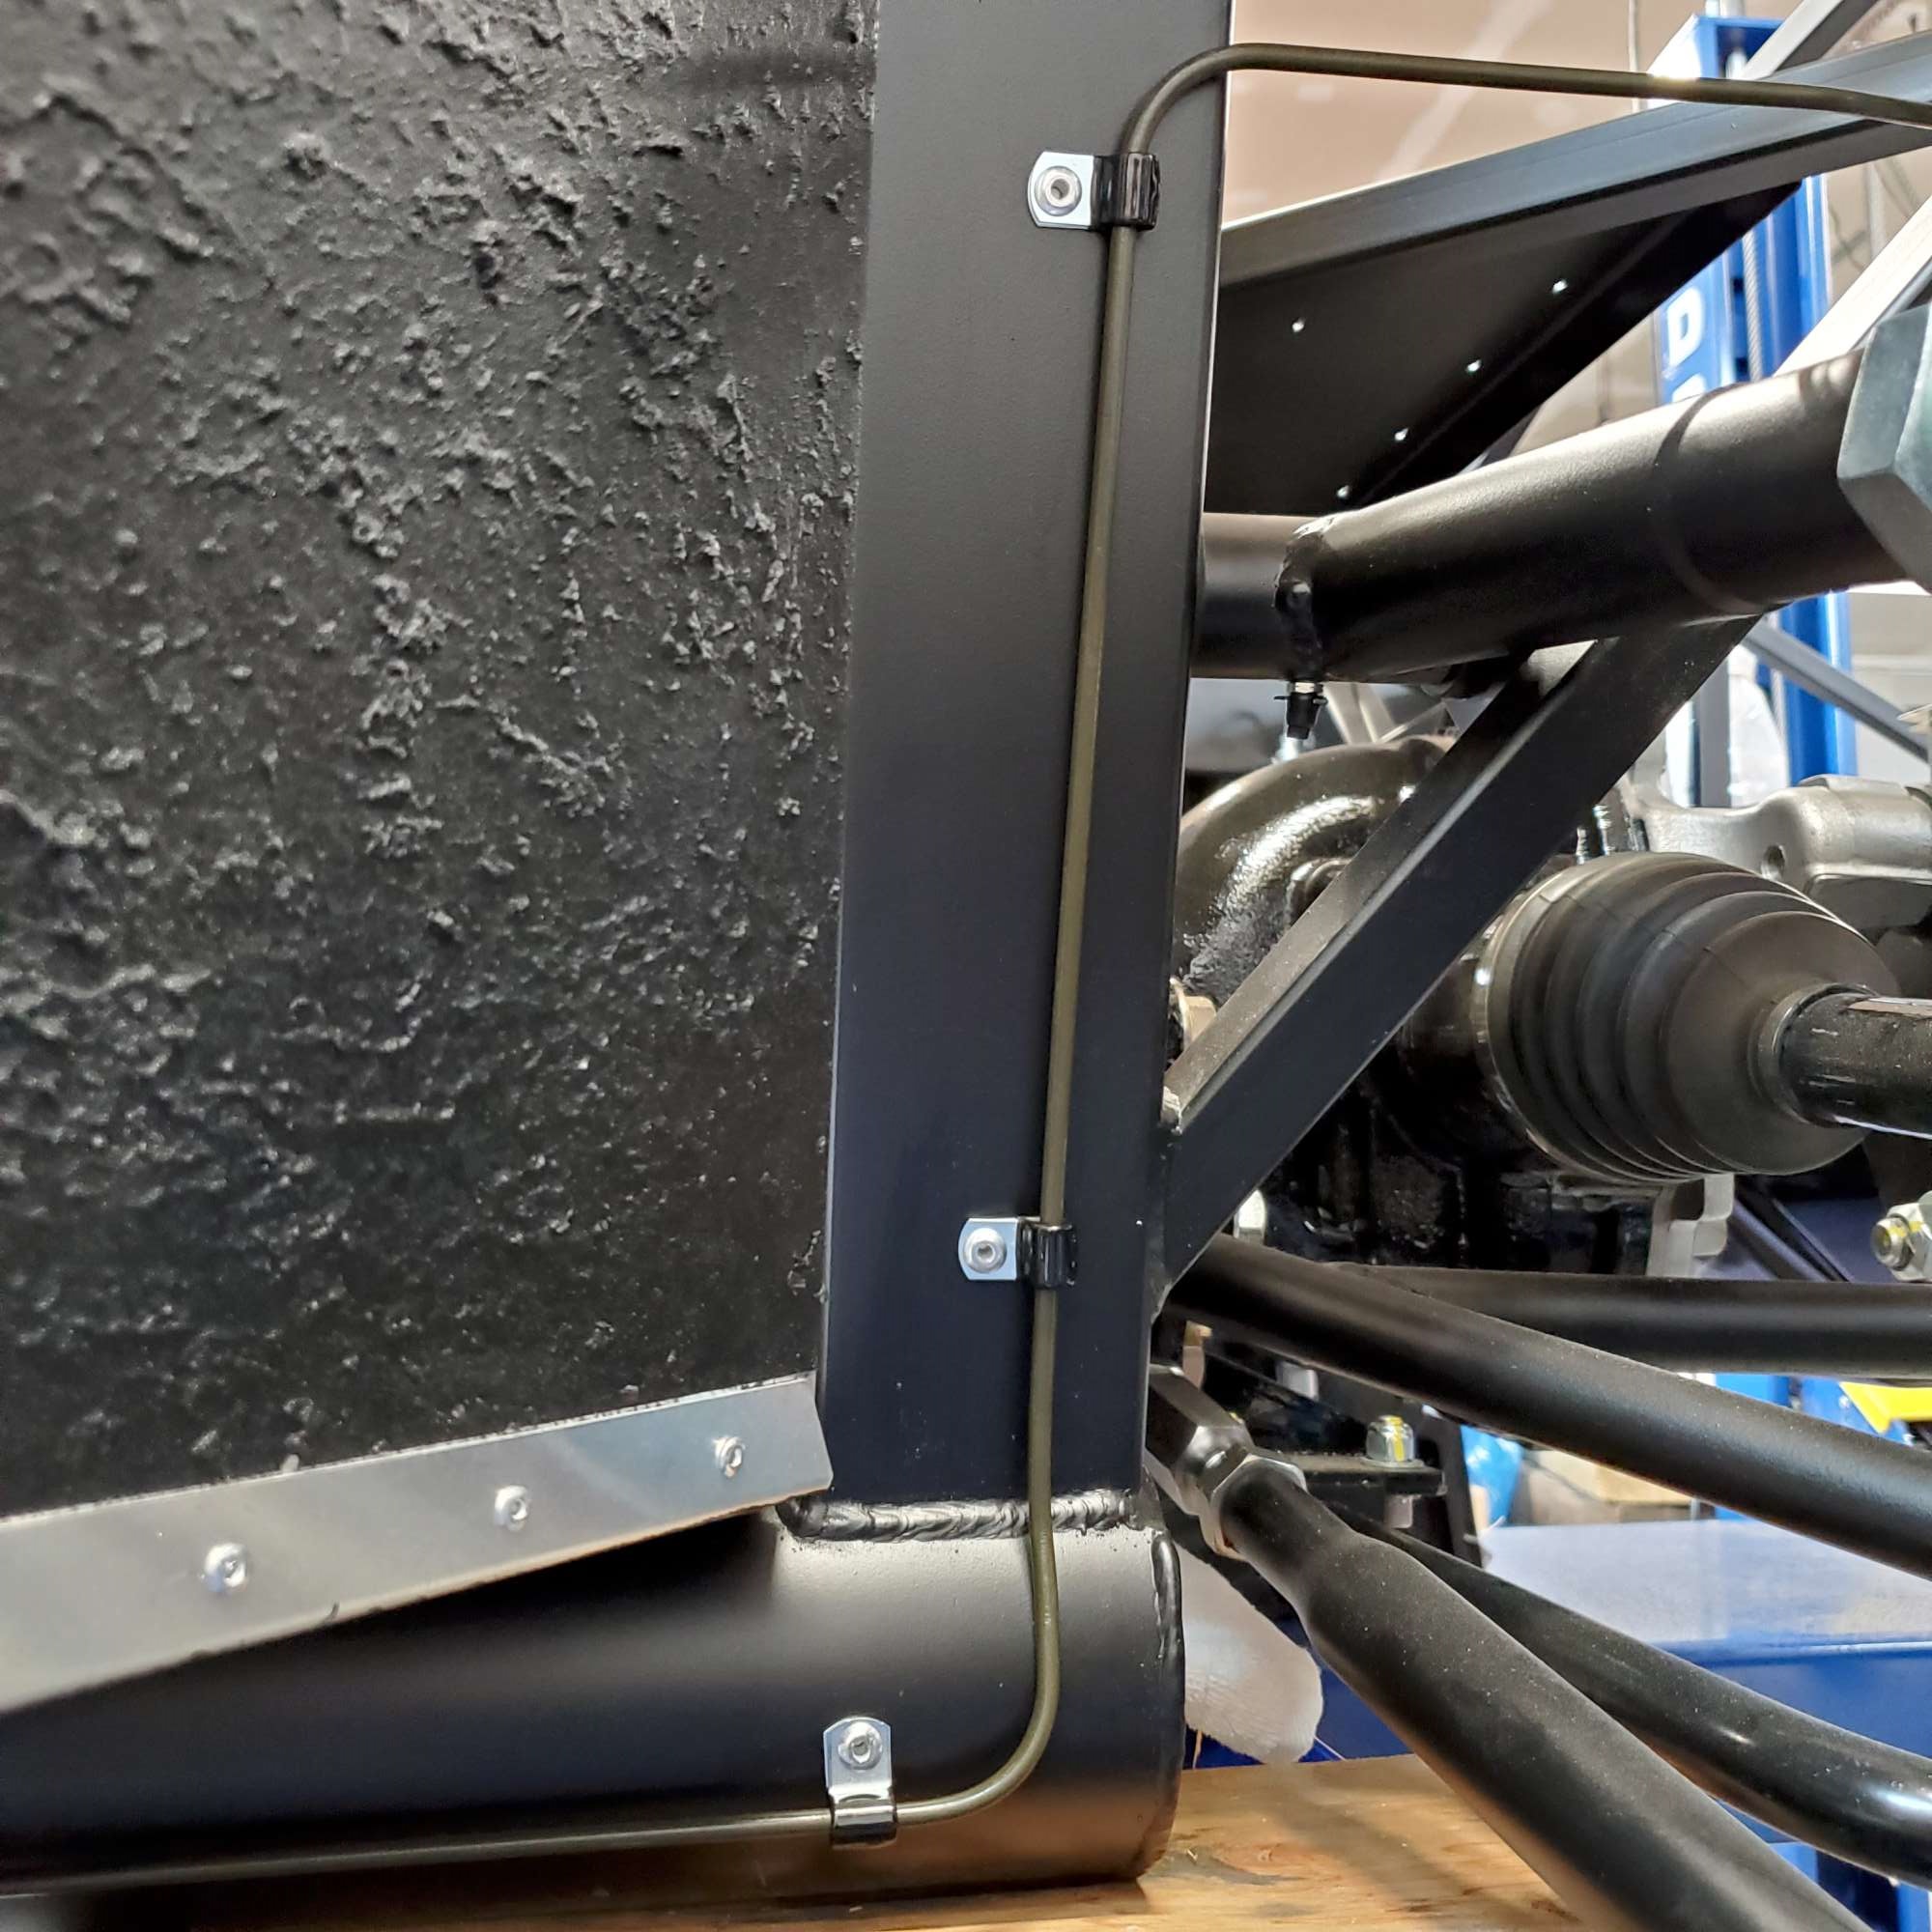
Over to the T at the DS rear.

Then out of the T and across to the PS rear.
Really glad to have this part of the build behind me. I hope the bleed process goes okay. That will be another first for me.
Figured it's a good time to rivet and silicone the inner wall of the DS footbox, so took care of that as well. The reservoir on the firewall is for the clutch. I also installed the Wilwood 0.81" MC that came with the hydraulic clutch kit from Forte.

Still having a lot of fun, and always welcome feedback from the forum.
Chris
Coupe complete kit delivered: 4/22/24.
Build Thread. Coyote. T-56. IRS w/3.55. Wilwoods. PS. HVAC. Side windows.
MK4 Complete kit.
Build Thread Index. Delivered: 10/15/2020. Legal: 7/25/23. Coyote Gen3. TKO600 (0.64 OD). IRS w/3.55. PS. Wilwoods. Sway bars. This build is dedicated to my son, Benjamin.
Build Thread.
-
Post Thanks / Like - 0 Thanks, 1 Likes
Fman liked this post
-
05-28-2021, 12:16 AM
#160
Nice work Chris! I know how relieved you must be to have that part of the build finished. In a lot of ways, I think it must be more difficult to use the fixed-length pieces that come with the kit, as you have to get creative on how to take up the extra lengths in some areas. Your work looks really clean. I'm sure the bleeding will go smoothly. 
MkIV Roadster build: Gen 2 Coyote, IRS, TKO600. Ordered 10/24/18. Delivered 1/29/19. Engine installed 8/8/21. First start 9/12/21. First go-kart 9/17/21. Off to paint 4/11/22. Back from paint 12/30/22.
Build thread here.
-
Post Thanks / Like - 1 Thanks, 0 Likes


 Thanks:
  Likes:


 Reply With Quote
