-
05-28-2021, 10:54 AM
#161
Senior Member

Thanks, John! That's a high compliment coming from you. Yes, the fixed-length presented a big challenge for me. I won't confess how many hours I put into the brake lines. It was a leaning experience to say the least. If I have the opportunity to build again in the future, I would like to try a flaring tool.
Chris
Coupe complete kit delivered: 4/22/24.
Build Thread. Coyote. T-56. IRS w/3.55. Wilwoods. PS. HVAC. Side windows.
MK4 Complete kit.
Build Thread Index. Delivered: 10/15/2020. Legal: 7/25/23. Coyote Gen3. TKO600 (0.64 OD). IRS w/3.55. PS. Wilwoods. Sway bars. This build is dedicated to my son, Benjamin.
Build Thread.
-
05-30-2021, 06:58 PM
#162
Senior Member
Sanity Check on Initial (Rough) Alignment
Several months ago when I assembled my IRS and IFS I followed the F5 recommendations for UCAs and LCAs which is supposed to put alignment roughly in the ballpark. However, my front tires point at each other. This made pushing it up onto the lift a bit difficult, and will continue to be an issue when ever I need to move it. So, it's time to do the initial rough alignment.
I'm following the helpful thread written by Karlos several years ago, as it seems to holistically address [power] steering rack centering, front end alignment, and steering wheel centering. My goal right now is to get the front alignment in the ballpark, and do some fine tuning later on during go-kart stage. I may eventually purchase my own alignment equipment...we'll see.
Karlos' helpful thread: https://thefactoryfiveforum.com/show...l=1#post215142
My question for the forum is why do I have a ~30 mm gap on the PS side between the string and the rear edge of the front tire? (I'm using the string alignment approach as shown in his thread above).
First, I centered the PS rack per above. Next, I adjusted the outer tie rods. On the DS I was able to adjust the outer tie rod end without an issue. It's lining up okay. However, on the PS side I have a ~ 30 mm gap.
I have a staggered wheel tire combo: Front is 275/40/R17, and Rear is 315/35/R17. I read somewhere on the forum when using the string alignment and running staggered wheels to subtract the difference in tire width between front and rear. In my case that would be 315 mm - 275 mm = 40 mm. If this is true, why would I only have to account for the difference on the PS, and not the DS?
I'm probably missing something here. Though the front tires are now in (or at least much closer to) ballpark alignment, I would like to understand the reason for the 30 mm gap I have on the PS. Since I have not touched the Toe on the IRS on either side (i.e. they're set to F5 recommended starting point), perhaps it's causing the difference?
Appreciate in advance your comments/suggestions.
Chris
Coupe complete kit delivered: 4/22/24.
Build Thread. Coyote. T-56. IRS w/3.55. Wilwoods. PS. HVAC. Side windows.
MK4 Complete kit.
Build Thread Index. Delivered: 10/15/2020. Legal: 7/25/23. Coyote Gen3. TKO600 (0.64 OD). IRS w/3.55. PS. Wilwoods. Sway bars. This build is dedicated to my son, Benjamin.
Build Thread.
-
06-01-2021, 12:56 PM
#163
Senior Member
Steering Rack and Steering Wheel Centered and IFS Toe Alignment
As I mentioned above, I completed the power steering rack centering procedure written up by Karlos. This process also centers the steering wheel, and IFS toe. It was an interesting process I probably wouldn't have figured out on my own. Thanks again for the great write-up, Karlos!
Here is my starting point. As I mentioned above, I set the outer tie rods per the F5 recommended starting point, and ended up with my front wheels looking like this: driver side.

Passenger side: Just a wee bit of toe-in and caster, eh?
Starting with centering the steering rack: here is the DS side starting point, and arrow indicating the direction to center. I think it was about 1/2" or so. I used the inside of the upright 2" frame sections as my chassis point of reference on both sides.
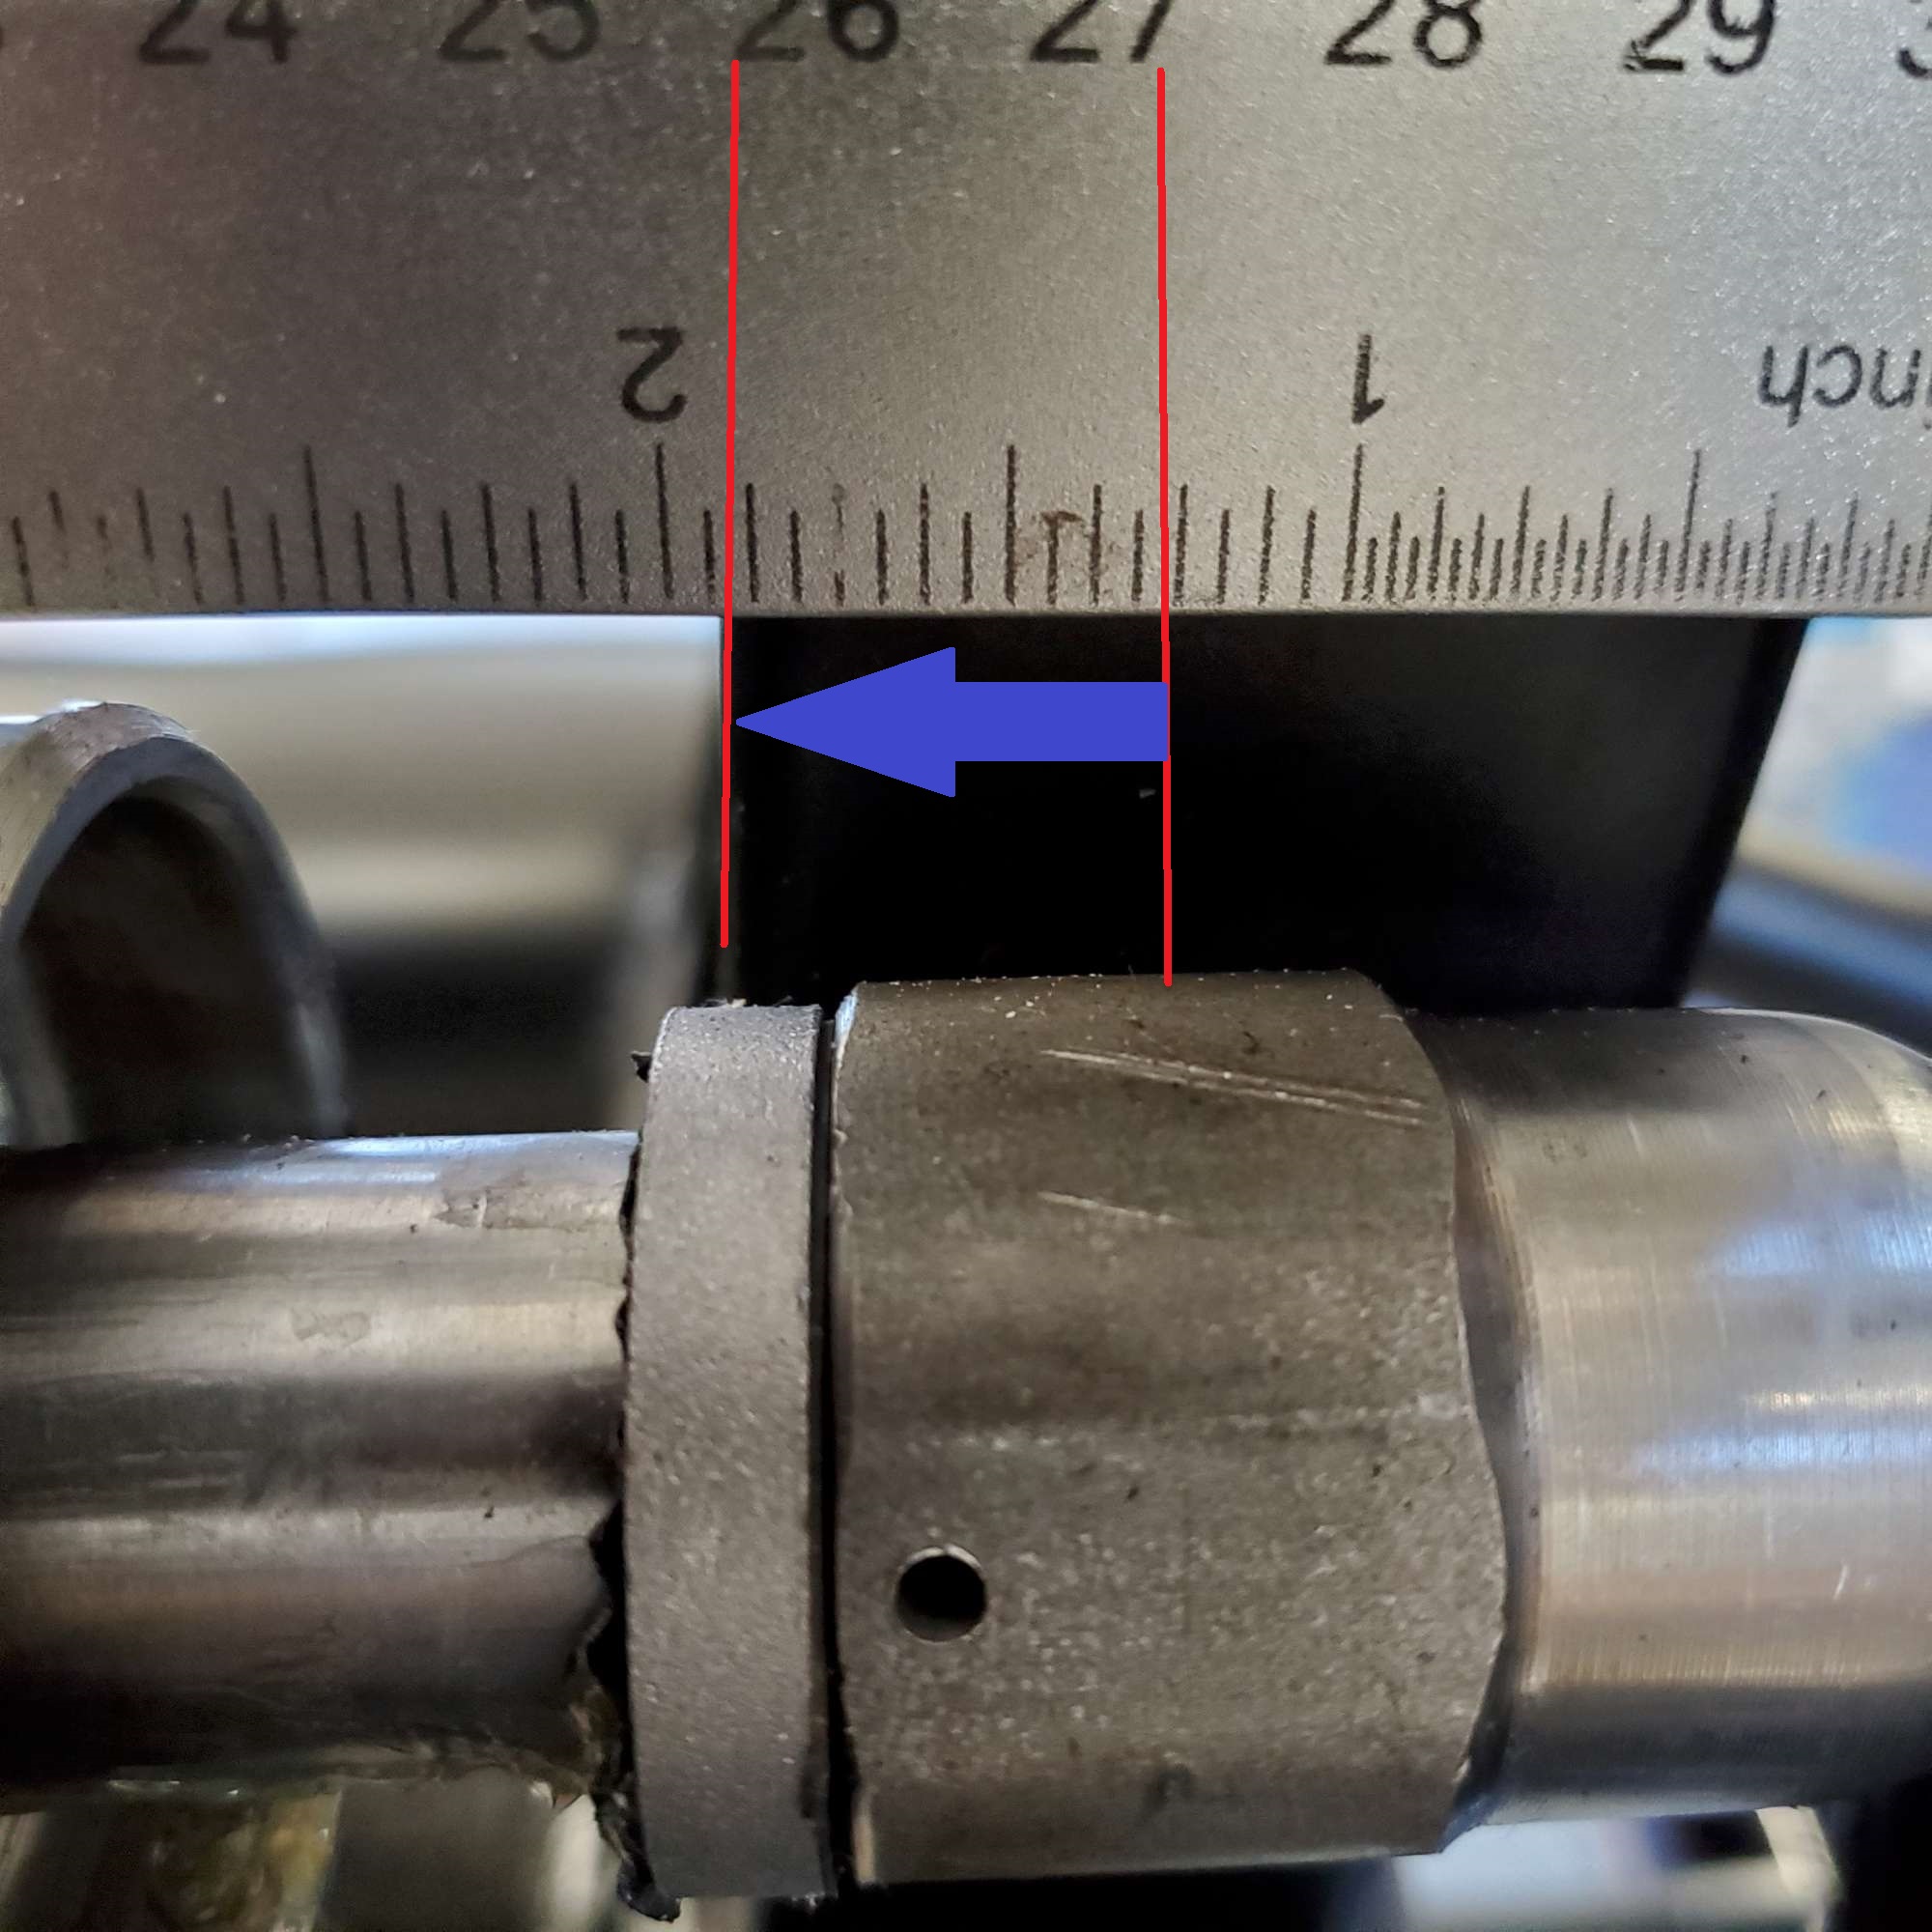
Here's the PS starting point. Red lines indicating where it ended up after centering.

I completed the first installation step in the Russ Thompson turn signal kit. This is the first time I've seen the steering wheel in place. Pretty cool. Was able to center the steering wheel. At some point after Karlos wrote his procedure F5 made a nice improvement in the splined shaft coming out of the steering rack: it now has a saddle, so no need to notch the spline for the set screw when centering the steering wheel. The saddle gives the set screw good seating on the shaft no matter the position of the steering wheel. (I haven't torqued down the RT bracket yet with nylon lock nuts. Will do that later on once I'm sure I don't need to take it apart anymore).

I have six of the nylon split spacers "steering travel restrictors" coming from Amazon. I will need to add a spacer (or two?) to even out my lock-to-lock steering wheel travel. Right now I have about 1 turn CCW and 1.2 turns CW. I expect the number of turns to be a little limited due to the 275/40/R17 front tires as compared to more narrow tires.
**If anyone has advice or suggestions as to my PS side alignment situation noted above I would very much appreciate you weighing in.
Chris
Coupe complete kit delivered: 4/22/24.
Build Thread. Coyote. T-56. IRS w/3.55. Wilwoods. PS. HVAC. Side windows.
MK4 Complete kit.
Build Thread Index. Delivered: 10/15/2020. Legal: 7/25/23. Coyote Gen3. TKO600 (0.64 OD). IRS w/3.55. PS. Wilwoods. Sway bars. This build is dedicated to my son, Benjamin.
Build Thread.
-
06-01-2021, 04:28 PM
#164
Nice work! I'm in a similar place as you, having just mounted my RT turn signal kit over the weekend so I can finalize dash position. One thing I noticed was that when I tightened down the two nyloc nuts holding the pillow bearing, the drag on the steering shaft went up a LOT. I backed off of those two nuts just a touch and the steering shaft became much easier to turn. The whole assembly is still rock solid, even with those two bolts not cranked down, and they're unlikely to further loosen since they're nyloc so I think I'm going to leave them like that.
MkIV Roadster build: Gen 2 Coyote, IRS, TKO600. Ordered 10/24/18. Delivered 1/29/19. Engine installed 8/8/21. First start 9/12/21. First go-kart 9/17/21. Off to paint 4/11/22. Back from paint 12/30/22.
Build thread here.
-
Post Thanks / Like - 1 Thanks, 0 Likes
-
06-02-2021, 10:23 AM
#165
Senior Member
Thanks for sharing, John. Good to know. I'm trying to minimize the number of times I crank down these nylon nuts (all nylon nuts), so using standard nuts just to hold in place for now.
Chris
Coupe complete kit delivered: 4/22/24.
Build Thread. Coyote. T-56. IRS w/3.55. Wilwoods. PS. HVAC. Side windows.
MK4 Complete kit.
Build Thread Index. Delivered: 10/15/2020. Legal: 7/25/23. Coyote Gen3. TKO600 (0.64 OD). IRS w/3.55. PS. Wilwoods. Sway bars. This build is dedicated to my son, Benjamin.
Build Thread.
-
06-02-2021, 04:33 PM
#166
Stack flat washers under the pillow bearing until it does not increase bind on the steering. You may have to use longer bolts.
20th Anniversary Mk IV, A50XS Coyote, TKO 600, Trunk Drop Box, Trunk Battery Box, Cubby Hole, Seat Heaters, Radiator hanger and shroud.
-
06-12-2021, 09:24 PM
#167
Senior Member
Radiator Installed (w/Breeze Parts)
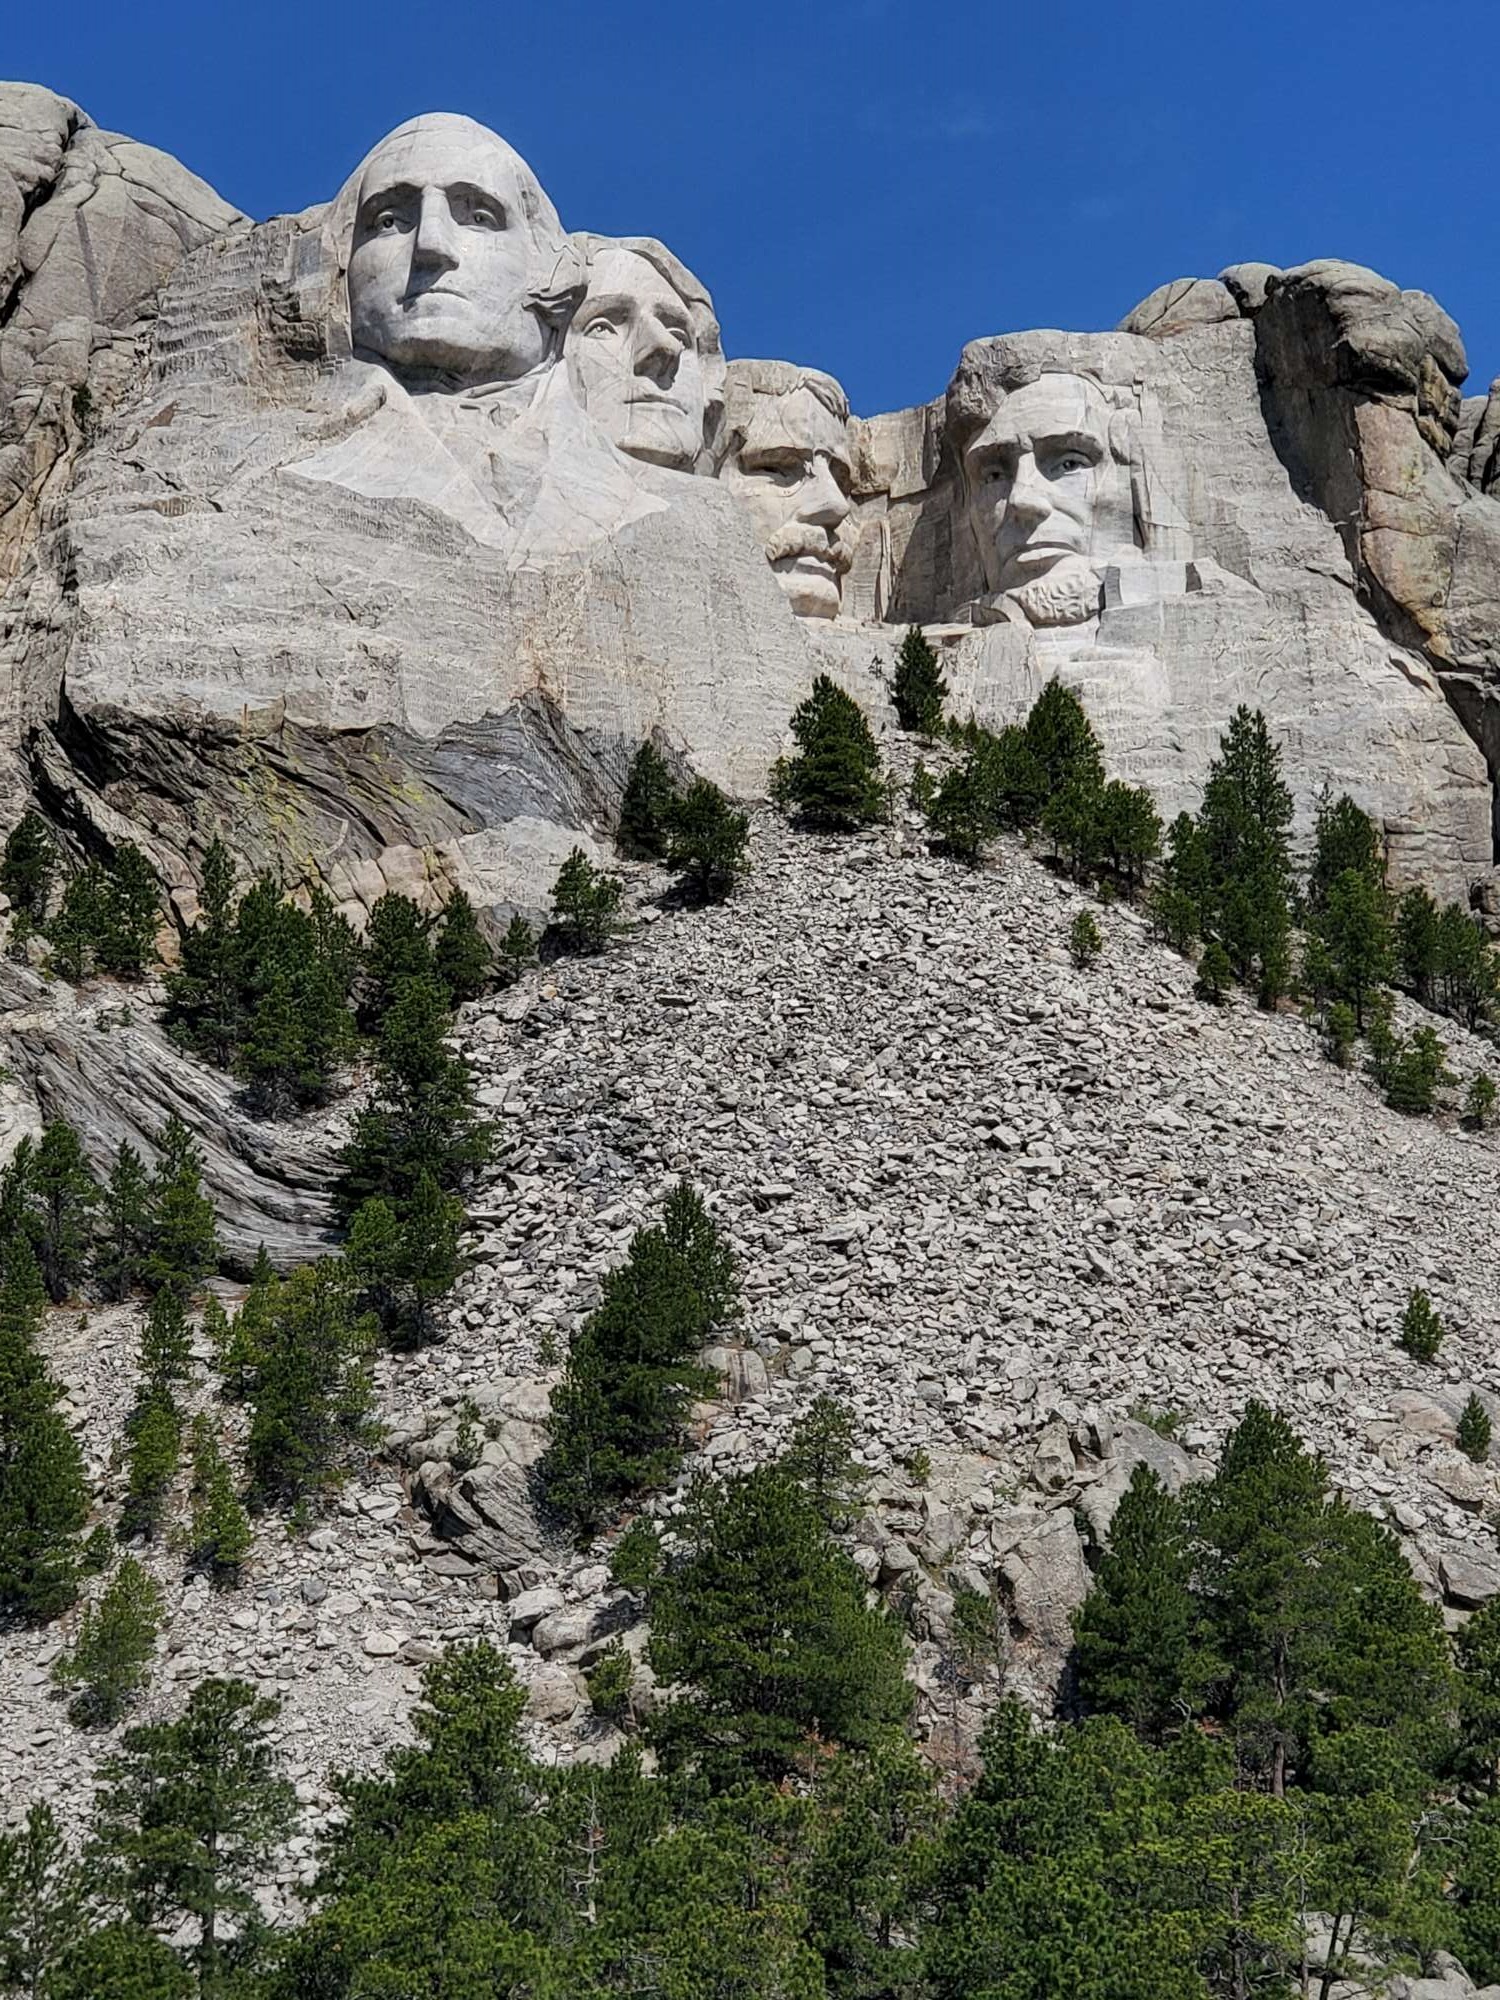
Last week I was blessed to be able to fly to Kentucky to meet my #2 son and drive with him across the country back to Spokane. About 2,100 miles. He completed his four year enlistment. He begins a new chapter in life. Good to have him home.
On the way I talked him into swinging by Mount Rushmore. We overnighted in Rapid City, so it wasn't too far of a detour. Who knows when/if we'll be back that way again. It was worth it!

It's amazing! Words don't do it justice. The faces are about 60' in height. It was an incredible experience. We didn't linger too long, as we had a lot of miles left to go. I snapped a number of pictures with my phone. Here's one giving a bit more perspective of the height to the sculpture above the viewing area:
I've been working on the radiator install. I ordered upper hinge mount, lower mount, and shroud from Breeze. One of the first steps is to remove the short 3/4" square tube that is welded to the upper radiator cross bar.
The angle grinder I inherited from my Dad came in quite handy. I thought it would be a bit overkill, but with a steady hand I was able to remove the short 3/4" square tube without too much trouble.
After that I attached the hinged upper mount. Then I treated the shroud to Scotch pad and ceramic enamel to match my other engine bay panels. Here it is ready to install.

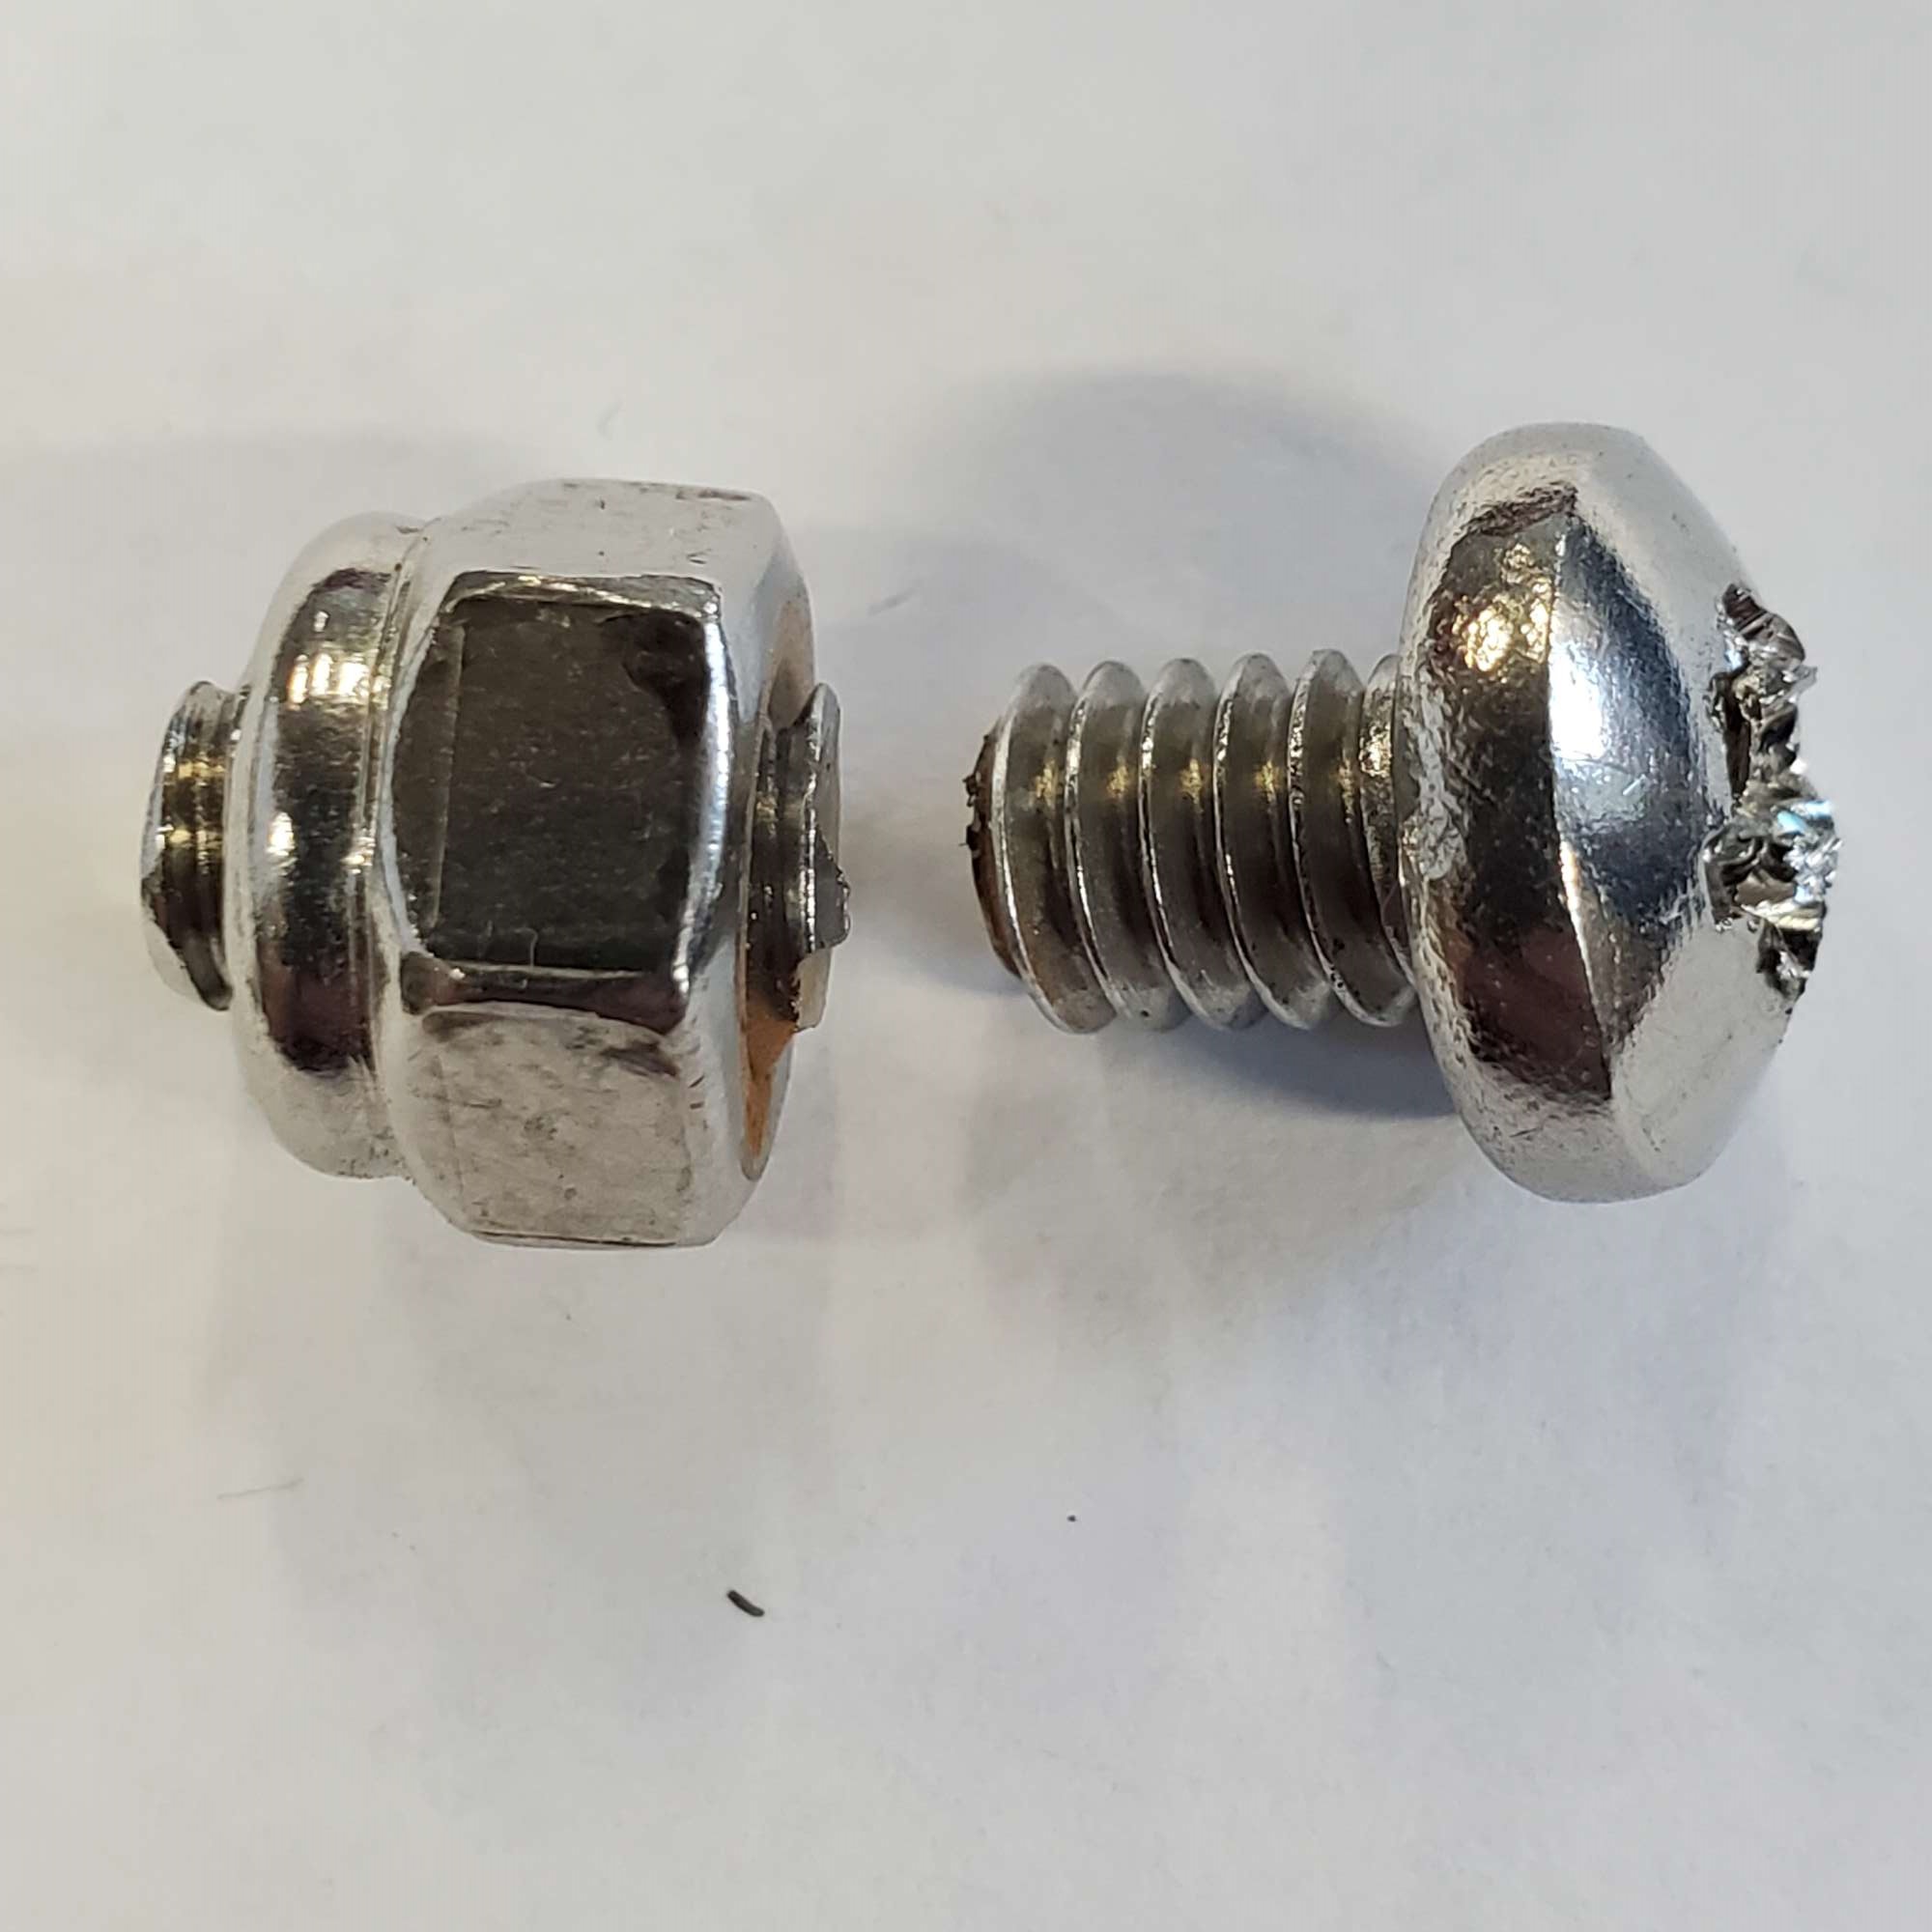
Whoa! Not so fast cowboy. Threading on the last stainless 1/4"-20 screw which mounts the fan to the shroud, I managed to gall the threads. Not sure what I did different or wrong, but this is how much it threaded before it wouldn't thread any further. Dremel to the rescue! Fortunately, it didn't thread any further: if it weren't for this gap the cutoff wheel wouldn't have been a good option. I'm not sure what I would have done in that case. Phew!
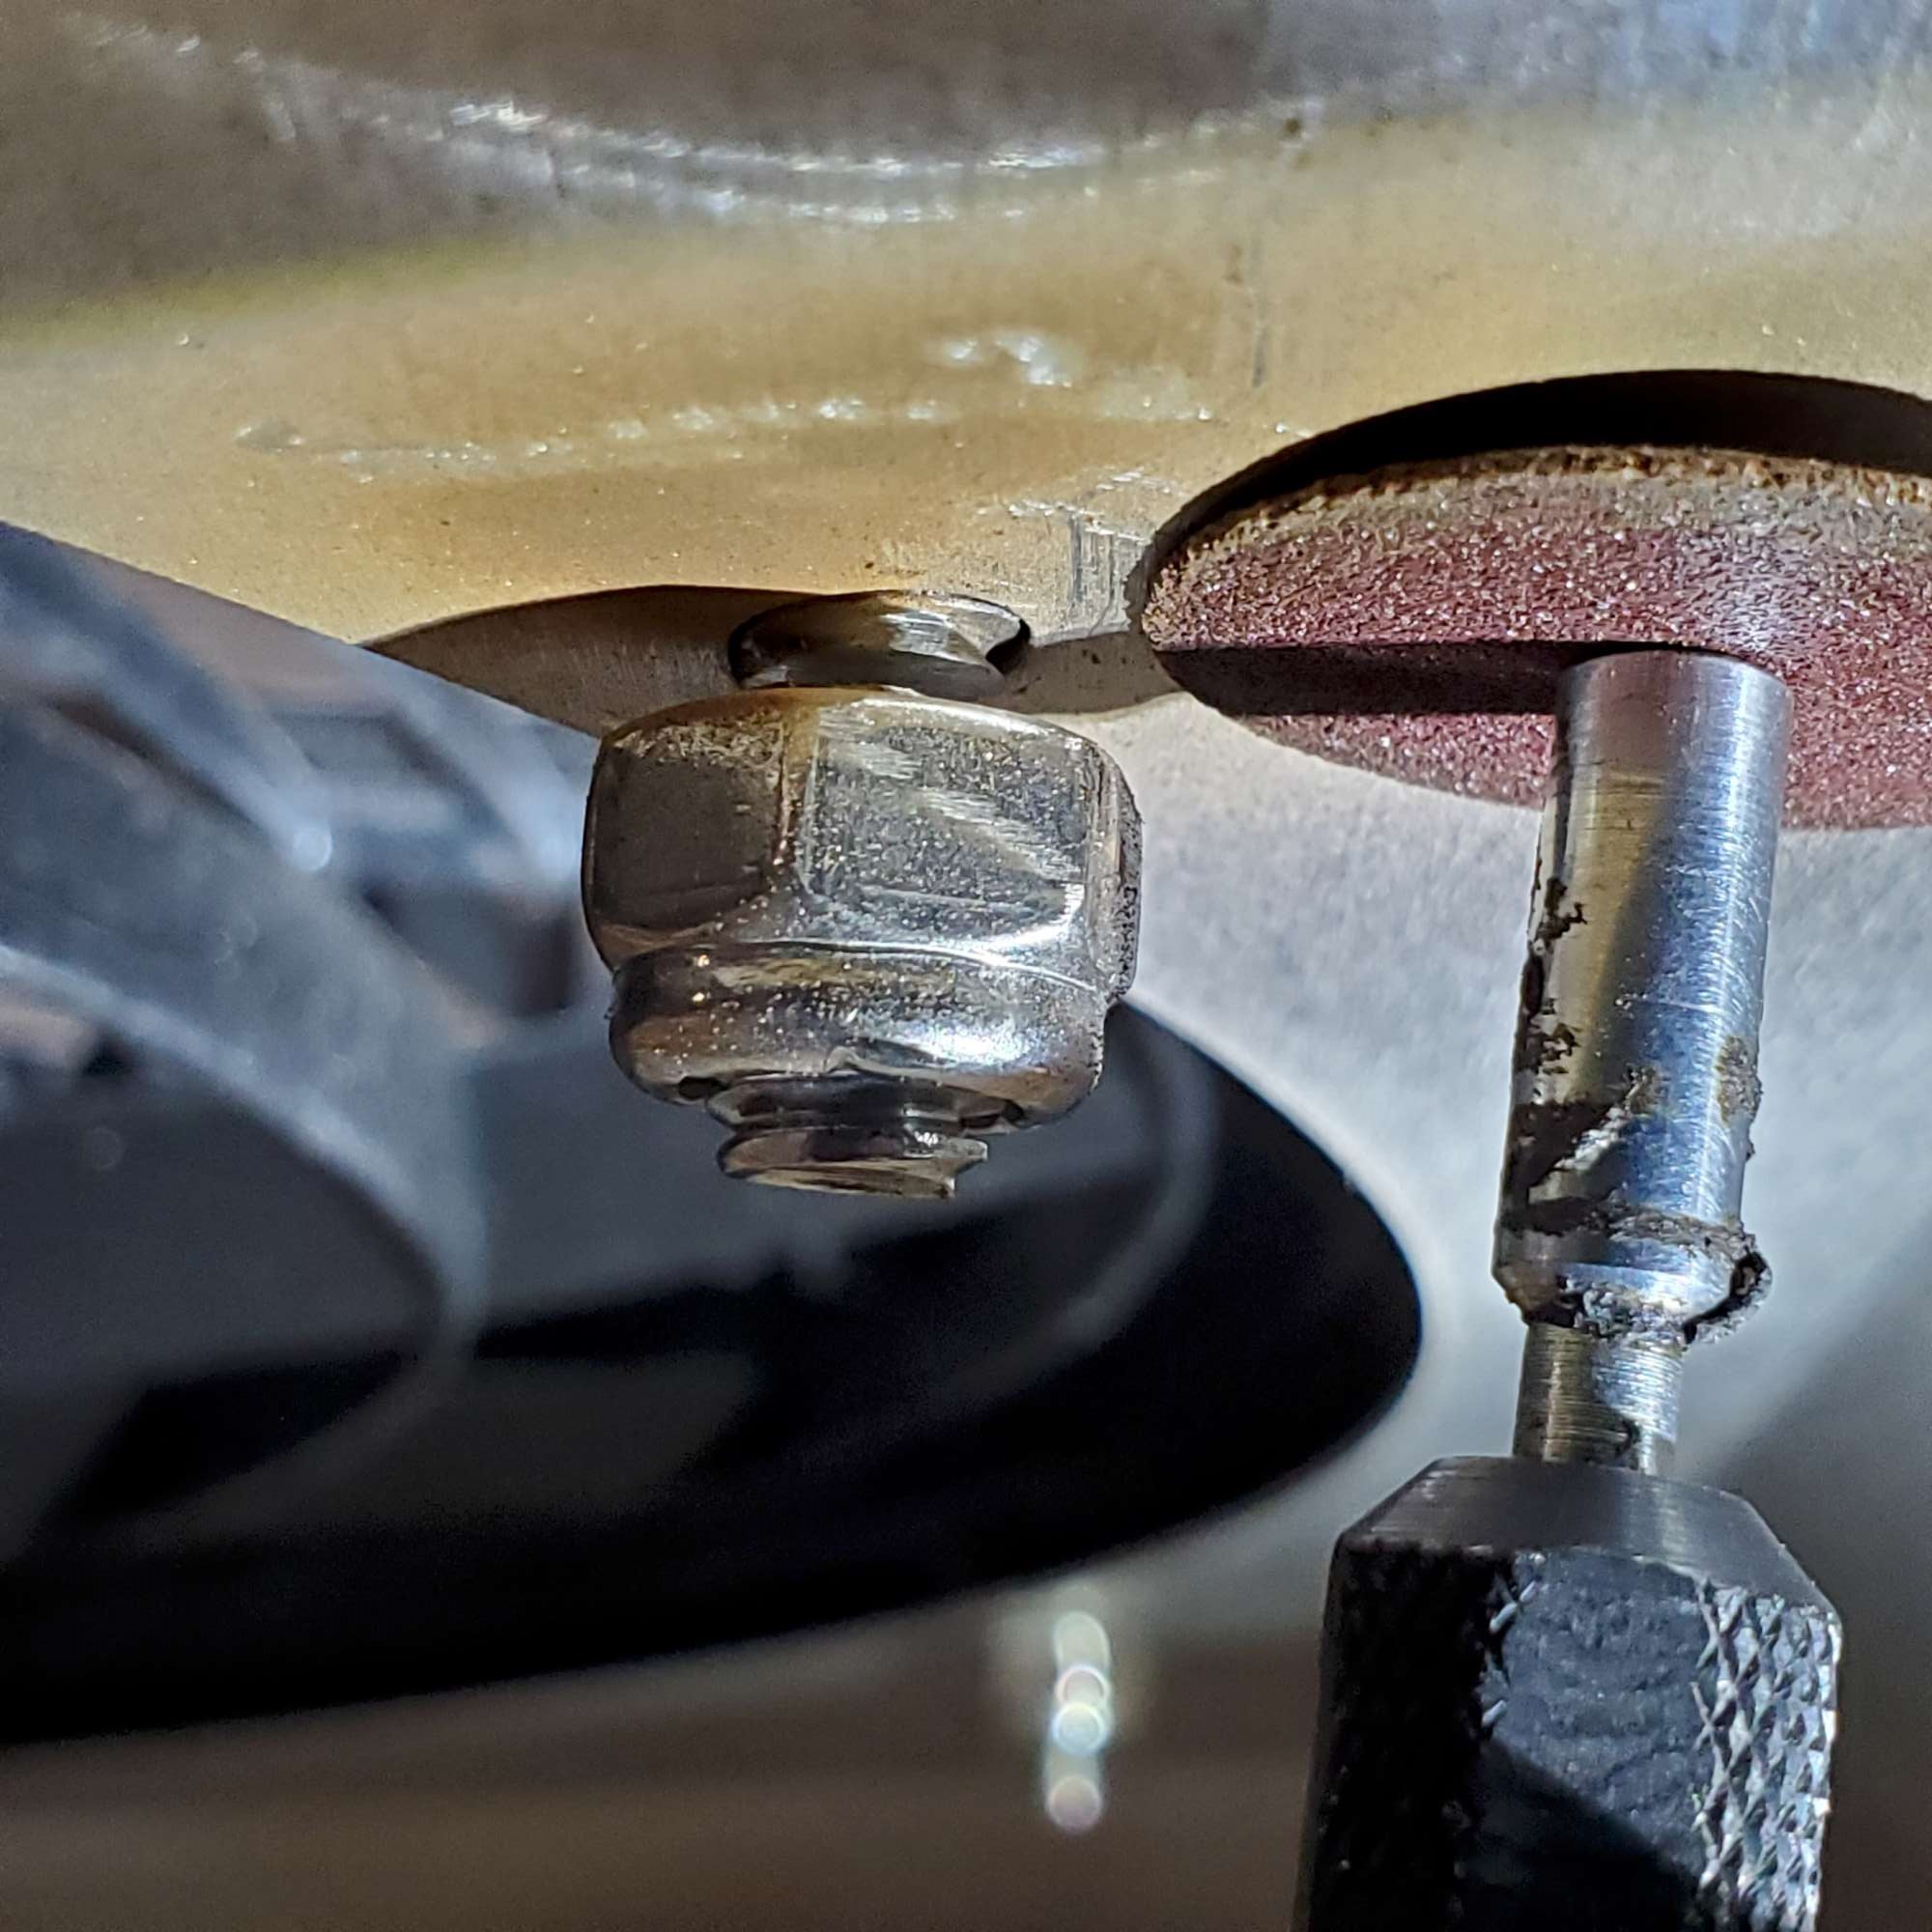
Chris= 1 Win. Galled stainless screw= 1 Loss.
Chris
Coupe complete kit delivered: 4/22/24.
Build Thread. Coyote. T-56. IRS w/3.55. Wilwoods. PS. HVAC. Side windows.
MK4 Complete kit.
Build Thread Index. Delivered: 10/15/2020. Legal: 7/25/23. Coyote Gen3. TKO600 (0.64 OD). IRS w/3.55. PS. Wilwoods. Sway bars. This build is dedicated to my son, Benjamin.
Build Thread.
-
06-12-2021, 09:33 PM
#168
Senior Member

If you haven't done it yet, get some anti-seize (Permatex or whatever available at any auto parts store) and put a little on the threads of every single SS piece of hardware you use. Don't have to go crazy with it. Just make sure some is there. Otherwise you will keep galling and cutting SS bolts. Ask me how I know that.
Build 1: Mk3 Roadster #5125. Sold 11/08/2014.
Build 2: Mk4 Roadster #7750. Sold 04/10/2017.
Build Thread
Build 3: Mk4 Roadster 20th Anniversary #8674. Sold 09/07/2020.
Build Thread and
Video.
Build 4: Gen 3 Type 65 Coupe #59. Gen 3 Coyote. Legal 03/04/2020.
Build Thread and
Video
Build 5: 35 Hot Rod Truck #138. LS3 and 4L65E auto. Rcvd 01/05/2021. Legal 04/20/2023.
Build Thread. Sold 11/9/2023.
-
06-12-2021, 09:39 PM
#169
Senior Member
Radiator Installed (w/Breeze Parts) - Part 2
With the fan and shroud assembled to the radiator, and all of the upper cross bar prep done (i.e. 1/4"-20 holes drilled) I used this angle finder to set the radiator to the recommended 51 deg. I was able to convince myself of the many other uses ( ) for an angle finder besides setting the radiator angle. Also, I didn't want to depend on a phone app., so picked up this one from Lowes for about $30.

If you're interested in the Breeze lower radiator mount and unfamiliar with it, here's how it mounts to the lower front chassis 3/4" tube. Pretty slick setup. I spray painted the stainless steel 1/2" cross bar black (not visible in this picture) that slides into the hose ends that come with the Breeze lower kit.

And, here it is installed. It will have cardboard taped for protection of the fins. Front view:

Rear view:
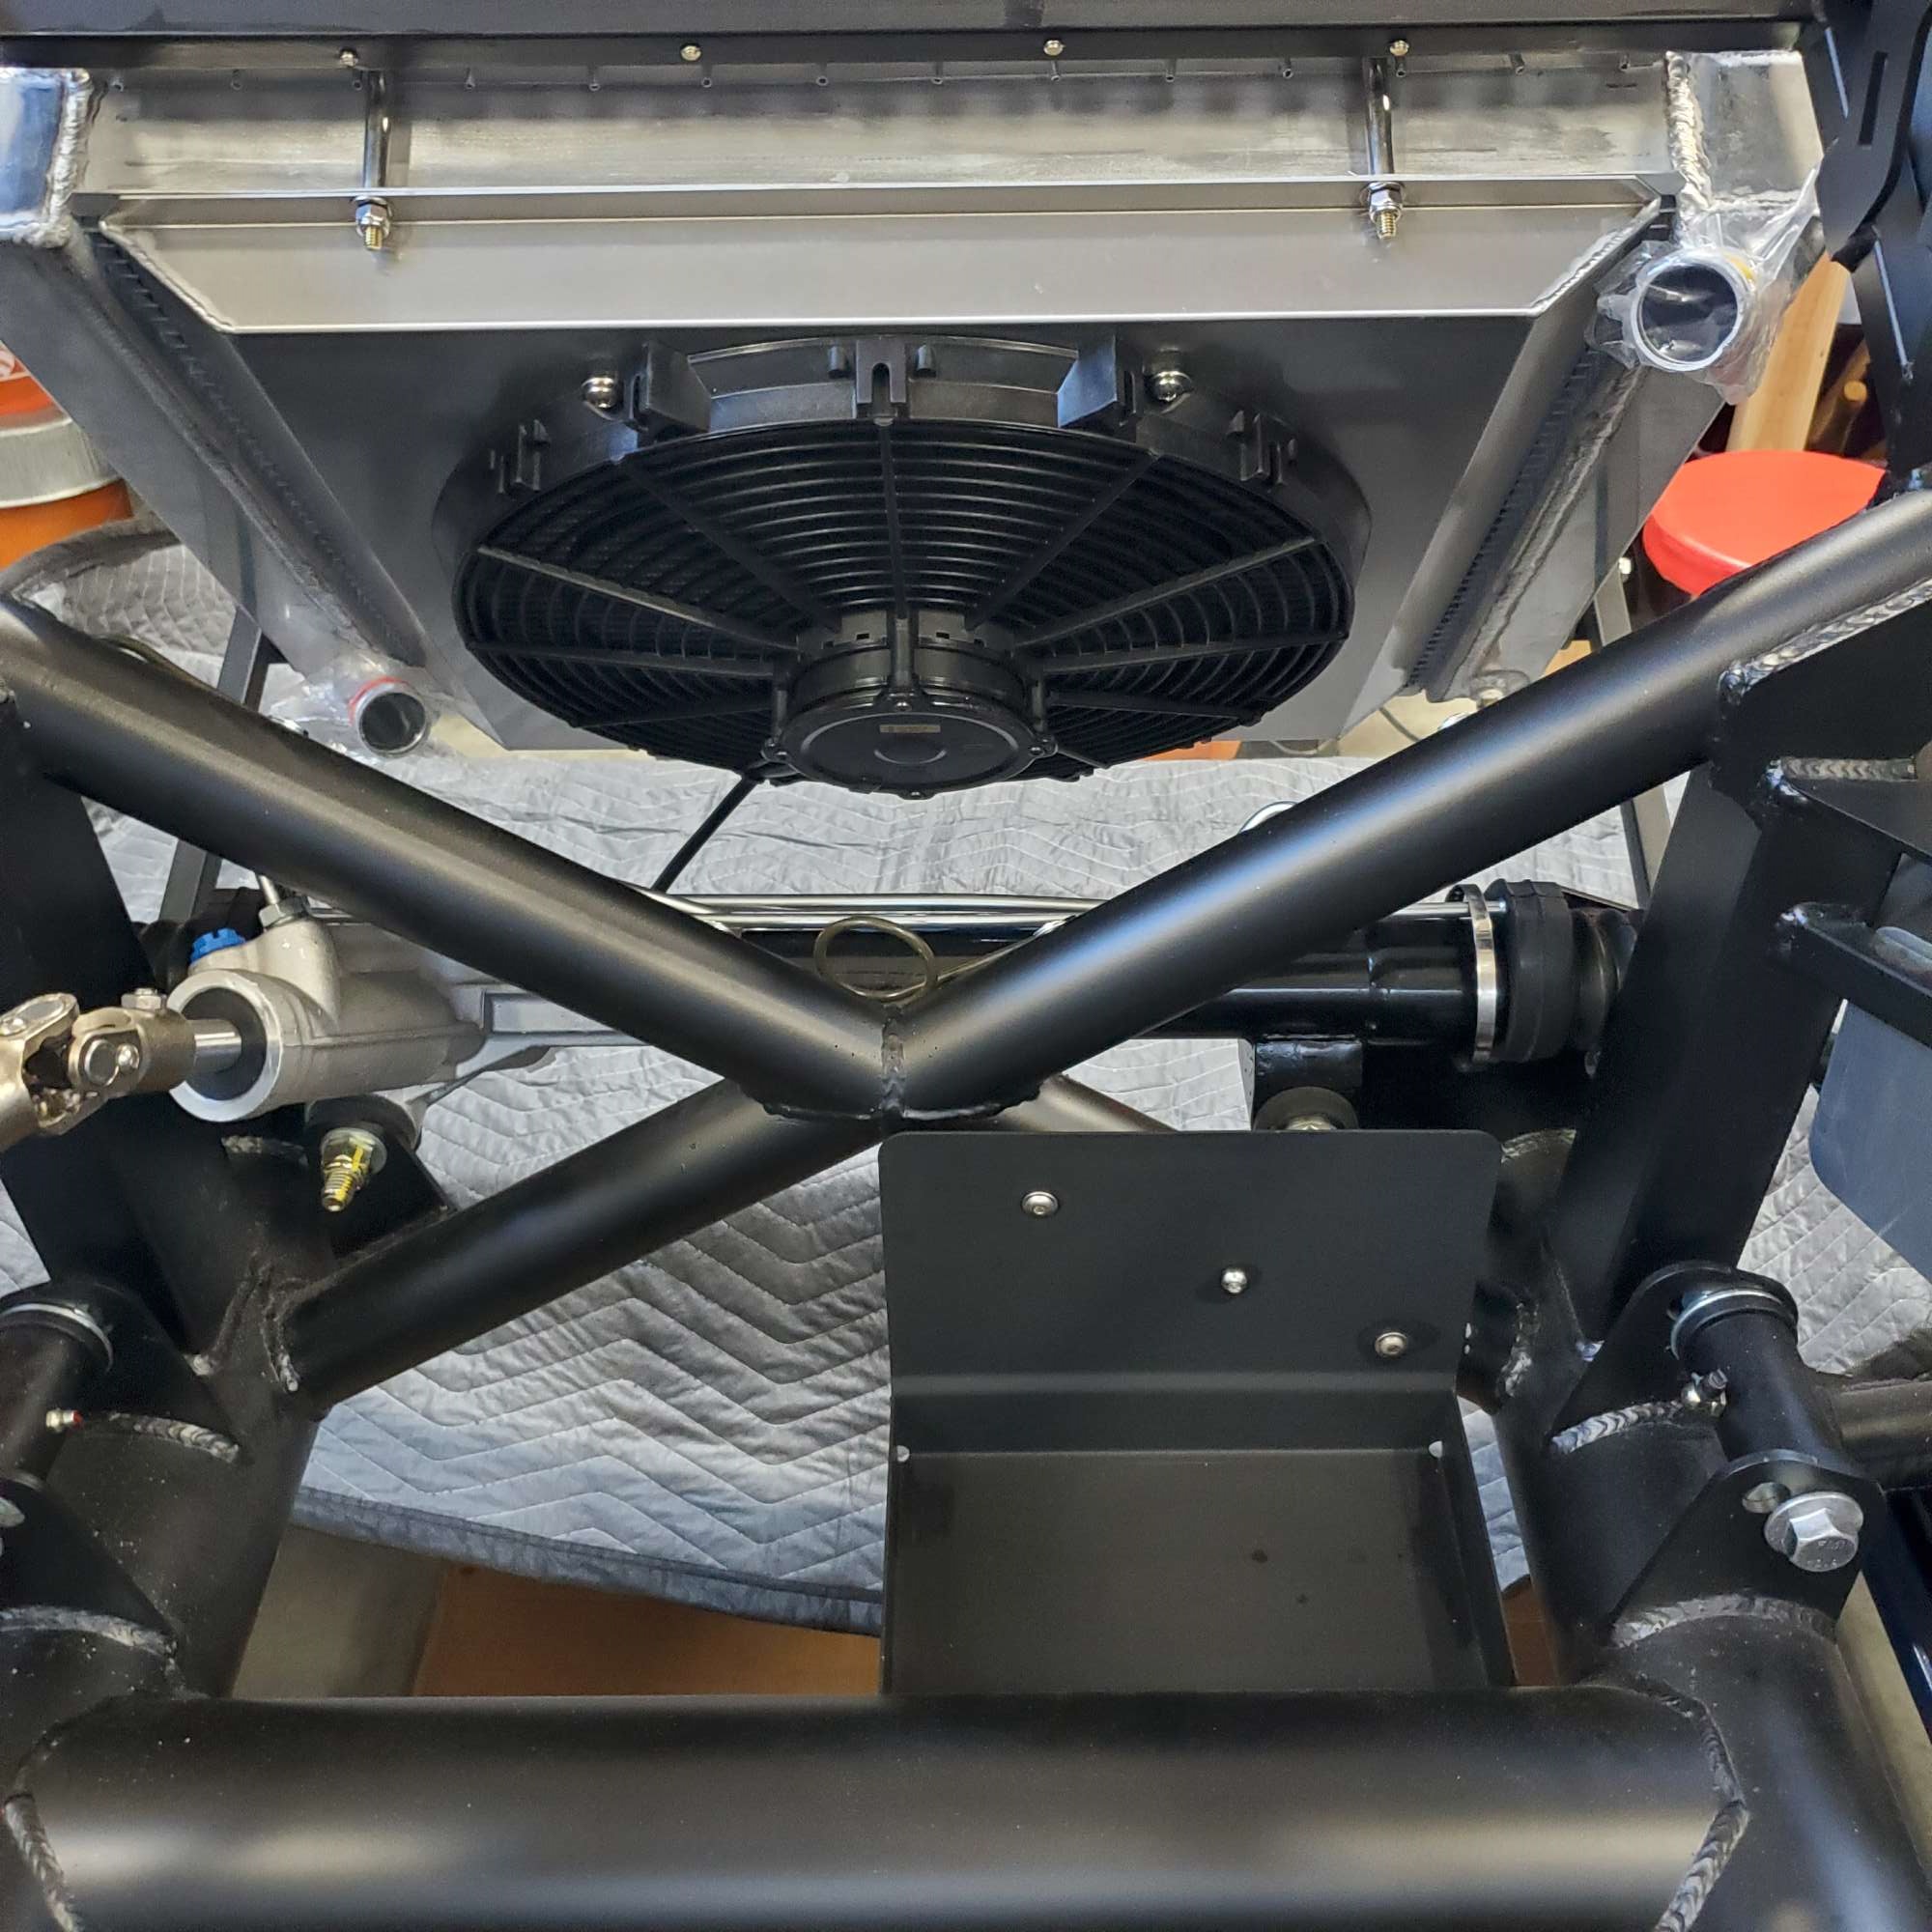
This was an interesting task. I enjoyed it. The Breeze parts were good quality, and I would use them again. Thanks, Mark!
Last edited by 460.465USMC; 06-12-2021 at 09:45 PM.
Chris
Coupe complete kit delivered: 4/22/24.
Build Thread. Coyote. T-56. IRS w/3.55. Wilwoods. PS. HVAC. Side windows.
MK4 Complete kit.
Build Thread Index. Delivered: 10/15/2020. Legal: 7/25/23. Coyote Gen3. TKO600 (0.64 OD). IRS w/3.55. PS. Wilwoods. Sway bars. This build is dedicated to my son, Benjamin.
Build Thread.
-
Post Thanks / Like - 0 Thanks, 2 Likes
-
06-12-2021, 09:41 PM
#170
Senior Member

Originally Posted by
edwardb

If you haven't done it yet, get some anti-seize (Permatex or whatever available at any auto parts store) and put a little on the threads of every single SS piece of hardware you use. Don't have to go crazy with it. Just make sure some is there. Otherwise you will keep galling and cutting SS bolts. Ask me how I know that.
After it galled I began to wonder about that. I used anti-seize on a couple other connections in the build, but didn't realize how easy stainless galls. Now I know (good ol' school of hard knocks!). I will take your advice and make this standard operating procedure. Thanks, Paul!
Chris
Coupe complete kit delivered: 4/22/24.
Build Thread. Coyote. T-56. IRS w/3.55. Wilwoods. PS. HVAC. Side windows.
MK4 Complete kit.
Build Thread Index. Delivered: 10/15/2020. Legal: 7/25/23. Coyote Gen3. TKO600 (0.64 OD). IRS w/3.55. PS. Wilwoods. Sway bars. This build is dedicated to my son, Benjamin.
Build Thread.
-
Post Thanks / Like - 1 Thanks, 0 Likes
-
06-15-2021, 08:48 PM
#171
Looks great! Had the same issue last week when we had to pull our fan shroud back off. One screw came out easily...the other one not so much. Will have to give the anti-seize a shot as well.
MK4 Complete Kit, EFI 427W/TKO 600, 2015 IRS
Ordered: 11/6/20, Kit Completion: 2/13/21, Picked Up: 2/16/21, Build Started: 2/19/21, First Start: 6/13/21, Go Kart: 8/15/21, Sent for Paint: 12/23/21, Back From Paint: 6/16/22, Street Legal: 7/11/22
-
Post Thanks / Like - 0 Thanks, 1 Likes
-
06-15-2021, 08:58 PM
#172
Senior Member

You’ll be able to use it to adjust your driveshaft angle as well. Being a perfectionist, I set mine to the exact 51 degree angle as well. You will adjust it some, when you fit the aluminum nose cowling and body interface.
Chris
Generation 3 Type 65 Daytona Coupe Complete Kit #151885 received May 6, 2022. Gen 3 Coyote, IRS, Tremec TKX, American Powertrain hydraulic throwout bearing & Wilwood brakes.
MK4 Basic Kit #7404, 347 EFI - Pro M Racing ECM, 30# injectors, 70 mm throttle body, 80 mm MAF, Edelbrock Performer aluminum heads & RPM II intake, all new G-Force T5, 3:55 gears, Pro 5.0 shifter, 3-link, carbon fiber dash/custom Speedhut gauges and paint by Da Bat.
-
Post Thanks / Like - 1 Thanks, 0 Likes
-
06-15-2021, 09:17 PM
#173
Originally Posted by
460.465USMC
After it galled I began to wonder about that. I used anti-seize on a couple other connections in the build, but didn't realize how easy stainless galls. Now I know (good ol' school of hard knocks!). I will take your advice and make this standard operating procedure. Thanks, Paul!
I think everyone learns this particular lesson the hard way. I seized a couple of SS bolts early on, and now use anti-seize on every SS fastener. The ones that are most prone to galling are SS bolts into nyloc nuts. That combo is almost certain to gall.
The build is looking great! I agree that the Breeze parts are all top notch. I think I bought one of nearly everything Mark sells.
MkIV Roadster build: Gen 2 Coyote, IRS, TKO600. Ordered 10/24/18. Delivered 1/29/19. Engine installed 8/8/21. First start 9/12/21. First go-kart 9/17/21. Off to paint 4/11/22. Back from paint 12/30/22.
Build thread here.
-
Post Thanks / Like - 1 Thanks, 1 Likes
-
06-16-2021, 01:54 PM
#174
Senior Member
Originally Posted by
NYMike
Looks great! Had the same issue last week when we had to pull our fan shroud back off. One screw came out easily...the other one not so much. Will have to give the anti-seize a shot as well.
Yeah, even broke out my impact driver, but to no avail. It was seized!
Chris
Coupe complete kit delivered: 4/22/24.
Build Thread. Coyote. T-56. IRS w/3.55. Wilwoods. PS. HVAC. Side windows.
MK4 Complete kit.
Build Thread Index. Delivered: 10/15/2020. Legal: 7/25/23. Coyote Gen3. TKO600 (0.64 OD). IRS w/3.55. PS. Wilwoods. Sway bars. This build is dedicated to my son, Benjamin.
Build Thread.
-
06-16-2021, 01:56 PM
#175
Senior Member
Originally Posted by
JohnK
I think everyone learns this particular lesson the hard way. I seized a couple of SS bolts early on, and now use anti-seize on every SS fastener. The ones that are most prone to galling are SS bolts into nyloc nuts. That combo is almost certain to gall.
The build is looking great! I agree that the Breeze parts are all top notch. I think I bought one of nearly everything Mark sells.
Thanks, John. I'm looking at Mark's Cubby....Father's Day? Now, if I could just get one of my sons to read this.
Chris
Coupe complete kit delivered: 4/22/24.
Build Thread. Coyote. T-56. IRS w/3.55. Wilwoods. PS. HVAC. Side windows.
MK4 Complete kit.
Build Thread Index. Delivered: 10/15/2020. Legal: 7/25/23. Coyote Gen3. TKO600 (0.64 OD). IRS w/3.55. PS. Wilwoods. Sway bars. This build is dedicated to my son, Benjamin.
Build Thread.
-
06-17-2021, 08:55 AM
#176
Senior Member

One other side note Chris is the FFR fan you are using is very loud, just a heads up on it. I have a friend who just finished his Roadster with a Coyote in it and I can hear his fan running when he is idling behind me at a traffic light. If you wanted to go with a quieter fan you can't hear when engine is running highly recommend the Flex a lite Wave 3000 CFM, I am amazed how quiet this fan is and according to Flex a lite pulls 3000 CFM which is an upgrade from the 2250 CFM FFR fan. The wave fan also only draws 18.5 amps.
Just something to consider, much easier to swap it now.
https://www.summitracing.com/parts/f...EaAv7nEALw_wcB
-
Post Thanks / Like - 2 Thanks, 0 Likes
-
06-17-2021, 01:36 PM
#177
Senior Member
Appreciate the heads-up, Travis. So many of these things a noob just doesn't know (or think of). Thanks.
Hope you're getting in some driving despite the heat.
Chris
Coupe complete kit delivered: 4/22/24.
Build Thread. Coyote. T-56. IRS w/3.55. Wilwoods. PS. HVAC. Side windows.
MK4 Complete kit.
Build Thread Index. Delivered: 10/15/2020. Legal: 7/25/23. Coyote Gen3. TKO600 (0.64 OD). IRS w/3.55. PS. Wilwoods. Sway bars. This build is dedicated to my son, Benjamin.
Build Thread.
-
06-18-2021, 09:08 AM
#178
Senior Member
Originally Posted by
460.465USMC
Appreciate the heads-up, Travis. So many of these things a noob just doesn't know (or think of). Thanks.
Hope you're getting in some driving despite the heat.
Chris I think the $175 for the Flex a lite is worth the investment to not have that high pitched fan sound on all the time and with cooling the Coyote your fan is definitely going to be used, just my humble .02...
108 degrees here today, car is going to be sitting for awhile... brutal heat, I hope this is not a sign of what our summer is going to be like here! Just gotta get through the July and August misery...
Last edited by Fman; 06-18-2021 at 09:27 AM.
-
Post Thanks / Like - 1 Thanks, 1 Likes
 Moniz
Moniz thanked for this post
-
07-01-2021, 04:20 PM
#179
Senior Member
Been too busy cutting my winter firewood to get any build time lately. (What kind of deranged kook cuts wood in >100 deg. weather?...that's another story). So, only have time to drop into the Forum to check in on others' builds.
I just came across this F5 MK4 YouTube video (18 min). It was released four days ago. Had a blast watching it--the first 11 min. in particular. Great inspiration to keep plugging away, especially for those of you going with the 427 option. I bet those who have finished their builds can relate to the MK4 driving experience, and know that of which they speak. For those like me still in process this is a must watch...I can't wait!
Factory Five Shelby Cobra Review // Homicidal Maniac
Last edited by 460.465USMC; 07-01-2021 at 08:15 PM.
Chris
Coupe complete kit delivered: 4/22/24.
Build Thread. Coyote. T-56. IRS w/3.55. Wilwoods. PS. HVAC. Side windows.
MK4 Complete kit.
Build Thread Index. Delivered: 10/15/2020. Legal: 7/25/23. Coyote Gen3. TKO600 (0.64 OD). IRS w/3.55. PS. Wilwoods. Sway bars. This build is dedicated to my son, Benjamin.
Build Thread.
-
Post Thanks / Like - 0 Thanks, 1 Likes
 Fman
Fman liked this post
-
07-09-2021, 02:49 PM
#180
Senior Member
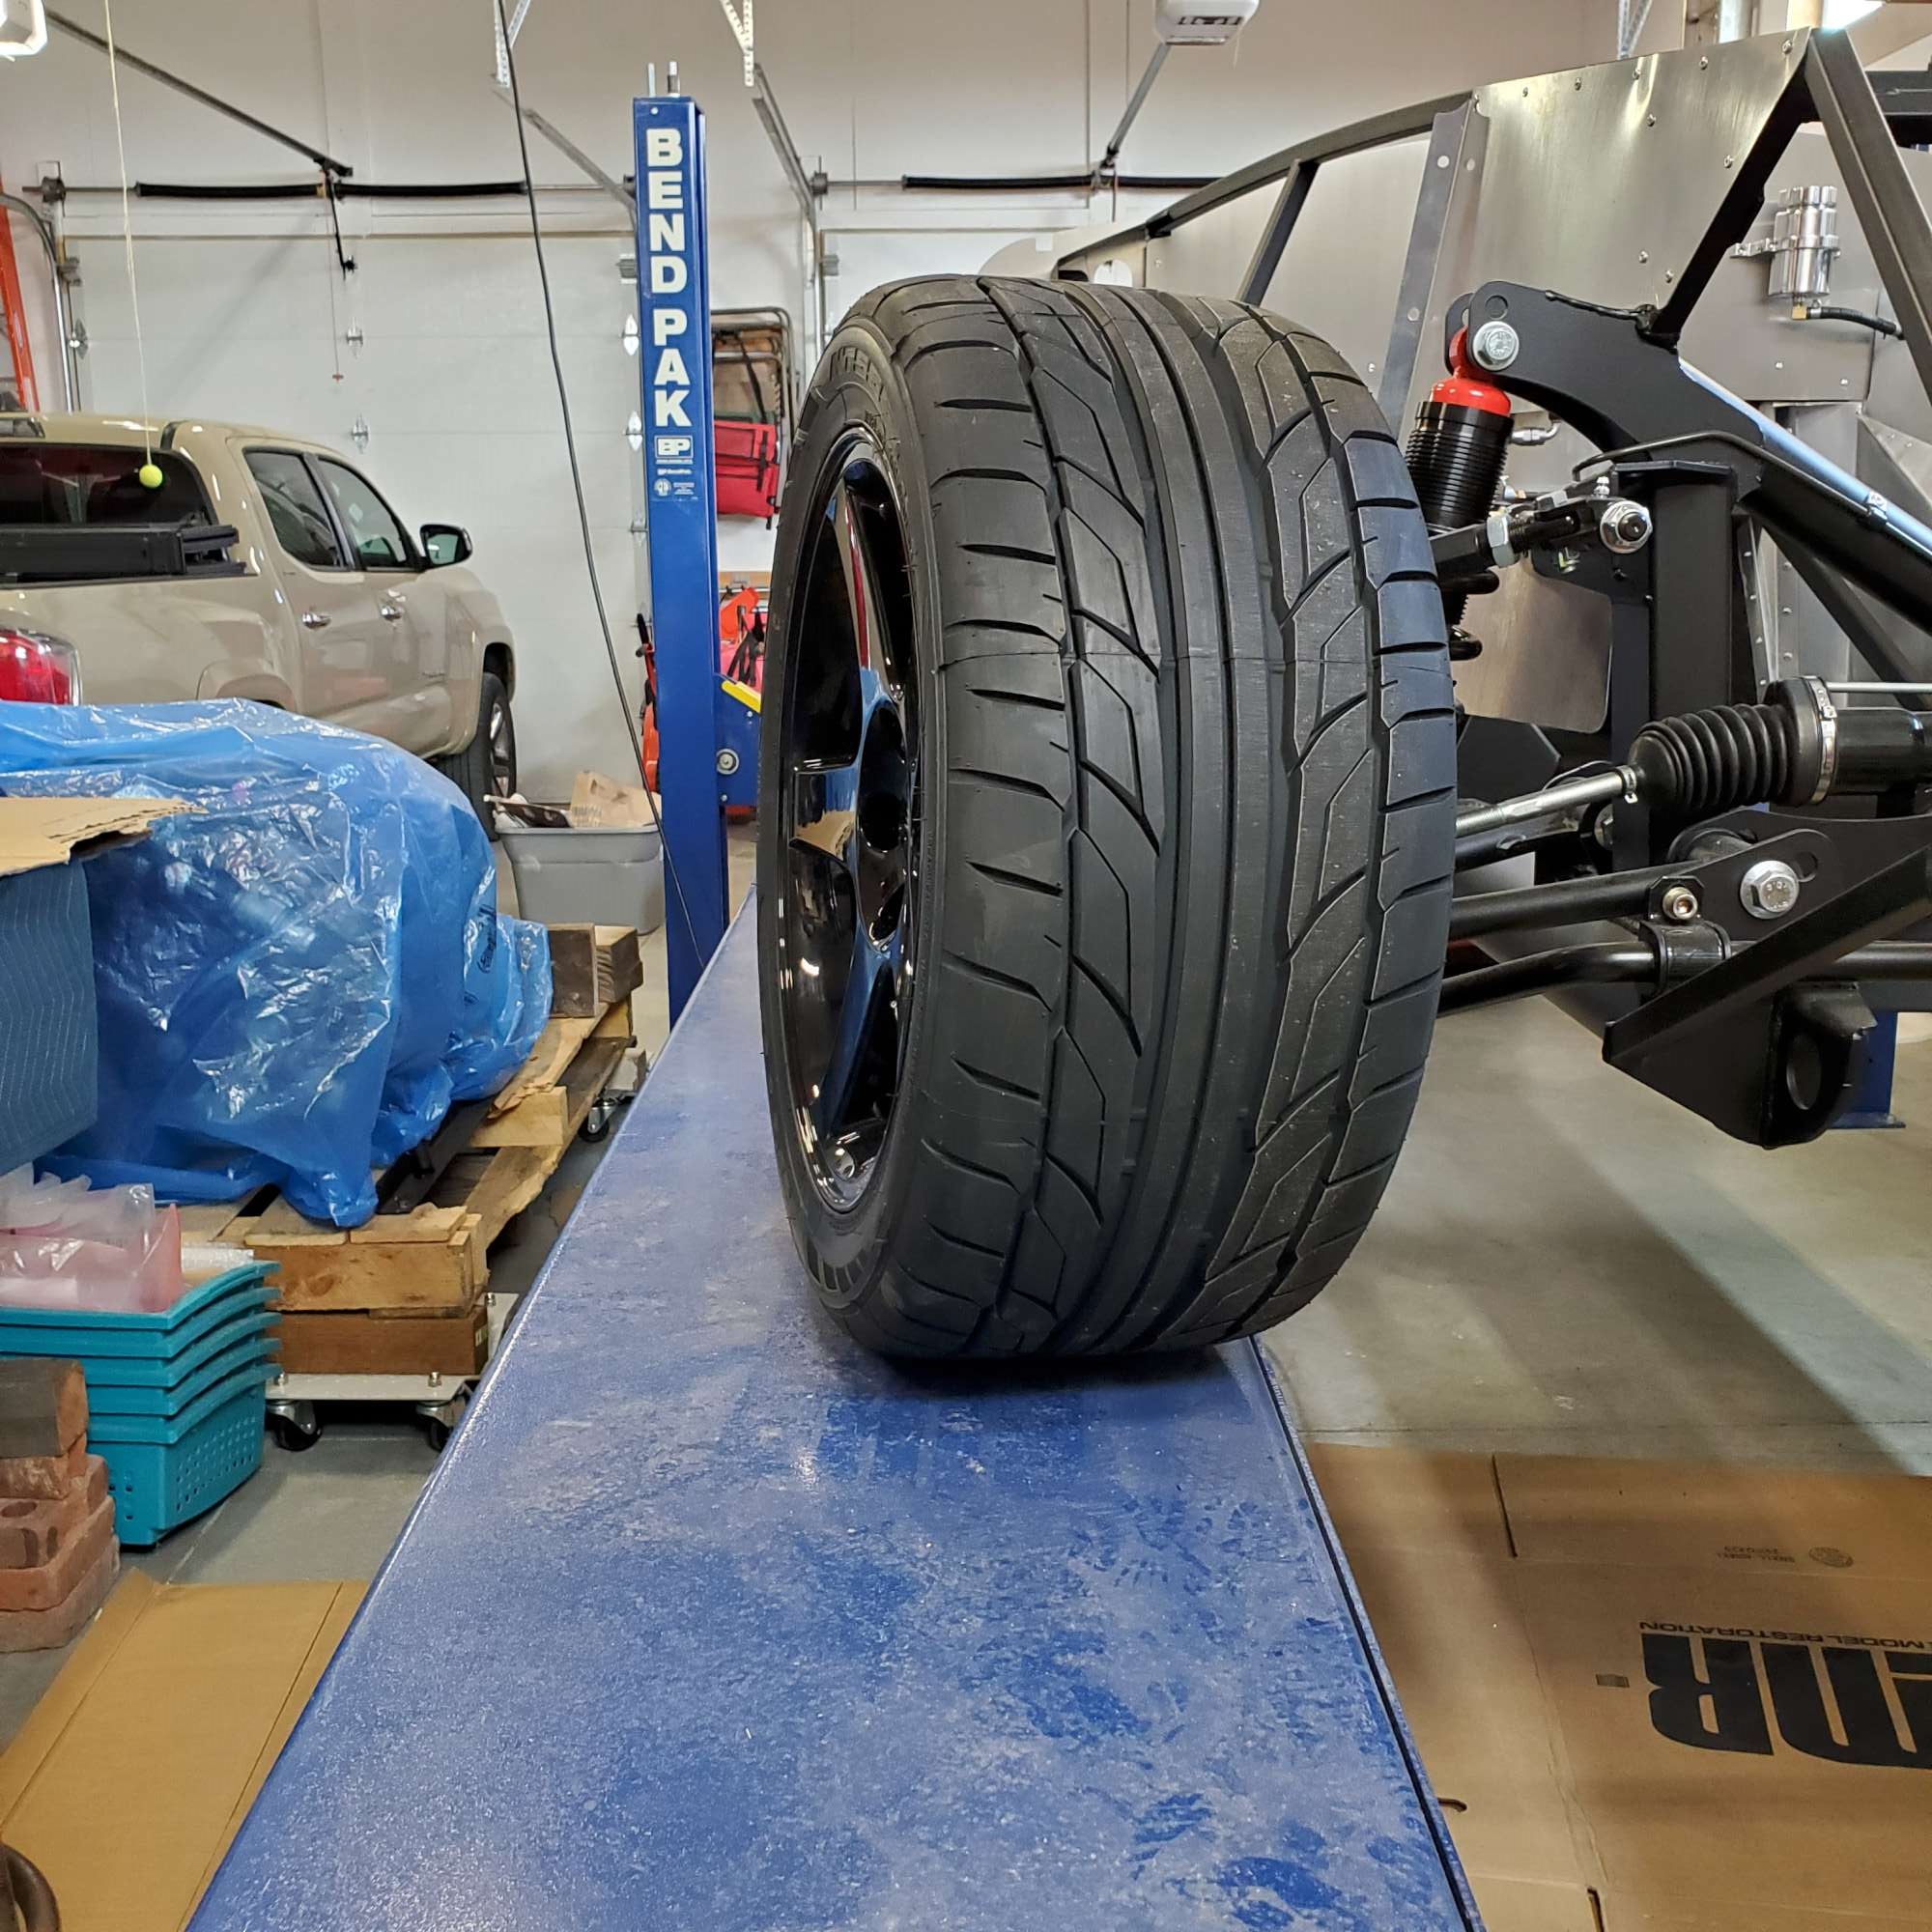
Wilwood E-brake Clearance Issue
When faced with a dreaded task, a saying can be heard in my house, "Eat the frog!" Not sure of its origin, but my wife uses it, and I adopted it too.
My Wilwood e-brake calipers rub on my 17" wheels. (I vascillated between 17" and 18" wheels, but felt confident 17" would clear the Wilwood 12.88" brake upgrade kit from F5). The interference can't be more than 1/16" to 1/32", but just enough to make contact. The four piston brake calipers have at least 1/2" clearance, so no problem there.
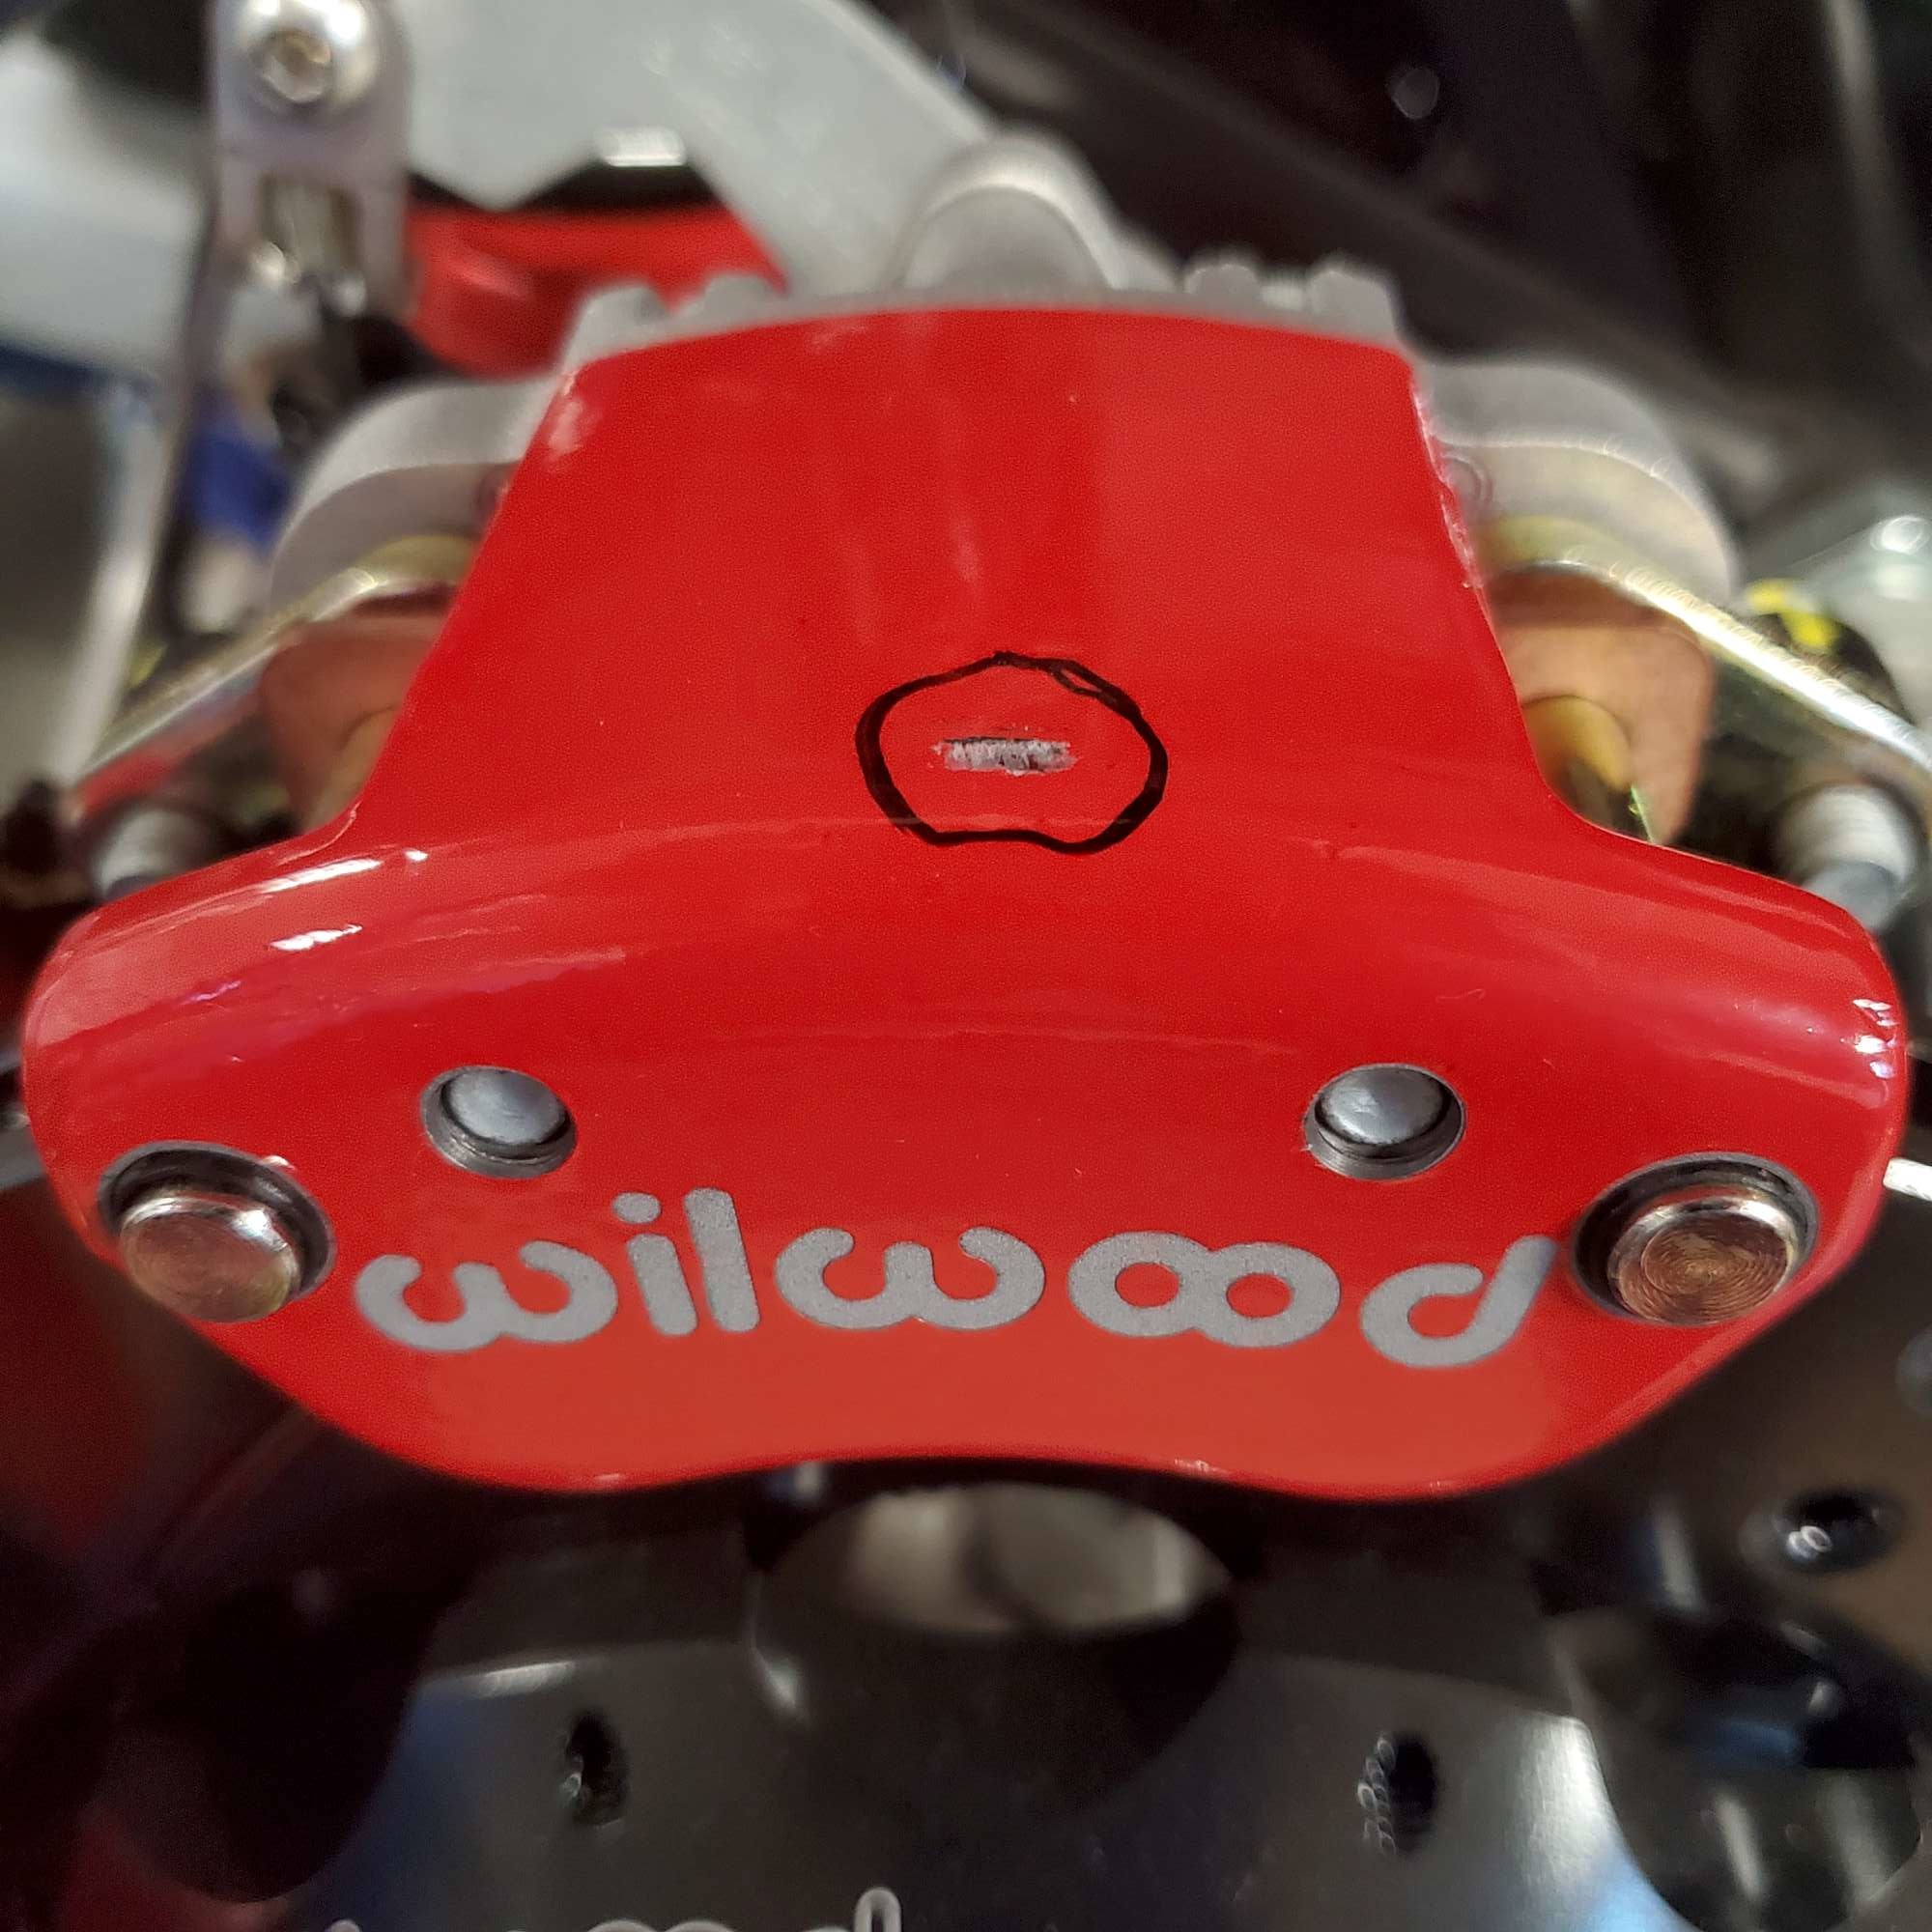
Here's what the interference did to my rear wheels before I discovered it. Not sure what I can do (if anything) to get rid of the ring that won't make it more visible.

To address the issue I removed some material from the top surface of the caliper. I figured 3-4 MM of grinding should provide sufficient clearance, allowing a little room for heat expansion. I didn't want to remove too much and potentially weaken the caliper body. Time will tell once it's in real-world operation.
My first experience with a flap disc on my angle grinder. Glad the e-brake caliper is aluminum, as it was pretty easy to remove material.
It was painful to start grinding on a shiny new caliper!
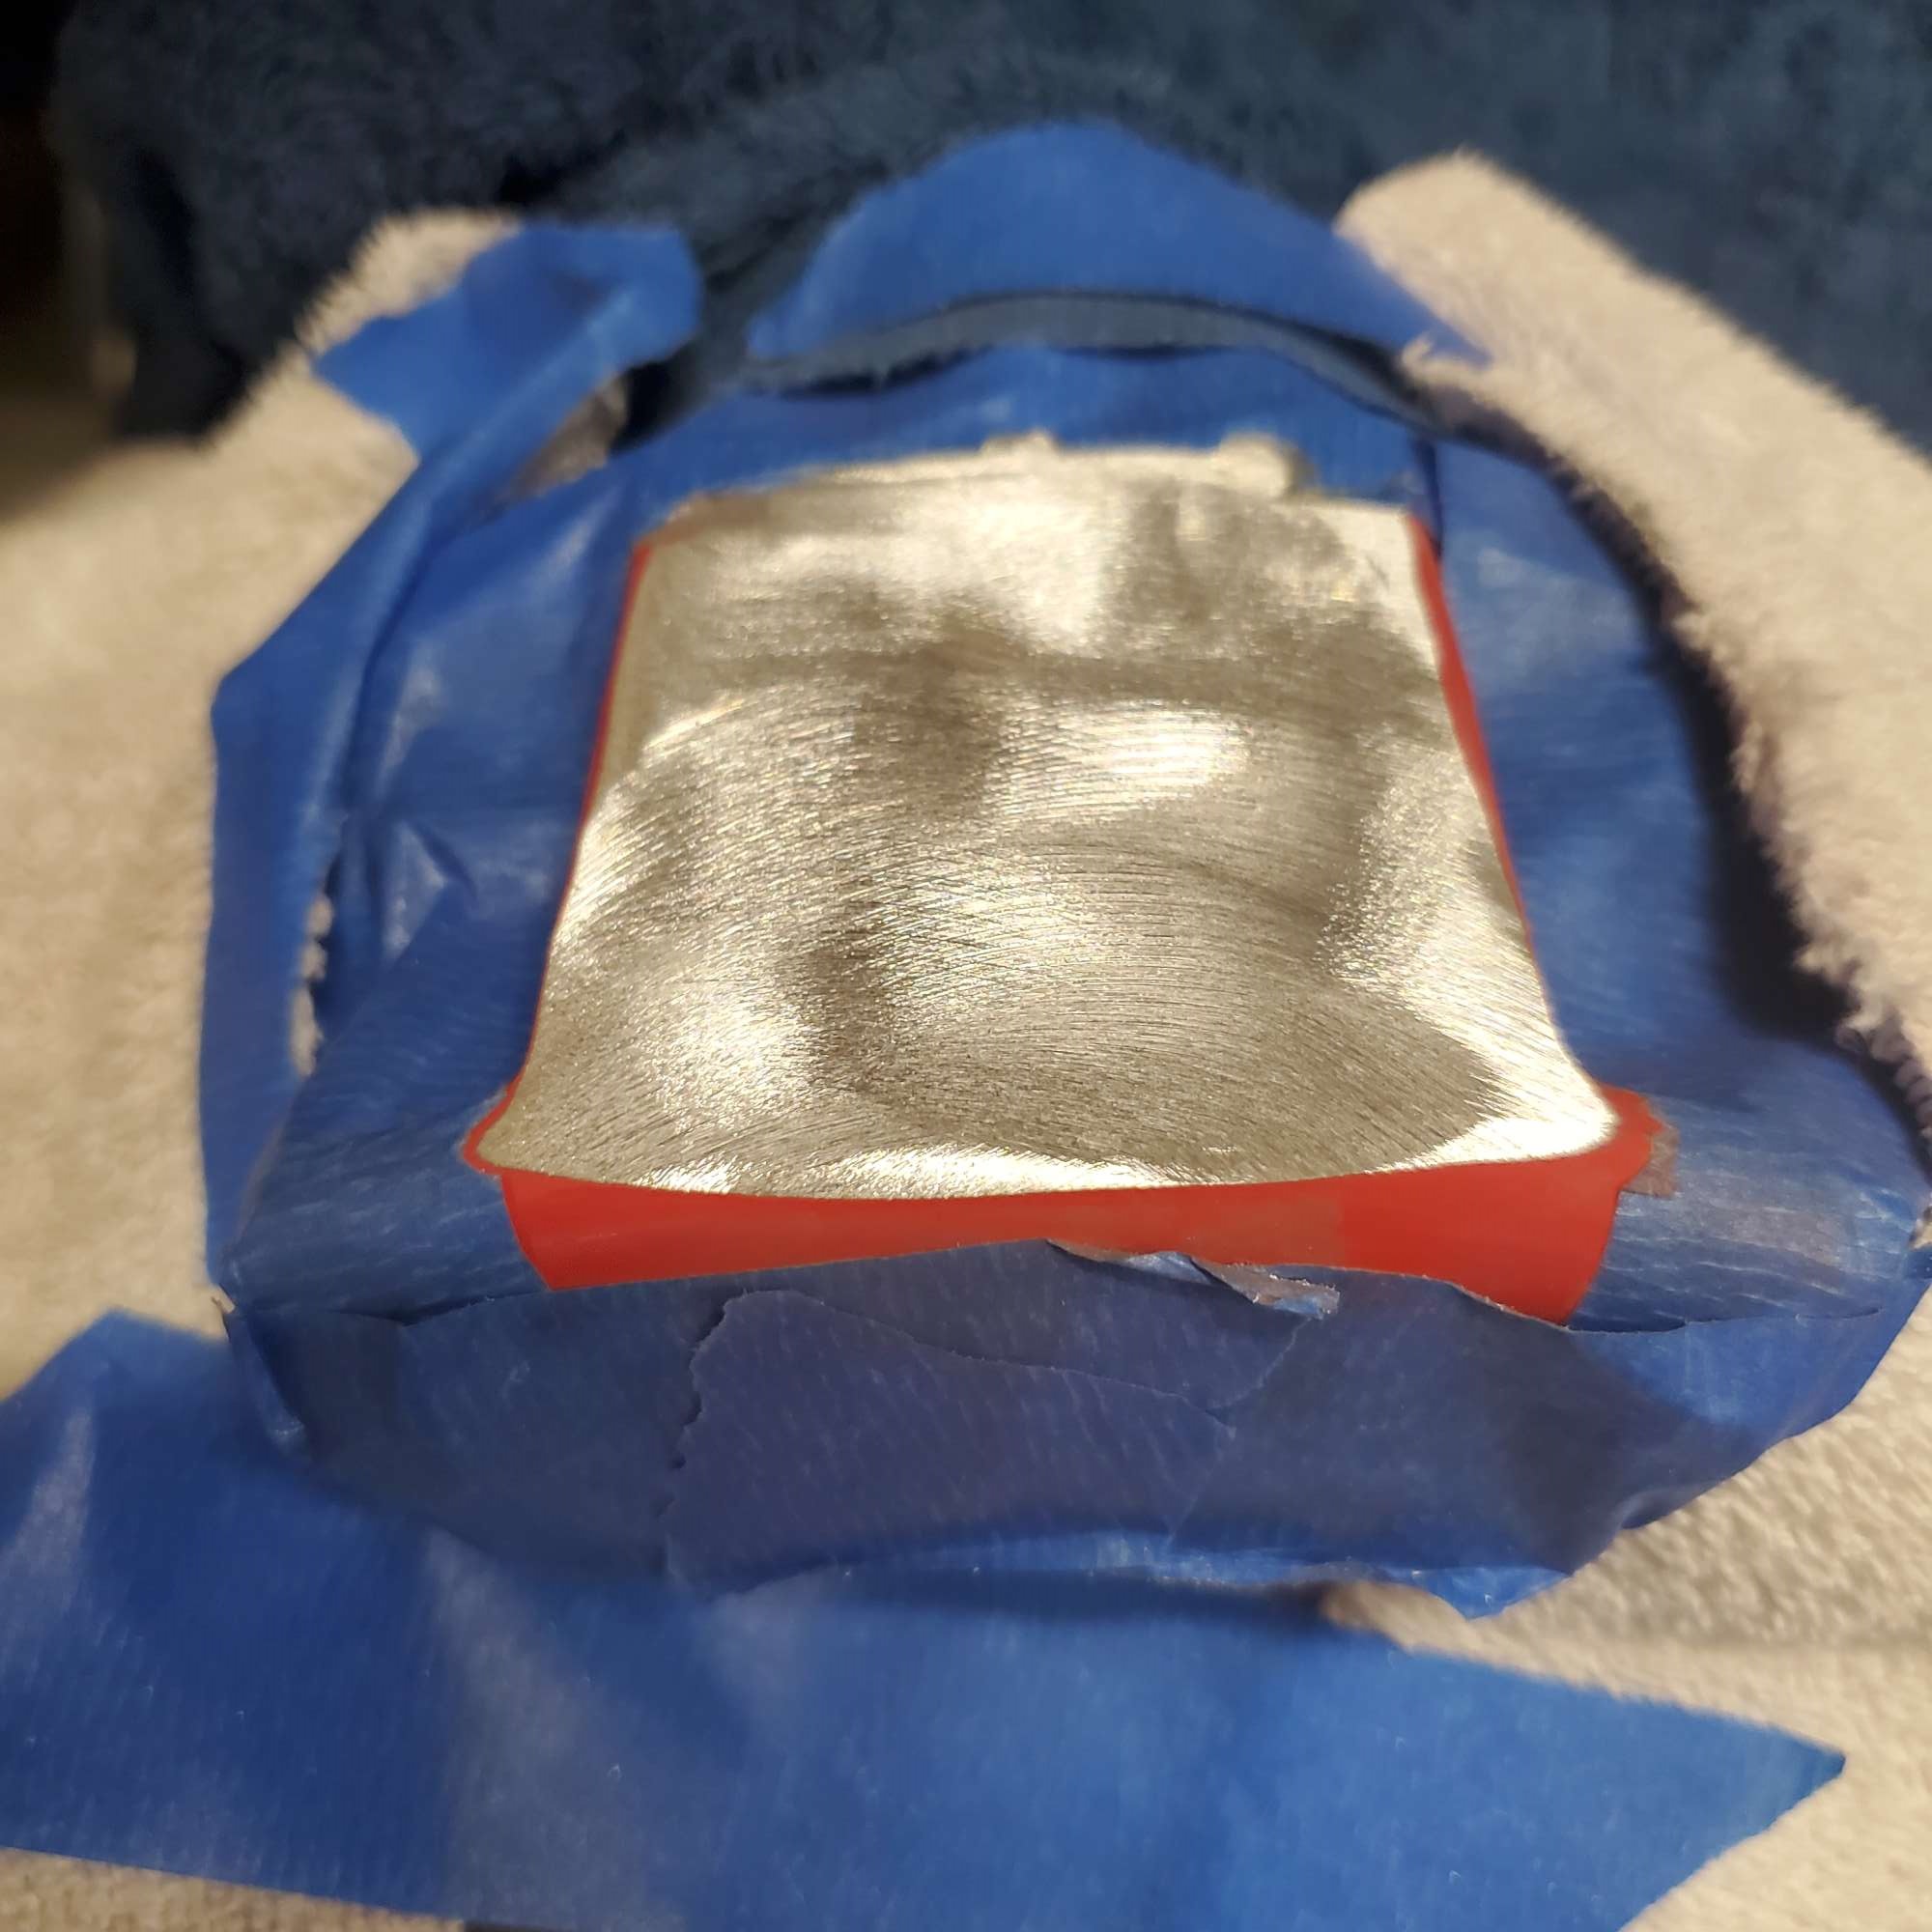
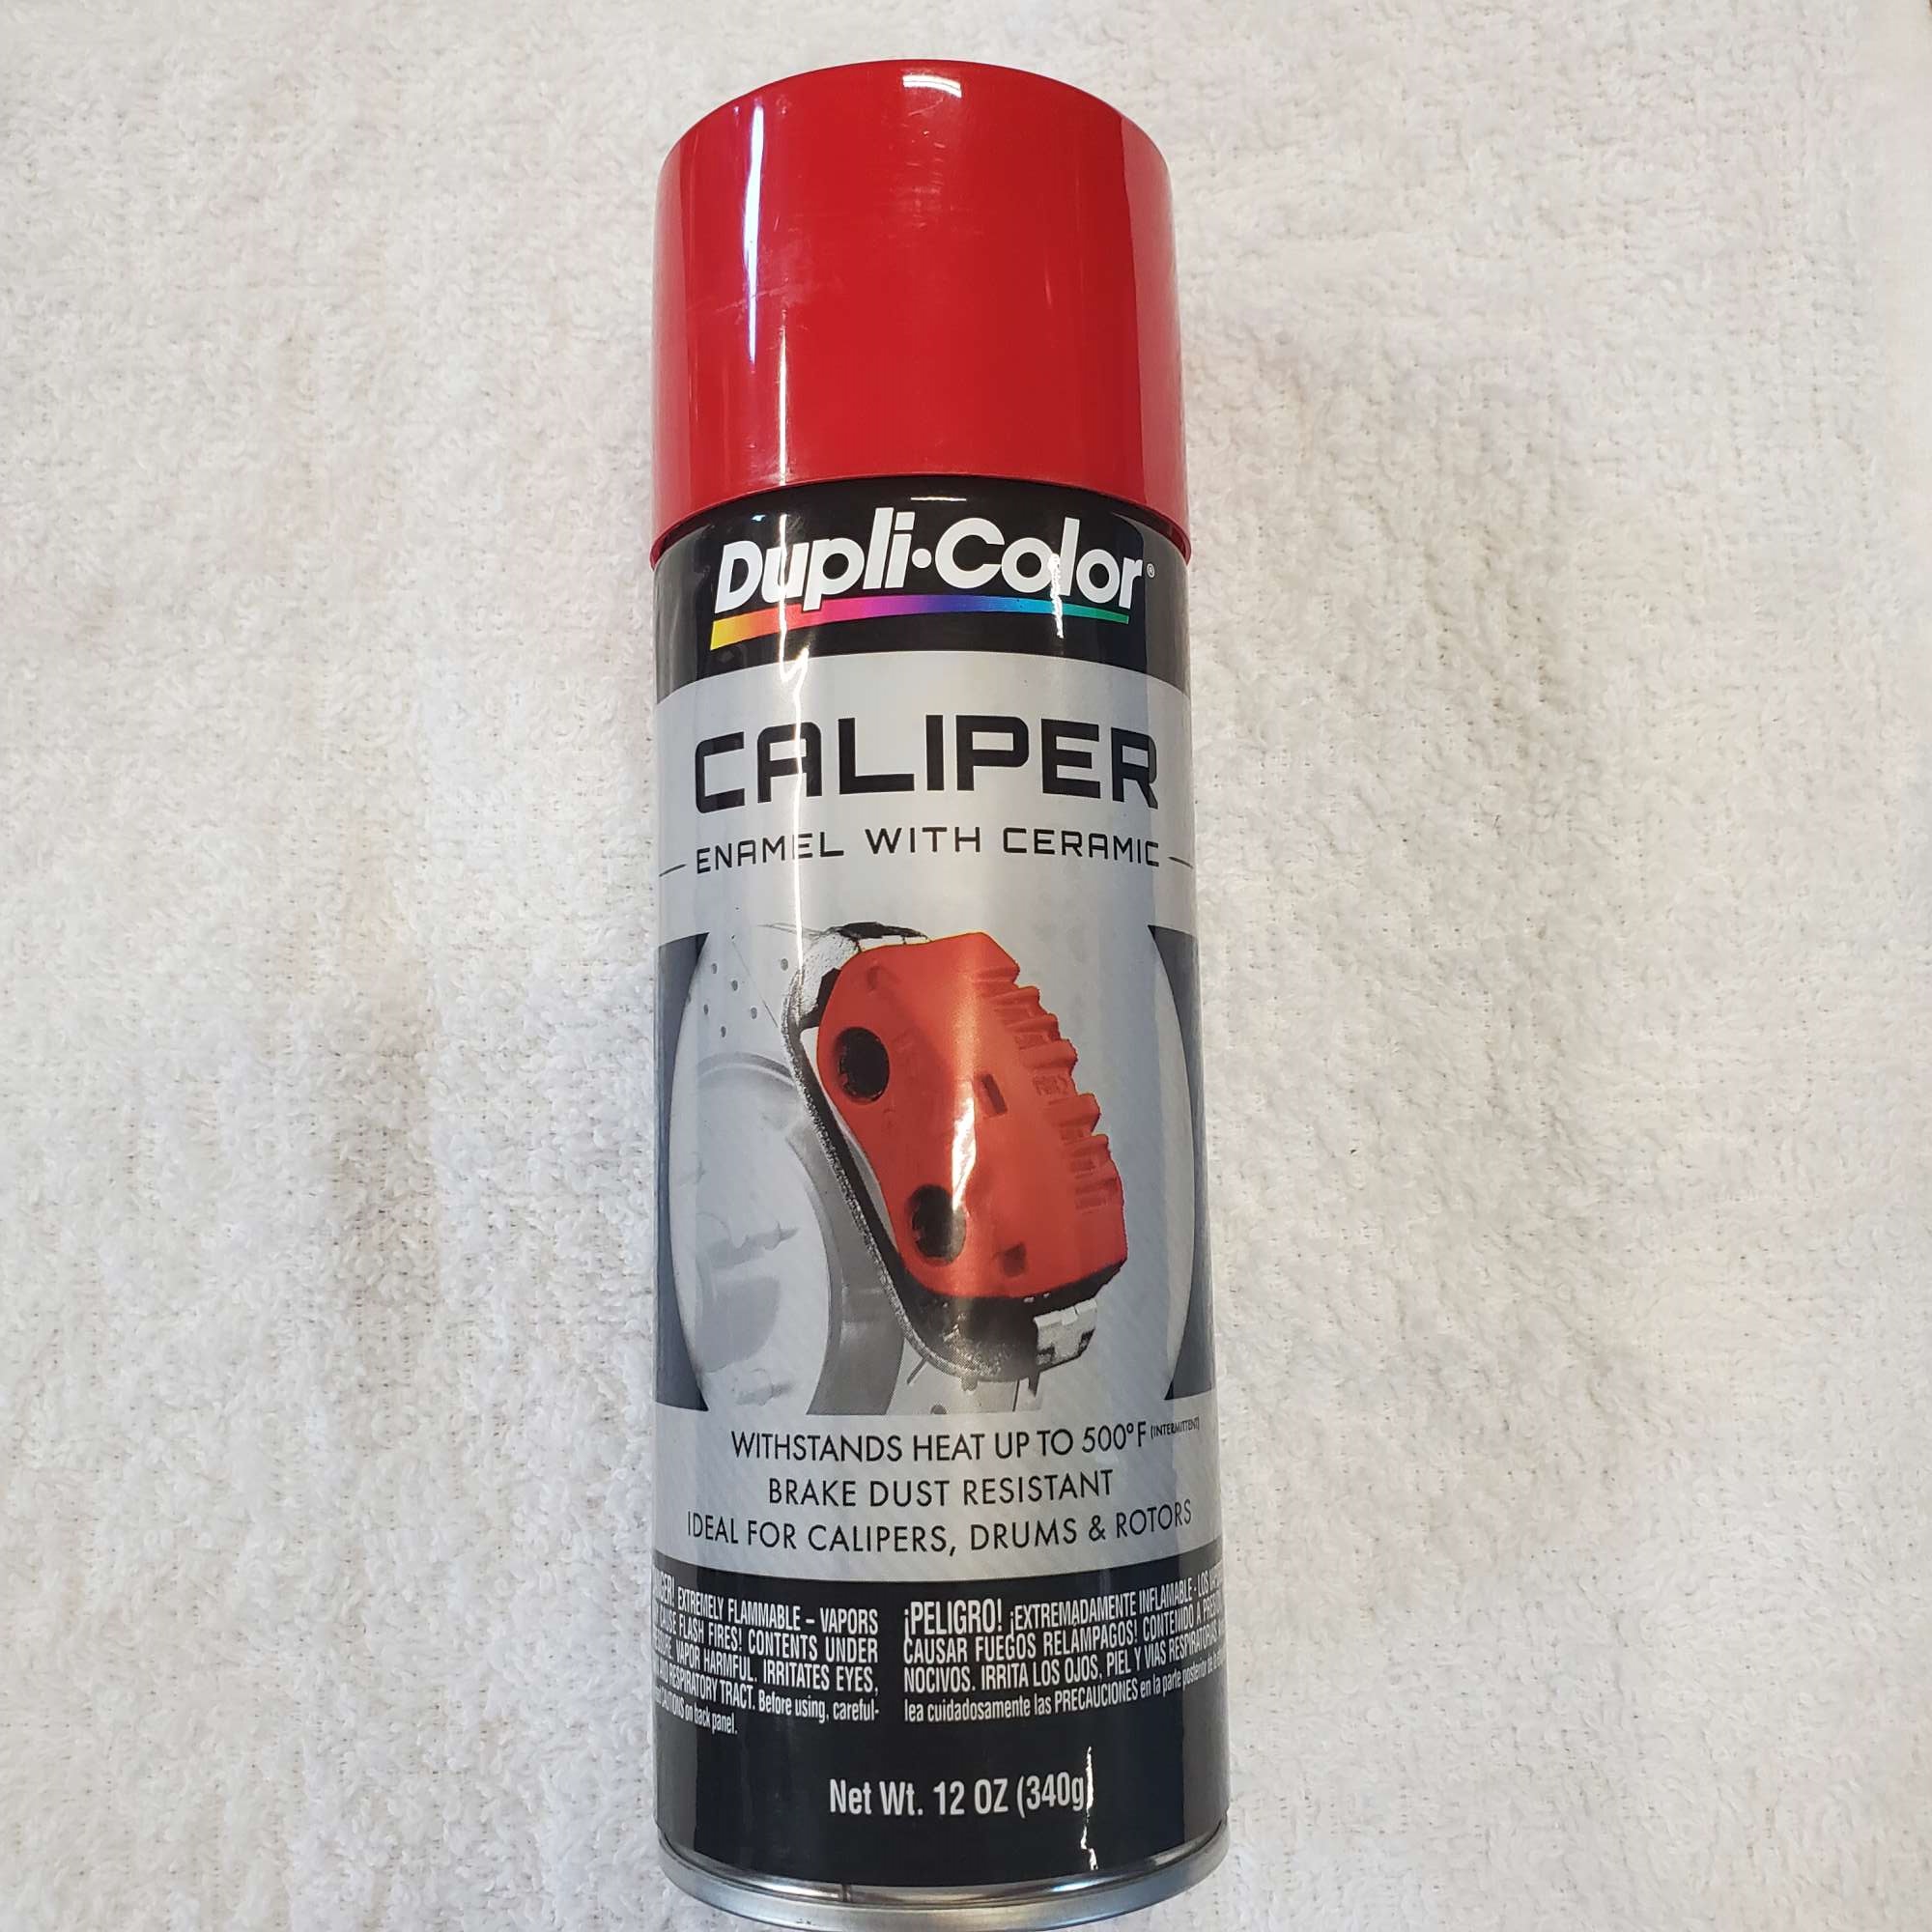
I picked up a can of red Dupli-color caliper paint. It's red, but that's all I'll say about the color match. Not too concerned though as it's impossible to see with the wheel mounted. Can I trust you all not to report me to the color matching police? I feel better knowing it's coated, even though I don't think this material (aluminum) would deteriorate if I hadn't painted it.
I ate the frog.
I'm making good progress on the e-brake installation, and hope to finish soon.
Last edited by 460.465USMC; 07-09-2021 at 08:16 PM.
Chris
Coupe complete kit delivered: 4/22/24.
Build Thread. Coyote. T-56. IRS w/3.55. Wilwoods. PS. HVAC. Side windows.
MK4 Complete kit.
Build Thread Index. Delivered: 10/15/2020. Legal: 7/25/23. Coyote Gen3. TKO600 (0.64 OD). IRS w/3.55. PS. Wilwoods. Sway bars. This build is dedicated to my son, Benjamin.
Build Thread.
-
Post Thanks / Like - 1 Thanks, 1 Likes
WIS89 thanked for this post
-
07-09-2021, 07:25 PM
#181
Senior Member

Originally Posted by
460.465USMC
I ate the frog.
I'm making good progress on the e-brake installation, and hope to finish soon.
Chris, looking good!
I had the same issue with the LMR wheels. The way they are designed they don't have the rear clearance. I went with a different rear brake kit for that reason. I'm interested to see how they turn out. Very creative solution.
MK4 #10008 - Ordered 10/06/20, Delivered 03/03/21, First Start 7/22/21, First Go Kart 7/24/21
Paint by Metal Morphous 5/14/22, Legally registered 6/8/22, Graduated 7/20/22
Build Thread
https://thefactoryfiveforum.com/show...been-delivered
Complete Kit, Ford 306, Sniper/Dual Sync, T5, Hydraulic clutch
-
Post Thanks / Like - 1 Thanks, 0 Likes
-
07-11-2021, 08:24 PM
#182
Senior Member
E-brake Installed
A local guy interested in building a F5 Roadster contacted me recently about coming over to check out my build. Jim came over and I showed him around the build. He's in the research phase, so was very interested to see one in person. It was fun to talk shop. Come over anytime, Jim!
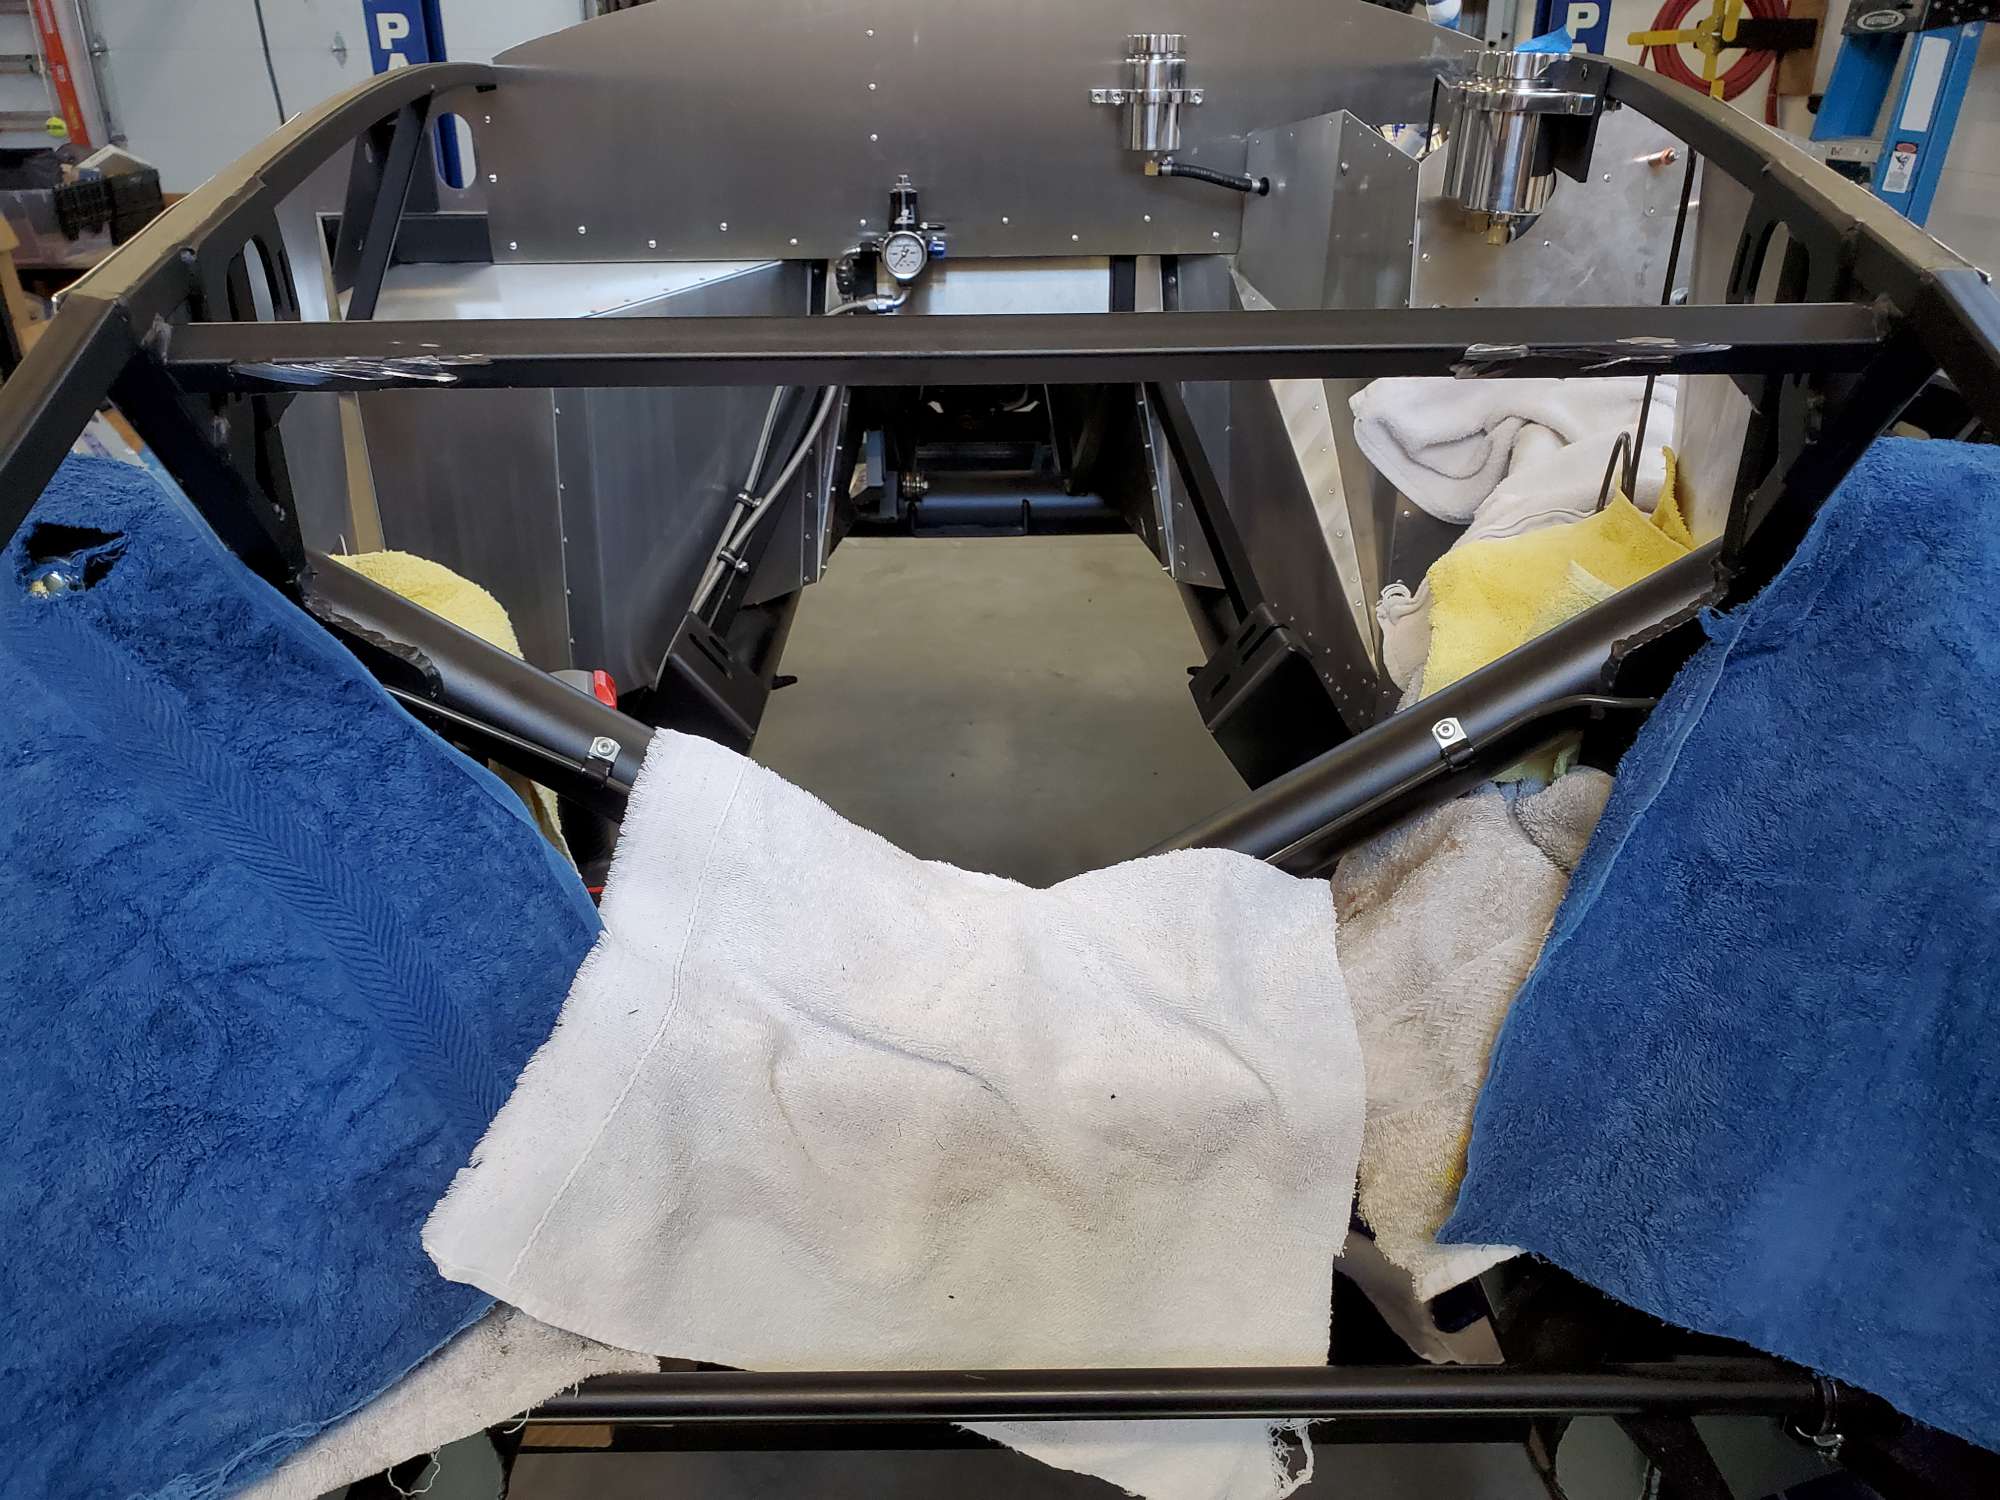
So, my last update mentioned the bit about "eating the frog": well, in truth I've had a couple tasks to apply the frog therapy. The second task is the e-brake install, mainly because it gets some bad press here in the forum. It turned out to be less problematic than I was expecting. I chalk up my good experience to the adjustability of the slotted L-mount brackets. They provide about 1/2" of lateral adjustment for the handle to avoid contact with the tunnel aluminum. Also, it just seems some parts go together better than others.
A couple main issues I've read about: (1) e-brake handle rubs on the transmission tunnel aluminum, and (2) routing the cables below the 4" cross member (as F5 instructs) may not be the best choice. My setup does not rub on the tunnel aluminum. I doubt it's because of anything I did.
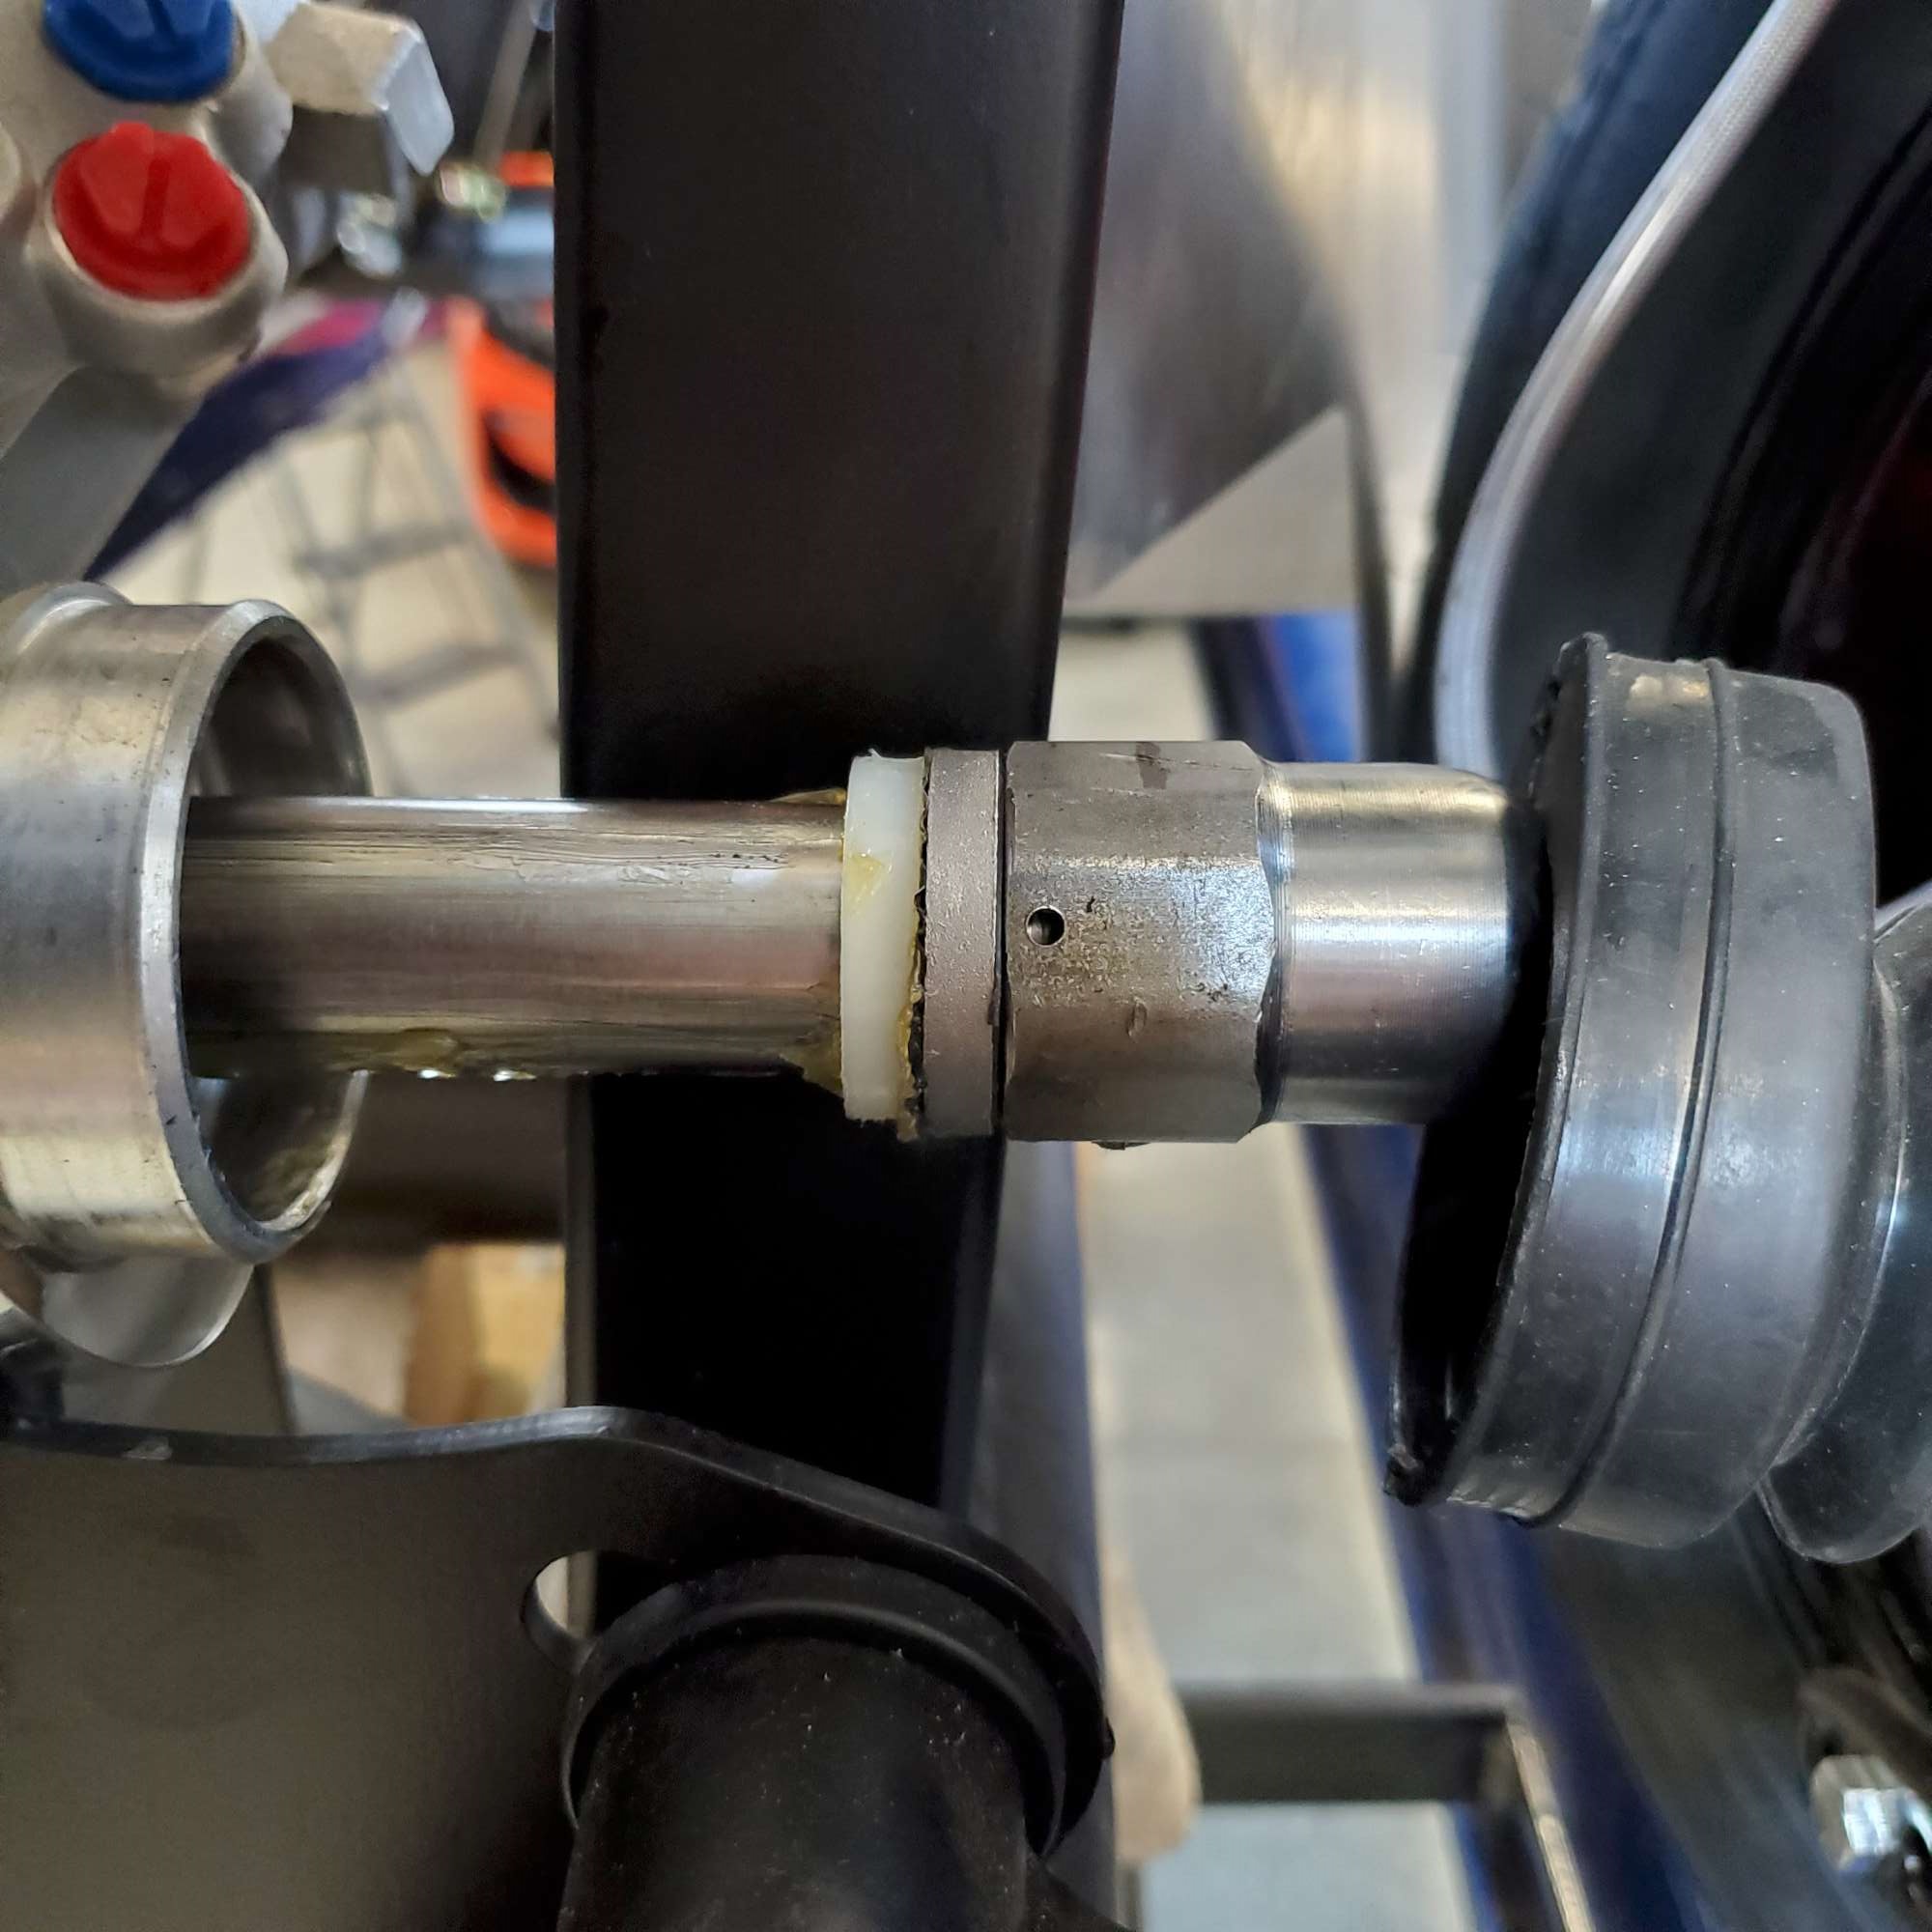
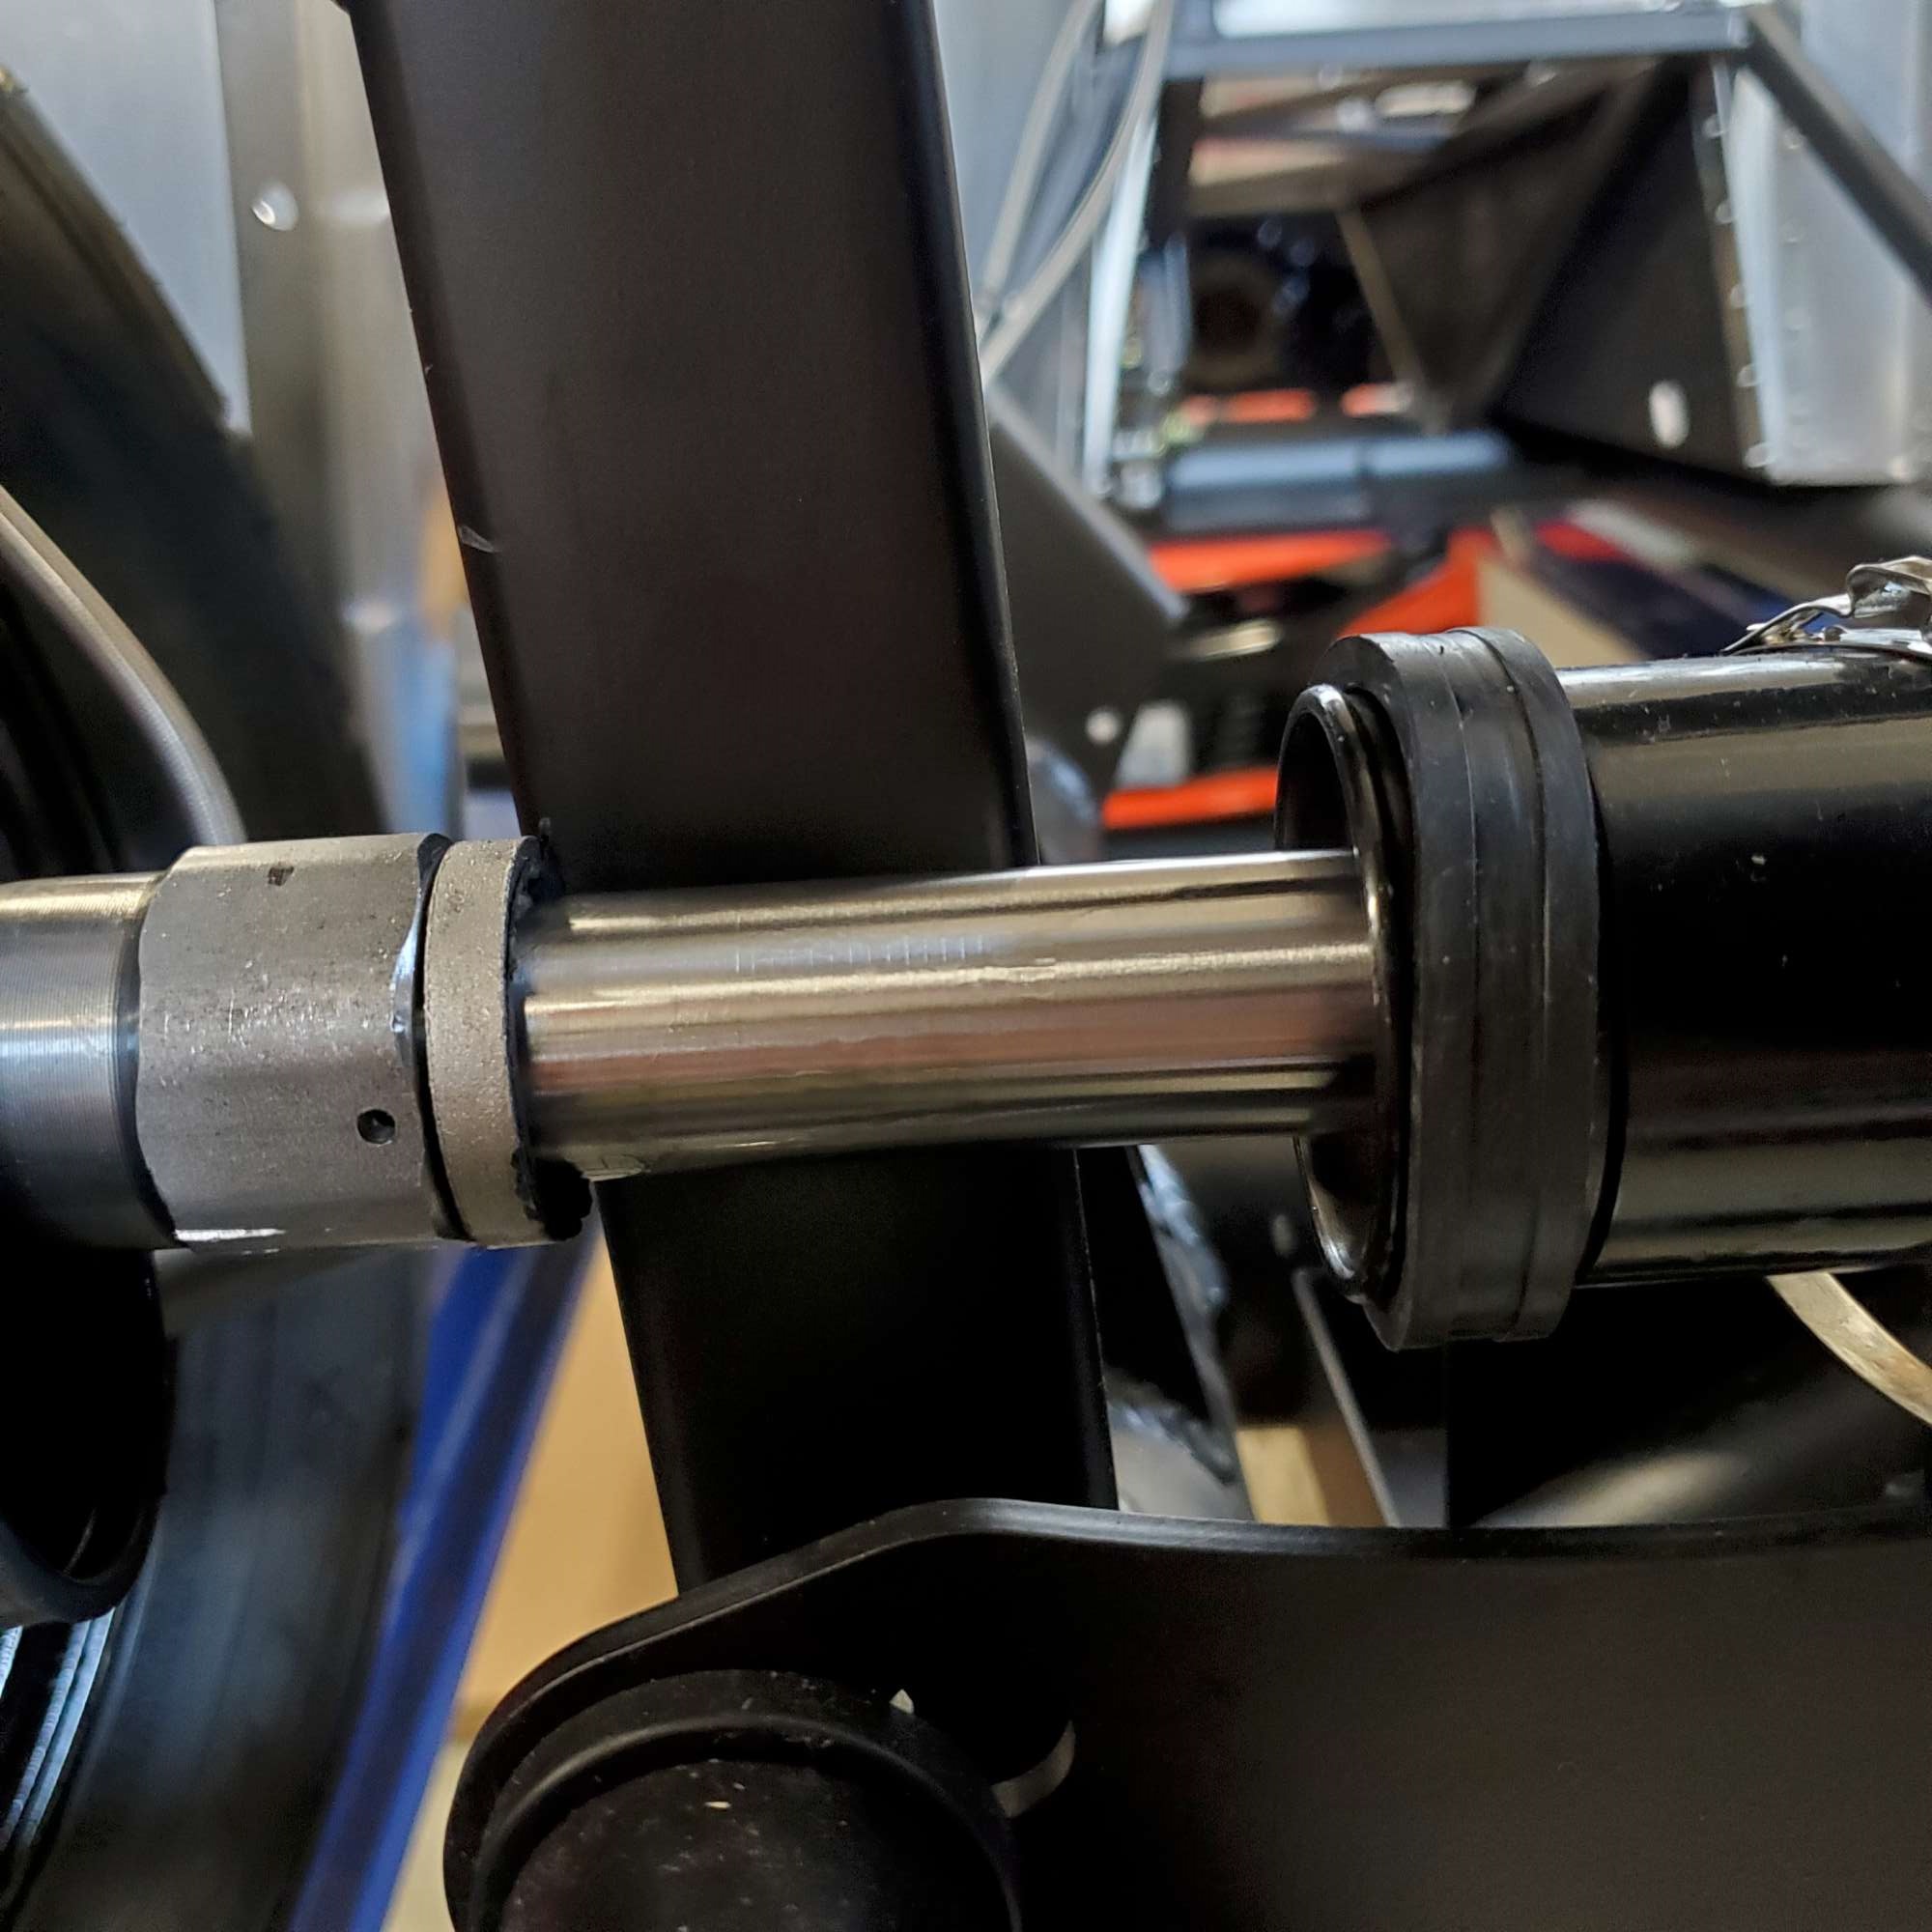
I chose to route the cables above the 4" cross member via pulleys. Mostly, because several of my go-to builders did. I first saw this idea in Edwardb's 20th anniv. build:
https://thefactoryfiveforum.com/show...l=1#post225428
Unfortunately, not all the Lokar pieces he used are still available. I was able to find the Parking Brake Connector Block (S-8070) from Speedwaymotors.com ($16.99). McMaster-Carr has a stainless steel clevis (6071K48; $9.94), and stainless steel all thread (5/16"-24) to connect the Lokar Block to the clevis (anti-seize applied to SS threads this time!). I needed these parts because routing the cables above the 4" tube makes them too long for the F5 supplied threaded rod setup.
Here's the handle assembly all together with Lokar block and SS clevis from McMaster-Carr:
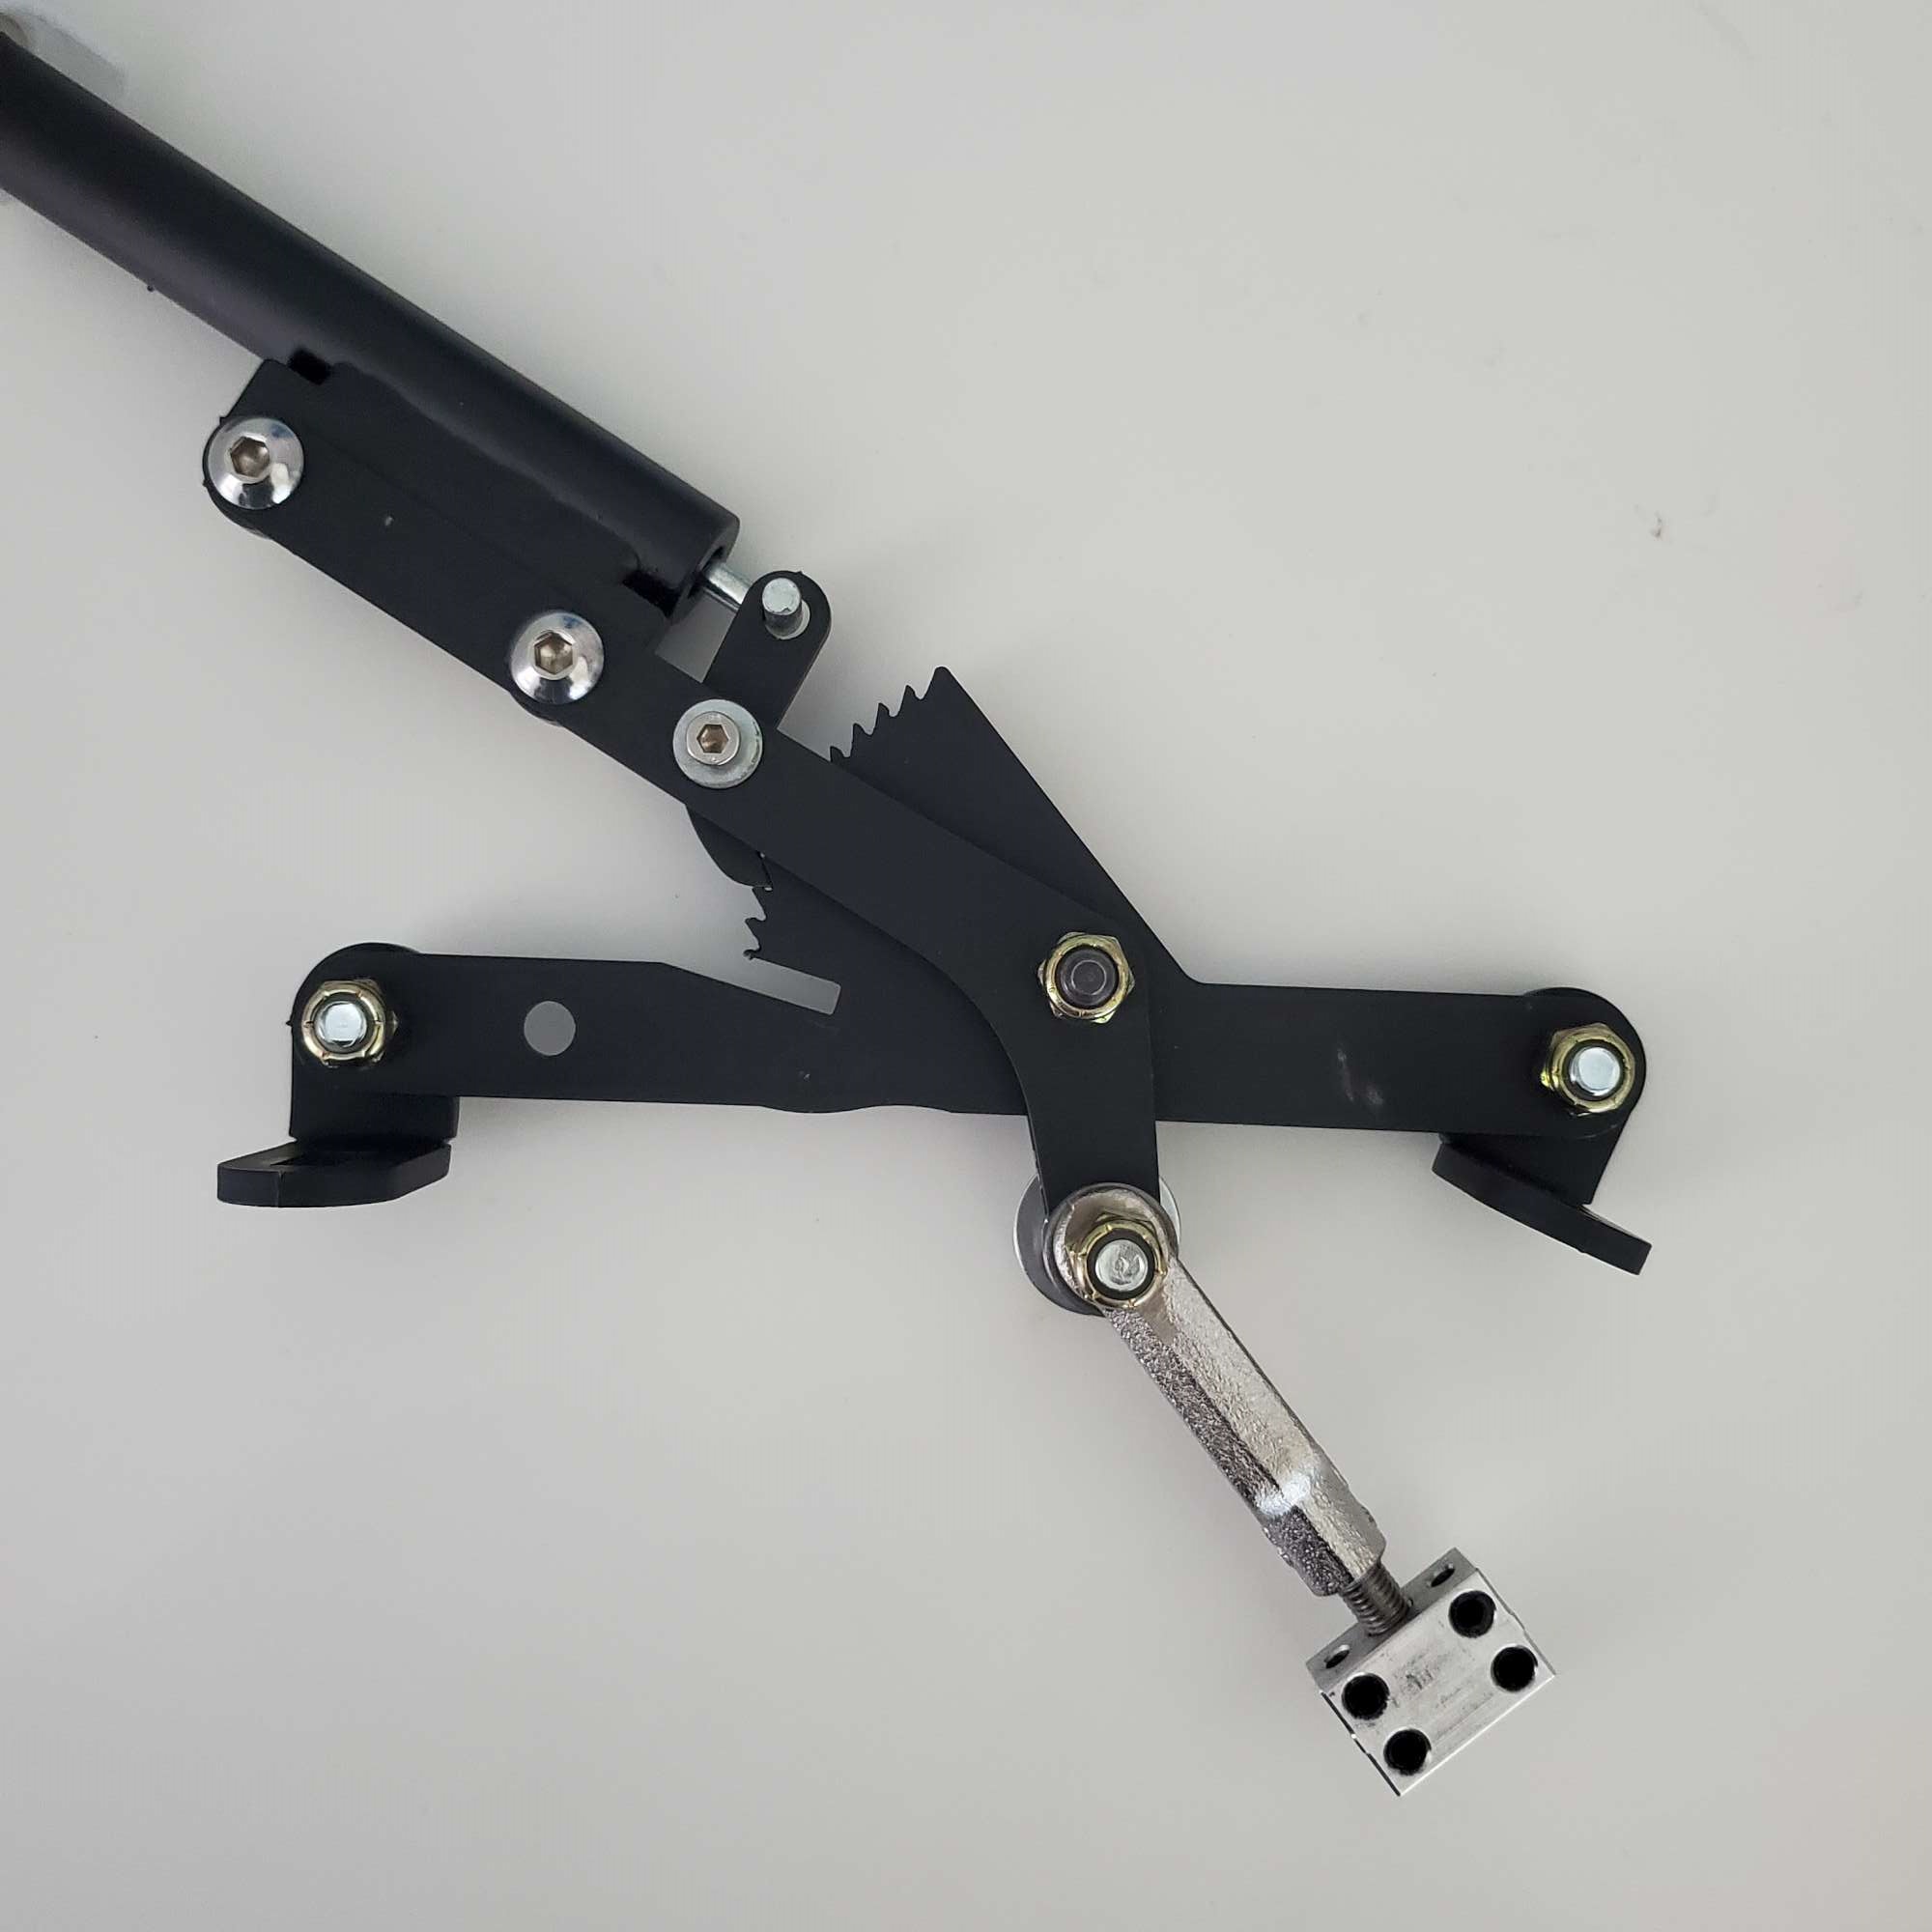
I added a 3/16" rivet just above and to the right of the anchor bolt at the base of the handle, as the "L" of the anchor bolt was too close for comfort to the aluminum panel.
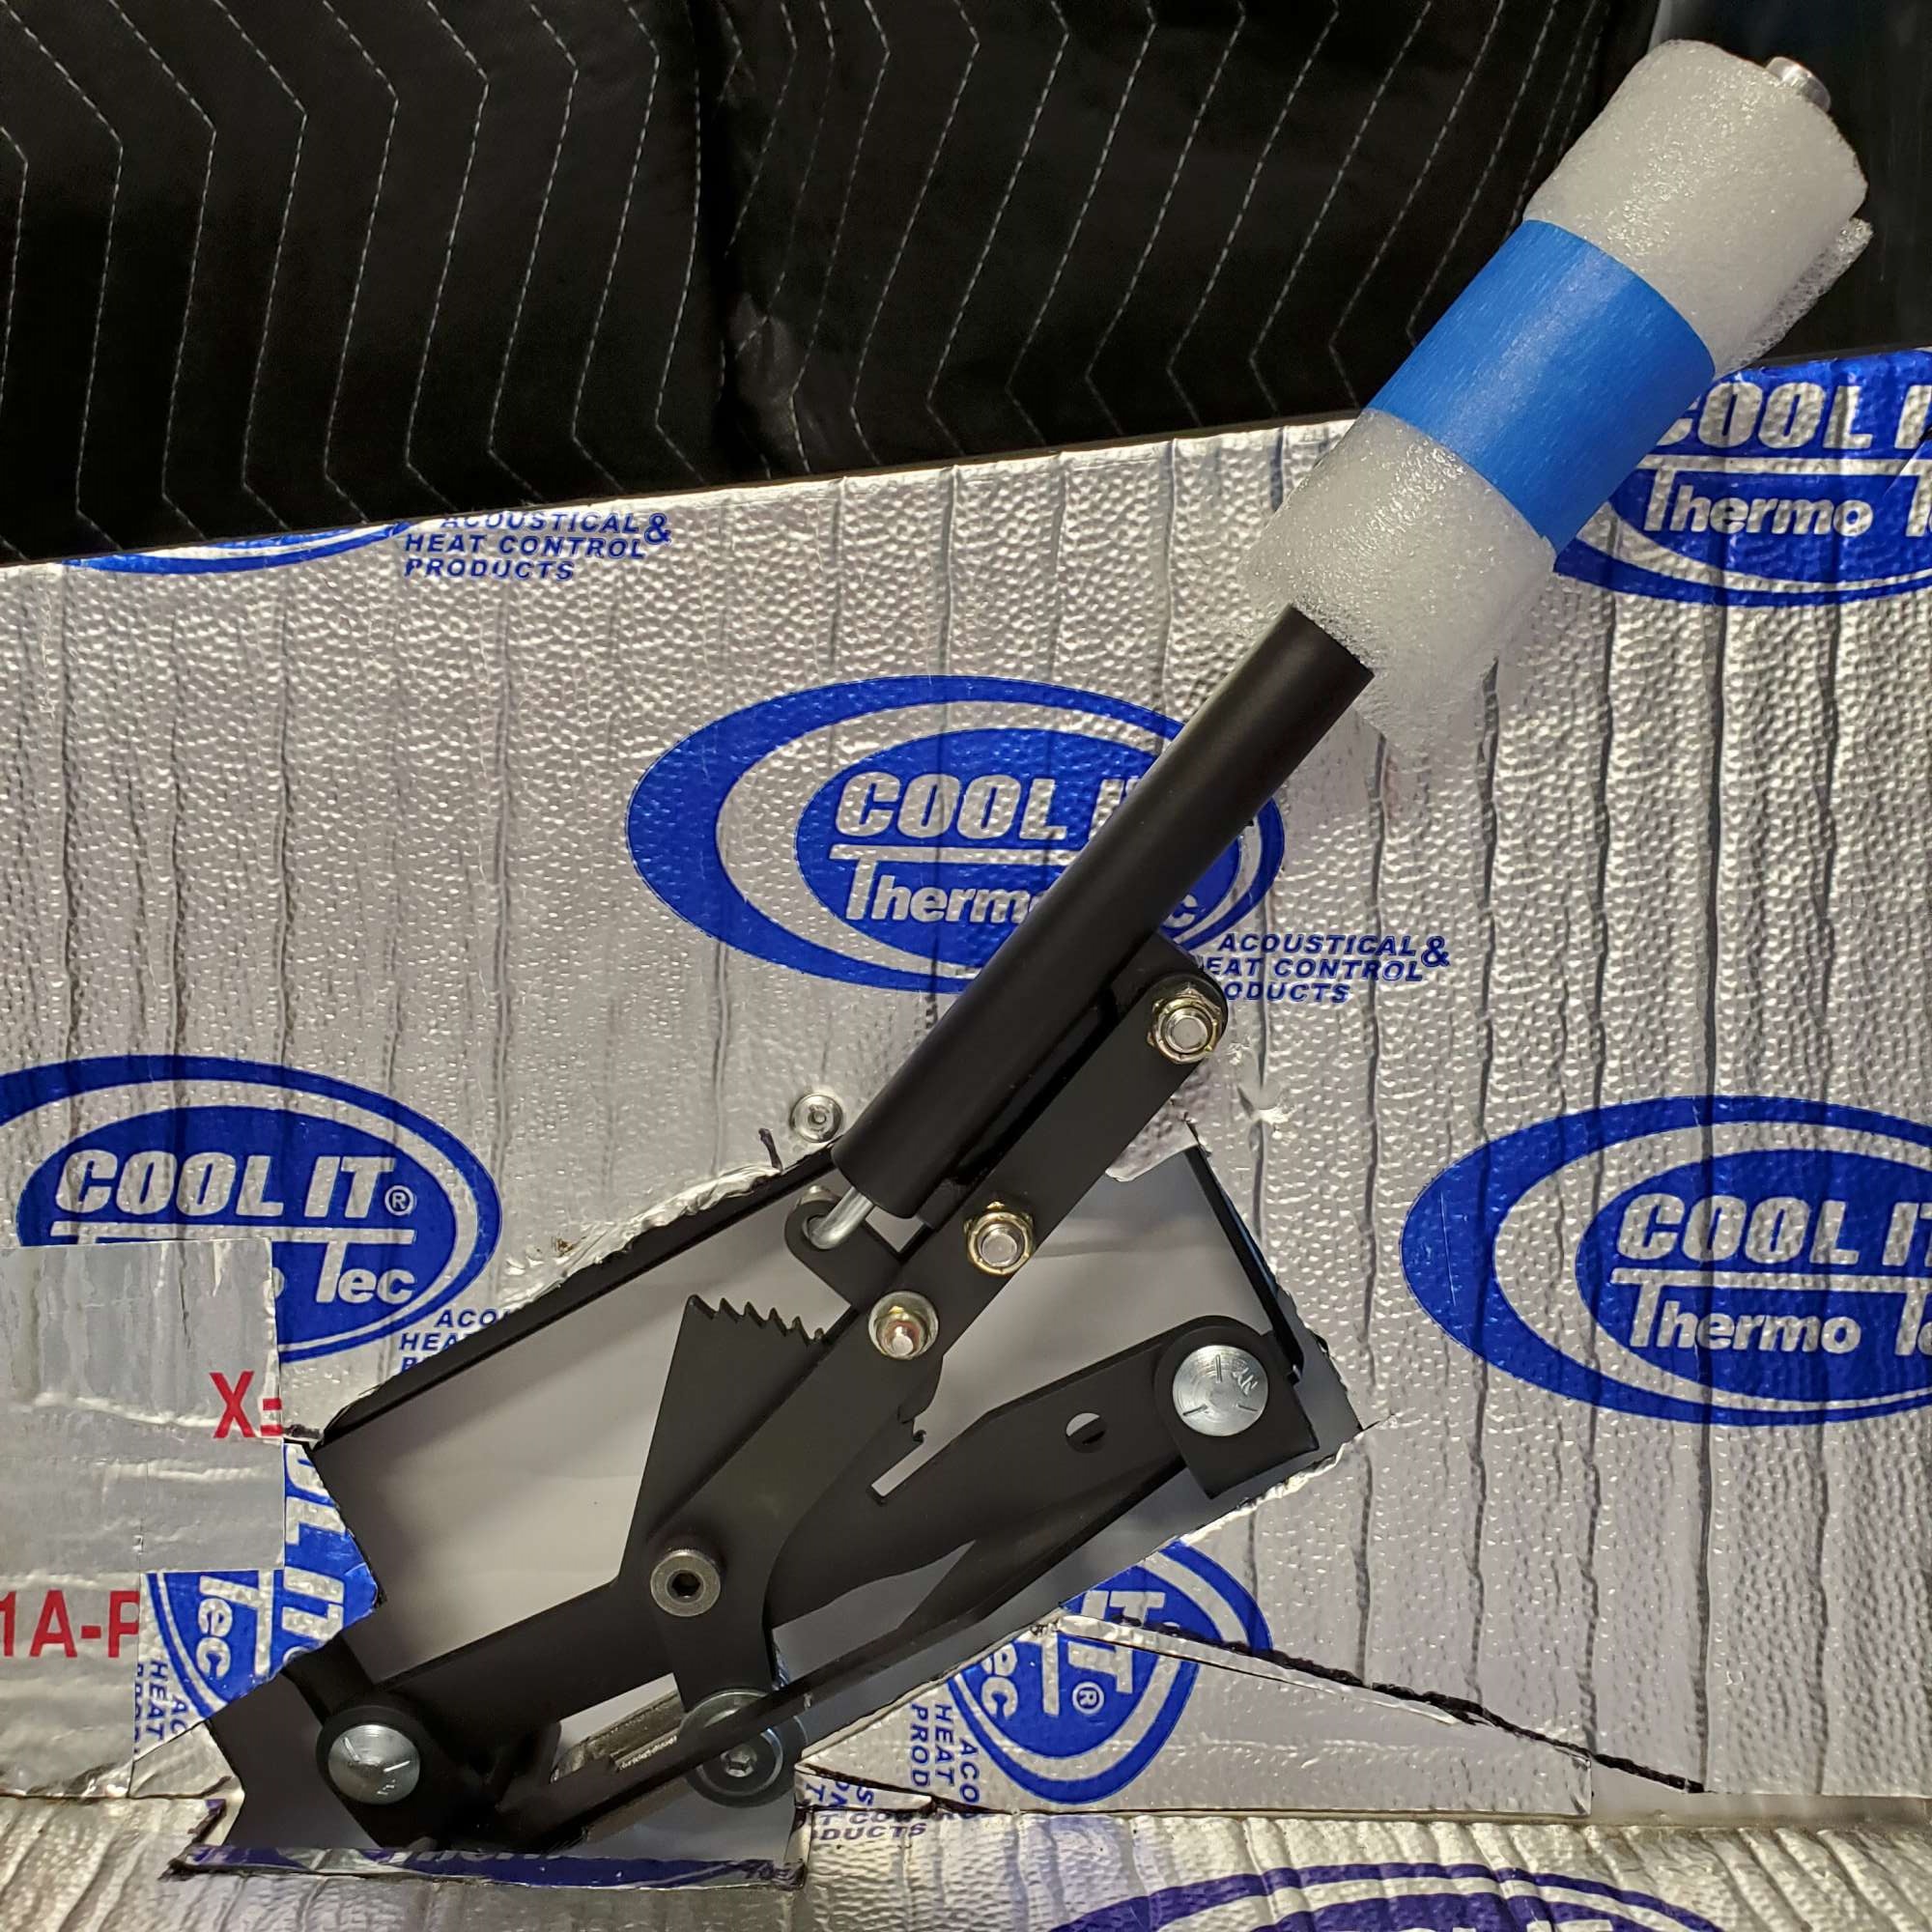
Here's a view from underneath, showing the Lokar block and SS clevis (e-brake engaged).
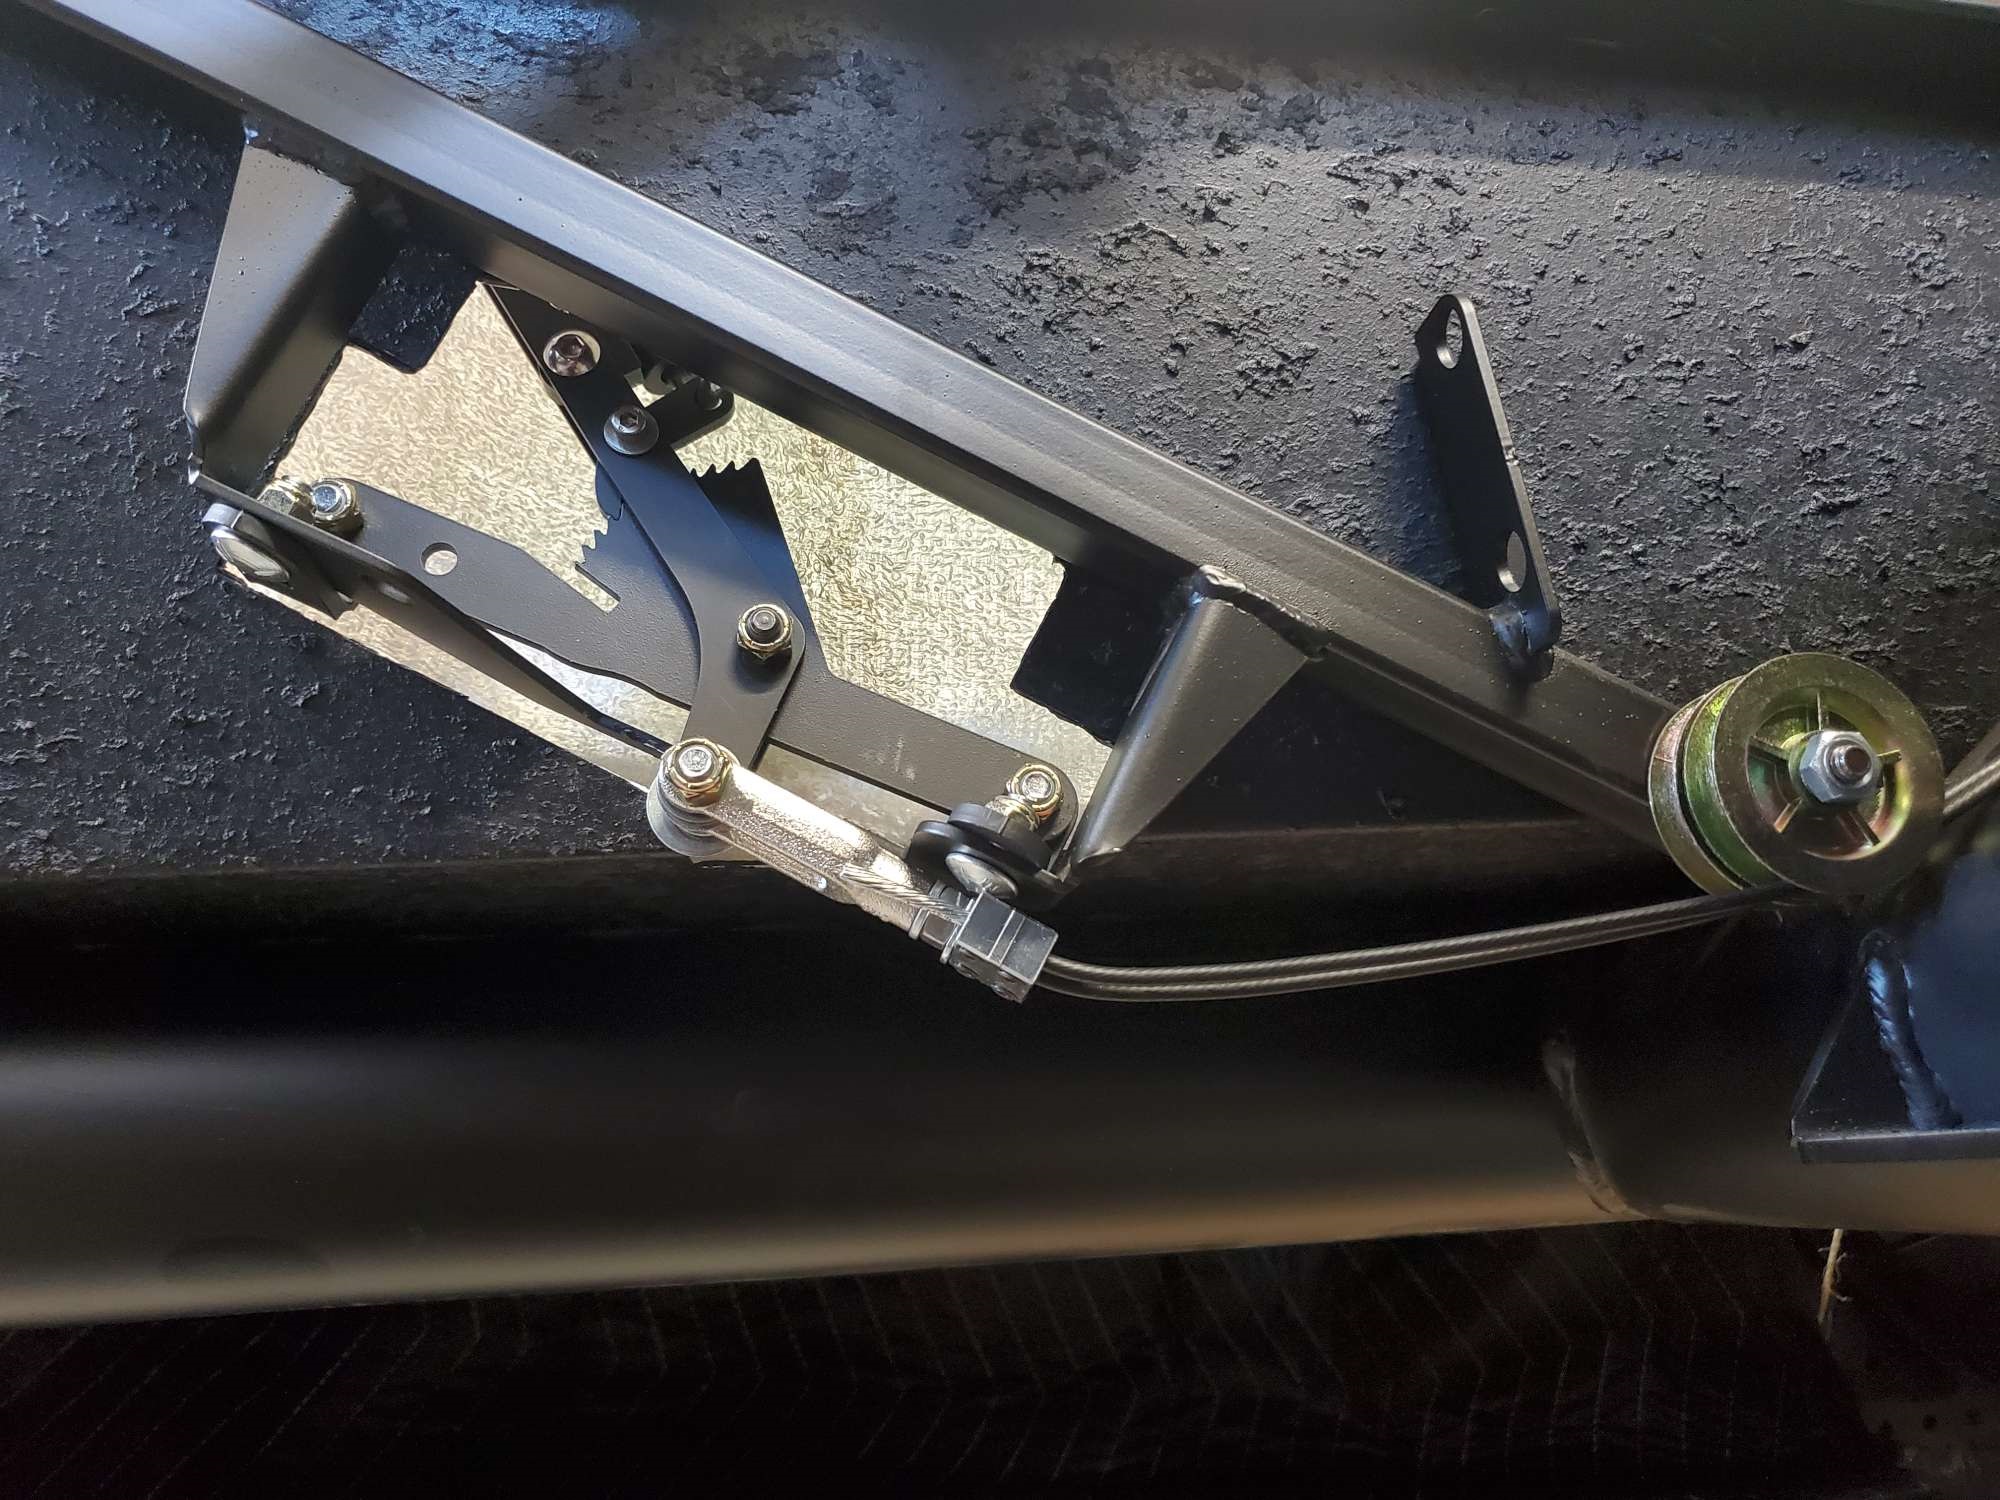
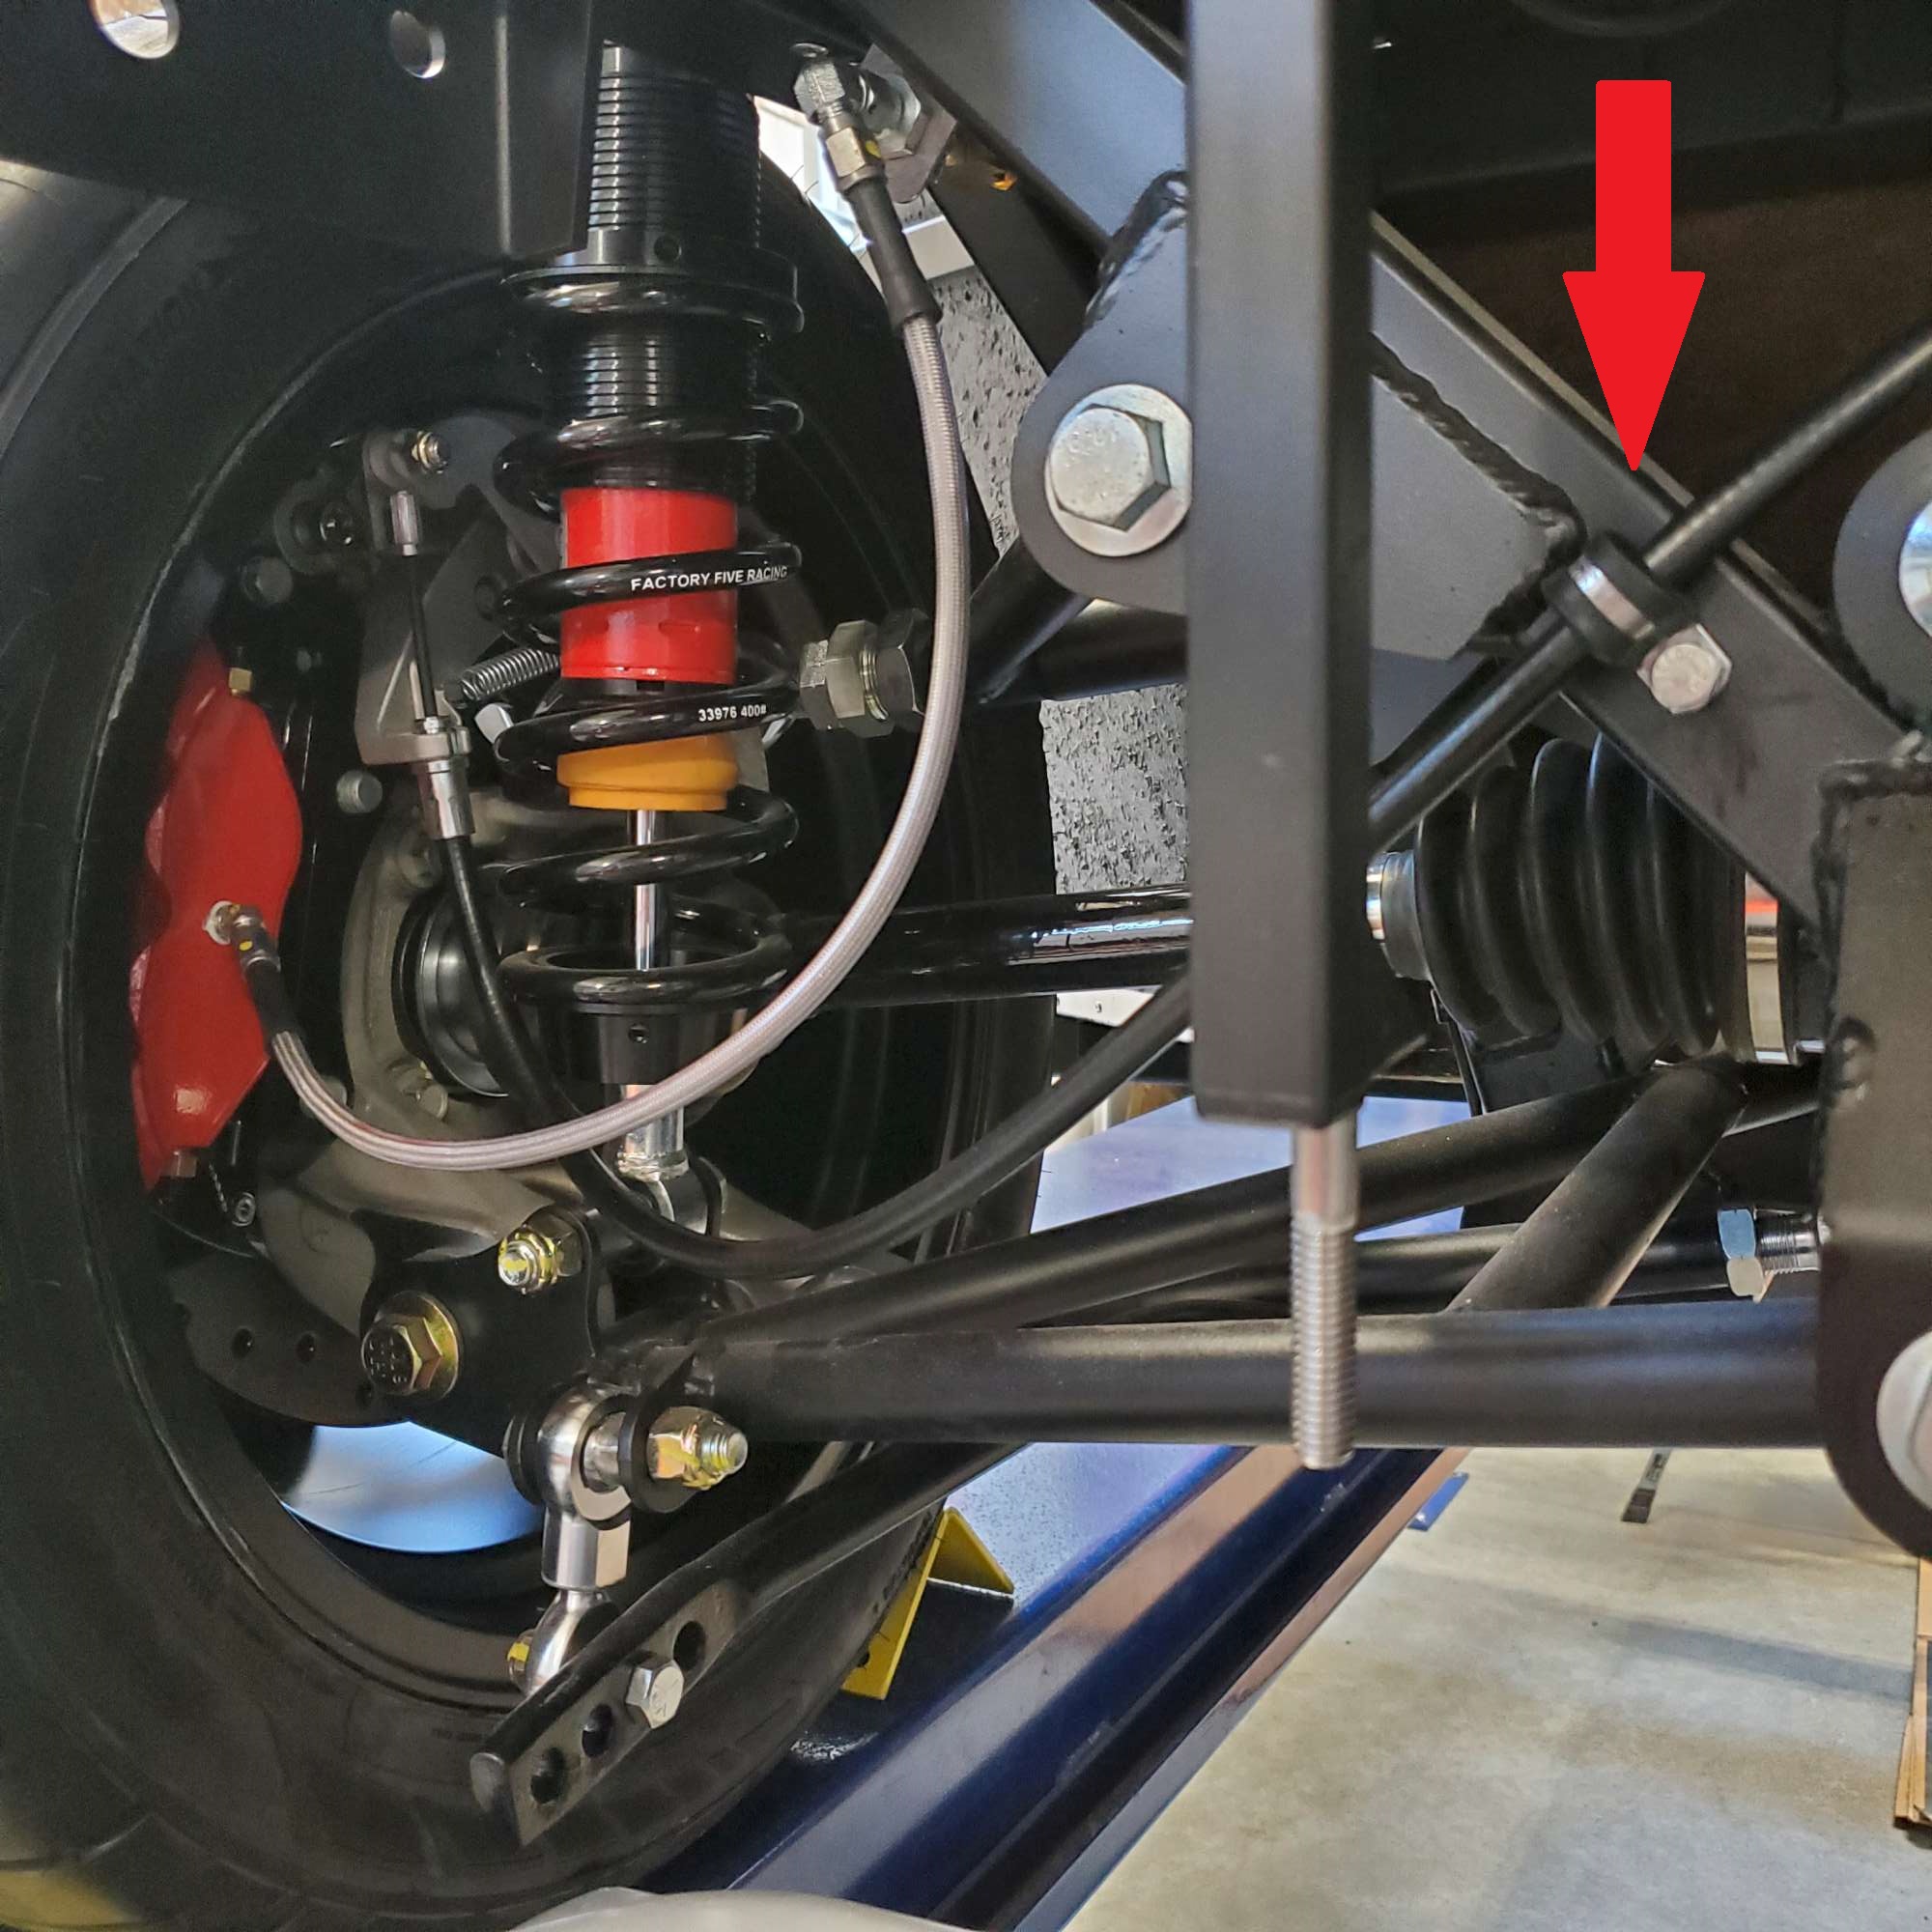
I didn't like the idea of the e-brake cable not fastened to the chassis between the caliper and the snap in connection in the transmission tunnel, so I drilled and tapped a SS 1/4"-20 bolt and installed a cushion clamp (red arrow). Now it's not making contact with anything. I feel better. 
All in all the e-brake went together surprisingly well, mostly due to Edwardb's clever solution. Thanks, Edwardb!
Second frog down the hatch!
Last edited by 460.465USMC; 07-12-2021 at 02:23 PM.
Reason: Clarity.
Chris
Coupe complete kit delivered: 4/22/24.
Build Thread. Coyote. T-56. IRS w/3.55. Wilwoods. PS. HVAC. Side windows.
MK4 Complete kit.
Build Thread Index. Delivered: 10/15/2020. Legal: 7/25/23. Coyote Gen3. TKO600 (0.64 OD). IRS w/3.55. PS. Wilwoods. Sway bars. This build is dedicated to my son, Benjamin.
Build Thread.
-
Post Thanks / Like - 0 Thanks, 2 Likes
-
07-12-2021, 07:19 AM
#183
You might consider rotating the flex brake line 180*, where it attaches to the caliper. At full droop the line might try to kink.
You can lift the car with all the weight off the wheels and see if it will be a problem.
Nice work!
20th Anniversary Mk IV, A50XS Coyote, TKO 600, Trunk Drop Box, Trunk Battery Box, Cubby Hole, Seat Heaters, Radiator hanger and shroud.
-
07-12-2021, 09:06 AM
#184
Senior Member
Chris, nice work! and good call on using EdwardB's double roller setup.
One thing I will say after using this ebrake for 1k miles now, I do no trust it. I carry a wheel chock for anything steeper than a parking lot. The metal they use on the handle itself is not awesome, I also press the button in when pulling upward to avoid having it ratchet to avoid wearing down the teeth. Just keep this in mind when you start driving.
-
07-12-2021, 02:21 PM
#185
Senior Member
Originally Posted by
Railroad
You might consider rotating the flex brake line 180*, where it attaches to the caliper. At full droop the line might try to kink.
You can lift the car with all the weight off the wheels and see if it will be a problem.
Nice work!
Appreciate you keeping an eye out on my build, Railroad. I'm pretty sure I checked full droop, but will watch when I lift it to crank down the IRS axle nut.
Originally Posted by
Fman
Chris, nice work! and good call on using EdwardB's double roller setup.
One thing I will say after using this ebrake for 1k miles now, I do no trust it. I carry a wheel chock for anything steeper than a parking lot. The metal they use on the handle itself is not awesome, I also press the button in when pulling upward to avoid having it ratchet to avoid wearing down the teeth. Just keep this in mind when you start driving.
Wow! It doesn't sound like these e-brakes perform their intended function well enough. I will test mine here soon on the axle nut, and see how it performs (been playing with it a bit already). Good tips on the chocks and teeth wear. Thanks, Travis.
Chris
Coupe complete kit delivered: 4/22/24.
Build Thread. Coyote. T-56. IRS w/3.55. Wilwoods. PS. HVAC. Side windows.
MK4 Complete kit.
Build Thread Index. Delivered: 10/15/2020. Legal: 7/25/23. Coyote Gen3. TKO600 (0.64 OD). IRS w/3.55. PS. Wilwoods. Sway bars. This build is dedicated to my son, Benjamin.
Build Thread.
-
07-13-2021, 07:59 PM
#186
Senior Member
IRS Spindle Nut - Need Help
After getting the E-brake installed, I figured I could finally torque down the rear IRS spindle nut. I knew it was going to take some serious leverage to get the 98 ft lb, plus additional 45 deg. of rotation.
I can achieve the 98 lb ft no problem with the E-brakes engaged. However, I'm hitting a wall and no where close to the additional 45 deg. For giggles, I adjusted my torque wrench to 250 ft lb to see how much more rotation this would provide: it only bought me about 5 deg. Say what? Wuch you talkin' 'bout, Willis?
So, I broke out my 1/2' drive Snap-on (inherited from my grandfather 25 years ago) with 15" handle. I even slid a cheater pipe over it for increased leverage. I cranked on it, but the only thing that is doing is starting to twist the Snap-on drive. Any more torque on the cheater bar and I'm sure it will break.
Am I doing something wrong? I know the IRS spindle nut is a bugger (many reports of this on the forum), but gee whiz! I can't imagine how much torque it must need if 250 lb ft only turns the nut 5 or so additional degrees beyond 98 ft lb. Does anyone know the approx. torque that equates to 98 lb ft +45 deg?
Looking for some help/suggestions, please.
Chris
Coupe complete kit delivered: 4/22/24.
Build Thread. Coyote. T-56. IRS w/3.55. Wilwoods. PS. HVAC. Side windows.
MK4 Complete kit.
Build Thread Index. Delivered: 10/15/2020. Legal: 7/25/23. Coyote Gen3. TKO600 (0.64 OD). IRS w/3.55. PS. Wilwoods. Sway bars. This build is dedicated to my son, Benjamin.
Build Thread.
-
07-14-2021, 05:51 AM
#187
Senior Member
Originally Posted by
460.465USMC
After getting the E-brake installed, I figured I could finally torque down the rear IRS spindle nut. I knew it was going to take some serious leverage to get the 98 ft lb, plus additional 45 deg. of rotation.
I can achieve the 98 lb ft no problem with the E-brakes engaged. However, I'm hitting a wall and no where close to the additional 45 deg. For giggles, I adjusted my torque wrench to 250 ft lb to see how much more rotation this would provide: it only bought me about 5 deg. Say what? Wuch you talkin' 'bout, Willis?
So, I broke out my 1/2' drive Snap-on (inherited from my grandfather 25 years ago) with 15" handle. I even slid a cheater pipe over it for increased leverage. I cranked on it, but the only thing that is doing is starting to twist the Snap-on drive. Any more torque on the cheater bar and I'm sure it will break.
Am I doing something wrong? I know the IRS spindle nut is a bugger (many reports of this on the forum), but gee whiz! I can't imagine how much torque it must need if 250 lb ft only turns the nut 5 or so additional degrees beyond 98 ft lb. Does anyone know the approx. torque that equates to 98 lb ft +45 deg?
Looking for some help/suggestions, please.
In my experience doing the 2015+ IRS twice, the 98 ft lb, plus additional 45 degrees of rotation spec is very close to the 250 ft. lbs. level. If that's what you have, I'd call it good. I typically wait and do mine when I have the wheel and tire and it's on the ground. That holds better than the e-brake. Especially when they're new and not bedded yet. I've been able to obtain the 45 degrees using a similar size handle and effort as the 250 ft. lbs. spec as the front hub nut. Which for my office hardened body is about full maximum effort. Can't say why you weren't able to obtain the full 45 degrees. But no point in breaking good tools. There is quite a bit of forum chatter about the IRS axle nuts. But that was with the previous T-Bird setup where guys did all kinds of things to get them tight enough and keep from loosening. I haven't heard or seen a single instance of the same problem with the newer setup.
Build 1: Mk3 Roadster #5125. Sold 11/08/2014.
Build 2: Mk4 Roadster #7750. Sold 04/10/2017.
Build Thread
Build 3: Mk4 Roadster 20th Anniversary #8674. Sold 09/07/2020.
Build Thread and
Video.
Build 4: Gen 3 Type 65 Coupe #59. Gen 3 Coyote. Legal 03/04/2020.
Build Thread and
Video
Build 5: 35 Hot Rod Truck #138. LS3 and 4L65E auto. Rcvd 01/05/2021. Legal 04/20/2023.
Build Thread. Sold 11/9/2023.
-
Post Thanks / Like - 1 Thanks, 0 Likes
-
07-14-2021, 09:48 AM
#188
Senior Member
Hi Paul. I torqued the 250 ft lb on the fronts okay with the same torque wrench, so I can't imagine how much torque would be required on my rears beyond the 250 ft. lbs. I already dialed in. Your experience and feedback makes me feel better. I'm no mech. engineer, but given my experience it seems like 250 ft lbs should hold. I'm calling it good!
Chris
Coupe complete kit delivered: 4/22/24.
Build Thread. Coyote. T-56. IRS w/3.55. Wilwoods. PS. HVAC. Side windows.
MK4 Complete kit.
Build Thread Index. Delivered: 10/15/2020. Legal: 7/25/23. Coyote Gen3. TKO600 (0.64 OD). IRS w/3.55. PS. Wilwoods. Sway bars. This build is dedicated to my son, Benjamin.
Build Thread.
-
07-14-2021, 07:52 PM
#189
Senior Member
IRS Spindle Nuts Torqued | Steering Centered
Feeling better after hearing from Edwardb on my IRS spindle nuts, I torqued them to 250 ft. lbs. I must have been a bit over zealous last time, because this time I was able to achieve about 25-30 deg. rotation after 98 ft. lbs. Calling it good.
Not too long ago I went through the steering centering process (noted it above), but I still needed to complete the final step and center the steering wheel lock-to-lock.
My clockwise steering wheel rotation was ~1.4 turns, but counterclockwise was ~1.1 turns. I bought some spacers (1979-2004 Steering Rack Limiters) from Amazon for a little under $18 for a pack of six: Steering Rack Limiters/Spacers. Since my wheel turned quite a bit further clockwise, I inserted the spacer on the driver's side.
Picture of limiter/spacer

Added one spacer (white) to the driver's side to equalize lock-to-lock steering wheel rotation. Now lock-to-lock is ~1.1 turns in both directions.
Passenger side for comparison - no spacer added.
I'm running 275/40/R17 on the front, and with the above config. the wheels just kiss the F-panels at full lock. I'll start with this, and adjust/make changes to accommodate the wider tires if the F-panel contact is an issue.
I was pretty gentle loosening the metal bands, hoping to reuse them so I didn't have to replace with a plastic cable tie. I think I was successful. When I first saw the clamped bands it reminded me of the clamps used on underground sprinkler systems (UGS). Since I've done a good amount of UGS maintenance on a couple different houses I've lived in over the years, I had this band clamping tool. I think it will work to reclamp the bands over the dust boots (once I'm certain I won't need to get back inside the boots).

I think I may be ready to start wiring.
Last edited by 460.465USMC; 07-14-2021 at 08:06 PM.
Reason: Clarity.
Chris
Coupe complete kit delivered: 4/22/24.
Build Thread. Coyote. T-56. IRS w/3.55. Wilwoods. PS. HVAC. Side windows.
MK4 Complete kit.
Build Thread Index. Delivered: 10/15/2020. Legal: 7/25/23. Coyote Gen3. TKO600 (0.64 OD). IRS w/3.55. PS. Wilwoods. Sway bars. This build is dedicated to my son, Benjamin.
Build Thread.
-
07-15-2021, 01:55 AM
#190
I remember having the same lock to lock difference on mine.. But I removed the lock from the short side, rather than adding a lock to the long side. I've never had any rubbing problems.
-
07-15-2021, 02:16 PM
#191
Senior Member
Hi Carl. What size tire are you running in the front?
Chris
Coupe complete kit delivered: 4/22/24.
Build Thread. Coyote. T-56. IRS w/3.55. Wilwoods. PS. HVAC. Side windows.
MK4 Complete kit.
Build Thread Index. Delivered: 10/15/2020. Legal: 7/25/23. Coyote Gen3. TKO600 (0.64 OD). IRS w/3.55. PS. Wilwoods. Sway bars. This build is dedicated to my son, Benjamin.
Build Thread.
-
07-15-2021, 08:57 PM
#192
Originally Posted by
460.465USMC
Hi Carl. What size tire are you running in the front?
255/35zr18
-
08-03-2021, 09:38 PM
#193
Senior Member
Electrical Started...Oh, the little things!
Finally finished my firewood for this winter, so able to get back on the build. I'm starting electrical, so spending some time reading the F5 chassis and Ford Performance instructions, as well as several build threads.
I'm starting with the main Coyote power wiring in the engine bay. I also wanted to get the RF fuse panel installed. This meant I would need another powder coating session. When I get out all the supply/gear to powder coat, it's nice to be able to keep the momentum going and do as many parts as I can before putting it all away. So, I PC'd the fuse panel bracket, as well as all the hood and trunk hinge pieces. Takes some time, but worth it IMHO.
Before PC-ing the fuse panel bracket I test fit it, and drilled all of the 1/8" rivet holes. I found the front PS side of the RF fuse bracket overlapped (read interfered) with the 1/4"-20 socket head that bolts the rear bracket of the brake/clutch MCs to the 1/4" tube. Not a big problem to drill a hole, and incorporate it as a fastener for the fuse panel bracket.
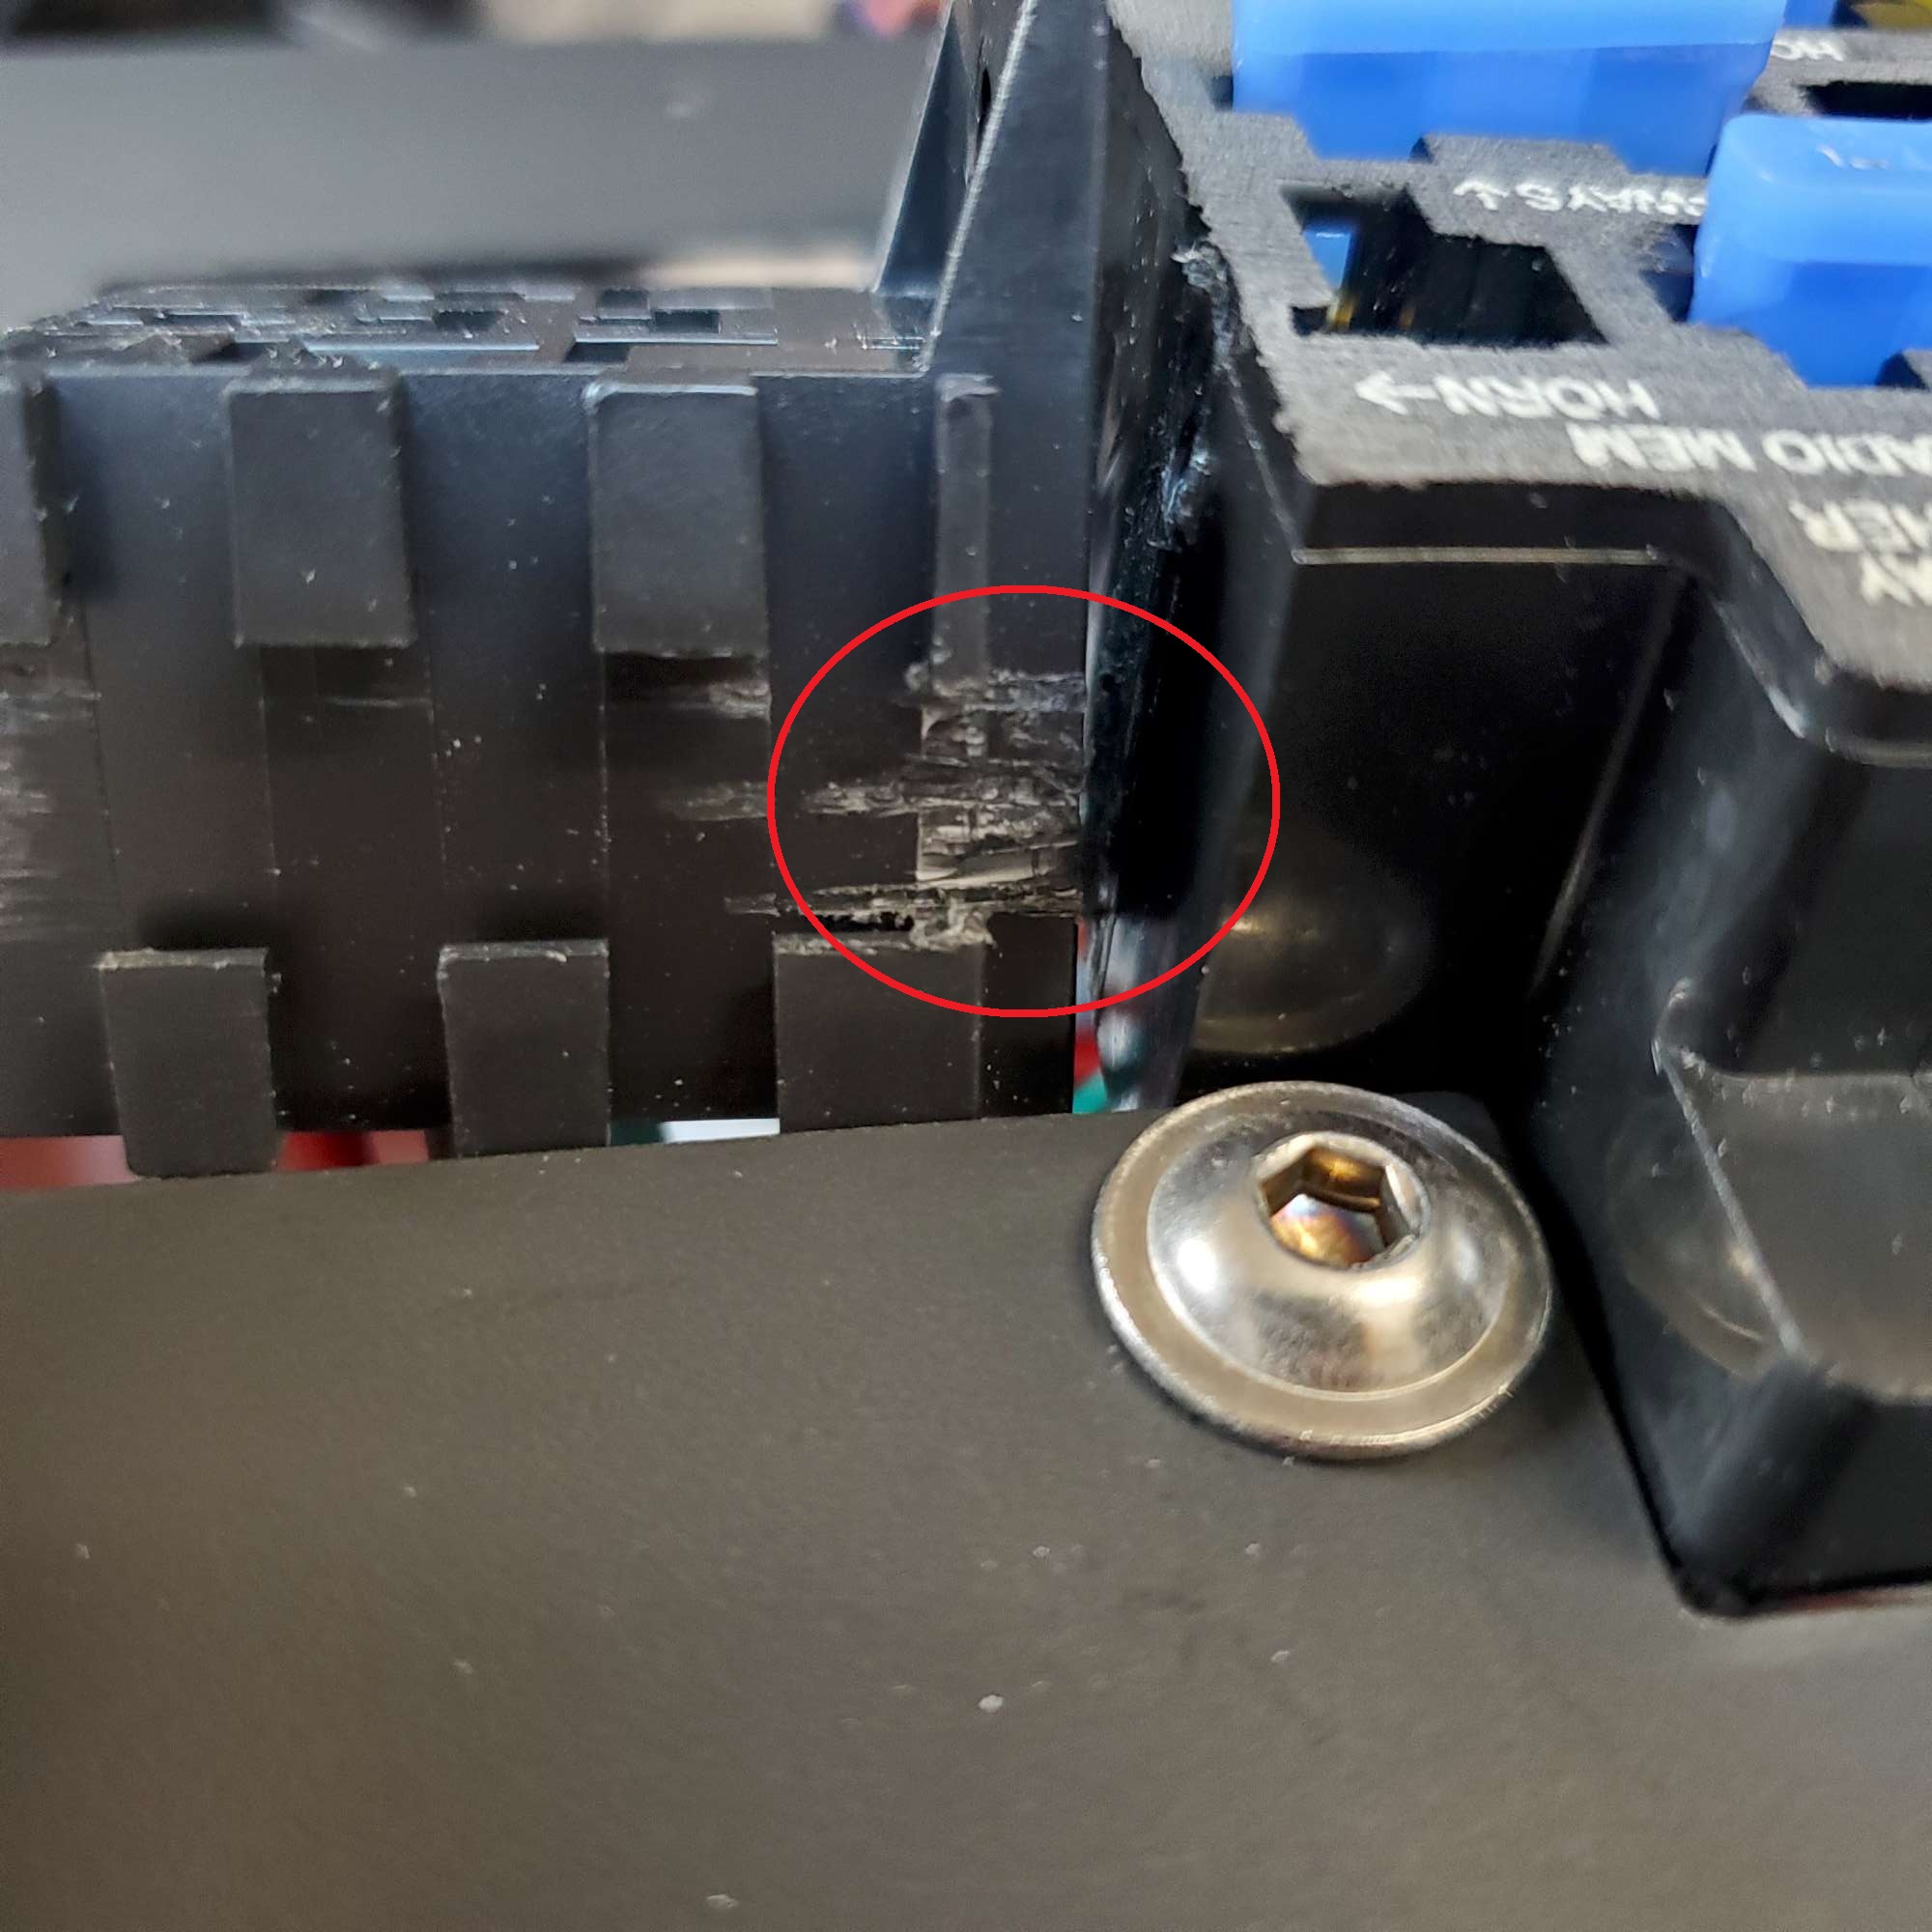
Thought by test fitting I was good-to-go. Nope. I missed something. The rear relay sockets (horn and fan) prevented the fuse panel from fully sliding/seating into the bracket. What to do? I disassembled it (again!), and removed just enough material from the side of the relay socket so it would fully seat.
Here's the point of interference:
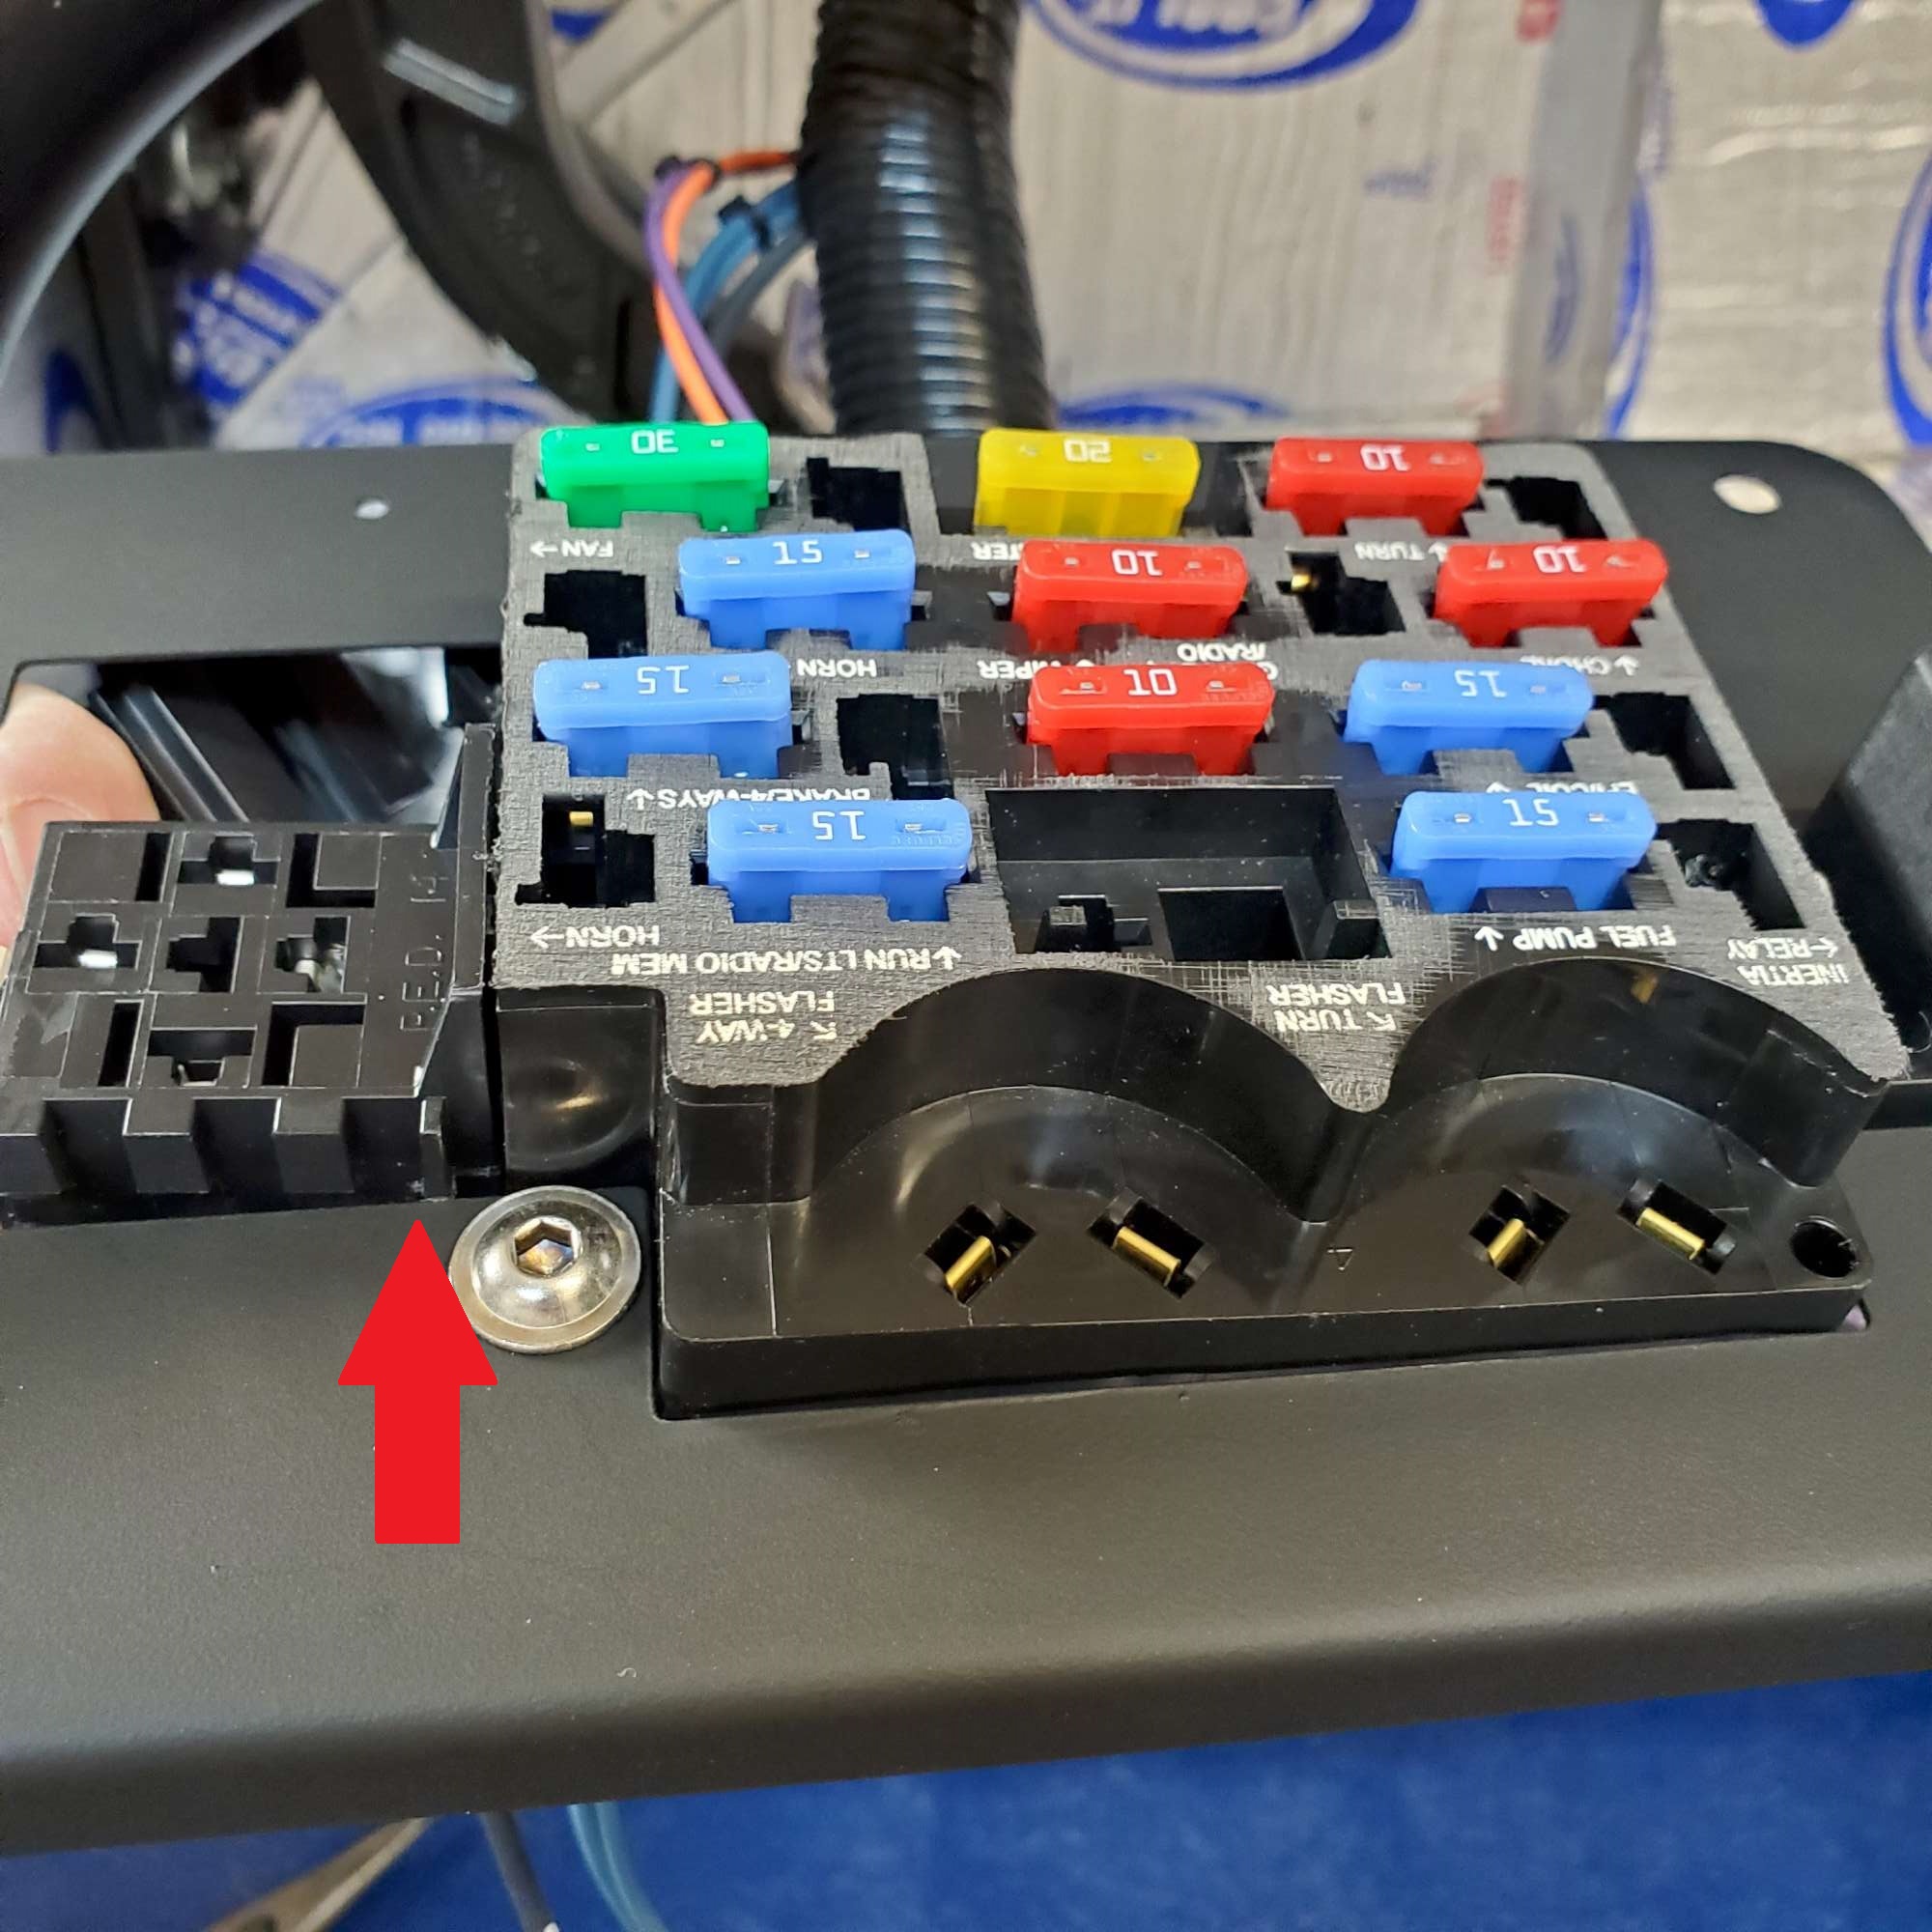
Close-up of the interference. You can see my first slice starting the material removal.

Material pretty much removed here.
Made it past that hurdle, so now it was just a matter of making it permanent with rivets. Not quite. The front mounting post of the panel interfered with the 3/4" tube. Sheesh! Again, not a huge deal. Was able to slice away a vertical strip from the post to clear the interference. You can see how I incorporated the 1/4"-20 socket head bolt as a fastening point (bottom left of picture). I liked that idea better than cutting a square out of the bracket to avoid it.

(You can see I nicked the PC in a few spots, but I ain't going to fix it today).
Finally, here is a homemade support bracket for the DS front corner. Have seen quite a few builders do this, as this corner is otherwise unsupported.

Today's update isn't really much of an update, but I sure feel good getting a couple little things off my chest. Thanks for "listening"!
A bit of frustration, but a "bad" day on the build is still a good day.
P.S. Coyote (Gen 3) computer, PDB, and Mega fuse mounted; picked up a battery and master batt cutoff switch, but not ready for pictures. Hope to finish that soon and update with pictures.
Last edited by 460.465USMC; 08-16-2021 at 10:31 PM.
Reason: Spelling
Chris
Coupe complete kit delivered: 4/22/24.
Build Thread. Coyote. T-56. IRS w/3.55. Wilwoods. PS. HVAC. Side windows.
MK4 Complete kit.
Build Thread Index. Delivered: 10/15/2020. Legal: 7/25/23. Coyote Gen3. TKO600 (0.64 OD). IRS w/3.55. PS. Wilwoods. Sway bars. This build is dedicated to my son, Benjamin.
Build Thread.
-
Post Thanks / Like - 0 Thanks, 1 Likes
-
08-03-2021, 09:57 PM
#194
Nice! I'm finding that with the electrical work, it's a million little things. Just keep knocking off a few little things every day and it'll be done before you know it.
MkIV Roadster build: Gen 2 Coyote, IRS, TKO600. Ordered 10/24/18. Delivered 1/29/19. Engine installed 8/8/21. First start 9/12/21. First go-kart 9/17/21. Off to paint 4/11/22. Back from paint 12/30/22.
Build thread here.
-
Post Thanks / Like - 1 Thanks, 0 Likes
-
08-04-2021, 02:53 PM
#195
Senior Member
Thanks for the encouragement, John. I try to get out to the garage after work as often as I can. I'm working from home now, so the "commute" to the garage is pretty short. I'm looking forward to installing the rest of the electrical; I enjoy wiring, switches, and the like. I think it's going to be a fun part of the build.
Chris
Coupe complete kit delivered: 4/22/24.
Build Thread. Coyote. T-56. IRS w/3.55. Wilwoods. PS. HVAC. Side windows.
MK4 Complete kit.
Build Thread Index. Delivered: 10/15/2020. Legal: 7/25/23. Coyote Gen3. TKO600 (0.64 OD). IRS w/3.55. PS. Wilwoods. Sway bars. This build is dedicated to my son, Benjamin.
Build Thread.
-
08-04-2021, 03:02 PM
#196
25th Anniversary #9772

Originally Posted by
460.465USMC
Finally finished my firewood for this winter, so able to get back on the build. I'm starting electrical, so spending some time reading the F5 chassis and Ford Performance instructions, as well as several build threads.
Made it past that hurdle, so now it was just a matter of making it permanent with rivets. Not quite. The front mounting post of the panel interfered with the 3/4" tube. Sheesh! Again, not a huge deal. Was able to slice away a vertical strip from the post to clear the interference. You can see how I incorporated the 1/4"-20 socket head bolt as a fastening point (bottom left of picture). I liked that idea better than cutting a square out of the bracket to avoid it.
FYI - you may want to make your fuse panel removable - my painter (Ken Pike) suggests making it removable to get access to the windshield posts...
-
08-04-2021, 03:48 PM
#197
Senior Member
Thanks for the tip, Toadster. I'll take a look at that clearance.
Chris
Coupe complete kit delivered: 4/22/24.
Build Thread. Coyote. T-56. IRS w/3.55. Wilwoods. PS. HVAC. Side windows.
MK4 Complete kit.
Build Thread Index. Delivered: 10/15/2020. Legal: 7/25/23. Coyote Gen3. TKO600 (0.64 OD). IRS w/3.55. PS. Wilwoods. Sway bars. This build is dedicated to my son, Benjamin.
Build Thread.
-
Post Thanks / Like - 0 Thanks, 1 Likes
-
08-04-2021, 09:11 PM
#198
Senior Member

Originally Posted by
toadster
FYI - you may want to make your fuse panel removable - my painter (Ken Pike) suggests making it removable to get access to the windshield posts...
I agree with Toadster, you need to have the ability to unscrew/remove the fuse panel to access the windshield post on the DS. No big deal, just drill out those rivets and replace with sheet-metal screws. Otherwise, looking good!
MKIV Complete Kit #9822 l BluePrint 347 EFI l TKO600 l Power Steering l Heater/Defrost l
Build Thread
-
Post Thanks / Like - 1 Thanks, 0 Likes
-
08-05-2021, 06:33 AM
#199
Senior Member

Originally Posted by
toadster
FYI - you may want to make your fuse panel removable - my painter (Ken Pike) suggests making it removable to get access to the windshield posts...
I was able to get my windshield bolts in without any issues with the panel in place. I tapped (1/2"-13) my windshield post which allows you to start the bolt with your hand and tighten it up with a socket once threaded. This is much easier than trying to get a nut on the back of that bolt.
-
Post Thanks / Like - 1 Thanks, 1 Likes
-
08-16-2021, 10:16 PM
#200
Senior Member
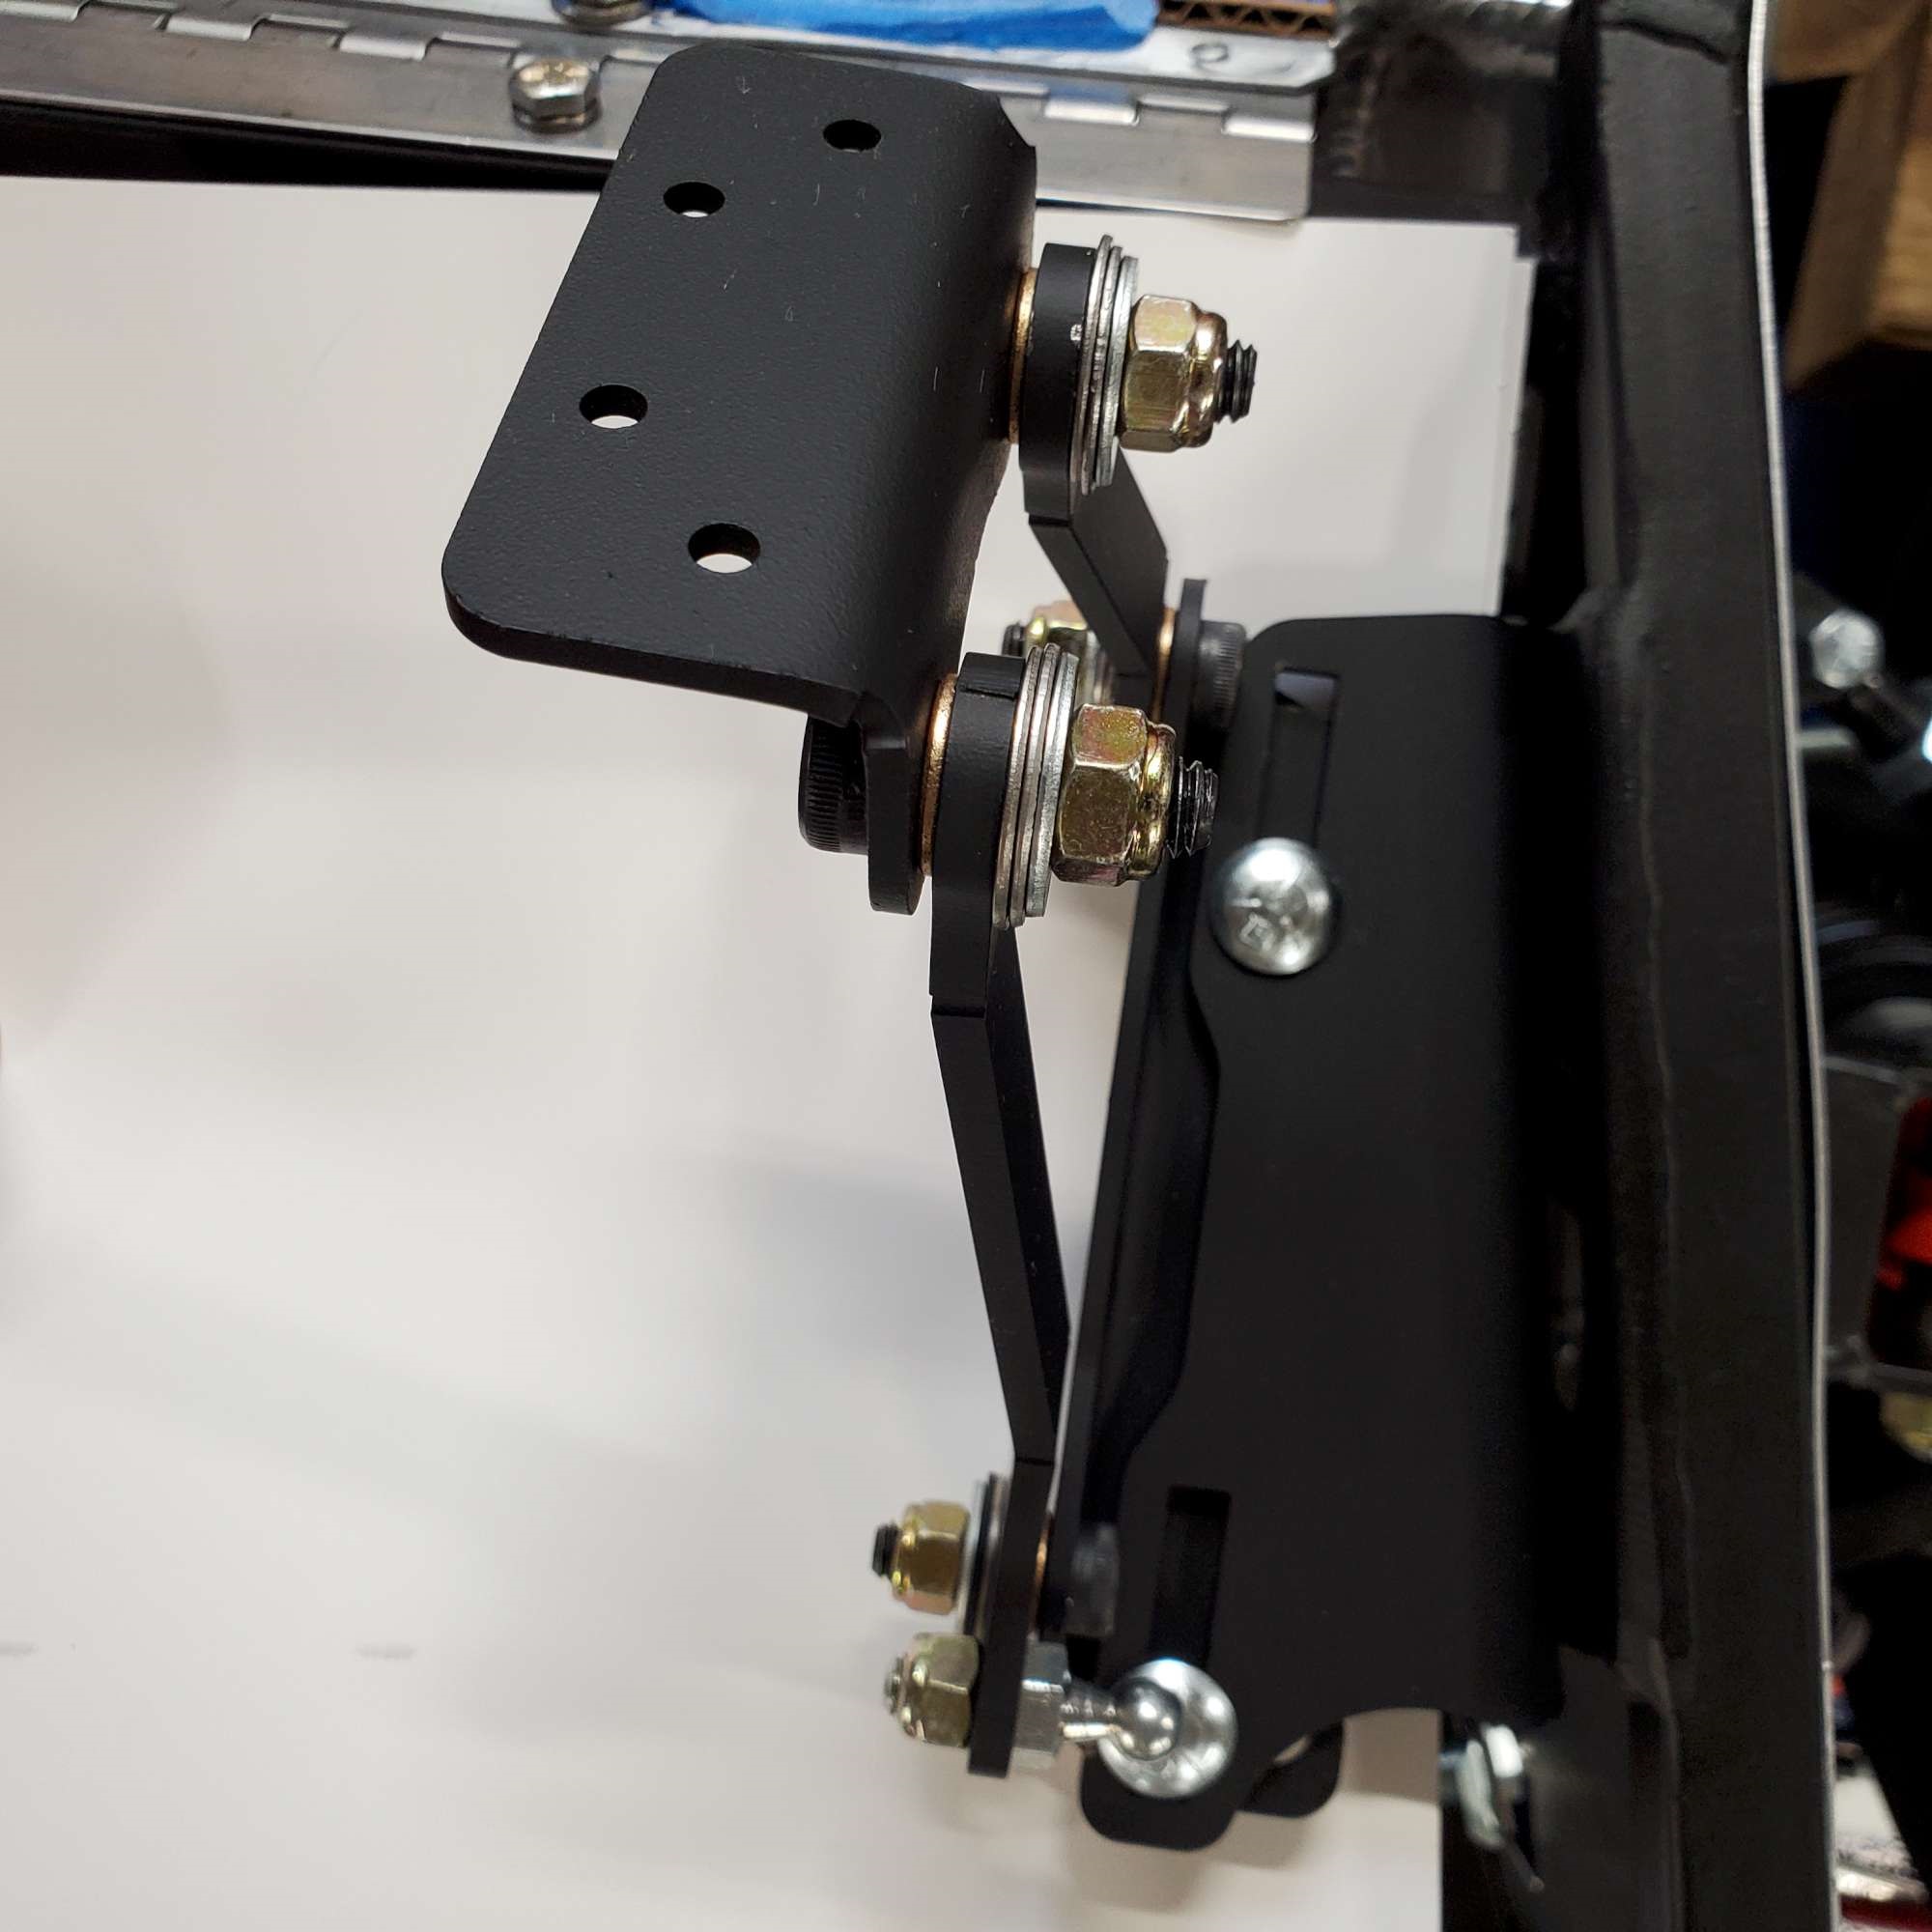
Coming up to breathe from Electrical...Hood Hinges
Lots of reading, thinking, planning, rereading, and mostly not wanting to screw up something on my electrical install means not much progress lately. So, I came up for air lest I drown in my electrical conundrum...Sheesh! For the sake of my sanity (insanity?) I picked up another aspect of the build, hood hinges.
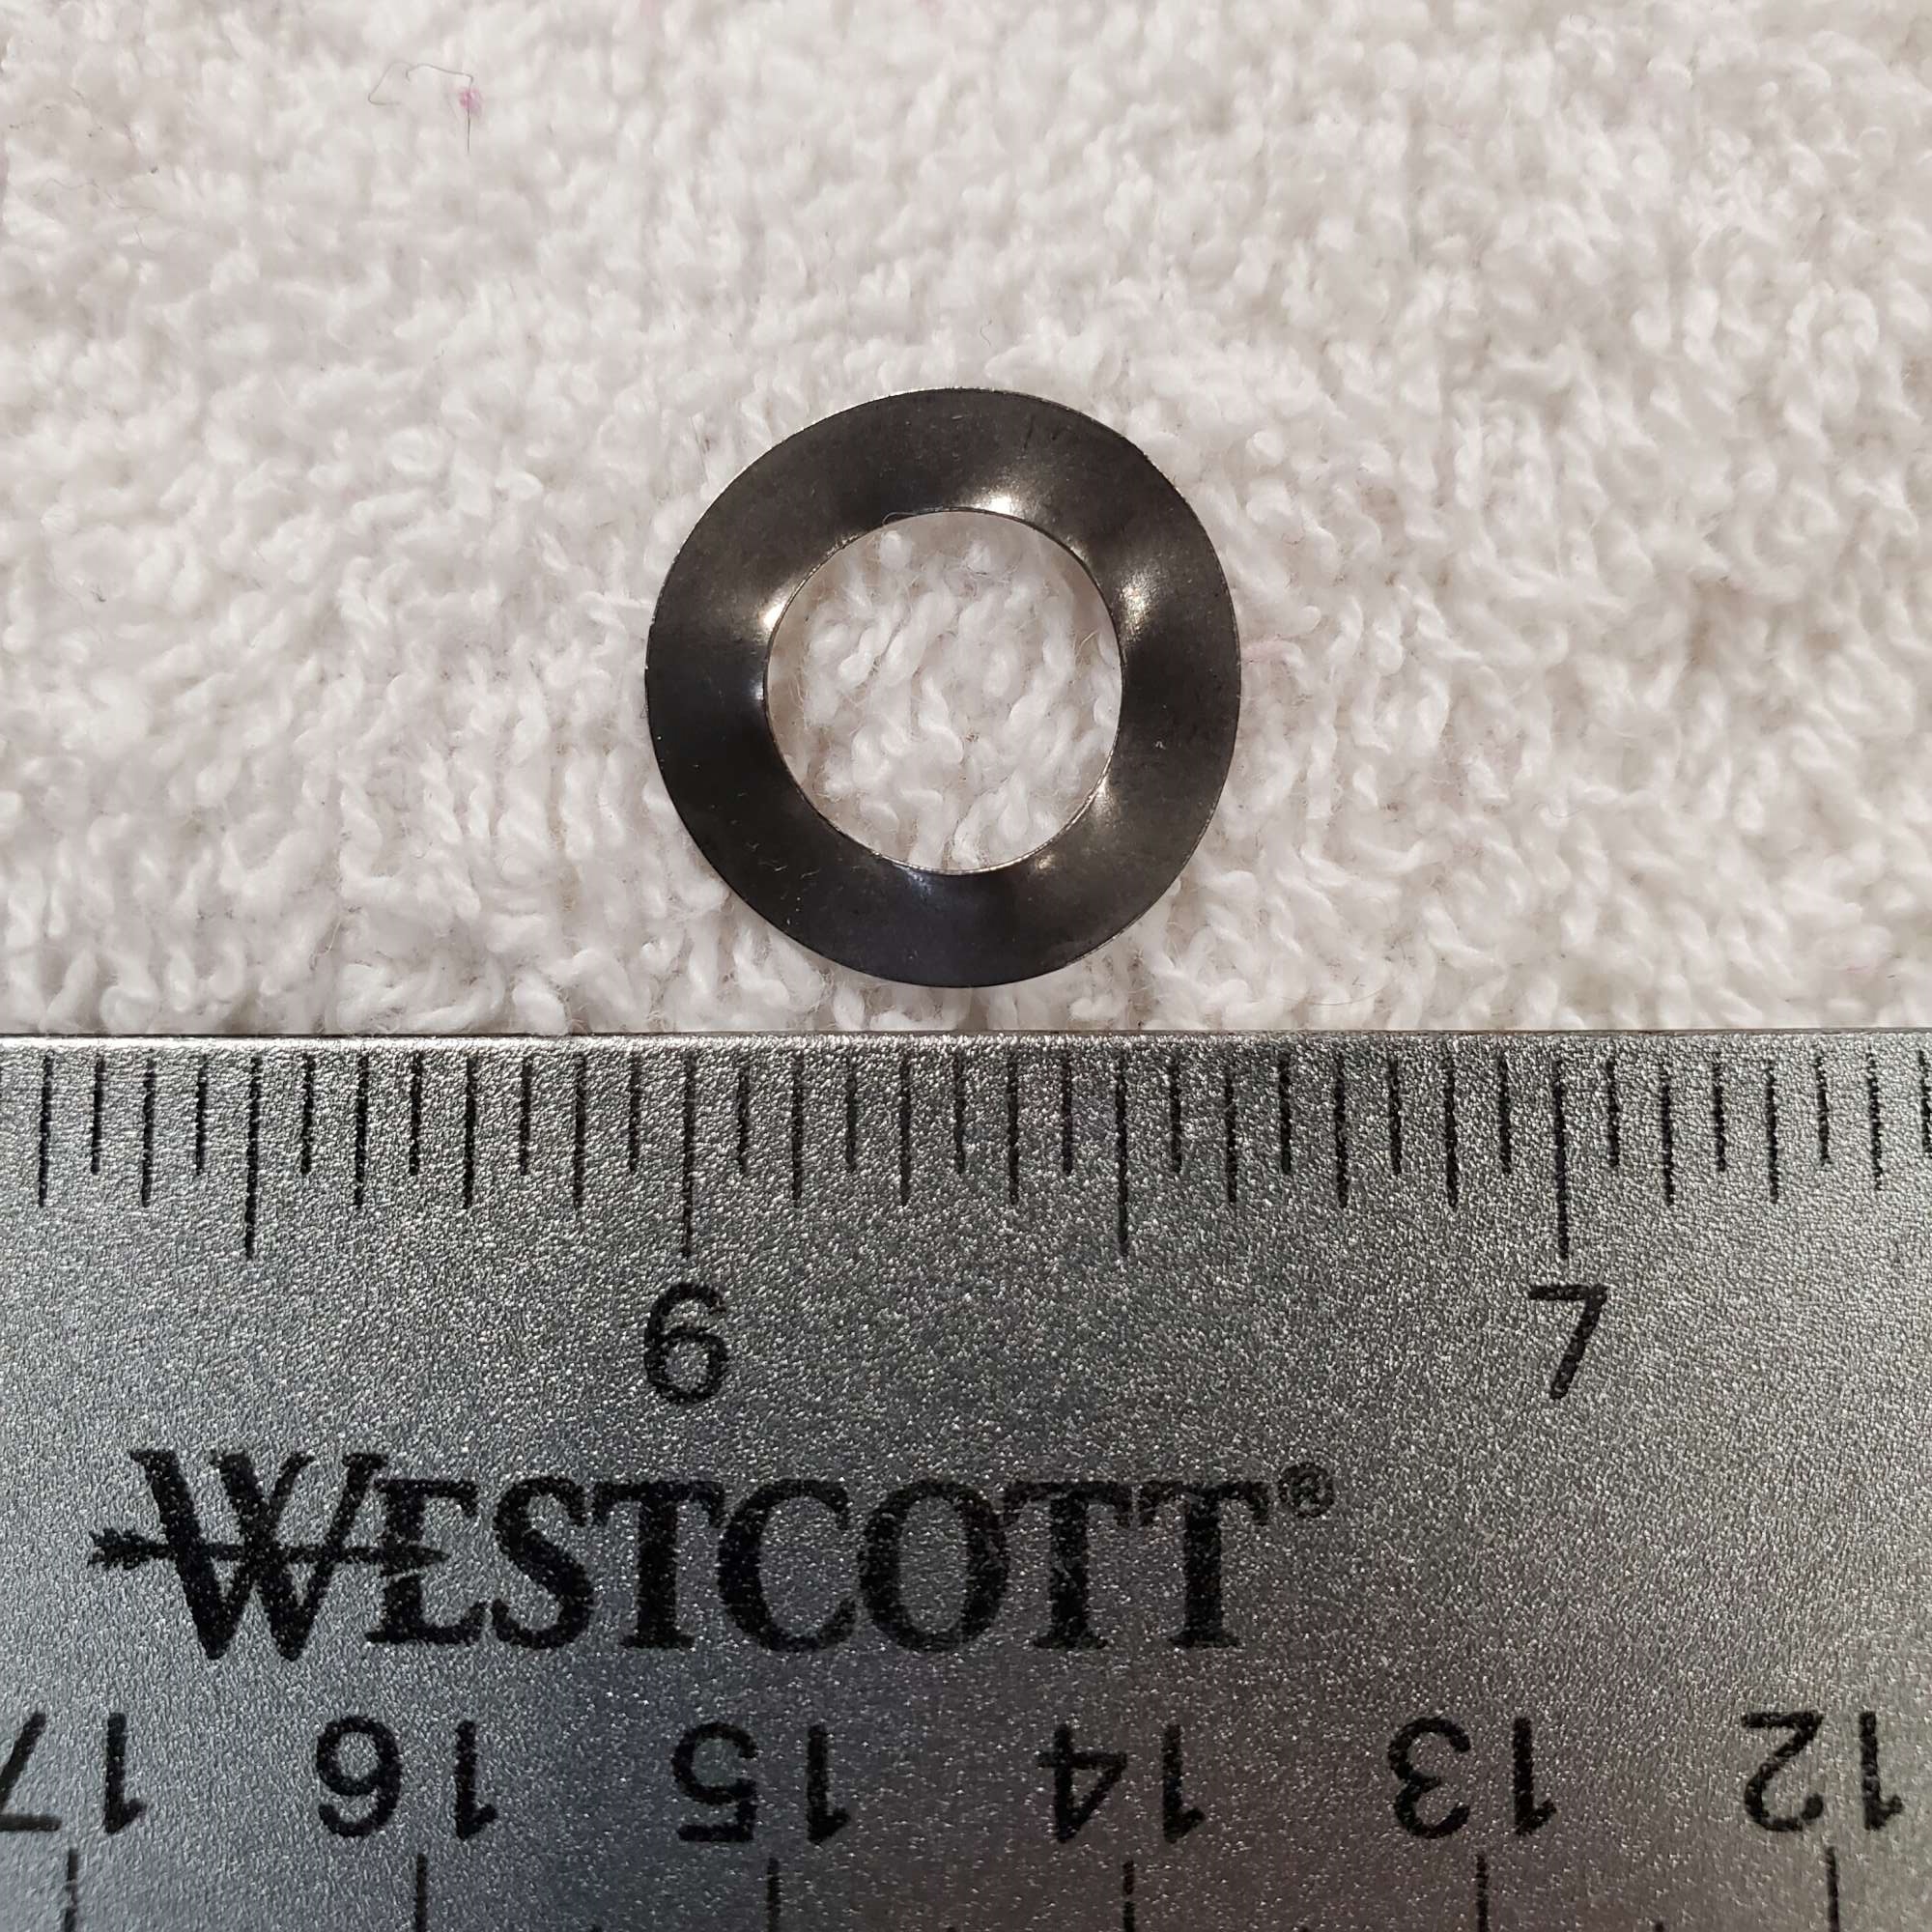
During my last mega-powder coat session I PCd the hood hinge hardware pieces, so they were ready to install. I followed advice from the forum to ditch the wavy washers, replacing with 3/8" stainless flat washers to stablize hinge and hood operation.
Here's a sample wavy washer that comes with the hinge hardware.
What is the chance I remembered this little nugget of wisdom before I assembled the hinges? Slim to none. The odds held true. Actually, I wasn't completely done before I remembered...only half way through the second hinge assembly! 
Thankfully, I had a good supply of stainless washers on hand, so it was an easy fix. Better to remember now versus after the hood is installed. In my mind's eye I can see it now: "Gee, these hood hinges seem a bit wobbly".
Passenger side.
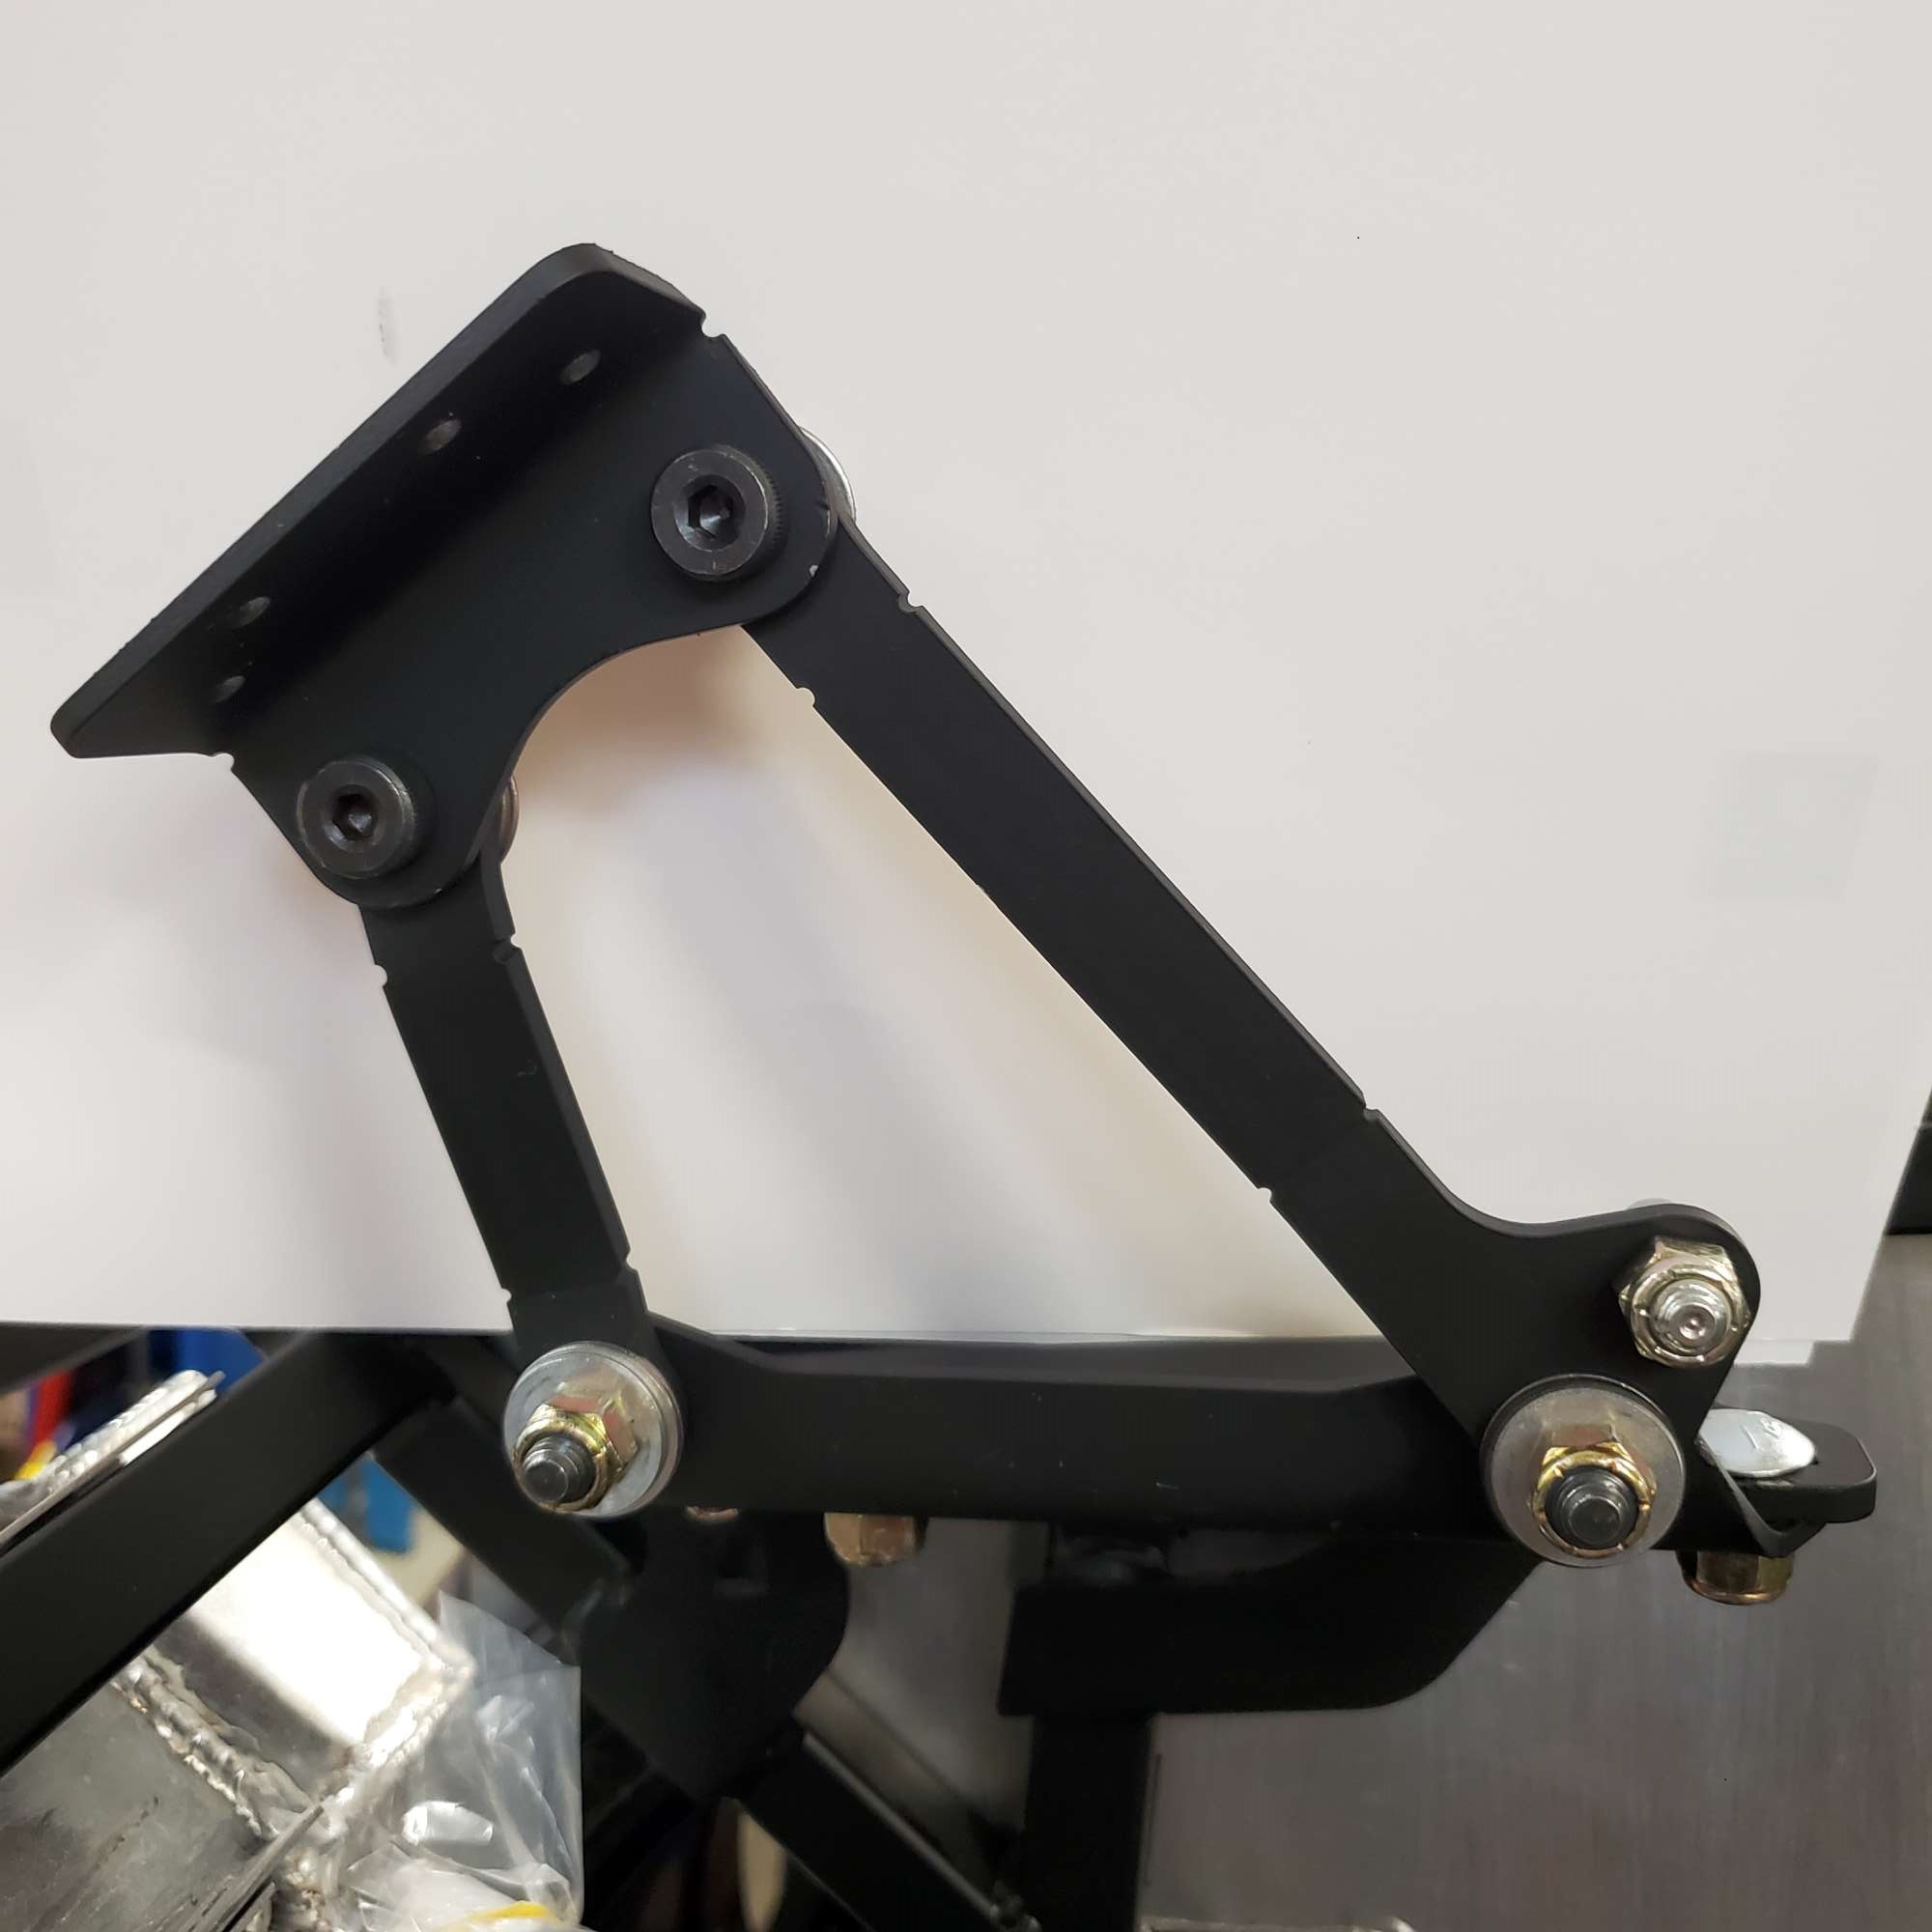
Top view of passenger side.
A little forward progress; a little backtracking. And so it goes. But still having a blast!
A big thanks to fellow builder, JohnK, for reminding me to divert to something else when I get bogged down: thanks, John!
Chris
Coupe complete kit delivered: 4/22/24.
Build Thread. Coyote. T-56. IRS w/3.55. Wilwoods. PS. HVAC. Side windows.
MK4 Complete kit.
Build Thread Index. Delivered: 10/15/2020. Legal: 7/25/23. Coyote Gen3. TKO600 (0.64 OD). IRS w/3.55. PS. Wilwoods. Sway bars. This build is dedicated to my son, Benjamin.
Build Thread.
-
Post Thanks / Like - 0 Thanks, 1 Likes


 Thanks:
  Likes:


 Reply With Quote

