-
Senior Member

I'm trying to decide if I like the satin finish of the frame PC better than the gloss. It's a moot point because I am not re coating it no matter what but I think the real test will be how does it look in a few years.
I took the axle down and mocked it up in the frame. One of the things I had been back and forth about was the quad shocks. I built the rear end out of a donor housing that was in remarkably good shape. They are useless but at the end of the day nobody really sees them. Why fix something that's not broke and besides they made for a great place to get a sling attached to. I took it off the stand and mocked it up in the frame and I had a change of heart. I just don't like the way they look and I could tell it was going to bother me till the end of time so I pulled it back down, took off the new parts then wrapped and taped the rest.
I used a sawsall and angle grinder. It went really well. I wish I had stopped to take pictures but I just got in the zone and forgot to.
Mounted everything back up. I did run into an issue where my axle was resting on the panhard bracket. It bothered me enough to make a thread on the main board but Dr. Kleiner said it was normal so that's good enough for me. I had the upper link tube shortened. In my mind that would put the axle at it's highest point, this is exactly backwards. When you lengthen it it rotates the axle up and away from the bracket. So learned a little something. So now I have it just off the bracket for now.

Re mounted the shocks and lined everything back up. I have the axles floating in there for now (nothing holding them in) and the back cover is loosely attached until my brakes come in.

One thing I had to do was I made the groove too deep on my frame dolly for the 4" round tubes to sit in. I had to modify it to make room for the LCA's. No big deal but something to keep in mind when designing yours. I also think your dolly has to sit behind the back 4' cross member. I had it in front and it was really easy to lift the front end. I would think rear axle would have been enough weight to make it tippy. Short term issue as you put things on the car it will balance itself out. Just my observations.


Last edited by Blitzboy54; 03-12-2021 at 01:33 PM.
MK4 #10008 - Ordered 10/06/20, Delivered 03/03/21, First Start 7/22/21, First Go Kart 7/24/21
Paint by Metal Morphous 5/14/22, Legally registered 6/8/22, Graduated 7/20/22
Build Thread
https://thefactoryfiveforum.com/show...been-delivered
Complete Kit, Ford 306, Sniper/Dual Sync, T5, Hydraulic clutch
-
Looking great! I’m also on the fence about the powder coat, but part of that is because on mine it flaked off by a few of the suspension mounts. I probably would have gone gloss if i had gotten it coated myself.
-
Senior Member


Originally Posted by
NYMike

Looking great! I’m also on the fence about the powder coat, but part of that is because on mine it flaked off by a few of the suspension mounts. I probably would have gone gloss if i had gotten it coated myself.
Thanks Mike,
Yup, where the panhard bracket bolts to the 4 inch tube a bunch of PC cracked and came off when I torqued it. I’ll POR 15 it but again it won’t match because the satin finish.
MK4 #10008 - Ordered 10/06/20, Delivered 03/03/21, First Start 7/22/21, First Go Kart 7/24/21
Paint by Metal Morphous 5/14/22, Legally registered 6/8/22, Graduated 7/20/22
Build Thread
https://thefactoryfiveforum.com/show...been-delivered
Complete Kit, Ford 306, Sniper/Dual Sync, T5, Hydraulic clutch
-
Senior Member

I received my new firewall from FFMetal. Great product and I had it in hand 4 days after I ordered it. Fman was right, the heater blower is heavy and makes the firewall a bit floppy. the new piece is cut well and is more than double the thickess. I am probably going to pick up the transmission cover as well when it's time.
Got it mocked up and ready just in time to get everything to the powdercoater tomorrow. Also be aware that the FFR supplied template for the heater really isn't close. Perhaps it was at one time but it was off by a lot.


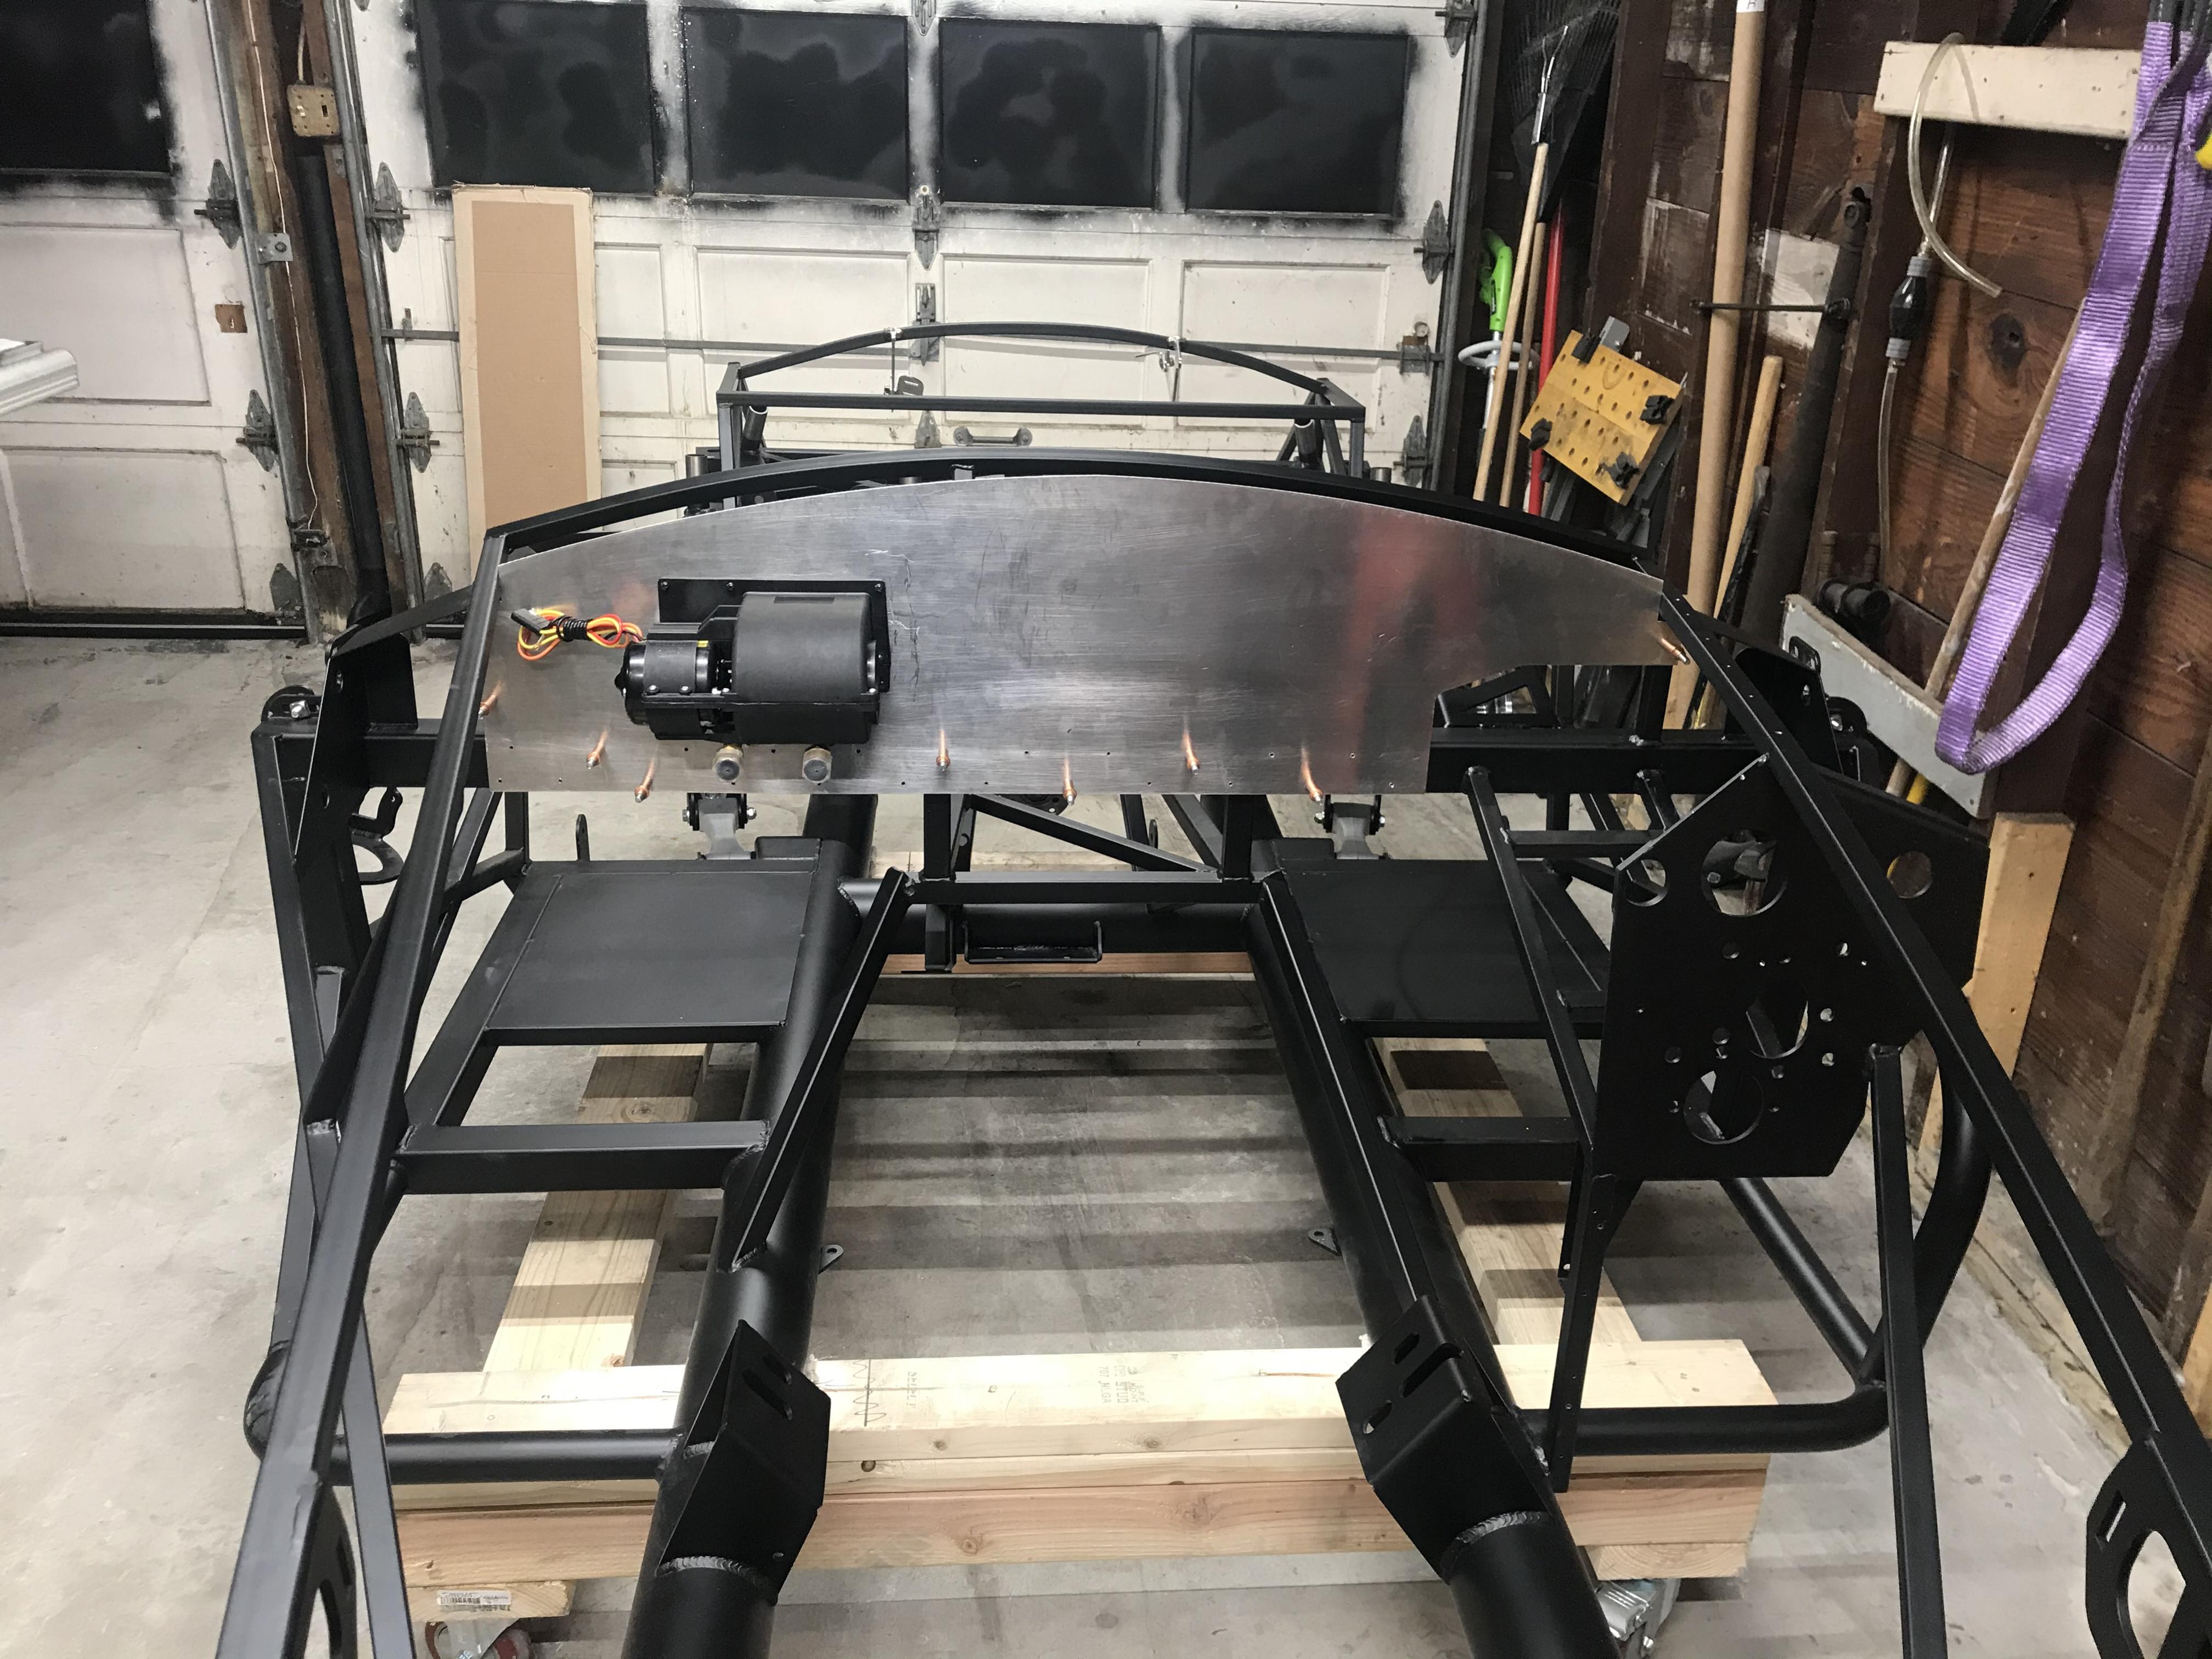
Last edited by Blitzboy54; 03-14-2021 at 01:55 PM.
MK4 #10008 - Ordered 10/06/20, Delivered 03/03/21, First Start 7/22/21, First Go Kart 7/24/21
Paint by Metal Morphous 5/14/22, Legally registered 6/8/22, Graduated 7/20/22
Build Thread
https://thefactoryfiveforum.com/show...been-delivered
Complete Kit, Ford 306, Sniper/Dual Sync, T5, Hydraulic clutch
-
Senior Member

I found the same problem with my heater template, off by about half inch. Measure twice. Cut once. I was lucky enough to read about it in other build threads. Pretty well documented issue.
-
Post Thanks / Like - 1 Thanks, 0 Likes
-
Senior Member

I purchased an oven I found on Ebay. A guy that owned rentals was selling this IKEA oven brand new for $100. He didn't realize it was a cabinet mounted unit when he purchased it and couldn't use it. It's 30 inches and I set it up in the basement. Our house is quite old and the basement is unfinishable space for a lot of reasons. It sets up perfectly for powder coating. I plan to powder coat as much as possible. I sent 4 tins to a business I found in Albany. I need my F panels and driver footbox front right away and the firewall doesn't fit in my oven. I plan to do the rest. But first need to learn how

I have 2lbs of gloss black from Prismatic Powders and a Harbor Freight powder coat system. The Easton unit and HF are inexpensive are reviewed comparably. I had a coupon so that was ultimately the decider. I reached out to Mark Eaton, he was the first guy I saw that did it himself. After reading his build thread It gave me the confidence to give it a try. https://thefactoryfiveforum.com/show...the-Coast-quot
I used a cut off piece of aluminum panel and one of the steel brackets that bolt on to the nose of the car since I am likely not going to use it it seemed like it was good for practice.
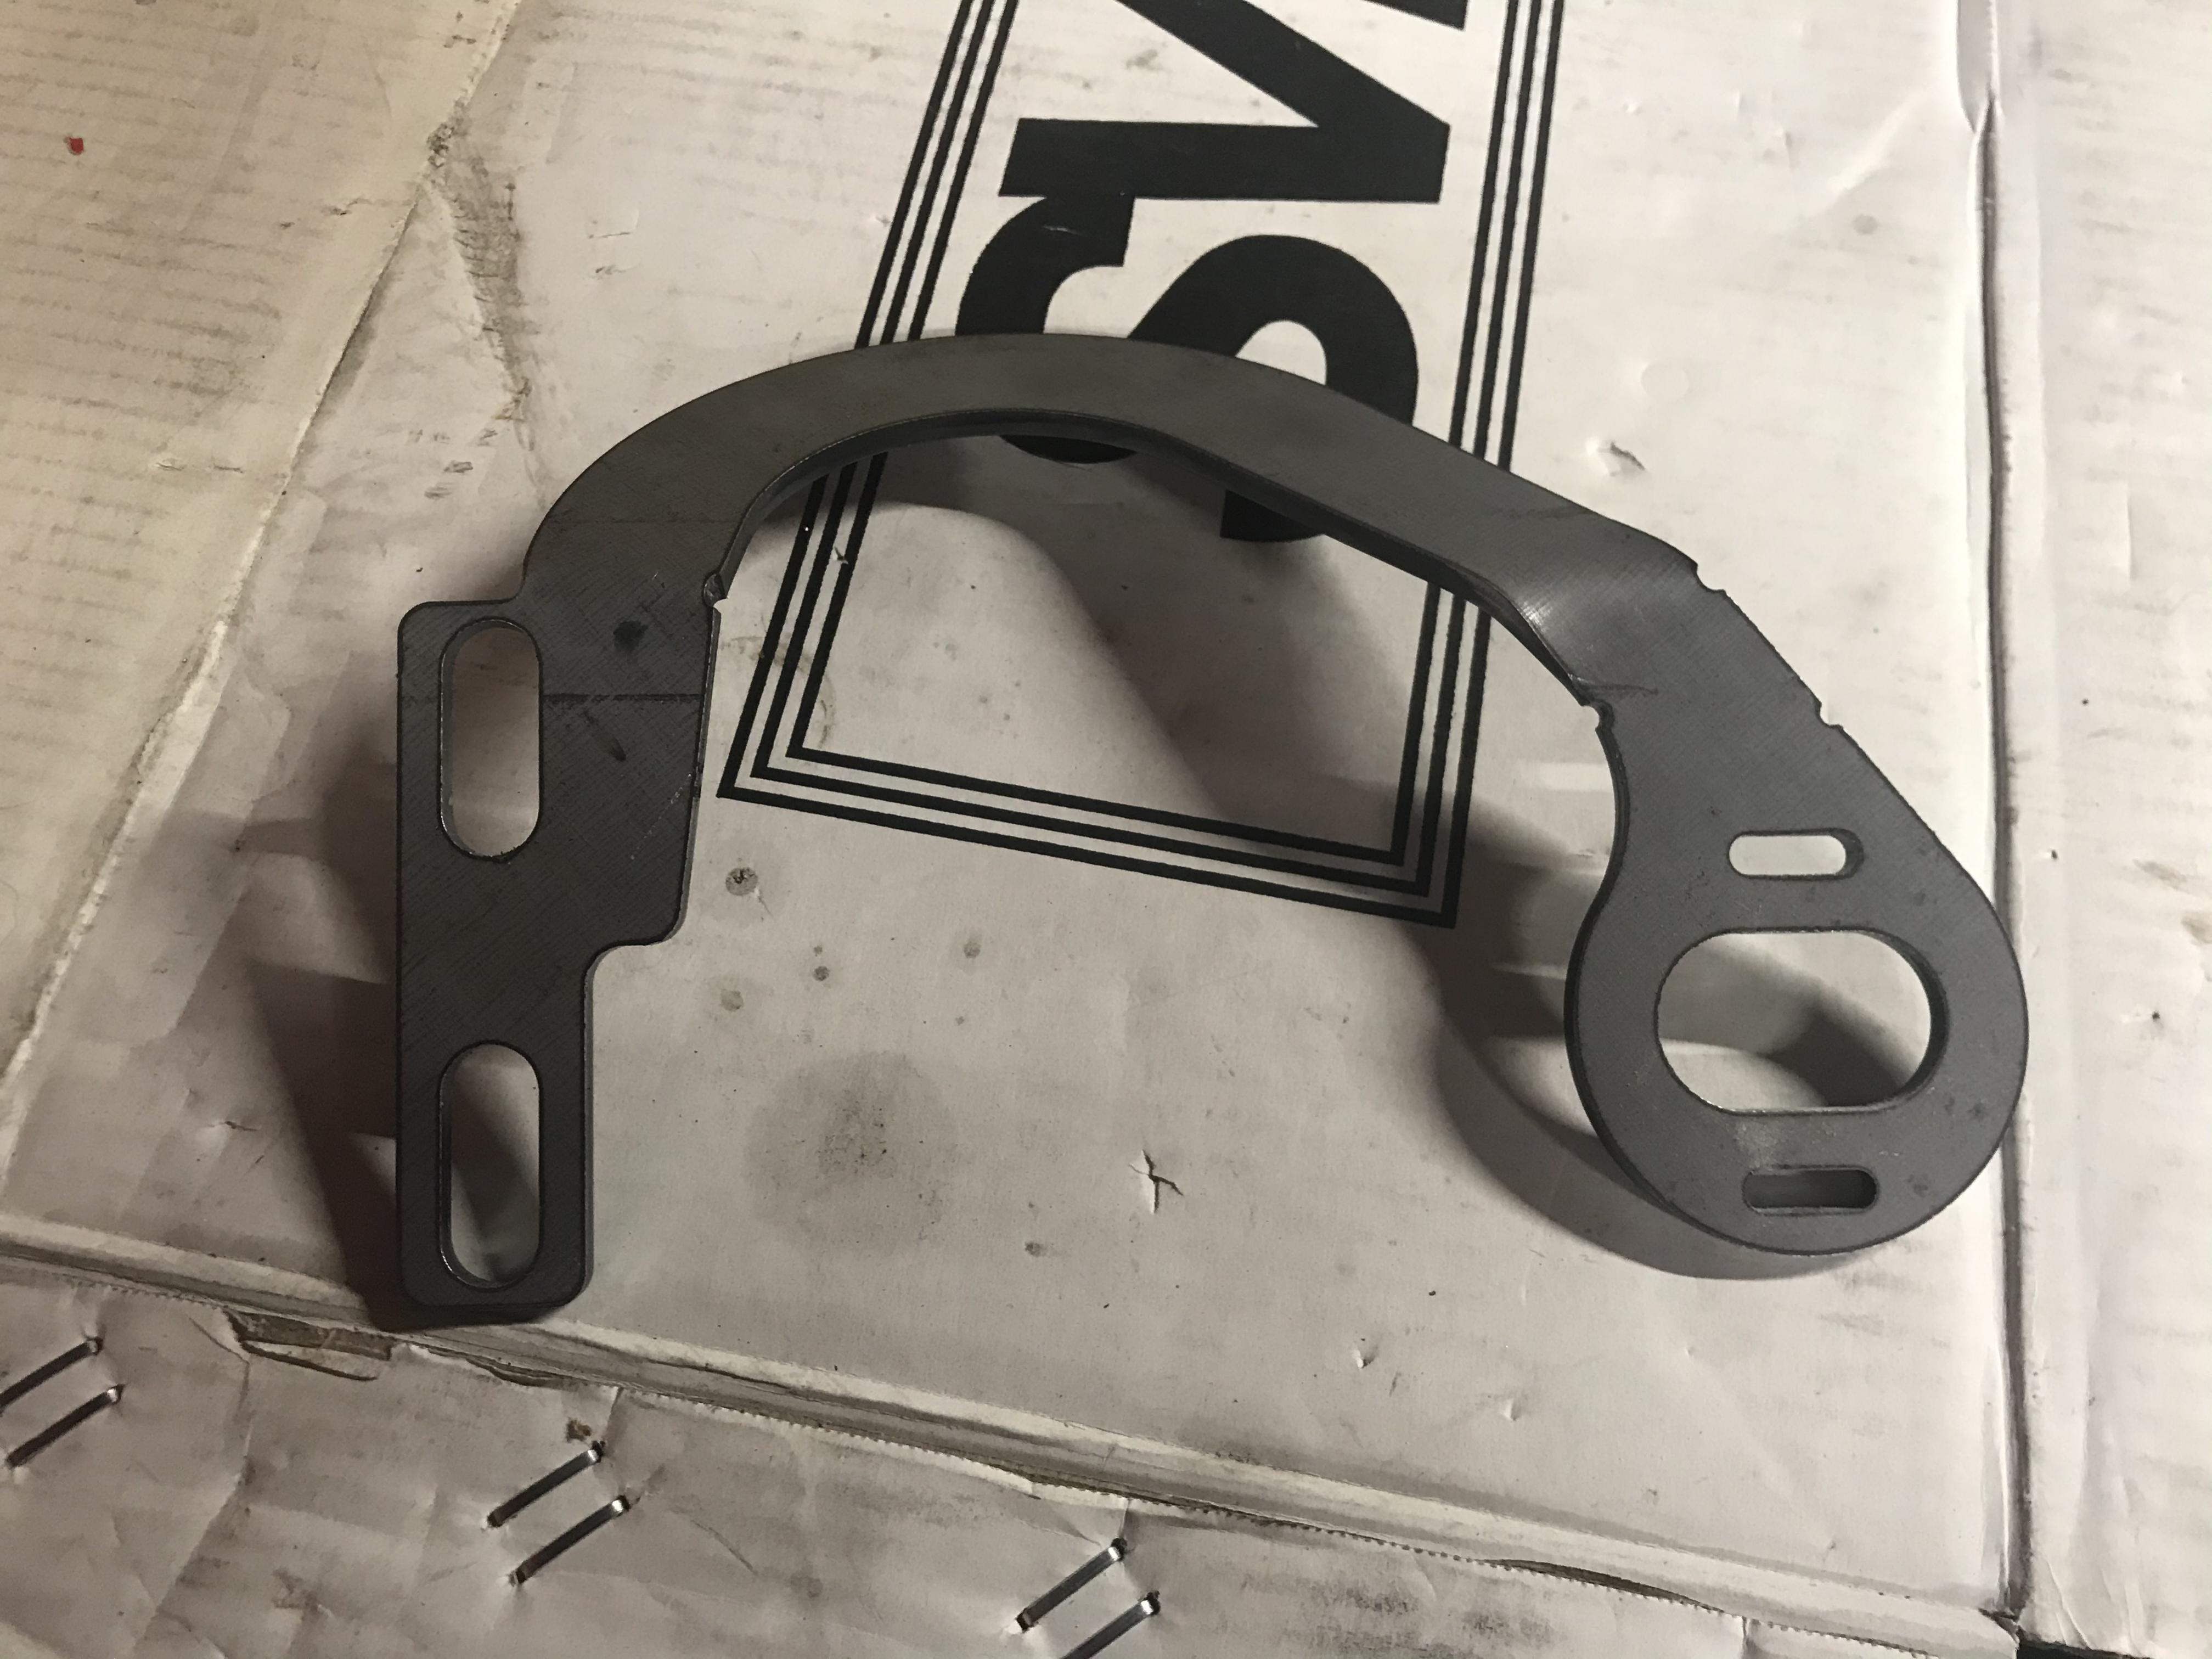
I need to pick up some proper cleaner tomorrow but in order to get started I used degreaser and brake cleaner to prep the metal. I prepped the aluminum panel and pre heated the oven to 400 degrees. I set the regulator to 15 psi and coated the metal.

I used an IR gun I borrowed from work to measure the metal temp. The curing instructions were 10 minutes at 400 after the metal reaches the proper temperature. I needed to heat the oven to 425 to get to 400 on the gun.

Then set the timer

Last edited by Blitzboy54; 03-16-2021 at 11:44 PM.
MK4 #10008 - Ordered 10/06/20, Delivered 03/03/21, First Start 7/22/21, First Go Kart 7/24/21
Paint by Metal Morphous 5/14/22, Legally registered 6/8/22, Graduated 7/20/22
Build Thread
https://thefactoryfiveforum.com/show...been-delivered
Complete Kit, Ford 306, Sniper/Dual Sync, T5, Hydraulic clutch
-
Senior Member

The first piece came out with a lot of thin spots, but not awful for the first try but not really close either. The edges were also bare in spots.

I obviously need more powder so I turned up the regulator to 20 psi. I spent twice as much time coating the bracket and made sure to spend more time in the little spots. I was also curious if you can add a "second coat", so I reshot the panel.

You definitely can re coat pieces so that's a relief if mistakes are made and mistakes will be made. The bracket looks better but I can still see some details in the edges I don't like yet. You can see in the panel a blemish. This was me accidently touching it with my glove when it was coming out of the oven. When it's still hot and soft it's super important not to touch it.
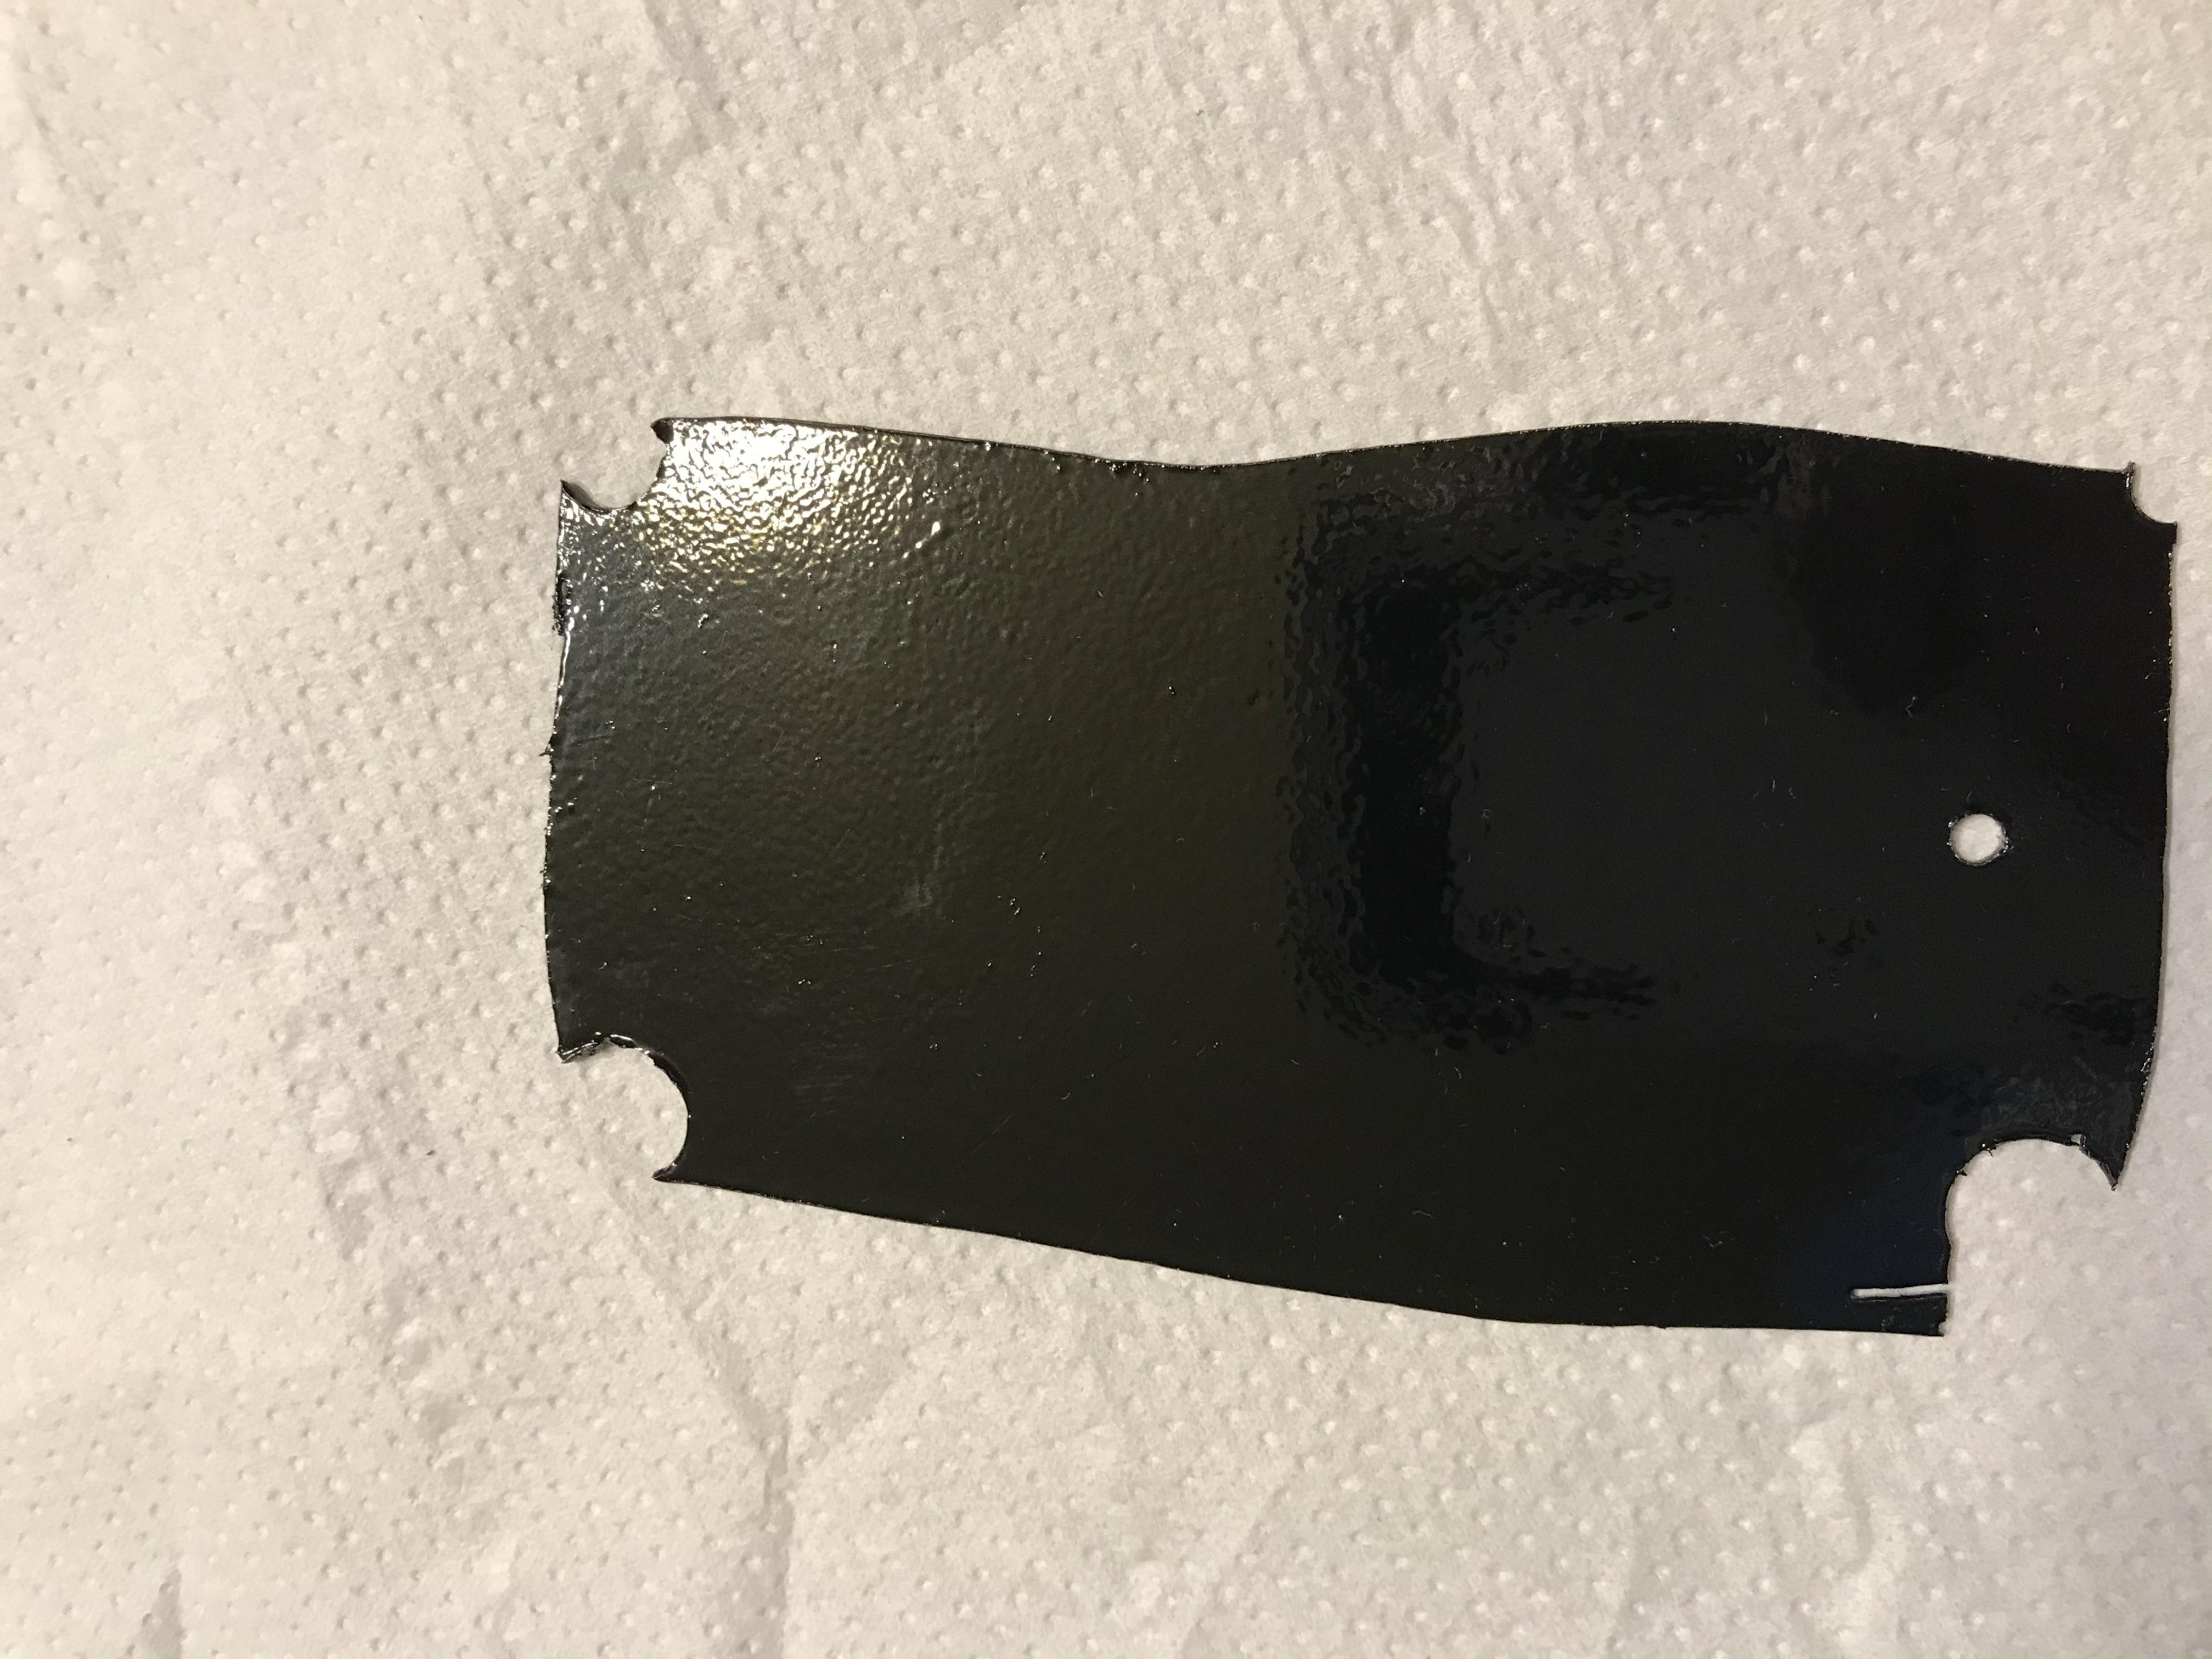
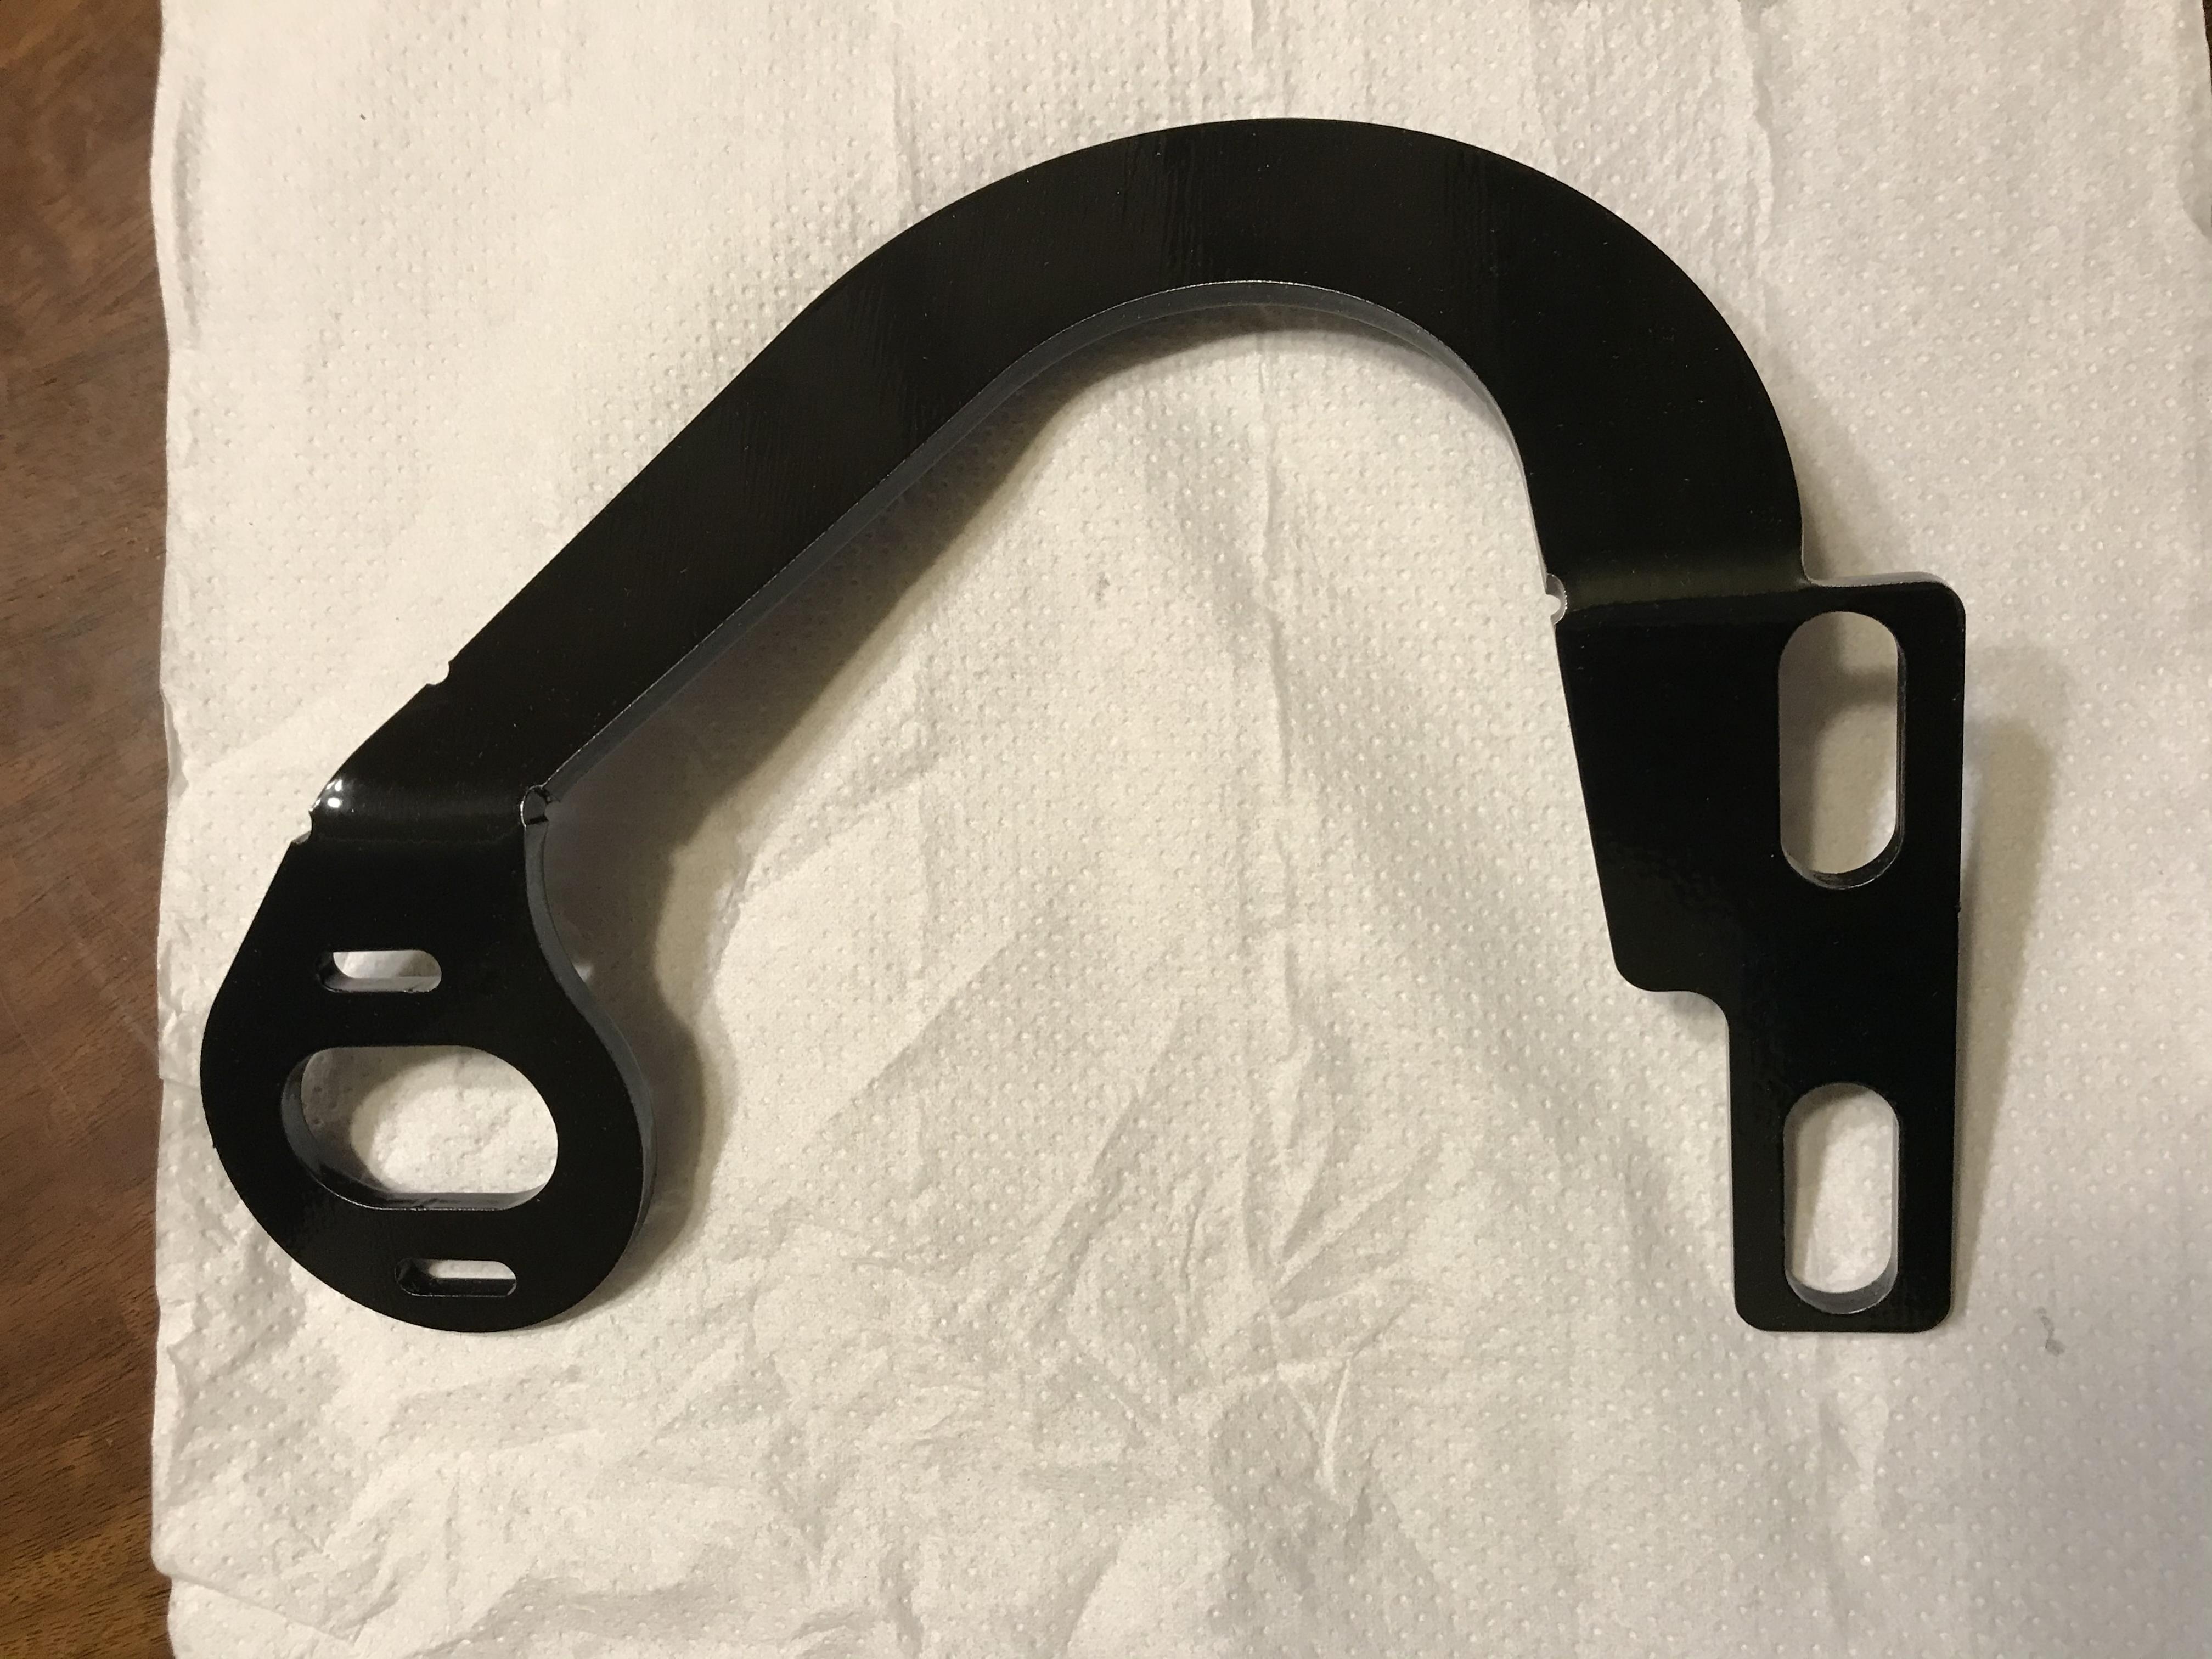
I plan to experiment with better cleaners and different metal prep as well as PC thicknesses and layers. I am going to take the some time this week to try and find the best combinations with the equipment I have, then get to work on the panels.
Last edited by Blitzboy54; 03-16-2021 at 10:04 PM.
MK4 #10008 - Ordered 10/06/20, Delivered 03/03/21, First Start 7/22/21, First Go Kart 7/24/21
Paint by Metal Morphous 5/14/22, Legally registered 6/8/22, Graduated 7/20/22
Build Thread
https://thefactoryfiveforum.com/show...been-delivered
Complete Kit, Ford 306, Sniper/Dual Sync, T5, Hydraulic clutch
-
My powder instructions are 20 minutes at 400* F. Different powders, different melting points. I usually set the oven temp higher than recommended curing temp. After opening the door and hanging items the temp is close to the recommended setting.
My powder gun does best at 5 to 6 lbs of pressure. I hang the part on a stainless wire and that on a stainless clothes line. The clothes line is connected to the guns static ground. That way everything is grounded at one time.
You can pre cook your items for cleaning and cooking out oils.
With the glass oven door you can watch the powder melt to molten and gloss.
I practice hanging all items in the oven, before powder coating. Very frustrating to have parts get bumped and having to spray the powder again.
Body, parking light brace looks good.
20th Anniversary Mk IV, A50XS Coyote, TKO 600, Trunk Drop Box, Trunk Battery Box, Cubby Hole, Seat Heaters, Radiator hanger and shroud.
-
Senior Member

I am learning to powder coat as well. I have a Redline EZ50 gun which works great. This is what I have learned along the way.
Grounding is critical and relying on your household electrical system may not be good enough. If you have direct access to your grounding rod in your house, that works, otherwise you can add a new grounding rod which is pretty easy. I put one in my basement workshop - 6' copper coated rod was $17 from Ace Hardware, drilled a hole in the basement floor and fairly easy work pounding it in with a small sledge hammer. Adhesion of powder was significantly improved once I did this.
As Railroad mentions, each powder has its own bake temp and duration. It is important to note that this temp is the surface temperature of what you are coating, not the oven temperature. A thin piece of metal will reach the desired temperature quickly, but a brake caliper will take a while. You need an infrared thermometer to measure surface temperatures - $20 at Harbor Freight or most auto parts stores. Once the surface temp hits the target, that is when you start your bake time. You may need to dial back your oven temp once you get the correct surface temperature so as not to overshoot too much.
If there is trouble with adhesion, it could be a prep problem. Parts need to be thoroughly cleaned and de-greased. General rule is that parts should be clean enough that you can put them on your best white linen and leave no mark. I too do a pre-cook like Railroad for any cast parts. Sand blasting is ideal, but not something I have access to. Treatment with iron phosphate will help and there are a few companies that sell it in small quantities (gallon size). Also, turning down your pressure can help too as it reduces the rate of powder delivered and allows better charging of the powder.
I find second coating a challenge with getting consistent adhesion. General recommendation is to reduce your voltage (if your gun supports it).
Bracket looks good, nice job. Good luck with your panels, I ended up sending most of mine out as I didn't have a big enough oven.
-
Senior Member

Excellent feedback, Thank You both.
Grounding is critical and relying on your household electrical system may not be good enough
I would assume then if you see a random spark while coating your grounding is not good enough. That's what happened on my first piece, maybe had more to do with my inconsistent coating on the first try. I ended up attaching my rack differently the second time. I will harden that up first.
I practice hanging all items in the oven, before powder coating. Very frustrating to have parts get bumped and having to spray the powder again.
Body, parking light brace looks good.
This I learned last night too. Order of operation will be test hang and remove, then pre heat the oven while I clean, pre bake if necessary then shoot.
What di you guys do differently with chrome? My plan was to scuff it giving it a brushed finish for better adhesion. I was planning to buy a few cheep chrome items to test on.
MK4 #10008 - Ordered 10/06/20, Delivered 03/03/21, First Start 7/22/21, First Go Kart 7/24/21
Paint by Metal Morphous 5/14/22, Legally registered 6/8/22, Graduated 7/20/22
Build Thread
https://thefactoryfiveforum.com/show...been-delivered
Complete Kit, Ford 306, Sniper/Dual Sync, T5, Hydraulic clutch
-
The spark is indication, the ground is good, also holding the gun too close to target.
I have not coated over chrome. Maybe some light glass beading or fine sanding prior to coating will help. Any change in surface texture will show in the powder coating.
20th Anniversary Mk IV, A50XS Coyote, TKO 600, Trunk Drop Box, Trunk Battery Box, Cubby Hole, Seat Heaters, Radiator hanger and shroud.
-
Senior Member


Originally Posted by
Blitzboy54

What di you guys do differently with chrome? My plan was to scuff it giving it a brushed finish for better adhesion. I was planning to buy a few cheep chrome items to test on.
I have not done a previously chromed piece. You might want to try calling a local powder coater and ask their advice or posting the question on the Powder365 Forum.
-
Senior Member

I got some of my panels back from PC and mounted them. I realize I still need to put holes in my firewall but felt ok about drilling them later. The grommets will be covering them anyhow. I've learned blue tape is your friend. I've been using a pneumatic riveter a coworker loaned me. It's really nice and will make the 3/8 rivets go easier I would assume. On my driver side F panel the day after I mounded them I realized I missed one. So I grabbed my hand rivet tool and installed it. The tool jumped in my hand and of course put a nice little scratch in my panel. So disappointing, I don't mind learning lessons but would have preferred a near miss. I used POR 15 and tooth pick to fill it in. It's not immediately obvious unless your looking for it but ooph.

Now that my F panels are in I started on my front suspension. The POL fairy stopped at my house this weekend and I got my LCA's. Like everyone else running power steering I modified my upper arms to create enough adjustment. I cut off the the sleeves (right about 3/8 on each side) and the same to the threads. I don't have a band saw and I was not comfortable using a sawsall so I did it the old fashioned way. Wasn't that bad. The aluminum went easy. The welded threads on the ball joint plate are another story. I just took my time and it eventually got through. Let me know if there are any obvious issues.


MK4 #10008 - Ordered 10/06/20, Delivered 03/03/21, First Start 7/22/21, First Go Kart 7/24/21
Paint by Metal Morphous 5/14/22, Legally registered 6/8/22, Graduated 7/20/22
Build Thread
https://thefactoryfiveforum.com/show...been-delivered
Complete Kit, Ford 306, Sniper/Dual Sync, T5, Hydraulic clutch
-
Not a waxer

You have installed the shortened link on the front on the driver's side; it needs to go to the rear. Your passenger side is correct.
Jeff
-
Senior Member


Originally Posted by
Jeff Kleiner

You have installed the shortened link on the front on the driver's side; it needs to go to the rear. Your passenger side is correct.
Jeff
Thanks Jeff, that makes more sense.
I got stuck on the idea that the shorter sleeve had to be on the solid welded leg. Unfortunately that means on the drivers side I trimmed the wrong threaded pieces. Hopefully that doesn’t come back o bite me. I’ll get that down and fixed.
Update** swapped. Hopefully I’m back on track.
434C3378-D8C9-457A-93F0-824185AF68FF.jpg
Another thing is after every phase start reading back through a few choice build threads. I was looking at Fman's and he had that issue already sorted via Paul. There is just so much great information on this forum.
Last edited by Blitzboy54; 03-22-2021 at 09:08 PM.
MK4 #10008 - Ordered 10/06/20, Delivered 03/03/21, First Start 7/22/21, First Go Kart 7/24/21
Paint by Metal Morphous 5/14/22, Legally registered 6/8/22, Graduated 7/20/22
Build Thread
https://thefactoryfiveforum.com/show...been-delivered
Complete Kit, Ford 306, Sniper/Dual Sync, T5, Hydraulic clutch
-
Senior Member

I wish I had a cleaner build space. I have an old dusty detached garage that I vacuum with a shop vac every night. Despite that it will always be hard to keep clean. It's just one of the challenges of this build. At some point I am going to have to cover it at night. I could make the garage better or I can build a Cobra. It was an easy choice.
So on to the pedal box. Nothing fancy just trying to do it like everyone else. I've always liked the look of the Wilwood pedal box and master cylinders. Just think they look sharp. Since I have my powder coat setup in the basement and am starting to get consistent results I decided to PC all the brackets because why not.

I the manual didn't say anything about removing the pedals to drill the switch bracket hole, it wasn't until I rewatched an FFR build video they mentioned it. I had already drilled from the top. The hole lined up right where it needed to be. For anyone that hasn't done it yet if you drill from the top you don't have to remove the pedal.

I am going to keep the pistons fairly even to start. I have 4 piston Wilwoods in the rear vs the FFR offered 1 piston. Both masters are 3/4 so I'm guessing I will need less bias. I may invest in the remote bias adjuster knob but I feel like once the breaks are set that will be that. I trimmed the recommended 5/8 off the end of the MC rods. Seemed like a lot but the instructions were clear and I haven't read in anyone's thread that there was a problem

I set the switch all the way out and brought the pedals in to meet them. As the system gets fine tuned I assume this will change but I'm generally happy with them for now.

Once the accelerator pedal is installed I may need to move the brake pedal over one slot

My seats are on back order so I'm sitting low but I like the setup so far.

Last edited by Blitzboy54; 03-23-2021 at 10:08 AM.
MK4 #10008 - Ordered 10/06/20, Delivered 03/03/21, First Start 7/22/21, First Go Kart 7/24/21
Paint by Metal Morphous 5/14/22, Legally registered 6/8/22, Graduated 7/20/22
Build Thread
https://thefactoryfiveforum.com/show...been-delivered
Complete Kit, Ford 306, Sniper/Dual Sync, T5, Hydraulic clutch
-
Looks nice! We are in very similar spots it looks like. I drilled mine switch holes from the underside without removing my pedals, it worked okay. The clutch bracket didn't seem like it was going to fit no matter what I drilled, I cut a small amount off of it in the rear with my hacksaw and it installed perfectly after that.
-
Senior Member


Originally Posted by
BeePea

Looks nice! We are in very similar spots it looks like. I drilled mine switch holes from the underside without removing my pedals, it worked okay. The clutch bracket didn't seem like it was going to fit no matter what I drilled, I cut a small amount off of it in the rear with my hacksaw and it installed perfectly after that.
The back of the pedal box is rounded a bit. Its easy to push the bracket too far back and not notice it's not totally flat. Then when you bring it around to the other side its a touch off.
We are sort of tied at the hip on this thing since the beginning So far it's been a lot of fun, hope you feel the same.
MK4 #10008 - Ordered 10/06/20, Delivered 03/03/21, First Start 7/22/21, First Go Kart 7/24/21
Paint by Metal Morphous 5/14/22, Legally registered 6/8/22, Graduated 7/20/22
Build Thread
https://thefactoryfiveforum.com/show...been-delivered
Complete Kit, Ford 306, Sniper/Dual Sync, T5, Hydraulic clutch
-

Originally Posted by
Blitzboy54

The back of the pedal box is rounded a bit. Its easy to push the bracket too far back and not notice it's not totally flat. Then when you bring it around to the other side its a touch off.
We are sort of tied at the hip on this thing since the beginning

So far it's been a lot of fun, hope you feel the same.
I am enjoying it quite a bit, just wish I had my IRS parts so I can work on that.
-
Looks great! When you put the gas pedal in, I would recommend mocking up the inside footbox panels to make sure you have clearance for the pedal. Its pretty tight in there and ours was not going to work where we initially thought we wanted it.
MK4 Complete Kit, EFI 427W/TKO 600, 2015 IRS
Ordered: 11/6/20, Kit Completion: 2/13/21, Picked Up: 2/16/21, Build Started: 2/19/21, First Start: 6/13/21, Go Kart: 8/15/21, Sent for Paint: 12/23/21, Back From Paint: 6/16/22, Street Legal: 7/11/22
-
Post Thanks / Like - 1 Thanks, 0 Likes
-
Senior Member

FFR has clearly moved on to a new accelerator pedal since the manual was published. it's unclear how to move the pedal leg. I eventually figured out you had to remove the spline from the pedal body but you need to use a little force


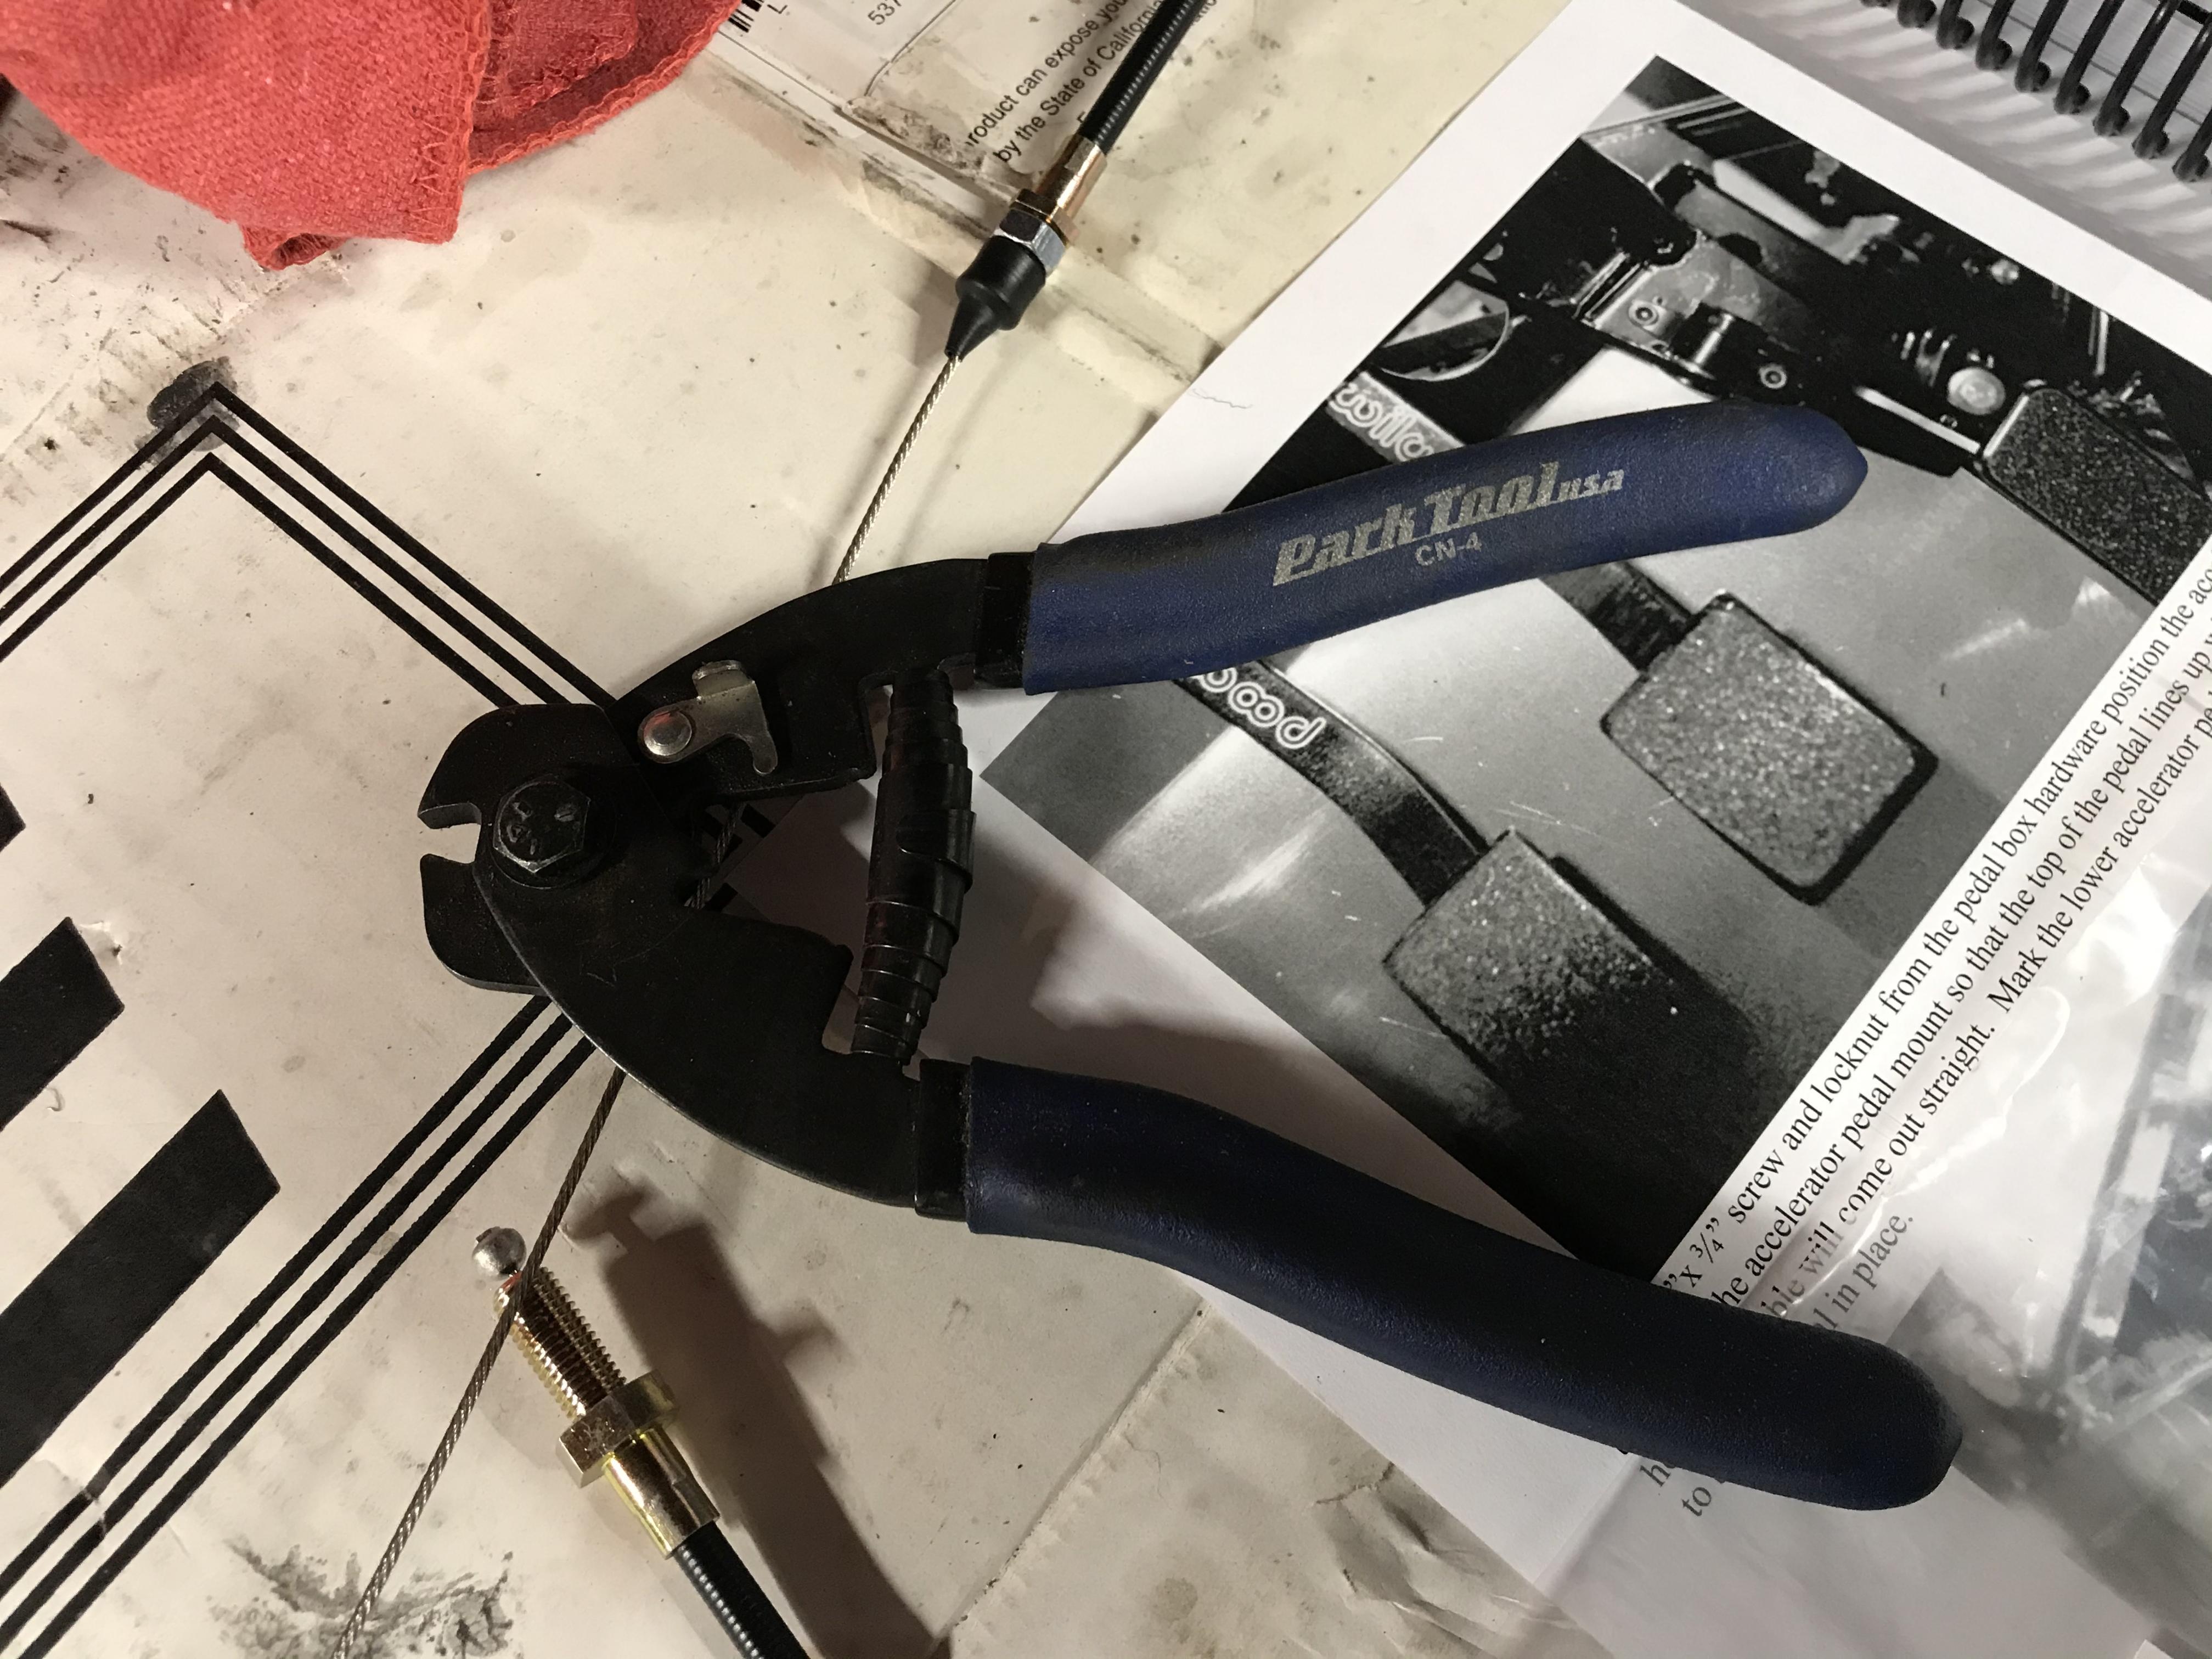
I finished the accelerator pedal and moved on to the throttle cable. Like NYMike I was a little confused as to how it goes together. Also like him I got into the forum and there were answers there. The manual is definitely vague on the subject, you need to cut both ends and put the larger end through the bulkhead. A little tip for folks if you cut a braided cable you definitely do not want to use wire cutters. If the cable frays you will be chasing it and its never really right after that. I worked in bicycle shops growing up and my wife and I are life long cyclists. Lots of bike tools hanging around our house. If you want a perfect cut on a braided cable get a set of bicycle cable cutters like these. Park Tools are the best but lots of brands work just fine. If you don't want to buy a set for one cut bring your cable by any bike shop and ask them to cut it.
Like everyone else I am missing my steering rack. FFR says mid to late April on those. So I mocked up the upper shaft. I'll need to go back put Loctite on the set screws in the shaft when the whole steering system is installed.


Finally, FFR had originally sent me a couple powder coated roll bars. Both were scratched pretty bad. They were super great about sending replacements and sending return shipping for the old ones for re work but since I want a gloss finish on them I asked for mild steel and they obliged. Then gave me a credit for the "inconvenience" I thought that was a very classy if an unnecessary gesture on their part.

Now it looks like I'm on to footbox and cockpit aluminum. Lots of mocking and powder coating this week. I have a little extra time this week. My wife and I get our second vaccine dose this weekend so we will have to see if that knocks us out any. Hopefully not.
My dad comes out Easter for a week to help with the car. I'm super excited to hang out in the garage and tinker.
Last edited by Blitzboy54; 03-24-2021 at 07:21 PM.
MK4 #10008 - Ordered 10/06/20, Delivered 03/03/21, First Start 7/22/21, First Go Kart 7/24/21
Paint by Metal Morphous 5/14/22, Legally registered 6/8/22, Graduated 7/20/22
Build Thread
https://thefactoryfiveforum.com/show...been-delivered
Complete Kit, Ford 306, Sniper/Dual Sync, T5, Hydraulic clutch
-
Post Thanks / Like - 0 Thanks, 2 Likes
-
-
Post Thanks / Like - 1 Thanks, 0 Likes
-
Senior Member

I'm on to footbox aluminum so I've been focusing on powder coating. For the thin panels I seem to have my sea legs under me. After some experimentation and advice this is the process I've landed on.
I start with a clean surface, Acetone, IPA (rubbing alcohol), gloves and lint free rags. I rub down both sides really good with the acetone. Then use a new rag and do the same with the IPA.

I then use a clean wire wheel I picked up at harbor freight and run it across all surfaces. It takes a little practice not to have it run off on you but just roll it over to one edge and make nice even passes. Then I shake it out and rub everything down again with IPA. This will take several rags. Rub until clean. This removes any sheen and exposes the native metal. This by far gives me the best adhesion.


I then pack up all the panels I am doing in that batch and roll them up in clean paper. I've been using the packing paper that comes in all the FFR boxes. Each piece gets test fit in the oven then pre baked at 400 for about ten minutes. It doesn't take long for them to get hot. Take them out, let then cool and shoot. The Harbor Freight gun has some quirks (I mean it was like $50 with a coupon) Depending on the angle you tip it is how much powder comes out. The nice thing is I've started using this as a feature. It helps even out the coats. I could definitely see if I was to do this with any kind of regularity why you would want a quality gun. But for this project if I was to spend real money on a powder coating system I mind as well just pay someone else to do it.
Practicing has helped a lot. I now recognize what an even proper coat looks like before it goes in the oven. I've only dealt in one color. I have others so we will see but the product is greatly improved I am quite happy with the results. Metal prep is the key I think it's 90% of getting a good finish

Last edited by Blitzboy54; 03-25-2021 at 01:52 PM.
MK4 #10008 - Ordered 10/06/20, Delivered 03/03/21, First Start 7/22/21, First Go Kart 7/24/21
Paint by Metal Morphous 5/14/22, Legally registered 6/8/22, Graduated 7/20/22
Build Thread
https://thefactoryfiveforum.com/show...been-delivered
Complete Kit, Ford 306, Sniper/Dual Sync, T5, Hydraulic clutch
-
Post Thanks / Like - 0 Thanks, 2 Likes
-

Originally Posted by
Blitzboy54

FFR has clearly moved on to a new accelerator pedal since the manual was published. it's unclear how to move the pedal leg. I eventually figured out you had to remove the spline from the pedal body but you need to use a little force
That took us a while to figure out too and even longer to actually force it apart without destroying it after we figured it out. They said the angle could be matched later in the car too, but I don't know how I would get it apart without removing it from the car. Hopefully it wont come to that.
Your powder coating looks great and I'm jealous! A separate oven is not in the cards for me so its not something we are going to be able to do on our build.
MK4 Complete Kit, EFI 427W/TKO 600, 2015 IRS
Ordered: 11/6/20, Kit Completion: 2/13/21, Picked Up: 2/16/21, Build Started: 2/19/21, First Start: 6/13/21, Go Kart: 8/15/21, Sent for Paint: 12/23/21, Back From Paint: 6/16/22, Street Legal: 7/11/22
-
Senior Member


Originally Posted by
NYMike

That took us a while to figure out too and even longer to actually force it apart without destroying it after we figured it out. They said the angle could be matched later in the car too, but I don't know how I would get it apart without removing it from the car. Hopefully it wont come to that.
Your powder coating looks great and I'm jealous! A separate oven is not in the cards for me so its not something we are going to be able to do on our build.
Thank you,
Yeah I made my best guess based on what other build threads looked like and the manual. Agreed if you have to adjust it you need to take it back out. That's why my drivers footbox won't have the outer panel installed until I am passed having a running motor.
MK4 #10008 - Ordered 10/06/20, Delivered 03/03/21, First Start 7/22/21, First Go Kart 7/24/21
Paint by Metal Morphous 5/14/22, Legally registered 6/8/22, Graduated 7/20/22
Build Thread
https://thefactoryfiveforum.com/show...been-delivered
Complete Kit, Ford 306, Sniper/Dual Sync, T5, Hydraulic clutch
-
I hated that stupid accelerator pedal, I dinged it up trying to get it in the right position. On the flip side, drilling the holes in the differential was not problem at all, which I have seen quite a few others complain about it.
-
Tool Baron

Originally Posted by
Blitzboy54

a bunch of PC cracked and came off when I torqued it. I’ll POR 15 it but again it won’t match because the satin finish.
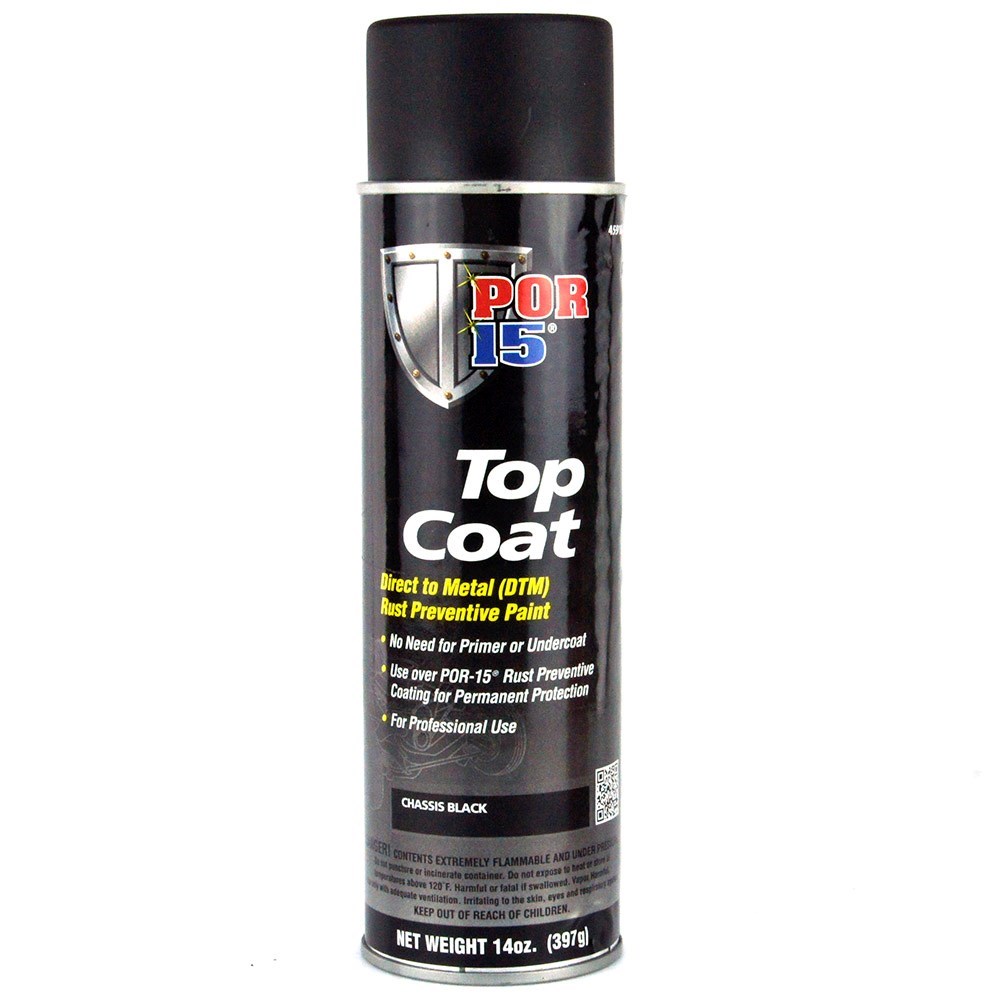
POR makes a chassis black spray top coat. It's a really good match for the satin F5R PC.
Frank
__________________________
Factory Five Racing MKIII Super Snake Replica. Cannonball Cobra Drop Trunk Box, Horn Button and other machined Do Dads.
i.e.427 Chromed Full Width Roll Bar with integrated LED Third Brake Light.
I will never forget My Buddy Paul.
-
Post Thanks / Like - 1 Thanks, 0 Likes
-
Senior Member

When I got home from work Friday I had a surprise. The rear brakes I ordered from Gordon Levy arrived. Interestingly the brakes from FFR that were ordered a month earlier are still MIA.

The FFR offering is a single piston with an integrated parking brake. As it turns out my 17" wheels were a touch too small for those so I am using these instead, they are 4 piston on the same 12.19" rotor with an shoe for a parking brake. I had to remove the axles to get the shoe assy on. I then refitted everything and adjusted the shoe to the rotor. I figured out after that this actually would have been a lot easier off the car. Just put the rotor on the bench then adjust the nut most of the way and finish the last few turns on the car. That's not what I did but what I would do if I was to do it again. The rotor had to come on and off a lot the way I did it.

After getting it set the way I wanted I measured the gap so I could pre set the second one and make life a bit easier.


I have it so the shoe contacts the rotor and stops about 1/3 of the actuator travel while pulling it by hand. I may have to fine tune it later but it's close and I might get lucky. If not I will have to take the rotors back off but only once.

Last edited by Blitzboy54; 03-28-2021 at 06:02 PM.
MK4 #10008 - Ordered 10/06/20, Delivered 03/03/21, First Start 7/22/21, First Go Kart 7/24/21
Paint by Metal Morphous 5/14/22, Legally registered 6/8/22, Graduated 7/20/22
Build Thread
https://thefactoryfiveforum.com/show...been-delivered
Complete Kit, Ford 306, Sniper/Dual Sync, T5, Hydraulic clutch
-
Senior Member

The instructions were really clear and easy to follow. These are not floating rotors so they need to be centered. The kit comes with a number of .031" shims. Center the caliper on the rotor and then torque down and use blue thread lock. It has an 1/8 NPT to AN fitting. I used a little thread tape on the NPT side, installed the pads from up top and put in the cotter pin.
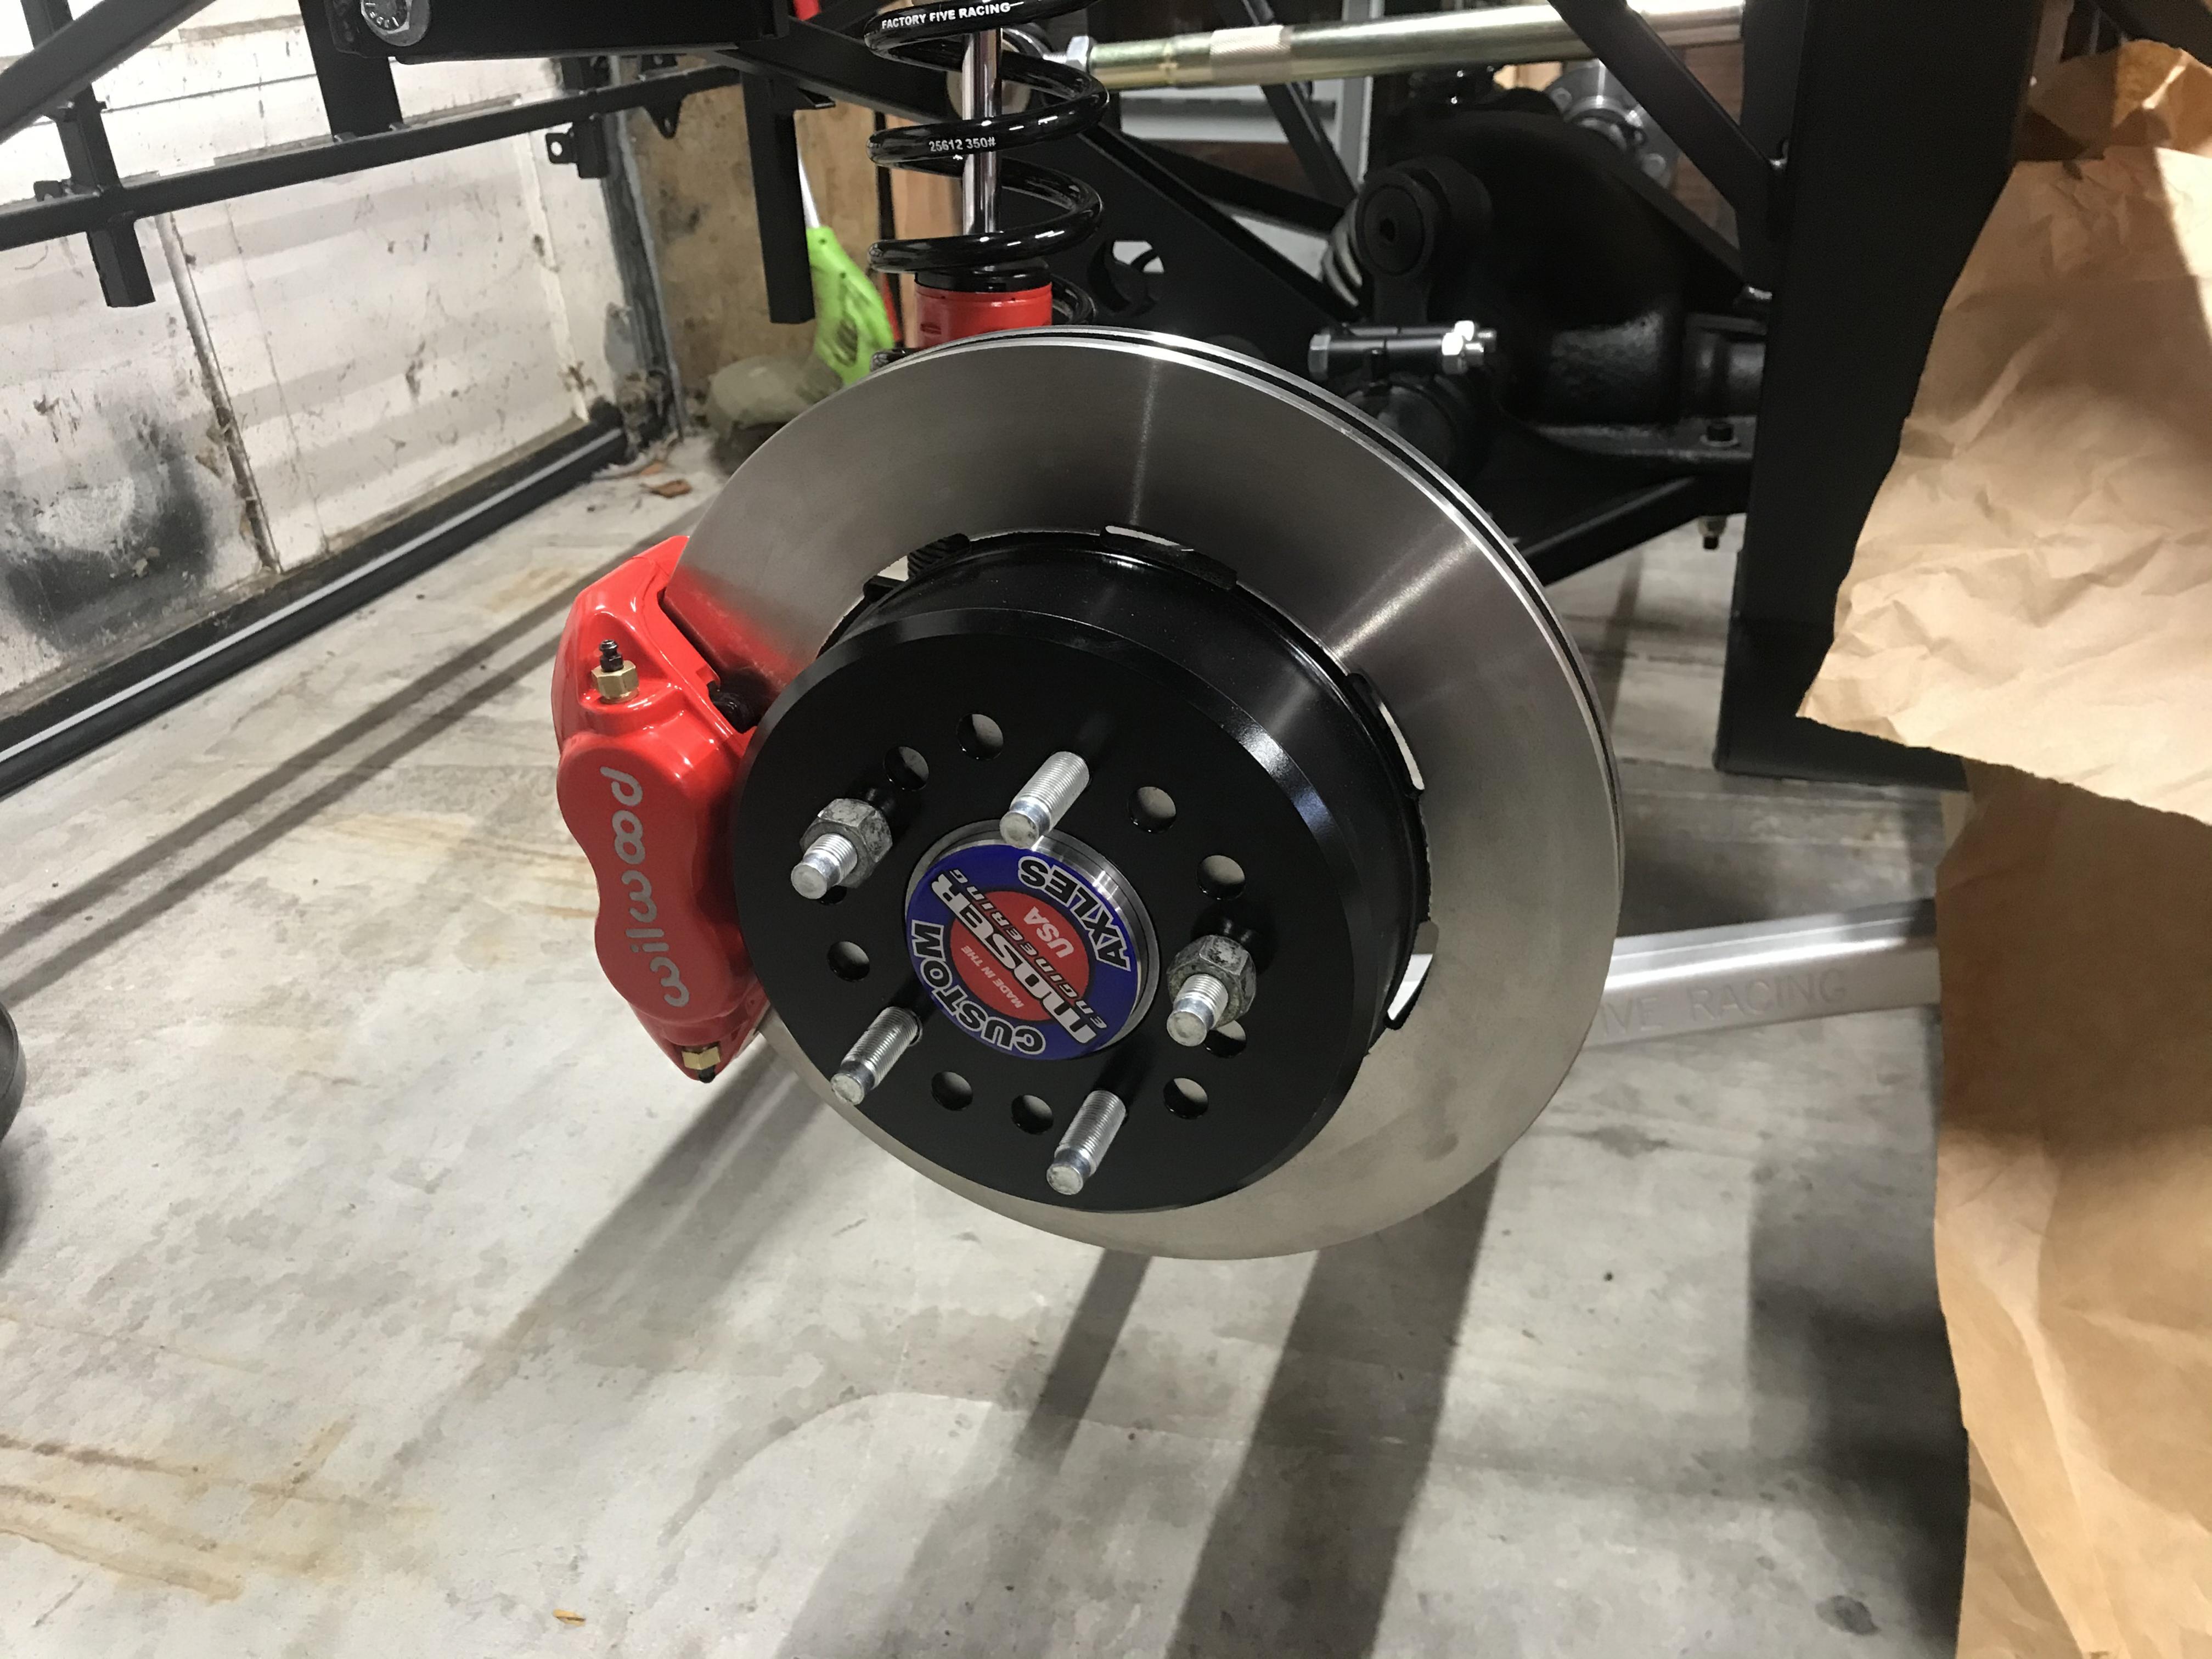

I mocked up my wheel because I really wanted to see how she would look. I'm pretty happy with it. I have about 1/2" clearance between the upper tire and the coil over spring. In a car like this that seems like plenty.
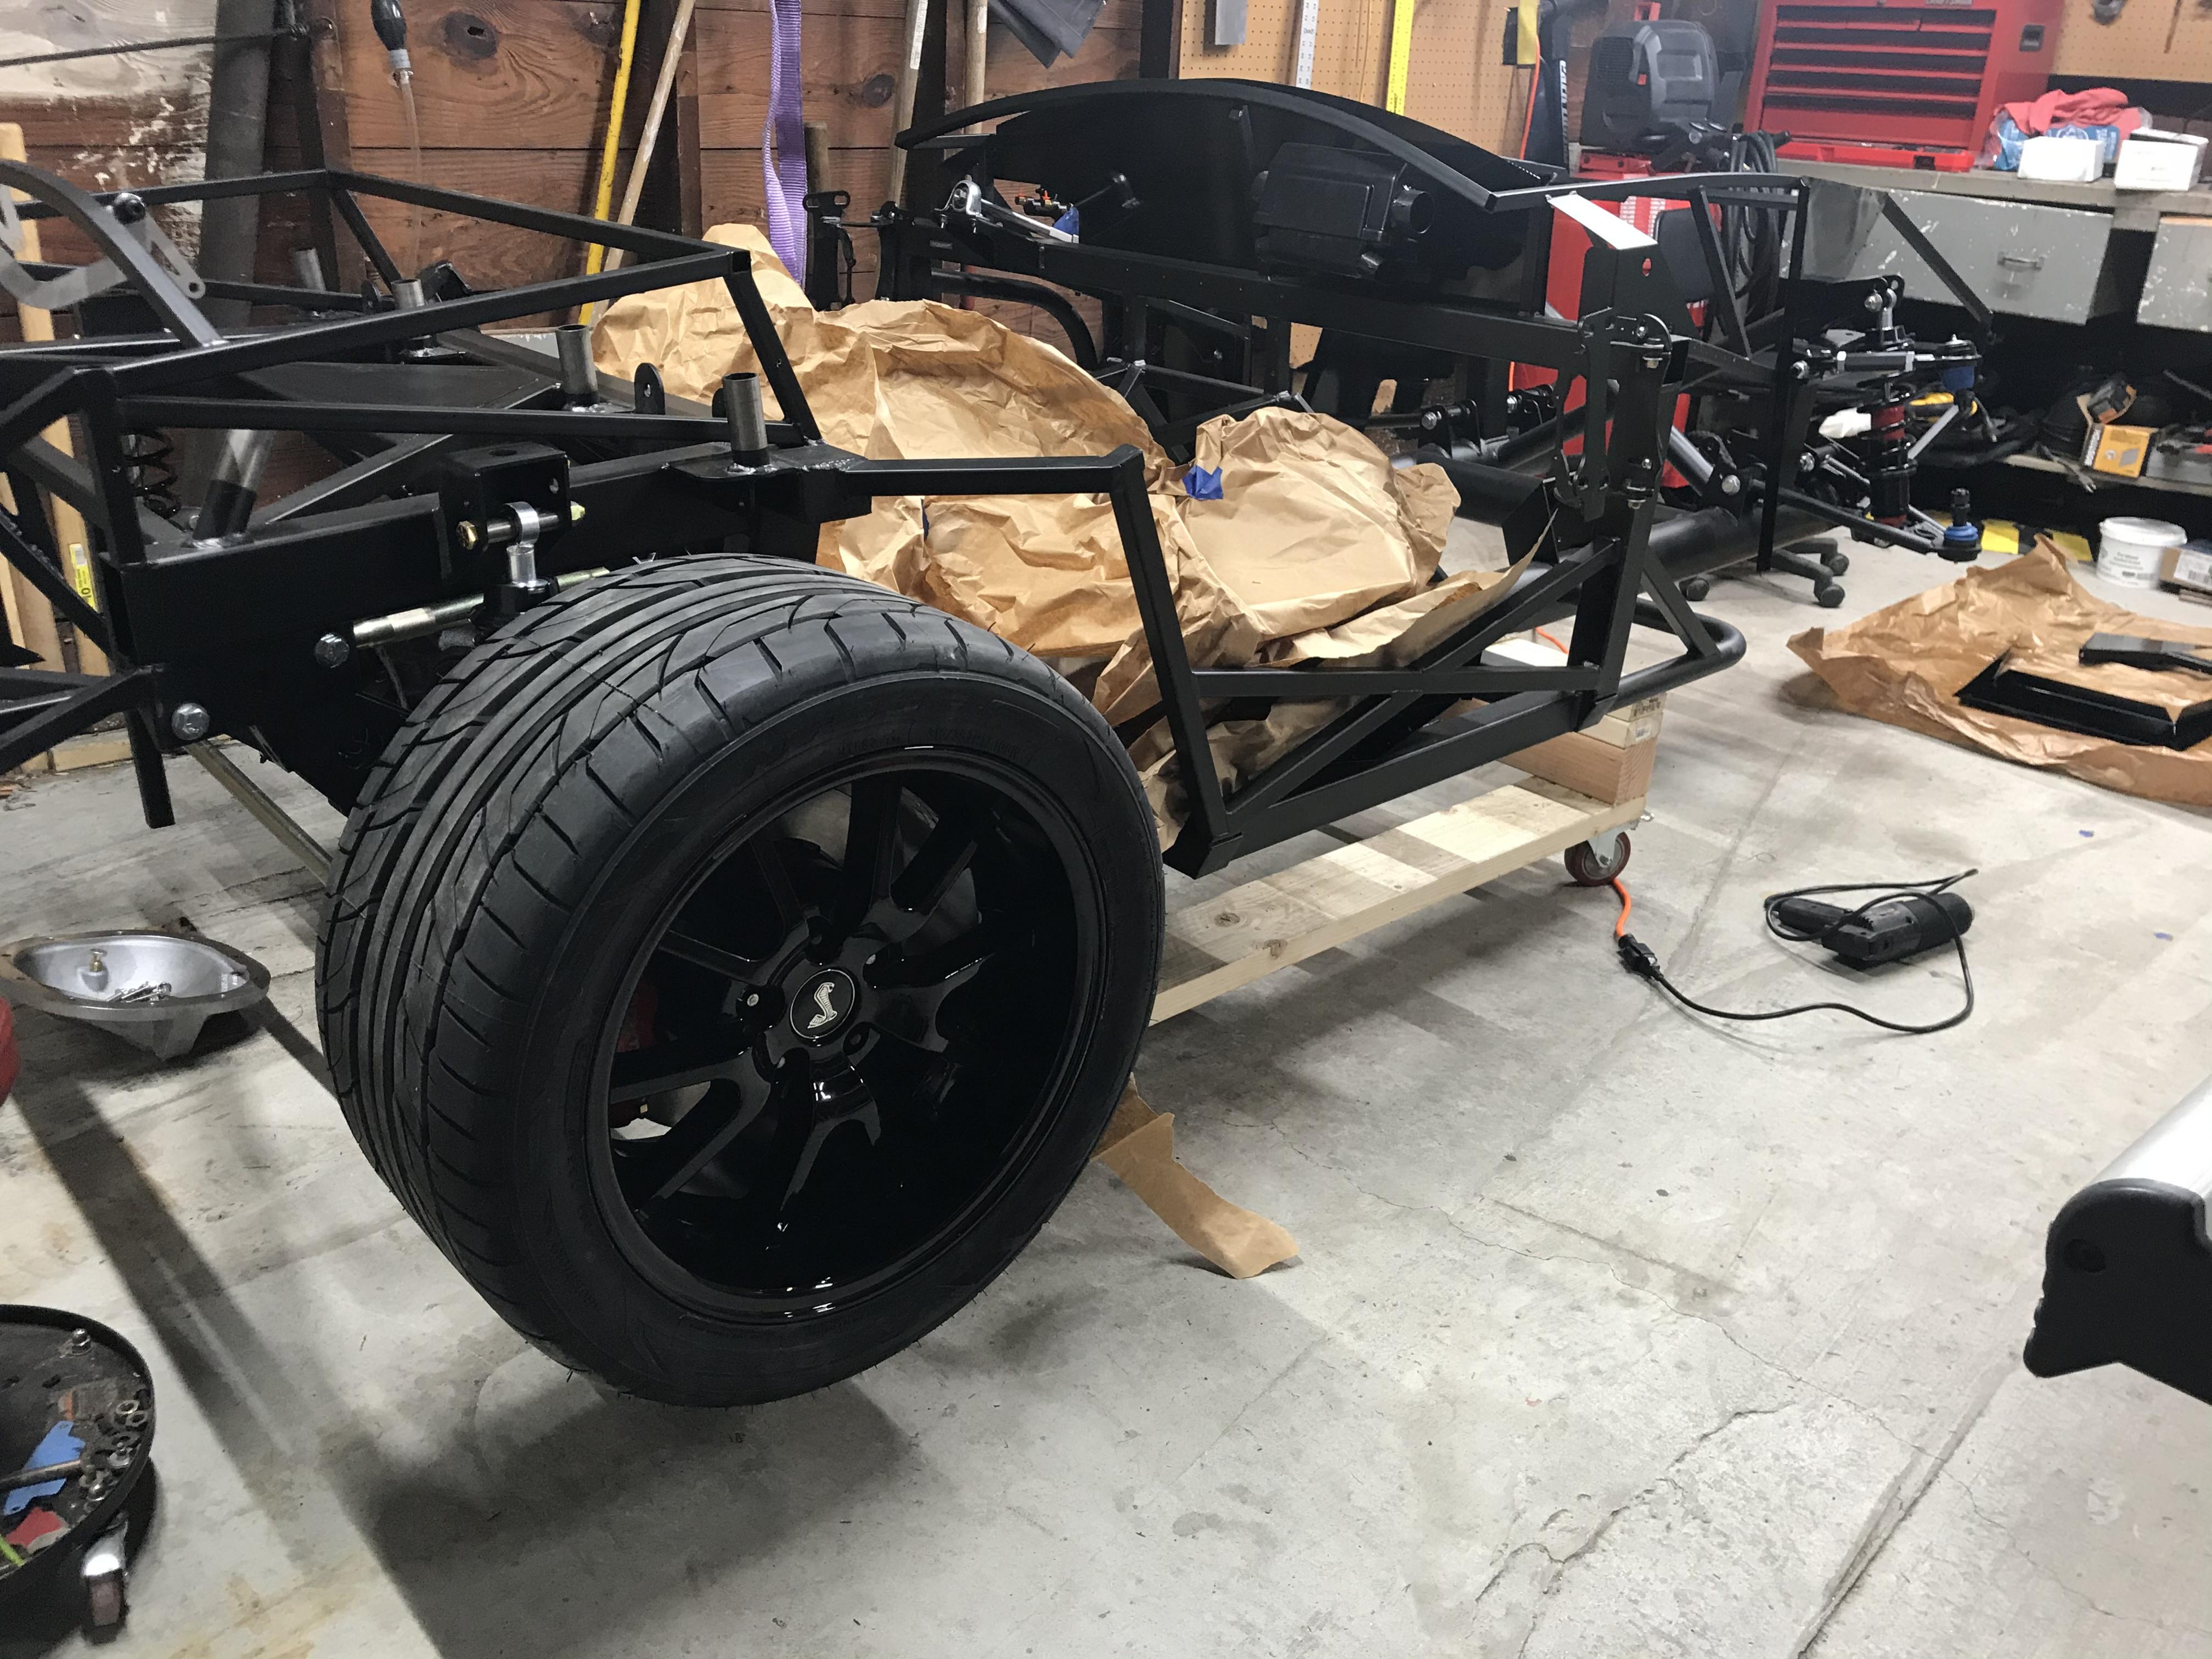

On another note. I finished pretty much all my aluminum panel powder coating and prep so I can start installing footbox panels as early as tomorrow. I will chip away at it this week. My I have Easter week off from work and my dad is coming up for the holiday and to help work on the car for 4 or 5 days. Really looking forward to working on it together
I also "installed" this.

Last edited by Blitzboy54; 03-28-2021 at 06:08 PM.
MK4 #10008 - Ordered 10/06/20, Delivered 03/03/21, First Start 7/22/21, First Go Kart 7/24/21
Paint by Metal Morphous 5/14/22, Legally registered 6/8/22, Graduated 7/20/22
Build Thread
https://thefactoryfiveforum.com/show...been-delivered
Complete Kit, Ford 306, Sniper/Dual Sync, T5, Hydraulic clutch
-
Post Thanks / Like - 0 Thanks, 1 Likes
-
Senior Member

Got the passenger side aluminum installed. The dumb thing I discovered i did was by pre installing my heater I cannot access the 2 rivet holes that are under the upper footbox. When I put the heater in I fully sealed it and do not want to take it back out. So I used a couple black button head screws. Not a big deal but something to avoid for future builders.


Last edited by Blitzboy54; 03-29-2021 at 09:53 PM.
MK4 #10008 - Ordered 10/06/20, Delivered 03/03/21, First Start 7/22/21, First Go Kart 7/24/21
Paint by Metal Morphous 5/14/22, Legally registered 6/8/22, Graduated 7/20/22
Build Thread
https://thefactoryfiveforum.com/show...been-delivered
Complete Kit, Ford 306, Sniper/Dual Sync, T5, Hydraulic clutch
-
So jealous that you have brakes. The wheels and panels look incredible! Those wheels are going to look awesome with the body on. Beer fridge is definitely a good addition to the build.
MK4 Complete Kit, EFI 427W/TKO 600, 2015 IRS
Ordered: 11/6/20, Kit Completion: 2/13/21, Picked Up: 2/16/21, Build Started: 2/19/21, First Start: 6/13/21, Go Kart: 8/15/21, Sent for Paint: 12/23/21, Back From Paint: 6/16/22, Street Legal: 7/11/22
-

Originally Posted by
NYMike

So jealous that you have brakes. The wheels and panels look incredible! Those wheels are going to look awesome with the body on. Beer fridge is definitely a good addition to the build.
I agree on all 3 counts!
-
Senior Member

Thanks guys! The beer fridge has been a solid addition.
MK4 #10008 - Ordered 10/06/20, Delivered 03/03/21, First Start 7/22/21, First Go Kart 7/24/21
Paint by Metal Morphous 5/14/22, Legally registered 6/8/22, Graduated 7/20/22
Build Thread
https://thefactoryfiveforum.com/show...been-delivered
Complete Kit, Ford 306, Sniper/Dual Sync, T5, Hydraulic clutch
-
Senior Member

First thing I was able to get ironed out this week was to fix a mistake. Myself and at least one other builder were struggling with the pedal rubbing against the aluminum of the inner footbox wall. It seemed weird because I've read a lot of build threads and not seen it as an issue. Then I figured I must have received a newer pedal and this is a recent problem. Well, it was neither, simply when I took the pedal apart to set the arm I reversed it. I had the arm on the left and pedal on the right. I took it back apart and now it fits just fine. FYI to any future builders. It's a little thing but it took me longer than I would like to admit to figure out.
This is the correct orientation


Completed as much driver footbox as I care to for a while. I test fit the rest but tucked it away for later. I can see that gap management will be a thing. Some of these gaps will require me to fabricate some pieces from scrap aluminum. However I can see I will need a water sealing solution. I think I may use a spray on sealer.

I'm on to the cockpit. I plan to put my charging ports behind the transmission tunnel on the u joint cover. I've seen it done. If anyone knows why this would be terrible mistake please let me know.


Last edited by Blitzboy54; 04-22-2021 at 10:32 PM.
MK4 #10008 - Ordered 10/06/20, Delivered 03/03/21, First Start 7/22/21, First Go Kart 7/24/21
Paint by Metal Morphous 5/14/22, Legally registered 6/8/22, Graduated 7/20/22
Build Thread
https://thefactoryfiveforum.com/show...been-delivered
Complete Kit, Ford 306, Sniper/Dual Sync, T5, Hydraulic clutch
-
Senior Member


Originally Posted by
Blitzboy54

I also "installed" this.

Best addition yet! 
Chris
Coupe complete kit delivered: 4/22/24.
Build Thread. Coyote. T-56. IRS w/3.55. Wilwoods. PS. HVAC. Side windows.
MK4 Complete kit.
Build Thread Index. Delivered: 10/15/2020. Legal: 7/25/23. Coyote Gen3. TKO600 (0.64 OD). IRS w/3.55. PS. Wilwoods. Sway bars. This build is dedicated to my son, Benjamin.
Build Thread.
-
Post Thanks / Like - 0 Thanks, 1 Likes
-
This thing is starting to look like a car! I'm happy and jealous. Congrats and nice work!
-
Senior Member

Thanks Chris! It’s been a nice addition, if the garage door is open my friends know to pop in. Wife has been spending time hanging out too.
This thing is starting to look like a car! I'm happy and jealous. Congrats and nice work!
Thanks man. Take your time and enjoy the journey. I had a head start and have had an unusual amount of time to work on it. My dad is out this week so it’s going to be a full weeks worth, but I expect things to slow down soon. I appreciate the kind words
MK4 #10008 - Ordered 10/06/20, Delivered 03/03/21, First Start 7/22/21, First Go Kart 7/24/21
Paint by Metal Morphous 5/14/22, Legally registered 6/8/22, Graduated 7/20/22
Build Thread
https://thefactoryfiveforum.com/show...been-delivered
Complete Kit, Ford 306, Sniper/Dual Sync, T5, Hydraulic clutch
-

Originally Posted by
Blitzboy54

Completed as much driver footbox as I car to for a while. I test fit the rest but tucked it away for later. I can see that gap management will be a thing. Some of these gaps will require me to fabricate some pieces from scrap aluminum. However I can see I will need a water sealing solution. I think I may use a spray on sealer.

I'm on to the cockpit. I plan to put my charging ports behind the transmission tunnel on the u joint cover. I've seen it done. If anyone knows why this would be terrible mistake please let me know.

Your black panels look great! Its really coming together. We are probably going to use some silicone and HVAC tape to seal some of those smaller gaps and scrap aluminum like you said for the bigger ones.
I really like that idea for the charging ports. My only concern would be the back side getting wet under the car. Not sure if that is actually an issue though. Where did you get the charging ports from?
MK4 Complete Kit, EFI 427W/TKO 600, 2015 IRS
Ordered: 11/6/20, Kit Completion: 2/13/21, Picked Up: 2/16/21, Build Started: 2/19/21, First Start: 6/13/21, Go Kart: 8/15/21, Sent for Paint: 12/23/21, Back From Paint: 6/16/22, Street Legal: 7/11/22
-
Senior Member


Originally Posted by
NYMike

Your black panels look great! Its really coming together. We are probably going to use some silicone and HVAC tape to seal some of those smaller gaps and scrap aluminum like you said for the bigger ones.
I really like that idea for the charging ports. My only concern would be the back side getting wet under the car. Not sure if that is actually an issue though. Where did you get the charging ports from?
I don’t think it will be an issue honestly. Everything is sealed plastics and I plan to use heat shrink over the connections.
This is the port I used. I originally got the link from Terry in LV. It’s what he used. I considered putting it in the dash but I’m installing a cubby and thought I could tuck the phones in there while charging. It’s been done both ways.
Ginsco Cigarette Lighter Socket Splitter 12V Dual USB 2A/1A Charger Power Adapter Outlet for Car Boat Marine Motorcycle Scooter RV DIY Kit (Black) https://www.amazon.com/dp/B01B79F8CW...ing=UTF8&psc=1
MK4 #10008 - Ordered 10/06/20, Delivered 03/03/21, First Start 7/22/21, First Go Kart 7/24/21
Paint by Metal Morphous 5/14/22, Legally registered 6/8/22, Graduated 7/20/22
Build Thread
https://thefactoryfiveforum.com/show...been-delivered
Complete Kit, Ford 306, Sniper/Dual Sync, T5, Hydraulic clutch
-
Senior Member

Been wrenching a lot the last few days. I'll have a lot of updates in the next week or so. I was hoping to get my motor back in the shop this week but the shop called and there are unfortunately a few setbacks. I'm probably a couple weeks out before I get it home.
I manged to finish the cockpit aluminum, up to the point of moving on to breaks and fuel

Interestingly enough I have been using gloss black from Prismatic Poweders. The 2lbs I originally ordered were getting low so I ordered more. I filled up my hopper and coated my battery box. After baking it it was a satin finish. I reached out with pics and they apologized. They accidentally sent me "stone black". it turned out to be a happy accident because I love it. I plan to use it for the wheel wells. I coated the back of the seat panels with it since they sort of act as the front of the wheel well.

The fuel tank is installed and like everyone else we went with a longer bolt. Ordered a bunch of HW including Kleiner Mod parts. Also ran the fuel hard lines


MK4 #10008 - Ordered 10/06/20, Delivered 03/03/21, First Start 7/22/21, First Go Kart 7/24/21
Paint by Metal Morphous 5/14/22, Legally registered 6/8/22, Graduated 7/20/22
Build Thread
https://thefactoryfiveforum.com/show...been-delivered
Complete Kit, Ford 306, Sniper/Dual Sync, T5, Hydraulic clutch


 Thanks:
  Likes:


 Reply With Quote


 So far it's been a lot of fun, hope you feel the same.


