-
Senior Member

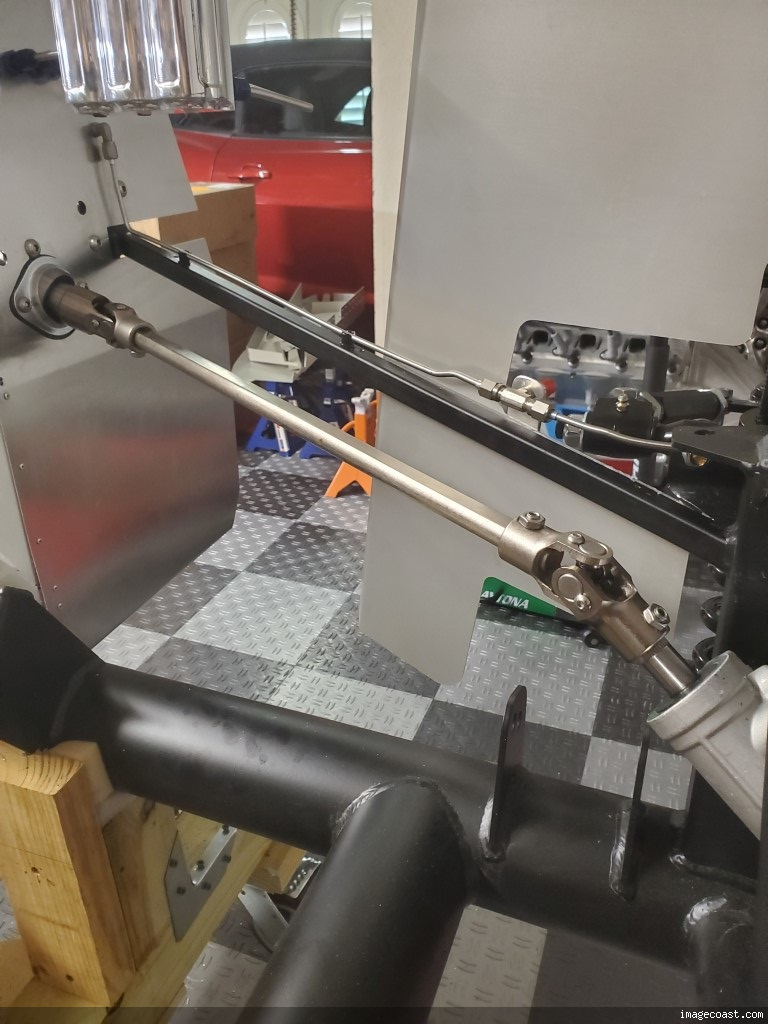
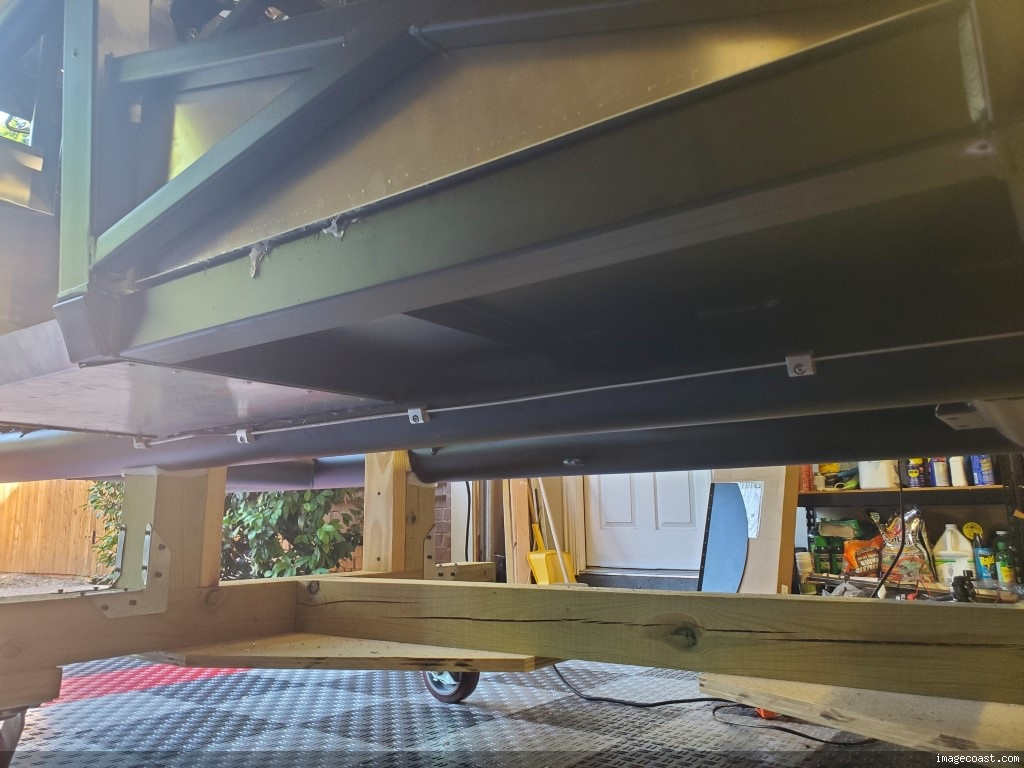
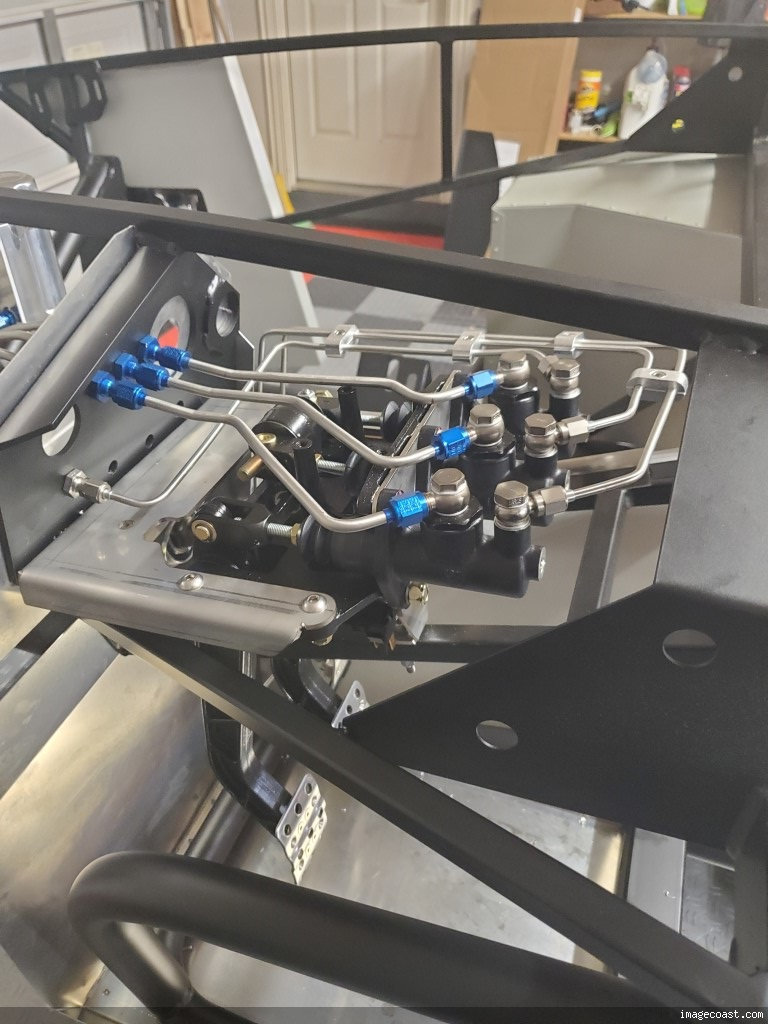
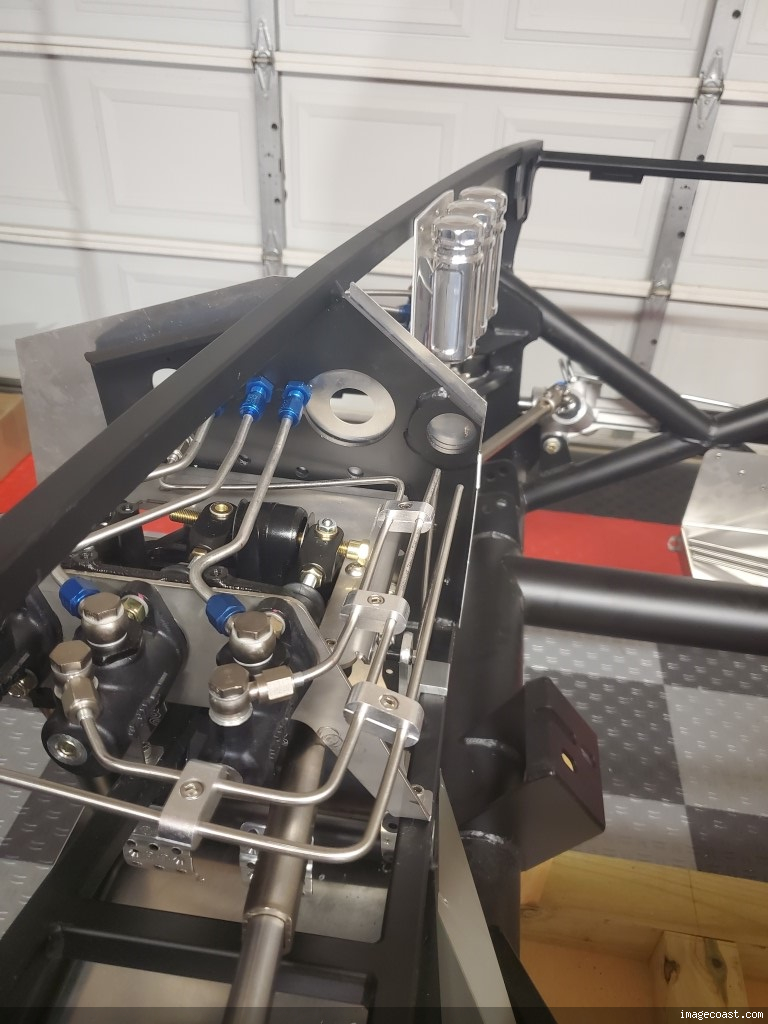
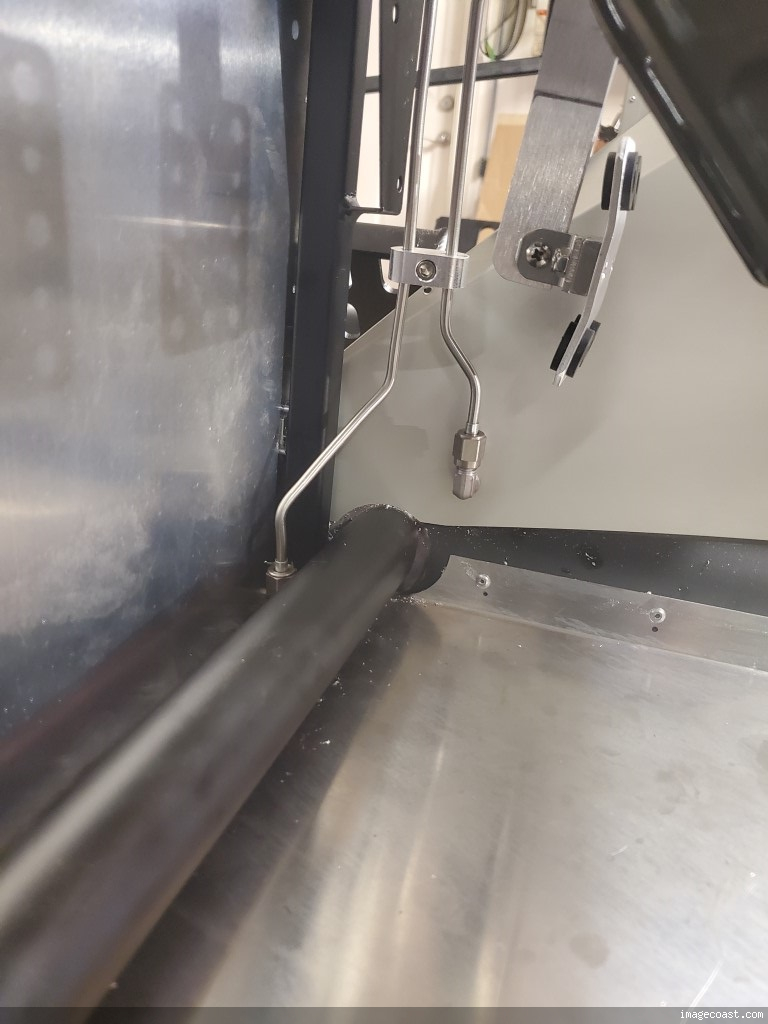
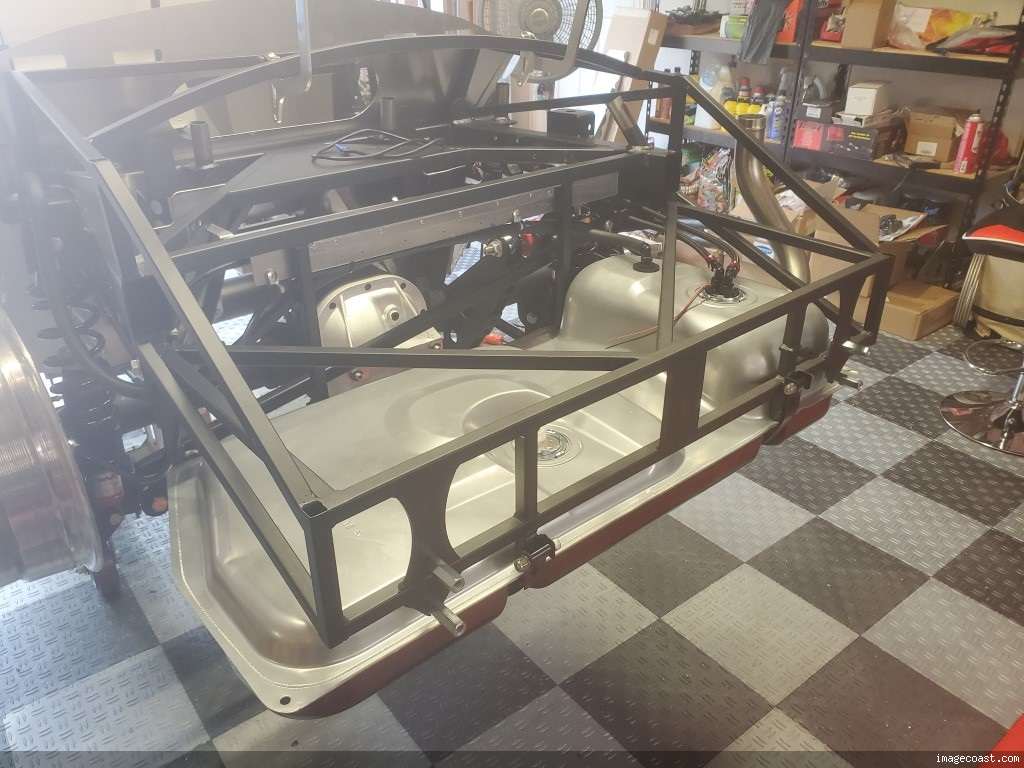
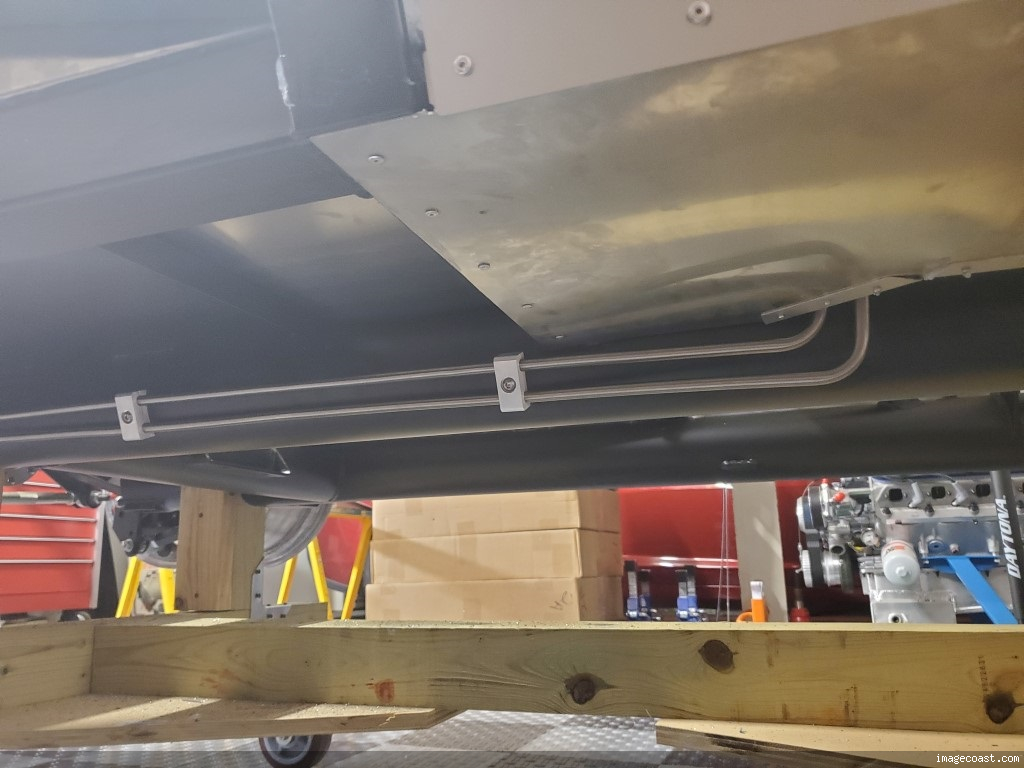
nice lines. I'm guessing you have plenty of clearance from the gas pedal to the rear and clutch lines?
-
Senior Member


Originally Posted by
egchewy79

nice lines. I'm guessing you have plenty of clearance from the gas pedal to the rear and clutch lines?
Yes
-
Senior Member

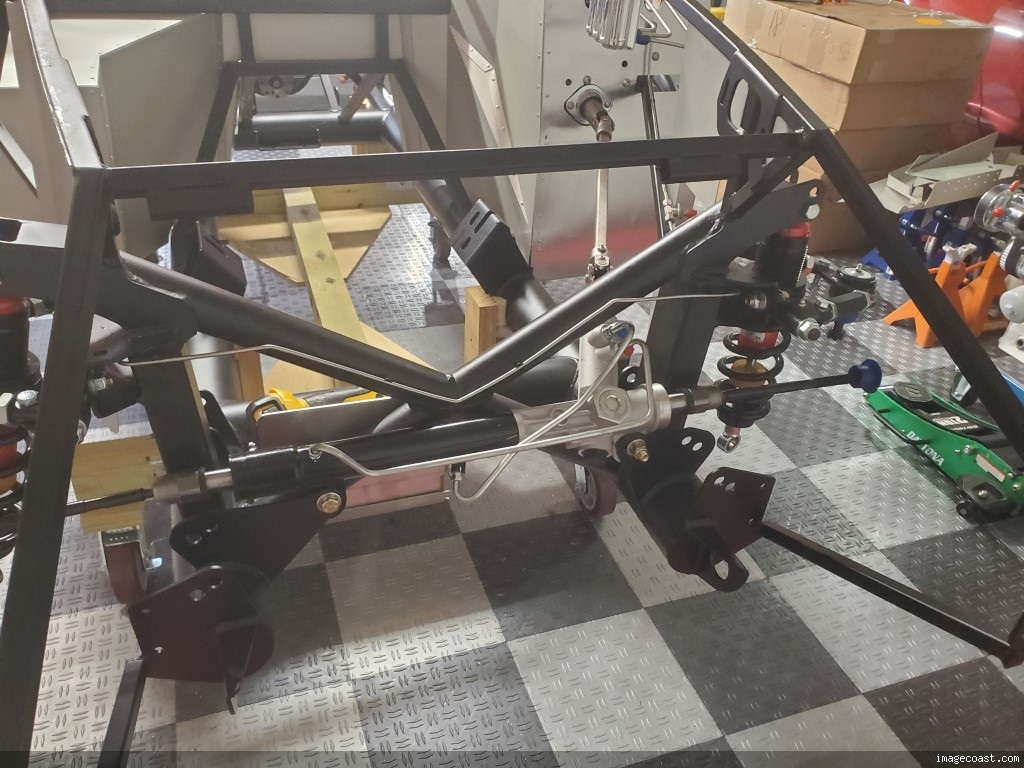
Your brake and clutch lines are beautiful.
Take a bow
MK4 #10008 - Ordered 10/06/20, Delivered 03/03/21, First Start 7/22/21, First Go Kart 7/24/21
Paint by Metal Morphous 5/14/22, Legally registered 6/8/22, Graduated 7/20/22
Build Thread
https://thefactoryfiveforum.com/show...been-delivered
Complete Kit, Ford 306, Sniper/Dual Sync, T5, Hydraulic clutch
-
Post Thanks / Like - 1 Thanks, 0 Likes
-
Senior Member
-
Post Thanks / Like - 0 Thanks, 1 Likes
-
Senior Member
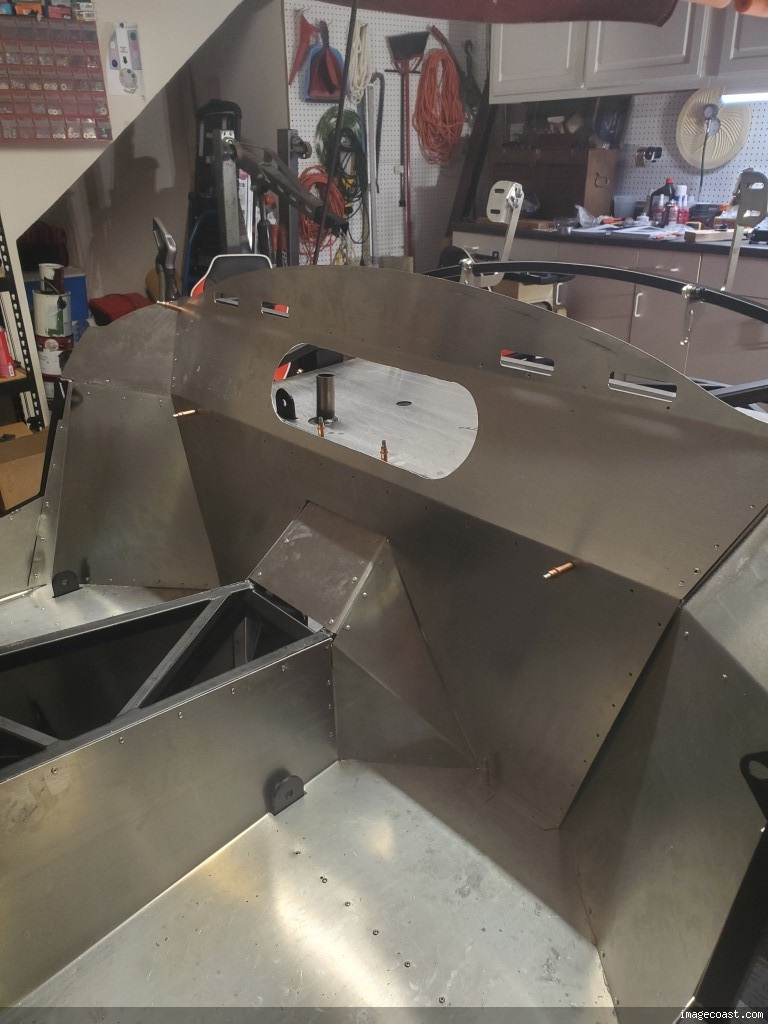
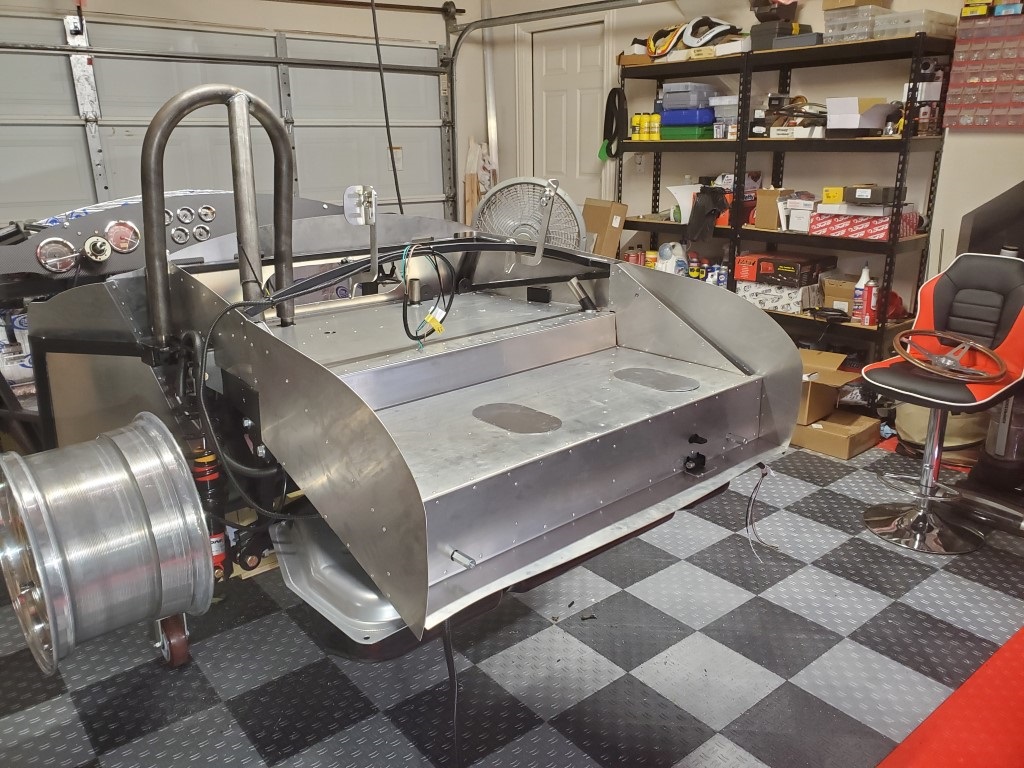
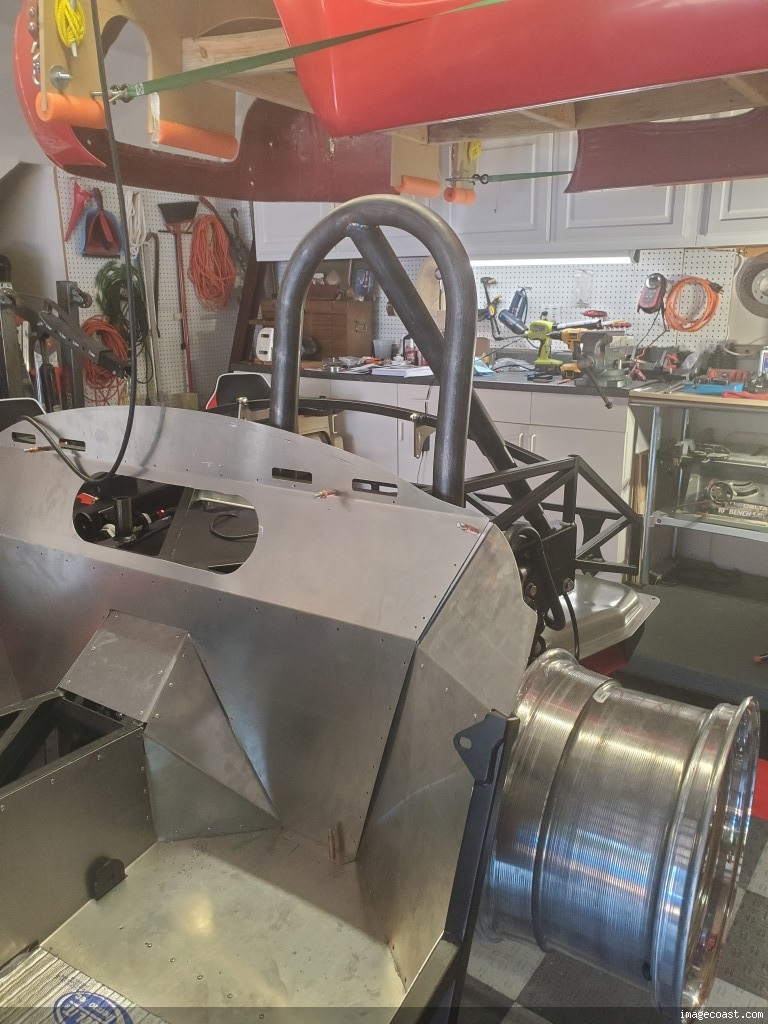
Patch panel to cover the E-brake opening.

And started on the dash.
-
Looking awesome. I need to come over and see your project!
-
Post Thanks / Like - 0 Thanks, 1 Likes
-
Senior Member
Originally Posted by
OB6
Looking awesome. I need to come over and see your project!
Come over anytime!
-
Senior Member

Wow! Those brake lines are too beautiful to cover up!
Chris
Coupe complete kit delivered: 4/22/24.
Build Thread. Coyote. T-56. IRS w/3.55. Wilwoods. PS. HVAC. Side windows.
MK4 Complete kit.
Build Thread Index. Delivered: 10/15/2020. Legal: 7/25/23. Coyote Gen3. TKO600 (0.64 OD). IRS w/3.55. PS. Wilwoods. Sway bars. This build is dedicated to my son, Benjamin.
Build Thread.
-
Post Thanks / Like - 0 Thanks, 1 Likes
-
Senior Member
-
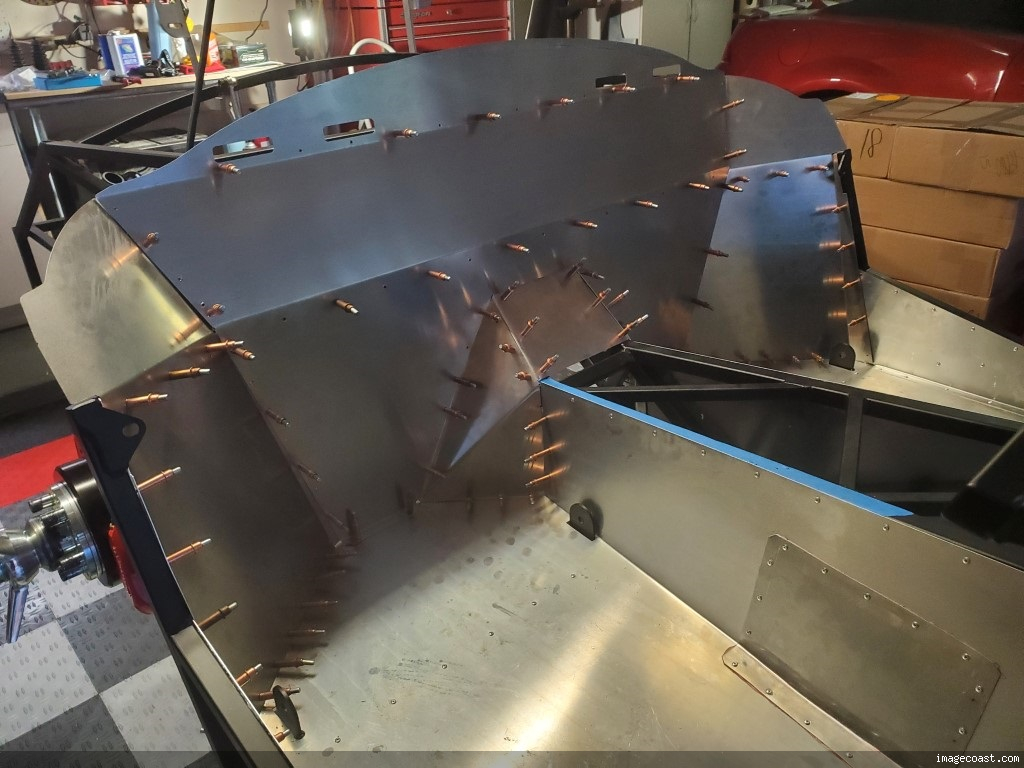
Out of Clecos... now just remove every other one and you will have a lot more...
-
Senior Member
Originally Posted by
BadAsp427
Out of Clecos... now just remove every other one and you will have a lot more...
If you look closely you can see I've already resorted to that! It's fine though, several of the panels are ready for silicone and rivet.
-
Post Thanks / Like - 0 Thanks, 1 Likes
-
Originally Posted by
460.465USMC
Wow! Those brake lines are too beautiful to cover up!
I got to see them in person... very impressive indeed. Mike's got some skills!
-
Post Thanks / Like - 0 Thanks, 1 Likes
-
Senior Member
Originally Posted by
OB6
I got to see them in person... very impressive indeed. Mike's got some skills!
Skills lol I didn't show him the barrel around back full of the lines I scrapped!
-
Post Thanks / Like - 0 Thanks, 1 Likes
-
Senior Member
You only need about 20% of the cleco's your actually using. I only had 25 for my build and never came close to running out. Having said that your car looks really clean. It's coming along nicely.
Last edited by Blitzboy54; 06-30-2022 at 10:06 AM.
MK4 #10008 - Ordered 10/06/20, Delivered 03/03/21, First Start 7/22/21, First Go Kart 7/24/21
Paint by Metal Morphous 5/14/22, Legally registered 6/8/22, Graduated 7/20/22
Build Thread
https://thefactoryfiveforum.com/show...been-delivered
Complete Kit, Ford 306, Sniper/Dual Sync, T5, Hydraulic clutch
-
Senior Member

Originally Posted by
Mike.Bray
I pick up my kit in 4 days 20 hours 43 min, and 19 seconds. I'm drooling over the steel lines you put in. Where did you source them, and how much more difficult are they to work with. I'm thinking I need to do this.
-
Senior Member
Originally Posted by
Tooth
I pick up my kit in 4 days 20 hours 43 min, and 19 seconds. I'm drooling over the steel lines you put in. Where did you source them, and how much more difficult are they to work with. I'm thinking I need to do this.
Nothing like a countdown to delivery or pickup!

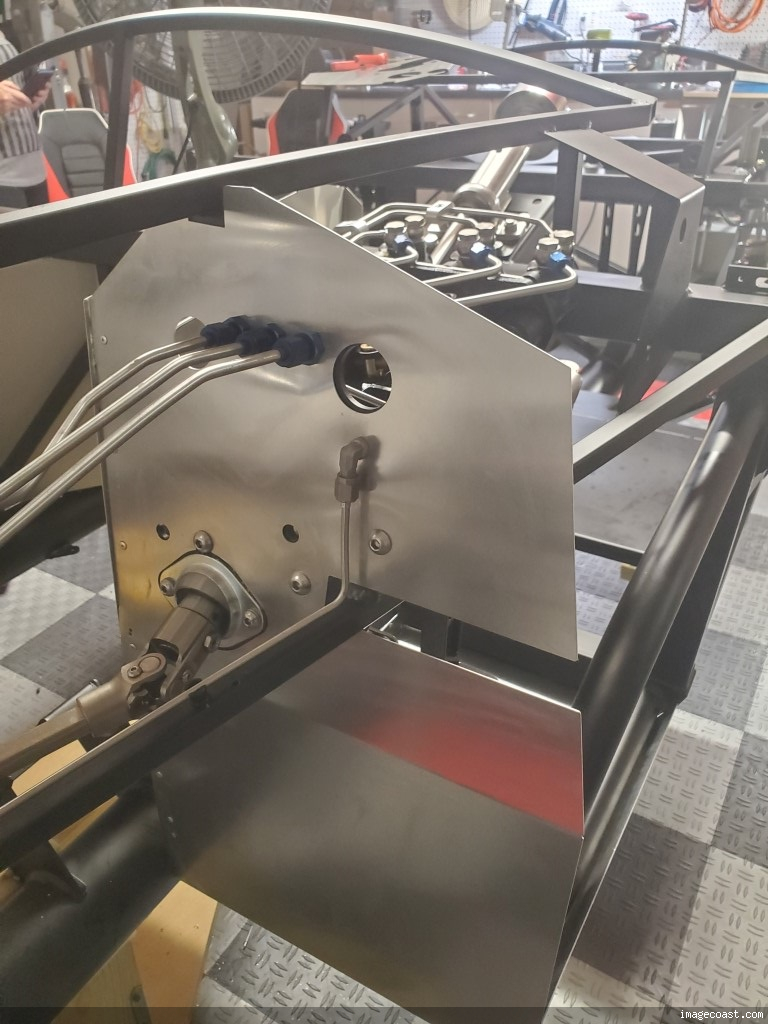
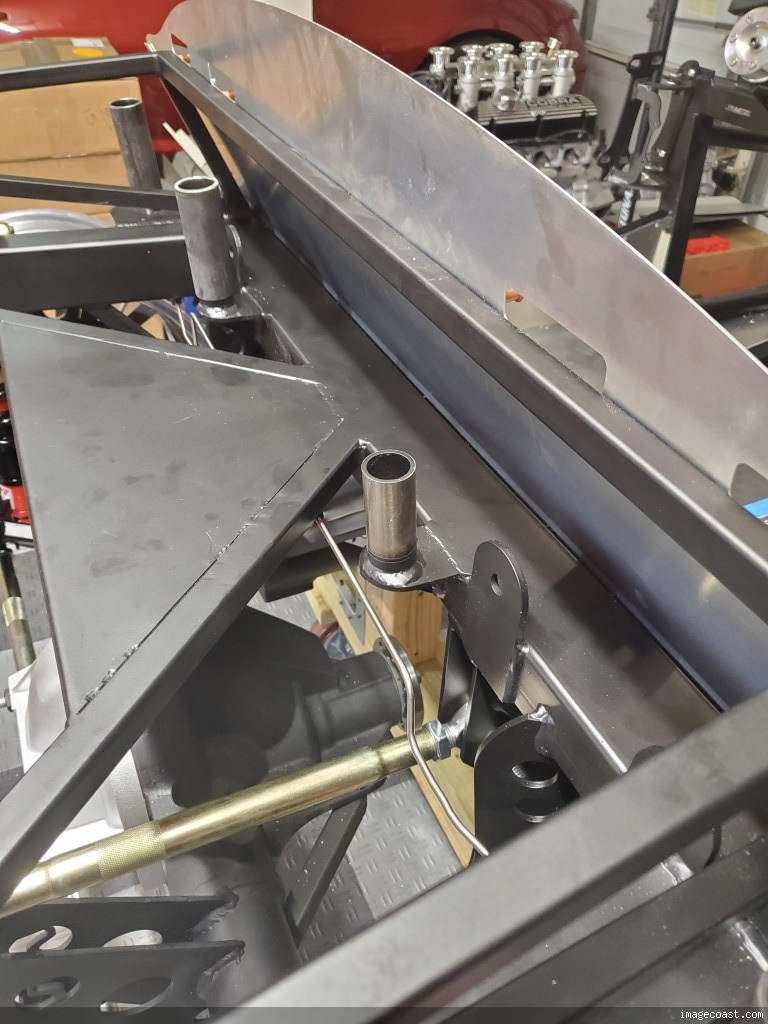
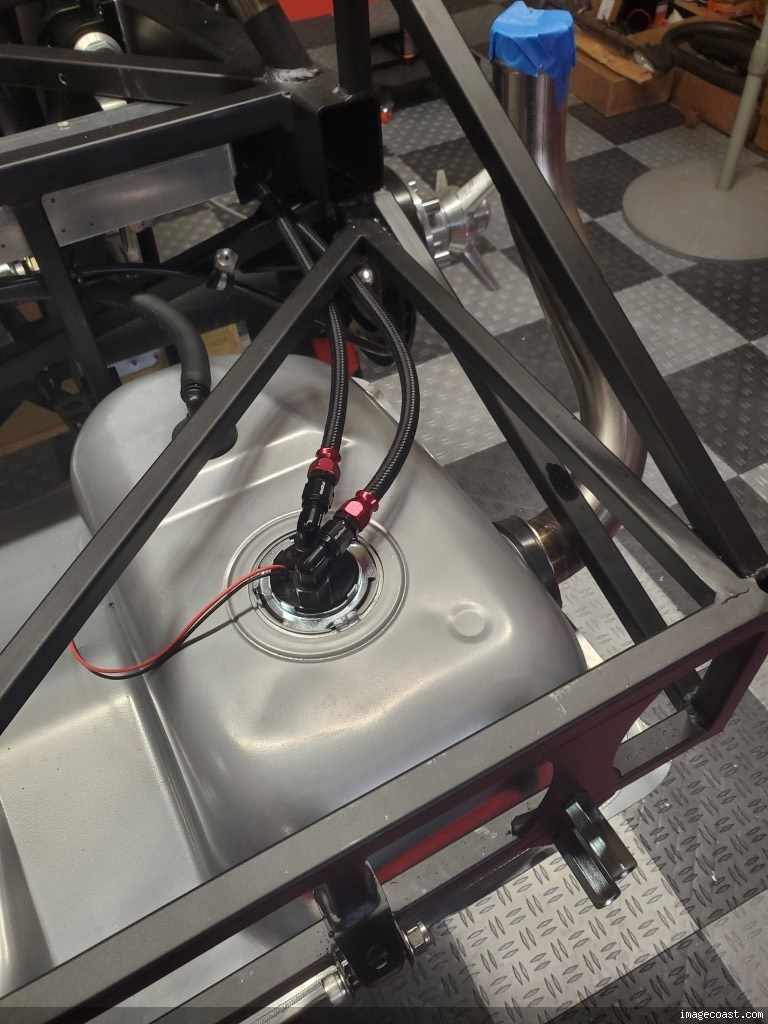
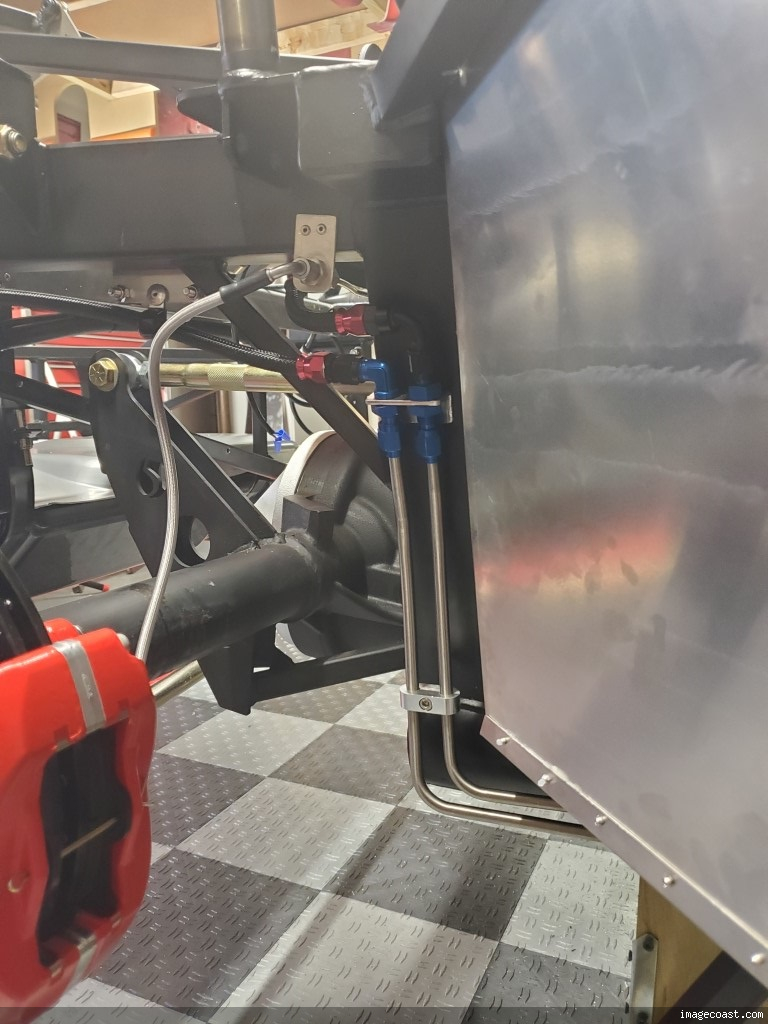
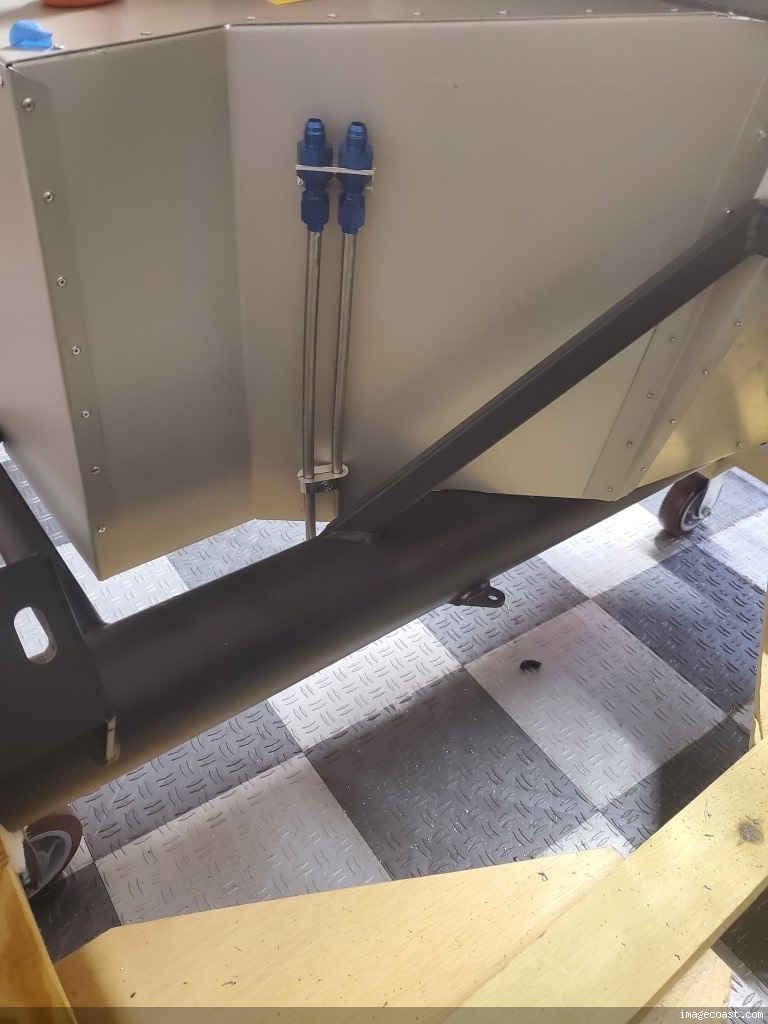
The lines themselves are seamless stainless steel from Earl's. I have a set of the nice Rigid lever benders from 30+ years ago but unfortunately they don't make them anymore. For 3/16" brake lines this is the same as the Ridgid. https://www.summitracing.com/parts/fra-900501 They work really well at getting the precise angle and placement you need.
I use this for cutting the tube. https://www.holley.com/products/plum...r/parts/003ERL After cutting I use a countersink in my drill to clean up the ID.
Flares for AN fittings in seamless tubing are done with a 37 degree single flare tool. The aircraft grade ones have rollers on the flaring tool to burnish the tubing. I have this tool. https://imperial-tools.com/products/...flaring-tools/
I've used both aluminum and steel AN fittings for brake lines but for the Cobra I went with steel fittings from Earl's.
Get some welding rod to lay out your lines/bends before going to the expensive stainless tubing.
And some useful tips:
Never forget to install the ferrule before flaring.
There is a minimum distance of straight tubing the flare tool needs to make a flare so plan accordingly.
-
Post Thanks / Like - 0 Thanks, 1 Likes
-
Senior Member
-
Post Thanks / Like - 0 Thanks, 1 Likes
 Fman
Fman liked this post
-
Senior Member
Hi Mike. I'm getting ready to install the Breeze cubby. What size hole did you cut in your rear cockpit wall?
Chris
Coupe complete kit delivered: 4/22/24.
Build Thread. Coyote. T-56. IRS w/3.55. Wilwoods. PS. HVAC. Side windows.
MK4 Complete kit.
Build Thread Index. Delivered: 10/15/2020. Legal: 7/25/23. Coyote Gen3. TKO600 (0.64 OD). IRS w/3.55. PS. Wilwoods. Sway bars. This build is dedicated to my son, Benjamin.
Build Thread.
-
Senior Member
Originally Posted by
460.465USMC
Hi Mike. I'm getting ready to install the Breeze cubby. What size hole did you cut in your rear cockpit wall?
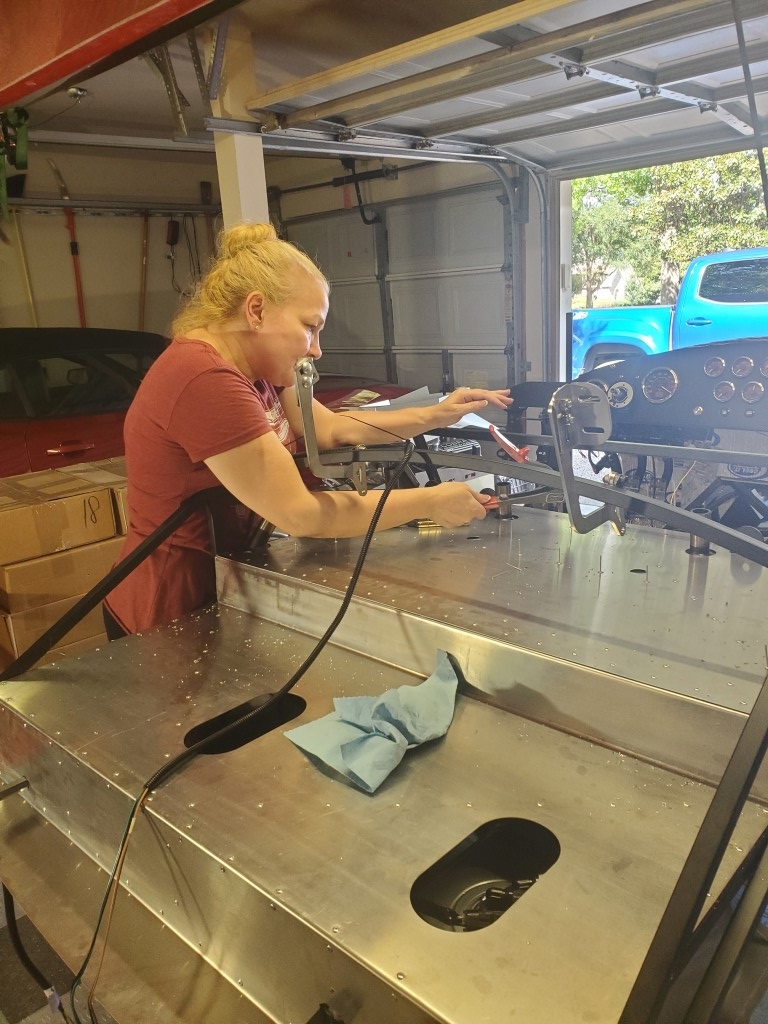
5" x 17.5" Used a 5" holesaw for the ends. Quick tip, don't ask the wife to hold the metal while using a 5" holesaw with a hand drill. Freaked her out a little.
-
Post Thanks / Like - 0 Thanks, 1 Likes
-
07-04-2022, 09:17 AM
#100
I found running a couple of screws through the waste section of the aluminum into a sheet of plywood, stabilized the aluminum while cutting the circular cuts. No spinning sheet metal, no chattering.
20th Anniversary Mk IV, A50XS Coyote, TKO 600, Trunk Drop Box, Trunk Battery Box, Cubby Hole, Seat Heaters, Radiator hanger and shroud.
-
Post Thanks / Like - 2 Thanks, 0 Likes
-
07-04-2022, 08:46 PM
#101
Senior Member
-
07-04-2022, 09:37 PM
#102
Originally Posted by
Mike.Bray
There is no real right/wrong with this stuff. A couple of tips before you get too far, though. Keep it about 1/2 to 3/4 inch below the edges along the top edges of the trans tunnel to ensure you can get the cover on. Also, any panel that gets bulb seal needs to have enough surface to let the seal fully seat. Also, try to drill any holes you need (seat belt bolts, etc.) before covering those areas or be prepared to dig the goop out of your bits. If you do have to clean a bit, brake cleaner works well to clean the tar off.
Dave
-
Post Thanks / Like - 2 Thanks, 0 Likes
-
07-07-2022, 08:29 PM
#103
Senior Member
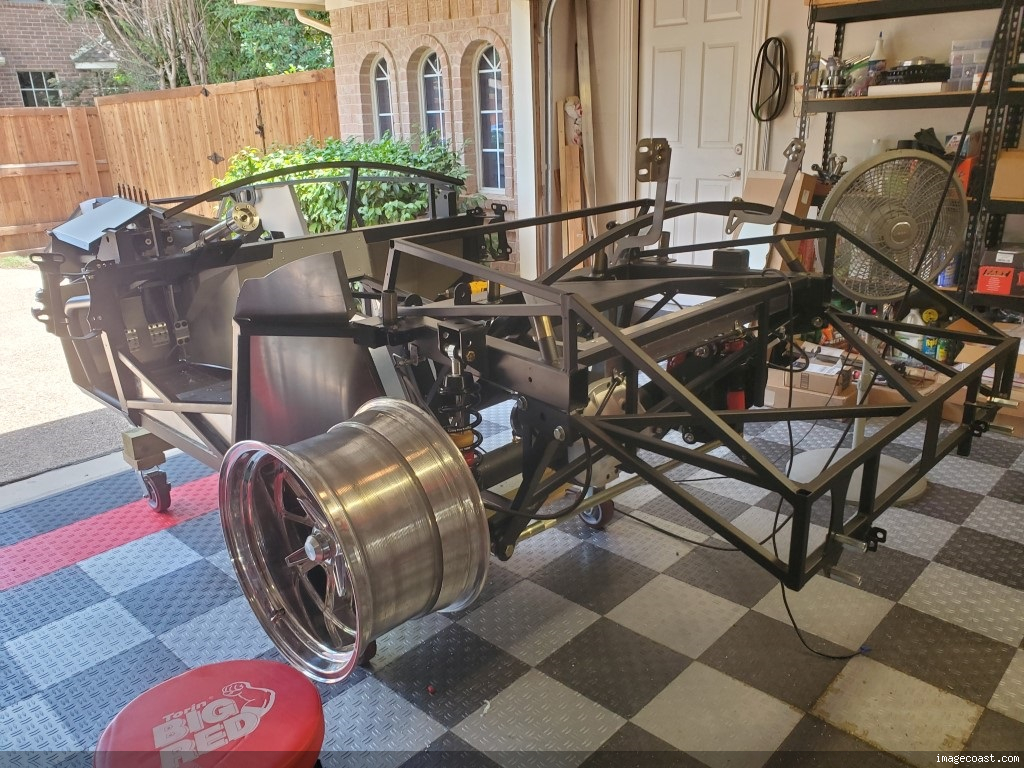
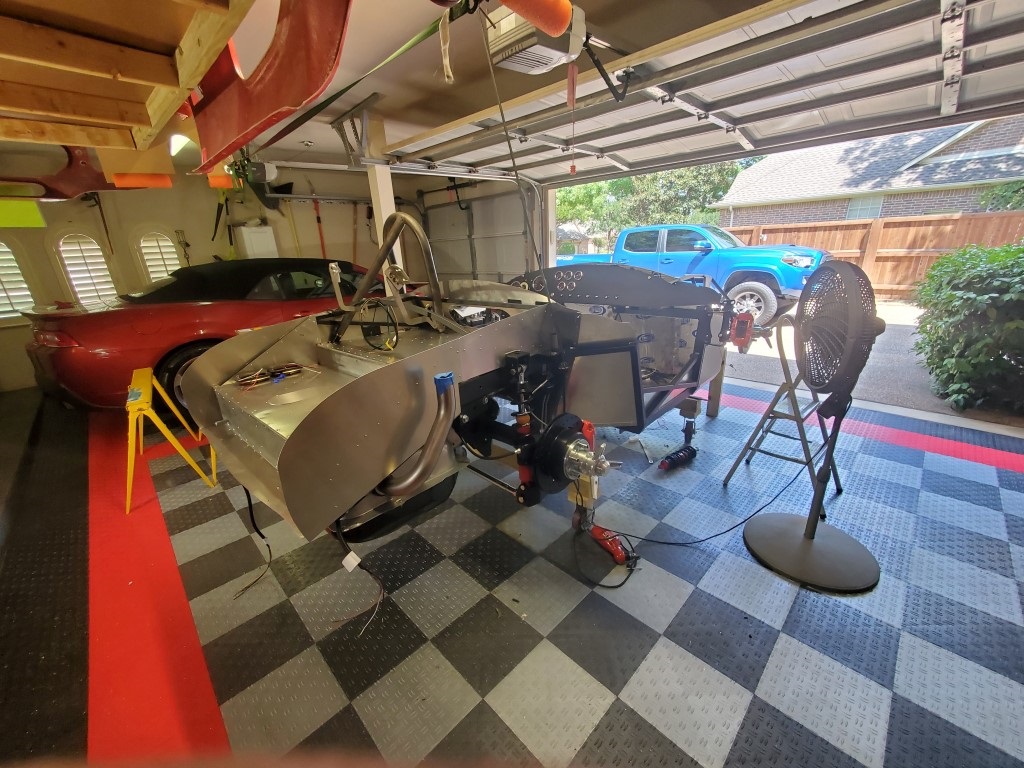
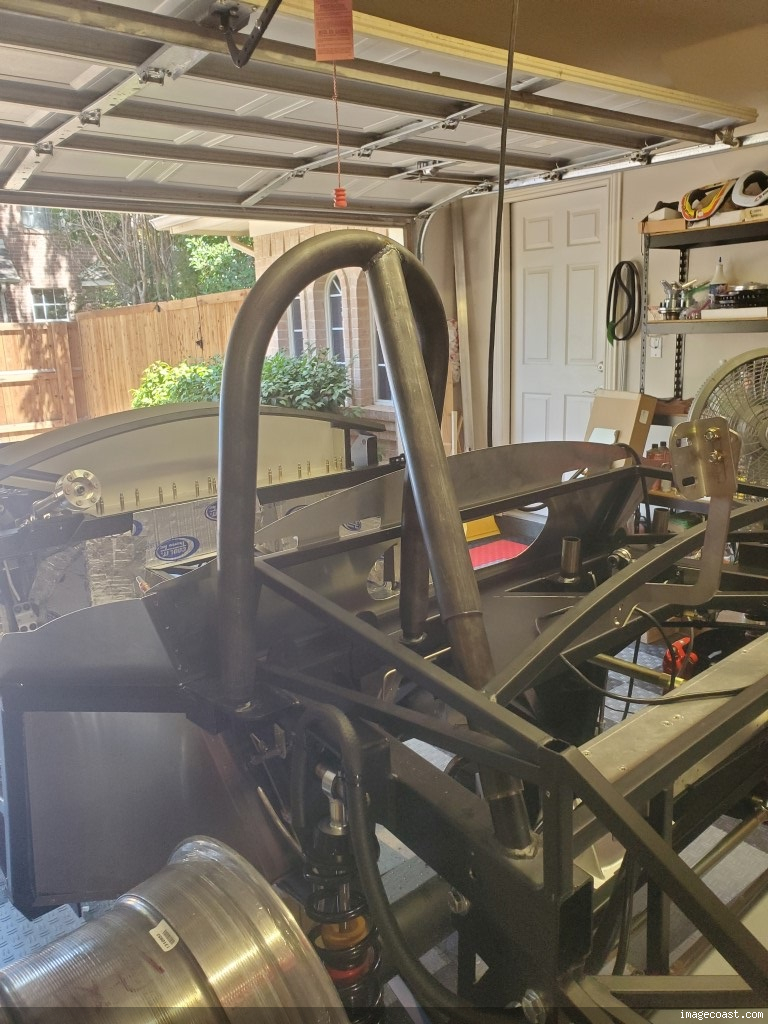
It's been extremely hot here in Texas and that combined with my age (I was a waiter at the Last Supper) have really zapped my energy. But I have managed to get a few things done the past couple of days.
Installed the Breeze roll bar, just need to drill and cross bolt it. The center to center spacing was off a little but a bottle jack fixed it.
-
07-07-2022, 08:35 PM
#104
Senior Member
-
Post Thanks / Like - 0 Thanks, 1 Likes
-
07-14-2022, 01:04 PM
#105
A little late to the party but Mike I cannot believe how good your brake lines look! I was pretty proud of mine until I saw yours LOL!
-
07-28-2022, 10:57 PM
#106
Senior Member
-
07-28-2022, 11:00 PM
#107
Senior Member
-
Post Thanks / Like - 0 Thanks, 2 Likes
-
07-28-2022, 11:01 PM
#108


Originally Posted by
Mike.Bray
Went away to the coast for a few days to cool off some and get some fresh shrimp. Now I'm back and this blistering heat here in Dallas is slowing me down. I'm just not young anymore lol
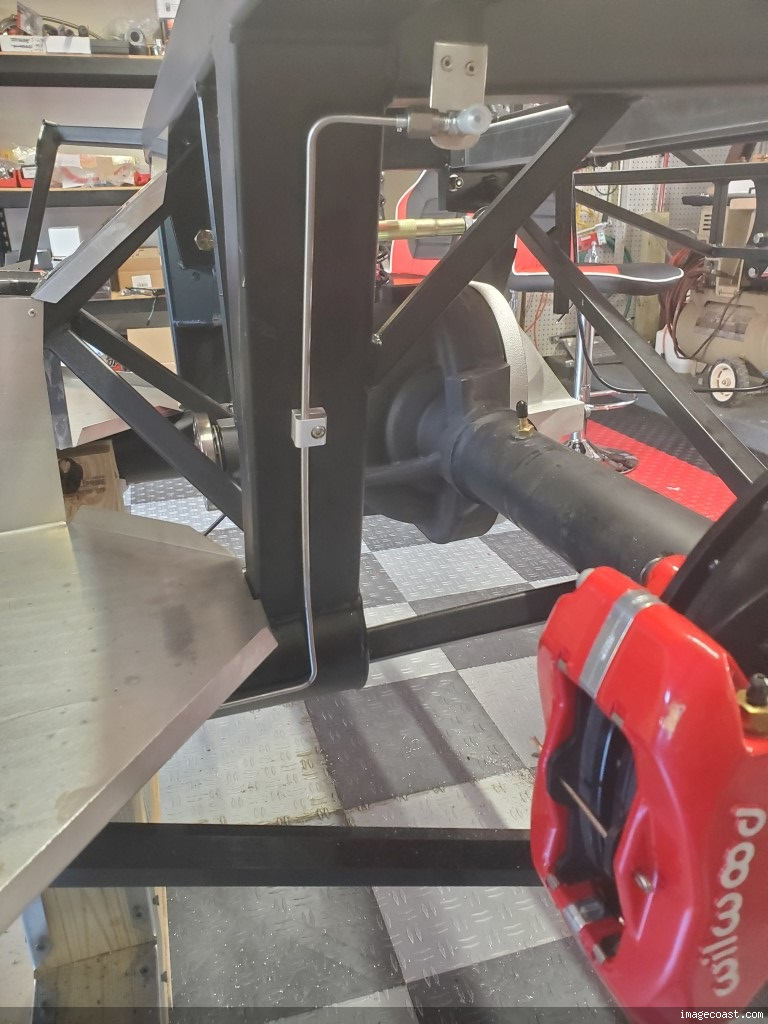
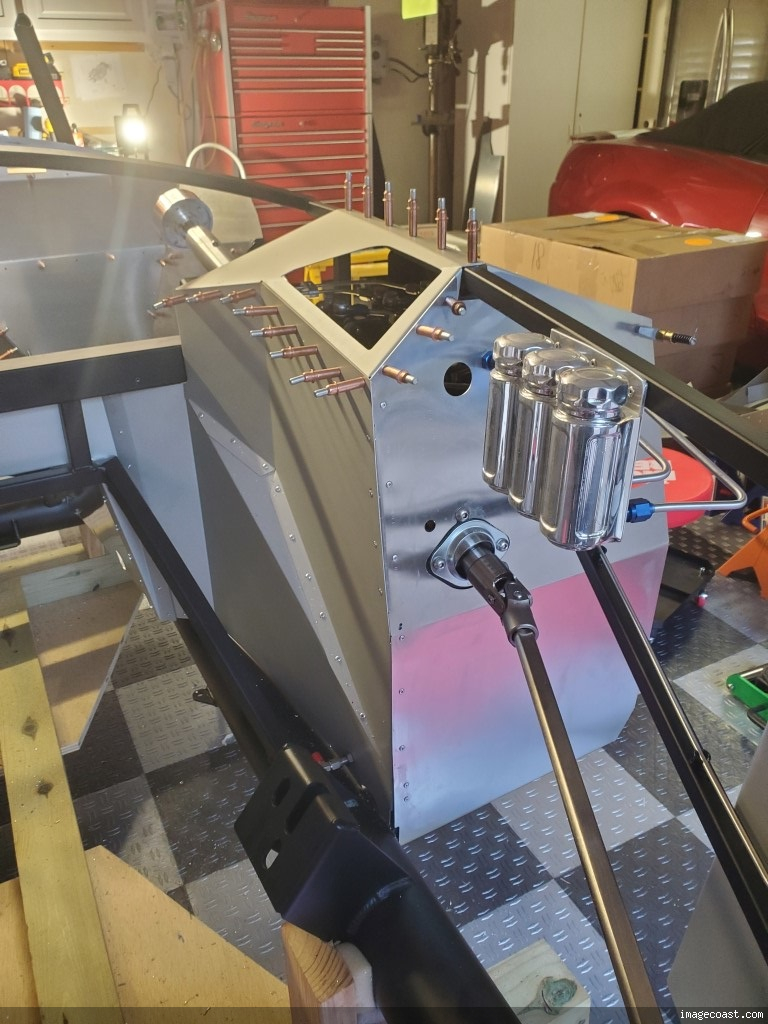
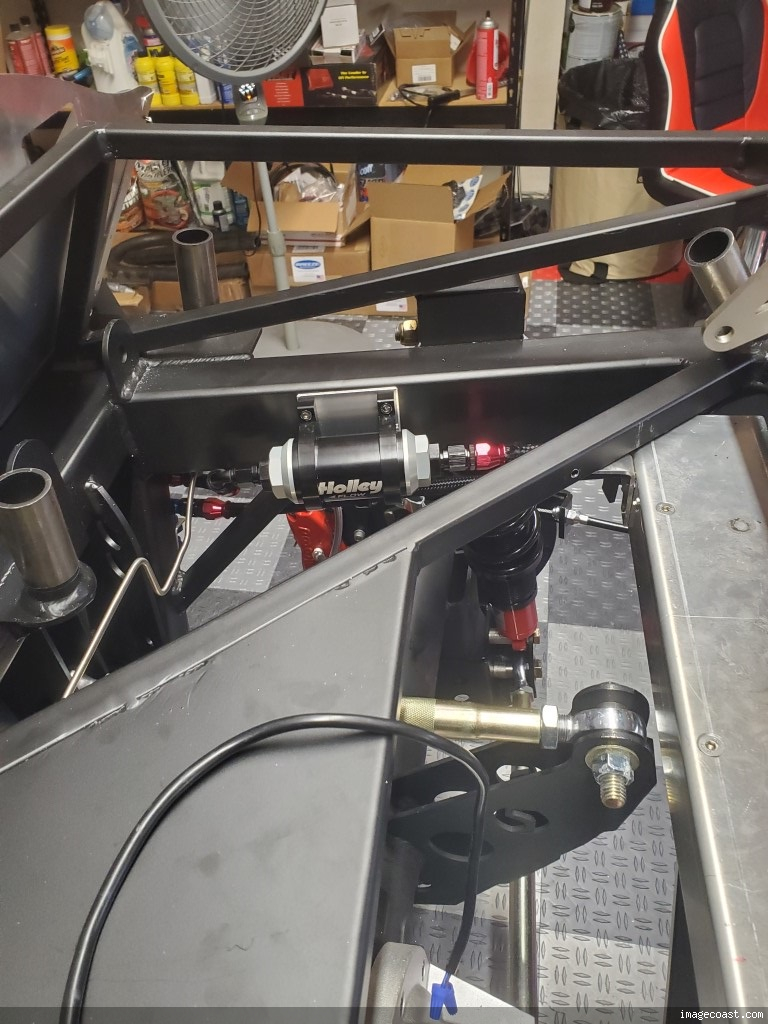
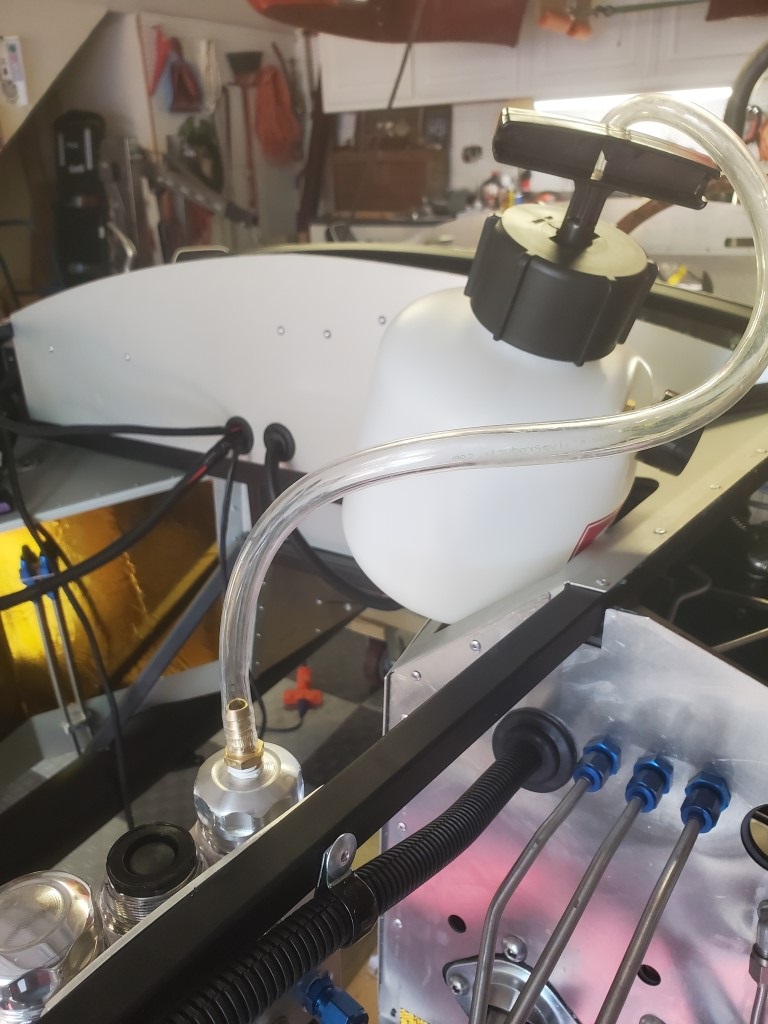
I started last night installing the Wilwood remote brake bias adjuster. There's not much room in the footbox of these cars so I installed one of the little Tilton right angle adapters.
https://www.summitracing.com/parts/TIL-72-560
You have to look close, it's not easy to get a clear shot of it.

I made a simple little panel to mount the adjuster knob next to the fuse panel. Two reasons, it can be reached by the driver and it keeps the cable short.
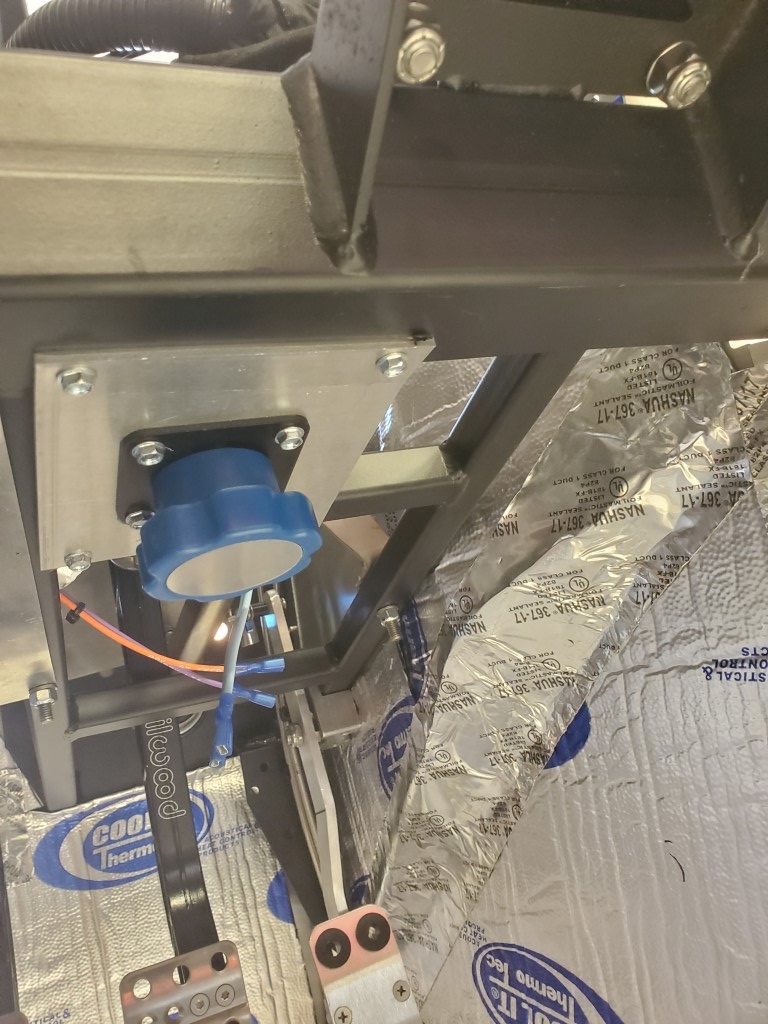
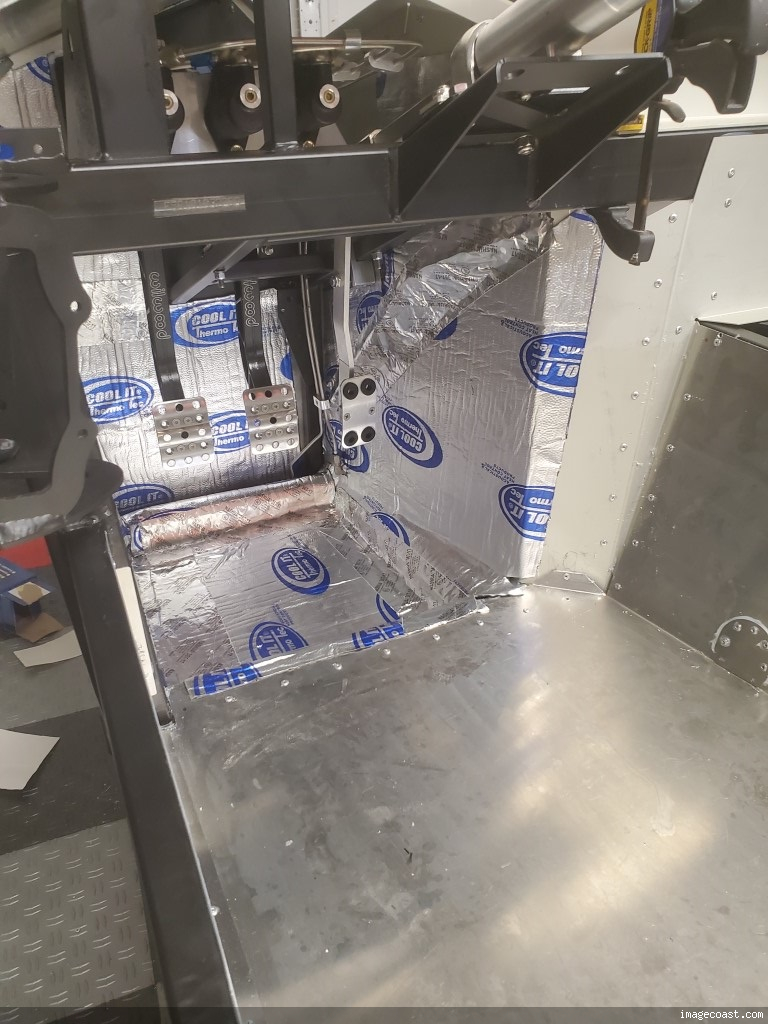
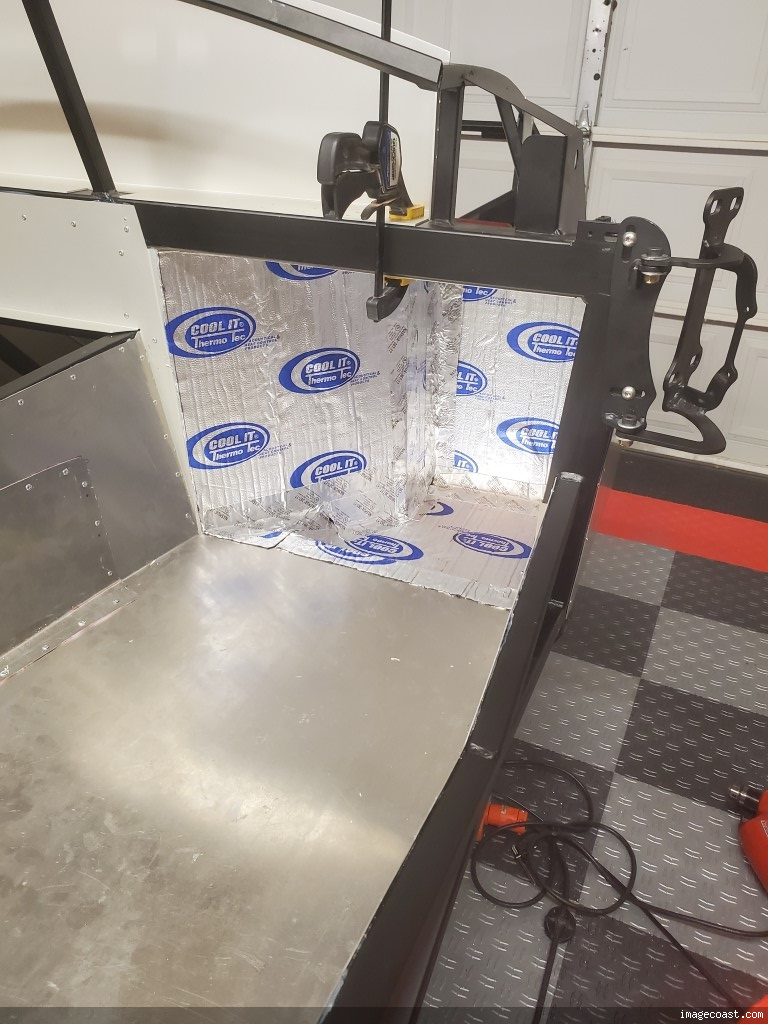
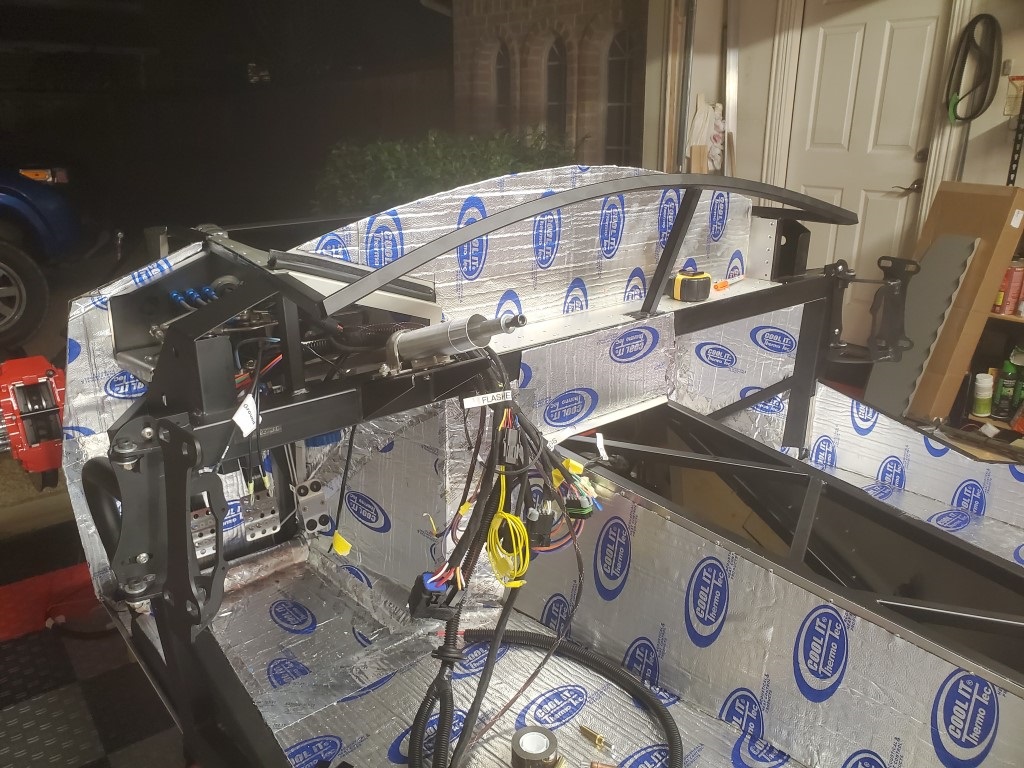
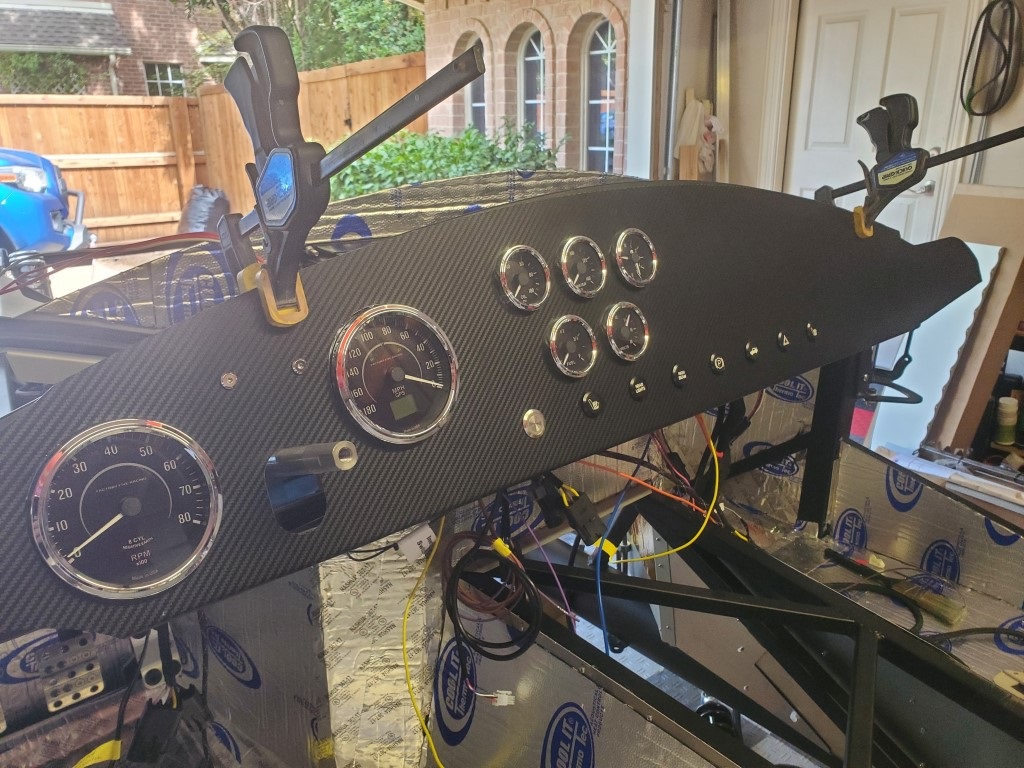
I've got the dash and wiring harnesses wired and ready to drop in so time to get the forward firewall insulated and permanently mounted.
Nice Job! I just finished mine too and it's in about the same area.
#10333 Complete Kit, Carbed 427w, TKX, IRS and many other upgrades
- Order Date: September 11, 2021 - 20th Anniversary of 9/11
- Delivery Day: April 1, 2022 - April Fool's Day
- First Start and Go-Kart: January 20th, 2023
- Graduation Date: July 4th, 2023 - Independence Day!!
- Legal Registration Date: October 4, 2023 - My Birthday!!
Visit my MKIV Build Thread (#10333)
-
Post Thanks / Like - 0 Thanks, 1 Likes
-
08-07-2022, 10:57 AM
#109
Senior Member
POL List Update
My POL list wasn't bad, only about 20 line items or so. Of that I only really only needed 8 line items, I can source nuts and bolts. As of yesterday I'm down to three items, none of which are critical to finishing the car. For me it's a very good feeling knowing if FFR were to go belly up or something (which I doubt they will) I'm not dependent on them to finish my project.
Now on the wrapping up the electrical!

-
08-09-2022, 05:53 PM
#110
Senior Member
Full bore into the electrical now.
Guard Dawg pushbutton start
RT turn signal (button is horn)
Pushbutton Head Lights
Pushbutton High Beams
Pushbutton E-Stopp Emergency Brake
Pushbutton Flashers
Pushbutton Seat Heater Controls
Pushbutton Trunk Release
Tail lights, brake lights, and rear turn signals all check out.
Fuel pump runs.
Dash lights all work.
I found these really cool Lumen LED headlights with switchback halo.
Here they are with the white halo for daytime running lights
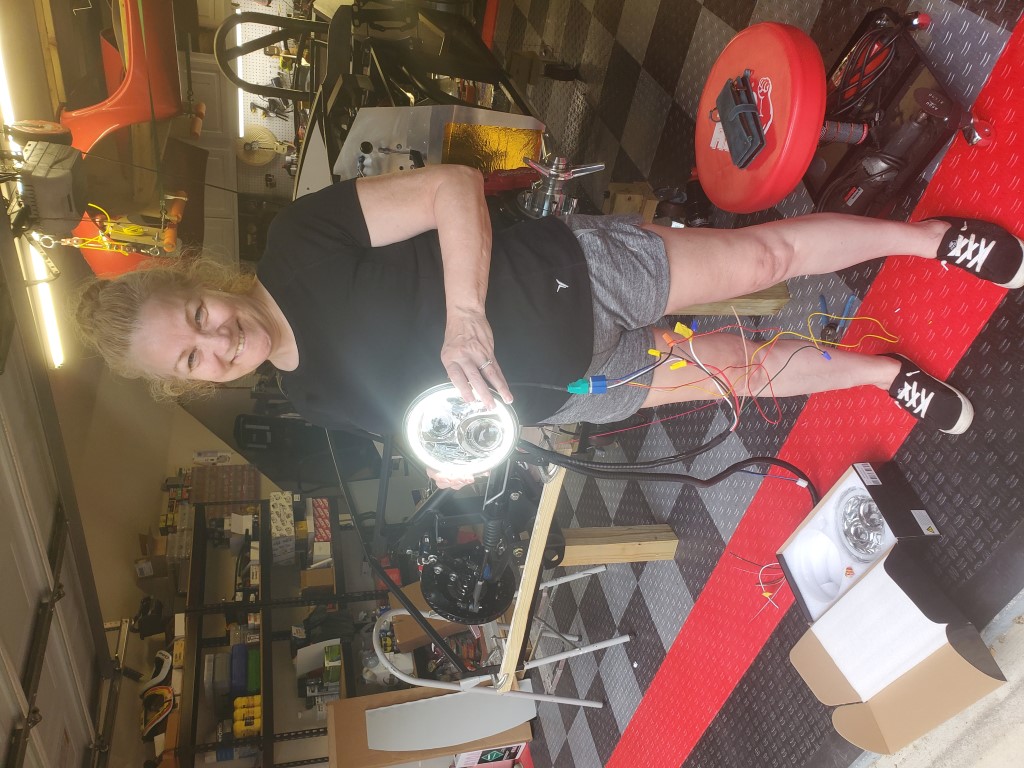
Here's they are with the amber halo for the turn signal
And here they are with the low beams on.

With these headlights I'm thinking of just eliminating the little round turn signal lights FFR supplies. Would require some bodywork to remove the raised boss, opinions?
Now on to troubleshooting the courtesy lights....
-
Post Thanks / Like - 0 Thanks, 1 Likes
-
08-10-2022, 04:58 PM
#111
Senior Member
Hey Mike. From your list it looks like you're putting together quite a custom setup on your electrical controls. Nice!
I have the same headlights. I wired the white halo function as DRLs, connected to the unused accessory output of my Digital Guard Dawg. So, they turn on with ignition. I kept the round turn signal lights, but converted to LED. All preference choices, of course.
I'm not a fiberglass/body guy, so can't help on your delete round turn signals question.
Chris
Coupe complete kit delivered: 4/22/24.
Build Thread. Coyote. T-56. IRS w/3.55. Wilwoods. PS. HVAC. Side windows.
MK4 Complete kit.
Build Thread Index. Delivered: 10/15/2020. Legal: 7/25/23. Coyote Gen3. TKO600 (0.64 OD). IRS w/3.55. PS. Wilwoods. Sway bars. This build is dedicated to my son, Benjamin.
Build Thread.
-
08-10-2022, 07:39 PM
#112
Senior Member

Opinion-Just for the true look, install the lights, just don't make them functional since you got what you need.
-
08-16-2022, 03:48 PM
#113
Senior Member
-
08-16-2022, 04:32 PM
#114
Senior Member

FFR Roadster Delivered 9/16/21
Forte 427 Fuel Injected with TKX Transmission
Forte's Axle
-
08-16-2022, 08:19 PM
#115
Senior Member
The Wilwoods should have only 2 bleed ports per caliper, Upper inside and upper out side. Bottom would only be used if you wanted to drain old fluid and refill with fresh.
-
08-16-2022, 09:23 PM
#116
Senior Member
Originally Posted by
F500guy
The Wilwoods should have only 2 bleed ports per caliper, Upper inside and upper out side. Bottom would only be used if you wanted to drain old fluid and refill with fresh.
I started out decades ago using JFZ calipers and John (owner of JFZ) told me air can get trapped in the bottom part as the inlet is centered. So I've always bled the bottom ports first and then moved to the top to finish. Since Wilwood basically copied the JFZ design I don't know why the Wilwoods would be different and seems to have worked for me over the years. What harm can it cause?
Edit. The original JFZ design was fed from the inside center the same as the current Wilwood. The bottom ports were connected from one side to the other with a steel tube so the fluid entered the side, flowed down, through the tube, and up to the other side. John told me it was best to crack the tube fittings on the bottom to let any trapped air out before final bleeding using the top bleed screws.
Wilwood updated the design to add internal porting from one side to the other. JFZ was a small operation and making that crossover tube would have been time consuming which is why I think Wilwood went to internal porting and four bleed screws for higher production. It may be true with this design you only need to bleed from the top screws, I haven't talked to Wilwood about it. But like I said, what can it hurt?
Last edited by Mike.Bray; 08-17-2022 at 05:40 PM.
-
08-17-2022, 06:17 PM
#117
Senior Member
I had some old Sierrra calipers with the external cross-over as well, still never used the lower ports. Your assistant needs a pneumatic rivet gun, good think you are not doing stainless rivets
-
Post Thanks / Like - 0 Thanks, 1 Likes
-
08-18-2022, 09:15 AM
#118
Senior Member
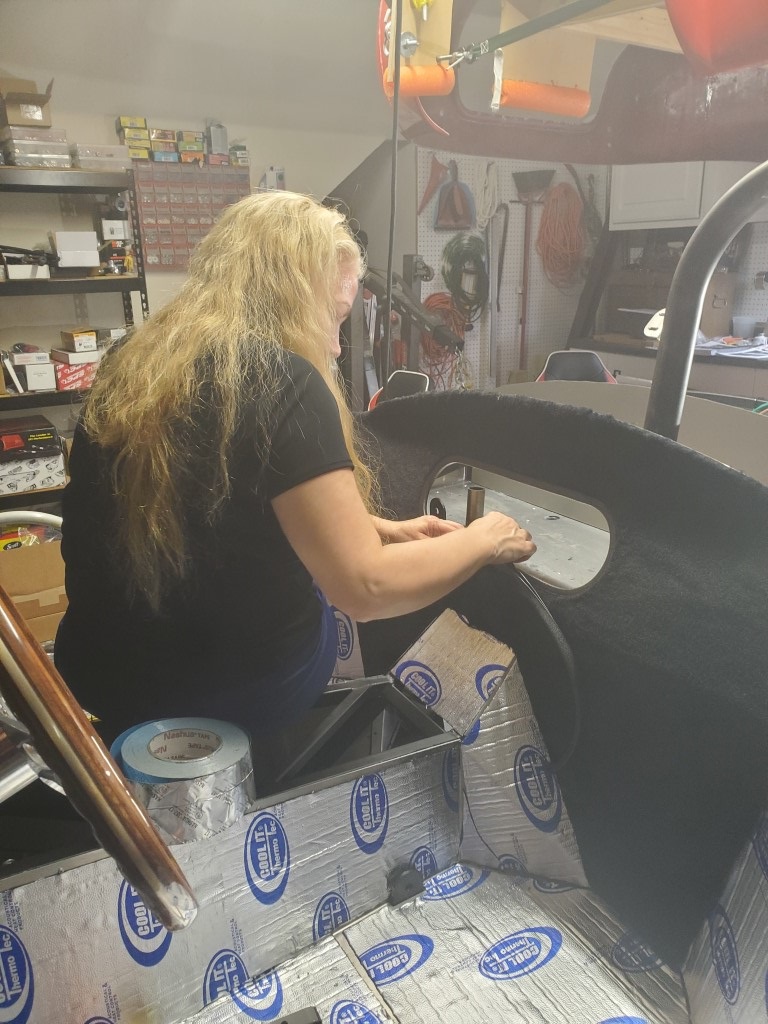
Turns out my personal Rosy the Riveter is also pretty handy laying and trimming carpet.
I decided to go with the Nitto 555G2 tires as this is a street car. I like the way they look.

After 2+ months of 100+ temperature days we finally got a break last night with a small front that came through. So I'm planning on taking advantage of the cooler weather for the next few days and hoping to tick a few things off my to-do list.
-
Post Thanks / Like - 0 Thanks, 2 Likes
-
08-19-2022, 06:13 PM
#119
Senior Member
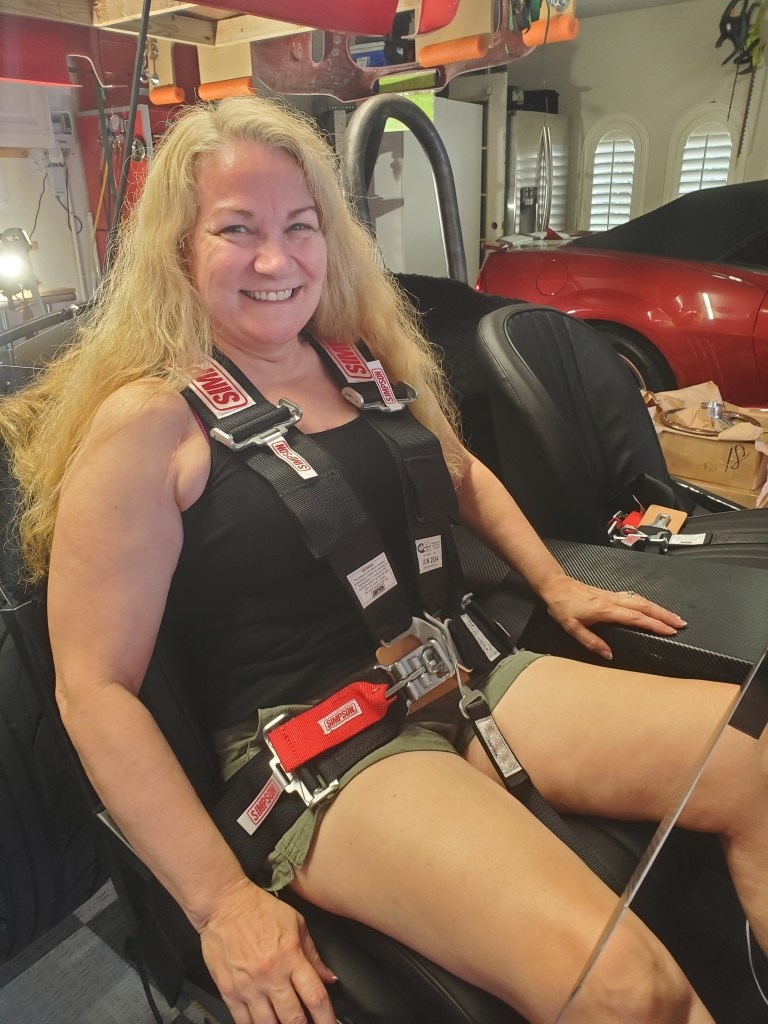
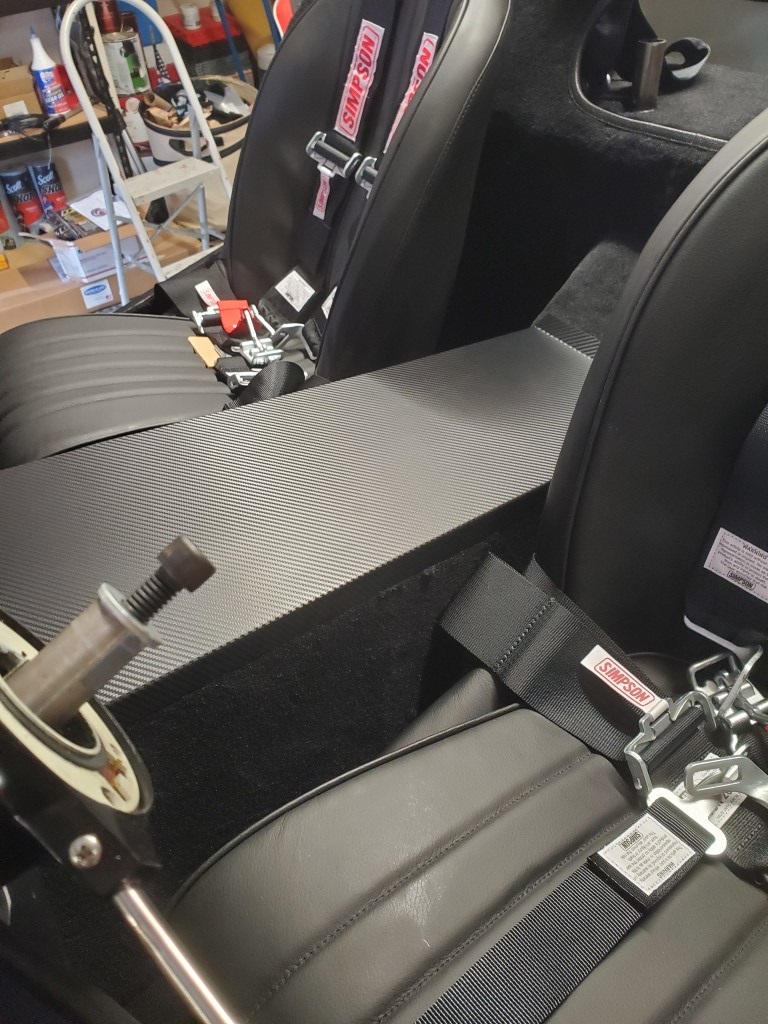
Still bouncing around checking little things off my to-do list. Spent today on seats.
First thing this morning I installed the Forte seat heaters. It was a lot easier than I was expecting and a shout out to Papa and his post #297 for some great tips. Got both seats done in about an hour.
Ran the wiring in the car, used the lap belt/bracket as a ground source.
From there installed the Breeze seat mounts, I like these a lot. Then fitted the seats and did the required Zoom Zoom.
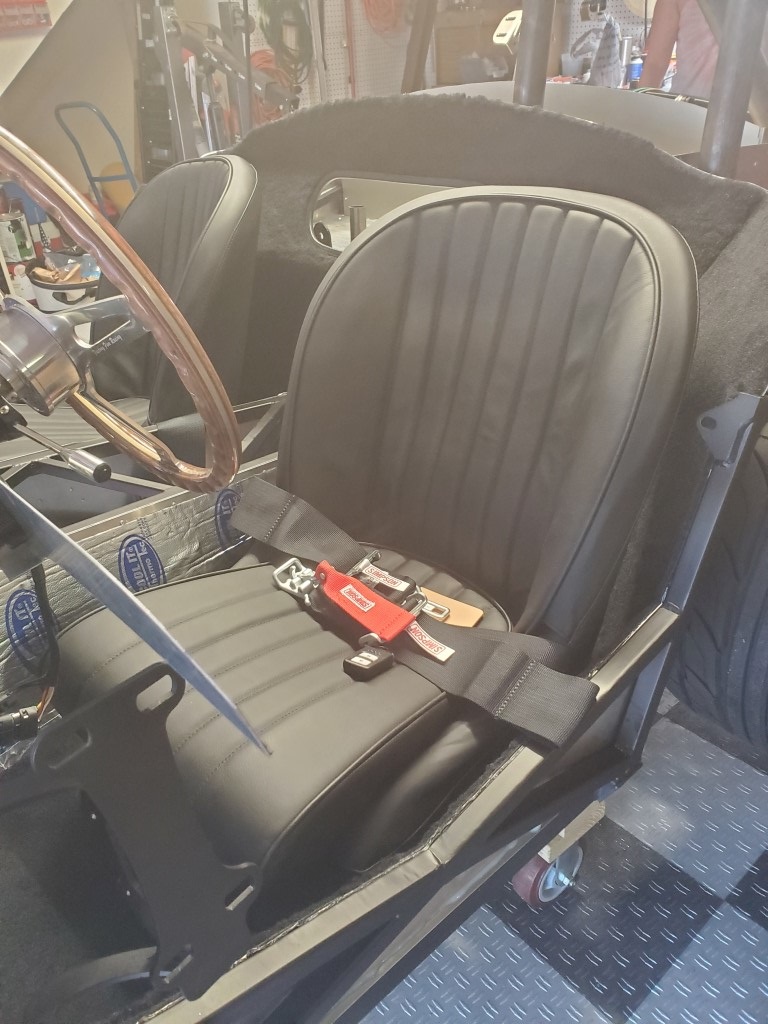
And finally powered up the heaters and the wife said her butt was getting warm so must be working. Or a hot flash.....
-
Post Thanks / Like - 0 Thanks, 1 Likes
-
08-23-2022, 08:07 PM
#120
Senior Member
-
Post Thanks / Like - 0 Thanks, 1 Likes


 Thanks:
  Likes:


 Reply With Quote