
Visit our community sponsor

Thanks:
0

Likes:
1
-
Love it Tim. I'm going to change my spark plug wires now. Surgery has put a lot of things on hold for me but changing the wires will not be one of them. Great build
-
A universal set of wires was used but you need to order one extra wire to get it to work out with these loom. No matter what I did, one wire would work out short. I ended up ordering a separate wire for the #6 plug 26.5" long.
Used with a different loom, might work fine without the extra wire..
Tim
-
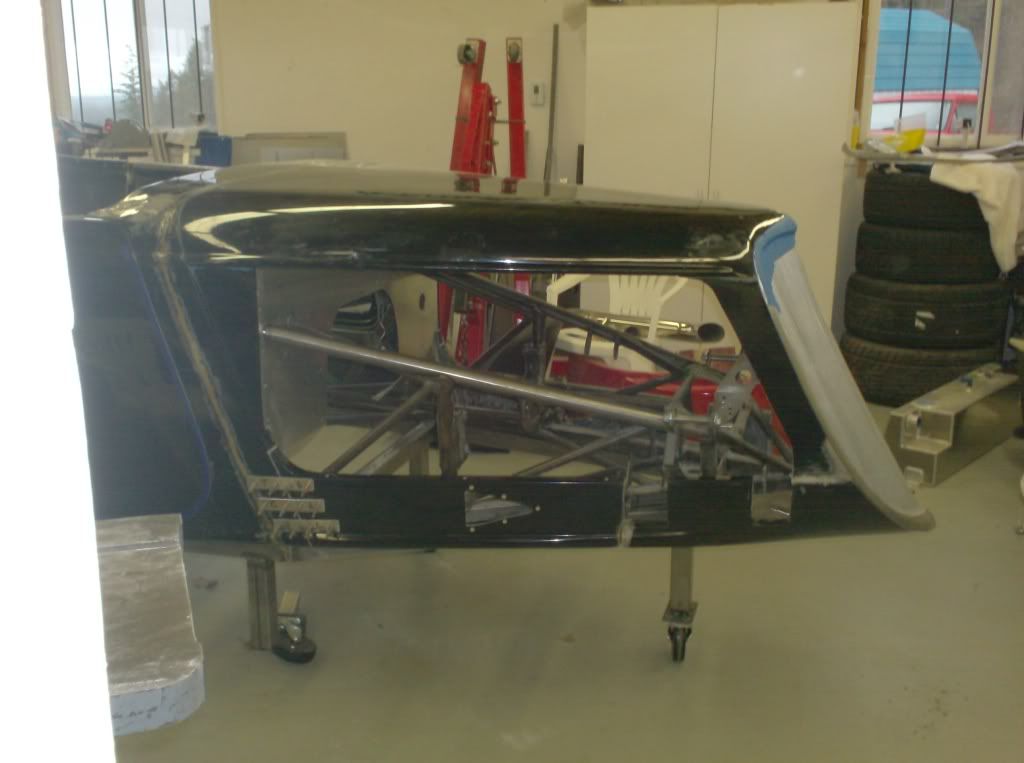
As I mentioned in another post, I bonded the nose cone to the extended body rails after cutting them off the body and cut the assembly in half , down the middle, at the nose cone. I then bonded the grill shell side upright pieces to it. I think it looks pretty clean and hides some stuff around the radiator.
I'm not using the factory head lights but the lights could be mounted now and wouldn't require removal to remove a side panel. I think it highlights the grill as well.
The nose cone fits much better if you slice it down the middle and reglass. As Dan Ruth discovered early on, it's about 1/4" too wide.

-
PLATNUM Supporting Member


Looking good Tim. Let me know when you can do some parts. I hope the rehab is going well.
-
Thanks Tim. I'll keep that in mind as I haven't decided which looms I will use.
-

Recovering from my shoulder issues, a friend rebuilt some IRS parts for me upgraded with poly bushings and Mustang Cobra brakes. I've designed a frame that will bolt into the chassis.
-
PLATNUM Supporting Member
That looks awesome. Nice fab work.
-
Pulled the first piece off the roll pan mold.

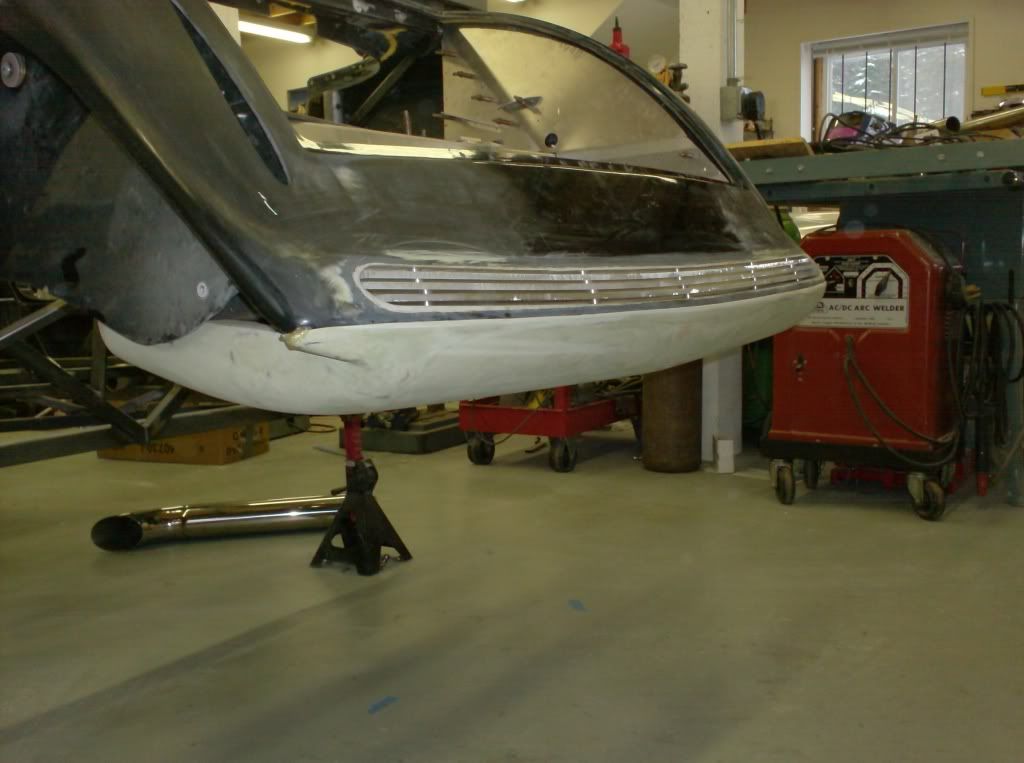
Second picture is the mold mounted to the body.
-
PLATNUM Supporting Member
-
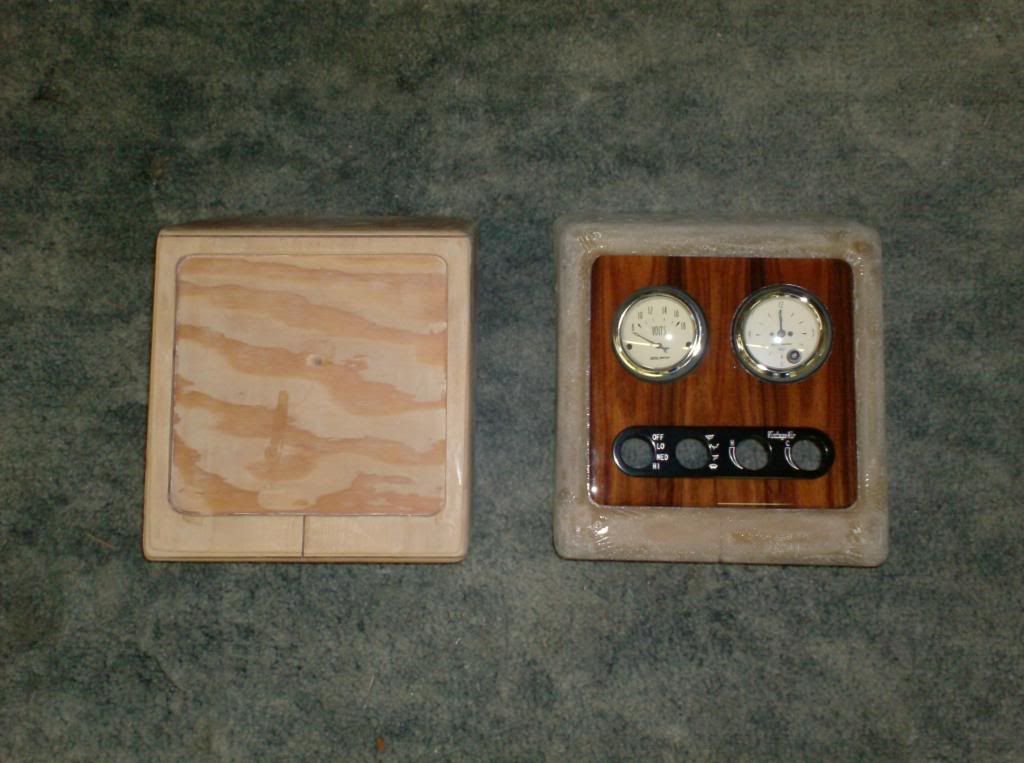
Made a mold and a fiberglass part to hold some extra gauges. It will suspend below the dash and behind the retractable cup holders. The recess for the wood panel measures 7" high and 6 5/8 " wide. Not sure what size GPS or back up camers screens are, but it might work for that as well.
-
-
Tim-
Your work is wonderful, but that engine......
Ohhhhhhh boy! She is just so sexy, I don't know where to start!! She is going to look so awesome in your '33!! WOW!!
Keep up the great work!!
Regards,
Steve
-
-


Decided to take the powder coat off the hood hinges and chrome. The picture shows the hinge with my delrin bushings installed.
The brake calipers were polished / painted

Originally Posted by
Tim Whittaker

Thanks Steve !!!!
-
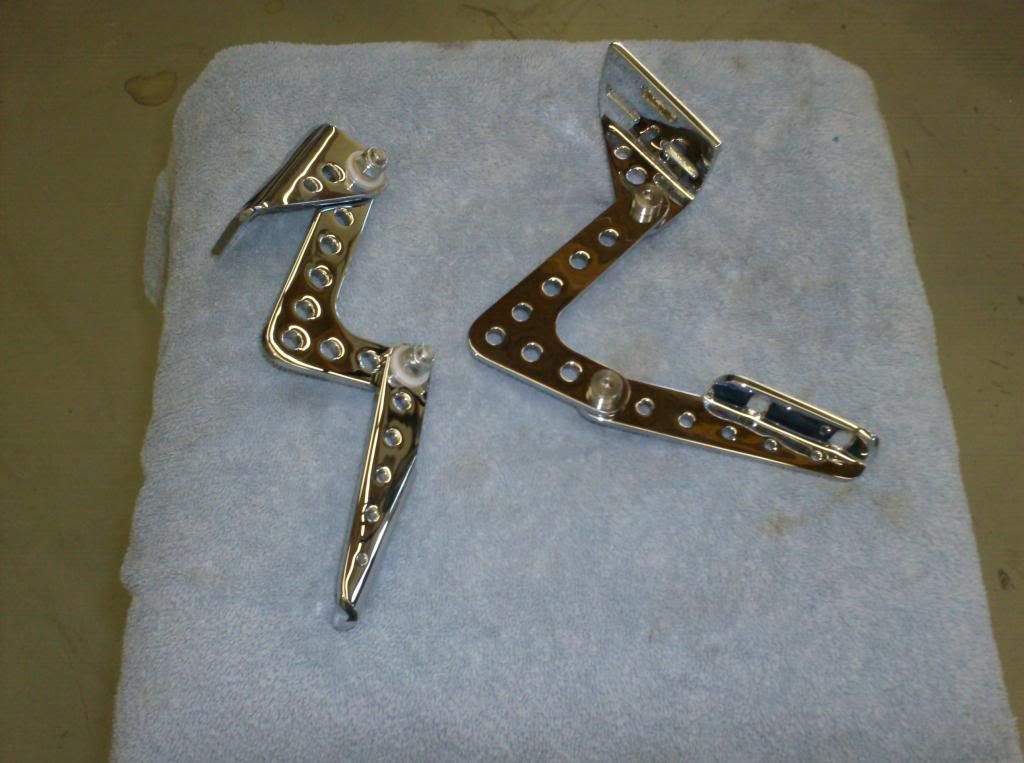
Assembled hood hinge with delrin bushings. Virtually all play is eliminated. I use these on the trunk and doors as well.
-
 Administrator

Wow. That engine is amazing. The build is so full of custom goodies I don't know where to start! An amazing build so far...

FFR 5369 Pin Drive, IRS, Trigos, Torsen, Wilwoods, FMS BOSS 302 "B" cam , Mass-flo. CA SB100 (SPCN) Registered
Delivered 4/23/06. "Finished" 4/2012 (still not done!)
-
Thanks David. More mods I haven't taken photos of and parts to develop. Can be seen at: kootenaivalleycustoms.com
-
Entrance draws are from PARR Automobile and the front lights were on the bicycle webpages of Auction web sites.
-
Door pulls are indeed from PARR. Not sure what you mean about the headlights.
-

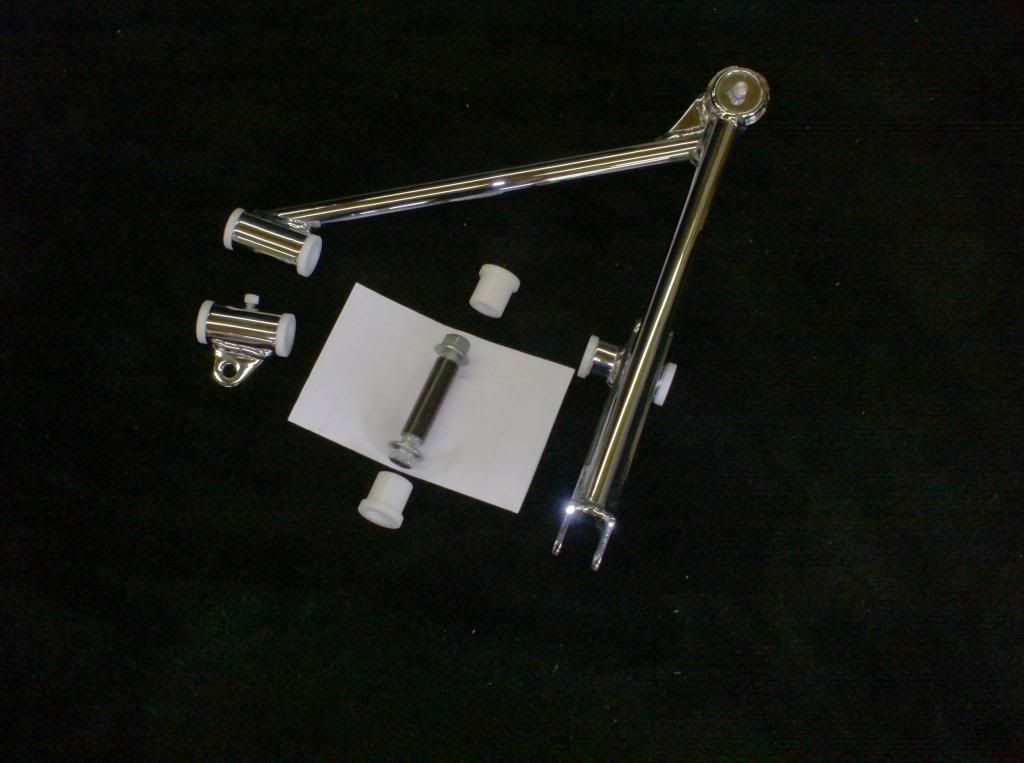
Machined up some barrels and assembled a bump steer kit. The nice thing about this is not only can you dial out or improve the bump steer, but you can adjust the length using the barrel and not have to deal with turning the tie rod as it has no flats for turning. You have to use pliers or something to turn the tie rod for toe adjustment.
The barrel is machine from stainless steel, so the cross section profile can be kept smaller in diameter than aluminum and it polishes nicely. Looks better than the kit supplied tie rod end in my opinion.
Although the un sprung weight is slightly higher, I felt the offset was worth it given the looks and ease for adjustment for the length and bump steer . Given the wide range of ride height and tire diameters that can be used on the 33, bump steer will be an issue for some if not most builds. Bump steer adjustment is about 1.5" maximum.
-
;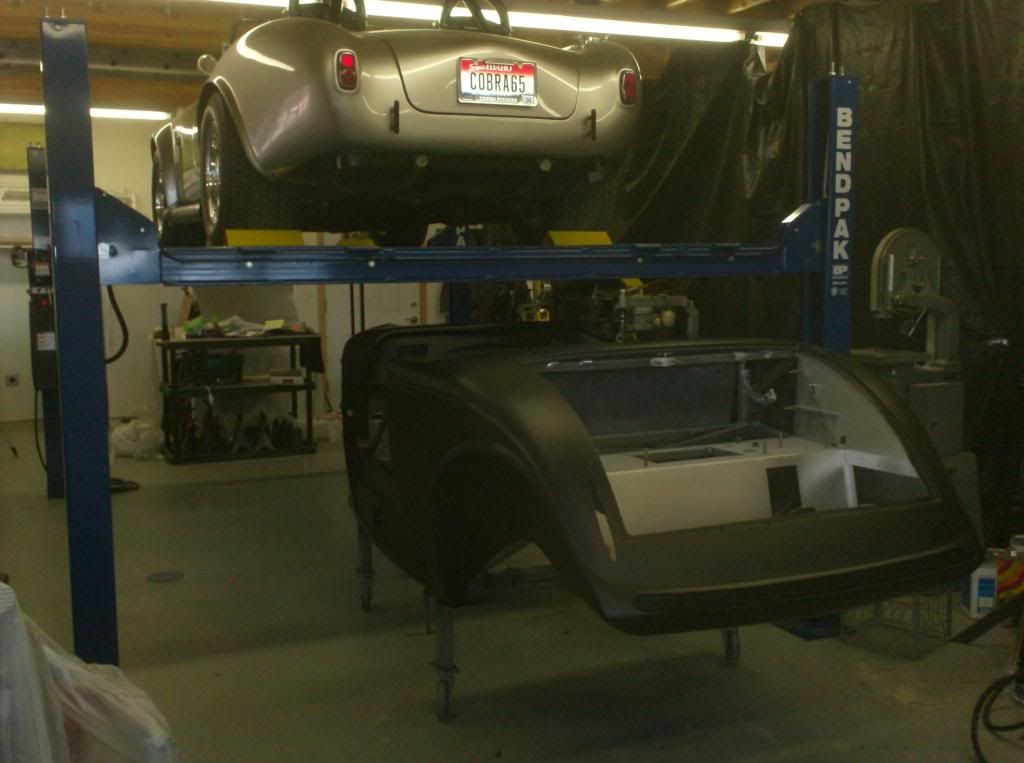
Finally got the car back from body work. In the primer for now.
-
-
-
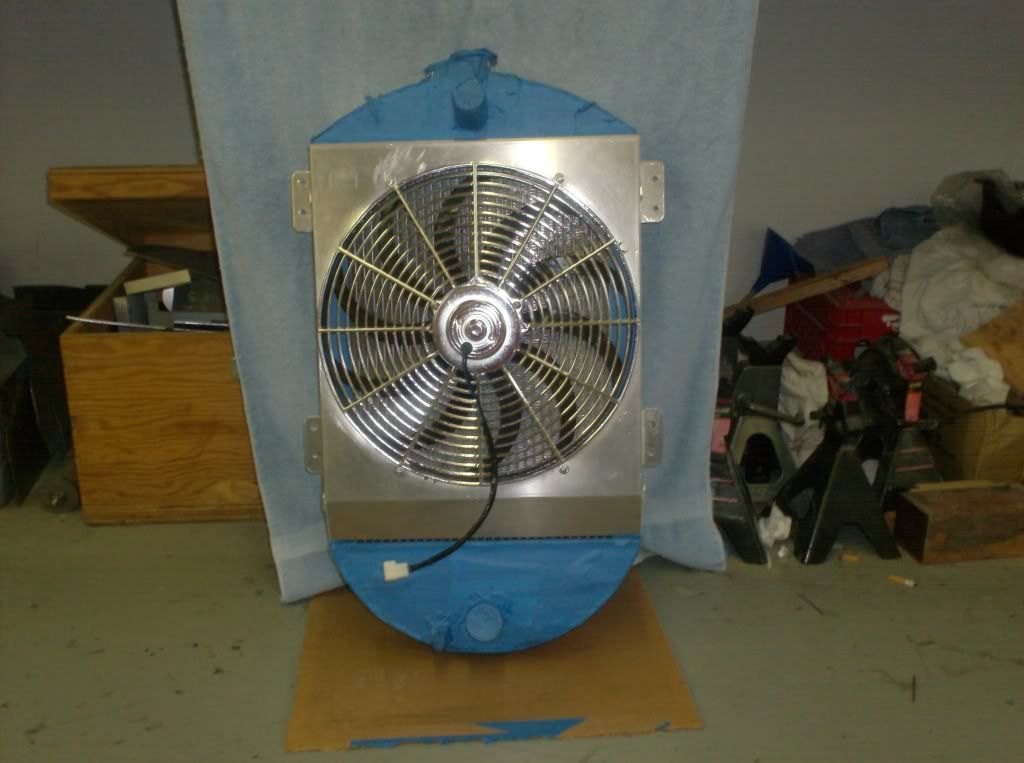
Chrome fan mounted inside Everson shroud
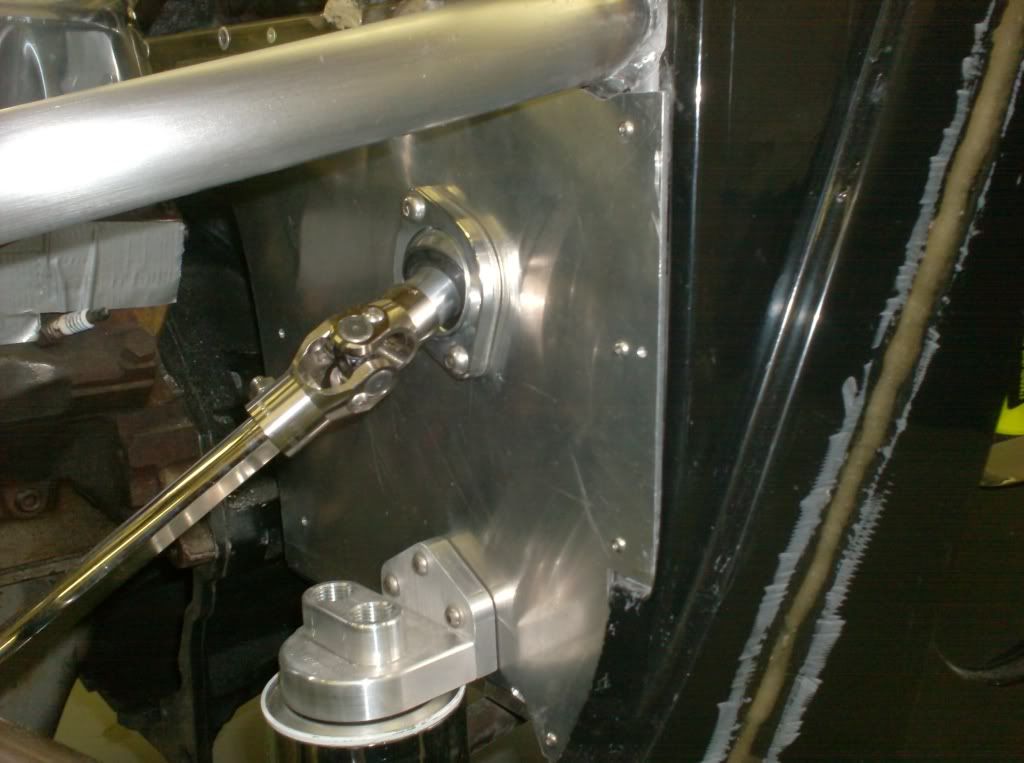
Billet steering shaft bearing cover and remote oil filter..
Last edited by Tim Whittaker; 01-05-2014 at 08:58 PM.
Reason: addition
-
-
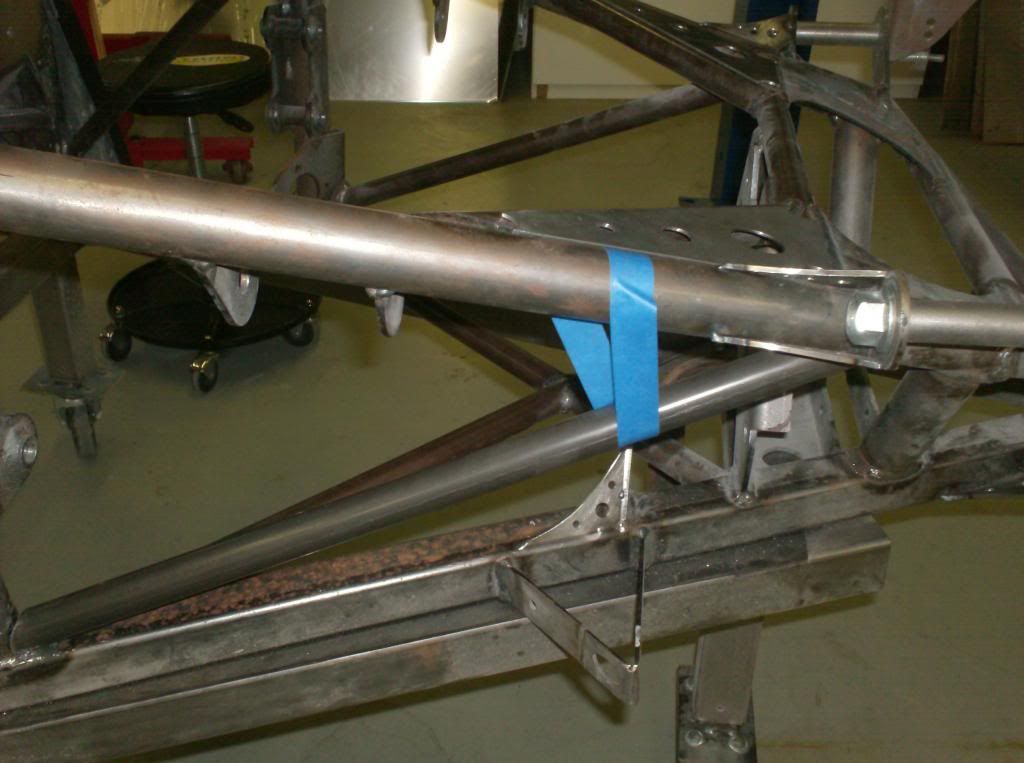
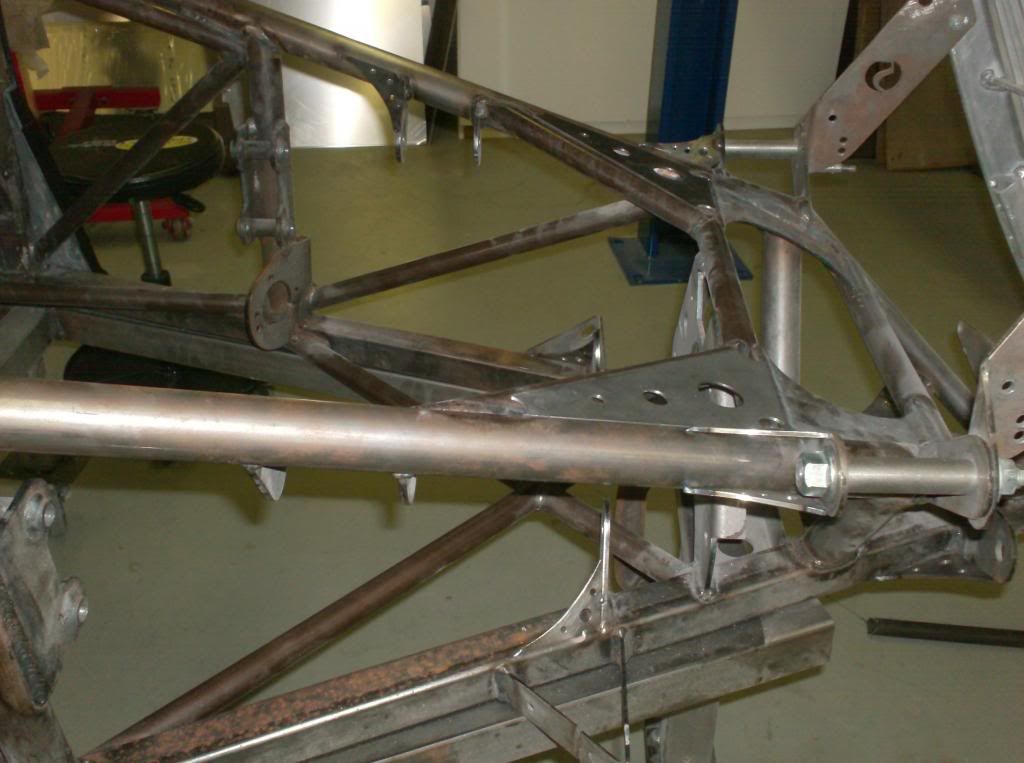
Being possessed by a demon, I had to add a few gussets to the suspension mounting arms. I think Hot Rod magazine proved the suspension is plenty strong but I just had to. The bigger gusset is just to cover an area where I had to move a tube for my Miller Speed AC bracket. It was easier to gusset than to grind the weld down correctly for the tube I removed. Gusset was easier than grinding in the confined area. Looks ok too. The other picture shows the tube temporarily placed with some mashing tape. The larger gusset will be welded in place after the tube is fit and welded.
-
-
this car looks amazing, especially the engine. how much power do you expect it to put down?
-
Thanks Gokart !!!! I have a 350 HP 306. I have a 600 HP Cobra if I really want to scare myself. This one's a cruiser ...........
-
Tim-
You are really making some progress. I love all the custom work!
Not only is it great craftsmanship, but it all has such a high degree of finish as well.
I am really impressed and enjoy watching your progress. Keep up the great work.
Regards,
Steve
-
Thanks Steve !!!! a lot more to come. After the IRS, electric power brakes are next and a list of smaller items I've been meaning to get done to the car and for customers.
-
Senior Member

Looks great Tim, after driving mine last weekend I'll be very interested in the power brake install.
-
Boz,
The brakes will be a Specialty Power Brakes unit. You can do some research on the net on it. I will just be supplying the mounting brackets and figuring out the pedal geometry to use the supplied pedal assembly.
-
Machined up some delrin bushings for the suspension. The delrin has a couple of advantages. I made them with a smaller diameter on the outer lip O.D. so no weld material has to be removed as some have had to do using the rubber.
Also, the delrin is more dimensionally stable so that it maintains its shape during dynamic loads of acceleration, braking and cornering. It's become the material of choice for a number of after market performance companies in regard to suspension parts for stability reasons. It has some lubrication quality and doesn't squeak !!!
In doing my development research, companies who have actually developed after market delrin bushings for Mustangs, BMW's, Corvettes and others were all positive. Some of the guys on the Cobras change from the rubber components to rod end bearings and a number have reported a better ride as the suspension is actually able to work as designed instead of having some restrictions in movement experienced with the rubber if not installed right.
I also machined up 4130 pivot sleeves that are all the same length so that shims can be used if needed to achieve the correct dimension of the "stack up" as there is some variation in length of the supplied pivot pins and suspension tubes that house the bushings. If the "stack up isn't correct, there will either be some ability for longitudinal movement or the bushing will be restricted. In my case, the upper suspension arm on one side would hold whatever position ( without spindles mounted ) I put it in because the rubber was "pinched" between the mounting ears as the pin was too short and the rubber bottomed out before the pin was captured by the ears. It didn't take much force to move it but it proved to me the suspension arm wasn't free to rotate on the pivot pin.
Last edited by Tim Whittaker; 03-22-2014 at 05:20 PM.
-
Senior Member

Tim, I love your attention to detail. I continue to learn a lot from you and others who post on this forum!
-
Senior Member

Just amazing Tim. Thanks for all the great ideas and parts.
Nick Sebastian - 33 Hot Rod #495
Factory Five Forums - hdnik
FFCars - lowntubd
Build Site/Blog -
www.nicks33hotrod.com
-
Senior Member

Good lord man! That rear end scaffolding you built is amazing. did you put it together just for this build?
-
LOL !!! Thanks Erik,
The rear end support was to help support everything right for fabrication. I'll be making the IRS available to others and developing a jig for all the parts as I go. It's kind of challenging to build things out in "space" to make sure it's right. I have to build a removable member at the rear that supports the center section as depending on ride height and tire diameter, the elevation of the center section needs to be slightly different to keep the camber gain the same as the suspension moves through it's travel in compression and rebound.
This is a true bolt in IRS package with no welding required. I will supply the cage but the end user has to supply the center section, half shafts, brakes and spindles. This way a person can either go with new stuff from someone like Mark Reynolds at Breeze Automotive or used stuff to keep the cost down. The parts can also be purchased a little at a time to help the builder financially this way .It's "modular" in design to be able to ship in a small container so I don't have to build a big box and the shipping cost are lower for the customer.
-
Originally Posted by
Tim Whittaker
LOL !!! Thanks Erik,
The rear end support was to help support everything right for fabrication.
This is a true bolt in IRS package with no welding required. .
Tim
You should check the final clearance between the driveshaft and the battery tray once yours is all together. I suspect you could then lower the tray like I did and have room for a much taller battery, maybe even a full size 27 series like mine uses. The alteration is pretty simple 3 cuts a few bolts and 1 plate<> done
Erik
For fabrication I like to use camping trailer jack stands because they come with a screw jack so you can level or dial things in to any height.
But I have used upside down 5 gal buckets too so nothing is too high tech for my shop. And I hate to weld.
Dale
Last edited by myjones; 03-25-2014 at 04:04 PM.
Reason: clarity
-
Hi
Dale,
My battery surface mounts below the upper deck in the trunk. It's sized for an Optima battery.
 Posting Permissions
- You may not post new threads
- You may not post replies
- You may not post attachments
- You may not edit your posts
-
Forum Rules

Visit our community sponsor


 Reply With Quote


