Very Cool Parts

Visit our community sponsor

Thanks Thanks:  0
Likes Likes:  0
Page 3 of 4 FirstFirst 1234 LastLast
Results 81 to 120 of 134

Thread: Chris' Bodywork Thread - Mk3.1

  1. #81
    Out Drivin' Gumball's Avatar
    Join Date
    Feb 2011
    Location
    Blackberry Township, IL
    Posts
    2,653
    Post Thanks / Like
    Quote Originally Posted by MPTech View Post
    Chris,
    Really enjoying this thread, thanks for sharing your experiences and knowledge.
    I have similar rectangular lights and was wondering, when you knock the edges off to contour to the rectangular shape, do you need to re-inforce the backside? Didn't know if it thinned out the the body too much taking off the original pad corners from the round lights.
    Looks GREAT, keep up the good work and post frequently!
    I did back-up the tail light area as part of patching over the holes that FFR cut. My body came with two circular holes in each pad for the round tail lamps and, wouldn't you know it, those were right where the mounting studs for the rectangular lamps needed to go. I cut some 6" circles of fiberglass cloth, then cut those in half to patch the top and bottom - see post #18 for details. I built that up about 3/16" - 1/4" thick on the inside, so that I wouldn't have issues with thinning the body when I did the resculpting, so it sort of killed two birds with one stone.
    Later,
    Chris

    "There are no more monsters to fear, and so, we have to build our own."
    Mk3.1 #7074

  2. #82
    Out Drivin' Gumball's Avatar
    Join Date
    Feb 2011
    Location
    Blackberry Township, IL
    Posts
    2,653
    Post Thanks / Like
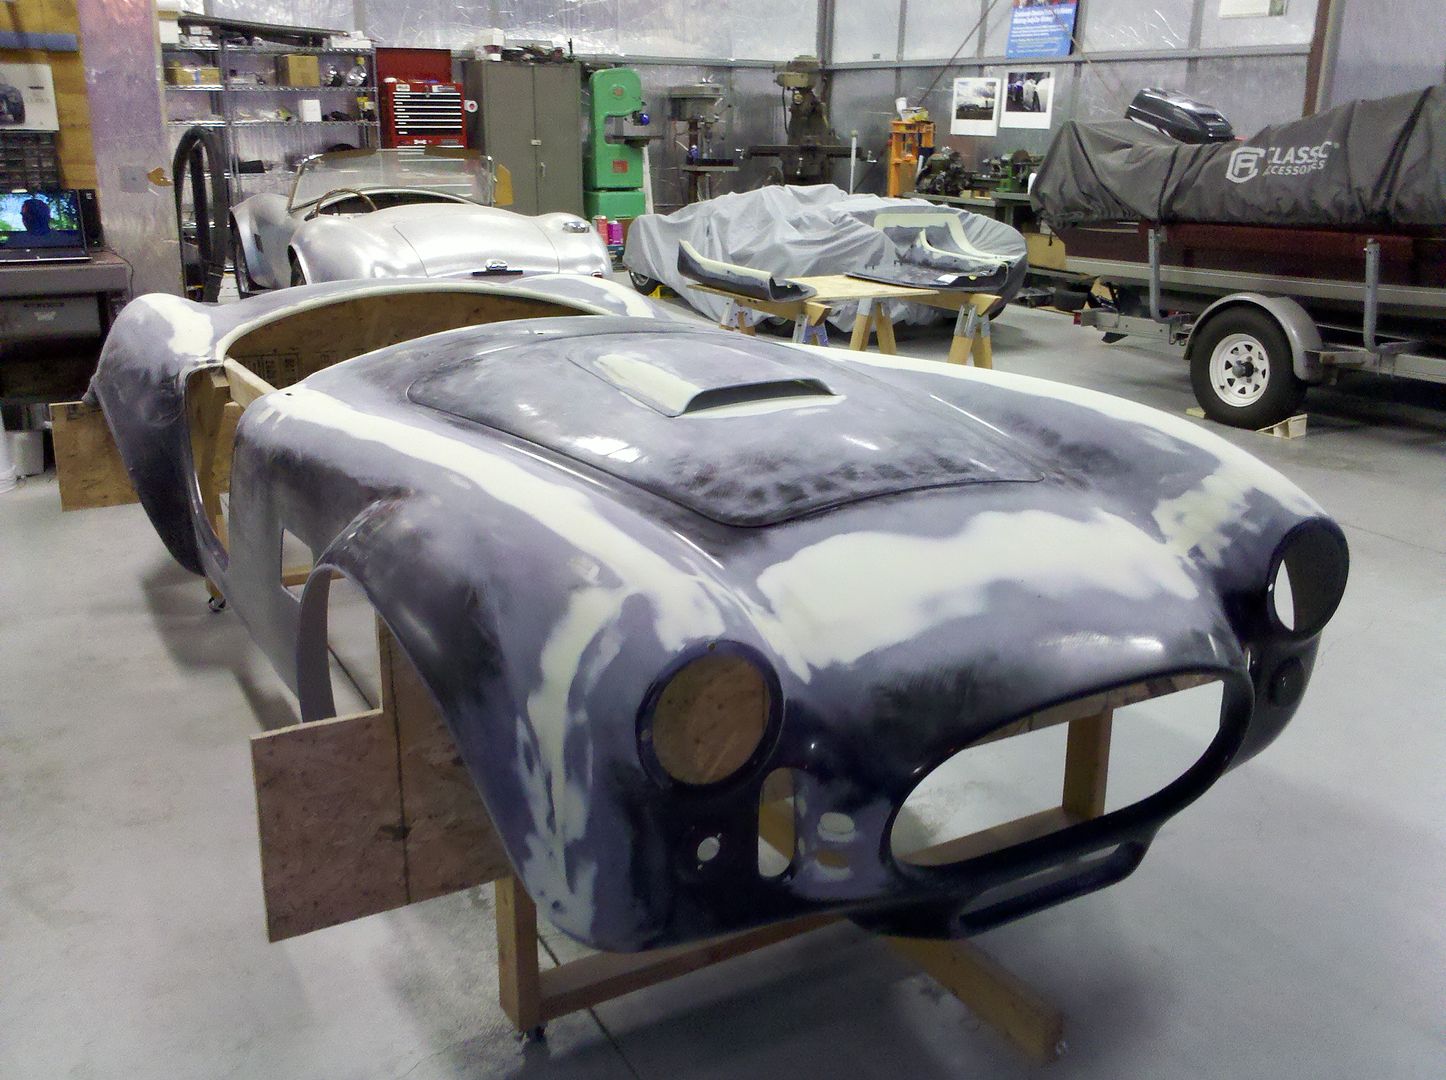
    Got a bunch of work done this weekend and I'm actually calling the first stage of my bodywork adventure concluded - here's how the body, doors, hood, trunk lid, and scoop spent most of the day.

    The next step will be to get the body and moveable panels on the chassis for gapping and leveling, then a few coats of Slick Sand and some blocking before it all comes off again and goes to the painter on the buck.

    For now, I'm going over my list to see if I forgot anything before getting it back on the chassis. Should have it on there by next weekend, so some good updates coming.


    Here are a couple of detail shots:

    Hoodscoop profile - I really like how Competition Cobra's mod came out...


    Inside of the hood with the scoop in place...


    It's starting to look like a car... one with a bit of a complexion problem, but a car nonetheless...

    Later,
    Chris

    "There are no more monsters to fear, and so, we have to build our own."
    Mk3.1 #7074

  3. #83
    Out Drivin' Gumball's Avatar
    Join Date
    Feb 2011
    Location
    Blackberry Township, IL
    Posts
    2,653
    Post Thanks / Like
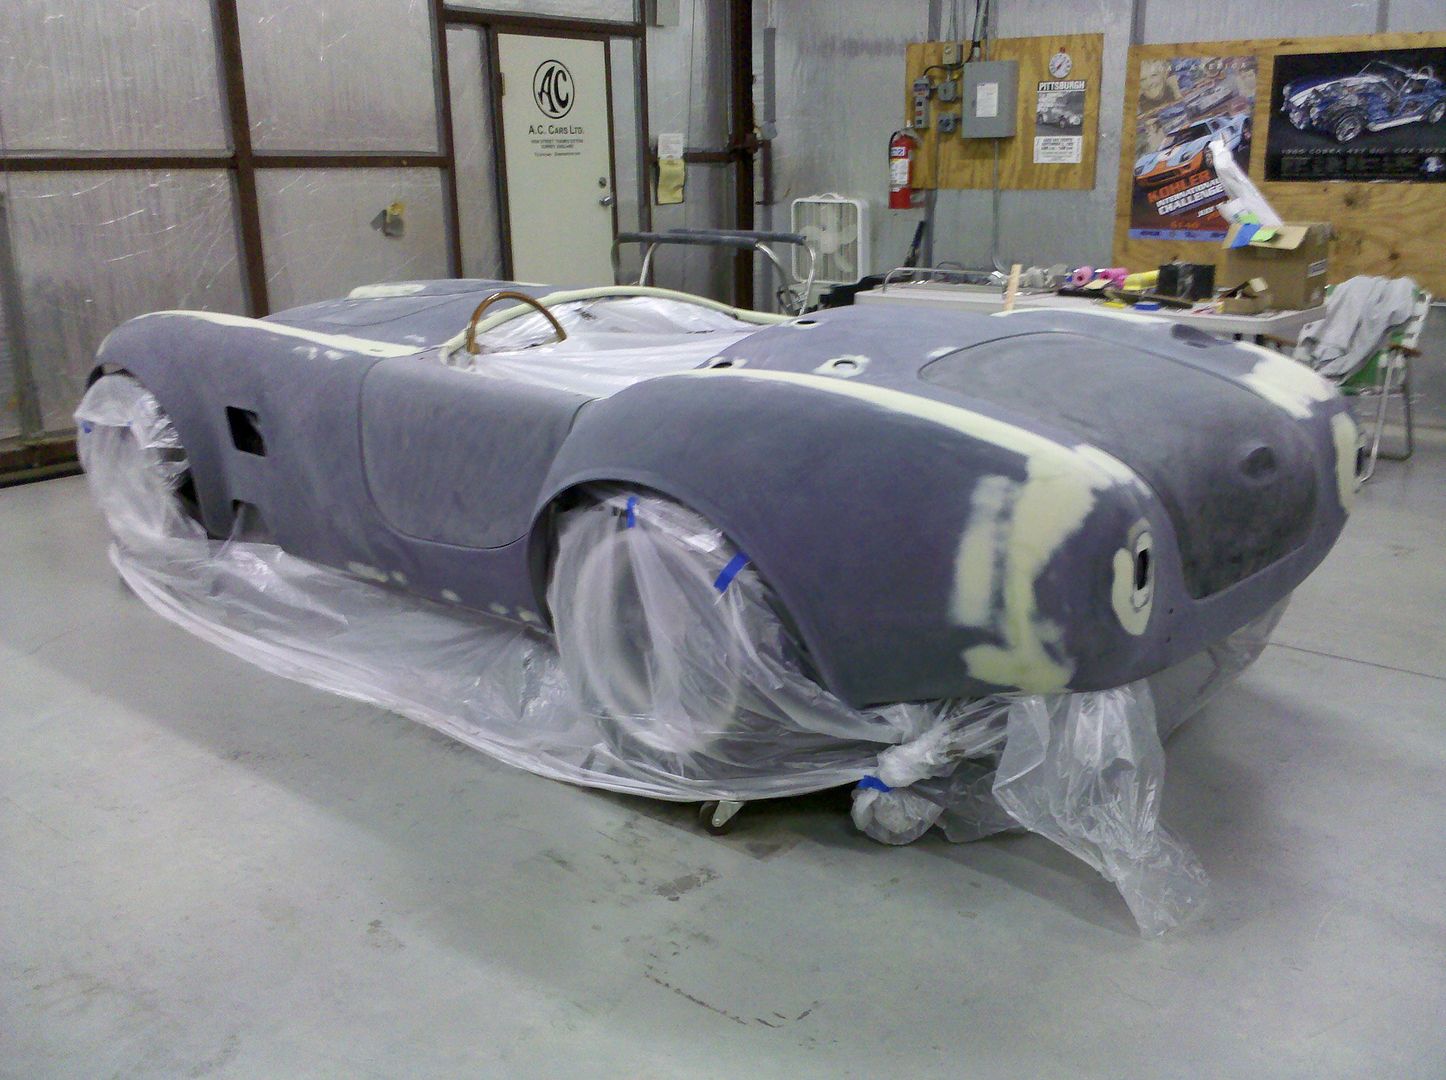
    I've been away from this post for a while, but not because I wasn't working on my car... just not doing much in the way of bodywork lately. I decided a month or so ago that I wasn't going to be able to finish the bodywork and get it painted/assembled in time for inspection this fall, so I decided to let the bodywork sit a while while doing some additional things on the chassis. Part of this effort was to get ready for one last body-on-chassis fitting so that I can gap the moveable panels and do the last little filler work, before sending the body and panels out for paint.

    I finally finished those chassis tweaks over the weekend, leaving just wiring and interior. The body is going on this week, so here's how things look for now:


    I'm going to have to make a few slits in the plastic sheeting to mount the body, but this should hopefully cut down somewhat on the dust and mess that I'll have in the nooks and crannys of the chassis.

    More to come...
    Later,
    Chris

    "There are no more monsters to fear, and so, we have to build our own."
    Mk3.1 #7074

  4. #84
    Out Drivin' Gumball's Avatar
    Join Date
    Feb 2011
    Location
    Blackberry Township, IL
    Posts
    2,653
    Post Thanks / Like
    Got the body back on the chassis last night. I had to cut the plastic wrap in a few places to install things like the splash guards (front and rear) and get access to the various hinges and latch points. In these pics, the doors, hood, and trunk are just set in place - nothing is adjusted or tightened down. It looks like everything is going to fall where it needs to when it gets bolted tight and adjusted. It also looks like I have less work to do to get the ends of the doors to match the front and rear cowls where I've rolled them. Next step is to get all the body mount bolts snugged down and a few other things installed, like the windshield, rollbar and bumpers. I'm also going to fit the soft top and tonneau so I can finally get those things punched and I can get Dale's cool "lift-the-dot" tool back to him (sorry again for the delay, Dale!), then I'll do the panel gapping and the last of the bodywork (including filling pinholes - yay!!!).


    Later,
    Chris

    "There are no more monsters to fear, and so, we have to build our own."
    Mk3.1 #7074

  5. #85
    Out Drivin' Gumball's Avatar
    Join Date
    Feb 2011
    Location
    Blackberry Township, IL
    Posts
    2,653
    Post Thanks / Like
    Lots of progress lately. After getting the body mounted (for like the sixth time or something), I added the moveable panels and adjusted everything. A word of caution to anyone thinking of wrapping their chassis in plastic before putting the body on... remember that you're going to need access to the mounting points for the doors, hood, trunk lid, windshield, body mounts and... most difficult of all, the splash guards. After cutting a bunch of access holes through the plastic, I was able to get everything in place and the body is now exactly where it will be once it's painted.

    Here are pics of the doors, hood, and trunk lid after a few hours of work adjusting everything. Like others have said in their bodywork threads, it takes lots of patience and ultimately is a compromise. I went with what I thought was the most liveable alignment of the doors (they were the hardest) and as you'll see below, that left a bit more of a gap at the top leading edges than I would have preferred. Fortunately, we can work with that. None of these have been gapped yet in relation to the body, so you can see that FFR did a bit of overzealous trimming on the tops of the doors.

    In the last two pics, the doors have been fully adjusted, the hidden lower mounts that I bonded into the rockers are set, and the latches and strikers are in place and holding the doors shut. It doesn't look like I'll have to do too much filling on these to get the doors level with the body... I'm expecting that I'll mostly be doing the gapping and adding a radius to the edges. I do have to add a bit of filler at the top front of the doors to get the panel levels good between the door tops and the front cowl, though.


    This is the Gess trunk lid:


    Last edited by Gumball; 10-07-2013 at 01:36 PM.
    Later,
    Chris

    "There are no more monsters to fear, and so, we have to build our own."
    Mk3.1 #7074

  6. #86
    Out Drivin' Gumball's Avatar
    Join Date
    Feb 2011
    Location
    Blackberry Township, IL
    Posts
    2,653
    Post Thanks / Like
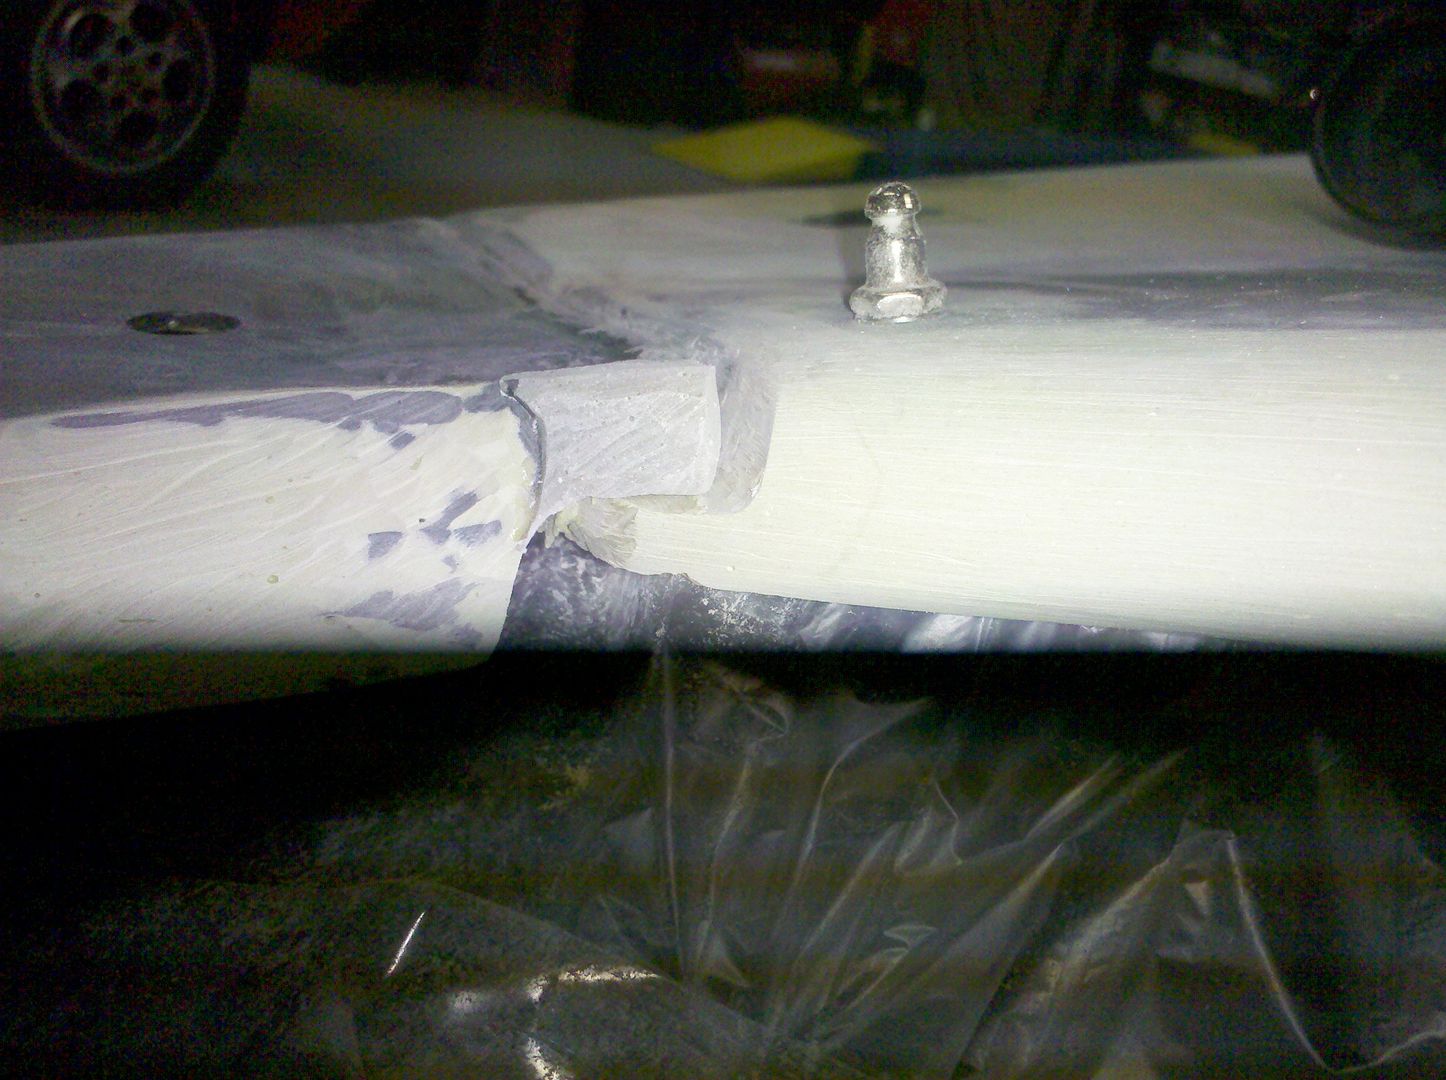
    Once the doors were adjusted, I had to decide whether I could live the the large-ish gaps that FFR gave me by their efforts at trimming the doors. After getting the passenger door to where I liked all aspects of the fit except the top front at the cowl, I was left with a nearly 3/8" gap along the top front of the door as well as just over 1/4" at the top rear. The driver's side was a bit better, but still on the plus-side of 1/4" at the top front of that door. I decided that given how nice everything else fell into place, I'd just add a bit of fiberglass to those areas. I went back to the heavy duty aluminium tape method and made forms for the fiberglass by sticking the tape to the door from the backside and then using a wooden paint stir stick to make a 90 degree channel. For the fiberglass / resin mix, I used something called "milled fiberglass flocking" from Aircraft Spruce. It sells for around four bucks for a 1lb bag, which is around ten times more than I needed. I mixed the vinyl ester resin and added the flox, which is like a powder - being super careful to make sure I was fully covered, including gloves, and wearing a respirator as this is nasty stuff in the powder form - and then mixed up a heavy paste that filled the form and didn't sag. This will be trimmed down with an angle grinder or a dremel to a uniform 3/16" gap all around the doors.

    Some close-ups of the "forms"

    Top rear of passenger door:


    Side view of the same one


    Leading edge of the passenger door after filling the "form"


    I'll post some more pics of this process once everything is trimmed down and the doors are gapped. But, overall I'm very happy with this process. In fact, I'm going to use this to add a bit to the sharp corner of both doors at the top front so that the doors match the rolled edge I added to the cockpit cowl. The flox is very easy to work with and also comes in cotton if you're really concerned about working with the powdered fiberglass. Just make sure to mix it well and not too thin if you're applying it to vertical surfaces.
    Last edited by Gumball; 10-07-2013 at 01:38 PM.
    Later,
    Chris

    "There are no more monsters to fear, and so, we have to build our own."
    Mk3.1 #7074

  7. #87
    Out Drivin' Gumball's Avatar
    Join Date
    Feb 2011
    Location
    Blackberry Township, IL
    Posts
    2,653
    Post Thanks / Like
    Just a couple of final pictures from the past week or so of work. These show the old-style FFR soft top bow in place. Before installing it, I reinstalled the under-body braces that I made and wrote about in an earlier post above. I had those powdercoated as they'll be slightly visible under the edge of the rear cowl, so they now match the frame. In these pics, those supports are just held in by clecos and then the ferrules are just slipped through the body... no bonding was applied. However, the installation is super rigid and I'm sure there will be no problems with the top flexing and causing cracks in the fiberglass or paint around those ferrules.


    Later,
    Chris

    "There are no more monsters to fear, and so, we have to build our own."
    Mk3.1 #7074

  8. #88
    Out Drivin' Gumball's Avatar
    Join Date
    Feb 2011
    Location
    Blackberry Township, IL
    Posts
    2,653
    Post Thanks / Like
    Very good weekend - lots of rain on Saturday, so I was able to lock myself in the hangar and work on panel gapping. There are quite a few ideas on this forum about how to get the panel gaps even and there are more opinions if you talk to people who do bodywork for a living. Being the hack that I am, I tried to take a simple approach and use the "paint stir stick method."

    Here's a reminder of how my doors looked once completely adjusted. This is the driver's door, but the passenger door was nearly identical. Both had been overzealously trimmed by FFR and the gap at the front cowl and the leading edge of the door neared 3/8". I decided to make a mold out of foil tape and used some milled fiberglass and resin to add to the door edges (see detail above). This closed the gap completely and allowed me to make the gap as small or large as I wanted without compromise.


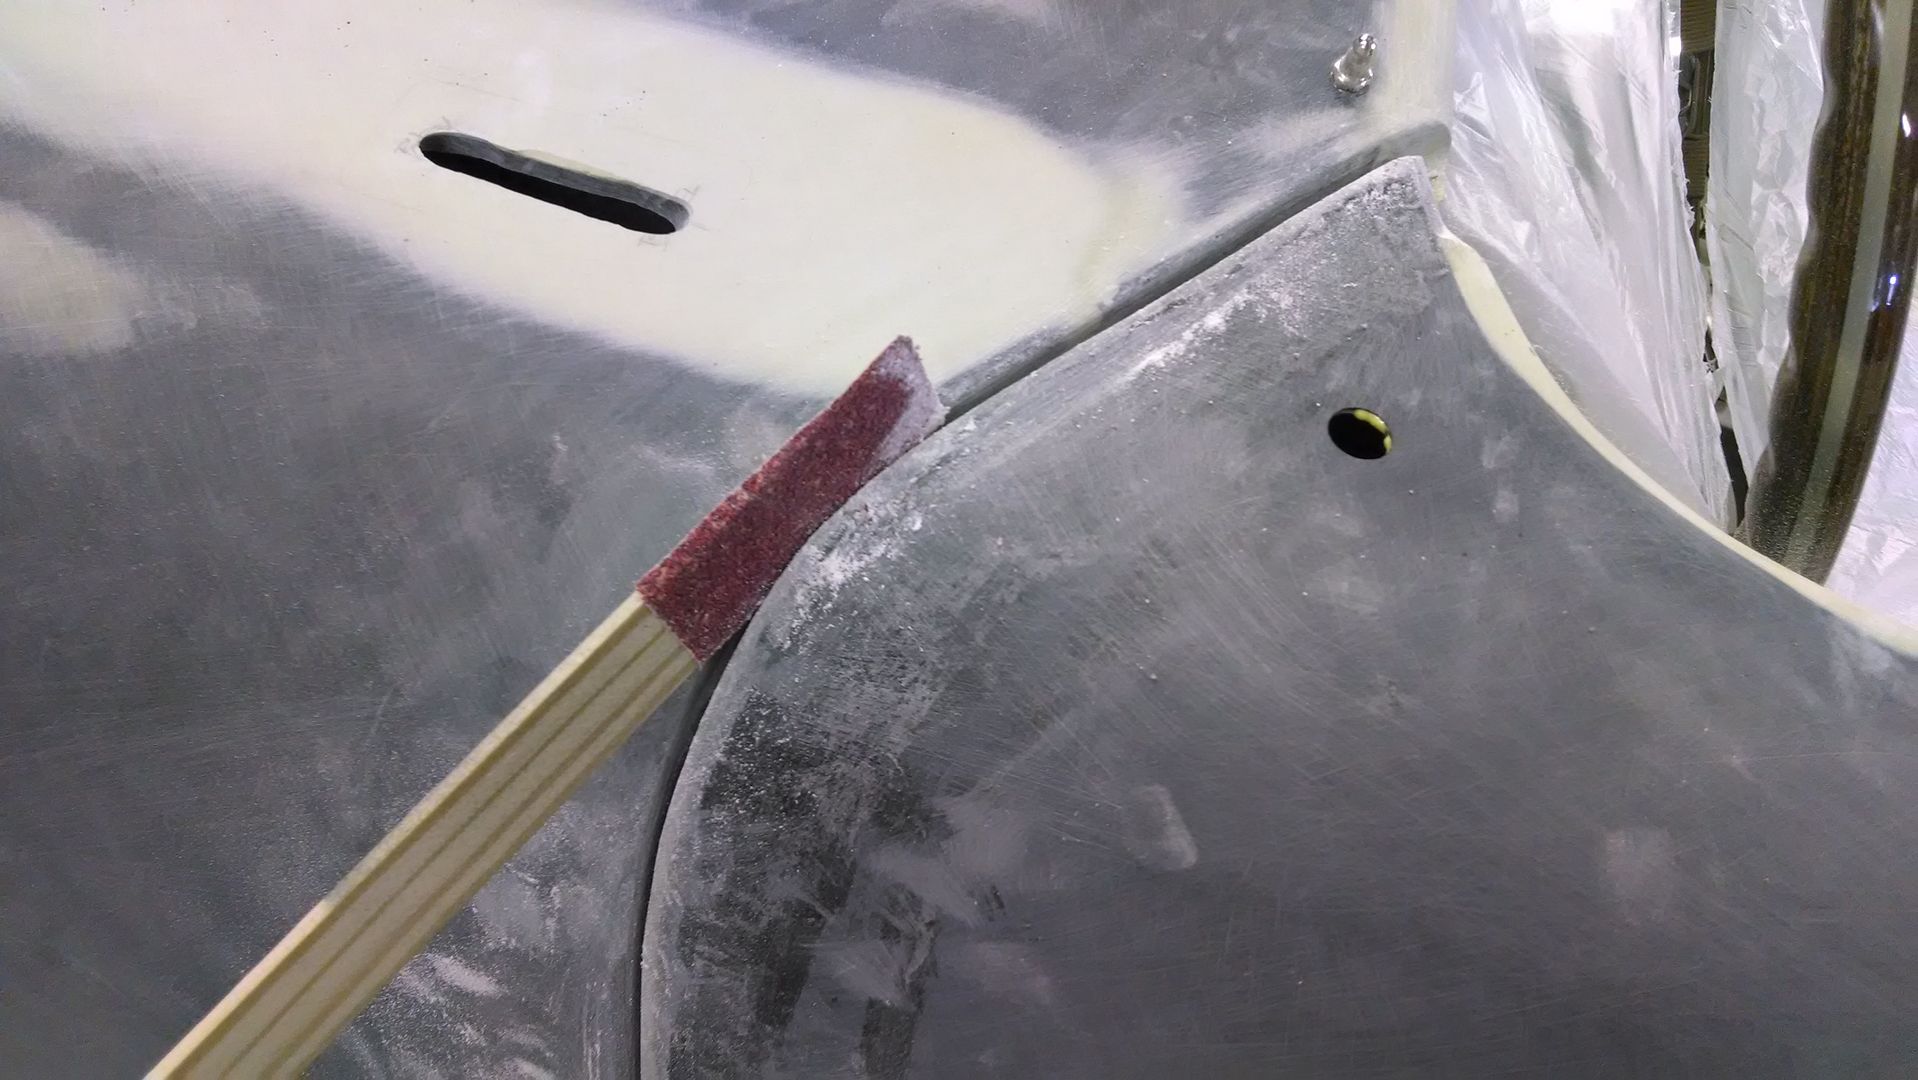
    To do the gapping, I used a sanding block and two paint stir sticks. One of the sticks was noticeably thinner than the other, so that was the initial stick I used. I bought some 40 grit adhesive paper (lengths that were 2 3/4" wide) and cut a bunch into 1" x 2 3/4" strips to use on the end of the stir sticks. Using the sanding block, I opened the gaps just enough to fit the tip of the thin stir stick into it so that I could begin working it. Of course, the initial gap that resulted from the sanding block wasn't too uniform, but that quickly changed with the use of the thinner stick. Then once the gap was opened sufficiently, I switched to the thicker stick (I've found that Home Depot stir sticks are high quality - uniform in thickness and very strong). Using the thicker stick, I was able to open the gap to a very uniform 3/16". With the adhesive sandpaper only on one side of the stick, the bare wood side simply rides against the body, using the body as the guide and doing absolutely no damage to the body. An additional benefit to doing the gaps this way is that the bevel on the door edge perfectly matches that of the opening.

    In this picture, the stir stick is just placed in the gap for illustration purposes... but you can see the dust on the corners of the stick showing how I was working just the corners down into the gap - that ensured that the width of the stick wouldn't open the corners of the door any more than along the straight runs.


    Here is the finished driver's door, ready for just a little skim coating along the leading edge and the bottom (typical of a Mk3) but otherwise all gapped.


    For those who wondered why I bothered to cover the entire chassis in a couple layers of thin bodyshop plastic sheeting before putting the body on, here's a good enough reason - the hood gapping is making an absolute mess that I would't want filtering down into the engine bay.


    Pic of the hood gap getting close - this is about 1/8" with the thin stick - still have to open it up a bit more using the thick one and finish getting it completely uniform all the way around.


    I struggled quite a bit on how to measure and mark the panels for trimming off the car. One of the things that caused me concern was how to get a good measurement off the rounded edge of the body openings. Doing it this way with the panels on the car ensures a very even gap all the way around the panel and allows for constant checking of the work. This is especially important where the hood and trunk lid break over the crown of the body as that appears to be a rub area on some cars. A couple areas are tight from an access perspective, though, so instead of the sanding block I had to use the thicker stick to get the initial gap opened up - front of all four panels where they are closest to the body. Also, this is not the fastest method - it's obviously much faster to mark the panels with tape, remove them, and go at them with a grinder. In the end, I settled for the slower, but more accurate method and I'm very pleased with the results.
    Later,
    Chris

    "There are no more monsters to fear, and so, we have to build our own."
    Mk3.1 #7074

  9. #89
    cobra Handler skullandbones's Avatar
    Join Date
    Jul 2011
    Location
    Superstition Mtn foothills 5 miles west of Gold Canyon AZ
    Posts
    2,686
    Post Thanks / Like
    Blog Entries
    19
    Hi Chris,

    I remember seeing the stick method used by an experienced body man where I got my first real job at 14. He would use it like you are on tight spots and for the initial shaping when rebuilding a wrecked area. I appreciate this thread as I have taken a break from the body work during the summer. It's cool enough now to get back to it. I like your slow approach. I will do the same and be very careful as I go. One note: I saw a fellow with a gapping tool that he made. It looked like it would be very helpful for quick checks. Are you using something like that? Thanks a lot, WEK.
    FFR MkIII 302 (ATK), EFI 75mm TB with custom box plenum chamber, 24# injectors, 4 tube BBK ceramic, cold air sys, alum flywheel, crane roller rockers, T5, Wilwood pedals, custom five link with Watt's link, 4 rotors, coil overs, power steering with Heidt valve, alum FFR rad, driver's crash bar mod, mini dead pedal mod, quick release steering wheel hub #6046

  10. #90
    Out Drivin' Gumball's Avatar
    Join Date
    Feb 2011
    Location
    Blackberry Township, IL
    Posts
    2,653
    Post Thanks / Like
    I'm using a digital caliper for the final checks, but everything so far has been within .005, certainly not visible to the eye. But, I did correct those by going over the narrow areas a bit more with the stick.
    Later,
    Chris

    "There are no more monsters to fear, and so, we have to build our own."
    Mk3.1 #7074

  11. #91
    Out Drivin' Gumball's Avatar
    Join Date
    Feb 2011
    Location
    Blackberry Township, IL
    Posts
    2,653
    Post Thanks / Like
    ... and I just keep on sanding. I worked on gapping the rest of the panels this weekend and was just about finished when I had to call it a night tonight. I'll finish the trunk lid in the next day or so and post some more pics. The panel gapping is going great and I really like the "take a little off at a time" method that I'm using. I've been alternating between a 6" durablock and the two different paint sticks with adhesive 40 grit and the edges are turning out really nice.

    I saved the trunk lid for last. As I wrote earlier in this thread, I decided to use the Gess trunk lid after all. This is a lid that Karl Gess made using a mold from a FFR trunklid that he modified for someone to eliminate the old "beak" that the earlier cars used to have. I did have to do a bit of adjusting of the hinges and of the rear body using the body mount (bumper) bolts and the trunk latch pin, but after a little more tweaking, it fit really nice.

    As soon as I finish the trunk lid, I can move on to doing some skim coating on the doors and trunk lid. That's about all that's left before I cry uncle and turn it over to the painter for the last steps of final blocking, sealing, and paint.
    Later,
    Chris

    "There are no more monsters to fear, and so, we have to build our own."
    Mk3.1 #7074

  12. #92
    Out Drivin' Gumball's Avatar
    Join Date
    Feb 2011
    Location
    Blackberry Township, IL
    Posts
    2,653
    Post Thanks / Like
    Time for a new installment in what is becoming my never-ending bodywork adventure! The doors, hood, and trunk lid are all finally adjusted and gapped - I opened the gaps up to a little under 1/4" on the advice of quite a few people as the gaps will get filled back in slightly with Slick Sand, sealer, color, and clear. Not much, I know, but those materials will add a bit back to the body and I don't want the gaps to be too tight on a dark color car due to heat induced expansion.

    Pics to come of the final gaps - they were on a phone that broke, so I can't get them downloaded tonight.

    I do have a few pics to share, though. This week, I removed a few inches of the rounded door edge to expose the fiberglass so that I could add a little material to the front top corners of the doors in an attempt to get them to line up better with the rolled cowl. The rolled cowls added about 3/4" to the front and rear, but the doors fell far short of that and needed some work.

    Here's the before - driver's side:


    I could have just built the corner up with more filler, but I thought it would be better go give it a base of fiberglass. I used foil tape to make a mold after clearing away the gel coat, then mixed a batch of resin with milled fiberglass (basically powdered stuff) until it was a paste. It ended up being a pretty big gob of 'glass on each corner.


    Once the new extensions had a couple days to set up, I just went at them with a Dremel (1/2" barrel sanding head) and ground away everything that didn't need to be there. Here's the driver's side after grinding.


    Another view of the ground-down driver's door extension:


    And here it is after a thin layer of filler - still needs some work to get the radius right... more filler to the rescue tomorrow:


    Here's a pic of the passenger door - a bit better on the radius the first time out:


    I'll need to work these a bit to make the transition from the cowl to the door look right, but I like this much better than the initial try. The nice thing about filler and fiberglass is that once you've built it up, it's easy to grind away and start over if you're not happy.
    Later,
    Chris

    "There are no more monsters to fear, and so, we have to build our own."
    Mk3.1 #7074

  13. #93
    Out Drivin' Gumball's Avatar
    Join Date
    Feb 2011
    Location
    Blackberry Township, IL
    Posts
    2,653
    Post Thanks / Like
    Pics of the finished gaps. In addition to the two paint sticks I mentioned in the earlier posts regarding gaps, I opened these up a bit further... just shy of 1/4"... using a piece of a wooden yard stick.


    Later,
    Chris

    "There are no more monsters to fear, and so, we have to build our own."
    Mk3.1 #7074

  14. #94
    Carl carlewms's Avatar
    Join Date
    May 2012
    Location
    Nokesville, VA
    Posts
    1,125
    Post Thanks / Like
    Your craftsmanship and patience is absolutely superb. I have not gotten to the body work stage but I plan to emulate much of what you've done here.

    Thanks, Carl
    Mk 4 Roadster
    October 25, 2012 - Kit Arrives
    April 8, 2013 - Build Starts
    August 23, 2015 - Rolling Chassis/Engine & Transmission Installed
    March 26, 2016 - Go Cart

  15. #95
    Out Drivin' Gumball's Avatar
    Join Date
    Feb 2011
    Location
    Blackberry Township, IL
    Posts
    2,653
    Post Thanks / Like
    Still working on those door-to-cowl gaps. The thickness of the doors isn't too hard to deal with at the rear, but quite a pain at the front cowl. Although I was happy with the shape I achieved with my process of rolling the cowls, I decided to add a bit of extra filler recently to reshape the ends so that they "thicken up" a bit near the transition to the doors.

    Here are some "work-in-progress" pics:

    Rear Cowl:


    Front Cowl:


    Later,
    Chris

    "There are no more monsters to fear, and so, we have to build our own."
    Mk3.1 #7074

  16. #96
    Out Drivin' Gumball's Avatar
    Join Date
    Feb 2011
    Location
    Blackberry Township, IL
    Posts
    2,653
    Post Thanks / Like
    ... and here are the finished door-to-cowl transitions. Just a little clean-up work to do on the edges once I shoot the body in Slick Sand, but I'm pretty happy with how these turned out.


    Later,
    Chris

    "There are no more monsters to fear, and so, we have to build our own."
    Mk3.1 #7074

  17. #97
    Out Drivin' Gumball's Avatar
    Join Date
    Feb 2011
    Location
    Blackberry Township, IL
    Posts
    2,653
    Post Thanks / Like
    Well, nearing the last phases of bodywork. Last night I began working on the low spots between adjacent panels. Once I'm done with this step, the last thing to do will be to work the inside of the hood and trunk lid, then to spray the exterior with Slick Sand and do the blocking.

    Given the snow we had yesterday, it looks like I'll leave those last two steps until after winter. For now, I'll finish the fitting of the moveable panels, put the windshield on for a final fit, and install the soft top and tonneau (so I can finally send the Lift-the-Dot punch back to Dale).

    The doors, hood, and trunklid were adjusted to the best compromise I could get before I did the gaps. The last part of that fitment process is to make sure that all four of those moveable panels are level with the body.

    Doors - Between the fiberglass I added to the edges, the hidden mounts on the body sides under the door openings that give infinite adjustment within the range, and the hours upon hours of time spent adjusting, I only have a couple of spots that needed filler. The doors will need a bit more work eventually to ensure that they are flat (i.e., block sanding, filler, and Slick Sand), but they look really nice almost all around the perimeter. I did have to add a bit of a skim coat to the front top of each where they meet the cowl, to the top rear of the passenger door, and the top of the rear cowl behind the driver's door, but it took very little filler to get the panels level.

    Hood - After a bit of modification to the Breeze hidden hood hinges (I had to strip, heat, and bend them after I initially powdercoated them right out of the box), I was able to get the hood almost perfect. There was a bit of a droop to the front driver's side corner, though, but not really enough to do anything with - I skimmed it anyway.

    Trunk - I ended up using the aftermarked lid made by Karl Gess a few years ago (pre Mk4 days) and, not surprisingly, there were a few minor fitment issues. But, once adjusted and with the latch in place, it was only off in three areas - two low spots on the lid and one high spot as shown by the filler on the driver's side body next to the lid.

    Here are some photos of the first skim coat - I'll sand this down a bit and then spread another layer on and feather it out a bit more into the panels.


    Later,
    Chris

    "There are no more monsters to fear, and so, we have to build our own."
    Mk3.1 #7074

  18. #98
    Senior Member bil1024's Avatar
    Join Date
    Feb 2011
    Location
    NY
    Posts
    1,433
    Post Thanks / Like
    Looking good! DOing some good work there Chris

  19. #99
    Out Drivin' Gumball's Avatar
    Join Date
    Feb 2011
    Location
    Blackberry Township, IL
    Posts
    2,653
    Post Thanks / Like
    I'm pretty much done with the leveling of the moveable panels - as mentioned above just a few spots needed to be skimmed in order to bring them up to the level of the adjacent panel. I did just a bit more skimming and sanding today, then I installed the windshield. This is the first time that the full windshield has been on the car and I was very happy with the fit, except for the need to open the slots in the body just a bit more to ensure that there is no contact between the fiberglass and the windshield posts. The gasket along the bottom of the frame is making nice contact across the full width, so I think I'm good there. While it was on, I added the side curtains and the top bows, then the soft top so I could punch the holes for the "lift-the-dot" fasteners. Thanks to the punch that Dale loaned me, it was a trouble free process... well, that is after I mis-punched the nine rear passenger side holes on my tonneau (DOH!). I'm going to drop the perforated tonneau off at the upholsterer who covered my seats so he can add a new border to it - effectively covering the mis-punched holes so that I can re-do it, the right way this time.

    I also did a check of the cowl to windshield bracket and found that I have to tweak the angle just a bit for it to mount flush. Overall, though, I think it will be a good addition and will work in concert with the ********** center post to give the windshield added rigidity when the top is in place.

    I have just a little more sanding to do this weekend, then will pull the body off and let it sit for the winter. Here are a few more progress pics - I'll post some final ones tomorrow before letting this thread go dormant for a few months.

    Here's the tonneau - not all the fasteners are in place, so there are a few wrinkles. I'll work those out as soon as it comes back from the upholsterer.


    Extra holes are visible along the rear of the passenger side... this was the first time I've ever fitted anything like this, guess I see why this is sometimes best left to the pros. At least I learned from it and the top came out perfect.


    Windshield and side curtains:


    Windshield bracket to cowl - I'm going to bond a plate with two machine screws to the underside of the cowl and use a couple of acorn nuts to hold this in place.

    Later,
    Chris

    "There are no more monsters to fear, and so, we have to build our own."
    Mk3.1 #7074

  20. #100
    Out Drivin' Gumball's Avatar
    Join Date
    Feb 2011
    Location
    Blackberry Township, IL
    Posts
    2,653
    Post Thanks / Like
    Well alright... my timetable just got pushed up a bit!!!

    My friend who's going to do the paint stopped by the other night to check it out and we decided that since he has a slot opening up soon, I'm going to deliver my car to him by Christmas. Uh-oh, though, that means I have to finish a bunch of stuff now that I was originally planning on doing in spring. Because of that, it's just been sitting for the past few weeks, so now I'm in a crunch to get the last few fitment issues resolved and do some final sanding/shaping of my body mods. It's not a huge list, but enough that I really need to focus as my time is at a premium now due to holidays and year-end things at work.

    One thing we decided is that he's going to handle all the voids and pinholes as I'm not going to do any Feather Fill or Slick Sand before it goes to him. He said he prefers to get it with my bodywork out in the open (I hope that's not some sort of slam on my quality).

    I can't believe that soon it'll be smooth, green, and shiny! I'll keep you guys posted as I get this stuff done and it goes off for paint.
    Later,
    Chris

    "There are no more monsters to fear, and so, we have to build our own."
    Mk3.1 #7074

  21. #101
    Out Drivin' Gumball's Avatar
    Join Date
    Feb 2011
    Location
    Blackberry Township, IL
    Posts
    2,653
    Post Thanks / Like
    Yesterday (Saturday) was "filler day" and I was able to skim coat a bunch of areas that need just a little more finishing. I'm going to give them one more look today, but I think I can consider the doors, hood, and scoop as done as I'm ever going to get them. It's going to be a short day today because of visitors and Christmas decorating, but I'm hoping to get the trunk lid done, too. That will leave just a little more grinding, sanding, and maybe the odd swipe of filler on the body before putting it back on the chassis for what (I hope) will be the last pre-paint fitment.
    Later,
    Chris

    "There are no more monsters to fear, and so, we have to build our own."
    Mk3.1 #7074

  22. #102
    Out Drivin' Gumball's Avatar
    Join Date
    Feb 2011
    Location
    Blackberry Township, IL
    Posts
    2,653
    Post Thanks / Like
    Just thought I'd post an "after" pic of the tonneau. The local upholsterer I'm using did a great job fixing my over-perforation issue by adding a border. While he was at it he also added a sleeve underneath along the passenger side of the zipper so that I can use a fiberglass pole for rigidity when the tonneau is zipped down the middle and the passenger side remains fastened in place for cool weather motoring.

    He saved the day for all of $100.


    Close-up of the border:

    Later,
    Chris

    "There are no more monsters to fear, and so, we have to build our own."
    Mk3.1 #7074

  23. #103
    Junior Member
    Join Date
    Oct 2013
    Location
    Madison, CT
    Posts
    15
    Post Thanks / Like
    Quote Originally Posted by David Hodgkins View Post
    Chris, lookin' good! Here's some inspiration:


    IMHO MKIII's look GREAT with MKIV trunks!

    Sorry to Hijack this thread - but can you tell me what rear axle/wheel/tire combo this roadster is using? It's EXACTLY what I'm trying to do with 15" wheels...
    Thank you!!

  24. #104
    Out Drivin' Gumball's Avatar
    Join Date
    Feb 2011
    Location
    Blackberry Township, IL
    Posts
    2,653
    Post Thanks / Like
    Cobrabite - you should probably PM David directly for info on that car so that he can provide you with the information.
    Later,
    Chris

    "There are no more monsters to fear, and so, we have to build our own."
    Mk3.1 #7074

  25. #105
    Out Drivin' Gumball's Avatar
    Join Date
    Feb 2011
    Location
    Blackberry Township, IL
    Posts
    2,653
    Post Thanks / Like
    I'm not sure how I've found time lately to work on the body, but given the pressure of a date for it to be delivered to the painter, I've been chipping away at the last few fitment issues in between Christmas stuff and year-end work challenges.

    After spending an inordinate amount of time working on getting the windshield right, I'm down to just the last couple of things before the body comes back off for the last time.

    Here's a shot of the rubber "O" rings I'm using for the rollbar - these are just some 1 1/2" ID plain rubber parts from McMaster-Carr that I sliced in half to use for the rear leg of the hoop. This pic shows the first attempt - the cuts aren't quite aligned, but it was good practice. The round ones fit perfect on the front tube, so if I can get this right, I'll be able to do Jack Wojack's car proud - he was my inspiration for this period-touch.


    I also did a bunch of final tweaking of the front bumper and made sure the rubber grommets for that fit properly, too.

    This pic shows those grommets, as well as a bunch of the little details I've been working on lately, like the windshield, side pipes, radiator aluminum, but not the oil cooler installation - which is just about done, too.


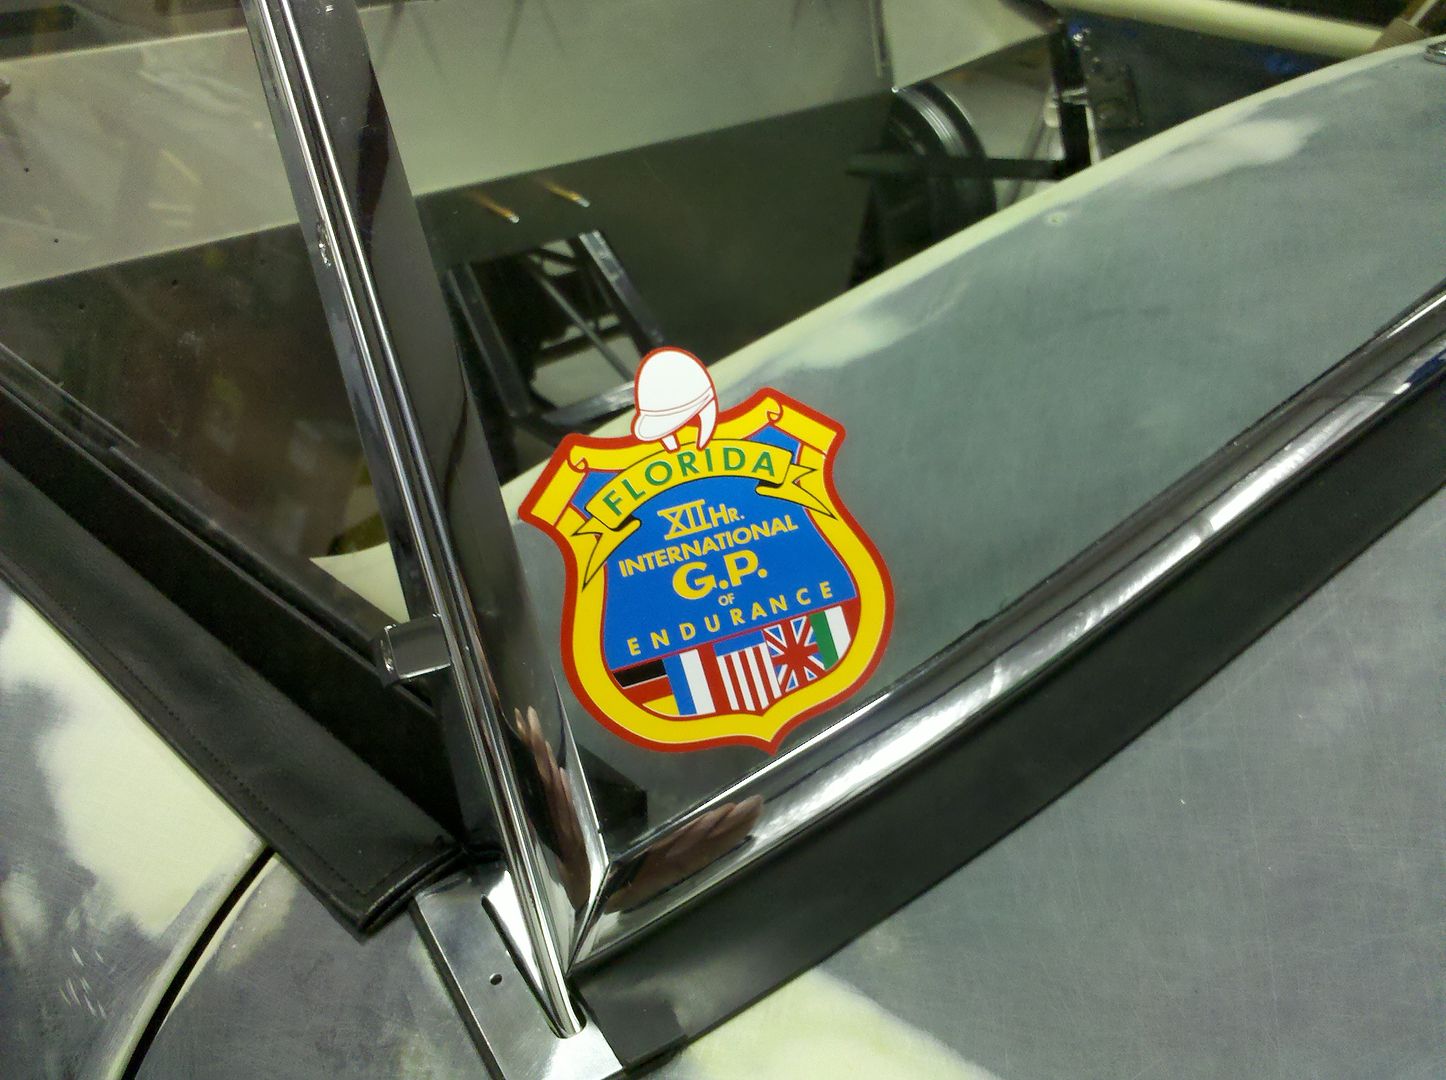
    One thing I didn't really like about the windshield provided by FFR (not counting their propensity for cracks), is the generic and modern DOT info - which I realize is required for compliance with licensing laws, but which detracts from the look of the car - at least IMHO. So, since I have a bunch of vintage race decals laying around, I added this Sebring one just for snicks. The mandatory info is still visible, in reverse, from the backside, but I have a "Triplex" decal that I'll place over top of that on the inside of the windshield once the car is licensed.

    Later,
    Chris

    "There are no more monsters to fear, and so, we have to build our own."
    Mk3.1 #7074

  26. #106
    Out Drivin' Gumball's Avatar
    Join Date
    Feb 2011
    Location
    Blackberry Township, IL
    Posts
    2,653
    Post Thanks / Like
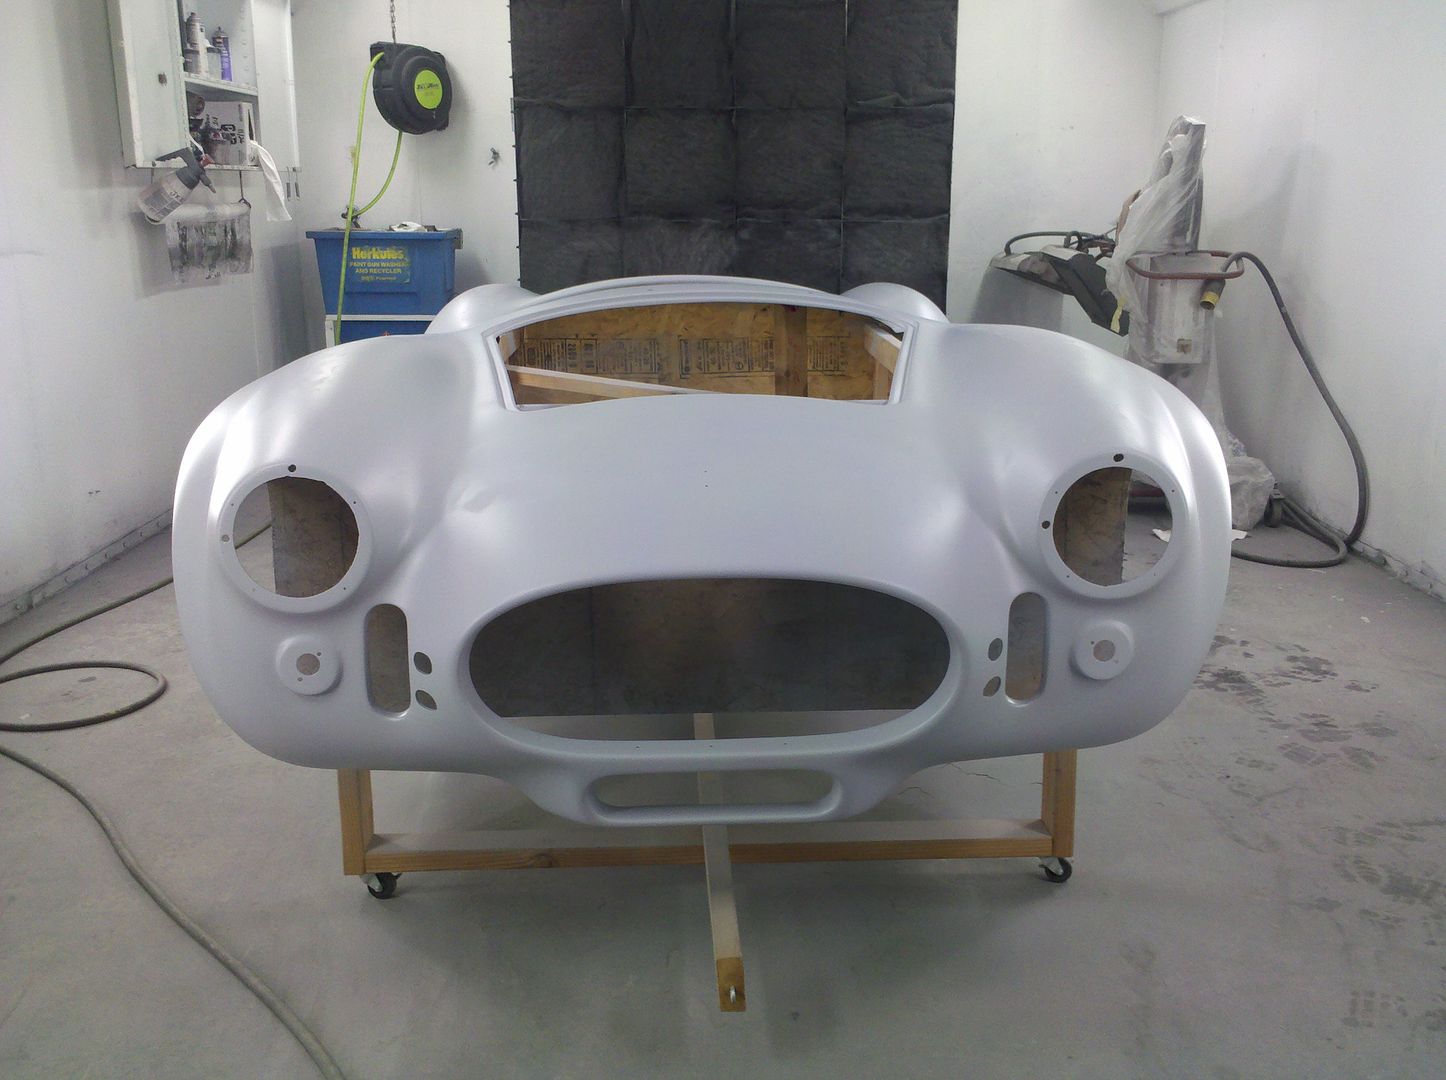
    Okay - yesterday was a big day... 7074 is now at the painter!!!

    After a thrash for the past few weeks, I officially finished my portion of the bodywork on Friday night. I was able to swing a little work-from-home and PTO time last week and the forecast was for near 50 degrees on Saturday, so I pushed to get it ready. Sure enough, it was sunny and warm as we wrapped the car / buck in a tarp and strapped it down on my trailer for the trip of a couple miles to my friend's shop.

    He's going to finish the bodywork by knocking down my seam repairs, then block it a few times before sealer and paint.

    Here are a couple pics after we dropped it off - more to come, for sure! I was pretty nervous leaving it with someone - it hasn't been out of my sight for the past four years - but I know it's in good hands. It should be flat, green, and shiny soon.


    Later,
    Chris

    "There are no more monsters to fear, and so, we have to build our own."
    Mk3.1 #7074

  27. #107
    Out Drivin' Gumball's Avatar
    Join Date
    Feb 2011
    Location
    Blackberry Township, IL
    Posts
    2,653
    Post Thanks / Like

    Paint Update!

    The painter texted me a couple pictures today and I just happened to be at the hangar... just a couple miles down the road. So, of course I ran right over and took a few pics of it in it's new coat of drab gray. What a difference to see it all one color and smooth.

    The guys were joking with me that I have a job if I ever want one. At first, I thought they were just giving me crap and that my hack-job bodywork caused them a bunch of problems, but they said it was actually pretty good and that they only had to fill a few obvious low spots and then tackle a huge amount of pinholes.

    A heartfelt thanks to everyone who posted their bodywork thread before me so that I could feel confident enough to tackle this, as well as all those who offered tips and criticism - I couldn't have made it as far on my own as I did without all of you.


    Here are the pics from today - next up is a few coats of high-build and some block sanding. They said that two or three sessions of that ought to get it in pretty good shape.


    In this pic, you can see how I flared the ends of the rolled front cowl to match-up with the doors - this was a pain, but I think the end result should flow really well once painted.


    Here's a close-up of how my modified tail lamp pad and surrounding area came out. Looks like it needs just a little massaging during blocking to make the transitions nice and smooth, but overall I'm really happy with this.

    Last edited by Gumball; 01-03-2014 at 10:14 PM.
    Later,
    Chris

    "There are no more monsters to fear, and so, we have to build our own."
    Mk3.1 #7074

  28. #108
    Senior Member MPTech's Avatar
    Join Date
    Feb 2011
    Location
    St. Louis, MO
    Posts
    1,186
    Post Thanks / Like
    Blog Entries
    8
    Very cool Chris!
    Just priming it a solid color makes it look more finished.

    Did he give you a timeline? Looks like they didn't have much work after you finished your magic. Like the tonneau too.
    Keep us posted!
    F5R #7446: MK4, 302, T5 midshift, 3.55 Posi IRS, 17" Halibrands
    Delivered 4/4/11, First start 9/29/12, Licensed 4/24/13, off to PAINT 2/15/14!! Wahoo!

  29. #109
    Senior Member Jester's Avatar
    Join Date
    Mar 2011
    Posts
    493
    Post Thanks / Like
    Great thread - fantastic work.

    A great reference for my next build

    Thanks for posting!

  30. #110
    Carl carlewms's Avatar
    Join Date
    May 2012
    Location
    Nokesville, VA
    Posts
    1,125
    Post Thanks / Like
    Chris,

    Thanks for your inspiration and leading the way on self performing the body work. Your thread will be at my side when I get to that stage this spring.

    Carl
    Mk 4 Roadster
    October 25, 2012 - Kit Arrives
    April 8, 2013 - Build Starts
    August 23, 2015 - Rolling Chassis/Engine & Transmission Installed
    March 26, 2016 - Go Cart

  31. #111
    Out Drivin' Gumball's Avatar
    Join Date
    Feb 2011
    Location
    Blackberry Township, IL
    Posts
    2,653
    Post Thanks / Like

    Paint!!!!

    My friend (and painter) called last night and asked if I wanted to drop by this morning and learn how to paint... on my car! The hood, trunk lid, and scoop are done, so he wanted to get paint on the inside of those panels and thought they'd be the perfect thing for me to lay on some color for the first time. After convincing me that I couldn't screw it up so bad that he couldn't fix it and after he showed me how much to overlap and how fast to go, he turned me loose with the gun and here are the results.

    We started by doing a couple coats of a 2K sealer, then moved on to the color coats. He tinted the 2K a light gray to accentuate the pewter tone in the Ivy Green mix, too, which I think nailed the look I was going for. He's using PPG products and went with a waterborne color, which seems to yield great results in both consistency and "pop" of the iridescent nature of the very fine metallic in this original '65-'66 Mustang color. After four color coats, he did a few coats of clear.

    I'm certainly no pro at this bodywork and paint stuff, but at least I can say that I had a hand in every part of the process now!

    Hood in 2K:


    Hood front corner without clear:


    The bracket I made to mount the trunk lid original-style support bracket - bonded to inner skin:


    Same corner as above, but with clear:


    Thanks to John O for blazing the trail with this color. It's very close to the '01 Bullitt green that I used on my '65 Mustang a few years ago, but much more period correct looking and more to my liking as it has less blue and more gray in it.
    Later,
    Chris

    "There are no more monsters to fear, and so, we have to build our own."
    Mk3.1 #7074

  32. #112
    Out Drivin' Gumball's Avatar
    Join Date
    Feb 2011
    Location
    Blackberry Township, IL
    Posts
    2,653
    Post Thanks / Like

    "Aluminum-look" for inside the body

    So I thought I'd try something different - I used Eastwood Aluma-blast paint to make the inside of the body look like metal. After prepping the inside of the body by sanding, Feather Fill, and more sanding, I used not quite a quart of the paint with a small coarse brush to get the effect of mill finish aluminum. I painted areas that will be visible (in some cases with a bit of neck craning) when the car is done: the entire trunk area, the nose inside the radiator, the area around the footboxes, in front of the door openings, the front cowl, and part of the wheel wells. The remaining areas will be covered with either truck bed liner, the rubber pads I made (top of the wheel wells) or the body color. All of the painted areas will get cleared, but we'll likely use a little flattener in the clear over the aluminum paint.

    I did this with a very dry brush, which meant lots of thin coats, but I'm really happy with the effect.

    Close-up of the trunk / lower body area in the driver's rear corner:

    Later,
    Chris

    "There are no more monsters to fear, and so, we have to build our own."
    Mk3.1 #7074

  33. #113
    Out Drivin' Gumball's Avatar
    Join Date
    Feb 2011
    Location
    Blackberry Township, IL
    Posts
    2,653
    Post Thanks / Like

    Cowl / Door Rivets - attempt at another original-style mod

    The aluminum body on an original car was held in place partly by a bunch of rivets ringing the cockpit - along the doors and the front/rear cowls. After rolling the cowls and the tops of my doors, I wanted to get the added effect of those rivets.

    For the doors, I used "split" rivets that are designed for soft materials. The door skins are pretty thin, so I figured these would grab hold without cracking or deforming the fiberglass.

    Here's the split rivet - they're from McMaster Carr:


    Rivets in place along the door:


    For the cowls, I used regular aluminum pop-rivets, but I removed the mandrels and ground them down so that they were only 3/16" long, then glued them in place. To do the grinding, I drilled a 1/8" piece of scrap stock, then inserted the rivets (minus mandrels) and put tape along the stock covering all the rivet heads and holding them all in place while I ran the back side over a grinder - cutting down all the rivets at once to the needed length. I then drilled holes in the lower edge of the rolled cowls, just a little deeper than 3/16". The rivets are held in place with a little Speedgrip body adhesive (two-part stuff that is really sticky). To get it all together, I used a toothpick in the rivet head to dip them in the goo and to place them in the hole. A little acetone took care of the excess goo.

    Here's a cut-down rivet:


    Holes drilled in the front cowl:


    Rivets in place along the front cowl:

    Later,
    Chris

    "There are no more monsters to fear, and so, we have to build our own."
    Mk3.1 #7074

  34. #114
    Out Drivin' Gumball's Avatar
    Join Date
    Feb 2011
    Location
    Blackberry Township, IL
    Posts
    2,653
    Post Thanks / Like

    Side Curtain Ferrule Support Tubes

    I'm installing one of the original-style FFR soft tops, the type with the rigid side curtains with frames and sliding plexi windows. The side curtains are held in place by three posts along the bottom of the frame that slide down into ferrules in the door tops. But, the ferrules don't go all the way through the body - resulting in two problems. First, they would allow rain or wash water to drain through the ferrules and into the door. Second, there was no support to the bottom of the ferrule, causing them to be loose and unsupportive.

    I found a way to take care of those issues, while at the same time giving the car a little more original appearance. Since the original cars had just a thin aluminum door skin on the outside, the inner frame of the door had small stub tubes welded in place to hold the side curtain ferrules. I replicated those tubes with small sections of chrome-moly scrap that I found laying around. Since it is sized so that the I.D. is the same as the O.D. of the ferrules, the holes on the outside of the door (for the ferrules) are smaller than the holes I drilled on the inside skin of the door for the tubes. This allows the tubes to be inserted up from the inside, then they bottom out against the inside of the outer door skin. The ferrules then slide down inside the tubes for a secure, wiggle-free fit. For final assembly, the ferrules will be inserted after paint with a little clear-seam sealer for a semi-permanent hold.

    The only challenge was how to hold the tubes in place while the car is being painted. I ended up smearing a little Speedgrip body adhesive around on the inside of both the inner and outer skins, then pushing the tubes up into place. After sliding the ferrules in place, I then smeared a small amount of Speedgrip around the outside of the tubes where they protrude out of the inner door skin. A little acetone on my finger (wear gloves when you do this at home, kids), I was able to smooth the Speedgrip very nicely for a clean installation. To keep the ferrules from getting stuck, I turned them and pushed them in and out every couple of minutes while the Speedgrip took a set. After an hour or so, I pulled the ferrules out and cleaned them with acetone - ready for final installation after paint.

    The final touch will be a pair of leather straps for the door latches that will connect to the center tube via a small button-head screw inserted from the back side - towards the door - so that the attachment point is not visible. The straps can be used as both door pulls and to open the door latch as the leather strap connects at the other end to the knob on the latch lever.

    Later,
    Chris

    "There are no more monsters to fear, and so, we have to build our own."
    Mk3.1 #7074

  35. #115
    Senior Member
    Join Date
    Jul 2013
    Location
    Tacoma, WA
    Posts
    139
    Post Thanks / Like
    Great original details Chris!
    FFR 3749 MkII, 428PI, TKO-600, IRS, Pin-Drive, Tri-States body, Under Car Exhaust
    Rod's BB Street Cobra Build

  36. #116
    Carl carlewms's Avatar
    Join Date
    May 2012
    Location
    Nokesville, VA
    Posts
    1,125
    Post Thanks / Like
    Chris,

    Simply superb!

    I am not sure I will do the rivet thing but I definitely like the brushed aluminum look.

    Carl
    Mk 4 Roadster
    October 25, 2012 - Kit Arrives
    April 8, 2013 - Build Starts
    August 23, 2015 - Rolling Chassis/Engine & Transmission Installed
    March 26, 2016 - Go Cart

  37. #117
    Out Drivin' Gumball's Avatar
    Join Date
    Feb 2011
    Location
    Blackberry Township, IL
    Posts
    2,653
    Post Thanks / Like

    Original style grab handle on cowl

    Okay, I'll admit that this is not correct for a 427 car and it could be bad for the cowl if someone grabs it when I'm not watching, but I really like the look of the grab handles on the cowl. I've had this one laying around since back when I first bought my kit - way back in 2009 - and wasn't sure if I'd use it. I found this, which is a chromed aluminum piece that is a replica of the original 289 car handle, from a Cobra restoration place. After doing the cowl rivets, I decided that the rolled edge, which is 3/4" of solid fiber glass layers with a skim of filler, would be strong enough for it - so long as I remind all passengers it's not structural - sort of another way of saying it's for looks only!

    Even though it's a fake handle on my fake Cobra, I think it adds a nice touch to the cockpit.

    To make it fit the contour of the rolled edge, I used a Dremel to shape the back side of mounting pads, then cut a couple of gaskets from left over dash/seat leather.


    To mount the handle, I drilled holes through the rolled cowl, then made a bracket for the back side out of 3/16" aluminum that I drilled and tapped for a couple of 10-32 screws. I ground the aluminum to make it fit the contour of the back of the cowl lip, and removed some excess material from the lower edge that was initially visible from the cockpit side. Although this spreads the load out across the cowl edge, too much pressure on the handle vertically would be bad for the cowl.


    Before final installation, I'll use some shorter screws and likely grind them down so that they're flush with the bracket when tight - unlike these used for test fit, which extended out a bit too far and will likely contact the dash.
    Later,
    Chris

    "There are no more monsters to fear, and so, we have to build our own."
    Mk3.1 #7074

  38. #118
    cobra Handler skullandbones's Avatar
    Join Date
    Jul 2011
    Location
    Superstition Mtn foothills 5 miles west of Gold Canyon AZ
    Posts
    2,686
    Post Thanks / Like
    Blog Entries
    19
    Looks like you are spacing your dash a little away from the cowl. I noticed what looks like another spacer toward the drivers side about the same thickness as your backing plate/mount for the grab bar. Is that correct? Thanks, WEK.
    FFR MkIII 302 (ATK), EFI 75mm TB with custom box plenum chamber, 24# injectors, 4 tube BBK ceramic, cold air sys, alum flywheel, crane roller rockers, T5, Wilwood pedals, custom five link with Watt's link, 4 rotors, coil overs, power steering with Heidt valve, alum FFR rad, driver's crash bar mod, mini dead pedal mod, quick release steering wheel hub #6046

  39. #119
    Out Drivin' Gumball's Avatar
    Join Date
    Feb 2011
    Location
    Blackberry Township, IL
    Posts
    2,653
    Post Thanks / Like
    Quote Originally Posted by skullandbones View Post
    Looks like you are spacing your dash a little away from the cowl. I noticed what looks like another spacer toward the drivers side about the same thickness as your backing plate/mount for the grab bar. Is that correct? Thanks, WEK.
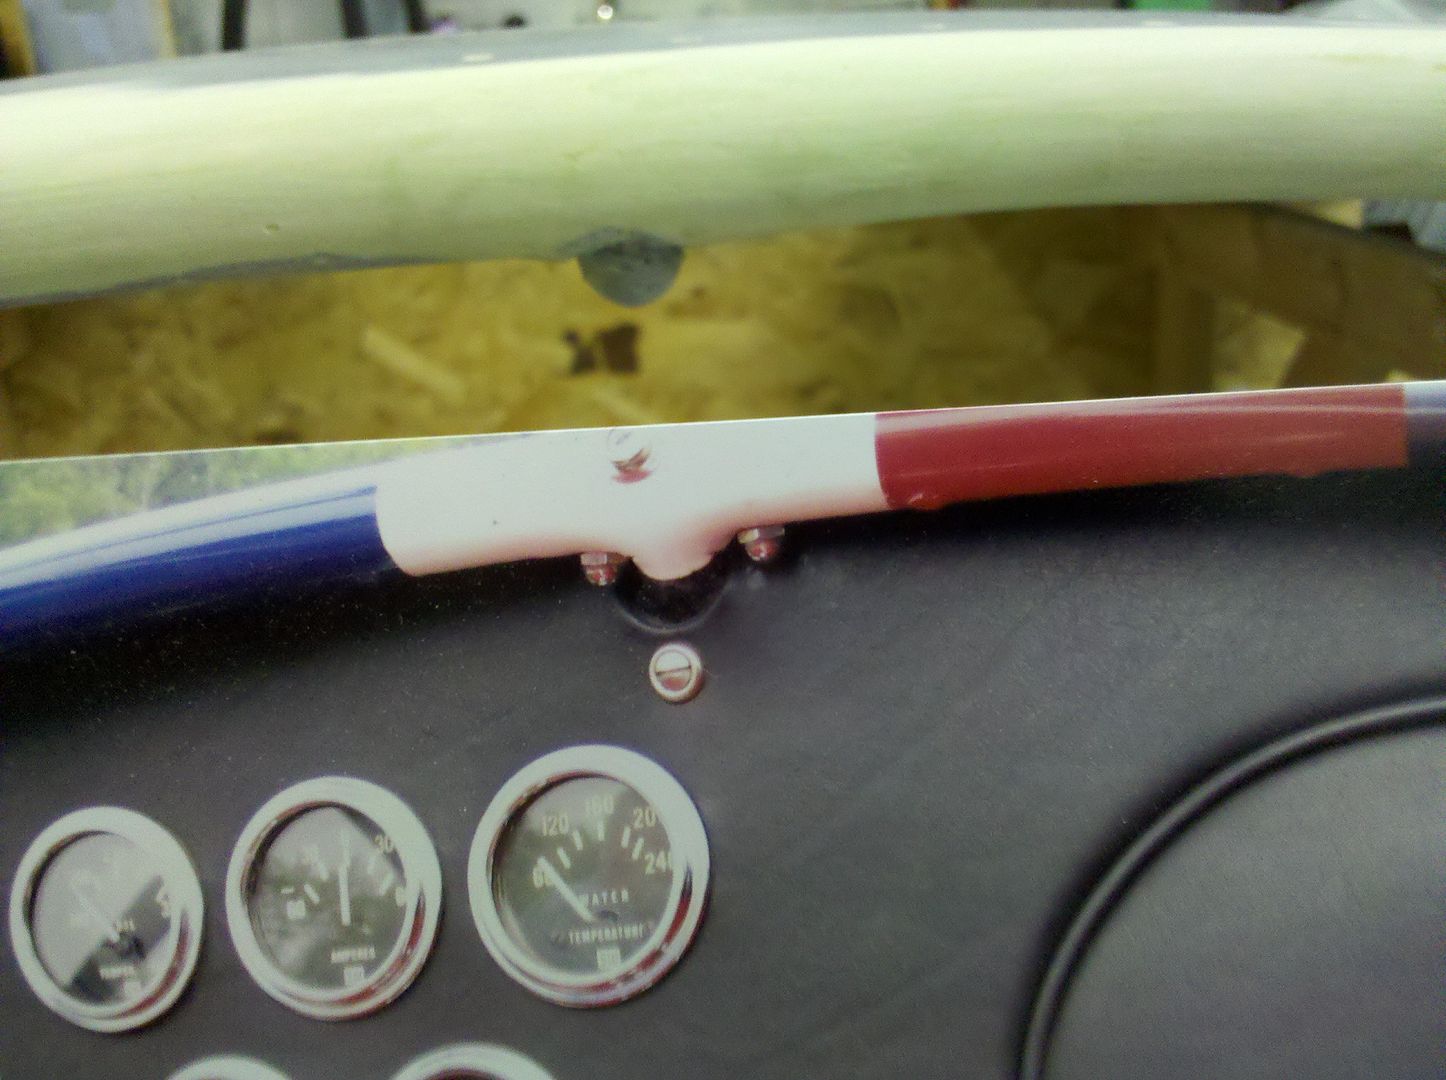
    That other thing that looks like a spacer is really a faux (I prefer that word to "fake" - just sounds so much more cosmopolitan) dash support tube. The original cars had tubes visible both below the dash (those angled ones that some of us put in between the bottom of the dash and the trans tunnel) and just a little nub at the top center.

    Here's a pic of mine from above while I'm holding a photo I took of the dash in an original car -

    Later,
    Chris

    "There are no more monsters to fear, and so, we have to build our own."
    Mk3.1 #7074

  40. #120
    Out Drivin' Gumball's Avatar
    Join Date
    Feb 2011
    Location
    Blackberry Township, IL
    Posts
    2,653
    Post Thanks / Like
    I stopped by the shop today and they had my car in the booth getting ready for the final 2K sealer. The painter mentioned that he's going to use a black tint for the sealer so that it gives the deep green paint I selected a richer look - plus that will help hide rock chips.

    Here are a few shots of it after the final sanding - I'll post more pics as soon as they get the sealer down.


    Here's a shot of the rivets on the rolled front cowl - ought to look pretty cool once covered in color and clear -

    Later,
    Chris

    "There are no more monsters to fear, and so, we have to build our own."
    Mk3.1 #7074

Page 3 of 4 FirstFirst 1234 LastLast

Tags for this Thread

Posting Permissions

  • You may not post new threads
  • You may not post replies
  • You may not post attachments
  • You may not edit your posts
  •  

Stewart Transport

Visit our community sponsor