
Visit our community sponsor

Thanks:
0

Likes:
0
-
 Administrator

Air Compressor Rehab. Old tank almost rusted out!
I'm in the middle of doing a rehab on my MKIII, after building my brothers MKIV over the past 1-1/2 years. While I was in the middle of my brother's build I moved into a little shop, about 400 sq feet total. Clearly the coolest thing about it is the 4 post lift. When I was spec'ing it out, I noted that the BendPak I ended up getting required reliable air. The only thing I had was a very loud single-phase 20 gal. upright compressor. My brother told me he had an old compressor I could use. It was bigger at 60 gal, and ran a lot quieter. I set it up in my shop and ran air lines to the lift and opposite wall. The system has 2 dryers and runs flawlessly.
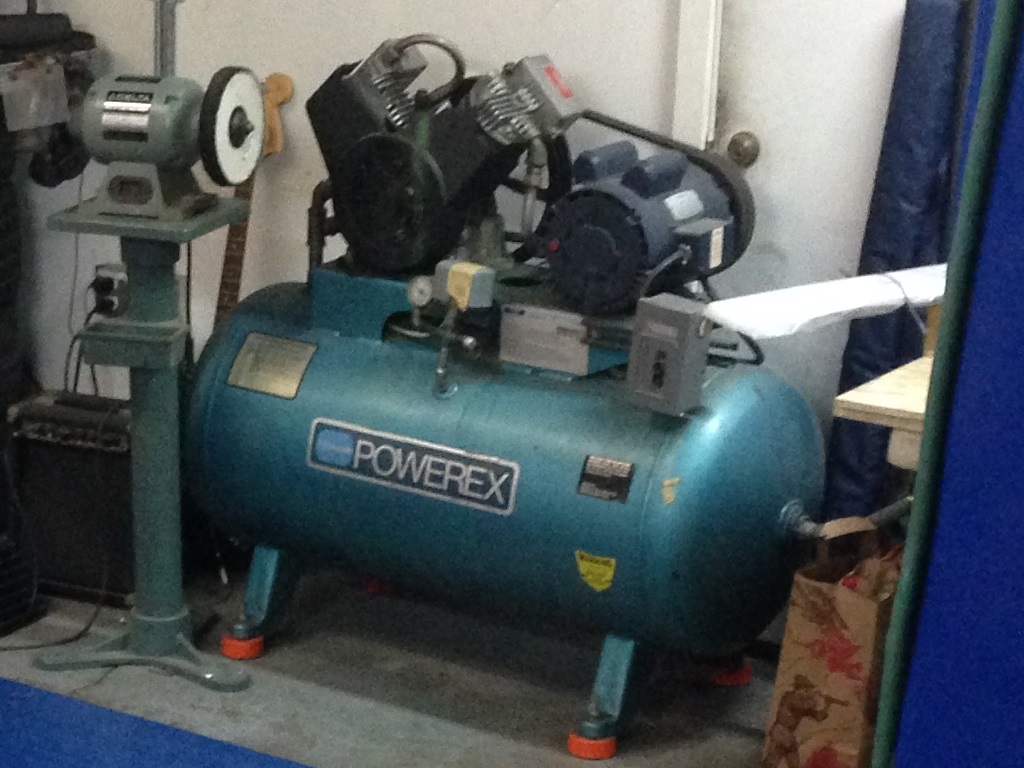
The system was only pressurized when I needed it, and the compressor was always turned off at night, so it was seeing light duty. I never bothered to drain it, as the line driers were always dry. Then a few weeks ago I decided to go ahead and open the drain plug on the tank to see how much water was in the tank. I opened the drain and nothing came out. That would be OK except I had some air in the system, which meant the drain was plugged. I tried to stick a screwdriver into the opening and all I got back was a ton of rust. BAD sign. So I unscrewed the plug and this is what I found:

Yeah. not good at all. I looked at the tank and discovered it was made in 1987. That means it's almost 30 years old. I decided to retire it immediately as it seemed to me that a tank with that much rust in it is a safety hazard! Those of you that know my story would know how much I have an aversion to things that can explode so pressurizing that tank instantly became very uncomfortable.
So the first thing I did was take it apart. Pretty soon the tank looked like this:

...and my nice engine turning jig looked like this:
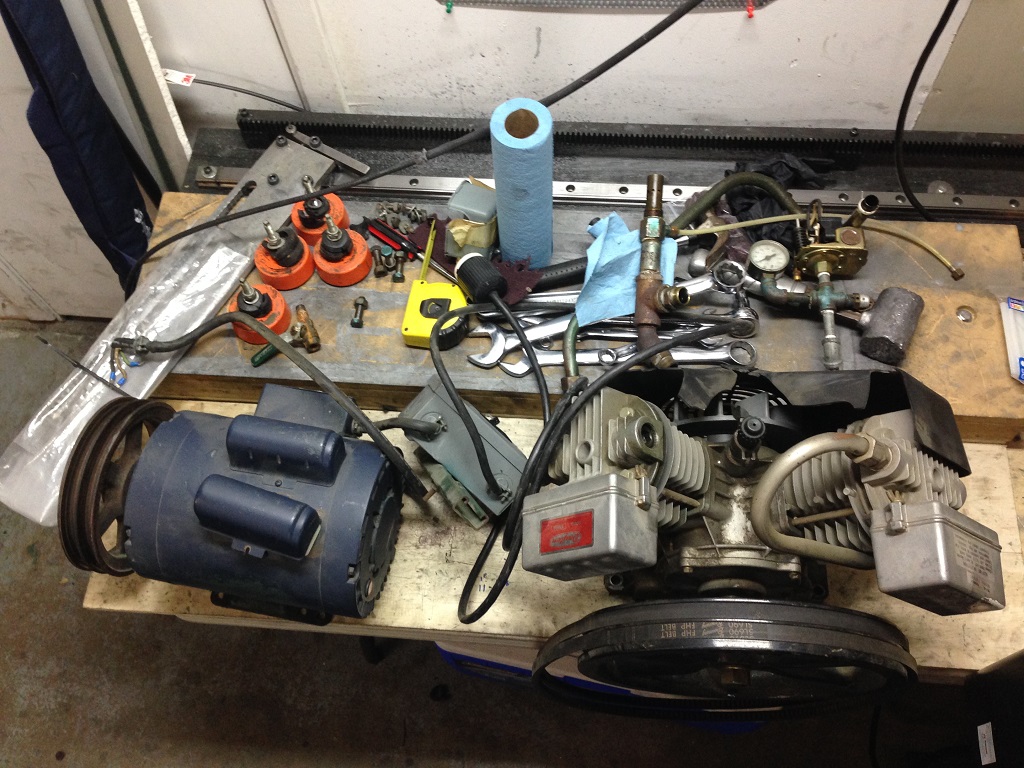
Well now my MKIII rehab project is at a standstill until I get a new tank installed. Not really knowing what I was doing, I located a local air compressor place and ordered a new 60 gal. horizontal Manchester tank with a deck on top to mount the motor and compressor to. I should have realized the decks come in different widths and heights! So the tank shows up at the shop and it's not until I start mocking up the compressor that I realize the deck is almost 2" too low and that the pulley sits lower than the base of the compressor and was now hitting the too-wide base. After taking a lot of measurements and head scratching I came up with a solution: mount the motor and compressor on some kind of 2" adapter plate. I went to the local industrial metal supply house and found another solution: 2" square-tube steel pipes. After some more measuring I went back and had 4 pieces cut, two at 8" and two at 10". It turned out that by using those tubes as mounting rails I wouldn't need to do any other modifications to mount things up. Well I did have to make one more item but I'll get to that in a bit.
Another problem I had was how to hook the system back into the line, since I had to cut it out. What I ended up using was a reverse thread pipe and coupler. I found these at a local pipe store along with the rest of the plugs I needed for the new tank. By sliding the tank over about 6 inches I was able to add the coupler and pipe piece right at the exit of the tank so if I need to disassemble it in the future I can separate the tank from the line by unscrewing this one piece of pipe.
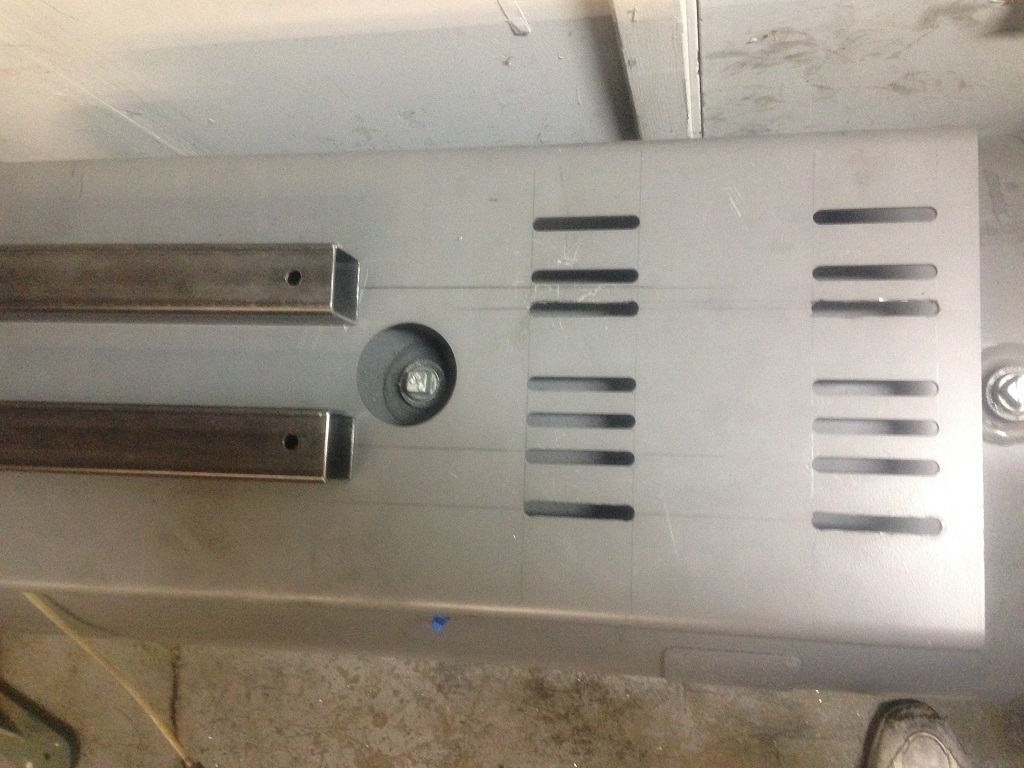
In order to mount the compressor I had to mark and drill 4 holes but for the electrical motor I added 4 new mounting slots, so that the motor could be adjusted to put tension on the belts
So I broke out the grinder and went to work, after drilling out the outer edges of the slots:

After I cleaned up the cuts with a file I had the base ready to mount the motor and compressor:
One other thing I had to "fix" was the switch for the motor. Due to the low height of the deck I had to create a mounting plate for the switch. I found a piece of steel plate at Home Depot and fashioned it up without issue. Once that was created I was able to put the whole system together again. For the feet I had to buy some rubber disks that have a plate and bolts attached to both sides. The old tank feet were cupped and used a piece of rubber inside the foot-cup but the new feet are flat so I had to do some re-designing so I could still use the vibration isolating feet from the old setup:
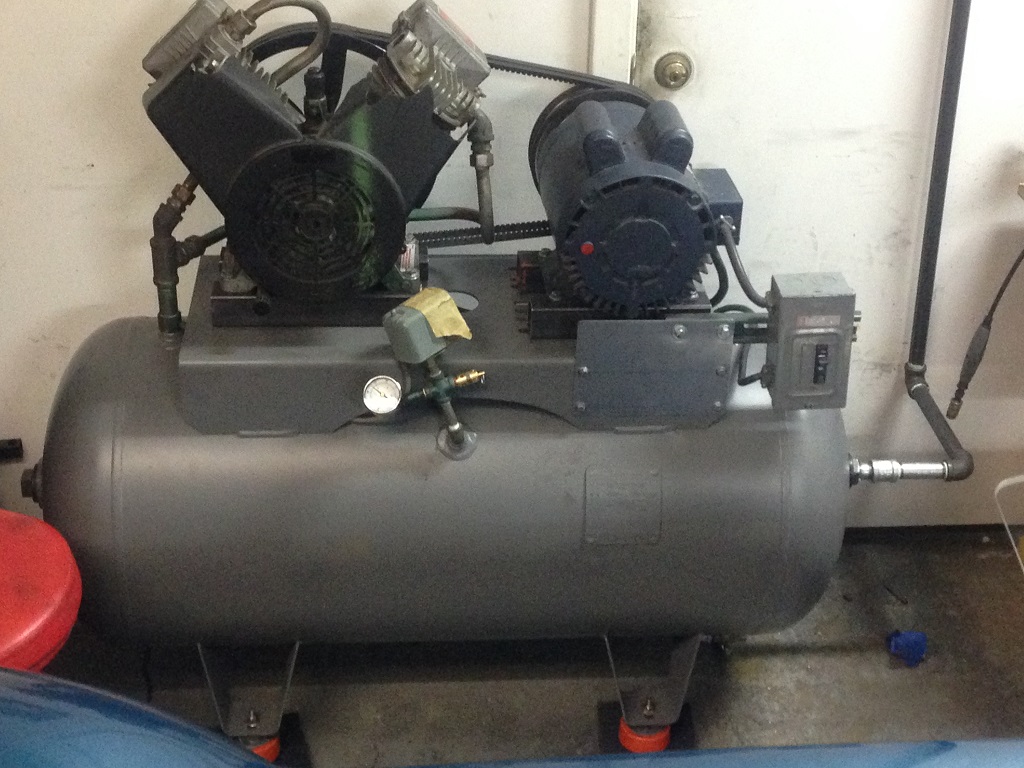
I was able to pressurize the lines and I'm now back in business! I got set back a week but now I feel a LOT safer!
FFR 5369 Pin Drive, IRS, Trigos, Torsen, Wilwoods, FMS BOSS 302 "B" cam , Mass-flo. CA SB100 (SPCN) Registered
Delivered 4/23/06. "Finished" 4/2012 (still not done!)
 Posting Permissions
- You may not post new threads
- You may not post replies
- You may not post attachments
- You may not edit your posts
-
Forum Rules

Visit our community sponsor


 Reply With Quote