-
04-12-2018, 07:55 PM
#401
Senior Member

Wow. This is going to look really nice.
-
04-12-2018, 10:00 PM
#402
Very nice! What did your fan setup look like for the booth? How clean was the air?
I made a wedding tent paint booth (examples on youtube) when I painted mine. I used 8 box fans with filters as the supply, then let it pressure vent through filters. I would have liked to add a fan to suck out as well but didn't have an explosion proof fan.
-
04-13-2018, 10:25 AM
#403
Senior Member


Originally Posted by
Aero STI

Very nice! What did your fan setup look like for the booth? How clean was the air?
Not very clean with all the overspray in the air. I think I'm going to paint in smaller batches to cut down on the overspray in the air. These panels will need to be wet sanded and buffed out, but I did lay down a lot of clear so I should be fine.
I just used two box fans and pleated furnace filters before the fans venting right out the window.
IMG_20180201_173402.jpg
I know... don't blow yourself up... I've used this method on three previous cars and it worked fine.
Last edited by Hobby Racer; 04-13-2018 at 05:40 PM.
-
04-18-2018, 06:36 AM
#404
Senior Member

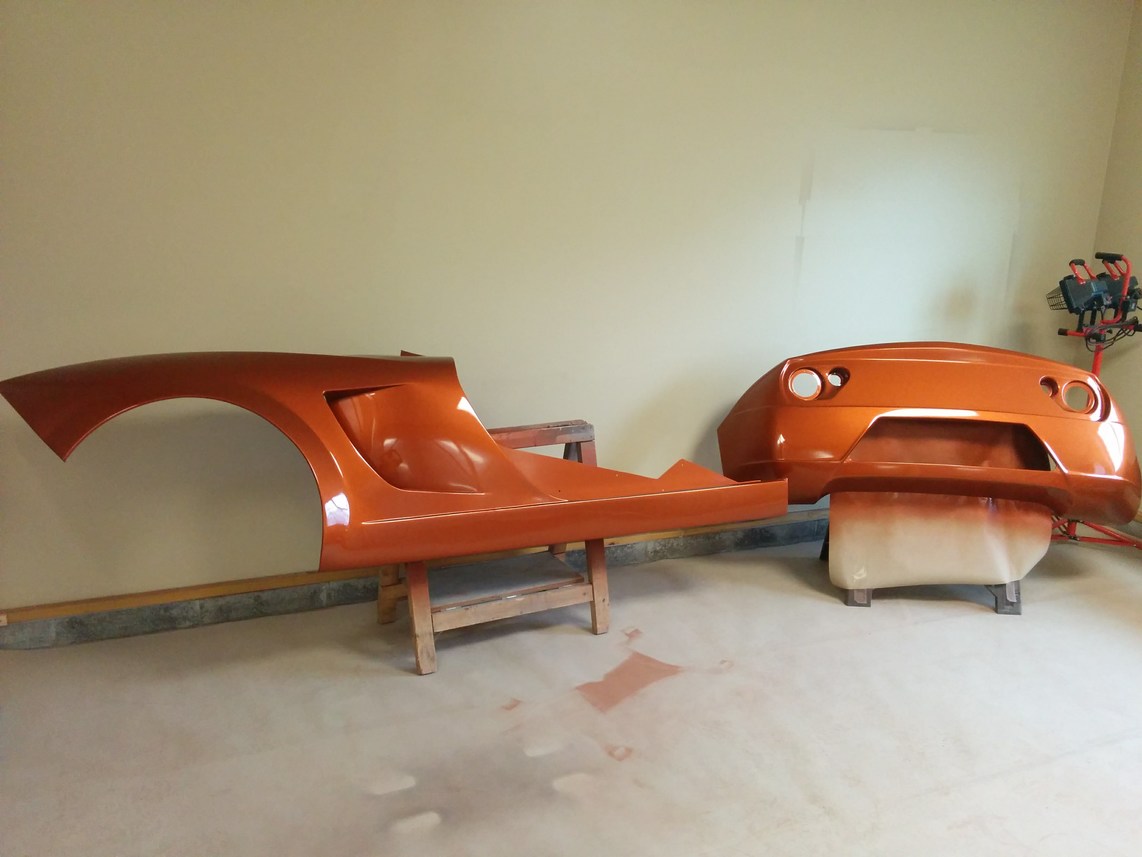
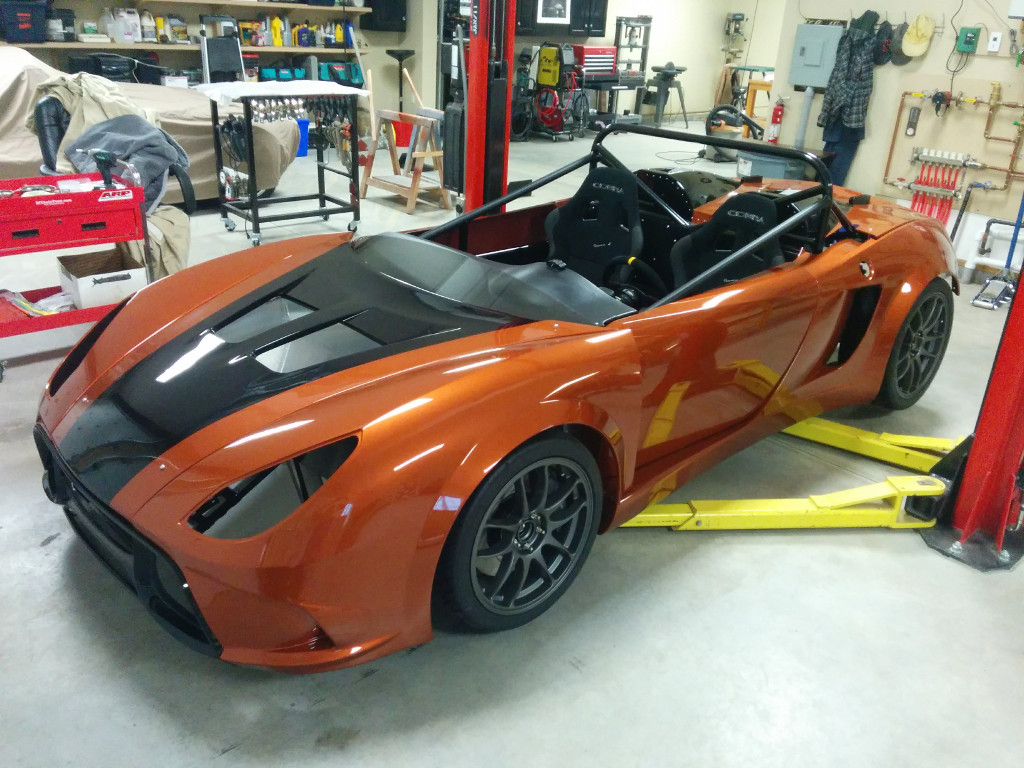
Painting Complete!
Finally painted the last of the panels. I was going to color sand and buff everything but my first track day is in a month and I still need to finish up a bunch of items. Most importantly I need to get it on a dyno and tune the motor. So I think I will skip the cut and polish for now and do it later this summer.
Anyway, here are some pics of the last panels.


-
04-18-2018, 11:23 AM
#405
Administrator


-
04-18-2018, 11:45 AM
#406
Senior Member

It does look great. I'm not sure if I'm going to show the pics of your car to my wife now, this color is one of her favorites and I was not planning to paint my car.  .
.
-
04-18-2018, 12:38 PM
#407
That looks awesome! How many hours do you think you put into painting it yourself?
-
04-18-2018, 06:18 PM
#408
Senior Member

Starting to assemble the body
The pics do not do it justice, in the sun light it looks amazing!


Originally Posted by
lsfourwheeler

That looks awesome! How many hours do you think you put into painting it yourself?
The actual painting is really quick, about 8-10 hours. The real time suck is the prep work, maybe 200 hours. That does not count the body work to change the fiberglass.
-
04-18-2018, 06:49 PM
#409
"Good Judgement comes from Experience. Experience comes from Bad Judgement"
Owner: Colonel Red Racing
eBAy Store:
http://stores.ebay.com/colonelredracing
818R ICSCC SPM
Palatov DP4 - ICSCC Sports Racer
-
04-18-2018, 08:00 PM
#410
Senior Member

-
04-18-2018, 10:10 PM
#411

Yes, I love Technology

Beautiful. One of my favorite colors. I gave my wife one decision on my project, the color. So white it will be... at least (it will eventually) look clean the longest. Actually saw 2016 white factory Subaru (diamond metal fleck in it I think), that looks real nice for white, and hey that would be the right "donor" stuff.
-
04-21-2018, 08:02 PM
#412
Looks great! I really like how the enlarged side vents turned out. Good to see another R coming together.
-
04-23-2018, 11:05 AM
#413
-
04-23-2018, 01:26 PM
#414
Senior Member

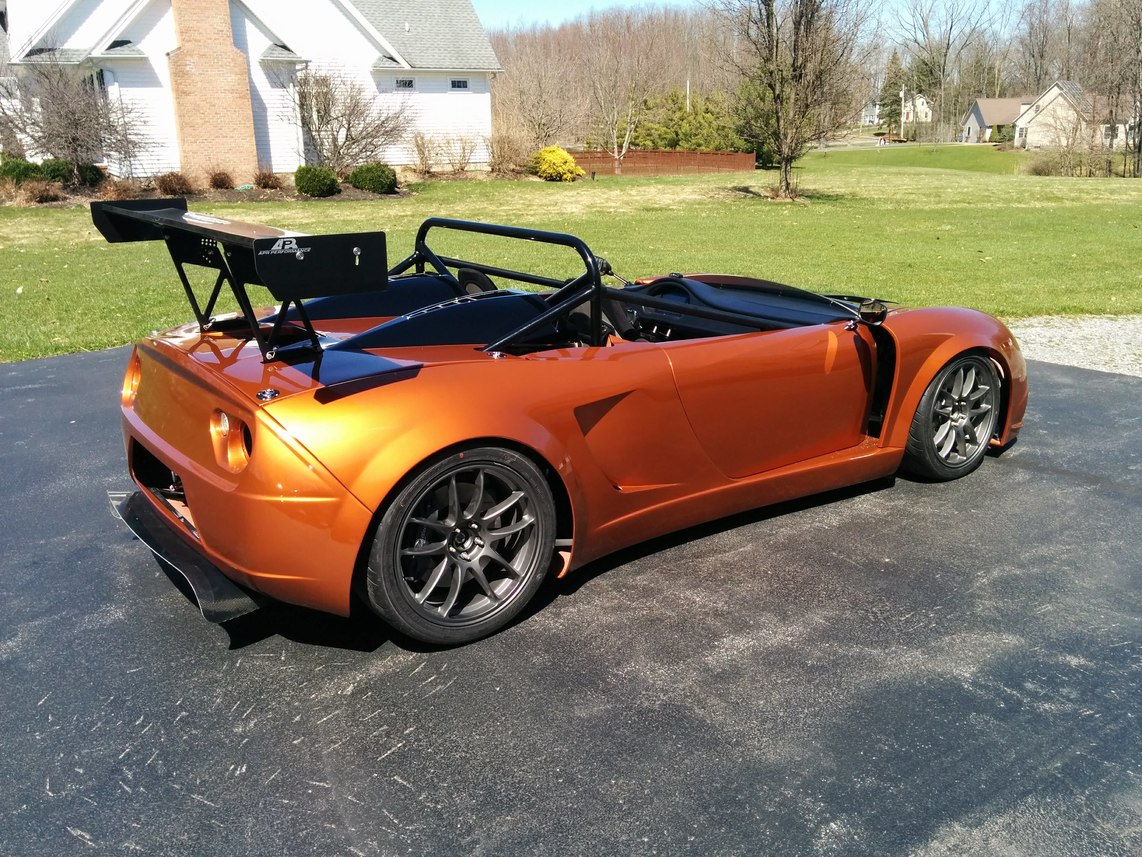
Spring is Officially Here!
Drove the car around my neighborhood for the first time today!
Only a short punch list now.
- Install headlights & taillights
- Align and corner balance
- Create a front splitter
- Fabricate an airbox
- Chase the gremlins!


-
04-23-2018, 01:57 PM
#415
Senior Member

That's absolutely awesome! It's beautiful, thanks so much for sharing your build with us. You've helped me quite a bit with my build just by posting your progress. Thank you.
How does it sound? What's your impression of the way you routed the exhaust?
-
04-23-2018, 05:15 PM
#416
Senior Member


Originally Posted by
flynntuna

That's absolutely awesome! It's beautiful, thanks so much for sharing your build with us. You've helped me quite a bit with my build just by posting your progress. Thank you.
How does it sound? What's your impression of the way you routed the exhaust?
Glad you enjoyed the build. The engine sound is amazing, I'll post up a video with sound as soon as I get it tuned. I have only blipped the throttle lightly and only up to ~ 3000 RPM's as its running pretty lean right now. The exhaust is great so far. No heat issues on the surrounding fiberglass, but as I said I have not ran the engine hard yet. Its quiet at idle but has a nice Porsche 911 like sound when revved. Not sure how loud it will be at full song though.
I was not going to put in the wheel liners but after my short trip around the block I had gravel and debris everywhere! I am now installing the liners 
Put it on the scales real quick and it's 1,970 lbs wet with ~ 5 gallons of gas.
-
04-27-2018, 04:48 PM
#417
Senior Member

Cheap and easy front splitter
The thing about splitters is that you need to treat them like disposable parts as they get busted up often when running on curbing, taking off track excursions, loading onto trailers etc... The FFR piece is nice, but at $549 it is definitely not disposable! My solution is to use cheap, readily available materials to make a simple splitter that is easy to put on and take off.

I used a 1/4" thick 4'x8' sheet utility panel (basically sanded plywood) for the splitter. I then riveted 1/16" thick 1"x1" aluminum angle to the back for support. Since the splitter is completely flat (unlike the FFR piece) there is an opening below the nose piece that needed to be blocked off. I added another 1/16" thick 1"x1" aluminum angle to both block air and strengthen the front section. I am waiting on the splitter support rods to come so I can add support to the front edge. When its all done I plan to cover the wood with some resin and mat to waterproof it and add some additional rigidity followed by some black paint.
I'm into this for less than $75, including the support rods! replacement splitters will cost around $30 since I should be able to reuse the hardware.
IMG_20180427_081320.jpgIMG_20180427_081408.jpgIMG_20180427_081637.jpgIMG_20180427_081658.jpg
Last edited by Hobby Racer; 04-27-2018 at 04:51 PM.
-
Post Thanks / Like - 1 Thanks, 0 Likes
-
04-27-2018, 05:04 PM
#418
-
04-28-2018, 03:27 PM
#419
Senior Member

Finished joining the front splitter to the rest of the under-body. Now I have a completely flat under tray front to rear. I made the panel between the splitter and the under-body easy to remove much like I did in the rear to join the diffusor and the under-body. A channel holds the front lip and 4 #10-32 button heads hold the rear of the panel.
IMG_20180428_160129.jpg IMG_20180428_160059.jpg
-
04-29-2018, 02:25 PM
#420
Senior Member

I like your idea,. I have the FFR one, and was going to use it as a mold to make a copy but your meathod looks to be cheaper. Or should I say less expensive. 
-
04-30-2018, 10:47 AM
#421
Senior Member

To save even more money, spend some more time and make it 3 piece. Two corner skids and a center section. Makes changing much easier, and you do not have to replace the whole thing when one corner gets BOOOOYAAAA'd. 
Thanks- Chad
818R-SOLD!!!- Go Karted 7/20/14/ Officially raced NASA ST2- 2/28/15
2016 Elan NP01 Prototype Racecar Chassis #20
1969 Porsche 911ST Vintage Race Car
1972 Porsche 911T (#'s matching undergoing nut & bolt resto in my garage)
-
04-30-2018, 10:53 AM
#422
Senior Member

If you do the wet layup on a prepped sheet of melamine or glass, with the first layer of CF (or S-glass and a little black pigment- aka round 2) you can get a pretty-nice part.
*Your car is looking absolutely great! Thanks for posting.
-
04-30-2018, 11:38 AM
#423
Senior Member


Originally Posted by
C.Plavan

To save even more money, spend some more time and make it 3 piece. Two corner skids and a center section. Makes changing much easier, and you do not have to replace the whole thing when one corner gets BOOOOYAAAA'd.

Great idea! For the next version I'm going to try that, because I know that this one may last 3 months tops...

Originally Posted by
DSR-3

If you do the wet layup on a prepped sheet of melamine or glass, with the first layer of CF (or S-glass and a little black pigment- aka round 2) you can get a pretty-nice part.
*Your car is looking absolutely great! Thanks for posting.
I originally was going to make this via wet layup but I have never done that from scratch and I need to get this done ASAP as I have my first HPDE on May 20th. But I may try to lay one up over the summer. I have an old sliding glass door that would be perfect for the flat layup surface.
Thanks for the kind words, I really like the way it has turned out myself.
-
04-30-2018, 02:51 PM
#424
Put some graphite powder in the mix as well, makes it last twice as long, super hard and slides over the pavement.
-
05-02-2018, 06:08 PM
#425
Senior Member

Heading to the chassis dyno Monday morning! Hope I can get a decent tune on this thing.
-
05-08-2018, 05:48 AM
#426
Senior Member

Well made it to dyno yesterday. It took them about an hour to figure out how to rig up the exhaust venting to work with my vertical exit exhaust pipes. I was able to transfer about 90% of the factory ECU parameters and tables to my Megasquirt ECU so the tune was not far off to start with. In the end I did not change much of the tune. It made 226hp and 207ft/lbs of torque. It was still pulling hard at 6000 rpm, but that was where we stopped the pulls.
I'll be doing more tuning at the track using my datalogs.

Last edited by Hobby Racer; 05-10-2018 at 06:05 PM.
-
05-09-2018, 06:32 AM
#427
Tazio Nuvolari wannabe


Originally Posted by
Hobby Racer

Here is a picture of the new mount plates tack welded together to hold their relative position so I can pour in liquid polyurethane to create the new lowered mount.
Attachment 71722
Notice how much closer the top and bottom plates are as compared to the first picture. The OEM mount has 1 1/4" of rubber, and my new mount has 3/8", so I took out about 7/8".
Here is the completed mount next to an OEM STI Group-N mount.
Attachment 71949
Just came across this. I have been trying to source shorter engine mounts for my '07 STi that I am using a tall NA intake on. It is causing me hood interference issues. Since I used to do a lot of urethane casting this would be a no-brainer for me! Just needed your idea to turn on the light bulb! Do you remember the durometer and whose material you used? 90A? Did you use any primer for urethanes or just the bare bead-blasted surface? Has it held up?
-
05-09-2018, 07:13 AM
#428
Senior Member


Originally Posted by
Scargo

Just came across this. I have been trying to source shorter engine mounts for my '07 STi that I am using a tall NA intake on. It is causing me hood interference issues. Since I used to do a lot of urethane casting this would be a no-brainer for me! Just needed your idea to turn on the light bulb! Do you remember the durometer and whose material you used? 90A? Did you use any primer for urethanes or just the bare bead-blasted surface? Has it held up?
I thought I posted that information earlier in my thread, but I could not find it either 
Here is a picture of the can the urethane came in and a pic just after I was done pouring it into my mount. They have easy instructions and its very simple. No primers needed, just clean bead blasted surface so it can bite.
IMG_20170805_145341.jpg IMG_20170805_145330.jpg
I purchased the urethane here. http://www.suspension.com/diymmi
I used the 80A but you can get it in other ratings.
Forgot to mention, its holding up well from the dyno sessions, but I have not tracked it yet. I will report back if there are any issues next week after my first couple of track days.
-
05-09-2018, 07:33 PM
#429
With a significantly thinner than stock mount, do you think bottoming it out will be an issue? I wouldn't think that would cause any damage but it might cause a clunk or other noise.
-
05-09-2018, 07:58 PM
#430
Senior Member

I do not believe it will bottom out, the 80A durameter urethane is very hard.
-
05-21-2018, 06:02 PM
#431
Senior Member

First day at the track
Went to Watkins Glen today and drove the car for the first time. I am very impressed with how it turned out. It still needs to be sorted, aero and suspension settings need to be optimized, but a very solid track car.
Steering felt very crisp and responsive but not twitchy. Those Cadillac brakes are so impressive, I can not tell you how well they work. The engine ran well but still needs some tuning to get the AFR's where they need to be. The sound from the vertical pipes is great. I do need ear plugs in addition to my helmet though 
The temps were perfect. I have not gone over the log files yet but I was keeping an eye on the gauges throughout the day. More on the that after I review the engine logs.
I bought a 4K action camera to get some video and as fate would have it, it will arrive tomorrow, just after I finish my track sessions! Next time I will have video to post, I promise.
-
05-21-2018, 08:38 PM
#432
Congratulations and nice work.
-
05-21-2018, 08:45 PM
#433
Great news, glad it ran well!
-
05-21-2018, 08:59 PM
#434
Senior Member

Hobby Racer, That is great news,
For you to have that much success on your first time out says a lot about your skills and decision making.
I may follow in you footsteps with the Cadillac brakes on my second car.
Bob
-
05-22-2018, 07:36 AM
#435
fasterer and furiouser

Beautiful!!! Next time I head up to Canandaigua i'd love to see this irl.
A well stocked beverage fridge is the key to any successful project.
-
05-24-2018, 07:49 PM
#436
Senior Member

-
05-24-2018, 09:47 PM
#437
Sorry to hear. Hopefully it should be easily fixed since it is still held together?
-
05-25-2018, 11:42 AM
#438
Why did they crack? Heat? Load on them? vibration?
Before you fix, I would want to know why they both cracked at the same location when all of your other welds held up fine.
-
05-25-2018, 05:26 PM
#439
Senior Member


Originally Posted by
RetroRacing

Why did they crack? Heat? Load on them? vibration?
Before you fix, I would want to know why they both cracked at the same location when all of your other welds held up fine.
I know exactly why they cracked. I only welded them on the outside and not the inside so they were not as strong as they should have been to start with. In addition I ground them down smooth for appearance sake, mistake number two, it left the weld metal too thin.
Live and learn, that's what car building is all about. The repair will be plenty strong although not as pretty.
-
05-26-2018, 01:23 PM
#440
No affiliation with this guy, but pretty good video that addresses what may be your exact situation:
https://www.youtube.com/watch?v=MIHKZBf7rwA


 Thanks:
  Likes:


 Reply With Quote


 .
.


