-
07-01-2019, 12:41 PM
#721
Question: In post #118, the first photo showing the back of the dash the dash supports appear to have the sides bent up in an "L", which I assume is for strength. My support pieces are flat, except for the turn down where they mount to the 2 inch frame tube. How were you able to make those bends? I have a metal brake, but can't figure out how to form the edges without ruining the frame attachment section. Thanks as always for your input.
-
07-01-2019, 02:13 PM
#722
Senior Member


Originally Posted by
zilverx

Question: In post #118, the first photo showing the back of the dash the dash supports appear to have the sides bent up in an "L", which I assume is for strength. My support pieces are flat, except for the turn down where they mount to the 2 inch frame tube. How were you able to make those bends? I have a metal brake, but can't figure out how to form the edges without ruining the frame attachment section. Thanks as always for your input.
I have the very inexpensive and basic Harbor Freight 30-inch brake. Used it to make those pieces. Yes, the "L" on the edges is for strength plus just looks more finished. The way I do that is first have an oversize piece, at least an inch or more past the intended "L" bend. That provides enough material to make the bends on the HF brake. Then I trim the excess material off to leave just the "L showing in the pictures. Hopefully that makes sense. Then use a block of wood or scrap piece of metal, whatever, that fits between the bent up "L" profile and put the other slight bends in using the brake. Someday maybe I'll get a real box brake. Have looked at Woodward Fab among others. But right now make do with the simple one.
Last edited by edwardb; 07-02-2019 at 05:27 AM.
Build 1: Mk3 Roadster #5125. Sold 11/08/2014.
Build 2: Mk4 Roadster #7750. Sold 04/10/2017.
Build Thread
Build 3: Mk4 Roadster 20th Anniversary #8674. Sold 09/07/2020.
Build Thread and
Video.
Build 4: Gen 3 Type 65 Coupe #59. Gen 3 Coyote. Legal 03/04/2020.
Build Thread and
Video
Build 5: 35 Hot Rod Truck #138. LS3 and 4L65E auto. Rcvd 01/05/2021. Legal 04/20/2023.
Build Thread. Sold 11/9/2023.
-
07-01-2019, 11:34 PM
#723
Paul
Iíd like to thank you for sharing your builds in great detail. Iíve referenced your builds numerous times which made my build easier. I really appreciate your contributions.
Eddie
build thread:
http://thefactoryfiveforum.com/showt...-USRRC-vspeeds
Build School: July 14-16, 2017
Kit purchased: July 25, 2017
Kit delivered: September 13, 2017
First Start: December 22, 2018
Body painted and kit completed and drivable: July 2019 (but still not done)
CA SB100 Registration: January 2020
Mk4 - 289 USRRC Roadster kit, Roush 427SR with Schneider Racing custom camshaft, Fitech EFI, TKO600 (.64-5th gear), 15" wheels, stock brake calipers, under car exhaust with Spintech 7000 muffler, no roll bar, Russ Thompson turn signal, removable steering wheel, and many other small upgrades and modifications
-
Post Thanks / Like - 1 Thanks, 1 Likes
-
08-12-2019, 11:19 PM
#724
Senior Member


Originally Posted by
edwardb

Those couplers are part number 90977A190 from McMaster. Grade 5, 7/16"-20 Thread Size, 1-3/4" long.
https://www.mcmaster.com/90977A190. I used them because my other on-hand hardware (threaded rod, lock nuts, etc.) was also fine pitch 7/16"-20. Similar couplers are typically available at your local hardware in 7/16"-14 threads. Also usually about 1-3/4" long and would work fine. The length isn't critical though.
Trunk body mounts.jpg
Did you add a spacer to make up the difference between the couple and the body. And I assume the upper one has to be re-installed when the trunk floor is permanently installed. I attached a picture of what I think is proper.
-
08-13-2019, 06:09 AM
#725
Senior Member


Originally Posted by
bobm488

Trunk body mounts.jpg
Did you add a spacer to make up the difference between the couple and the body. And I assume the upper one has to be re-installed when the trunk floor is permanently installed. I attached a picture of what I think is proper.
No, I wouldn't recommend using a spacer like that. Better to use a nut and washer on the inside so you can adjust the body position for the best trunk lid fit. In other words, when you push the threaded rod piece through the body, put on a washer and then a nut before threading into the coupler. Thread the coupler in, and then sandwich the body between the nut and washer on the inside and whatever hardware you're using on the outside to hold the quick jacks and/or bumper and overriders. There will be a small section of the threaded rod left exposed. Doesn't hurt anything. But I put a piece of electrical conduit over it and looks fine. Hope that all makes sense.
As far as the trunk floor, no I don't remove the couplers during assembly. I install all four couplers on the bare chassis and leave them there. I drill the holes the trunk floor piece a bit bigger so the aluminum slides over them.
Last edited by edwardb; 08-13-2019 at 06:15 AM.
Build 1: Mk3 Roadster #5125. Sold 11/08/2014.
Build 2: Mk4 Roadster #7750. Sold 04/10/2017.
Build Thread
Build 3: Mk4 Roadster 20th Anniversary #8674. Sold 09/07/2020.
Build Thread and
Video.
Build 4: Gen 3 Type 65 Coupe #59. Gen 3 Coyote. Legal 03/04/2020.
Build Thread and
Video
Build 5: 35 Hot Rod Truck #138. LS3 and 4L65E auto. Rcvd 01/05/2021. Legal 04/20/2023.
Build Thread. Sold 11/9/2023.
-
10-02-2019, 03:22 PM
#726
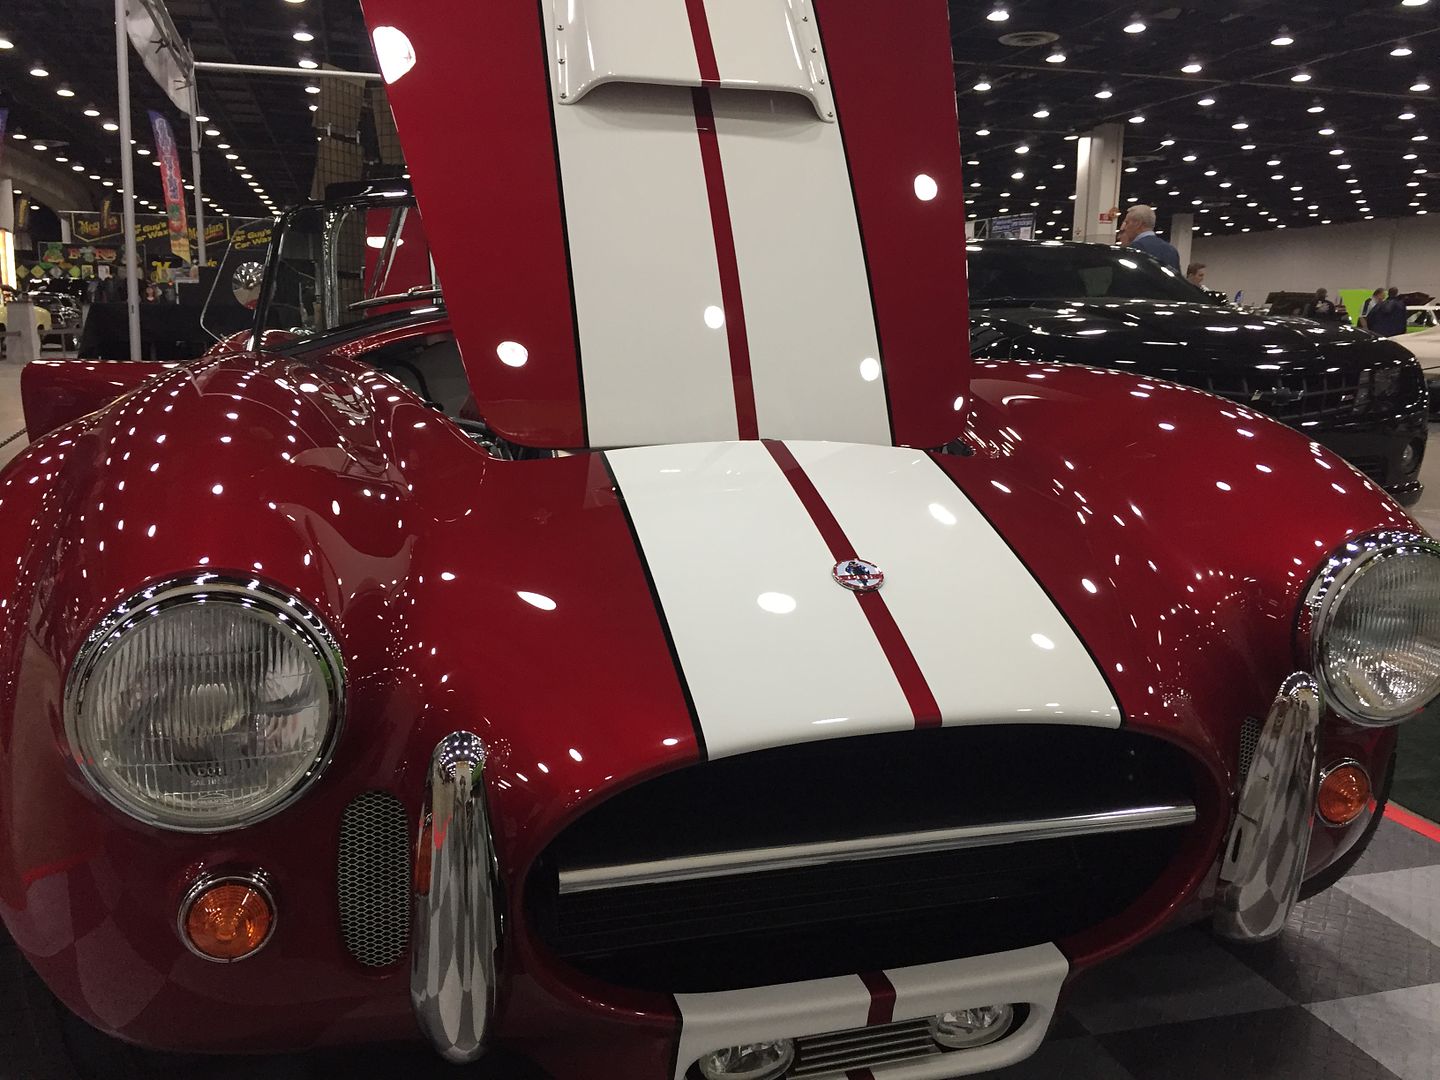
Hola Edwardb, what specific type of red is that? Itís beautiful! Thanks!

Originally Posted by
edwardb

-
10-02-2019, 04:45 PM
#727
Senior Member


Originally Posted by
Aircontroller

Hola Edwardb, what specific type of red is that? It’s beautiful! Thanks!
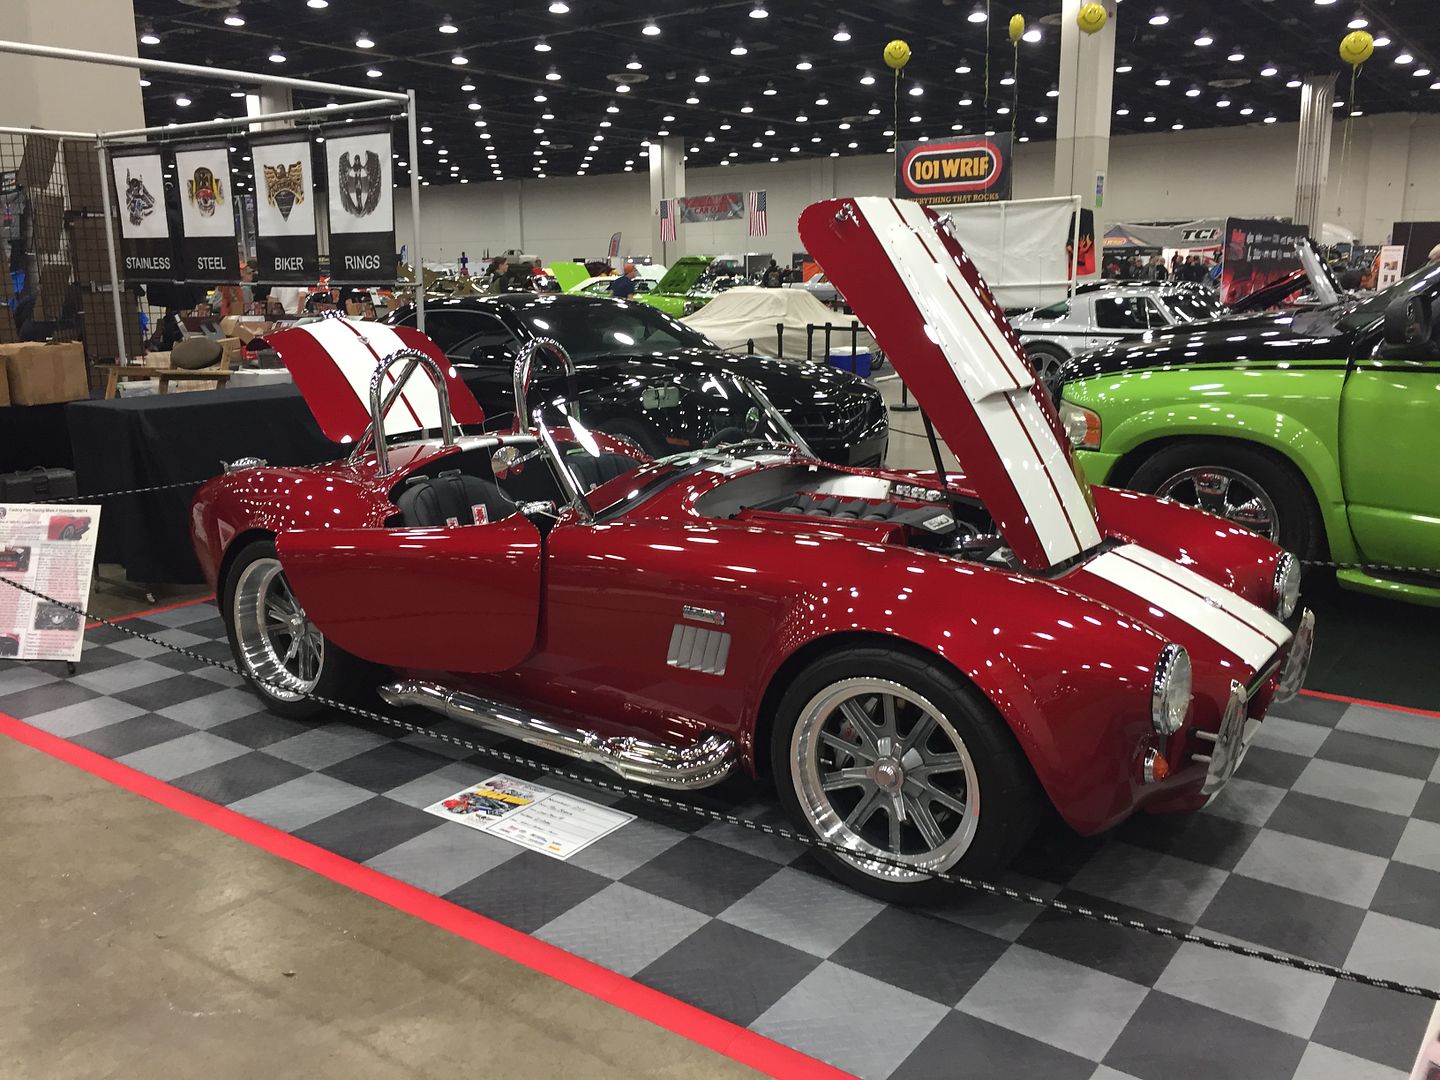
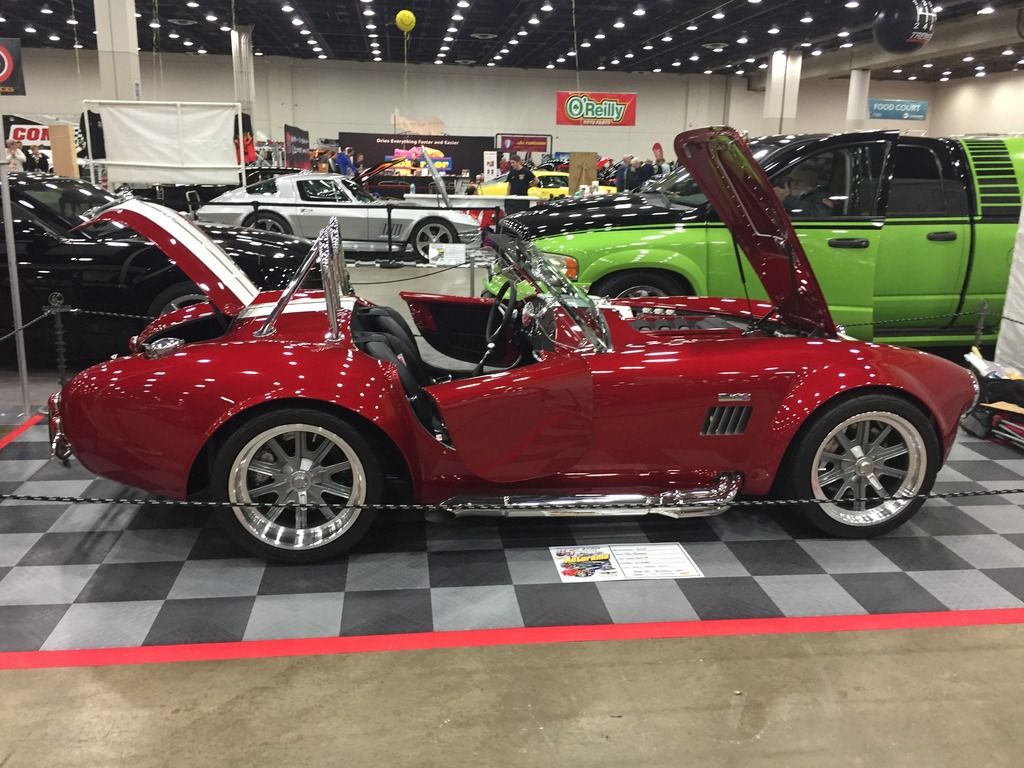
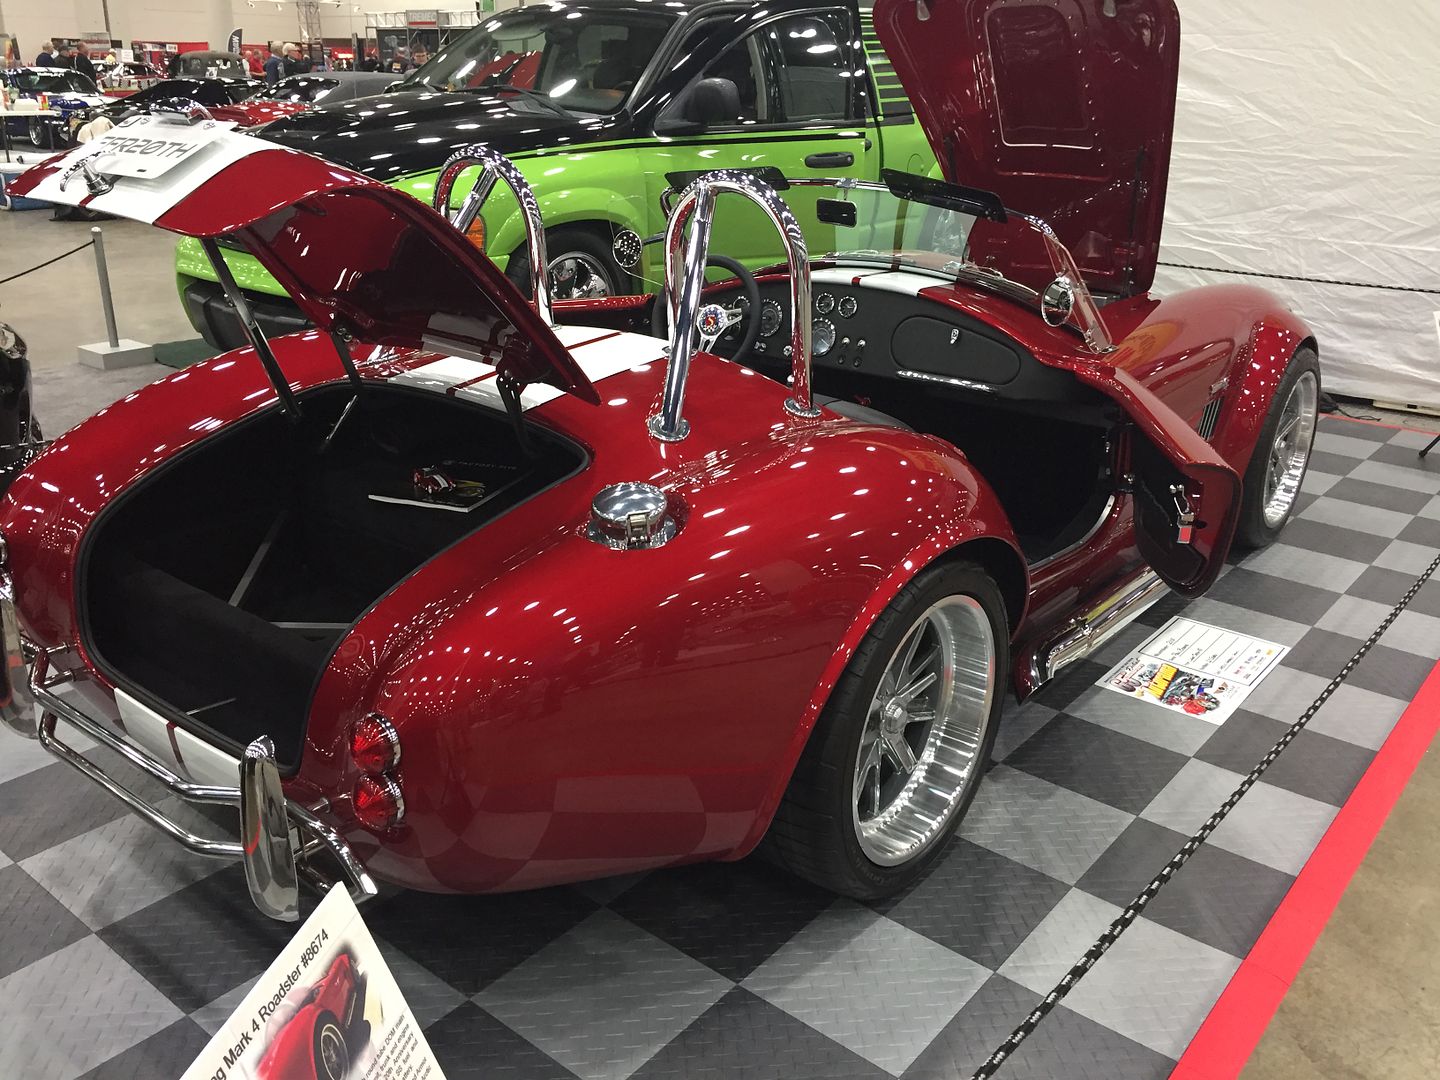
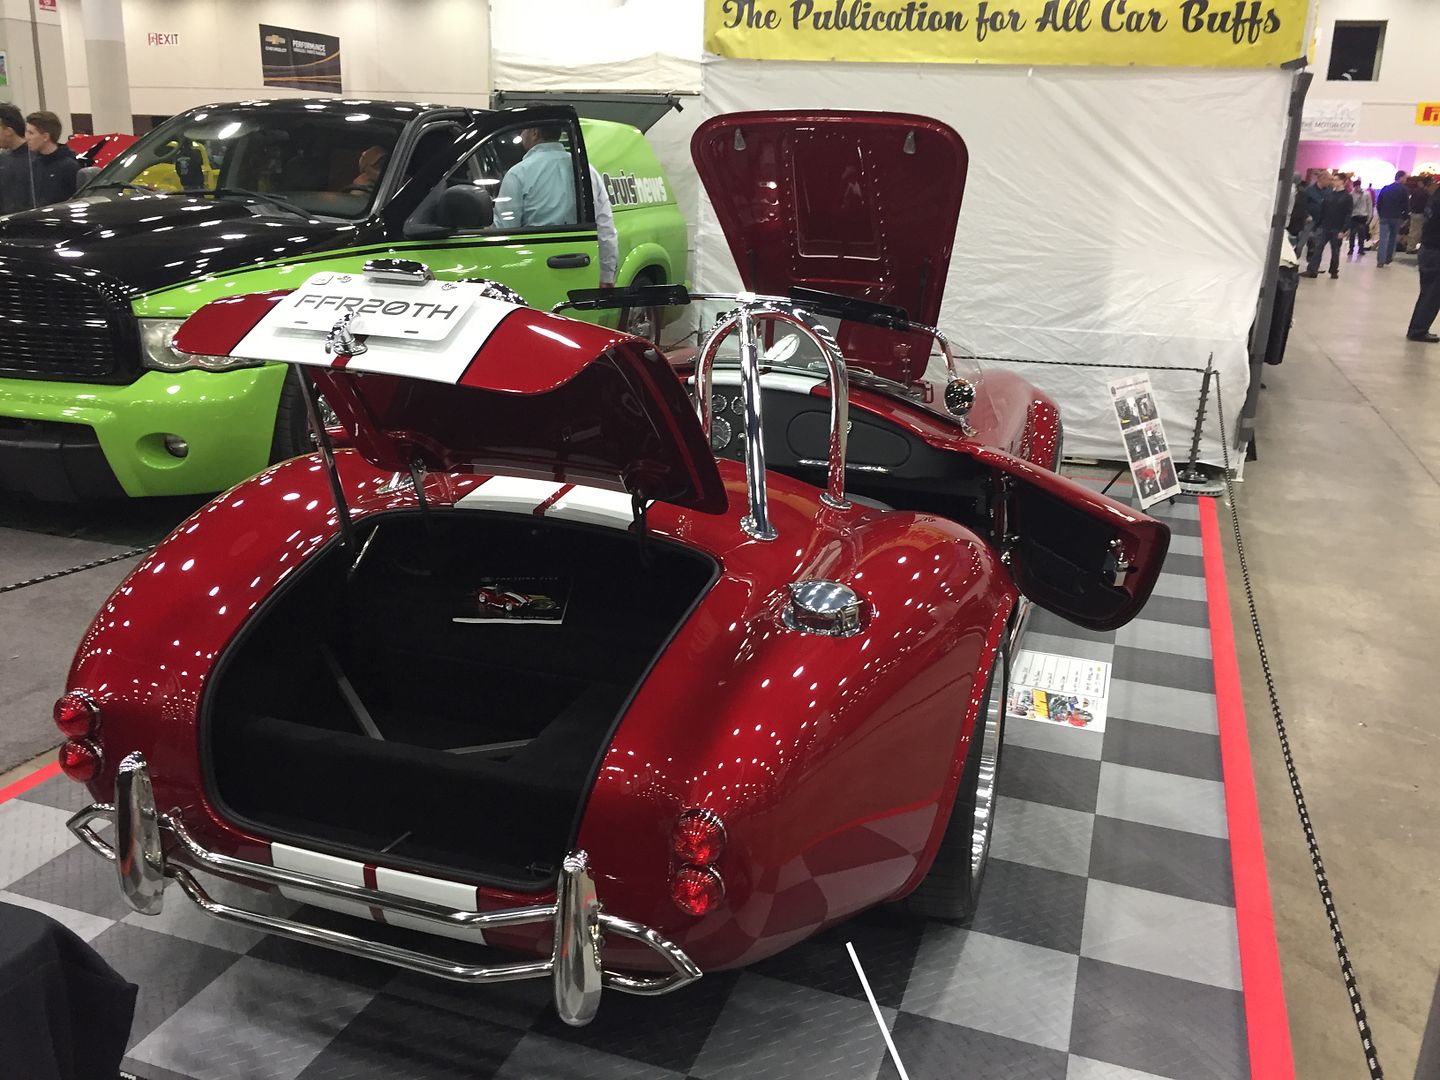
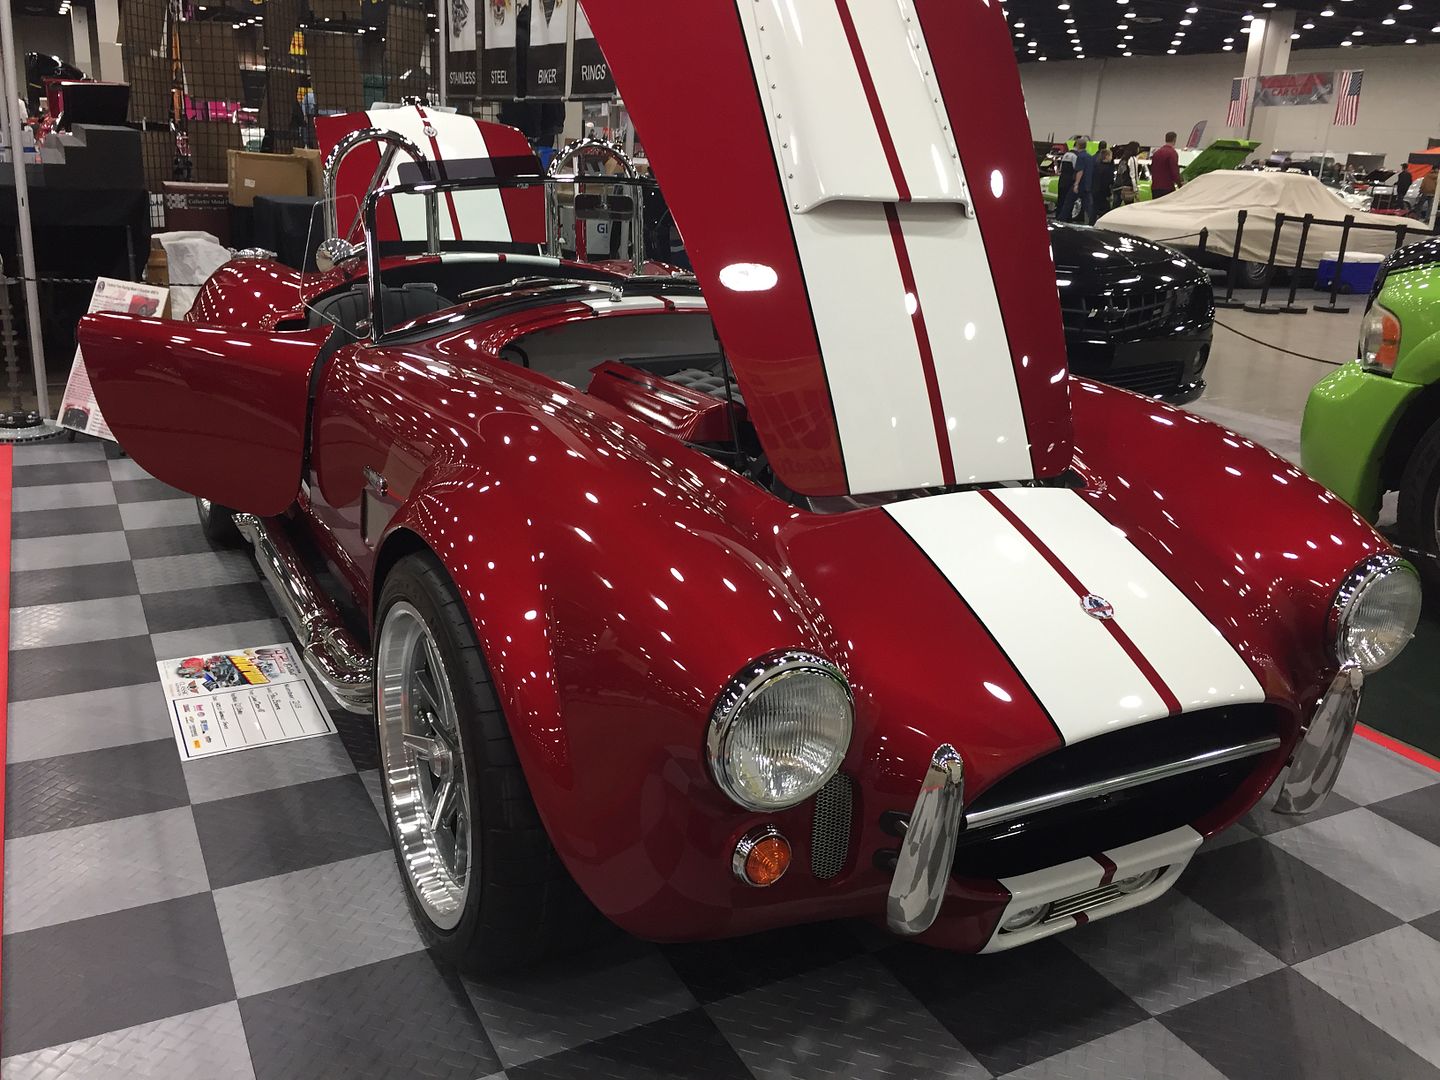
Agreed, it's a great color. It's very rare when people are looking at the car that they don't comment about the color. In a good way. It's actually a bit more "red" in sunlight versus the indoor lighting at Cobo Center Detroit where those pics were taken. Officially, it's Ford Red Candy 2, code RZ. A tri-coat.
Build 1: Mk3 Roadster #5125. Sold 11/08/2014.
Build 2: Mk4 Roadster #7750. Sold 04/10/2017.
Build Thread
Build 3: Mk4 Roadster 20th Anniversary #8674. Sold 09/07/2020.
Build Thread and
Video.
Build 4: Gen 3 Type 65 Coupe #59. Gen 3 Coyote. Legal 03/04/2020.
Build Thread and
Video
Build 5: 35 Hot Rod Truck #138. LS3 and 4L65E auto. Rcvd 01/05/2021. Legal 04/20/2023.
Build Thread. Sold 11/9/2023.
-
10-02-2019, 05:48 PM
#728
Hey, I've seen that car before, same spot too.
Doesn't look as good there as out in the wild though. Sounds and rides great too. Truly stunning!
Jim
-
Post Thanks / Like - 1 Thanks, 0 Likes
-
10-11-2019, 08:17 PM
#729
Just got through this thread, thanks so much for posting all this helpful information for us new builders! Your build came out beautifully!
-
Post Thanks / Like - 1 Thanks, 0 Likes
-
11-11-2019, 07:05 PM
#730
Hey Paul,
Question for you. How do you like the 18" rims and tires compared to the 17"s on your #7750? Is the ride a lot rougher on the 18"s?
Thanks,
Rod
-
Post Thanks / Like - 0 Thanks, 1 Likes
-
11-11-2019, 08:05 PM
#731
Senior Member


Originally Posted by
rezell3d

Hey Paul,
Question for you. How do you like the 18" rims and tires compared to the 17"s on your #7750? Is the ride a lot rougher on the 18"s?
Thanks,
Rod
Hi Rod. I'm very happy with the 18" wheels and tires. But the two cars are quite different. #7750 was a solid axle build (Levy 5-link) with the standard red Koni shocks. This build is IRS with the silver double adjustable Koni shocks. I find this car rides quite a bit better than #7750. What I would expect comparing solid axle to IRS. According to FF, the double adjustable shocks are slightly more compliant than the red Koni's, so that contributes as well. Would this ride be even better with 17" wheels and tires? Don't know, but it's really good just the way it is. Everyone that rides in it, and I've given lots of rides, are surprised (in a good way) about how it rides. I don't have any concerns recommending the 18's. Chose them again for my Coupe build. That's about all I can offer. Hope it helps.
Last edited by edwardb; 11-11-2019 at 08:07 PM.
Build 1: Mk3 Roadster #5125. Sold 11/08/2014.
Build 2: Mk4 Roadster #7750. Sold 04/10/2017.
Build Thread
Build 3: Mk4 Roadster 20th Anniversary #8674. Sold 09/07/2020.
Build Thread and
Video.
Build 4: Gen 3 Type 65 Coupe #59. Gen 3 Coyote. Legal 03/04/2020.
Build Thread and
Video
Build 5: 35 Hot Rod Truck #138. LS3 and 4L65E auto. Rcvd 01/05/2021. Legal 04/20/2023.
Build Thread. Sold 11/9/2023.
-
11-11-2019, 08:22 PM
#732

Originally Posted by
rezell3d

Hey Paul,
Question for you. How do you like the 18" rims and tires compared to the 17"s on your #7750? Is the ride a lot rougher on the 18"s?
Thanks,
Rod
Rod,
I just switched from 17" to 18" wheels on my MK4 and although I haven't gotten my car on the open road, the ride doesn't feel any different with the couple of trips around the block (about 4 miles) that I've made so far.
Dave
-
Post Thanks / Like - 1 Thanks, 1 Likes
-
12-25-2019, 10:24 PM
#733
Merry Christmas from Scott in Thailand.
Congrats on 5000 miles!
Just a few words of Thanks for a greatly informative write up and build. I don't think a day goes by that during my MkIV SBF build that I have not referenced the very thorough build up of your 20th anniversary Roadster. Even though I do have experience building other replicas and race cars, there's always those head scratchers, but I always find that referencing your build is the best affirmation of how to do it right. Much Thanks and Happy 2020!
-
Post Thanks / Like - 1 Thanks, 2 Likes
-
02-26-2020, 06:30 PM
#734

Originally Posted by
edwardb

Thanks for the generous comment. I'm anxious to see and drive the final product as well. But I also enjoy the build process.
The MaxJax? It's exactly what it is. A relatively basic DIY quality lift. I wouldn't compare it directly to a more professional version, but then it's much cheaper and fits better into my 2-car garage. It's perfect for the low ceiling garage I have. I can't go any higher than this will go. My only complaint is the two posts don't always stay perfectly synchronized. But it's not a big issue and completely workable. The difference in working on the build on a lift vs. the usual jack stands and crawling on the ground is night and day.
He does have skills, he is welcome to drive to Chicago, and spend the weekend to help with my build when it arrives aft the 11 April completion. Ill have cold ones and pizza.
-
04-21-2020, 08:33 PM
#735
Senior Member

EdwardBs Mk4 #8674 Table of Contents
1. Build plan plus pickup
2. Front suspension
3. IRS update and donor
4. Clutch pedal interference and center section installation
5. Front suspension completed, sway bar, radiator shroud
6. Fuel tank
7. Trunk box, GP Headers
8. Dash layout, radiator installation, IRS assembly completed
9. Coyote received
10. Coyote accelerator pedal modification
11. IRS setup recommendation
12. Coyote mockup
13. Coyote control pack installation
14. Lower radiator hose, instrument panel and glovebox
16. Front Wilwood brakes
17. Coyote Mustang style expansion tank and hoses
18. Rear Wilwood brakes
19. Coyote tach connection
20. KRC power steering
21. Panel mockup complete
22. E-brake modification, cables through frame (not under)
23. Instrument panel cover and installation
24. Heated seats
25. Powder coated panel installation
26. SS fuel lines and filter
27. SS brake lines
28. Rear harness, fuel tank, instrument panel mount
29. Power wiring
30. Lizard Skin insulation
31. Dash and wiring harness (scroll down for multiple posts)
32. LED headlights and running lights
33. Spinner adapter set screws
34. Locking gas cap, leather dye, dash handle, charcoal filter
35. Coyote assembly (scroll down for multiple posts)
36. Door latches and door cards
37. Coyote installation
38. Hydraulic clutch
39. First start
40. Go-kart
41. Wiring spreadsheet
42. Body prep and fitting
43. Wiper installation
44. Side louvers
45. Body undercoat
46. Radiator screen and surround (scroll down for multiple posts)
47. Final assembly before paint (scroll down for multiple posts)
48. Paint (scroll down for multiple posts and pages)
49. Visors, wind wings, mirrors
50. Final assembly (scroll down for multiple posts)
51. 2017 Detroit Autorama (scroll down for multiple posts)
52. Itís a wrap
53. Build thread P.S.
54. 2018 Detroit Autorama Ford Performance
55. 5000 miles report
Last edited by edwardb; 04-21-2020 at 08:39 PM.
Build 1: Mk3 Roadster #5125. Sold 11/08/2014.
Build 2: Mk4 Roadster #7750. Sold 04/10/2017.
Build Thread
Build 3: Mk4 Roadster 20th Anniversary #8674. Sold 09/07/2020.
Build Thread and
Video.
Build 4: Gen 3 Type 65 Coupe #59. Gen 3 Coyote. Legal 03/04/2020.
Build Thread and
Video
Build 5: 35 Hot Rod Truck #138. LS3 and 4L65E auto. Rcvd 01/05/2021. Legal 04/20/2023.
Build Thread. Sold 11/9/2023.
-
Post Thanks / Like - 2 Thanks, 3 Likes
-
04-21-2020, 09:27 PM
#736
Thanks, Paul! You taking the time to add things like the table of contents is really helpful to all of us out here. Thank you.
2018 Factory Five Mk IV, Gen 2 Coyote, Tremec TKO 600 5 speed, complete kit, standard brakes and rear axle;
Delivered: 5 Sept 2018
First start: 31 Aug 2019
First go-cart: 22 Sept 2019
Basically done except paint: May 2020
Graduation: June 2021
-
Post Thanks / Like - 0 Thanks, 1 Likes
-
04-21-2020, 09:56 PM
#737
Ha, this is cheating. I had this thing memorized during my build.
Such a great resource. Thanks again Paul.
-Steve
-
Post Thanks / Like - 0 Thanks, 1 Likes
-
06-25-2020, 04:55 PM
#738
I just read this whole thread today and took quite a few notes. Since I use EverNote to keep track of things, it keeps a link to the direct post so you'll be sure to be credited! You made a beautiful car and did a great job with the thread as well!
A sincere thank you!
-
Post Thanks / Like - 0 Thanks, 1 Likes
-
06-26-2020, 08:58 AM
#739
Senior Member


Originally Posted by
ToddQ

I just read this whole thread today and took quite a few notes. Since I use EverNote to keep track of things, it keeps a link to the direct post so you'll be sure to be credited! You made a beautiful car and did a great job with the thread as well!
A sincere thank you!
You read whole thing?  Impressive. Thank you and you're welcome. The thread that keeps on giving. Now in it's fourth season approaching 7K miles and still love the car. Had it at a cruise-in last night with lots of lookers and positive comments. Good luck with your build.
Build 1: Mk3 Roadster #5125. Sold 11/08/2014.
Build 2: Mk4 Roadster #7750. Sold 04/10/2017.
Build Thread
Build 3: Mk4 Roadster 20th Anniversary #8674. Sold 09/07/2020.
Build Thread and
Video.
Build 4: Gen 3 Type 65 Coupe #59. Gen 3 Coyote. Legal 03/04/2020.
Build Thread and
Video
Build 5: 35 Hot Rod Truck #138. LS3 and 4L65E auto. Rcvd 01/05/2021. Legal 04/20/2023.
Build Thread. Sold 11/9/2023.
-
Post Thanks / Like - 1 Thanks, 1 Likes
 ToddQ
ToddQ thanked for this post
-
06-26-2020, 10:48 AM
#740

Originally Posted by
ToddQ

I just read this whole thread today and took quite a few notes. Since I use EverNote to keep track of things, it keeps a link to the direct post so you'll be sure to be credited! You made a beautiful car and did a great job with the thread as well!
A sincere thank you!
ToddQ, I have also read the thread prior to my kit arrival, also went through other threads, Edwardb has been helpful along with other builders. you can't go wrong with the forum.
-
Post Thanks / Like - 0 Thanks, 2 Likes
-
06-27-2020, 11:48 AM
#741

Originally Posted by
edwardb

You read whole thing?

Impressive. Thank you and you're welcome. The thread that keeps on giving. Now in it's fourth season approaching 7K miles and still love the car. Had it at a cruise-in last night with lots of lookers and positive comments. Good luck with your build.
Ha! Yes, I'm a little slower now, but I took speed-reading classes in grade school. Up to 1,500 words per minute! I also had to slow down to take good notes  Thanks for wishing me luck with my build, I'll need it!
-
07-09-2020, 04:37 PM
#742
Hi Paul, how did you secure your tunnel cover in place? Thanks!
-
07-09-2020, 09:54 PM
#743
Senior Member


Originally Posted by
ThreeSpore

Hi Paul, how did you secure your tunnel cover in place? Thanks!
Post #339 on page 9 describes and pictures how I attached the transmission tunnel cover. Don't know why you couldn't find it.  Direct link: https://thefactoryfiveforum.com/show...l=1#post244996.
The post shows the three attachment points. One slips into existing sheet metal. The other two have bolts that are accessible from the bottom. I wanted the attachment hidden but still solid. All good and (so far...) haven't had to remove it now in its fourth driving season. I think there's value in having the cover removable. Plus I wanted the leather covering (vs. standard carpet) so it's natural to have it as a separate piece. You'll have to decide whether the hidden attachment method is worth it. Definately some extra work for maybe minimal payback. Many just put screws along the sides. Doesn't take many. It's what I ended up doing on my Coupe build. Used black chrome screws which kind of blend in with the black covering.
Build 1: Mk3 Roadster #5125. Sold 11/08/2014.
Build 2: Mk4 Roadster #7750. Sold 04/10/2017.
Build Thread
Build 3: Mk4 Roadster 20th Anniversary #8674. Sold 09/07/2020.
Build Thread and
Video.
Build 4: Gen 3 Type 65 Coupe #59. Gen 3 Coyote. Legal 03/04/2020.
Build Thread and
Video
Build 5: 35 Hot Rod Truck #138. LS3 and 4L65E auto. Rcvd 01/05/2021. Legal 04/20/2023.
Build Thread. Sold 11/9/2023.
-
07-09-2020, 10:52 PM
#744

Originally Posted by
edwardb

Post #339 on page 9 describes and pictures how I attached the transmission tunnel cover. Don't know why you couldn't find it.

Direct link:
https://thefactoryfiveforum.com/show...l=1#post244996.
The post shows the three attachment points. One slips into existing sheet metal. The other two have bolts that are accessible from the bottom. I wanted the attachment hidden but still solid. All good and (so far...) haven't had to remove it now in its fourth driving season. I think there's value in having the cover removable. Plus I wanted the leather covering (vs. standard carpet) so it's natural to have it as a separate piece. You'll have to decide whether the hidden attachment method is worth it. Definately some extra work for maybe minimal payback. Many just put screws along the sides. Doesn't take many. It's what I ended up doing on my Coupe build. Used black chrome screws which kind of blend in with the black covering.
Perfect, I must have missed it :-) thanks again mate. I am also doing a leather covering, and was pondering ways to attach. You method looks quite straight forward and I will definitely re-use that.
-
07-15-2020, 09:14 PM
#745
Hi Edward! How did you route your rear brake line off the master cyl? I know you went down the square tube behind the drivers pedal, but how did you route around the pedal bracket, steering column, and multiple bolts that go in there? (also how do you bend your brake lines so damn well?)
-
07-16-2020, 07:39 AM
#746
Senior Member


Originally Posted by
ActionBa5tard

Hi Edward! How did you route your rear brake line off the master cyl? I know you went down the square tube behind the drivers pedal, but how did you route around the pedal bracket, steering column, and multiple bolts that go in there? (also how do you bend your brake lines so damn well?)
For the rear brake lines, I mounted the rear master cylinder on the inside and it's a pretty simple curve over to the corner of the footbox and down. Pic 1 below. From there, down the side of the 3/4-inch tube. Pic 2. Held in place with the same clamps I used everywhere else. Pic 3 is the view from the outside. Then out the bottom through a hole in the footbox and to the rear along the 4-inch chassis tube. Pic 4. Later filled this hole with silicone to seal and prevent any rubbing. For this build, this routing avoided any mounting bolts, the steering column, etc. Since it's a Coyote build, the drive by wire (DBW) accelerator pedal doesn't interfere with this location. No wires, cables, whatever. Once completed, some are concerned the brake line through this area is buried under insulation and carpet. I'm OK with it since it's stainless plus there are no fittings or joints. In this case, it's one piece from the master cylinder to the tee fitting at the back. Takes some patience to make that piece and then get it into place. But got it done. I use the kit supplied steel lines to mock up every piece. Then duplicate using the SS tubing. As far as straight, yeah I know that's an issue because usually when you buy bulk tubing it's coiled. Inline Tube, a well known mainly on-line supplier of tubing and fittings is local for me. So I go to their place and get the SS pieces over the counter and left straight. They also have the mounting clips, tube nuts, tees, etc. Then it's just a matter of careful planning and execution.
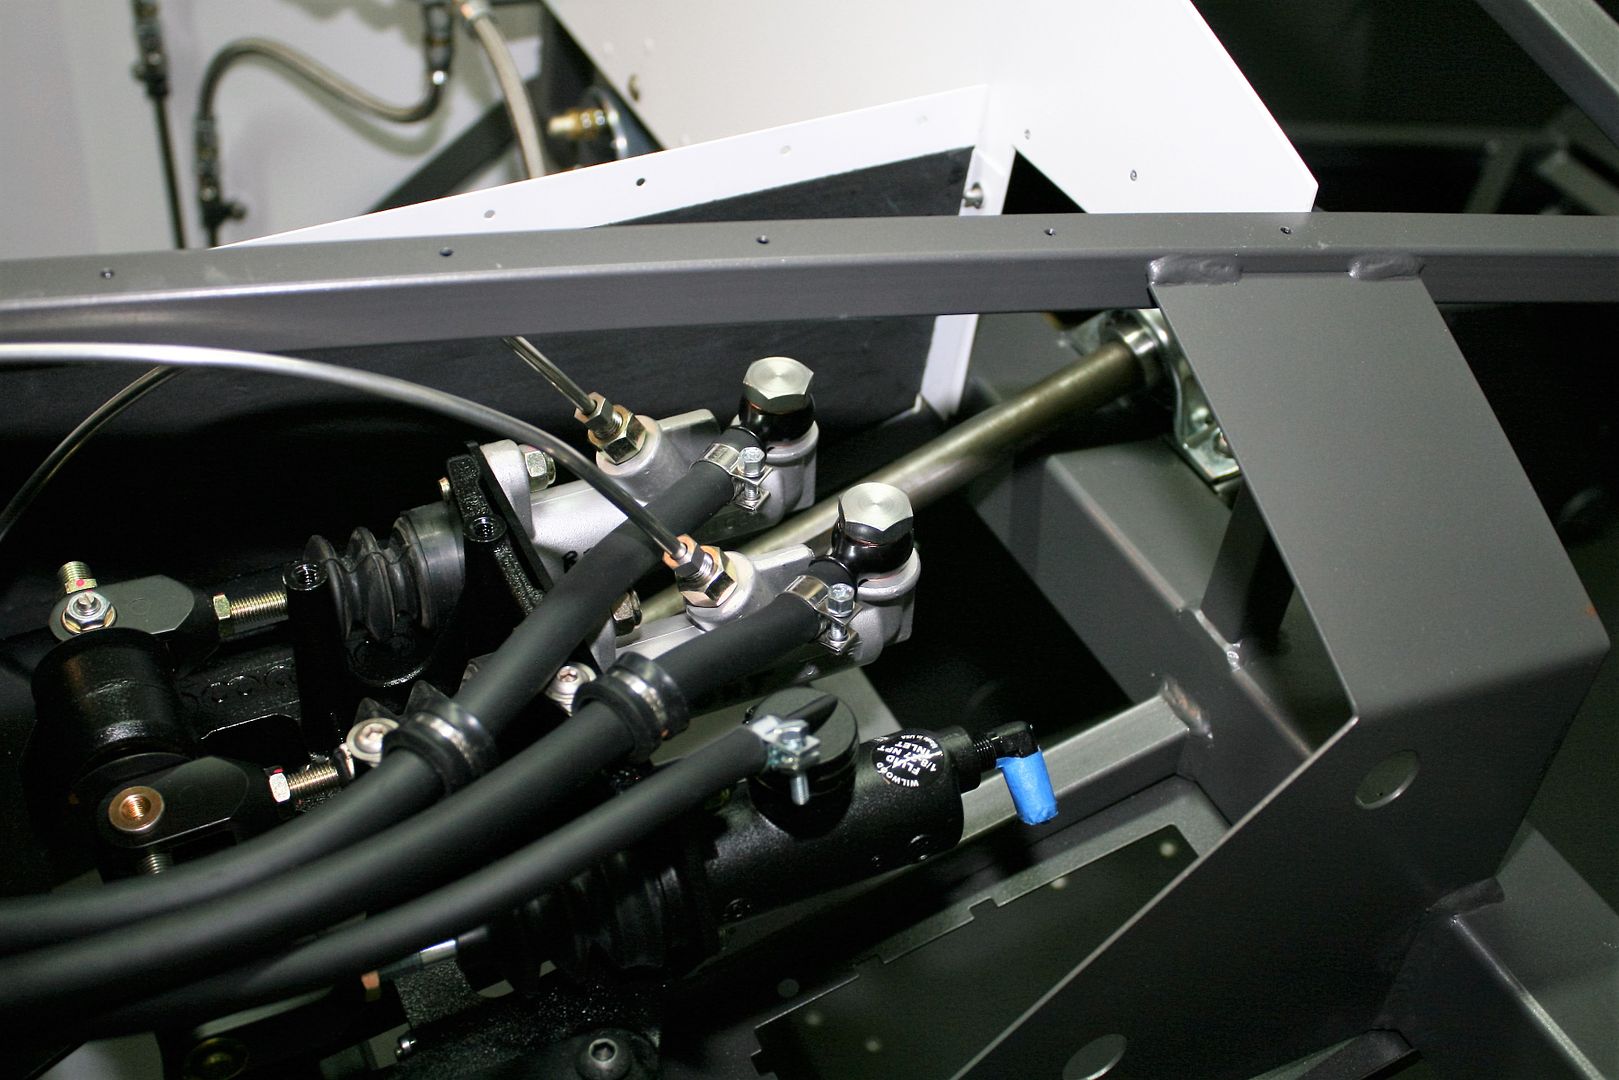
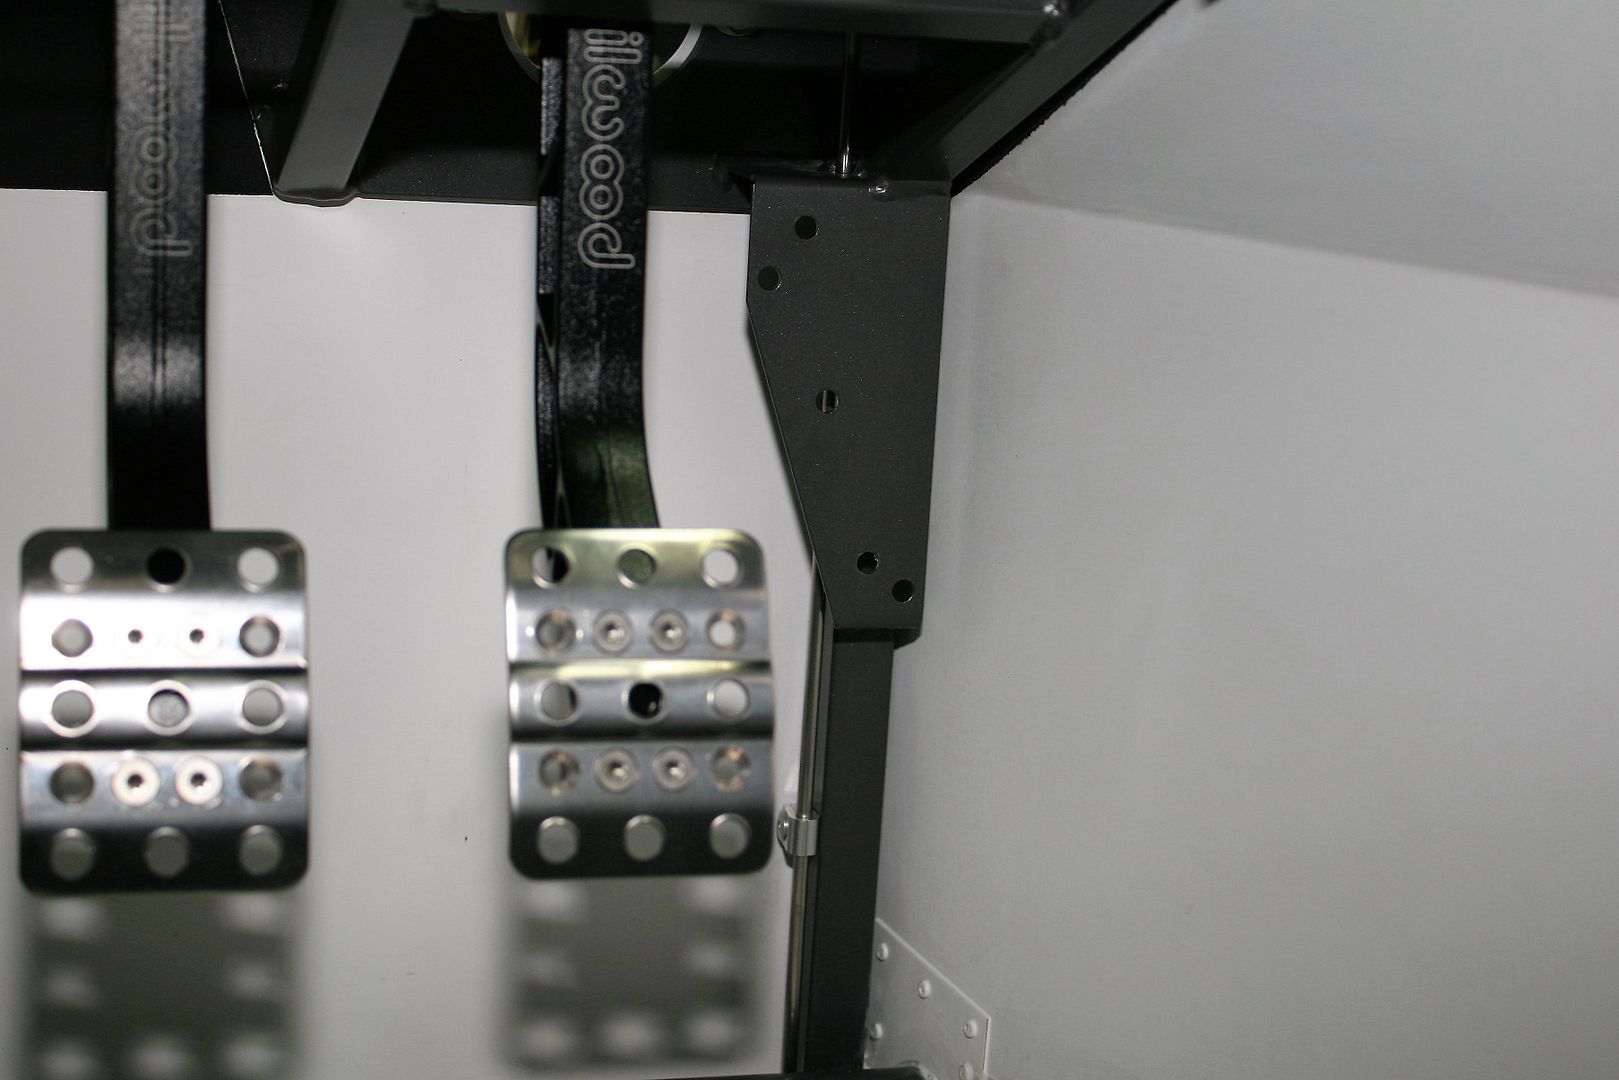
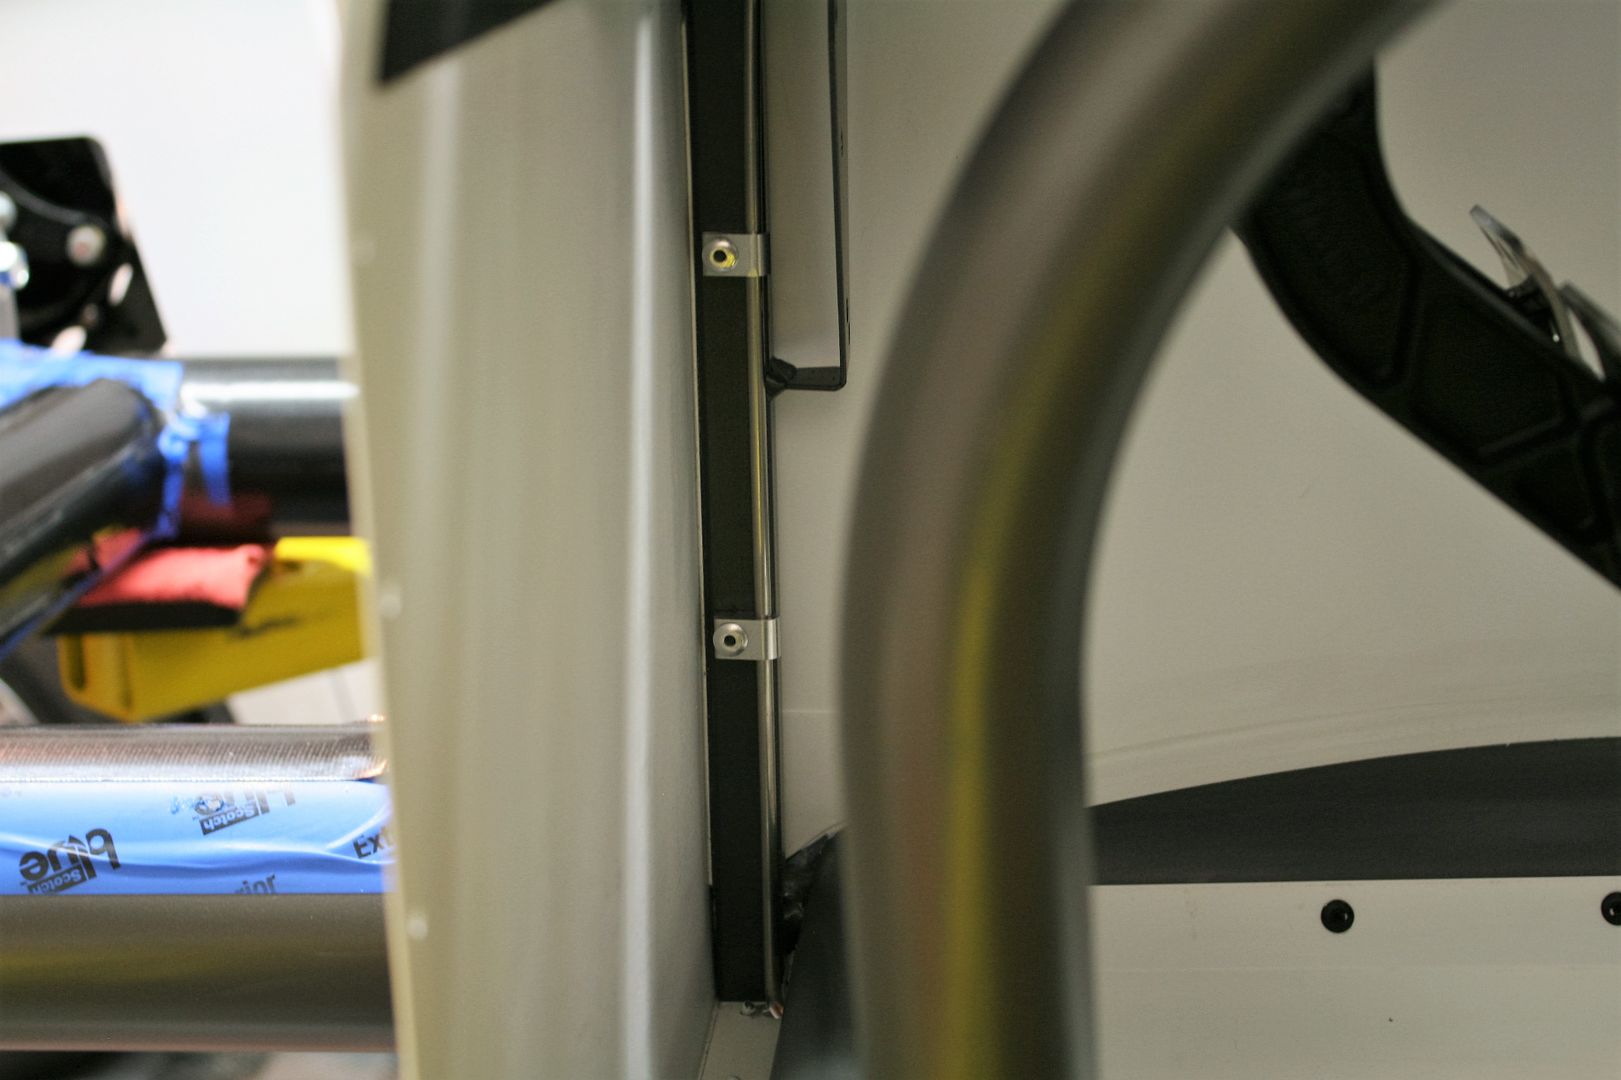
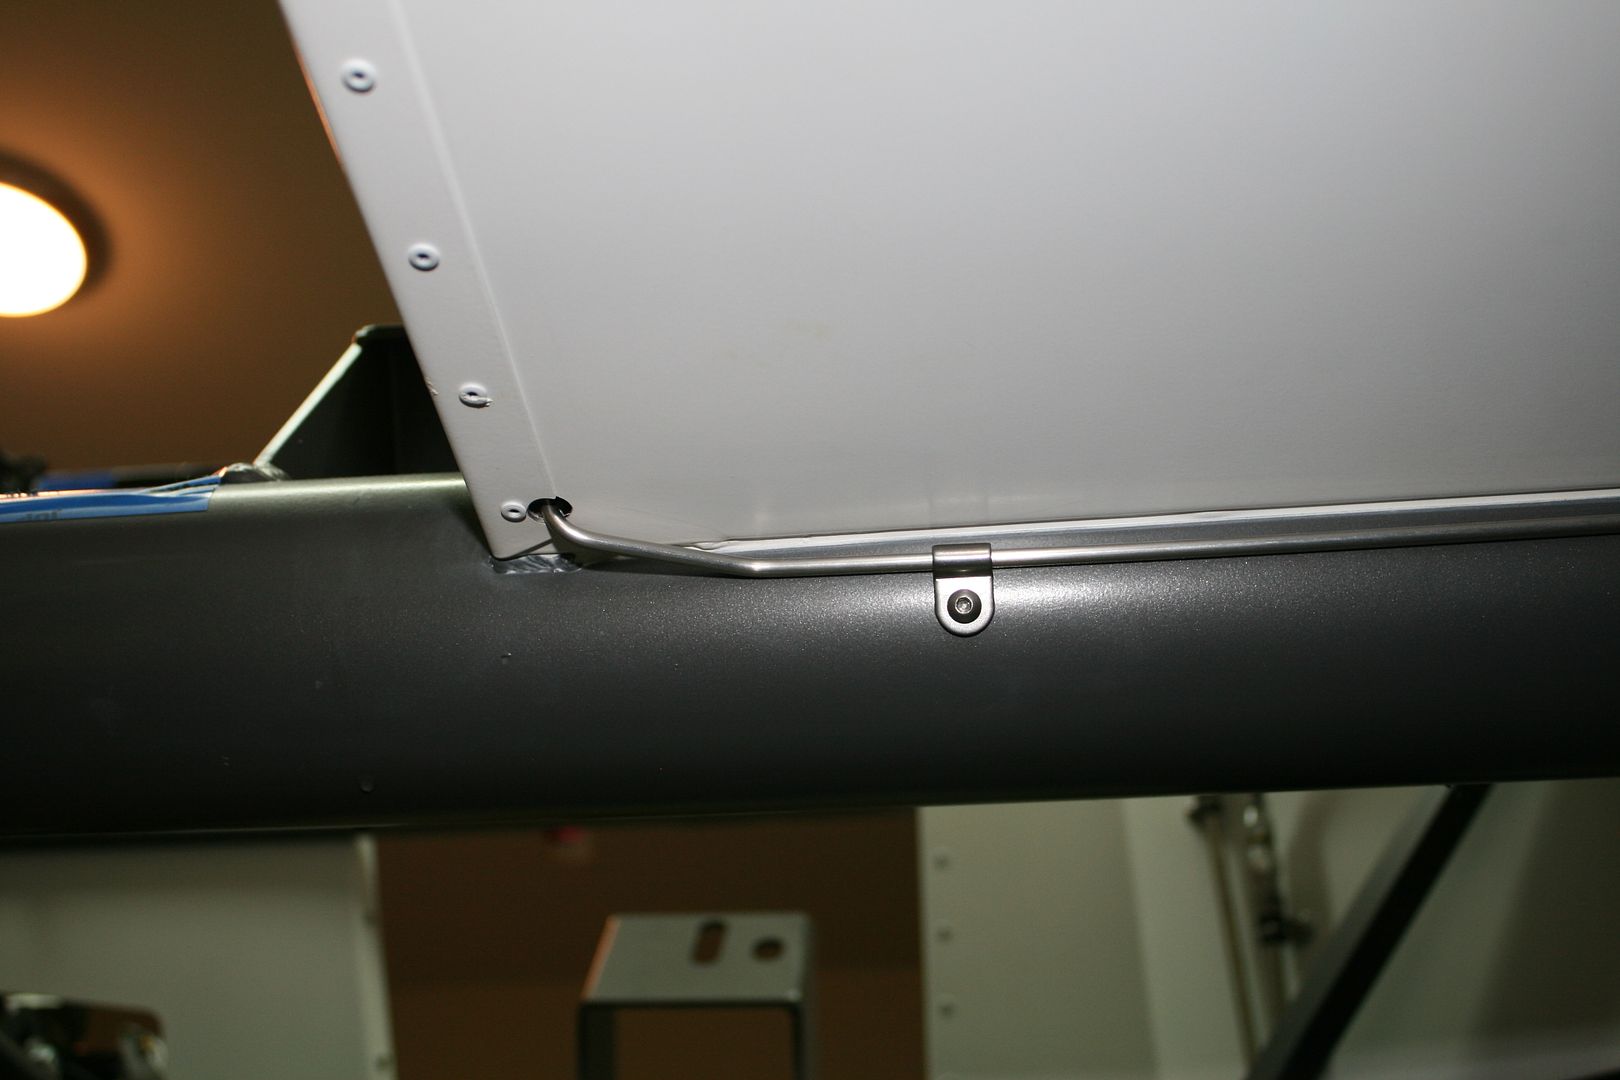
Last edited by edwardb; 07-16-2020 at 07:44 AM.
Build 1: Mk3 Roadster #5125. Sold 11/08/2014.
Build 2: Mk4 Roadster #7750. Sold 04/10/2017.
Build Thread
Build 3: Mk4 Roadster 20th Anniversary #8674. Sold 09/07/2020.
Build Thread and
Video.
Build 4: Gen 3 Type 65 Coupe #59. Gen 3 Coyote. Legal 03/04/2020.
Build Thread and
Video
Build 5: 35 Hot Rod Truck #138. LS3 and 4L65E auto. Rcvd 01/05/2021. Legal 04/20/2023.
Build Thread. Sold 11/9/2023.
-
07-16-2020, 08:53 AM
#747
Hey Paul - quick question for you... It looks like you fastened the clips for the rear brake line along the 4" tubes with 10-32 screws into tapped holes into the frame but the clips in the footbox are attached with rivets. Are the screws for aesthetics or is there a reason for some of the clips to be removable?
MkIV Roadster build: Gen 2 Coyote, IRS, TKO600. Ordered 10/24/18. Delivered 1/29/19. Engine installed 8/8/21. First start 9/12/21. First go-kart 9/17/21. Off to paint 4/11/22. Back from paint 12/30/22.
Build thread here.
-
07-16-2020, 11:05 AM
#748
Senior Member


Originally Posted by
JohnK

Hey Paul - quick question for you... It looks like you fastened the clips for the rear brake line along the 4" tubes with 10-32 screws into tapped holes into the frame but the clips in the footbox are attached with rivets. Are the screws for aesthetics or is there a reason for some of the clips to be removable?
I can't cite any really good reason because they're likely never to come off. But you're right, I did tap the frame and install the clips with 10-32 screws where they're accessible. Did the same thing with the fuel lines on the PS frame. For those buried in the footbox I just popped them in with rivets. Not a super friendly place to be working with a tap plus that tube is a lot thinner and really not a good candidate for threads.
Build 1: Mk3 Roadster #5125. Sold 11/08/2014.
Build 2: Mk4 Roadster #7750. Sold 04/10/2017.
Build Thread
Build 3: Mk4 Roadster 20th Anniversary #8674. Sold 09/07/2020.
Build Thread and
Video.
Build 4: Gen 3 Type 65 Coupe #59. Gen 3 Coyote. Legal 03/04/2020.
Build Thread and
Video
Build 5: 35 Hot Rod Truck #138. LS3 and 4L65E auto. Rcvd 01/05/2021. Legal 04/20/2023.
Build Thread. Sold 11/9/2023.
-
07-16-2020, 11:45 AM
#749
Perfect - thanks. I was thinking of fastening them all with rivets, but wanted to make sure I wasn't missing some important reason why I'd need to be able to remove them down the road that wasn't immediately obvious to me. I suppose I could always just drill out the rivets in the unlikely event that I'd need to remove a line.
MkIV Roadster build: Gen 2 Coyote, IRS, TKO600. Ordered 10/24/18. Delivered 1/29/19. Engine installed 8/8/21. First start 9/12/21. First go-kart 9/17/21. Off to paint 4/11/22. Back from paint 12/30/22.
Build thread here.
-
07-16-2020, 02:25 PM
#750

Originally Posted by
edwardb

For the rear brake lines, I mounted the rear master cylinder on the inside and it's a pretty simple curve over to the corner of the footbox and down. Pic 1 below. From there, down the side of the 3/4-inch tube. Pic 2. Held in place with the same clamps I used everywhere else. Pic 3 is the view from the outside.
ahhh i see. Youve drilled holes in (im assuming) both the pedal bracket and the bracket its mounted to. makes sense and would reduce the need to do any nasty bends. Thank you!
-
11-28-2020, 05:39 PM
#751
Hi Ed - Thank you for the incredible detail and effort your put into this build thread. My son and I really appreciate it as we are about to start our build. In post #9 you talk about add 10-32 nutserts for future accessibility. I'm struggling to see what these are used for later. Could you explain what these were used for later and post some pictures if you still have them? Thank you!
-
11-28-2020, 10:31 PM
#752
Senior Member


Originally Posted by
kmseddon

Hi Ed - Thank you for the incredible detail and effort your put into this build thread. My son and I really appreciate it as we are about to start our build. In post #9 you talk about add 10-32 nutserts for future accessibility. I'm struggling to see what these are used for later. Could you explain what these were used for later and post some pictures if you still have them? Thank you!
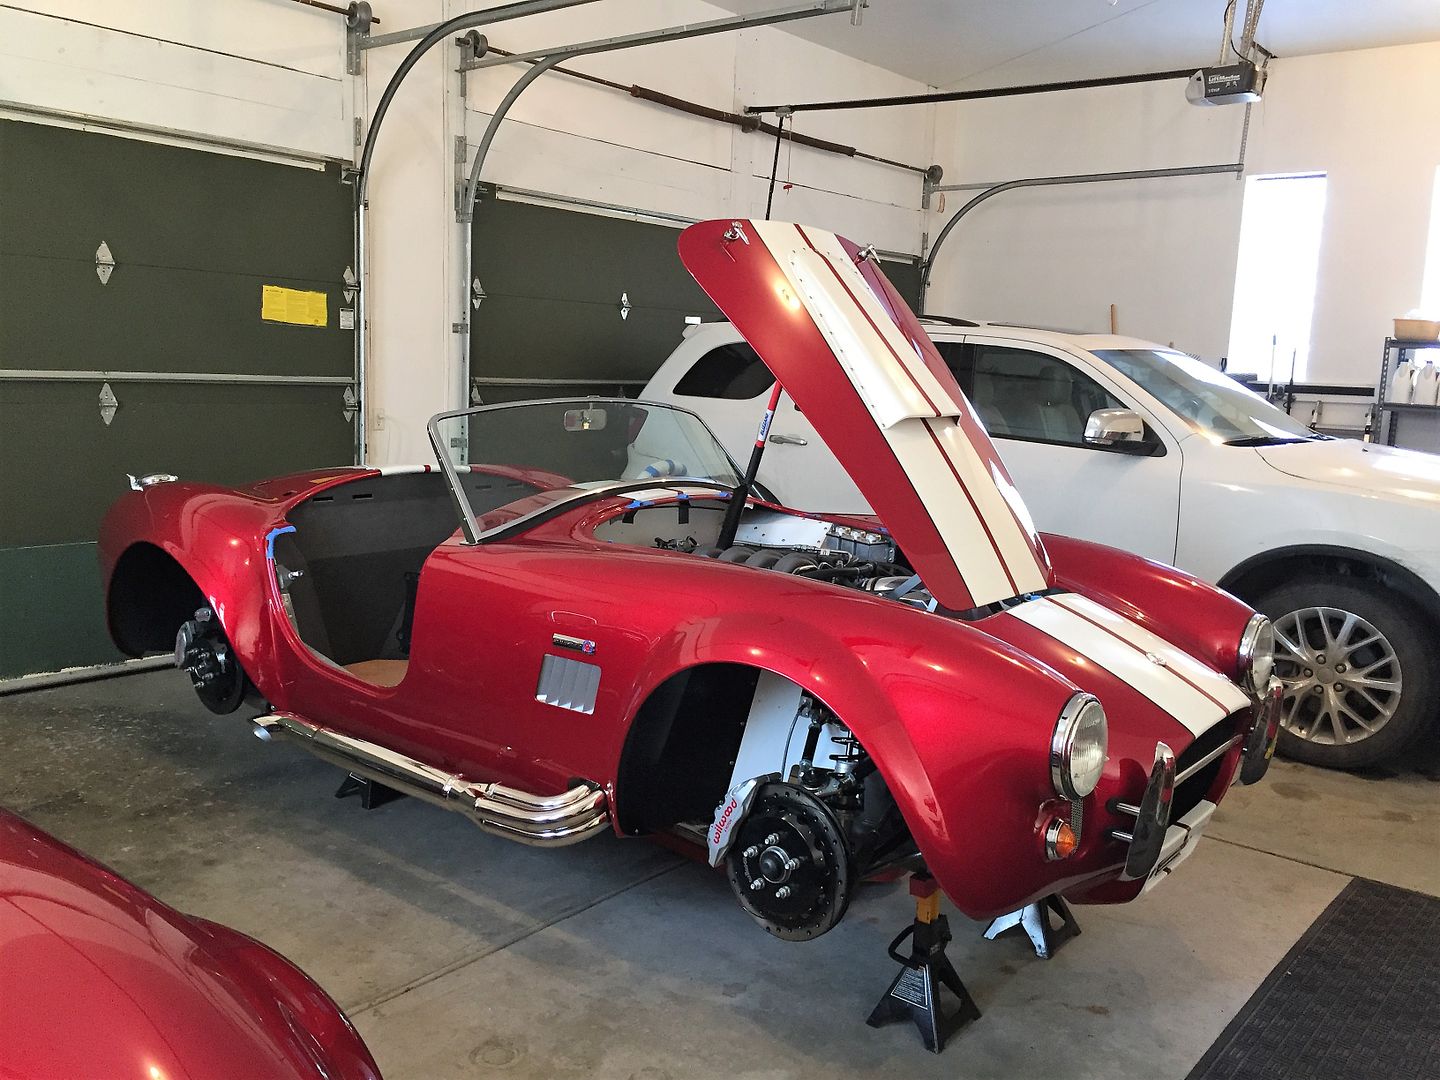
You're welcome. Good to hear this build thread just keeps giving. The back edge of the F panel is where the front splash guards mount. They typically go in and out a few times during the build. Plus on the finished car removing them gives access to the side pipe bolts, the windshield bolts on the right side, the Coyote PCM if you're using it, plus some other reasons I'm probably forgetting. So I like using nutserts instead of rivets so the splash guard is more easily removeable. This is very much a personal decision. Some just use clecos during the build and then drill out the rivets any time they want to remove the splash guards. Your choice. I will also remind that poorly installed nutserts can be a real pain. They can spin, fall out, etc. So practice and be confident about what you're doing if you choose to go that way.
In case you're not positive about what I'm describing, this picture during final assembly shows the front splash guard in place. You can see the several silver screws that are in the nutserts holding it in place. Good luck with your build!
Build 1: Mk3 Roadster #5125. Sold 11/08/2014.
Build 2: Mk4 Roadster #7750. Sold 04/10/2017.
Build Thread
Build 3: Mk4 Roadster 20th Anniversary #8674. Sold 09/07/2020.
Build Thread and
Video.
Build 4: Gen 3 Type 65 Coupe #59. Gen 3 Coyote. Legal 03/04/2020.
Build Thread and
Video
Build 5: 35 Hot Rod Truck #138. LS3 and 4L65E auto. Rcvd 01/05/2021. Legal 04/20/2023.
Build Thread. Sold 11/9/2023.
-
Post Thanks / Like - 1 Thanks, 0 Likes
-
01-09-2021, 05:10 PM
#753
Thanks Paul! Your build thread is super helpful. We are planning on bringing ours to Rochester Hills in the summer of 2021, fingers crossed I'll/it'll be ready. We have family there. I'll look you up when we are around.
-
01-09-2021, 11:45 PM
#754
Senior Member


Originally Posted by
Scott Walker

Thanks Paul! Your build thread is super helpful. We are planning on bringing ours to Rochester Hills in the summer of 2021, fingers crossed I'll/it'll be ready. We have family there. I'll look you up when we are around.
Cool. This Roadster is gone. Sold late last year. But the newly finished Coupe is going strong. Let me know when you're around. Hope things are a little more "normal" next summer.
Build 1: Mk3 Roadster #5125. Sold 11/08/2014.
Build 2: Mk4 Roadster #7750. Sold 04/10/2017.
Build Thread
Build 3: Mk4 Roadster 20th Anniversary #8674. Sold 09/07/2020.
Build Thread and
Video.
Build 4: Gen 3 Type 65 Coupe #59. Gen 3 Coyote. Legal 03/04/2020.
Build Thread and
Video
Build 5: 35 Hot Rod Truck #138. LS3 and 4L65E auto. Rcvd 01/05/2021. Legal 04/20/2023.
Build Thread. Sold 11/9/2023.
-
09-13-2021, 06:34 PM
#755
Edwarb, how did you mount the aluminum support angles to the back of your dash panel? I canít see any screws coming through the face of the aluminum which makes sense since you want a flush surface for the foam and leatherÖ but how did you do it?
I am doing a similar dash to yours with the 1/8Ē foam and leather. Was there a certain produce you used for stretching the leather to get the folded marks in it from shipping out? Thank you
-
09-13-2021, 09:51 PM
#756
Senior Member


Originally Posted by
Morrisett

Edwarb, how did you mount the aluminum support angles to the back of your dash panel? I can’t see any screws coming through the face of the aluminum which makes sense since you want a flush surface for the foam and leather… but how did you do it?
I am doing a similar dash to yours with the 1/8” foam and leather. Was there a certain produce you used for stretching the leather to get the folded marks in it from shipping out? Thank you
The angled support brackets on the back of the dash are held in place with flat head bolts and nuts through the dash. I don't recall how much I detailed this in the build thread, but for a couple builds I added a .040 doubler to the back of the FF dash to make it a bit stiffer and solid. The three brackets in the center only go through the doubler, so aren't visible in any pictures from the front. The end pieces do go through to the face of the dash since the doubler wasn't in that area. Those I countersunk just below the dash level and use JBWeld as a filler. Sanded flush and covered.
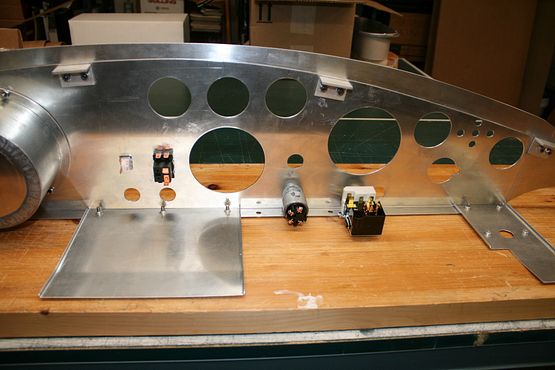
For the leather, you really don't want to stretch it to remove wrinkles. The hide I purchased came folded and also had wrinkles. I contacted the seller and he said to drape it over a clothes pole or whatever and let it hang. The wrinkles did go mostly away after a week or two as I recall and fully disappeared without doing anything special when I covered the dash.
Build 1: Mk3 Roadster #5125. Sold 11/08/2014.
Build 2: Mk4 Roadster #7750. Sold 04/10/2017.
Build Thread
Build 3: Mk4 Roadster 20th Anniversary #8674. Sold 09/07/2020.
Build Thread and
Video.
Build 4: Gen 3 Type 65 Coupe #59. Gen 3 Coyote. Legal 03/04/2020.
Build Thread and
Video
Build 5: 35 Hot Rod Truck #138. LS3 and 4L65E auto. Rcvd 01/05/2021. Legal 04/20/2023.
Build Thread. Sold 11/9/2023.
-
02-10-2022, 10:21 PM
#757
Paul, I have really enjoyed reading this detailed thread many times while waiting on my kit. I recall seeing a dimensioned drawing of your dash layout *somewhere* and cannot find it again. Would it be possible for you to point me to it again?
-
02-11-2022, 08:45 AM
#758
Senior Member


Originally Posted by
smccoy

Paul, I have really enjoyed reading this detailed thread many times while waiting on my kit. I recall seeing a dimensioned drawing of your dash layout *somewhere* and cannot find it again. Would it be possible for you to point me to it again?
Cool. Good luck with your build! I posted the dash dimensions on a post in the other forum. https://www.ffcars.com/threads/edwar...3#post-4988081
Build 1: Mk3 Roadster #5125. Sold 11/08/2014.
Build 2: Mk4 Roadster #7750. Sold 04/10/2017.
Build Thread
Build 3: Mk4 Roadster 20th Anniversary #8674. Sold 09/07/2020.
Build Thread and
Video.
Build 4: Gen 3 Type 65 Coupe #59. Gen 3 Coyote. Legal 03/04/2020.
Build Thread and
Video
Build 5: 35 Hot Rod Truck #138. LS3 and 4L65E auto. Rcvd 01/05/2021. Legal 04/20/2023.
Build Thread. Sold 11/9/2023.
-
02-11-2022, 10:05 AM
#759
Thank you! I knew I had seen it on one of the forums but sure couldn't find it yesterday.
-
03-26-2022, 01:50 PM
#760
You have the carbon fiber dash; did you install the heater box? if not if i were to move the firewall forward; how much room do you think i would get with the coyote gen3
Scott


 Thanks:
  Likes:

 Reply With Quote




 Impressive. Thank you and you're welcome. The thread that keeps on giving. Now in it's fourth season approaching 7K miles and still love the car. Had it at a cruise-in last night with lots of lookers and positive comments. Good luck with your build.
 Thanks for wishing me luck with my build, I'll need it!
 Direct link:


