-
Senior Member

Comp dash for MK4
I'm looking for a comp dash and it appears my only options are...
1) Purchase a blank dash from Factory Fave and have a local shop cut the holes
2) Buy a dash from Acton for $385 (which seems a bit pricy)
Any other suggestions?
-Fred
-
Not a waxer

#3) Buy a blank from FFR and you cut the holes.
http://www.amazon.com/General-Tools-...EJZ7JKT5DAY562
Cheers,
jeff
-
Senior Member

x2 what Jeff said!
That's exactly what I did and the tool I used. (you can also buy specialized hole saw/drill bits from the big box stores).
F5R #7446: MK4, 302, T5 midshift, 3.55 Posi IRS, 17" Halibrands
Delivered 4/4/11, First start 9/29/12, Licensed 4/24/13, off to PAINT 2/15/14!! Wahoo!
-
Senior Member

I used hole saws for the small gauges and a reciprocating saw for the larger ones. Turned out great. Just make sure that you've got a wood backing (plywood) when you're cutting the holes. That makes all the difference.
Build Blog
#8203, carbed 427W (611 hp), TKO 600, IRS
Delivered: May 27, 2014
Mechanically "Complete": October 1, 2014
-
Senior Member

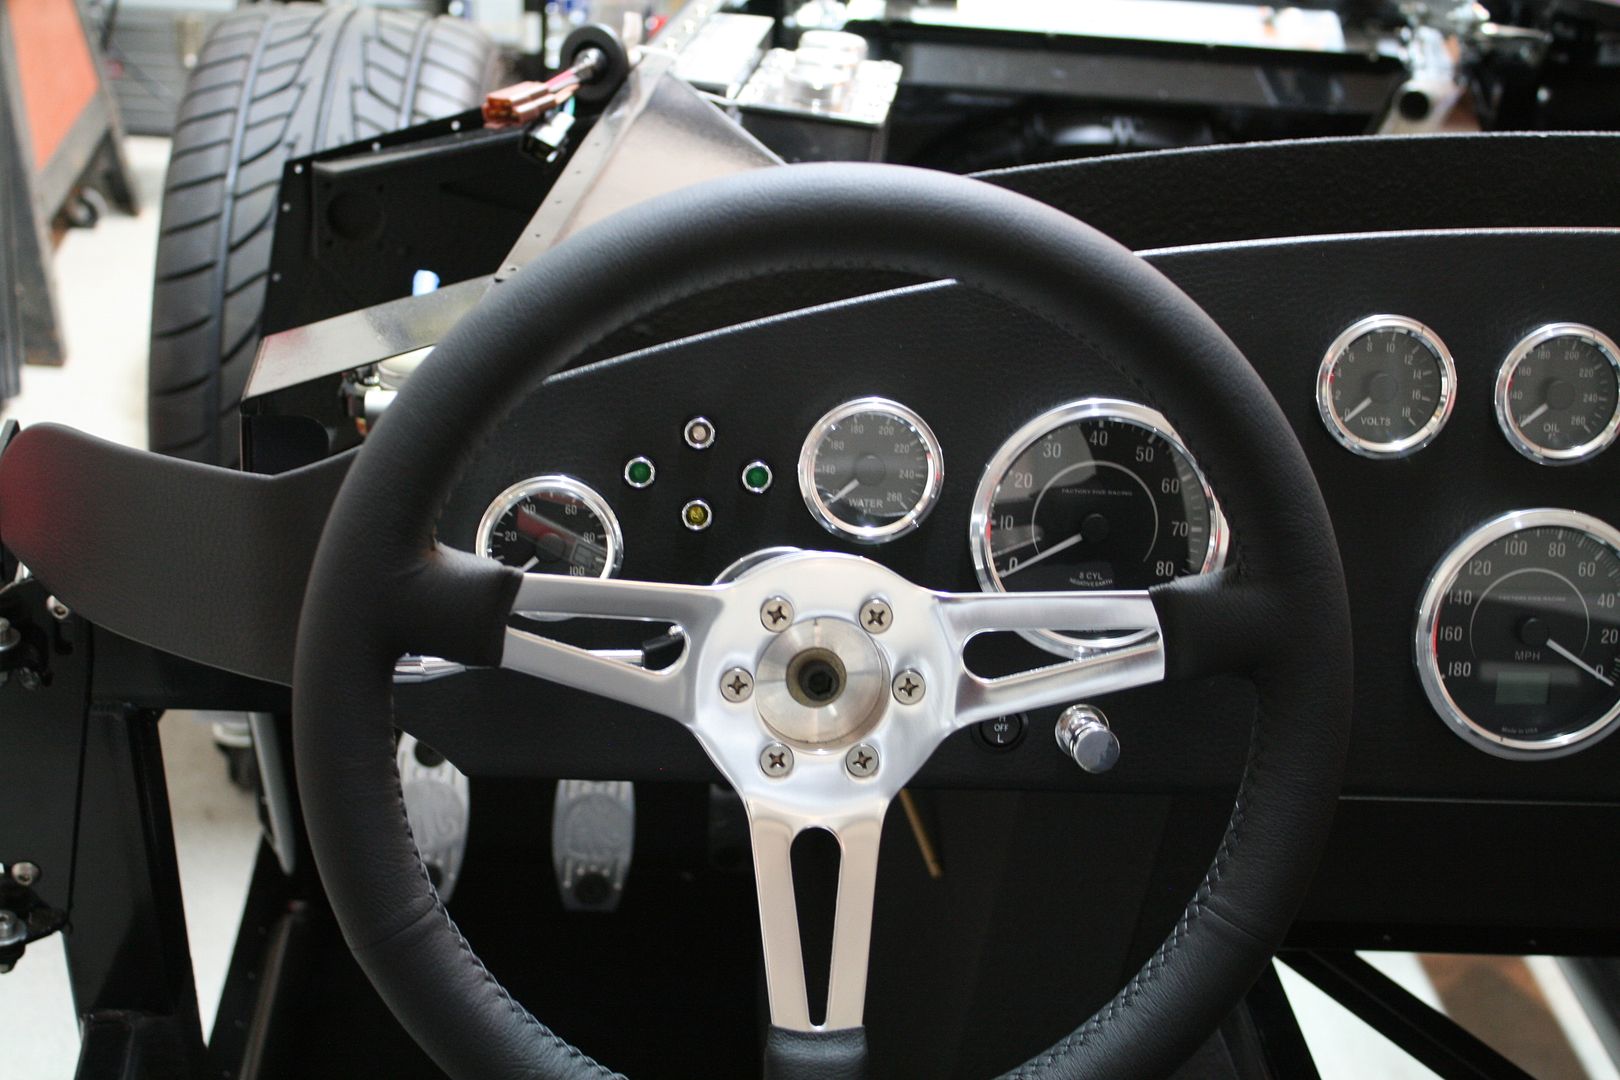
X4 (or whatever). Buy the blank dash and cut it yourself. Not only cheaper, but you can get the gauges exactly where you want them. For me this is huge, and would cause me to make my own cutouts even if the pre-cut version was more reasonable. Make patterns of your instruments and play with the sight lines with the dash in your car, seat, and steering wheel in place. You can stay true to the comp layout and still move the gauges around a little so you can see them better. Especially the tach. It tends to hide behind the steering wheel.
The circle cutter works fine. However, I ended up using a step drill for the smaller stuff and a sabre saw with a very fine metal cutting blade on the larger ones. Also works fine. This is only .040 aluminum. Not steel. It's easy to cut and file/sand if necessary.
My Mk4 build while layout out the dash. This pic isn't exactly in line with the sight line in the seat, but gives the best idea of what I'm talking about.
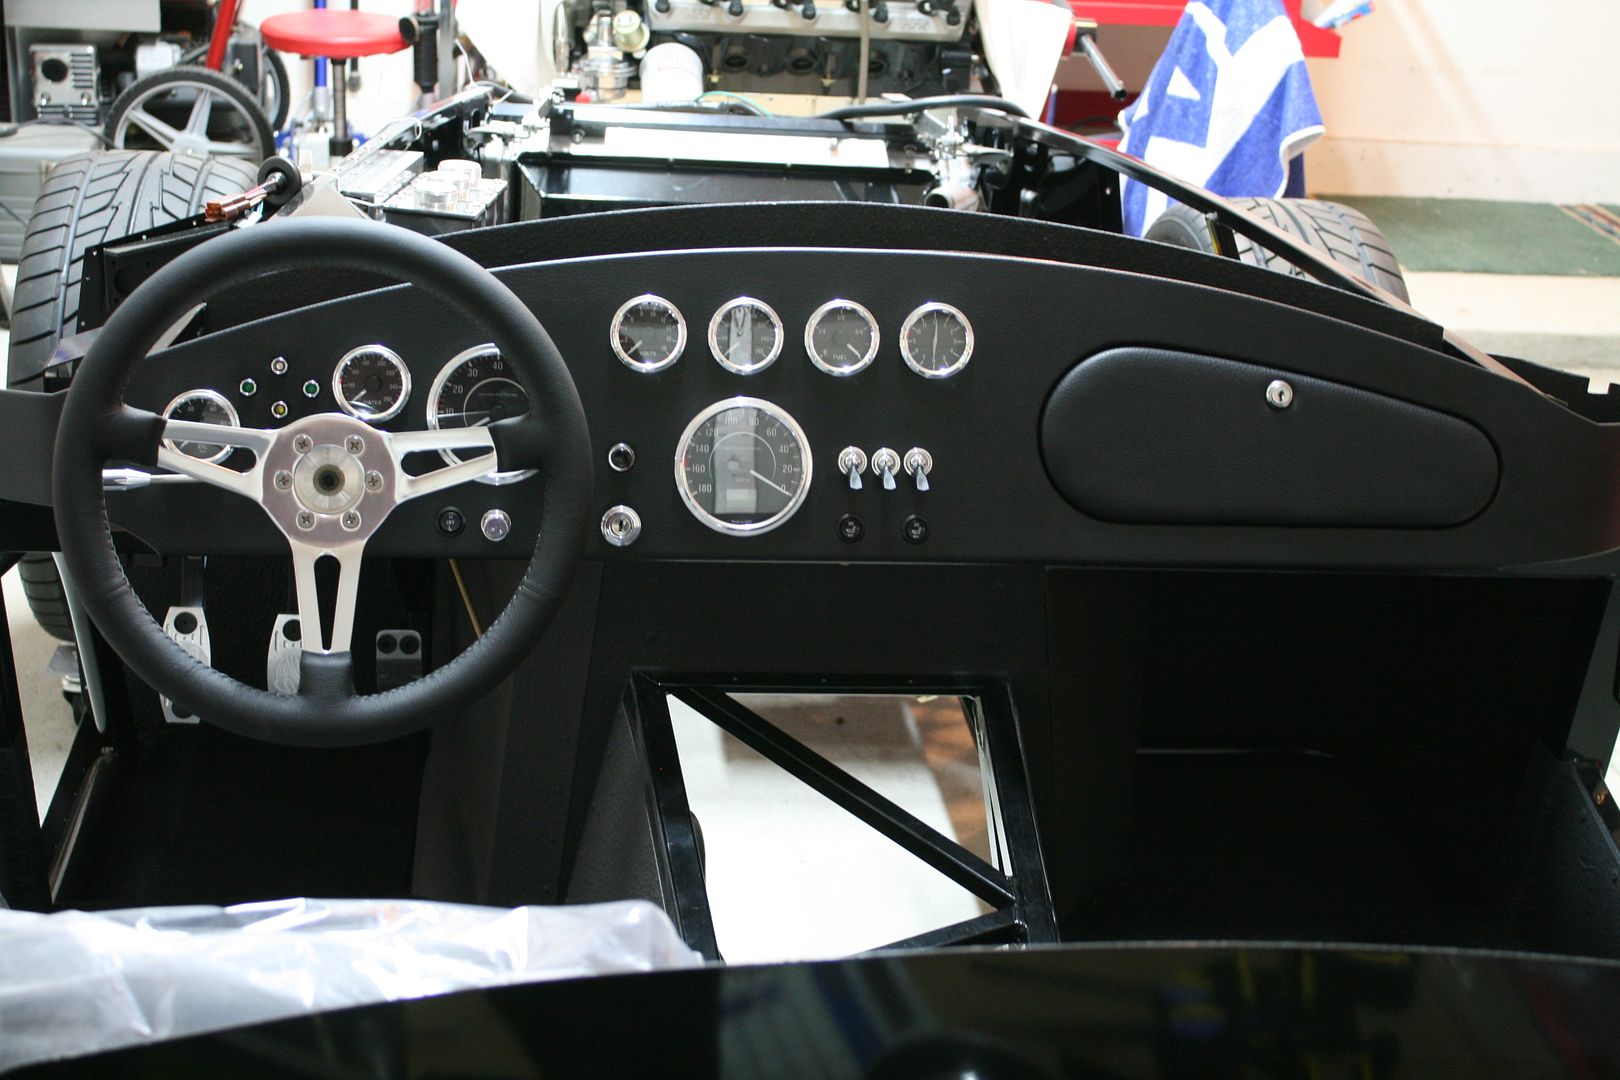
Finished dash:
This is very close to where my eyes would be in the driver's seat. Shows how moving the tach slightly, along with other subtle changes, makes the instruments more visible. But still a comp layout.
Last edited by edwardb; 02-10-2015 at 02:56 PM.
Build 1: Mk3 Roadster #5125. Sold 11/08/2014.
Build 2: Mk4 Roadster #7750. Sold 04/10/2017.
Build Thread
Build 3: Mk4 Roadster 20th Anniversary #8674. Sold 09/07/2020.
Build Thread and
Video.
Build 4: Gen 3 Type 65 Coupe #59. Gen 3 Coyote. Legal 03/04/2020.
Build Thread and
Video
Build 5: 35 Hot Rod Truck #138. LS3 and 4L65E auto. Rcvd 01/05/2021. Legal 04/20/2023.
Build Thread. Sold 11/9/2023.
-
Senior Member


Originally Posted by
edwardb

Make patterns of your instruments and play with the sight lines with the dash in your car, seat, and steering wheel in place. You can stay true to the comp layout and still move the gauges around a little so you can see them better. Especially the tach. It tends to hide behind the steering wheel.
The circle cutter works fine. However, I ended up using a step drill for the smaller stuff and a sabre saw with a very fine metal cutting blade on the larger ones. Also works fine. This is only .040 aluminum. Not steel. It's easy to cut and file/sand if necessary.
Exactly. I also agree that the step drill is the absolute best tool for this job, if you can afford it. I went to buy one and they were crazy expensive. I used a hole saw that was slightly smaller, and then filed out the hole as needed.
Build Blog
#8203, carbed 427W (611 hp), TKO 600, IRS
Delivered: May 27, 2014
Mechanically "Complete": October 1, 2014
-
Senior Member


Originally Posted by
Bren

Exactly. I also agree that the step drill is the absolute best tool for this job, if you can afford it. I went to buy one and they were crazy expensive. I used a hole saw that was slightly smaller, and then filed out the hole as needed.
I only used step drills for the small holes, e.g. switches, indicator lights, etc. I get them at Harbor Freight. Usually ten bucks or so for a two or three piece set. Useful many places in the build. I don't use them on steel much. They seem to wear pretty quickly. But for aluminum, I haven't worn any out yet. Agreed that large diameter name brand ones are quite expensive.
Build 1: Mk3 Roadster #5125. Sold 11/08/2014.
Build 2: Mk4 Roadster #7750. Sold 04/10/2017.
Build Thread
Build 3: Mk4 Roadster 20th Anniversary #8674. Sold 09/07/2020.
Build Thread and
Video.
Build 4: Gen 3 Type 65 Coupe #59. Gen 3 Coyote. Legal 03/04/2020.
Build Thread and
Video
Build 5: 35 Hot Rod Truck #138. LS3 and 4L65E auto. Rcvd 01/05/2021. Legal 04/20/2023.
Build Thread. Sold 11/9/2023.
-
Post Thanks / Like - 0 Thanks, 1 Likes
-
Senior Member


Originally Posted by
edwardb

I only used step drills for the small holes, e.g. switches, indicator lights, etc. I get them at Harbor Freight. Usually ten bucks or so for a two or three piece set. Useful many places in the build. I don't use them on steel much. They seem to wear pretty quickly. But for aluminum, I haven't worn any out yet. Agreed that large diameter name brand ones are quite expensive.
Huh, guess who's headed to Harbor Freight for some step bits...
Build Blog
#8203, carbed 427W (611 hp), TKO 600, IRS
Delivered: May 27, 2014
Mechanically "Complete": October 1, 2014
-
Carl

Like all have said...buy the blank and cut yourself. A couple of tips:
1. I recommend the step bit for the smaller holes but be careful...the aluminum is pretty soft and you can make the hole too big without careful use;
2. I covered the dash in painters tape, used circles of the right diameters and then sat in the car to tweek the layout;
3. The blank dash comes with the hole for the shaft, but if your using the RT turn signal you will to expand the hole.
Have fun!
Mk 4 Roadster
October 25, 2012 - Kit Arrives
April 8, 2013 - Build Starts
August 23, 2015 - Rolling Chassis/Engine & Transmission Installed
March 26, 2016 - Go Cart
-
Search McMaster Carr for adjustable hole saw. That is what I used and it worked great. image.jpg
-
Senior Member


Originally Posted by
edwardb

I only used step drills for the small holes, e.g. switches, indicator lights, etc. I get them at Harbor Freight. Usually ten bucks or so for a two or three piece set. Useful many places in the build. I don't use them on steel much. They seem to wear pretty quickly. But for aluminum, I haven't worn any out yet. Agreed that large diameter name brand ones are quite expensive.
Yup, I use the step drill bits all the time; invaluable.
SOLD 03/2013: MK II #5004: 5.0 EFI: 8.8, 3.55, E303, TW heads, GT40 intake, 24#, 70mm MAF
Ordered MK IV Coyote Complete Kit.
-
25th Anniversary #9772


Originally Posted by
Jeff Kleiner

6 years later, still asking Jeff posts  LOL
LOL
what do you use on carbon fiber?
-
Senior Member


Originally Posted by
toadster

6 years later, still asking Jeff posts

LOL
what do you use on carbon fiber?
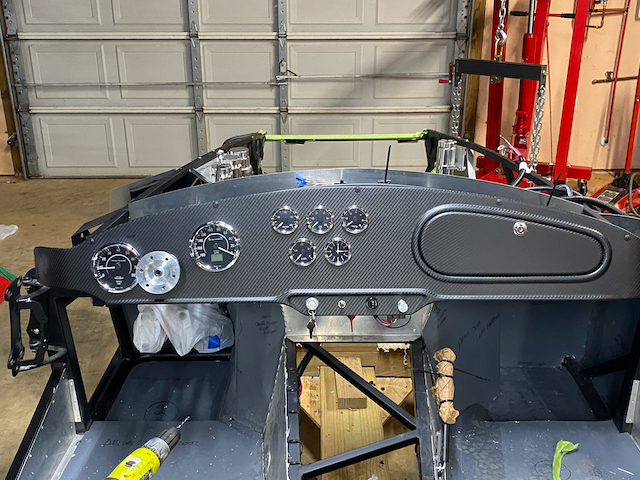
I used the same adjustable hole bit that Jeff linked from amazon. Wear a mask and gloves. CF is no joke to the lungs and feels worse than fiberglass when it gets on your skin. I used a drill press with wood backing on the CF dash. Did not do the competition layout.
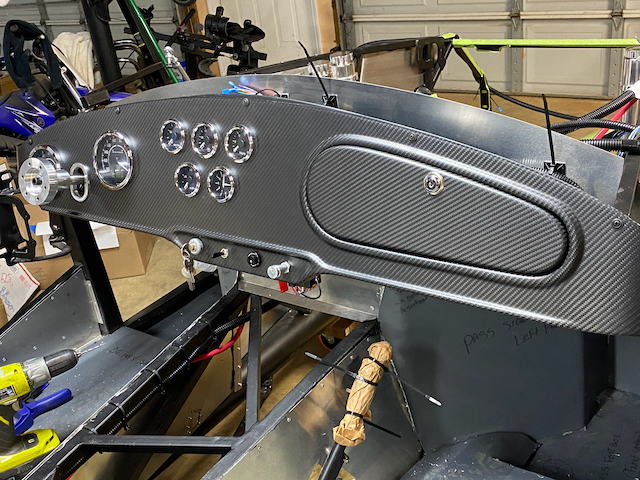
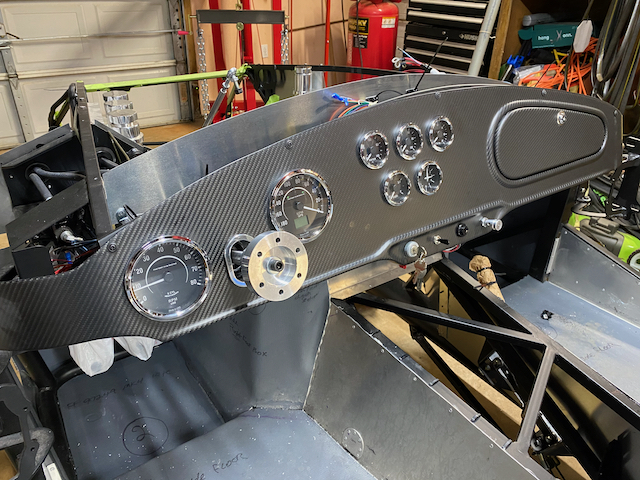
Last edited by nucjd19; 03-25-2021 at 03:59 PM.
FFR MK4 Roadster (9945) complete kit, delivered 12/4/2020, First start and go kart 5/7/2021. Legal 8/14/2021, Paint finished 7/18/2022 (Viking Blue). 347BPE CI, TKO600, Moser 8.8 3link 3.55, Halibrand 17x9 17x10.5, power steering. Carbon Fiber Dash. Carbon Fiber trans tunnel, adjustable Kirkey Lowback Vintage seats, Vintage gauges, RT drop trunk mod, FFmetal drop battery mod and trans tunnel, Forte front sway bar. Forte mechanical throttle linkage, RT gas pedal.
www.covespringsfarm.com
-
Senior Member

I am about to start working on some of the holes with flats on one/both sides of the circle. Any suggestions on how to best make the hole with flats? I’m thinking undersized hole, make flats with flat file and open up rounded portions with rounded file....
Matt
FFR Complete Kit, Coyote, Tremec TKX, 3.73 IRS, power steering, 18" Halibrands, Wilwood brakes, Gas-N pipes + header, Viking blue color
Roadster Build Time Tracker


 Thanks:
  Likes:


 Reply With Quote


 LOL
LOL

