-
01-17-2022, 01:09 PM
#281
I agree with Fman - I'd try to make as much removable as possible for serviceability. I added Molex connectors throughout the dash wiring wherever there wasn't already a connector.
MkIV Roadster build: Gen 2 Coyote, IRS, TKO600. Ordered 10/24/18. Delivered 1/29/19. Engine installed 8/8/21. First start 9/12/21. First go-kart 9/17/21. Off to paint 4/11/22. Back from paint 12/30/22.
Build thread here.
-
Post Thanks / Like - 1 Thanks, 1 Likes
-
01-17-2022, 04:49 PM
#282
Senior Member


Originally Posted by
Fman

Chris, I would definitely make all connections removable, my RT turn signal is broken and won’t hold in right turn position. I have to hold it in place with my finger. I’ll prob just leave it because I don’t want the hassle of removing it. I also took out my clock and replaced with oil temp gauge. You never know what you will have to swap out after your car is finished, IMO the easier to disconnect stuff the better.
Thanks, Travis. I may be too hung up on soldering connections. Knowing myself, I can see how I would (and need!) to get behind the dash to remove/replace/fix something(s). Appreciate your input.

Originally Posted by
JohnK

I agree with Fman - I'd try to make as much removable as possible for serviceability. I added Molex connectors throughout the dash wiring wherever there wasn't already a connector.
Good to hear from you, John. I like your Molex approach (familiar with these from years ago), but need to tap the brakes on the buy-more-tools-bus (just picked up engine crane and leveler, etc.). I can see the wisdom in what you and Travis are recommending. I may just use my faithful Klein crimpers on some of these connections that don't already have connectors, especially if it means in the future I would have to cut the wire to remove a gauge, etc.
Chris
Coupe complete kit. Index. Delivered: 4/22/24.
Build Thread. Coyote Gen 4X. T-56. IRS w/3.55. Wilwoods. PS. HVAC. Side windows.
MK4 Complete kit.
Build Thread Index. Delivered: 10/15/2020. Legal: 7/25/23. Coyote Gen3. TKO600 (0.64 OD). IRS w/3.55. PS. Wilwoods. Sway bars. This build is dedicated to my son, Benjamin.
Build Thread.
-
01-18-2022, 08:05 AM
#283
Senior Member


Originally Posted by
460.465USMC

It's been almost six weeks since I've touched my build. We lost our son Benjamin, Aug. 26. He would have turned 19 last week. The last time we were together he was in our garage to change the oil in his Honda Civic.
Hey Chris,
I am late to this because I am only reading your build thread now, but reading this broke my heart. I hope. you and your family is doing well. I am so sorry for your loss. There's nothing else I can add except everyone who read your post is heartbroken and cannot possibly imagine what you're going through.
-
Post Thanks / Like - 0 Thanks, 1 Likes
-
01-18-2022, 10:49 AM
#284
Senior Member

And just on Friday I was contemplating posting on your build thread with something like, "gee, isn't it about time we get to see a photo of the rat's nest that is the back of dash before you clean it up?" Seems like that's one of those minor milestones for every first-time builder.
I really went down a rat hole with the dash wiring in terms of where to solder, where to crimp, and where to put connectors, so can't provide the clearest advice. I eventually realized the most important part was to get on with it, but be able address servicability where possible. Snipped out all the gauge connectors and soldered directly into the dash harness. That might sound dumb on the face of it. But, I'm confident of my soldered connections, and the worst that happens is that if a gauge fails, I have to snip a few wires and either solder, crimp, or install a connector - all working from the front of dash, without taking it out - before reaching behind the dash to spin the ring that pulls the new gauge in place. Thinking through it, that was a good enough serviceability plan for me. I'm not making that a recommendation, just saying that was how I got myself unstuck ...
JohnK's approach ... like his dash layout and wiring, way cleaner than he gives himself credit for, and I also took notes on his use of connectors in various places. But as with you, I was feeling a bit of tool / material purchase fatigue at the time, and just forged ahead. Now I'm tidying up a few things before putting the dash in place permanently. Just as important is servicability in the engine bay, which Fixit stressed to me. You want to minimize the time you spend leaning over the engine once the body is on and an expensive paint is laid over it. So there I did focus on having a connector to every component which might need to be replaced.
Glad to see you keeping at it, Chris, thanks for the update.
MK4 #7838: IRS 3.55 TrueTrac T5z Dart 347
The drawing is from ~7th grade, mid-1970s
Meandering, leisurely build thread is
here
-
Post Thanks / Like - 2 Thanks, 1 Likes
-
01-18-2022, 07:12 PM
#285
Senior Member


Originally Posted by
zee

Hey Chris,
I am late to this because I am only reading your build thread now, but reading this broke my heart. I hope. you and your family is doing well. I am so sorry for your loss. There's nothing else I can add except everyone who read your post is heartbroken and cannot possibly imagine what you're going through.
Thank you for your kind words and concern, Zee. It's very appreciated.
Chris
Coupe complete kit. Index. Delivered: 4/22/24.
Build Thread. Coyote Gen 4X. T-56. IRS w/3.55. Wilwoods. PS. HVAC. Side windows.
MK4 Complete kit.
Build Thread Index. Delivered: 10/15/2020. Legal: 7/25/23. Coyote Gen3. TKO600 (0.64 OD). IRS w/3.55. PS. Wilwoods. Sway bars. This build is dedicated to my son, Benjamin.
Build Thread.
-
01-18-2022, 07:26 PM
#286
Senior Member


Originally Posted by
John Ibele

And just on Friday I was contemplating posting on your build thread with something like, "gee, isn't it about time we get to see a photo of the rat's nest that is the back of dash before you clean it up?" Seems like that's one of those minor milestones for every first-time builder.
I really went down a rat hole with the dash wiring in terms of where to solder, where to crimp, and where to put connectors, so can't provide the clearest advice. I eventually realized the most important part was to get on with it, but be able address servicability where possible. Snipped out all the gauge connectors and soldered directly into the dash harness. That might sound dumb on the face of it. But, I'm confident of my soldered connections, and the worst that happens is that if a gauge fails, I have to snip a few wires and either solder, crimp, or install a connector - all working from the front of dash, without taking it out - before reaching behind the dash to spin the ring that pulls the new gauge in place. Thinking through it, that was a good enough serviceability plan for me. I'm not making that a recommendation, just saying that was how I got myself unstuck ...
JohnK's approach ... like his dash layout and wiring, way cleaner than he gives himself credit for, and I also took notes on his use of connectors in various places. But as with you, I was feeling a bit of tool / material purchase fatigue at the time, and just forged ahead. Now I'm tidying up a few things before putting the dash in place permanently. Just as important is servicability in the engine bay, which Fixit stressed to me. You want to minimize the time you spend leaning over the engine once the body is on and an expensive paint is laid over it. So there I did focus on having a connector to every component which might need to be replaced.
Glad to see you keeping at it, Chris, thanks for the update.
Hi John. Thanks for dropping in! I made good progress yesterday at Camp Kitchen Table. Ended up soldering most connections on the cut end wire side of the RF weatherpacks. However, I made sure there is a connector somewhere in each main circuit for easy disconnect if I need to remove the entire dash. I'm >95% done with this task, and ended up with only the RT turn signal wirings with push-on terminals. Everything else disconnects from either the main 10 pin RF harness weatherpacks, or by a connector at the individual gauge/component.
Great point about spinning the ring to get access to the rear of a gauge. Good reason to leave just a bit of slack to be able to pull the gauge through from the front.
I couldn't agree more on how clean JohnK's wiring looks on the backside (and elsewhere for that matter!). He sets the bar high!
On to getting the dash connected so I can begin checking these circuits.
Chris
Coupe complete kit. Index. Delivered: 4/22/24.
Build Thread. Coyote Gen 4X. T-56. IRS w/3.55. Wilwoods. PS. HVAC. Side windows.
MK4 Complete kit.
Build Thread Index. Delivered: 10/15/2020. Legal: 7/25/23. Coyote Gen3. TKO600 (0.64 OD). IRS w/3.55. PS. Wilwoods. Sway bars. This build is dedicated to my son, Benjamin.
Build Thread.
-
Post Thanks / Like - 1 Thanks, 0 Likes
 JohnK
JohnK thanked for this post
-
01-18-2022, 08:13 PM
#287
You guys are very kind. Thank you. I'm just a first-time builder figuring this out as I go along. 
MkIV Roadster build: Gen 2 Coyote, IRS, TKO600. Ordered 10/24/18. Delivered 1/29/19. Engine installed 8/8/21. First start 9/12/21. First go-kart 9/17/21. Off to paint 4/11/22. Back from paint 12/30/22.
Build thread here.
-
Post Thanks / Like - 0 Thanks, 2 Likes
-
01-31-2022, 11:36 PM
#288
Senior Member

Update on my dimmer/LED dash light issue. I chimed in on this same issue on a recent thread posted by vtollomk4, so apologies for the duplication: Vintage Gauges and Wiring. Wanted to post here if for no other reason than for my own future reference.
I measured the voltage output at the white "Dash Lights" wire on pin 2 of the headlight switch using my Fluke multimeter. The change in voltage between full CCW (just before courtesy light click) and full CW is less than 0.01 volts. Not exactly a usable voltage variance. My gauge lights are full bright. They do not shut off until I turn off the headlights.
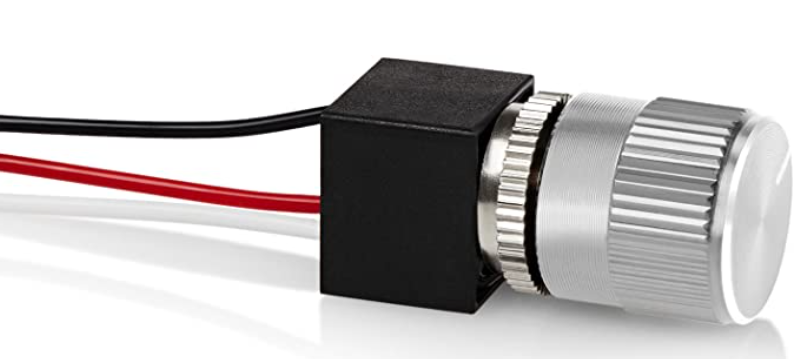
I'm going to try this dimmer per a suggestion from Papa. I'm going with the version seen below, but it's also offered with a black knob, and fits in the same size hole as the gauge programming button--important for me as I already purchased (later returned) the Speedhut dimmer kit, and drilled the 0.265" hole in my dash. Engineered and manufactured in the USA--Bonus!! Worth a shot for $30.
12 Volt DC Dimmer for LED...
Will my wiring ever come to an end? Just when I think I'm getting close, I find more to do. Anyway, I tested each circuit individually using a Power Probe III. No smoke released. Phew! Then, I energized the entire fuse panel from the vehicle battery through the master cutoff. No smoke! And, everything works as expected...except...the gauges won't dim. I hope to have that resolved once the dimmer arrives. It was really cool to see the gauges and flush mount switches light up for the first time. The Speedo even acquired GPS from inside my garage. I wired that up for quick acquisition.
In the meantime, I'm stepping through the tedious task of wire management. What a tangled mess I wove! I ended up eliminating both 10 pin dash connectors, because few wires were left running through them. Also removed both rear harness connectors. I'm not saying I recommend this approach, or that it's better. But after stripping back all the harnesses to remove unused wires, shortening to length, etc. it seemed the cleanest way forward for me. Once I complete this I'll share the obligatory Before and After pictures. (Fair warning to keep expectations low on how pretty it will turn out).
One last item: I upgraded the horn and hazard switches with flush mount switches mounted to the dash, as previously shown. I'm going to upgrade the front running lights with Amber LEDs from Watson Streetworks (~$30). While on their website I saw their push button start with RFID security module. The push button matches my horn and hazard switches, and I'm not overly excited about the supplied ignition switch. I'm sure it's fine and works/has worked in many builds. Their kit on on back order, so I'm going use the kit supplied ignition switch for now, so I can keep moving forward. The Watson unit should be a nice finish to my dash.
Last edited by 460.465USMC; 01-31-2022 at 11:39 PM.
Chris
Coupe complete kit. Index. Delivered: 4/22/24.
Build Thread. Coyote Gen 4X. T-56. IRS w/3.55. Wilwoods. PS. HVAC. Side windows.
MK4 Complete kit.
Build Thread Index. Delivered: 10/15/2020. Legal: 7/25/23. Coyote Gen3. TKO600 (0.64 OD). IRS w/3.55. PS. Wilwoods. Sway bars. This build is dedicated to my son, Benjamin.
Build Thread.
-
Post Thanks / Like - 1 Thanks, 1 Likes
 WIS89
WIS89 thanked for this post
-
01-31-2022, 11:47 PM
#289
Nice work Chris! Hang in there... it eventually ends.  The cleanup of the wires is the most tedious part but it sounds like you're in the home stretch now.
MkIV Roadster build: Gen 2 Coyote, IRS, TKO600. Ordered 10/24/18. Delivered 1/29/19. Engine installed 8/8/21. First start 9/12/21. First go-kart 9/17/21. Off to paint 4/11/22. Back from paint 12/30/22.
Build thread here.
-
Post Thanks / Like - 1 Thanks, 0 Likes
-
02-01-2022, 08:44 AM
#290
Chris,
I'll caution you on the push-button start you're looking at. There have been quite a few (not all) people that have tried to use it and have had issues. Do your homework before committing. Great progress on the build!
Dave
-
Post Thanks / Like - 1 Thanks, 0 Likes
-
02-01-2022, 10:15 AM
#291
I'm not familiar with the Watsons Streetworks push button start module, but I did install the Digital Guard Dawg push button start in mine and it's been working fine so far (granted very limited use so far). They offer many different choices of buttons with their system, including billet buttons like what you currently have. It's definitely pricier than the Watsons Streetworks unit but perhaps a bit more "tried and true".
MkIV Roadster build: Gen 2 Coyote, IRS, TKO600. Ordered 10/24/18. Delivered 1/29/19. Engine installed 8/8/21. First start 9/12/21. First go-kart 9/17/21. Off to paint 4/11/22. Back from paint 12/30/22.
Build thread here.
-
Post Thanks / Like - 0 Thanks, 1 Likes
-
02-01-2022, 10:58 AM
#292
Senior Member

Chris, good update and solid progress. The wiring does indeed seem endless at times, something I can say since I'm in the middle of it myself.
I read the thread you referenced and there was plenty of helpful advice in there, and some less so. LED dimmers are fundamentally different in operation from the dimmer incorporated in the headlight switch knob, which you've already found isn't going to help you. At best it'll get you above and below the operating voltage of the LED's, and thus allow you to turn them on and off. You should be on the right path with the dimmer Papa recommended.
I've been noodling how to best test all my circuits before hooking up the battery. I haven't tested them one at a time as I've progressed, so I've got some work to do when I'm done with wiring and before hooking up the battery. Happy to see an endorsement of the Power Probe, which I was considering purchasing. More on your tips n' tricks may be appreciated, either in your build thread or PM ...
Keep on rockin' !
MK4 #7838: IRS 3.55 TrueTrac T5z Dart 347
The drawing is from ~7th grade, mid-1970s
Meandering, leisurely build thread is
here
-
Post Thanks / Like - 1 Thanks, 0 Likes
-
02-01-2022, 12:34 PM
#293
Senior Member

Hi John. The Power Probe III (PP3) was worth every penny IMHO.
My approach was to inject 12V to the particular circuit at the back side of the fuse panel. For example, to test the turn signals, I injected power on the input to the turn signal flasher. There were a couple of circuits that required power at two locations. So, for those I used an alligator clip lead to introduce 12V at the second location simultaneously. It took a good amount of tracing to make sure when I injected 12V I wasn't unintentionally powering up another circuit at the same time. Tedious, but for me it was worth it because I don't trust myself given the number of connections. Again, not recommending this as a preferred way for others, but it worked for me, i.e. reduced the smoke-release risk factor to an acceptable level.
Your build thread has been so informative to me. If there's some way I can offer any return help, don't hesitate to PM me. Happy to write or give you a call to talk through anything I've done.
Chris
Coupe complete kit. Index. Delivered: 4/22/24.
Build Thread. Coyote Gen 4X. T-56. IRS w/3.55. Wilwoods. PS. HVAC. Side windows.
MK4 Complete kit.
Build Thread Index. Delivered: 10/15/2020. Legal: 7/25/23. Coyote Gen3. TKO600 (0.64 OD). IRS w/3.55. PS. Wilwoods. Sway bars. This build is dedicated to my son, Benjamin.
Build Thread.
-
02-01-2022, 04:36 PM
#294
Senior Member


Originally Posted by
460.465USMC

Hi John. The Power Probe III (PP3) was worth every penny IMHO.
My approach was to inject 12V to the particular circuit at the back side of the fuse panel. For example, to test the turn signals, I injected power on the input to the turn signal flasher. There were a couple of circuits that required power at two locations. So, for those I used an alligator clip lead to introduce 12V at the second location simultaneously. It took a good amount of tracing to make sure when I injected 12V I wasn't unintentionally powering up another circuit at the same time. Tedious, but for me it was worth it because I don't trust myself given the number of connections. Again, not recommending this as a preferred way for others, but it worked for me, i.e. reduced the smoke-release risk factor to an acceptable level.
Your build thread has been so informative to me. If there's some way I can offer any return help, don't hesitate to PM me. Happy to write or give you a call to talk through anything I've done.
Thanks Chris, good for now. PPIII on order, and I'll PM you when I have more questions.
MK4 #7838: IRS 3.55 TrueTrac T5z Dart 347
The drawing is from ~7th grade, mid-1970s
Meandering, leisurely build thread is
here
-
02-06-2022, 11:12 PM
#295
Senior Member

LED Gauge Dimming Solved
I didn't have much time garage time over the last several days--wife and I slipped out of town to celebrate our 30th anniversary. However, while I was away the LED dimmer switch arrived--link noted in previous post. I was able to get it installed this afternoon and...it works! The switch has On/Off functionality as well as LED dimming. There is plenty of fine dimming adjustment, so I should be good-to-go for night driving.
One interesting note: with the knob full CW (full bright) the gauge lights shimmer. The LED halo lighting on the flush mounted horn and hazard switches is also on the gauge lighting circuit. Rotate the knob just a tad CCW and the shimmering stops. I'm guessing full CW is just beyond the adjustment range of happiness for the LEDs? I'm not too concerned about it, as I have full adjustability.
Thanks again to the forum for the advice, and a special Thank You to Papa who sent me the link to the LED dimmer switch.
LED dimmer switch
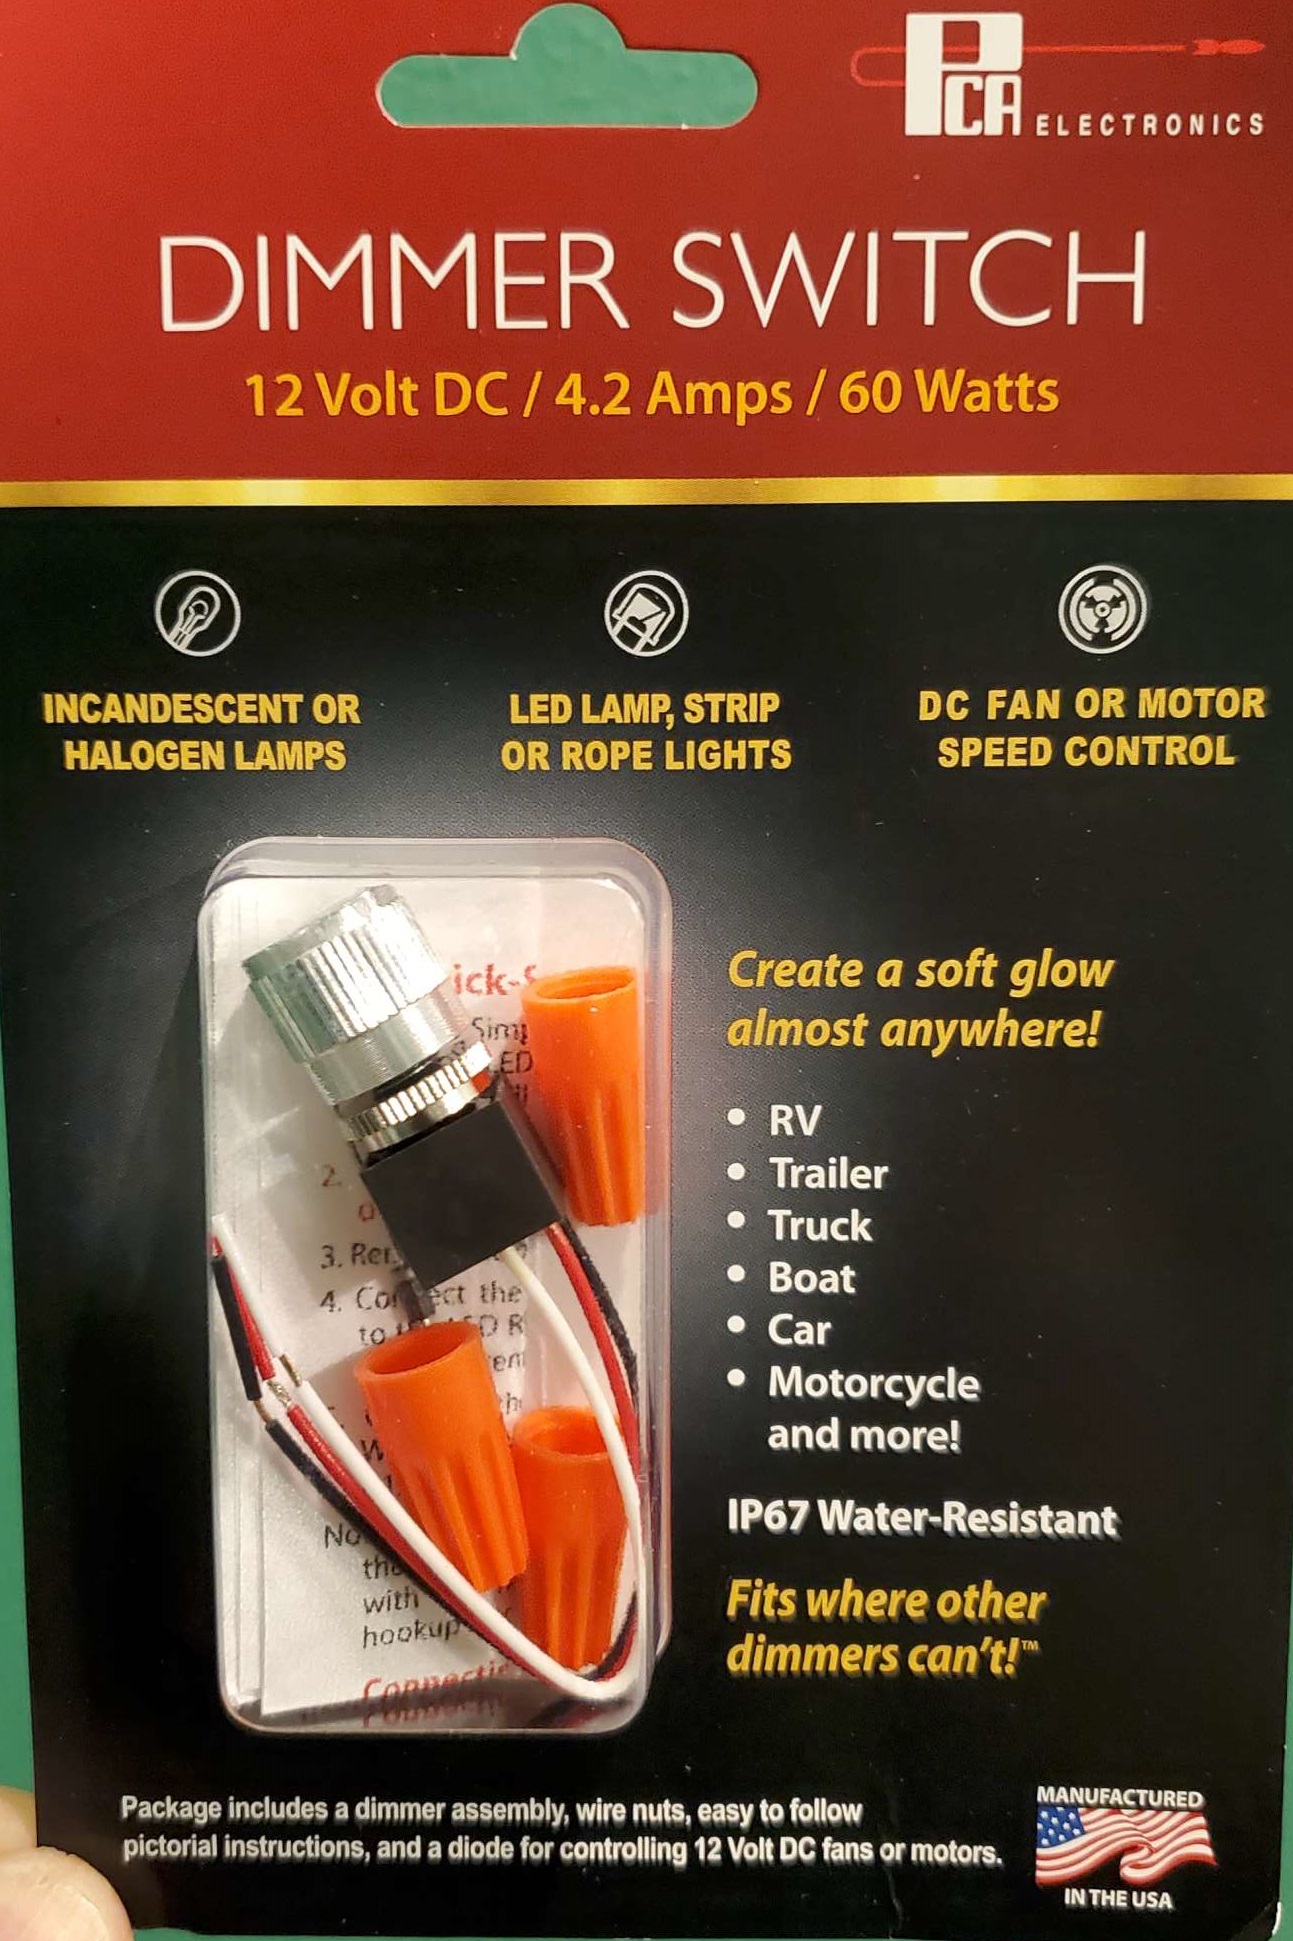
Dimmer switch installed. I'm sure someone will notice the small hole just above the dimmer knob. Before I knew my gauges were LED, as noted above I purchased and installed the standard dimmer kit from Speedhut. The dimmer has a protruding tab to keep it from spinning when the knob is turned. This hole was for that tab. I may come up with a way cover/hide it.
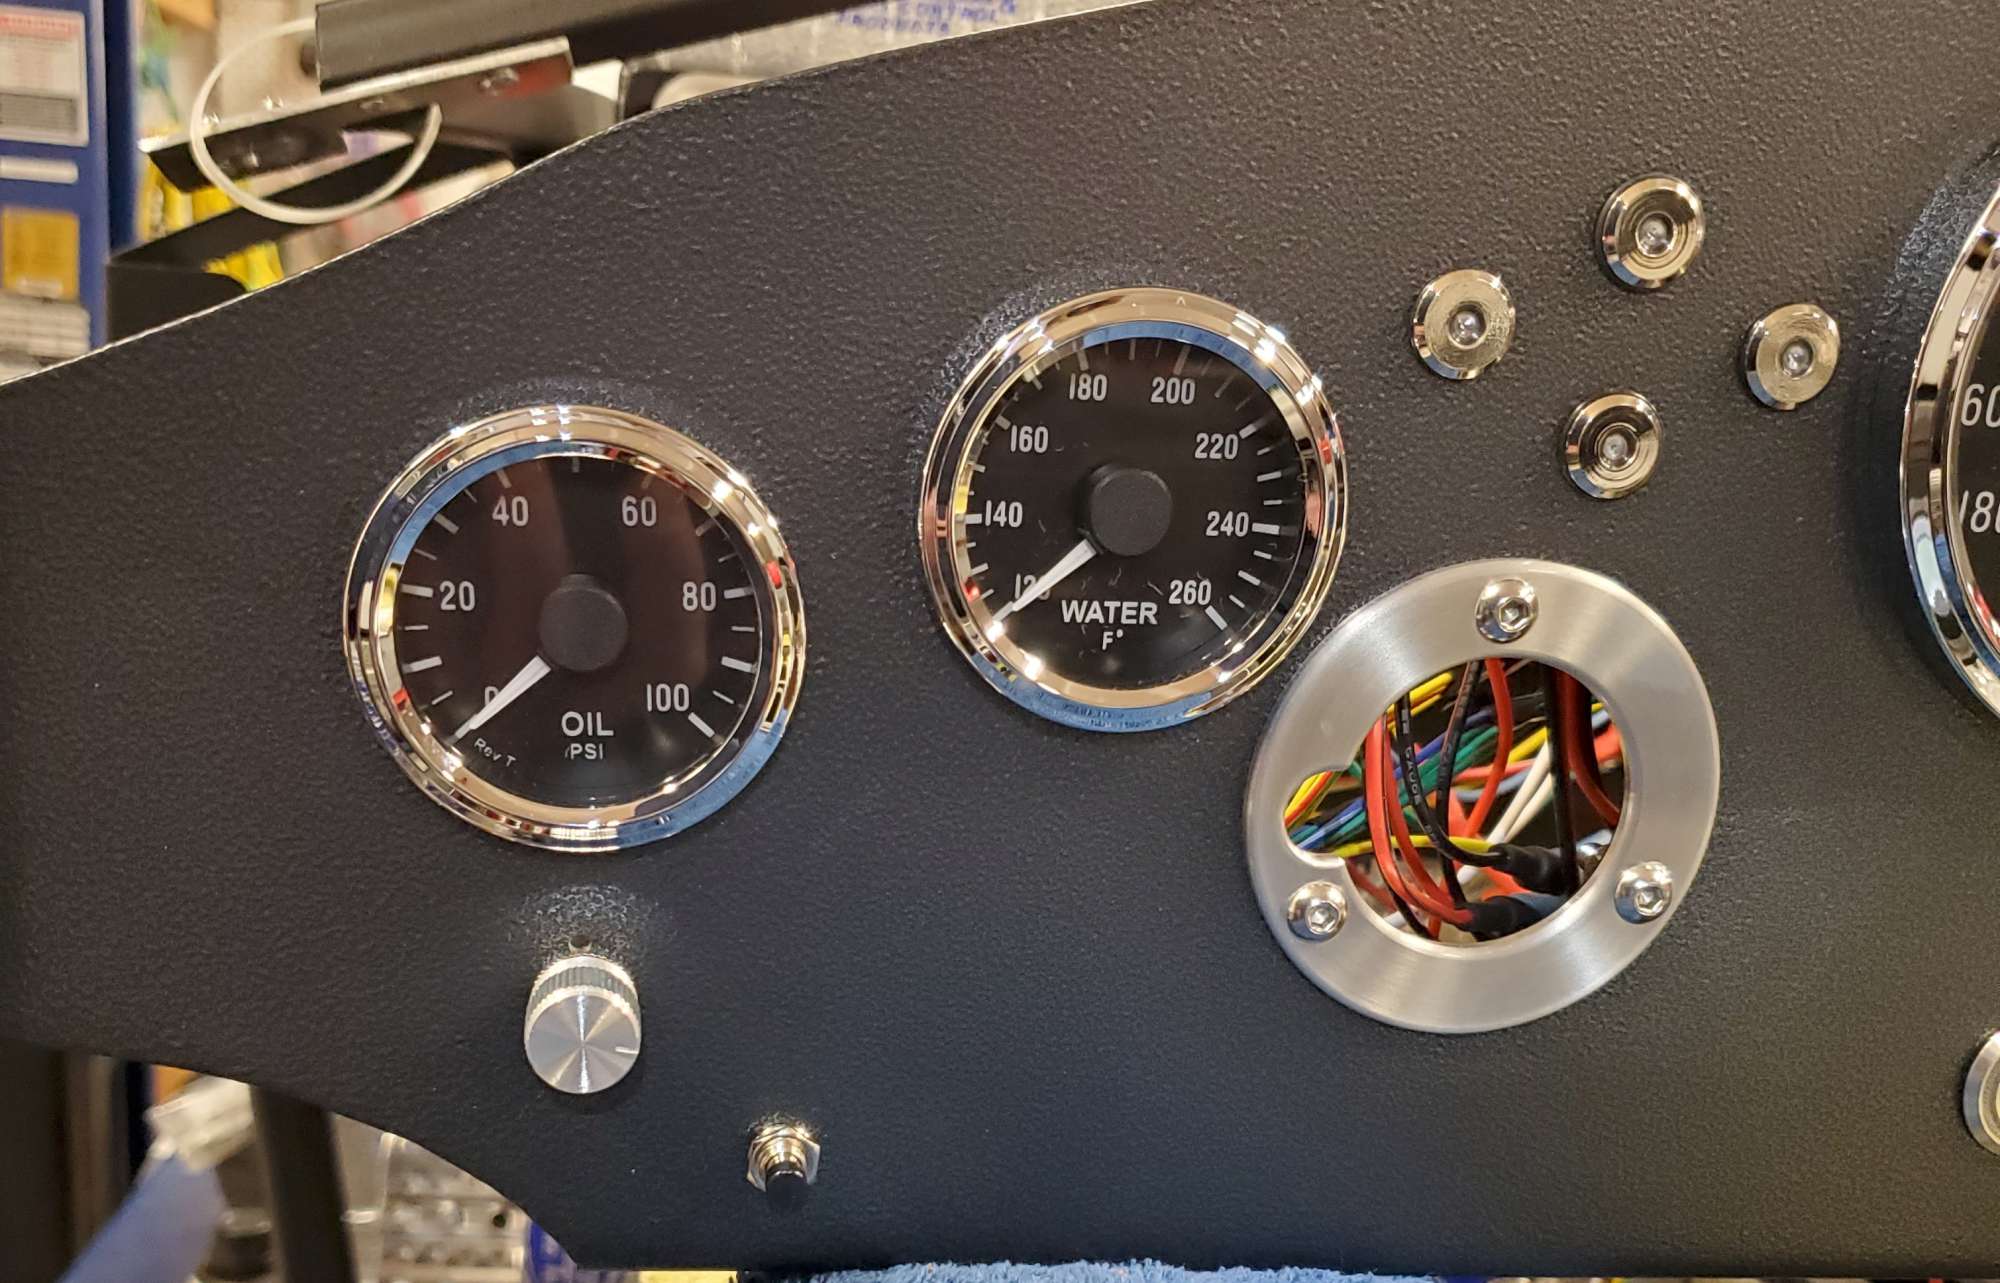
Push-button start update: given some concern from forum members who installed my original choice I opened the wallet a little wider and ordered the "Digital Guard Dawg PBS-I Push Button Start System, Pre 1998". Speedway Motors had it on sale. It comes standard with a flush mount push button with blue LED halo lighting--just the one I wanted. It should be here later this week, so hopefully this weekend I can get it installed and maybe, just maybe I will be closer to the last chapter in dash wiring.
Chris
Coupe complete kit. Index. Delivered: 4/22/24.
Build Thread. Coyote Gen 4X. T-56. IRS w/3.55. Wilwoods. PS. HVAC. Side windows.
MK4 Complete kit.
Build Thread Index. Delivered: 10/15/2020. Legal: 7/25/23. Coyote Gen3. TKO600 (0.64 OD). IRS w/3.55. PS. Wilwoods. Sway bars. This build is dedicated to my son, Benjamin.
Build Thread.
-
Post Thanks / Like - 0 Thanks, 1 Likes
 Fman
Fman liked this post
-
02-07-2022, 11:37 AM
#296
Senior Member

Good deal, glad that problem's solved. I'm thinking the shimmering you see should be solvable, since there shouldn't be any more 'on' than just full duty cycle. Have you tried totally isolating power and ground for that item, just to see if the problem still occurs?
The dash hole ... dang you're honest  Never woulda noticed. But, since you mention it, you're now in a club with (I'm expecting) a very large percentage of the builder community. I'm thinking you'll find a bezel that will make the dimmer knob look even better.
MK4 #7838: IRS 3.55 TrueTrac T5z Dart 347
The drawing is from ~7th grade, mid-1970s
Meandering, leisurely build thread is
here
-
Post Thanks / Like - 0 Thanks, 1 Likes
-
02-08-2022, 11:59 AM
#297
Senior Member

Good idea, John. I could at least eliminate the LED push-buttons as the source of the shimmer. I'll have to double check, but think I would have to cut the connections to the push buttons to isolate the gauges, and then re-solder after testing. Two steps forward, one step back. Ugh!
Chris
Coupe complete kit. Index. Delivered: 4/22/24.
Build Thread. Coyote Gen 4X. T-56. IRS w/3.55. Wilwoods. PS. HVAC. Side windows.
MK4 Complete kit.
Build Thread Index. Delivered: 10/15/2020. Legal: 7/25/23. Coyote Gen3. TKO600 (0.64 OD). IRS w/3.55. PS. Wilwoods. Sway bars. This build is dedicated to my son, Benjamin.
Build Thread.
-
02-15-2022, 08:29 PM
#298
Senior Member

Dash is Complete! (Part 1)
At long last my dash is completely wired and installed. Phew! It's been a long, long journey...all the extra time is self-inflicted due to my own choices. Some of the key choices were:
- Starting with a blank piece of 0.090 aluminum
- Making the dash removable--no visible screws on the face
- Adding a grab handle
- Choosing to powder coat v. vinyl or leather, etc. etc.
But, I finished it! Hard to believe I made it after all this time. The best part is no smoke releases....yet! And, all circuits have been tested (couple exceptions like the fuel pump) and are working.
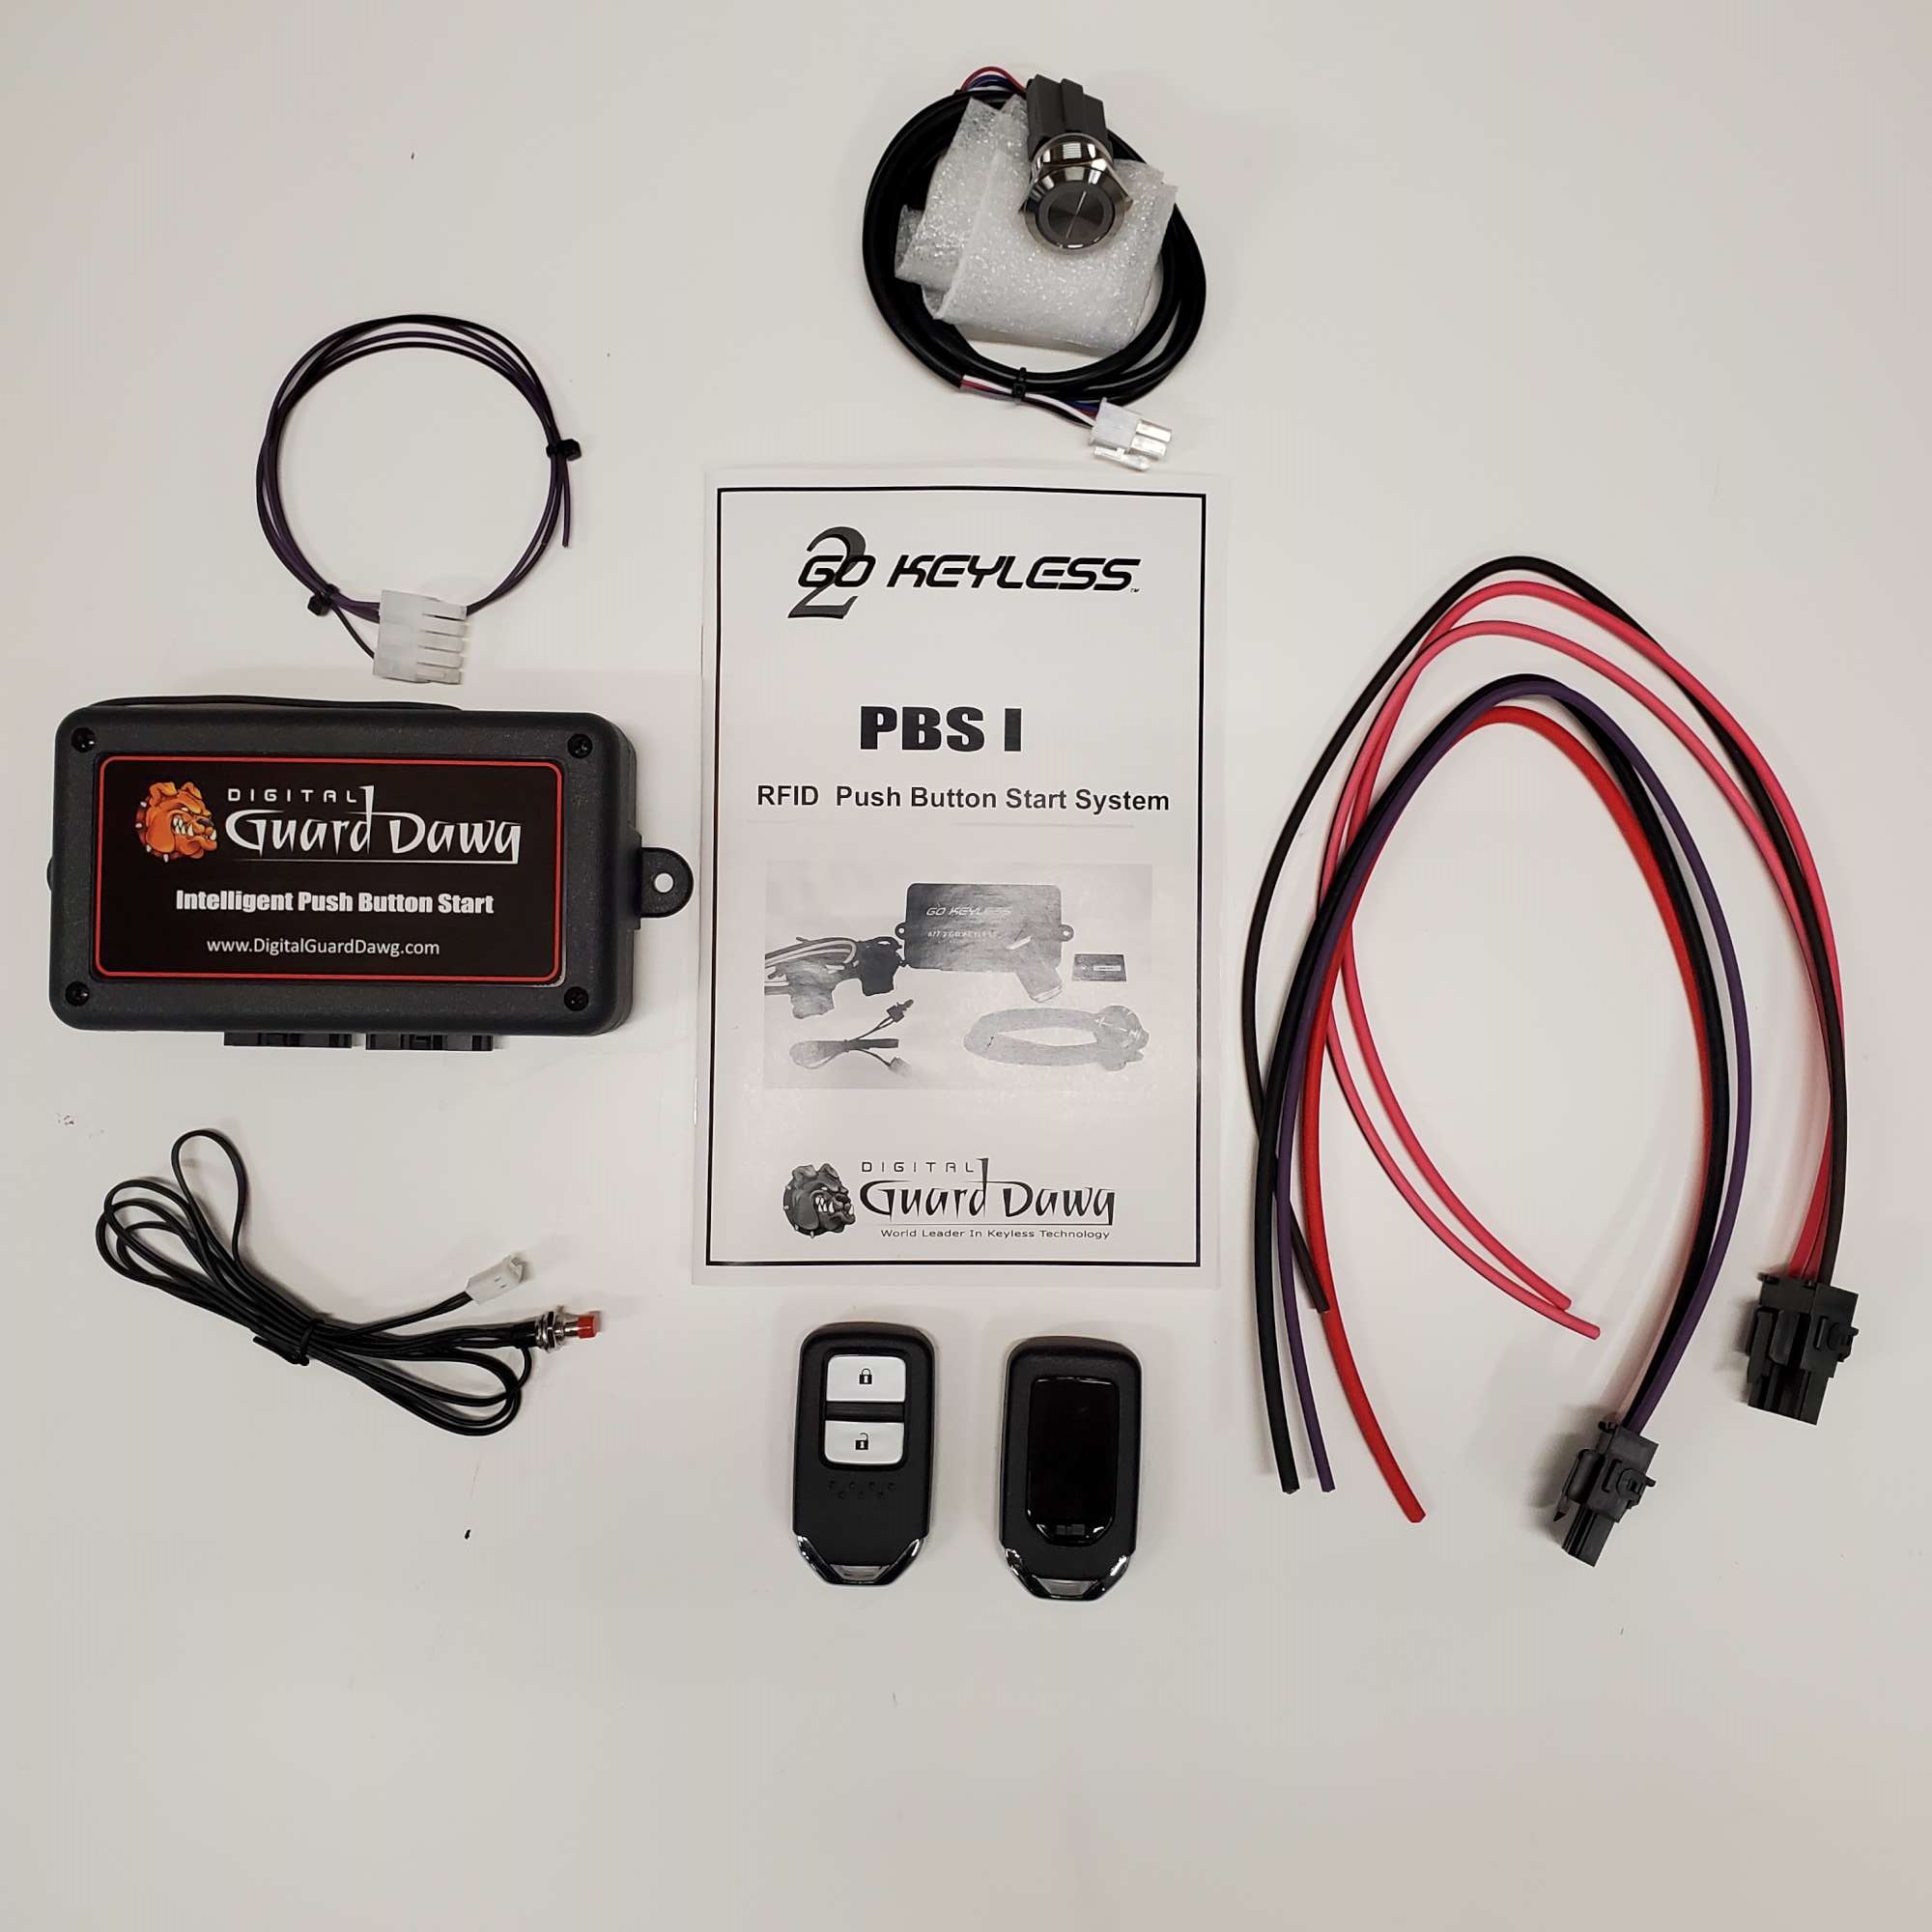
I mentioned in a recent update I decided to go with the Digital Guard Dawg (DGD) push-button start. It's now installed and working. My first impression is this is a quality unit. Even the quality of the FOBs are comparable to the FOBs that come with a modern daily driver.
Here's what came with the PBS-1 version. It has two accessory circuits: I connected one to the RF Accessory circuit, and the second will be used for DRLs in my headlights (more on that in a future post):
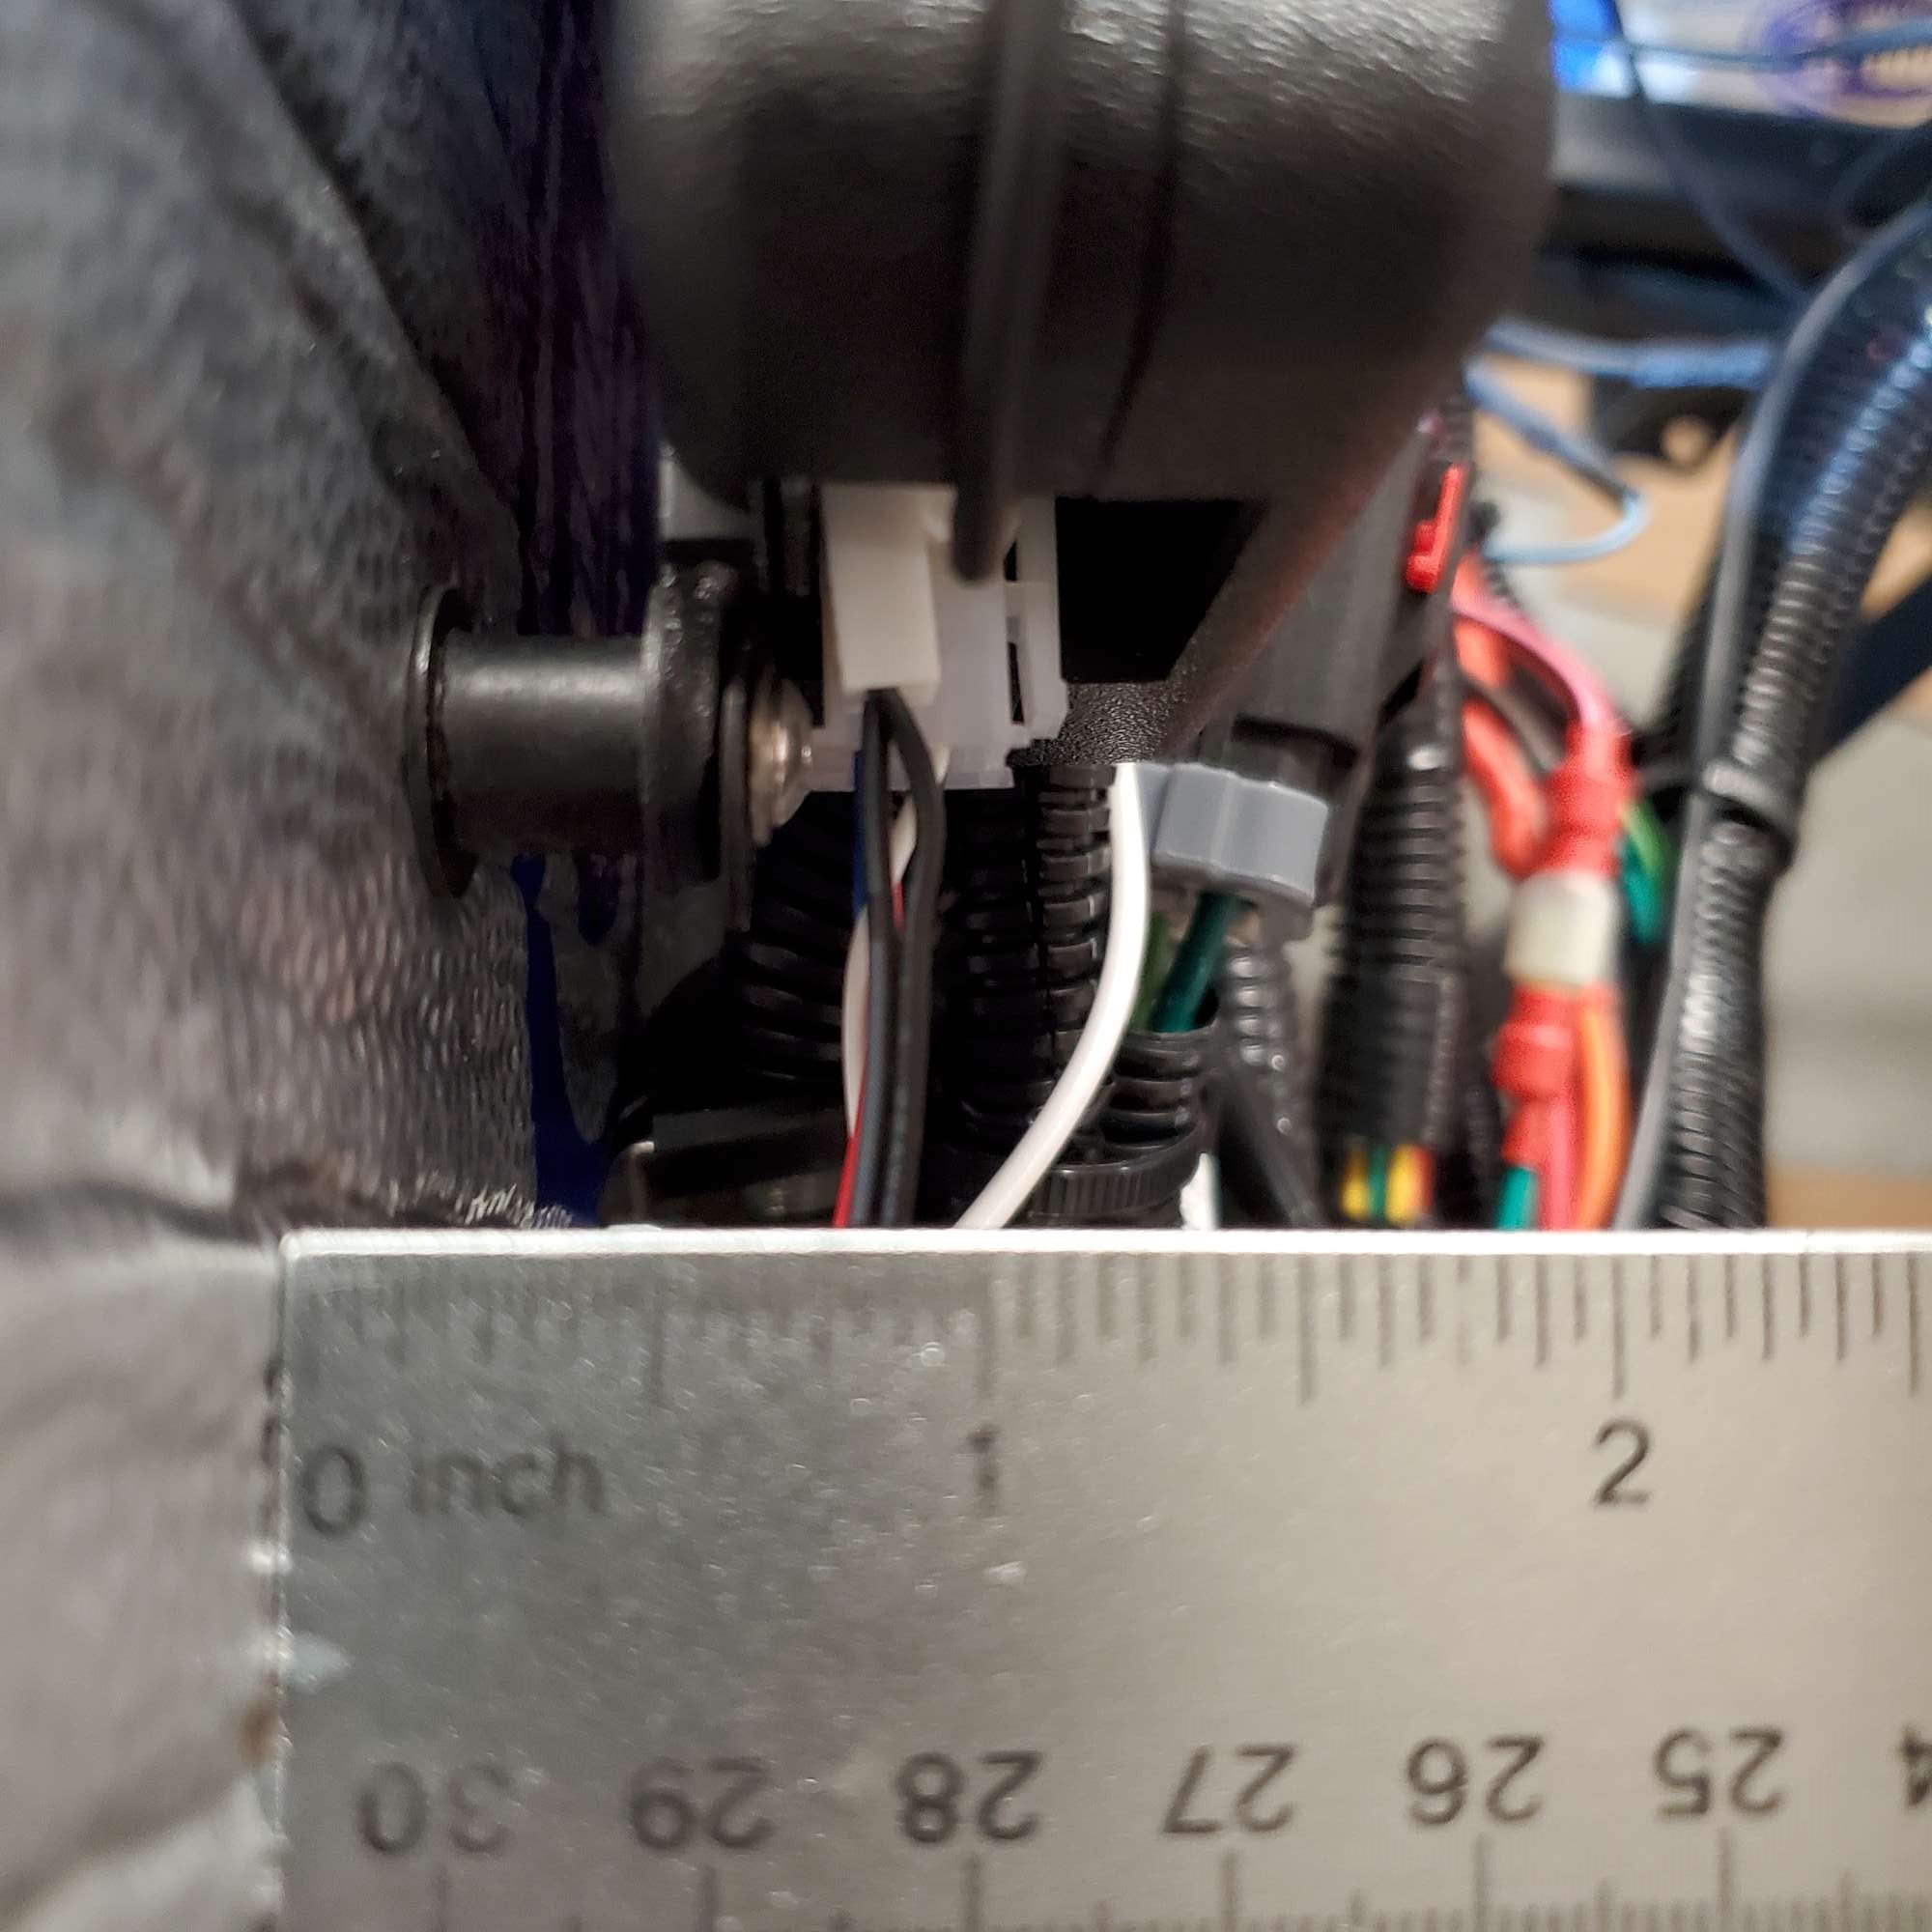
Not knowing how warm the firewall will be with the Thermotec, I added about 1/2" of air gap with spacers between the DGD and the firewall. Could be totally unnecessary, but I like the idea of a safety margin, and I have plenty of space.
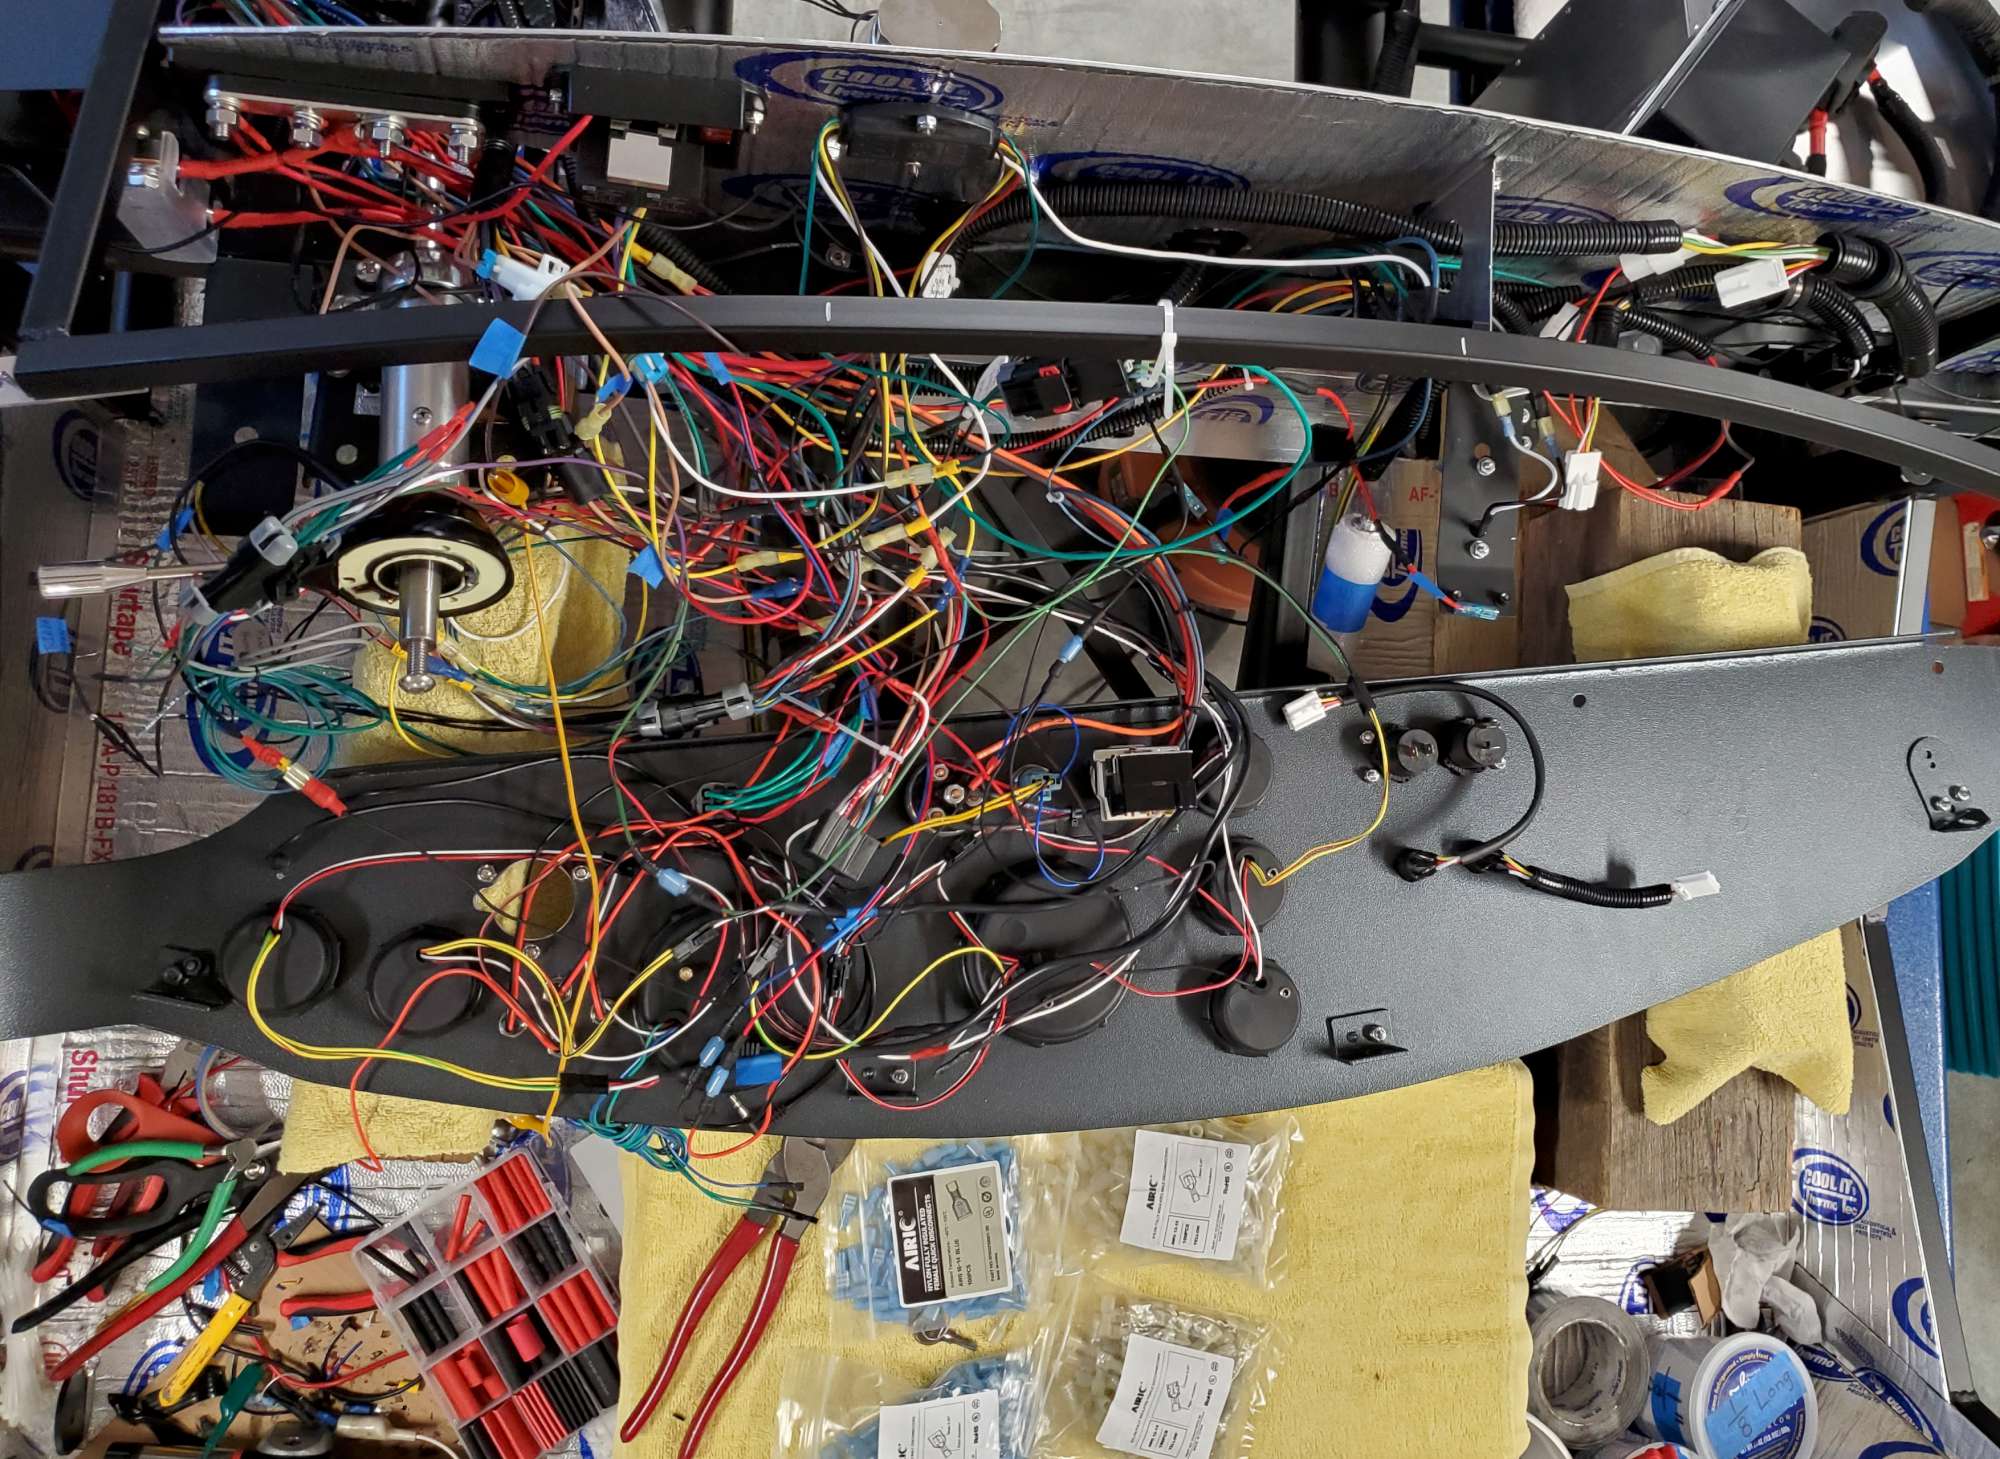
And now...wait for it...the obligatory rats nest photo. I have a few versions of rats nest. This is the final version before wire tidy-up started.
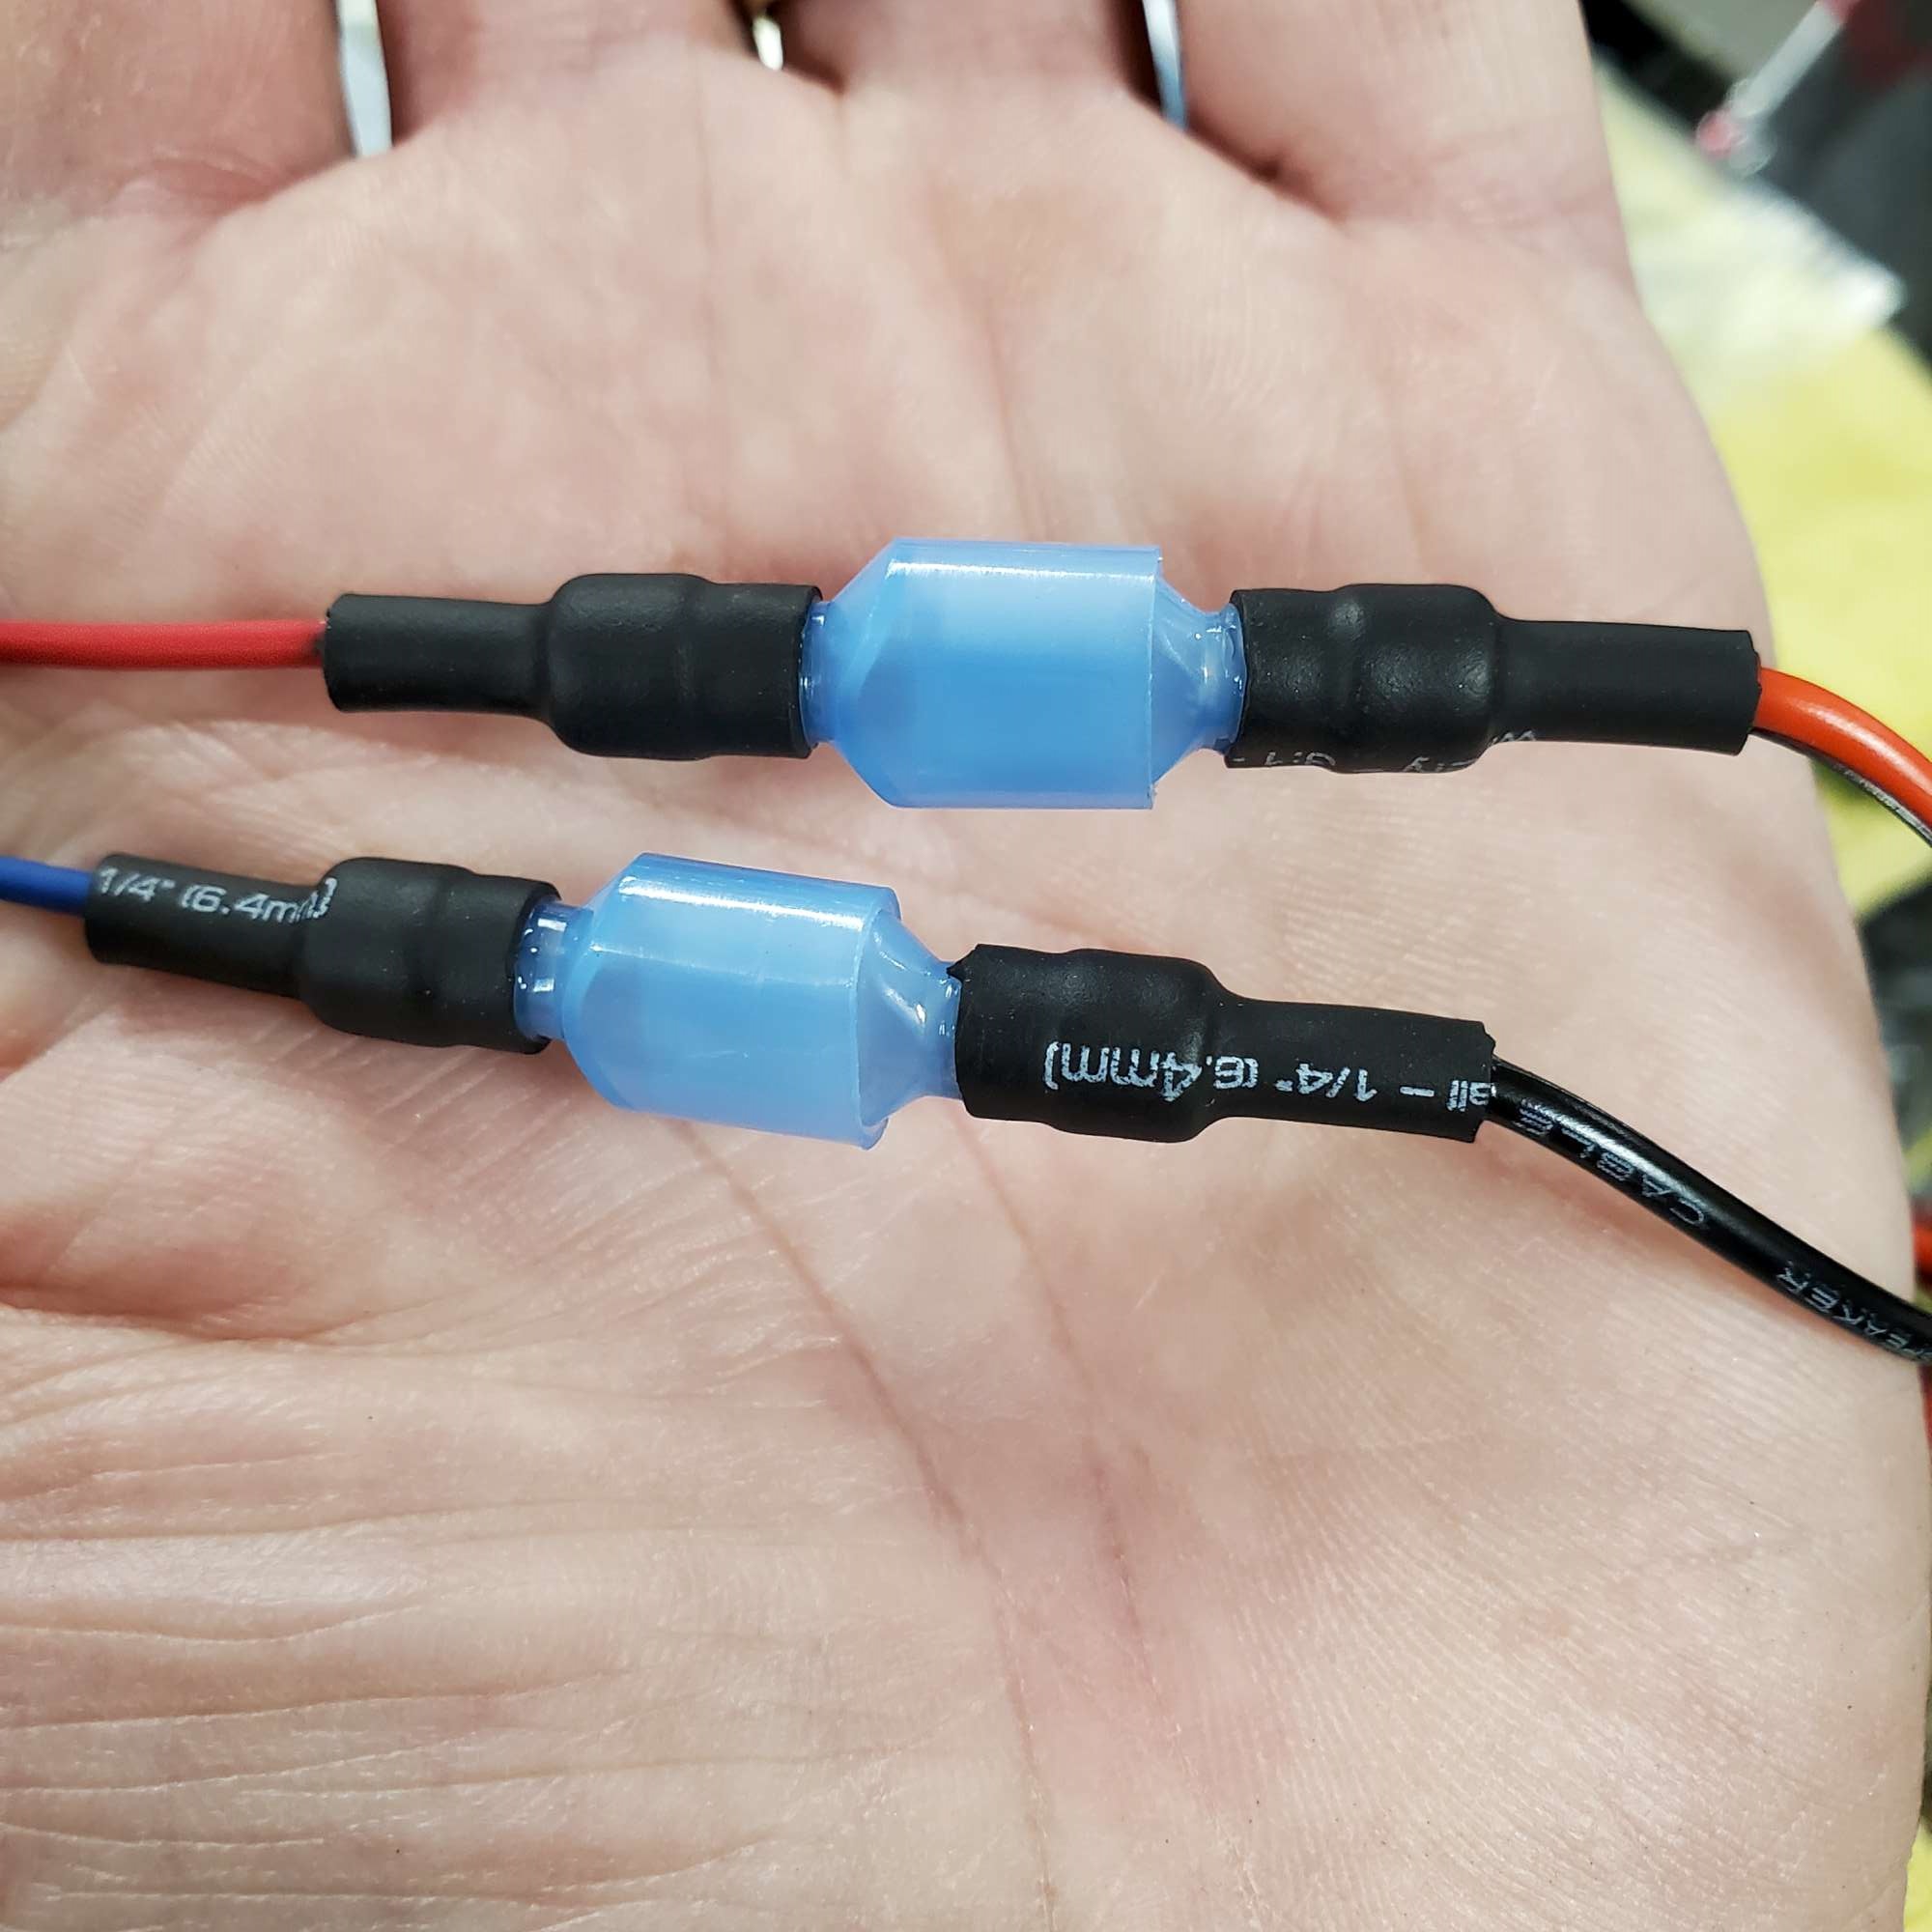
I soldered many of the connections, but some are crimped with nylon push-on terminal connectors like this. I took the advice seriously of several who advised about being able to disconnect for future servicing or changes. Added dual wall adhesive lined shrink tubing for extra protection against accidental contact, and strain relief.
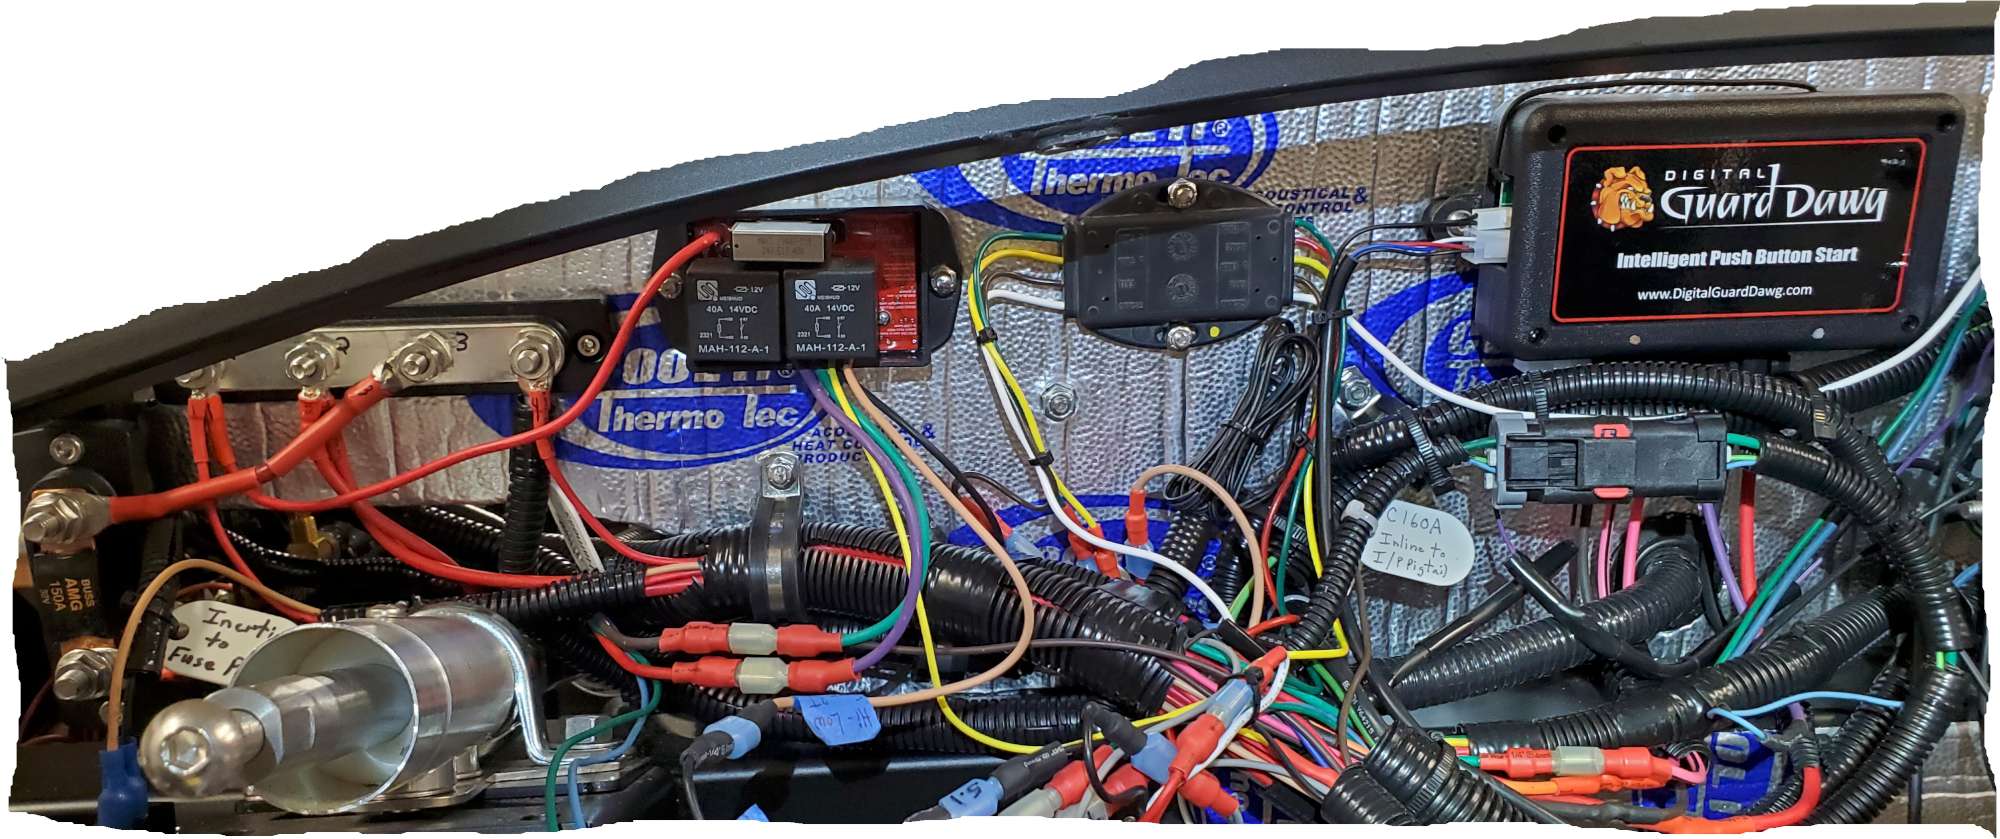
There are builders among us who are wiring artists. I'm not one of them. But, it's functional and the wires are protected. For the clock, I bought a second programming button from Speedhut, which is permanently mounted to the bottom lip of the dash. A second programming button is permanently mounted on the lower left hand side. That one is for the Speedo menus.

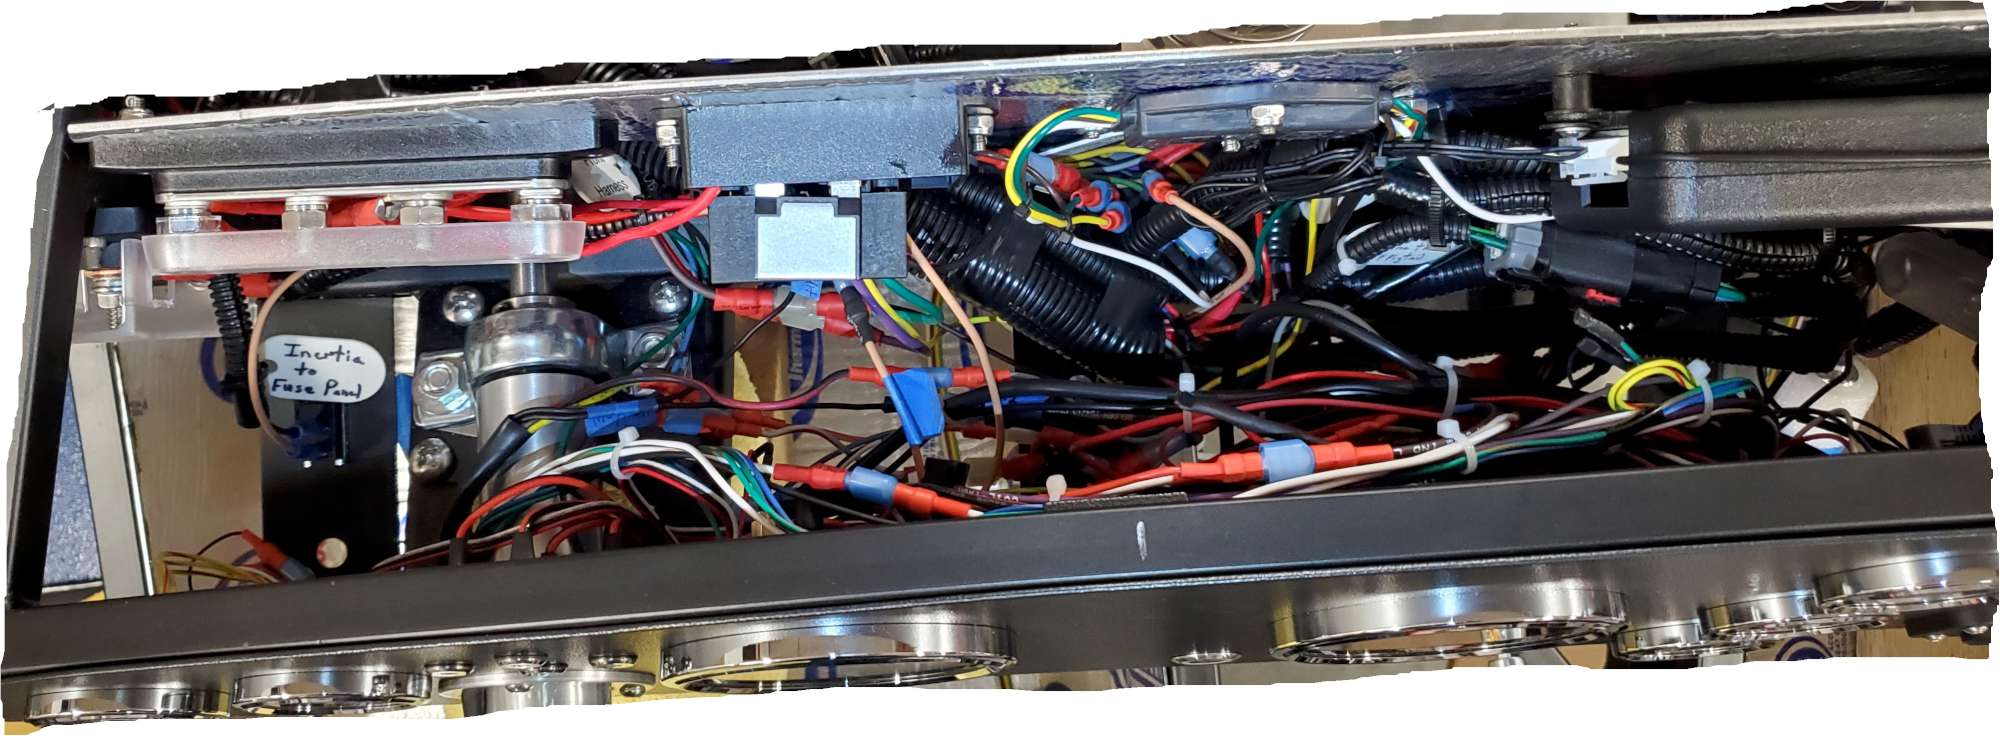
Driver's side layout behind the dash, from left to right:
- 150A Blue Sea Systems (BSS) fused connection to alternator (mounted vertically with cover off for photo)
- +12V bus bar (BSS) - cover off for photo
- Ididit headlight relay (provides flash-to-pass and high/low beam operation with RT turn signal)
- LED tail light converter (comes with kit)
- DGD control module
- Ground bus bar (BSS) mounted to the vertical dash support--shown in previous post
If you're having deja vu, it's because you're familiar with Edwardb's builds. I took many cues from him.
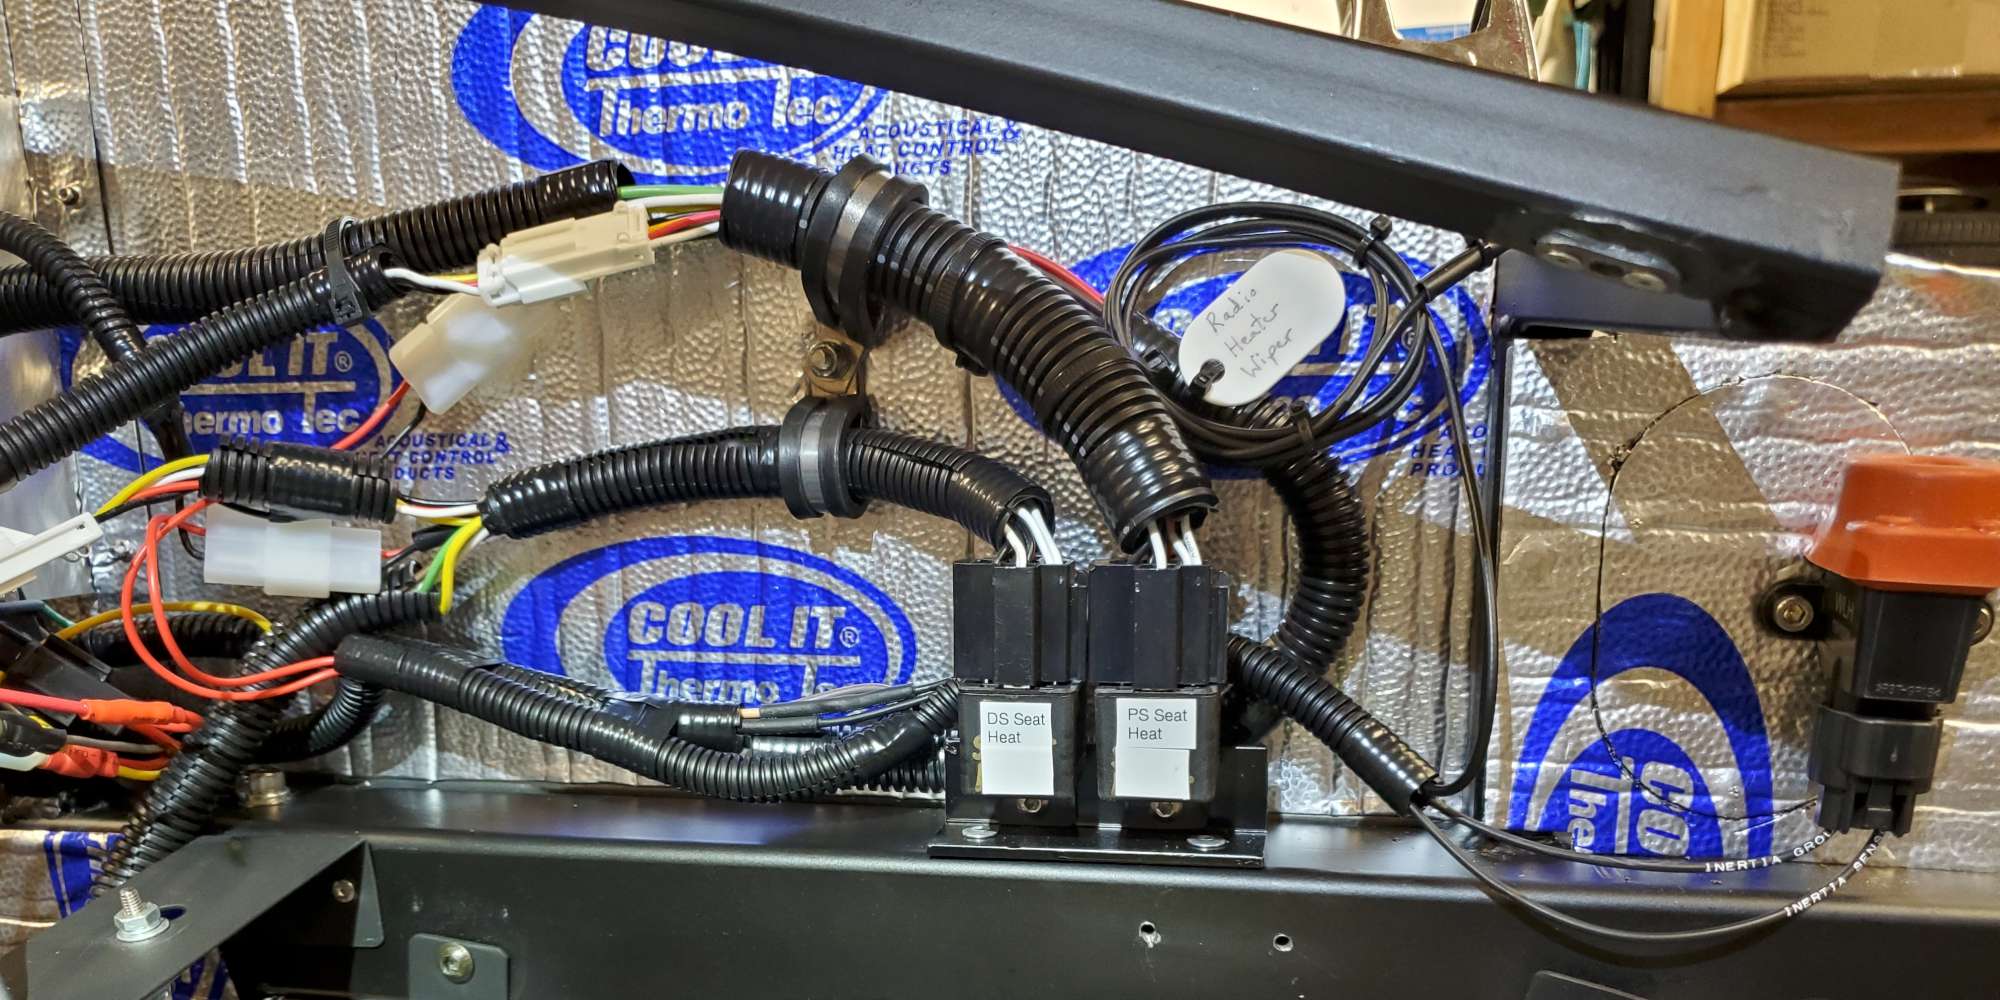
Passenger side layout behind the dash. I mounted the Cobraheat seat heater relays here to a 1" angle aluminum bracket, which required rework of the supplied wiring harness. Extra coax for the GPS antenna is coiled up and secured. The inertia switch on the right. I'm not using the radio, wiper, and heater circuits. So, I left those wires long in case of future use. They are protected with shrink tubing on the ends, and secured in loom behind the Cobraheat loom.
Chris
Coupe complete kit. Index. Delivered: 4/22/24.
Build Thread. Coyote Gen 4X. T-56. IRS w/3.55. Wilwoods. PS. HVAC. Side windows.
MK4 Complete kit.
Build Thread Index. Delivered: 10/15/2020. Legal: 7/25/23. Coyote Gen3. TKO600 (0.64 OD). IRS w/3.55. PS. Wilwoods. Sway bars. This build is dedicated to my son, Benjamin.
Build Thread.
-
Post Thanks / Like - 0 Thanks, 1 Likes
 Papa
Papa liked this post
-
02-15-2022, 08:30 PM
#299
Senior Member

Dash is Complete! (Part 2)
Here is the view behind the dash with it installed. Like everyone says, it's pretty tight.
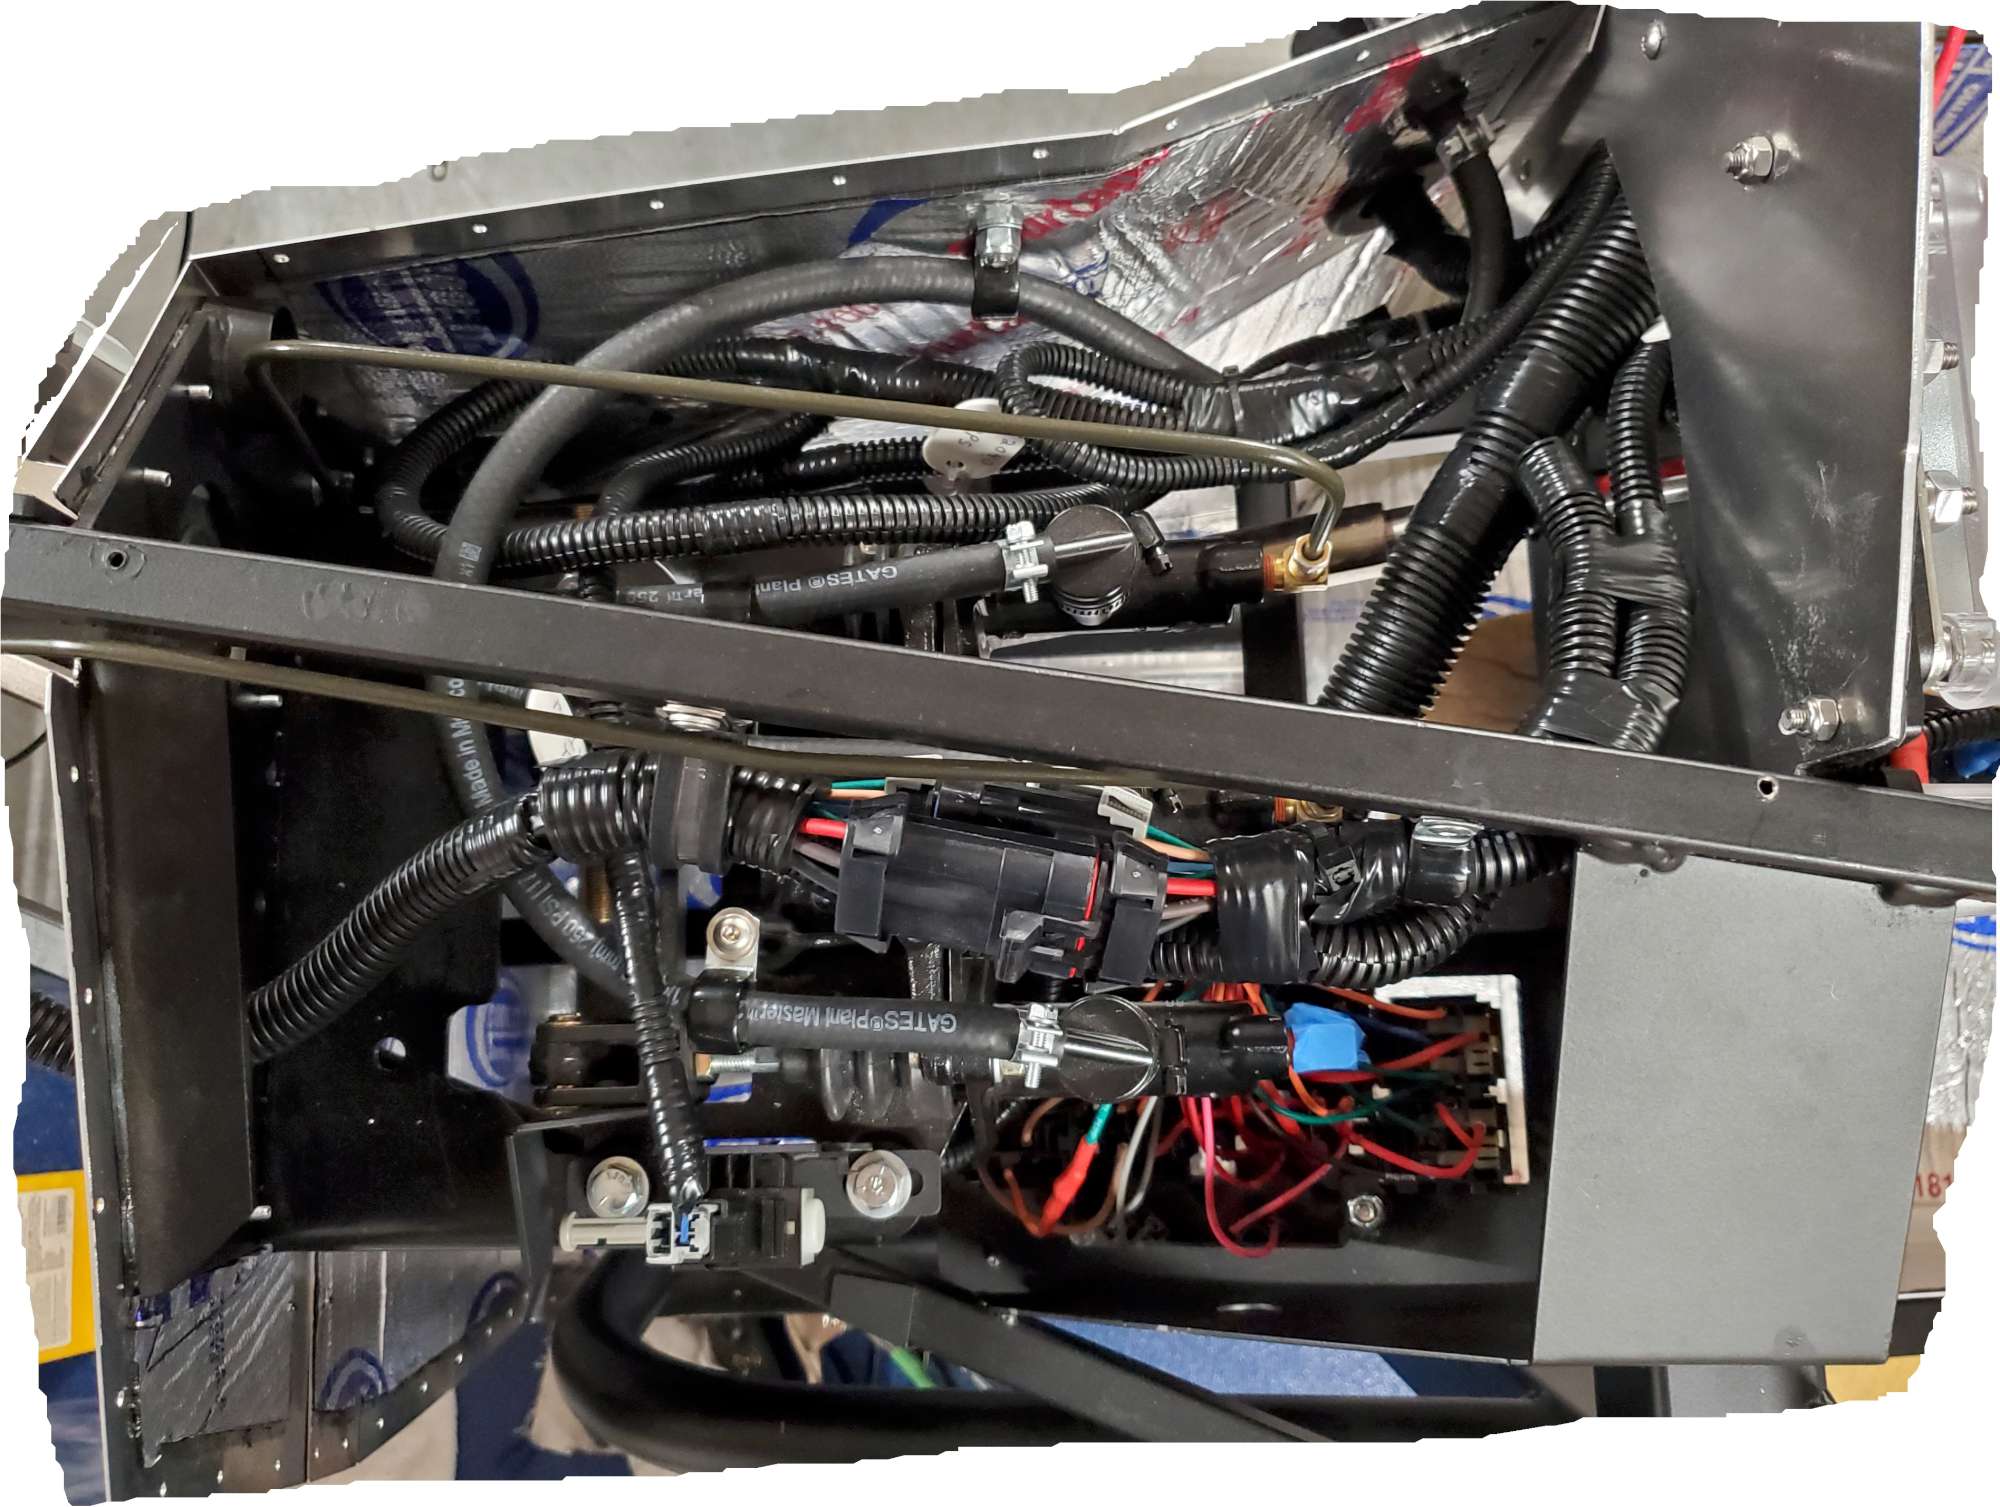
View of driver's side footbox looking down.
And, the dash is in place!
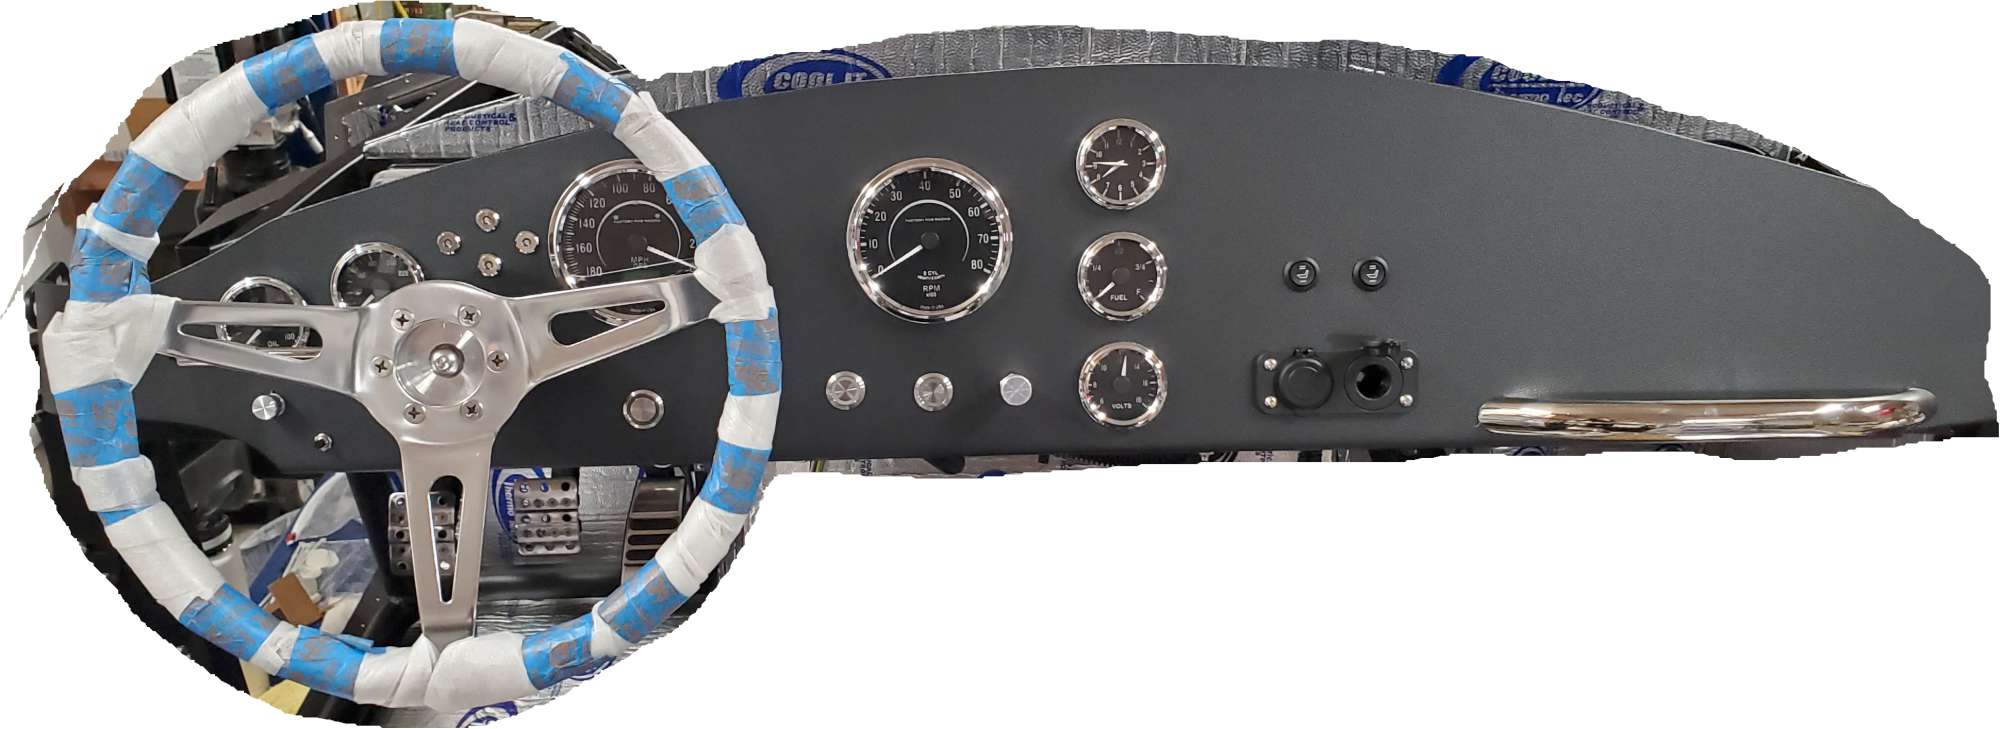
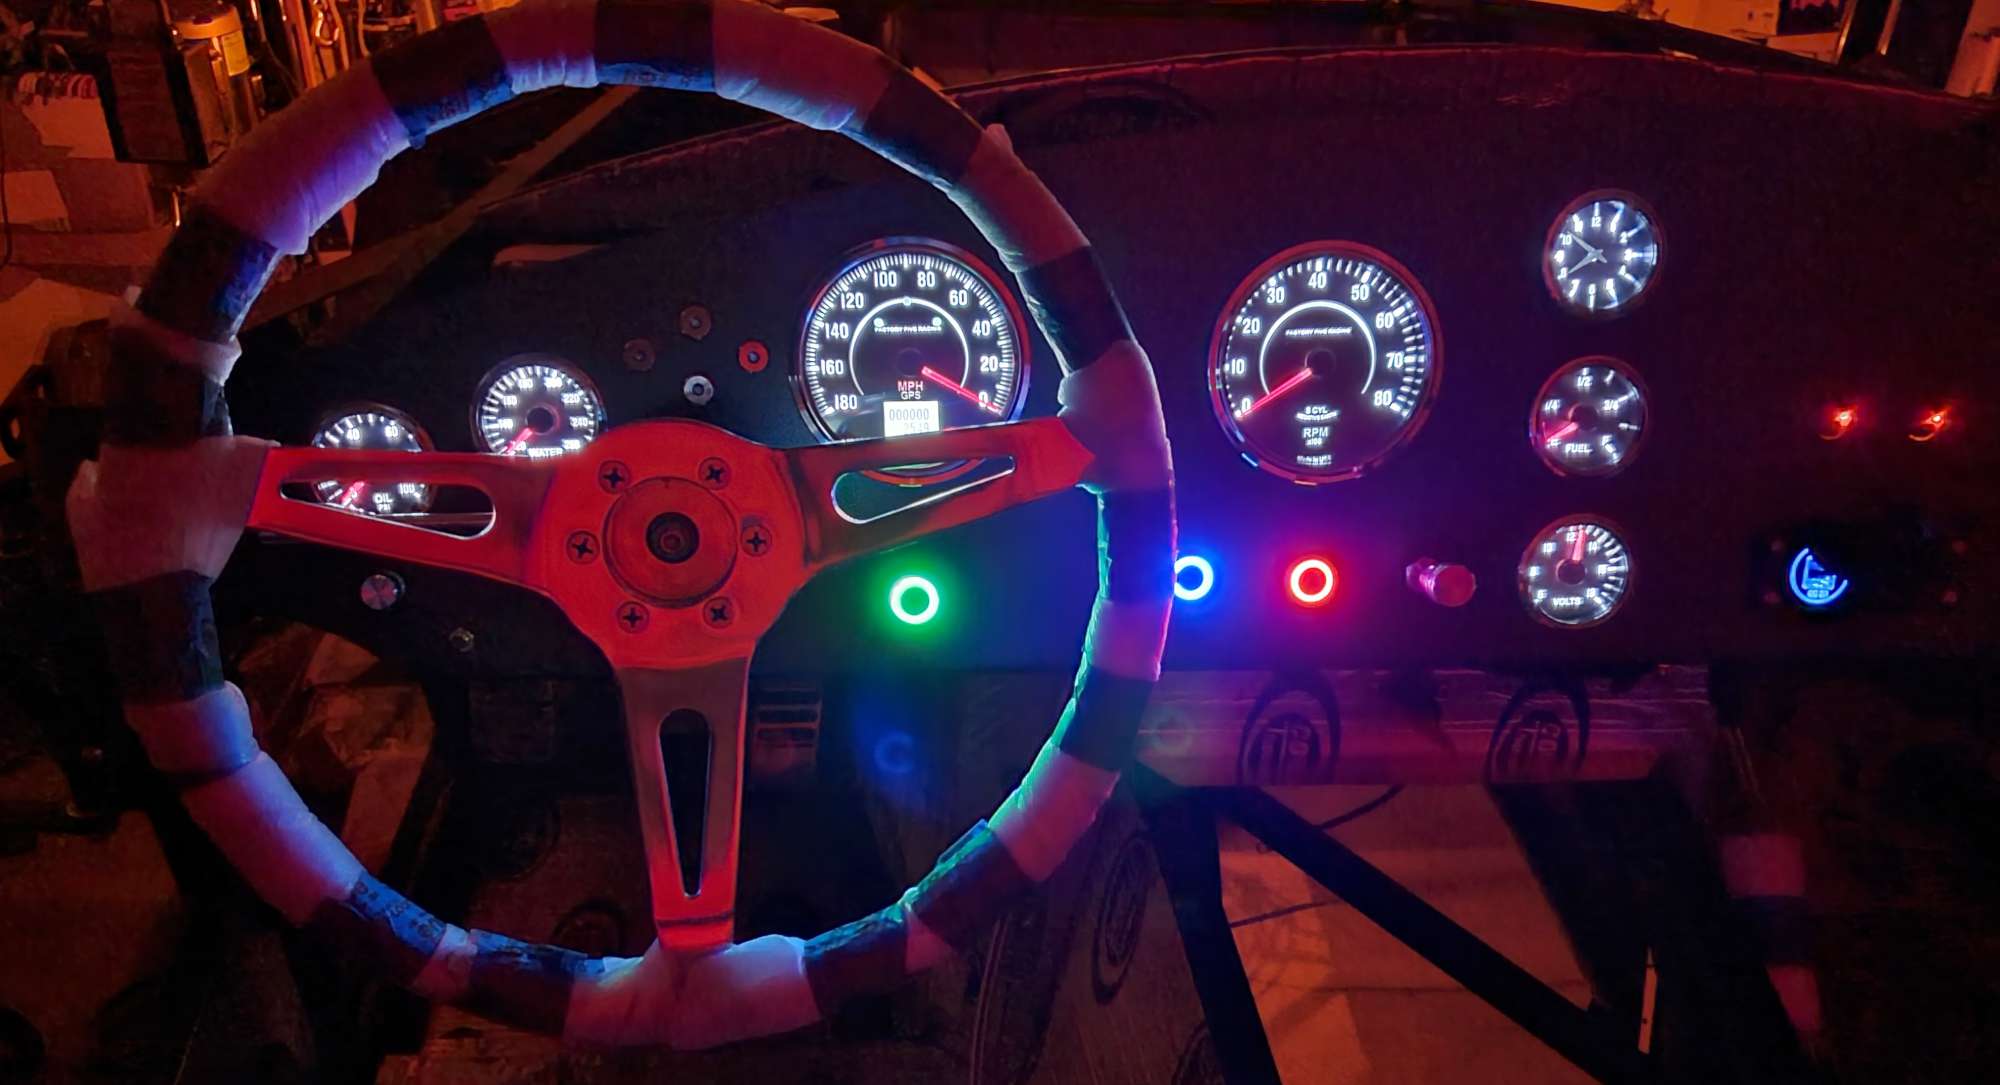
View from the driver's seat with gauge backlighting at full brightness. Flush mounted buttons along the bottom from left to right are: Hazard/flashers (green halo), push-button start (blue), and horn (red)
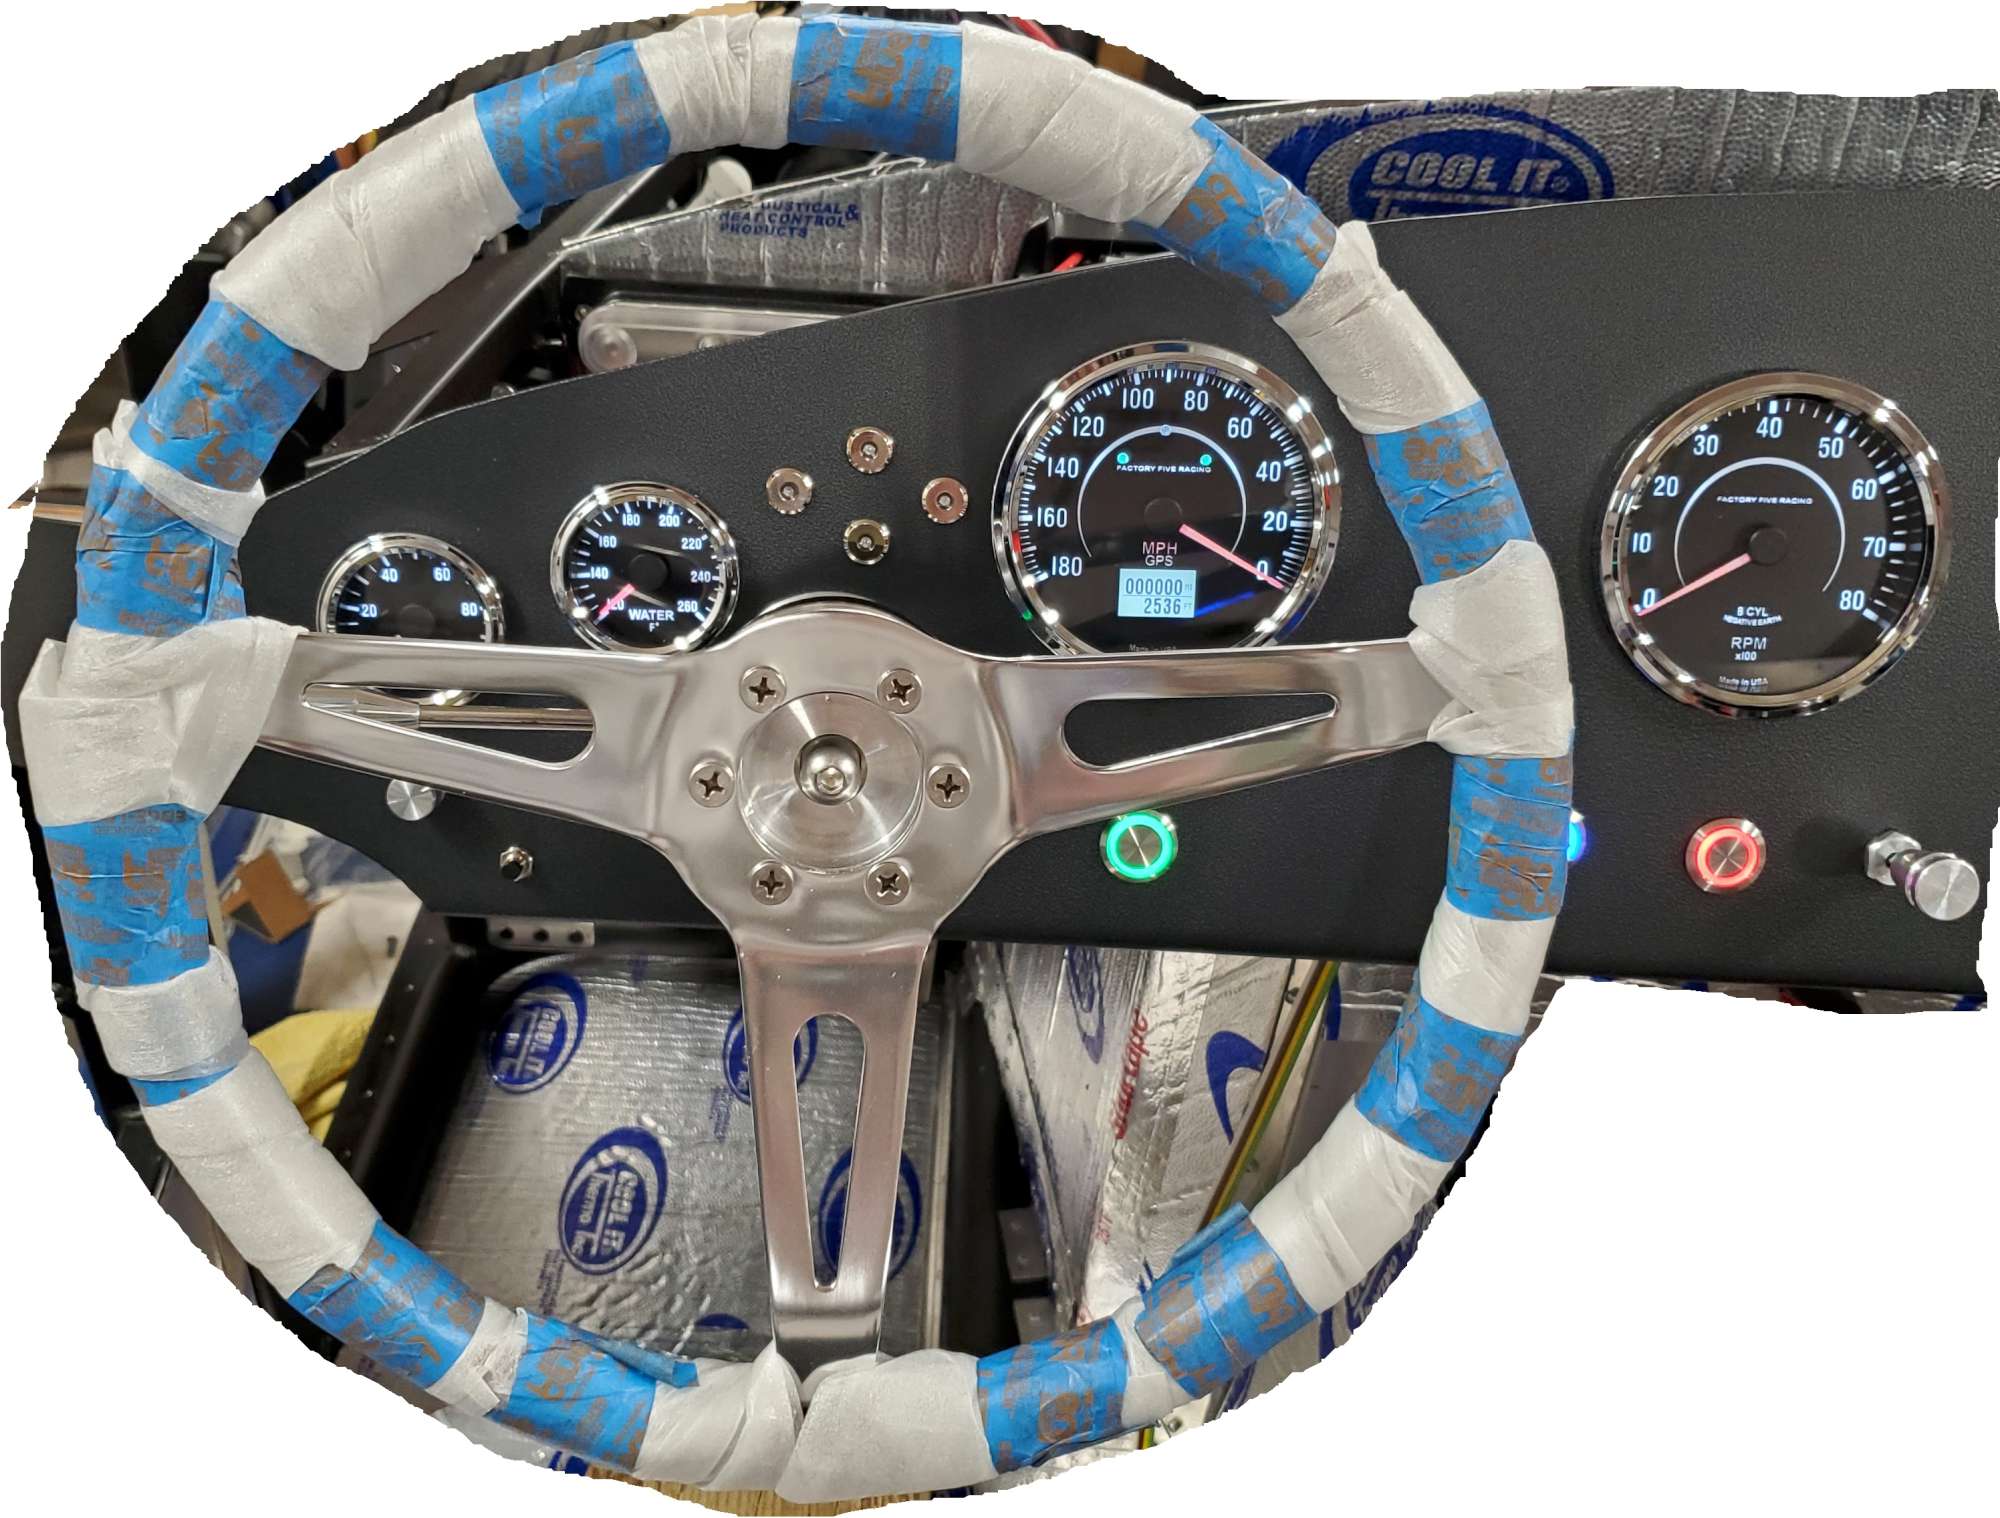
I couldn't help myself. This was fun to see for the first time.
Here are a few of the notable wire "surgery" items and changes I made to the wiring harnesses:
- Eliminated sending unit harness 6-pin connector, because I'm only using the oil pressure and H2O temp. wires.
- Rear harness: removed Speedo wires, because I'm using GPS driven Speedo.
- Coyote harness 6-way I/P Pigtail connections (also referred to as 16 way - not sure where the 16 way term comes from)? Cut short orange jumper toward front of RF fuse panel and soldered green from Coyote 6-way (Cavity 1). Cut to length orange EFI/Coil wire (ign switched) and soldered to light green from Coyote 6-way (Cavity 5). Cut to length light blue wire connected to Ign Sw "ST" (center post on mine) to Coyote 6-way (Cavity 3) - Starter Motor Request (SMR)..
- A note on the LED converter module: the newer style tail lights are LED--the tail light is used for Stop and Turn Signal (i.e. only three wires on LED light). The converter is required.
- USB: repurposed the fan circuit (Dark Blue Cooling Fan) wire to power, and the dark green "Fan Thermo Switch" wire to ground. I'm using the Coyote PCM to power and control the fan. My RF harness controls the fan via the ignition, so the USB outlets will only power with the ignition On. Thanks for the advice from Edwardb using this circuit.
- 12V aux outlet: wired directly to the 12V BSS with an inline 10A fuse. This allows me to plug in my battery to keep the battery topped off. Another brilliant idea from Edwardb--one of my favorites.
- Powered the CobraHeat circuits by repurposing the 20A Heater ckt. While I had the harness disassembled, I removed the crimp splice and soldered it. This was the first use of my Power Probe III to test a circuit - both sets of seat heater pads work!
Feels really good to hit this milestone. Now, I'm really looking forward to the next phase of starting motor prep on the Coyote in preparation to drop it in eventually.
Last edited by 460.465USMC; 02-15-2022 at 08:54 PM.
Chris
Coupe complete kit. Index. Delivered: 4/22/24.
Build Thread. Coyote Gen 4X. T-56. IRS w/3.55. Wilwoods. PS. HVAC. Side windows.
MK4 Complete kit.
Build Thread Index. Delivered: 10/15/2020. Legal: 7/25/23. Coyote Gen3. TKO600 (0.64 OD). IRS w/3.55. PS. Wilwoods. Sway bars. This build is dedicated to my son, Benjamin.
Build Thread.
-
Post Thanks / Like - 0 Thanks, 3 Likes
-
02-15-2022, 08:55 PM
#300
Very nice work Chris! Congratulations on completing the dash wiring. That's a huge accomplishment. The wiring turned out great. The new fobs that DGD provide look very nice - much nicer than the ones I got when I purchased mine.
MkIV Roadster build: Gen 2 Coyote, IRS, TKO600. Ordered 10/24/18. Delivered 1/29/19. Engine installed 8/8/21. First start 9/12/21. First go-kart 9/17/21. Off to paint 4/11/22. Back from paint 12/30/22.
Build thread here.
-
Post Thanks / Like - 1 Thanks, 0 Likes
-
02-15-2022, 09:10 PM
#301
Senior Member


Originally Posted by
JohnK

Very nice work Chris! Congratulations on completing the dash wiring. That's a huge accomplishment. The wiring turned out great. The new fobs that DGD provide look very nice - much nicer than the ones I got when I purchased mine.
Thanks, John! Your advice was key at several junctures. Much appreciated!
I was just thinking if I had to do it over, would I do it the same with all the changes and such? Um...I'm going to enjoy this for now, and then answer that at some point in the distant future. 
Chris
Coupe complete kit. Index. Delivered: 4/22/24.
Build Thread. Coyote Gen 4X. T-56. IRS w/3.55. Wilwoods. PS. HVAC. Side windows.
MK4 Complete kit.
Build Thread Index. Delivered: 10/15/2020. Legal: 7/25/23. Coyote Gen3. TKO600 (0.64 OD). IRS w/3.55. PS. Wilwoods. Sway bars. This build is dedicated to my son, Benjamin.
Build Thread.
-
02-15-2022, 11:55 PM
#302
Senior Member

Nice work! You wiring is much nicer than mine looked... exciting to move on to engine install next!
-
Post Thanks / Like - 1 Thanks, 1 Likes
-
02-16-2022, 07:59 AM
#303
Senior Member

I like the set up. Looking good. Can't wait to see some miles on that odometer!
-
Post Thanks / Like - 1 Thanks, 1 Likes
-
02-16-2022, 11:13 AM
#304
Senior Member

Looks fantastic! Absolutely without a doubt one of my favorite parts of the build was getting the dash fully lit. Congratulations!
Your wiring harness behind the dash and in the footbox looks about the same as mine, to my eye looks pretty clean.
-
Post Thanks / Like - 1 Thanks, 1 Likes
-
02-16-2022, 11:22 AM
#305
Looking good, Chris! One thought for you regarding the LED lit switches/buttons on the dash. If you find them to be too bright, you can add resistors in the wiring to reduce the brightness, or you could tie them into another dimmer like the one you used for the gauges.
Dave
-
Post Thanks / Like - 2 Thanks, 0 Likes
-
02-16-2022, 03:27 PM
#306
Senior Member


Originally Posted by
Fman

Nice work! You wiring is much nicer than mine looked... exciting to move on to engine install next!
Thanks, Travis! It all gets covered up, so I guess the important thing in the long run is whether my connections stay solid. I dread the day I would need to take it all apart to find out I had a bad crimp or solder. Really appreciate your feedback!

Originally Posted by
egchewy79

I like the set up. Looking good. Can't wait to see some miles on that odometer!
Hey Chewy! That day seems like an eternity away. But, that's okay because I'm having a blast with the build. At times I get frustrated at my slowness, but not much I can do about that. Thanks for the kind words.

Originally Posted by
Blitzboy54

Looks fantastic! Absolutely without a doubt one of my favorite parts of the build was getting the dash fully lit. Congratulations!
Your wiring harness behind the dash and in the footbox looks about the same as mine, to my eye looks pretty clean.
Hi Jesse. How is the body work waiting game going? It was fun to see some progress in your recent pictures.
Thanks for the compliment. Yeah, I agree this milestone is really cool. Man, it was a lot of work, but overall it's very satisfying to see where I ended compared to my starting point.

Originally Posted by
Papa

Looking good, Chris! One thought for you regarding the LED lit switches/buttons on the dash. If you find them to be too bright, you can add resistors in the wiring to reduce the brightness, or you could tie them into another dimmer like the one you used for the gauges.
Dave
Thanks, Dave! Appreciate your engineering eye this. I have the Hazard (green) and Horn (red) tied into the dimmer circuit (gauges + switches) you helped me with. I'll have to see whether the Start/Run (blue) is too bright. If so, I suppose tying it into the dimmer with the others will be my first choice.
Chris
Coupe complete kit. Index. Delivered: 4/22/24.
Build Thread. Coyote Gen 4X. T-56. IRS w/3.55. Wilwoods. PS. HVAC. Side windows.
MK4 Complete kit.
Build Thread Index. Delivered: 10/15/2020. Legal: 7/25/23. Coyote Gen3. TKO600 (0.64 OD). IRS w/3.55. PS. Wilwoods. Sway bars. This build is dedicated to my son, Benjamin.
Build Thread.
-
02-16-2022, 05:14 PM
#307
Senior Member

Hey, fantastic progress, Chris. The work looks plenty neat to me. Plus, the rat's nest image makes you look like a genius! Congratulations on the progress!
MK4 #7838: IRS 3.55 TrueTrac T5z Dart 347
The drawing is from ~7th grade, mid-1970s
Meandering, leisurely build thread is
here
-
Post Thanks / Like - 1 Thanks, 1 Likes
-
02-16-2022, 10:10 PM
#308
Senior Member


Originally Posted by
John Ibele

Hey, fantastic progress, Chris. The work looks plenty neat to me. Plus, the rat's nest image makes you look like a genius! Congratulations on the progress!
That's the whole point of the rat's nest photo, right?  Thanks for the encouragement, John.
Chris
Coupe complete kit. Index. Delivered: 4/22/24.
Build Thread. Coyote Gen 4X. T-56. IRS w/3.55. Wilwoods. PS. HVAC. Side windows.
MK4 Complete kit.
Build Thread Index. Delivered: 10/15/2020. Legal: 7/25/23. Coyote Gen3. TKO600 (0.64 OD). IRS w/3.55. PS. Wilwoods. Sway bars. This build is dedicated to my son, Benjamin.
Build Thread.
-
02-16-2022, 11:37 PM
#309
Senior Member

LED Conversion Question
Question for the electrical gurus. I just swapped my front running light bulbs (1157) for the Watson Streetworks amber LEDs. They are a direct fit, i.e. plug-n-play. My MK4 kit came from F5 with LED tail lights and LED flashers, but with incandescent 1157 bulbs up front. However, when I put the LEDs in front they illuminate faintly. If I put a 1157 bulb back in place on one side (doesn't matter left or right), the LED illuminates as expected. Both sides have the same behavior. The tail lights are unaffected.
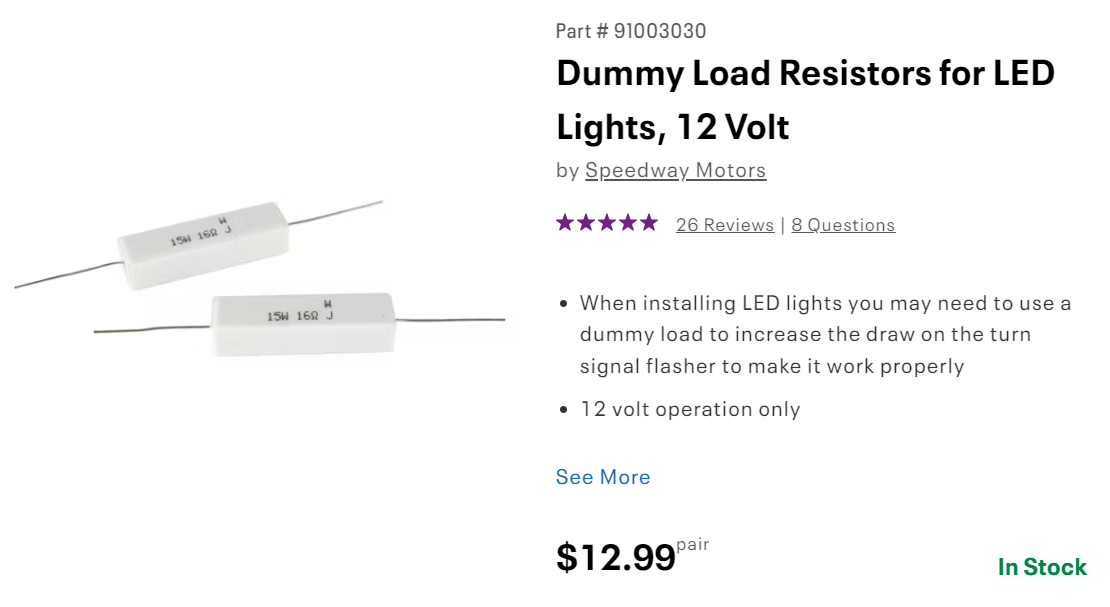
Doing a bit of research this evening, and it seems I may need to add a dummy load resistor (see below) because the LEDs don't draw enough current to fully actuate the flasher? I see a recommendation to add one to each front running light. Does this sound right? Would I need to add one to the turn signal wire, and a second to the running light wire, and repeat for the other side?
I intend to attach the grounds for the running lights to the frame at their respective corner. Could this help the issue? I wouldn't think so, because the 1157 bulbs draw more power. So, if it were a grounding issue, I would think it would surface with the 1157 before it would with the LEDs because they draw less power.
Last edited by 460.465USMC; 02-16-2022 at 11:40 PM.
Chris
Coupe complete kit. Index. Delivered: 4/22/24.
Build Thread. Coyote Gen 4X. T-56. IRS w/3.55. Wilwoods. PS. HVAC. Side windows.
MK4 Complete kit.
Build Thread Index. Delivered: 10/15/2020. Legal: 7/25/23. Coyote Gen3. TKO600 (0.64 OD). IRS w/3.55. PS. Wilwoods. Sway bars. This build is dedicated to my son, Benjamin.
Build Thread.
-
02-17-2022, 12:35 AM
#310
Hey Chris. I've also heard that LED bulbs don't place enough of a load on standard flashers for them to work properly, but I don't know if the dummy load resistors will work or not. FWIW - I purchased the complete LED lighting kit from Watsons Streetworks and it came with electronic LED flashers. I don't see those listed for sale separately on their website, but if the load resistors don't work you could give them a call and see if they're available for purchase. They work just fine with all LED bulbs at all corners.
MkIV Roadster build: Gen 2 Coyote, IRS, TKO600. Ordered 10/24/18. Delivered 1/29/19. Engine installed 8/8/21. First start 9/12/21. First go-kart 9/17/21. Off to paint 4/11/22. Back from paint 12/30/22.
Build thread here.
-
02-17-2022, 08:29 AM
#311
You should just need to swap out your flasher relays with something like these.
https://www.amazon.com/CEC-Industrie...%2C110&sr=8-16
You want a "no load" flasher in both the turn signal and hazard circuits.
Last edited by Papa; 02-17-2022 at 08:38 AM.
-
Post Thanks / Like - 1 Thanks, 0 Likes
-
02-17-2022, 09:32 AM
#312
Yeah, that looks pretty much exactly like the ones Watsons Streetworks provides in their LED lighting kits.
MkIV Roadster build: Gen 2 Coyote, IRS, TKO600. Ordered 10/24/18. Delivered 1/29/19. Engine installed 8/8/21. First start 9/12/21. First go-kart 9/17/21. Off to paint 4/11/22. Back from paint 12/30/22.
Build thread here.
-
02-17-2022, 11:06 AM
#313
Senior Member

My kit came with standard mechanical flashers, and with two of these, which I thought were LED flashers. It states "No Load Flashers" on the plastic housing:
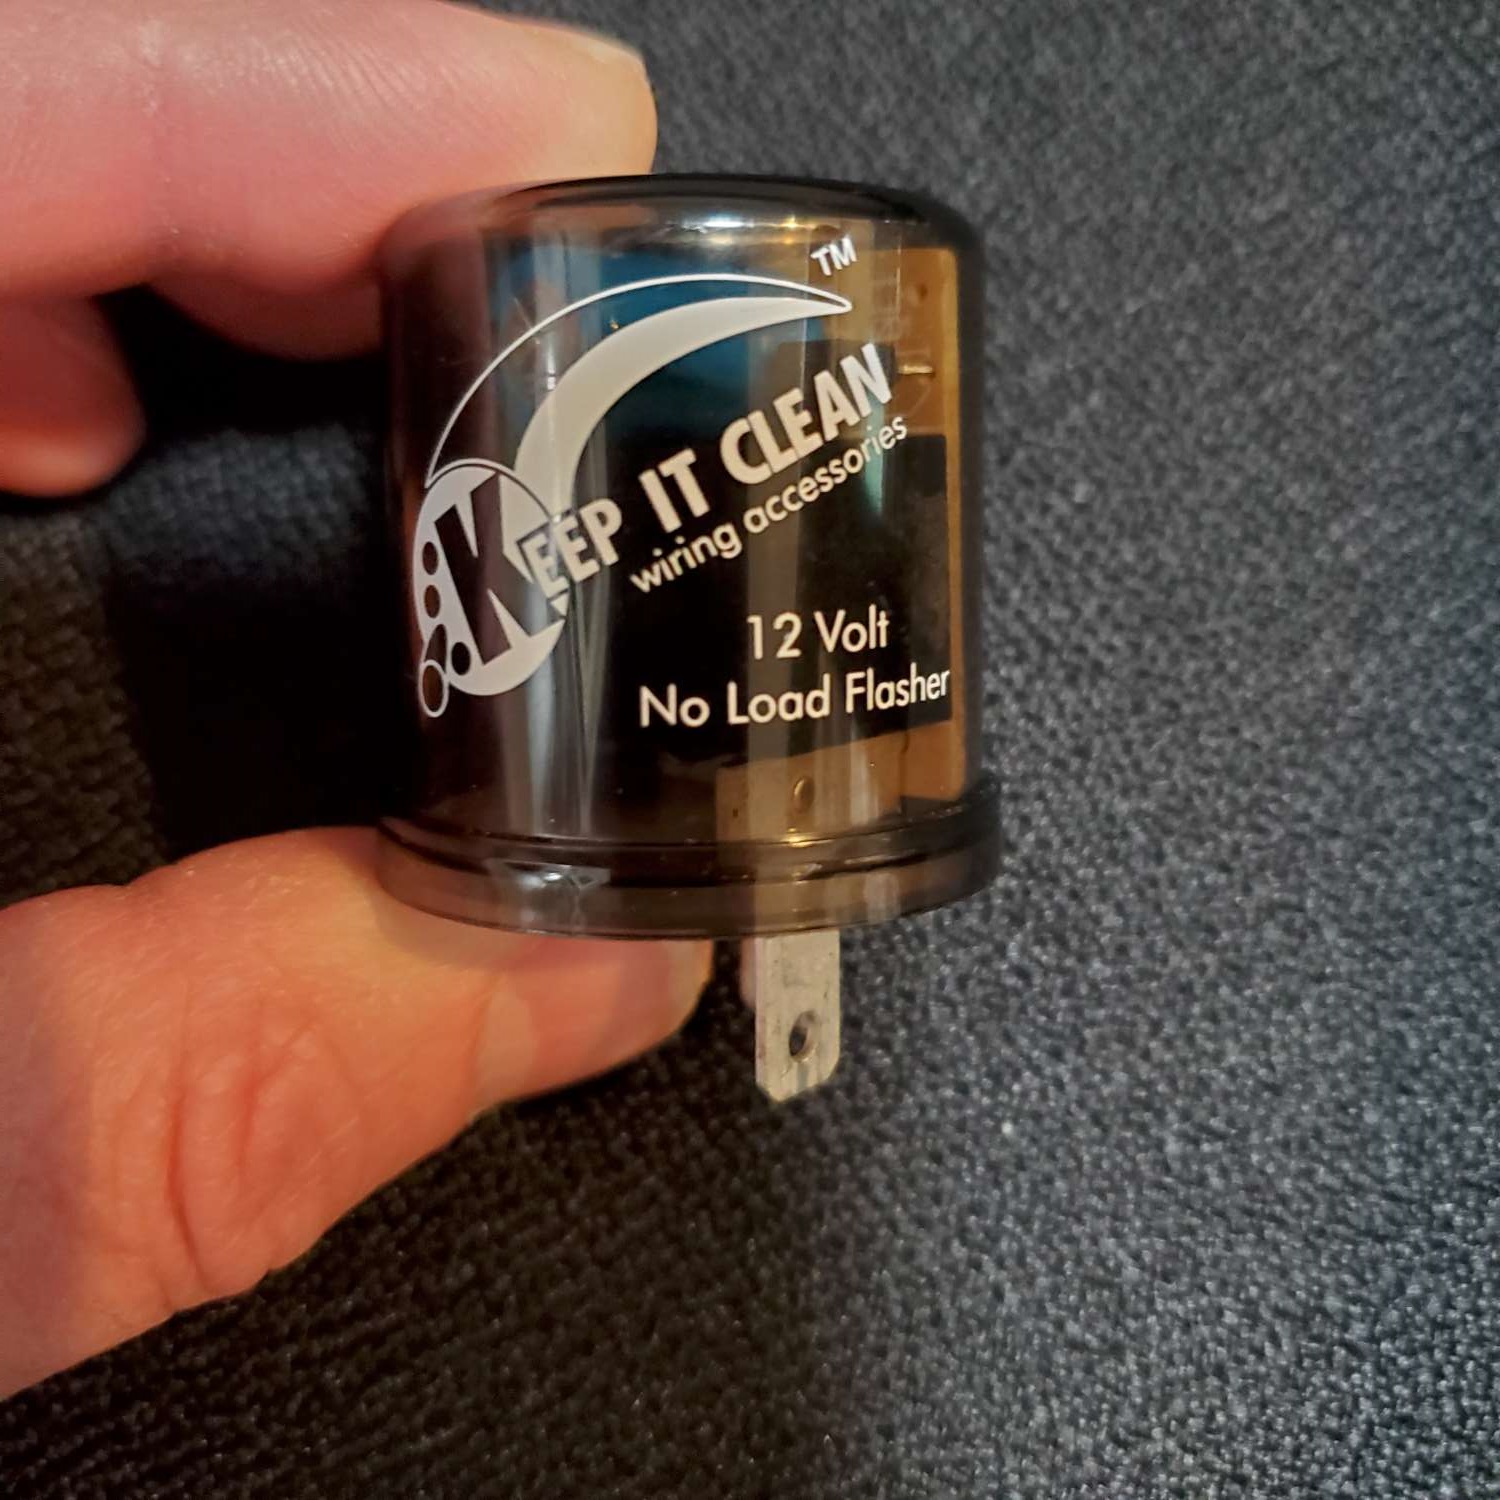
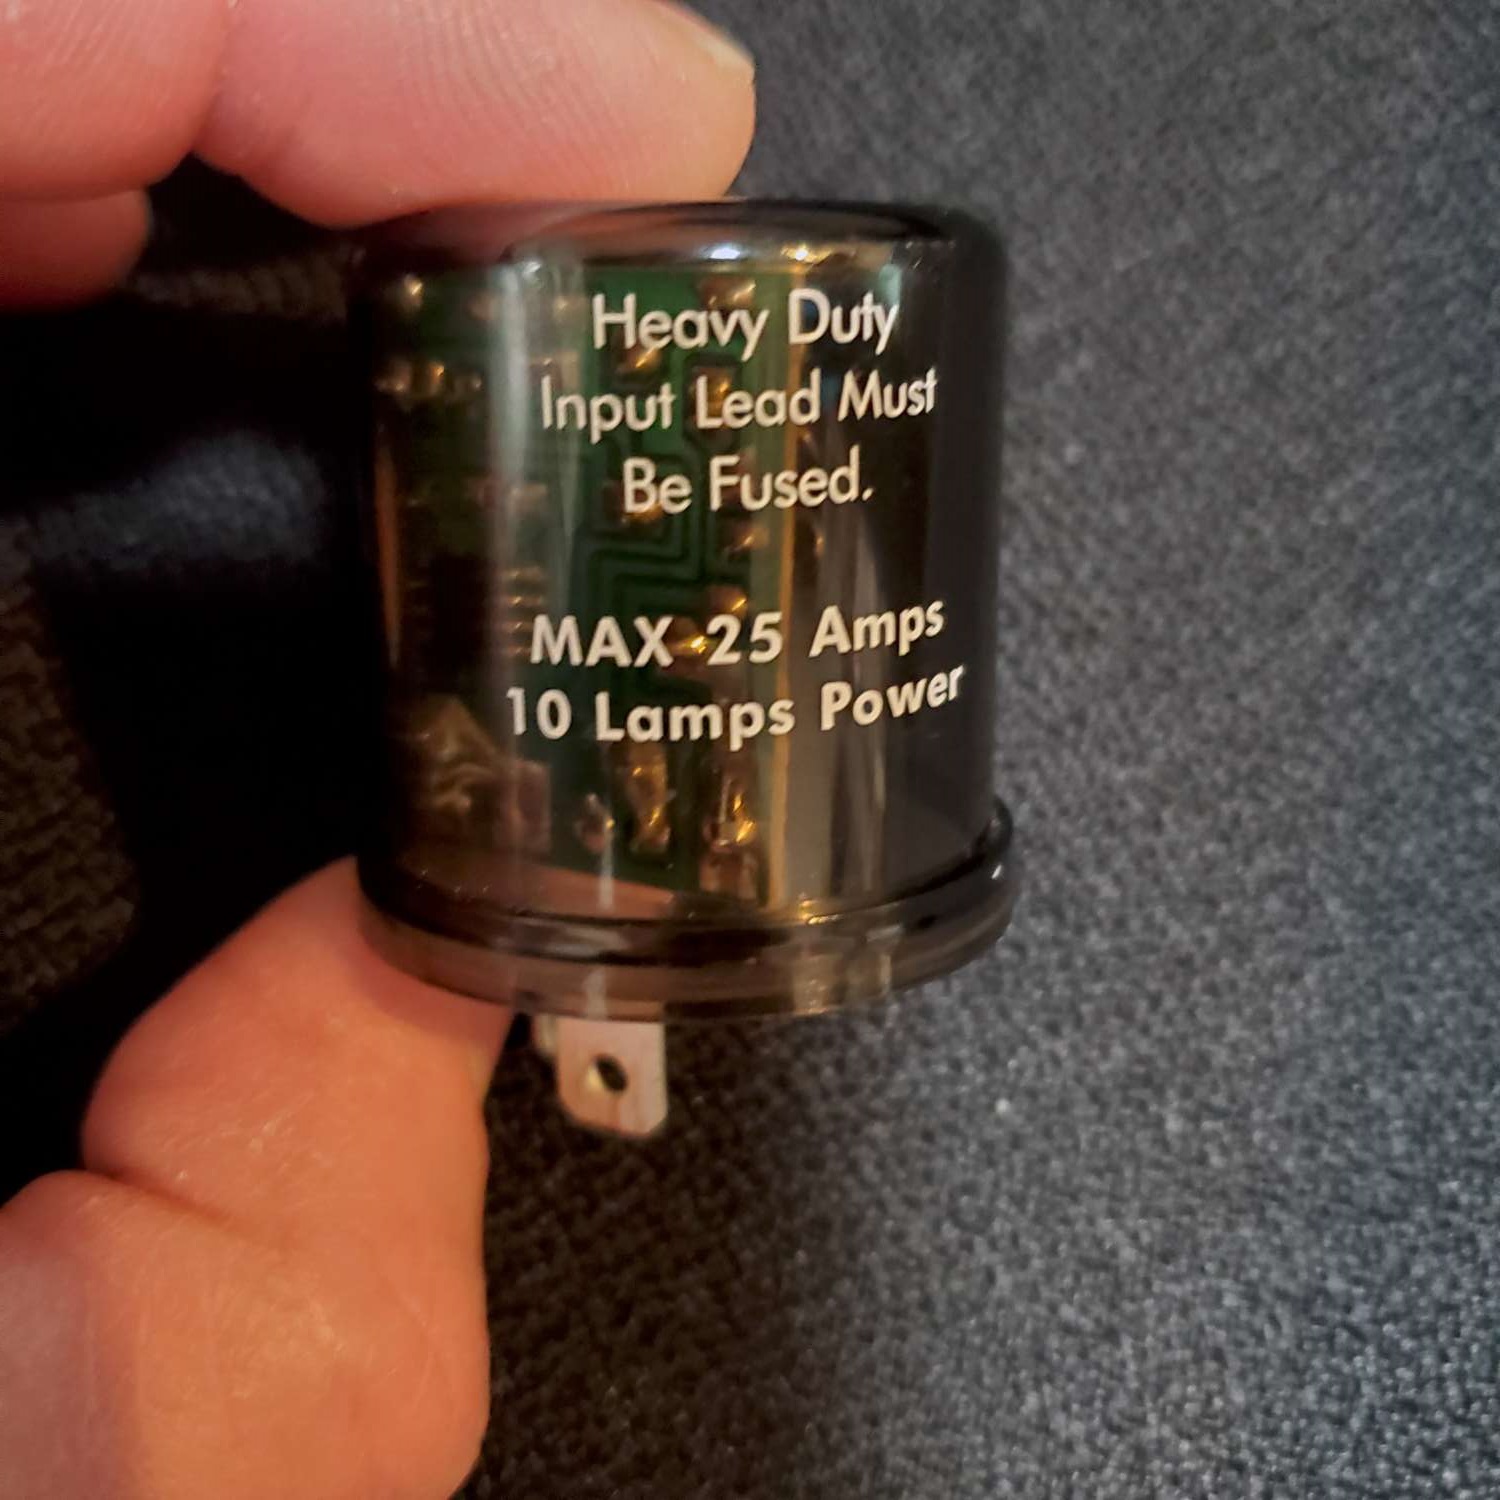
They don't, however, have the ground pigtail like the ones Papa linked to, or like the ones Watson Streetworks sells. Could that ground pigtail be the missing link?
Chris
Coupe complete kit. Index. Delivered: 4/22/24.
Build Thread. Coyote Gen 4X. T-56. IRS w/3.55. Wilwoods. PS. HVAC. Side windows.
MK4 Complete kit.
Build Thread Index. Delivered: 10/15/2020. Legal: 7/25/23. Coyote Gen3. TKO600 (0.64 OD). IRS w/3.55. PS. Wilwoods. Sway bars. This build is dedicated to my son, Benjamin.
Build Thread.
-
02-17-2022, 11:26 AM
#314
I've never seen a true no load LED flasher without the ground wire so I looked them up:
https://www.keepitcleanwiring.com/ca...-Fixed-Flasher
In the specs they list bulb type as "incandescent or partial LED" 
So... I think this is why FFR provided incandescent bulbs for the front. I suspect you may need to switch to a true no load flasher with ground pigtail to go to all LED bulbs.
Seems like an odd and confusing direction for FFR to go in to save, what... $5?
MkIV Roadster build: Gen 2 Coyote, IRS, TKO600. Ordered 10/24/18. Delivered 1/29/19. Engine installed 8/8/21. First start 9/12/21. First go-kart 9/17/21. Off to paint 4/11/22. Back from paint 12/30/22.
Build thread here.
-
Post Thanks / Like - 1 Thanks, 0 Likes
-
02-17-2022, 11:47 AM
#315
Senior Member

Ah! That totally makes sense given the LED behavior I’m seeing. No load flashers with ground pigtail to be ordered today! Nice sleuthing, John! Thanks!
Chris
Coupe complete kit. Index. Delivered: 4/22/24.
Build Thread. Coyote Gen 4X. T-56. IRS w/3.55. Wilwoods. PS. HVAC. Side windows.
MK4 Complete kit.
Build Thread Index. Delivered: 10/15/2020. Legal: 7/25/23. Coyote Gen3. TKO600 (0.64 OD). IRS w/3.55. PS. Wilwoods. Sway bars. This build is dedicated to my son, Benjamin.
Build Thread.
-
02-17-2022, 06:08 PM
#316
Senior Member

FWIW, I've used the "no pigtail flashers" from Watson's (20th Anniversary Roadster) and they worked fine. LED's on all four corners. Both my Coupe and the Truck came with solid state flashers from Factory Five, and they had the grounding pigtails, which of course I used. Can't explain the difference or if that applies in your case. My guess is not but that's just a guess.
If you have electronic flashers already installed, and the circuit is working correctly with the LED rears and incandescent fronts, IMO the load resistors are not needed and won't solve anything. That's an old fashioned solution that's been replaced by using now widely available solid state flashers. I'm guessing you have a backfeed issue which others doing LED conversions have experienced. Often diodes will prevent. This thread (unfortunately without a solution) does cover some of the ground. https://thefactoryfiveforum.com/show...not-going-well
Build 1: Mk3 Roadster #5125. Sold 11/08/2014.
Build 2: Mk4 Roadster #7750. Sold 04/10/2017.
Build Thread
Build 3: Mk4 Roadster 20th Anniversary #8674. Sold 09/07/2020.
Build Thread and
Video.
Build 4: Gen 3 Type 65 Coupe #59. Gen 3 Coyote. Legal 03/04/2020.
Build Thread and
Video
Build 5: 35 Hot Rod Truck #138. LS3 and 4L65E auto. Rcvd 01/05/2021. Legal 04/20/2023.
Build Thread. Sold 11/9/2023.
-
Post Thanks / Like - 1 Thanks, 0 Likes
-
02-17-2022, 07:45 PM
#317
Senior Member

Oh, man! I just read through that thread, and stevant had his hands full. I truly hope I haven't landed an issue that extensive to troubleshoot. I don't have any funky lighting changes with my gauges or any other lighting. Just the dim LED issue with both front LEDs installed. I have a pair of no load LED flashers with ground pigtail on order. Hoping this will resolve.
After reading that thread I'm getting a little nervous about the LED projector beam headlights are arriving tomorrow. Doh!!
Appreciating the help and feedback from all you guys! I'll update once the replacement flashers are installed.
Chris
Coupe complete kit. Index. Delivered: 4/22/24.
Build Thread. Coyote Gen 4X. T-56. IRS w/3.55. Wilwoods. PS. HVAC. Side windows.
MK4 Complete kit.
Build Thread Index. Delivered: 10/15/2020. Legal: 7/25/23. Coyote Gen3. TKO600 (0.64 OD). IRS w/3.55. PS. Wilwoods. Sway bars. This build is dedicated to my son, Benjamin.
Build Thread.
-
02-17-2022, 07:59 PM
#318
Chris,
Did you try the hazard lights with the LED bulbs in the front? If those work, it could be a defective flasher relay. If that's the case, swap the hazard flasher to the turn signals and see what happens.
-
Post Thanks / Like - 1 Thanks, 0 Likes
-
02-17-2022, 08:46 PM
#319
Senior Member

Good suggestion, Dave. Yes, I should have mentioned in my first post I tried the four-way flashers and the behavior is the same.
Chris
Coupe complete kit. Index. Delivered: 4/22/24.
Build Thread. Coyote Gen 4X. T-56. IRS w/3.55. Wilwoods. PS. HVAC. Side windows.
MK4 Complete kit.
Build Thread Index. Delivered: 10/15/2020. Legal: 7/25/23. Coyote Gen3. TKO600 (0.64 OD). IRS w/3.55. PS. Wilwoods. Sway bars. This build is dedicated to my son, Benjamin.
Build Thread.
-
02-18-2022, 01:53 PM
#320
Senior Member


Originally Posted by
460.465USMC

My kit came with standard mechanical flashers, and with two of these, which I thought were LED flashers. It states "No Load Flashers" on the plastic housing:


They don't, however, have the ground pigtail like the ones Papa linked to, or like the ones Watson Streetworks sells. Could that ground pigtail be the missing link?
That's weird. My kit came with the 2 mechanical flashers and then the LED flashers. Mine most definitely did (do) have the pigtails. What happens when you drop those in?


 Thanks:
  Likes:


 Reply With Quote


 The cleanup of the wires is the most tedious part but it sounds like you're in the home stretch now.

 Never woulda noticed. But, since you mention it, you're now in a club with (I'm expecting) a very large percentage of the builder community. I'm thinking you'll find a bezel that will make the dimmer knob look even better.


