-


Rear Suspension Assembly
The IRS mid-shafts went in without issue. I painted the shaft and CV housing with POR15. These areas will rust if you look at them wrong. Then I put a little gear lube on the c clip that goes into the housing. A couple firm taps with the soft blow hammer and they both easily installed. The first time around, I never heard a click to verify full insertion on either side. This was no different, but I know by two things. One, they bottom out by the sound of the hammer. And two, I measure the gap between shaft and housing, which is supposed to be ~1/8" according to the manual. Mine is identical on both sides. And as the instructions state, give them a pull to ensure they don't release and all is good!
A couple of things I noted from the last build for the install:
- Longer mid-shaft goes on the driver side, shorter one on the passenger side. Don't get them mixed up!
- Grease the arms per the instructions BEFORE you install. Otherwise the bushings will bulge out as the grease will have nowhere to go when under compression.
- If you use anti-seize, it will amplify torque values. You'll still be within the limits of the fastener, but I started to but decided not to. Just don't go hog wild on the mechanical lock nuts and you shouldn't have to worry about heat and galling.
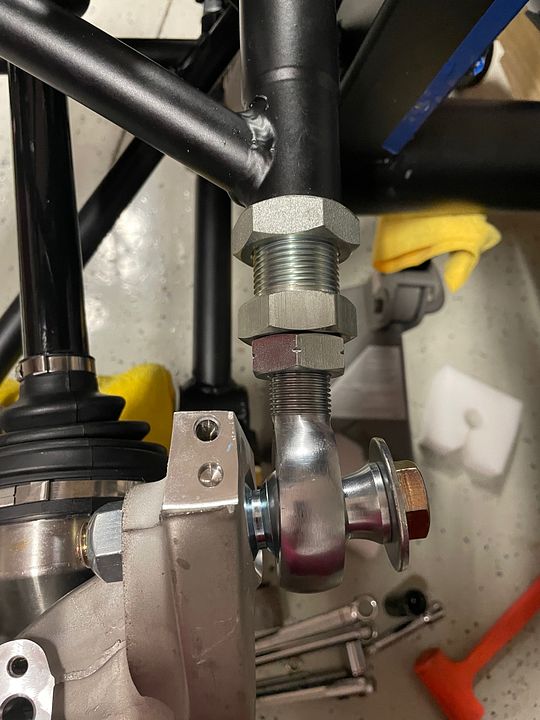
- Every attachment point will most likely need to be widened. Have your threaded bar, nuts and washers handy.
- I left the arms with roughly 1/2" of threads showing on both sides of the lock nuts for adjustment later. Another Paul lesson from the past!
- I'll be filling the smaller top holes of the knuckle with silicone to keep dirt and debris out.
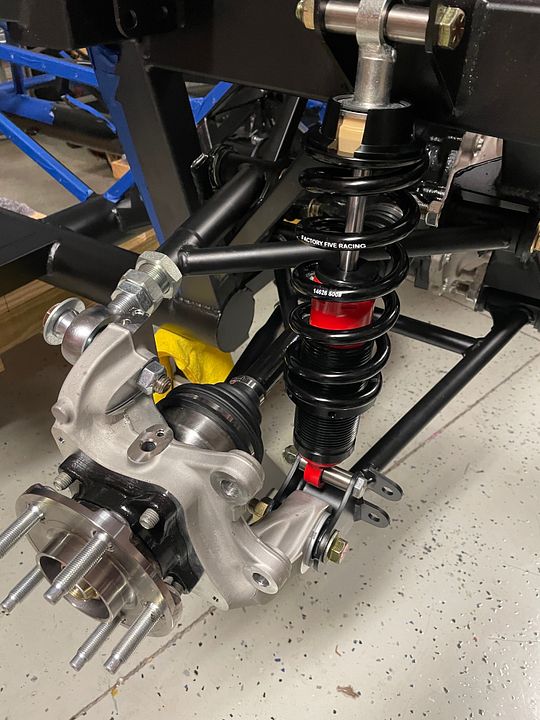
Torqued all arms to 100 ft/lbs, witness marks on all bolt heads and moved on. I did get forum advice around the UCA, as the rod end seemed a little close to the arm but was guided to proper positioning and all is well. This is the basis of my earlier comment around drilling the knuckle hole. It doesn't have to be picture perfect precise and FFR planned for that. As usual, the forum is awesome!!
Shocks went together without issue, although I had a leaky one and FFR sent out a replacement that I'll get in a few days. I did note that many of the mounting eyelets on the shocks were not flush, which made getting a bolt through a little rough in some instances. And of course, if everything is not perfectly parallel, I don't know what I'd do with myself! 5 second fix and I took a C-Clamp and flattened them flush as I wasn't able to move them by hand. And to satisfy the OCD folks out there, the Factory Five logo is right side up on the springs (PAPA!)  . All in all, both sides came out great and move up and down like butter!
I did want to make mention of the grease and quick release coupler that I used. Grab yourself a Lock N Lube zerk coupler and gone are the days of hanging from your grease gun trying to get it to release. I also used my favorite grease....GREEN Grease. Synthetic polymer grease that is super tacky, waterproof and is compatible with most other greases. Easy to see as well. I got my fitting from Amazon and Green grease is available at your local Autozone or Advanced Auto.

Last edited by cv2065; 12-19-2023 at 08:41 PM.
-
Post Thanks / Like - 0 Thanks, 1 Likes


 Thanks:
  Likes:


 Reply With Quote