-
03-15-2024, 02:47 PM
#321
I was not a big fan of the blue, until it got its stripes. Fabulous! I will bet the trim will dress it, even more.
20th Anniversary Mk IV, A50XS Coyote, TKO 600, Trunk Drop Box, Trunk Battery Box, Cubby Hole, Seat Heaters, Radiator hanger and shroud.
-
04-06-2024, 09:43 AM
#322
Senior Member

I've certainly made my share of not so great decisions in my life but trusting Riggs Fabrication to do my paint & bodywork ranks up near the top. They build nice cars, not Riddler caliber cars, but nice. But they have no clue when it comes to paint. I think they're trying to "do it all" so they're becoming a Jack of all trades - master of none shop. Went through three different painters, massively over budget, and a colossal and very fundamental screwup that is documented earlier in this thread. But after a quick 12 1/2 months my baby came home yesterday, less a couple of boxes of parts that I need to go back and collect.
Yesterday afternoon my good friend was nice enough to pick my car up and bring it to me.
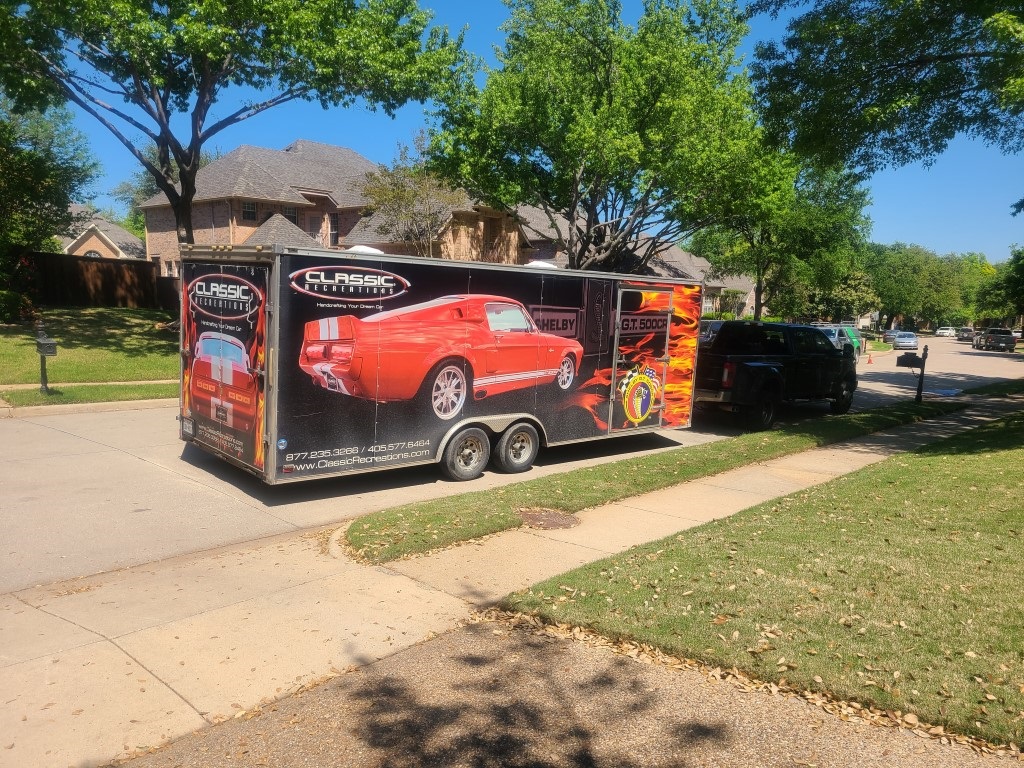
The wankers at Riggs couldn't even charge the battery for me so we had to find a way to get it up my driveway and into the garage. Fortunately my truck has a winch so that got us most of the way, at least close enough the three of us could then get it into the garage.
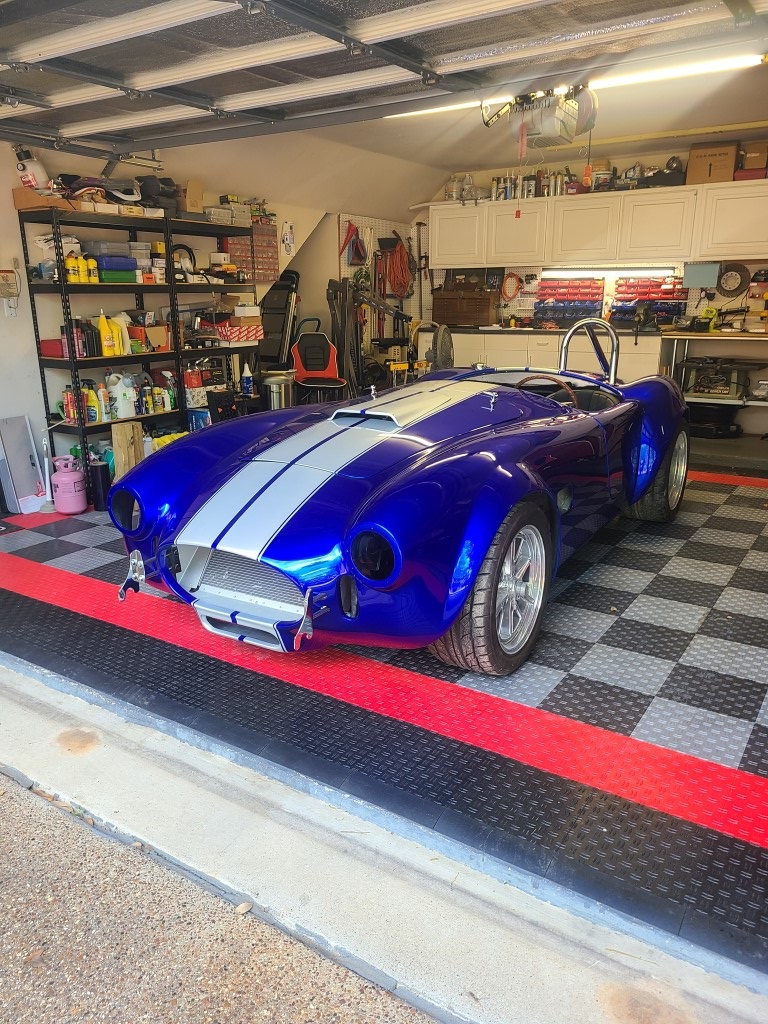
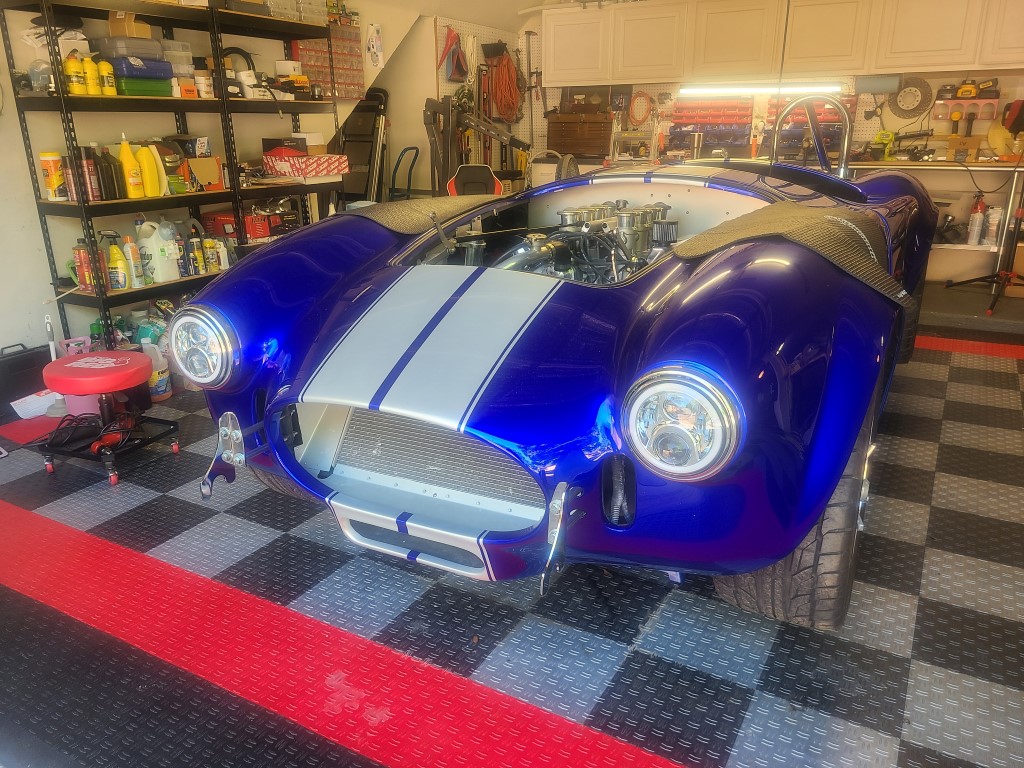
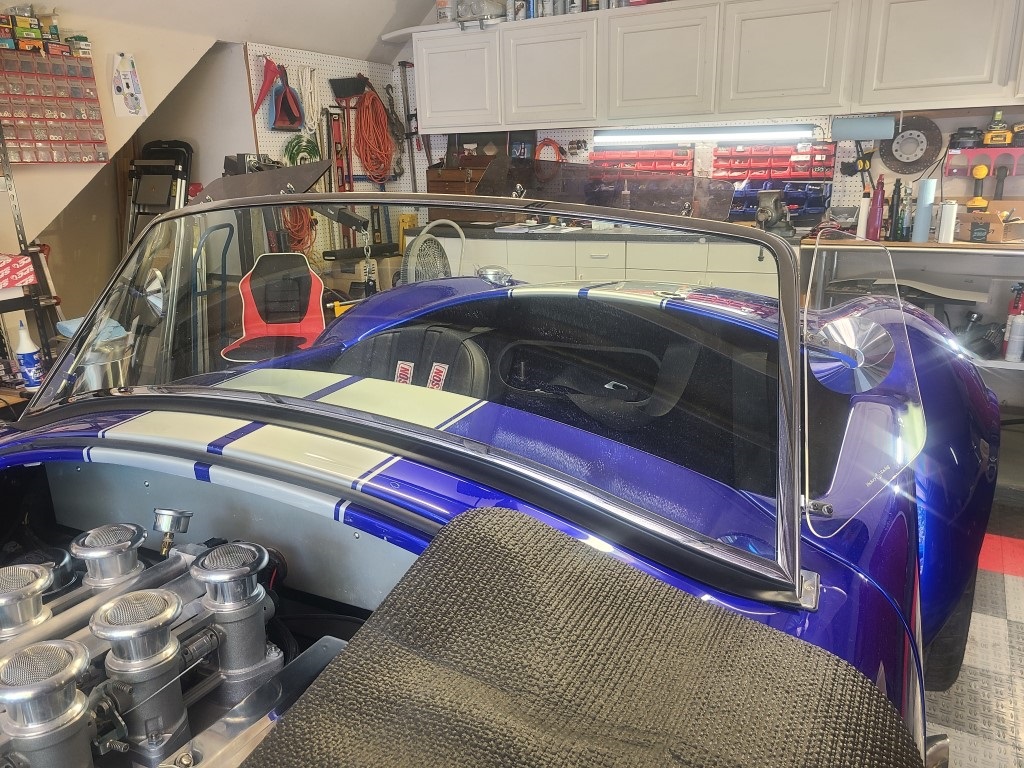
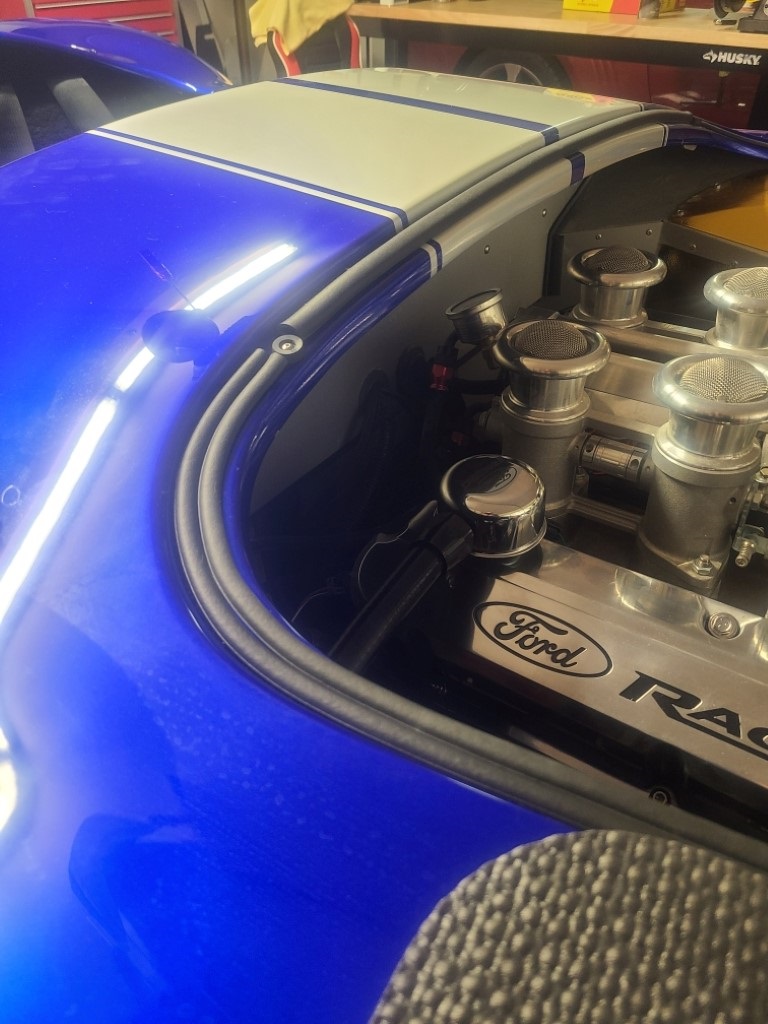
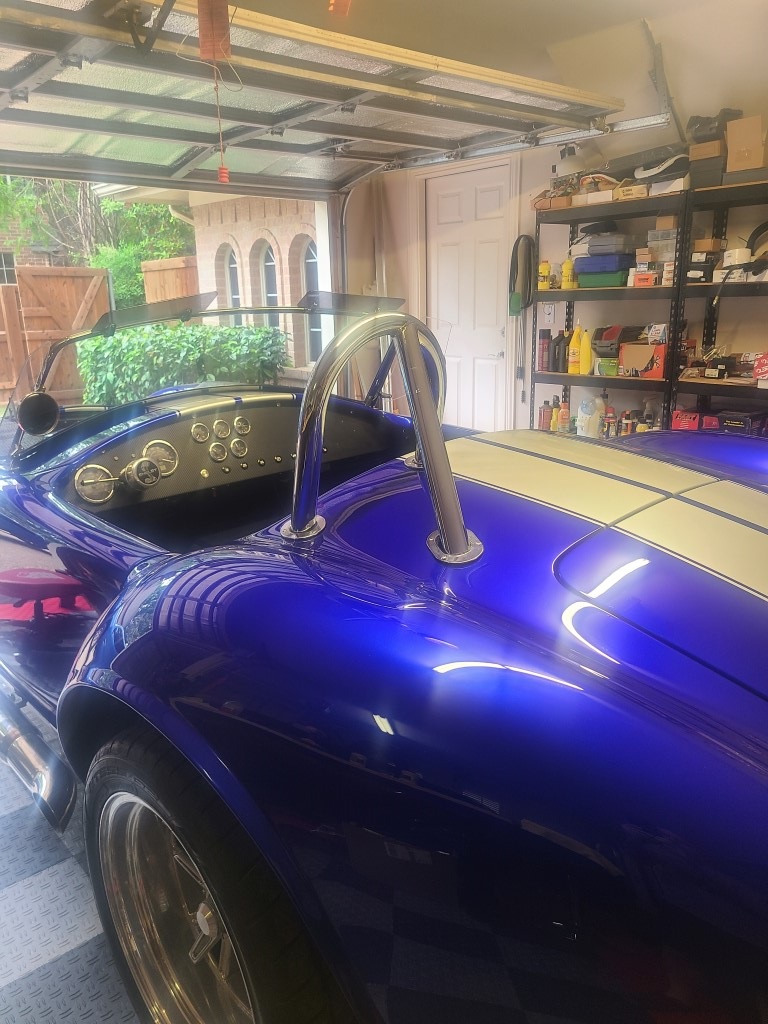
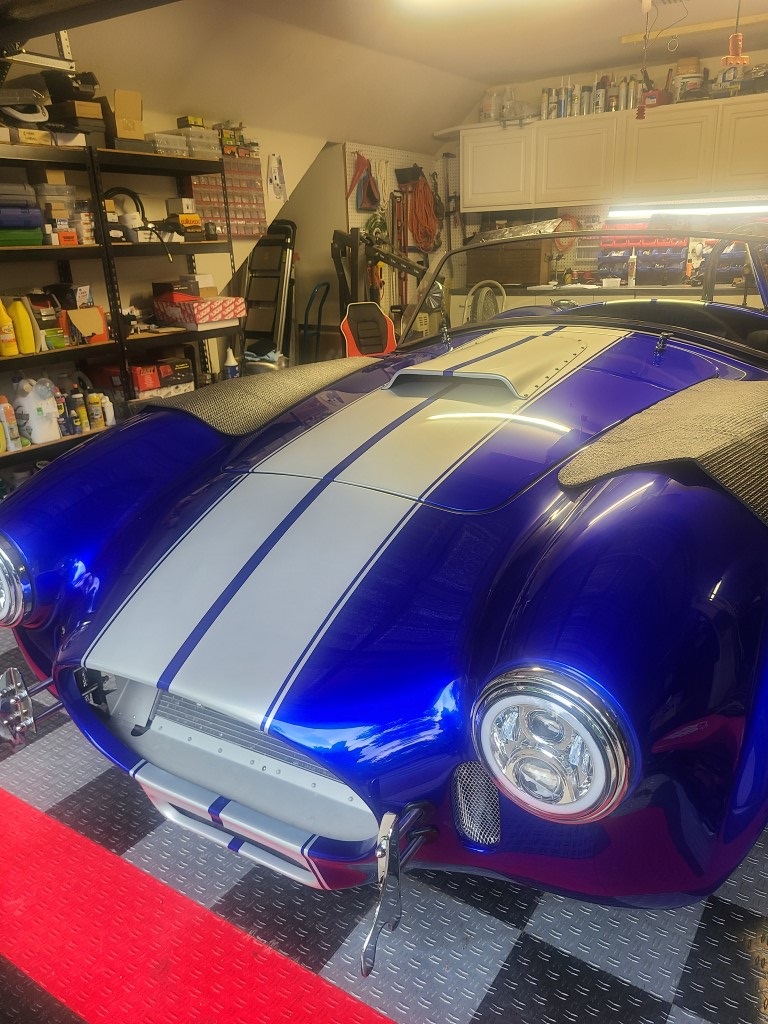
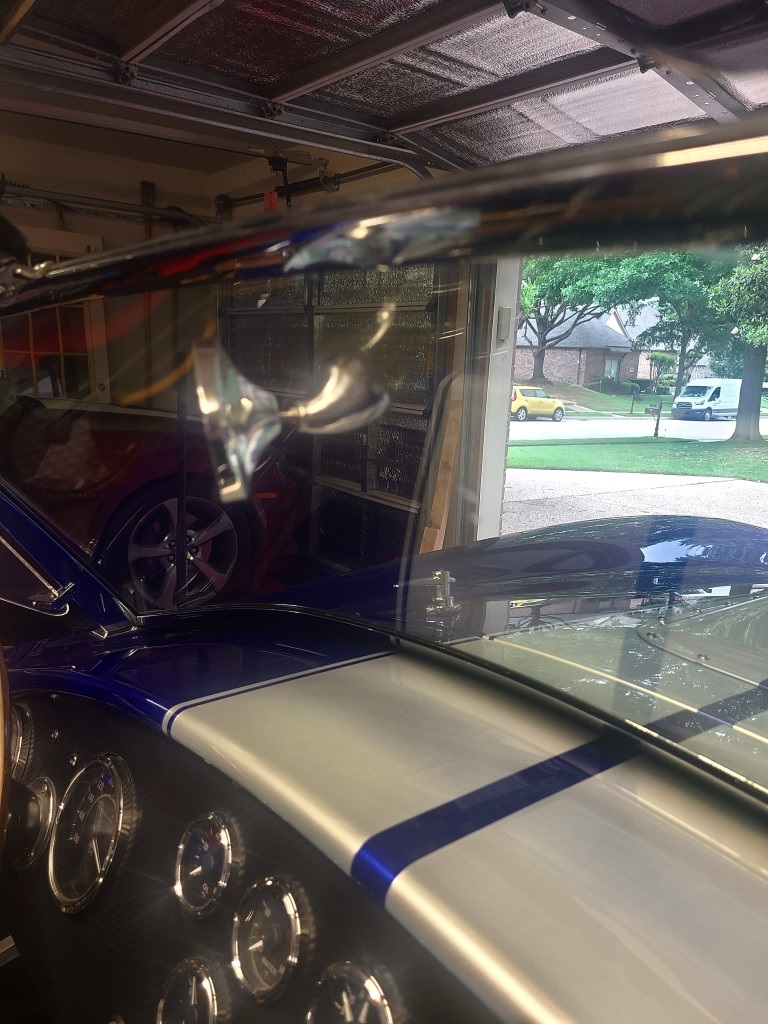
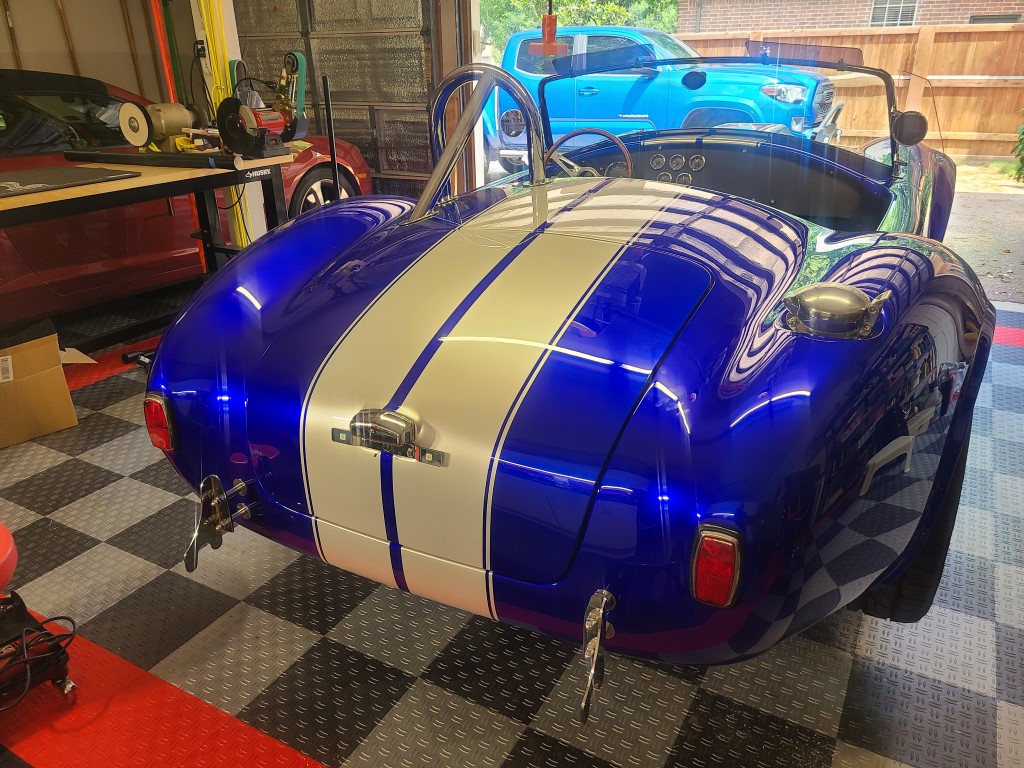
In the end the color turned out spectacular and I really like the stripes. Depending on the angle and lighting they shift from a brilliant white to a silver. It's a neat effect.
So today I'll pull the battery and probably get it exchanged as it doesn't look like it's taking a charge. Then there's a pretty long to-do list to get going on. After sitting on my butt for a year I'm ready. I just hope I can find all of my parts and remember where they go!
-
Post Thanks / Like - 0 Thanks, 4 Likes
-
04-07-2024, 04:10 PM
#323
Senior Member
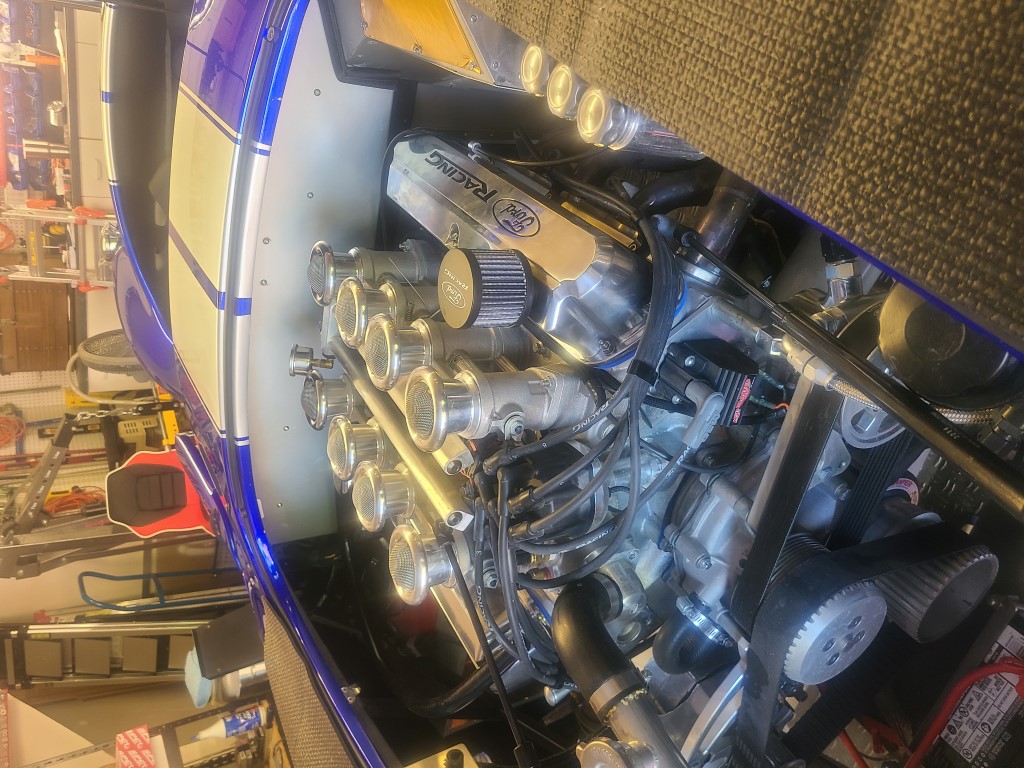
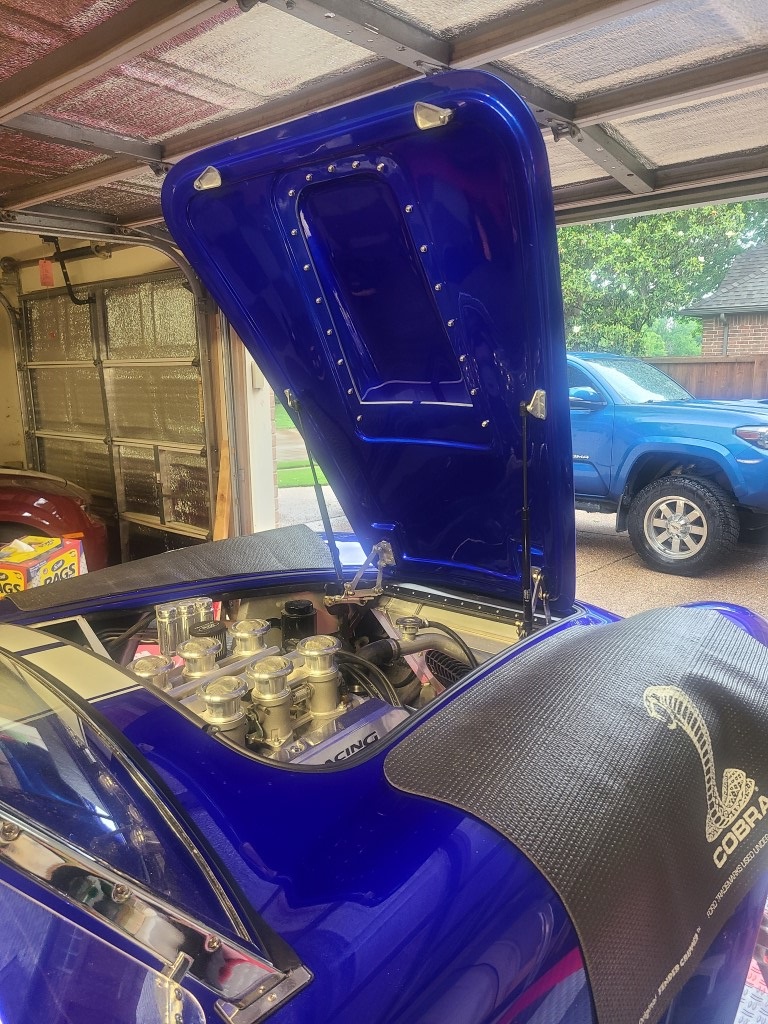
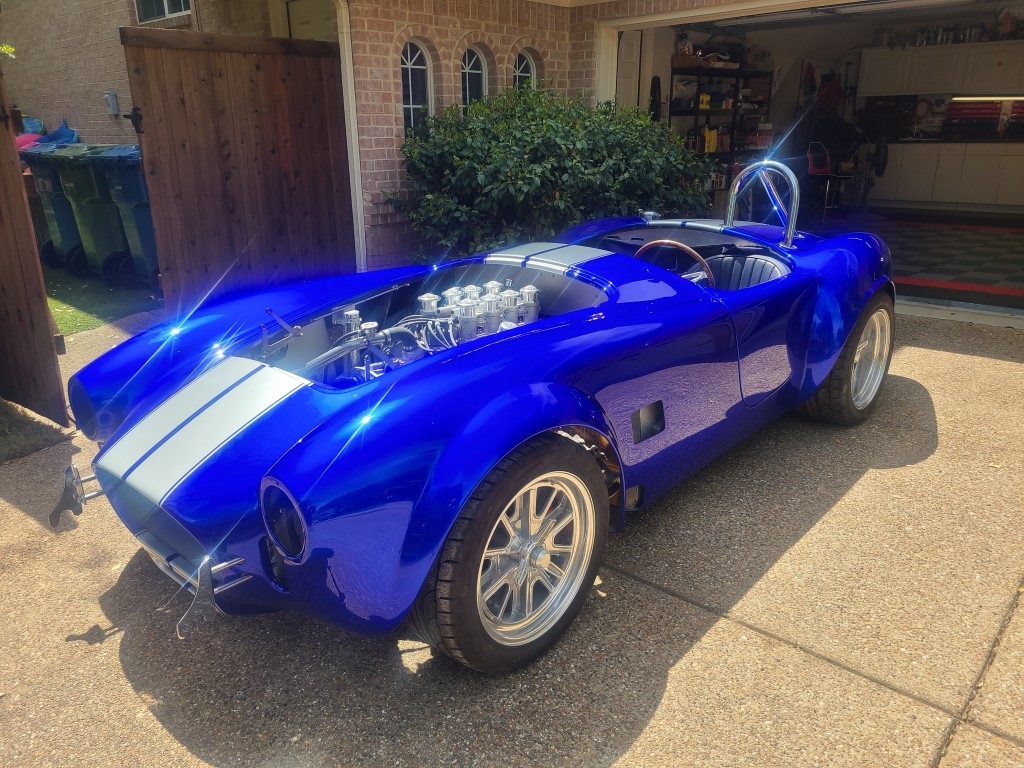
I got the engine fired up today without much effort and pulled it out onto the driveway so I could spray the engine compartment down. Glacier Speed Painters sent it back dirtier than I can even describe, it's going to take me a month to clean it. Very disappointing.
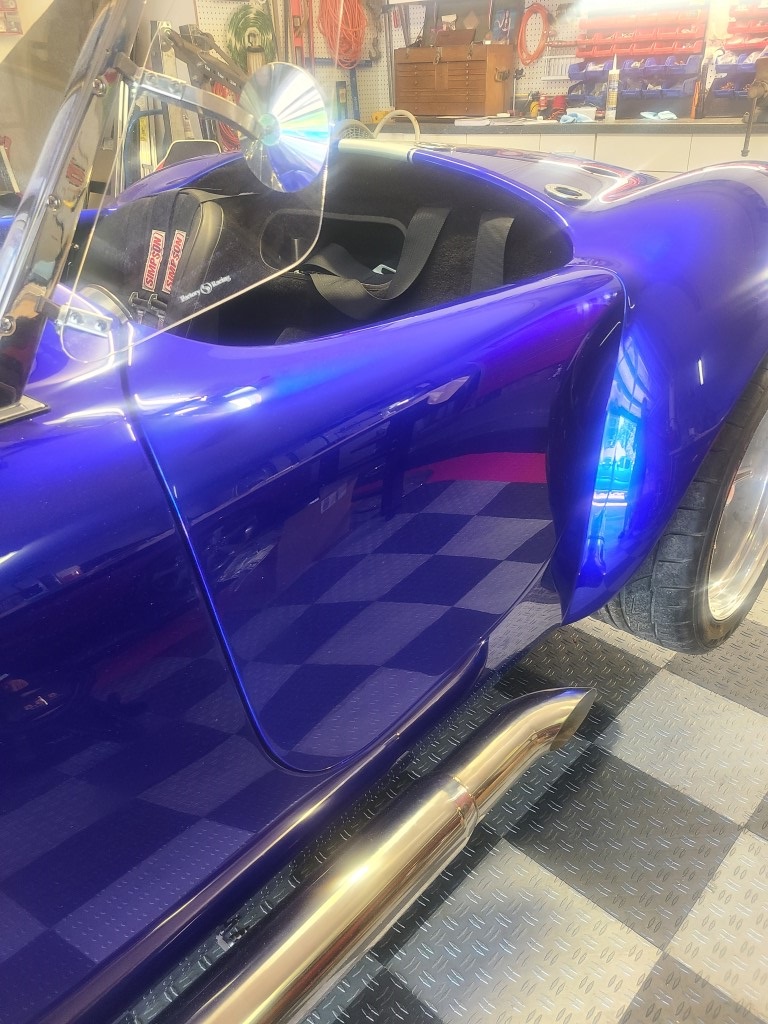
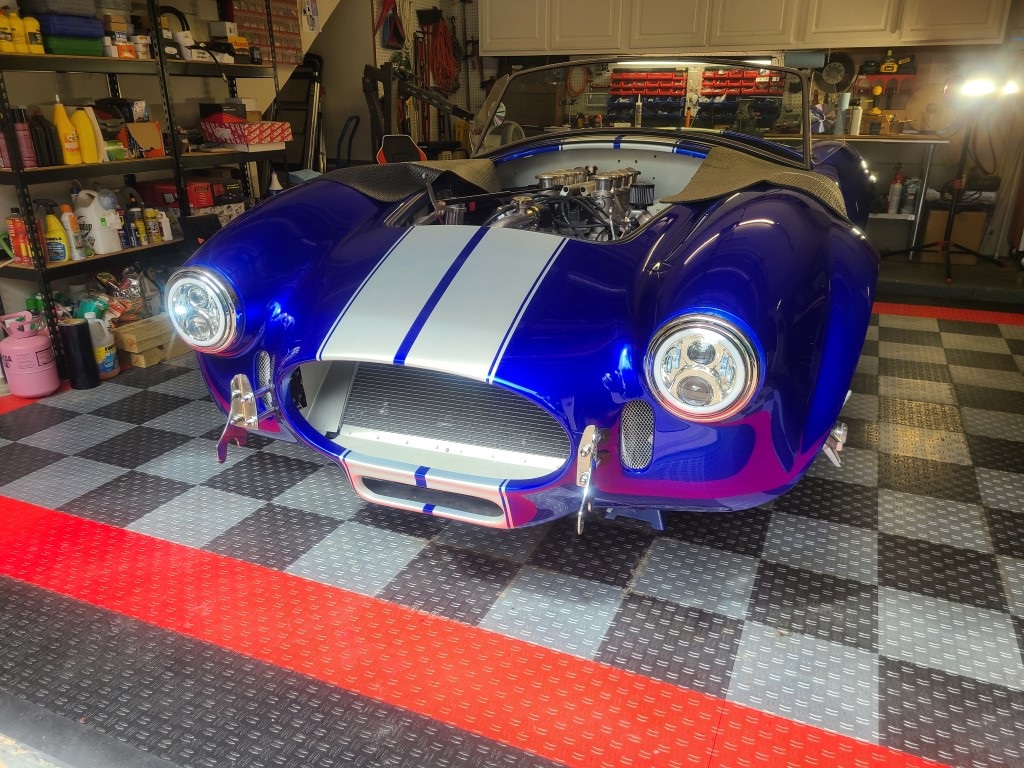
But on the bright side, it's a nice sunny day here so I got to see it outside in the sun. That blue really sparkles in the sun, it looks amazing.
-
Post Thanks / Like - 0 Thanks, 1 Likes
-
04-07-2024, 05:02 PM
#324
VERY NICE Mike 
Did you get the radiator surround painted white? If so, that is a nice touch! Tough to keep clean, but I suspect with your background building HotRods, not too much out of your wheel-house 
Craig C
-
04-07-2024, 06:48 PM
#325
Senior Member

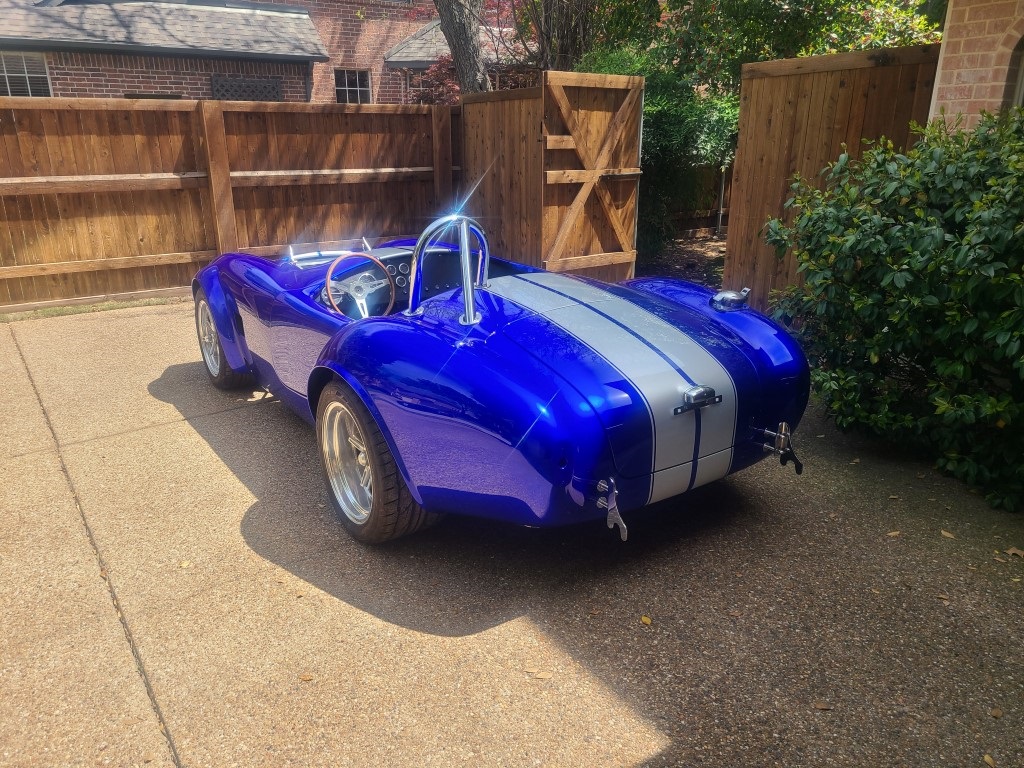
Beautiful! All your pictures look great, but I think that rear three quarter view is my favorite--something about that blue on the rear fenders and deck slope. I hope the issues with the painter are the last of your troubles, and that everything (especially including titling) goes super smooth for you. It's amazing that it's been 12-1/2 months--you're a patient man!
-
04-08-2024, 05:34 PM
#326
Senior Member
Spent the afternoon cleaning and doing some little things now that the car is back home. There's a pretty long list of to-do items, trying not to rush or get overwhelmed. I just need to remember it's like eating an elephant, just take one bite at a time.
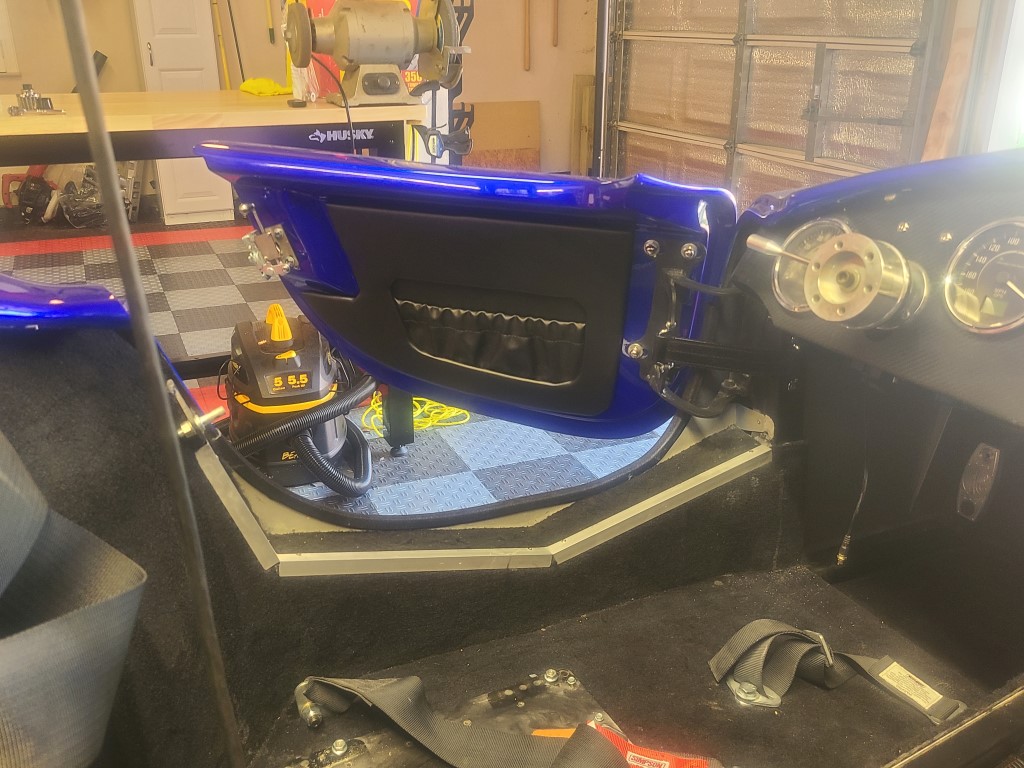
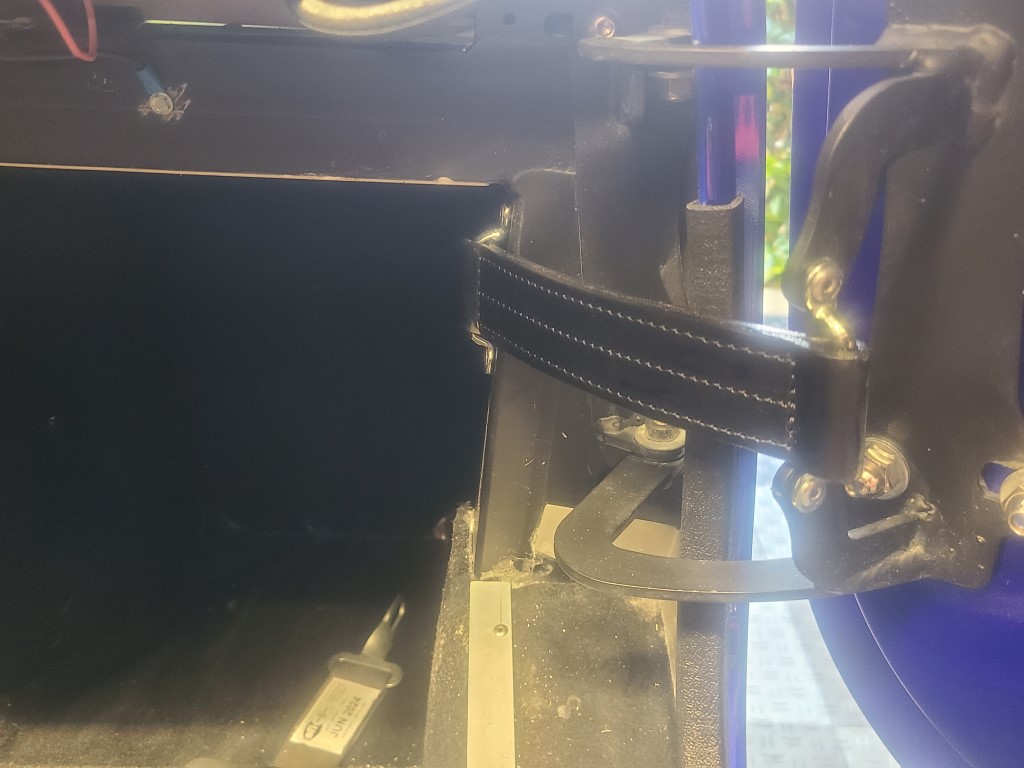
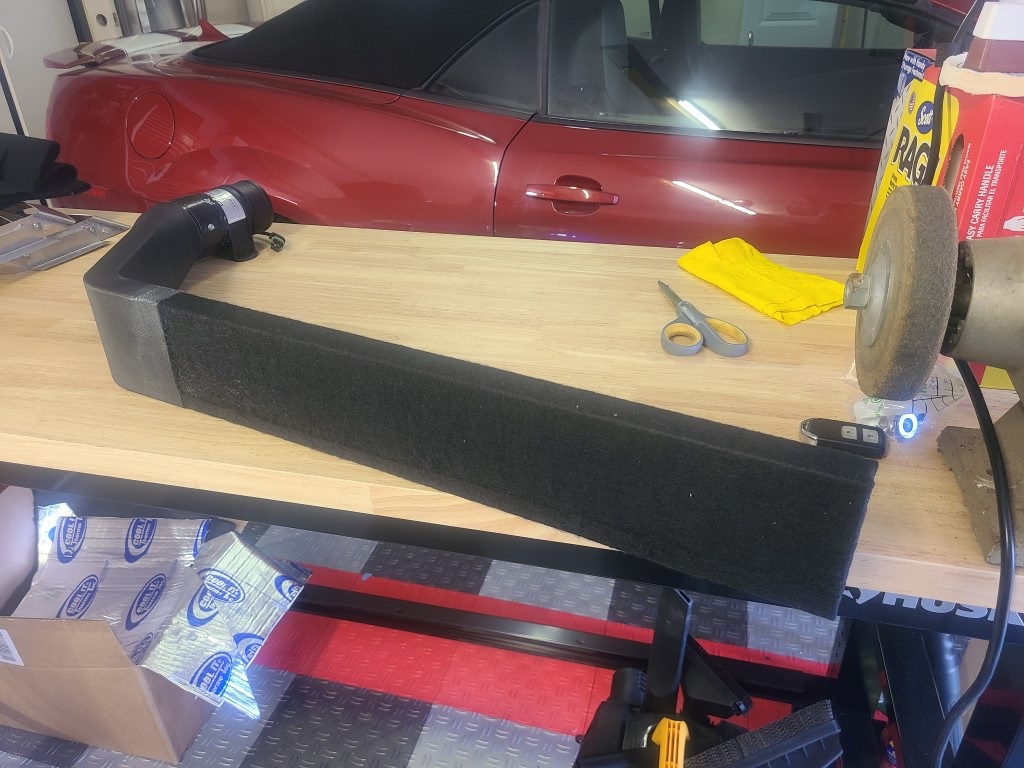
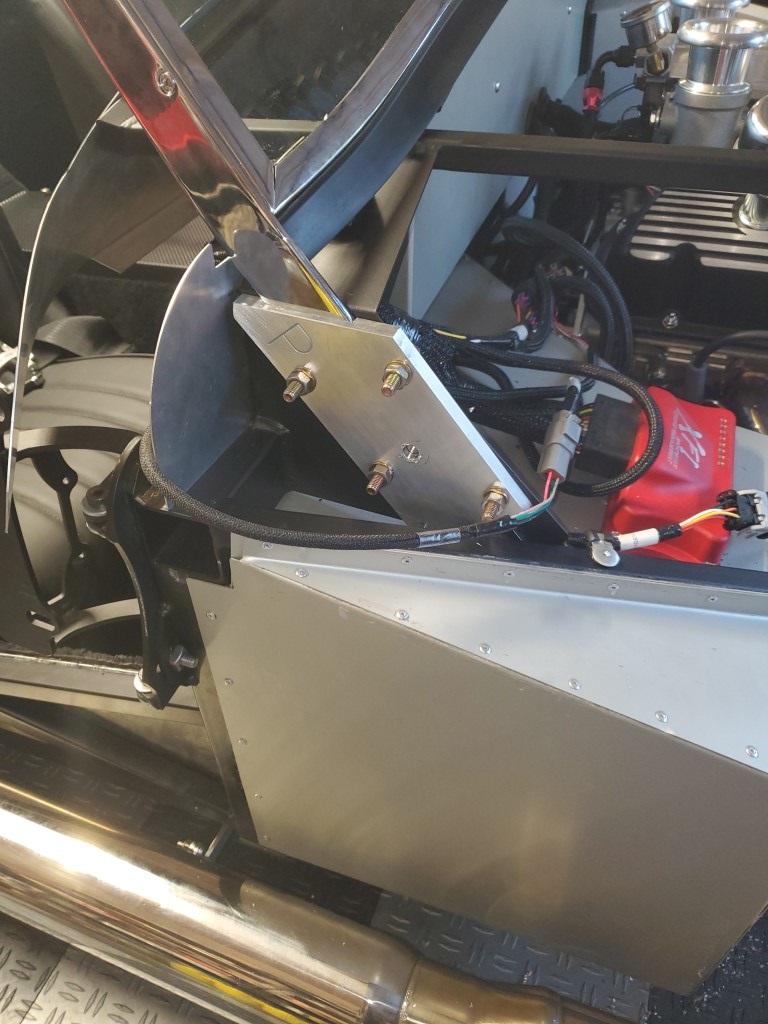
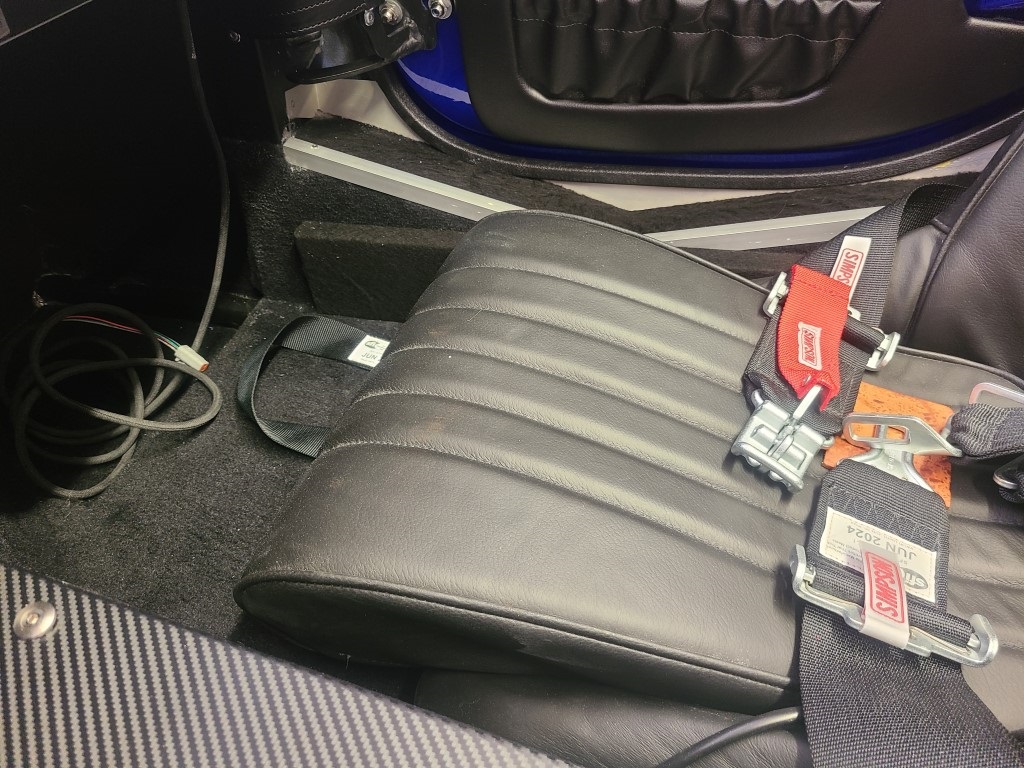
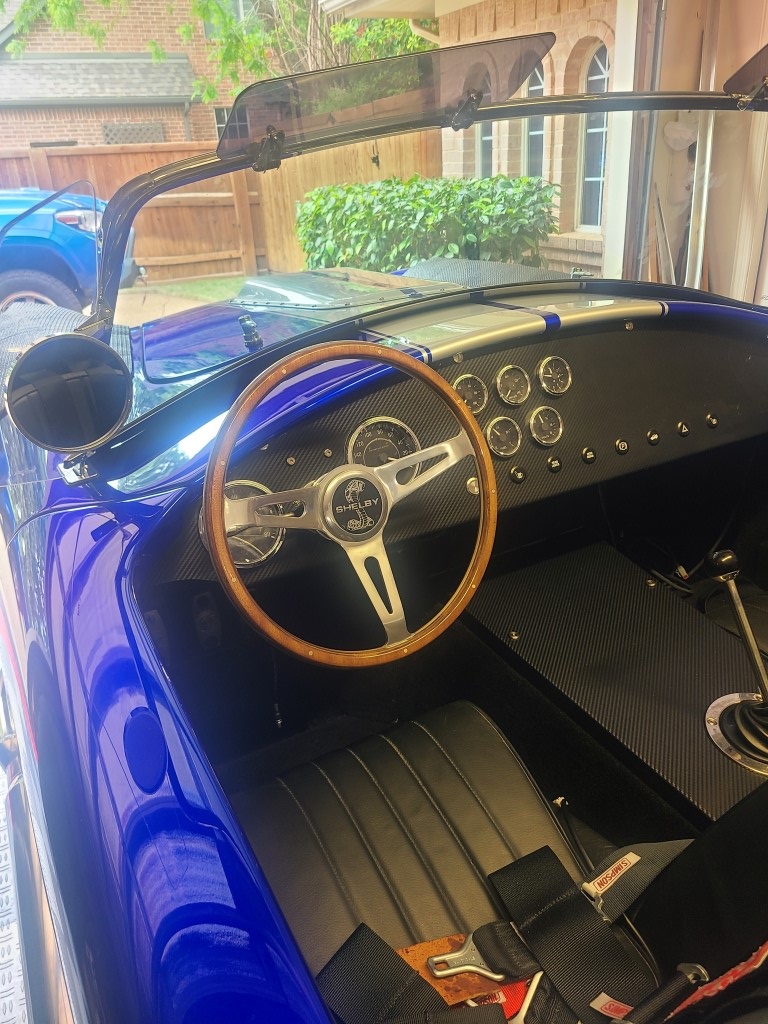
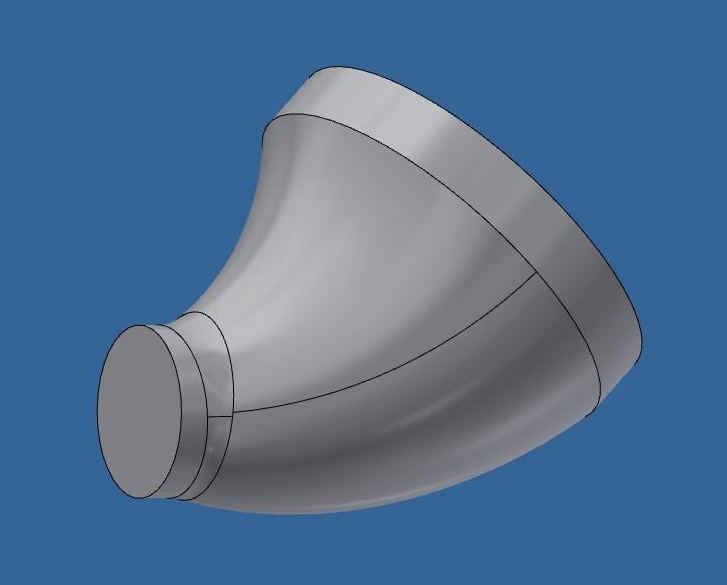
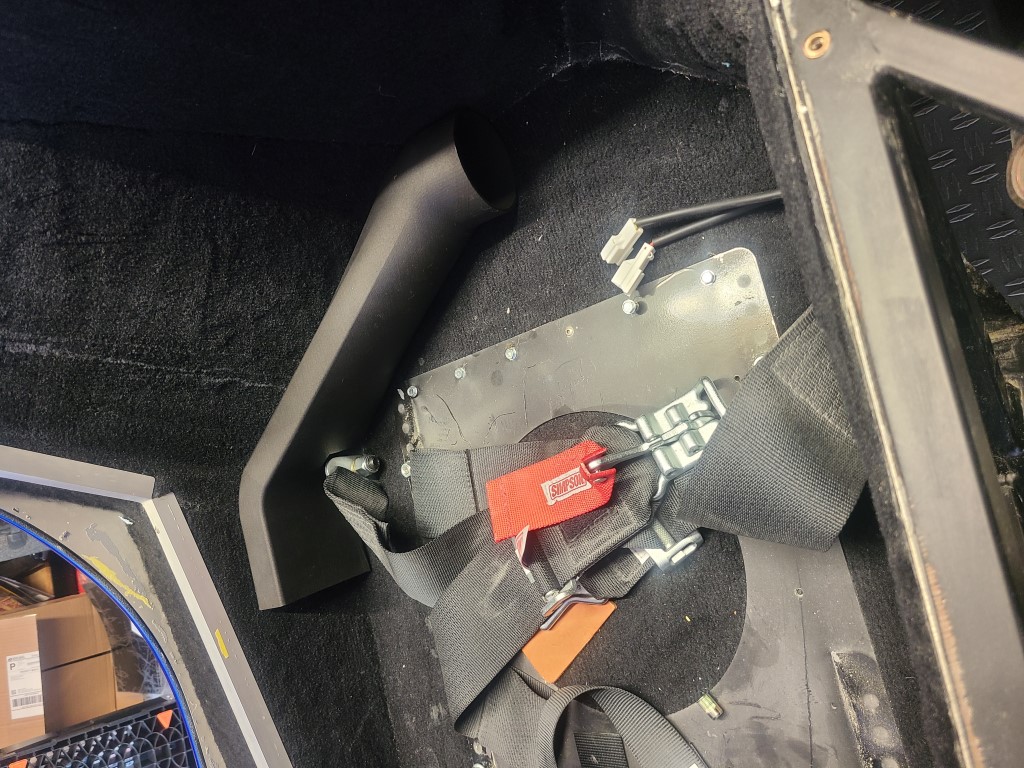
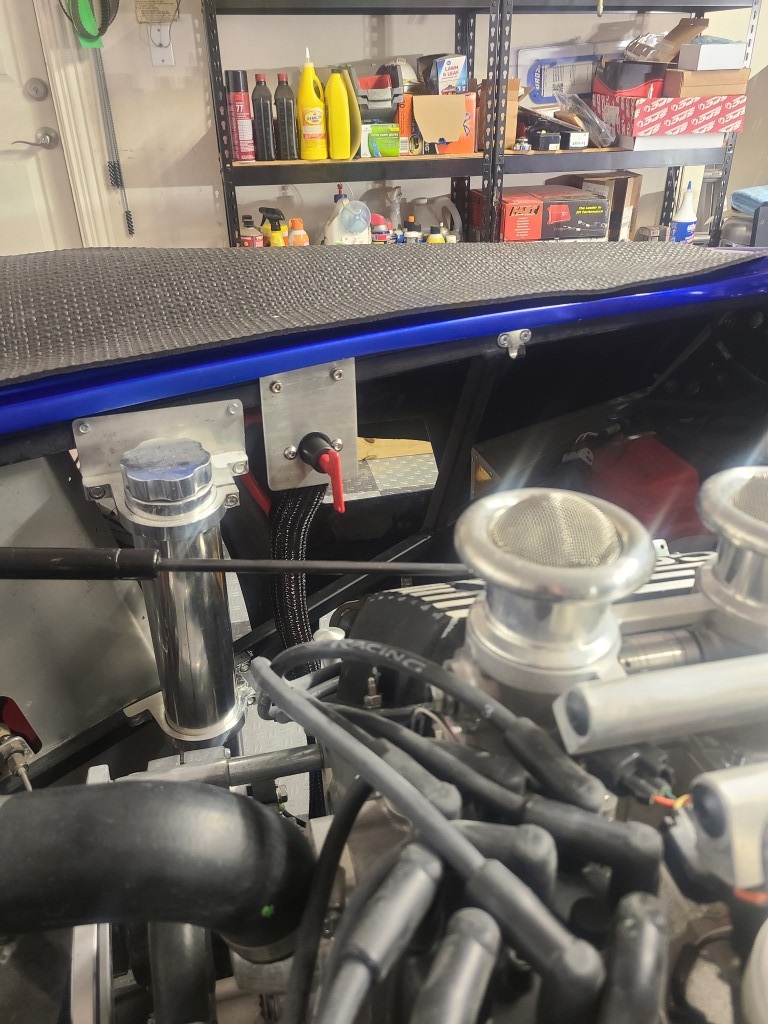
Did a test fit of my 3D printed air duct for the footbox cooling. I had to change out the seatbelt mouunting bolts from hex head to button head for a little clearance but that was it, the plenum slipped into place nicely. Now to get the mirror image printed for the DS.
-
04-08-2024, 05:37 PM
#327
Senior Member
Received my center cap for the steering wheel today, also 3D printed. I think it's going to look nice when it's polished and the background is filled with black.
-
Post Thanks / Like - 0 Thanks, 1 Likes
-
04-08-2024, 09:23 PM
#328
Senior Member

Glad to see your car is back home with you, that blue is truly one of a kind!! Looks awesome.
Delivery Date 6-24-23 Build thread
Living the Dream
SBF 427 564hp/576tq Holley Sniper with Hyperspark by Smeding Performance. Tremec TKX .68 OD. IRS . Wilwood 12.88 brakes. Wilwood EPB. First start 11-17-23. First go cart 11-20-23.
-
04-08-2024, 10:05 PM
#329
Your a trooper Mike, way to hang in there. Now back to the fun stuff
-
04-08-2024, 10:11 PM
#330
-
04-08-2024, 10:53 PM
#331
Senior Member


Originally Posted by
Mike.Bray

But after a quick 12 1/2 months my baby came home yesterday, less a couple of boxes of parts that I need to go back and collect.
Yesterday afternoon my good friend was nice enough to pick my car up and bring it to me.
Congrats on getting it back home, Mike. I was wondering what happened. Sorry to read about your bad experience. I hope things improve going forward. It looks great!
Chris
Coupe complete kit delivered: 4/22/24.
Build Thread. Coyote. T-56. IRS w/3.55. Wilwoods. PS. HVAC. Side windows.
MK4 Complete kit.
Build Thread Index. Delivered: 10/15/2020. Legal: 7/25/23. Coyote Gen3. TKO600 (0.64 OD). IRS w/3.55. PS. Wilwoods. Sway bars. This build is dedicated to my son, Benjamin.
Build Thread.
-
04-09-2024, 08:26 AM
#332
Not a waxer

I know all about what you’ve had to endure so am happy to see that it’s back home, hopefully without too much of a fight.
Jeff
-
04-09-2024, 08:36 AM
#333
Senior Member

Happy to see you moving forward again Mike.
Cheers from down under
Mk.4 FFR supplied Right hand drive
Received 12/2012 completed 12/2019
Gen1 Coyote / TKO600 / IRS
Lots of mods to make compliant for Australian design rules
-
04-11-2024, 04:34 PM
#334
Senior Member
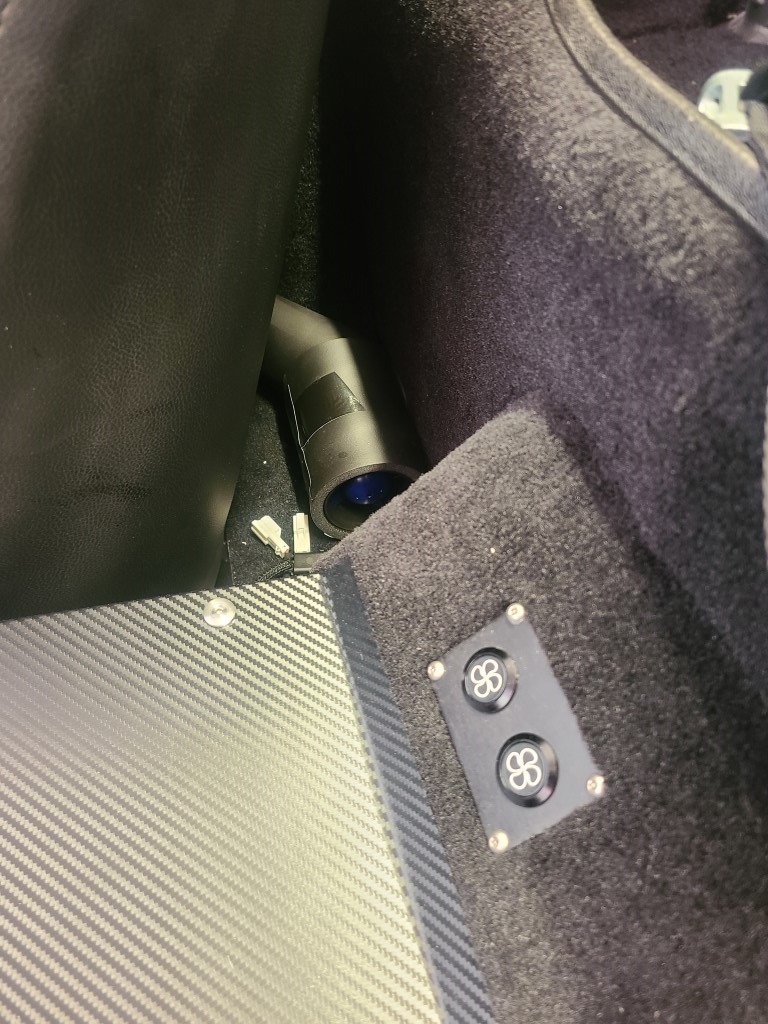
I went back and forth all through the build whether I should install a battery disconnect or not. Now that the car is mostly assembled and almost finished I've decided to add one. I don't recommend this method though, do it as you're wiring.
Two things convinced me to add it. One, these cars sit more than they are driven and there are small draws on the battery. Second, I'm using the FFR supplied switch with the removable key, a small theft deterrent. I mounted it under the hood which can be locked adding to the theft deterrence.
-
04-14-2024, 10:15 AM
#335
Senior Member
-
Post Thanks / Like - 0 Thanks, 2 Likes
-
04-14-2024, 10:29 AM
#336
#10333 Complete Kit, Carbed 427w, TKX, IRS and many other upgrades
- Order Date: September 11, 2021 - 20th Anniversary of 9/11
- Delivery Day: April 1, 2022 - April Fool's Day
- First Start and Go-Kart: January 20th, 2023
- Graduation Date: July 4th, 2023 - Independence Day!!
- Legal Registration Date: October 4, 2023 - My Birthday!!
Visit my MKIV Build Thread (#10333)
-
Post Thanks / Like - 1 Thanks, 0 Likes
-
04-14-2024, 04:42 PM
#337
Senior Member

Mike, looks great. Back to the fun stuff!.
I love the "missing" turn signals! Where did you find those head lights?
Allyn
-
04-14-2024, 04:57 PM
#338
Senior Member
Originally Posted by
Rebostar
Mike, looks great. Back to the fun stuff!.
I love the "missing" turn signals! Where did you find those head lights?
Allyn
These are the headlights I used. https://www.carid.com/1965-ford-gt-h...parentsubmodel[]=SUBMODEL|With+Factory+2-Headlight+System
-
04-16-2024, 05:35 PM
#339
Senior Member
-
04-17-2024, 01:21 PM
#340
Is the air just going to blow out the end of the rectangular tube towards the front of the foot box or are you going to add an additional feature to send the air towards passenger’s legs/seat?
Better question, is the purpose just to provide passive cooling to the passenger by directing airflow to the foot box to prevent stationary air from heating up too much or is purpose to provide active cooling by directing air towards the passenger to cool?
Last edited by JayOH; 04-17-2024 at 02:15 PM.
-
04-17-2024, 02:14 PM
#341
Senior Member
Originally Posted by
JayOH
Is the air just going to blow out the end of the rectangular tube towards the front of the foot box or are you going to add an additional feature to send the air towards passenger’s legs/seat?
Better question, is the purpose just to provide passive cooling to the passenger by directing airflow to the foot box to prevent stationary air from heating up too much or is purpose to provide actively cooling by directing air directly towards the passenger to cool?
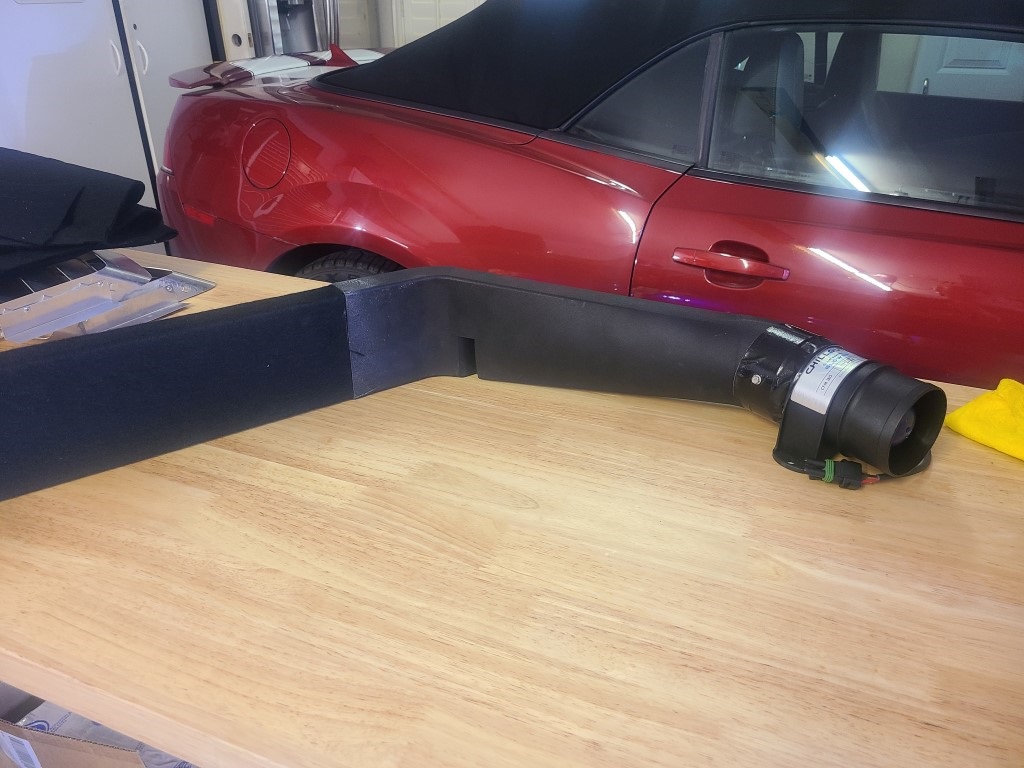
Yes, the air blows out the end of the rectangular tube into the footbox.
The theory is twofold. First, by pulling (relatively) cool air from behind the seat and blowing it into the footbox it will help keep the area cool as the footboxes tend to heat up from the engine and headers. Second, blowing air into the footbox will slightly increase the pressure inside creating a pressure differential between the inside of the footbox and the engine compartment.
I think blowing relatively cool air into the footbox will help. I doubt if the pressure differential created will be enough to make a difference though. Either way I don't think what I'm doing is going to hurt anything, just remains to be seen how much it helps.
-
04-23-2024, 01:20 PM
#342
Senior Member
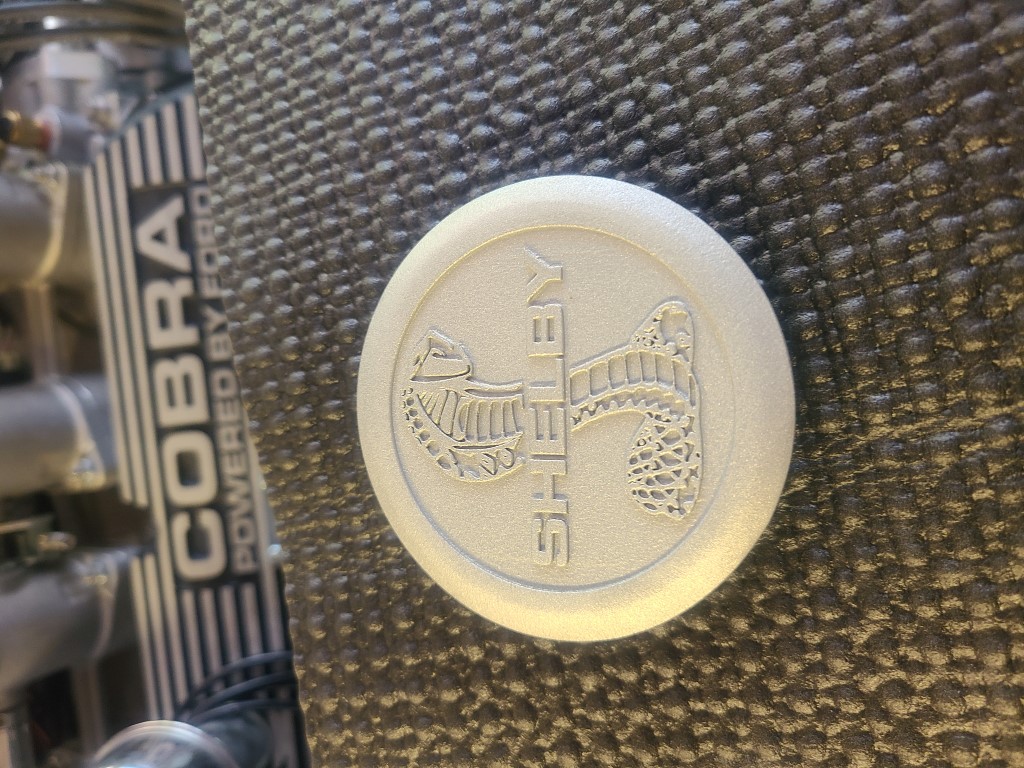
Small update, got the steering wheel center insert finished today.
Here's the part raw from the 3D printer. Material is aluminum.
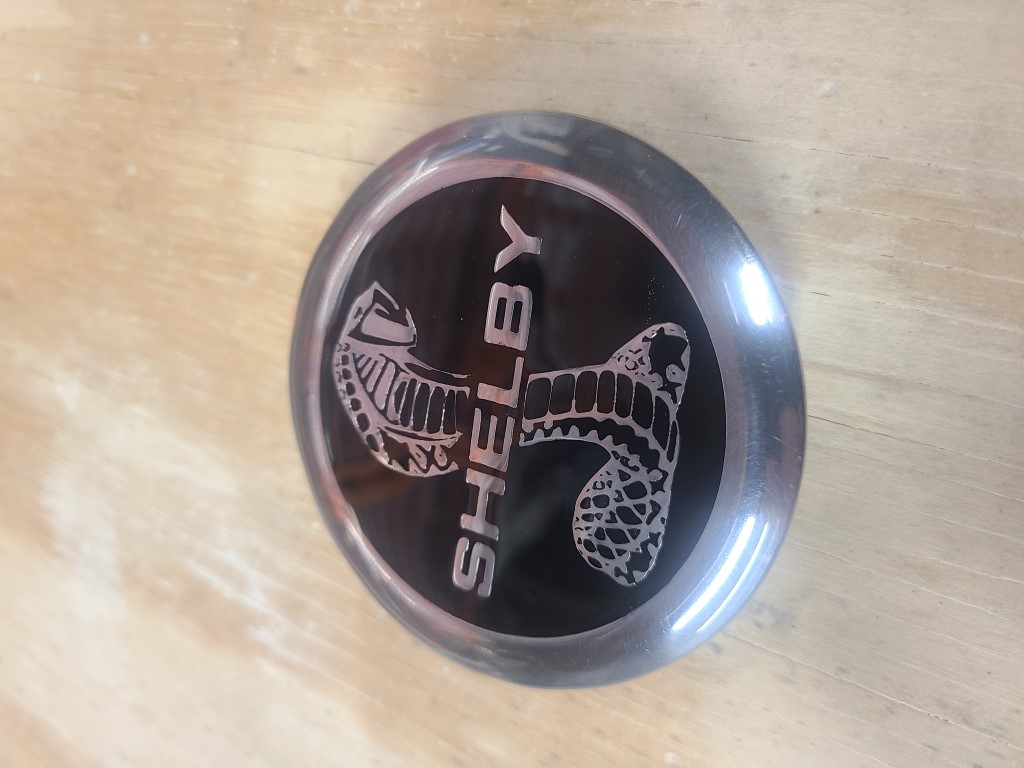
And here it is after my buddy Matt Bufford did his magic and made my junk look good.
-
Post Thanks / Like - 0 Thanks, 3 Likes
-
04-23-2024, 02:30 PM
#343
Senior Member

looking good. love the custom touches.
-
04-24-2024, 05:07 PM
#344
Senior Member
-
Post Thanks / Like - 0 Thanks, 1 Likes
-
04-24-2024, 05:12 PM
#345
Senior Member
-
04-24-2024, 05:26 PM
#346
Senior Member
-
Post Thanks / Like - 0 Thanks, 1 Likes
-
04-25-2024, 01:59 PM
#347
Good luck with the build. I'm in Houston and look forward to seeing your blog.
-
04-25-2024, 04:48 PM
#348
Senior Member
-
04-26-2024, 05:52 PM
#349
Senior Member
Mike
Your car is looking awsome!! Where can I find that cool carbon fiber console cover? I need one!!
Allyn....aka Rebostar
-
04-27-2024, 10:12 AM
#350
Senior Member
Originally Posted by
Rebostar
Where can I find that cool carbon fiber console cover? I need one!!
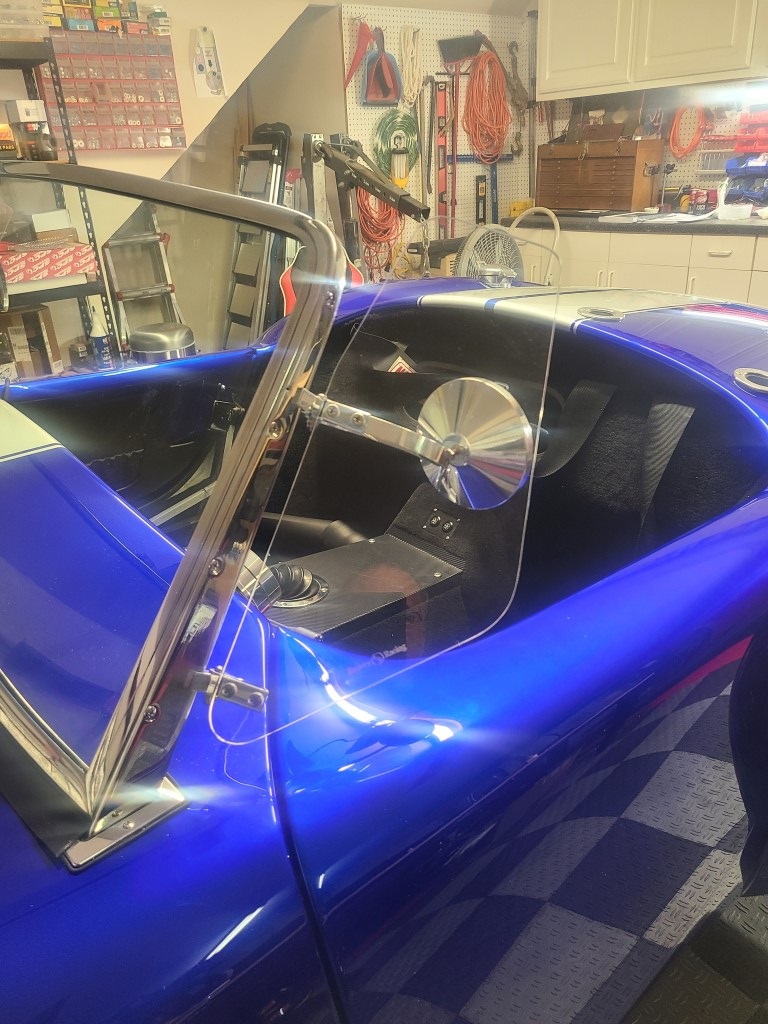
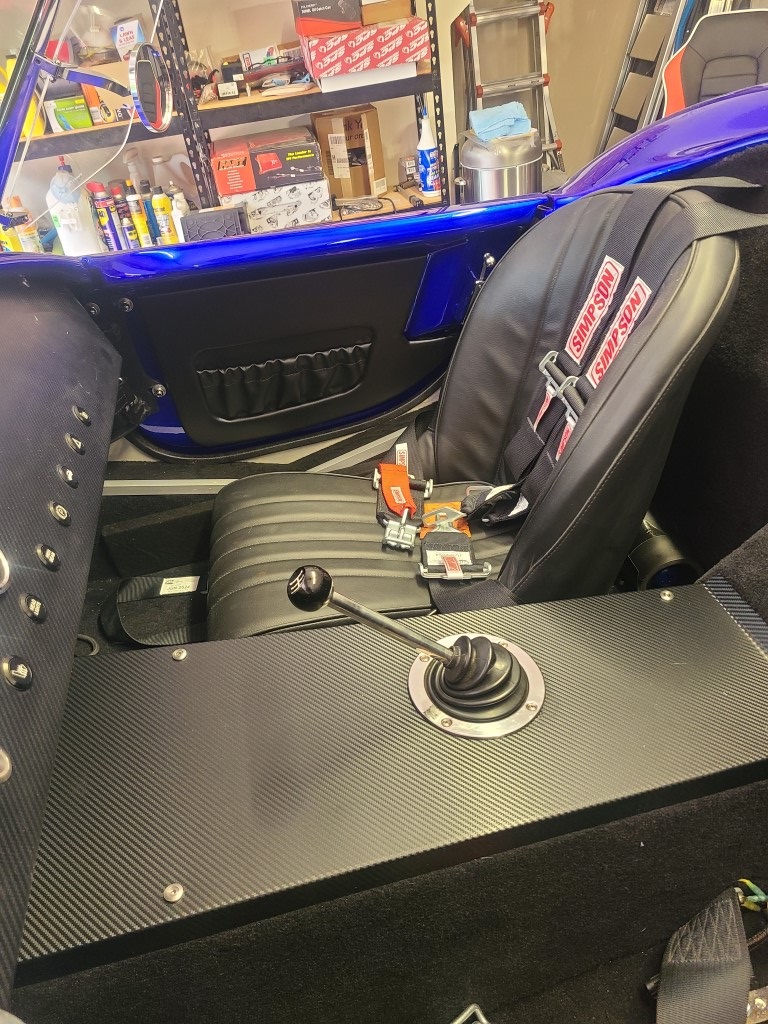
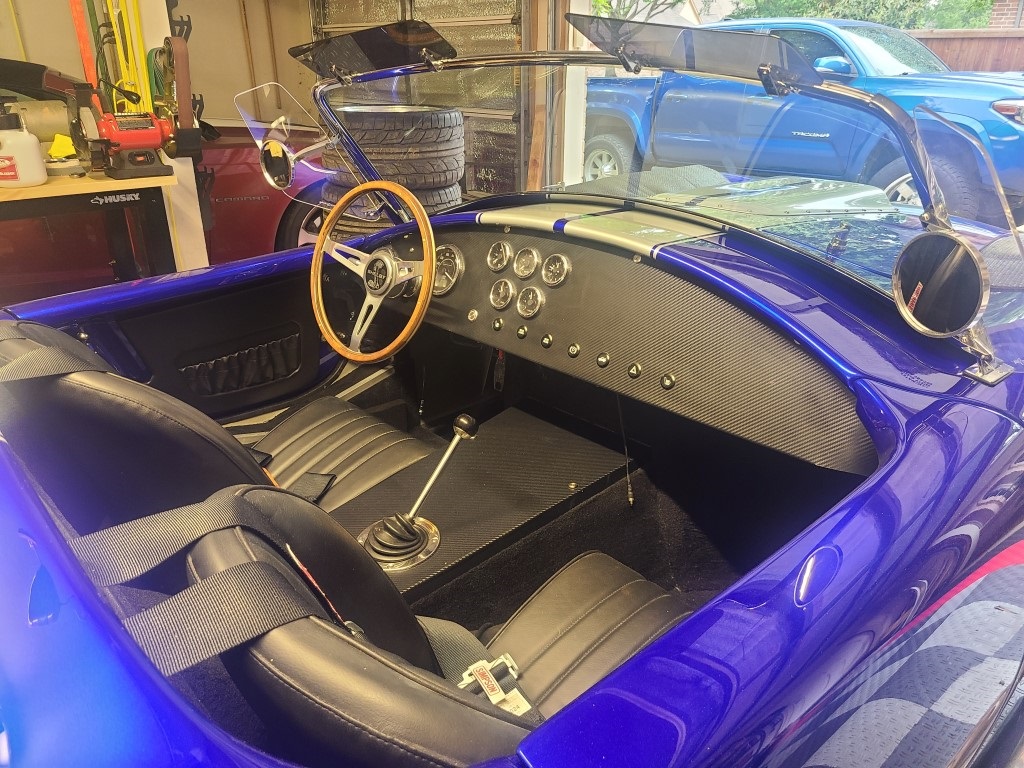
Tricked you lol! it's not really carbon fiber. I started with this heavier tunnel top from FFMetal. It comes blank so you can put the shifter hole where you need it. The FFR-supplied one already has a hole and it's usually in the wrong place. FFMetal also sells the Firewall Forward Kit and Fat Tire "F" panels which I would recommend.
Then I covered it with this stuff from Amazon.
If you're interested I used 10-24 screws from here.
Mike
-
04-27-2024, 05:26 PM
#351
Senior Member
-
Post Thanks / Like - 0 Thanks, 1 Likes
-
05-02-2024, 03:48 PM
#352
Senior Member
-
05-04-2024, 06:08 PM
#353
Senior Member
-
05-07-2024, 11:08 AM
#354
Senior Member
Trunk Tuesday!
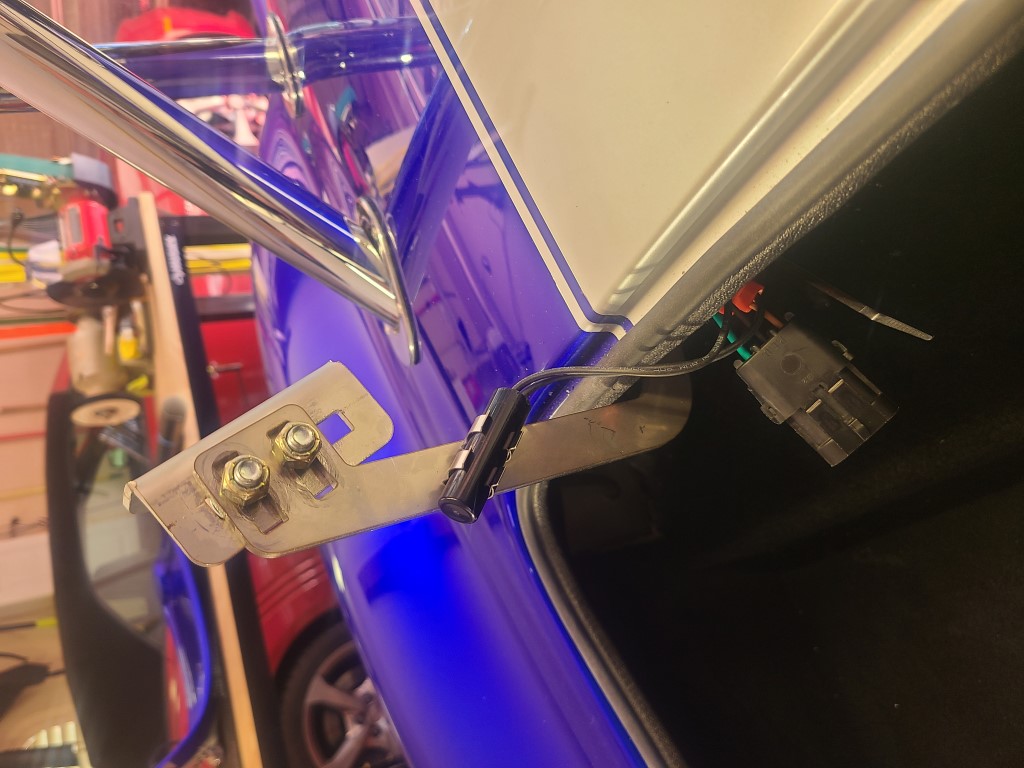
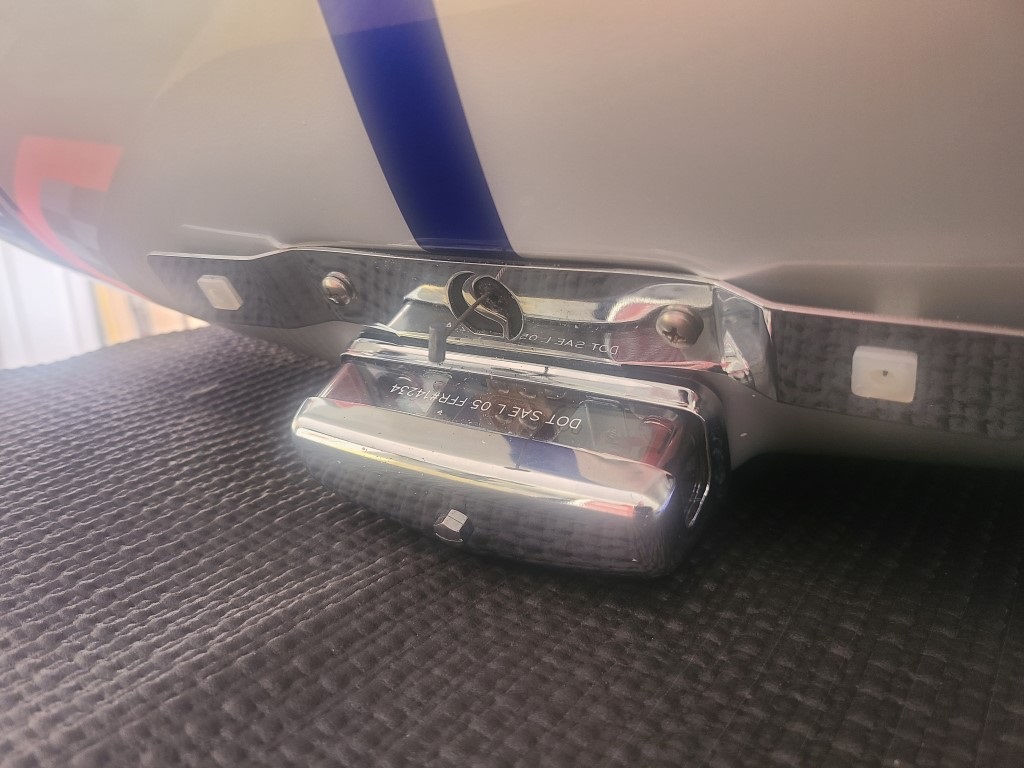
Buttoned up the deck lid today so it's ready to go back on when the rest of the trunk is done. I installed an electric trunk release and ran the wires internally to a Weather Pack connector. Also installed a cover over the opening, but first polished it up a little for some bling.
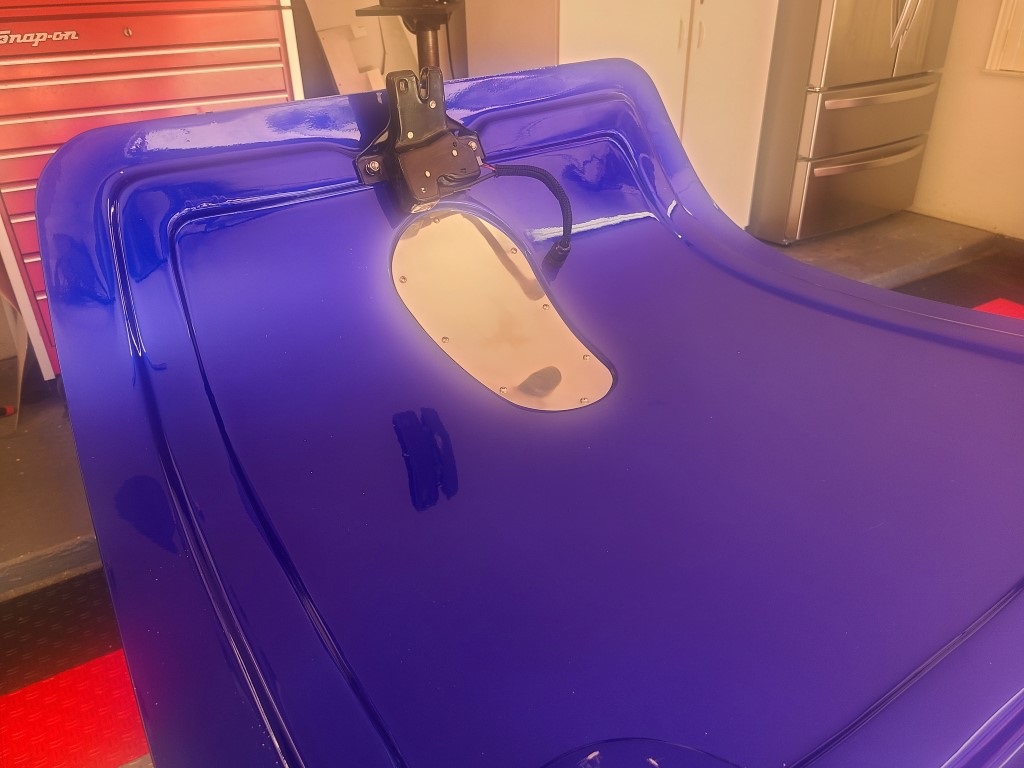
This trunk release has a cable for an emergency manual release so I ran it out through the rear of the deck lid behind the license plate.
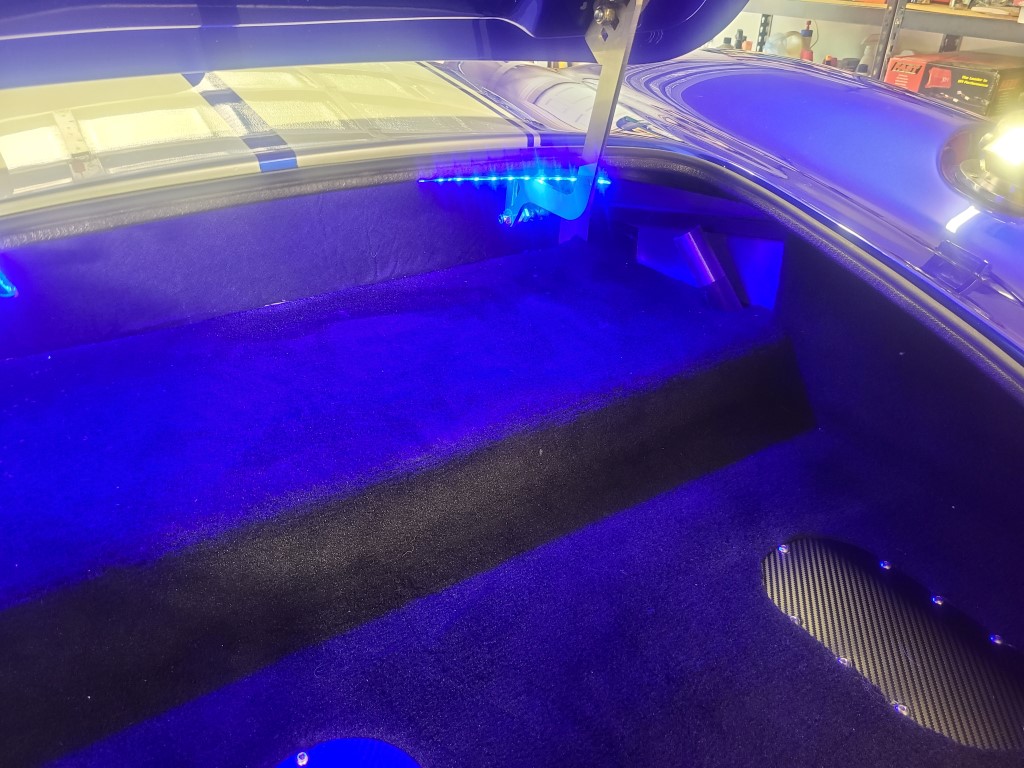
Now on to the inside of the trunk.
-
05-08-2024, 08:02 AM
#355
Originally Posted by
Mike.Bray
And here it is after my buddy Matt Bufford did his magic and made my junk look good.
Wow, that looks great. Do you have a friend or local business that does 3D printing in metal or is there an online service you used to have the print made?
-
05-08-2024, 08:53 AM
#356
Senior Member
Originally Posted by
JayOH
Wow, that looks great. Do you have a friend or local business that does 3D printing in metal or is there an online service you used to have the print made?
I have both but lately I've been getting all of my 3D printing through a website. Most of the actual printing has been done in China, best cost/quality/delivery. These steering wheel inserts are aluminum with is very difficult to 3D print but they knocked it out of the park.
-
05-08-2024, 09:24 AM
#357
Mike,
Do you have a file you could share for this insert?
Thank You!!
Craig M
-
05-08-2024, 02:57 PM
#358
Senior Member
-
05-11-2024, 10:08 AM
#359
Senior Member
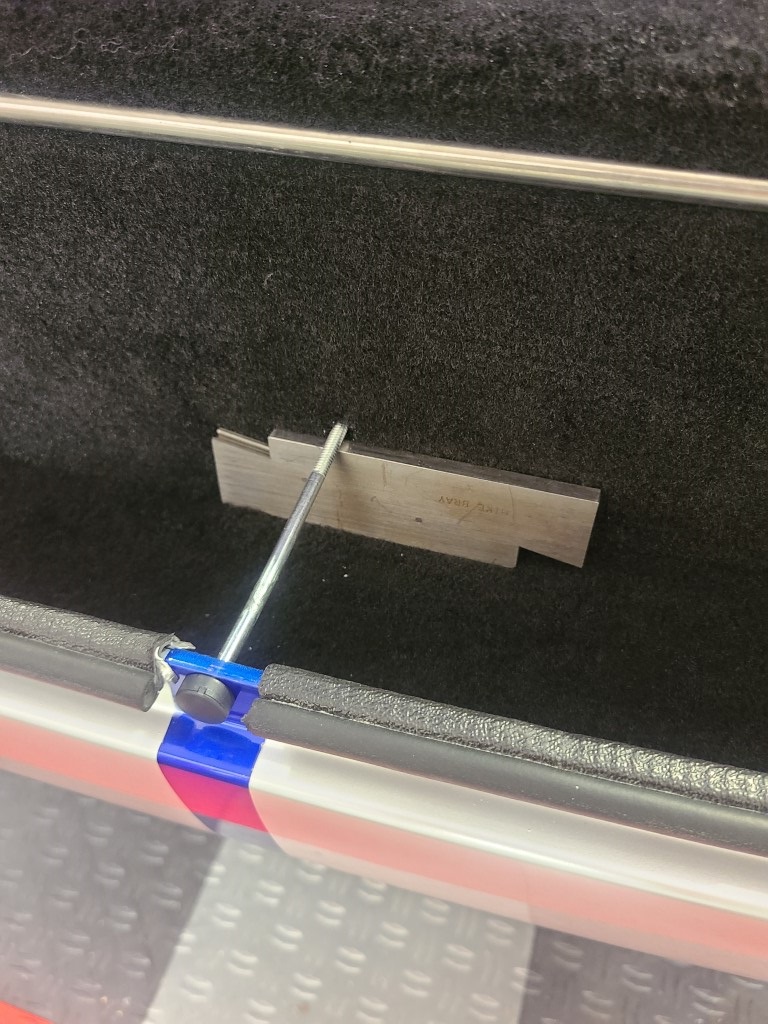
One final post on the trunk lid. Since I was using an electric latch mechanism from a Ford Taurus determining where the latch pin needed to be was a bit of a challenge. My first idea was to have my wife crawl inside the trunk and mark it but she objected to that for some reason. Guess I should have installed a drop trunk. There's not a lot of leeway where you can drill the hole in the body so I just kind of centered it. From there I figured I could angle the pin up or down some to find the ideal position. Off to Ace Hardware to get a #10 screw x 4" long (cheapest I've ever got out of that place) and installed it through the hole supported on the other end by an adjustable parallel from my machinist days. Actually ended up dropping the latch mechanism some and angling the latch pin up slightly but was able to nail it.
In my previous post I said I had done a final alignment of the trunk lid. I lied. My wife pointed out it could be better, her eagle eyes are both a blessing and a curse sometimes. So a little more tweaking, pass inspection this time, and now ready to say the trunk is done. BTW, the trunk is opened by a pushbutton on the dash, in the video she's using the manual cable release so we know it works.
-
05-11-2024, 11:15 AM
#360
Not a waxer
Originally Posted by
Mike.Bray
...My first idea was to have my wife crawl inside the trunk and mark it but she objected to that for some reason.
Mike, surely you've heard that if you want to know who really loves you, lock your wife and your dog in the trunk of your car then let them out an hour later and see who is happy to see you.
Jeff
-
Post Thanks / Like - 0 Thanks, 2 Likes


 Thanks:
  Likes:


 Reply With Quote