-
Member

-
Member

-
Post Thanks / Like - 0 Thanks, 1 Likes
-
Member

-
Post Thanks / Like - 0 Thanks, 1 Likes
-
Member

The other London...
Not build related, but an incredible experience for my wife and I was a trip to the U.K. last month. The primary purpose was to run the London Marathon. All I can say is what an experience!!! We have run the major marathons here in the US and the crowds in London were over the top! We have now both completed four of the six Major Marathons in the world, just Tokyo and Berlin remain (and we are scheduled for Berlin this fall).
A small sample of the incredible places we experienced.
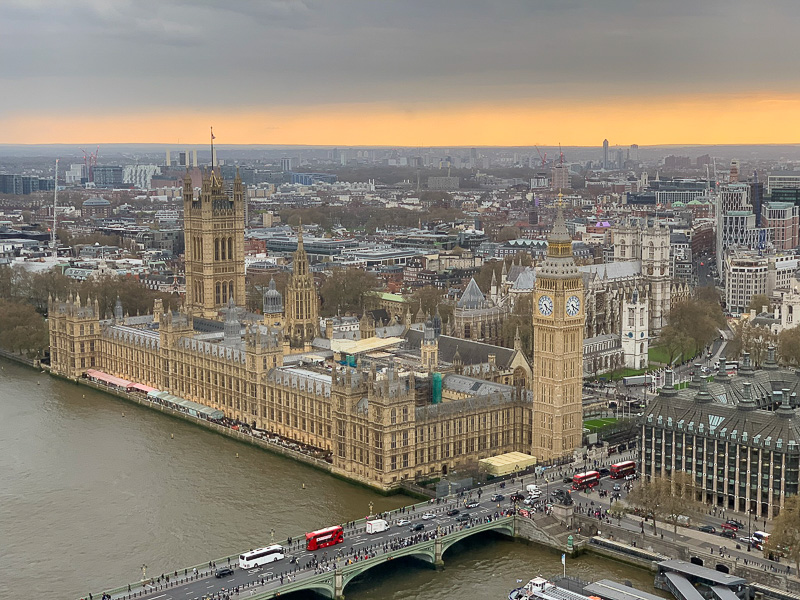
Westminster Abbey and the clock tower where Big Ben lives (Big Ben is the nickname of the bell)
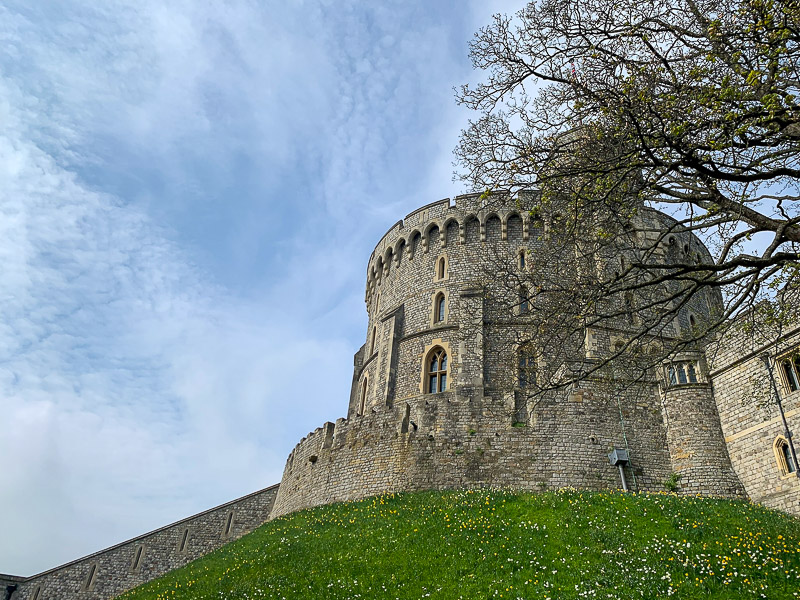
Windsor castle, the lower portion built in 11th century
Also visited Edinburgh for a few days

Now back to the build!
Type 65 Daytona Coupe Complete Kit ordered 11/2021, delivered 7/25/2022....the fun has begun!
Build Thread
-
Post Thanks / Like - 0 Thanks, 1 Likes
-
Senior Member

Hi Scott. Just read through your build. I think you're making great progress, and not a little ingenuity along the way. Your build looks really clean, and professional. Keep up the good work. I'm subscribed and looking forward to your next progress update.
P.S. my wife and I are just finishing up The Crown series on Netflix. Probably about as close to London as we'll get. So cool you and your wife saw it in person, and checked off another big marathon. Impressive.
Chris
Coupe complete kit delivered: 4/22/24.
Build Thread. Coyote. T-56. IRS w/3.55. Wilwoods. PS. HVAC. Side windows.
MK4 Complete kit.
Build Thread Index. Delivered: 10/15/2020. Legal: 7/25/23. Coyote Gen3. TKO600 (0.64 OD). IRS w/3.55. PS. Wilwoods. Sway bars. This build is dedicated to my son, Benjamin.
Build Thread.
-
Post Thanks / Like - 1 Thanks, 0 Likes
-


Scott,
Your build is looking good. A couple of thoughts looking at your updates.
1. I also put the heater valve inside the footbox. It's a tight fit and with hoses coming out both sides I didn't see the need to mount it to anything as it seems very secure.
2. With regard to the oil cooler location, I can tell you just from a few heat cycles in the driveway, when the fan comes on that air is HOT! Would be nice to mount the cooler in front or in a different spot, but not a lot of options. Maybe the concentration of heat won't be as bad while driving down the road. I put a small steering fluid cooler on the engine side of that panel.
My 27 yr old son who lives in Boulder is also a runner. Has run Chicago and Boston, among a few smaller ones. I think he's shooting for Berlin sometime soon. Has one in Ogden Utah this Saturday.
John
Gen 3 Coupe #334 received 11/4/21. Coyote, IRS, TKX, Wilwoods
'02 GT donor, 4.6 sohc, Received #5488 on 5/29/06. 3-link, ps, pb. Hoosier Cobra member (Hoosiercobra.com)
-
Post Thanks / Like - 0 Thanks, 1 Likes
-
Member

Thanks Chris, some friends we traveled to London with mentioned the Crown series. I wish I would've know about that before our trip, they said it helped provide a lot of history about the things we were seeing. We also couldn't help but notice just how nice everyone was!

Originally Posted by
Indy Shu

Scott,
1. I also put the heater valve inside the footbox. It's a tight fit and with hoses coming out both sides I didn't see the need to mount it to anything as it seems very secure.
2. With regard to the oil cooler location, I can tell you just from a few heat cycles in the driveway, when the fan comes on that air is HOT! Would be nice to mount the cooler in front or in a different spot, but not a lot of options. Maybe the concentration of heat won't be as bad while driving down the road. I put a small steering fluid cooler on the engine side of that panel.
My 27 yr old son who lives in Boulder is also a runner. Has run Chicago and Boston, among a few smaller ones. I think he's shooting for Berlin sometime soon. Has one in Ogden Utah this Saturday.
John, thanks for the input. I looking at the heater control valve over the weekend, trying to determine how best to fabricate a bracket to hold it and came to the same conclusion.
I was concerned about location of the PS cooler and the hot air coming out of the radiator. Obviously I'm committed so we'll see how it works, worst case I can always fabricate some ducts to bring cool air to it 
And congrats to your son, and definitely have him add the London Marathon to his list!
Type 65 Daytona Coupe Complete Kit ordered 11/2021, delivered 7/25/2022....the fun has begun!
Build Thread
-
Your build is looking super nice! I also put the bypass switch inside, but pushed out the footbox to get it tucked in, and also to be able to close it off to try to keep the heat out of the footbox. I was able to use the supplied bracket, but ended up bending the top mounting tab in 180 degrees, put in rivnuts, and put screws in from the outside.
20230415_141942.jpg
20230415_141956.jpg
Last edited by burchfieldb; 05-19-2023 at 04:20 PM.
-
Member


Originally Posted by
burchfieldb

Your build is looking super nice! I also put the bypass switch inside, but pushed out the footbox to get it tucked in, and also to be able to close it off to try to keep the heat out of the footbox. I was able to use the supplied bracket, but ended up bending the top mounting tab in 180 degrees, put in rivnuts, and put screws in from the outside.
20230415_141942.jpg
20230415_141956.jpg
Thank you! I didn't think about modifying the footbox, great idea. I plan on putting insulation on the heater hoses inside the footbox to cut down on the radiated heat.
Type 65 Daytona Coupe Complete Kit ordered 11/2021, delivered 7/25/2022....the fun has begun!
Build Thread
-
Member

-
Post Thanks / Like - 1 Thanks, 0 Likes
-
Member

Finally back at it
After an unexpected year off from the build(for good reasons), I'm back at it!
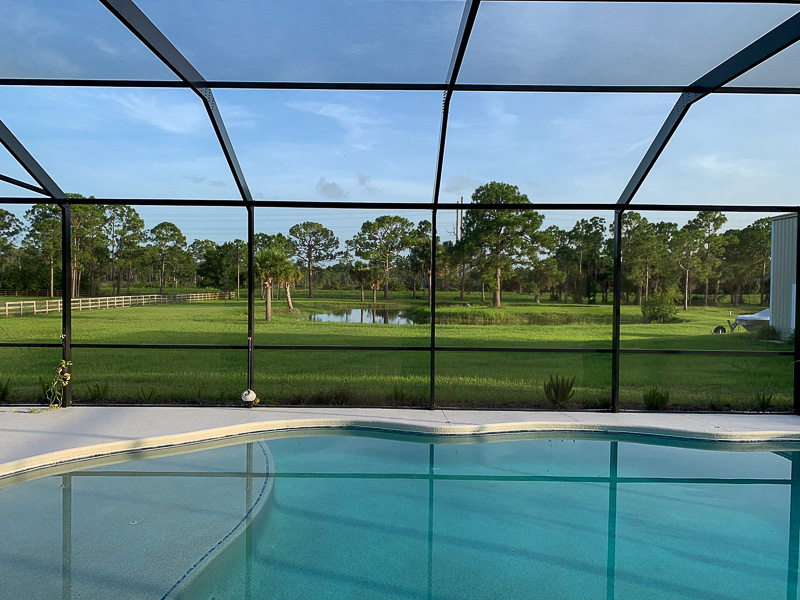
In June of last year my wife decided she was tired of the beachside barrier island area where we lived due mainly to traffic and noise, not to mention ridiculous insurance rates. We found a newer house on almost 3 acres about 20 miles south in an equestrian community, and as a major bonus it had a 1500 square foot building!
So began the scramble of buying, selling and then the moving. We've been in the new house 11 months, after getting settled into the house a lot of time was spent moving into the shop and making it useable. I'm not done (probably never will be) but it's at a point where I can spend time on the Coupe again. The last few months have been spent getting reacquainted with the car and figuring out where I left off.
The back yard:
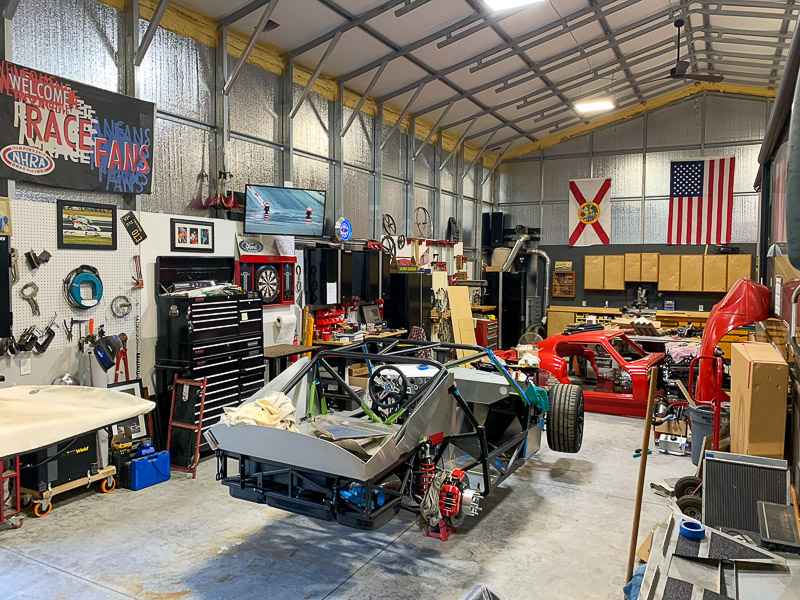
The shop, started with just an empty metal building and only 6 outlets, and no 220V drops. So added four 220V outlets, two additional circuits of 120V outlets, Plywood on the walls, made and installed cabinets, bought more cabinets, made shelving and this is the current state:
More to come about the progress that has been made on the kit. The major accomplishment was the engine bay aluminum went out and is back from powder coating!
Type 65 Daytona Coupe Complete Kit ordered 11/2021, delivered 7/25/2022....the fun has begun!
Build Thread
-
Post Thanks / Like - 0 Thanks, 6 Likes
-
Senior Member

Welcome back, Scott. I can't believe it's been over a year since your last build update. I really enjoyed following your build last year. Will be taking some notes since my Coupe build is now underway.
I hear you on the house move. I did the same thing. Been in my "new" (built in 1907) place for 10 months. I also inherited a metal building. It was an empty shell. So, spent the entire winter getting it up to speed. It's much smaller than my last garage, so every square inch has a purpose.
Looking forward to seeing your build progress. Just received my Gen 4 Coyote. Trying to figure out how to get it off the pallet using my HF engine hoist. The pallet is too wide for the hoist legs. Will probably cut down the pallet with my Sawzall in order to slide the hoist into position.
Chris
Coupe complete kit delivered: 4/22/24.
Build Thread. Coyote. T-56. IRS w/3.55. Wilwoods. PS. HVAC. Side windows.
MK4 Complete kit.
Build Thread Index. Delivered: 10/15/2020. Legal: 7/25/23. Coyote Gen3. TKO600 (0.64 OD). IRS w/3.55. PS. Wilwoods. Sway bars. This build is dedicated to my son, Benjamin.
Build Thread.
-
Member

Thanks Chris, it surprised me how long it took to get a new shop space organized and functional! Mine is bigger than my previous garage, I can't imagine having to go from large to smaller. That would be no easy task!
My Gen 3 Coyote was mounted to a small metal stand that was mounted to the pallet. If I remember right I was able to unbolt it and slide the engine towards the corner of the pallet and the engine hoist straddled that corner and was able to pick it up. Then I cut down the pallet so it would fit between the engine hoist, put casters on it and used that to store the engine until it went in the car.
Type 65 Daytona Coupe Complete Kit ordered 11/2021, delivered 7/25/2022....the fun has begun!
Build Thread
-
Senior Member

Good idea to slide it toward a corner. Didn't think of that. Not sure it would have made a difference in my case, as that would take some serious muscle!
It was Sawzall to the rescue. Was able to narrow the pallet so the hoist could straddle it.
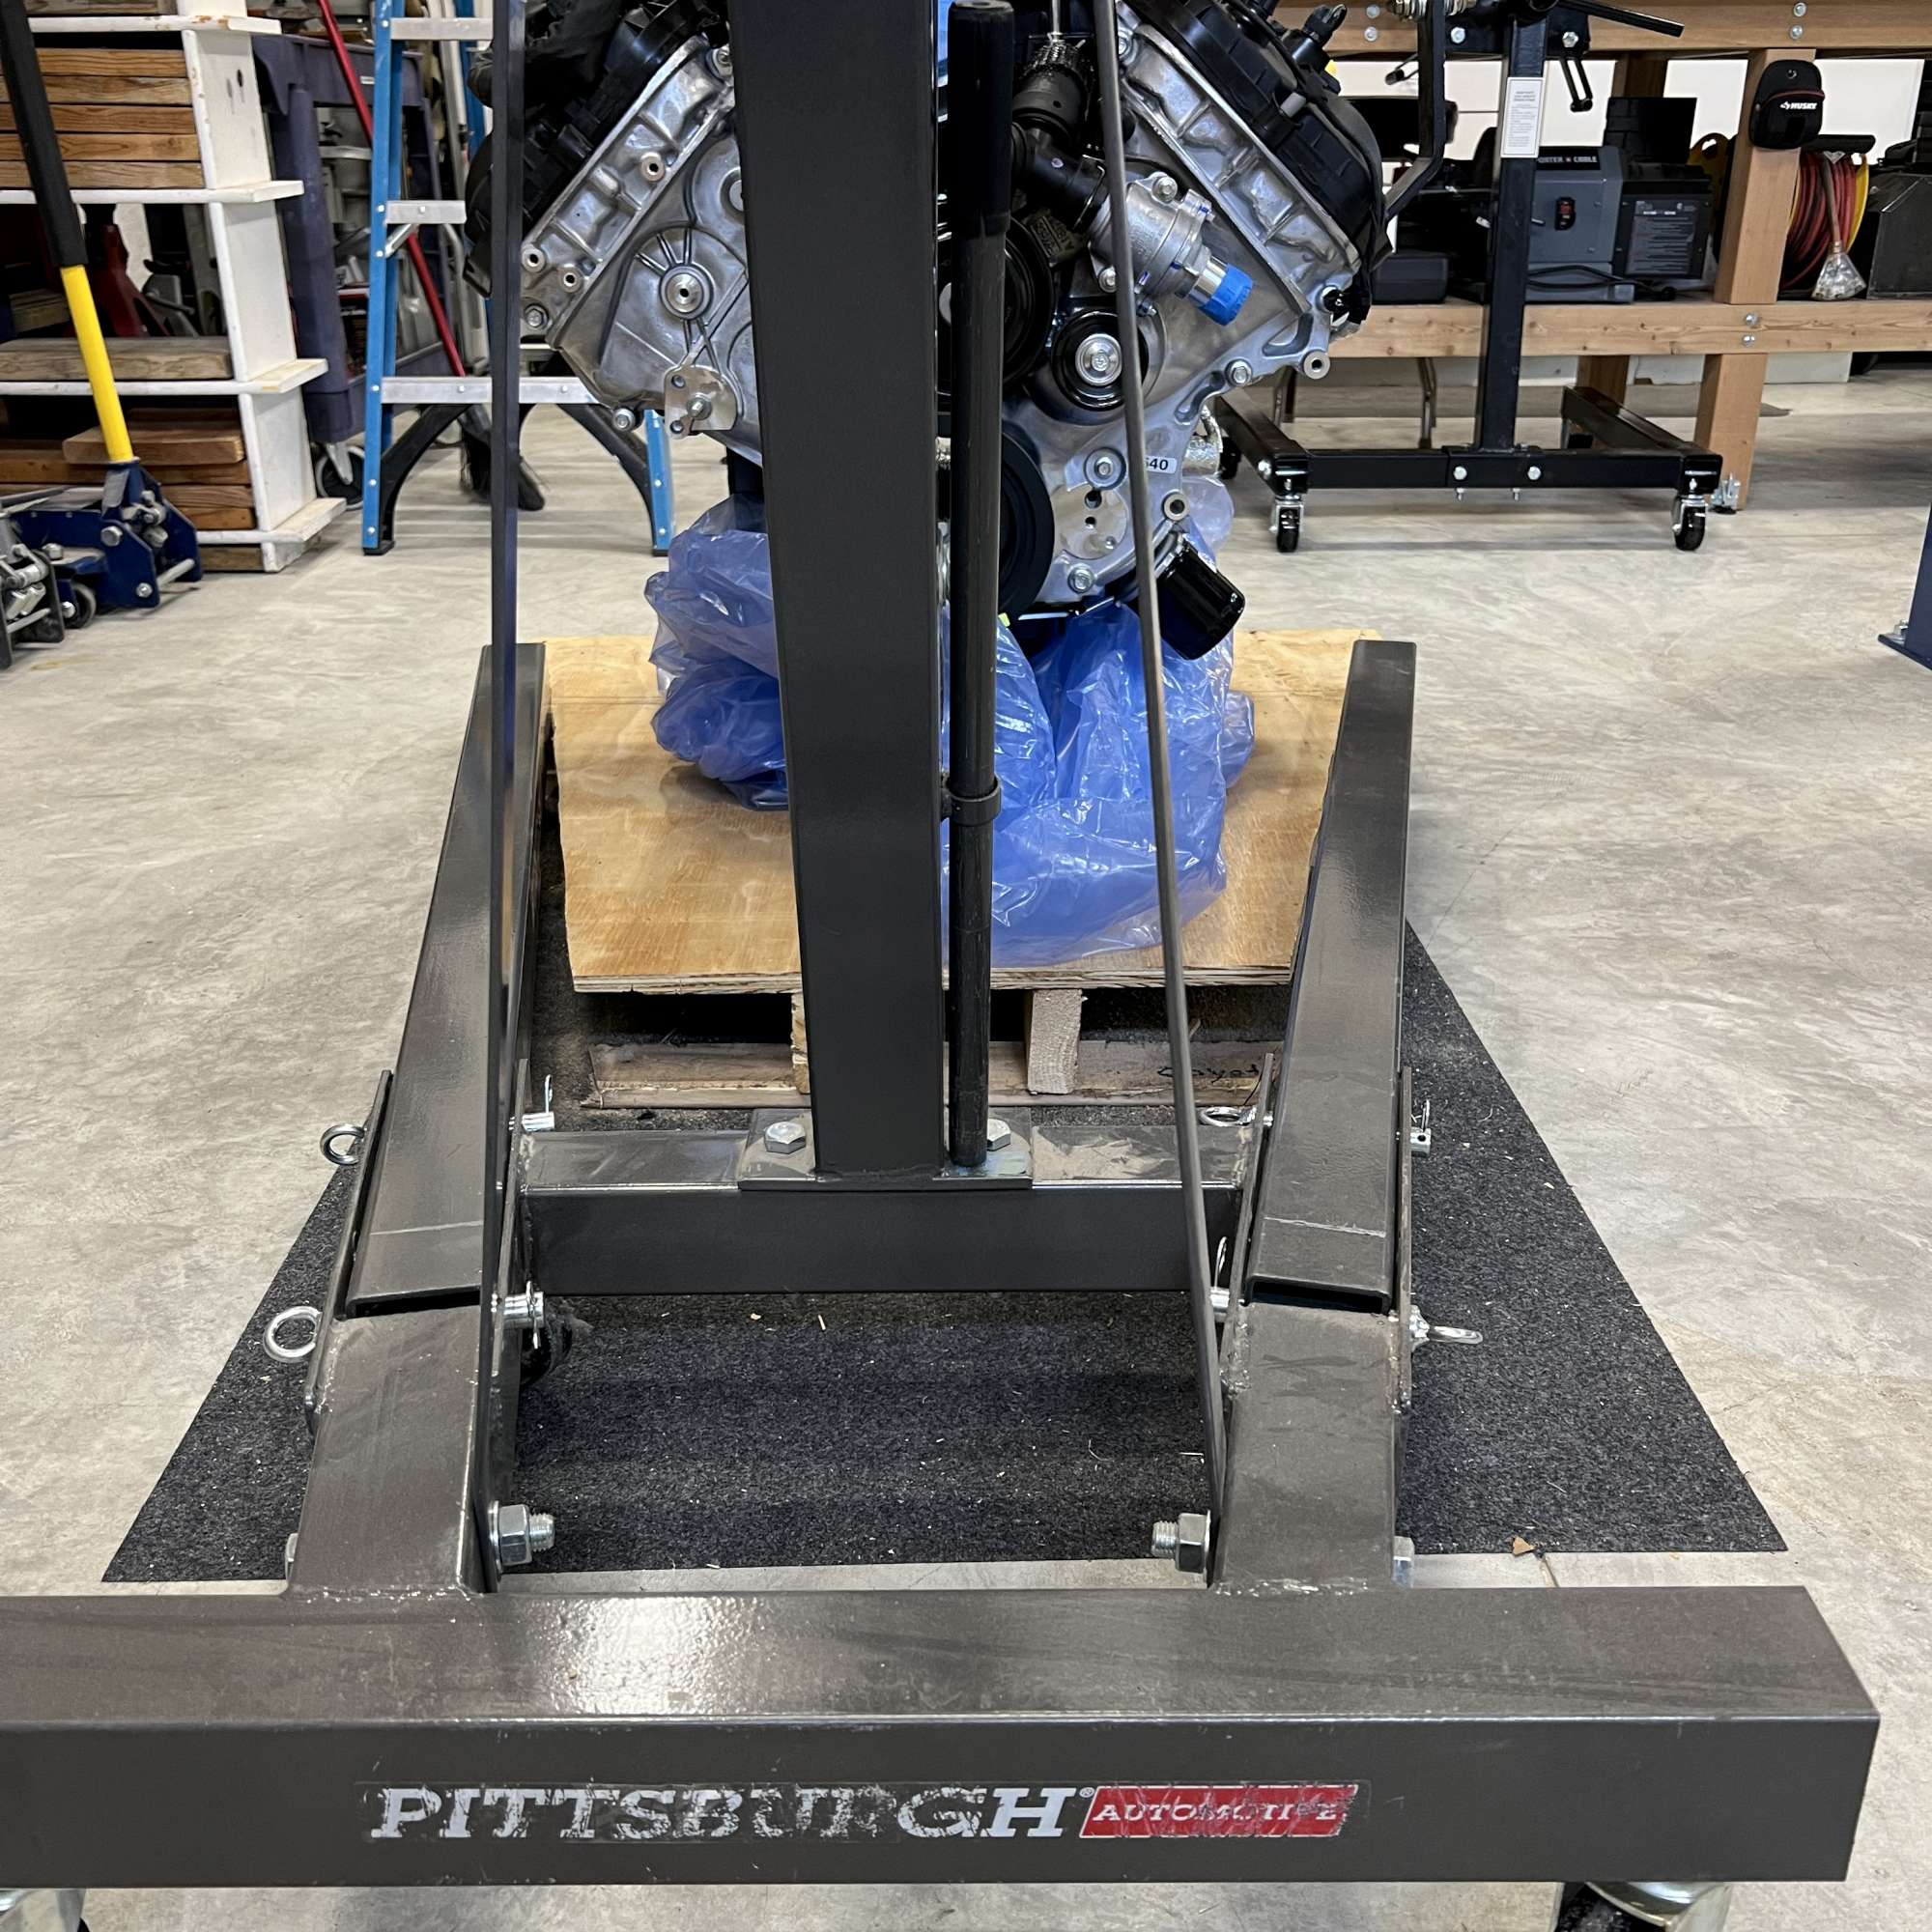
Good to have it off the pallet. I like your idea of putting it on casters. As I mentioned my new garage space is much smaller (half the square feet). Easily moving it around would be big help. Thanks for the idea!
This Gen 4 looks an awful lot like a Gen 3. Really can't see any difference so far, besides the reported header flange bolt pattern difference on the left side.
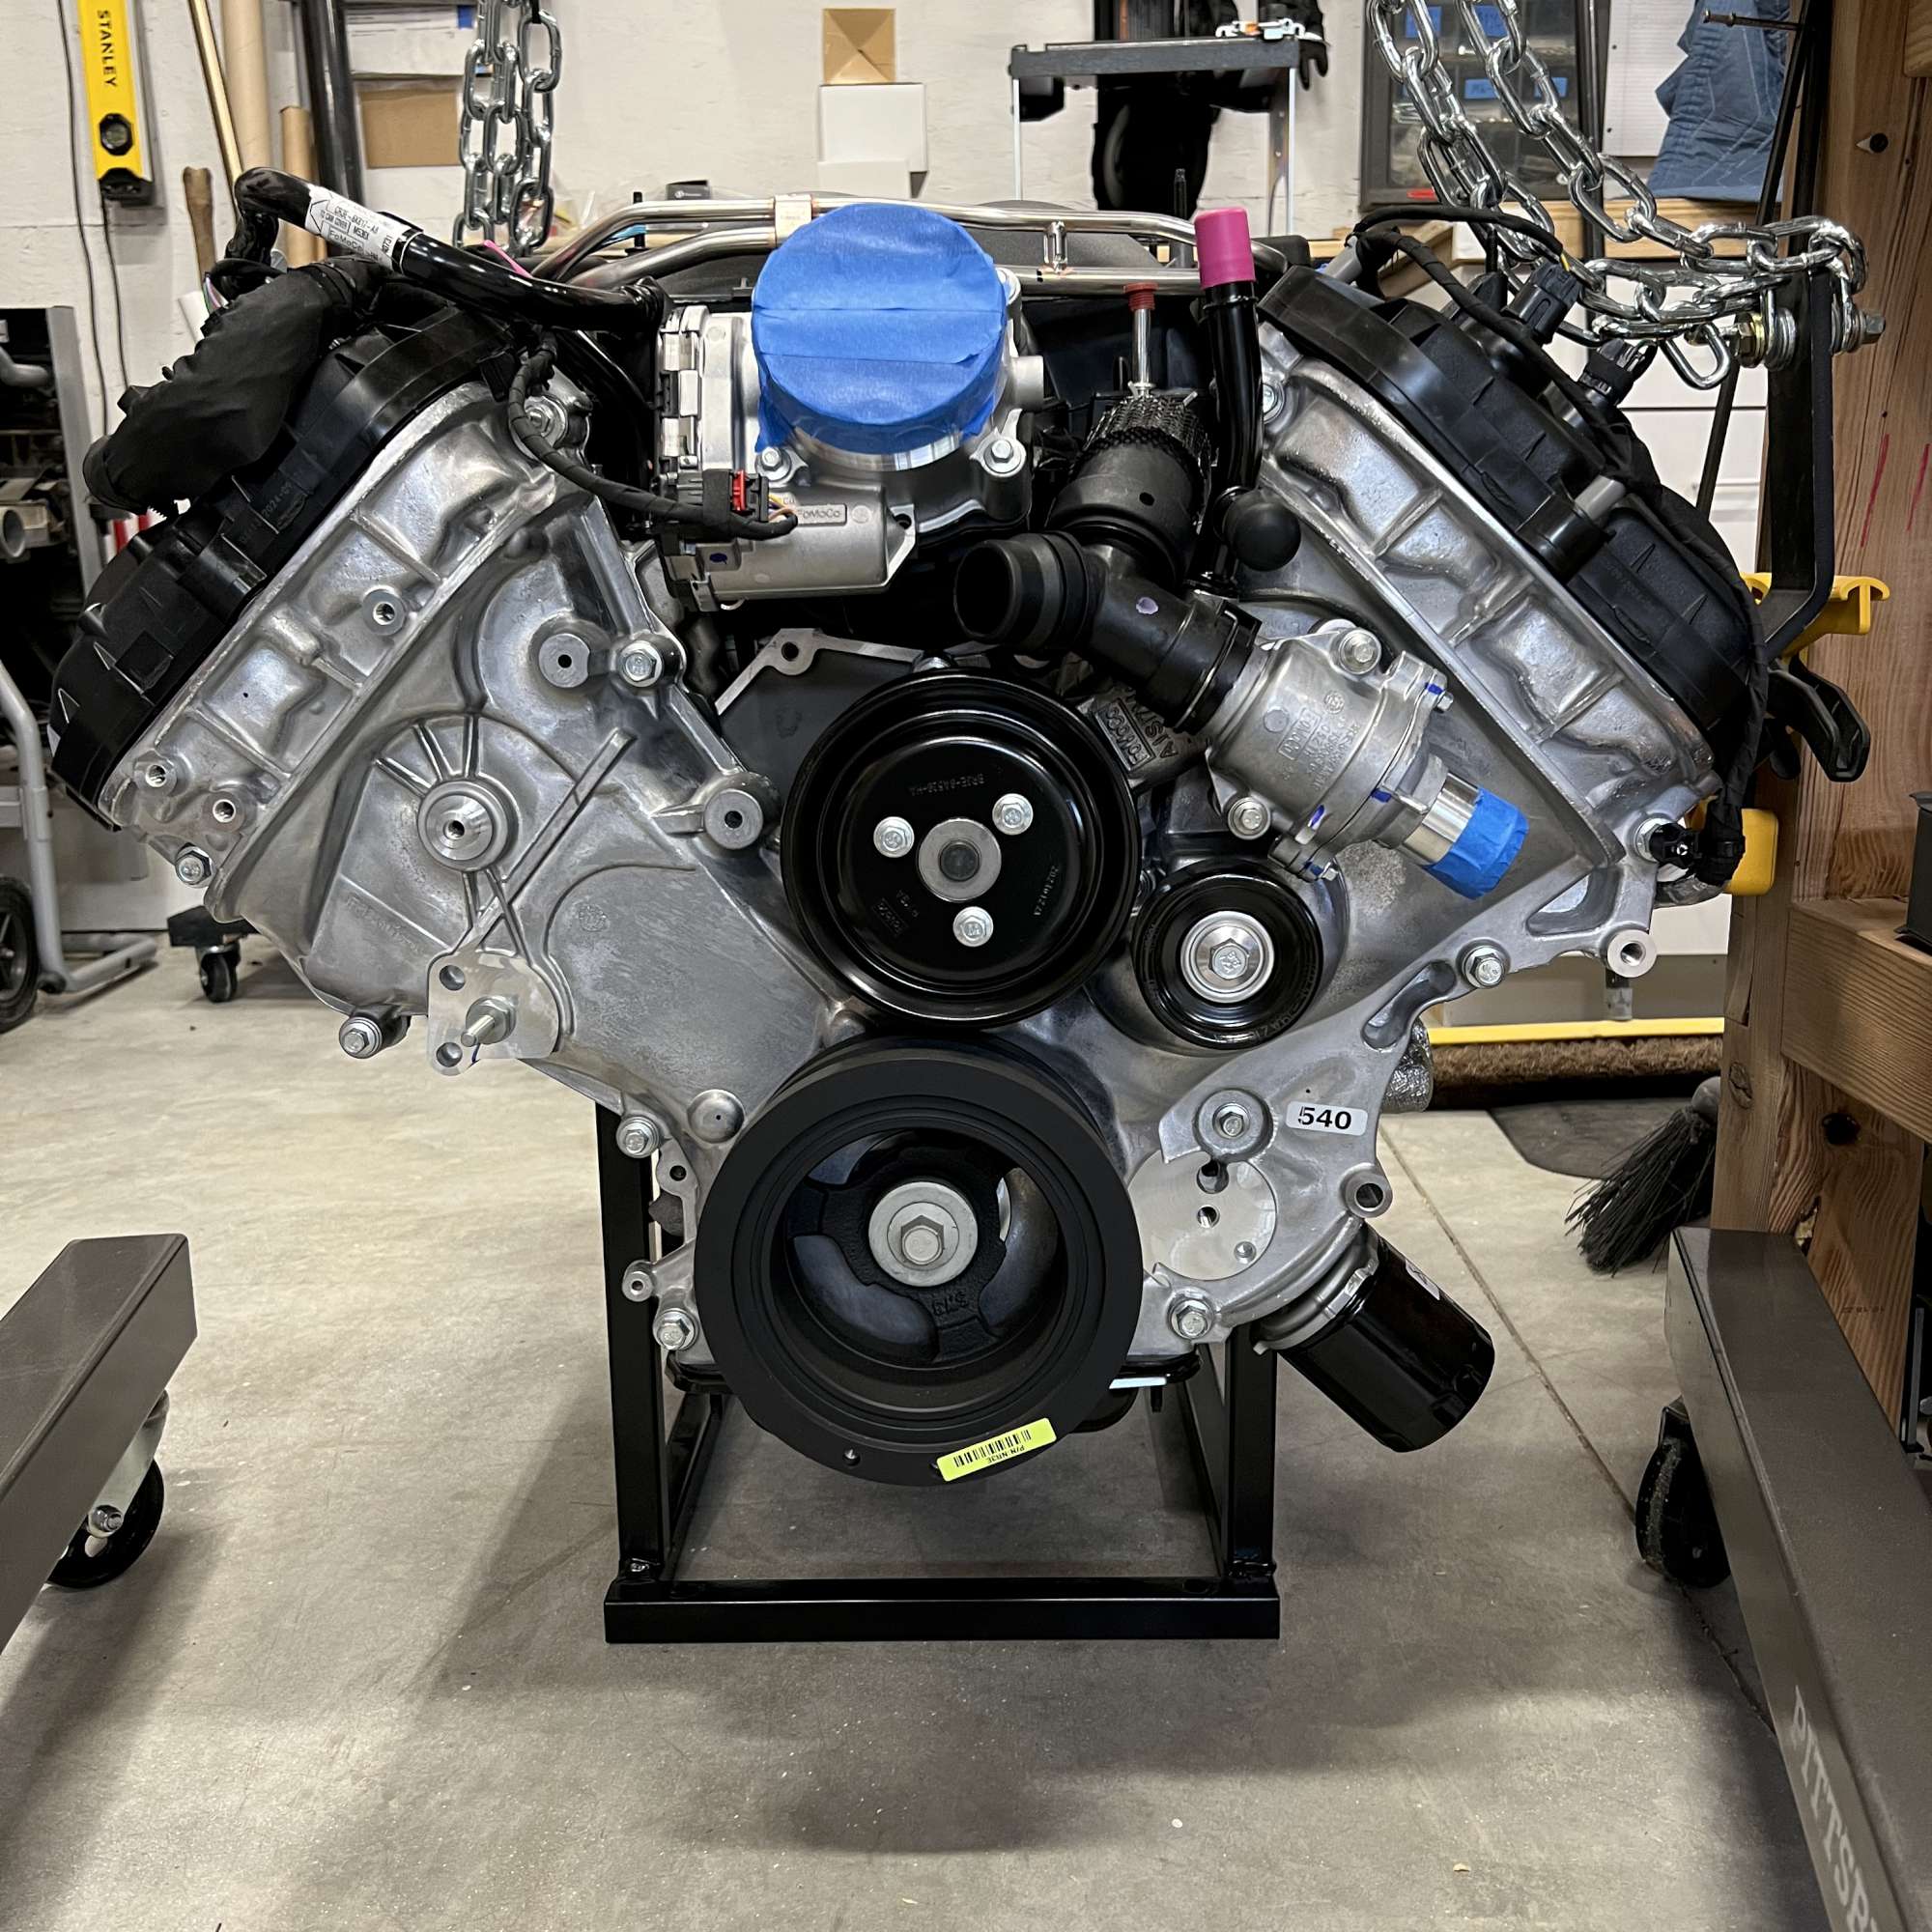
Sorry to hi-jack your build thread for a minute. I'll be quiet now. Happy building!
Chris
Coupe complete kit delivered: 4/22/24.
Build Thread. Coyote. T-56. IRS w/3.55. Wilwoods. PS. HVAC. Side windows.
MK4 Complete kit.
Build Thread Index. Delivered: 10/15/2020. Legal: 7/25/23. Coyote Gen3. TKO600 (0.64 OD). IRS w/3.55. PS. Wilwoods. Sway bars. This build is dedicated to my son, Benjamin.
Build Thread.
-
Post Thanks / Like - 0 Thanks, 1 Likes
-
Member

-
Post Thanks / Like - 0 Thanks, 1 Likes
-
Member

-
Post Thanks / Like - 0 Thanks, 1 Likes
-
Senior Member


Originally Posted by
slarson

Filling unwanted panel holes
Most, if not all of the FFR sheet metal screw holes used to mount the panels for shipping didn't line up with my rivet spacing. So I quickly gave in to the fact that I would need to fill the unwanted holes and moved on with drilling and fitting panels. I searched for solutions and found many that some claimed to work but none that sounded like they were guaranteed, other than TIG welding which I attempted but am nowhere near good enough. So I choose to fill the holes with Low Temperature Aluminum Welding Rods from Harbor Freight.
First I used my hold deburring countersink tool to create a bevel/countersink on each side of the panel.
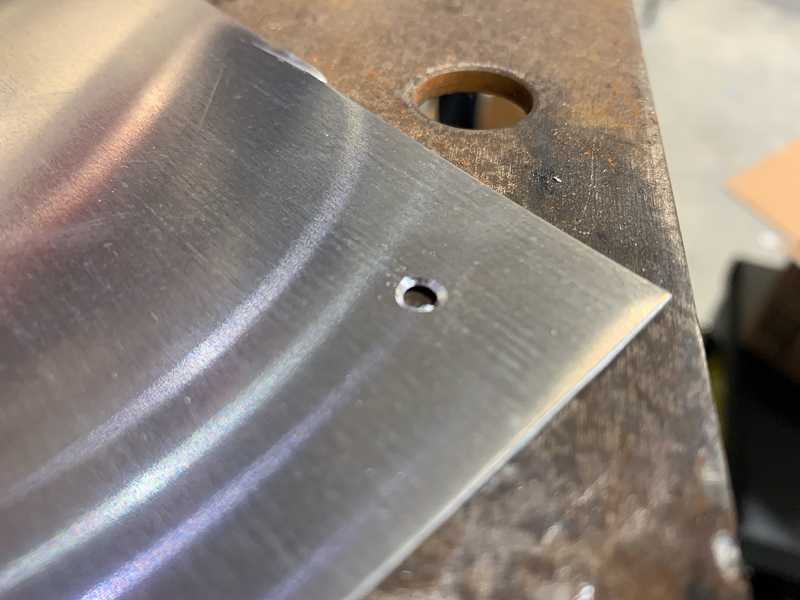
Then using a propane torch, heated up the panel until the rod flowed into the hole, kind of like soldering, heat is slowly until the metal is hot enough to melt the filler. This took a few practice runs but was quick once I got the hang of it.
Top side after adding filler:
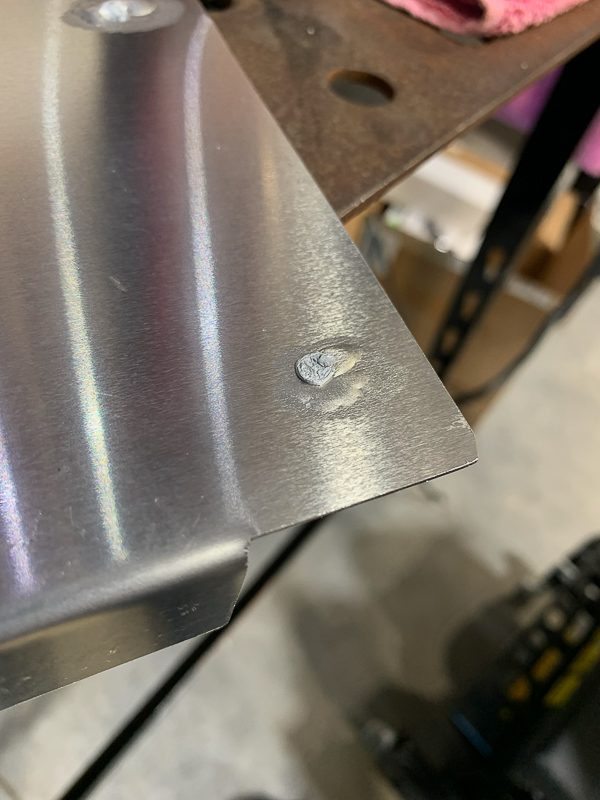
Bottom side after adding filler:
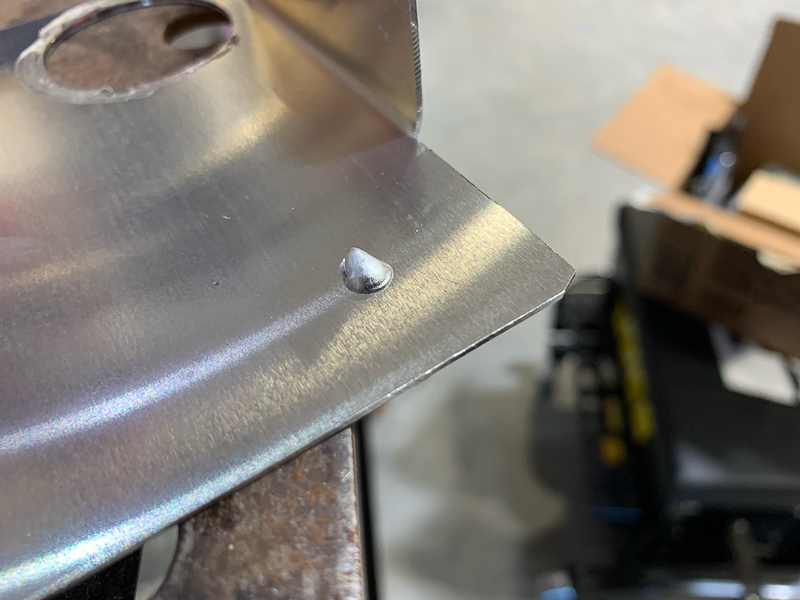
Then sand the filler down with 50 grit followed by 120 grit sanding disks in a 4.5" angle grinder. This is where is pays to go slow and remove a little at time.
This was one of the trial runs, my technique got better as I went.
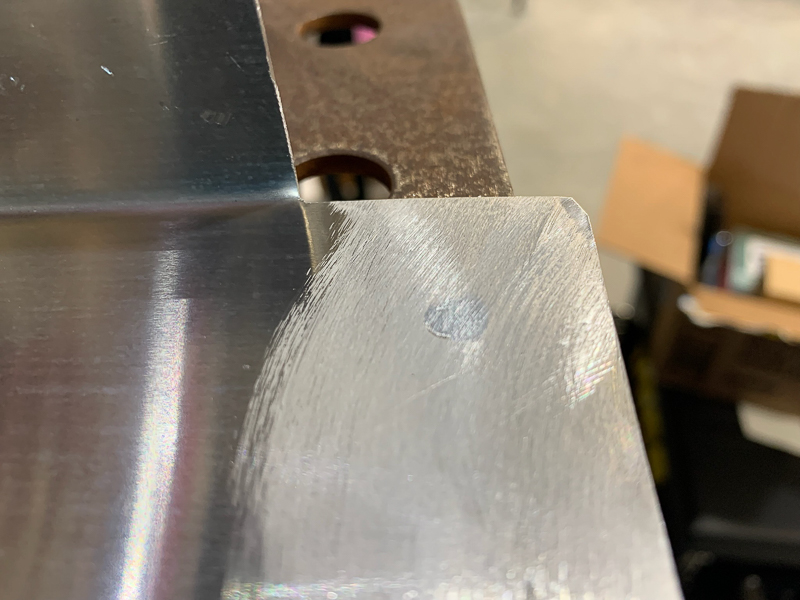
Final result and I can't find any of the repairs in my coated panels. There was a filled hole just right of the top center rivet.
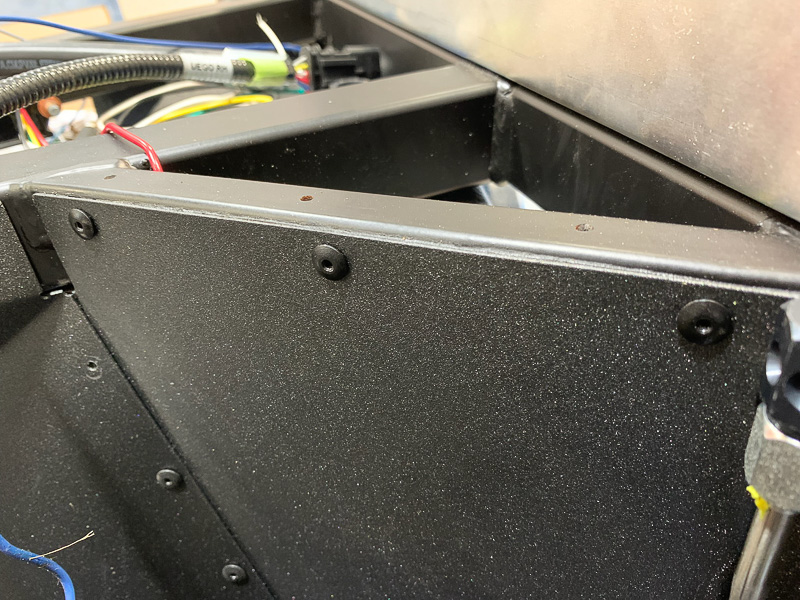
I'm sure the textured powder coat helps hide some imperfections.
That's pretty cool.
Those self tapping screw holes from the factory really irritated me. I wish they'd just tape the panels, or leave them off the body, instead of having to deal with of their haphazard holes everywhere
I might try your method
-
Post Thanks / Like - 0 Thanks, 1 Likes
-
Glad to see this worked. This was also the plan I had to try to fill the holes, but had not got around to it yet.
-
Member


Originally Posted by
burchfieldb

Glad to see this worked. This was also the plan I had to try to fill the holes, but had not got around to it yet.
Yes, it was actually quicker and easier than I thought it would be. Just have to go slow with the grinder and practice a few time on scraps before attempting a real panel.
I can't see a single patch in my panels, although I did go with a textured powder coat so that helps hide imperfections.
Type 65 Daytona Coupe Complete Kit ordered 11/2021, delivered 7/25/2022....the fun has begun!
Build Thread
-
Member

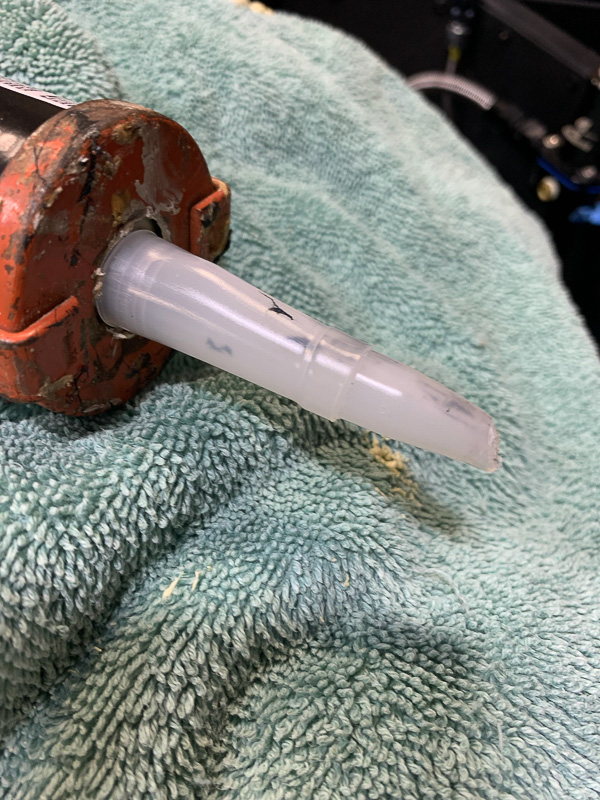
Saving partially used Silkaflex caulking tubes
I stuck a nail in a partially used tube of Silkaflex a few months ago, hoping I would be able to use it later.... Well, I tried to get the nail out and it wouldn't budge. So I had the thought of slicing the tip length wise to see if the nail and dried up caulking would come out. Sure enough it worked like a charm.

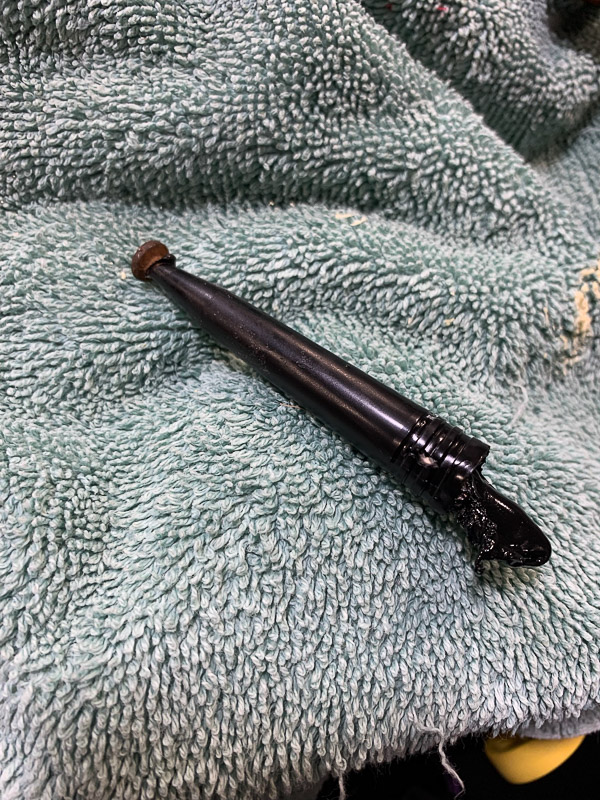
The to fix the tip I just put on two pieces of heat shrink tubing, worked like a charm.
Type 65 Daytona Coupe Complete Kit ordered 11/2021, delivered 7/25/2022....the fun has begun!
Build Thread
-
Member

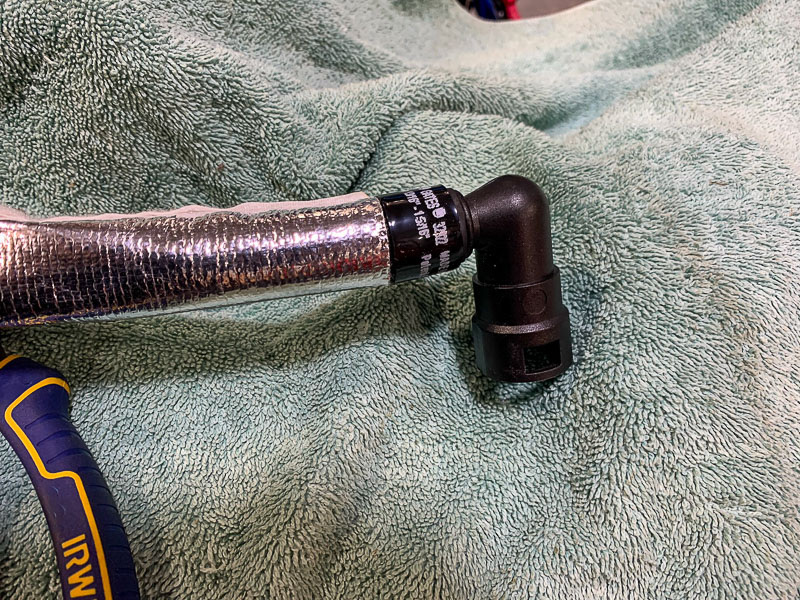
Protecting Braided Sleeving when installing Heat Shrink tubing
The braided expandable sleeve I'm using to cover some hoses and wiring seems to have a low melting temperature. I've noticed it start to melt when shrinking a piece of heat shrink to finish off the end.
I had a few small pieces of Thermo-Tec Express Sleeve left over so I tried using that as a shield around the braided sleeving. Worked like a charm!
The Express Sleeve is a velcro closure so super easy to put on and take off.
Type 65 Daytona Coupe Complete Kit ordered 11/2021, delivered 7/25/2022....the fun has begun!
Build Thread
-
Member

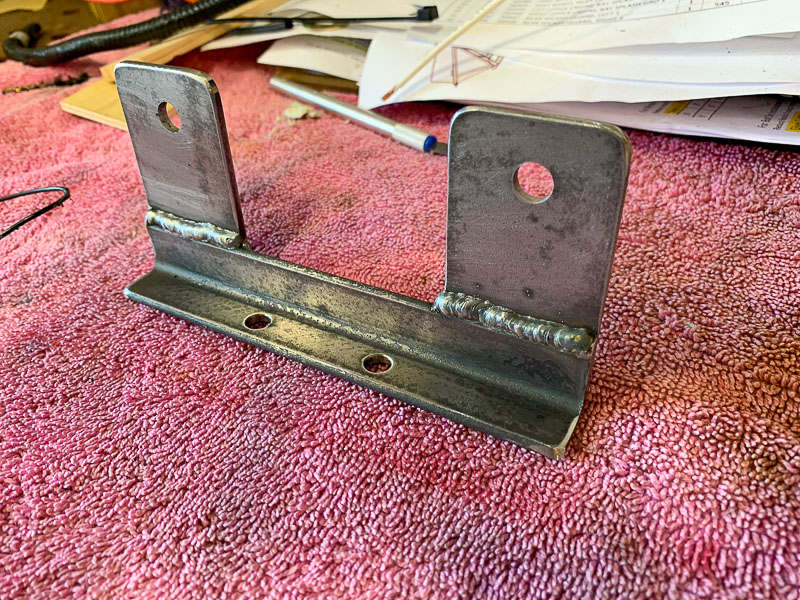
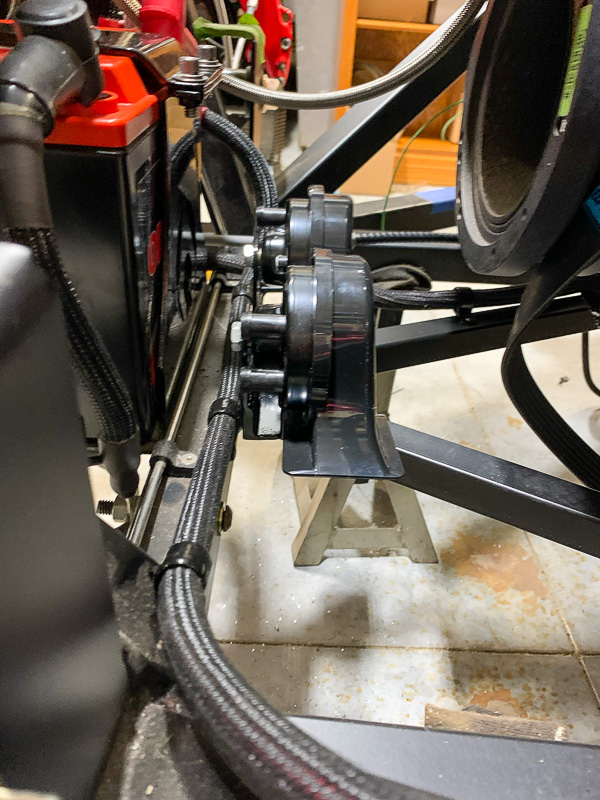
Horn Mount Bracket
There seemed to be a nice empty space behind my battery to mount the horns, just needed to fabricate a bracket from some scrap metal lying around.
A piece of 3/4" angle iron and a two short pieces of 1.5" x 1/8" flat bar.
Horns mounted
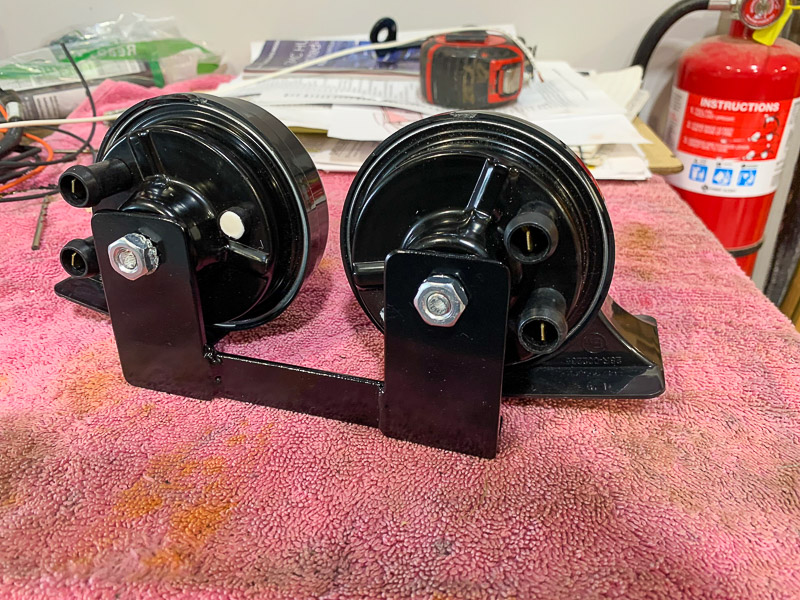
And two 1/4" rivnuts into the frame triangluation bars and good to go.
Type 65 Daytona Coupe Complete Kit ordered 11/2021, delivered 7/25/2022....the fun has begun!
Build Thread
-
Post Thanks / Like - 0 Thanks, 2 Likes
-
Member

First Start Birthday Present!!!
My son has been home for a few weeks and we've been cleaning up loose ends in prepping for the first start.
After a few setbacks and trouble shooting the first start occurred Monday and it just happened to be my birthday

Now all that's left is everything else!
Type 65 Daytona Coupe Complete Kit ordered 11/2021, delivered 7/25/2022....the fun has begun!
Build Thread
-
Post Thanks / Like - 0 Thanks, 3 Likes
-
Senior Member

Wahoo! Congrats, Scott! And, happy birthday! Very cool it all worked out to fire it off while your son was there.
Chris
Coupe complete kit delivered: 4/22/24.
Build Thread. Coyote. T-56. IRS w/3.55. Wilwoods. PS. HVAC. Side windows.
MK4 Complete kit.
Build Thread Index. Delivered: 10/15/2020. Legal: 7/25/23. Coyote Gen3. TKO600 (0.64 OD). IRS w/3.55. PS. Wilwoods. Sway bars. This build is dedicated to my son, Benjamin.
Build Thread.


 Thanks:
  Likes:


 Reply With Quote
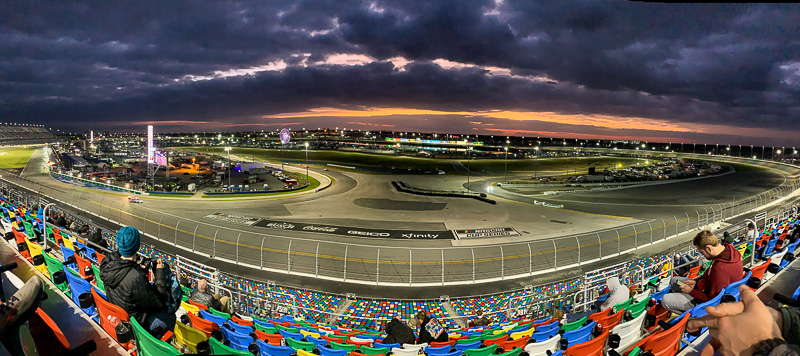
 ). And the annual trip to the Gatornationals that my son came home from Denver for, I think this was our 24th year in a row.


