Hopefully I can return the favor on my build questions with electrical help or suggestions.
I plan on wearing out my welcome with that! The electrical part is my biggest weakness by far. I'm red green colorblind mildly and an electrician friend of mine told me to never touch it, so I have stayed away. Now that means I just don't have a base of knowledge, and that bugs me. I love learning stuff. If you have cooking questions I can help, but not many come up building a car I'm guessing.
"Doddmoore," Mitchell Moore on facebook, Follow Tonks347Cobra on Instagram
MK IV Complete kit, SB Ford 347, Holley Sniper EFI, TKO 500, Moser 8.8 Solid axle, Wilwoods, Power Steering
My Build Thread: Tonks347, The Baker's Build
Slow and steady wins the race.
Well, I spent the better part of Saturday and a few hours this morning building my version of a chassis dolly.
After looking at several ideas/plans here, picking ideas, I came up with a plan. I wound up going with a center spine design, but threw a little twist into the uprights. Since this thing will take the better part of a year to assemble... - A requirement was to get the thing up to a comfortable working height where I'm not stooping over, or can roll under it easily.
- To be able to work SAFELY, without worrying about it falling off jack-stands or something.
- A rig where you can do some serious tugging/prying/pulling and not have it move around.
The main chassis tubes will sit in the round "saddles", and the ratchet straps will snug the assembly down tight. The rear casters are fixed, the fronts are swivels. I added some lift-jack/locks to the front as well - stomp these down and the frame/dolly isn't moving anywhere.
(Now I have to find that scrap carpet I was saving for someday to line the "saddles"...)
Nice dolly. Your back will thank you for it later.
Started dreaming of a Cobra around 1987
Purchased Complete Kit 6/9/2017, Delivered 9/4/2017, Rolling Chassis 3/30/2018, Engine Dyno'ed 3/4/2022, Engine installed 8/27/2022 Click here for my build thread
Serial #9158
Design Engineer at BluePrint Engines
I've got access to a "gantry crane" rig (think swingset that breaks down, with a chainfall) that a buddy built for lifting bodies off frames. Once "done" enough I'll just sling it and lower it down.
Nice dolly. Your back will thank you for it later.
That is primarily the reason for the height. The 4" main tubes will be about 30" AFF. I'd (and my back) would much rather need to work needing a milk-crate than bending over.
(The photos kinda mess with your sense of proportion... the last pic against "Blackie" is a fooler - he is slammed down that low, 3" clearance(!).
Made some plugs from PVC pipe fittings for the axle holes, capped the vent, and tossed it in the blast cabinet for a cleanup. A couple of coats of satin clear and it's ready. RearAxle07.pngRearAxle06.png
(The pipe plugs did require a little work. I had to chuck them in the lathe and turn them to the correct 46mm dia. to fit the seals. Had to take about 2mm off the dia.)
Had a Chevelle Club meeting yesterday, and was thinking about the height...
So, when I got back to the 40 Watt I removed 10" off each upright of the dolly. In hindsight this actually seems to be better. It will put the dash hoop at about countertop height, and make the logistics of getting the chassis down on the ground easier.
It's getting very real now... Did my final kit evaluation, final payment, and talked to Jolene at Stewart. I'll be having a big truck on my street the week after Memorial Day!!
Had a Chevelle Club meeting yesterday, and ran into "my guy" that had the gantry lift... he doesn't have it anymore!
So, when I got back to the 40 Watt I removed 10" off each upright of the dolly. In hindsight this actually seems to be better. It will put the dash hoop at about countertop height, and make the logistics of getting the chassis down on the ground easier.
(drafting up some AutoCAD drawings to share).
The guys that have lifts and build these cars should have to do it with one arm tied behind their back. On the ground is the way to go... said no one ever!!! Wish I had a lift, had my car on the lift for inspection the other day and wow wish I could of had that in my garage during the build. Getting up and down from the floor, sitting or laying on the concrete floor gets the job done but not as pleasant as I would like....I'm procrastinating on doing the aluminum around the radiator, I think its because of that hard concrete floor, now if had a lift it would have been done already..haha.
Good luck with your build, it can be a roller coaster ride, have fun.
Yeah, a lift would be a great addition to the 40 Watt, but it just won't work... Garage is as big as the city will allow, and then there's the issue with Mrs. Fixit's daily driver. It would fit, but I'd have to wear a helmet in there or risk a crack in the head at every turn.
I've got buddies in the Chevelle Club that have "Garage-mahal" setups - either purpose-built outbuildings or custom garages/toy boxes on their homes - and it would be nice!
A little cleanup with "409", a buff on the rag-wheel, and some paint fill and 50 years is gone... looks & works like new!
Total Cost: $20
Oh yeah, those are sweet!
Started dreaming of a Cobra around 1987
Purchased Complete Kit 6/9/2017, Delivered 9/4/2017, Rolling Chassis 3/30/2018, Engine Dyno'ed 3/4/2022, Engine installed 8/27/2022 Click here for my build thread
Serial #9158
Design Engineer at BluePrint Engines
I'm pretty fortunate to have a junkyard (sorry... Automotive Recycling Specialist) within an hour's drive that doesn't crush "old" stuff! French Lake Auto Parts
It's a total time-trip to wander this place... and they let you in there with tools! There's Stude's, Hudsons, Nash, IH, name it, from the 20's to the 70's in there, and it's not a place where a weedwhacker or chainsaw's needed to get to something.
The two passenger side vent pulls (about 4' long) came from two cars next to each other in the "Ford" section. Where else are you going to find TWO '67 Galaxie's ten feet apart?
The windshield squirters were taken from one of FIVE '65 Rivvy's in the "Buick" section.
They've got late model stuff up front, they are in business to make money... and it's a hike to the vintage area - but at least they HAVE a vintage area!!
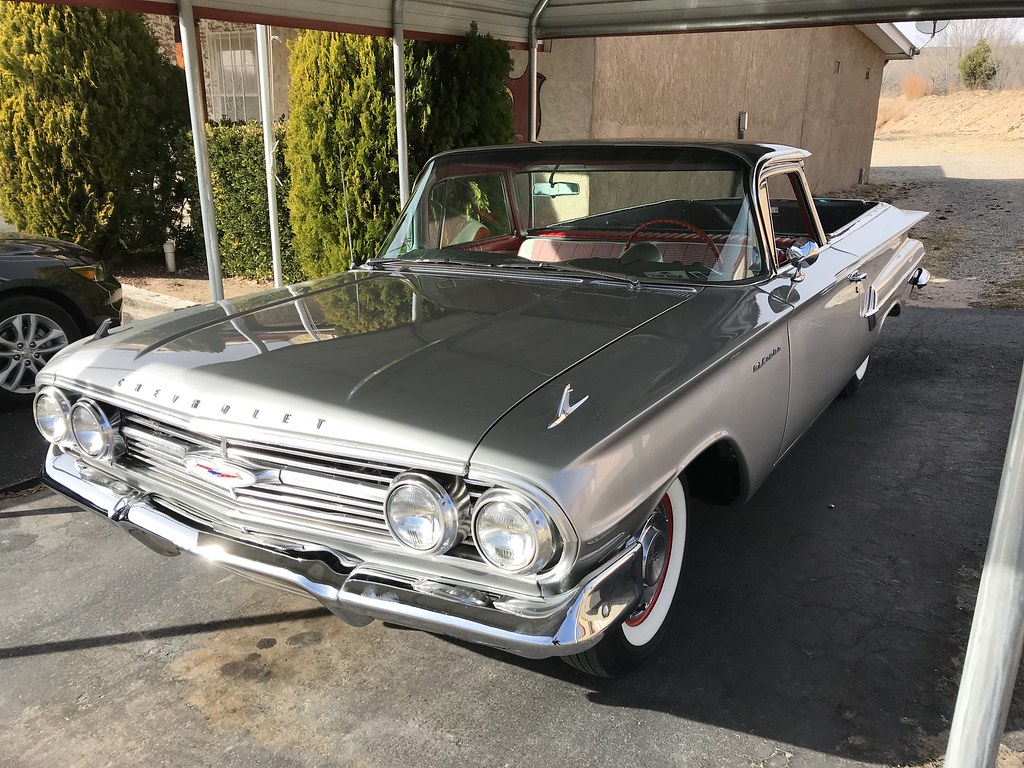
Let me know as delivery day gets closer and I'll bring the good camera and some Shiner Bock along to grease the proceedings. For some inspiration, I spied a sister to your El Camino a few weeks back while vacationing in New Mexico. Looked like a car port for a sheltered show car, but the owner happily came out, fired it up and drove away after I snapped the pics.
Getting close now - exciting!
Cheers,
-- John
MK4 #7838: IRS 3.55 TrueTrac T5z Dart 347
The drawing is from ~7th grade, mid-1970s
Meandering, leisurely build thread is here
Do you mind if I visit sometime this summer. I have a MKIV started up here in Thunder Bay Ont. as well. Just started working on it again after our Arctic winter here. I'm usually in Minny a few times each summer. Mine is a MKIV as mentioned, coyote, TKO 600, IRS(older style). I'll be ordering running gear from Mike Forte soon. Would like to see all the builds nearby if possible.
A shout-out to forum member John Ibele . With nothing more than a few messages here, a text or two and a phone call he welcomed me to his home/shop to see his MkIV build and do some bench-racing. We're only about 20 minutes apart, and have already made a pact to swap skill-sets. Car-clubs/car-guys are the best!
I also made a stop at the bank and transferred a chunk-o-Benjamins to Mike Forte. My Coyote/TKO package will be headed west soon!!
I had a blast as well, and from the description of your shop and a peek at that El Camino, I'll soon be happily swapping go-fer duties in return for advice. Looking forward to seeing your shop on delivery day!
MK4 #7838: IRS 3.55 TrueTrac T5z Dart 347
The drawing is from ~7th grade, mid-1970s
Meandering, leisurely build thread is here
Due to labor problems, and my work travel commitments, my kit delivery will be bumped another week... It's a bummer, but you gotta roll with the punches.
Due to labor problems, and my work travel commitments, my kit delivery will be bumped another week... It's a bummer, but you gotta roll with the punches.
I guess there's looking on the bright side, and figuring that gives you at least a decent chance of unloading in something less than 95*, with 70% RH.
MK4 #7838: IRS 3.55 TrueTrac T5z Dart 347
The drawing is from ~7th grade, mid-1970s
Meandering, leisurely build thread is here
Arrived this morning via XPO Logistics. The driver was cool enough to lend a hand rolling it up the drive and using the pallet jack to get it set on some moving dolly's for me.
I used my recently arrived lifting brackets from the Engine Factory - worked like a charm (I supplied the eyebolts).
It comes very nicely crated from Ford. If you carefully remove the uprights and lower frame, the "saddles" at the front & rear of the block (attached by metal straps) can be reused to set it on a dolly. It's all rebagged and rolled in the corner - now I need a car to bolt it in!
Because of the rain today, Mrs. Fixit's plans to power-wash the house and clean windows/screens was postponed. (Aw Shucks!) So I headed out to the 40 Watt and started doing some pre-assembly on my parts from Mr. Forte.
Today was spent fitting up the clutch & pressure plate, bellhousing, transmission, and clutch slave cylinder.
1st order of business was to get the (Ford) block-off plate installed (I'd pre-painted it last week). This meant pulling the flywheel, slipping it in place, and reinstalling the flywheel... also installing the rubber plug. Hands-down the easiest job of the day!
After bolting and torque'ing the flywheel back on, the machinist in me kicked in and decided to check the run-out of the flywheel. DeadNuts on the money! .001" over 6 revolutions, high-spot in exactly the same place. (Ford did good). Bolted the friction disc & pressure plate on, using the supplied alignment dowel (nice touch Ram Clutches!)
I also fabbed up some installation "helpers" for the transmission. My bellhousing is machined for 7/16-14 hold-down bolt for the transmission, so I picked up a few 3-1/2" bolts, cut the heads off, sawed a slot in the shaft (for screwdriver removal later), and threaded them in.
I am very impressed with the engineering & quality of the hydraulic clutch cylinder setup from Forte's Performance - with a single exception...
The mounting of the supplied/machined clevis to the throwout bearing fork.
They've done a great job using the OEM stamped clutch fork, designing an adapter for the Heim rod, and machining a bracket for the cylinder... but the attachment to the fork is a little hinky - just a 1/4-20 bolt and a flat washer.
I took measurements of the punched hole in the fork, made an average, and machined an insert bushing for the hole from brass. It is just enough oversize to require a smack or two with a hammer to drive in, and this compensated for the not-quite-round punched hole.
My setup from Forte's included a stamped tin cover for the clutch fork opening. This piece is designed for a cable clutch, but a few mods make it quite suitable for the hydraulic setup.
I punched a 1-1/8" hole in the endcap for the bellows clearance. Difficulty is that the screws are inaccessible with the slave cylinder mounted ... So a few studs were made from some 10-24 machine screws, loctite'd in, and nuts/washers used hold the cover in place. The punched holes in the cover were snipped out into slots, and now the cover is removeable with a wrench.
I didn't mention earlier that while I had the dial-indicator out, I checked the concentricity of the bellhousing bore to the pilot bearing/crank centerline. Tremec did a good job - it's well within spec... my setup is +/- .003.
The trans slid right in all the way up to where the front bearing carrier registers into the bellhousing bore. Then it got tough. It is a very snug/precise fit! A few choice cuss words and some wiggling/jiggling and THUNK - it slid in.
If you'll notice, I only used 3 guide studs to fit the transmission. I purposely left the 4th open to enable a bolt to be threaded in finger tight. The bolt is ONLY to hold the trans in place (and not lose what I'd gained). DO NOT use the attaching bolts to "pull in" the transmission! At the least you'll bend the clutch disc, at worse crack a mounting ear off the transmission, and in-between strip out a mounting hole in the bellhousing.
If everything is right, the gearbox will slip into place with some fiddling & grunt work.
One of my backorder pieces arrived from Ford the other day - the engine cover/valve cover plastic.
Since I still don't have a car to bolt things onto (read that Stewart) I'm satisfying my need to tinker by working on what I can.
The VC's just cried for a little detailing "pop", and I thought that a inlay of "Ford Blue" in the text would do the trick.
I used 3M's #471 vinyl tape to mask off the covers. Its a very stretchy and sticky product, but leaves no residue when peeled off. Being a vinyl/plastic tape (not paper backed) it cuts with an absolutely clean edge - great for detail items.
I wiped down the pieces with acetone, and overlayed everything with a layer of 471. Then using an X-Acto knife (and about 6 blades) carefully "edge-cut" all the lettering. Having a very sharp blade is key here... just slide along the edges of the plastic and slice the tape. If it starts to drag/bunch up, hone or replace the blade.
After cutting I rubbed down the edges again with my finger, another wipe with acetone, then shot on about 8 "fog" coats of Dupli-color Ford engine blue. The parts sat for a day and then were unmasked. There was a little bit of "paint bleed" under a few spots, but easily cleaned up with some solvent and a Q-Tip.
At the risk of putting a jinx on things...
I talked to Jolene yesterday afternoon - my kit will be loaded on the truck today, and will be delivered this week.


 Thanks:
  Likes:


Originally Posted by Fixit


 Reply With Quote


 ... So a few studs were made from some 10-24 machine screws, loctite'd in, and nuts/washers used hold the cover in place. The punched holes in the cover were snipped out into slots, and now the cover is removeable with a wrench.