-
08-12-2018, 02:18 PM
#161
Senior Member

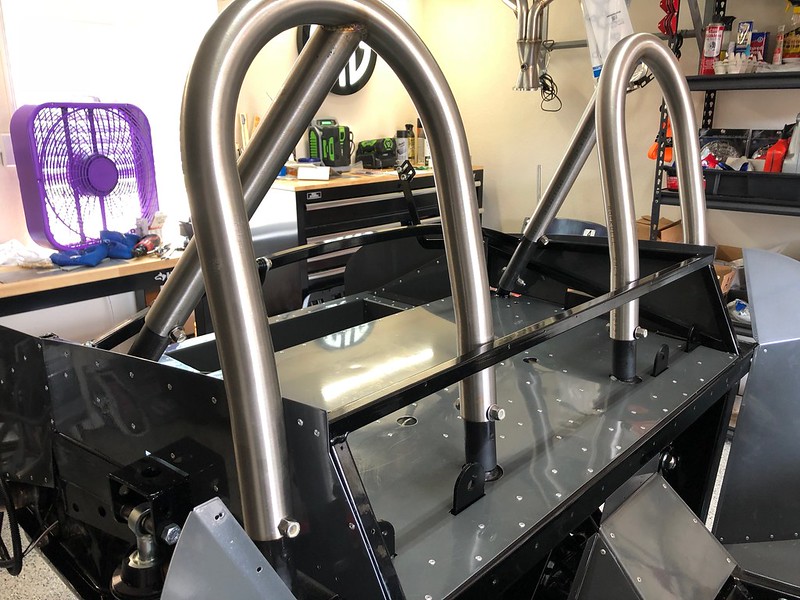
Breeze roll bars drilled and through-bolted
I riveted most of my remaining aluminum in place as I hope to spray Lizard Skin soon. Before I put the rear cockpit wall in place I figured I better get my Breeze roll bars drilled first or else it would be nearly impossible to get in position to drill the holes. I read that a lot of people struggled with this but I didn't find it too difficult so will detail what I did here.
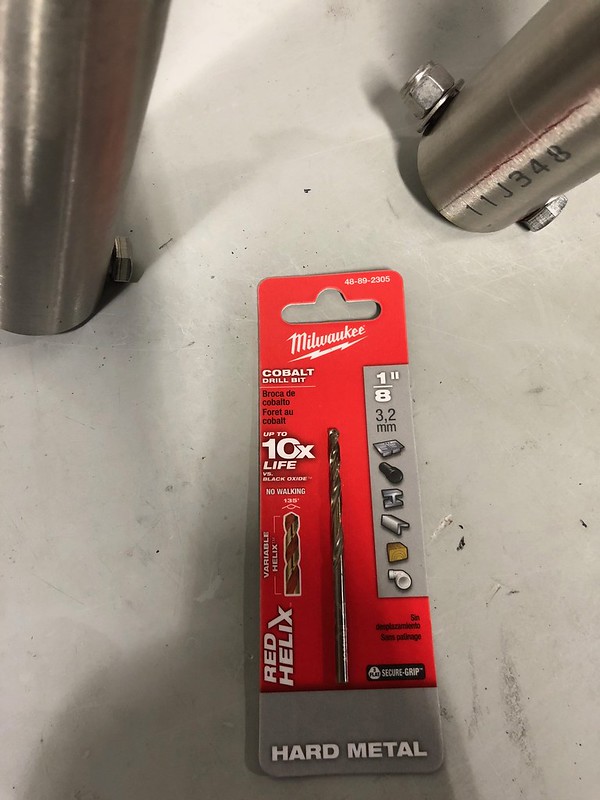
From looking at how I could drill from two sides, and to gain access to the roll bars once the body is in place, I decided to drill the holes in a mostly front to rear orientation. I bought three drill sizes: 1/8", 1/4", and 7/16". I bought the Milwaukee cobalt drill bits at Home Depot. I bought 2 of the 1/8" bits and one each of the others.
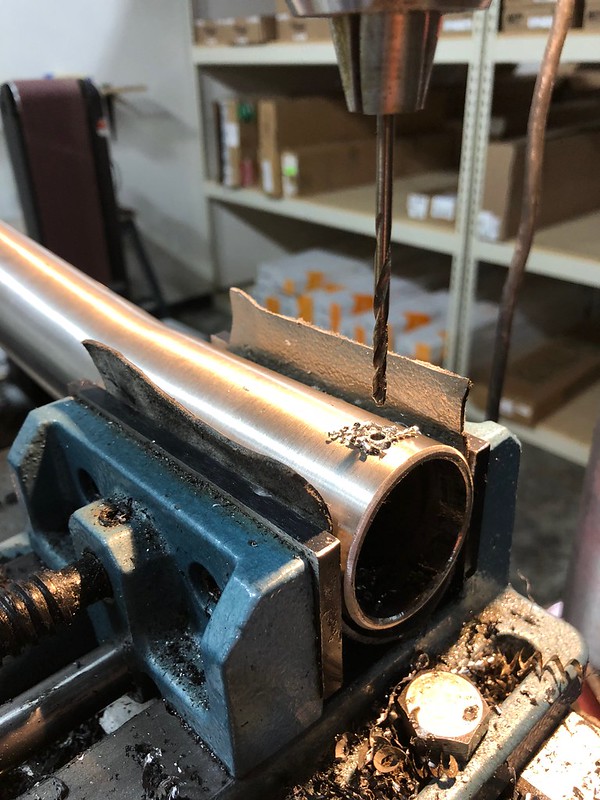
I'm lucky to have access to a large drill press with a cross vise and it definitely made the job easier. I center punched the tubes at each leg and drilled with the 1/8" bit first, then the 1/4", and then the 7/16". I would swap out the bits and completely drill each leg to completion before moving to the next leg. I ran the press at 550 RPM and used lots of Tap Magic oil. It probably took me just over an hour to get them all drilled.
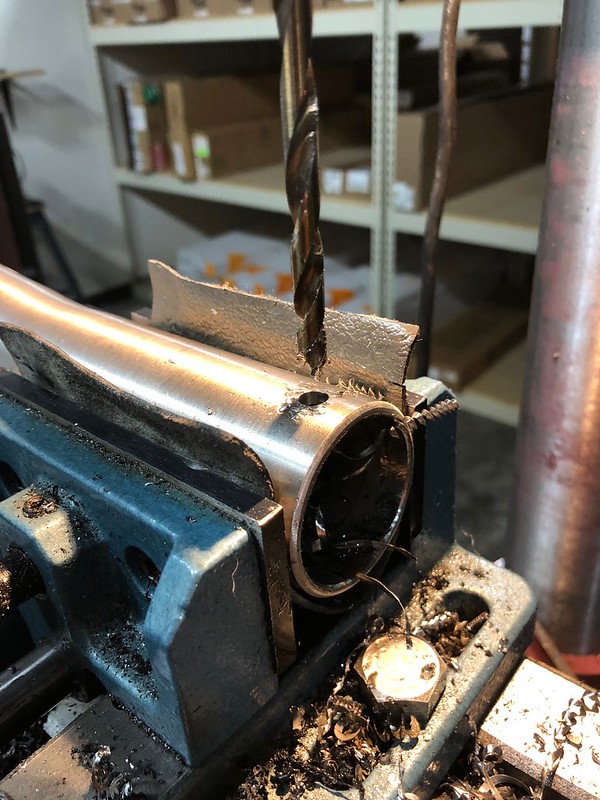
I then honed out the inside of each leg a bit with a drum sander bit on my cordless drill to remove any burrs and greased up the inside of the legs and the stub tubes. The roll bars pressed back onto the stub tubes fairly easily. I aligned them to the top of the paint marks I had made earlier which are 3" above the floor of the trunk. I then used my center punch to mark the center of each hole on both sides.
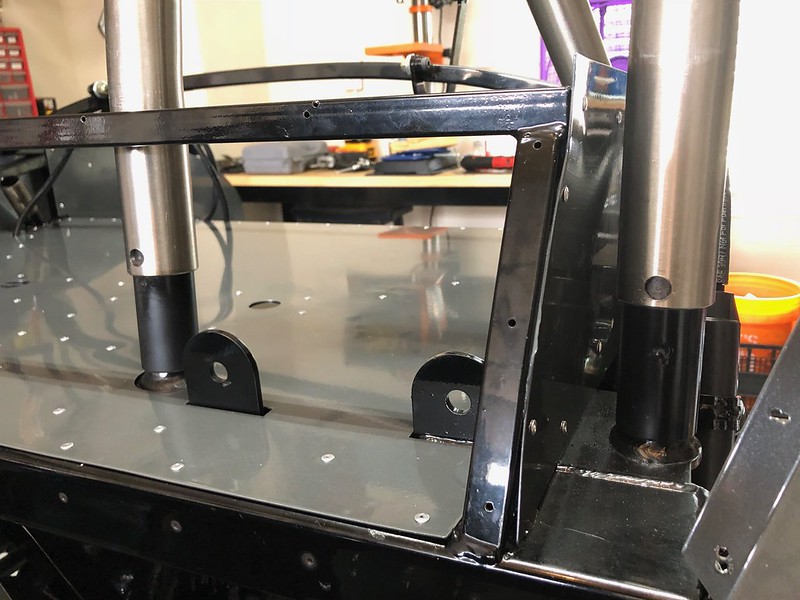
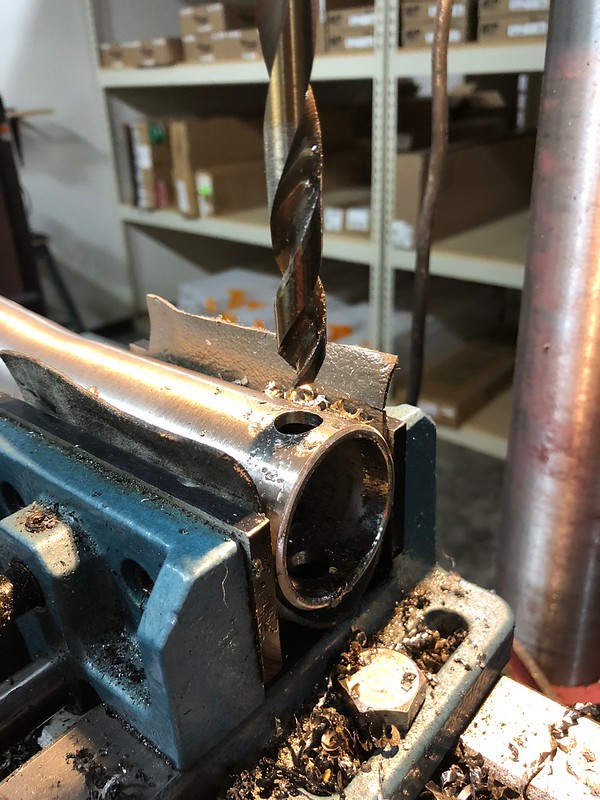
Using the same bits as before I drilled 1/8" pilot holes on each side. I did NOT try to drill through to the other side as I figured it would be next to impossible to get the holes to line up that way. I then moved up to the 1/4" bit and finally the 7/16" bit. My cordless drill was struggling a bit on the 7/16" bit, probably because it was getting pretty dull a this point. I switched to my corded 1/2" drill to finish these up. Here is the final product, all six legs and rear stub tube drilled and with through bolts installed. I am glad I decided to plug weld the front stub tubes in place as that saved me from having to mess with an additional 4 holes. I have read that some think it is a bad idea to weld them in place as they needed the additional movement in order to fit the bars, but I don't think that is the case, at least I didn't have any problems at all with the way I did it here. All told it was probably about a total of 2.5 hrs to complete this job.
-
08-12-2018, 04:14 PM
#162
Senior Member
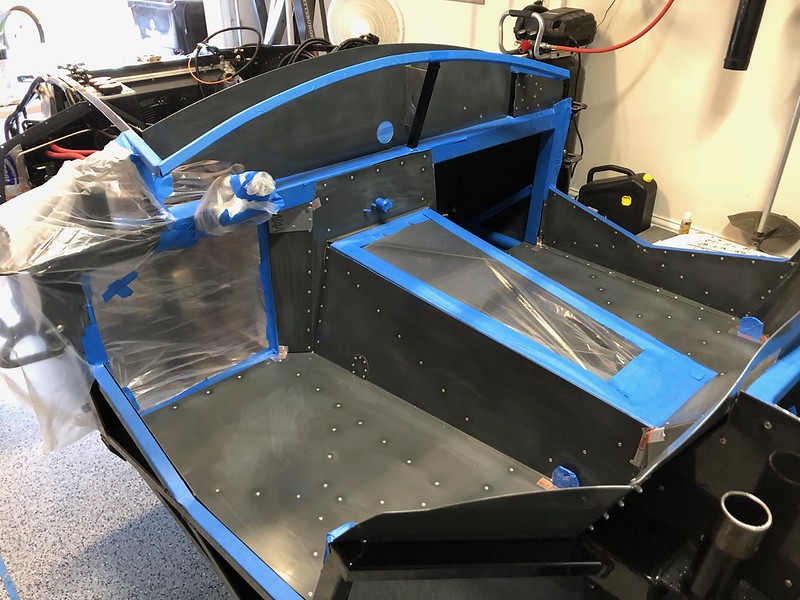
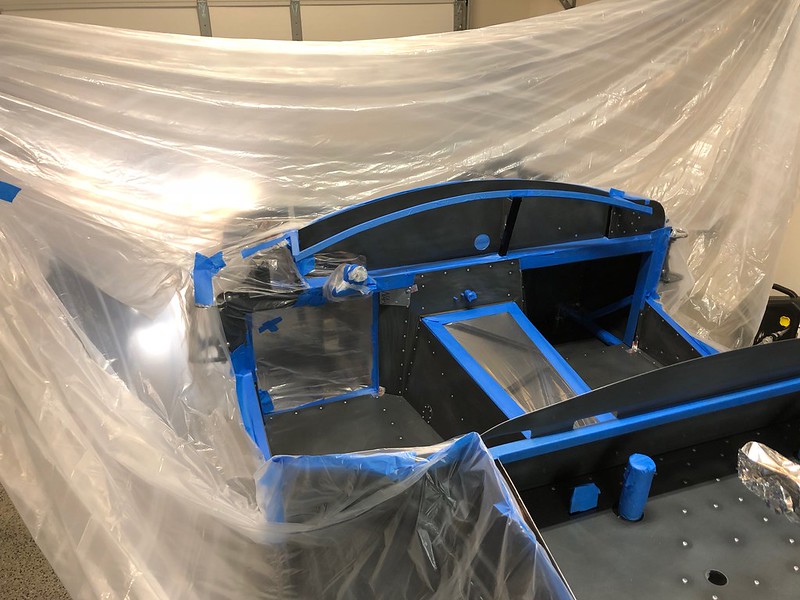
Panels in place
I've riveted in the remaining back cockpit wall and hope to spray Lizard Skin next weekend.
-
08-12-2018, 04:24 PM
#163
Senior Member
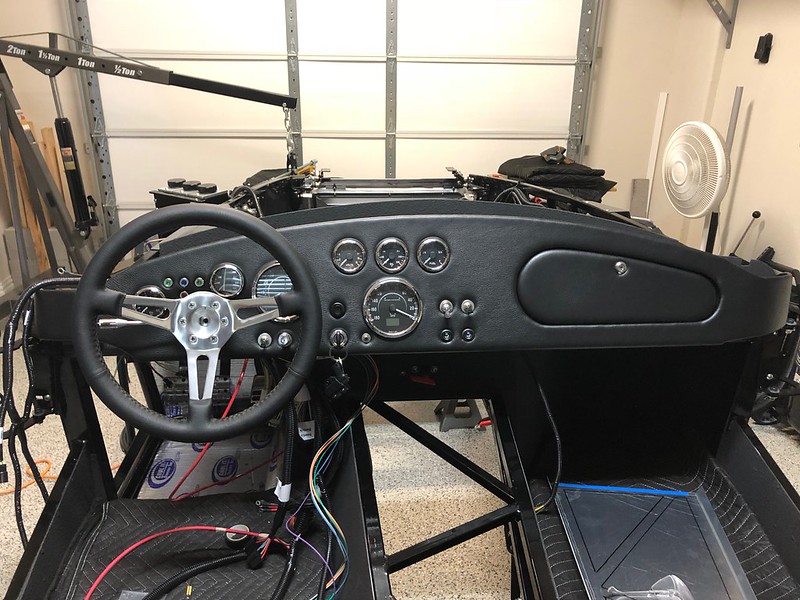
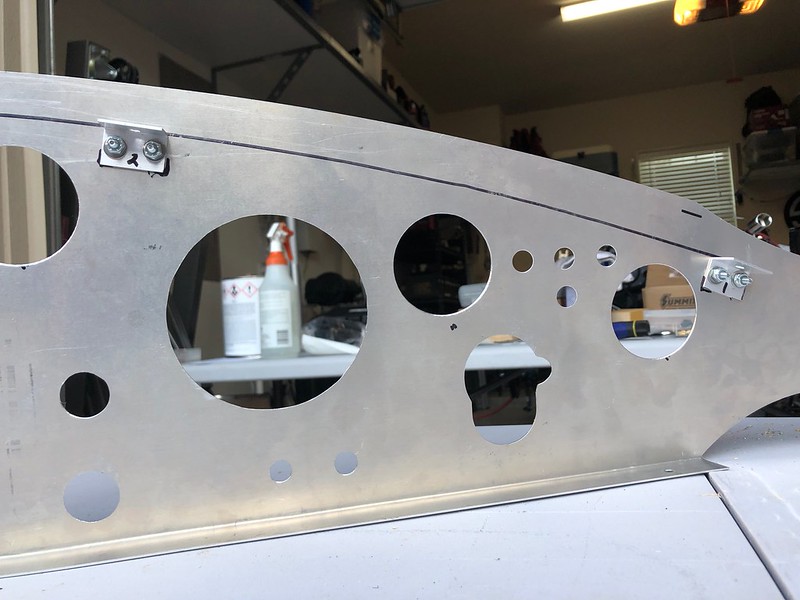
Test dash
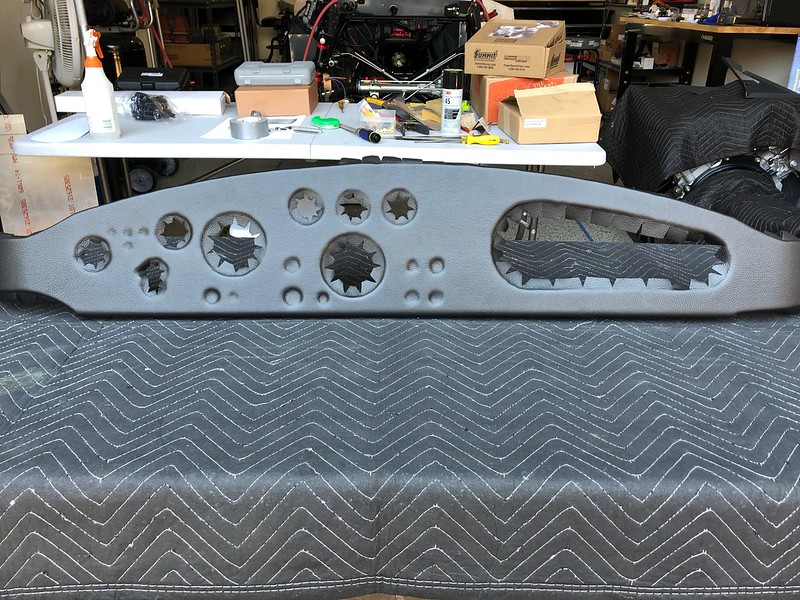
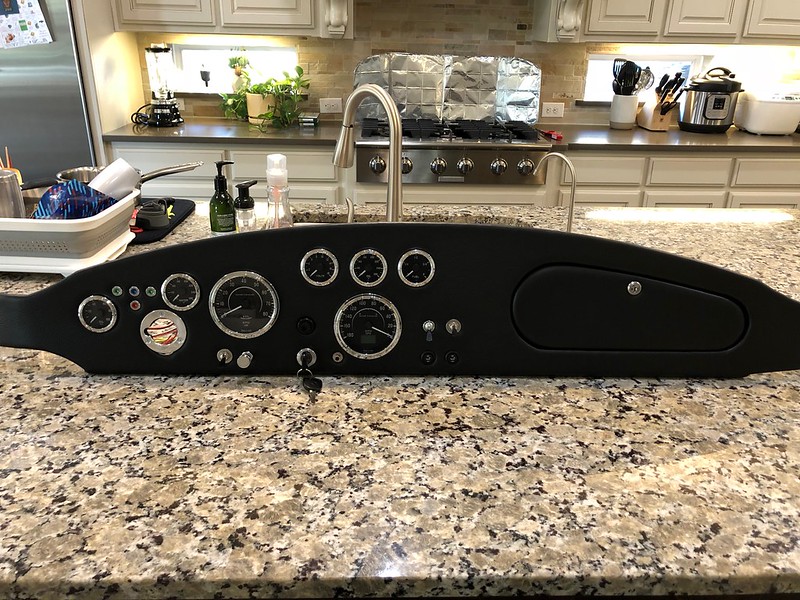
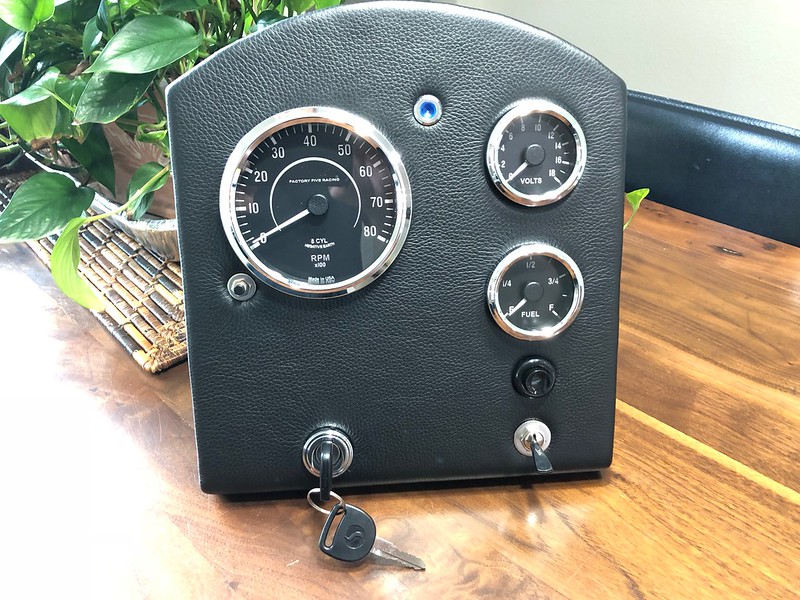
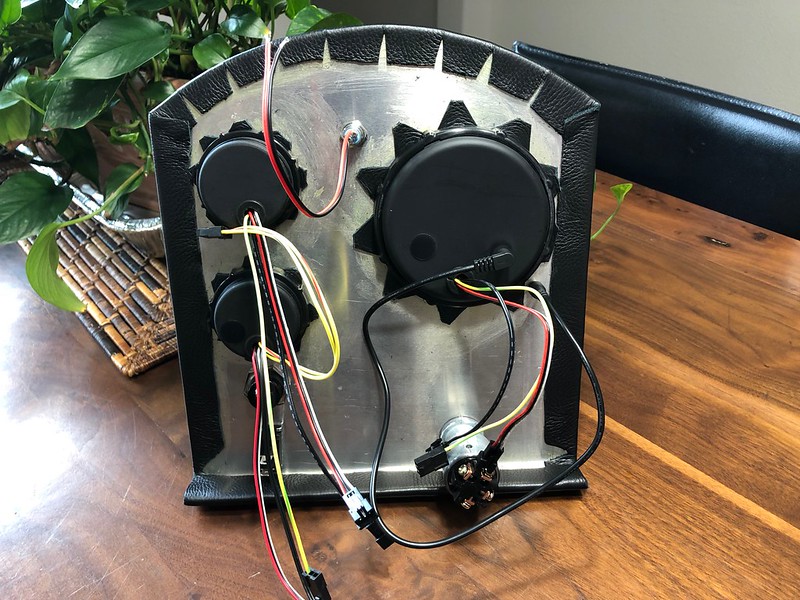
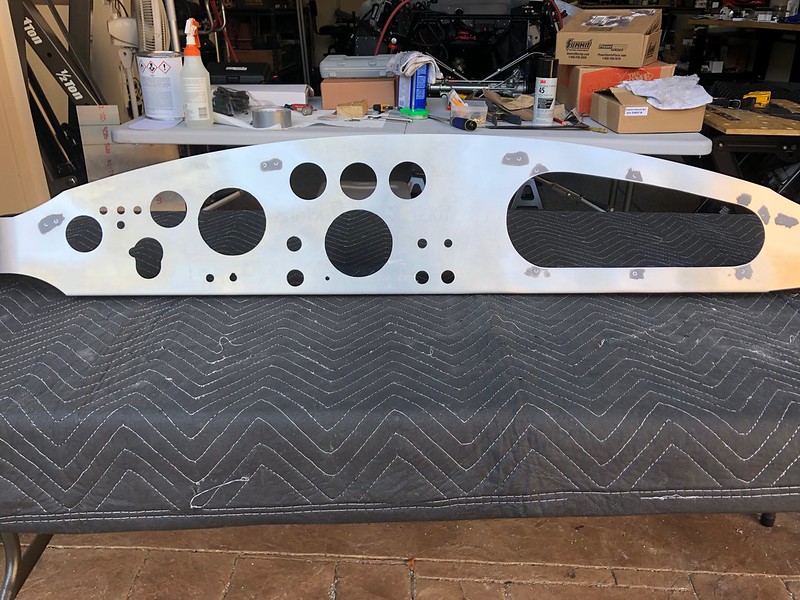
Before I start cutting holes in my blank dash, I decided it would be a good idea to make a "test dash" where I could figure out the best hole sizes for each gauge and switch and practice covering with the foam and leather I plan to put on the dash. I cut a piece of aluminum and bent a tab on the bottom and curved the top so I could practice covering a curve with leather as well. I did learn that the 2 1/8" hole saw is a better choice than the 2" for the small gauges. I thought 2 1/8" was too loose but after pulling the leather back through the opening it is about perfect, whereas the 2" was just way too tight. For the large gauges I bought a 3 7/8" hole saw, which is a little too tight. I don't want to spend money on a 4" hole saw so I am just going to open up both those holes to 4" with a drum sander instead. Overall I am pretty pleased with how it turned out. I used a couple of SS washers as bezels for the speedo menu button and the toggle switches.
I used the Landau Top & Trim adhesive and applied it with cheap paint brushes from Home Depot. This stuff works very well. I found that once I pulled the leather over the edge or through an opening and pressed it into place it would not move. I didn't even feel the need to put any weights or anything on it, just ran my roller over it a couple times and it isn't moving at all.
-
08-13-2018, 05:58 AM
#164
Senior Member

Its really coming along!! Rollbars and the test dash look great!
Higgy
MK4 #11012 picked up 04/16/24
351W, 3 link, single roll bar
MK4 #10616 picked up 4/10/23
302w, 4 link, 17's, dual roll bar SOLD
MK4 #9759 picked up on 4/3/19
351C, 3 link, 17's, dual roll bars SOLD
-
08-15-2018, 11:39 AM
#165
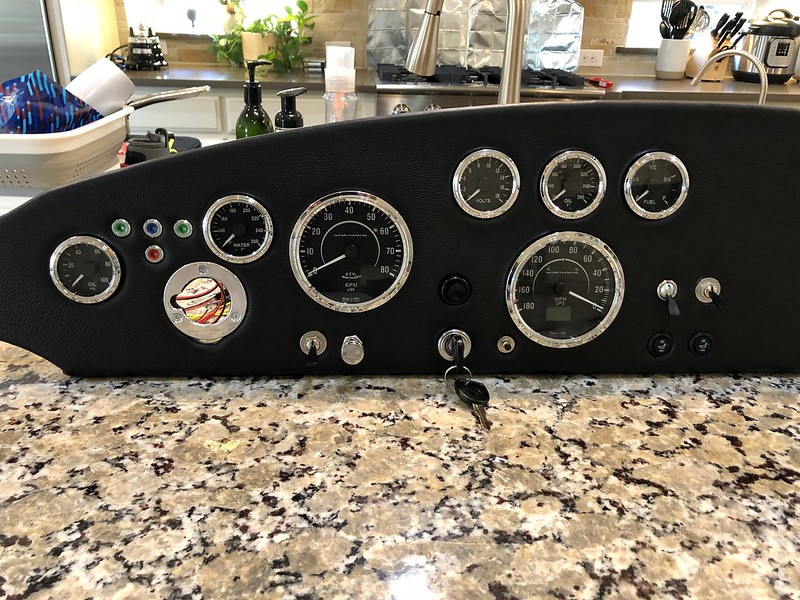
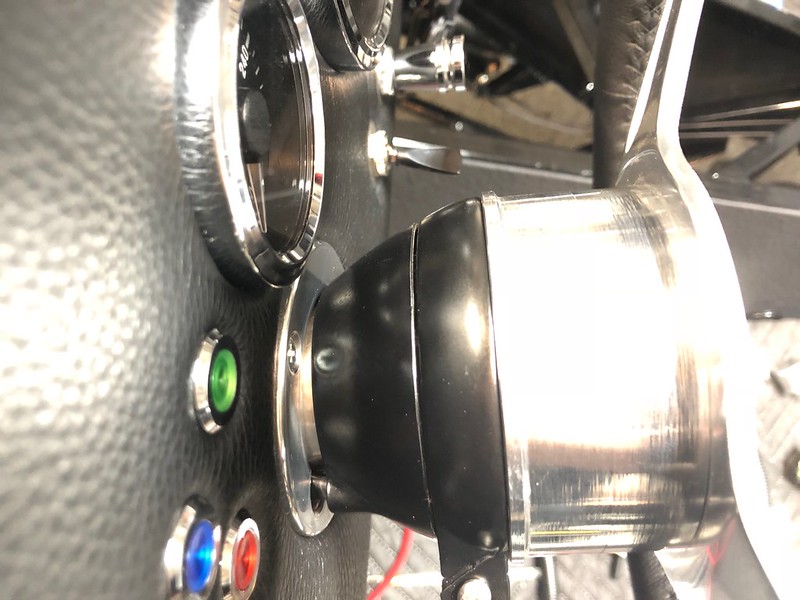
Nice job Shark........ I have not really looked into the gauges after install into the dash but will once time to hook up. What’s the button for attached to the RPM gauge?
Build#1: MKIV Roadster #9320
-
08-15-2018, 02:25 PM
#166
Senior Member

Originally Posted by
stevant

Nice job Shark........ I have not really looked into the gauges after install into the dash but will once time to hook up. What’s the button for attached to the RPM gauge?
I just grabbed a 4" gauge for the test dash. The button will actually be used for the GPS speedo to cycle though all the menu options on it. You do need to use the button to program the tach, however, but no need to have that one permanently mounted in the dash. I am going to install a couple remote stereo jacks in the support panel underneath, however, and hook them up to the tach and the fuel gauge in case I ever need to reprogram those - will be a lot easier than having to get to them behind the dash.
-
08-15-2018, 05:32 PM
#167
I think you also need the button for the clock?
Build#1: MKIV Roadster #9320
-
08-15-2018, 08:34 PM
#168
Senior Member
Originally Posted by
stevant
I think you also need the button for the clock?
Yes but I traded in my clock for an oil temp gauge
-
08-19-2018, 07:24 PM
#169
Senior Member
-
08-25-2018, 05:17 PM
#170
Senior Member
-
08-25-2018, 09:07 PM
#171
Senior Member
MK4 #11012 picked up 04/16/24
351W, 3 link, single roll bar
MK4 #10616 picked up 4/10/23
302w, 4 link, 17's, dual roll bar SOLD
MK4 #9759 picked up on 4/3/19
351C, 3 link, 17's, dual roll bars SOLD
-
09-01-2018, 02:19 PM
#172
Senior Member
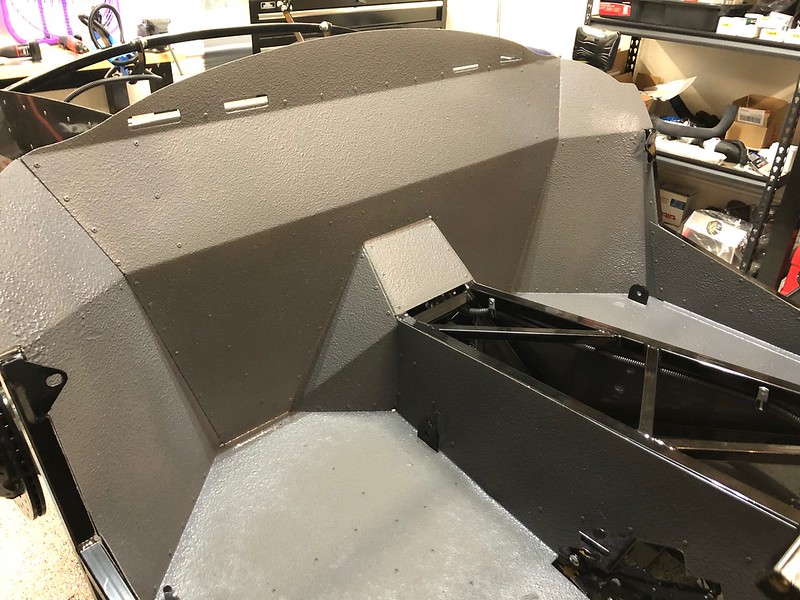
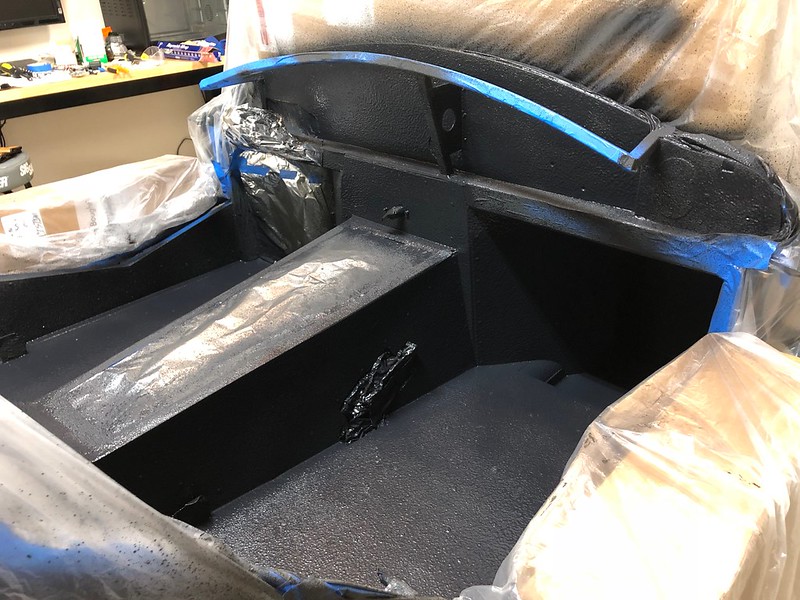
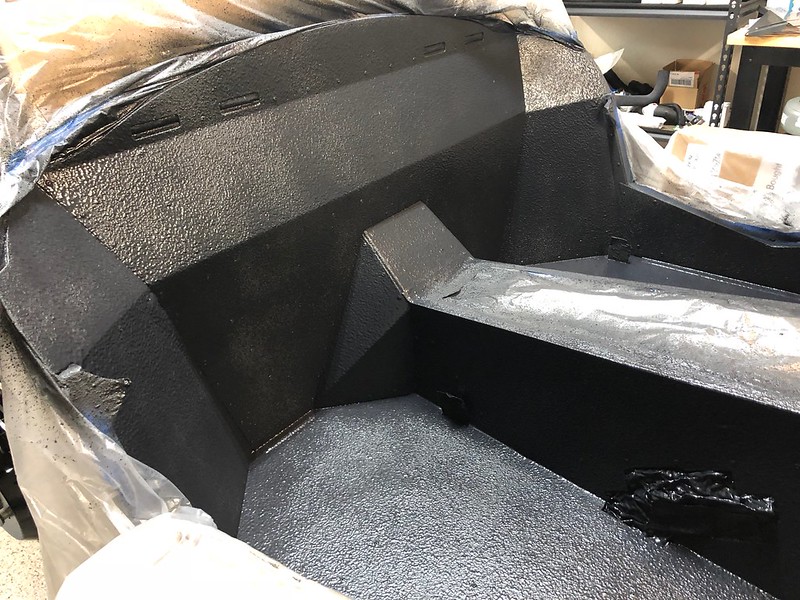
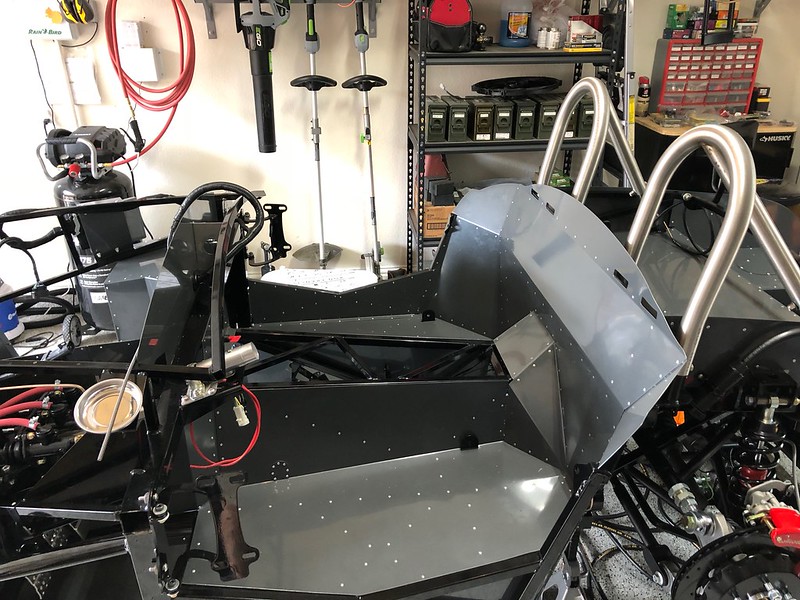
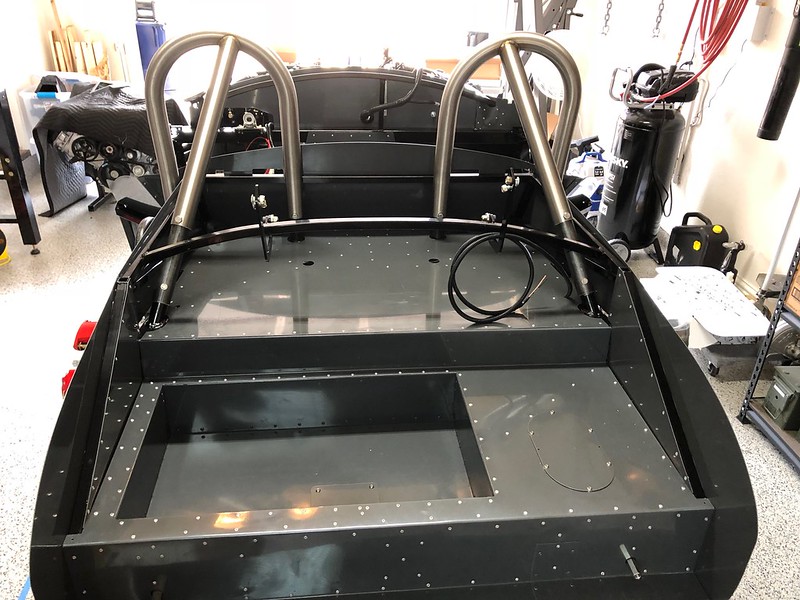
Trunk inner panels
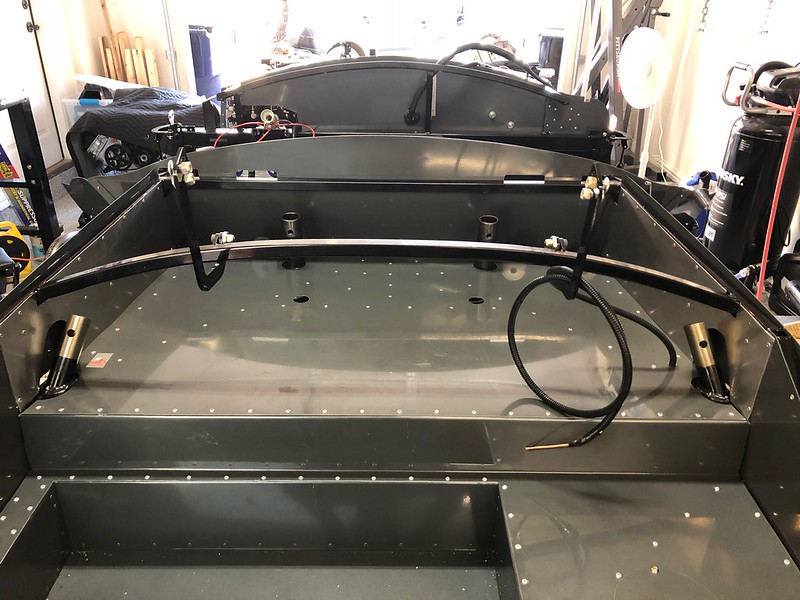
I fabricated a couple of inner panels for the upper trunk this morning. I just took some measurements and then transferred to some poster board and then to aluminum. Took a bit of checking and trimming but finally got them to fit the way I like. It seems so much more finished with these, I'm surprised FFR doesn't include them in the kit.

-
Post Thanks / Like - 0 Thanks, 1 Likes
-
09-01-2018, 10:13 PM
#173
So this looks really good. In fact, at first I was trying to figure out what you did... I had to go back to the bunch of photos I took of my kit before I took all the panels off. So if I'm seeing it correctly, you now have a "double" wall on the side right? Because from my photos I have, it looks like there is a side panel there, but you have the support braces on the inside of the truck if you leave them as is... Am I understanding what you did?
-
09-02-2018, 09:15 AM
#174
Senior Member

Yes... a double wall. I made the same panels for 9365 - and I agree, FFR should include them - they'll make the trunk trim-out so much easier and better looking.
Chassis_04.jpg Chassis_05.jpg
John D. - Minneapolis 'Burbs
1965 El Camino - LT-1, 4L60e, 4wh discs, SC&C susp.
2013 F-150 Platinum - Twin Turbo 3.5
2018 Mk4 Roadster w/ Coyote - #9365 - Build Thread Delivery 7/3/18, 1st Start 1/4/19, 1st Road Mile 5/5/19, Legal 6/18/19, In Paint 2/25/21, Done (?) 4/2021
-
09-02-2018, 10:42 PM
#175
Ok, you guys convinced me, I need to do the same thing.
-
09-03-2018, 06:04 AM
#176
Not a waxer

Originally Posted by
Fixit
---and I agree, FFR should include them -
The early cars did but when the trunk configuration and structure was redesigned to eliminate the dropped floor several months into Mk4 production they changed the outer trunk side aluminum and deleted the the inner panels.
Jeff
-
09-03-2018, 08:23 PM
#177
Senior Member
-
09-03-2018, 09:36 PM
#178
-
Post Thanks / Like - 0 Thanks, 1 Likes
-
09-09-2018, 12:45 PM
#179
Senior Member
-
09-10-2018, 04:22 PM
#180
So now that you have the Lizard Skin in place, do you also plan to put any other coating/padding, etc down? Like you have in your foot box. Why did you not do the foot box BTW?
-
09-11-2018, 10:35 AM
#181
Senior Member
Originally Posted by
BadAsp427
So now that you have the Lizard Skin in place, do you also plan to put any other coating/padding, etc down? Like you have in your foot box. Why did you not do the foot box BTW?
Because my pedals and MC's and everything was already in place in the DS footbox, I just thought it would be easier to use the stick-on product there rather than trying to mask and spray around all that. The Lizard Skin is all I plan to use for sound/heat in the rest of the cockpit.
-
Post Thanks / Like - 1 Thanks, 0 Likes
-
09-15-2018, 05:13 PM
#182
Senior Member
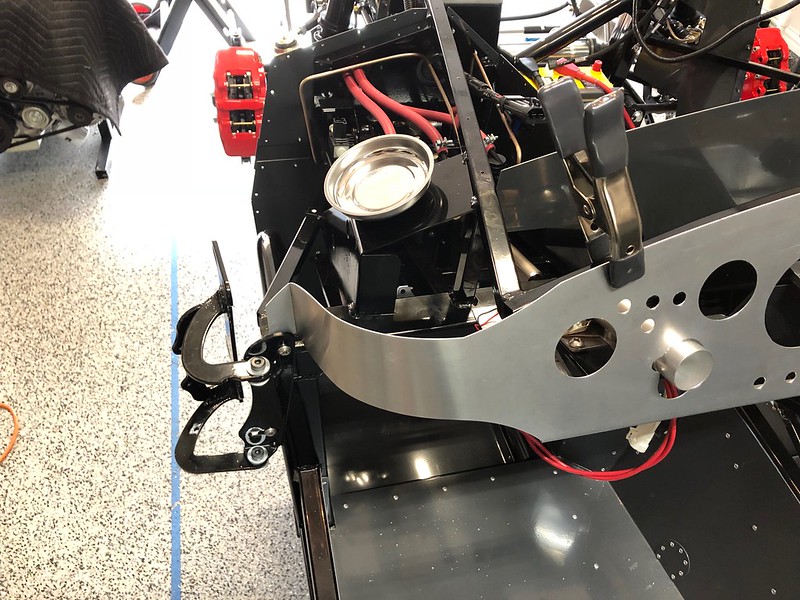
Pressure Bleeder
After bleeding my brakes the old fashion way a while back, I still had some air in my rear circuit. The rear MC would move about 4x as much as my fronts. I bought an extra cap for my reservoir and collected the parts I needed at Home Depot to make a pressure bleeder. Here are the parts I used and the finished product.
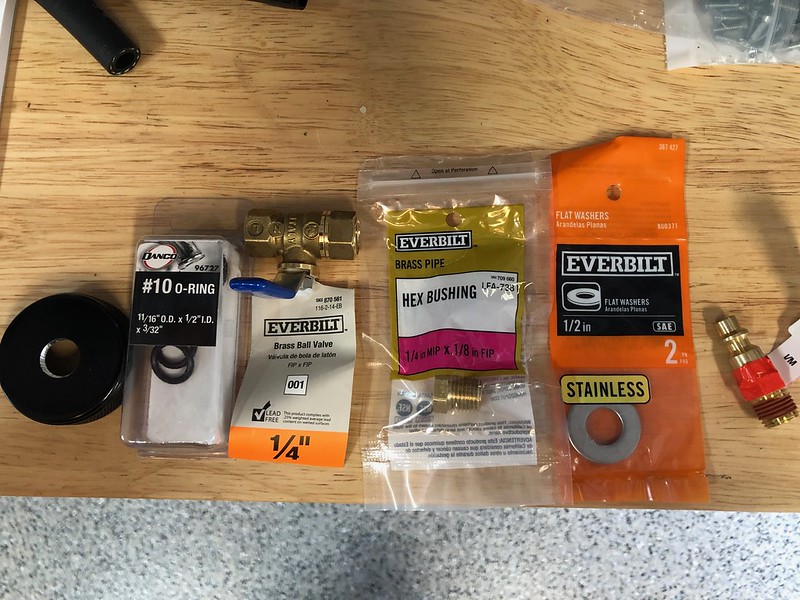
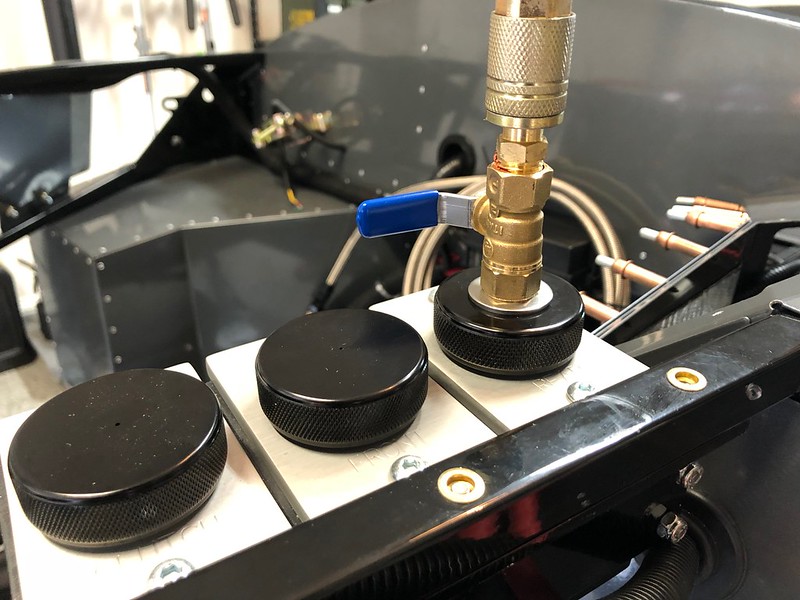
I set the compressor at 15psi and re-bled the rear brakes. Wow, what a difference. Now I have a nice hard pedal with equal movement in both the front and rear MC. I wish I had just done this from the beginning. Super easy and was done in 5 mins.
-
09-15-2018, 05:24 PM
#183
Senior Member
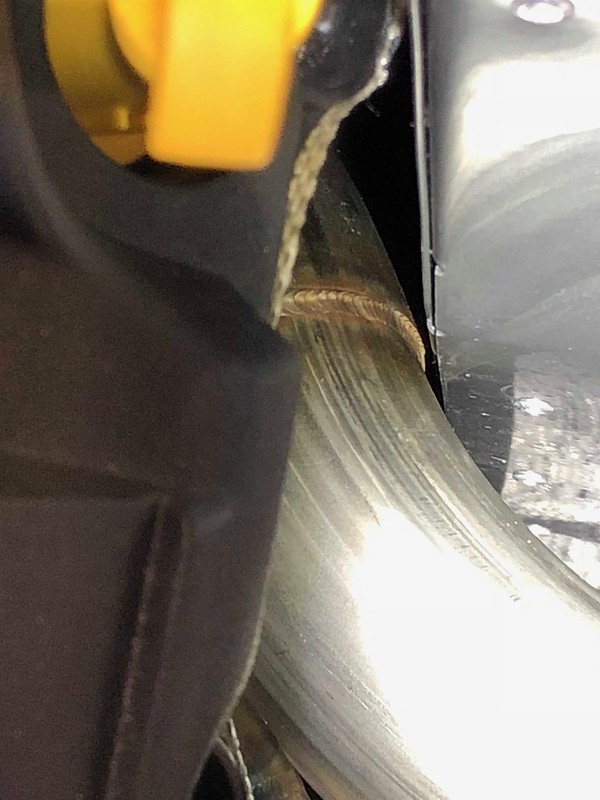
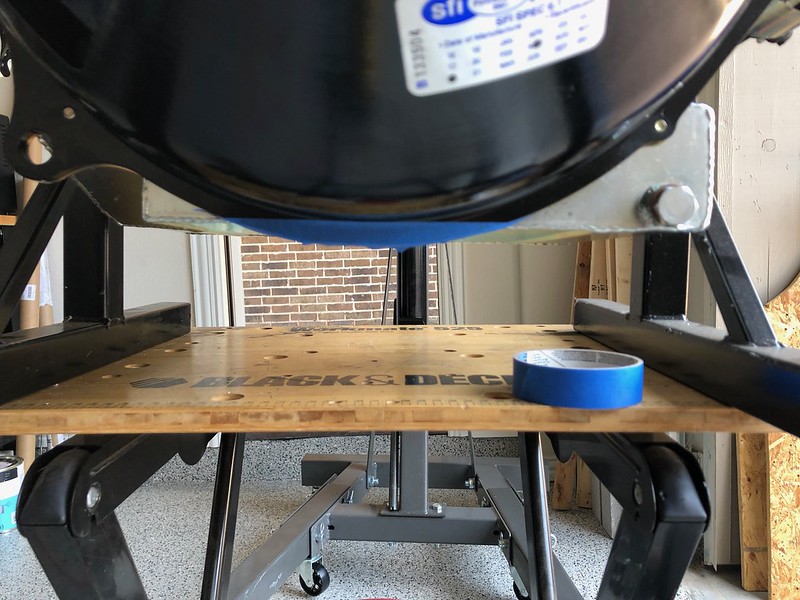
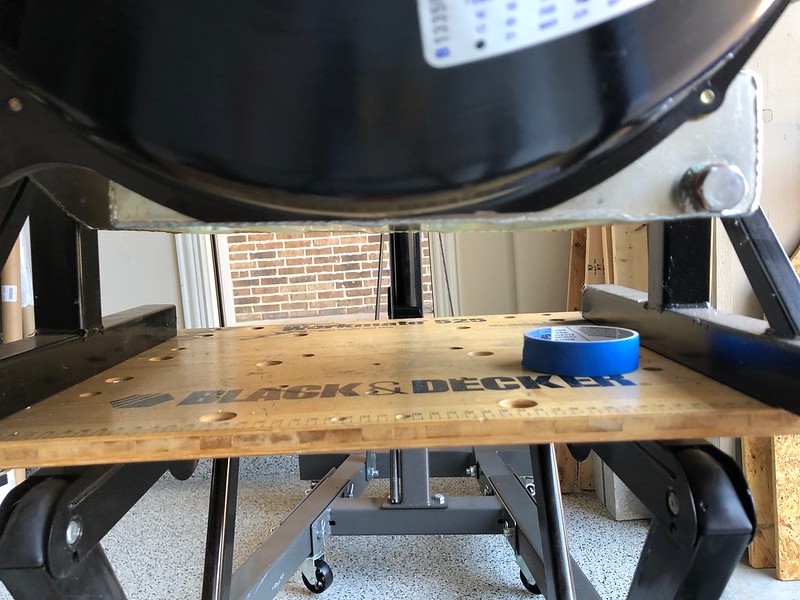
Cut bottom flange off QuickTime bell housing
As others had advised, I went ahead and cut off the bottom flange of my QuickTime bell housing and backer plate. I figure it would be a LOT easier to do it now while it is still out of the car. I removed the trans and hoisted the engine up and rested it on top of my Black and Decker WorkMate (with the hoist still handling most of the weight) and cut it off with the angle grinder. I cleaned it up with a flap disk and then touched it up with some of the leftover POR-15 that has been in the bottom of my fridge since May - it's still good!
-
09-15-2018, 05:47 PM
#184
Looking really good! You're last two threads gave me more work to do. One, I'm definitely going to cut me some side panels. And two, I've got to get me another B&D Workmate. I have a really old one that is on its last legs, and man do those things come in handy!
-
09-15-2018, 07:26 PM
#185
Senior Member
I've had this WorkMate for several years and I have certainly gotten my money's worth.
Last edited by shark92651; 09-16-2018 at 02:02 PM.
-
09-16-2018, 02:06 PM
#186
Senior Member
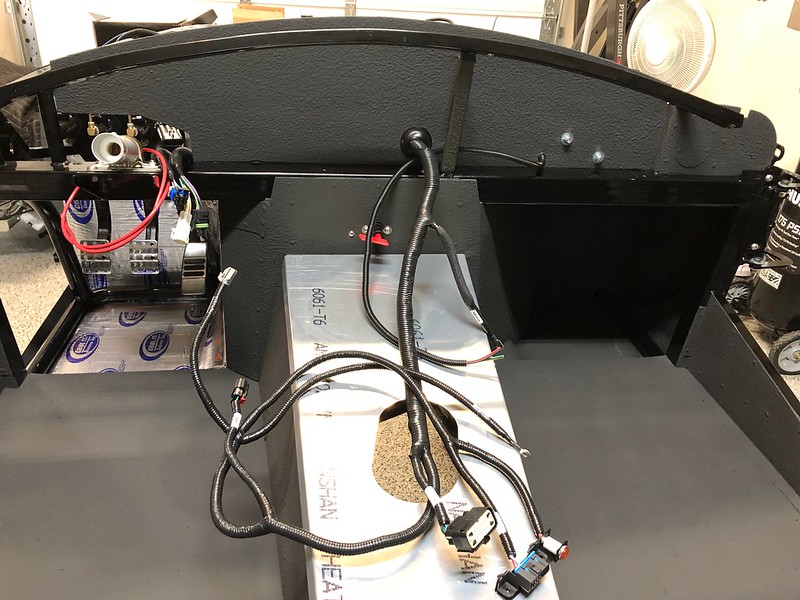
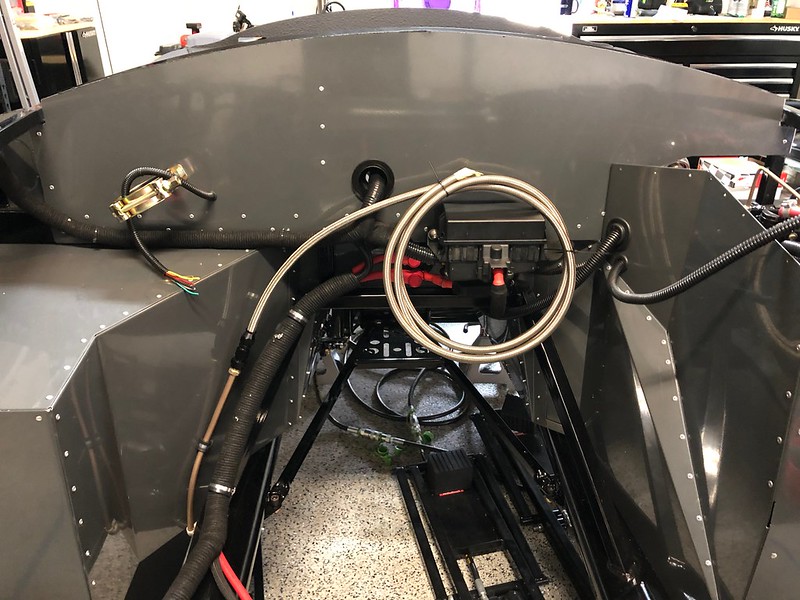
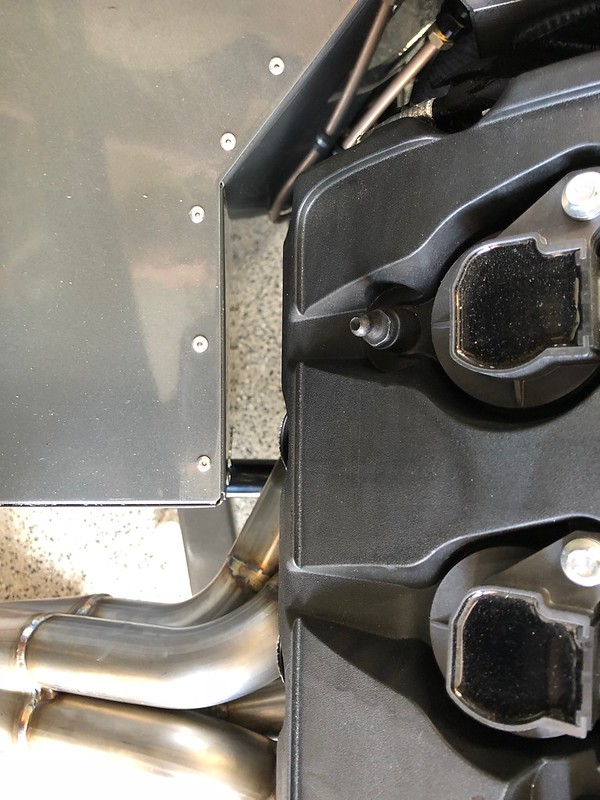
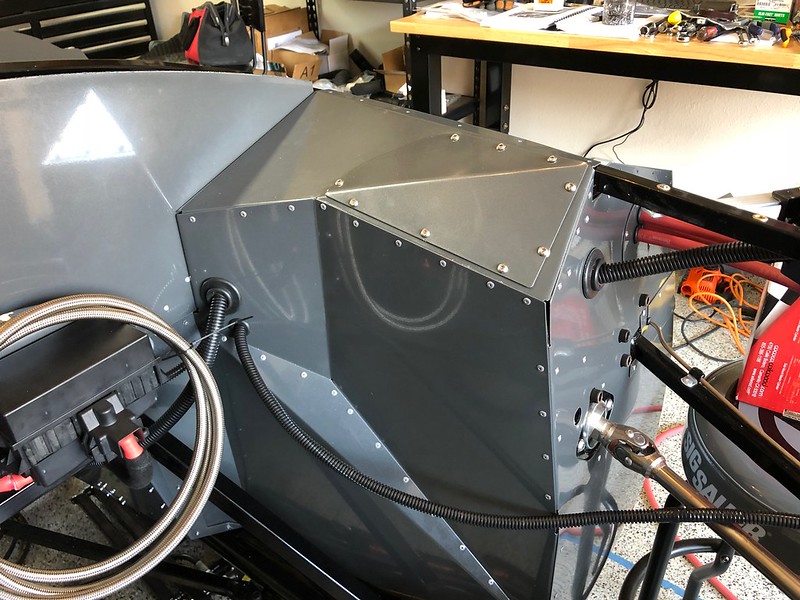
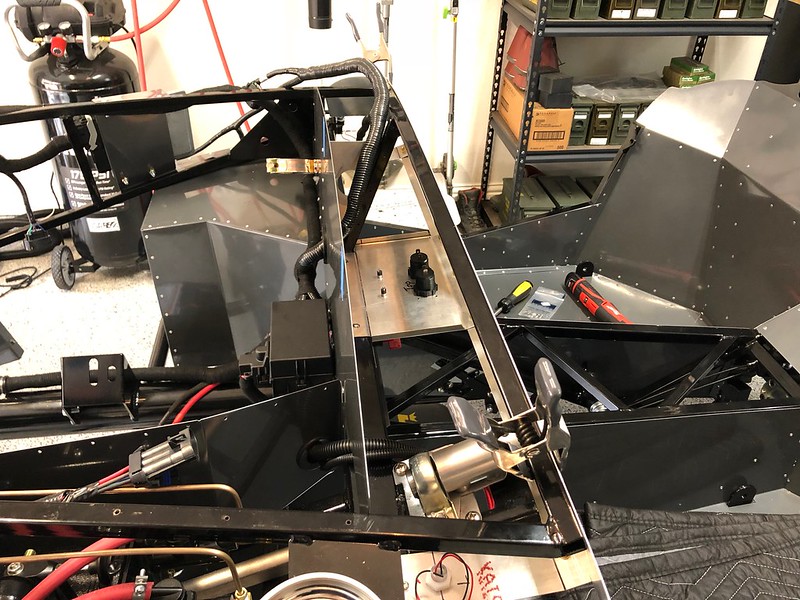
DS footbox top installed
Nothing too exciting today but I got my DS footbox top panel in place, with removable access panel. I had to get my hydraulic reservoir out of the way to get in there so I made a little support out of a piece of aluminum so it's kind of just hanging out in space there. I guess I'll just leave it there until I get the motor installed.
-
09-17-2018, 12:44 AM
#187
Originally Posted by
shark92651
Nothing too exciting today but I got my DS footbox top panel in place, with removable access panel. I had to get my hydraulic reservoir out of the way to get in there so I made a little support out of a piece of aluminum so it's kind of just hanging out in space there. I guess I'll just leave it there until I get the motor installed.
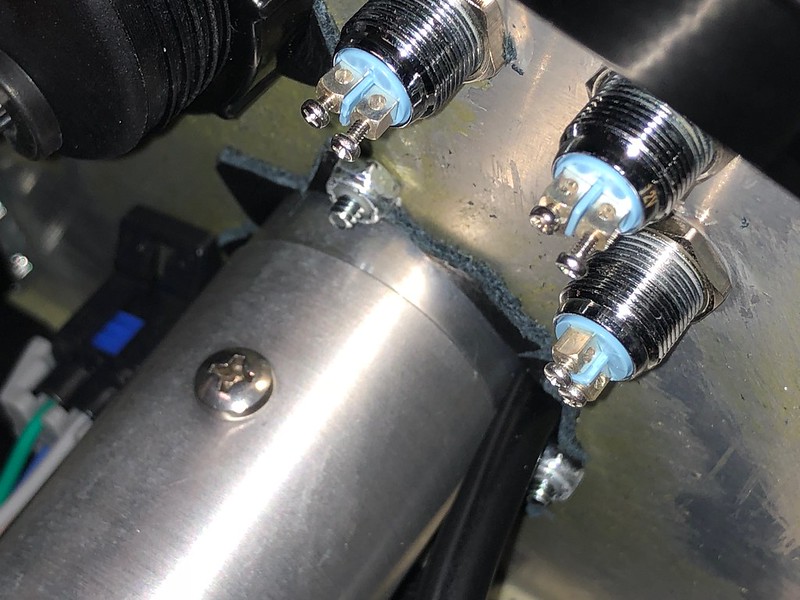
Looks great!! Question: Where you have your 3 hydraulic hoses coming out of the driver's side front foot box panel, where did you get your hoses as well as the triple grommet they are feeding through?
-
09-17-2018, 01:23 AM
#188
The removable top access panel 3 top screws may conflict with the body. Those screws I used red loctite on at a depth to accept the panel which I slotted. You'll only have six screws to tighten then. Build is looking awesome by the way 
Last edited by RR20AC; 09-17-2018 at 01:25 AM.
20th Anniversary MK4 Roadster, #8752, 18 of 20, Delivered 12/03/15, 1st Start 01/28/2017, off to paint 4/13/2017, Forte 351w/ Holley EFI, Forte throttle linkage, TKO 600/Forte Hyd. Clutch, UniSteer Electra Steering, RT's turn Signals, many Breeze parts, Paint by the Jeff Miller. Finished on 10/08/2017. 500 mile inspection on 10/21/2017, 3000 mile inspection on 1/14/19.
-
09-17-2018, 09:36 AM
#189
Senior Member
Originally Posted by
cv2065
Looks great!! Question: Where you have your 3 hydraulic hoses coming out of the driver's side front foot box panel, where did you get your hoses as well as the triple grommet they are feeding through?
Those are the hoses that came with the master cylinders. If you need to order some, it is EPDM rubber hose, same as used for air hose. You can get it in red or black at McMaster-Carr. The part# for red is 5405K2. I bought a cheap assortment of rubber grommets on eBay, and I just carefully spaced 3 of them out and drilled the panel for them.
https://www.ebay.com/itm/180-pc-Rubb...-/292371204638
Originally Posted by
RR20AC
The removable top access panel 3 top screws may conflict with the body. Those screws I used red loctite on at a depth to accept the panel which I slotted. You'll only have six screws to tighten then. Build is looking awesome by the way
I would not be surprised if there is a conflict. I purposely avoided the top-left corner for that reason, from looking at other builds. I suppose I could leave the cover off when I put the body on and then use whichever ones I have access to. Your idea to slot the top holes is a good one and would be an easy mod, thanks for the suggestion.
Last edited by shark92651; 09-17-2018 at 09:39 AM.
-
09-17-2018, 09:42 AM
#190
Originally Posted by
shark92651
Those are the hoses that came with the master cylinders. If you need to order some, it is EPDM rubber hose, same as used for air hose. You can get it in red or black at McMaster-Carr. The part# for red is 5405K2. I bought a cheap assortment of rubber grommets on eBay, and I just carefully spaced 3 of them out and drilled the panel for them.
Ah, I see it now...that's the round block off panel that you drilled the holes in. Thanks!
-
09-17-2018, 09:45 AM
#191
Originally Posted by
shark92651
Yes but I traded in my clock for an oil temp gauge
l
Did you get the oil temp gauge from Seedhut or FF?
Last edited by Sigurd; 09-17-2018 at 09:46 AM.
Reason: Spelling
-
09-17-2018, 10:59 AM
#192
Senior Member
Originally Posted by
Sigurd
l
Did you get the oil temp gauge from Seedhut or FF?
I contacted Speedhut and they hooked me up with a trade in. It comes with the sender as well so don't do like I did and order that separately.
Update: I needed to revisit this recommendation. The sender that comes with the gauge will barely fit between the oil pan and the frame rail, but it doesn't leave enough room to plug in the harness. I ended up using their smaller "universal sender" as I can actually get a wire hooked onto it. The SKU is G-SNDR-14 for anyone that needs that info.
Last edited by shark92651; 10-19-2018 at 01:41 PM.
-
09-20-2018, 08:59 AM
#193
Senior Member
-
09-20-2018, 09:03 AM
#194
Senior Member
-
09-20-2018, 09:34 AM
#195
Looking good. I’m excited for you. Can’t wait to see that Coyote in place.
-Steve
-
Post Thanks / Like - 1 Thanks, 0 Likes
-
09-22-2018, 11:27 AM
#196
Senior Member
-
09-22-2018, 11:40 AM
#197
Well Used Member

Question... If you bring the RT turn signal assembly out (back) any further, won't that interfere with back side (or forward facing) of the steering wheel hub? I had to grind off about 1/16 " from the tube in order to slide the turn signal forward, away from the steering wheel hub so that it would bind on the hub.
If Brute Force doesn't work, you're not using enough of it.
Basic Stuff: MK4 Complete Kit #8439, Wilwood's, 17" Halibrands. Extra Stuff: Stainless brake and fuel lines, Breeze cooling, Battery mount, SS Roll Bar. Old Fart Stuff: Heater, Seat Heaters, Footbox Fresh Air, Stereo, Keyless ignition, Power Steering, Hyd Clutch.
Young & Dumb Stuff: 427w Dart, TKO600, 3 link Moser M9/Ford 9", 3.5:1, Eaton TruTrac Posi. Graduation Thread
-
09-22-2018, 02:49 PM
#198
Senior Member
Originally Posted by
boat737
Question... If you bring the RT turn signal assembly out (back) any further, won't that interfere with back side (or forward facing) of the steering wheel hub? I had to grind off about 1/16 " from the tube in order to slide the turn signal forward, away from the steering wheel hub so that it would bind on the hub.
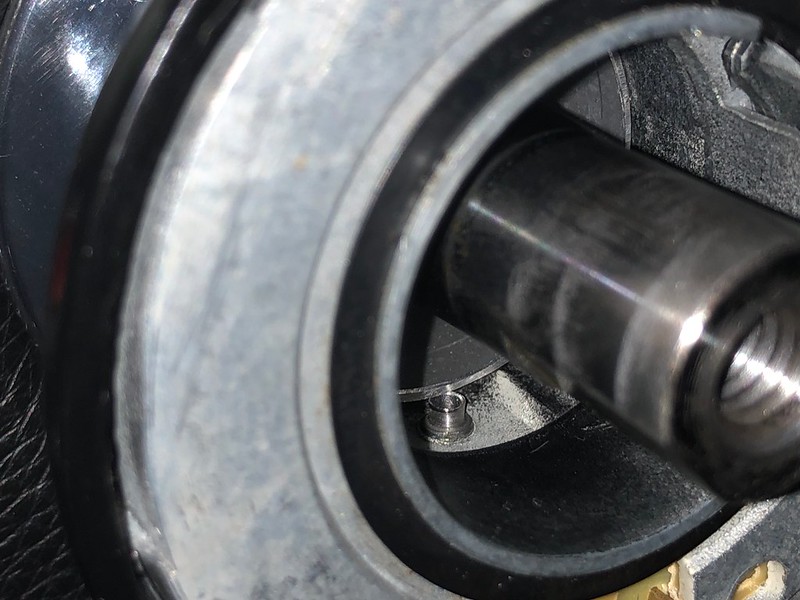
If I follow what you are asking, I don't think that is an issue as the inner steering shaft can be pulled out to leave a small gap between the turn signal hub and the steering hub. Russ warns in his instructions that some people cause it to bind by pressing the upper steering shaft too far in, and then when tightening the nut that holds the wheel it pulls the steering wheel hub further in and causes them to bind. Is this what you are referring to, the RT hub rubbing against the FFR steering wheel hub? If not I apologize for the confusion.
I am in contact with Russ, by the way, and he is working with me to find the best resolution to my issue. I will post updates when it is resolved. One thing he pointed out is that there is supposed to be a small curved plate on the end of the jam screw which helps spread the contact force to the tube. I did find that plate in my box and put that in place, but still don't feel good about the amount of contact I am getting.
-
09-22-2018, 09:33 PM
#199
Well Used Member
Ahhhh.... There ya go. Thanks.
If Brute Force doesn't work, you're not using enough of it.
Basic Stuff: MK4 Complete Kit #8439, Wilwood's, 17" Halibrands. Extra Stuff: Stainless brake and fuel lines, Breeze cooling, Battery mount, SS Roll Bar. Old Fart Stuff: Heater, Seat Heaters, Footbox Fresh Air, Stereo, Keyless ignition, Power Steering, Hyd Clutch.
Young & Dumb Stuff: 427w Dart, TKO600, 3 link Moser M9/Ford 9", 3.5:1, Eaton TruTrac Posi. Graduation Thread
-
09-30-2018, 04:53 PM
#200
Senior Member


 Thanks:
  Likes:


 Reply With Quote
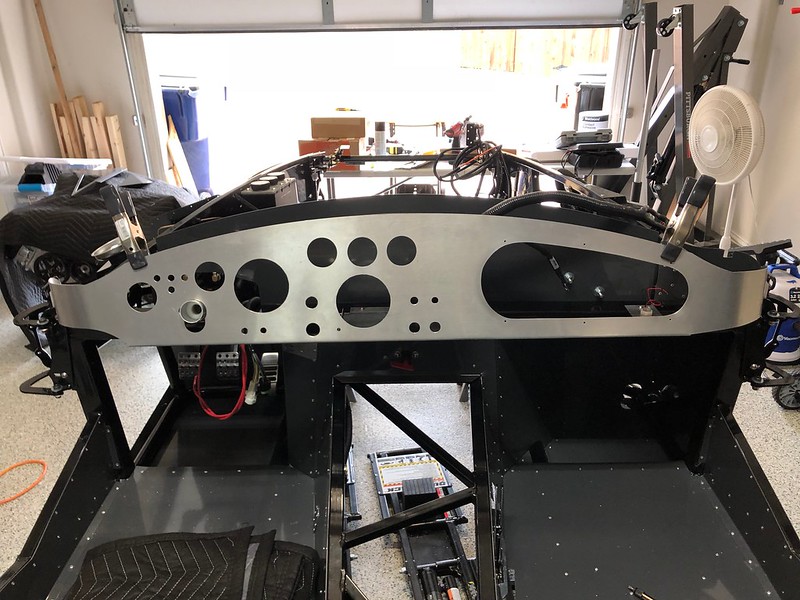
 [/url]
 [/url]
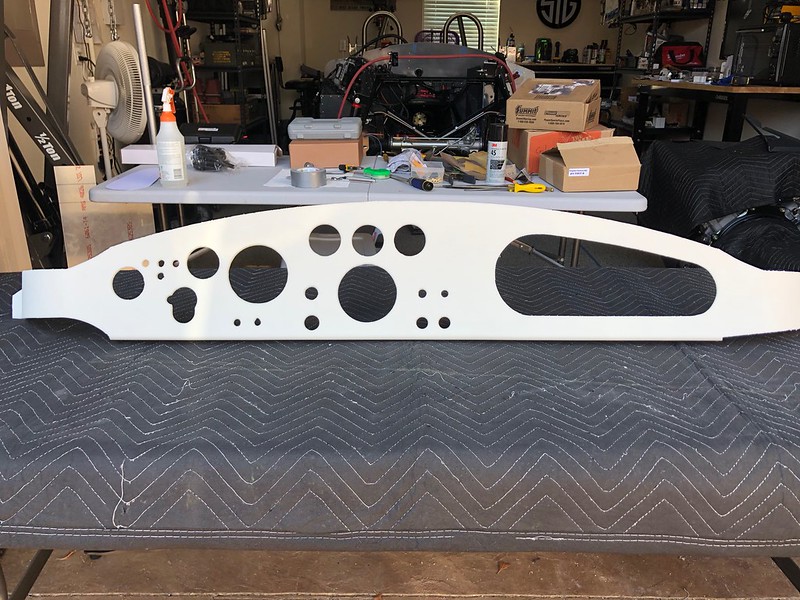 [/url]