Very Cool Parts

Visit our community sponsor

Thanks Thanks:  29
Likes Likes:  38
Results 1 to 40 of 779

Thread: EdwardBs Mk4 #8674 20th Anniversary Build

Hybrid View

Previous Post Previous Post   Next Post Next Post
  1. #1
    Senior Member wareaglescott's Avatar
    Join Date
    Apr 2016
    Location
    Auburn, AL
    Posts
    2,146
    Post Thanks / Like
    Sure is exciting seeing this build come to a conclusion!

    Speaking of the battery I have a question on the front battery mount.
    I used the same Breeze front setup you used. I notice it is pretty tight reaching down there around the cooling hoses to access the battery. When the battery was going in I wasn't really thinking about what it would take to replace it or how much the body and hood being in position may affect getting the battery out.
    Now that your body is on does it complicate getting it out at all? Do you anticipate having to disconnect some of the cooling hoses when you change the battery or do you feel there is room to lift to out?
    MK4 #8900 - complete kit - Coyote, TKO600, IRS - Delivered 6/28/16 First Start 10/6/16 Go cart - 10/16/16 Build completed - 4/26/17 - 302 days to build my 302 CI Coyote Cobra - Registered and street legal 5/17/17
    Build Thread http://thefactoryfiveforum.com/showt...e-build-thread
    PHIL 4:13 INSTAGRAM - @scottsrides

  2. #2
    Senior Member edwardb's Avatar
    Join Date
    Feb 2011
    Location
    Lake Orion, Michigan
    Posts
    10,604
    Post Thanks / Like
    Quote Originally Posted by wareaglescott View Post
    Now that your body is on does it complicate getting it out at all? Do you anticipate having to disconnect some of the cooling hoses when you change the battery or do you feel there is room to lift to out?
    I don't think the body or hood changes anything. You're right, it could be a little tight getting that thing out of there. Looks like it might squeeze out the bottom rather than the top. If not, the upper radiator hose might need to be disconnected and moved aside. I've had great luck with Optima batteries (knocking on wood...) so hopefully won't have to find out very a long time.
    Build 1: Mk3 Roadster #5125. Sold 11/08/2014. Build 2: Mk4 Roadster #7750. Sold 04/10/2017. Build Thread
    Build 3: Mk4 Roadster 20th Anniversary #8674. Sold 09/07/2020. Build Thread and Video. Build 4: Gen 3 Type 65 Coupe #59. Gen 3 Coyote. Legal 03/04/2020. Build Thread and Video
    Build 5: 35 Hot Rod Truck #138. LS3 and 4L65E auto. Rcvd 01/05/2021. Legal 04/20/2023. Build Thread. Sold 11/9/2023.

  3. #3
    Junior Member
    Join Date
    Oct 2013
    Posts
    12
    Post Thanks / Like
    I’ve been following this thread since the beginning and have pick up a lot of good information for when I’m able to purchase a Roadster Kit and start my build. Thank you for sharing your wisdom and knowledge. Good Luck at the Car Show.

    Brien

  4. #4
    Senior Member wareaglescott's Avatar
    Join Date
    Apr 2016
    Location
    Auburn, AL
    Posts
    2,146
    Post Thanks / Like
    Quote Originally Posted by edwardb View Post
    I don't think the body or hood changes anything. You're right, it could be a little tight getting that thing out of there. Looks like it might squeeze out the bottom rather than the top. If not, the upper radiator hose might need to be disconnected and moved aside. I've had great luck with Optima batteries (knocking on wood...) so hopefully won't have to find out very a long time.
    What a great thought about it potentially coming out the bottom. Had not even considered that. Genius!
    MK4 #8900 - complete kit - Coyote, TKO600, IRS - Delivered 6/28/16 First Start 10/6/16 Go cart - 10/16/16 Build completed - 4/26/17 - 302 days to build my 302 CI Coyote Cobra - Registered and street legal 5/17/17
    Build Thread http://thefactoryfiveforum.com/showt...e-build-thread
    PHIL 4:13 INSTAGRAM - @scottsrides

  5. #5
    Senior Member edwardb's Avatar
    Join Date
    Feb 2011
    Location
    Lake Orion, Michigan
    Posts
    10,604
    Post Thanks / Like

    Trunk Lighting

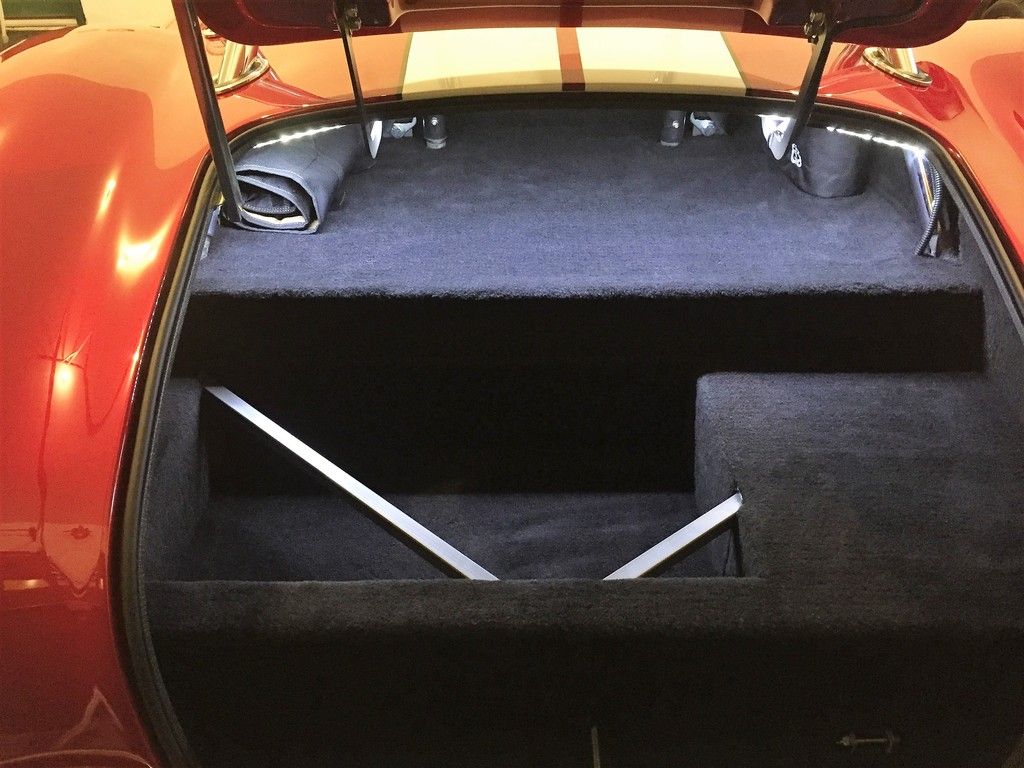
    Yesterday I finished the roll bars. That was the last of my “pre-show” punch list items. I was really glad to get that done. Drilling the holes for the trim rings I purposely didn’t do before just to make sure the final fit was exact. So needed to drill 20 holes for the six trim rings (dual roll bars) into my new paint. Needless to say, I was very careful. Also some interesting reaches getting them all installed and tightened, But all done now. I’ve not done dual roll bars before, so will need to get used to the look.

    With a little remaining time, decided to go ahead and install my trunk lights. I’ve done trunk lights on each of my other builds with single fixtures, but always a little underwhelmed with the final result. With the popularity and availability, did an LED strip light on this build and much better. I planned ahead for the power and added a wire inside the RF rear harness from the courtesy light circuit before installing it into the chassis. This is an always on battery circuit, so perfect for this application. Same circuit can be used for interior or footwell lights, which I also did. I ran the added wire along with the wires to the license plate light. So the power was available in the corner of the trunk where the wires make the transition into the trunk lid.

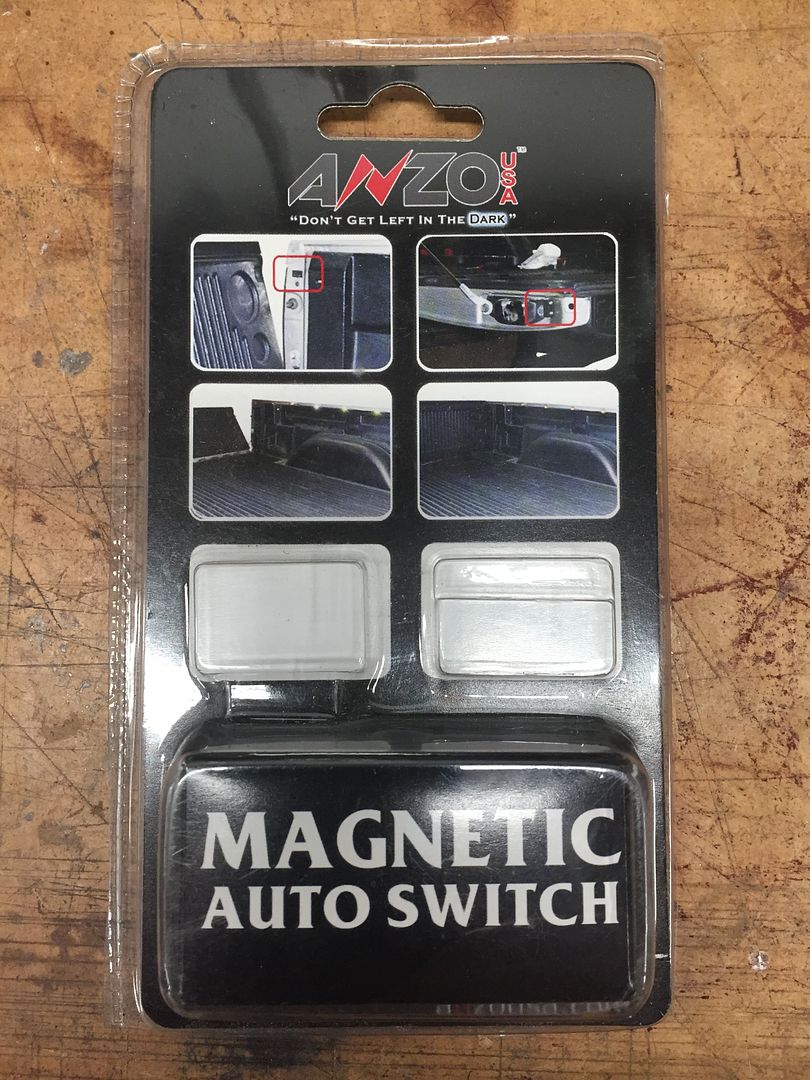
    I picked up a Weatherproof LED Flexible Light Strip, part number WFLS-NWx-SWBK, from superbrightleds.com. It’s 1 meter long (slightly more than needed), silicon encased, and with 3M mounting tape on the back. Nice product and perfect for this application. On #7750 I used a pin switch mounted against the trunk hinges and that works fine. But it was a bit of messing around making a bracket, getting it lined up properly, etc. I thought about using a mercury tilt switch this time, but instead saw this magnetic proximity switch while in O’Reilly Auto Parts a while back, so decided to give it a try.


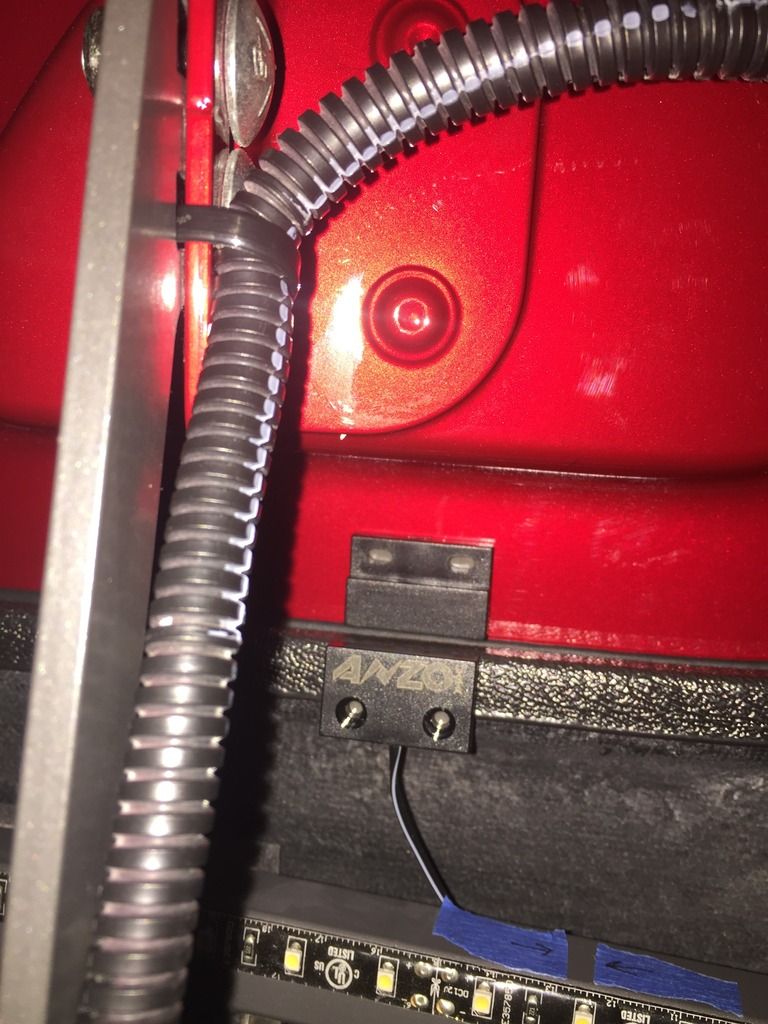
    Played around with several locations for the switch and after some testing found it wasn’t super critical on alignment or even proximity. If the magnet was within a quarter inch or so, it switched off. I ended up with the wired portion of the switch stuck to the bottom of the bulb seal around the trunk opening, and the magnet stuck to the underside of the trunk lid. Based on the locations, neither are particularly visible and using a VOM determined it switched on and off perfectly. I used the provided 3M emblem tape to attach each piece. That stuff is pretty robust, so hoping they stay put. I used the photo timer function on my iPhone to verify the proper locations. That’s a pretty neat trick to place stuff that’s hidden if you haven’t tried it. In this case, start the 10 second timer, lay the phone (or regular camera, iPad, whatever) in the right location, close the lid, wait for the picture to be taken, then review the results. Took a number of tries to find the right spot for both pieces. This is one of those pictures, showing the final result from inside the trunk with the lid closed.


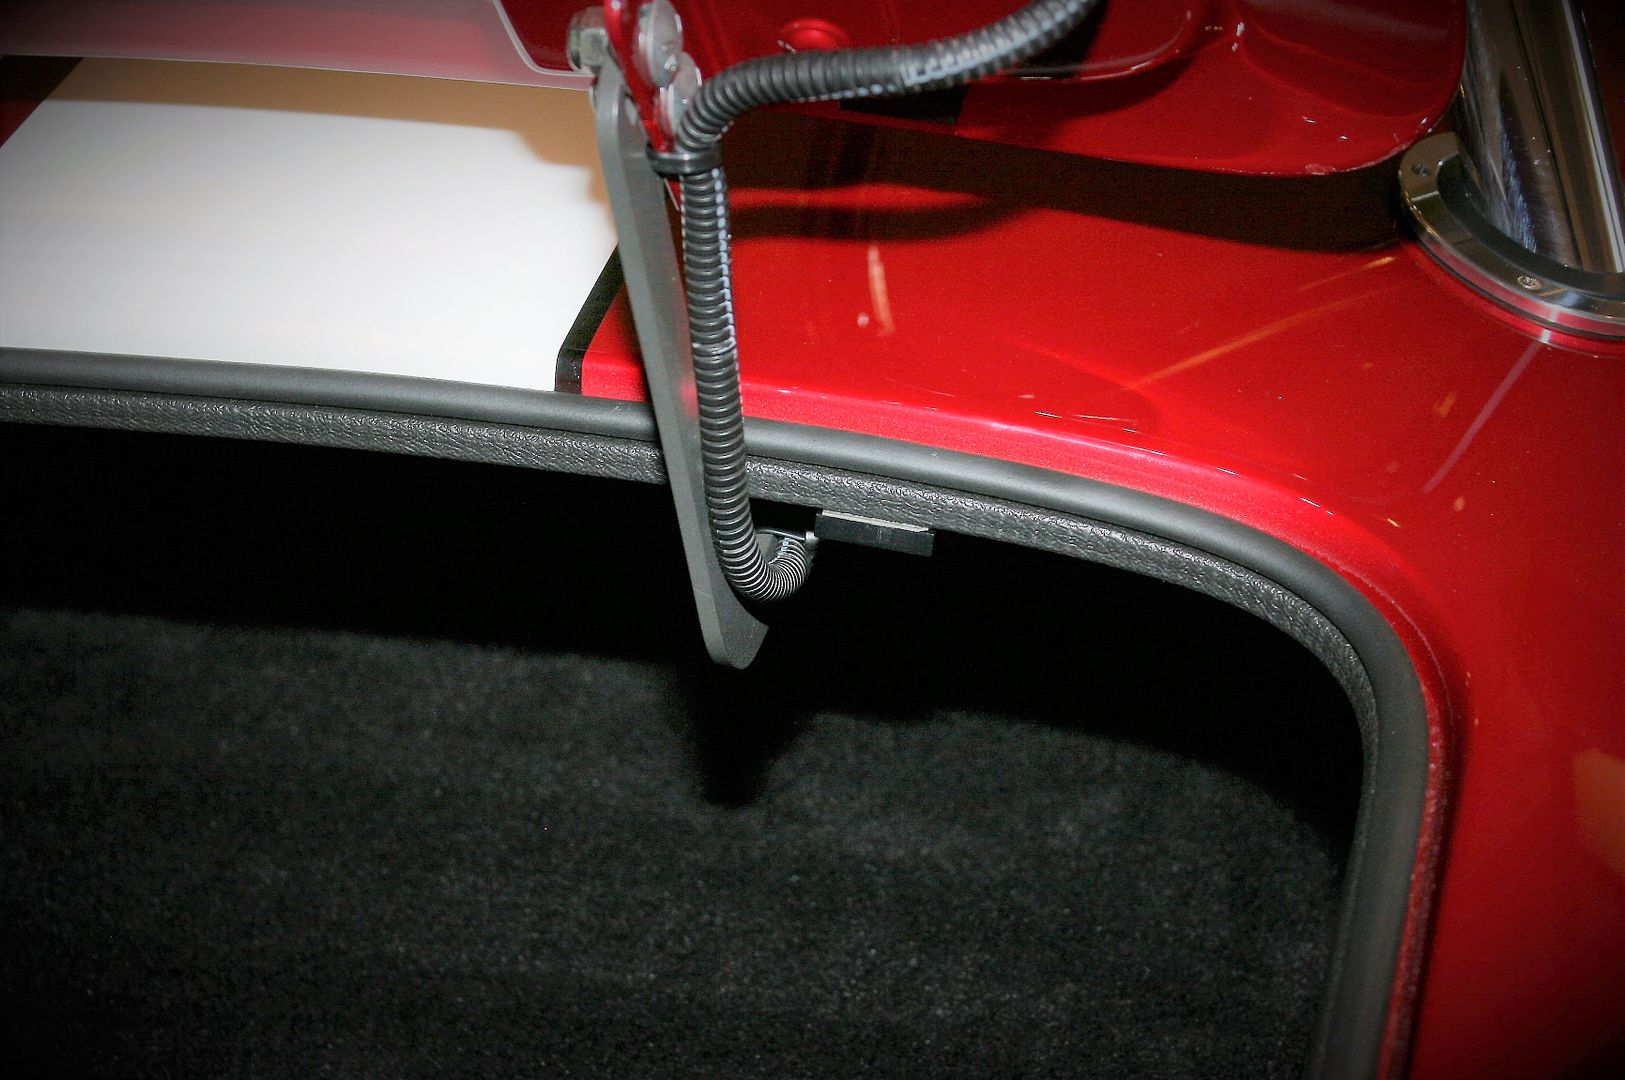
    This is about all you can see of the switch with the lid open. Just to the right of the trunk hinge. The magnet stuck on the trunk lid is just visible, but not where it’s easily seen.


    I stuck the LED strip light along the bottom back edge of the hoop above the trunk opening. Just enough room inside the trunk hinges. Goes end-to-end. I cut off about 6-8 inches. At the cut line of course. Then wired everything up and tucked the wires behind the Weatherpack I have for the license plate wires. Works great. The switch harness has a little slide switch so you can switch the circuit off (e.g. if you have the trunk lid open for a long time and don’t want the lights on the whole time) but I didn’t do anything special with that. I can reach it if I have to, but likely not important.

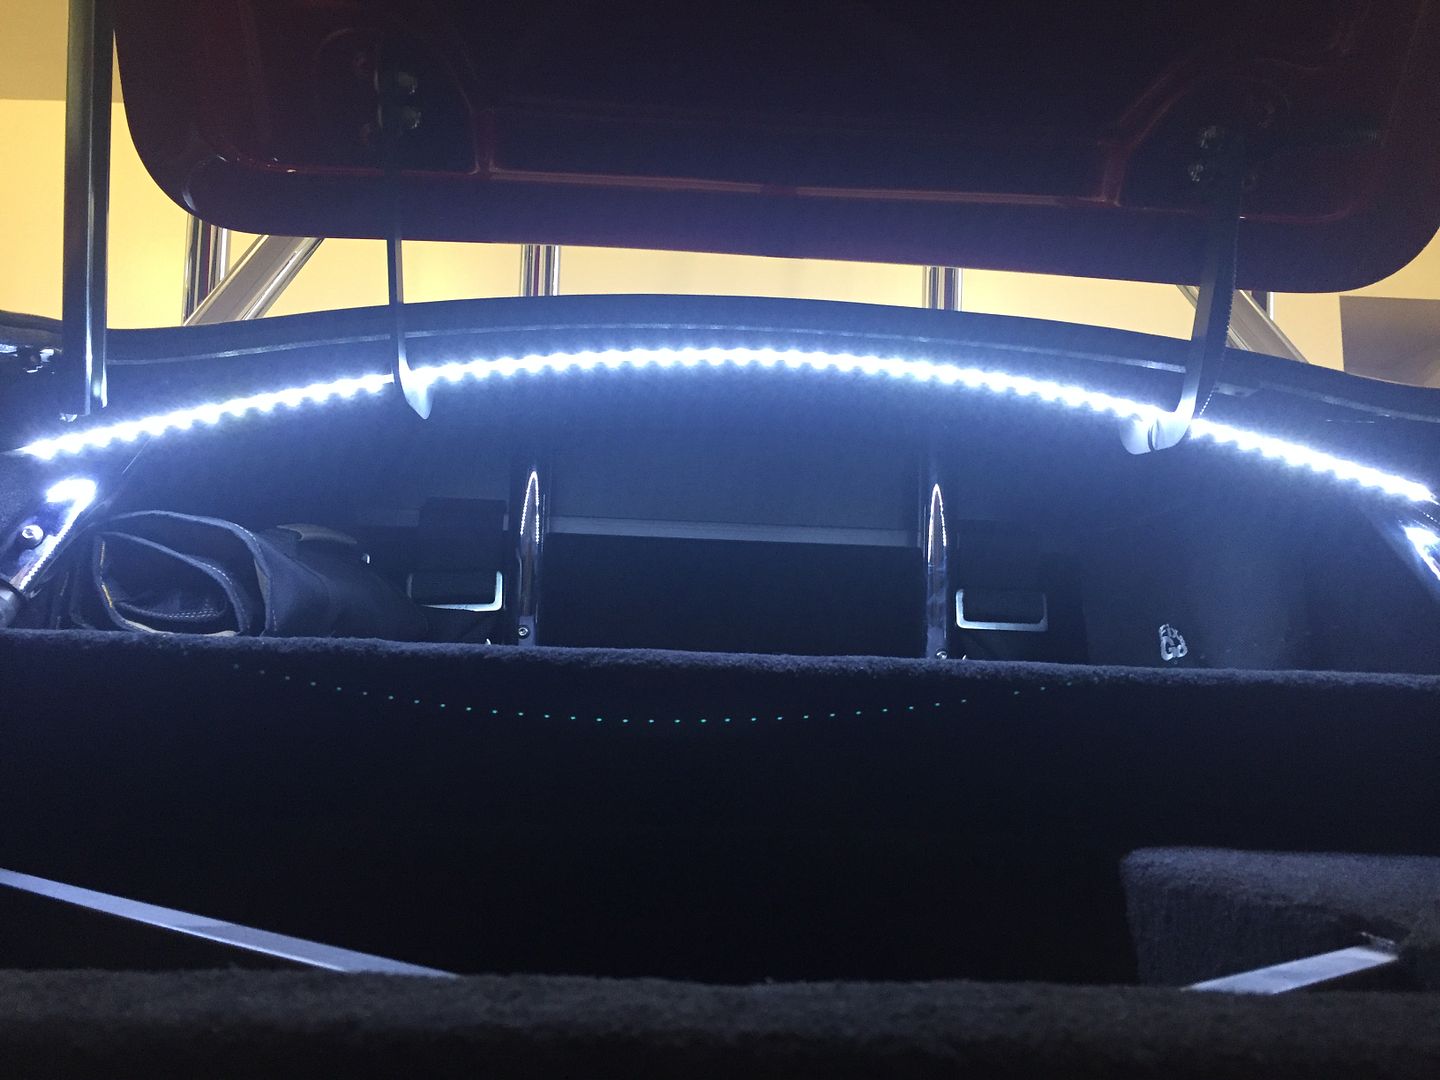
    Looking from the ground up at the light strip:


    A more normal angle showing how it lights the trunk. I like it. Still on jack stands. When it's on the ground, don't expect to directly see the lights on the ends like in this pic.


    Now to get the last of the paint shop dust off the build and wheels back on.
    Build 1: Mk3 Roadster #5125. Sold 11/08/2014. Build 2: Mk4 Roadster #7750. Sold 04/10/2017. Build Thread
    Build 3: Mk4 Roadster 20th Anniversary #8674. Sold 09/07/2020. Build Thread and Video. Build 4: Gen 3 Type 65 Coupe #59. Gen 3 Coyote. Legal 03/04/2020. Build Thread and Video
    Build 5: 35 Hot Rod Truck #138. LS3 and 4L65E auto. Rcvd 01/05/2021. Legal 04/20/2023. Build Thread. Sold 11/9/2023.

  6. #6
    Well Used Member boat737's Avatar
    Join Date
    Feb 2016
    Location
    So. Bay (So. Calif.)
    Posts
    881
    Post Thanks / Like
    I did something very similar, except I mounted mine in a housing, which pretty much eliminates the 'direct' view of the LED. superbrightleds.com has aluminum housings ( https://www.superbrightleds.com/more...-housing/2039/ ) for the LED strips. I GENTLY bent one to match the hoop bend, put some 3M double sided sticky foam tape on the back, and mounted it with 3 rivets just for good measure. The LED strip goes inside the aluminum housing, and then a nice plastic lens snaps in place to protect it. I actually did the same in the front and rear of the engine compartment.
    Attached Images Attached Images
    If Brute Force doesn't work, you're not using enough of it.
    Basic Stuff: MK4 Complete Kit #8439, Wilwood's, 17" Halibrands. Extra Stuff: Stainless brake and fuel lines, Breeze cooling, Battery mount, SS Roll Bar. Old Fart Stuff: Heater, Seat Heaters, Footbox Fresh Air, Stereo, Keyless ignition, Power Steering, Hyd Clutch.
    Young & Dumb Stuff: 427w Dart, TKO600, 3 link Moser M9/Ford 9", 3.5:1, Eaton TruTrac Posi. Graduation Thread

  7. #7
    Senior Member Dave Howard's Avatar
    Join Date
    Feb 2012
    Location
    North Bay, Ontario
    Posts
    534
    Post Thanks / Like
    Quote Originally Posted by boat737 View Post
    I did something very similar, except I mounted mine in a housing, which pretty much eliminates the 'direct' view of the LED. superbrightleds.com has aluminum housings ( https://www.superbrightleds.com/more...-housing/2039/ ) for the LED strips. I GENTLY bent one to match the hoop bend, put some 3M double sided sticky foam tape on the back, and mounted it with 3 rivets just for good measure. The LED strip goes inside the aluminum housing, and then a nice plastic lens snaps in place to protect it. I actually did the same in the front and rear of the engine compartment.
    Great idea Boat737. That looks very nice and helps hide the blinding LED. Nice work

  8. #8
    Senior Member edwardb's Avatar
    Join Date
    Feb 2011
    Location
    Lake Orion, Michigan
    Posts
    10,604
    Post Thanks / Like
    Quote Originally Posted by boat737 View Post
    I did something very similar, except I mounted mine in a housing, which pretty much eliminates the 'direct' view of the LED. superbrightleds.com has aluminum housings ( https://www.superbrightleds.com/more...-housing/2039/ ) for the LED strips. I GENTLY bent one to match the hoop bend, put some 3M double sided sticky foam tape on the back, and mounted it with 3 rivets just for good measure. The LED strip goes inside the aluminum housing, and then a nice plastic lens snaps in place to protect it. I actually did the same in the front and rear of the engine compartment.
    Quote Originally Posted by Dave Howard View Post
    Great idea Boat737. That looks very nice and helps hide the blinding LED. Nice work
    I like the product Boat737 used as well. Looks nice. Wouldn't have fit under the hinges on mine though. The lower profile encapsulated strip I used just clears. The individual LED's won't be visible in mine when it's sitting down on the ground, as I mentioned.
    Build 1: Mk3 Roadster #5125. Sold 11/08/2014. Build 2: Mk4 Roadster #7750. Sold 04/10/2017. Build Thread
    Build 3: Mk4 Roadster 20th Anniversary #8674. Sold 09/07/2020. Build Thread and Video. Build 4: Gen 3 Type 65 Coupe #59. Gen 3 Coyote. Legal 03/04/2020. Build Thread and Video
    Build 5: 35 Hot Rod Truck #138. LS3 and 4L65E auto. Rcvd 01/05/2021. Legal 04/20/2023. Build Thread. Sold 11/9/2023.

  9. #9
    Senior Member KDubU's Avatar
    Join Date
    May 2015
    Location
    Kennebunkport, ME
    Posts
    1,193
    Post Thanks / Like
    Congrats Paul!
    Kyle

    Complete Kit pickup 09/05/2015, 351w, QF680, 3.55, 3-Link, 15" Halibrands with MT's, Painted Viking blue with Wimbledon white stripes on 03/15/2017. Sold in 08/2018 and totally regret it.

Posting Permissions

  • You may not post new threads
  • You may not post replies
  • You may not post attachments
  • You may not edit your posts
  •  

FFMetal

Visit our community sponsor